



Long hair changes the whole math of a top knot. A knot that looks neat on shoulder-length hair can slide, sag, or split the second you add real length and weight.
That’s why the best top knot hairstyles for long hair are never just about throwing everything up and hoping for the best. They’re about where the ponytail sits, how tightly the base is anchored, and whether the shape is doing the heavy lifting or the pins are.
Weight matters.
My favorite trick is to stop thinking about a top knot as one move and start thinking of it as three: build a strong base, reduce bulk, then shape the finish. Once you do that, the style stops fighting your hair and starts using it.
1. Sleek High Top Knot for Long Hair
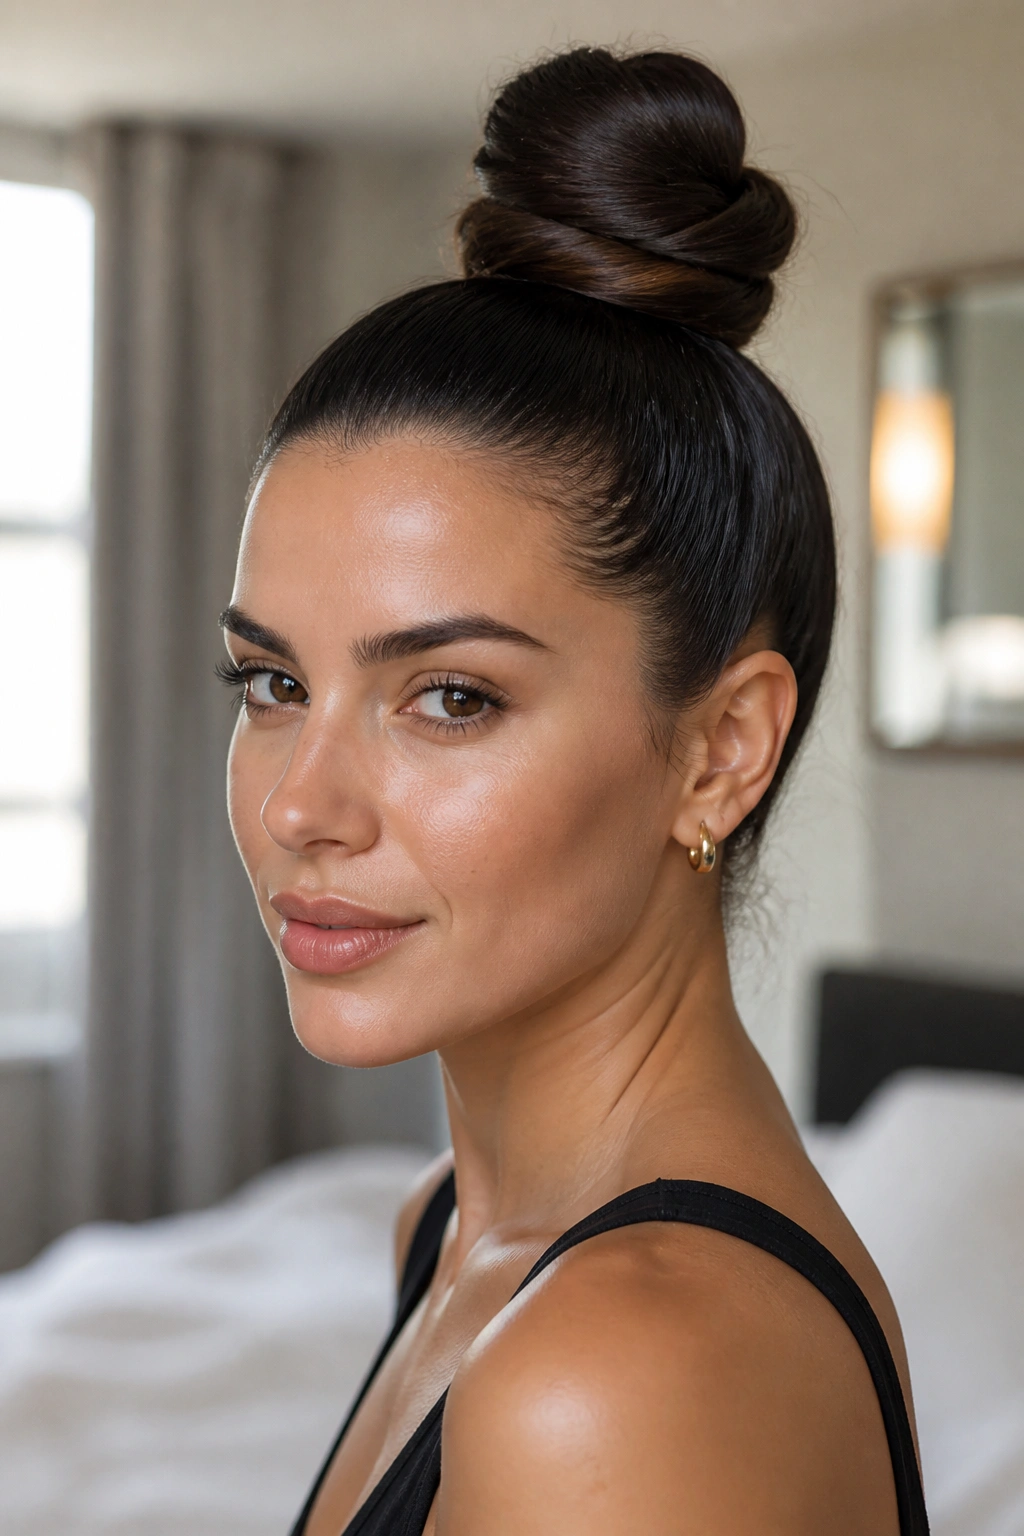
A sleek high top knot is the cleanest answer when you want long hair off your neck and out of the way. It looks sharp, but more than that, it behaves well. A strong crown, a high ponytail, and a compact wrap keep all that length from dragging the style down by lunchtime.
Start by brushing your hair upward with a little smoothing cream or light gel, then secure it at the crown with a snag-free elastic. If your hair is thick, split the ponytail into two sections before you wrap it. That small move reduces bulk and keeps the knot from turning into a lopsided lump.
That matters.
Why It Works on Long Hair
Long hair gives you enough length to build a knot with a real shape, not just a tiny twist. The trick is controlling the base so the style sits high instead of sliding back toward the middle of your head.
A sleek finish also hides the fact that you’ve packed a lot of hair into one spot. When the surface is smooth, the eye reads the style as intentional and polished instead of heavy.
- Use one elastic at the base and a second hidden elastic around the wrapped bun if your hair is past mid-back.
- Pin the bun in a crisscross pattern with 2 to 4 bobby pins.
- Brush flyaways upward, not downward, or they’ll fight the shape.
- A tiny bit of gel along the hairline keeps the crown neat without making the bun look stiff.
Best move: wrap the ponytail in two directions, not one. It keeps the knot flatter and helps long hair sit closer to the head.
2. Soft Messy High Top Knot
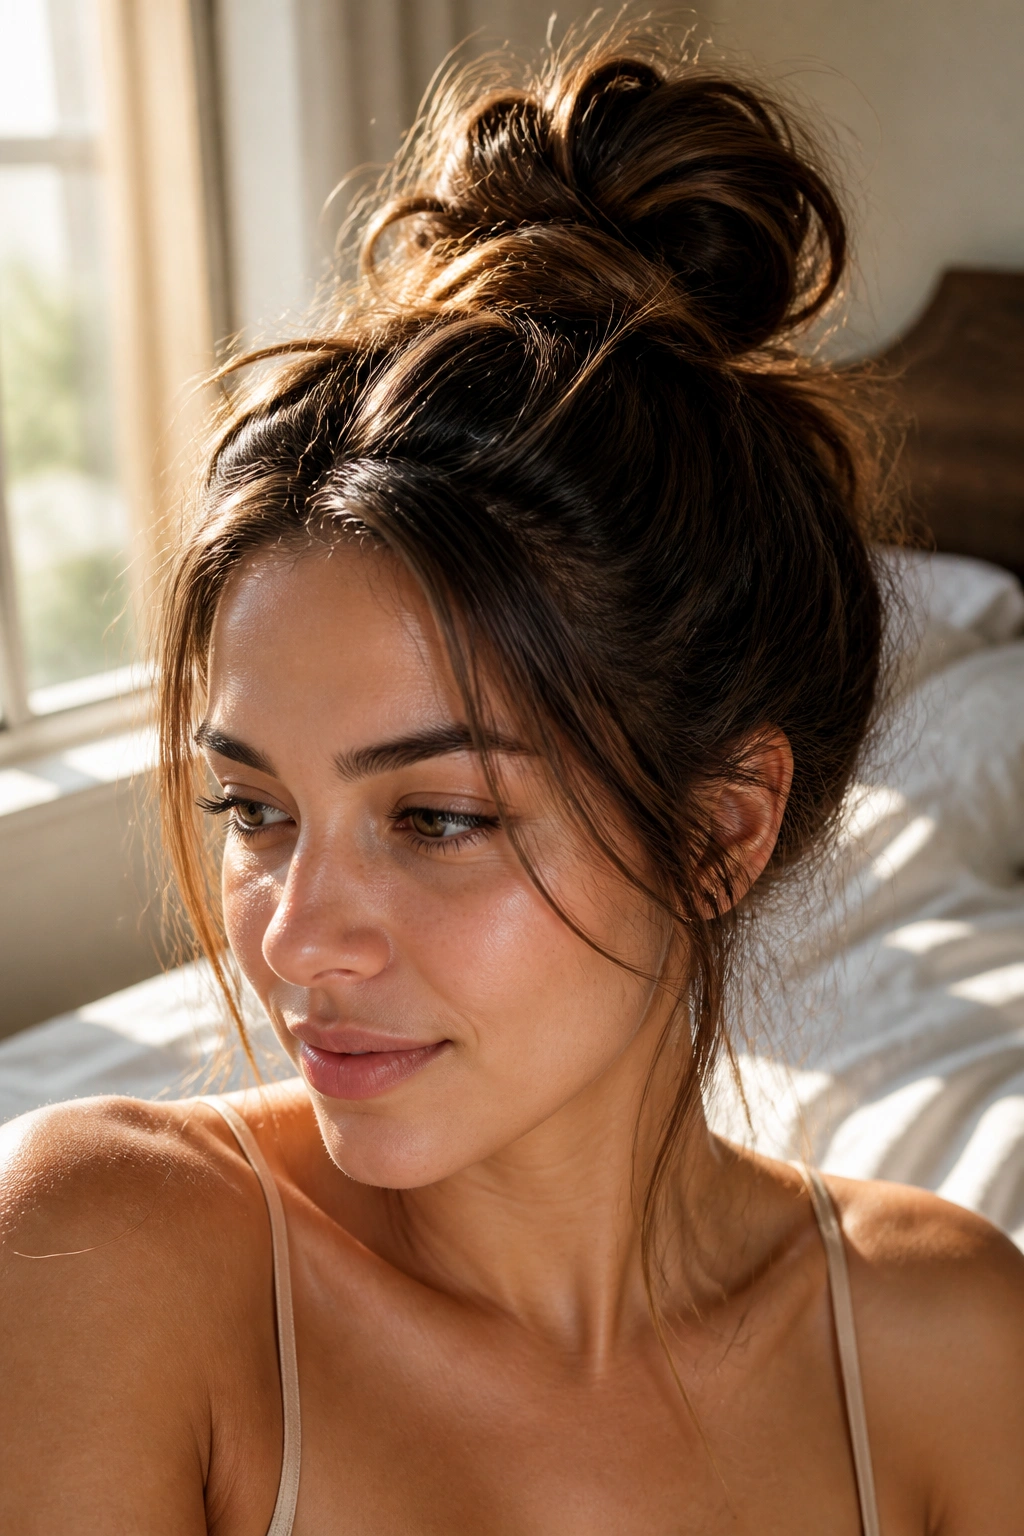
If your hair looks better after it’s been lived in for a day, this is your knot. A soft messy top knot works because long hair already has a little body and movement, so you do not need to force it into a severe shape. The goal is relaxed, not lazy.
I like this style when I’m dealing with hair that has a bit of texture or a dry shampoo finish. Pull the ponytail up, twist it loosely, and let the bun sit a little wider than a sleek version. Then tug at the edges of the knot with your fingers until it feels airy instead of tight.
A messy knot has a funny little rule: if you overwork it, it stops looking soft and starts looking unfinished. So stop sooner than your instinct tells you to.
A few face-framing pieces help, especially on long hair, because they break up the height of the bun. Keep the front pieces thin. Thick chunks can make the whole thing feel heavy around the cheeks, which is never the look.
One more thing. Don’t chase perfect symmetry here. The slight imbalance is the point.
3. Braided Base Top Knot
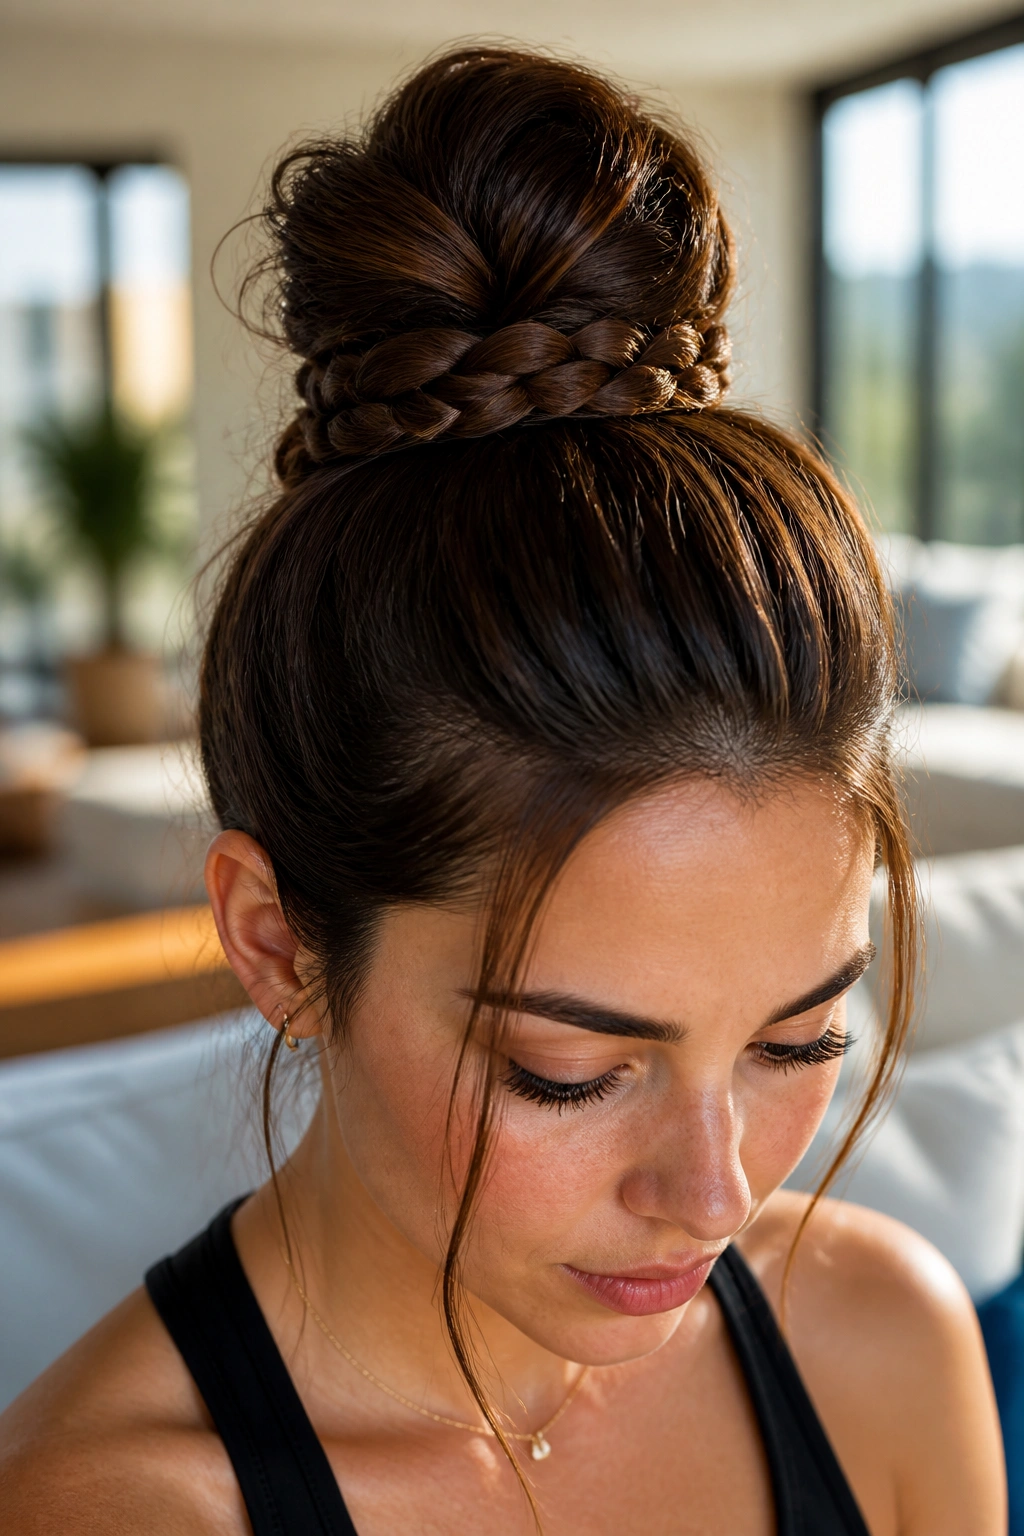
Why braid the tail before you wrap it? Because long hair carries its own weight, and a braid gives that weight somewhere to go. Instead of a loose tail collapsing at the edges, the braid holds the shape together from the inside out.
This is one of my favorite top knot hairstyles for long hair when the hair is thick or slippery. A plain twist can unravel if the length is heavy, but a three-strand braid or fishtail gives you grip. It also makes the bun look fuller without making it puff out in a bad way.
How to Build the Braid
- Pull the hair into a high or mid-high ponytail and fasten it tightly.
- Braid the ponytail all the way to the ends, using a regular braid if you want speed or a fishtail if you want a tighter texture.
- Wrap the braid around the base in a circle, letting the braid’s ridges show.
- Pin the ends underneath the bun, then press the bun gently with your palms to flatten anything that sticks out too far.
The finished style has a little more structure than a basic wrap, and that’s the whole advantage. It stays put better, especially on heavy hair that tends to pull itself loose.
Tip: if the braid looks too skinny, pancake it lightly before wrapping. Just tug the outer edges of the braid with two fingers. Small move. Big difference.
4. Low Nape Top Knot
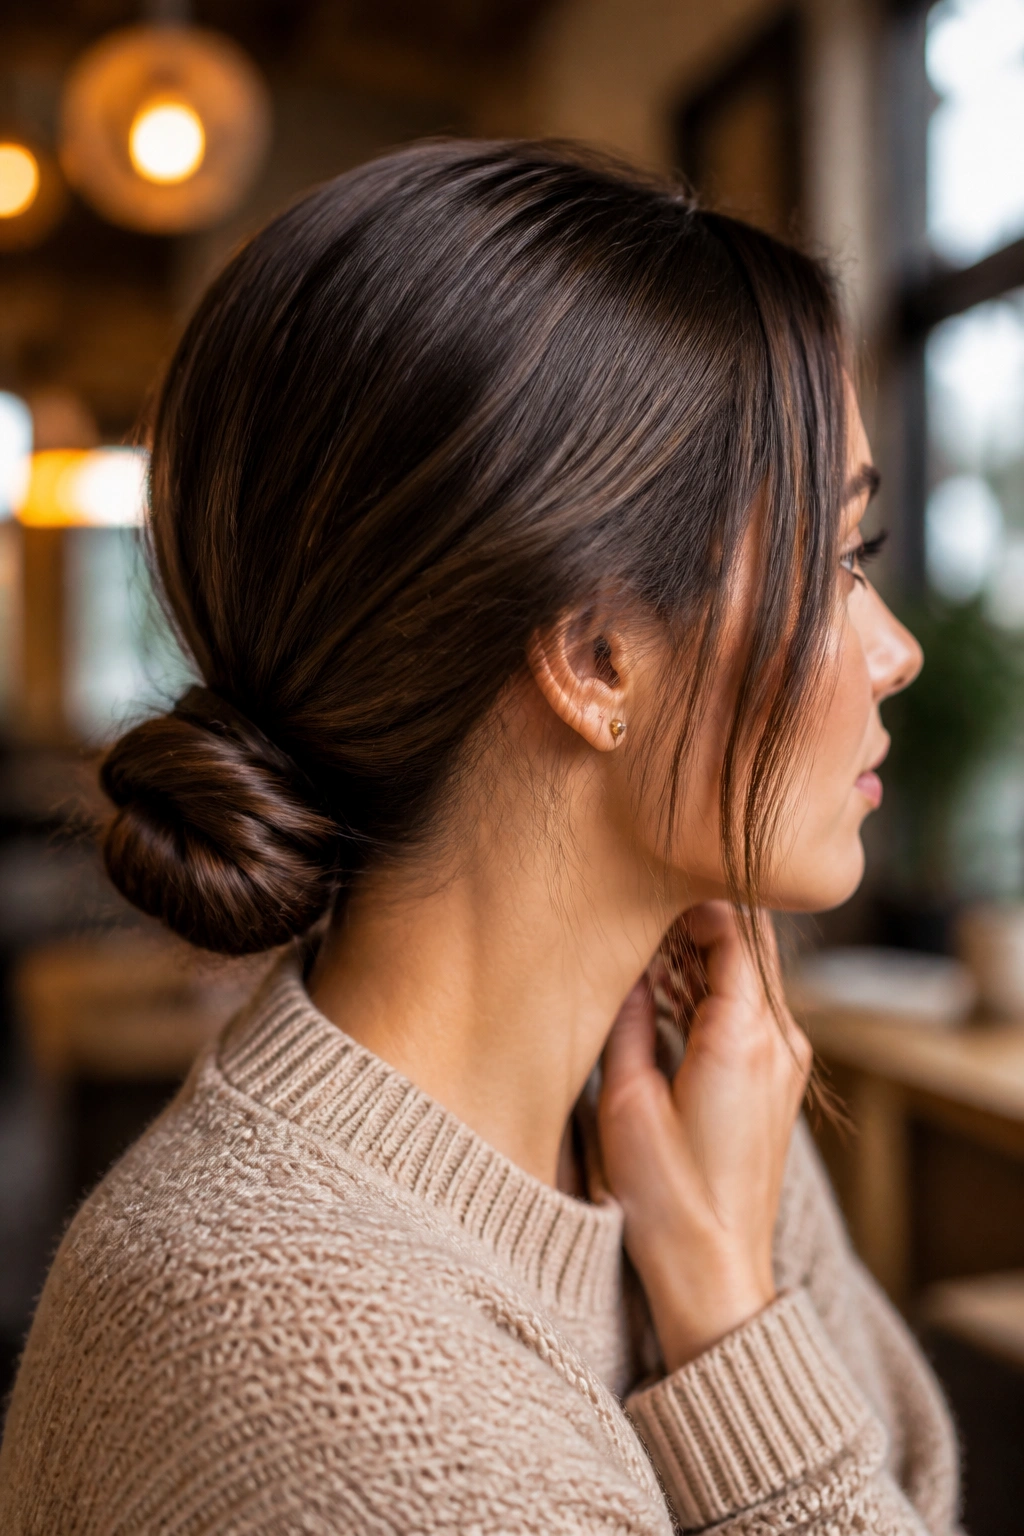
A low knot is not a compromise. It’s a choice, and on long hair it can be the smartest one in the room. When the knot sits at the nape, the weight of the hair is easier to control, and the style puts less stress on the crown.
This version is the one I reach for when my scalp wants a break. High knots can feel a bit like a tiny tug-of-war after a few hours, especially if your hair is dense or very long. A low nape knot settles closer to the head and usually survives better in real life, where you’re leaning back on chairs and pulling on coats and dealing with wind.
It also looks good with coats, high collars, and big earrings. That is not a small thing. Sometimes the best hairstyle is the one that plays nicely with the rest of your outfit instead of competing with it.
For long hair, the easiest approach is to make a low ponytail first, twist it upward, then fold the tail around the base. If the hair is extra long, split the tail into two sections and wrap them in opposite directions. The shape gets flatter, and the knot feels less bulky at the back.
5. Half-Up Top Knot
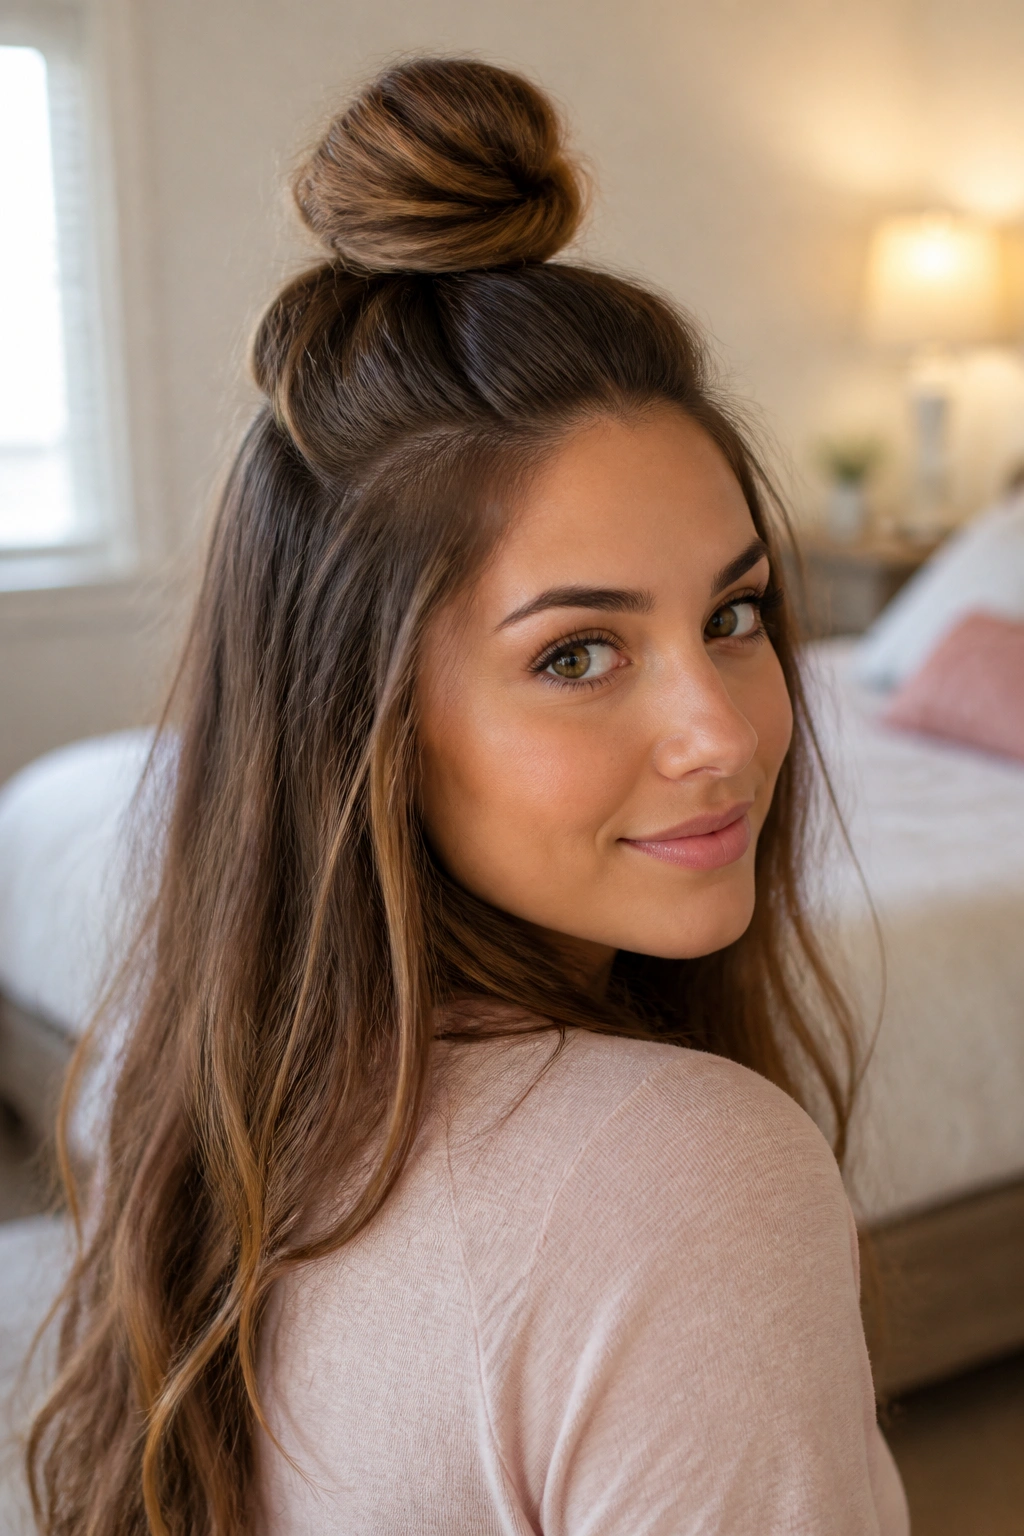
Picture a long ponytail falling down your back while the top section is pulled into a small knot at the crown. That’s the half-up top knot, and it’s one of the easiest ways to keep length visible without letting it take over your face.
This style is useful when you want the lift of an updo but don’t want to hide all your hair. It works especially well on long hair because the loose section keeps the look soft, while the knot on top gives the style enough structure to feel deliberate. If your hair is very thick, this can be more comfortable than a full top knot, because you’re only lifting part of the weight.
A little tease at the crown helps if your roots are flat. Don’t go wild with it. You only need enough lift so the knot doesn’t look pasted to your head. Then smooth the front sections back, gather the top third, and make a compact bun or twist.
Best Ways to Wear It
- With straight lengths for a cleaner contrast.
- With loose waves for a softer, more casual shape.
- With curled ends if you want the bottom section to feel dressed up.
- With second-day hair, when the texture gives the knot extra grip.
Practical note: a half-up knot tends to look best when the bun is smaller than you think it should be. Long hair makes people overbuild the top section. Resist that urge.
6. Twisted Rope Top Knot
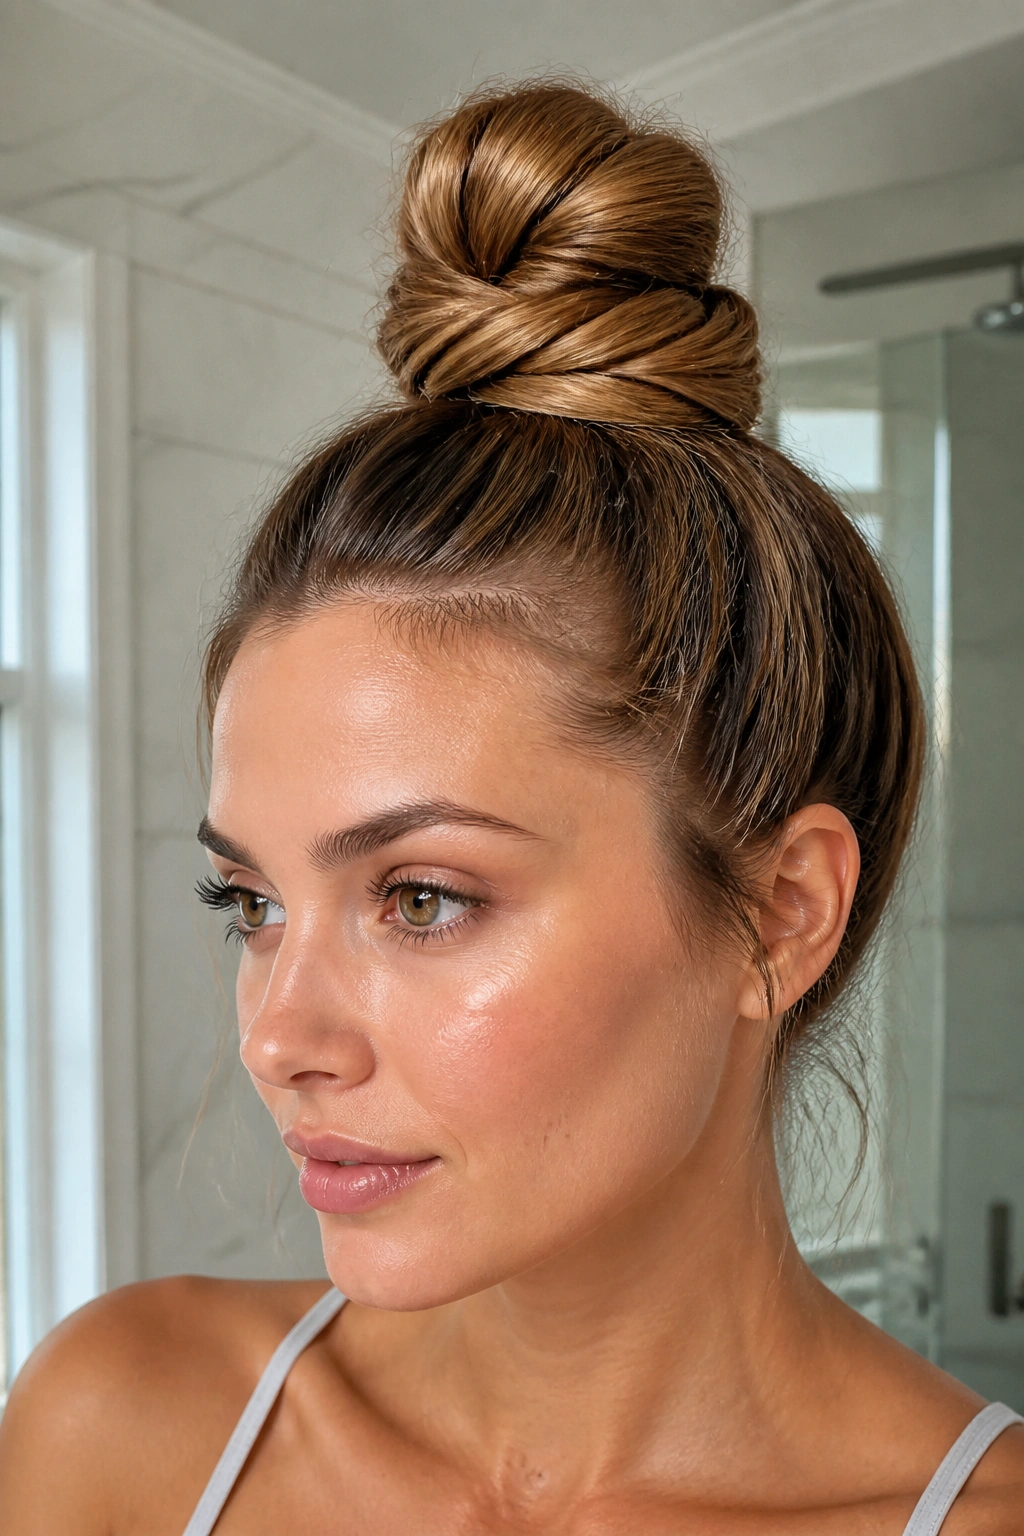
This is the sneaky one that flatters fine, slippery hair. A twisted rope top knot uses two tight rope twists instead of one loose wrap, and that extra twist gives the bun more grip and a more polished finish.
Here’s the basic idea: gather the hair into a high ponytail, split the tail into two sections, twist each section in the same direction, then twist them around each other in the opposite direction. That rope effect locks the hair together before you even pin it, which is exactly why it lasts better than a soft coil.
I like this style when I want the knot to look neat without being severe. Rope twists have a little movement in them, and on long hair they create a nice rope-like texture that reads as intentional even if the rest of the style is simple.
It also helps when the ends are blunt or heavy. A straight tail can poke out of a bun in awkward ways. A rope twist tucks itself in more cleanly.
If you use one small elastic at the end of the tail before wrapping, the whole knot tends to stay cleaner. Not glamorous advice. Useful, though.
7. Wrapped Scarf Top Knot
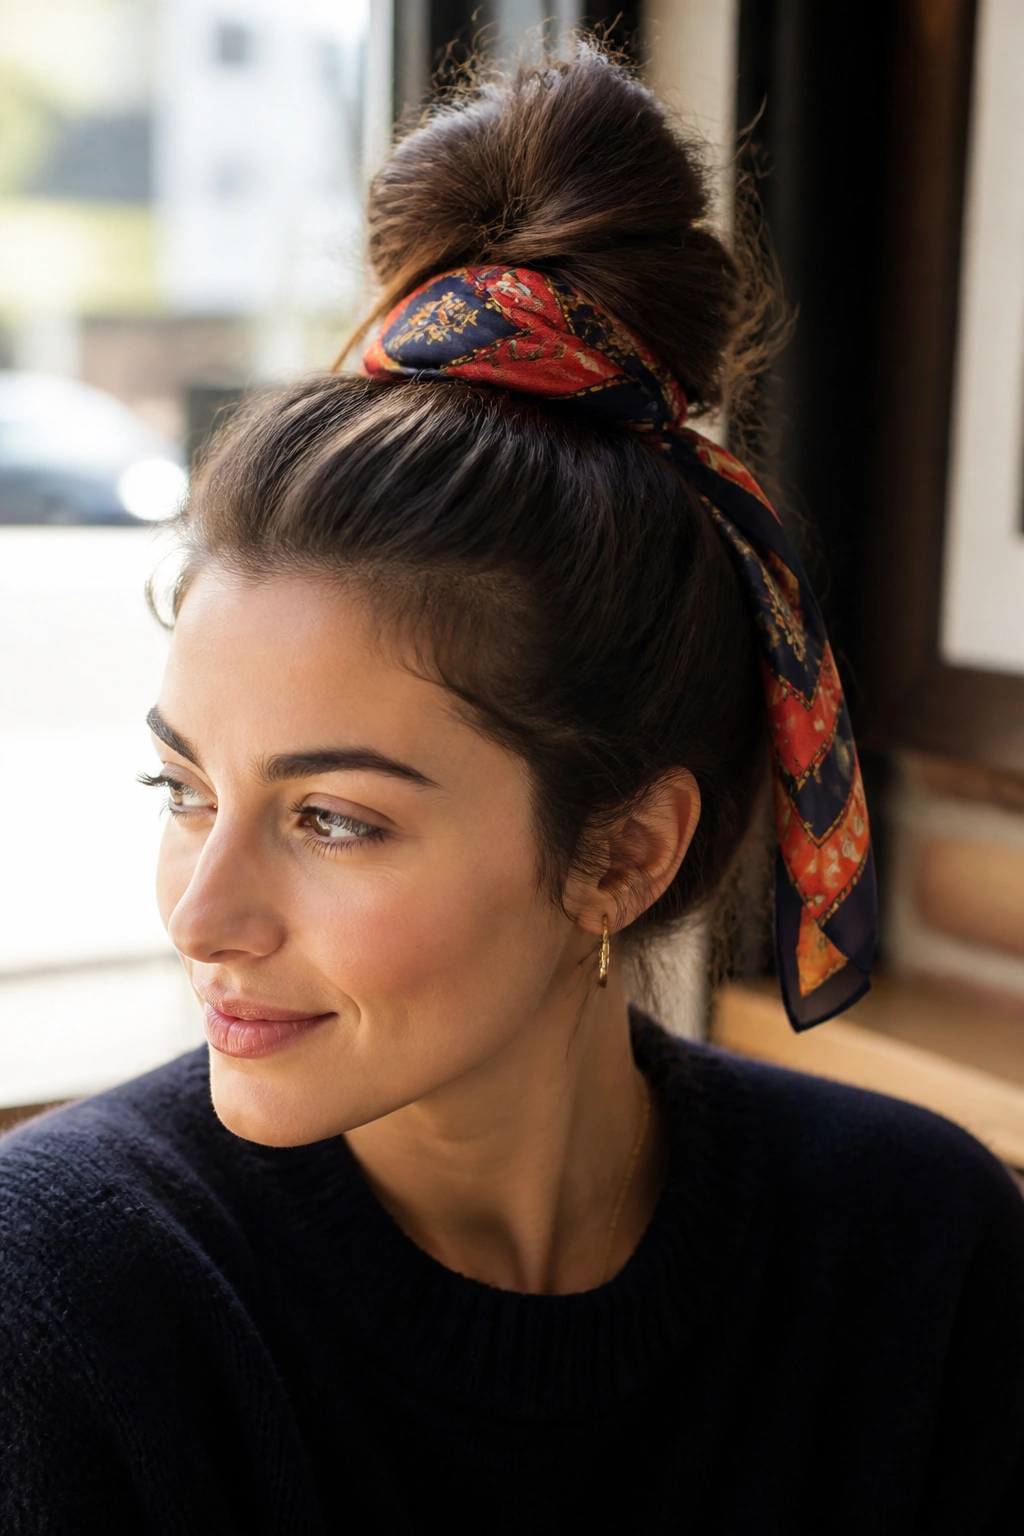
Want the knot to look finished even when the bun itself is plain? Add a scarf. A wrapped scarf top knot turns a basic updo into something with color, pattern, and a little softness around the face.
The best part is that the scarf does some practical work too. It hides the elastic, gives the knot more visual width, and helps a long style feel less heavy. I prefer a narrow silk or cotton scarf about 1.5 to 2 inches wide because it wraps neatly without turning bulky. A wide scarf can overwhelm the bun and make the whole thing sit too high.
Tie the hair into a top knot first, then wrap the scarf around the base and let the ends trail, knot, or tuck underneath. If the fabric slips, pin it once under the bun where no one can see it.
Choosing the Right Fabric
- Silk gives the softest finish and slides easily if you want drape.
- Cotton grips better and works well for casual styles.
- Linen blends feel a bit more textured, which can be helpful on very smooth hair.
- Avoid a scarf that is too thick or too wide unless the bun itself is large.
The scarf changes the mood fast. Plain hair becomes dressier. A basic bun becomes intentional. And the style still takes about the same amount of time, which is hard to complain about.
8. Curly Top Knot
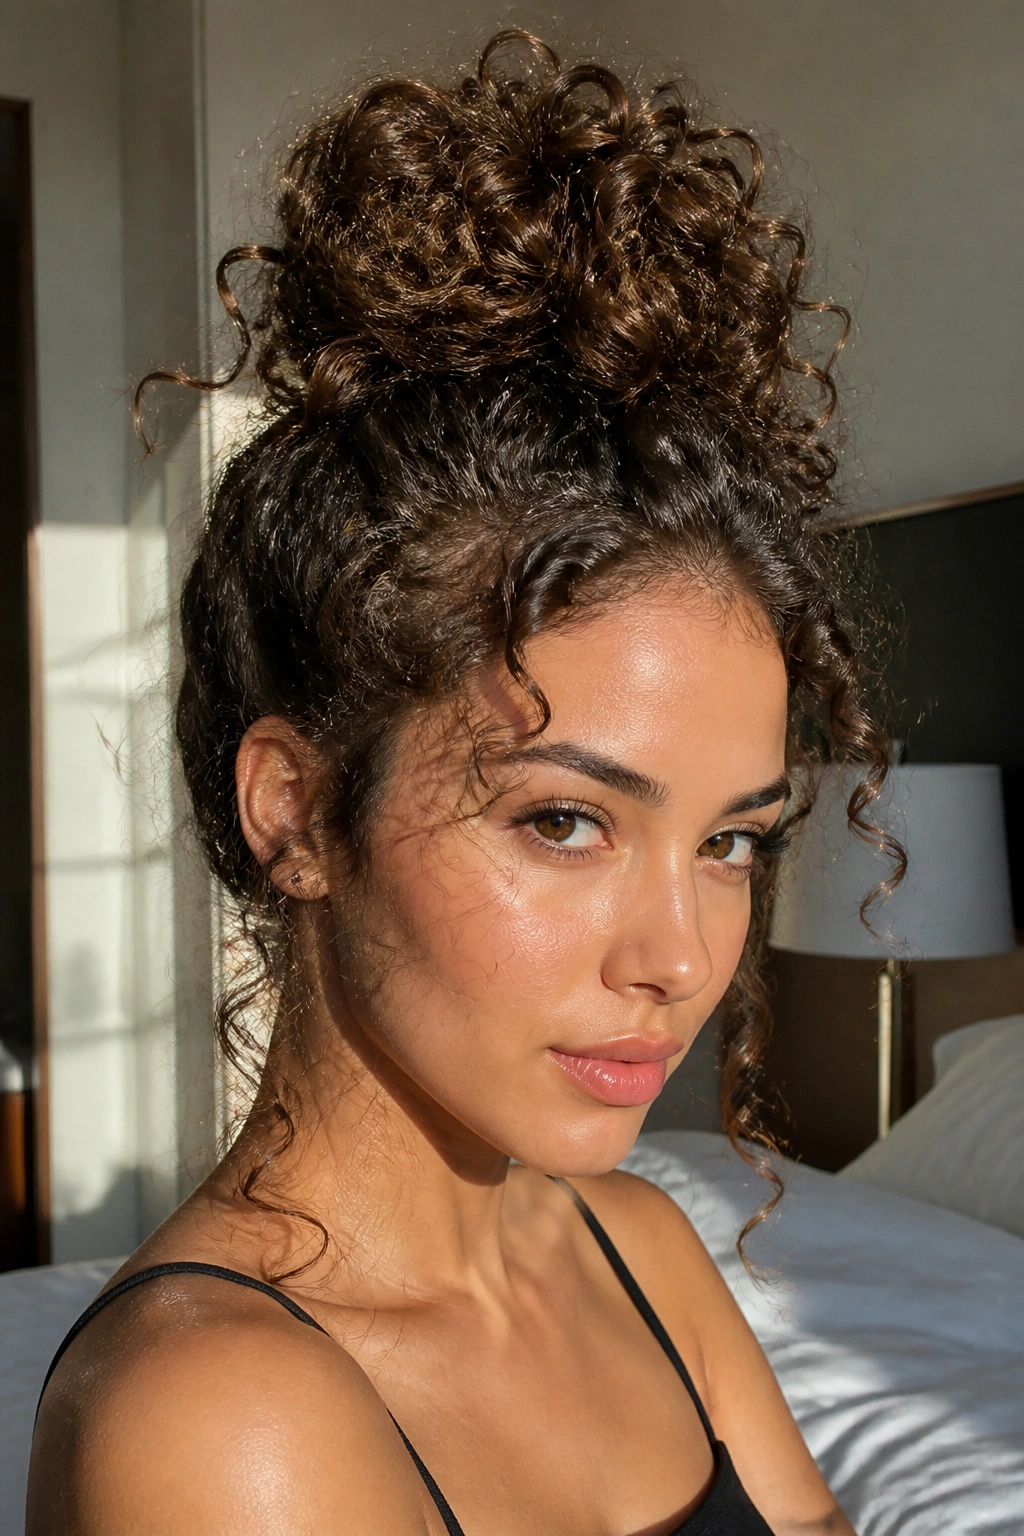
A curly top knot should feel loose in your hands, not smashed flat. That’s the whole point. Curly and wavy long hair already has built-in volume, so the style works best when you let that texture show instead of forcing everything into a tight ball.
If your hair is curly, start by gathering it high in a way that keeps the curl pattern intact. Don’t brush it into submission. Use your fingers or a wide-tooth comb if needed, then secure the ponytail with a strong elastic. Wrap the curls gently, leaving some ends visible if they help the bun look fuller and softer.
Flat curls make a sad bun.
I say that because I’ve watched too many people smooth out the life of their texture and then wonder why the knot looks tiny. With curly hair, the trick is shape, not polish. You want the knot to sit high and rounded, but not compressed. A satin scrunchie can help protect the curl pattern while holding the base comfortably.
A little curl cream on the loose face pieces keeps the front from frizzing out. And if the bun feels too tight by the end of the day, it probably is. Curly hair should not be pulled into a knot like it owes you money.
9. Bubble Top Knot
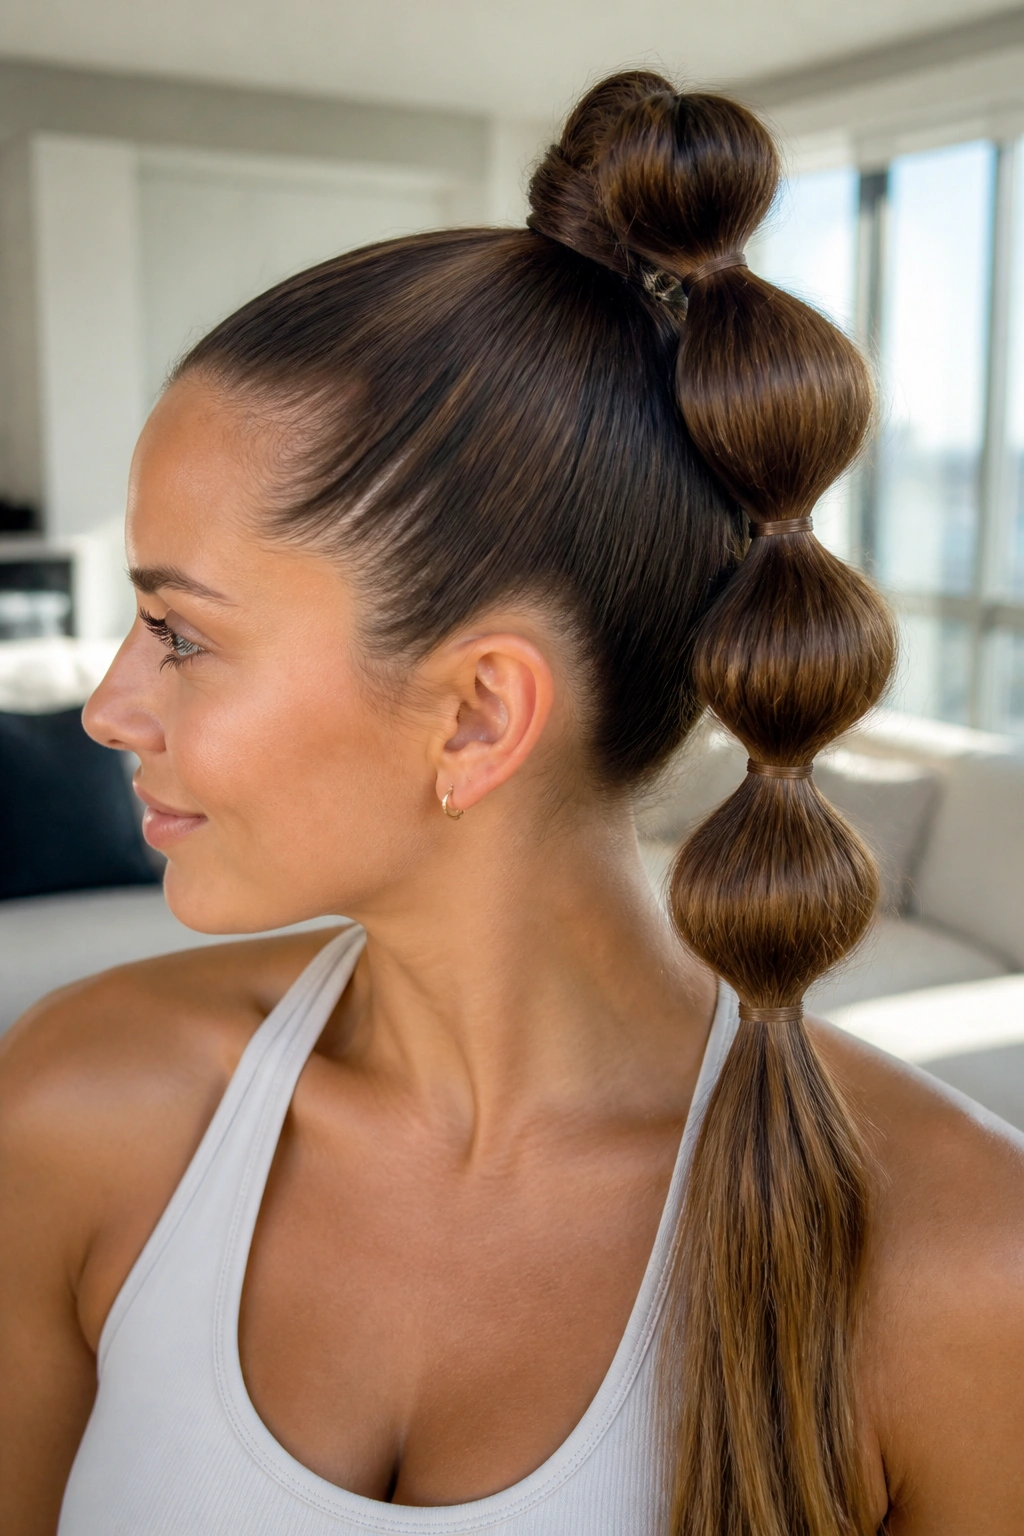
Unlike a plain wrapped bun, a bubble top knot gives long hair more places to grip. That matters when the tail is so long that one twist alone feels too thin or too heavy.
The style starts with a high ponytail. Add small elastics every 2 to 3 inches down the tail, then puff each section slightly so it forms little rounded bubbles. After that, wrap the bubbled tail around the base and pin it. The result is textured, a little playful, and much easier to build than it sounds.
This one works especially well on very long hair or on hair extensions, because the bubble sections prevent the tail from looking like a heavy rope hanging off the bun. It breaks the length into manageable pieces. I also like it because it adds shape even when the hair is very straight and glossy.
Quick Details That Help
- Use clear elastics if you want the bubbles to blend in.
- Make each bubble about 2 to 3 inches long so the shape reads clearly.
- Tug the sides of each bubble gently after securing it.
- Pin the wrapped base under the bulkiest part so the knot feels balanced.
It’s a good style when you want something a little different without getting fussy. The structure does most of the work for you.
10. Crown Braid into Top Knot
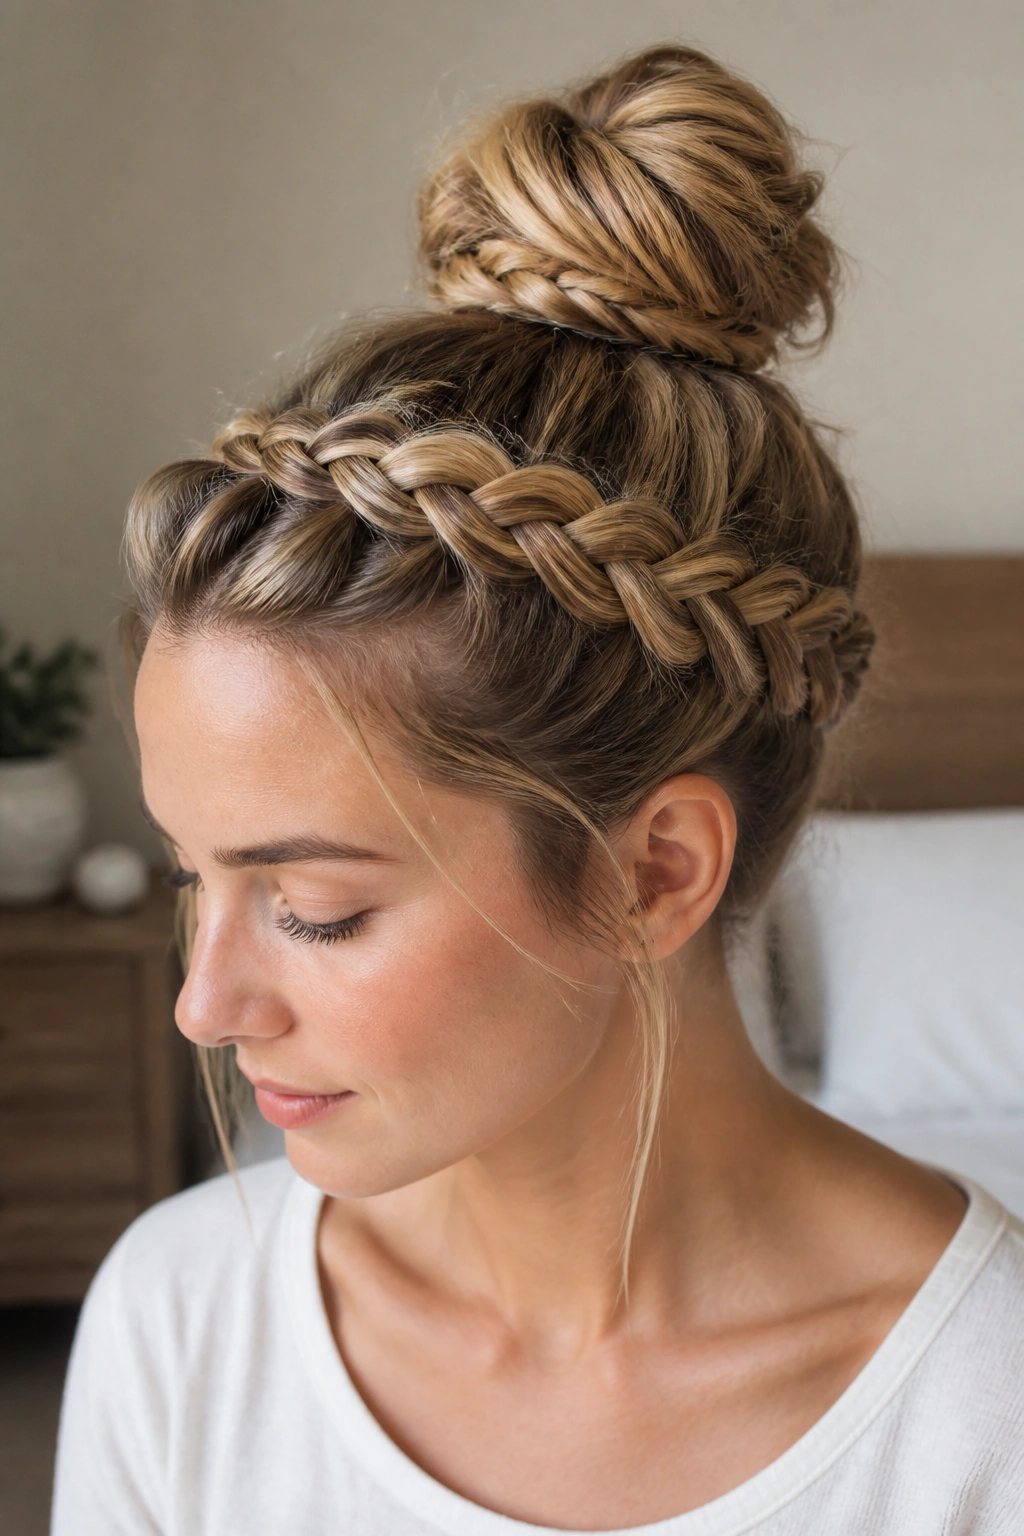
When I want long hair to stay put for hours, I start with a braid at the hairline. A crown braid into top knot gives you that clean, wrapped look around the head before the hair ever reaches the bun, which makes the final style look more finished than a simple pull-up knot.
The braid can start at one temple and travel across the crown, or it can be a full wraparound braid that feeds into the knot at the top back of the head. Either way, the braid controls the front section of the hair and hides a lot of the little flyaways that usually try to escape first.
This is a strong choice for second-day hair. A slightly oily root actually helps the braid hold, and the knot benefits from the added texture. It can also make long hair feel lighter, because some of the bulk is distributed along the braid before it ever gets to the bun.
Where to Start the Braid
A braid that starts too far back can disappear into the knot and lose its point. Start near the front hairline, keep the sections even, and angle the braid toward the crown.
Then tuck the braid tail into the knot instead of leaving it loose. That tiny decision keeps the style tidy and helps the top knot feel like part of the braid, not an afterthought. You want one shape, not two styles fighting each other.
11. Side-Swept Top Knot
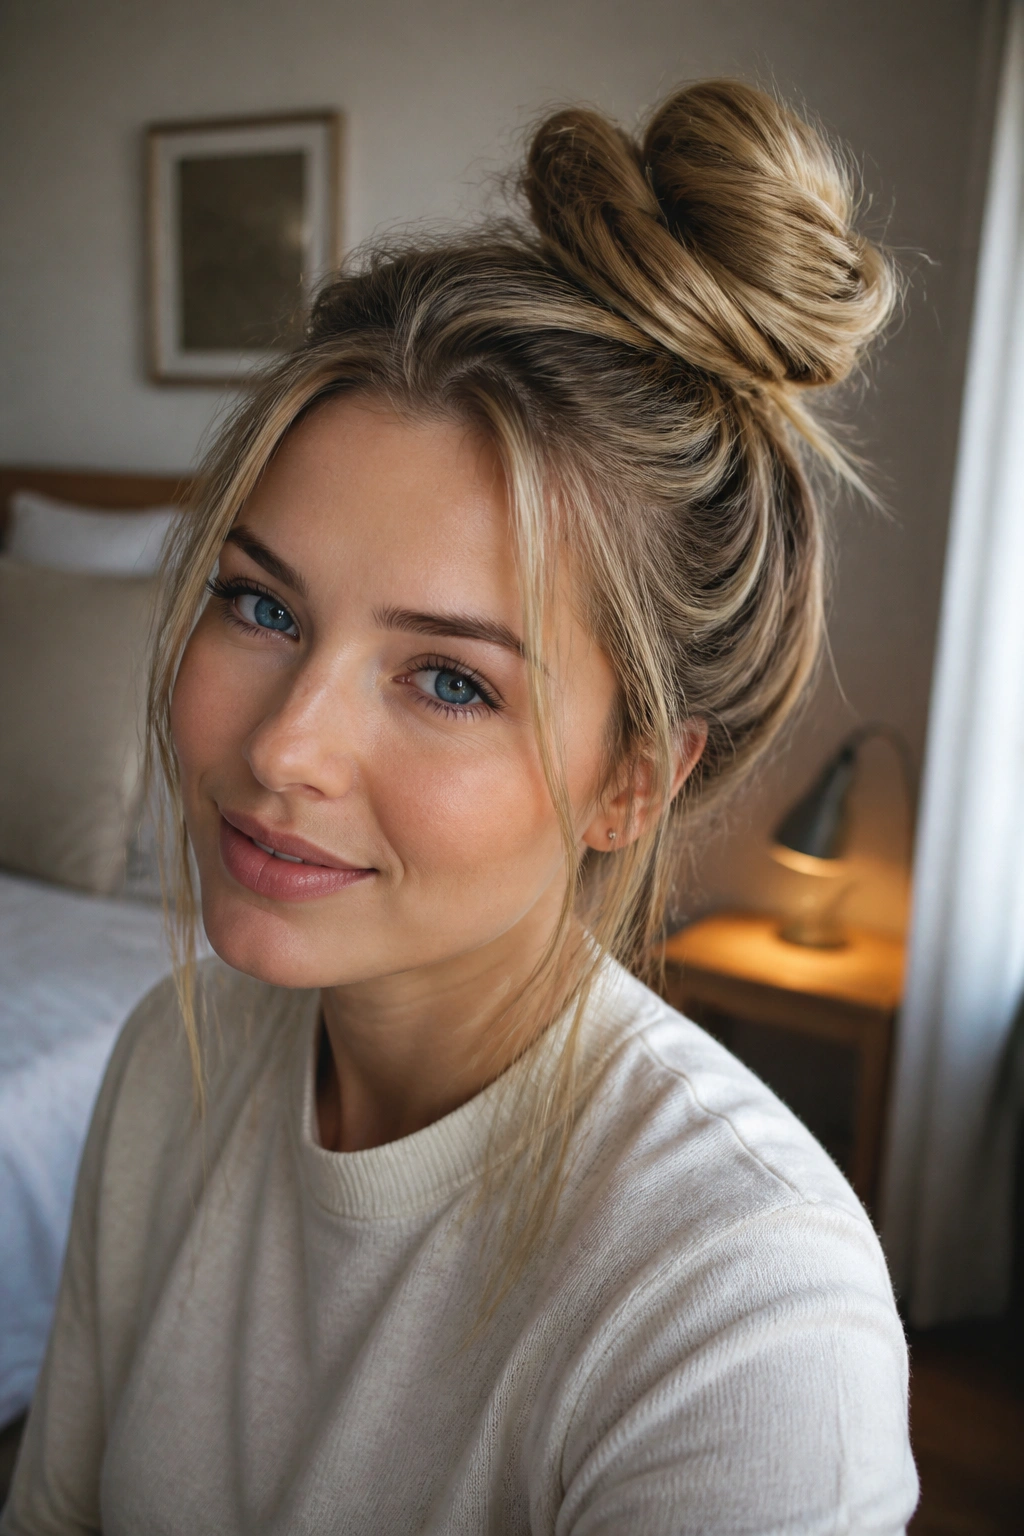
Why put the knot dead center every time? A side-swept top knot shifts the balance a little, and on long hair that slight offset can make the whole style feel softer and more interesting.
Instead of placing the ponytail at the exact center of the crown, move it a little to one side. Not enough to look accidental. Just enough that the knot has a directional feel. A deep side part helps, especially if your face shape likes a little asymmetry. The style can also play down a very high forehead or soften a strong jawline without trying too hard.
This is one of those styles that looks more styled than it really is. A lot of the work happens in the placement. Once the ponytail is slightly off-center, the knot can be twisted, braided, or wrapped in the usual way.
I like to leave one front section a touch looser than the other. That little imbalance keeps the style from feeling too formal. If you want more polish, tuck one side behind the ear and keep the other side with a soft bend. If you want it messier, pull a few tiny pieces free near the temple.
Small shift. Big change.
12. Sleek Wet-Look Top Knot
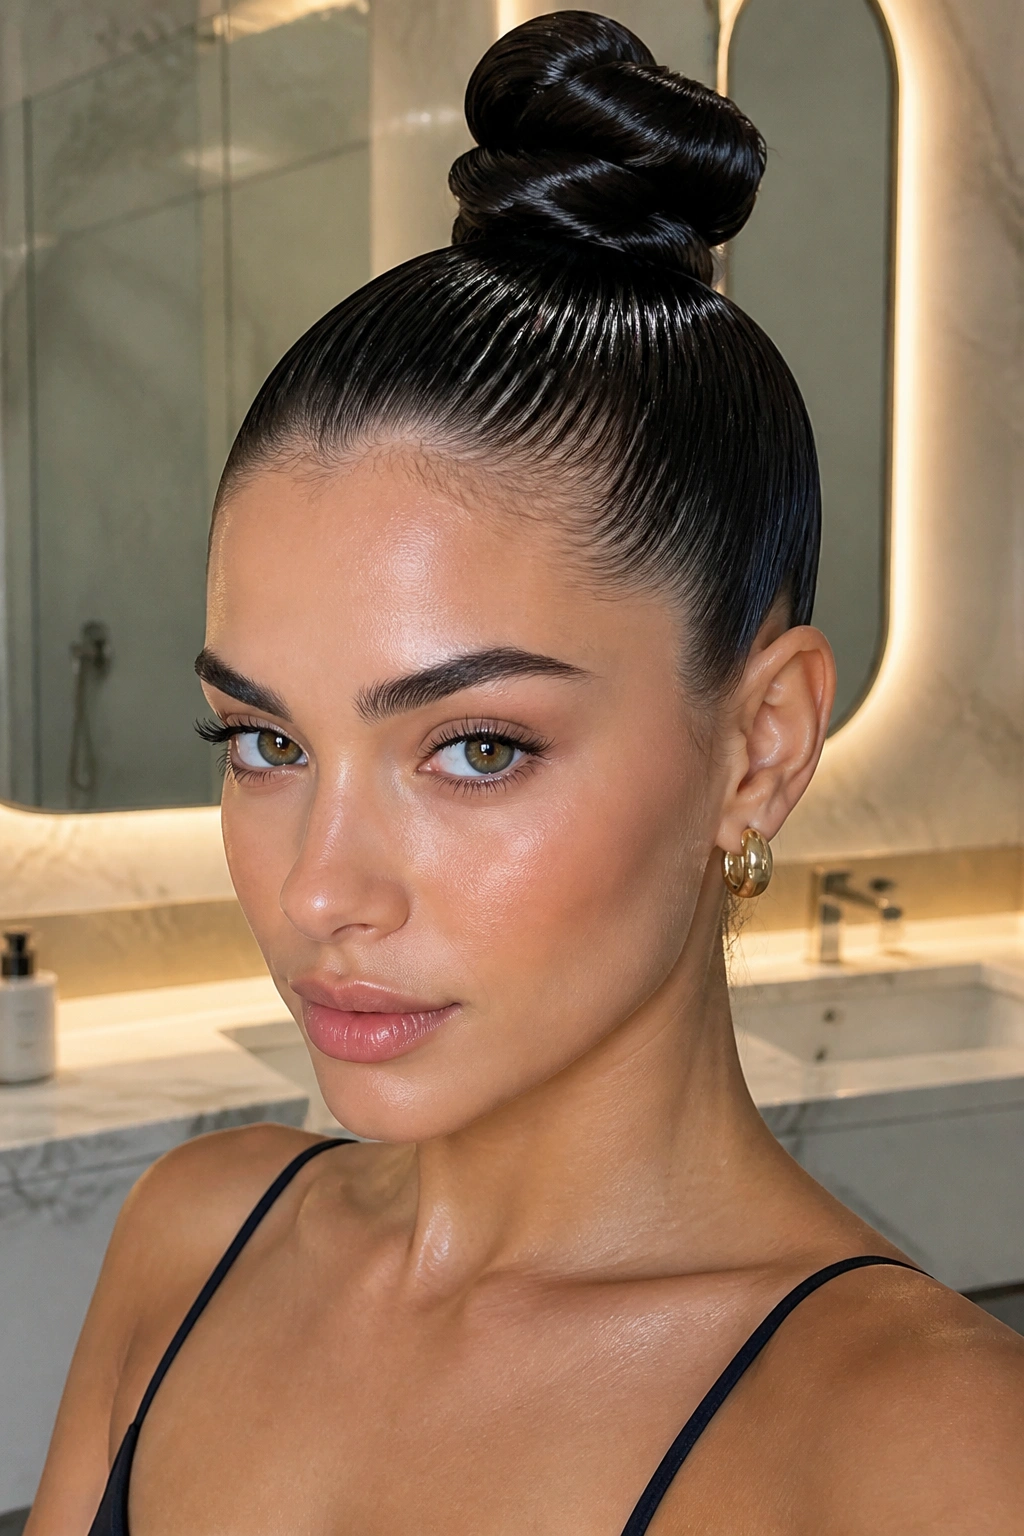
If you like sharp lines, this is the cleanest one in the bunch. A sleek wet-look top knot takes the polish of a tight bun and adds a glossy finish at the hairline, which can make long hair look controlled even when the actual bun is packed full.
The key is product placement. Apply gel or a light styling cream to the front sections first, then brush everything up with a fine-tooth comb. You want the hair to lie flat at the scalp without turning crunchy or greasy. A little shine is good. A wet mop is not.
Long hair can make this style tricky because the tail carries so much volume, and the temptation is to drown it in product. Don’t. Smooth the crown and the sides, then let the bun itself stay clean and dense. The contrast between the glossy head shape and the compact knot is what makes it work.
How to Keep It from Flaking
- Use one gel layer, then stop. Too much product dries chalky.
- Comb in sections so you do not drag product into clumps.
- Finish with a soft brush or edge brush around the hairline.
- If you need extra hold, mist the finished style lightly instead of adding another thick layer.
This one is not for a rushed morning. It asks for a few extra minutes. Still worth it when you want the kind of knot that looks crisp from every angle.
13. French Twist Top Knot
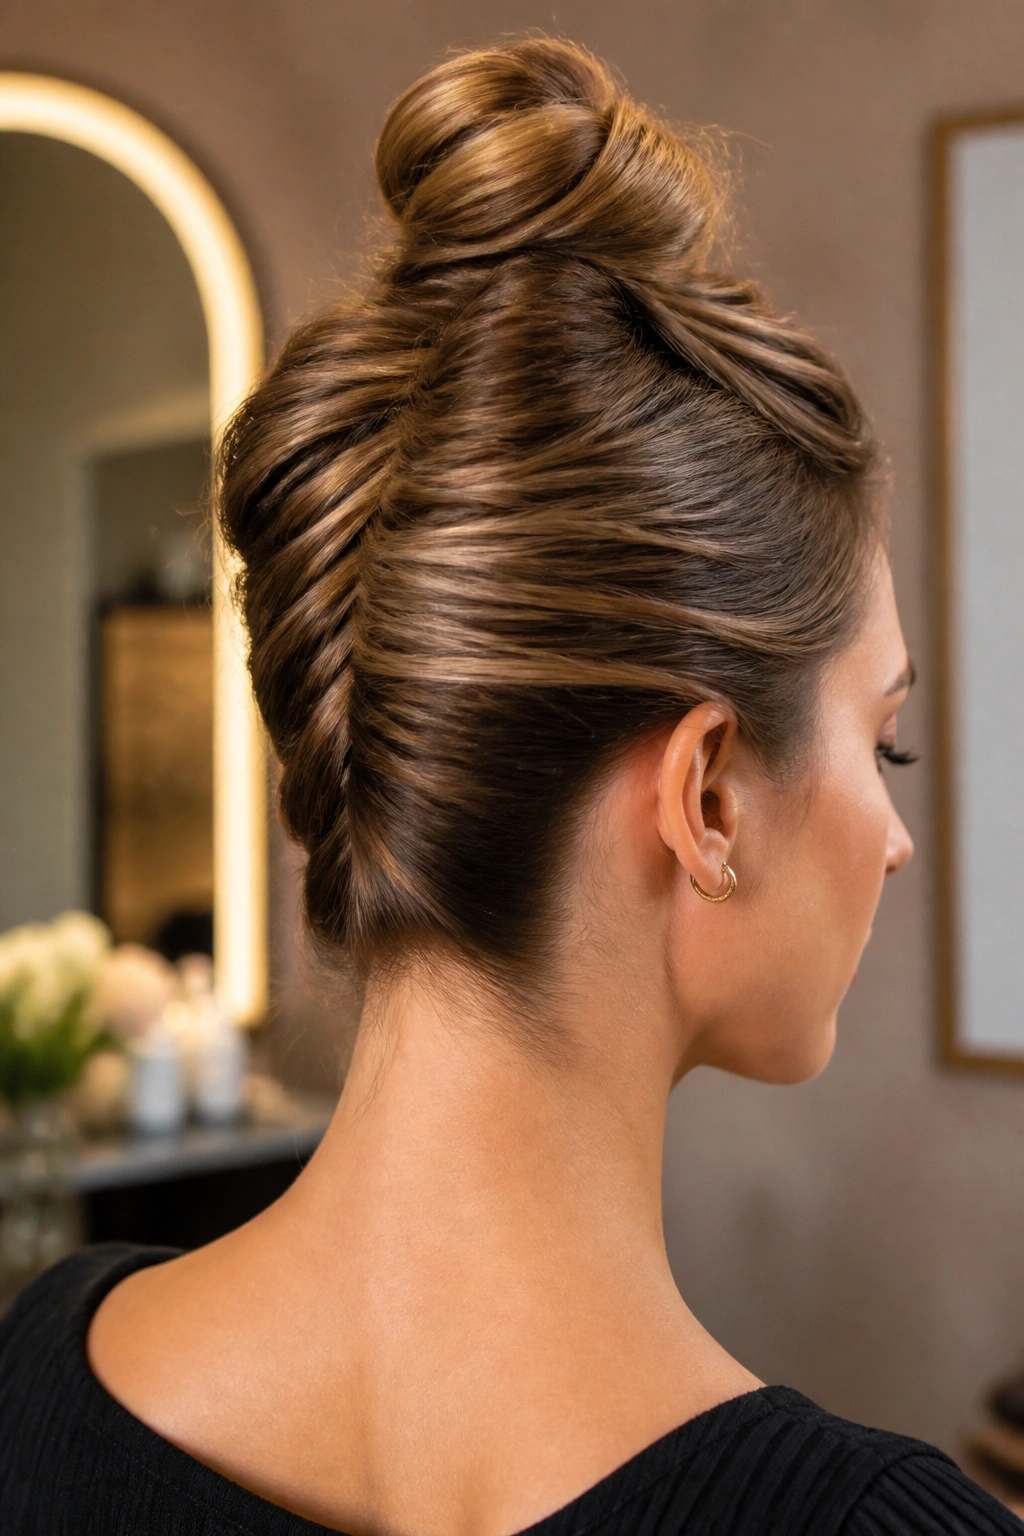
The French twist version is what I reach for when I want the knot to look deliberate, not thrown together. It’s a smart choice for long hair because the length folds vertically along the head before it tucks into the bun, which gives the style a cleaner backbone.
Instead of gathering everything straight into a high ponytail, sweep the hair upward as if you’re making a French twist, then roll it against the head and secure it with pins. The leftover ends can be tucked into a small knot at the top or folded under the twist itself. The result sits somewhere between an updo and a top knot, and that middle ground is what makes it useful.
This version is especially good when you want some height without a giant bun. The twist keeps the profile narrow, so long hair doesn’t balloon out at the sides. If your hair is very straight, texture spray at the roots helps the shape hold. If it’s wavy, you may need less support than you think.
What Makes It Different
The French twist gives you a smoother vertical line than a standard knot. That means the style looks neat from the side, which is where a lot of top knots fall apart visually. Pin the twist first, then deal with the bun shape after. That order matters more than people realize.
14. Tucked Chignon Top Knot
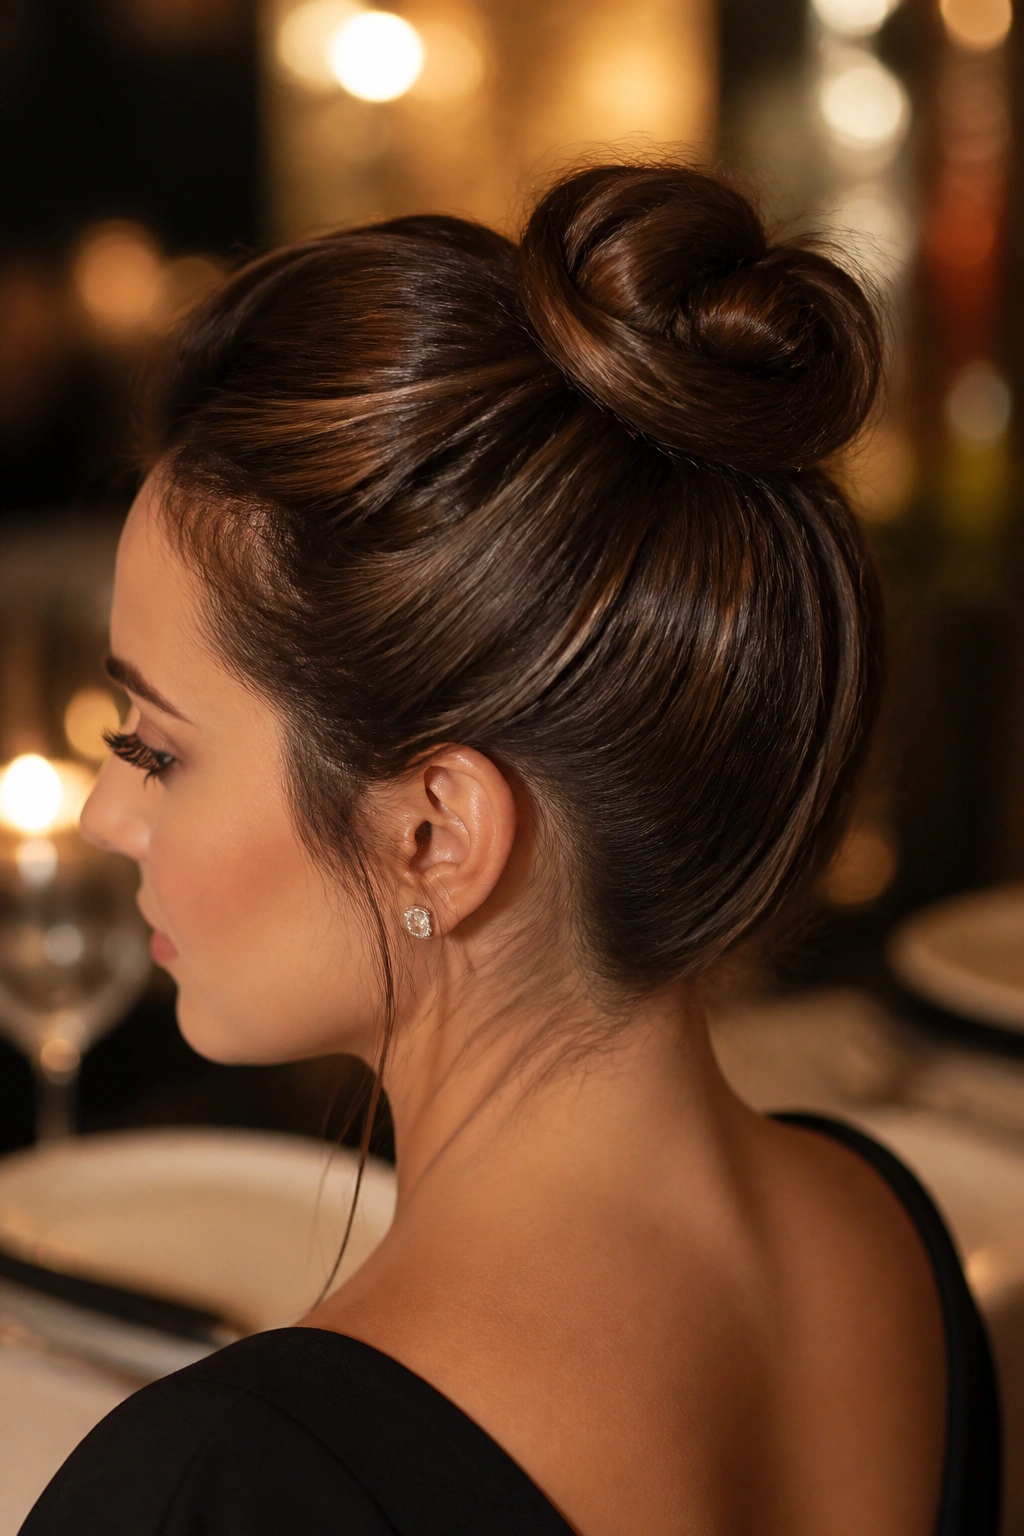
Can a top knot look soft and formal at the same time? Yes, if it borrows a little from a chignon. A tucked chignon top knot sits low enough to feel elegant, but it still keeps enough lift to count as a proper knot.
This is the version I’d pick for a dinner, a wedding, or any setting where a plain messy bun would feel too casual. The shape is compact, and the ends are tucked rather than left loose. Long hair helps here because there’s enough length to fold and hide, which keeps the finish neat without needing a donut or a huge stack of pins.
The trick is not to over-tighten the first ponytail. Build a secure base, twist the hair upward, then tuck the ends into the center instead of wrapping them all the way around the outside. That makes the bun look smooth and contained. A little volume at the crown keeps it from looking flat against the head.
I like this style with a side part or a few soft pieces around the face. It has enough structure already. What it needs is shape, not extra drama.
15. Accessorized Top Knot with Pins and Clips
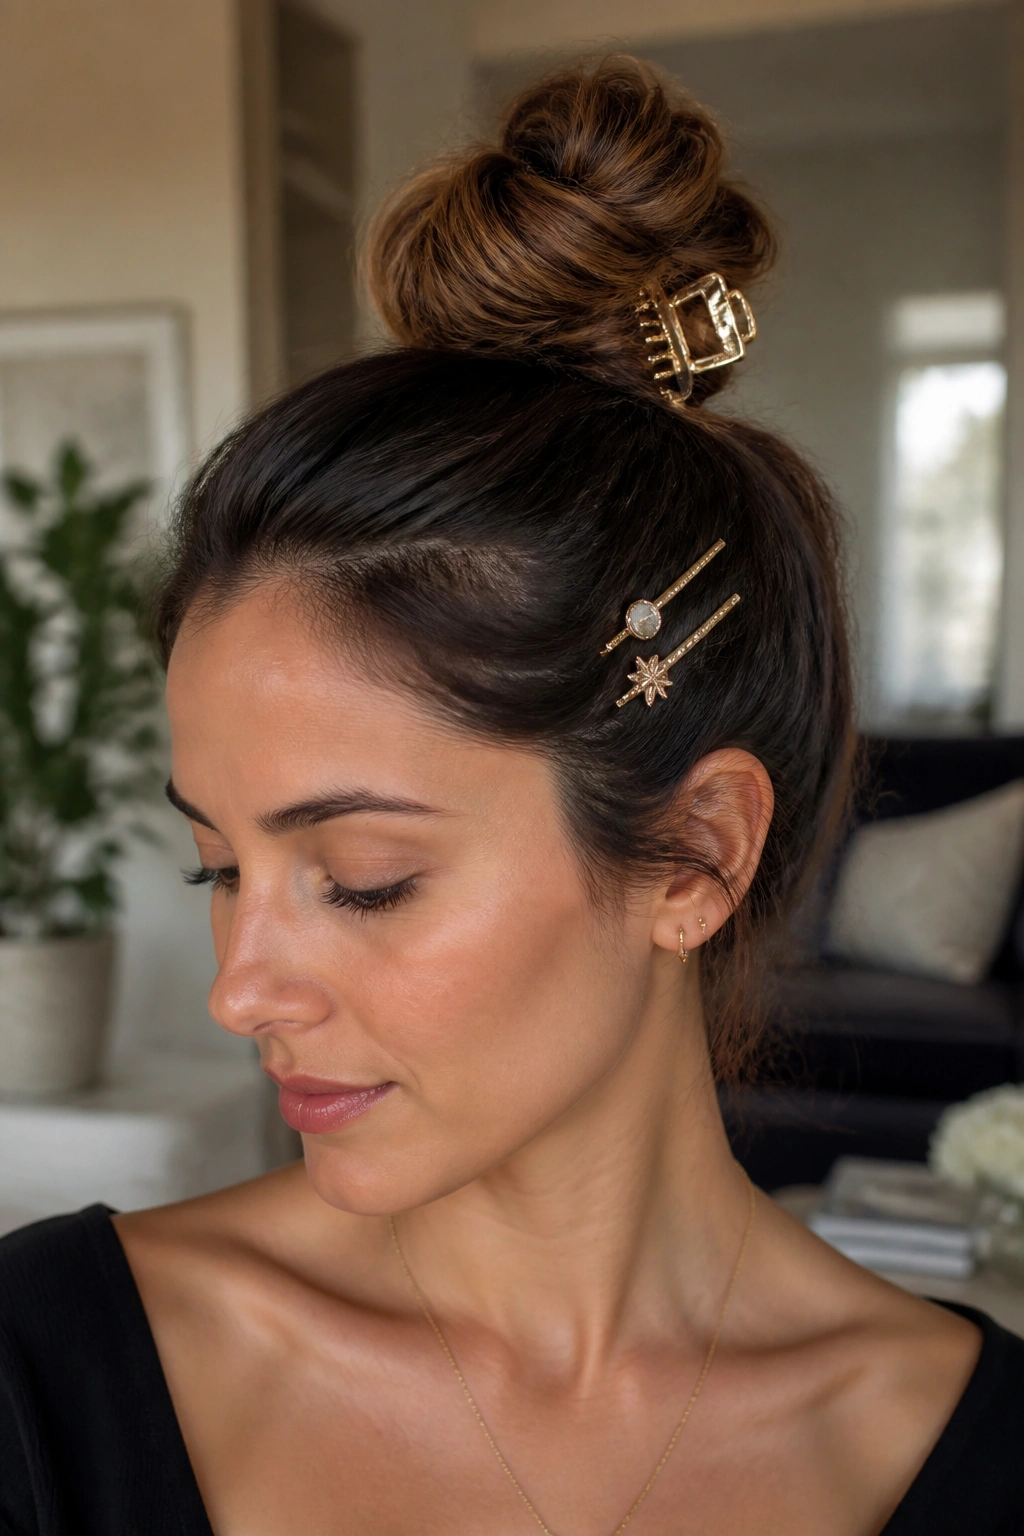
Sometimes the style is done when you stop messing with it and add the right accessory. A pin-studded or clip-finished top knot can make long hair feel styled in one clear step, and it saves you from overbuilding the bun just to make it look special.
Pearl pins, thin metal bars, decorative U-pins, and even a large claw clip can all change the tone. A claw clip works best when the knot is compact and the clip is large enough to grip the full base. Pins work better when you want precise placement, especially around the side or just above the bun. I tend to prefer pins for thicker hair because they let you control the shape without crushing it.
The style is also useful when the bun itself is simple. A neat top knot with one strong accessory often looks more finished than a bun that was teased, sprayed, and overworked into something fussy. That’s especially true on long hair, where the bun can already feel heavy.
Easy Ways to Use Accessories
- Place 2 to 3 decorative pins on one side of the knot for a clean, asymmetrical finish.
- Use a single oversized clip only if the hair is fully secured underneath.
- Angle pins slightly upward so they grip the bun instead of sliding out.
- Keep the rest of the style simple if the accessory has pearls, stones, or a strong color.
A good accessory does not rescue a weak knot. It finishes a solid one. That’s the difference.
Final Thoughts
Long hair gives you options, but it also gives you weight to manage. The styles that last tend to have one thing in common: a secure base before the bun starts to build.
If you want the shortest path to a dependable look, reach for braided, twisted, or sleek versions first. If you want softness, messy, half-up, and scarf-wrapped knots do the job without making the hair feel trapped. And if you like a style that looks more finished than effortful, the French twist and chignon versions are hard to beat.
Keep a few bobby pins and a small elastic in your bag. That tiny backup kit saves more bad hair moments than any fancy tool ever will.
