



Half up half down hairstyles solve a very specific problem: you want your hair off your face, but you do not want the pulled-tight, all-or-nothing look that can make everything feel stiff. There’s a reason these half-up styles keep showing up in real life, not just in polished photos. They work for work calls, coffee runs, school pickup, dinner, and those mornings when your hair has opinions of its own.
The nice part is that the style does not ask for perfection. A half-up section that sits a little higher or lower, a twist that leans loose instead of tight, a couple of bobby pins where you thought you needed six — those small choices change the whole feel. Half an inch matters. So does the direction of the twist. And yes, the condition of your hair matters too; a bit of texture usually helps more than a fresh shampooed slip-and-slide.
I keep coming back to this category because it covers almost every mood. You can make a half-up style polished, messy, soft, sporty, sweet, or sharp without changing the basic idea. That makes it one of the most practical haircut-adjacent styling tricks you can learn, especially if you want something that looks deliberate without eating twenty minutes of your morning.
A few tools make life easier: clear elastics, a pack of bobby pins, a small claw clip, a tail comb, and a little texture spray or dry shampoo when your roots need grip. Keep those nearby, and the styles below become much less fussy. The simplest place to start is the twisted version. It teaches the shape fast.
1. Twisted Crown Half Up
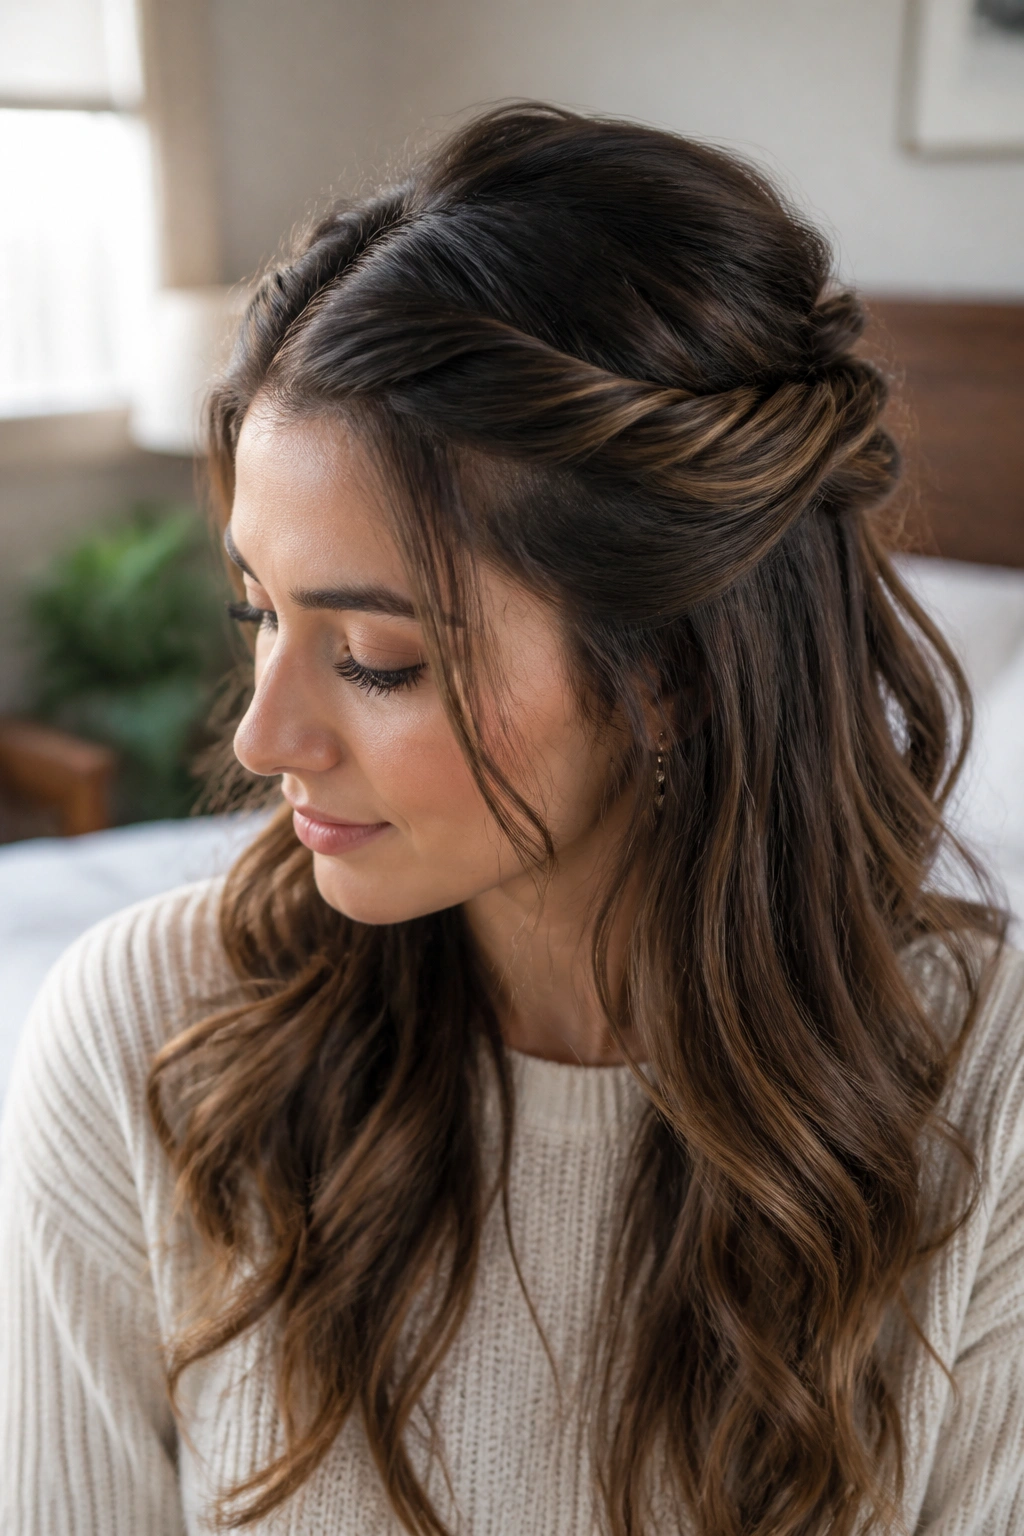
This is the half-up style I’d hand to someone who says they’re “bad at hair” and means it. You take a small section from each temple, twist both sides back, and pin them together at the back of the head. Done well, it looks soft and finished. Done carelessly, it still looks better than a lot of things that took twice as long.
Why It Works So Well
The twist gives you structure without the work of a braid. That matters when your hair is layered, because layers can slip out of a braid and make the whole thing feel messy in a bad way. A twist hides that problem better.
A little texture spray at the roots helps the section stay where you put it. If your hair is silky, lightly rough up the crown with your fingers first. If it’s curly or wavy, keep the twist loose so you don’t crush the shape.
- Best on medium to long hair
- Needs 2 to 4 bobby pins
- Takes about 3 minutes once you’ve done it twice
- Works especially well with day-old hair
- Looks nicest when the front pieces stay soft, not pulled flat
Pro tip: pinch the twist once it’s pinned and tug it open by 1/4 inch. That tiny move keeps it from looking strict.
2. Half Up Half Down Ponytail With Face-Framing Pieces
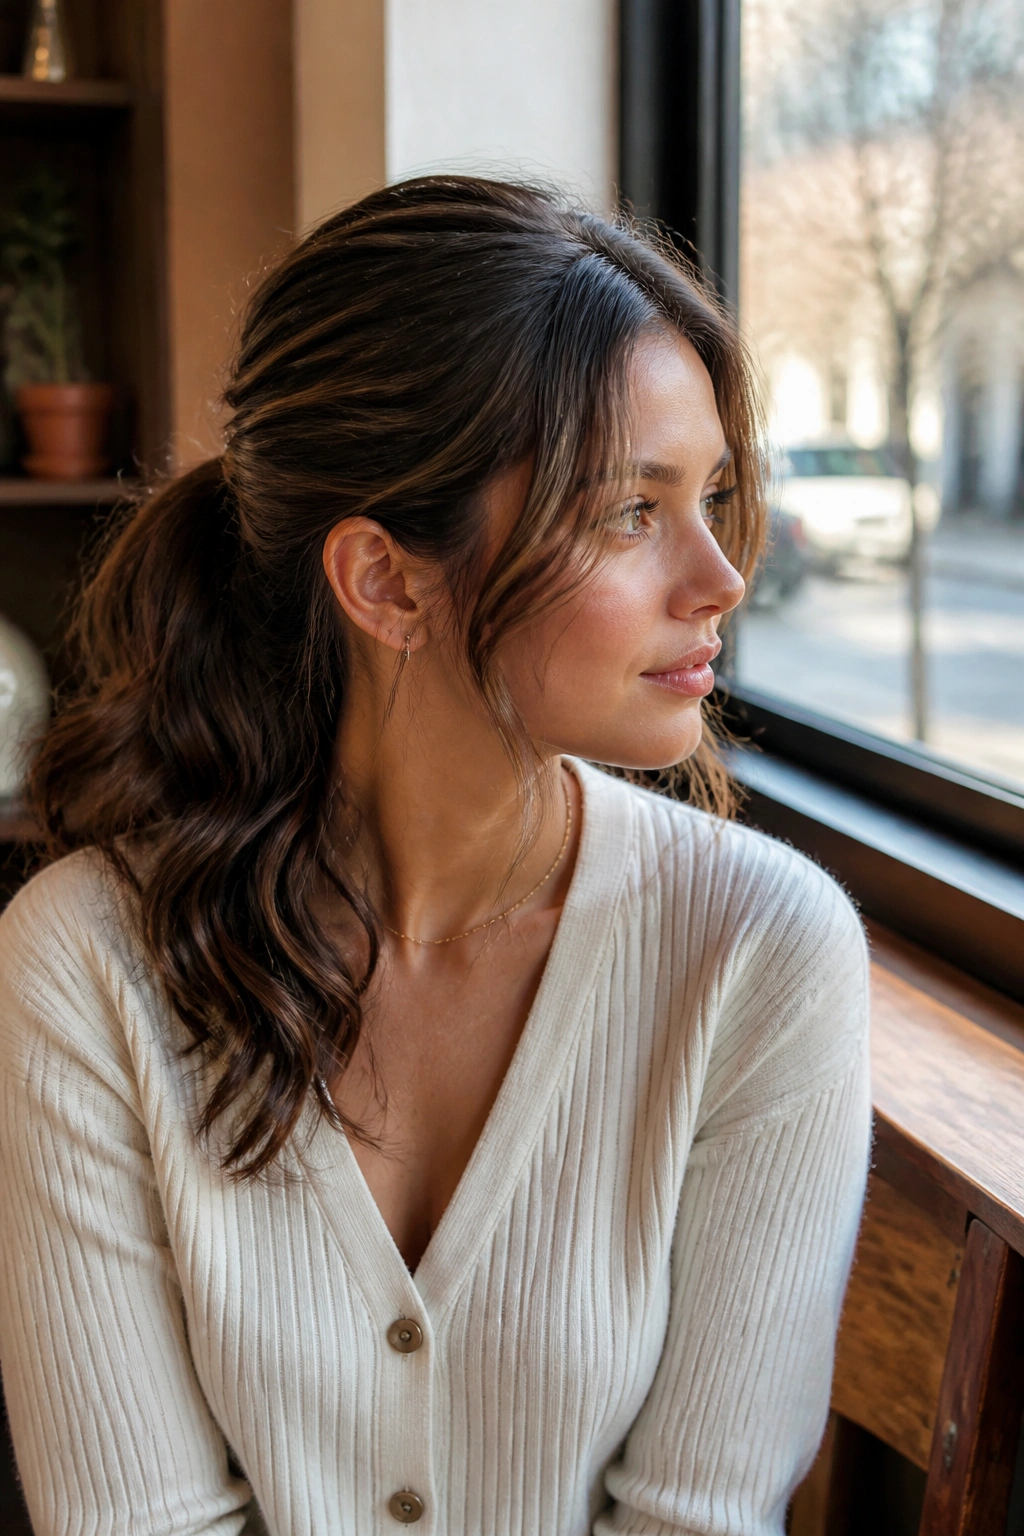
This is the one that earns its keep on busy mornings. A half-up ponytail is fast, easy to place, and forgiving if your part is a little crooked or your ends are not cooperating. The face-framing pieces matter more than people think; they stop the style from feeling like a gym shortcut.
You do not need a high ponytail here. In fact, a slightly low half ponytail usually looks better because it leaves the crown smoother and the shape softer. Gather the top section from about temple to temple, secure it with a small elastic, then pull the ponytail apart a touch with your fingers so it doesn’t sit like a tight little nub.
Leave two slim pieces near the cheekbones, or let your curtain bangs fall naturally if you have them. That frame is what gives the style movement. Without it, the look can feel blunt.
I reach for this one when I want hair out of my face but still want length showing at the back. It works with straight hair, waves, and loose curls, and it does not ask for much more than a brush and a mirror.
3. Loose Side Braid Half Up
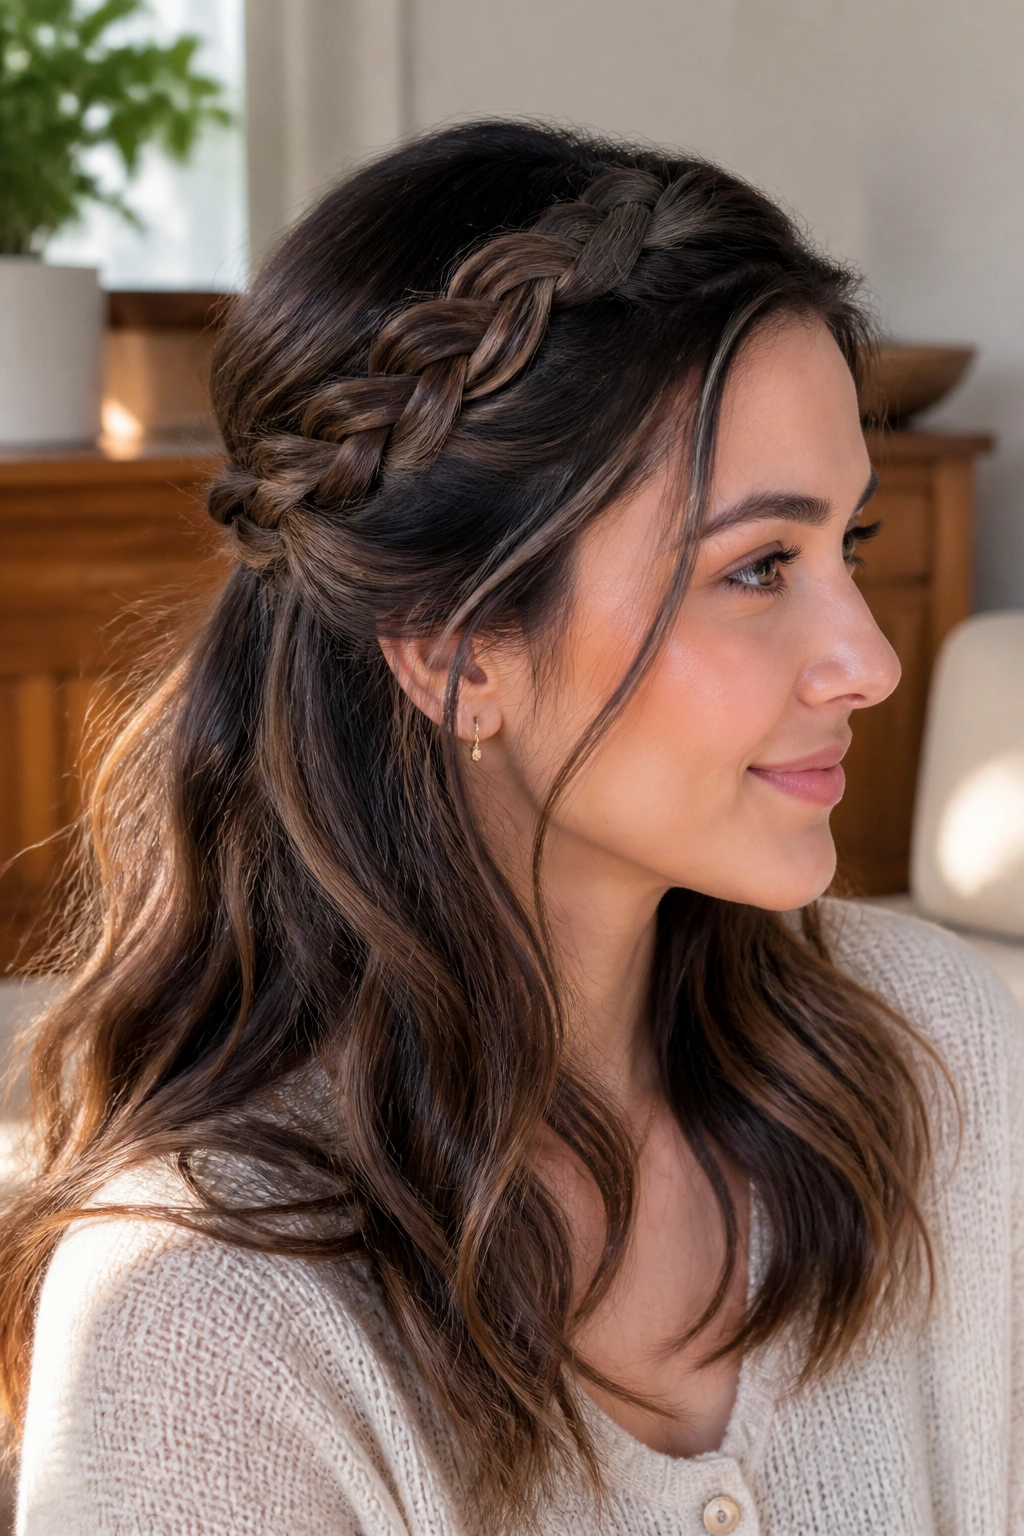
Why does a loose side braid look so much more relaxed than a center braid? Because it breaks the symmetry a little. That small shift makes the whole style feel less like a school picture and more like something you’d wear on a regular Tuesday.
Start by taking a section from one side of the head, just above the ear, and braid it loosely back toward the opposite side. Keep the tension light. If you pull too hard, the braid loses that lived-in shape and starts looking narrow and stiff. Pin the end under a layer of hair so the finish feels hidden, not obvious.
How to Keep It Soft
A side braid sits best when the first few stitches are slightly loose and the braid is not too thick. If your hair is fine, backcomb the roots of the section once before you braid. That gives the grip you need without making the braid bulky.
This style is especially good for layered cuts, since the braid holds the front shorter pieces in place while still leaving the rest of the hair down. It also works nicely on second-day hair, which has enough grit to stay put. A tiny bend in the loose lengths helps, too. Straight, slippery ends can make the braid feel disconnected from the rest of the look.
4. Mini Claw Clip Half Up
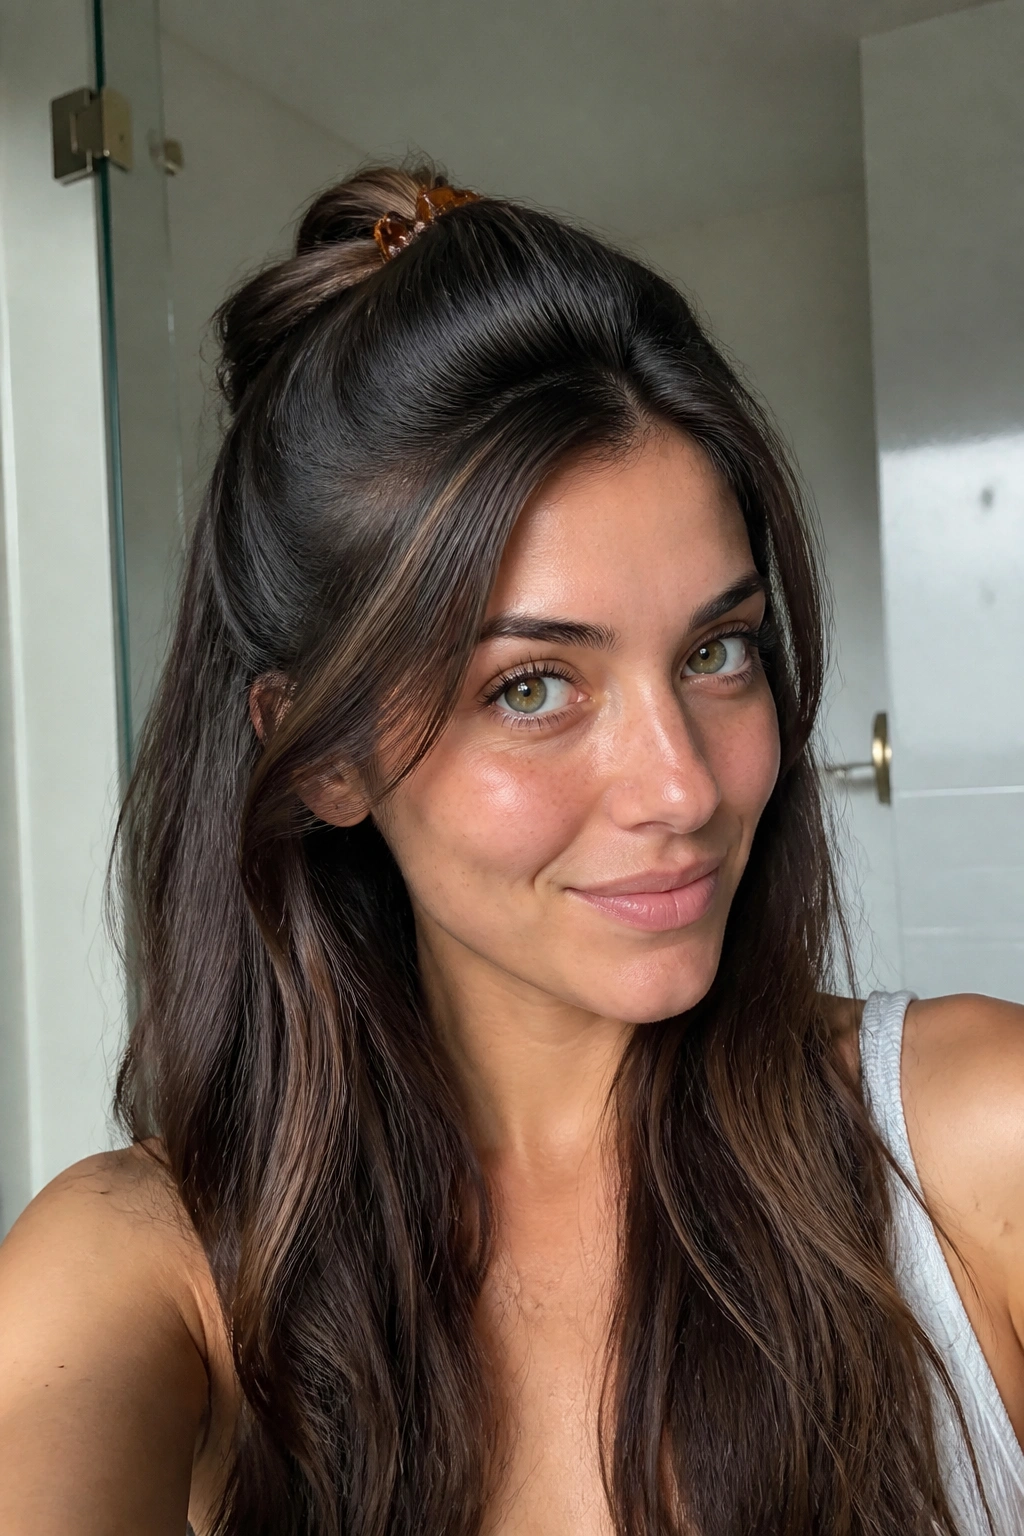
A mini claw clip is one of those things that seems too small to matter until you use it properly. Then it becomes the most useful object in your bathroom drawer. This half-up style is what I throw together when I have five minutes and no patience for pins.
Gather the top third of your hair, twist it back once or twice, and secure it with a clip that actually grips. That last part matters. Tiny clips with weak teeth slide out of fine hair in about ten minutes, and thicker hair will laugh at them. Choose a clip with enough depth to hold the twist without crushing it flat.
The look is neat without feeling formal, which is why it works for errands, errands that turn into lunch, and long workdays when you want your hair lifted but not locked down. It also plays nicely with both straight and wavy textures.
- Use a clip that opens wide enough for your twist
- Keep the twist centered, not too high
- Let the ends fan out a little if you want a softer shape
- Best for shoulder-length to long hair
- Faster than a braid, cleaner than a messy bun
One catch: if your hair is very silky, mist the section with dry shampoo first or the clip may slip.
5. Sleek Half-Up Knot
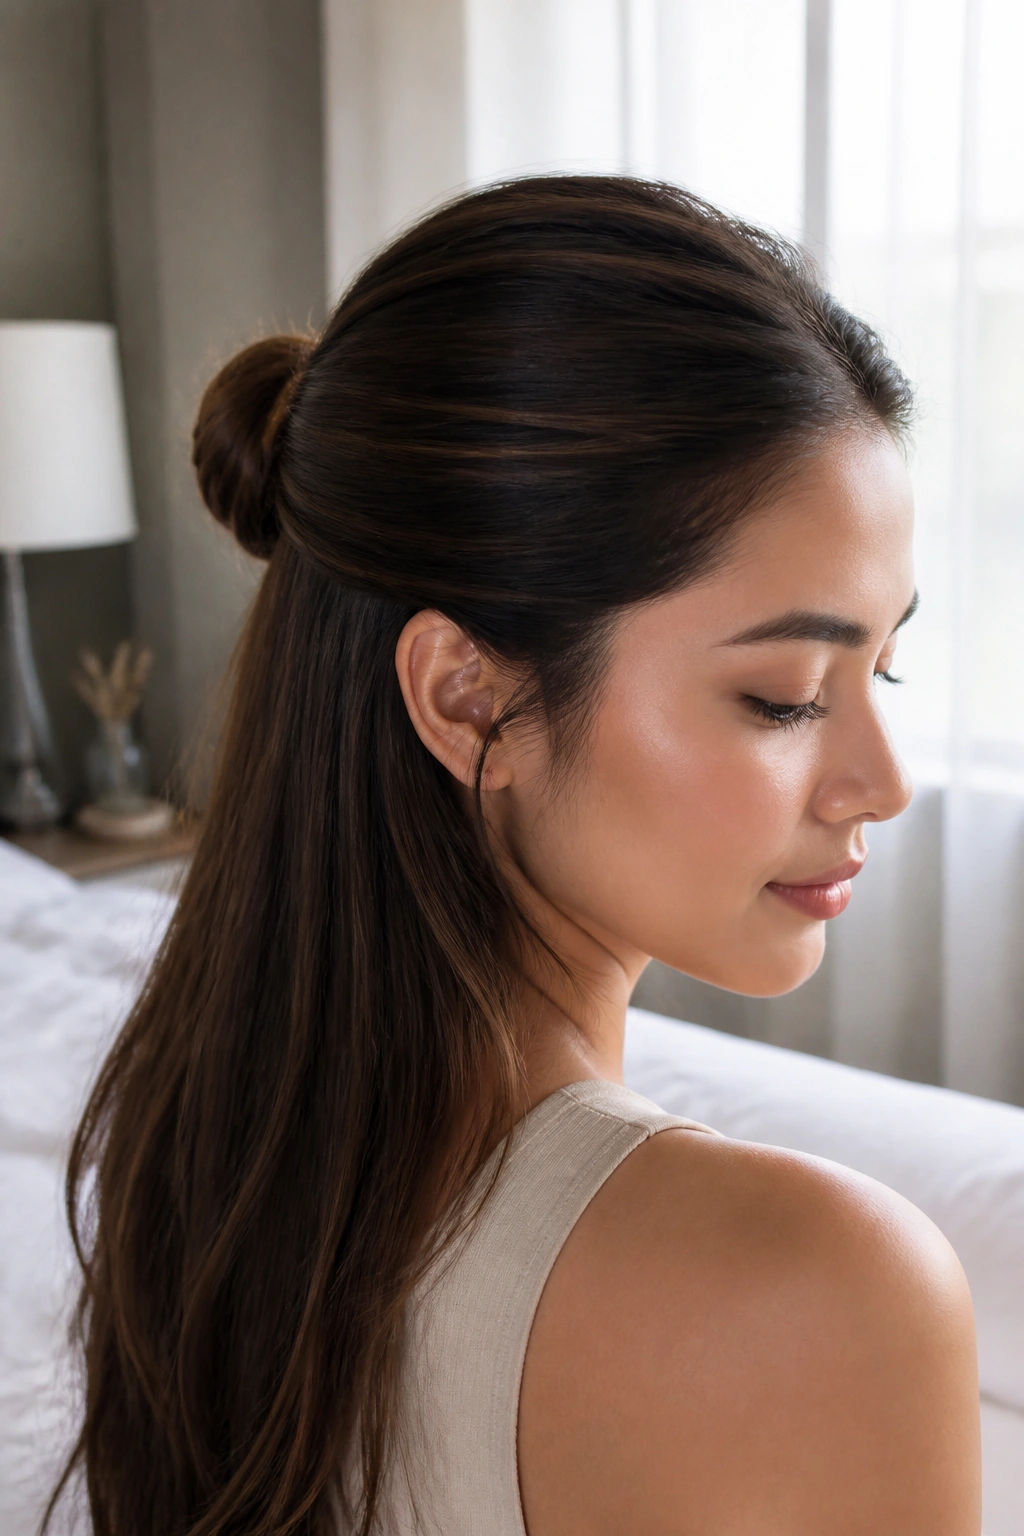
The sleek half-up knot is for days when you want the style to look cleaner than “I grabbed my hair and hoped.” It has a sharper edge than the twisted versions, and that makes it a good choice when you want your face to feel more open. The trick is smoothness at the crown, not tightness everywhere.
Brush the top section back with a little styling cream or lightweight gel on the palms of your hands. Gather it at the back of the head, twist it once into a knot, and pin the ends underneath so they disappear. If you leave the knot too loose, it can look accidental. If you pull too hard, it turns severe. The sweet spot sits in the middle.
This style works well with straight hair and blown-out waves, especially when the ends are glossy and the top has no flyaways. I like it when the lower half of the hair has movement, because the contrast keeps the look from feeling too controlled.
A small detail makes a big difference here: smooth the part and the hairline with a toothbrush or spoolie sprayed lightly with hairspray. Not drenched. Just enough to tame the baby hairs that always escape first.
6. Ribbon-Tied Half Up
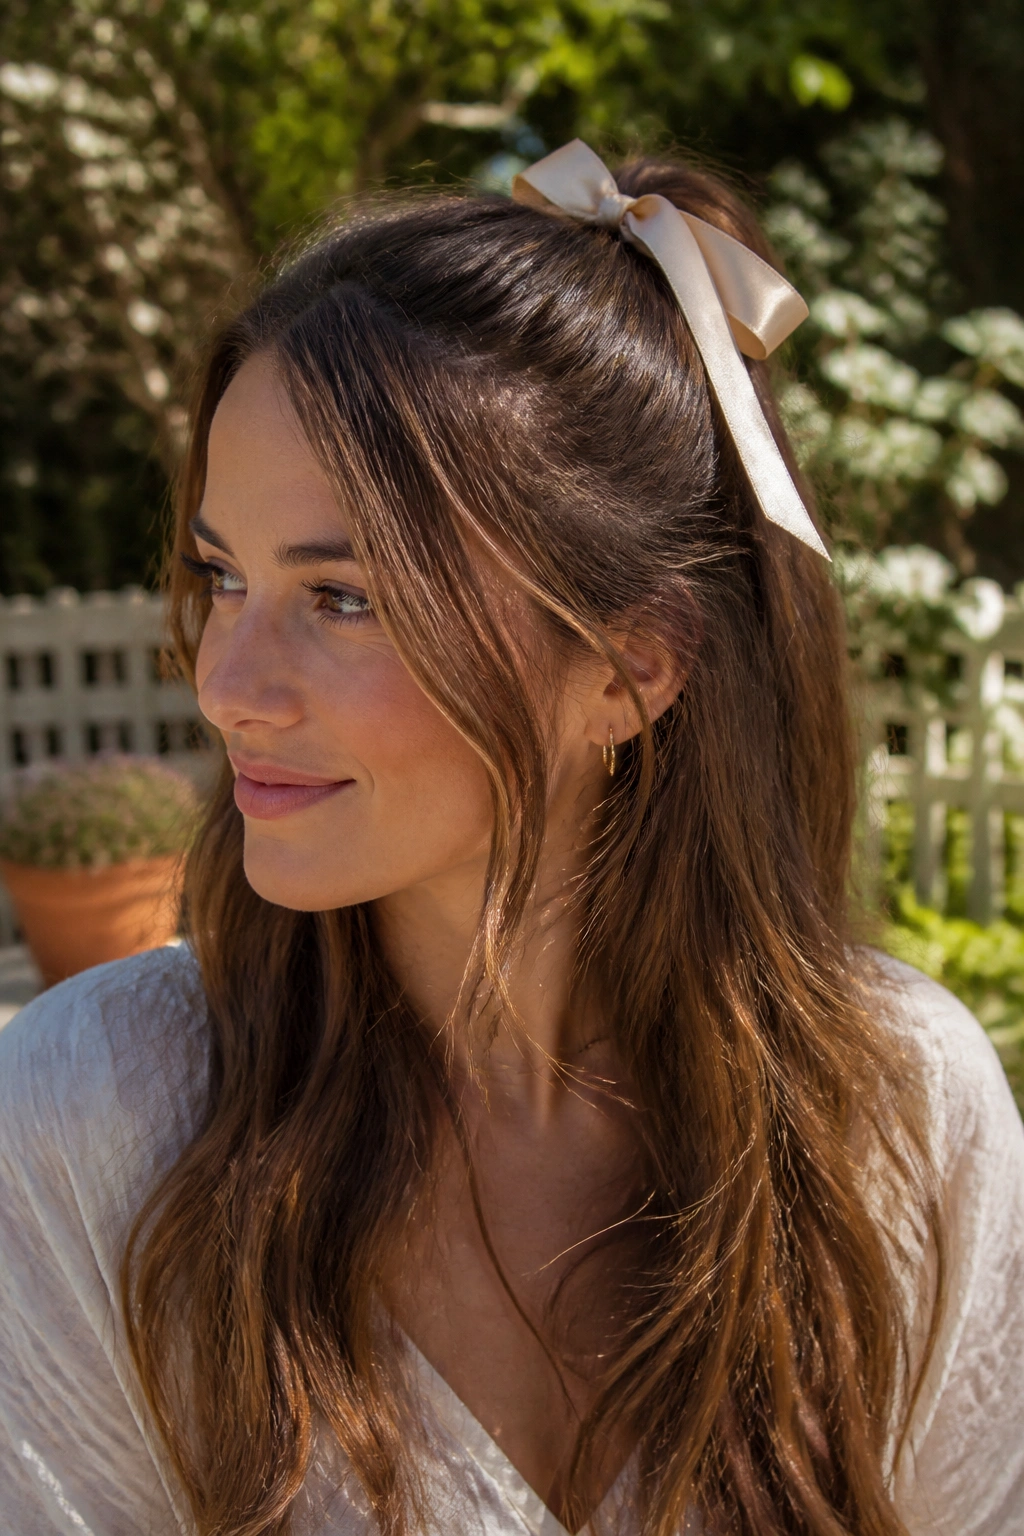
A ribbon changes the whole mood of a half-up style. A clip can feel practical; a ribbon feels intentional and a little softer around the edges. That is why I prefer it when I want the style to look thoughtful without seeming overworked.
Tie the top section into a small half ponytail, then wrap a satin or grosgrain ribbon around the base and secure it with a bow. Keep the ribbon width between 1/2 inch and 1 inch if you want it to sit neatly. Wider ribbons can overwhelm fine hair, while very narrow ones can disappear into thicker hair.
Unlike a metal clip, a ribbon moves with the hair. That gives the style a bit of swing, especially when the rest of the hair is worn loose and wavy. It is also an easy fix for growing-out layers, because the ribbon distracts the eye from uneven lengths.
This is the version I’d choose for brunch, a casual office day, or any time you want an accessory to do some of the work. A plain black ribbon looks crisp. A soft beige or muted blue feels calmer. Either way, tie the bow off-center if you want the look to feel less precious.
7. Bubble Half Up Half Down Ponytail
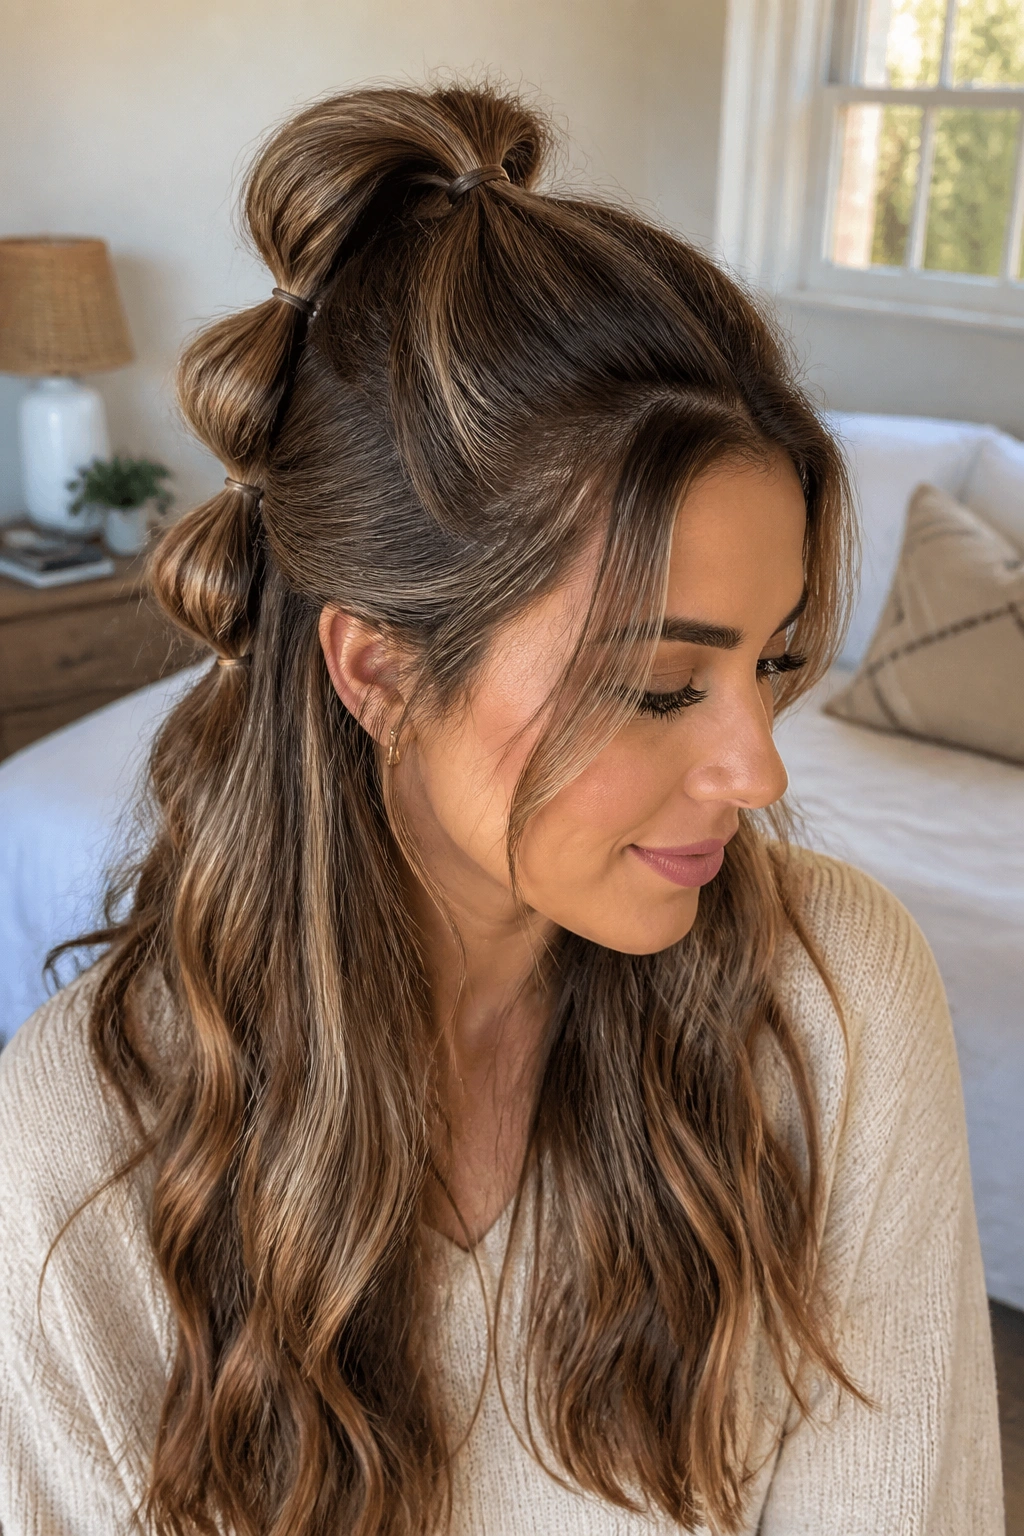
The bubble half-up half-down ponytail looks fancier than it is. That is the whole appeal. You are basically using a few extra elastics to create shape, and the result has more volume than a plain ponytail without demanding braid skills.
Start with a standard half ponytail. Then place another elastic about 1 to 1½ inches down, and another below that if the hair is long enough. Tug the sections between elastics gently until they puff into rounded bubbles. The spacing does not need to be exact, but it should be even enough that the rhythm feels deliberate.
What Makes the Bubbles Look Right
The bubbles hold better when the section has a little texture first. If your hair is clean and slippery, use dry shampoo at the crown before you begin. A tail comb helps you section the top cleanly, but your fingers can work if you’re in a rush.
This style looks best when the bubbles are plump, not tight. Pull each bubble outward from the sides, not straight up, or the ponytail can start to resemble a stretched rubber band. That is not the goal.
- Use clear elastics for a clean finish
- Leave 1 to 1½ inches between each tie
- Best on medium to long hair
- Works especially well on straight or lightly waved hair
- Takes about 4 minutes
My opinion: this one looks best when a few face-framing pieces are left out. It keeps the whole thing from feeling too staged.
8. Rope-Braid Half Up
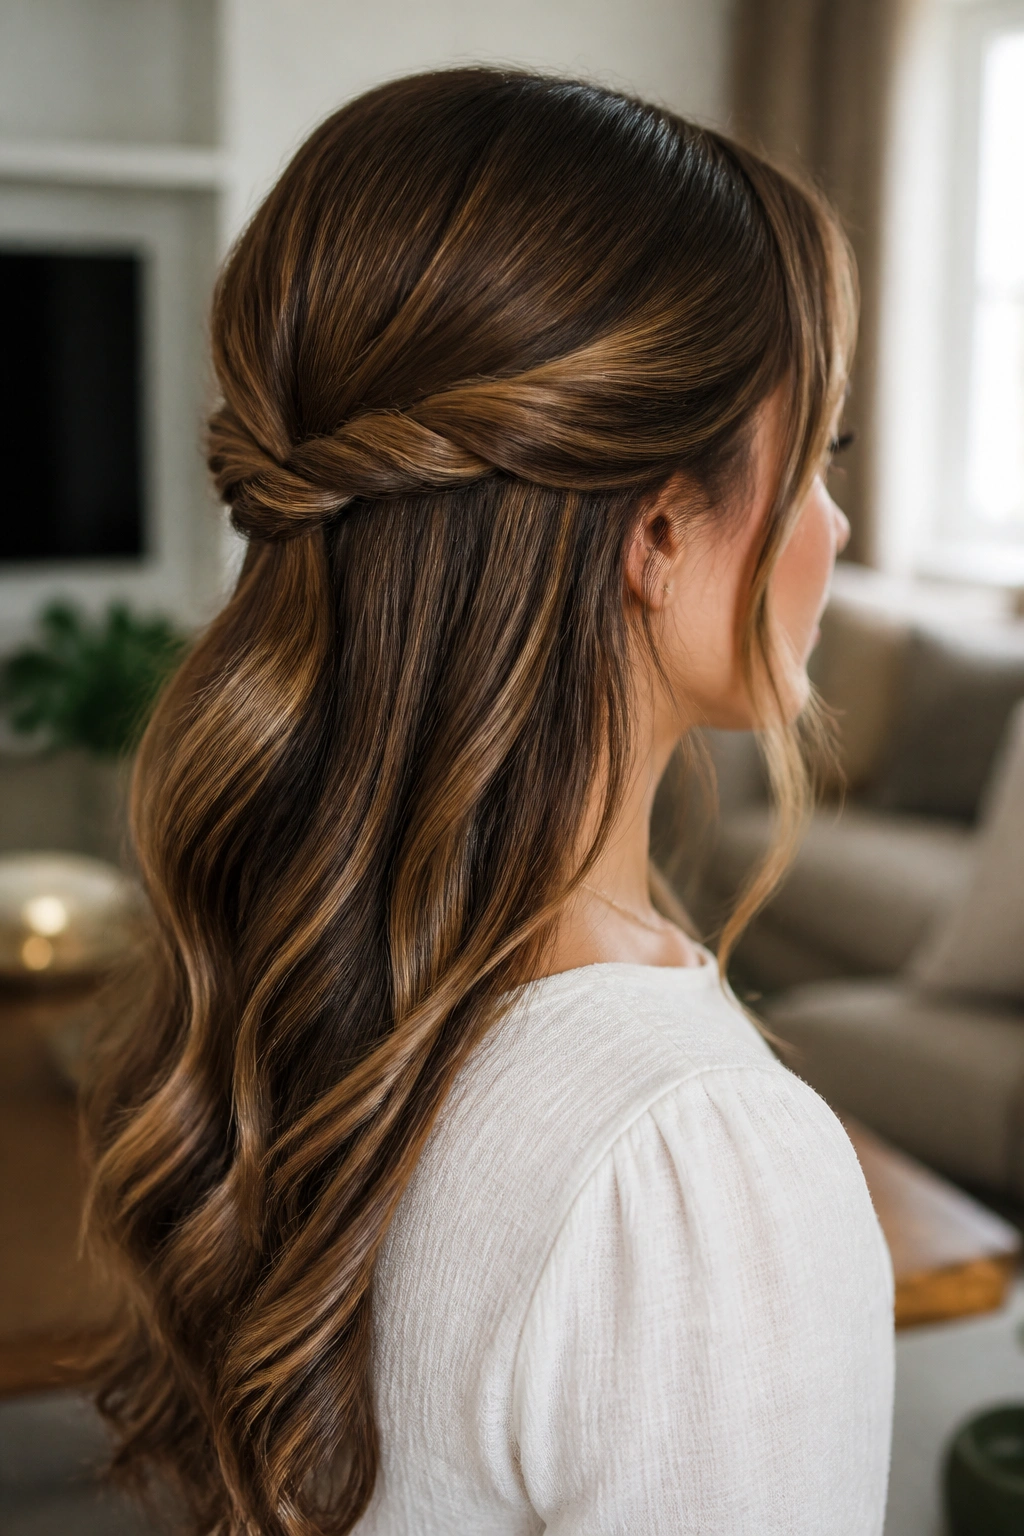
A rope braid is the underrated cousin in the half-up family. It looks neat, takes less time than a three-strand braid, and stays clean even when the sections are small. That makes it a smart choice for everyday wear, not just dressy hair days.
Split the half-up section into two pieces. Twist each piece in the same direction, then wrap them around each other in the opposite direction. That opposite movement is what gives a rope braid its bite. Secure the end with a small elastic, then pin it back if the braid is long enough to need support.
If you’ve ever felt like regular braids turn messy before you even finish them, this is a calmer option. The shape holds better on straight hair and works beautifully on highlighted hair because the twists catch light in a subtle way — not flashy, just clear enough to notice.
The real win here is speed. Once you learn the hand motion, the braid becomes almost automatic. Keep the twists snug but not twisted to the point of kinks. Too much tension makes the braid stiff, and stiff is the enemy of everyday hair.
9. Side-Swept Half-Up Clip
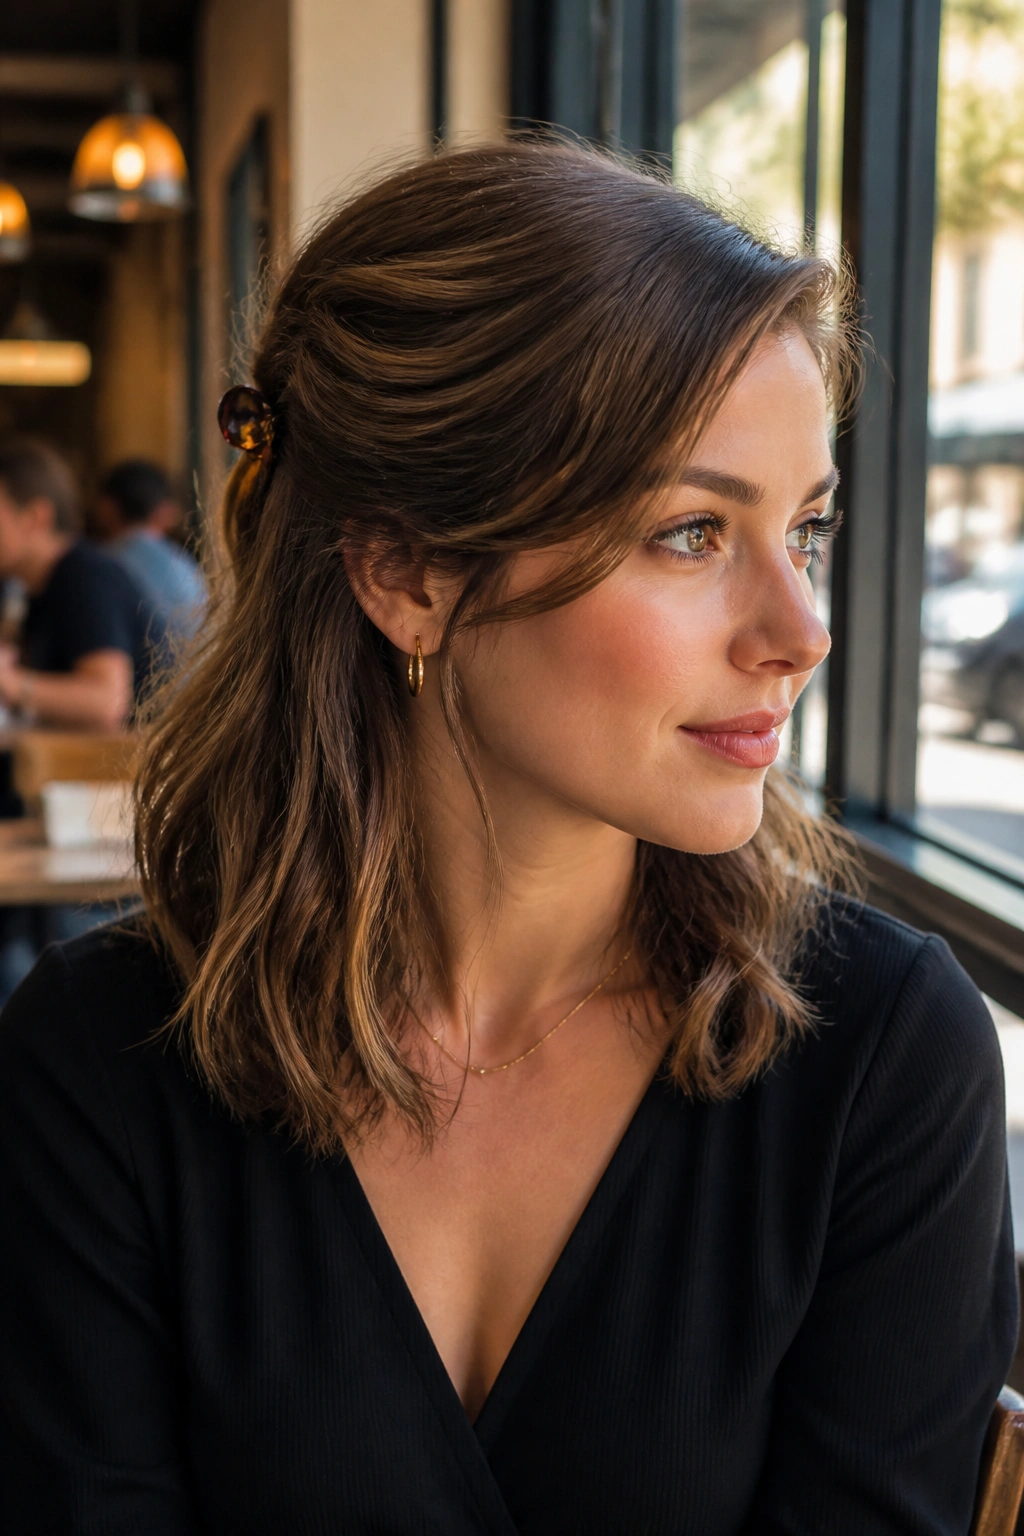
This is the style for the person who likes a little asymmetry. A side-swept half-up clip feels less structured than a centered half ponytail, and that’s exactly why it works on days when you want your hair to look casual but not forgettable.
Sweep more hair from one side than the other, then clip it back just behind the opposite ear or slightly higher at the crown. The imbalance gives the style movement. It also helps if one side of your haircut has better layers than the other, which happens more often than people admit.
A barrette or small decorative clip works nicely here, but the shape matters more than the hardware. If the clip is too large, it can swallow the style. If it’s too tiny, the section slides. Somewhere in the middle is the sweet spot.
This one is especially good for shoulder-length cuts, lob haircuts, and anyone growing out bangs. It keeps the front clear without forcing all the hair back. If your part has gone a little off-center by midweek, good. That helps the shape. A perfectly straight part can make the asymmetry too obvious.
10. Criss-Cross Pin-Back Half Up
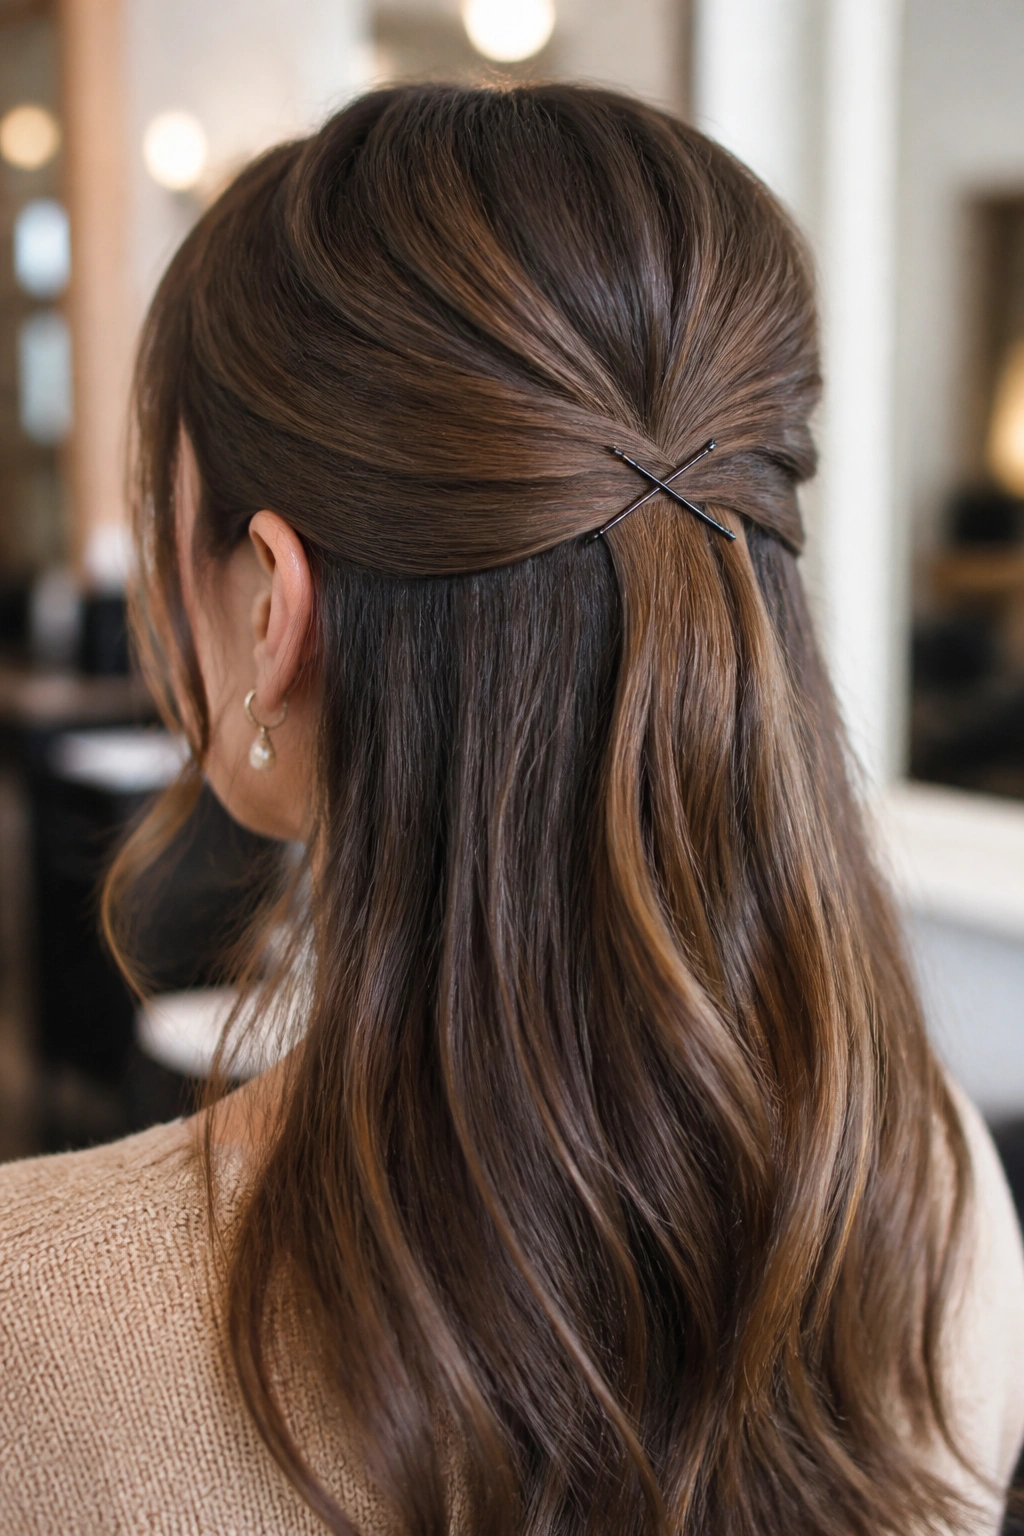
Criss-cross pinning looks like a trick, but it is mostly about good placement. Two small sections are pulled back from each side, crossed over one another, and pinned in place so the lines form a neat X or layered overlap at the back. It sounds fussy. It isn’t.
Pin Placement Matters
Use bobby pins that match your hair color as closely as possible. Place the first pin with the wavy side facing down toward the scalp, then lock the second pin over the top in the opposite direction. That tiny detail helps the style hold far better than a single pin ever will.
This look is a gift for fine hair, because the crossed sections create the illusion of more structure than there really is. It also works when you want to control short layers around the hairline without smoothing everything into a helmet.
- Great for thin or medium hair
- Needs 4 to 6 bobby pins
- Best when the sections are small and tidy
- Works with straight or softly waved hair
- Looks more polished than a simple tuck
I like this one for days when I want something quiet and neat. No ribbon. No clip. Just a clean little detail at the back that tells people you paid attention.
11. Messy Half-Bun Half Up
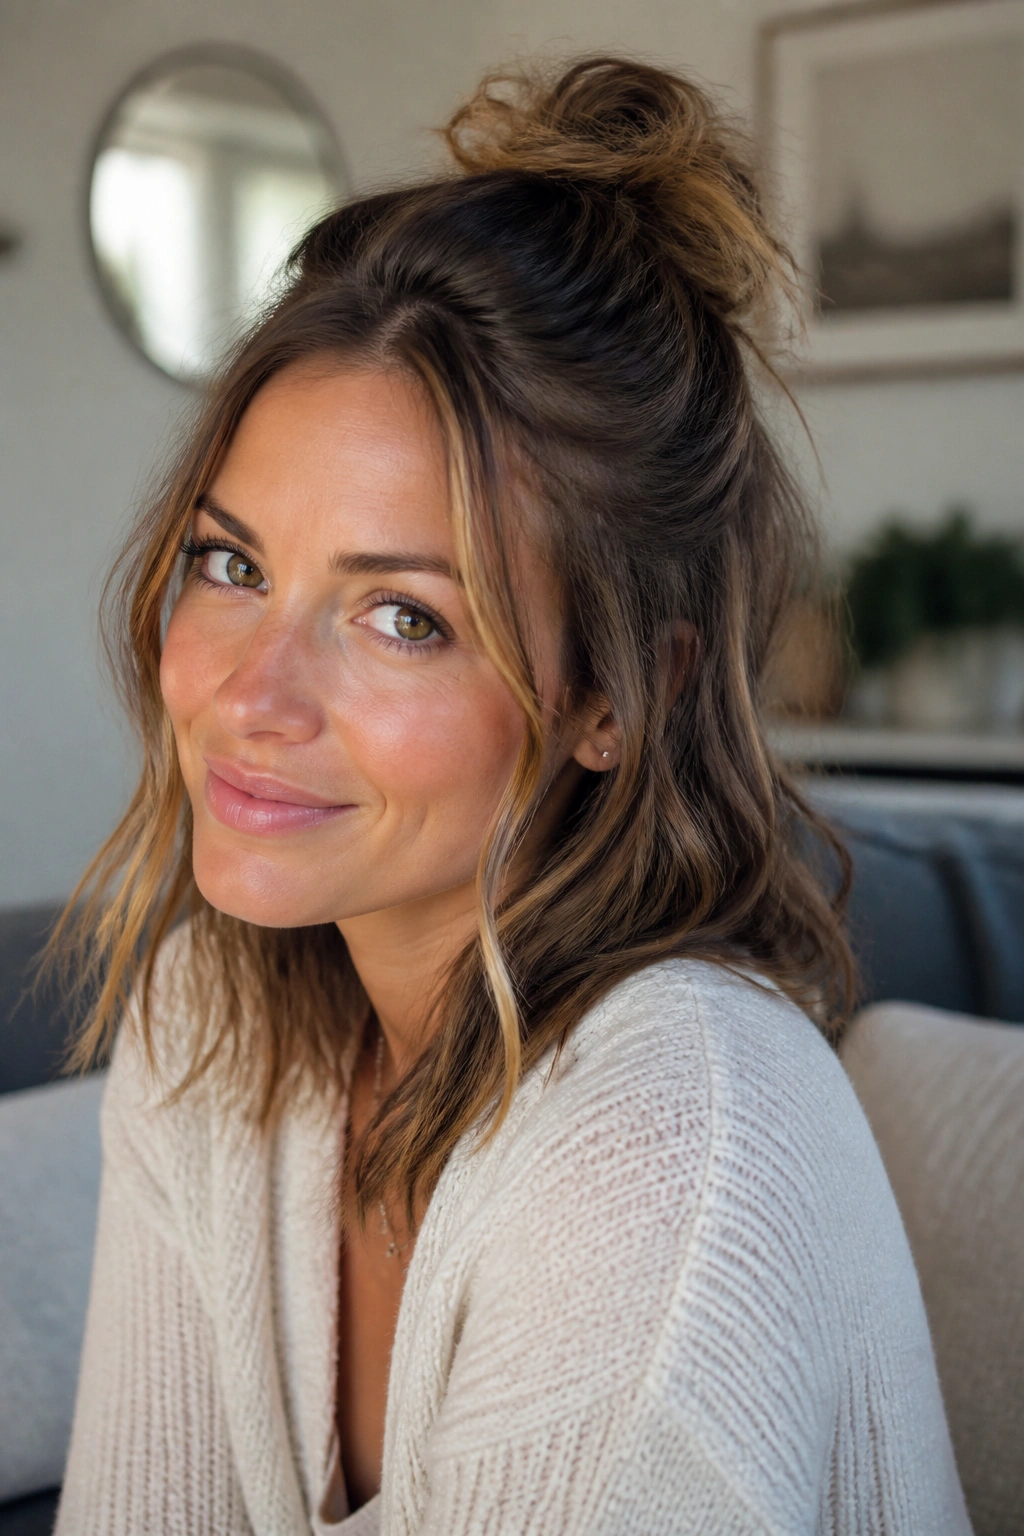
A half-bun can go wrong fast if you try to make it too perfect. The point is not a tiny topknot sitting there like a golf tee. The point is a soft, lifted shape that keeps the top away from your face and leaves the rest of the hair down.
Pull the upper section back, twist it loosely, and wrap it into a bun at the crown or slightly behind it. Leave a few ends out if that helps the shape feel softer. Then tug the bun apart just enough to add width. One firm elastic or two bobby pins usually hold it.
This style works when your hair has texture and when you want volume on top. It can be especially good on medium-length cuts because the bun is easier to shape without looking oversized. If your hair is very long, keep the bun low enough that it doesn’t feel like a tower.
I reach for this on off-duty days. It has a little attitude, but not much effort. And if a few flyaways show? Fine. They belong there. Over-smoothing this style is what makes it lose its charm.
12. Headband Tuck Half Up
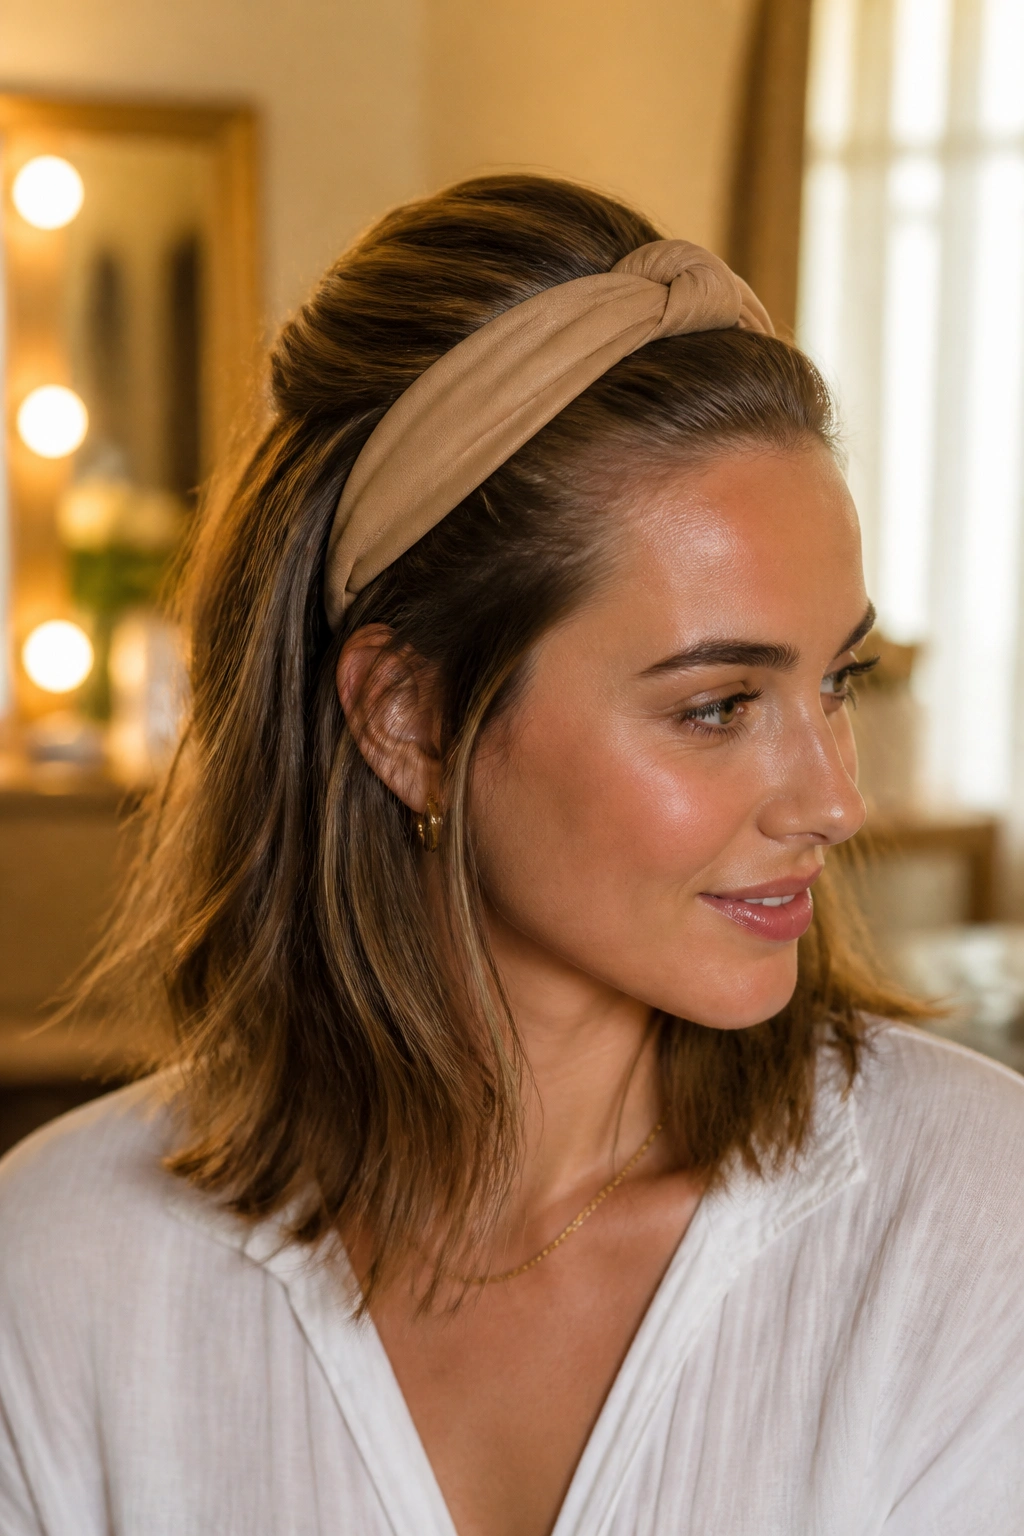
The headband tuck is one of the easiest ways to make a half-up style look deliberate when your hands are busy or your hair is misbehaving. It is also one of the few styles that feels useful on shorter lengths, especially shoulder-length cuts that never quite stay in a ponytail.
Place a soft headband around the crown, then tuck the top section into it so the hair lifts and folds back. The result is a half-up shape without a visible elastic at the center. A padded headband gives more volume; a slim one feels lighter and cleaner.
Unlike a half ponytail, this style does not rely on a tight anchor point. That makes it a solid option for fine hair that breaks under too much tension or for days when your scalp wants a break from clips and pins. It can also handle a little frizz without losing the shape.
Best of all, it works when the front pieces are a bit uneven. The headband hides a thousand sins. If one side is flatter than the other, nudge the tuck on that side with your fingers and move on.
13. Curly Half Up Half Down Puff
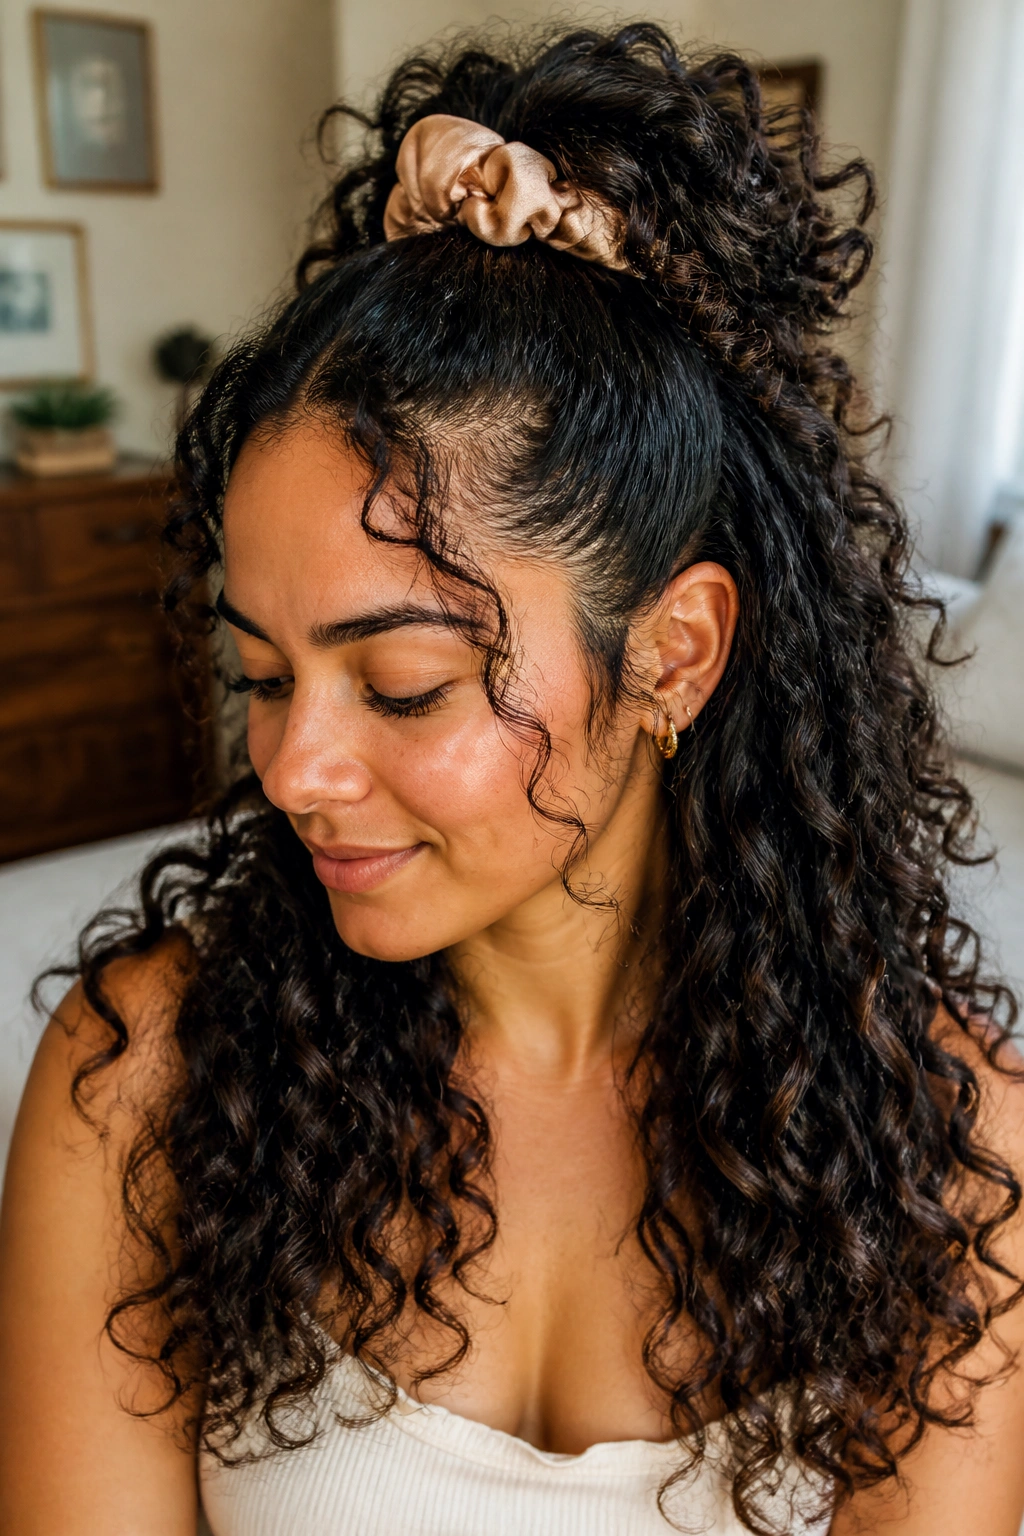
Curly hair changes the whole logic of half-up styling. You do not want to flatten the crown just to keep the top in place, because the volume is part of the point. A good curly half-up style lifts the roots while keeping the curl pattern alive.
Gather the top section loosely and secure it with a satin scrunchie, soft elastic, or clip that won’t snag. Leave enough hair down that the curls still read as full and springy. The top section should sit more like a small puff than a strict ponytail. Tight tension at the roots can leave a dent that takes forever to bounce back from.
I like this style best when the curls have a little day-two memory in them. Freshly washed curls can be too soft and slippery, while slightly lived-in curls hold the shape better. A little curl cream or water mist on the front pieces can wake them up if they’ve gone fuzzy.
The sweetest thing about this version is that it does not fight the hair. It lets the texture do the work. If you’ve ever felt like half-up styles were made for straight hair, this is the correction.
14. Fishtail Half Up
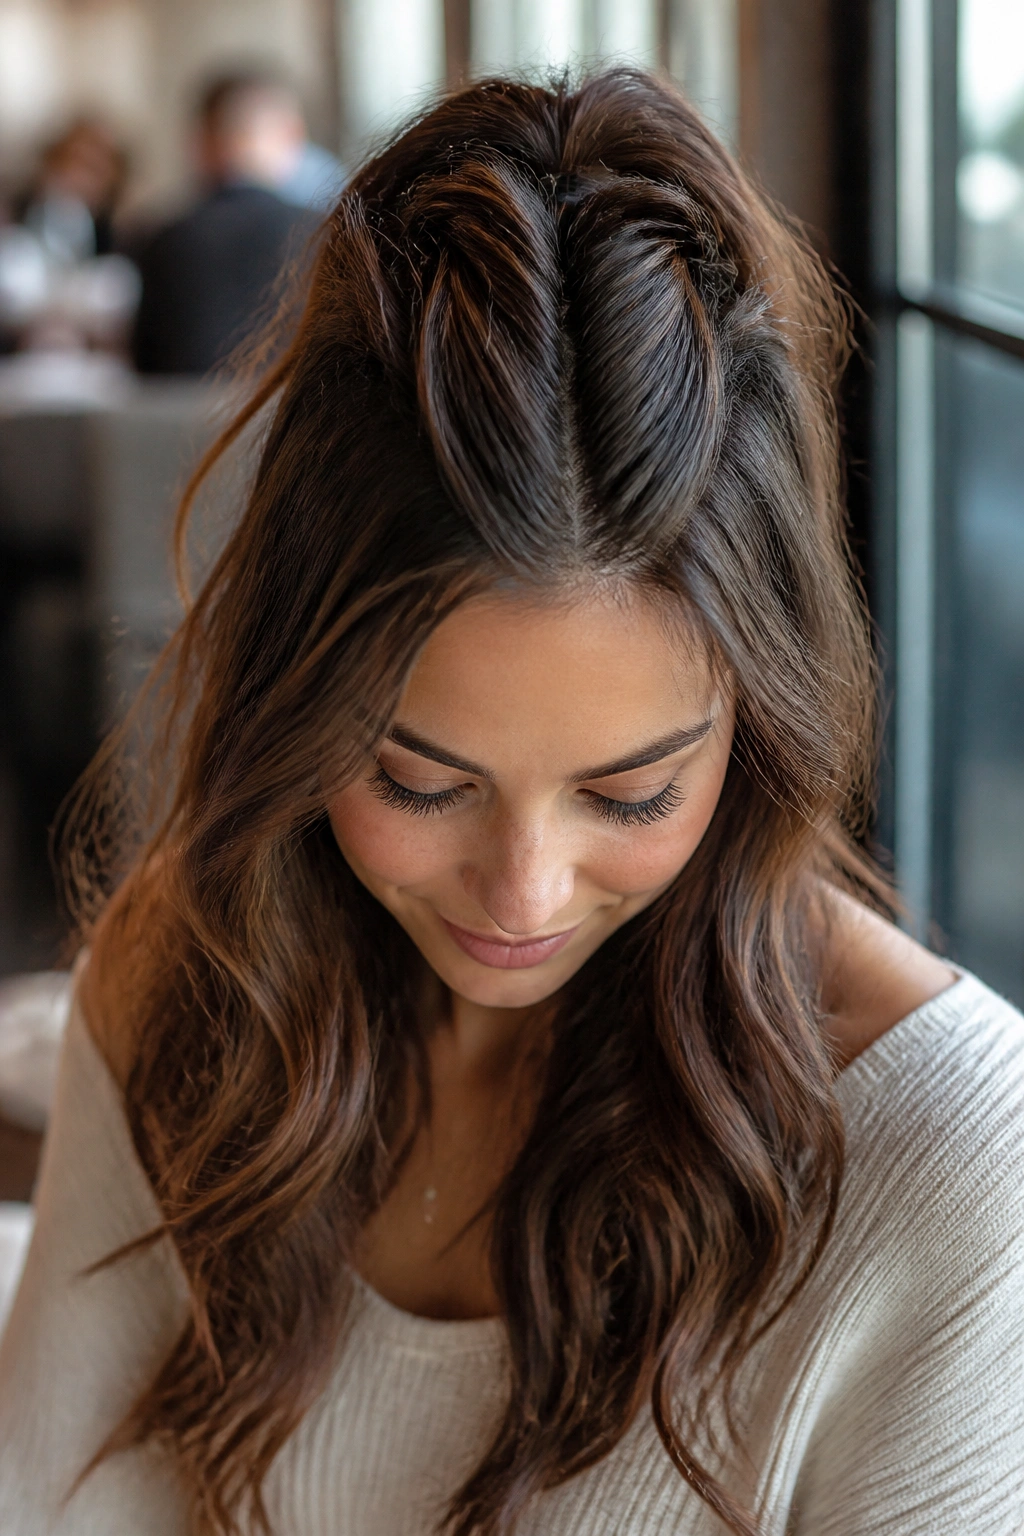
A fishtail half-up braid has more detail than a regular braid, which means you can make a small section look interesting without braiding the entire head. It is a nice middle ground for people who want something a little more intricate but still wearable on a normal day.
Take a small top section, split it into two, then move a thin piece from the outside of one side across to the other side, repeating until you reach the end. The thinner the strands, the finer the braid pattern. If you rush and take big chunks, it turns chunky fast and loses that neat herringbone look.
Where It Shines
This style works especially well on medium to long hair, and on hair that has been waved lightly first. The waves give the braid something to grip, and they keep the finished piece from feeling too stiff.
- Use a rat-tail comb for a clean section
- Keep the braid narrow if you want it to sit softly
- Pin the end under the loose hair for a cleaner finish
- Best when the rest of the hair is left down and loose
- A little hairspray on the braid helps if your layers slip out
This is the version I’d choose when I want the top half to do a little more work visually. It looks detailed without being loud about it.
15. Low Twist-and-Pin Half Up
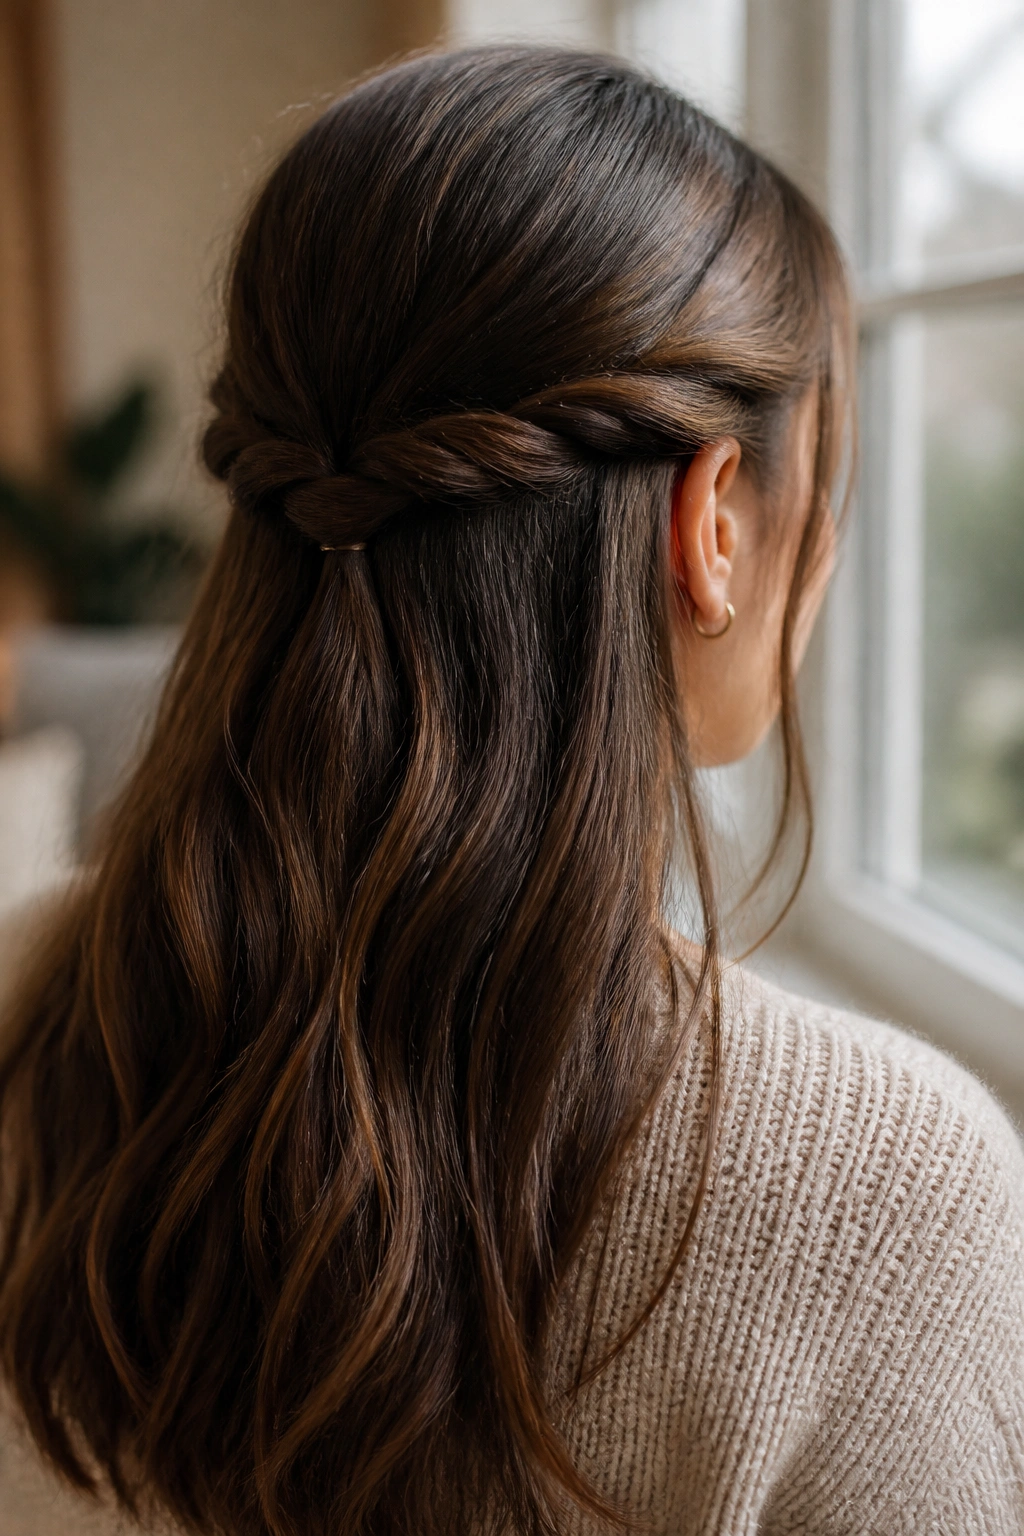
A low twist-and-pin half-up style has a calmer feel than the higher versions. Instead of lifting the half-up section to the crown, you gather it lower at the back of the head, twist each side inward, and pin them where they meet. The silhouette is softer. Less “styled,” more “put together.”
That lower placement helps if you have a long face and don’t want more height on top. It also suits thicker hair because the weight of the hair can support the shape without fighting it. If the twist sits too high, the whole style can start to puff up in a way that feels accidental. Low keeps it grounded.
A few loose pieces around the jawline keep this from feeling severe. The trick is to leave enough softness that the twists melt into the rest of the hair, not so much that the style disappears. That balance is what makes it useful for everyday wear.
I like this one on days when I want my hair controlled but not obviously done. It’s the kind of style that works with a sweater, a button-down, or a simple T-shirt. No drama. That is the charm.
16. Curtain Bangs Half Up Half Down
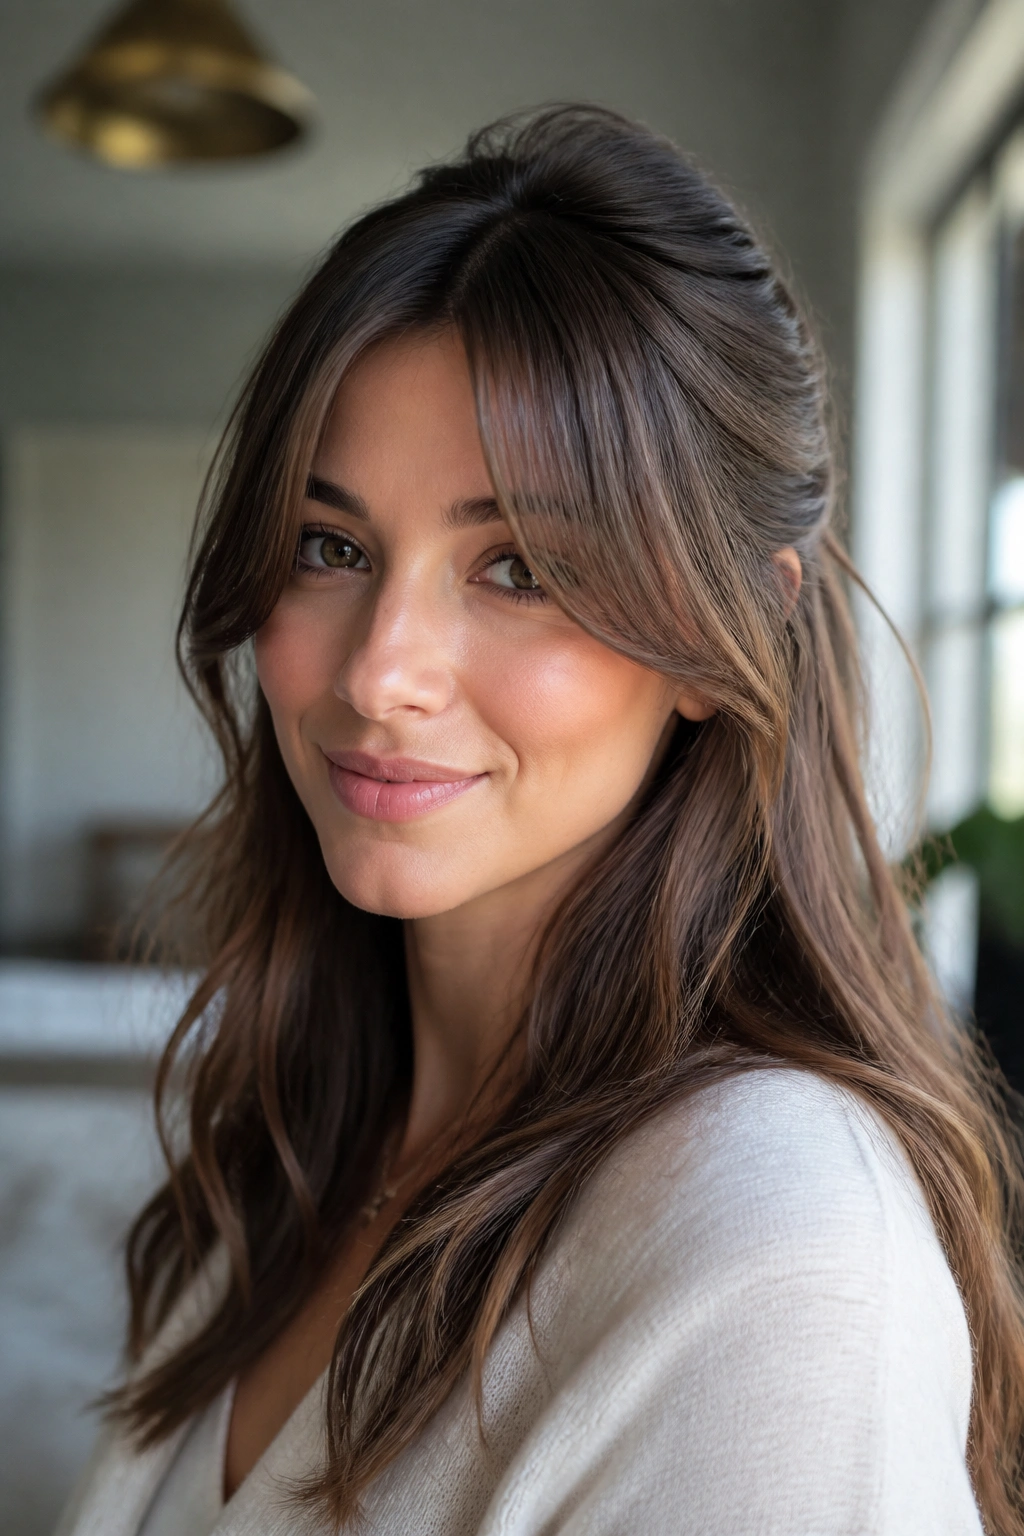
Curtain bangs change the whole math of a half-up style, and usually for the better. Instead of fighting the fringe, you let it do its job while the half-up section sits behind it. The result feels soft around the face and less rigid than a pulled-back crown.
Keep the half-up section a little farther back than you would with bangs-free hair. If you grab too much from the front, the bangs lose their shape and start behaving like side pieces. The line should sit behind the fringe, not on top of it.
This is one of those styles where the cut and the styling talk to each other. The bangs give you movement up front, and the half-up piece lifts the crown just enough to make the whole shape feel open. It works with straight hair, but it also looks good when the bangs have a bit of bend from a round brush or a quick pass with a dryer.
If your bangs are on the shorter side, keep a few wisps free around the temples. That little escape hatch prevents the front from looking too tightly arranged. You want a frame, not a fence.
17. Braided Halo Half Up
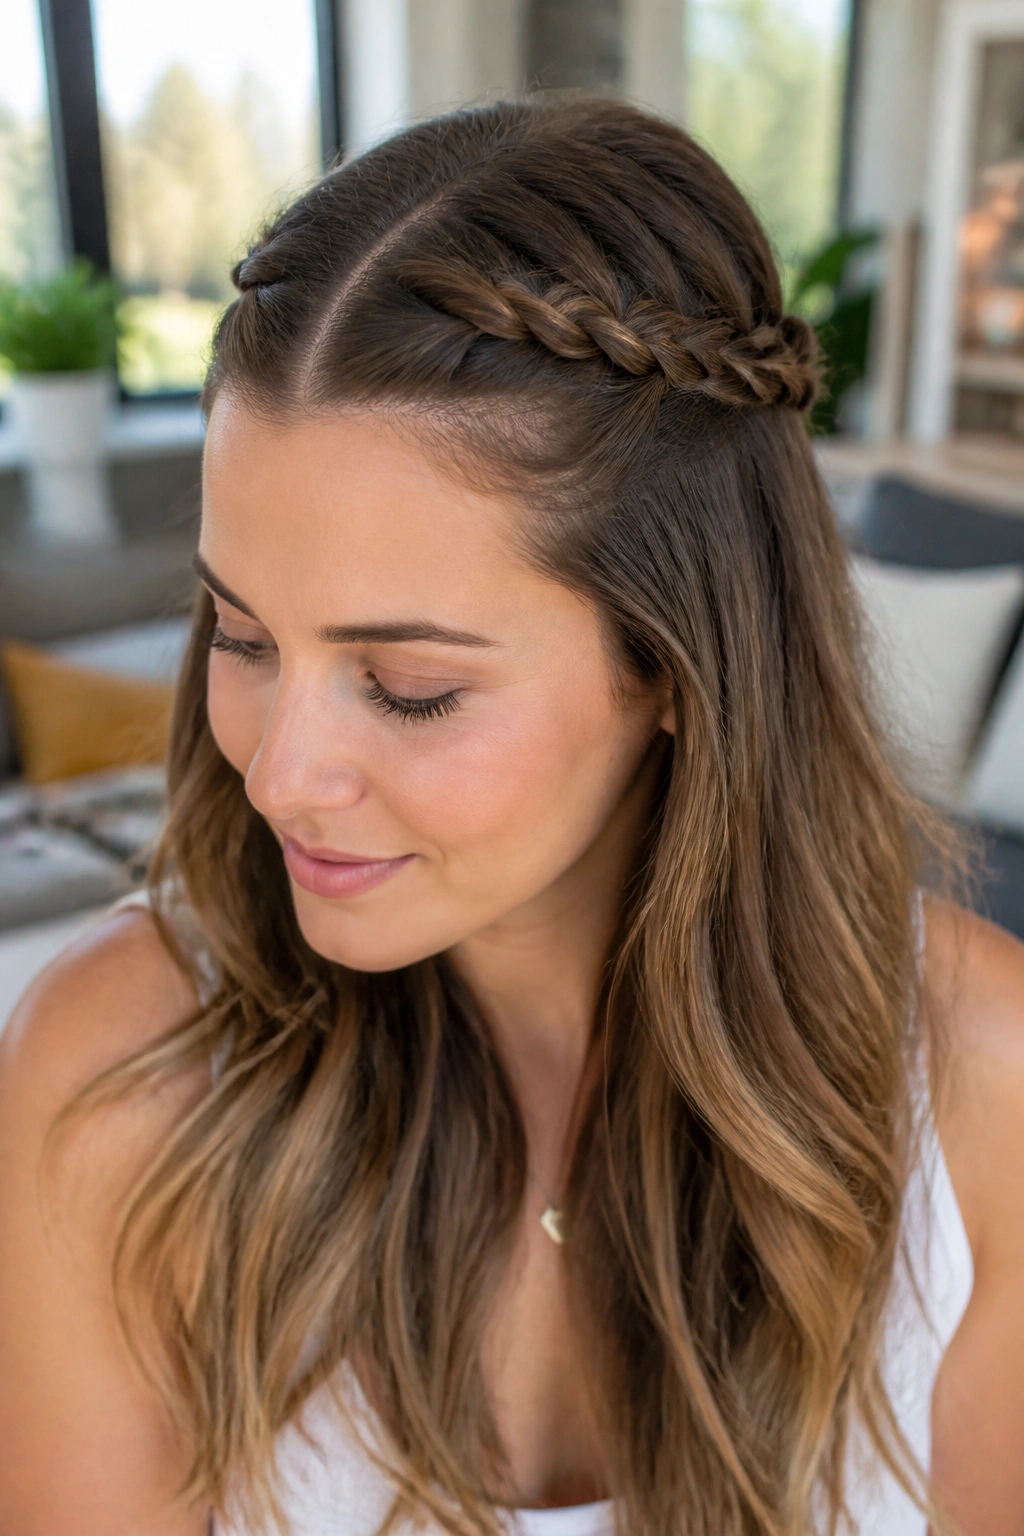
A braided halo half-up style sounds dressier than it is. In practice, it is usually just two narrow braids or twists brought back from each side and pinned together so they form a soft crown across the top of the head. It gives shape without making the whole style feel formal.
Unlike a full crown braid, this version leaves most of the hair down, so it wears more lightly. That matters on long hair, where full-up styles can feel heavy by midafternoon. The halo idea also works nicely if you want to show off highlights or dimension, because the braid sits right where the eye tends to land first.
A little texture at the roots helps the braids stay put. If your hair is slippery, start with a small amount of dry shampoo at the crown and braid the first inch a bit tighter than the rest. That one inch is where the style tends to fail if it’s going to fail.
This is the style I choose when I want the half-up shape to feel graceful, not casual. It still counts as everyday, but it has a more finished line than a basic twist.
18. Wrapped-Elastic Half Up
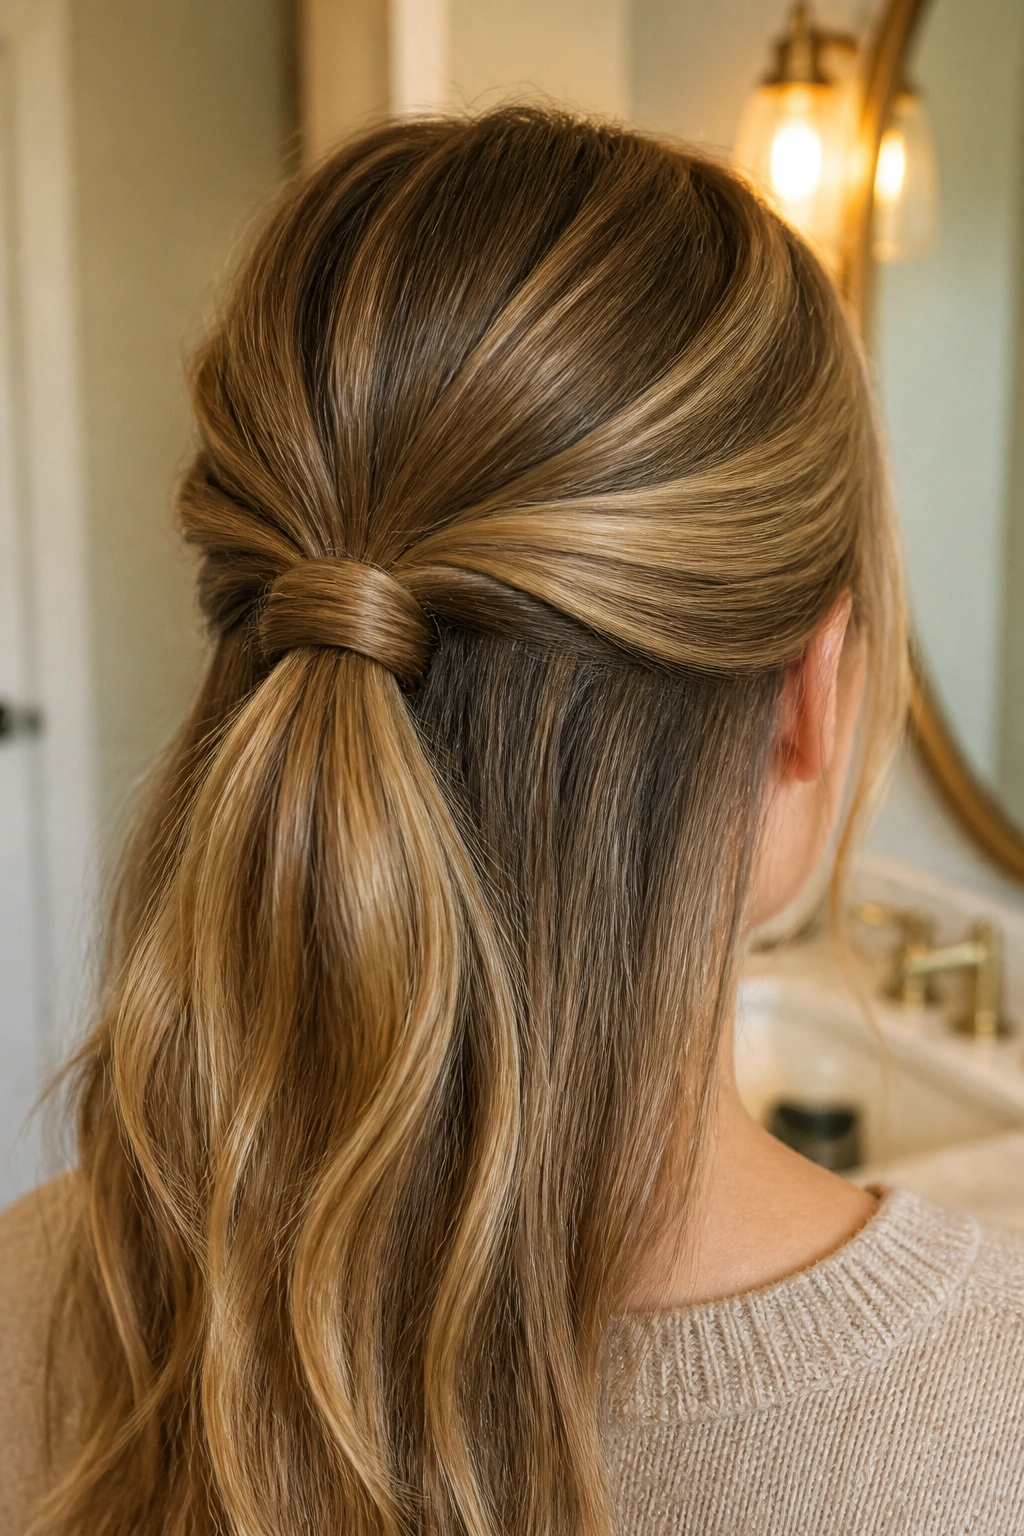
The wrapped-elastic half-up style is the cleanest version of the whole category, and it is a quiet favorite of mine because it fixes a problem people do not always notice: the elastic itself. Covering it with a strand of hair makes the style look smoother instantly, even if the rest of the hair stays simple.
Start with a regular half ponytail at the back of the head. Take a small strand from underneath the ponytail, wrap it around the elastic once or twice, and pin the end underneath with a bobby pin. That tiny move hides the hardware and gives the style a more finished edge.
This version works across hair textures, but it especially helps fine hair, where a visible elastic can look bulky. It also looks good on thicker hair because the wrapped section creates a neat break between the top and bottom halves. If your hair has layers, choose a strand with enough length to wrap cleanly without slipping loose halfway through.
A style does not have to be complicated to look polished. Sometimes it only needs one smart detail. Get this one right, and the rest of the half-up half-down hairstyles in your rotation start to make more sense, because you’re not just styling hair — you’re controlling the shape, the hold, and the finish at the same time.
