



Curly hair and half-up half-down styles are a better match than most people think. The trick is not control, exactly. It’s shape. Pull the top section back with enough intention, and the whole style looks lifted, fresh, and a little more finished without flattening the texture that makes curly hair worth showing off in the first place.
That small difference matters. Tug too hard and you get a dented crown, a narrow ponytail, and the strange half-flat look that makes curls lose their energy. Leave the top too loose and the style slips out by lunch. The sweet spot sits somewhere in the middle, where a few pins, a soft elastic, and a decent mirror do most of the work.
I trust half-up styles on curly hair more than most full updos. They let the curl pattern stay visible, which is the whole point, and they usually survive better when the hair has a little grit from day two or day three. A bit of leave-in, a touch of gel at the roots if needed, and a satin scrunchie can make the difference between “cute” and “why is this sliding down my head?”
Some versions are polished enough for dinner. Some are fast, messy, and excellent on a morning when you have no patience for sectioning. All of them depend on the same idea: keep the top controlled and let the rest of the curls stay themselves.
1. Curly Crown Puff for a Half-Up Half-Down Look
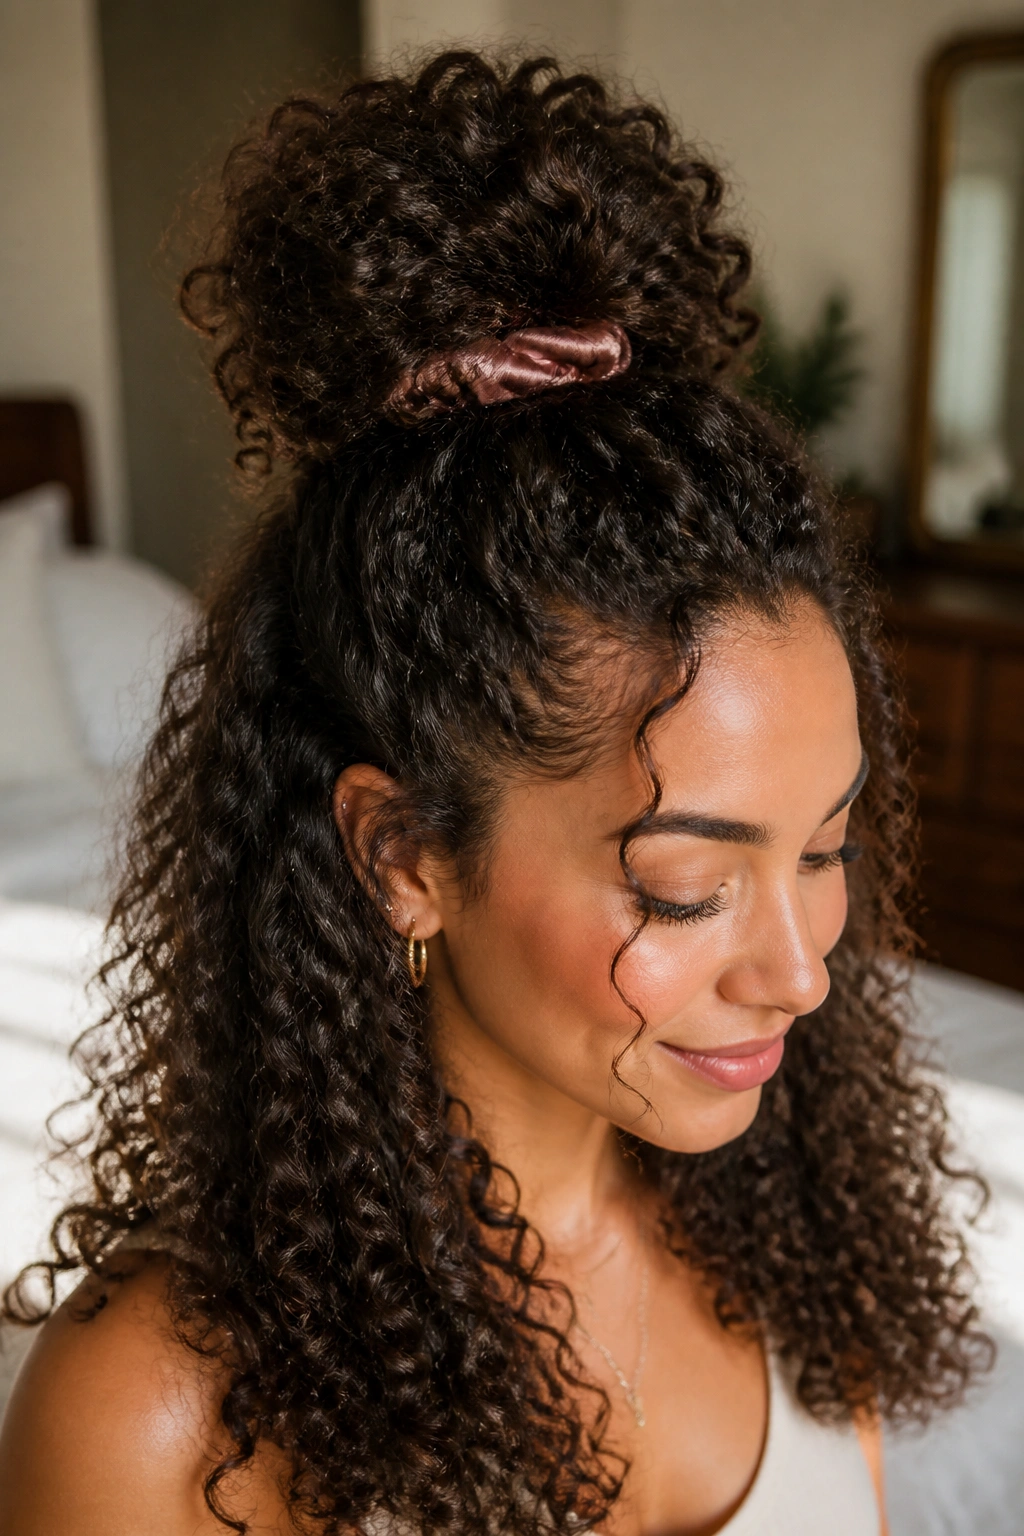
A high crown puff is the quickest way to make half up half down styles for curly hair look deliberate instead of improvised. It lifts the shape right where curly hair tends to collapse first, at the crown, and leaves the length free to move. That balance is why it keeps showing up in real life, not just in polished photos.
Why It Works
The trick is section size. Take hair from temple to temple, then gather it from just above the ears up to the crown, not from a tiny strip along the hairline. You want the puff to feel broad enough to frame the face, not like a token ponytail tied to the top of your head.
Curly hair already has volume, so the puff should support it, not fight it. A soft elastic or satin scrunchie keeps the section from getting crushed, and a pair of crossed bobby pins under the base can stop the style from drifting backward.
- Best on: medium to long curls, twist-outs, and stretched wash-and-go hair
- Best grip: satin scrunchie, spiral tie, or a snag-free elastic
- Best prep: a light mist of water mixed with leave-in conditioner at the roots
- Best finish: gently pull the puff upward once it’s secure so it sits higher than the rest of the hair
My favorite part: keep the section wider than you think. That one choice keeps the style from looking skimpy.
2. Twisted Temple Pull-Back
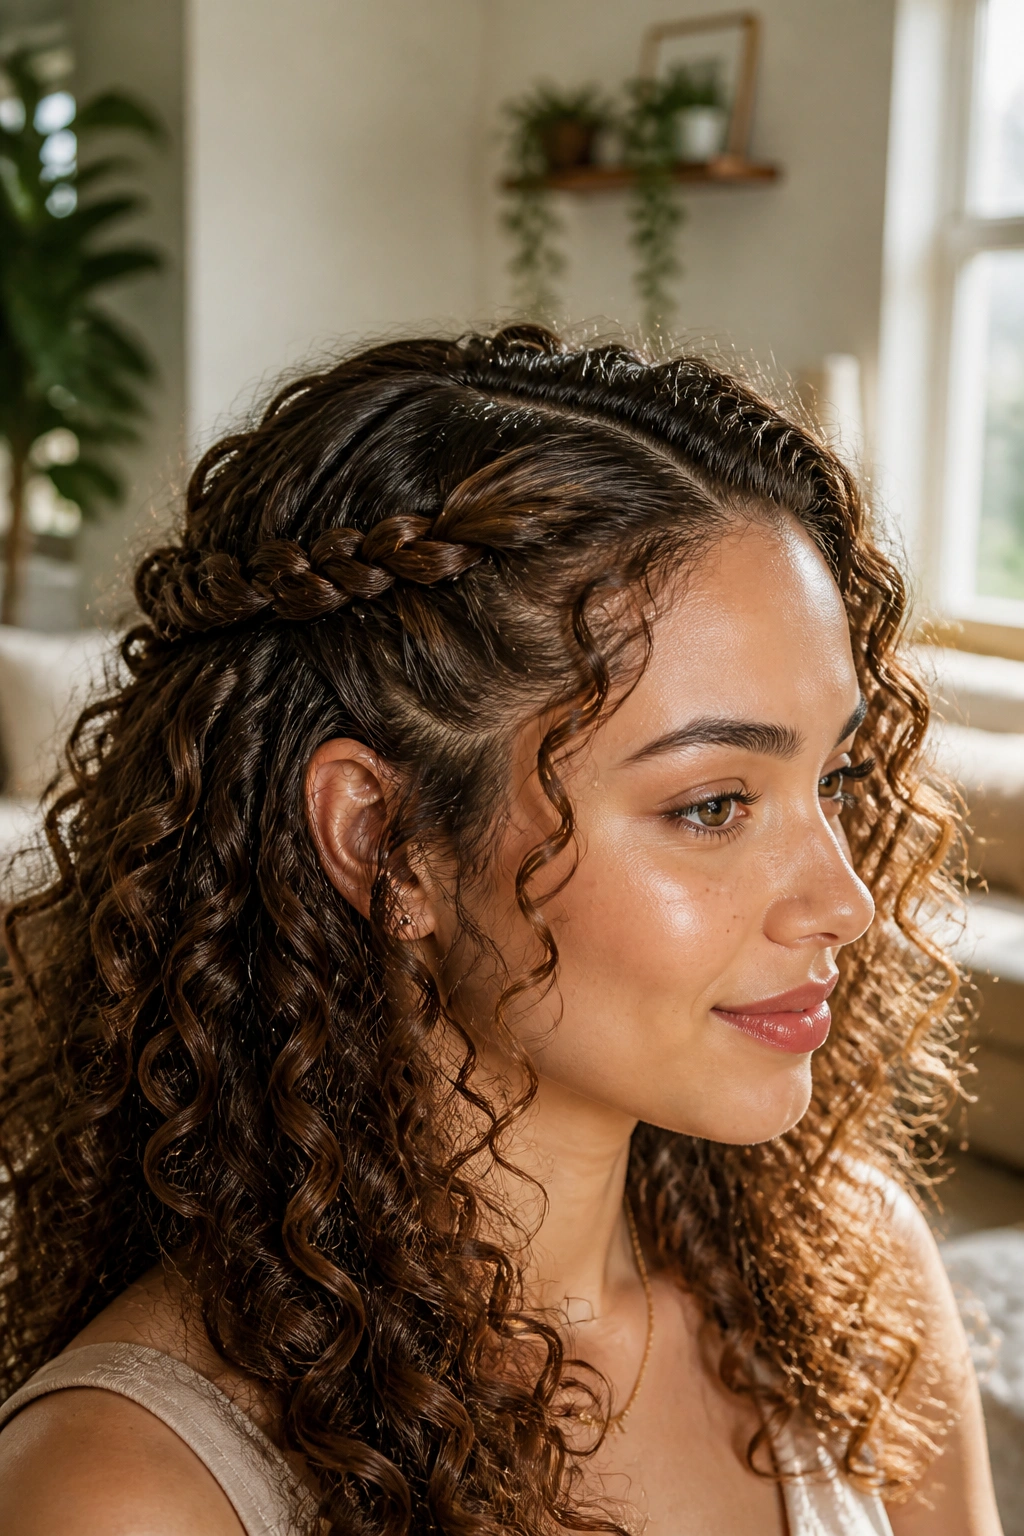
Need something cleaner than a puff but softer than a braid? Twisted temple pull-backs do that job without making curly hair look overworked. The style takes a small section from each side, twists it back away from the face, and joins the pieces at the back with a pin or a tiny elastic.
The shape is tidy, but it still lets the curl pattern live. That matters. Curls look best when the front of the style is guided, not flattened, and a twist gives you that control without the sharp line a braid can create.
This is one of the easiest styles to rescue on a second- or third-day curl set. If the front pieces have lost some definition, a small amount of gel or curl cream on the twist keeps the ends from frizzing apart before you get out the door.
One small detail makes the difference: twist the hair while it still has a little slip. Dry hair can puff out and catch as you go. Slightly damp hair, or dry hair with a pea-sized amount of styling cream, behaves much better.
3. Tiny Braids Across the Front
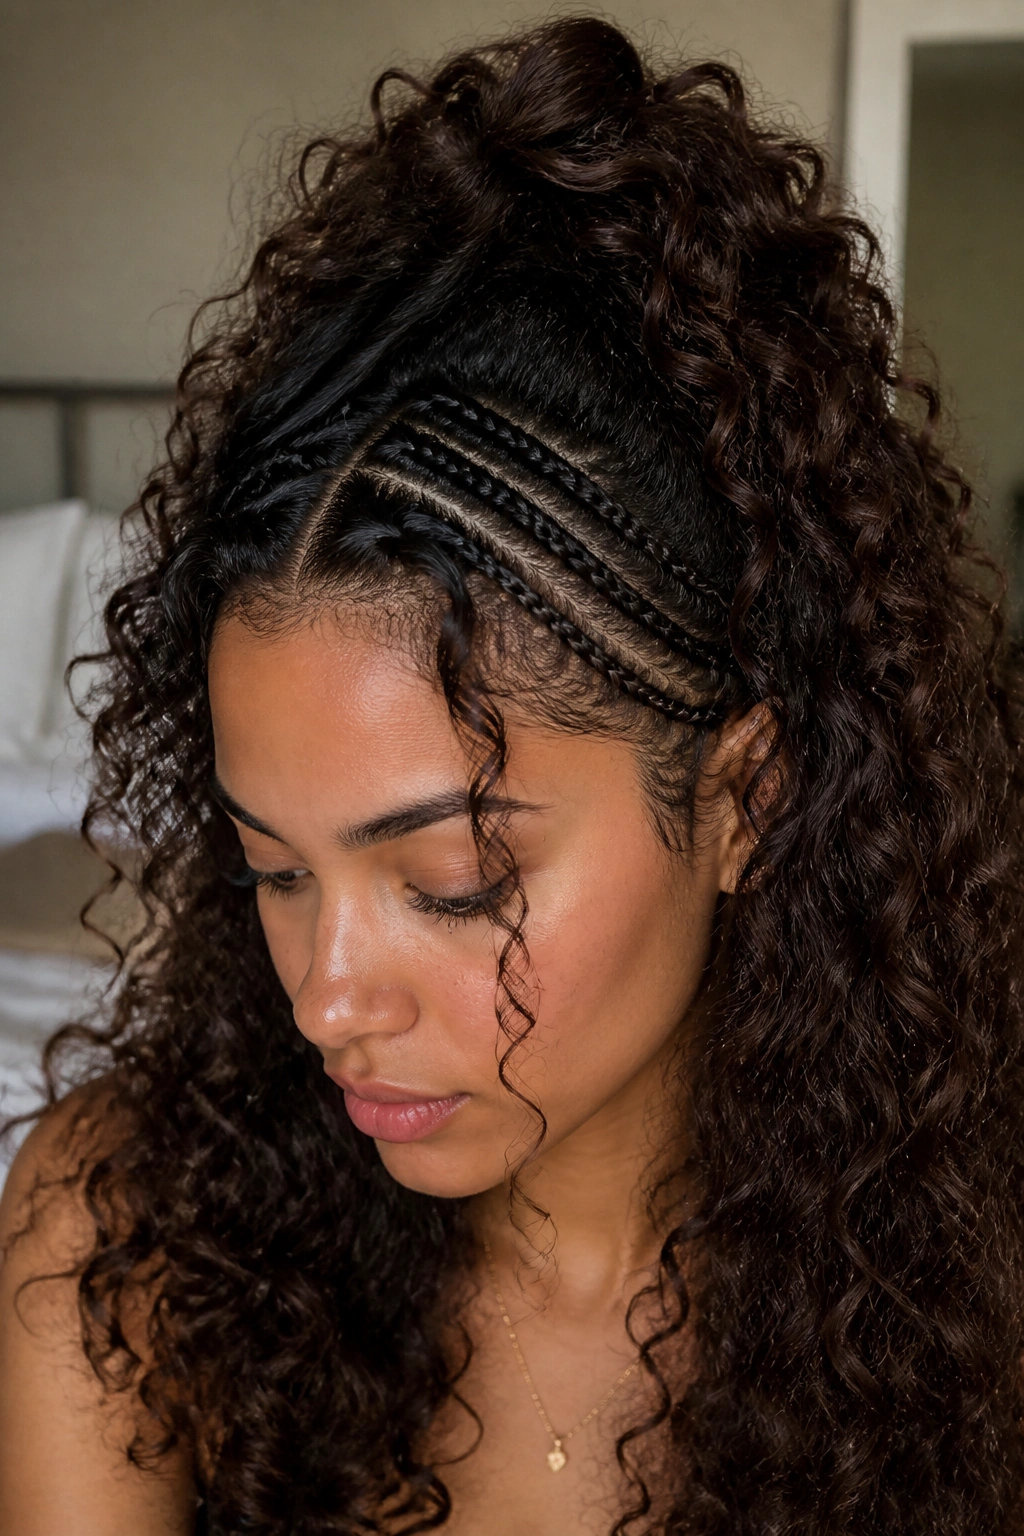
A few skinny braids at the hairline can turn a plain half-up style into something that feels planned. They also solve a useful problem: curls around the face often frizz first, and braids hold those shorter pieces in place without needing a full slick-back.
How to Wear It
Start with one to three braids near the front part or just above the temples. Keep them narrow—about the width of a pencil or a little wider—so they sit close to the head without taking over the style. Pin the ends under the top section, then let the rest of the curls fall loose.
- Use this when: the front layers are shorter than the rest of the hair
- Keep tension light: tight braids can tug at the hairline and make the style feel stiff
- Best product: a light cream or a little mousse, not a heavy butter
- Best look: braids tucked into a puff, knot, or loose ponytail
Watch the scalp. If the braids start too tight, the style stops looking soft and starts looking like work. That is not the goal.
This one has a nice range. Two small braids feel casual. Four or five start to read more styled. Either way, the braid detail gives you structure while the curls do the rest.
4. High Curly Knot With Face-Framing Pieces
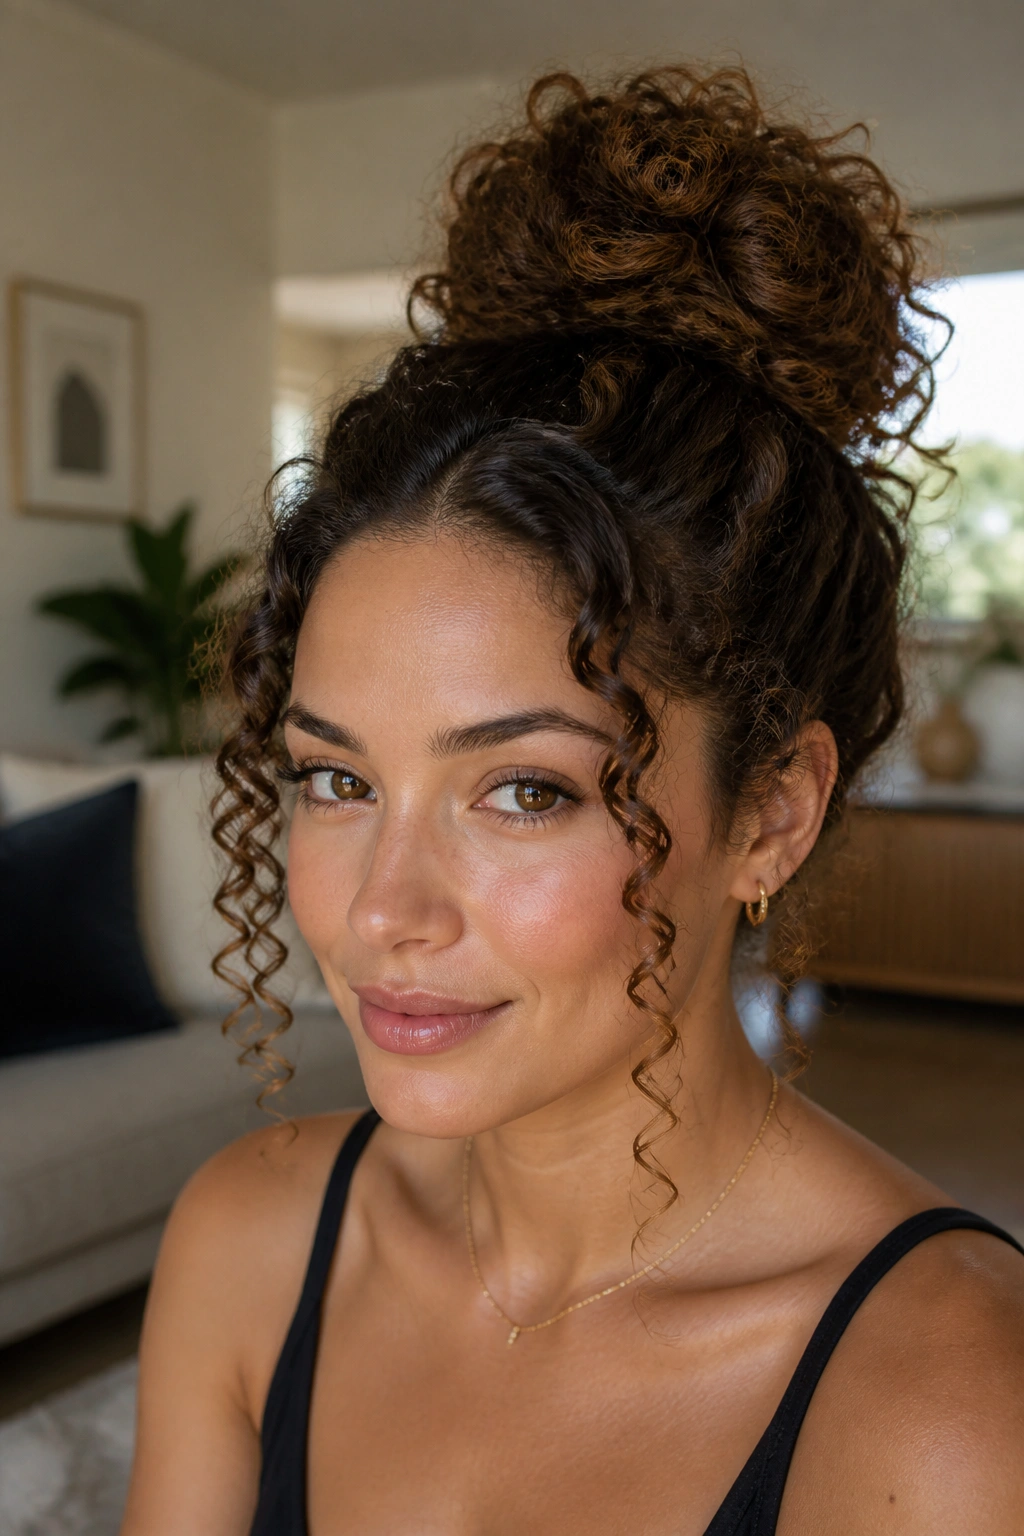
A messy top knot is not lazy when the curls underneath are still doing the work. In curly hair, the high knot becomes more interesting because the lower half stays full and textured instead of scraped back into a neat little shell.
Pull the top section high, twist it once or twice, and wrap it into a knot that sits near the crown. Leave two face-framing curls out in front. Those loose pieces soften the whole look and keep the style from becoming too severe.
A lot of people make this mistake: they try to make the knot too perfect. Don’t. Curly hair looks better when the knot has some shape and the ends are allowed to poke out a little. That slight messiness gives it life.
What to Watch For
- Use a small elastic first, then a few pins to anchor the knot
- Keep the knot centered, not pushed too far forward
- Leave the front curls alone unless they need a tiny bit of water or cream
- If your hair is dense, split the top section into two smaller knots and stack them loosely
Tiny is better here. A giant knot on top of curly hair can throw off the balance and make the bottom feel heavy.
5. The Quick Claw-Clip Half-Up
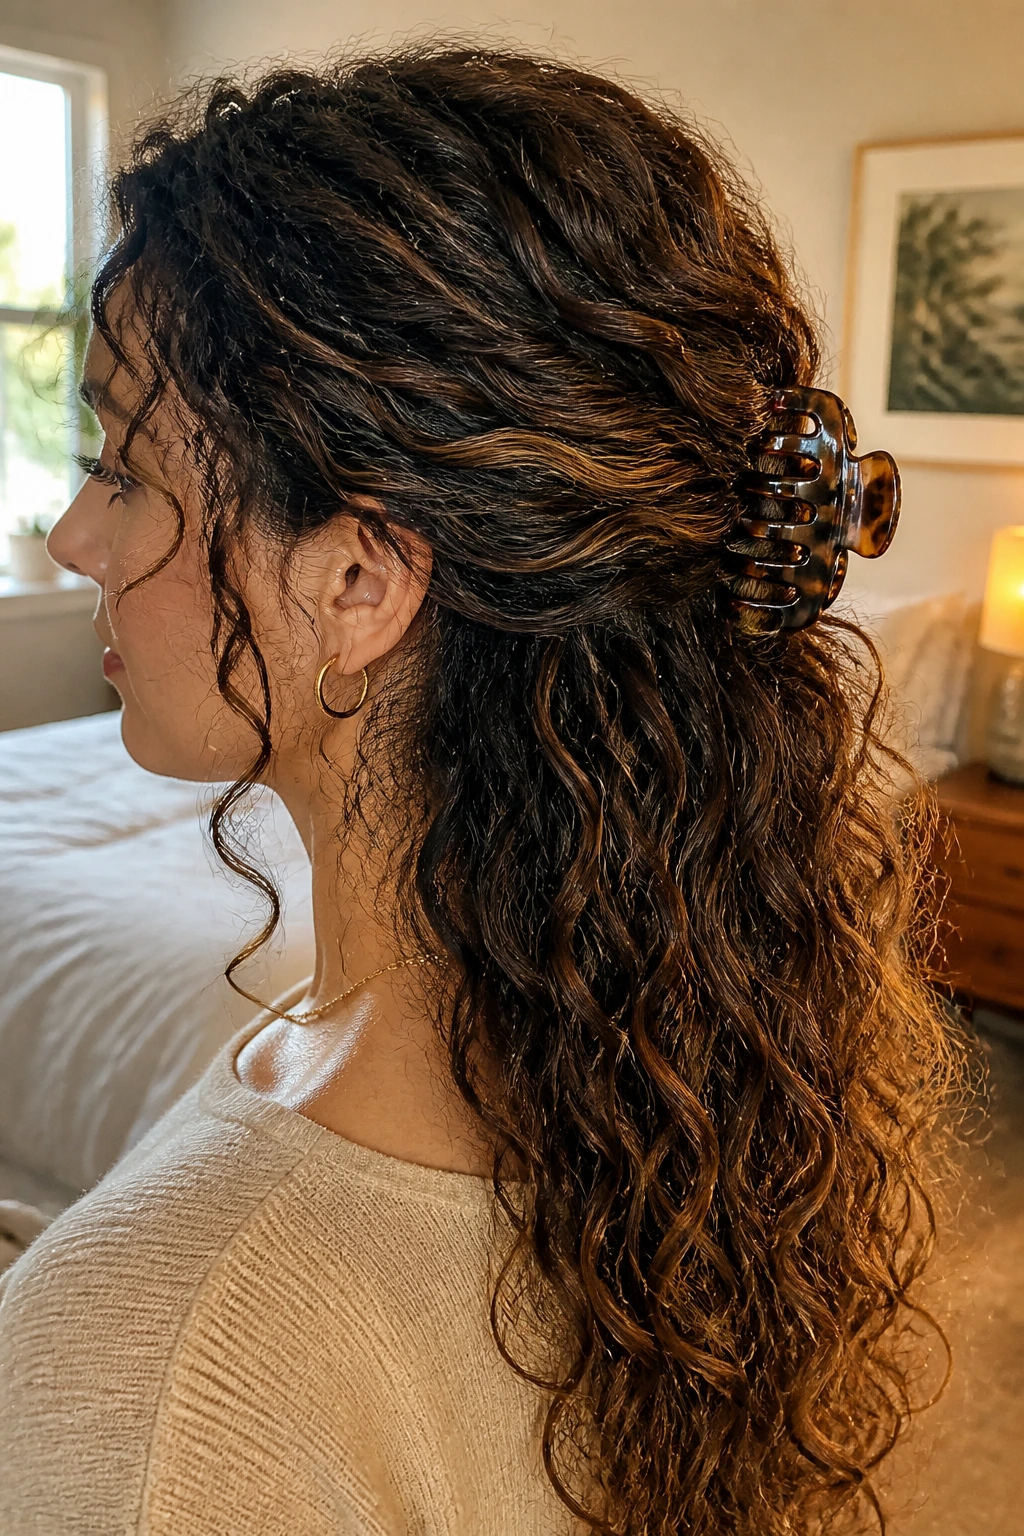
A good claw-clip half-up has that loose, lifted feel at the crown, not the smashed, bunched-up look you get from a clip that is too small. The hair should look like it was gathered with ease, then held in place. Not squeezed.
The best version starts with a wide top section, usually from temple to temple. Twist it once at the back of the head, fold it upward, and catch the twist with a medium or large claw clip. The lower curls stay free, and the top gets enough control to keep hair out of your face.
Oversized clips are not the enemy here. Tiny clips are. They slide, dent the curls, and make the whole thing feel like it might give up at any second. A clip with spaced teeth and a slightly curved shape holds better on textured hair because it can grip without crushing.
One more thing: if your curls are soft and slippery, rough up the roots a little with dry shampoo or a few sprays of texturizing mist. The clip needs something to grab.
This is the style I reach for when I want the hair to look styled but not too done. It has a casual, lived-in feel that works with jeans, a blazer, or a dress that needs the hair to stay out of the way.
6. Deep Side Part and One-Sided Sweep
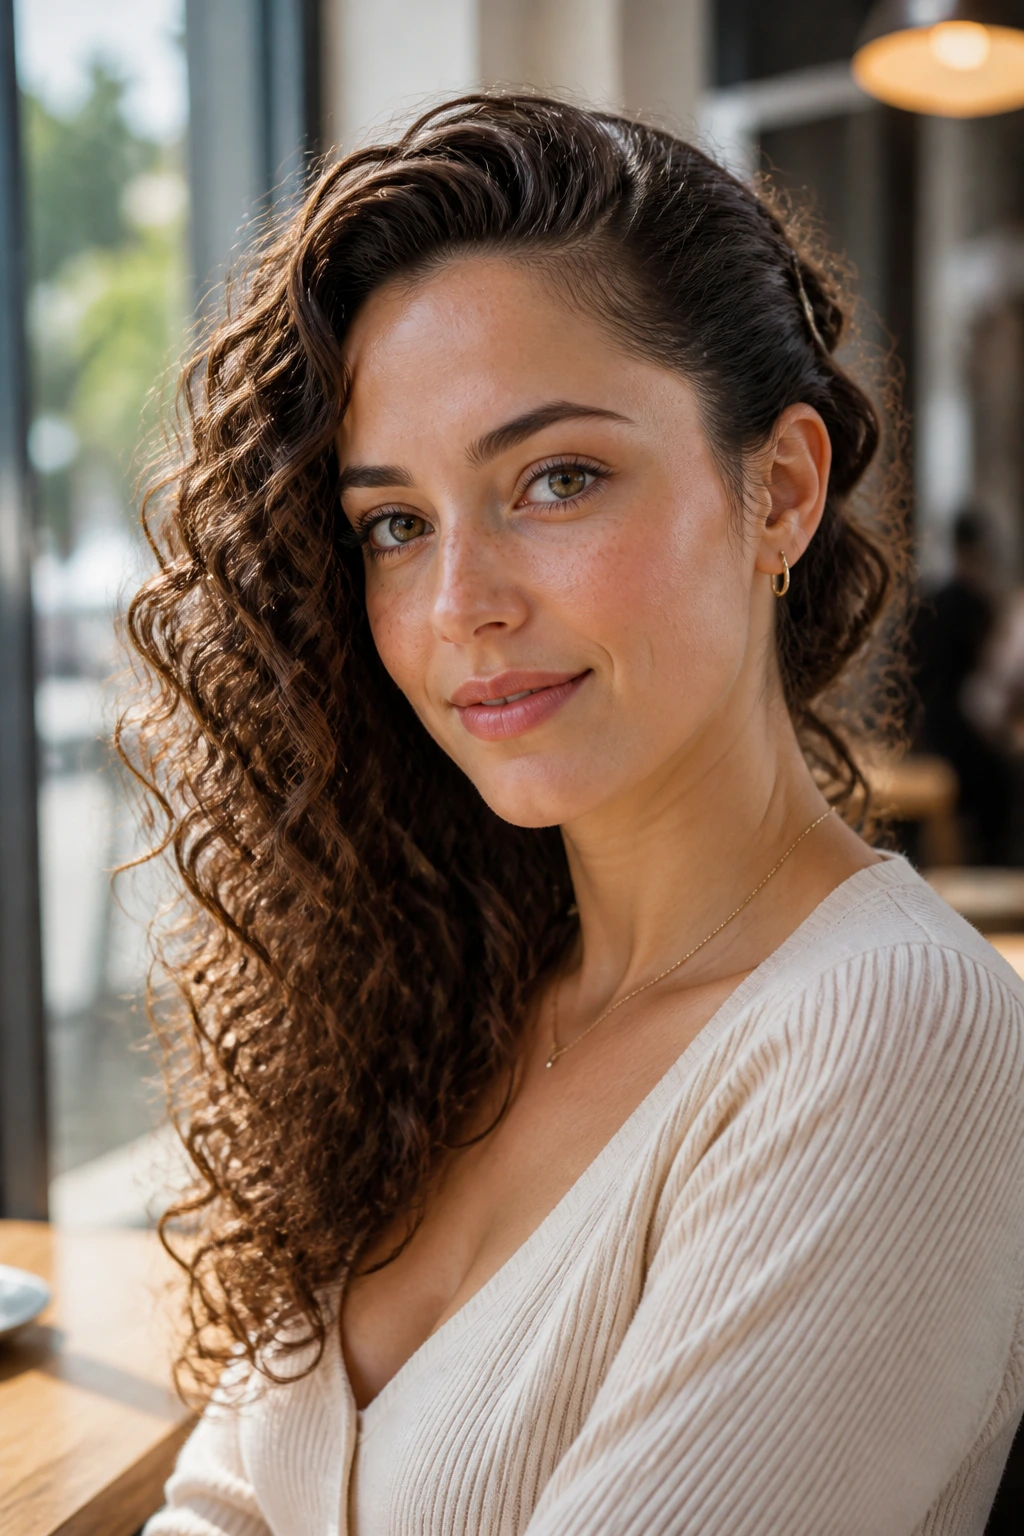
One side. That is all you need.
A half-up style does not have to sit in the middle to look balanced, and curly hair often looks better when the part is slightly off-center. Sweep the heavier side back toward the crown, pin it just behind the ear or slightly higher, and let the rest fall in a diagonal line.
Unlike a centered puff, this version keeps one temple open and gives the curl pattern a slant. That diagonal line softens sharper features and works well if one side of your curl pattern naturally falls flatter than the other. It also helps when one front layer is shorter and refuses to stay tucked into a center style.
The placement matters more than the gear. Use one or two hidden pins, not a chunky clip that fights the shape. Keep the part clean, then leave the lower curls loose and full.
This is one of those styles that looks more expensive than it is. Not fancy. Just considered.
7. Bubble Half-Up Ponytail for Long Curls
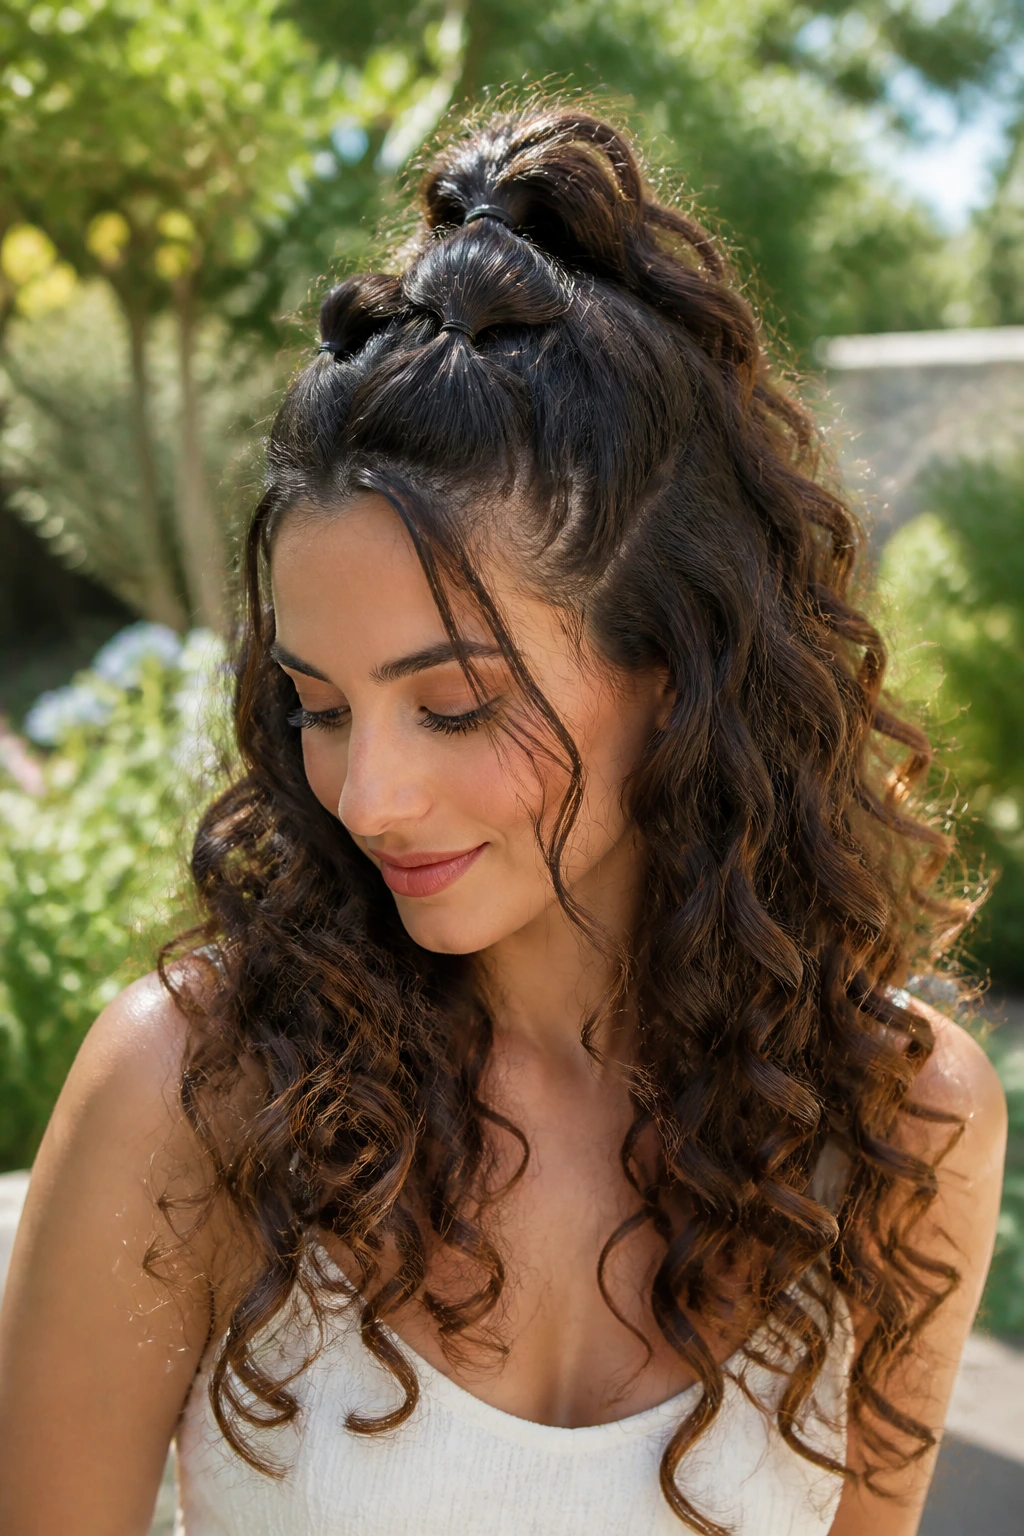
Three bubble sections are enough to change the whole shape of the style. More than that, and it starts to feel busy.
How the Shape Holds
Gather the top half into a short ponytail at the crown or slightly below it. Add small elastics every 2 to 3 inches down the length of the top ponytail, then gently pull each section outward until it rounds into a bubble. The loose curls below keep the look soft, while the segmented top gives it a playful edge.
The real trick is using snag-free elastics. Curly hair does not need another excuse to fray at the ends, and those rough little bands can leave a line that is annoying to undo. Clear elastics work, but soft black ones often hold better.
- Best on: longer curls or stretched curls with enough length to form 2 to 4 bubbles
- Keep the bubbles even: pinch each section from both sides before you pull
- Use a little control: a dab of gel on the crown can keep flyaways from puffing up
- Avoid: overfilling each bubble, which makes the ponytail look lumpy instead of round
If the bubbles lean sideways, don’t panic. Slightly asymmetrical bubbles can look better than stiff, perfect ones.
8. Two Rope Twists Into One Half-Up Tie
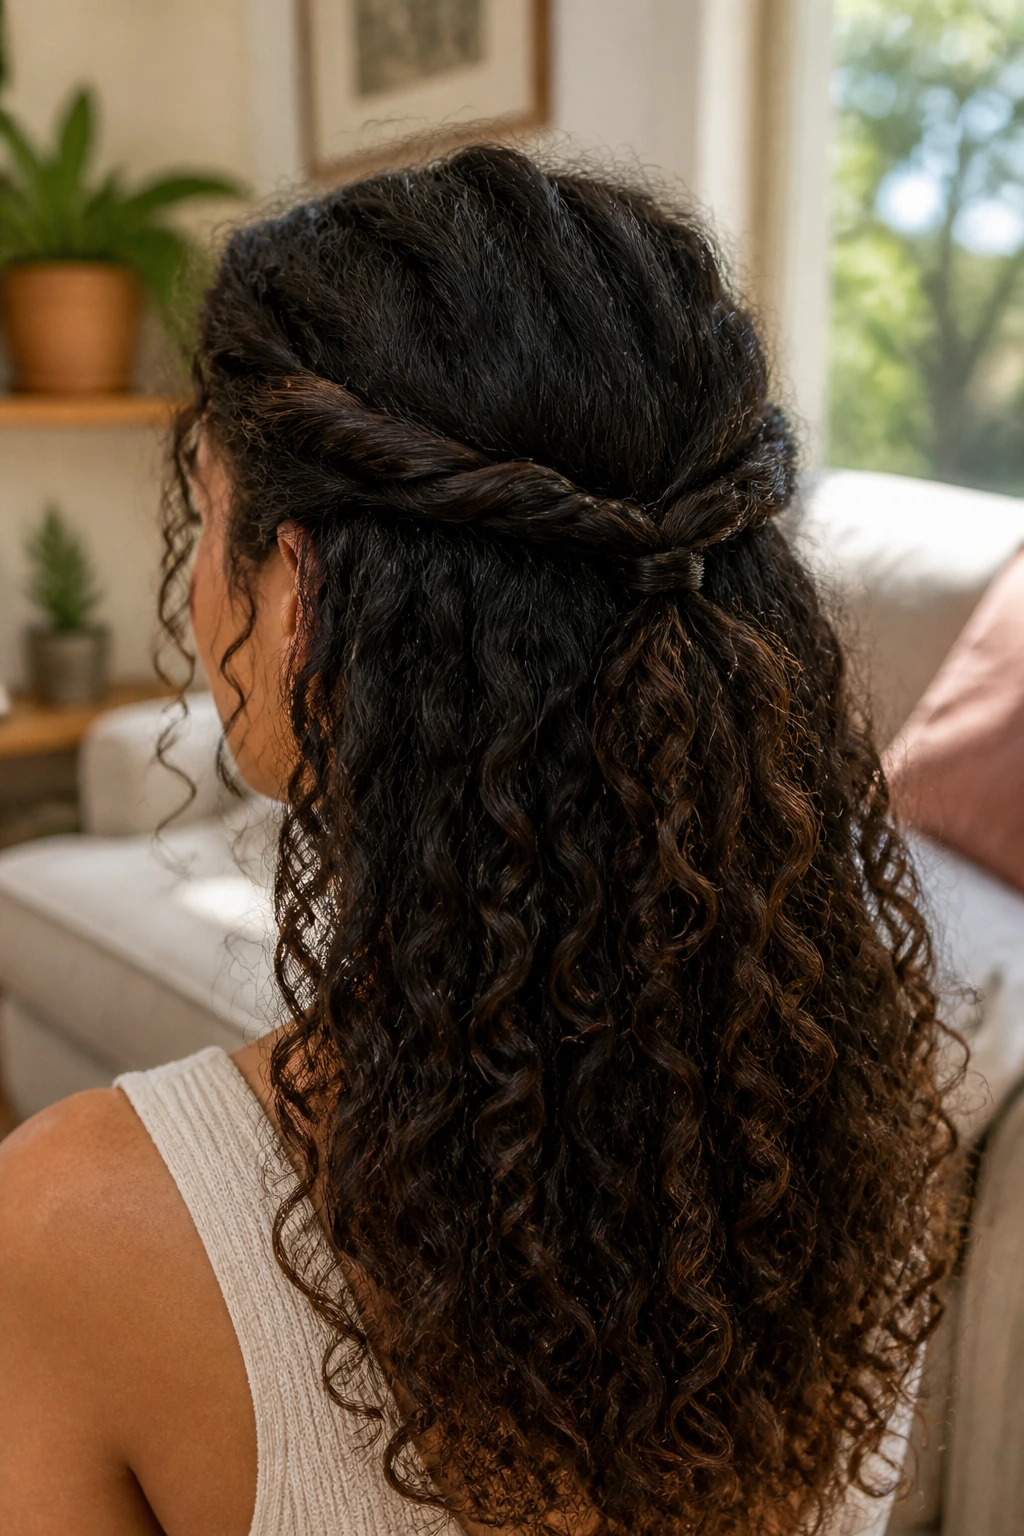
Rope twists are the unsung hero of curly half-up styles. They take less time than braids, they hold shape well, and they keep the front of the hair from wandering into your eyes every ten minutes.
Start with two front sections, one on each side of the part. Twist each section away from the face, then bring them together at the back and tie them with a small elastic or pin them into a tiny knot. The rest of the curls stay down and full. That contrast is what makes it work.
This style looks especially good on curls that are already stretched a little. The twist reads more clearly when the texture isn’t too springy at the roots. If the hair is soft and freshly washed, a little cream or gel on the twist keeps the strands from slipping apart before the day is over.
It’s the kind of style that does not ask for much. If you have five minutes and a mirror, you can get it done. If you have ten, you can tidy the front pieces and make it look cleaner. Either way, it holds up.
9. Double Space Buns With the Ends Down
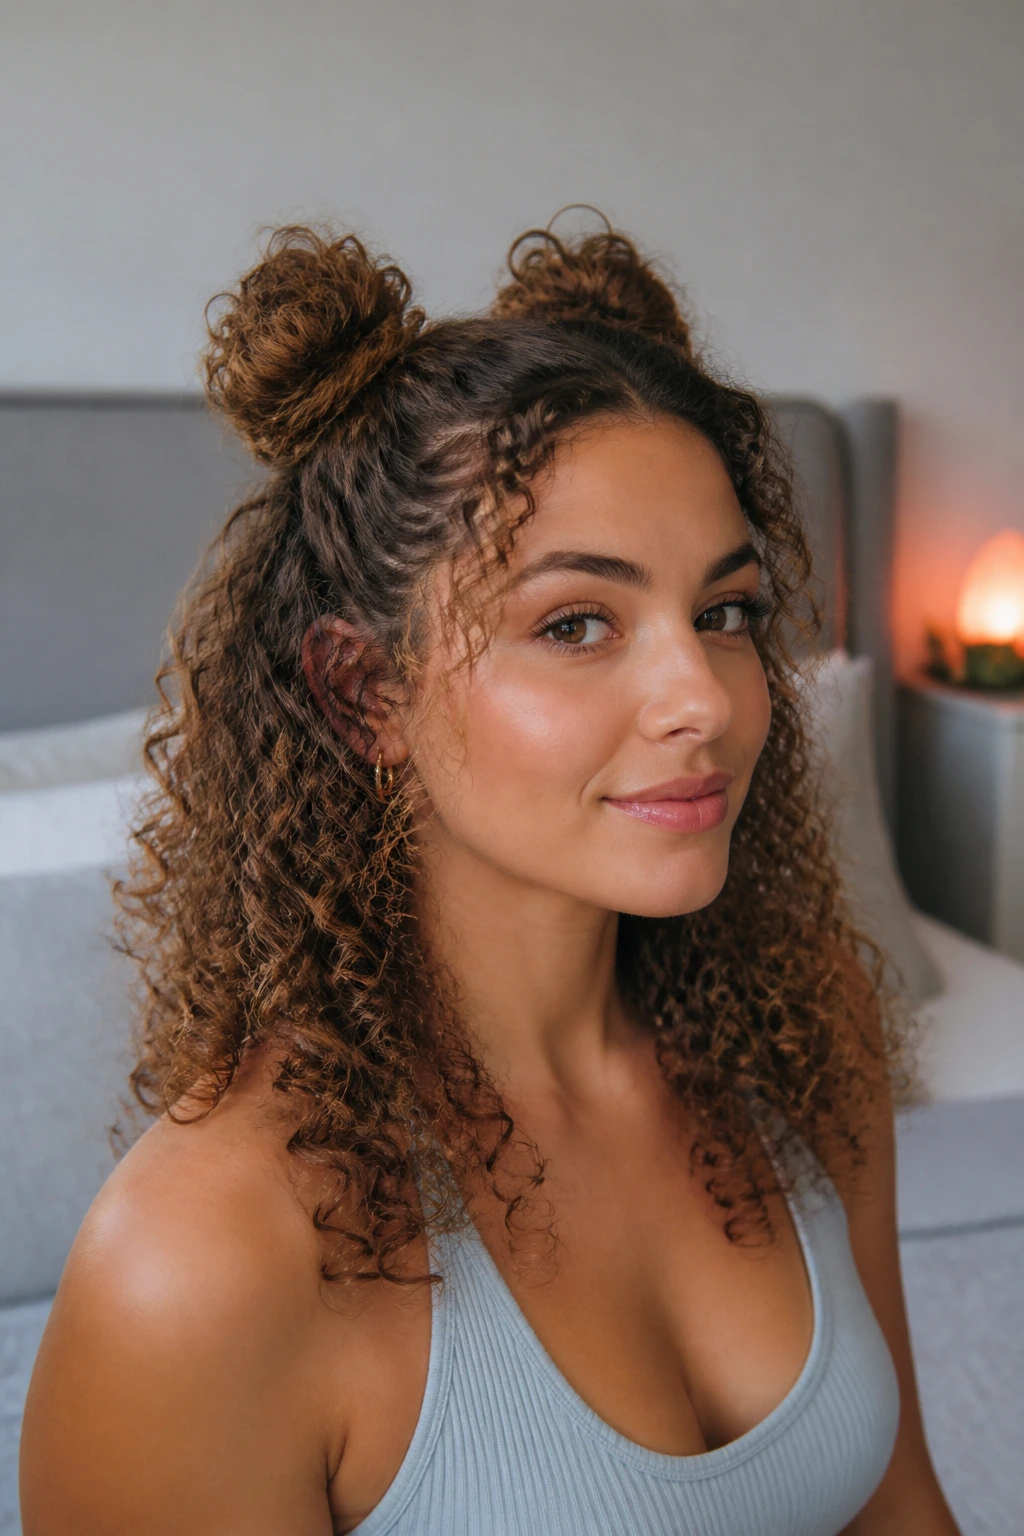
Want something playful without giving up your length? Double space buns do exactly that, and on curly hair they look less costume-like than people expect when the buns stay small.
The cleanest version starts with two top sections, one on each side of the crown. Twist each section into a small bun and pin or tie it close to the head. Leave the lower half loose so the curls still show. The buns should be compact, almost tucked-in, not oversized.
A little unevenness helps. Perfectly matched buns can look stiff, while tiny differences in height or fullness give the style a softer feel. That is especially true if your curls have different densities on each side, which happens more often than people admit.
How to Keep It from Looking Too Young
Use the buns as a frame, not the whole story. Keep the lower curls defined, and leave a couple of face pieces out if you want the style to read more grown-up. A narrow part helps too, because a huge center part can push the look in a more playful direction.
Tiny, high, and textured is the sweet spot here. Anything larger starts to take over.
10. Curly Mohawk Half-Up
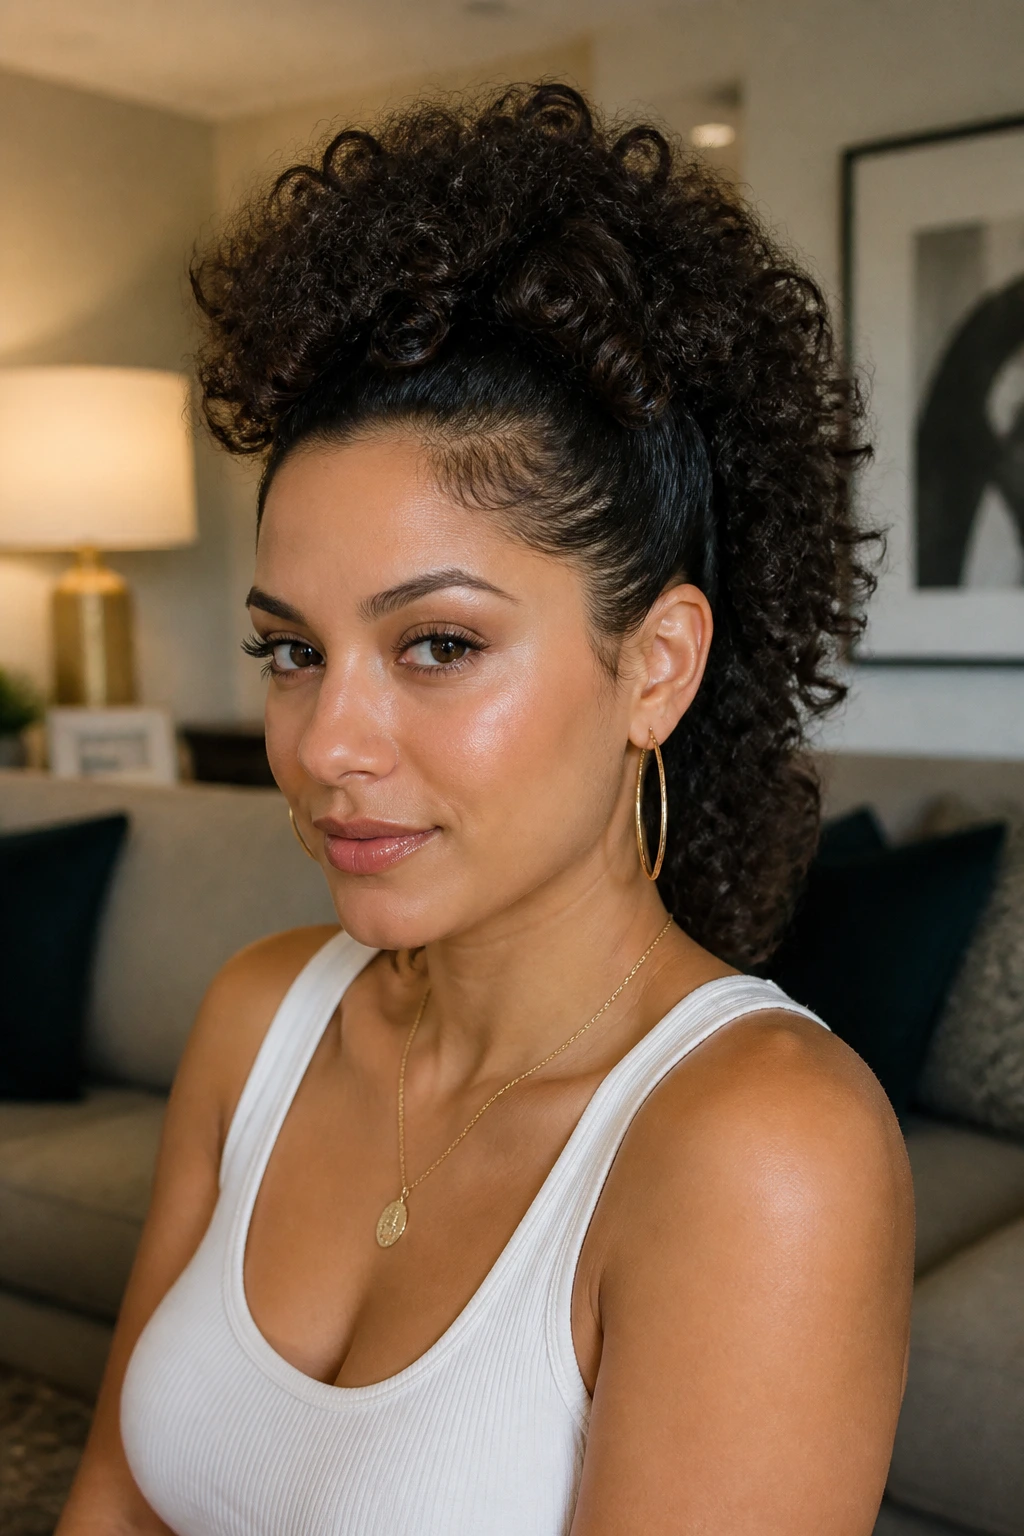
There are mornings when the front of your hair wants to grow upward and the rest wants to take over the room. The curly mohawk half-up works with that energy instead of pretending it isn’t there.
Pin the sides back tightly from the temples, not from the ears, so the center strip stays lifted and full. The result is a tall ridge of curls down the middle with the sides tucked away. It looks bold, but it can be soft too, depending on how much volume you leave on top.
What Makes It Work
- Start with dry or mostly dry hair so the shape stays where you place it
- Use 4 to 6 bobby pins, crossed in an X, for better grip
- Lift the crown a little before pinning so the center does not collapse
- Keep the pinned sides smooth, but not slicked flat unless that is the look you want
This style is especially good when your curls have width and you want to show it off. It can also save you on a bad-frizz day because the center volume becomes the point. The sides disappear, and the hair on top gets to be dramatic in the best way.
11. Half-Up With a Silk Scarf or Ribbon
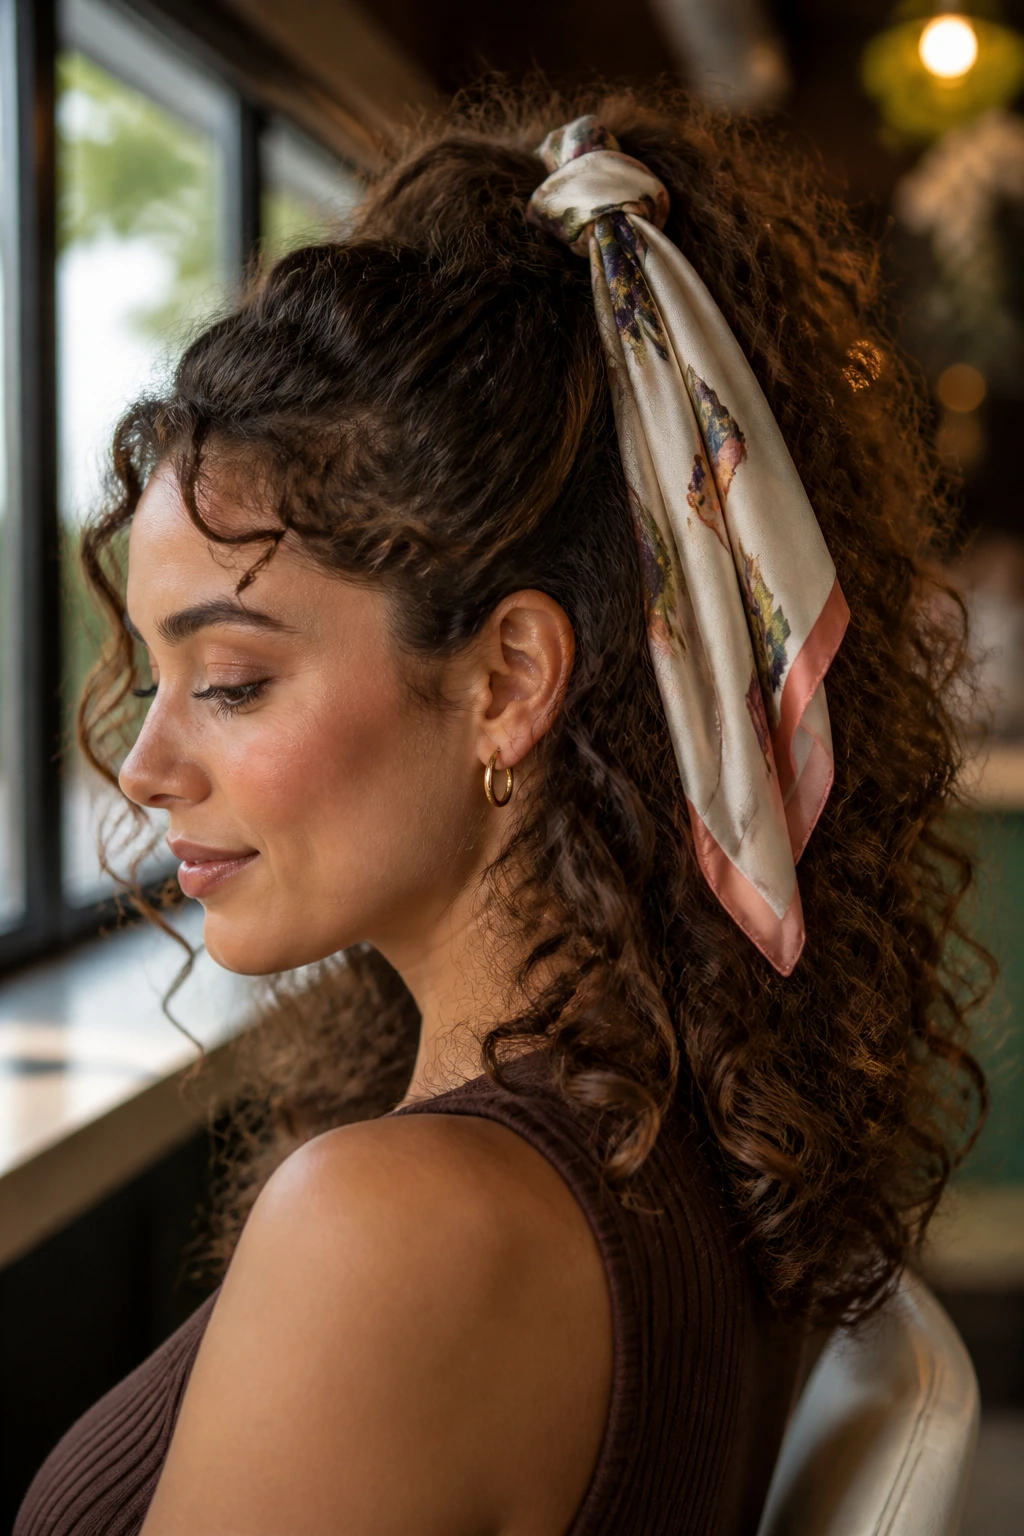
A silk scarf changes the whole mood in one move. A ribbon does it too, though the feel is a little different—more playful, less polished, sometimes exactly what the outfit needs.
Tie the half-up section first, then wrap the scarf or ribbon around the base. Let the tails hang down, or knot them to one side if you want the shape to sit lower on the head. A scarf about 1.5 to 2 inches wide gives enough presence without swallowing the curls.
The accessory should support the hair, not hide it. That is where a lot of people go wrong. A giant printed scarf can take over the style, which is fine if that is the goal, but it stops reading as a curly hairstyle and starts reading as an accessory with hair attached.
Silk and satin are useful because they slide against the curls instead of roughing them up. That matters on soft, freshly washed hair that tends to unravel at the slightest provocation. If you want the curls to stay touchable, choose something smooth.
My bias: a narrow ribbon looks best when the curls are already full. A scarf works better when the hair needs a little visual lift.
12. Low Half-Up Ponytail at the Occipital Bone
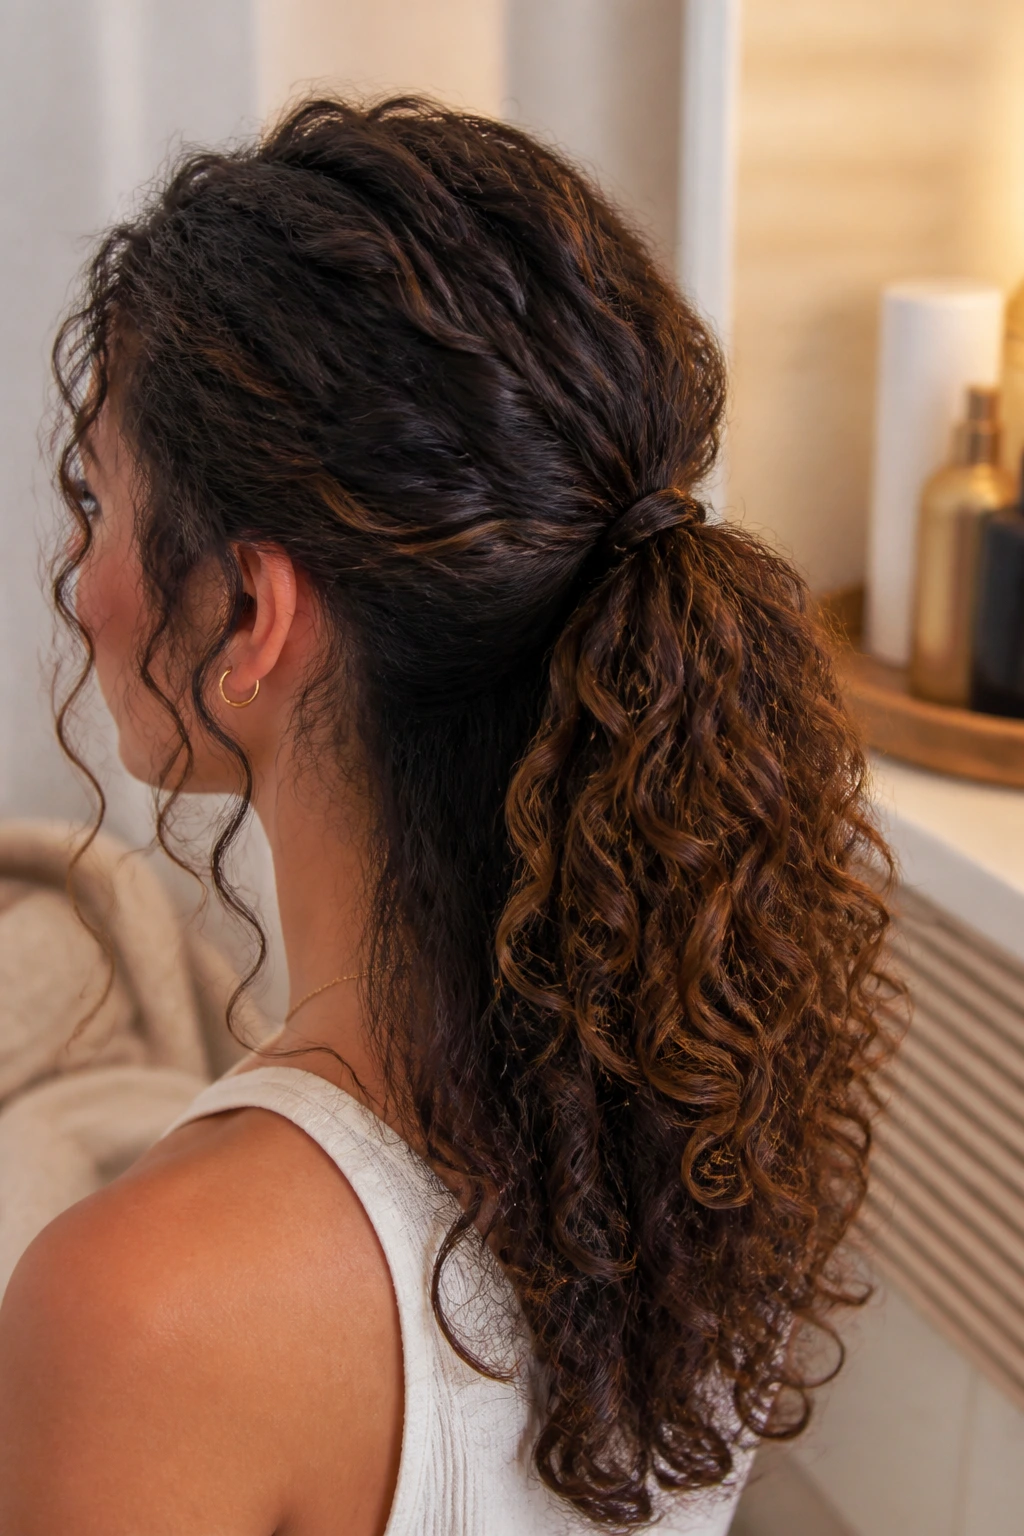
Unlike a high crown puff, a low half-up ponytail sits back and lets the curls hang like a curtain. The shape feels calmer, a little more grown, and often easier to wear for long stretches because the weight is lower on the head.
Place the ponytail at the occipital bone—the bump at the back of your head where the skull starts to curve down. That spot gives the style balance. Too high, and it starts to mimic a top knot. Too low, and it loses the half-up shape altogether.
The top should still have some lift. Brush or finger-comb only the upper section enough to gather it, then secure it with a narrow elastic or a small wrap. You want the front to look smooth, but not flat. The curls below need room to move.
This style works well when you want polish without drama. It also makes a nice compromise for layered curly hair, where the top pieces are too short for a full ponytail but too long to ignore.
One small tip: wrap a curl around the elastic if the band is visible. It makes the whole thing look more finished in about two seconds.
13. Waterfall Braids Over Loose Curls
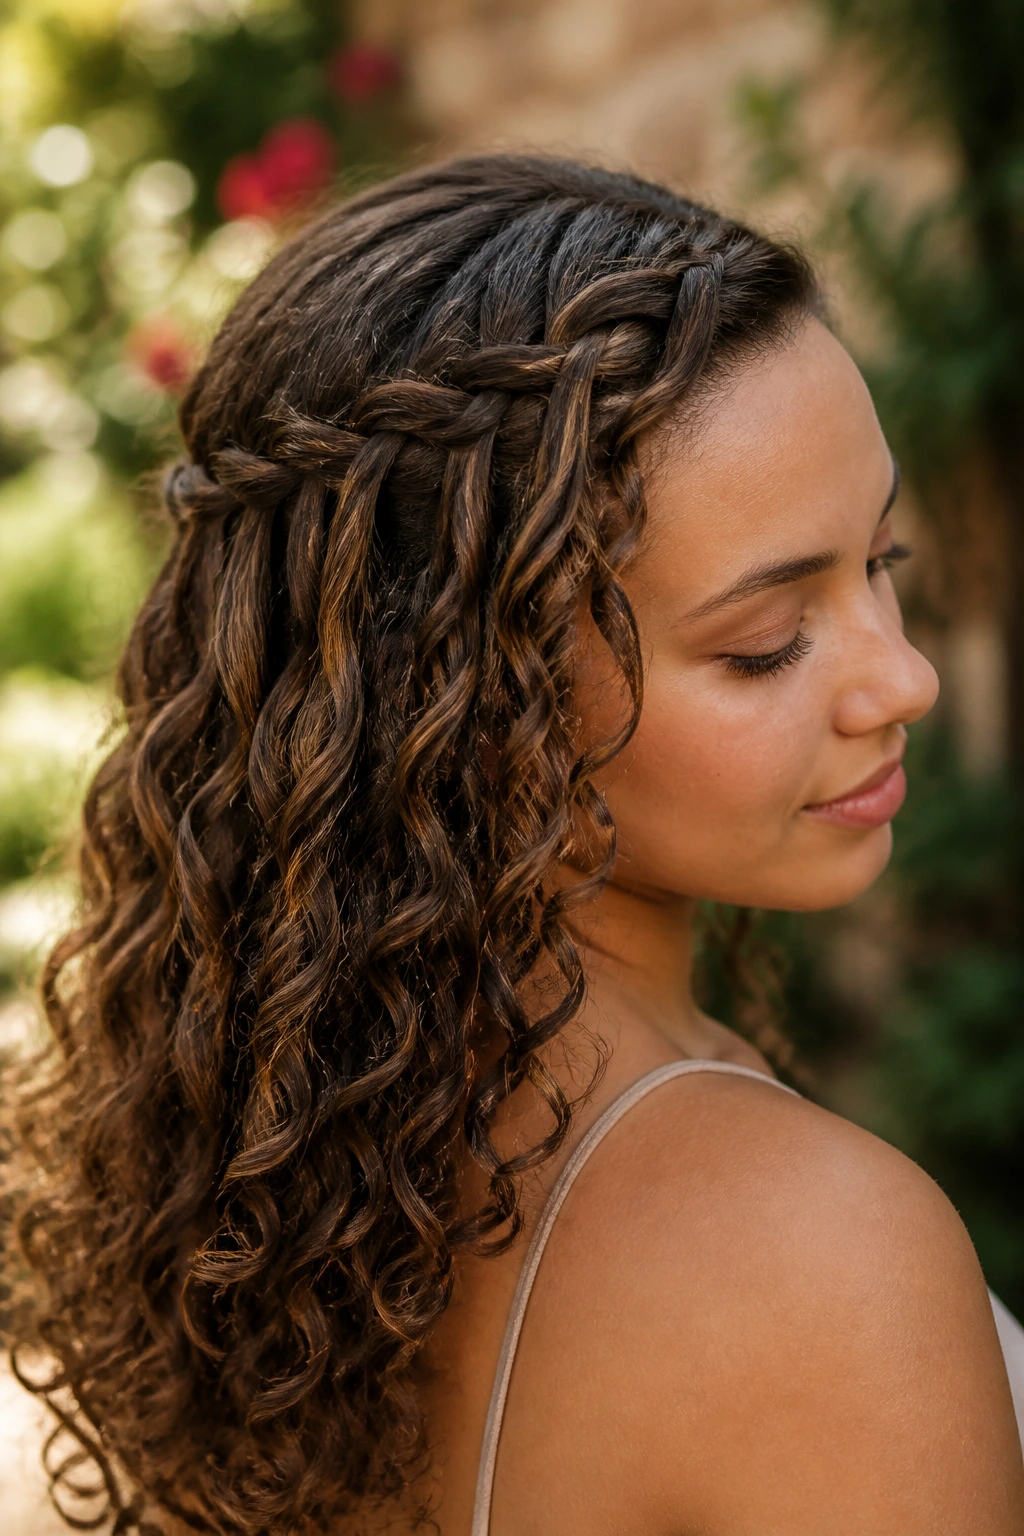
Waterfall braids look fussy until you realize they only need three passes.
The Shape in Plain Terms
Take a section near one temple, braid across the back, and drop one strand each time you cross it so the loose curls stay visible underneath. The braid becomes a moving line across the head, while the rest of the hair stays down. On curly hair, that contrast is the whole charm.
The braid is best when it stays loose. Tight waterfall braids can pull the curl pattern into odd little dents, and they usually look more rigid than they should. A relaxed hand keeps the braid soft enough to blend into the texture.
- Best on: long curls, stretched curls, or hair with some natural slip
- Product help: a small amount of cream or mousse to keep the braid neat
- Section size: medium, not tiny, so the braid is visible from a few feet away
- Finish: pin the end under the back layer and hide the bobby pin under a curl
Loose hands make this style better than perfect hands. The braid should look like it belongs with the curls, not like it came from a different haircut.
14. Sleek Sides, Big Curl Length
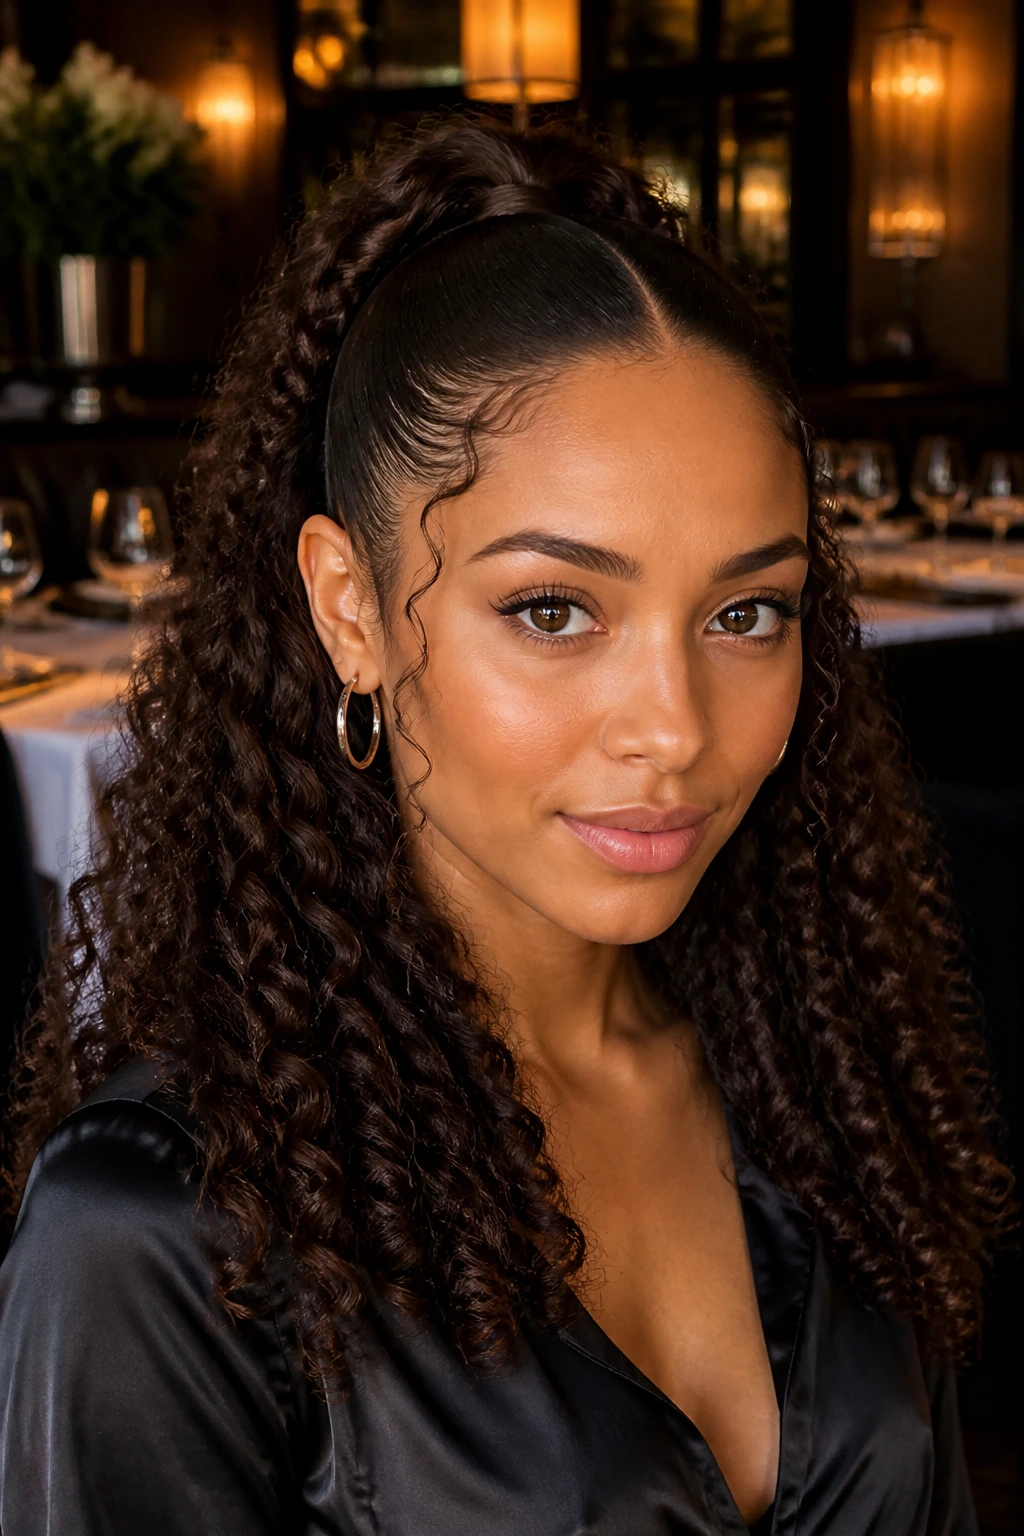
Want the curls to do the talking and the hairline to stay put? Slick only the sides and the front section, then leave the back loose and full. That’s the shape here, and it works because it gives you contrast without flattening the whole head.
Use a small brush or edge brush with gel on the front 1 to 2 inches of hair near the hairline. Stop there. Do not keep brushing back into the crown unless you want the style to look sharp and much less soft. The loose back section should still have room to puff out, because that’s what keeps the style curly instead of slicked.
This one has a cleaner, dressier mood than a puff or twist. It suits dinners, events, and any day you want the front to stay in place while the length still moves. If your curls are dense, the contrast can look gorgeous. If they’re fine, the smoothing at the front can make the length feel fuller by comparison.
The line between sleek and stiff is narrow. Stop the smoothing sooner than your instinct tells you.
15. The Softest Half-Up Half-Down Style for Curly Hair
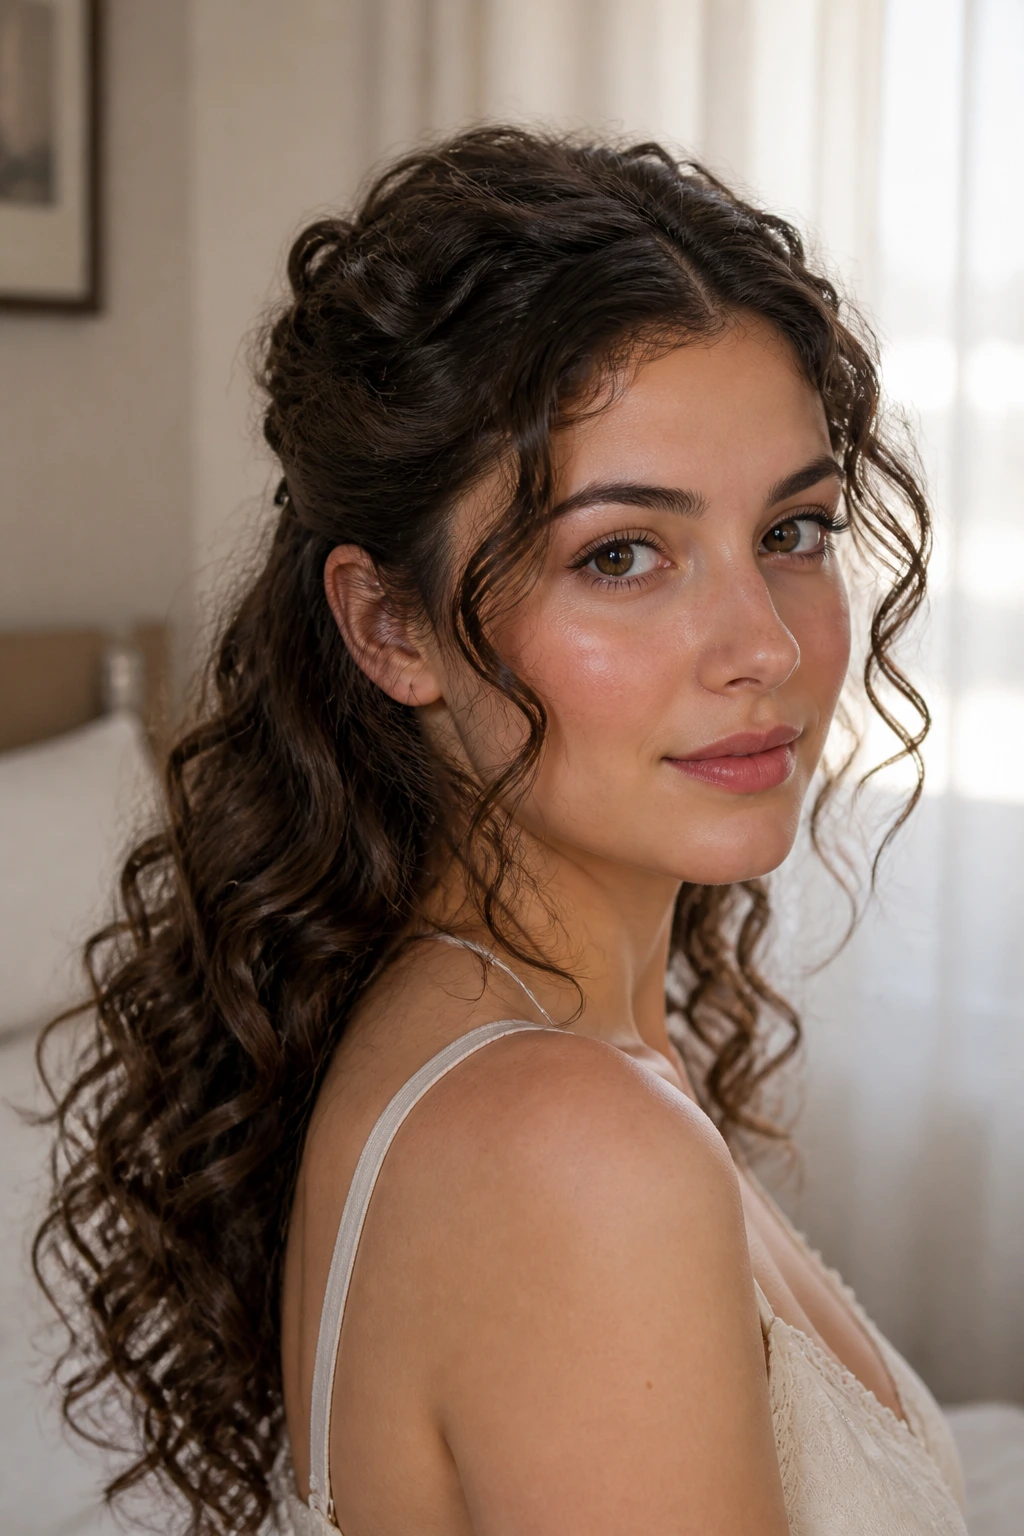
The version people keep coming back to is the one that asks the least from the curls. A small half-up gathered from the temples or just above the ears, secured with two pins or a tiny clip, can look better than a style that took three times as long.
This is the style for mornings when you want the hair off your face but still want the curls to look like curls. Leave the front pieces soft. Let a few spirals fall loose near the cheeks. If the top section needs help, mist it lightly and smooth it with your fingers instead of a brush. Brushes can be useful, but they also love to erase the shape you just built.
The reason this style works so often is simple: it never tries too hard. The top has enough control to feel intentional, and the rest stays free enough to keep its texture. It plays well with wash-and-go curls, braid-outs, and stretched hair alike.
If you only keep one half-up move in rotation, make it this one. It handles errands, work, dinner, and the kind of day that runs longer than expected without falling apart by midafternoon. And when the curls are having a good day, this style gets out of the way and lets them be the main event.
