



Long hair has a way of turning a simple bun into a small engineering problem. The weight pulls at the nape, the ends sneak out, and one loose pin can undo the whole thing ten minutes after you leave the house. That’s why low bun hairstyles for long hair are worth learning properly: they can look polished, but they also stay put when the hair is pinned with a little intention.
The trick is not making every bun look identical. Long hair gives you more to work with, which sounds like a gift until you realize it also means more length to tuck, more bulk to control, and more chances for the shape to sag. A low bun can sit smooth and neat, loose and romantic, braided, twisted, knotted, or dressed up with a scarf or pins. Same base. Different mood.
I like low buns because they solve a real problem. They keep the neck clear, they work with dresses and collars, and they tend to be kinder to heavy hair than high buns, which can feel like a small brick by the end of the day. If your hair is silky, a little dry shampoo or texture spray at the roots helps. If it’s thick, pinning in sections matters more than forcing everything into one giant coil.
Start with the version that matches your texture and the kind of day you’re having. Then bend it a little.
1. Sleek Center-Part Low Bun for Long Hair
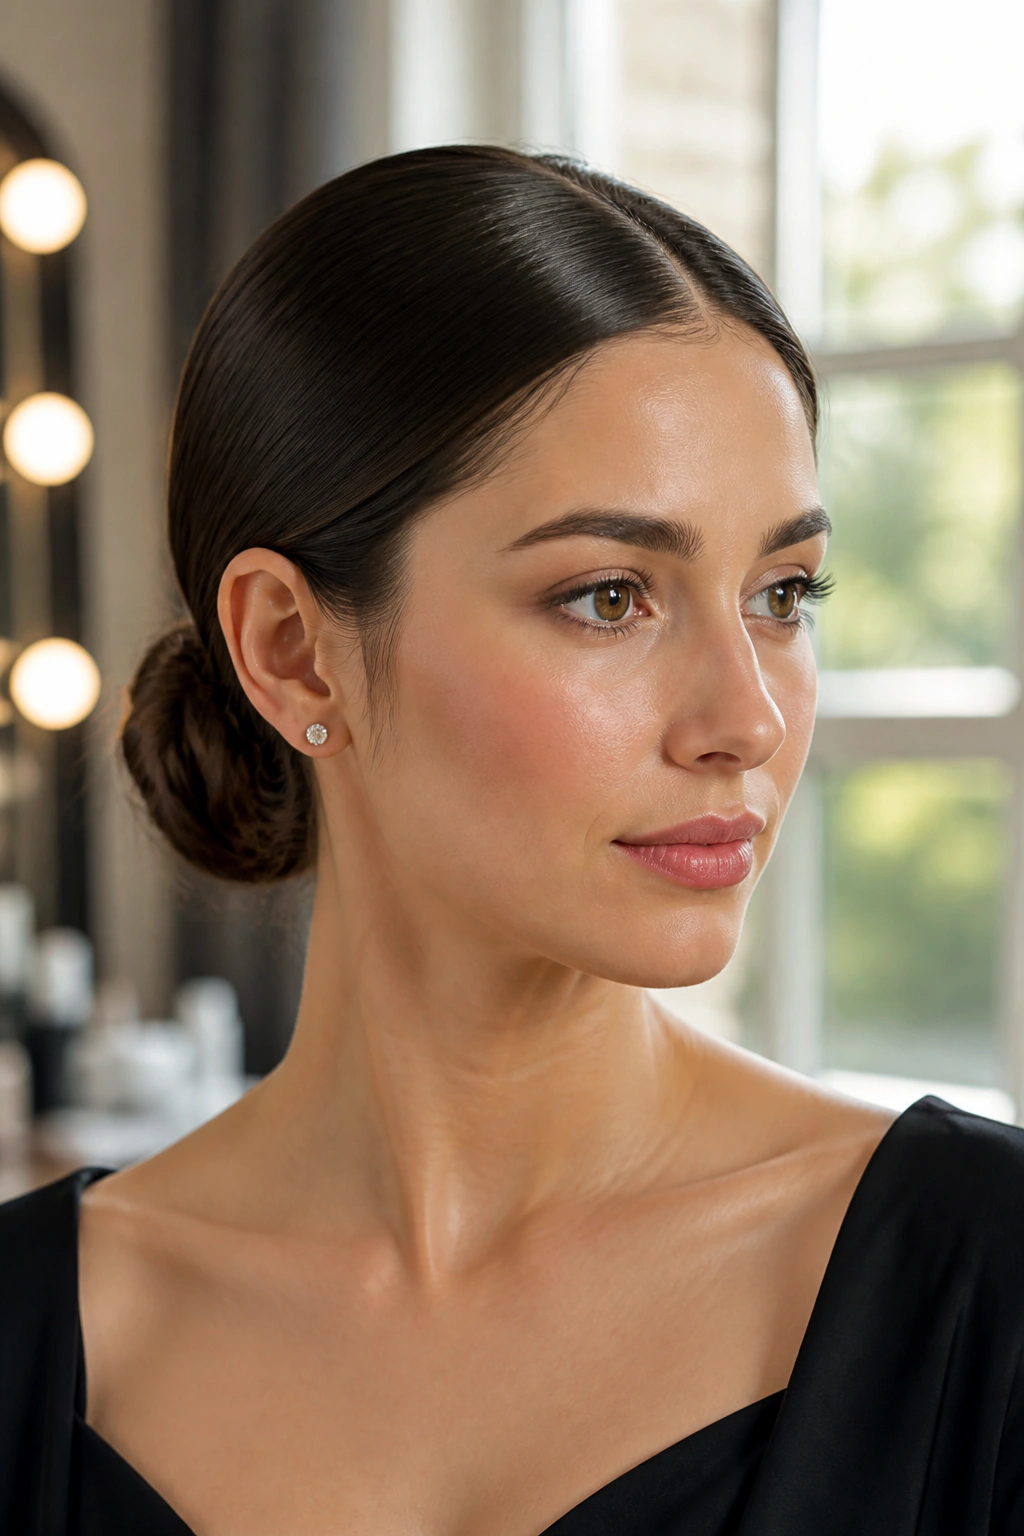
A center part and a smooth bun can make long hair look almost architectural. This is the low bun that reads clean, sharp, and deliberate without needing a lot of decoration, which is part of why it works so well for interviews, dinners, and formal events.
Why It Looks So Crisp
The center part gives the face a straight frame, and the bun at the nape keeps the length under control instead of puffing outward. On long hair, that matters. If you gather too high, the weight shifts; if you keep it low, the bun feels anchored.
A fine-tooth comb helps here, along with a small amount of smoothing cream on the midlengths and ends. I’d keep product away from the roots if your hair gets flat easily. The goal is shiny and close, not greasy.
- Use a 1/4-inch elastic to make a low ponytail first.
- Wrap the ponytail around its base, then pin through the thickest part of the coil with 2-inch bobby pins.
- Mist the surface lightly with hairspray and press flyaways down with the back of a comb.
- If the ends poke out, tuck them under the bun once before pinning.
Tip: Cross two bobby pins in an X over the same spot. It holds better than a single pin, especially if your hair is dense.
2. Deep Side-Part Wrapped Low Bun
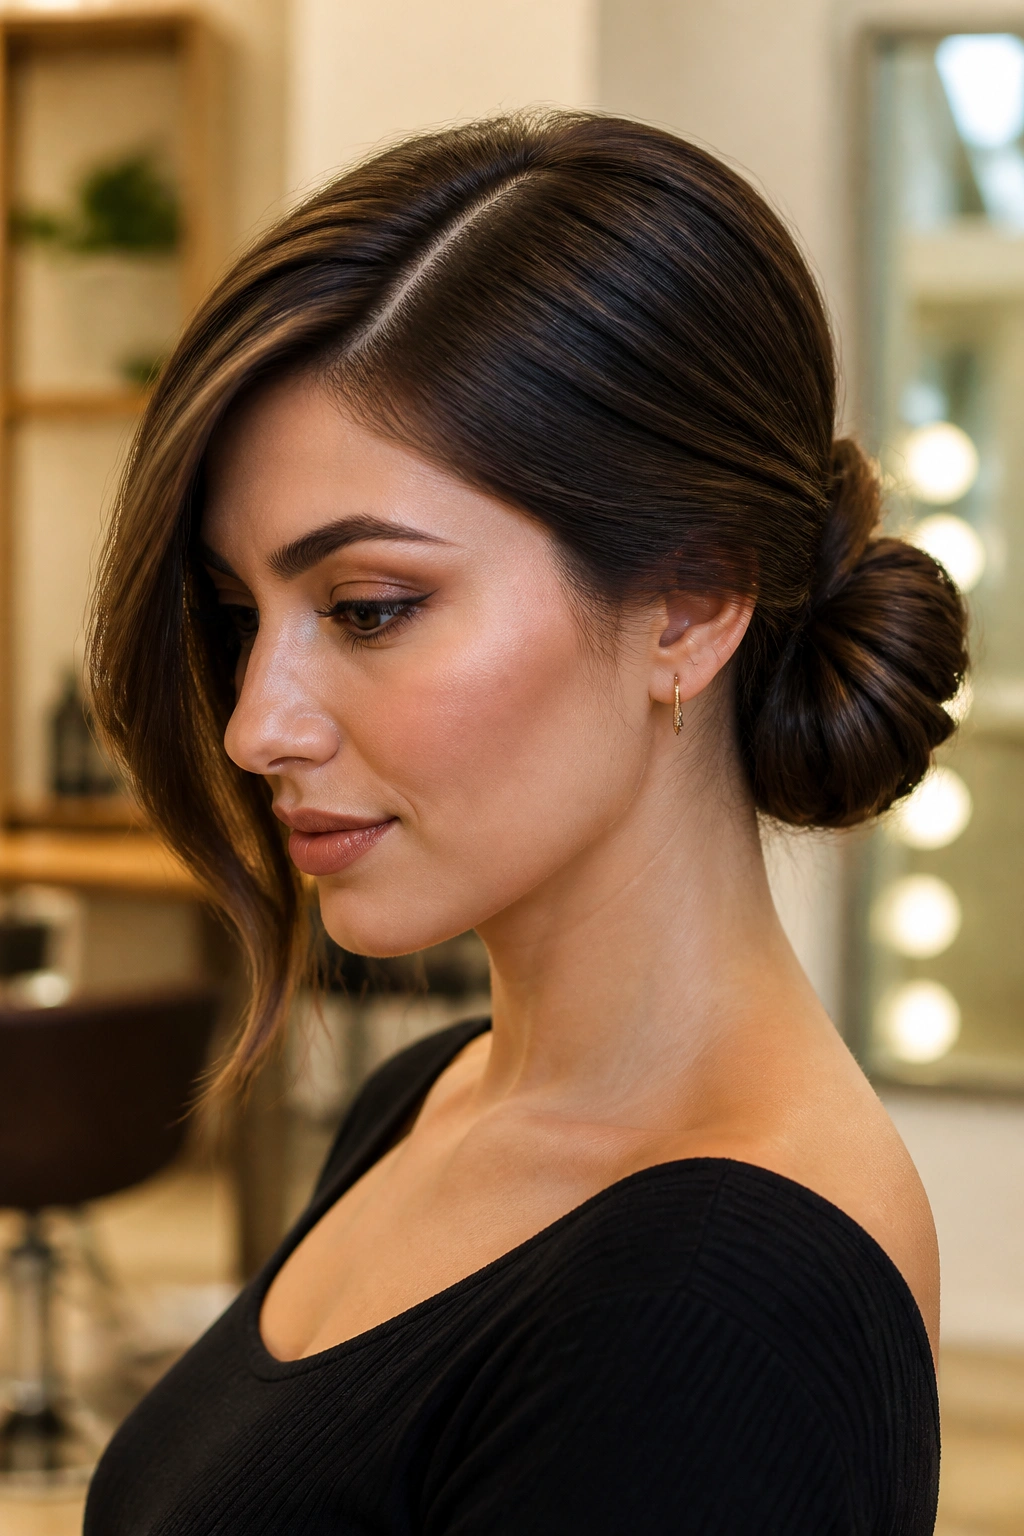
A deep side part changes the whole mood. The bun itself can be nearly identical to a classic low bun, but the part shifts the balance and makes the style feel softer, a little more dramatic, and less strict.
The reason this version flatters long hair is simple: the side part breaks up the width at the top of the head, then the wrapped bun keeps the length contained at the nape. If your hair is heavy, this is a smart choice because the asymmetry distracts from any slight sagging in the bun shape.
I like this on hair that has a little natural bend. Blow-dry the front with a round brush, sweep it over to one side, then gather the rest low and twist it into place. Don’t force the front to sit too flat. A tiny bit of lift near the roots keeps the whole style from looking pasted down.
For a cleaner finish, smooth the side with a drop of serum. For a more lived-in look, leave the front pieces loose and pin the bun a little off-center. Either way, the side part does half the styling for you.
3. Braided Low Bun With Hidden Ends
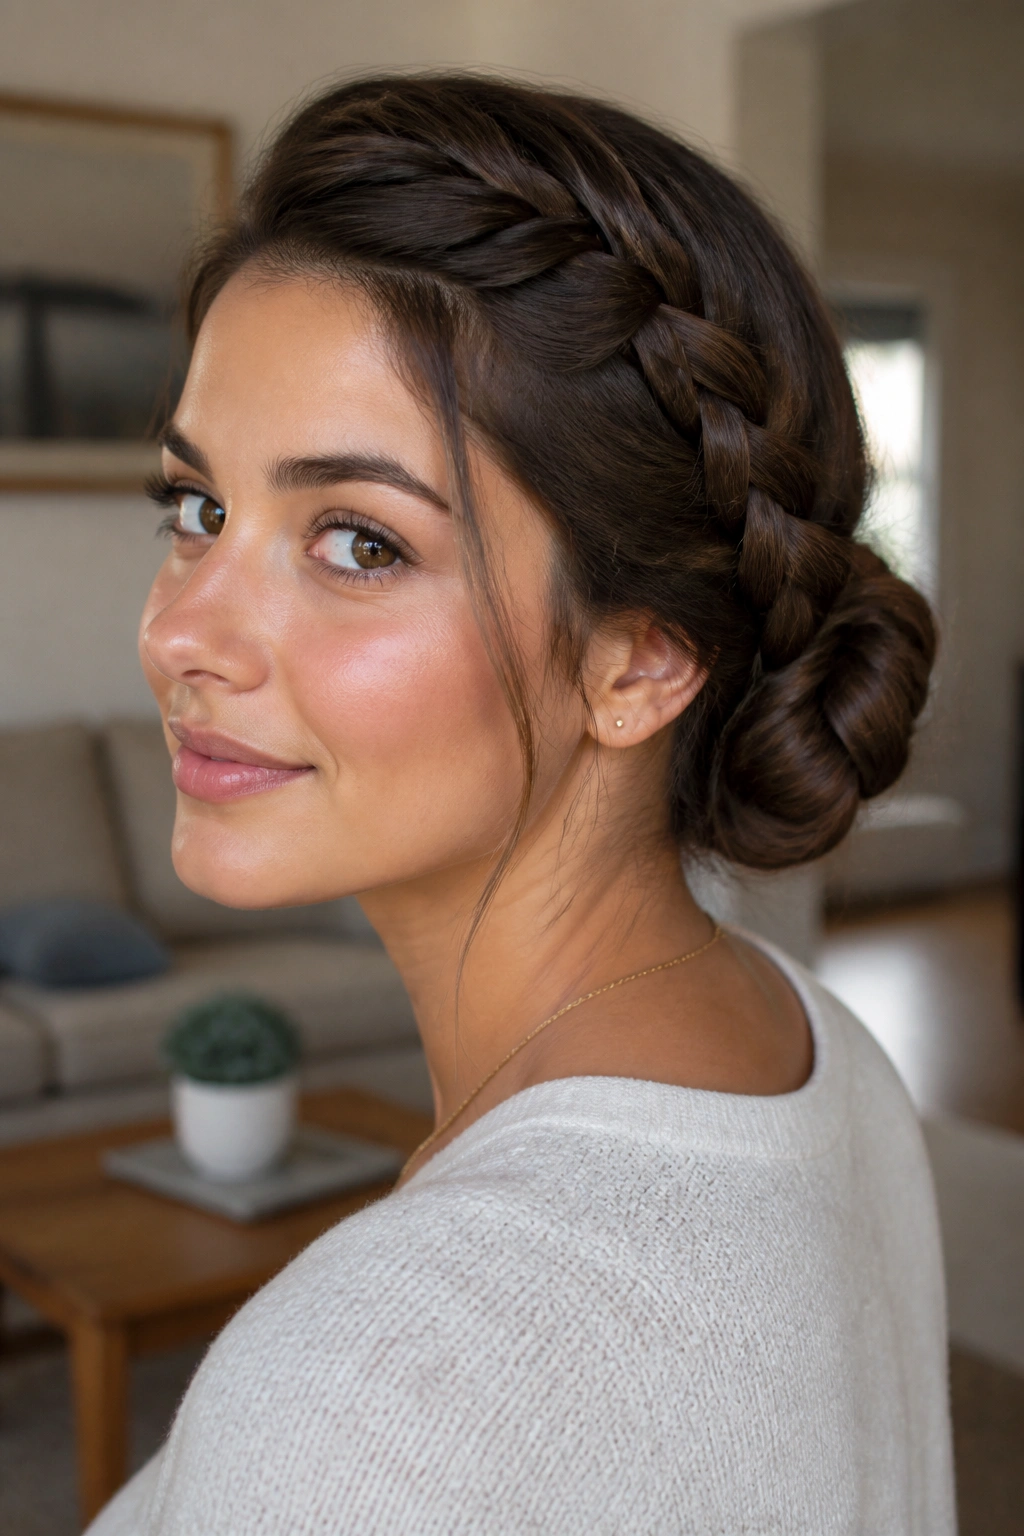
Why does a braid make a bun hold better? Because it gives the hair structure before the bun even starts. A braided low bun is one of the easiest fixes for slippery, layered long hair, and it looks more detailed than a plain twist.
What Makes It Hold
The braid adds ridges, and those ridges give the pins something to grab. That matters if your hair is fine, freshly washed, or so smooth that regular buns slide around. A simple three-strand braid works fine, but a Dutch braid adds even more grip and makes the bun feel fuller at the base.
How to Use It
Braid the ponytail all the way down, then coil the braid into a flat circle at the nape. Pin through the braid at three points: the start, the bend, and the tail. If the braid is long, tuck the tip under the coil before the last pin goes in.
This one is good when you want detail without a lot of softness. It looks tidy from the front and a little more interesting from the back. That’s the whole charm.
4. Messy Low Bun With Loose Tendrils
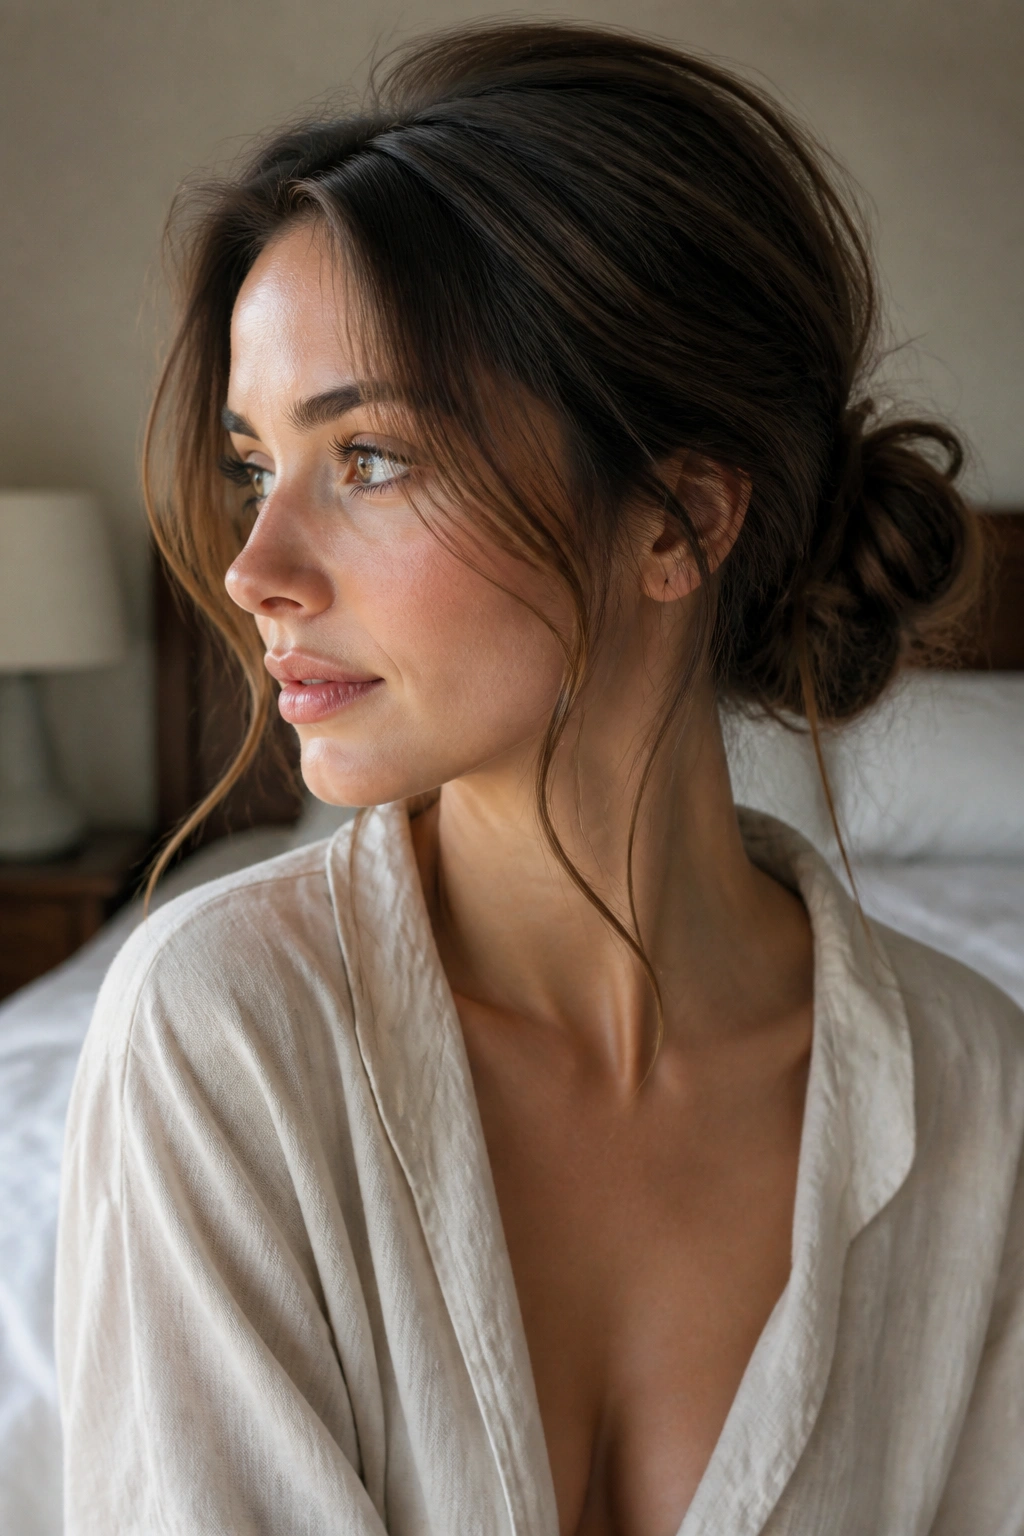
The style I reach for when I have ten minutes and hair that refuses to behave is a messy low bun with a few strands left out around the face. It looks relaxed on purpose, which is useful when the rest of your hair is doing its own thing anyway.
The real trick is leaving the crown a touch loose before you pin the bun. If you pull everything tight, the style can slide straight into severe territory. A little lift at the top and a few undone ends near the ears make the bun feel softer and less stiff.
- Pull the hair into a loose nape ponytail.
- Twist the lengths, then wrap them into a loose knot.
- Pull a few pieces free around the temples and the nape.
- Tug the bun outward gently with your fingers so it looks fuller.
- Finish with a flexible hold spray, not a hard shell of hairspray.
The end result should look like you pinned it up, then changed your mind halfway through. That’s the point. A messy low bun on long hair looks better when it’s allowed to breathe a little.
5. Twisted Low Bun for Thick Hair
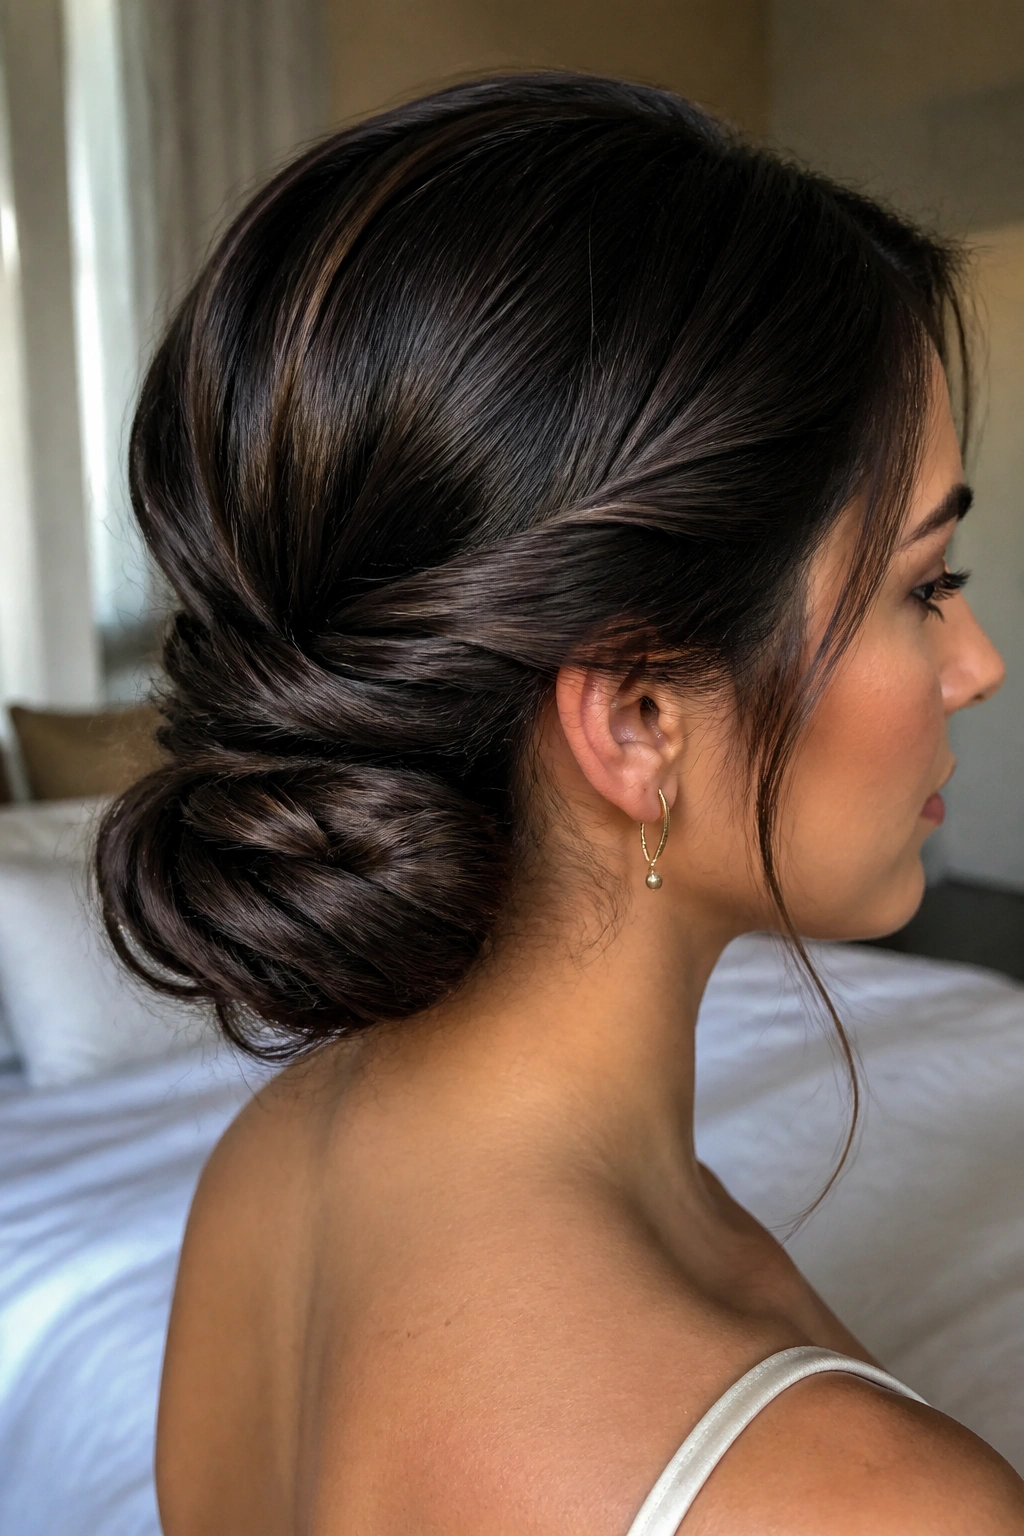
A twisted low bun is one of those styles that looks more complicated than it is. On thick long hair, it’s a favorite because the twist gives the bun shape without demanding a perfect coil.
First divide the hair into two sections at the nape. Twist each section away from the face, then cross them over each other before wrapping the ends into a compact bun. That simple cross-over makes the style feel more secure than a plain wrap, and it also shows off the texture in a way a smooth bun never will.
Why I Reach for It
The twist hides a lot. Layers, blunt ends, dry tips, uneven density — all of that disappears a little once the hair is wound into two sections. It’s useful on long hair that feels heavy or uneven at the bottom, because the style gives the eye a reason to look at the shape instead of the ends.
If your hair is very thick, pin each twisted side before you bring the ends around. That small pause saves you from having to redo the whole thing later. A twisted bun should feel secure at the base and soft at the outer edge, never bulky in one spot.
6. Low Chignon With a Clean Finish
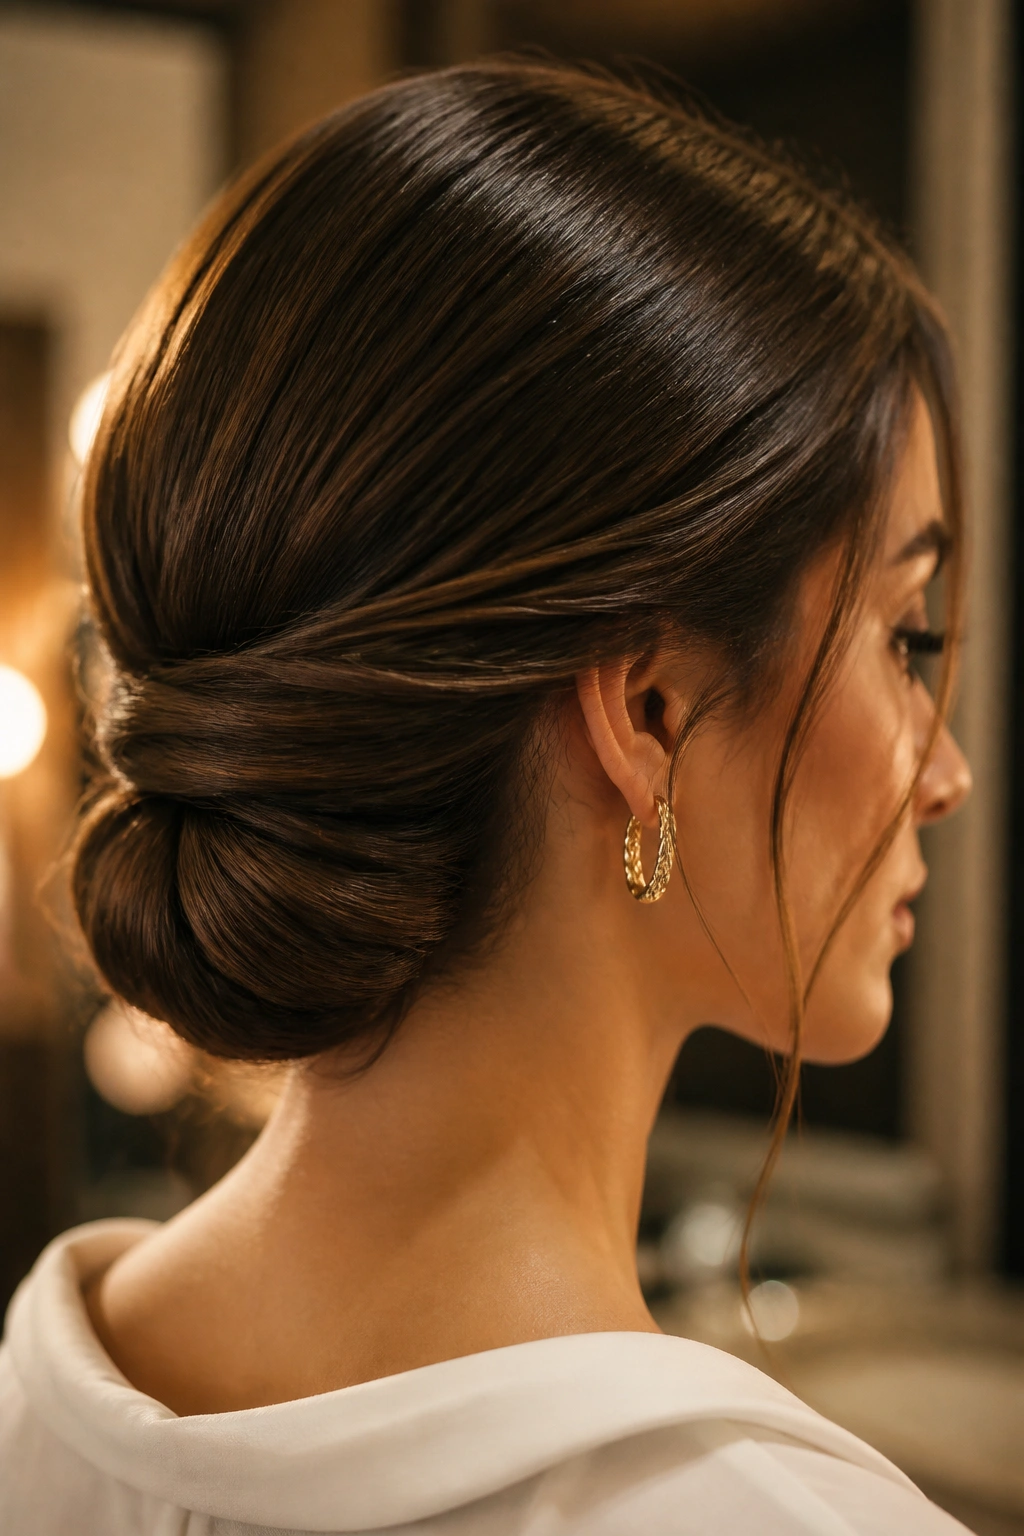
A chignon sits a little differently from a standard bun. It stays lower, flatter, and longer through the back, which is why I like it on long hair that needs refinement more than volume.
Unlike a round bun, a chignon often has an elongated shape. The hair is folded or tucked into itself rather than spun into a tight ball. That gives it a quieter profile, which works well with sharp necklines, satin fabrics, and dresses that already have a lot going on.
This is the low bun I’d pick if I wanted the hair to step back rather than compete. Keep the surface smooth, secure the center first, then work outward so the shape stays even. If the hair is layered, a few hidden pins under the roll can keep the shorter pieces from slipping out.
Best for: thick hair, layered cuts, and formal looks that need a neat finish.
Skip it if: you want big softness around the face. A chignon is more composed than romantic.
7. Knot-Loop Low Bun at the Nape
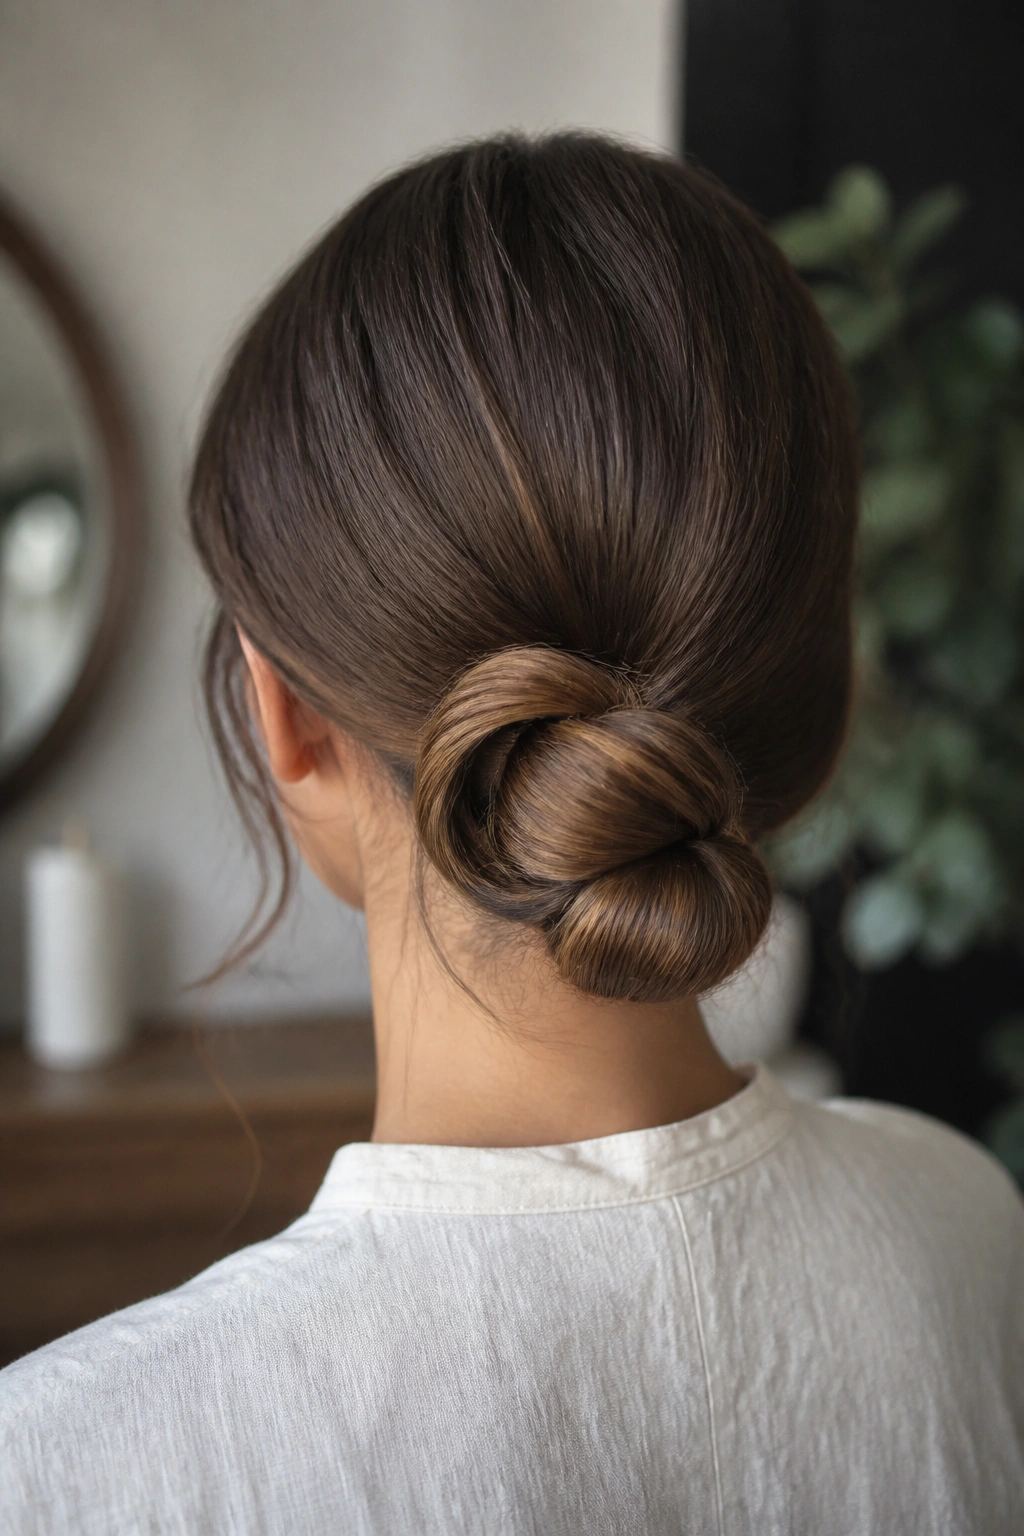
A knot gives the illusion of effort, but the technique is dead simple. This low bun works well on long hair because the knot creates its own anchor, so you do not have to force the ends into a huge wrap.
Where It Sits Best
Keep it low and centered, right at the nape or a finger-width above it. That placement matters. Too high, and the knot starts to pull; too low, and it can slip against the collar. The sweet spot is where your neck begins to curve.
Quick Shape Notes
- Start with a low ponytail.
- Fold the tail in half so it creates a loop.
- Pull the loose ends through once, then stop before the loop becomes too tight.
- Pin the base from both sides.
- Tuck any extra length underneath so the knot looks intentional.
A knot-loop bun works especially well on long hair that has some thickness but not a ton of body at the roots. It gives you shape without needing a wide bun. The style feels modern, but not cold.
8. Donut Low Bun That Builds Volume
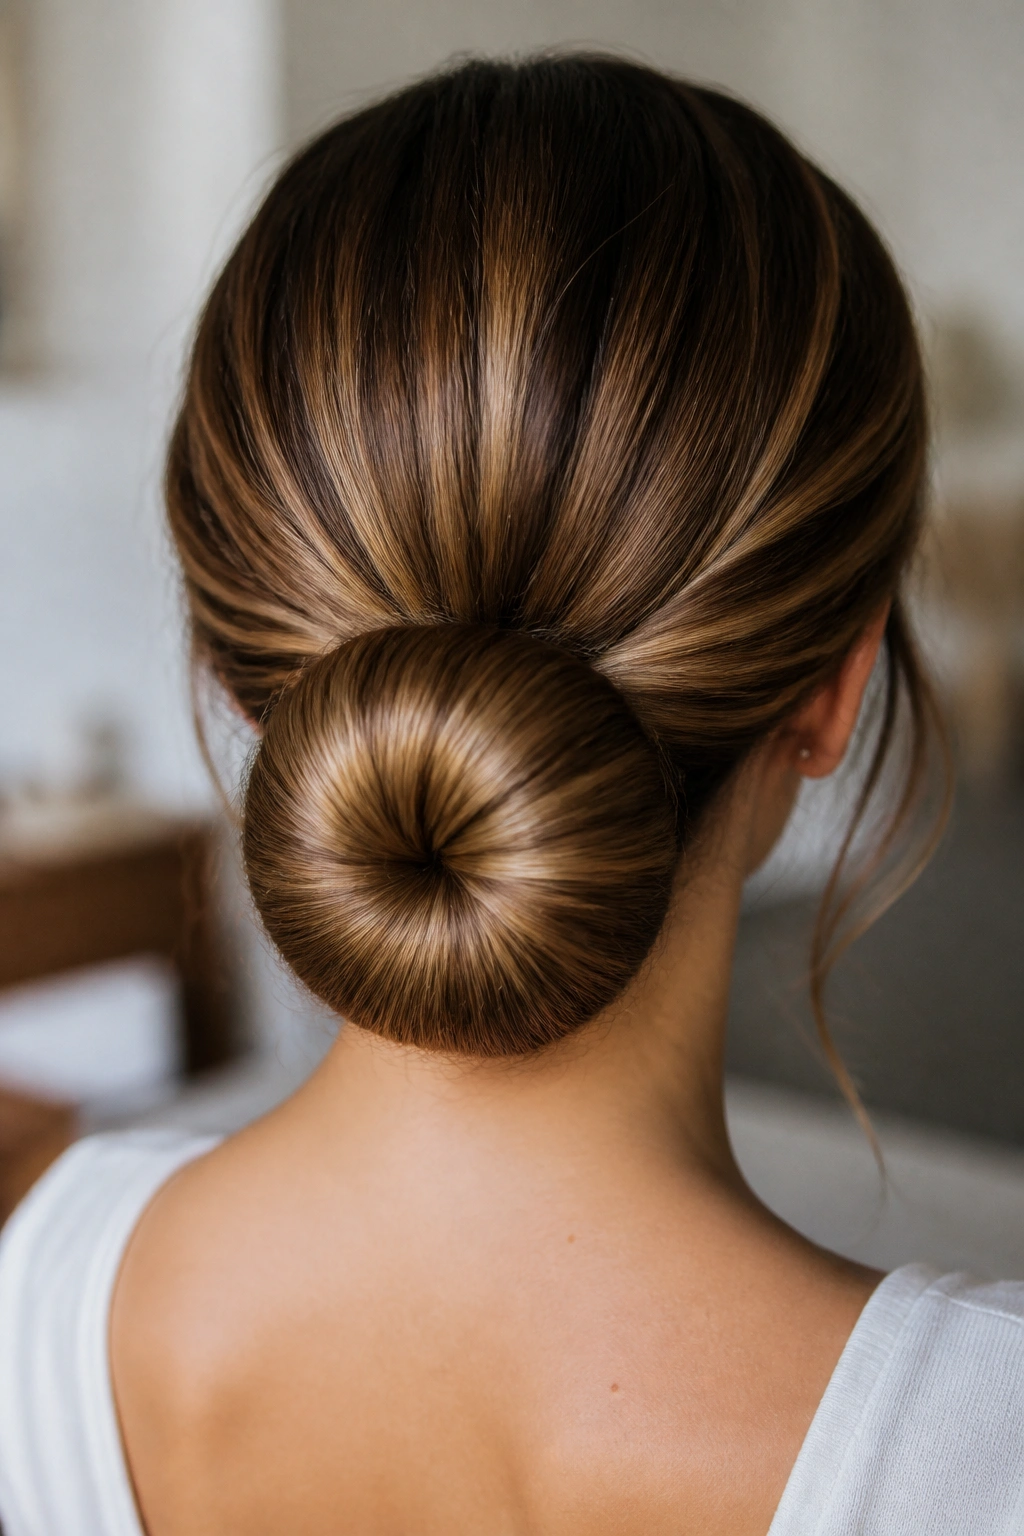
If your hair is extra long, a donut can save your wrists. It creates the bun shape for you, which means the hair wraps evenly instead of bulking up in one lumpy side.
The best version uses a smaller foam donut than people expect. A huge donut can make a long-hair bun look too round and a little stiff. A 3- to 4-inch donut is usually enough if the hair is long and layered. Pull the ponytail through the center, fan the hair around the foam, and tuck the ends underneath as you roll downward.
That rolling motion matters. If you try to cram the ends under all at once, the bun gets fat at the edges and skinny in the middle. Slow, even wrapping gives you a smoother ring.
This style is good when you want the bun to look full from the back but stay close to the head. It also works nicely under veils, clips, and combs because the base is stable. If you need a low bun that feels neat without spending fifteen minutes on pins, this is the one I’d pick.
9. Low Bun With Face-Framing Pieces
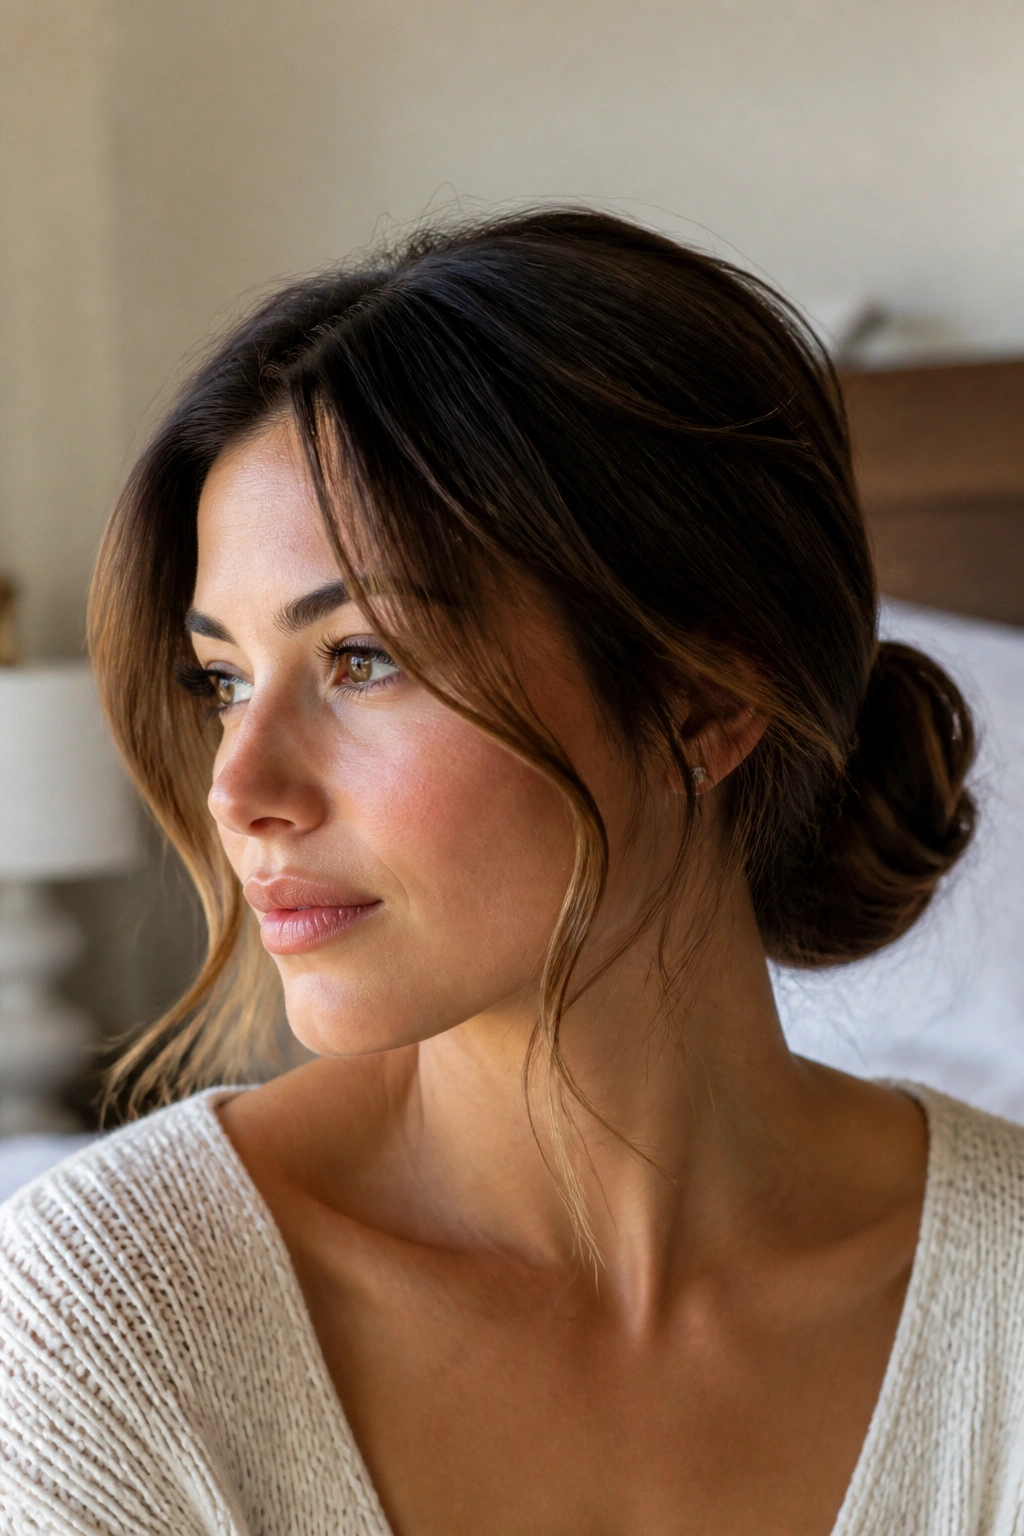
Can a bun look soft without falling apart? Absolutely. Face-framing pieces change the whole reading of the style, especially on long hair, because they add movement right where people look first.
The bun itself can be simple: low ponytail, twist, pin. The front pieces do the rest. I like to leave out two sections near the temples, then bend them lightly with a 1-inch curling iron so they curve rather than hang straight. If your hair is very straight, that small bend keeps the pieces from looking accidental.
How to Place the Pieces
Keep the shortest sections near the cheekbone, not the jaw. That gives the face some lift. If you want a softer effect, let one side fall a little lower than the other. If you want the style to feel cleaner, make the front pieces match in thickness.
A low bun with face-framing pieces is one of the easiest ways to make long hair look styled without making it look stiff. It has a little motion, and that motion is doing a lot of work.
10. Curly Low Bun for Natural Texture
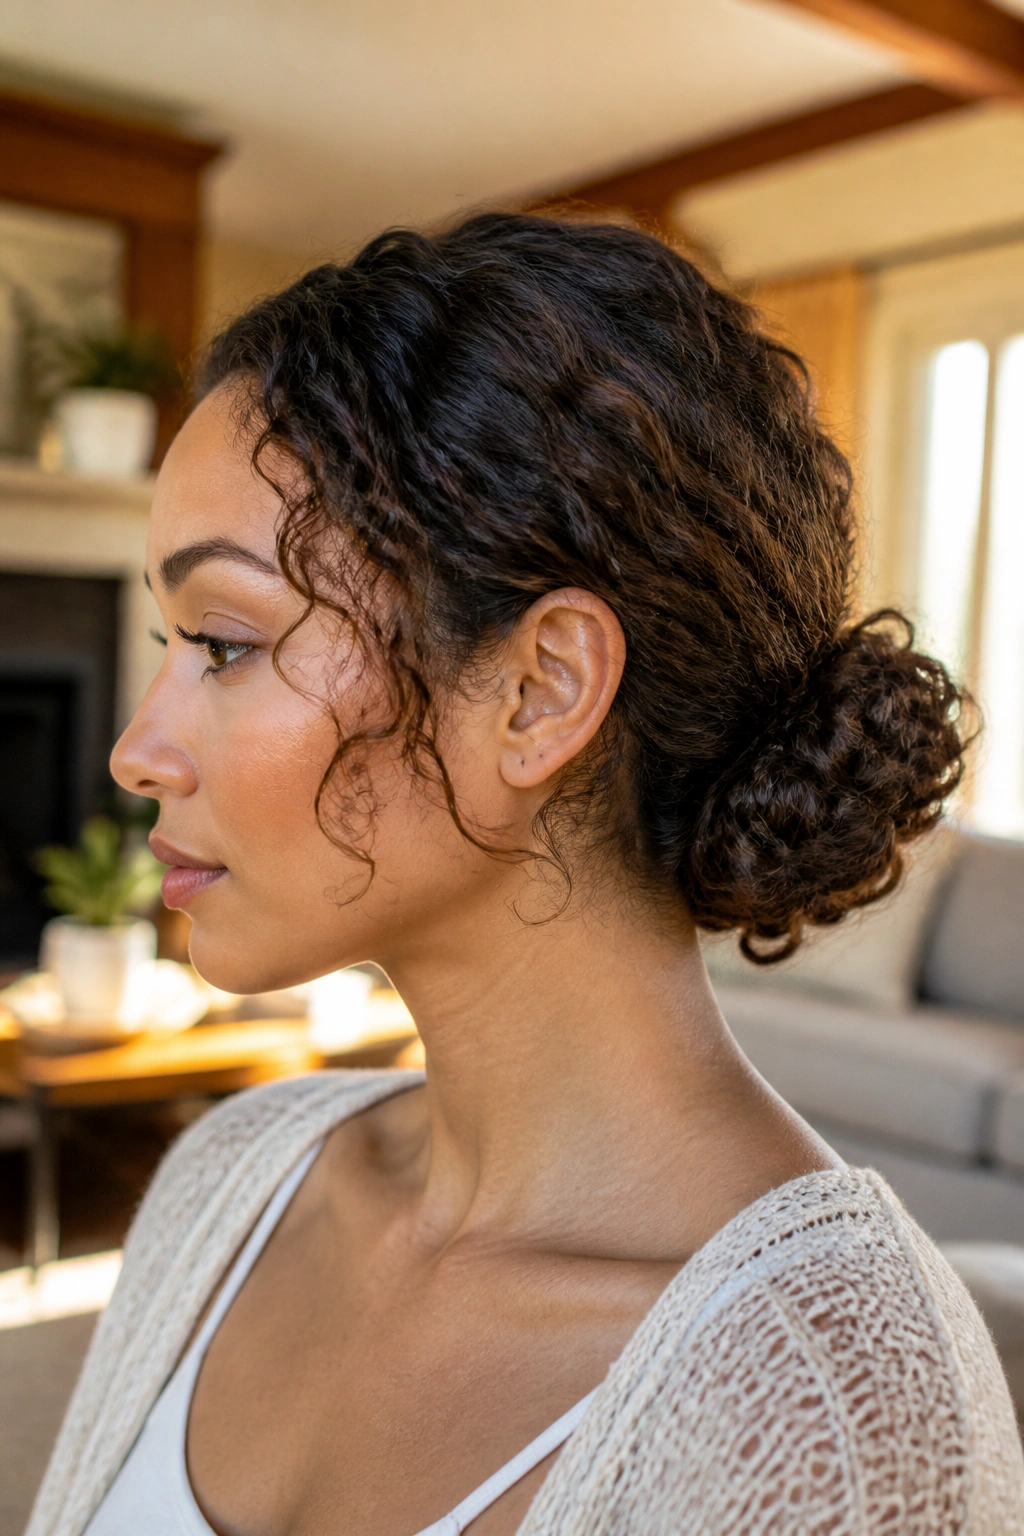
Curly hair does not need to be flattened to make a low bun work. A curly low bun is stronger when the curl pattern stays intact, even if the shape gets a little loose around the edges.
The mistake I see most often is brushing curls straight before pinning them up. That usually makes the bun puff in the wrong places and lose the shape that made the hair interesting in the first place. Instead, gather the curls gently with your hands, let them stack naturally, and pin section by section at the nape.
A little curl cream or leave-in conditioner on the outer layer helps the hair stay soft. Not drenched. Soft. If the curls are tight, leave a few ringlets out around the ears or at the back of the neck so the bun does not look too compressed.
- Work with dry or fully set curls.
- Use pins, not a single tight elastic.
- Let the bun stay a little irregular.
- Keep the crown rounded instead of pressed flat.
Curly low buns have personality built in. That’s the part I like most.
11. Fishtail Low Bun With Fine Texture
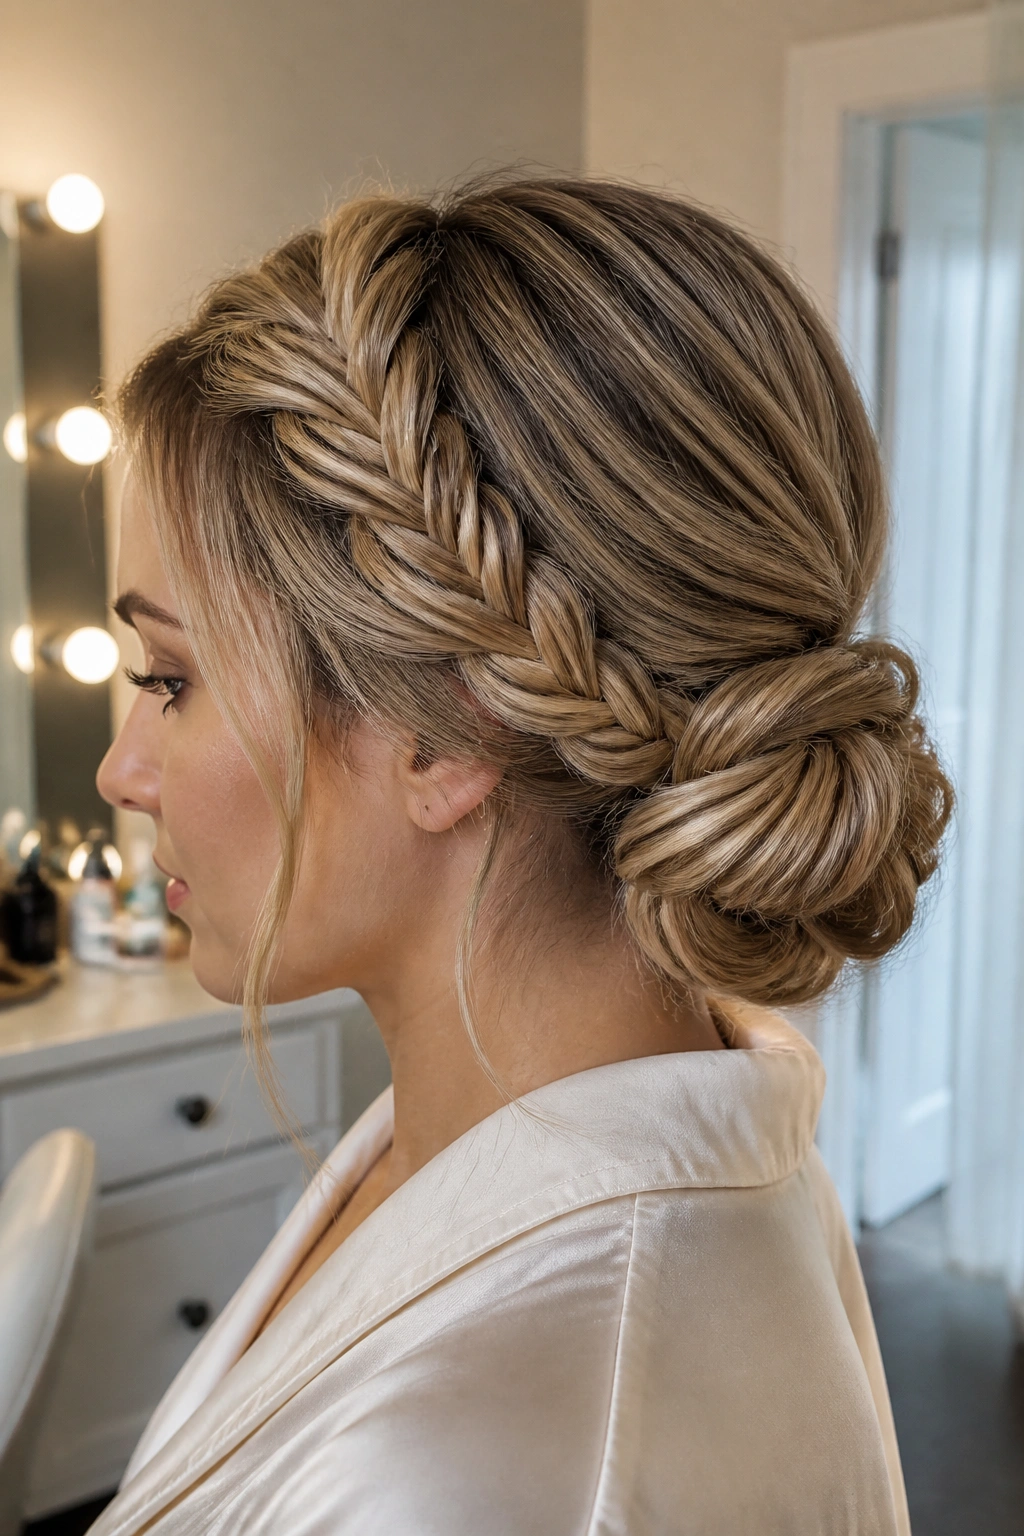
A fishtail braid gives a low bun a sharper surface than a regular braid does. The pattern is smaller, tighter, and more detailed, so the finished bun looks textured from across the room.
The style works well on long hair because fishtails need length to show off. Shorter hair can still be braided this way, but long hair gives the weave time to breathe before it gets pinned up. That extra detail makes the bun look richer, especially if the hair is a single tone or only lightly highlighted.
I’d braid the ponytail into a fishtail first, secure the end with a tiny elastic, then wrap the braid into a low coil. Pin through the thicker ridges where the braid overlaps itself. The points along the braid catch the pins better than a smooth twist would.
This bun is a good match for dresses with plain fabric or open backs, because it adds visual texture without needing accessories. It’s a little fussy to braid at first, yes, but once you’ve done it a few times, it becomes one of the best low bun hairstyles for long hair that needs a bit of detail.
12. Gibson Tuck Low Bun
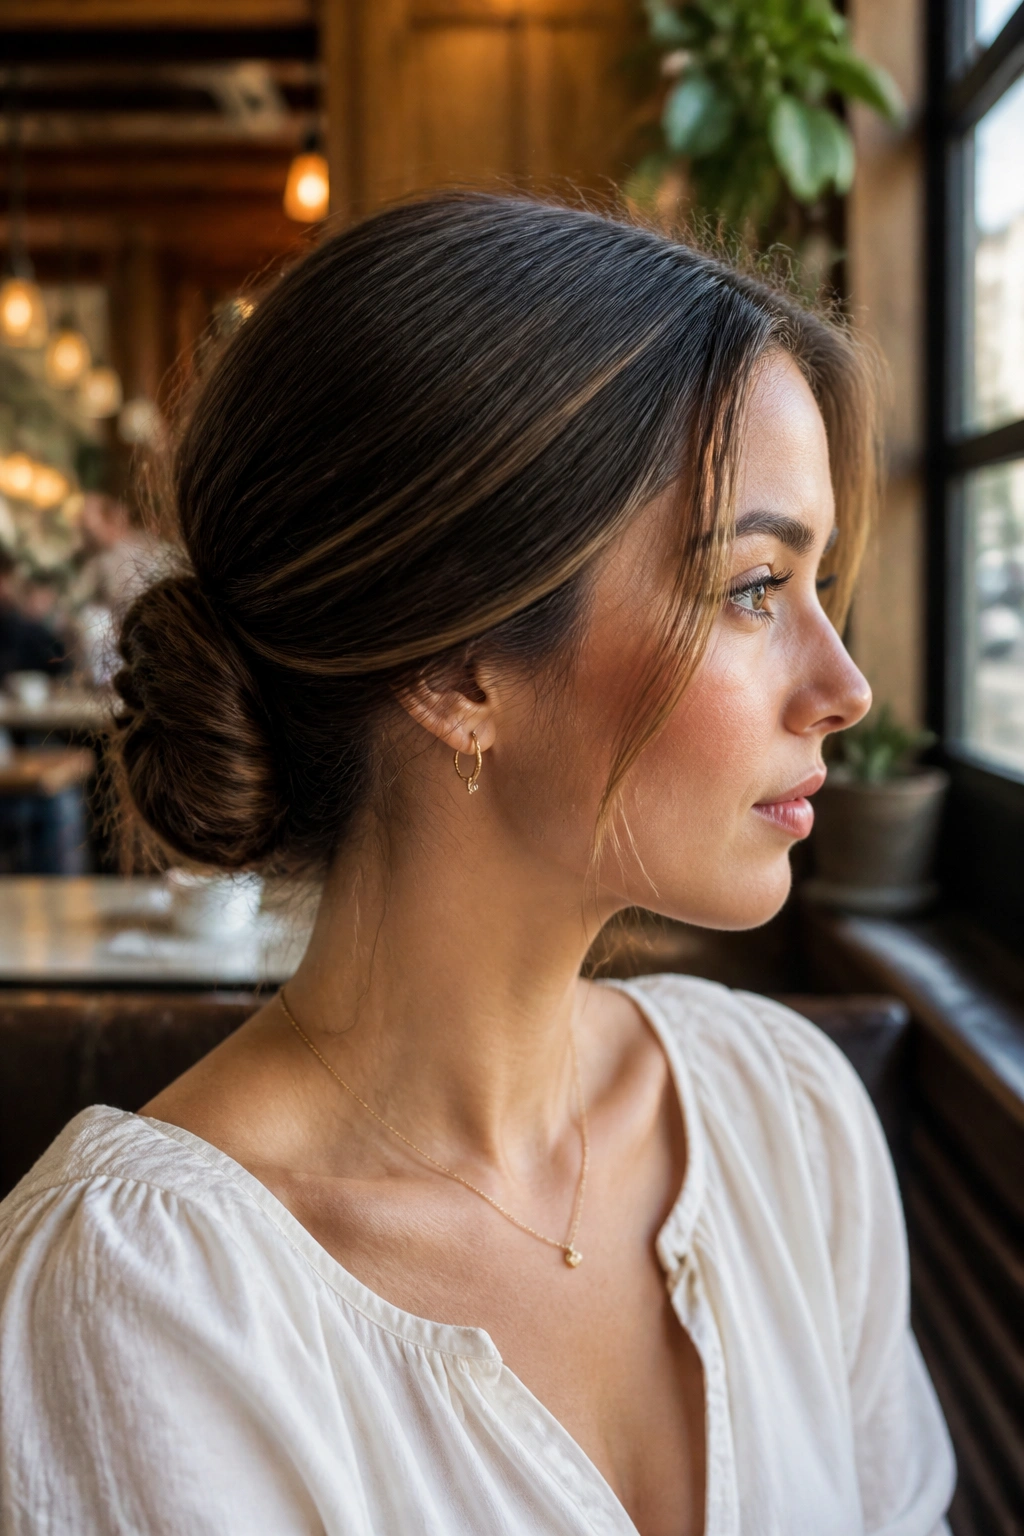
A Gibson tuck sits between a bun and a roll. It’s softer than a chignon and less rigid than a sleek bun, which makes it a smart choice when you want the nape area to stay tidy without looking overly formal.
What makes it different is the fold. Instead of winding the hair around a center point, you tuck the lengths upward and inward, creating a rolled shape that sits low against the head. That works especially well on long hair with layers because the tuck hides the ends instead of asking them to behave like a perfect coil.
Who It Suits Best
- Hair with medium to long layers
- Hair that needs a secure shape for several hours
- Styles that need to sit flat under collars or jackets
- Anyone who wants a vintage feel without a stiff finish
Use a small elastic to create a loose ponytail, split a space above the elastic, and flip the lengths upward through it. Then tuck the ends into the fold and pin them closed. The result is neat, but not severe. I reach for this one when I want the hair to look finished from the back and quiet from the front.
13. Scarf-Wrapped Low Bun
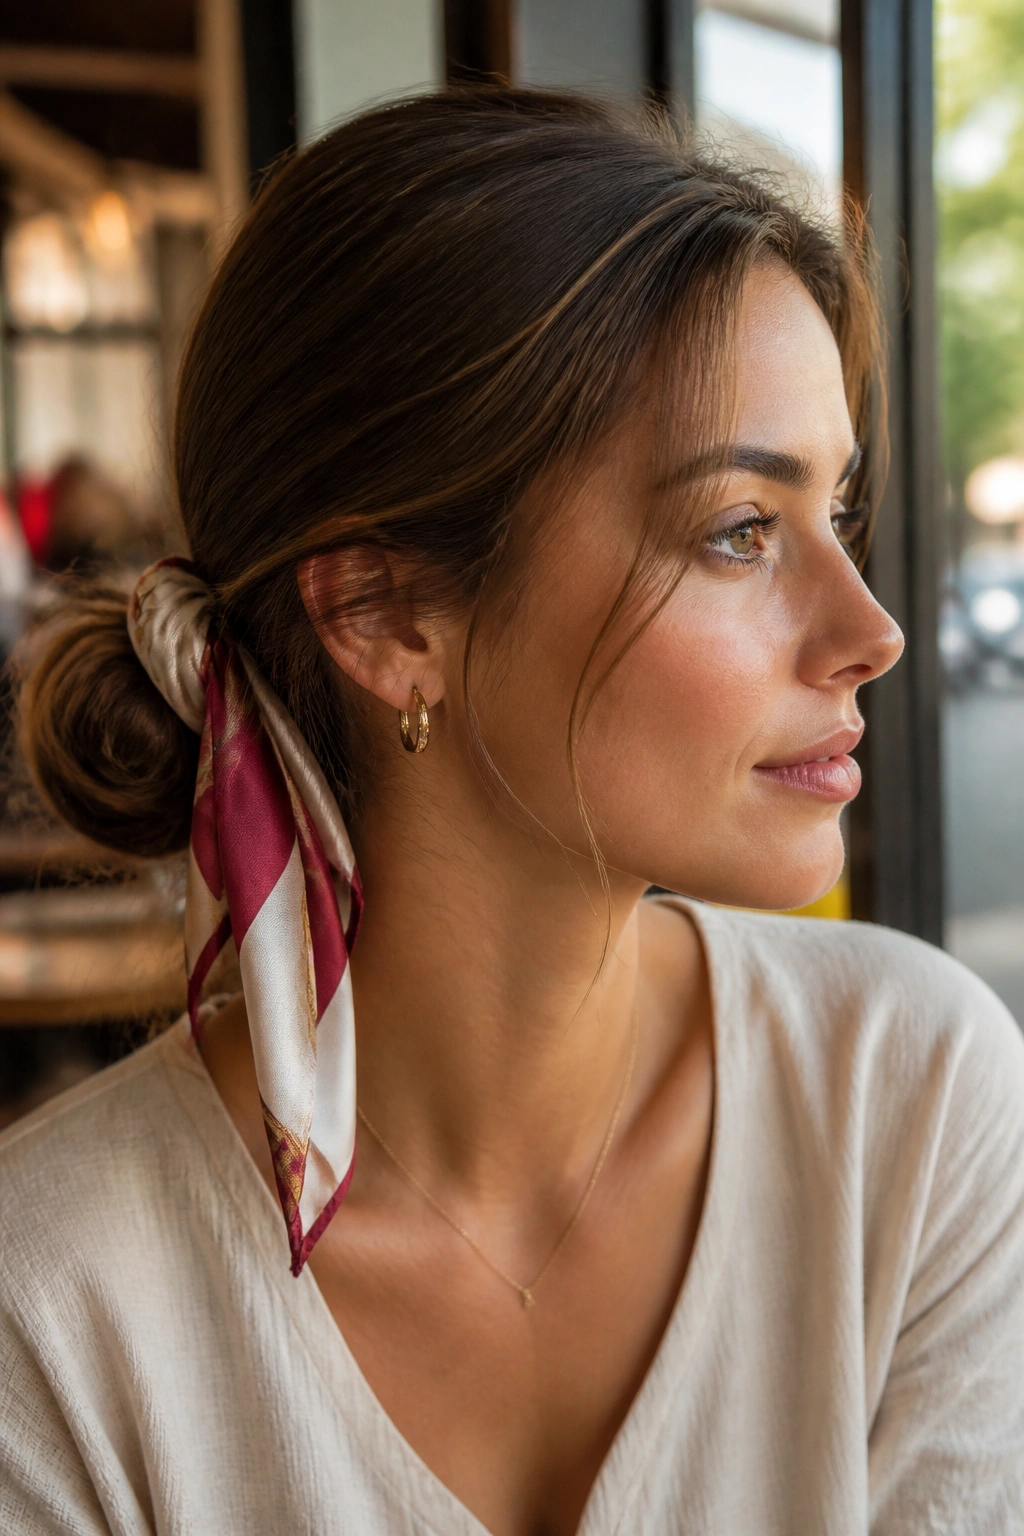
A scarf changes the whole feel of a low bun in one move. It gives long hair color, shape, and a little movement without asking you to build a complicated style underneath.
Best Scarf Size
A square silk scarf around 20 to 27 inches works well for most long hair. Smaller scarves can disappear into thick buns, while oversized ones tend to balloon out and lose the line of the bun. Fold the scarf into a long band, tie it over the base of the bun, or weave it through the ponytail before you wrap the hair.
The bun itself can stay plain. That’s the point. If the accessory is doing the talking, the structure underneath should be clean and simple. A low bun wrapped with a scarf looks especially good with casual dresses, linen shirts, or anything that needs a little color near the neck.
I like this style because it is forgiving. If the bun is a touch imperfect, the scarf covers the seam. If the hair is very long, the scarf helps manage the tail ends before they become a bulky knot. It’s practical and decorative at the same time, which is rare enough to be useful.
14. Double Braid Low Bun
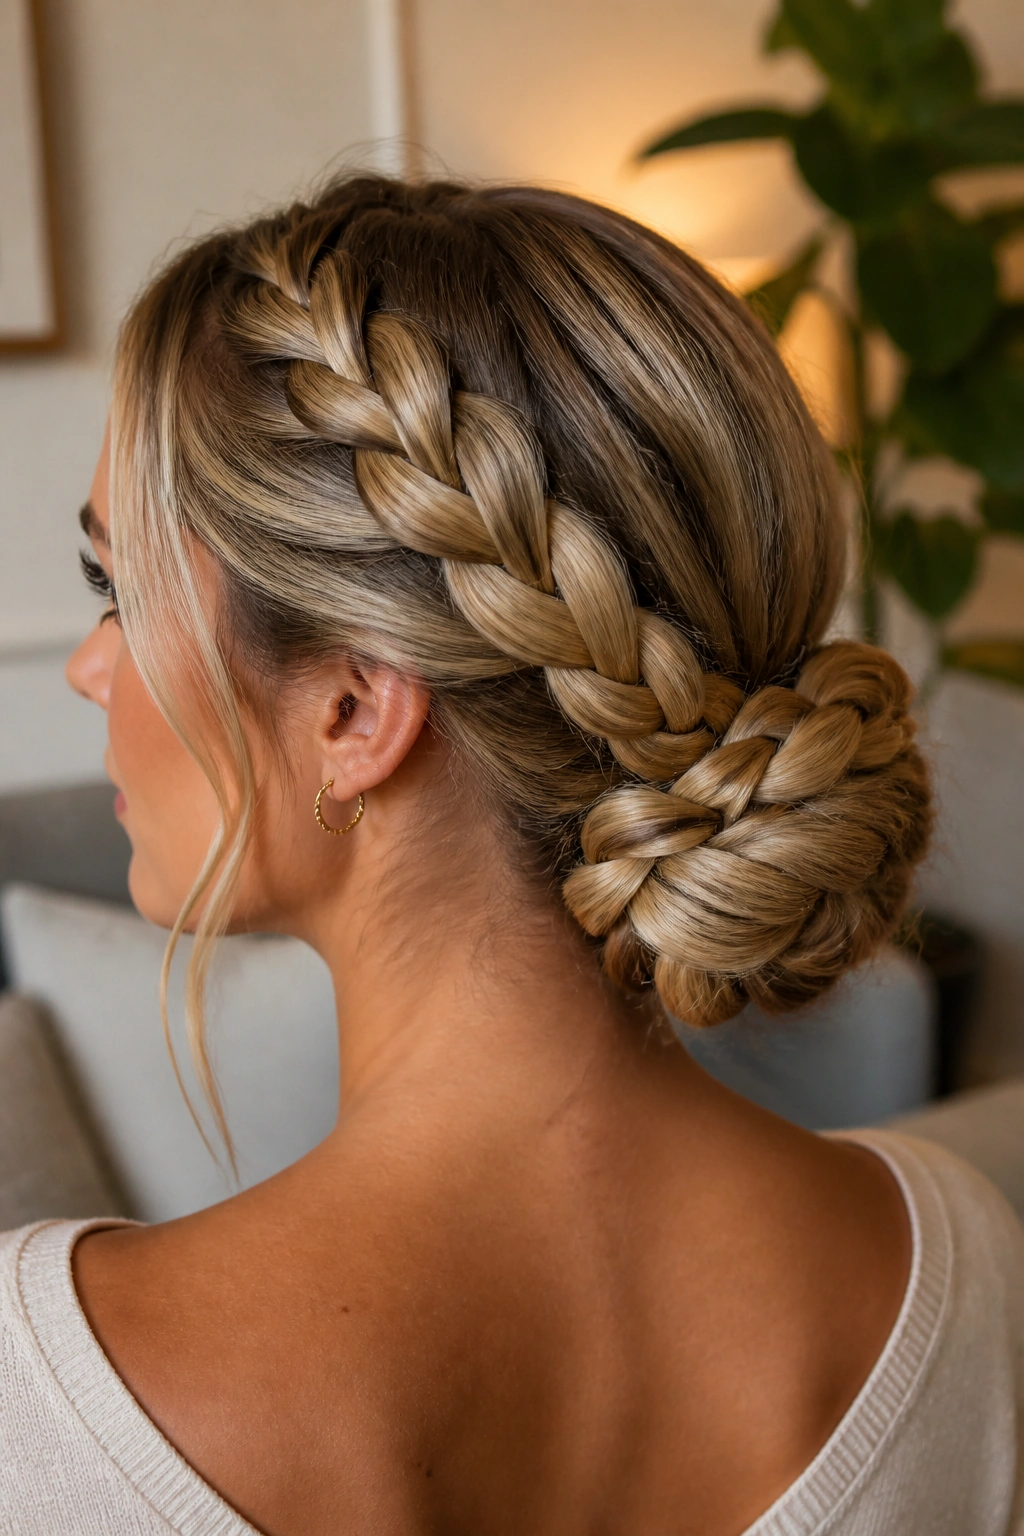
Two braids feed a bun better than one. They create a thicker base, a more balanced shape, and a finished look that feels deliberate without being fussy.
The easiest version starts with a low ponytail split into two sections. Braid each section, then wrap both braids around each other at the nape. That creates a bun with a woven look, and it also helps if your hair tends to separate into layers. Instead of fighting the layers, you fold them into the style.
This one has a little more visual weight than a single braid bun. That makes it a good option for long hair with lots of density, because the style can carry the bulk. If your hair is fine, backcomb the ponytail lightly before braiding so the braids have more grip and the bun does not look flat.
A double braid low bun is the sort of style I’d wear when I want the back of the hair to matter as much as the front. It looks finished from every angle, which is not something every bun can say.
15. Rope-Twist Low Bun
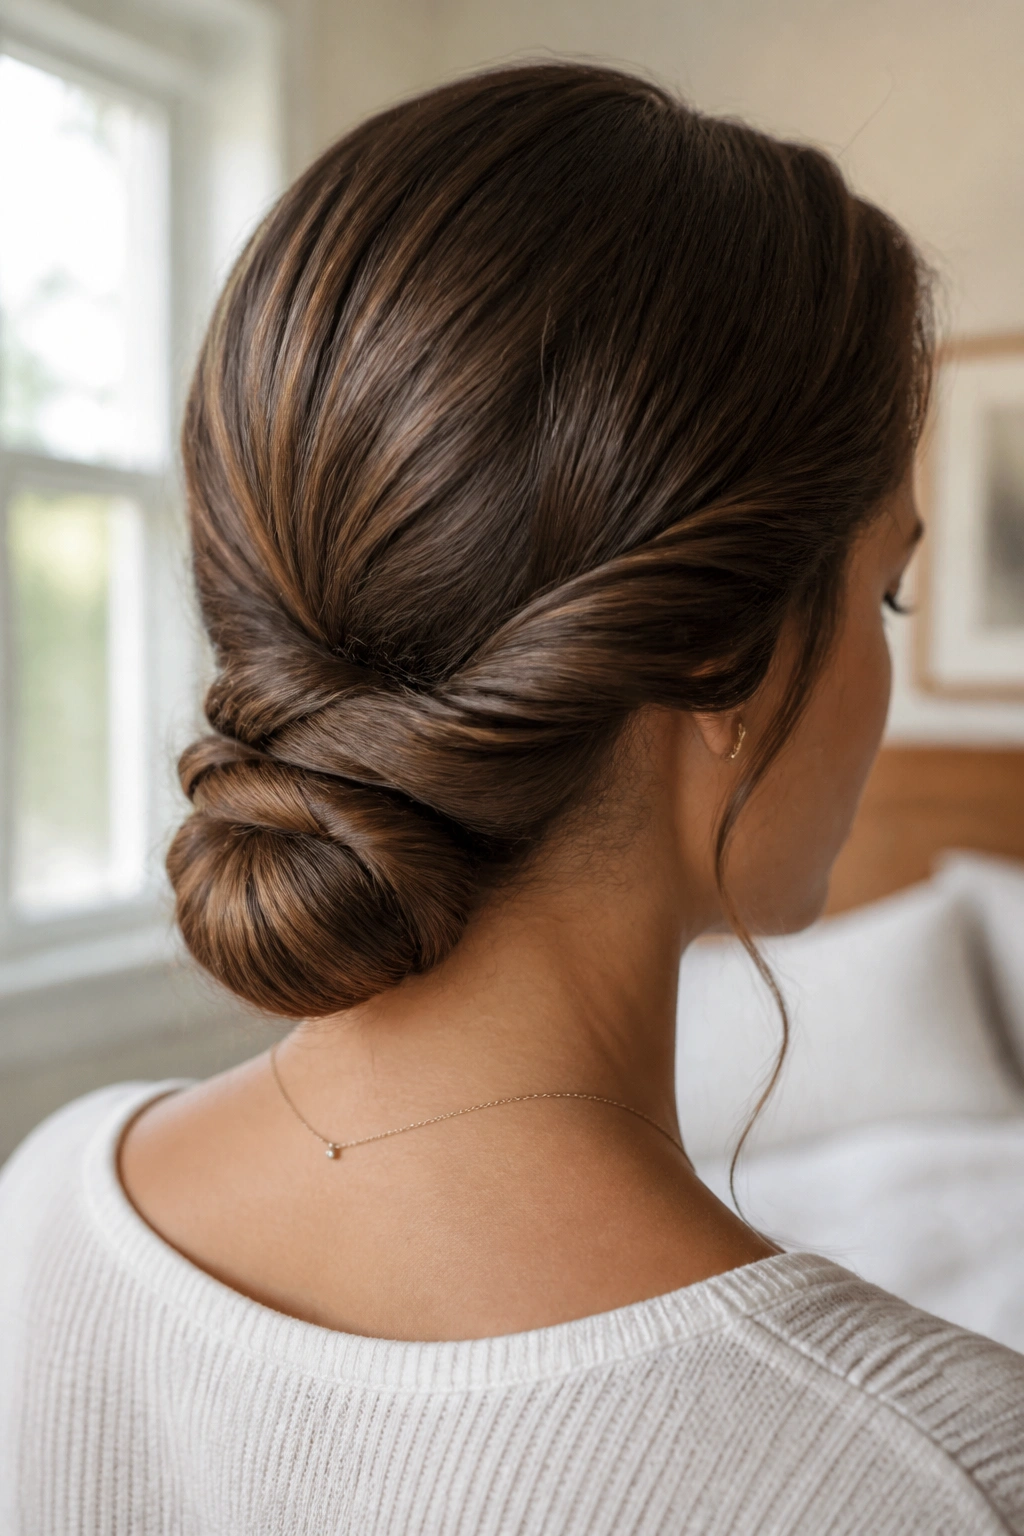
Why does a rope twist look so neat? Because it creates clean lines without a lot of fuss. On long hair, that matters, since a twist can hold the length in place while still showing a bit of texture.
How to Get the Shape Right
Divide the ponytail into two sections. Twist each section in the same direction, then wrap them around each other in the opposite direction. That opposing motion is what makes the rope pattern hold. If you twist both pieces too loosely, the bun loosens fast. If you pull them tight before pinning, the shape stays compact and smooth.
This is one of my favorite low buns for long hair that is a little slippery. The rope texture gives the pins something to grab, and it keeps the bun from looking flat. You can leave the twist visible for a polished finish, or you can loosen the outer edge a bit for softness.
A rope-twist bun sits nicely under hats, collars, and coats because it stays close to the head. That makes it more useful than people sometimes expect.
16. Side-Braid Into Low Bun
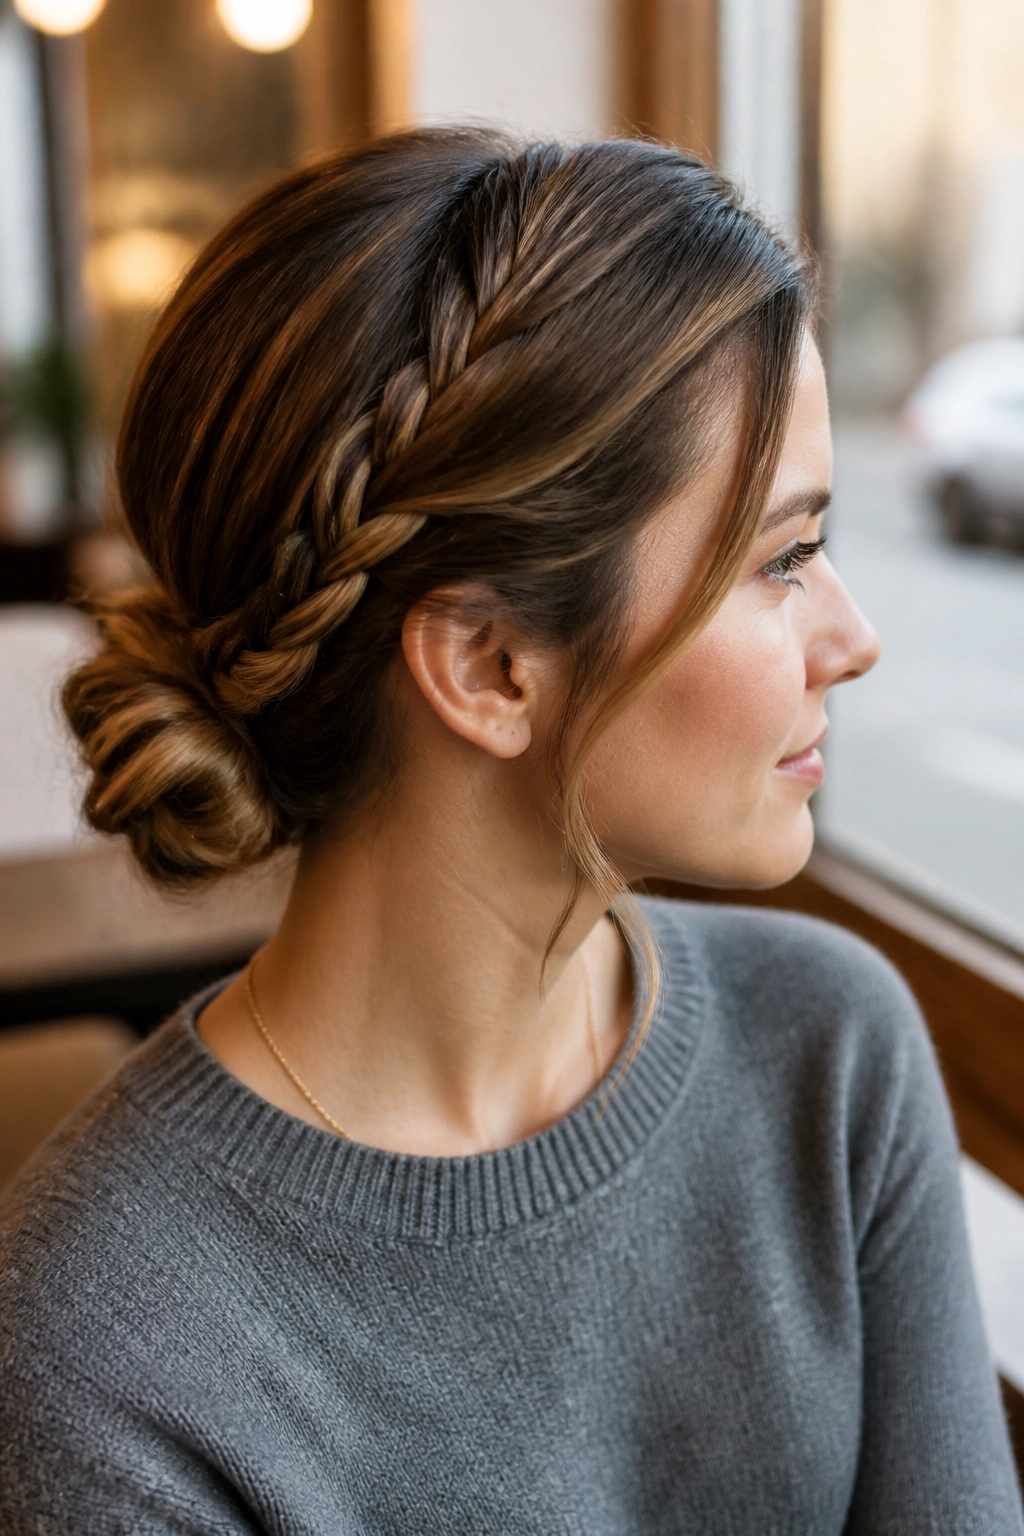
If your hair falls flat at the crown, a side braid can fix that fast. It shifts the focus upward and toward one side before the bun even starts, which gives the whole style more shape.
The braid does two jobs here. It builds texture near the front and then feeds that texture into the bun at the nape. That creates a nice line from the temple down to the base of the neck, which is flattering on long hair because it keeps the style from feeling like one big lump at the back.
- Start the braid near the hairline or above one ear.
- Braid diagonally back toward the nape.
- Gather the rest of the hair low and wrap everything into a bun.
- Pin the braid across the bun instead of hiding it completely.
- Let the braid’s edge stay visible so the style reads from the side.
The best part is that it handles asymmetry well. If one side of your hair behaves better than the other, use that. The braid turns the mismatch into part of the design.
17. Sculpted Low Bun With Hidden Pins
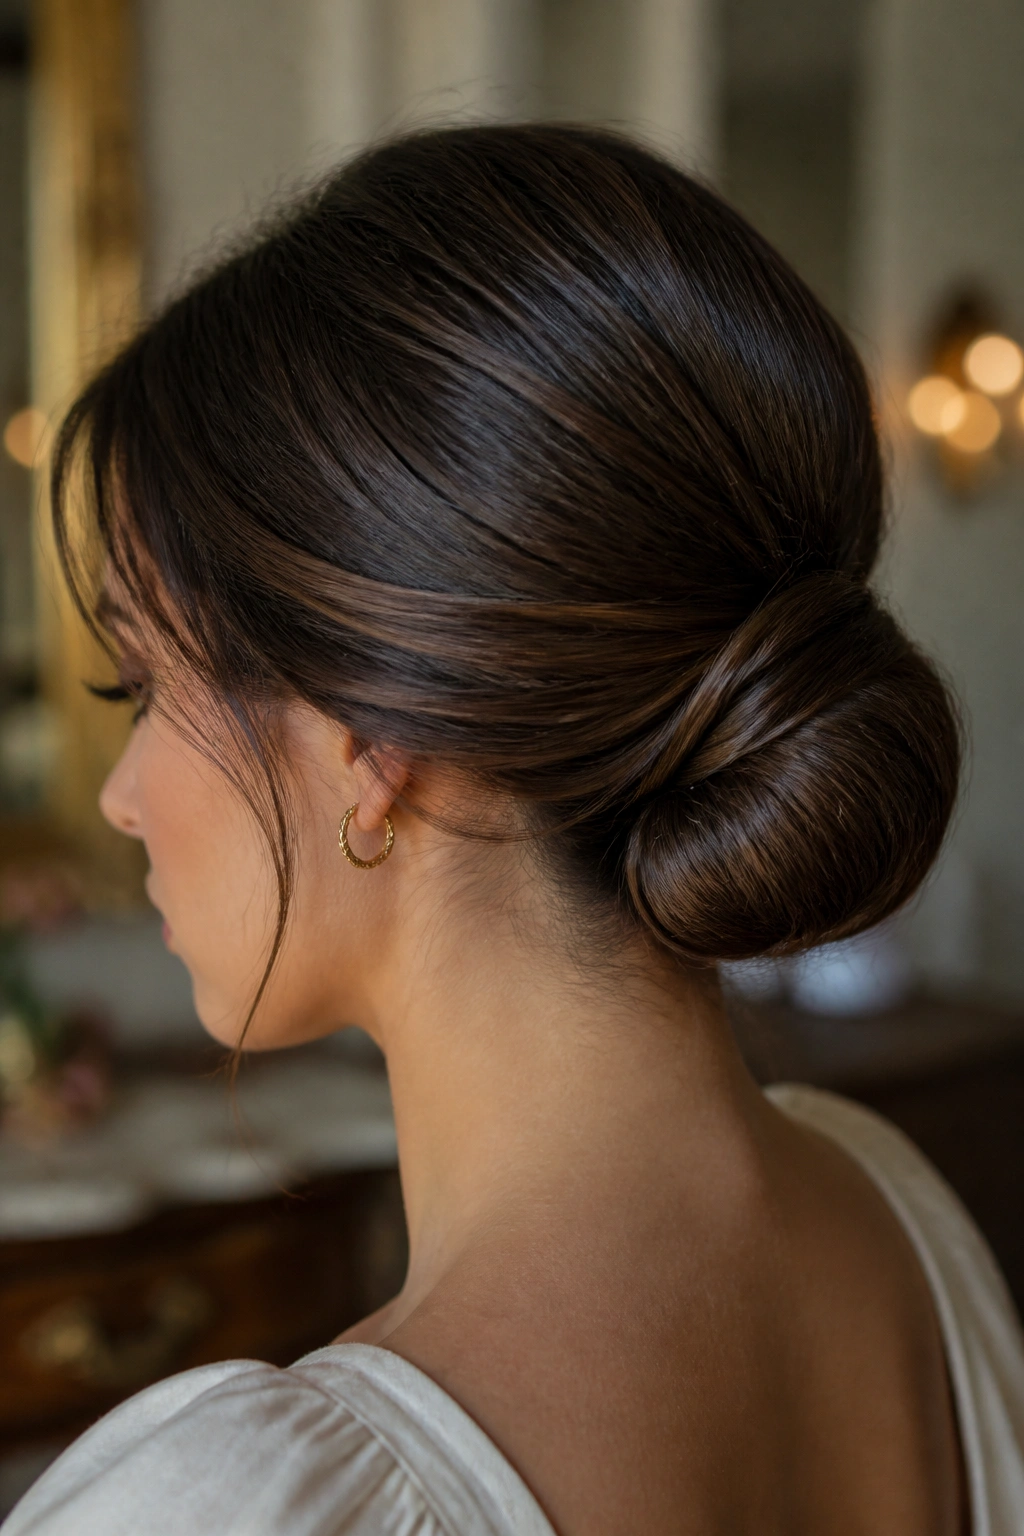
A sculpted low bun is the style that makes people think you spent much longer on your hair than you did. The shape is controlled, but not stiff, and the base sits low enough to feel elegant rather than severe.
What gives it that polished look is pin placement. Instead of winding the hair into one tight circle, you shape it in sections and secure each section before moving on. That lets the bun keep a rounded back, a smooth side, and a clear center line if you want one. Long hair works well here because there is enough length to shape and reshape before the pins go in.
I like this version for dresses with open backs or busy necklines. It keeps the hair tidy while still looking intentional from behind. If you use large pins, hide them under the outer layer of hair so only the shape shows. A sculpted bun should read as controlled, not overworked.
The trick is to stop adjusting once the form is right. Too much touching breaks the surface, and then the style starts to lose the clean lines that made it good in the first place.
18. Pearl-Pinned Low Bun for Long Hair
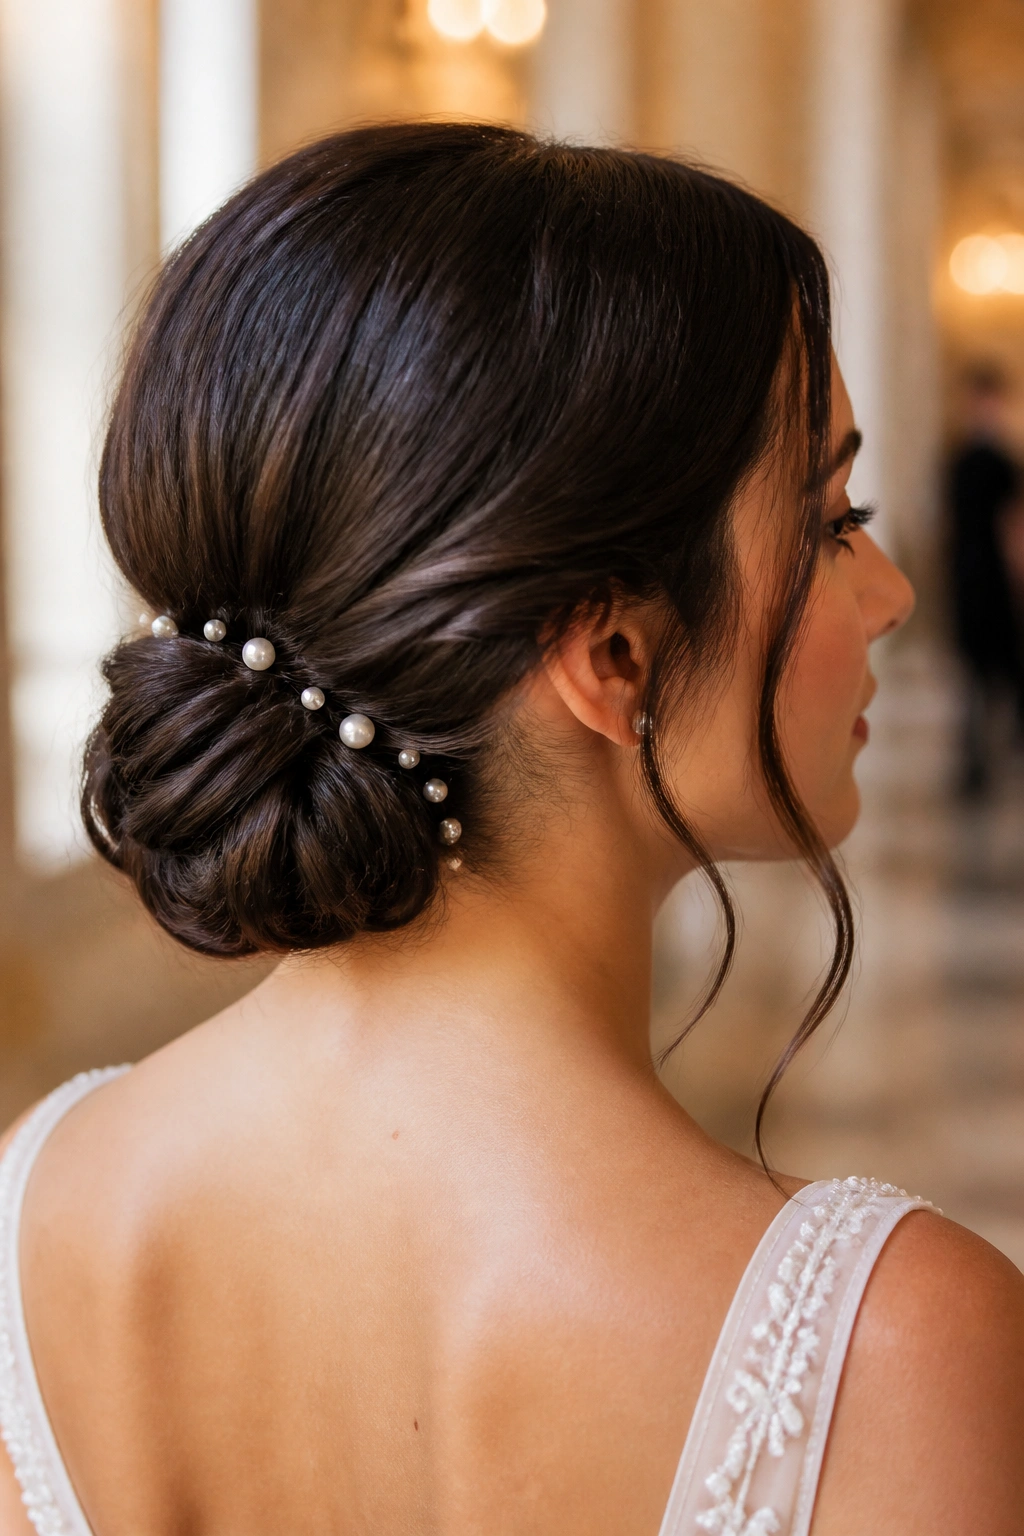
Pearl pins change a low bun from simple to finished in seconds. The bun underneath can be plain, twisted, braided, or softly messy; the pins give it a focal point and make the back of the hair feel deliberate.
Unlike a bare bun, this version uses accessories as part of the shape. That means you can keep the actual styling easier. Build the bun first, then place 3 to 7 pearl pins in a loose curve, cluster, or scattered line near one side. If the bun is very smooth, the pins look sharp and clean. If it has texture, they look softer and more romantic.
This is the low bun I’d pick for weddings, gallery nights, dinner reservations, or any event where the back of your hair will be seen. It also suits long hair that tends to feel heavy in plain updos, because the pins break up the mass and pull the eye to the details instead of the bulk.
If you want the look to last, anchor each decorative pin through a real pin or the base elastic, not only through surface hair. Pretty pins that slip are annoying. Secure ones are worth keeping.
A low bun does not need much to feel dressed up. Sometimes a few small pearls are enough.
