



Short hair can look sharper in an updo than long hair ever does. A bob, lob, or grown-out pixie sits closer to the head, which means the shape can look cleaner and more deliberate with less effort.
The catch is hold. Short pieces slide, slip, and poke out in places you did not ask for, so the style has to work with the haircut instead of against it. A little texture helps. So does pin placement, and yes, the direction of the pins matters more than most people think.
I always trust an updo more when it has one solid anchor at the nape, a second point near the temple, and a few crossed pins holding everything flat. That small, boring detail is what keeps a style looking polished instead of fussy. Tiny hair? Fine. The structure just has to be smarter.
A tail comb, a couple of clear elastics, bobby pins that match your hair color, and a light mist of texture spray will get you surprisingly far. Short hair does not need drama to look done. It needs control, a clean part, and a shape that makes sense from the side as well as the front.
1. Low Twisted Nape Knot
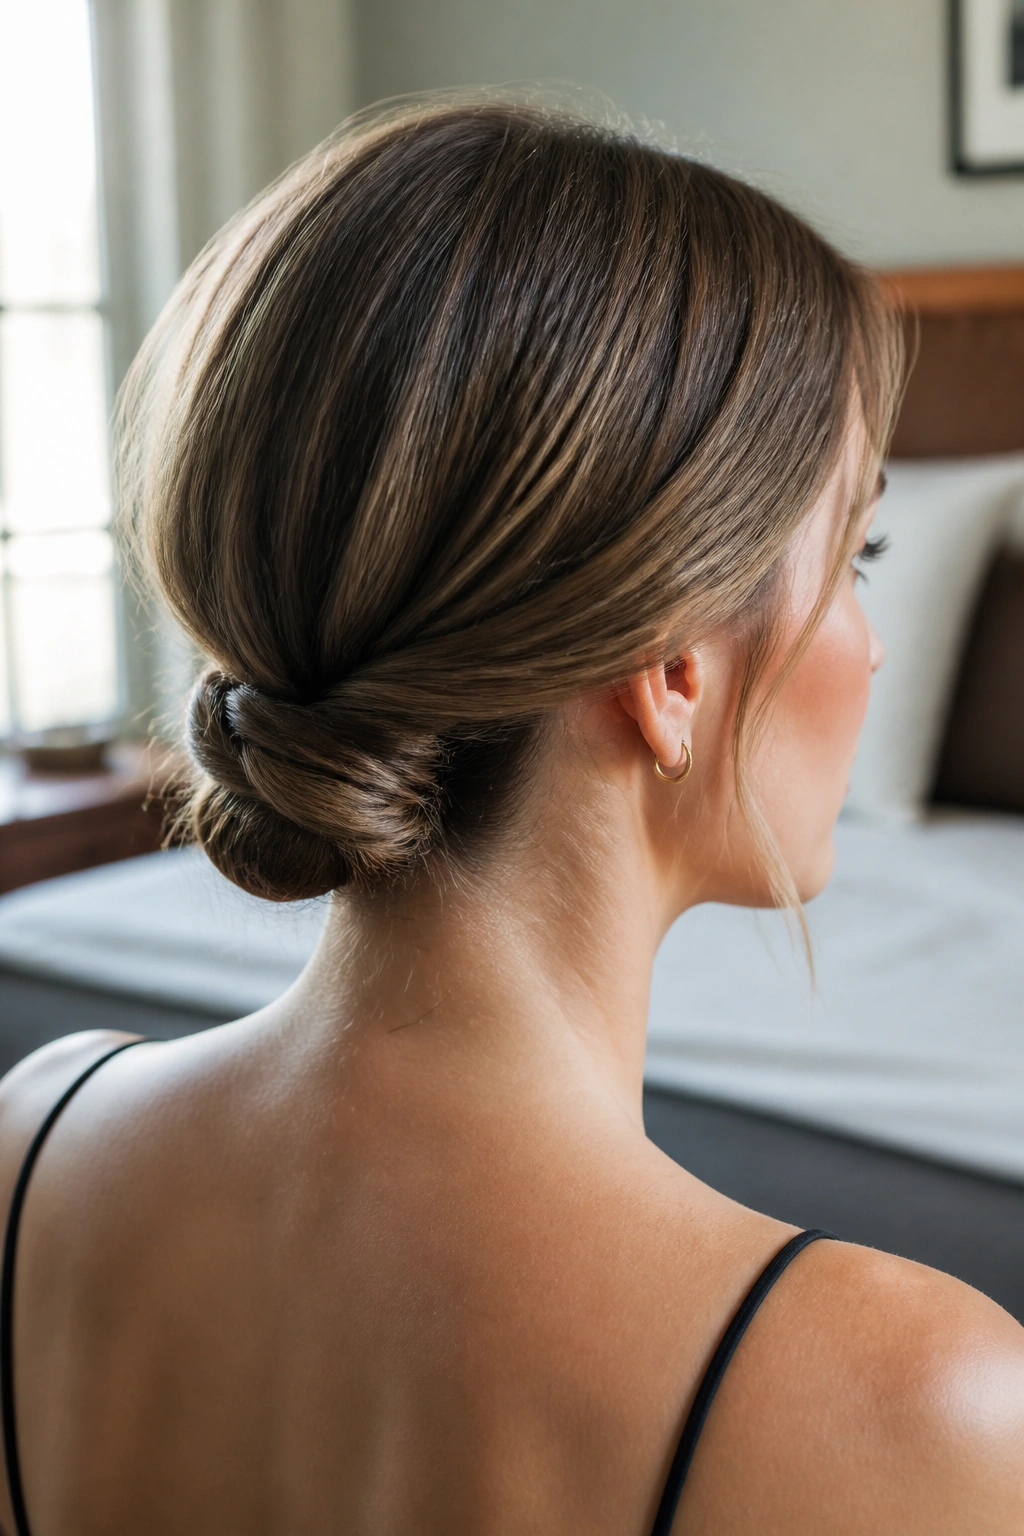
Low and neat wins here.
This is the short updo I reach for when hair brushes the collarbone or stops right at the chin. You split the hair into two sections, twist each one back, and tuck the ends into a small knot at the nape. It looks calm, tidy, and a little more intentional than a basic clip-back style.
Why it works so well
The knot sits low enough that short layers can disappear into it. That matters. If you try to place the bun too high, the shorter pieces around the face start escaping and the whole thing looks thin.
A light mist of texture spray before you twist gives the hair some grip. If your hair is very slippery, rough it up first with dry shampoo at the roots and a touch of styling cream on the ends. That combination sounds simple because it is, and simple is usually what holds.
- Best on hair that reaches the nape or collarbone
- Works with a middle part or a soft side part
- Needs 4 to 6 bobby pins, crossed in an X
- Looks best when the twists sit close to the head
Pro tip: pin the first twist before you build the second one. It keeps the knot from getting lopsided halfway through.
2. Mini French Twist with Pins
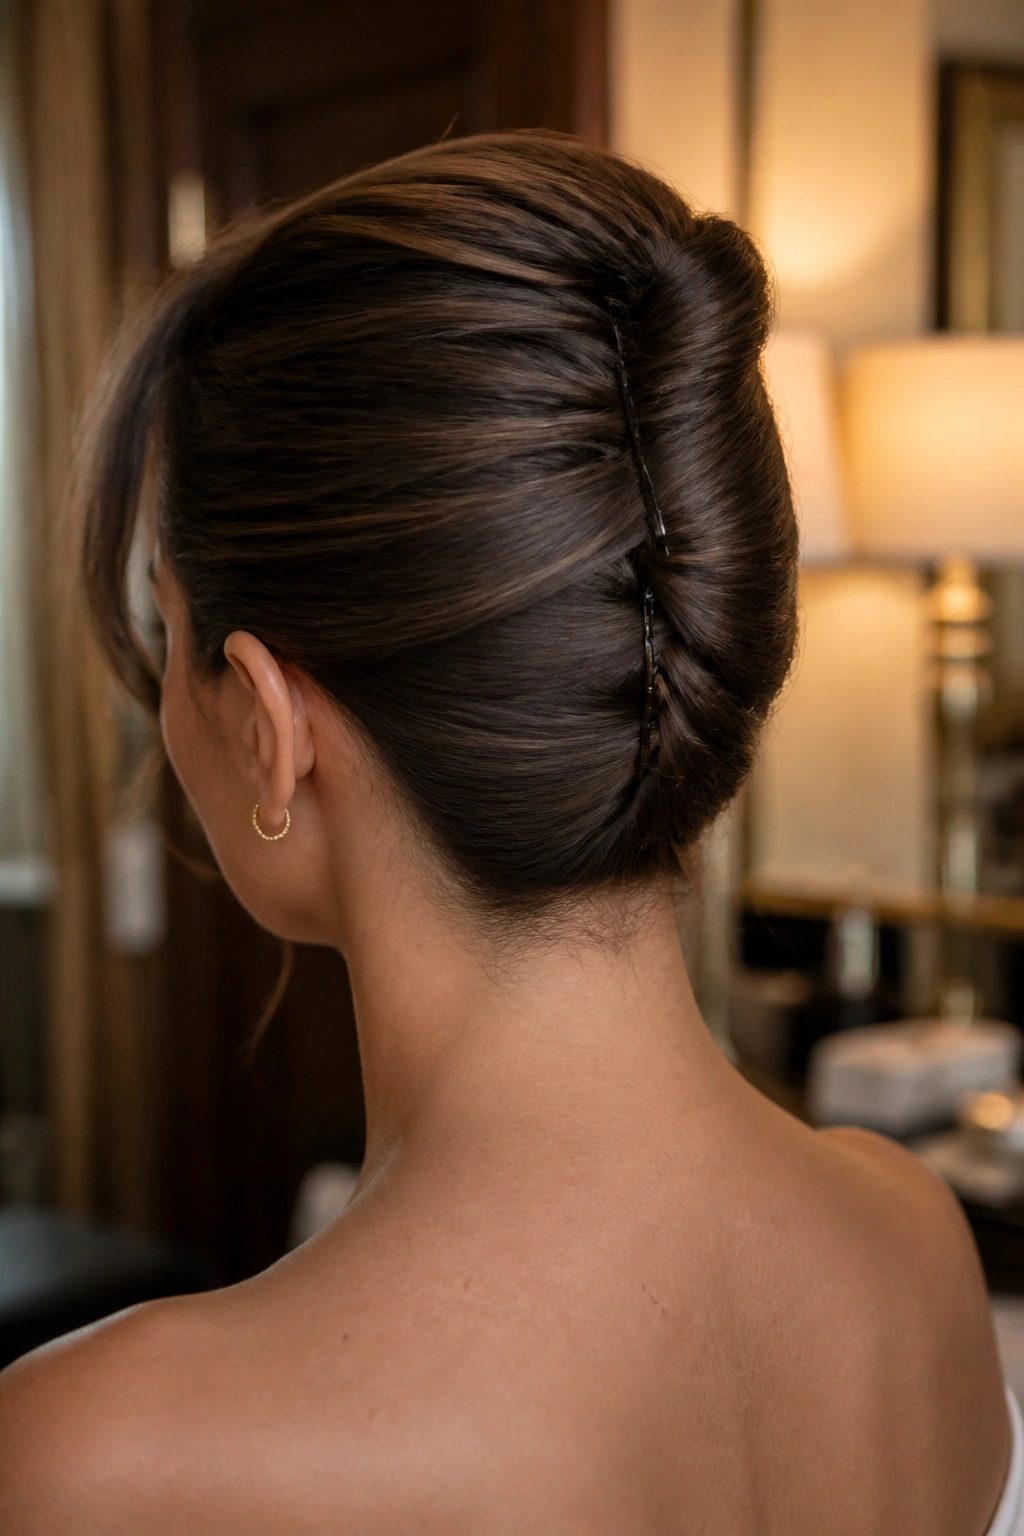
A French twist does not need long hair to look elegant.
On short hair, the trick is making the twist narrow and snug instead of trying to build a thick roll. Brush everything back, gather the length at the center back, and roll it upward with your thumb guiding the fold. Then pin the seam from top to bottom so the roll stays tight against the head.
How to keep it from slipping
Use texture spray before you start. Not a lot. Just enough that the hair feels slightly rough rather than glassy. Fine hair especially needs that bit of friction, or the roll starts to sag within an hour.
The pins should go in vertically along the seam, then one or two can be crossed near the center for extra grip. If you have blunt ends, tuck them under with U-pins instead of forcing the regular bobby pins to do all the work. They will complain. In the form of a style collapse.
This one looks dressier than it is. That is why I like it. It has the neat profile of a formal updo, but it takes less time than most people expect once you stop overthinking the shape.
3. Braided Crown Tuck
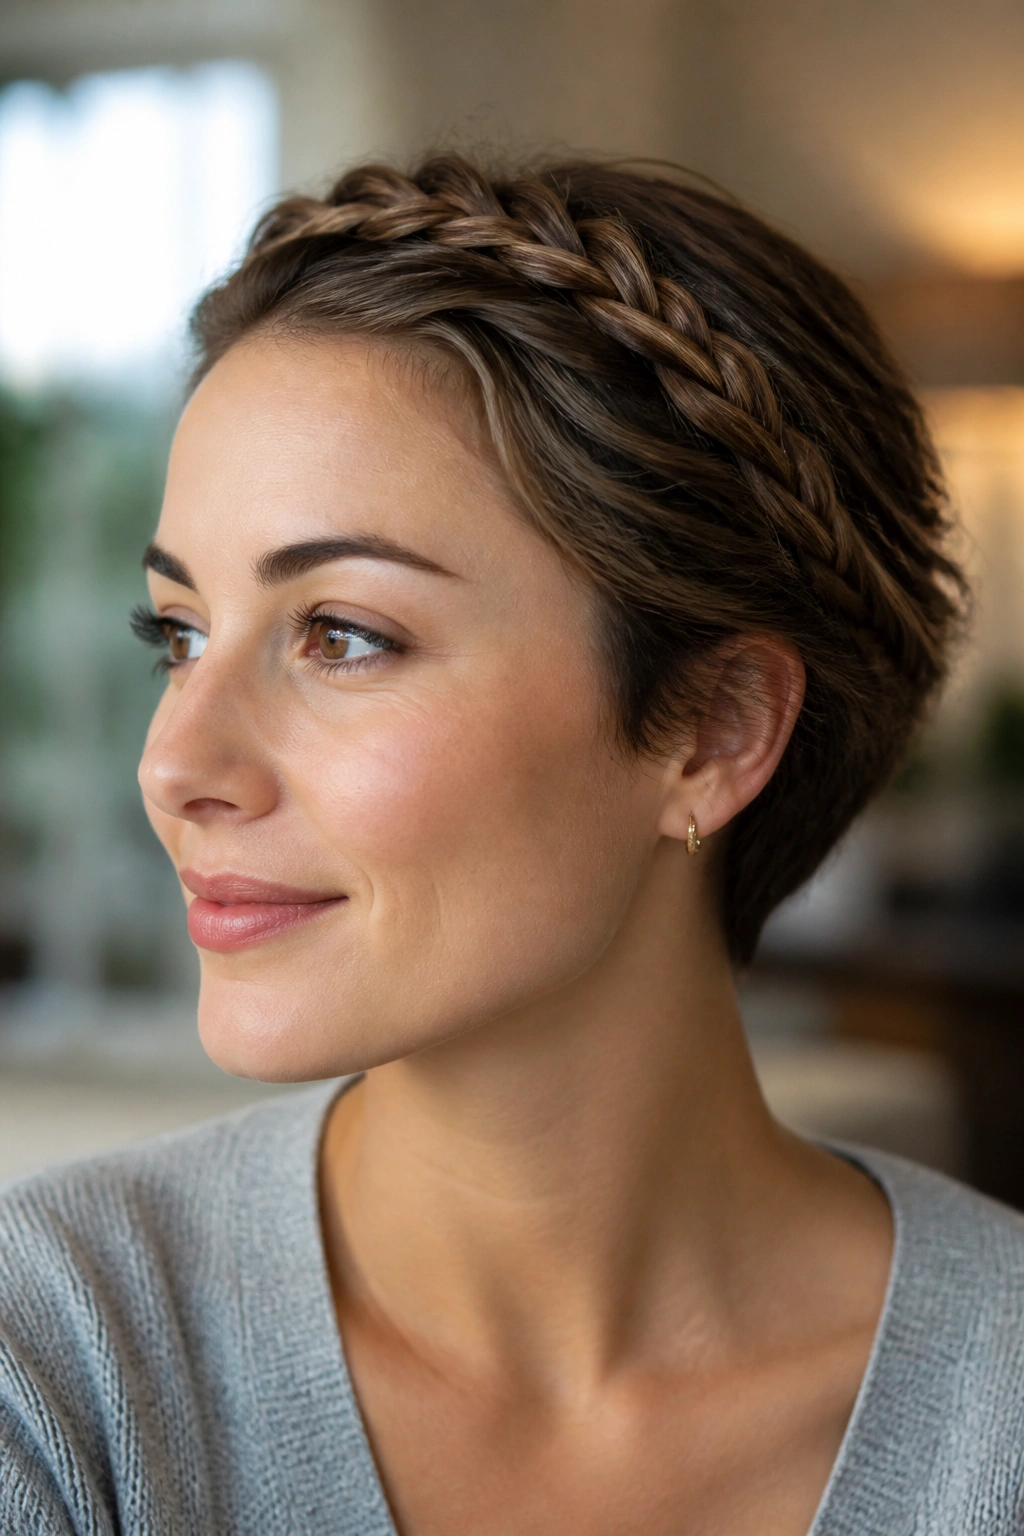
Second-day hair is the secret ally here.
When the roots have a little bend and the ends are not perfectly fresh, a braided crown tuck can look far more polished than a smooth, flat style. Start a small braid near one temple, curve it along the hairline toward the back, then repeat on the other side if your length allows. The ends get tucked under at the back and pinned flat, almost like you are hiding the finish on purpose.
What makes it work
The braid gives you structure where short hair usually fights back. It also disguises layered ends, which is the part that tends to look wispy in shorter styles.
A narrow braid is enough. You do not need a thick Dutch braid sitting on top of your head like a headband. In fact, too much braid makes the look feel heavy.
- Best for bobs, lobs, and grown-out pixies
- Use a fine-tooth comb to section the hair cleanly
- Secure the braid ends with tiny clear elastics
- Finish with a flexible-hold spray, not a stiff shell of lacquer
The nicest version of this style leaves a few face pieces soft. Not curled into spirals. Just bent around the cheekbones so the whole thing feels relaxed but still put together.
4. Sleek Side-Swept Pin-Up
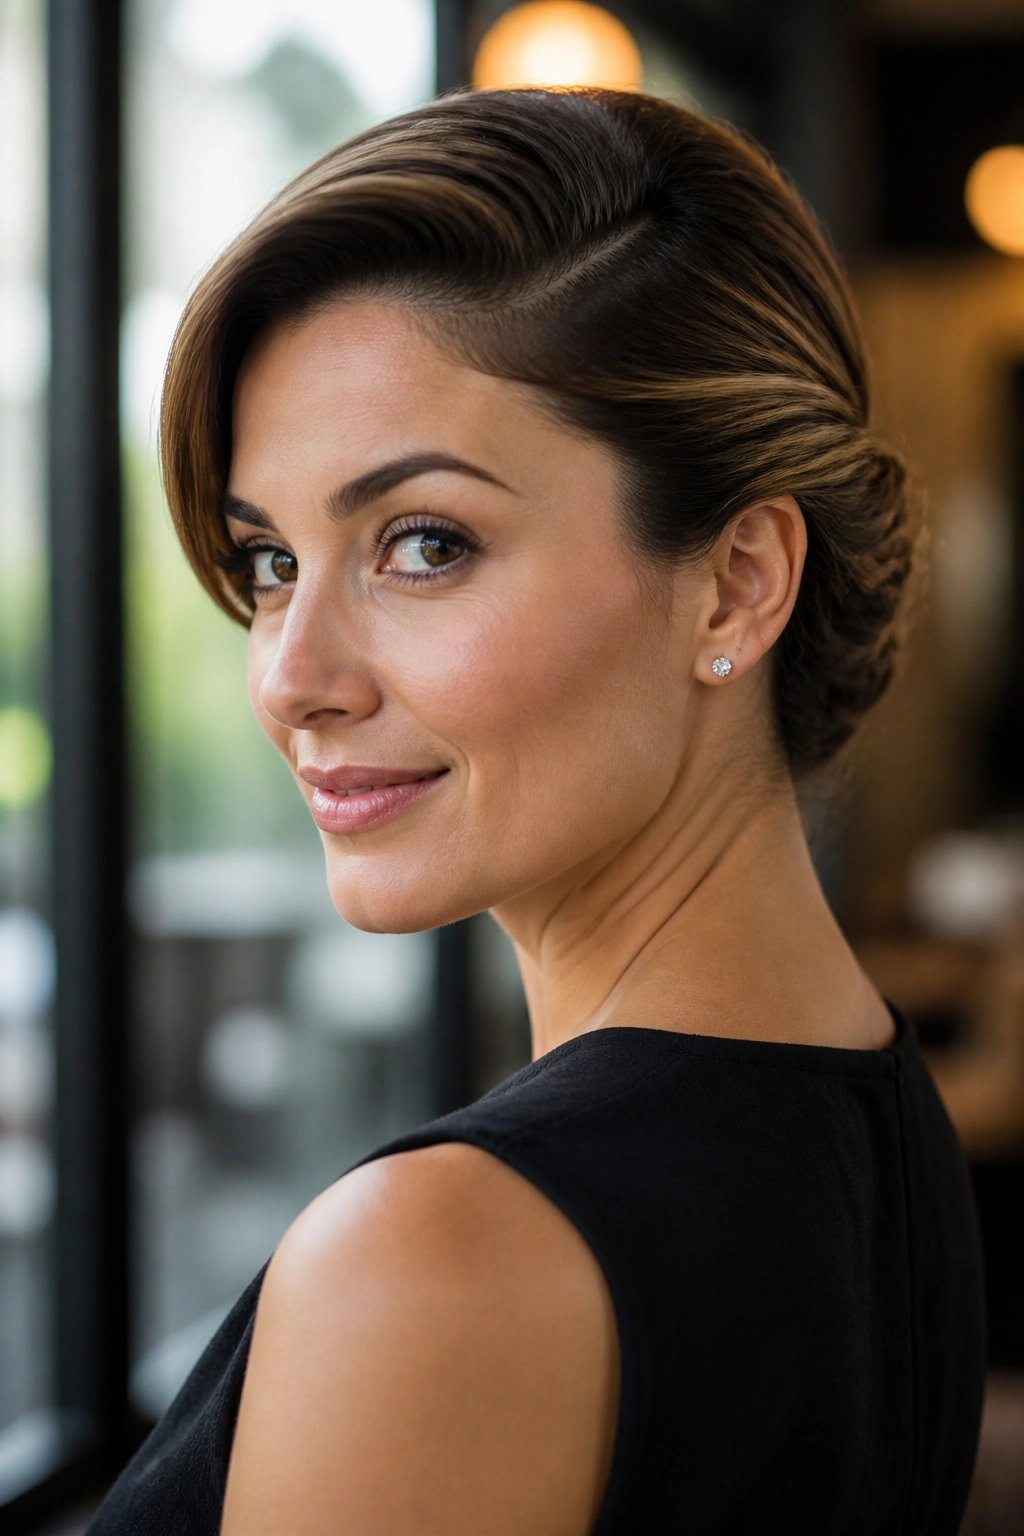
What if your hair is too short for a bun and too layered for a twist?
Sweep everything to one side, tuck it behind the ear, and pin it low at the back of the head with the ends folded under. That is the whole idea. The side-swept shape gives you polish, and the tucked finish keeps the length from poking out in the wrong direction.
The front matters here. A clean side part, even a shallow one, makes the style look deliberate. Then you smooth the top with a pea-sized amount of styling cream, not enough to flatten it completely but enough to keep flyaways from standing up like static.
The part that matters
Pin close to the scalp, not out in the air. Short styles fail when the pins sit too far from the head and create little shelves that shift as soon as you move.
A soft bend around the face helps this style a lot. You can make that bend with a flat iron, a round brush, or even a quick wrap around your finger while the hair is still warm from blow-drying. Tiny thing. Huge difference.
If you want something that feels clean, fast, and slightly old-school in the best way, this is a strong choice.
5. Half-Up Topknot
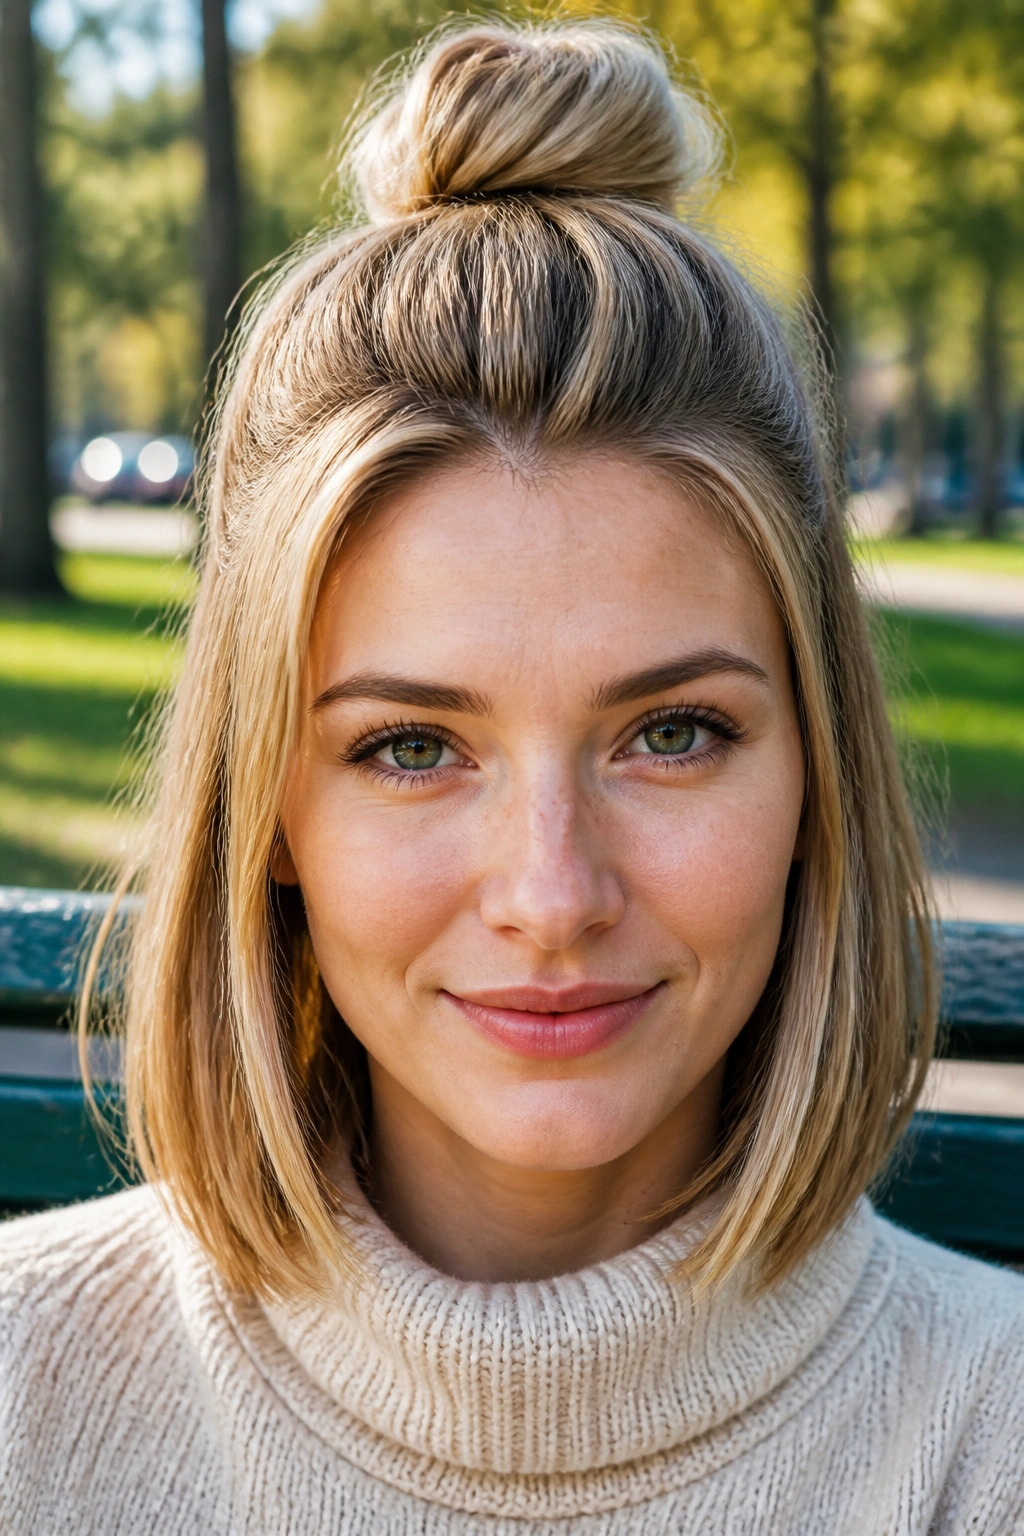
The half-up topknot is the easy answer when your hair is almost too short for an updo but not short enough to give up.
Pull the top third of the hair into a small knot at the crown, leave the bottom section down, and smooth the sides so the topknot looks neat instead of scrappy. On a bob, the knot may be tiny. That is fine. Tiny can look chic if the base is tidy.
I like this one because it gives the illusion of more styling than it actually takes. The lower hair stays down, which helps if the cut has layers that would otherwise stick out of a full bun. The top section gives you shape and lift. The rest just behaves.
Use a small elastic and wrap a short strand around it if you want the finish to look cleaner. That little cover-up makes the style feel more finished, even when you only spent five minutes on it. A few drops of shine serum on the ends help too, especially if the cut has dry-looking texture.
Best part: it works when the hair around the nape is too short to gather. The style stops asking that section to do too much.
6. Rolled Chignon for Chin-Length Hair
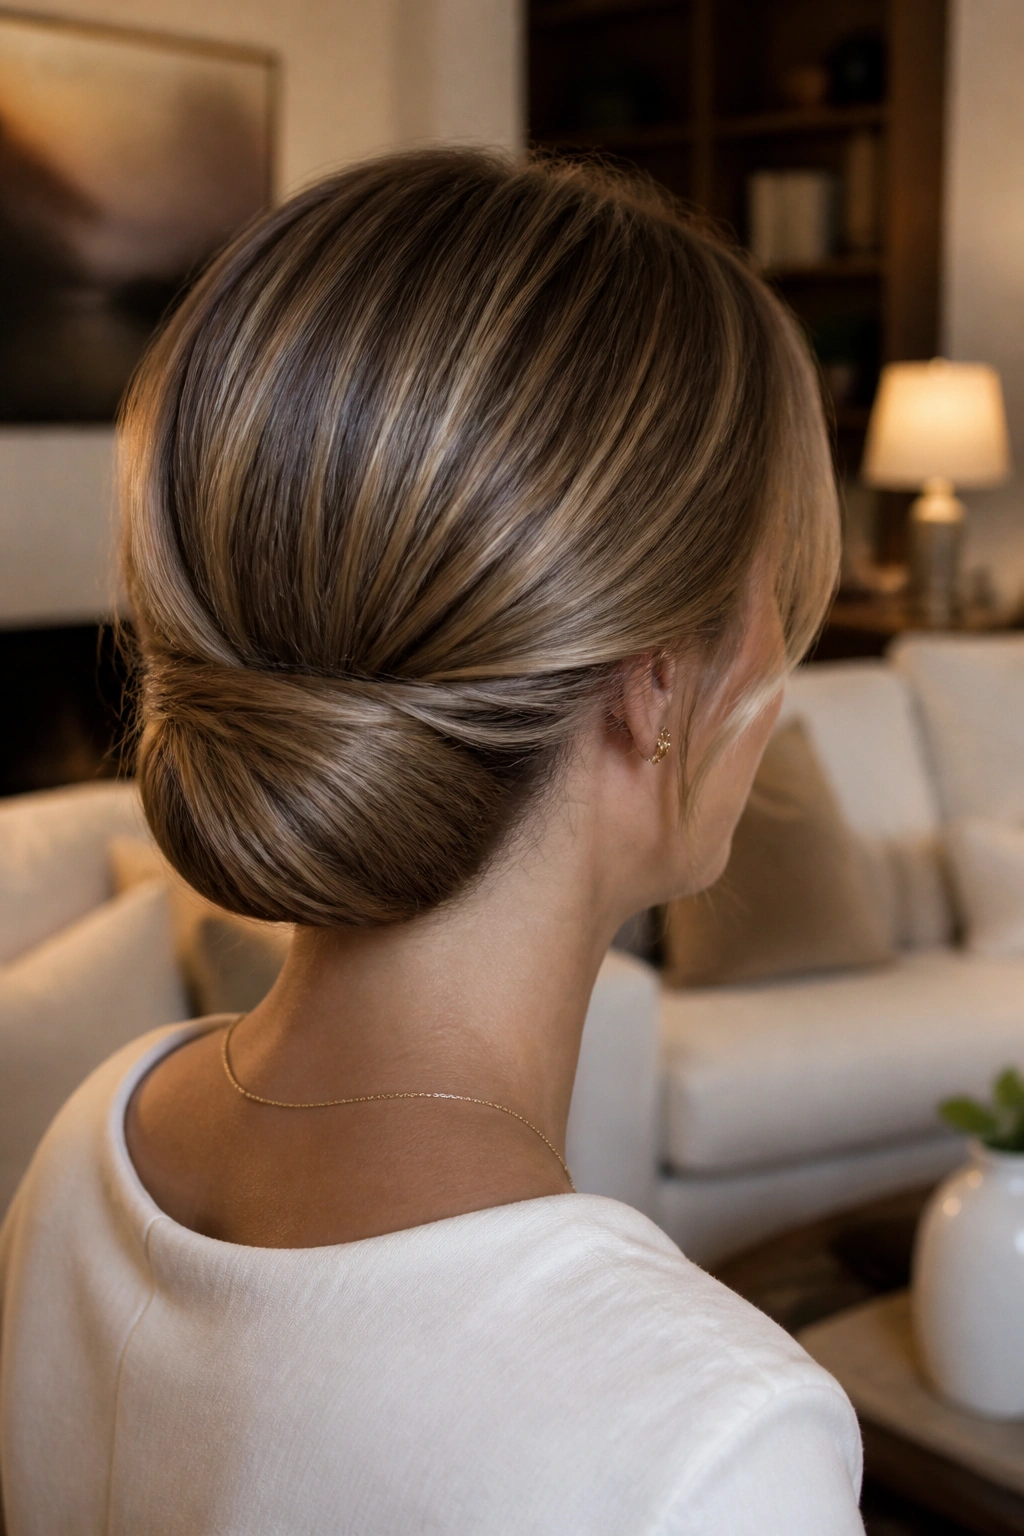
A full bun on chin-length hair can be a liar. It promises structure, then falls apart the second you turn your head.
A rolled chignon is the better move. You gather the hair low, roll the ends inward toward the nape, and pin the shape into a soft oval instead of a round puff. The result sits flatter against the head, which is exactly what shorter hair usually needs.
This version works especially well on blunt cuts. The cleaner the line of the haircut, the more controlled the roll looks. If your hair is heavily layered, it can still work, but you may need a few more pins and a bit more prep spray to keep the ends from escaping.
The trick is not to overstuff the roll. Small is fine. A compact chignon often looks more expensive than a swollen one because it sits neatly and holds the silhouette of the head. That sounds fussy, but you can see the difference immediately in the mirror.
7. Double Rope-Twist Bun
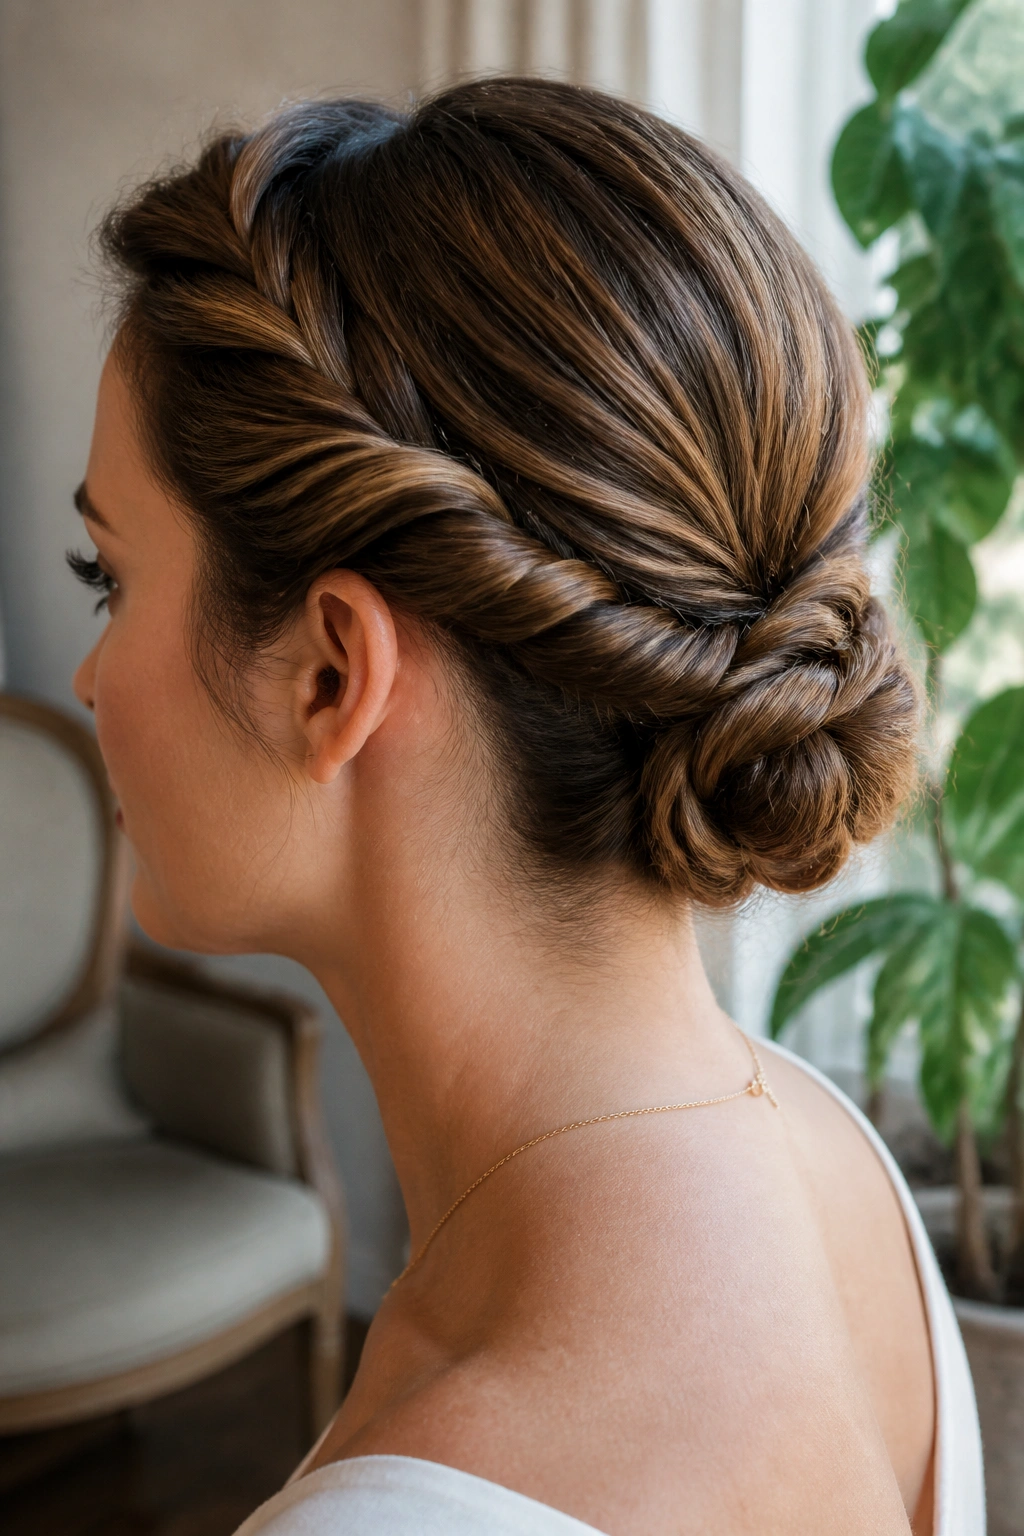
Two twists, one knot, very little drama.
Start by dividing the hair down the middle. Twist each side away from the face, then bring both twists to the nape and wrap the ends together into a compact bun. Rope twists grip better than smooth sections because the spiral pattern gives the pins something to catch.
What makes rope twists hold
The direction matters. Twist each side the same way at first, then wrap the two sections around each other in the opposite direction. That keeps the shape tight instead of loose and fluffy.
Use a little styling cream on the mids and ends before twisting. Not enough to make the hair slippery. Just enough to stop frizz from turning the twists fuzzy halfway through the day.
- Works well on hair that falls between the jawline and shoulders
- Needs 2 small elastics and 6 to 8 pins
- Best when the hair has a slight bend or natural wave
- Finish by pinching the twists flatter near the head
This style looks a bit more done than a plain bun, but not so done that it feels precious. I like that balance. It is neat, practical, and hard to ruin once the twists are anchored.
8. Faux Bob Tuck
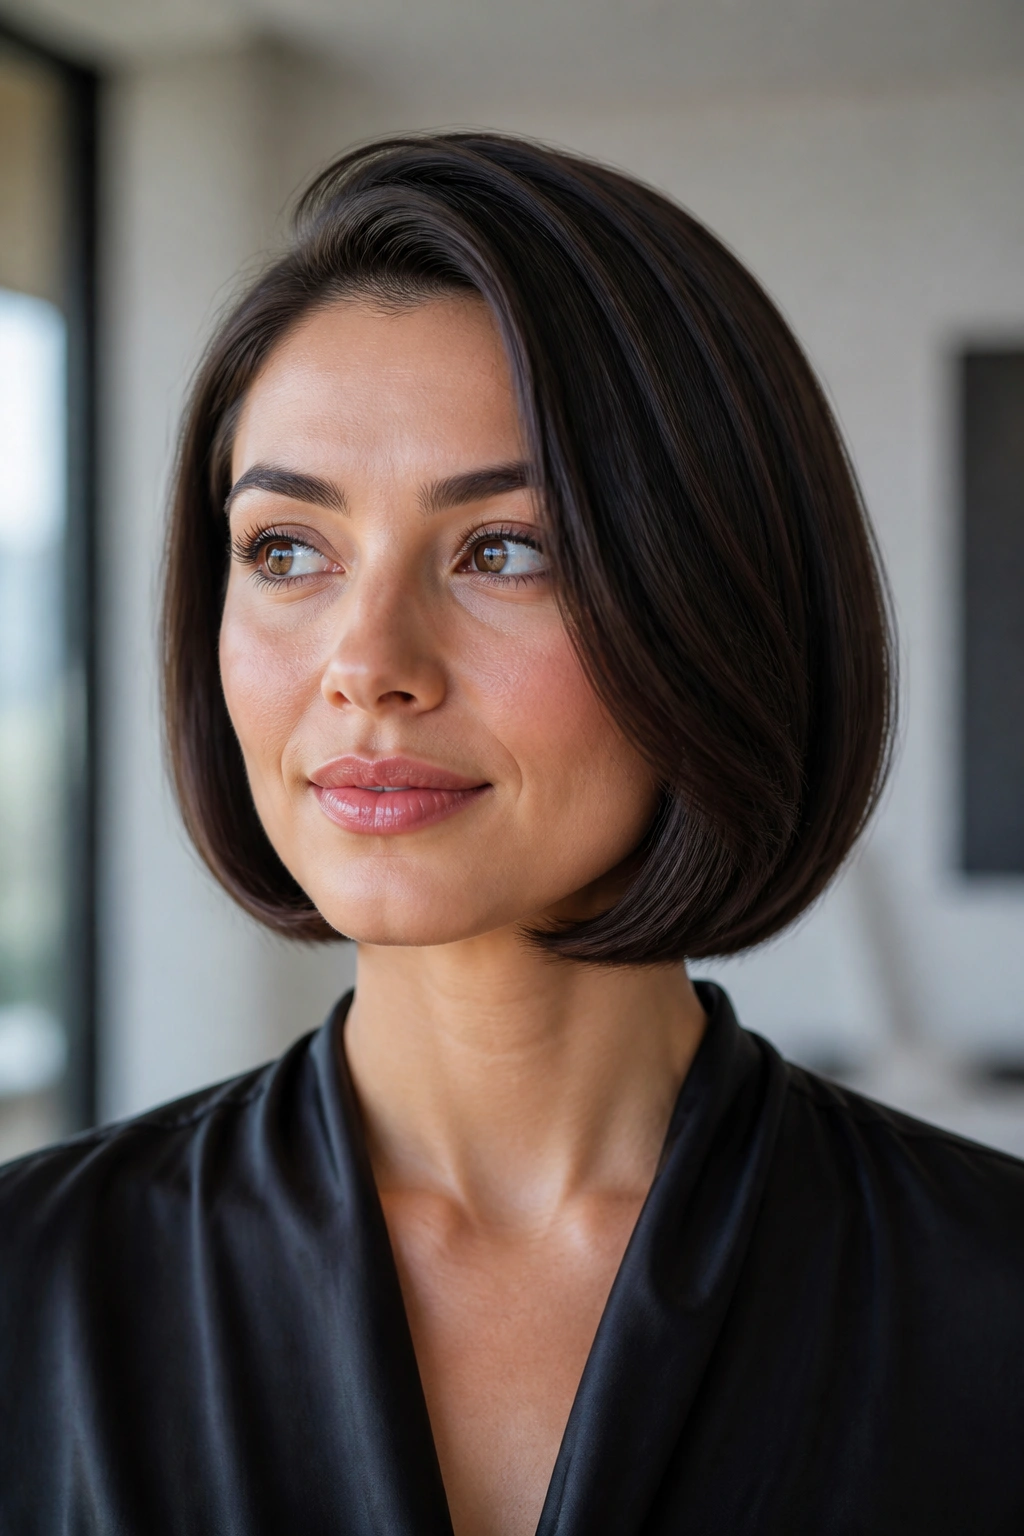
This is the sneaky one.
If your hair is already short, a faux bob can make it look even sleeker by tucking the ends under so the shape reads as a polished chin-length style. You gather the lower half of the hair, fold the ends inward under themselves, and pin them hidden along the neckline. From the front, it can look like a carefully set bob with a little extra shine.
Why this one fools the eye
The tucked ends remove bulk at the back, which is where short hair often looks awkward in formal styling. Once the weight disappears, the front sections fall more cleanly and the neckline looks sharp.
This style is especially kind to one-length cuts. Layers can still work, but they need a few more pins to keep the tucked shape from popping out.
A soft side part makes the faux bob feel more natural. So does a gentle bend through the ends, as long as the bend is tucked inward, not flipped outward like a page corner. That tiny difference changes the whole look.
It is a good one for weddings, dinners, and any event where you want people to think you spent longer on your hair than you did.
9. Pinned Volume at the Crown
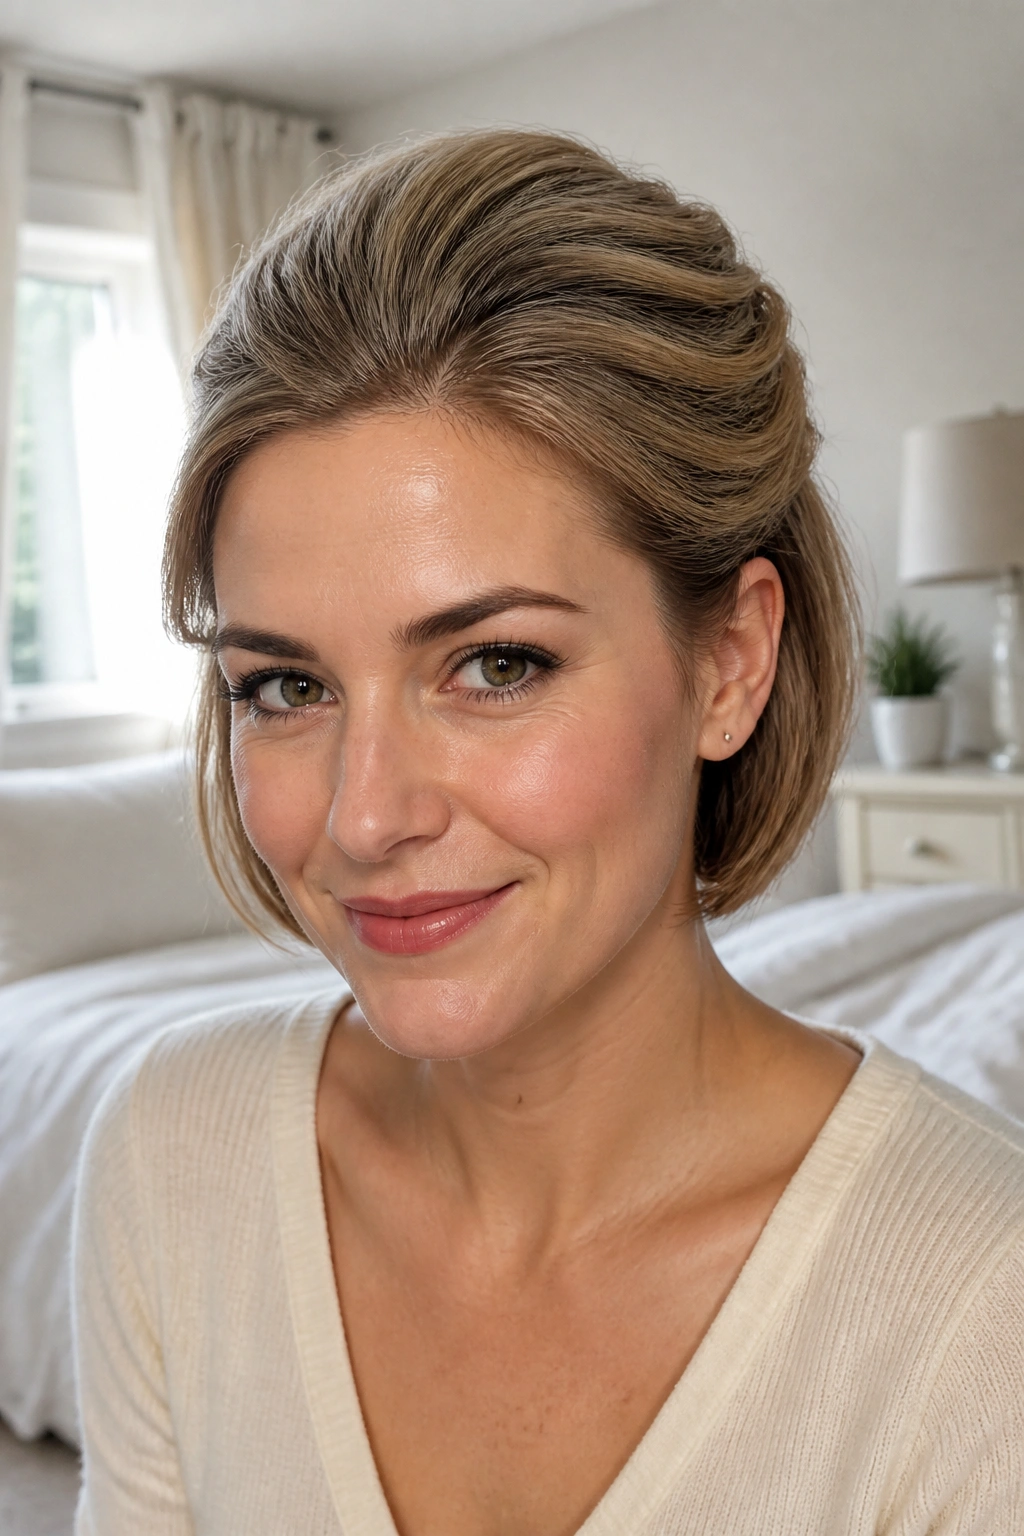
Flat hair and short hair often show up together. Annoying, yes. Fixable, also yes.
Lift the crown with a little backcombing or a root spray, then smooth the top layer over it and pin the sides back behind the ears. You are not building height for the sake of height. You are creating enough shape that the profile looks intentional from every angle.
A tail comb helps here. Tease only the section at the crown, not half your head. If you overdo it, the top starts looking fluffy in a way that reads more rushed than polished. A little structure goes further than a giant puff.
What to watch for
Keep the front smooth but not tight. If the roots are pulled flat against the scalp, the style loses the lift that makes it work.
Use two pins on each side, crossed low near the ear. Then check the back in a second mirror if you can. This style can look perfect from the front and oddly loose from the rear if you skip that part.
It is not a full updo in the strict sense, and I do not mind that. Sometimes the most polished short hairstyle is the one that borrows a little lift, a little pinning, and a little restraint.
10. Halo Twist with Hidden Ends
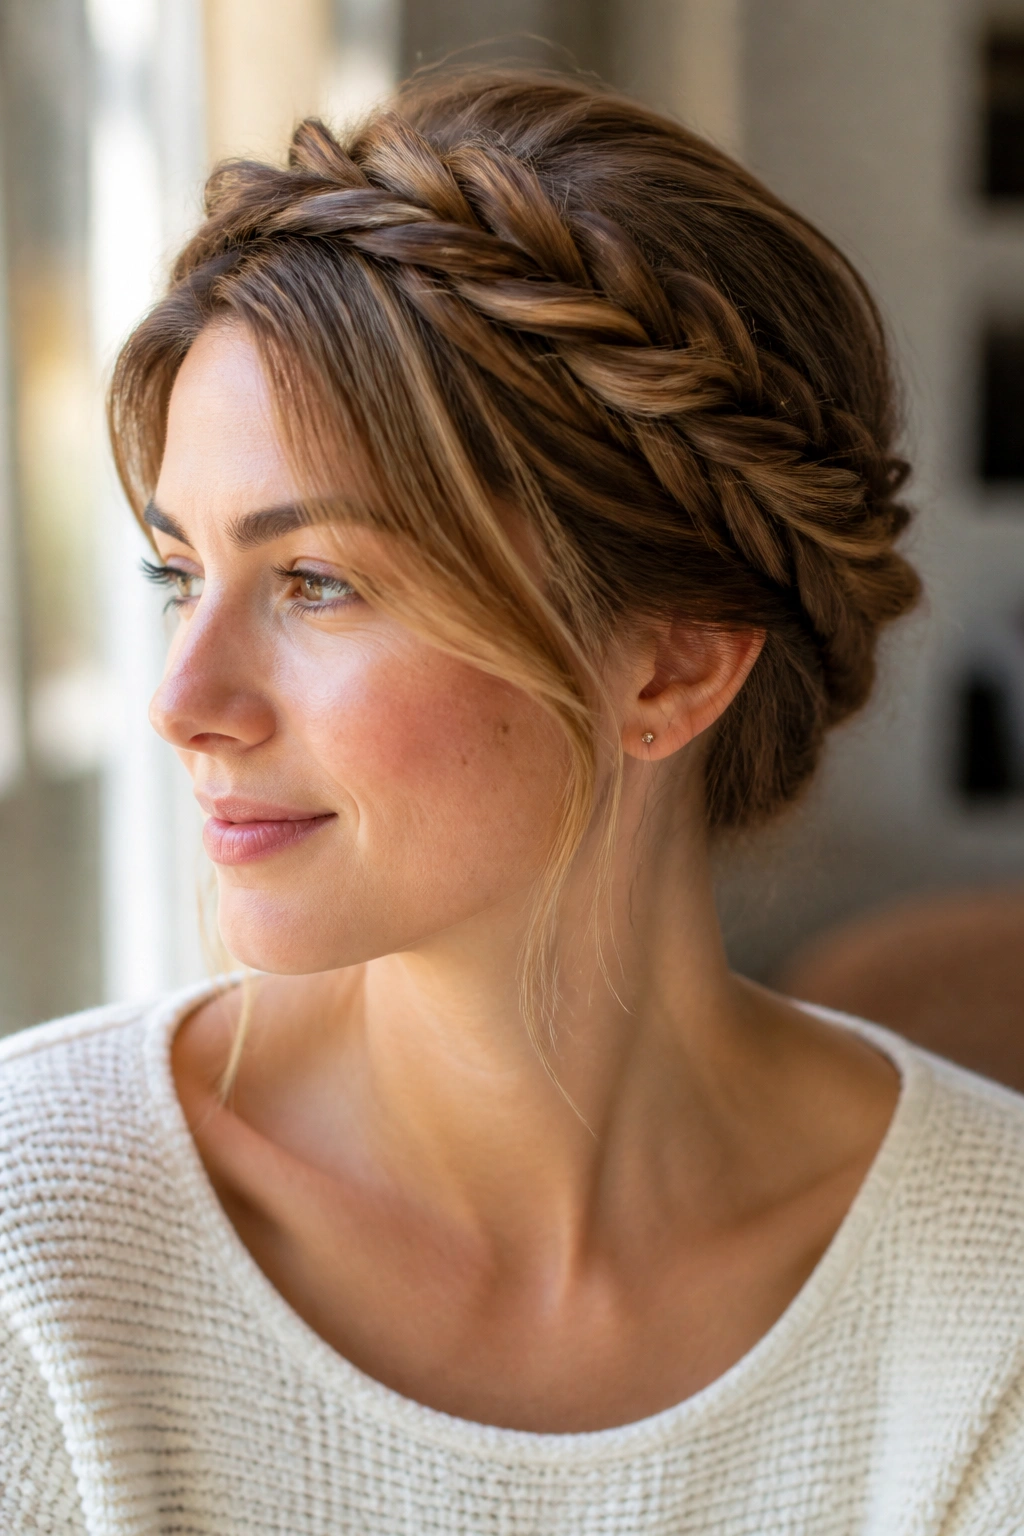
The halo twist looks more intricate than it is.
Take a section from one temple, twist it back along the head, and keep adding small pieces as you move toward the other side. Do the same from the opposite side if your length allows, then hide the ends under the back twist and pin them flat. The shape should skim the head, not sit on top of it.
What makes this style so useful is the way it handles layers. Shorter pieces can disappear into the twist, especially if you work with small sections and keep the tension even. Too much tension leaves the style tight and severe. Too little and the whole thing looks loose by the time you finish the second side.
A touch of shine spray at the end helps the twists read clean instead of fuzzy. I would not use heavy oil unless the hair is dry, because too much slip makes the hidden pins slide. That is one of those annoying little things people only discover after they are already dressed.
This style sits somewhere between casual and formal, which is rare and useful. It can carry you through a daytime event and still look right at dinner.
11. Turned-In Low Pony Bun
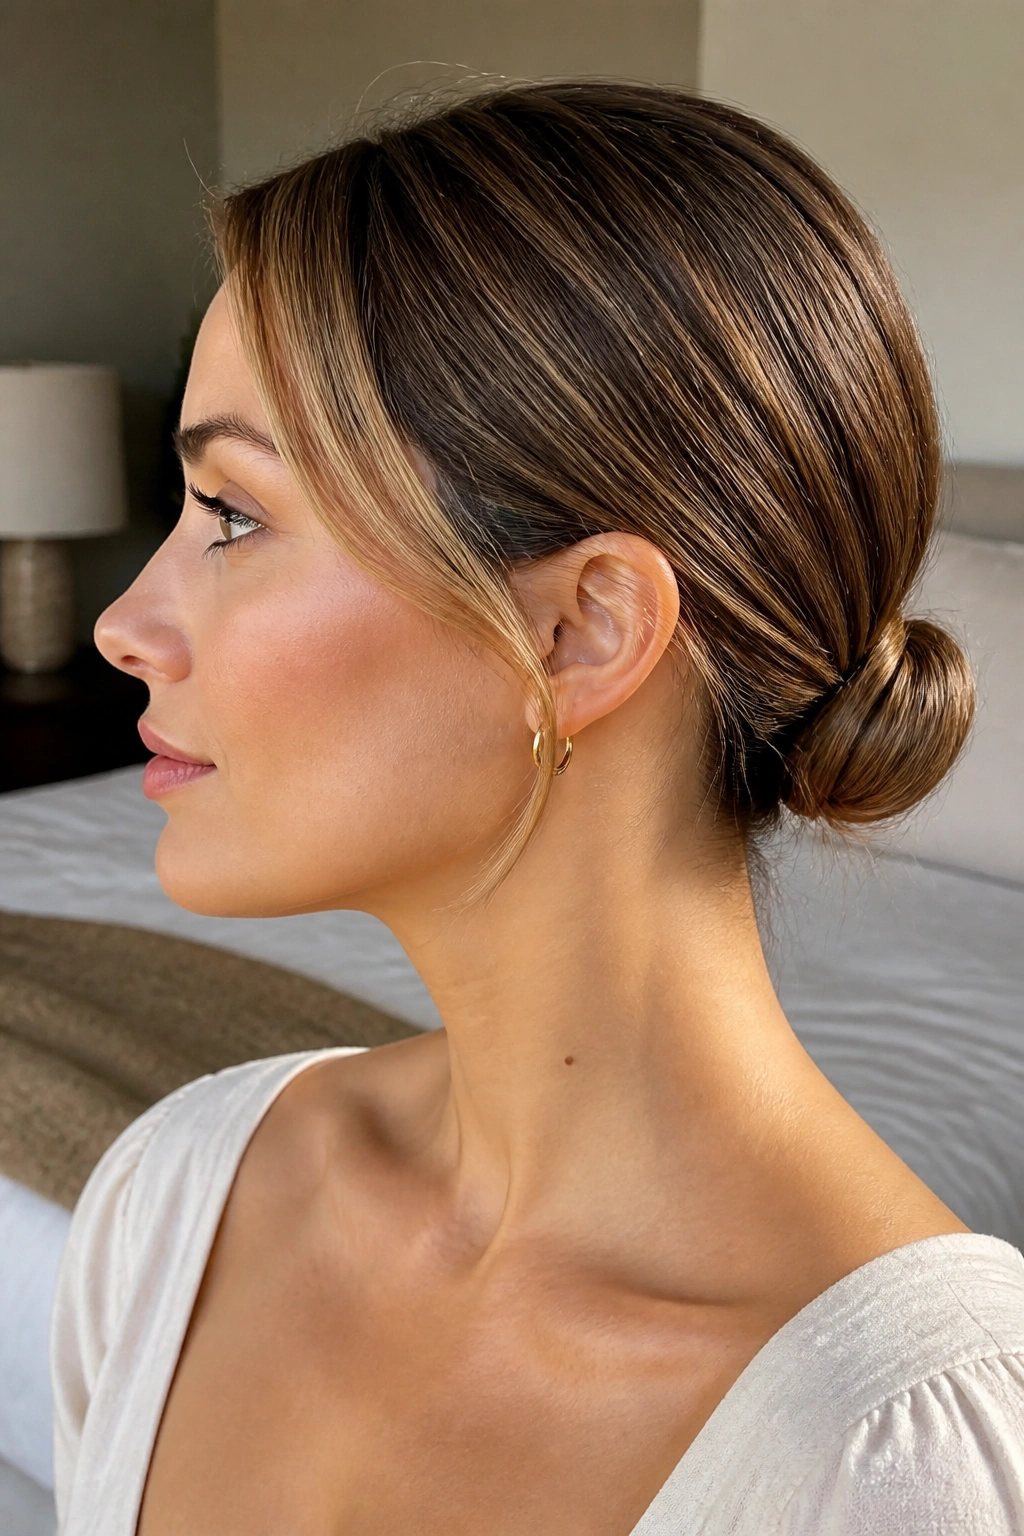
Can a ponytail count as an updo if it barely makes a loop? Yes. Absolutely.
Gather the hair into a low ponytail at the nape, leave a small gap above the elastic, and flip the tail up through that opening so it turns inward. Then tuck the ends under and pin them into a small bun shape. It is neat, fast, and kind to short lengths that refuse to make a full circle.
Best for fine hair
Fine hair tends to collapse under heavy styling, so this turned-in shape works better than a bulky knot. It keeps the profile small and flat while still looking finished from the side.
A small elastic is better than a thick one here. Thick elastics create a lump that the bun has to hide, and short hair does not have much room to hide anything. You want the base to stay slim.
If you want the style to last, prep the roots with dry shampoo or texture powder before you gather the ponytail. That gives the elastic something to hold onto and keeps the crown from going flat halfway through the day.
It is not flashy. That is the point. It looks clean, neat, and quietly polished.
12. Scarf-Wrapped Knot
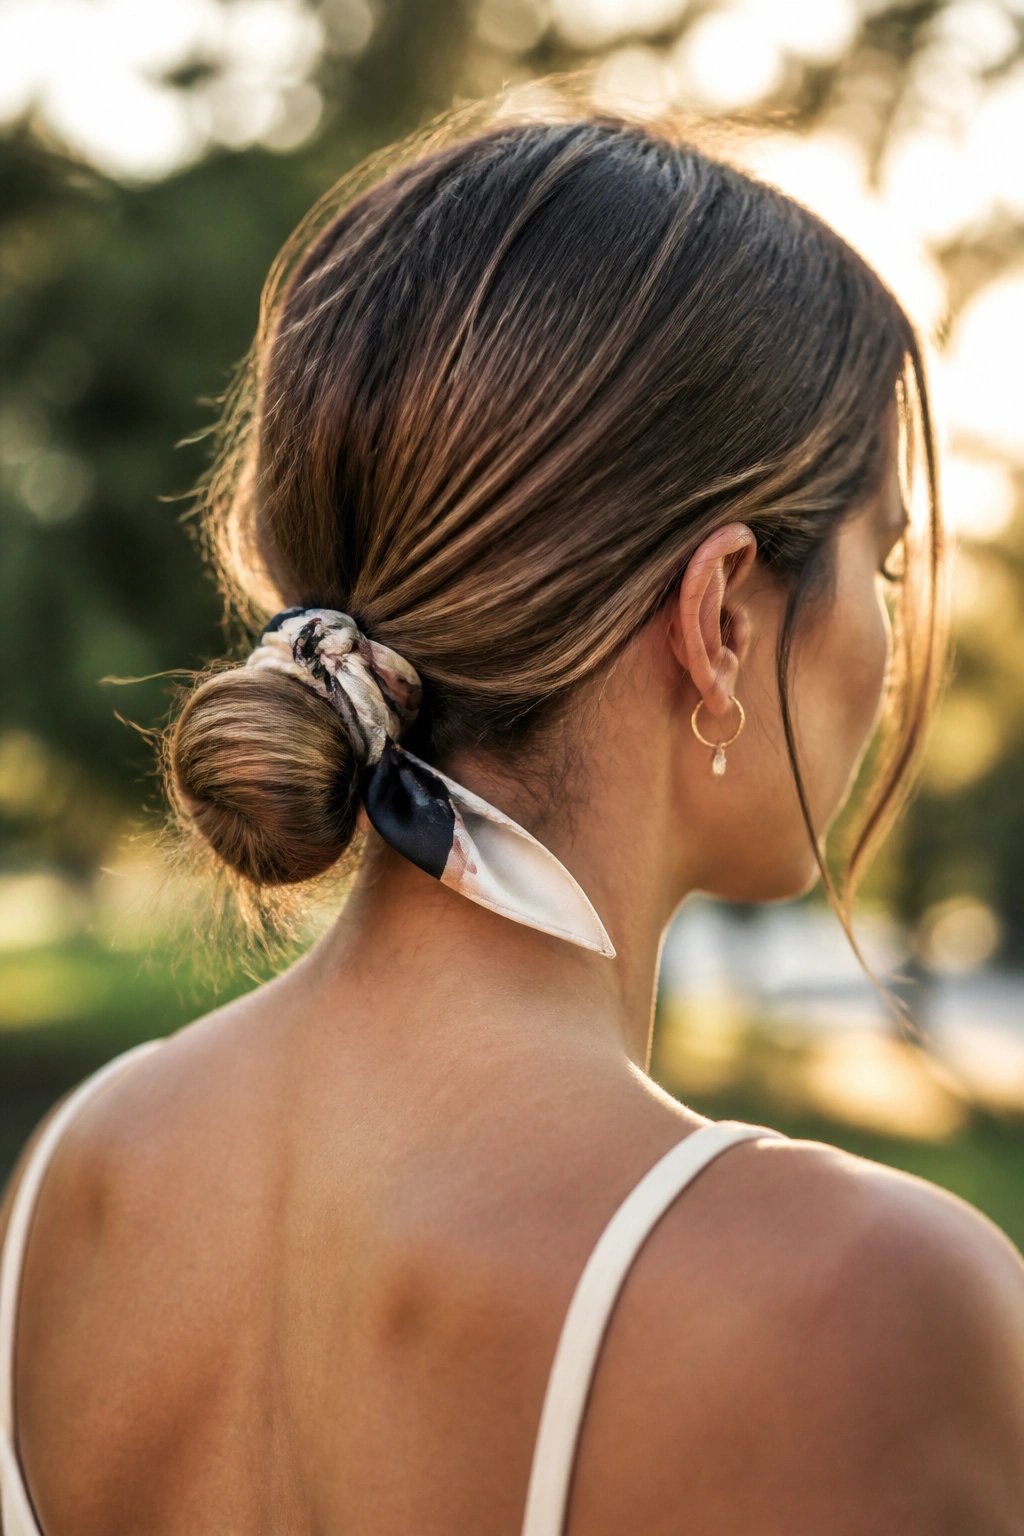
A scarf can rescue short hair on a day when every layer seems to have its own agenda.
Pull the hair into a small knot at the nape or slightly to one side, then wrap a narrow silk scarf around the base and tie it just off-center. The scarf hides the short ends, adds control, and gives the style a finished edge without needing a lot of extra pins.
This works best with scarves that are narrow enough to sit close to the head. A wide square scarf can swallow a short style and make it look bulky. A thin strip, about 1 to 2 inches wide, keeps the shape tidy.
The wrapped knot also buys you a bit of forgiveness if the haircut is uneven. A few shorter layers can peek out in a way that feels intentional once the scarf is in place. Without it, those same pieces may look like they escaped on purpose.
I like this one for days when the hair needs a visual anchor. The scarf does part of the work, and that is the honest appeal. You are not pretending the style is more elaborate than it is.
13. Sleek Gibson Tuck
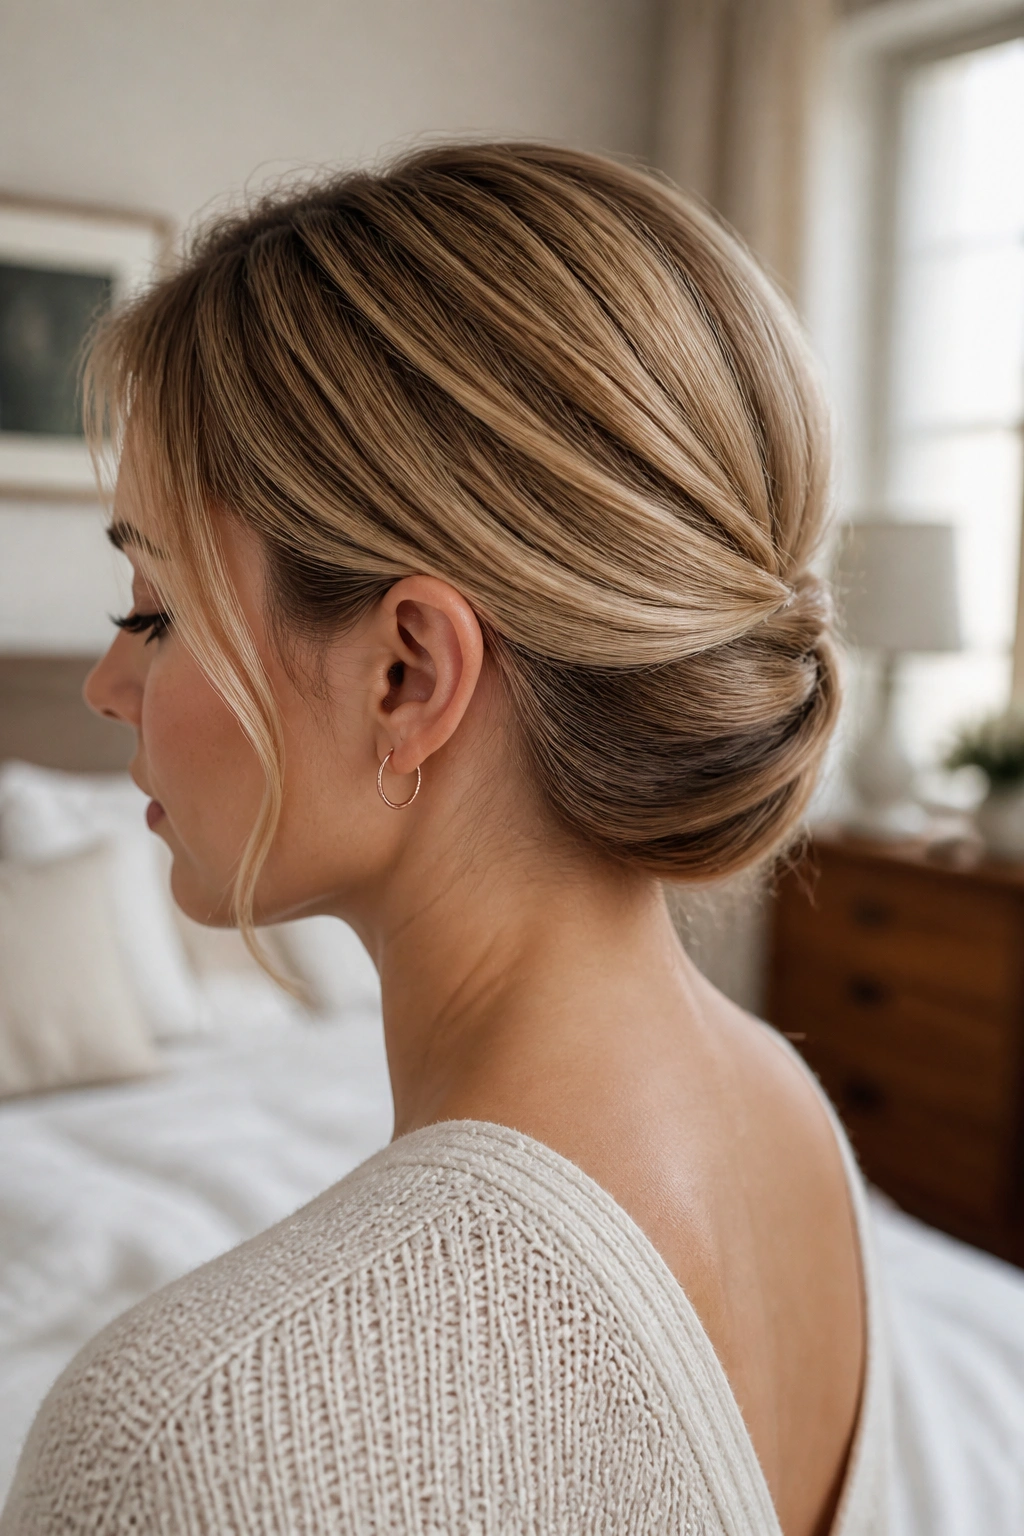
The Gibson tuck has a calm, polished profile that suits short hair better than people expect.
Brush the hair back into a low loose ponytail, create a pocket above the elastic, and tuck the lengths upward into that fold. Then pin the tucked roll along the nape until it sits smooth and compact. If the hair is too short to tuck all at once, work in smaller sections. Rushing this part makes a mess fast.
How to keep the roll smooth
Start with a side or center part and keep the top surface flat with a little styling cream. The Gibson tuck looks best when the front is neat and the back has a soft curve instead of a hard fold.
- Strong on bob-length hair with a bit of bend
- Better with a light texture spray than with fresh, slippery blowout hair
- Needs medium-length bobby pins, not the tiny flimsy kind
- Works well for formal events without looking stiff
A shine spray at the end gives the roll a cleaner edge. Not a wet look. Just enough sheen to make the shape visible.
This is one of those styles that looks like you spent a lot of time on it, which is flattering if true and even better if false.
14. Soft French Roll
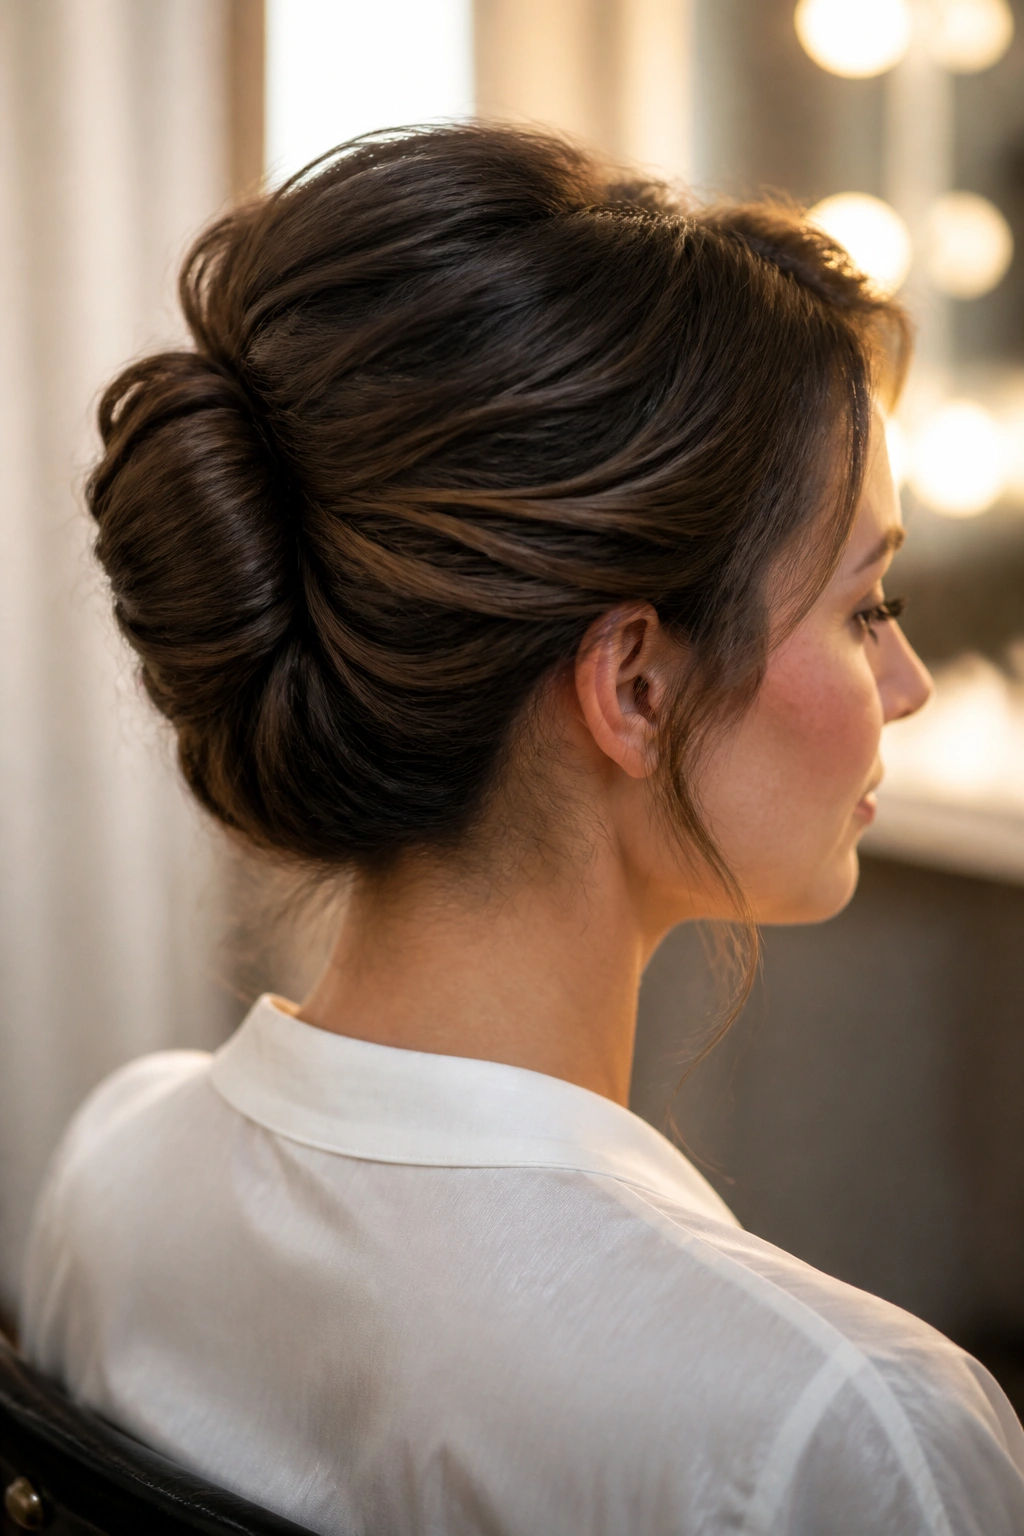
The soft French roll is the dressier cousin of the mini twist.
Instead of making the style ultra tight, you gather the hair at the back, twist it upward, and let the roll stay a little rounded through the center. The ends get tucked inward and pinned along the seam. On short hair, the softness is the point. A rigid roll can look harsh when there simply is not much length to build with.
The shape works well when the haircut has some movement around the face. A few loose bends near the temples keep it from feeling too severe. If the hair is very straight, add a little wave first. Even a light bend from a flat iron helps the roll hold shape and stops the edges from looking blunt.
Use long pins if your hair is thick enough to need them. Short pins can pop out near the seam, especially at the crown where the roll has more tension.
This one has a bit of old-Hollywood energy without being costume-y. That balance is harder to hit than it sounds, and the soft version gets it right more often than the crisp one.
15. Pinned Curl Updo
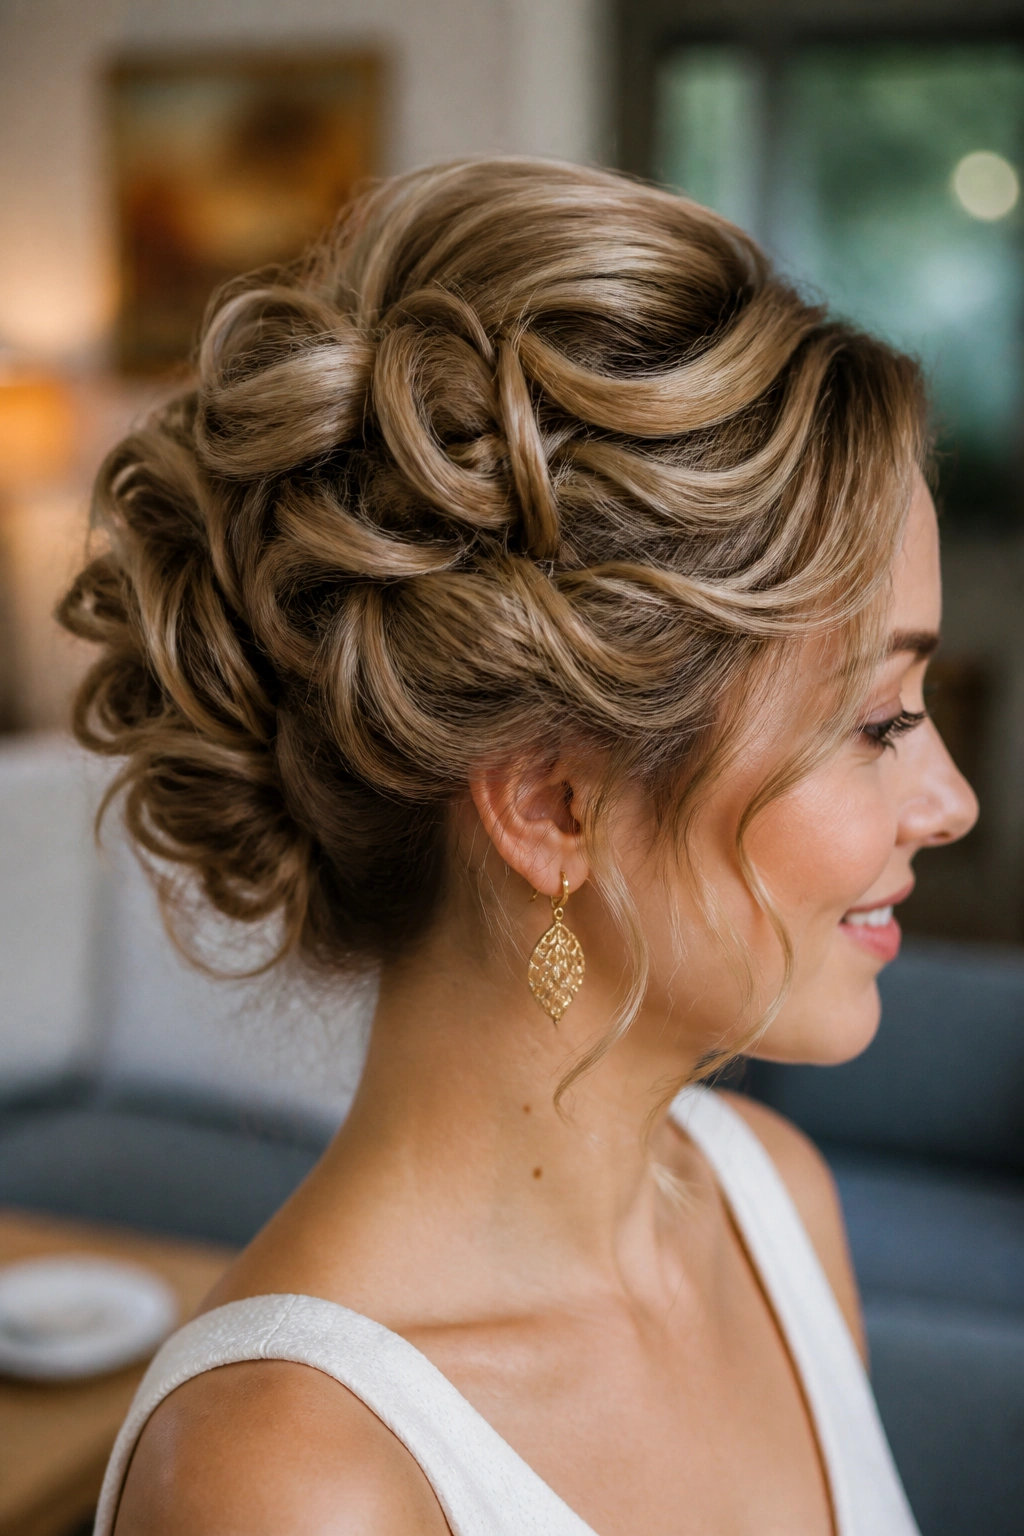
If your hair wants to bend, let it bend.
A pinned curl updo uses natural wave, heat-set curls, or loose bends to build shape piece by piece. You curl or rough-dry the hair first, then pin individual sections upward and back, hiding the ends under the next curl or under a base section at the nape. It is less about making one perfect bun and more about building a small sculpted shape from several moving parts.
Why this is the most forgiving option
Short hair with movement tends to hold better than bone-straight hair in a formal style. The bends give the pins a place to grab, and the finished shape looks softer around the edges.
You can make this as loose or as neat as you want. A few side pieces can stay free. A small crown lift helps. Even a messy-looking section can work if the pinning is deliberate and the ends are hidden with care.
Use a flexible-hold spray after each section is pinned, not just at the end. That keeps the shape from shifting while you build it. And if a curl slips, replace it with a twist. Short hair rarely needs a perfect plan to look good. It needs a plan that can survive a real head moving through a real day.
Final Thoughts
Short updos work best when they are compact, anchored, and a little smarter than they look at first glance. The styles that flatter short hair do not fight the haircut; they use its shape, weight, and natural bends to create a cleaner finish.
If one of these styles keeps slipping, the fix is usually not more hair spray. It is better pin placement, a touch of texture, or a smaller shape that matches the length you actually have. That is the part people forget.
A polished look on short hair usually comes from restraint. Keep the profile neat, hide the ends on purpose, and let the cut do some of the work.
