



A bubble ponytail looks like you spent time on it, even when you didn’t.
That’s the appeal, really. No curling iron marathon. No complicated braiding pattern. Just a ponytail with shape, spacing, and enough attitude to look styled instead of tossed together. The bubble ponytail ideas women keep trying all have that same core appeal: they turn a plain elastic routine into something sharper, softer, or dressier with almost no extra tools.
The style works because it gives the eye something to follow. Clean crown, defined sections, little puffs down the length — suddenly the whole thing feels planned. The trick is in the tension. Pull too tight and the bubbles look pinched. Leave too much slack and the style collapses into a saggy ponytail that never had a chance.
Flat roots ruin it. So do random section sizes. The best bubble ponytail hairstyles keep the elastic placement deliberate, use enough product to smooth flyaways, and leave each bubble with room to puff. That’s where the good versions separate from the awkward ones.
Start with the look that fits your hair length and your tolerance for fuss. The rest falls into place pretty quickly.
1. Sleek High Bubble Ponytail
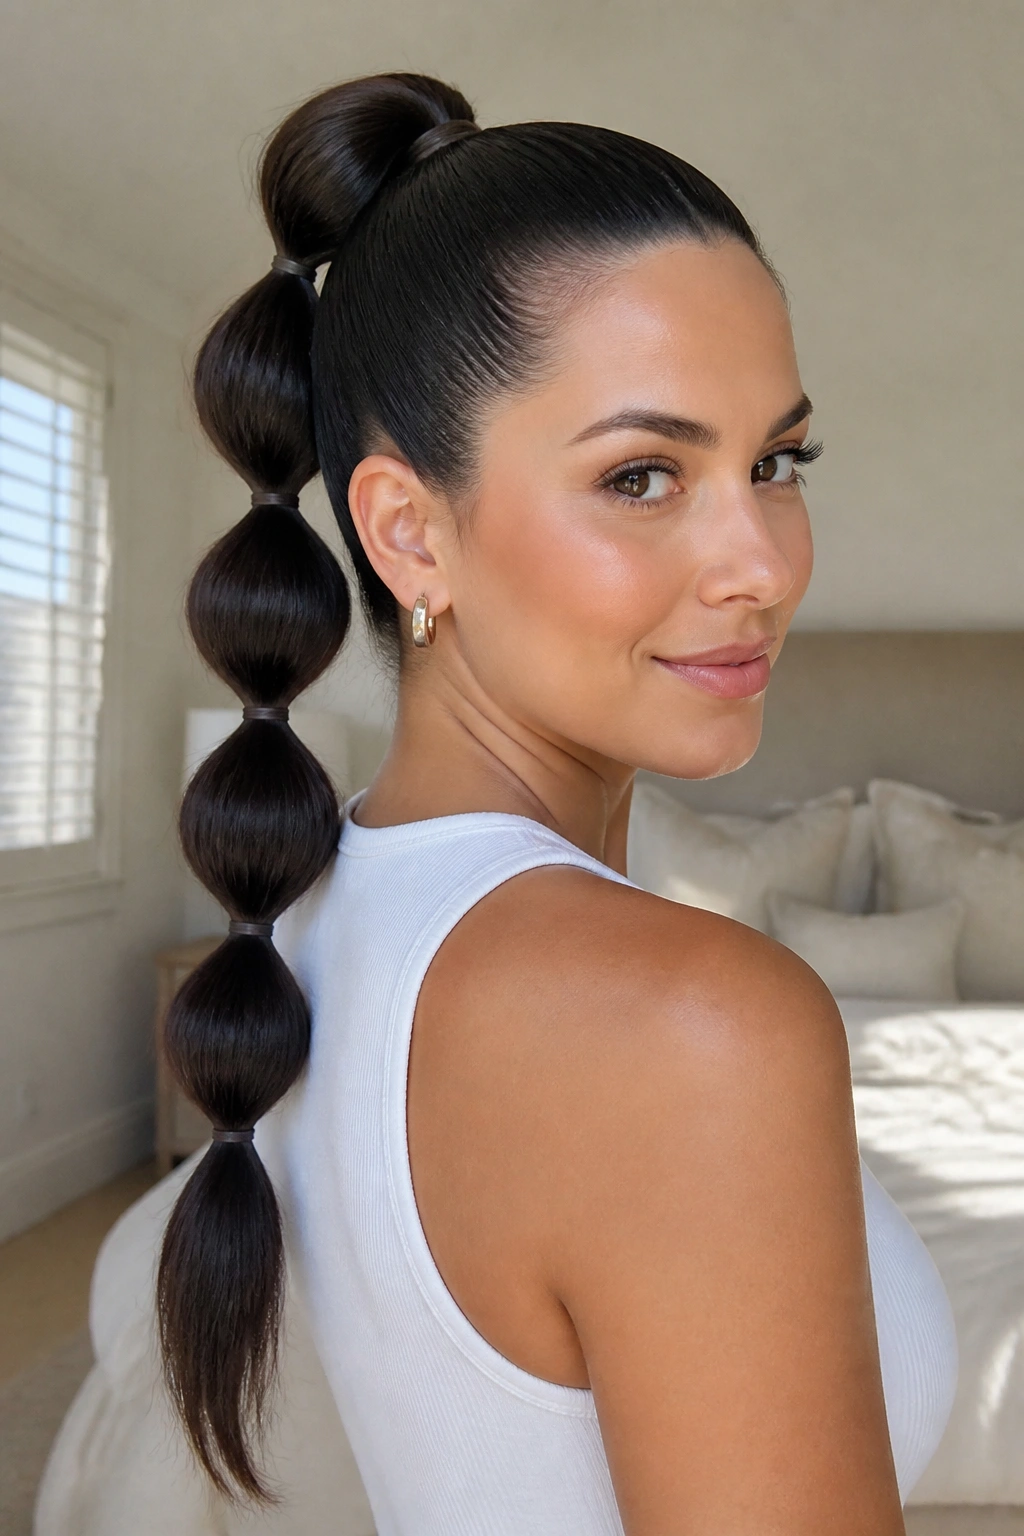
A sleek high bubble ponytail is the one that makes the rest look easier than they are. It sits up high on the crown, pulls the face upward a bit, and gives you that clean, long line that works with sharp makeup or a simple tee and hoop earrings. It’s polished, but not fussy.
Why It Works
The height does most of the heavy lifting. When the ponytail starts high, each bubble reads more clearly because the sections hang free instead of getting swallowed by the shoulders. A smoothing cream at the roots and a fine-tooth comb are enough for most hair types, though thick hair may need a touch of gel around the hairline.
I like this version best when the elastic placement is even. About 1½ to 2 inches between bands usually gives the cleanest shape on medium-length hair. If the gaps are too small, the ponytail looks cramped. If they’re too wide, the bubbles flatten and the whole thing loses its rhythm.
Quick Details That Help
- Best for medium to long hair
- Works well with a middle part or a soft side part
- Use 4 to 6 clear elastics for a shoulder-length ponytail
- A small strand wrapped around the base hides the first band neatly
- A light mist of hairspray on your hands keeps flyaways down
Best tip: set each bubble with your fingers before moving to the next band. If you wait until the end, the first sections often lose shape while you’re still working.
2. Low Bubble Ponytail With a Center Part
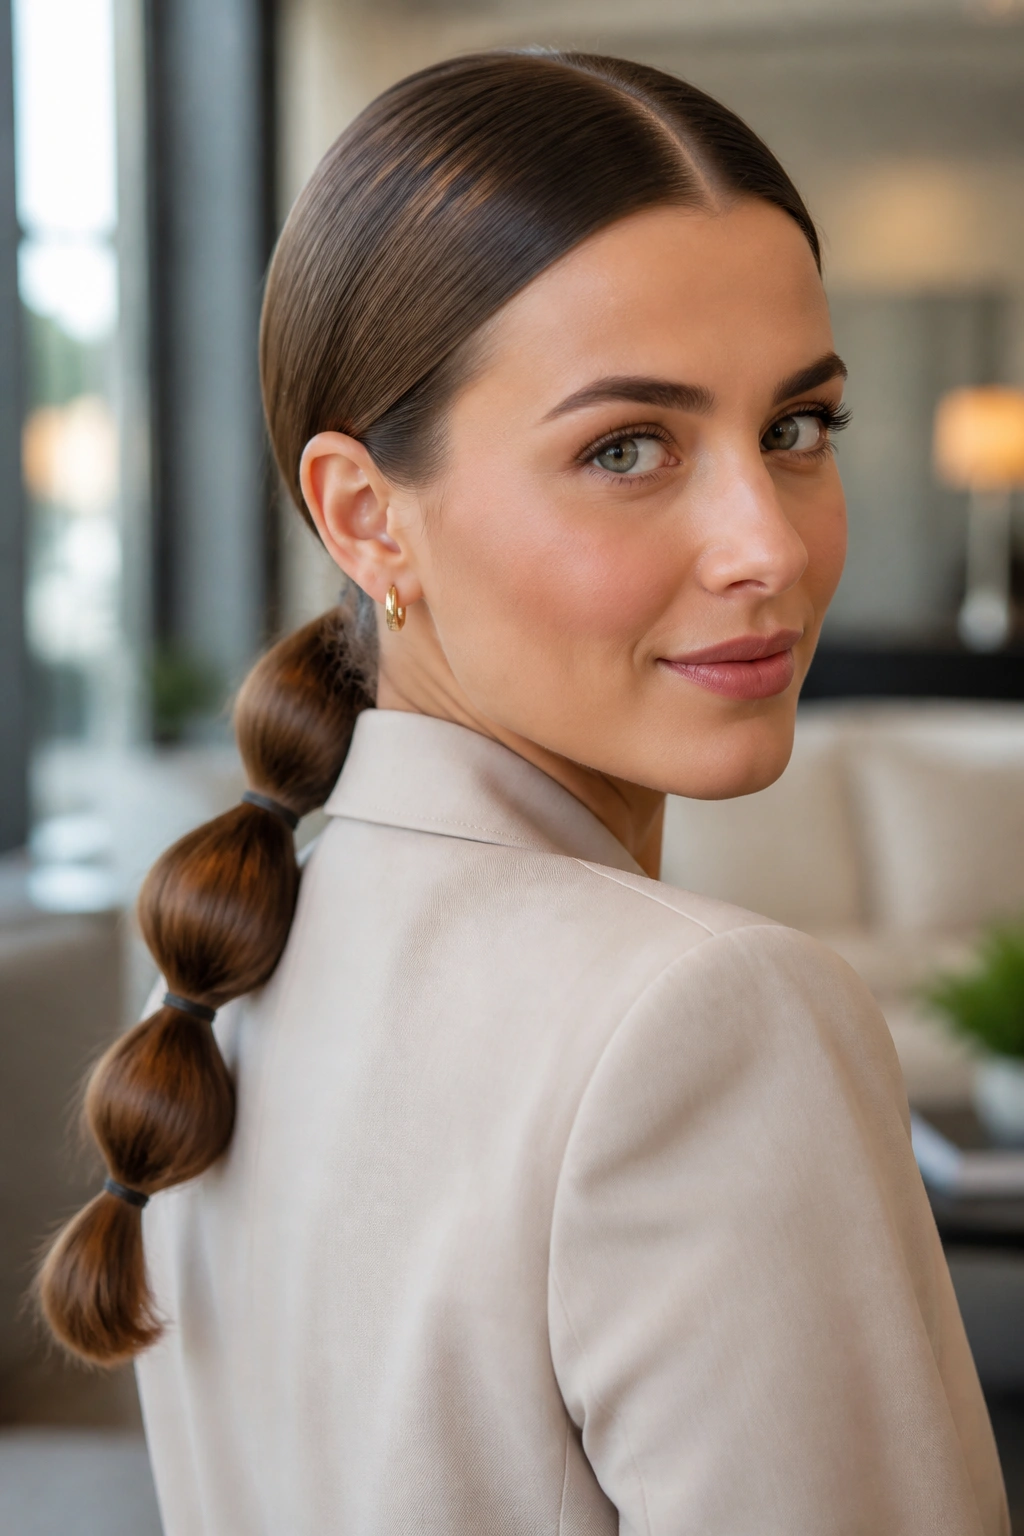
A low bubble ponytail with a center part reads polished before you add a single accessory. It sits at the nape, which makes the style calmer and a little more grown-up than the high version. That lower placement also keeps the bubbles from getting too wild on long hair.
The center part gives it structure right away. It draws a clean line through the front and lets the ponytail do the rest of the talking. If you want something that works for the office, dinner, or a day when your hair needs to behave, this is the safest smart choice.
The bubbles themselves can be a touch larger here. Low placement gives you room to use wider sections, and that extra length makes the ponytail feel softer instead of severe. I’d use a flat brush at the roots, then stop fussing. Too much smoothing can make the style look stiff.
A low bubble ponytail is also kind to hair that has a little frizz or movement. You do not need a glassy finish for this to work. In fact, a bit of texture keeps it from looking overly precious.
3. Half-Up Bubble Ponytail
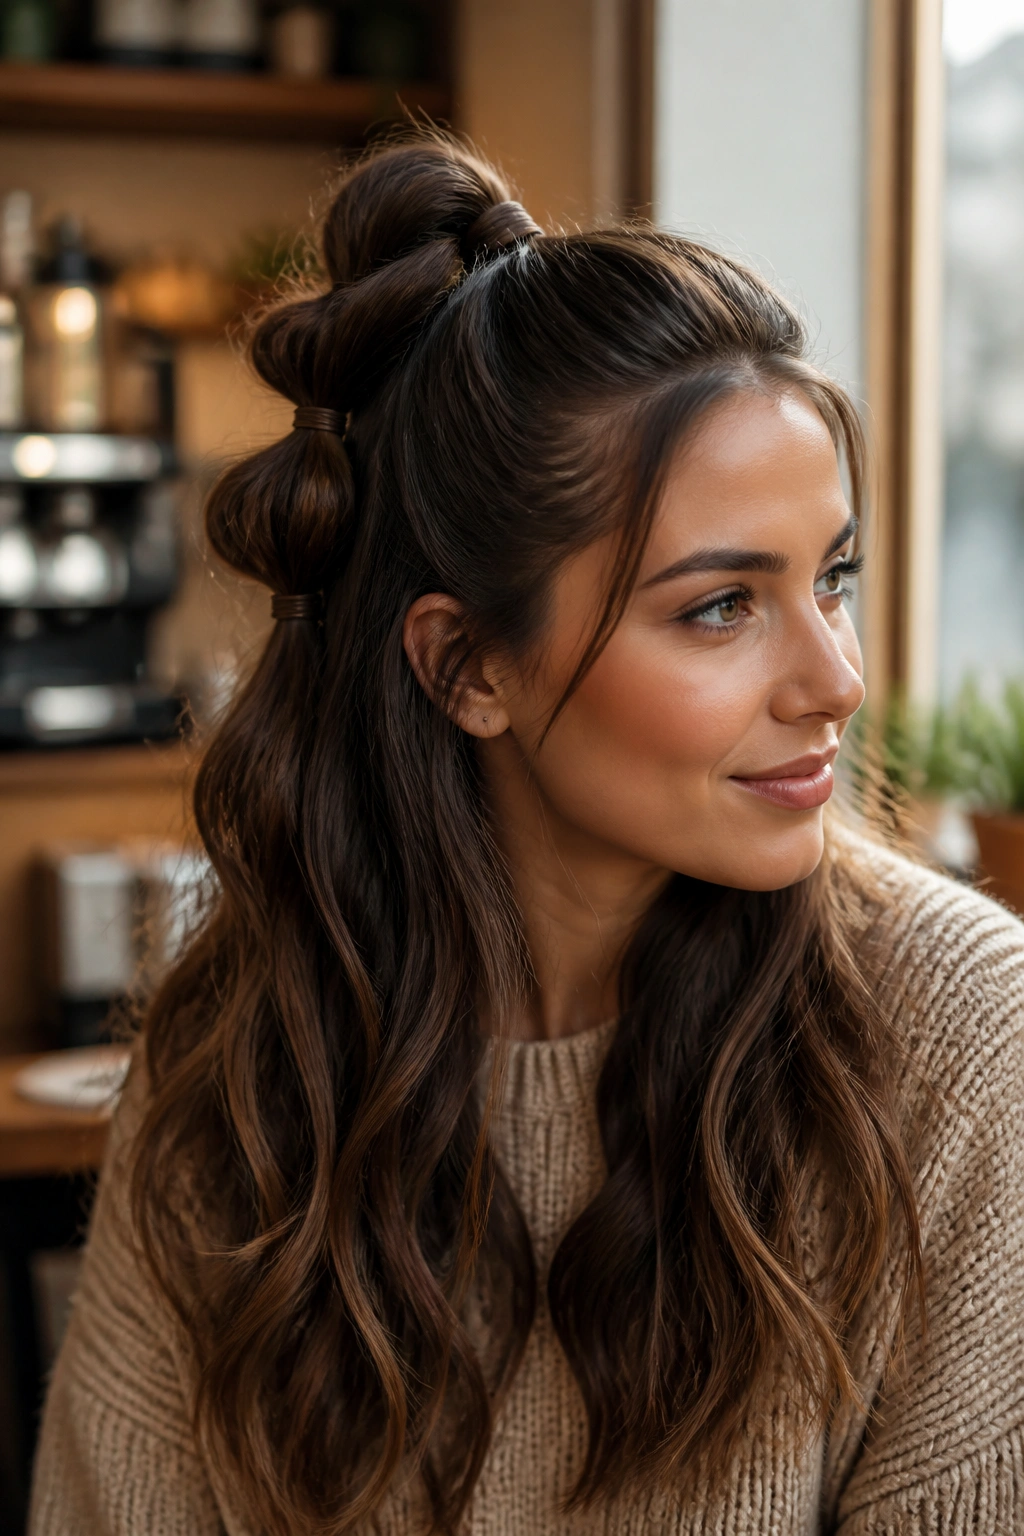
Want the bubble look without pulling all your hair up? The half-up bubble ponytail is the easiest answer, and it’s flattering in a way that surprises people. It keeps length down your back while giving the crown some lift, which is handy if your hair falls flat when it’s all tied back.
How to Wear It
The top section should be clean and fairly neat, but not so tight that it gives you a headband headache by lunchtime. Gather from temple to temple, or a little wider if you want more lift. Then add two to four small bubbles depending on hair length.
What Makes It Easy to Wear
- Good for long layers that need control at the crown
- Nice on hair that is thick at the ends but flatter on top
- Leaves the lower hair loose, so the style stays softer
- Works with straight hair, waves, or loose curls
- Easy to pin one side back if you want a lopsided look
The best part is how forgiving it is. If the top bubble section is a little imperfect, the loose hair underneath covers a lot. That makes this one friendlier than a full ponytail for people who want the idea of the style without the commitment.
4. Braided Bubble Ponytail Hybrid
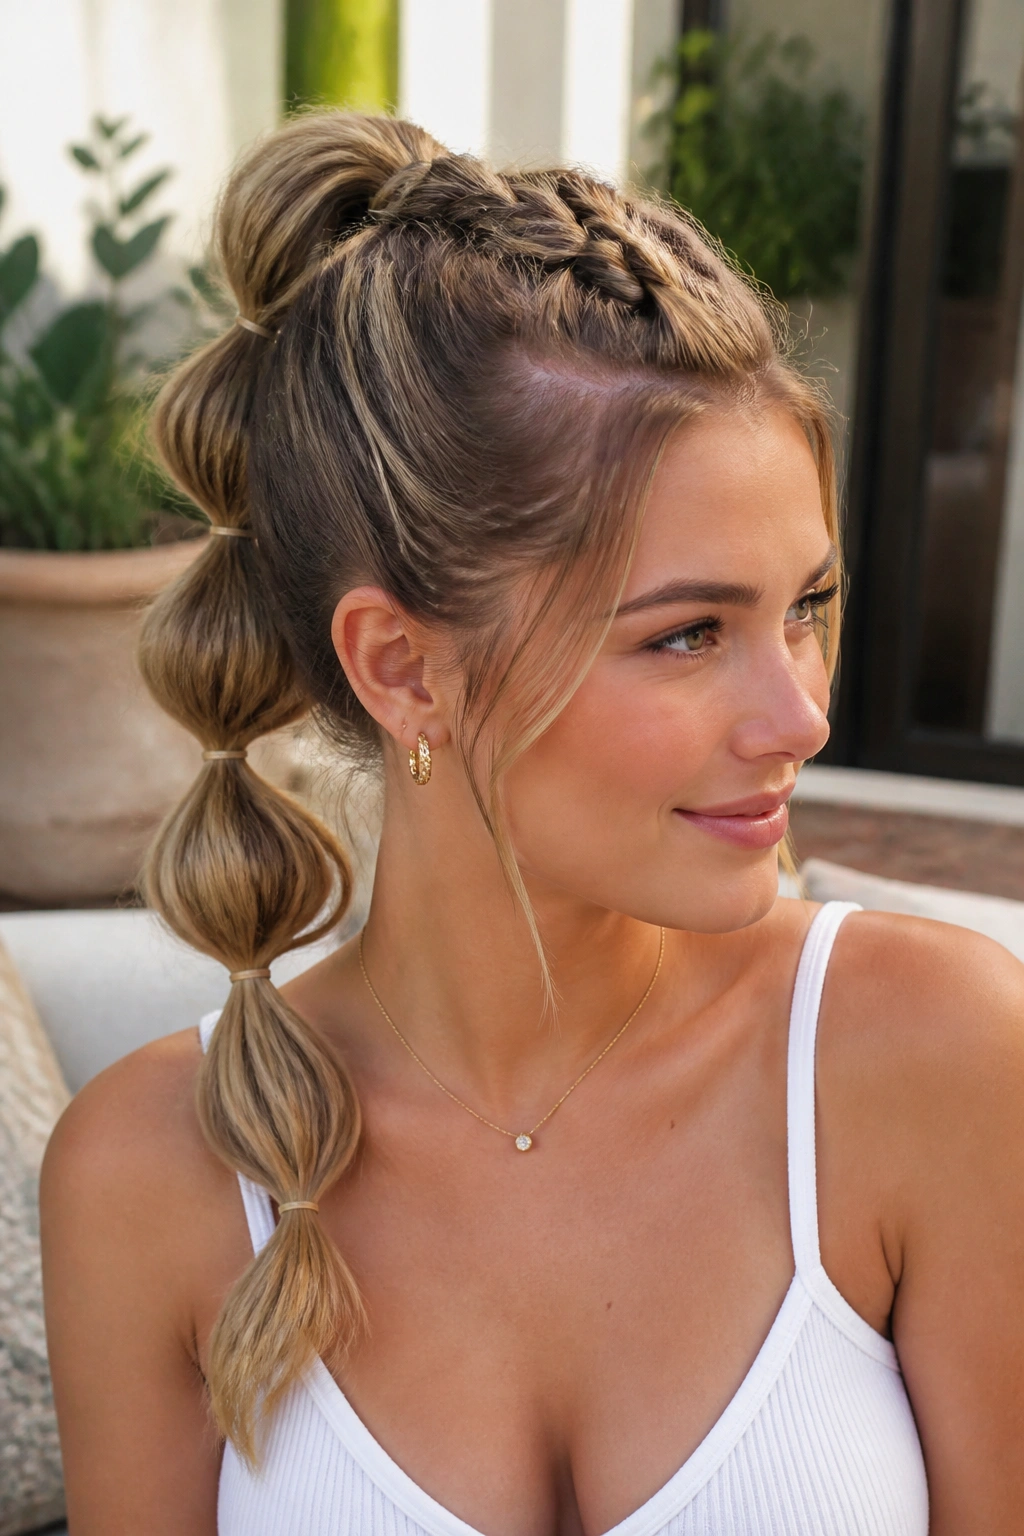
This is the version I reach for when a plain ponytail feels too plain and a full braid feels like too much work. Start with a braid at the top or weave a short braid into the first section, then switch to bubble sections farther down. The result has more grip, more texture, and a little more personality.
A braid changes the whole energy of the style. It keeps the crown tighter, which helps if your hair slips out of ponytails by the third hour. Then the bubbles bring in shape and softness so the ponytail doesn’t end up looking too sporty. It’s a good compromise, and sometimes that’s the smartest move.
This works especially well on long hair or hair with a bit of grip from second-day texture. Freshly washed hair can be slippery with this one, so a spritz of texturizing spray at the roots helps the braid hold and keeps the bubbles from sliding.
- Use a small three-strand braid or a fishtail braid at the top
- Switch to clear elastics once the ponytail is secured
- Keep the braid snug, but not flattened
- Pull the bubbles gently so the braid and the puffed sections feel connected
The final look is practical and decorative at the same time. That’s rare.
5. Wrapped Bubble Ponytail With Hidden Elastics
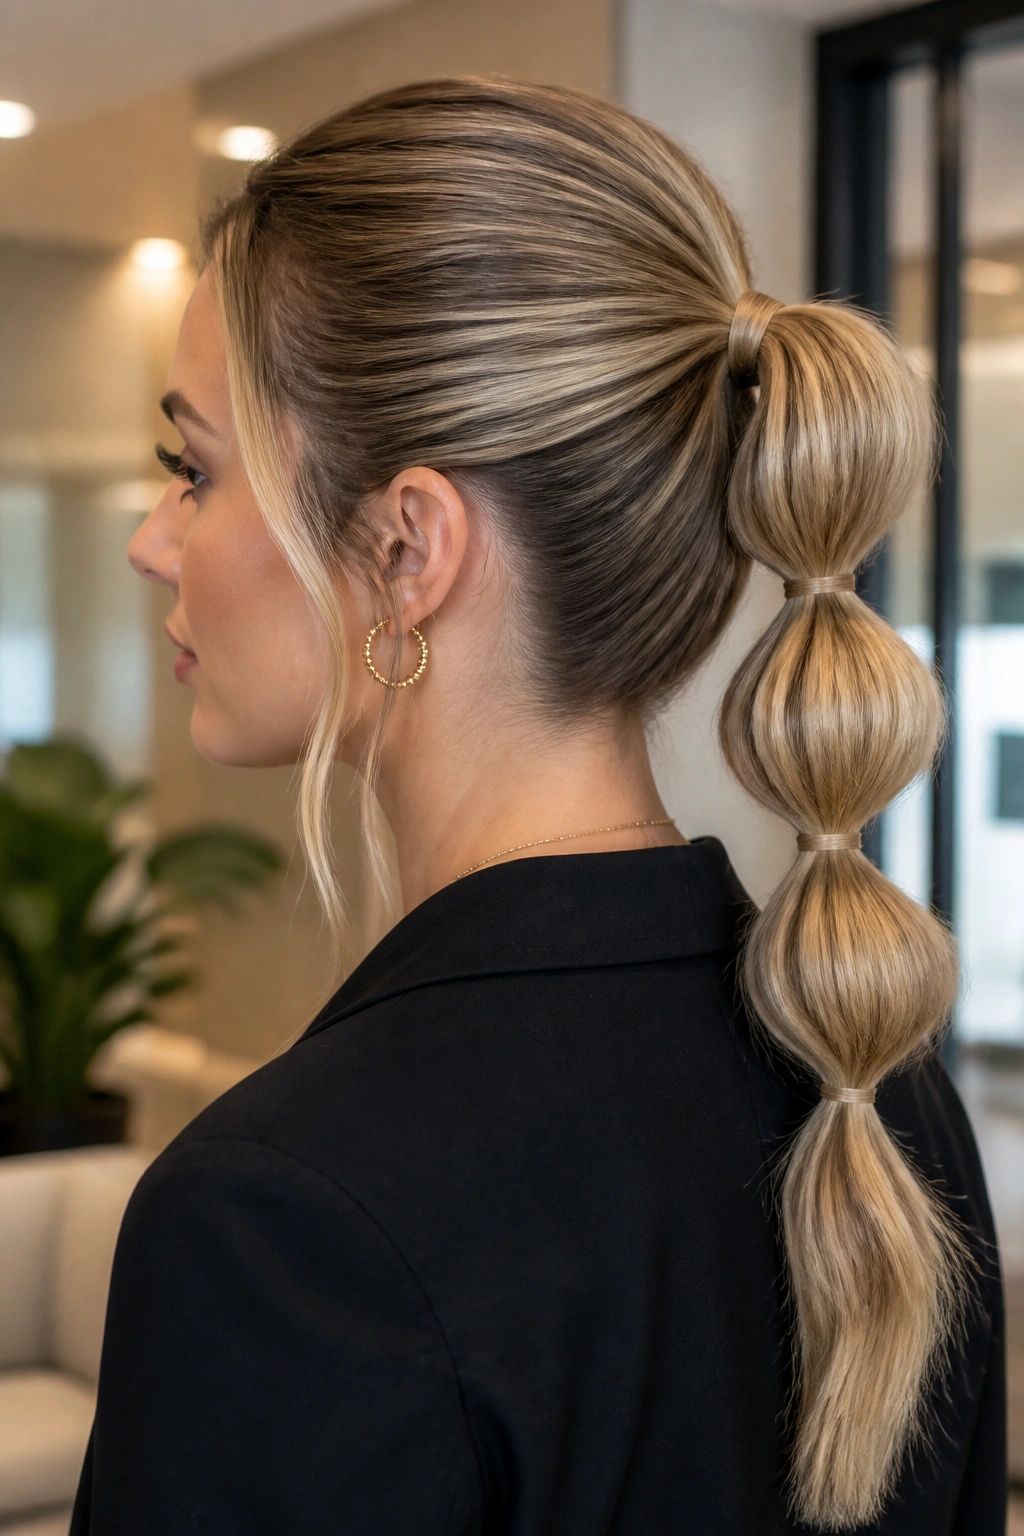
I have a soft spot for the wrapped version because it looks finished from every angle. The elastics are still doing the work, but you barely see them. Each one gets covered with a thin strand of hair, so the bubbles read as clean bands of volume instead of obvious ties.
That small change matters more than people think. Visible elastics can make a bubble ponytail feel casual in a hurry. Wrapped bands shift it into a dressier lane without changing the basic structure. If you’re wearing it with a blazer, a slip dress, or a simple black top, the wrap keeps the style from looking too school-gym neat.
The only part that takes patience is the wrapping. Take a narrow piece of hair, twist it once, then wind it around the elastic until the band is hidden. Pin the end under the base of the bubble with a bobby pin. A tiny pin works better than a giant one here; big pins poke out and ruin the clean line.
This is also the version that benefits most from a mirror check at the back. One loose wrap can unravel the whole illusion. Annoying. Worth it.
6. Textured Bubble Ponytail for Wavy Hair
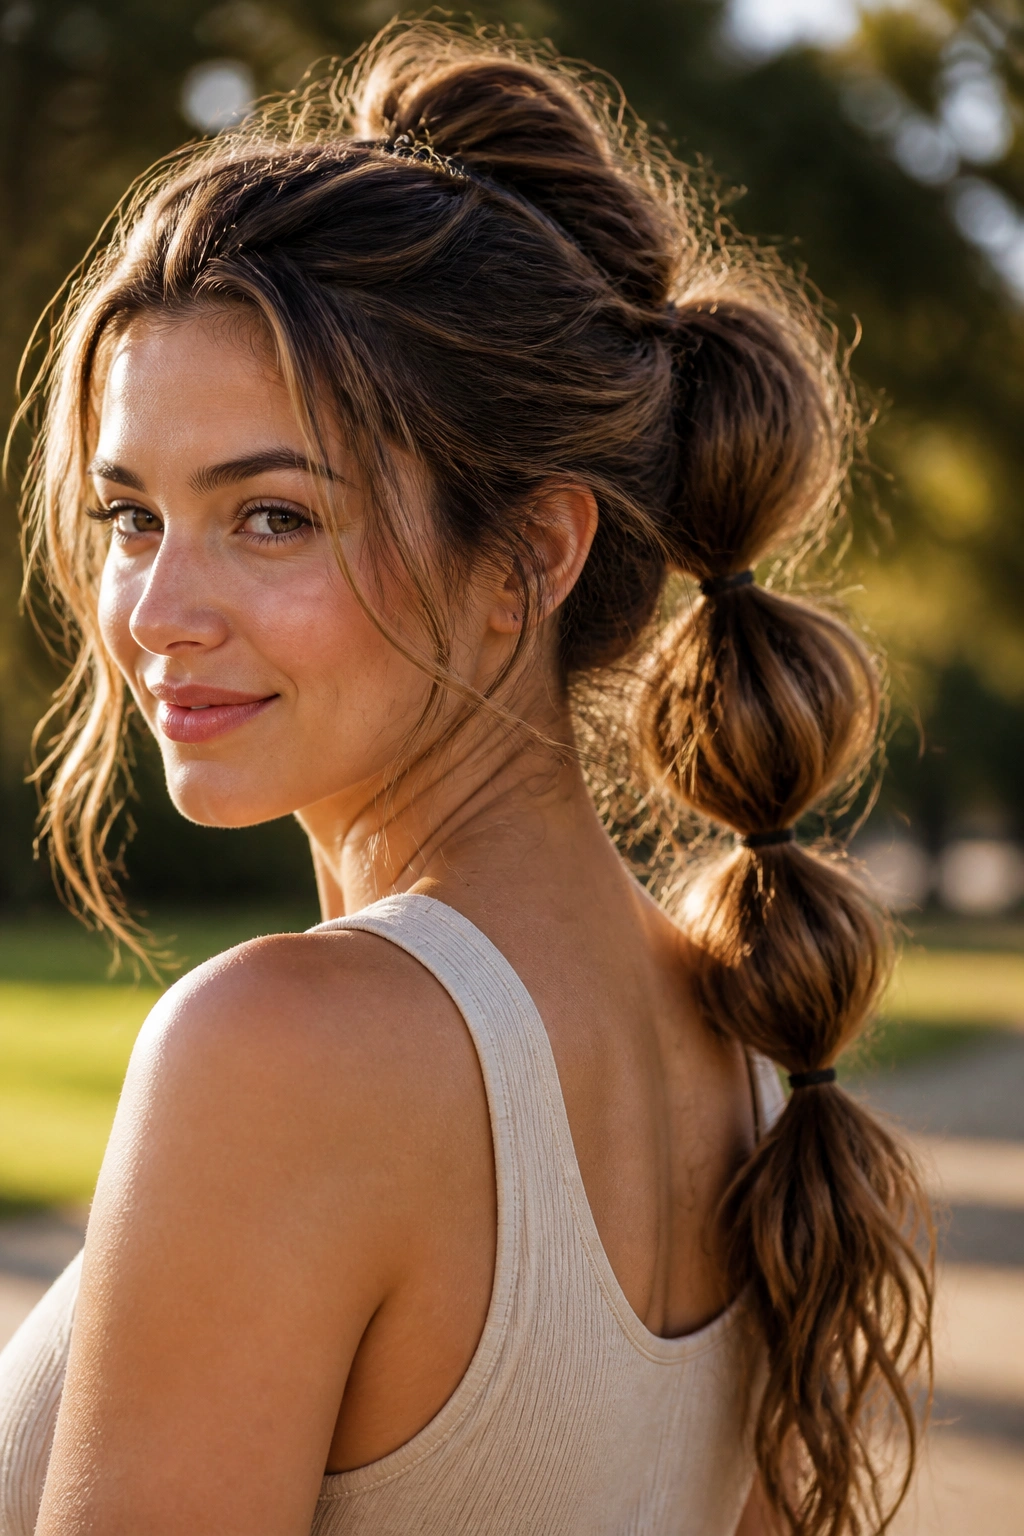
Unlike the sleek versions, this one gets better when a few pieces escape. Wavy hair gives bubble ponytails a softer outline, and I think that looseness is half the point. You’re not chasing perfection here. You’re making shape out of movement.
Texturizing spray does more good than a heavy smoothing cream in this style. Work it through dry hair before tying the ponytail, then use your fingers instead of a brush when you section the bubbles. The result has more grip and less stiffness, which matters when you want the bubbles to look airy rather than polished.
A textured bubble ponytail is especially nice if your hair has layers. Those shorter pieces around the face and crown help break up the shape in a natural way. If the front gets a little frizzy, leave it. That texture makes the style feel lived in instead of overworked.
What Makes It Different
- Better on hair with bend, wave, or soft frizz
- Looks good with slightly uneven bubble sizes
- Needs less product than a sleek ponytail
- Easier to refresh during the day with a few finger tugs
If you hate the idea of a crisp style that has to stay crisp, this one will probably suit you better.
7. Side-Swept Bubble Ponytail
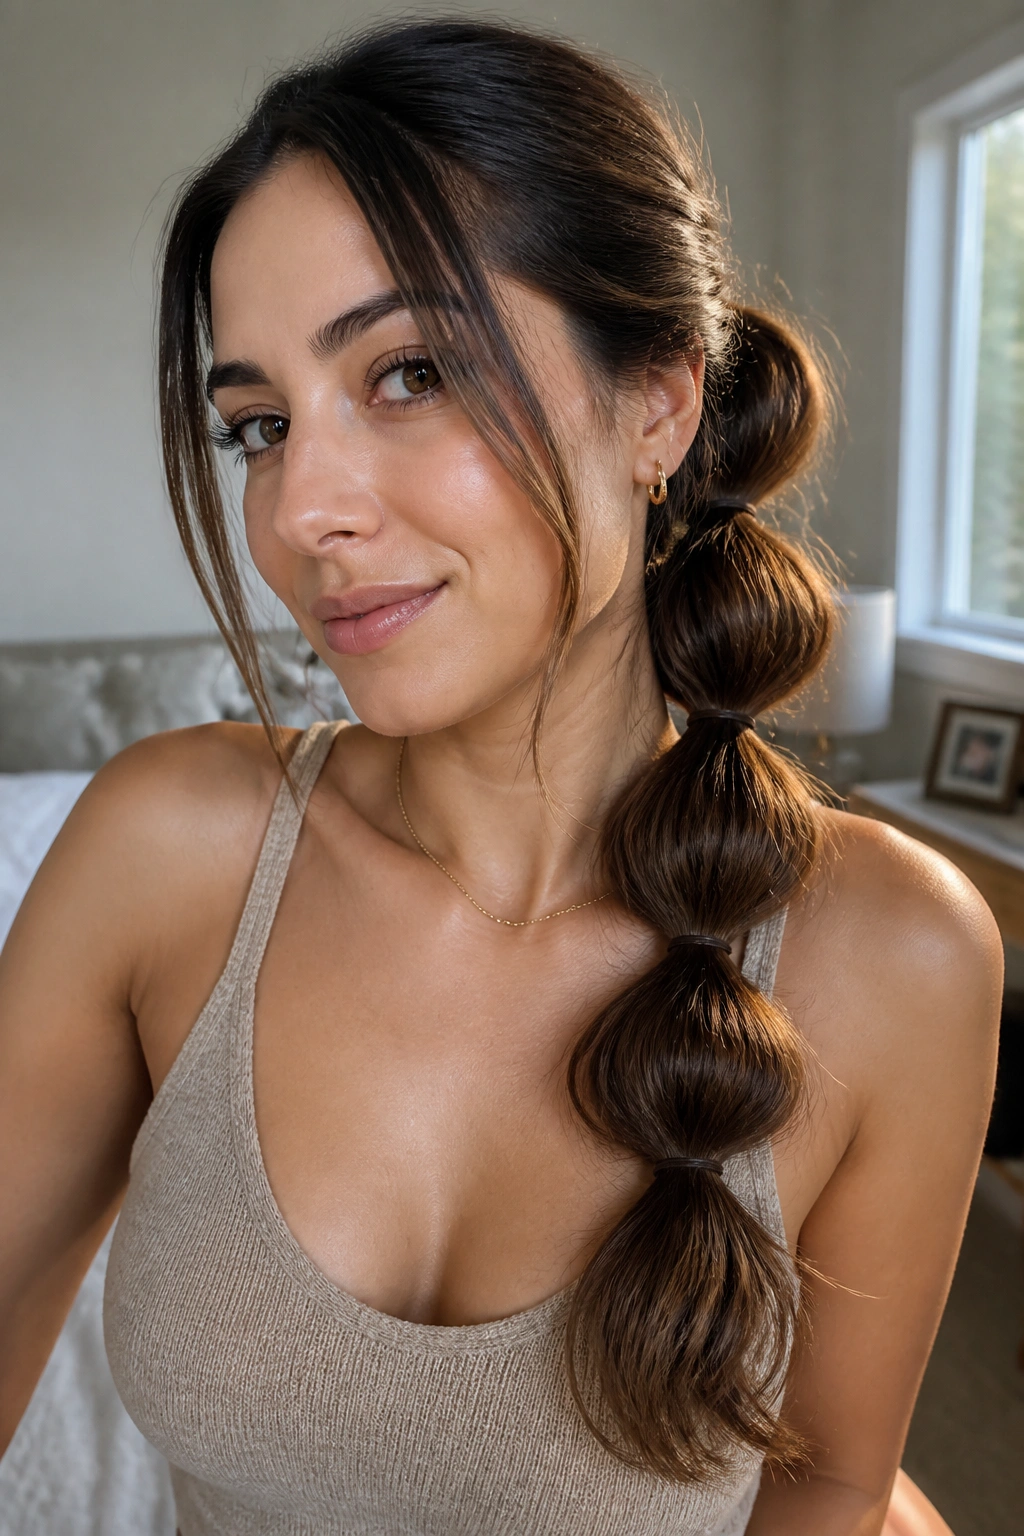
A side-swept bubble ponytail is for the days when symmetry feels boring. Sweep the ponytail just behind one ear or anchor it slightly off-center at the nape, then let the bubbles fall over one shoulder. That shift changes the whole mood. Softer. A little more romantic. Less obedient.
The side placement helps if your hair has a naturally heavy part or if one side tends to fall flatter than the other. Instead of fighting it, you lean in. The bubbles can be slightly tapered too, with the first few sections near the base a little tighter and the lower ones looser so the ponytail drapes nicely.
I like this version with one shoulder-baring top or a wide neckline. It frames the collarbone better than a centered ponytail, and that matters more than people admit. Hair can shape the outfit just as much as accessories do.
Small Detail That Keeps It Balanced
- Start with a deep side part or a soft off-center part
- Place the ponytail at the lower side of the head, not the temple
- Use 3 to 5 bubbles, depending on length
- Pull the upper face-framing pieces loose so the front doesn’t look too severe
The result feels relaxed, but not sloppy. That balance is the whole game.
8. Crown-Lift Bubble Ponytail
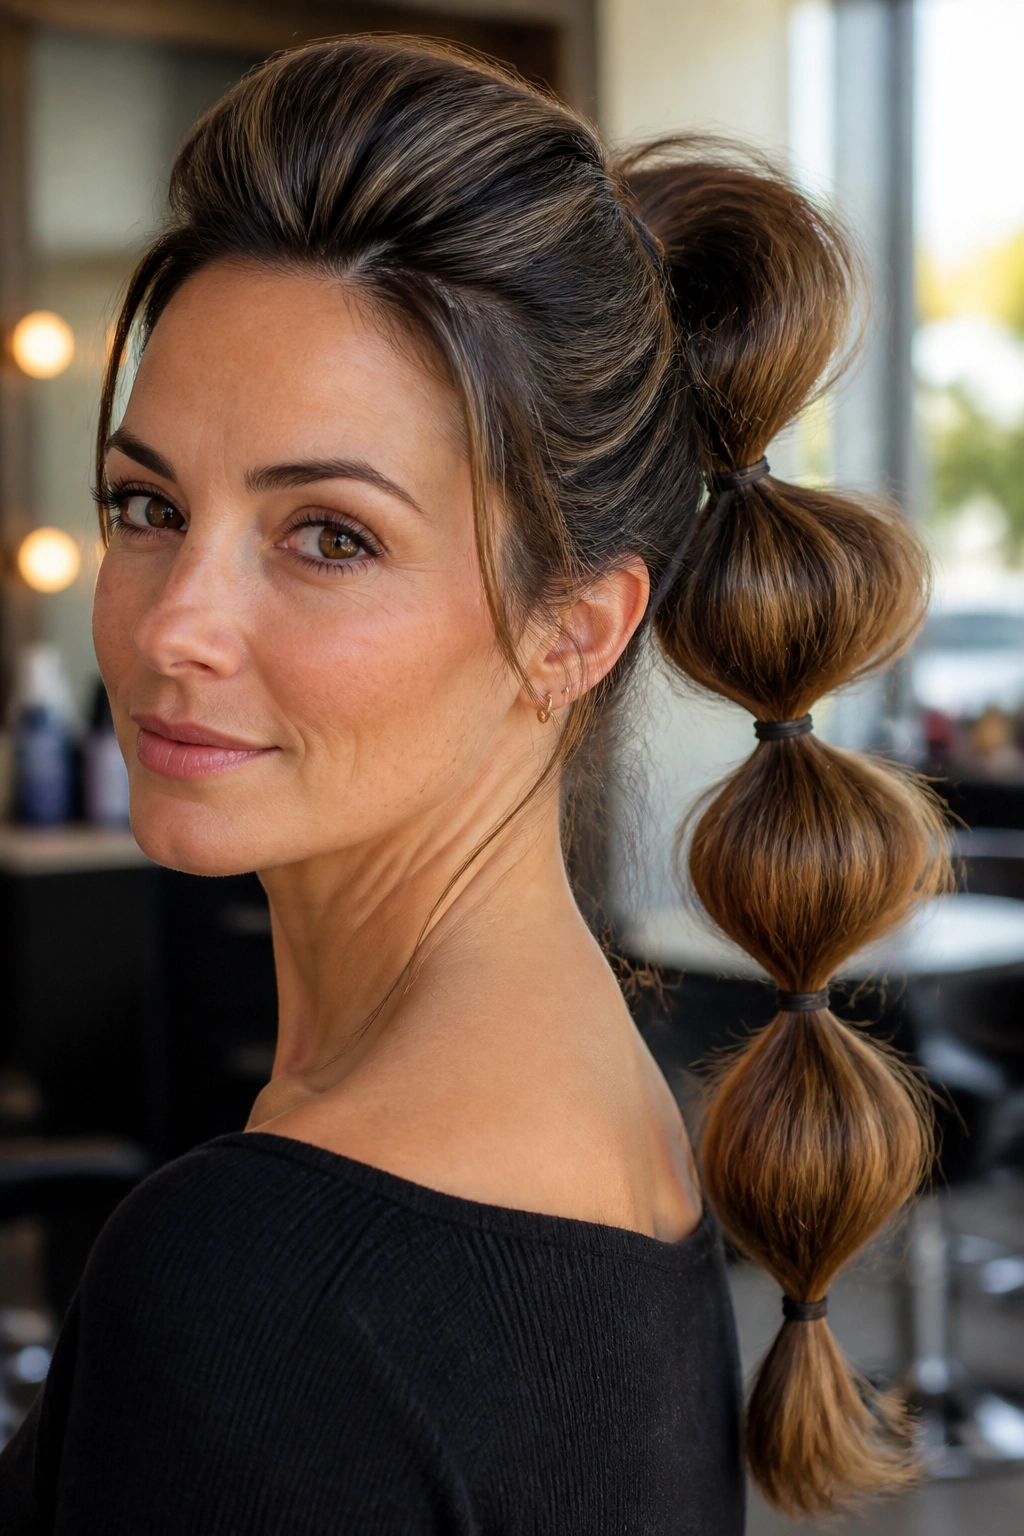
If your hair goes flat at the top, start the volume at the crown, not in the bubbles. That’s the move here. A little lift near the roots changes how the whole ponytail sits, and it matters more on fine hair than almost anything else.
Tease the crown gently with a tail comb, then mist the roots with dry shampoo or a light texture spray. You do not need a giant bouffant. Just enough lift so the ponytail has room to breathe. After that, tie the base and let the bubbles do their thing. The crown stays raised, and the bubbles get a better starting point.
This style works well on shorter layers too because the lift masks some of the uneven pieces that tend to fall out near the hairline. If your hair slips around by lunchtime, a small amount of mousse before blow-drying can help more than extra hairspray later. Build the shape first. Hold it second.
- Best for fine or medium hair
- Good when the crown collapses under a plain ponytail
- Use a teasing brush lightly, not aggressively
- Finish with a flexible-hold spray so the lift stays soft
It looks fuller from the side, which is often the angle that matters most.
9. Big-Volume Bubble Ponytail
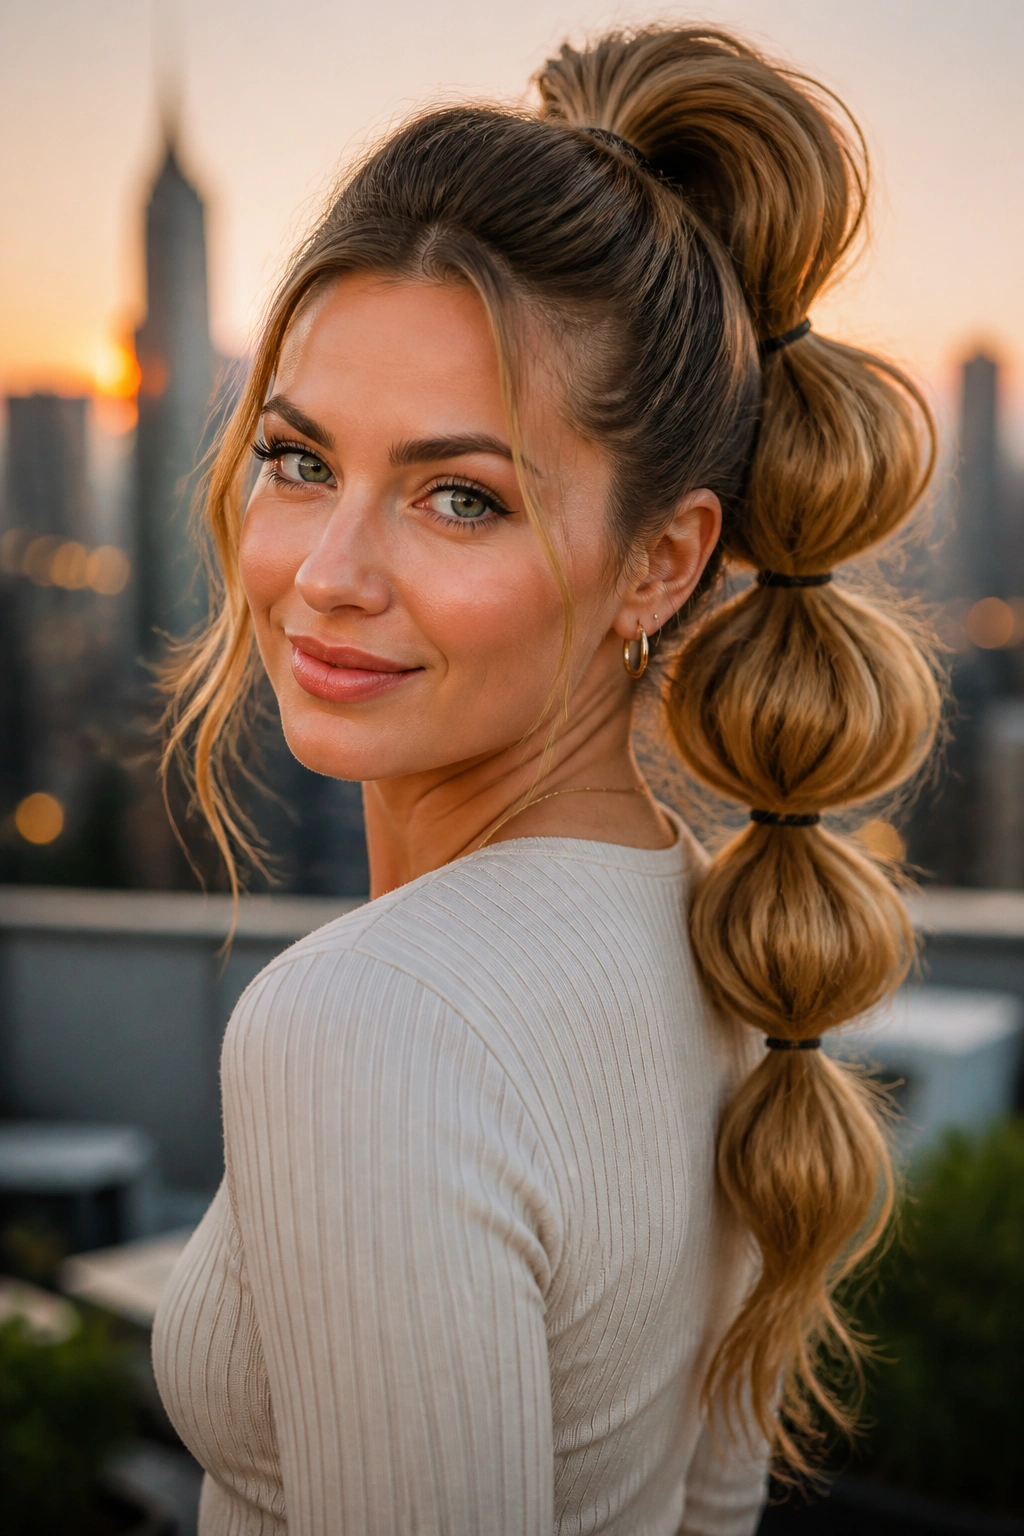
Can a bubble ponytail look glamorous instead of tidy? Absolutely. A big-volume version leans into size. The bubbles are fuller, the sections are wider, and the ponytail has a bit of drama without needing curls or a complicated base.
The trick is to work with larger sections of hair. About 2½ to 4 inches between elastics can create a much rounder bubble on long hair. After each band goes in, tug the sides of the section outward with your fingertips until the shape feels soft and puffed, not pinched. That little pull is what makes the difference.
This one loves thick hair. It also works on hair with some wave, because the bend helps the bubbles hold their shape. Straight, very fine hair can still do it, but you may need to rough up the texture first with dry shampoo or a spritz of volumizing spray. Otherwise the bubbles can look thin from the side.
How to Keep the Shape Soft
- Don’t place the elastics too close together
- Pull the bubbles wider before you touch the next section
- Curl the ponytail ends slightly if you want extra fullness
- Avoid heavy creams that weigh the hair down
It’s the style I’d pick for a night out when I want height without a full updo. Strong shape. Easy movement.
10. Bubble Ponytail With Ribbon or Scarf
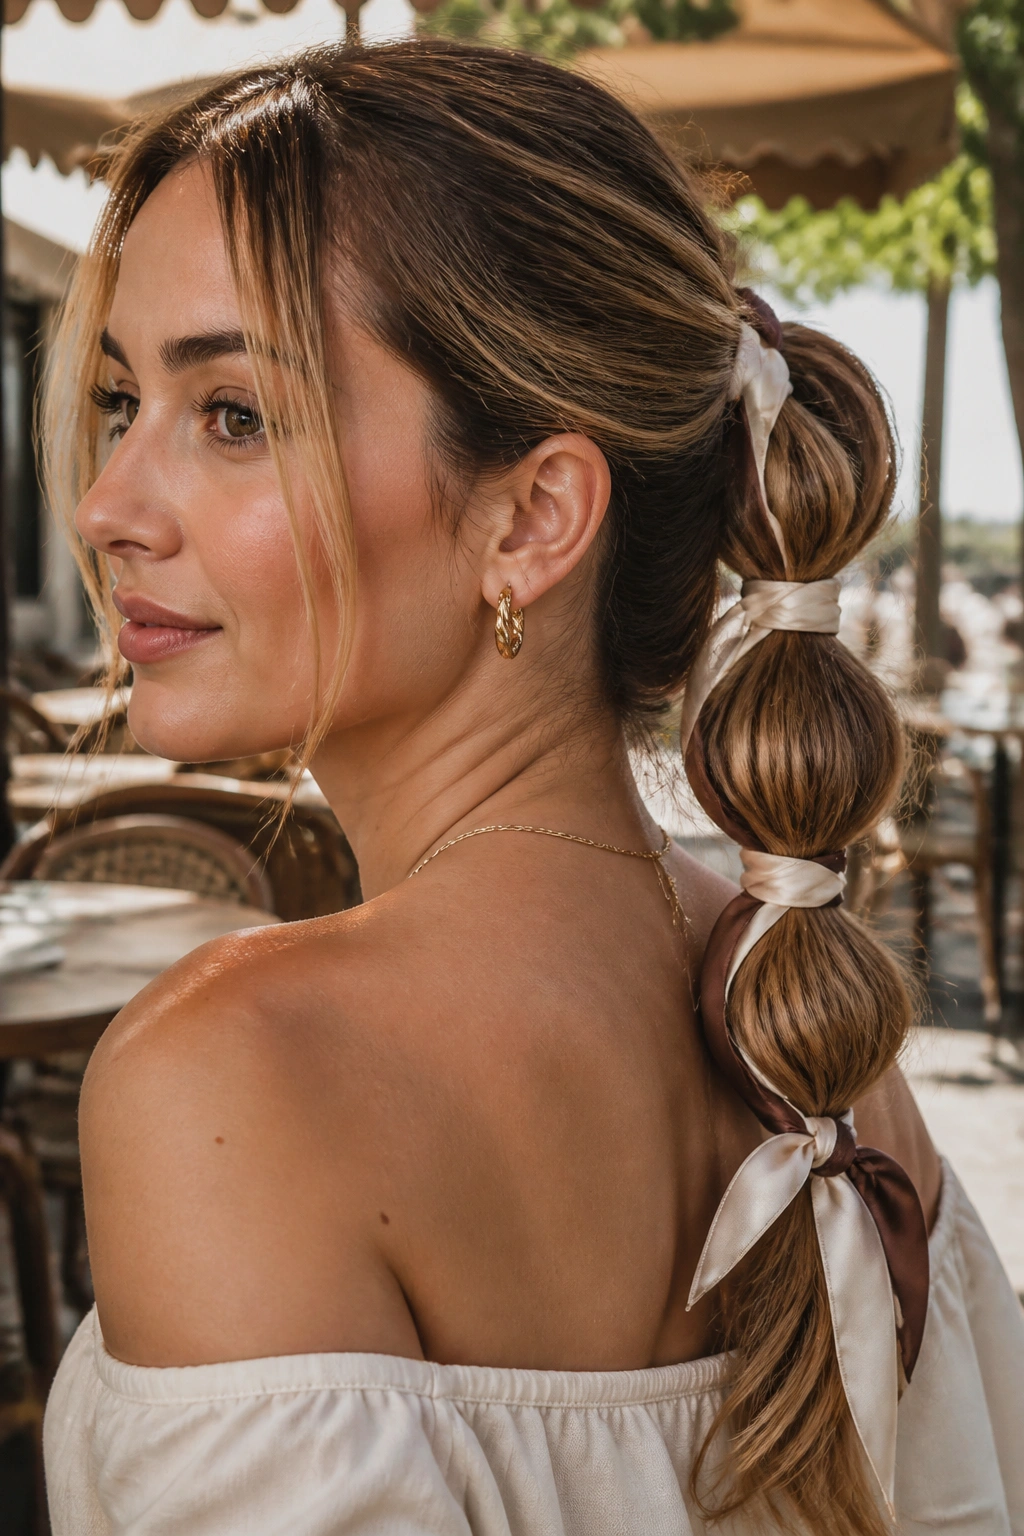
A silk ribbon can change a bubble ponytail in about ten seconds. Tie it around the base, weave it between the bubbles, or knot it at the end. The hair itself stays the same, but the mood shifts fast. Softer. More intentional. Less like you grabbed a spare elastic from the bottom of your bag.
Ribbons work best when they echo something else in the outfit. A black ribbon with a white shirt. A satin ribbon with a dress that has a little sheen. A narrow scarf if you want more color and movement. Keep the fabric light so it doesn’t pull the ponytail down or create a bulky knot at the nape.
The prettiest version is usually the least crowded one. One ribbon is enough. Two starts to feel busy unless the rest of the outfit is very simple. And if the scarf is patterned, let the hair stay smooth so the eye has a place to rest.
Best Ways to Use It
- Tie the ribbon at the base and let the ends hang
- Wrap a thin scarf around one elastic only
- Use a matte ribbon for daytime and satin for dressier looks
- Match the width of the ribbon to your hair thickness
A ribbon is not decoration glued on top. It should feel part of the ponytail.
11. Bubble Ponytail for Short Hair and Lobs
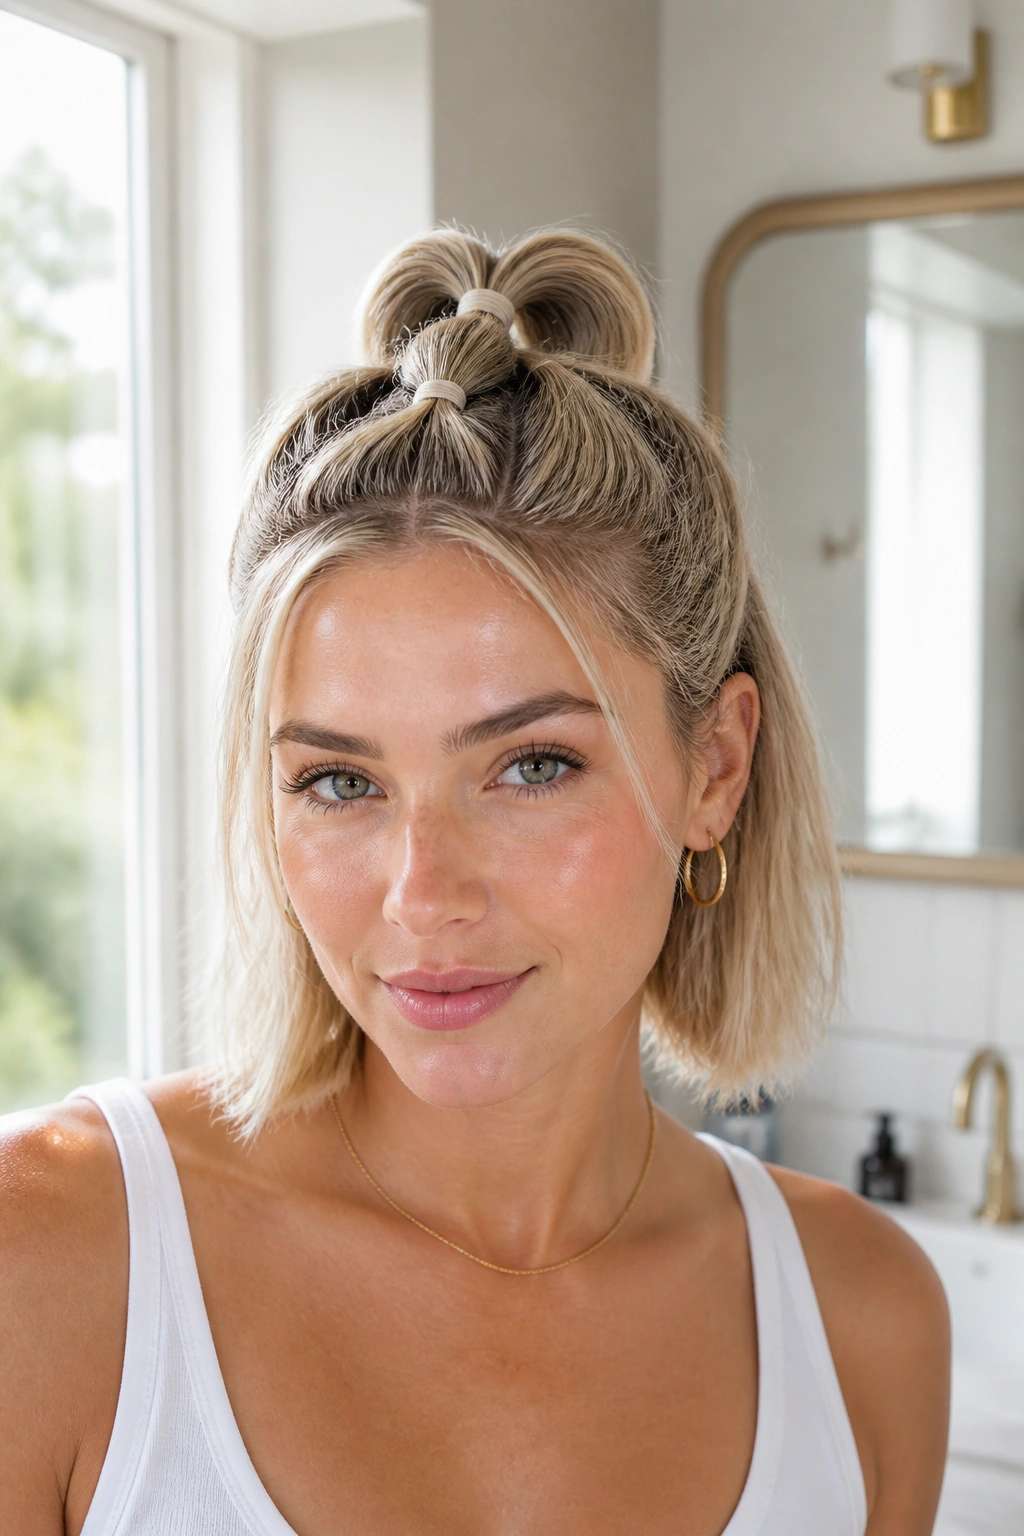
Short hair can do a bubble ponytail, but the sections need to be smaller and the bands closer together. That’s the part people miss. If your hair stops around the collarbone or just below it, don’t try to force big dramatic bubbles. The style reads better when the shape is compact.
A lob usually works best with a low or mid ponytail and three or four tight sections. The bubbles won’t hang long, so the goal changes a bit. You’re building stacked shape instead of length. That can look sharp, especially on blunt cuts where the line at the ends already feels clean.
Tiny clear elastics help a lot here. Thicker bands can eat up too much length and make the ponytail look stubby. If a few pieces fall out around the face, leave them. They soften the shape and stop the style from looking like it’s trying too hard.
This version is good for days when you want movement without losing the shape of a haircut. Short hair often needs that balance more than long hair does. And yes, it absolutely counts.
12. Workout-Ready Bubble Ponytail
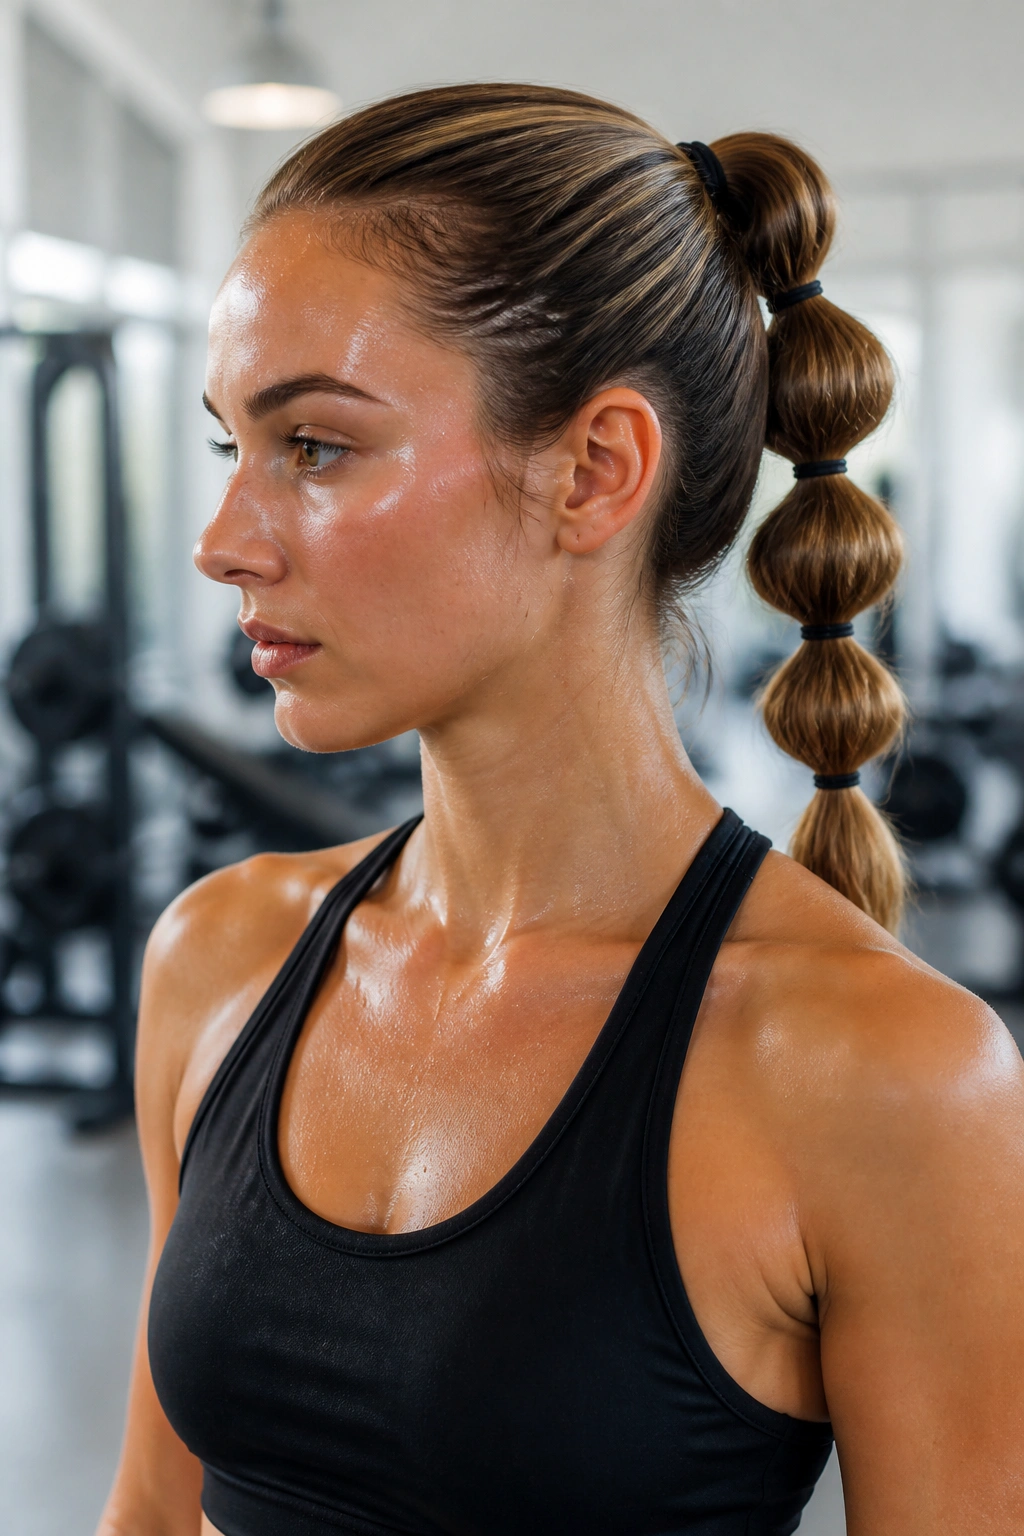
Pretty does not have to mean fragile. A workout-ready bubble ponytail is made to stay put, which means the spacing and tension matter more than the polish. You want a secure base, snag-free elastics, and sections that won’t collapse the second you move.
A mid-height ponytail usually works better than a very high one here. It stays stable, and it doesn’t bounce around quite as much. Keep the bubbles a little tighter than you would for a dinner look, since loose sections tend to fray faster when you’re sweating, stretching, or moving fast.
Skip heavy oils and glossy creams. They make the hair slide around, and that gets annoying fast. A light gel at the hairline or a spritz of strong-hold spray on a toothbrush can tame baby hairs without turning the style stiff. If you’re dealing with very slick hair, a few hidden bobby pins at the base help more than adding more product.
Why It Holds Up
- Secure base with no slack at the crown
- Snug elastic spacing
- Less slip from sweat and movement
- Easy to redo in under 2 minutes
It’s practical first. That is the point.
13. Curly Bubble Ponytail
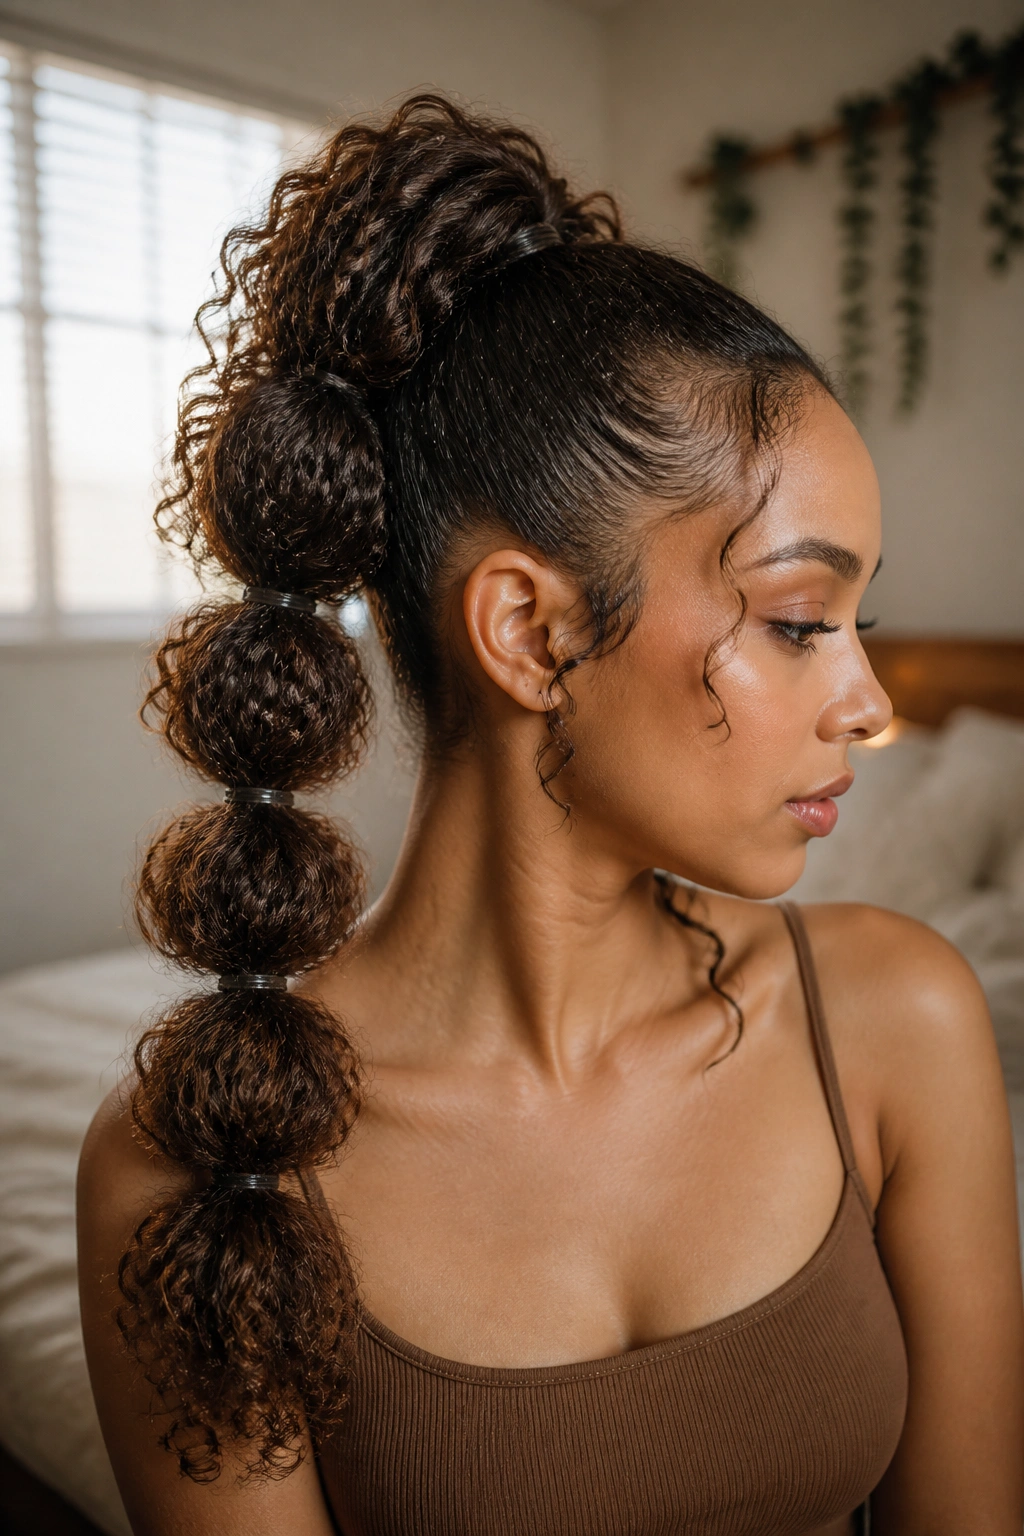
What if your hair already has volume? Then the bubble ponytail gets easier, not harder. Curly hair brings built-in shape, so the bubbles don’t need to work as hard to look full. The style ends up feeling richer and more dimensional than it does on straight hair.
The trick is not to brush curls out before you start. Use your fingers or a wide-tooth comb to gather the ponytail so you keep the curl pattern intact. A little gel or edge control around the front can smooth the hairline, but leave the ponytail itself loose enough to show the curl texture between each band.
The bubbles may look more like soft rounded sections than perfect circles, and that’s fine. On curly hair, perfect circles usually mean too much tension. The shape should stay springy. If you pull too hard, the curls lose bounce and the whole style gets flat at the ends.
How to Keep Curls Intact
- Work on dry or fully diffused hair
- Use wide sections between elastics
- Pull only the outer edges of each bubble
- Keep the last few curls at the end free if you want extra softness
Curly bubble ponytails have presence. They do not need much help.
14. Bubble Ponytail With Metal Cuffs
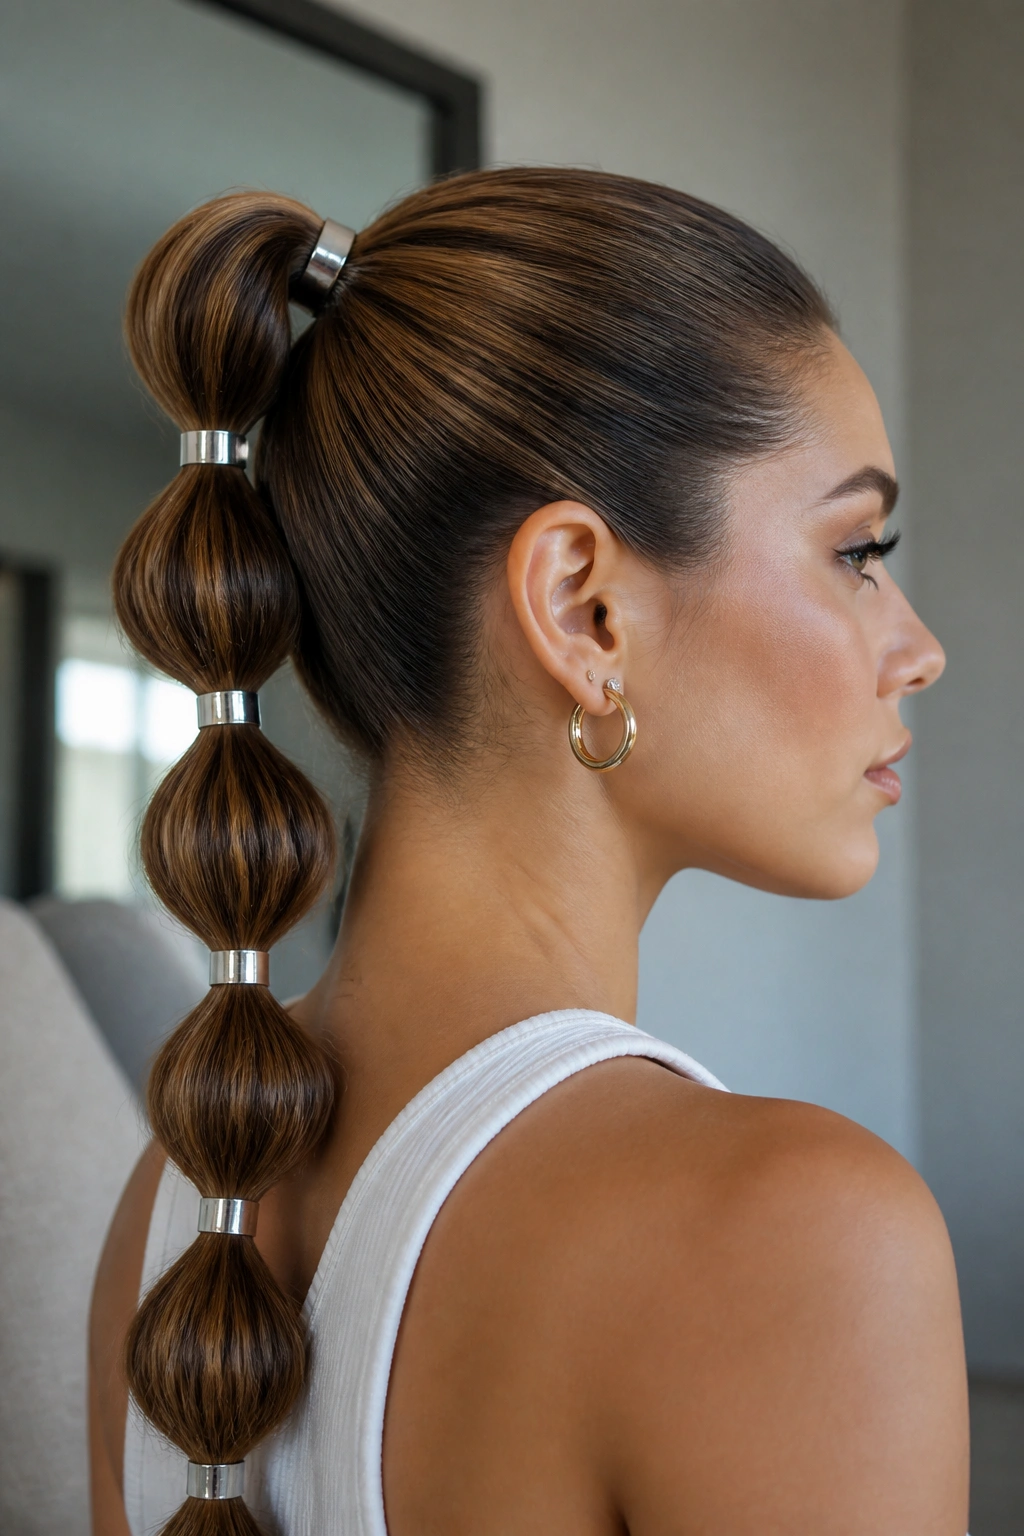
The cuffs do the styling work here, so the ponytail can stay simple. Metal hair cuffs or rings slide over the elastics and turn each section into a more graphic shape. The bubble is still there, but the cuff adds a hard edge that changes the mood from sweet to sharper.
This version looks best when the cuff size matches the hair thickness. Too small, and the band disappears. Too large, and it starts to look costume-like. I prefer a mid-size cuff on straight or blown-out hair, where the shine of the metal has room to show. On curly hair, the look can get busy unless the ponytail is very neat.
Spacing matters more with cuffs than with plain elastics. If the sections are too close, the hardware starts to crowd each other. Leave room so each cuff can sit on its own. That gives the style a cleaner line and stops it from looking stacked in a rushed way.
Good Pairings for Cuffs
- Sleek blowouts
- Monochrome outfits
- Sharp collars or structured jackets
- Minimal earrings, so the hair still gets attention
A cuffed bubble ponytail has a little attitude. Not loud. Just sure of itself.
15. Soft Low Bubble Ponytail for Dressier Days
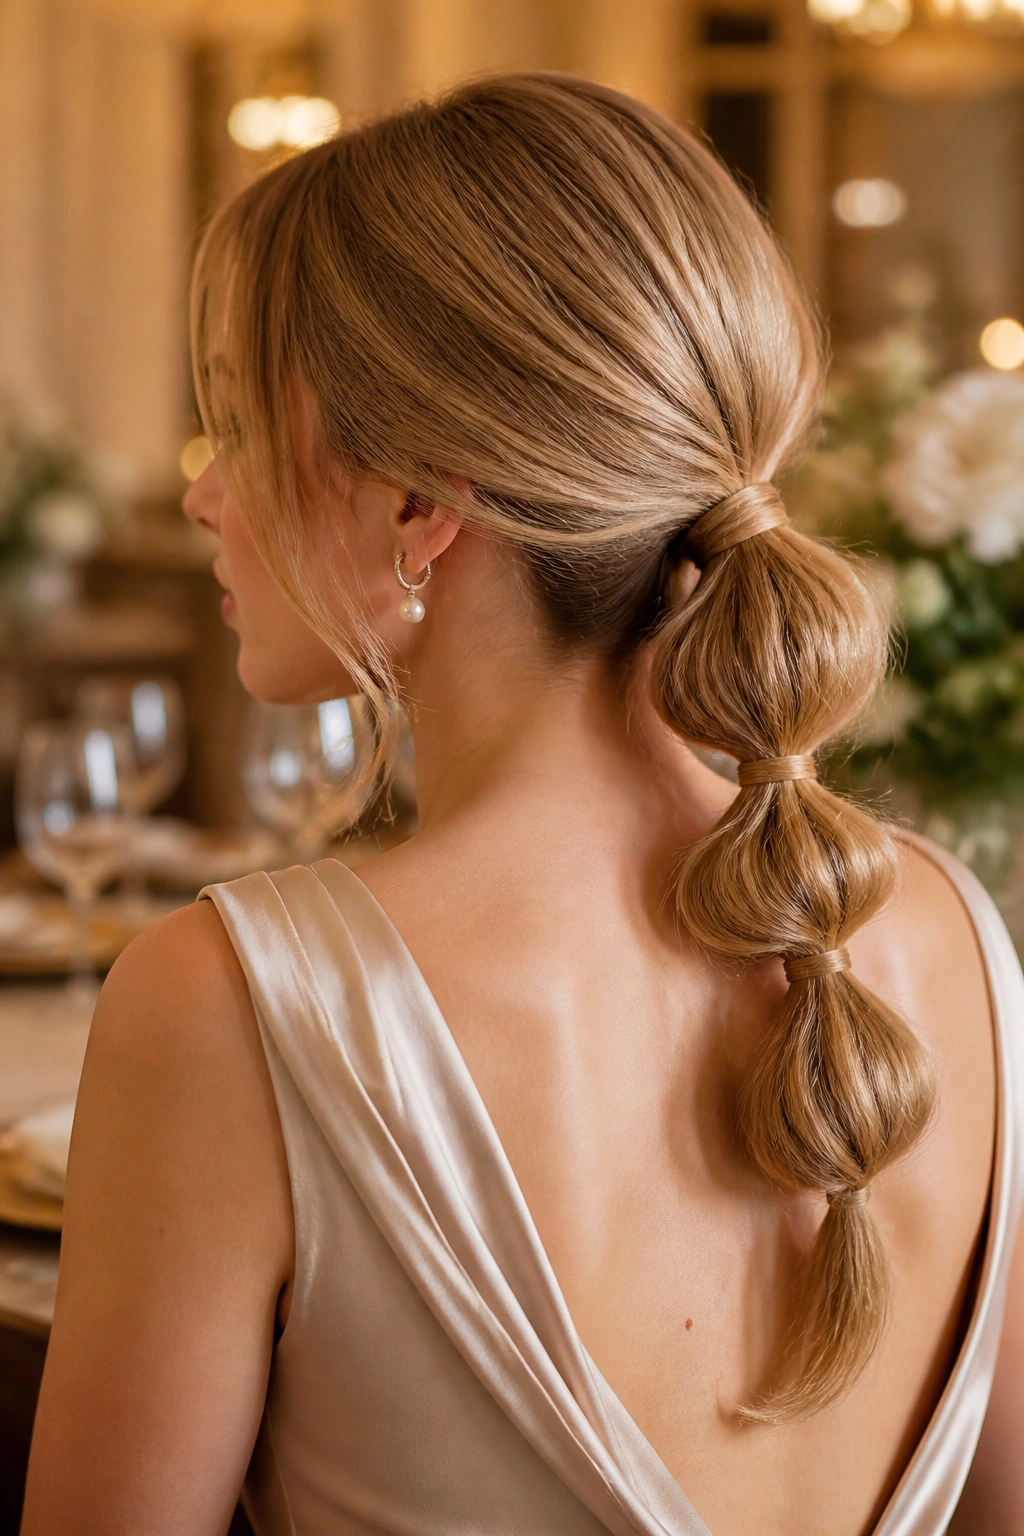
If I had to pick one version for weddings, dinners, or any outfit that needs a softer finish, this would be it. The soft low bubble ponytail sits near the nape, keeps the bubbles rounded but gentle, and leaves room for face-framing pieces that move when you do. It feels feminine without being precious, which is harder to pull off than people think.
The base should stay smooth, but not frozen. A little bend in the front pieces helps the style breathe. I’d use a low ponytail, then create only three or four bubbles with slightly wider gaps than you’d use for a sporty version. That gives the length a graceful line instead of a rigid one.
A few small details matter here. Wrap one piece of hair around the first elastic if you want the base to disappear. Leave the bubbles a touch uneven on purpose, because a perfectly matched row can look a bit stiff when the rest of the outfit is soft. And if you’re wearing earrings, this style gives them room without fighting for attention.
It’s the one I’d choose when I want the ponytail to look elegant and still feel easy to wear.
Final Thoughts
Bubble ponytails work because they give you structure without asking for a full styling session. A few elastics, a bit of spacing, and the right placement can change the whole feel of your hair in under ten minutes.
The real decision is the mood. Sleek for sharp. Soft for dressy. Textured for easy days. High if you want lift, low if you want calm, side-swept if you want a little movement. That’s the part people keep rediscovering: one basic shape can do a lot more than it first looks like it can.
If your first attempt looks a little off, adjust the spacing before you blame the style. Half an inch makes a difference.
