



Half updo hairstyles are what I reach for when hair is stuck between “down” and “up” and neither option feels worth the fight. You get the face-framing lift, a little shape at the crown, and enough length left behind to keep the style soft.
That mix is the reason these styles survive real life. They hide oily roots a bit, they work on hair that’s not freshly blown out, and they do not demand perfect symmetry. Good. Because perfect symmetry is overrated anyway.
A smart half-up style should take minutes, not a full bathroom session. It should also look better when your hair has a touch of grip — second-day texture, a little dry shampoo, or even the slight roughness that comes from air-dried hair. Sleek styles have their place, but on easy days I like the versions that don’t punish you for not trying very hard.
The best ones below lean on twists, clips, braids, knots, scarves, and a few pins. Nothing fussy. Nothing that needs a curling wand and a prayer. Start with the one that matches your energy level, and save the more polished versions for the days when you’ve got an extra five minutes.
1. Twisted Crown Half Updo
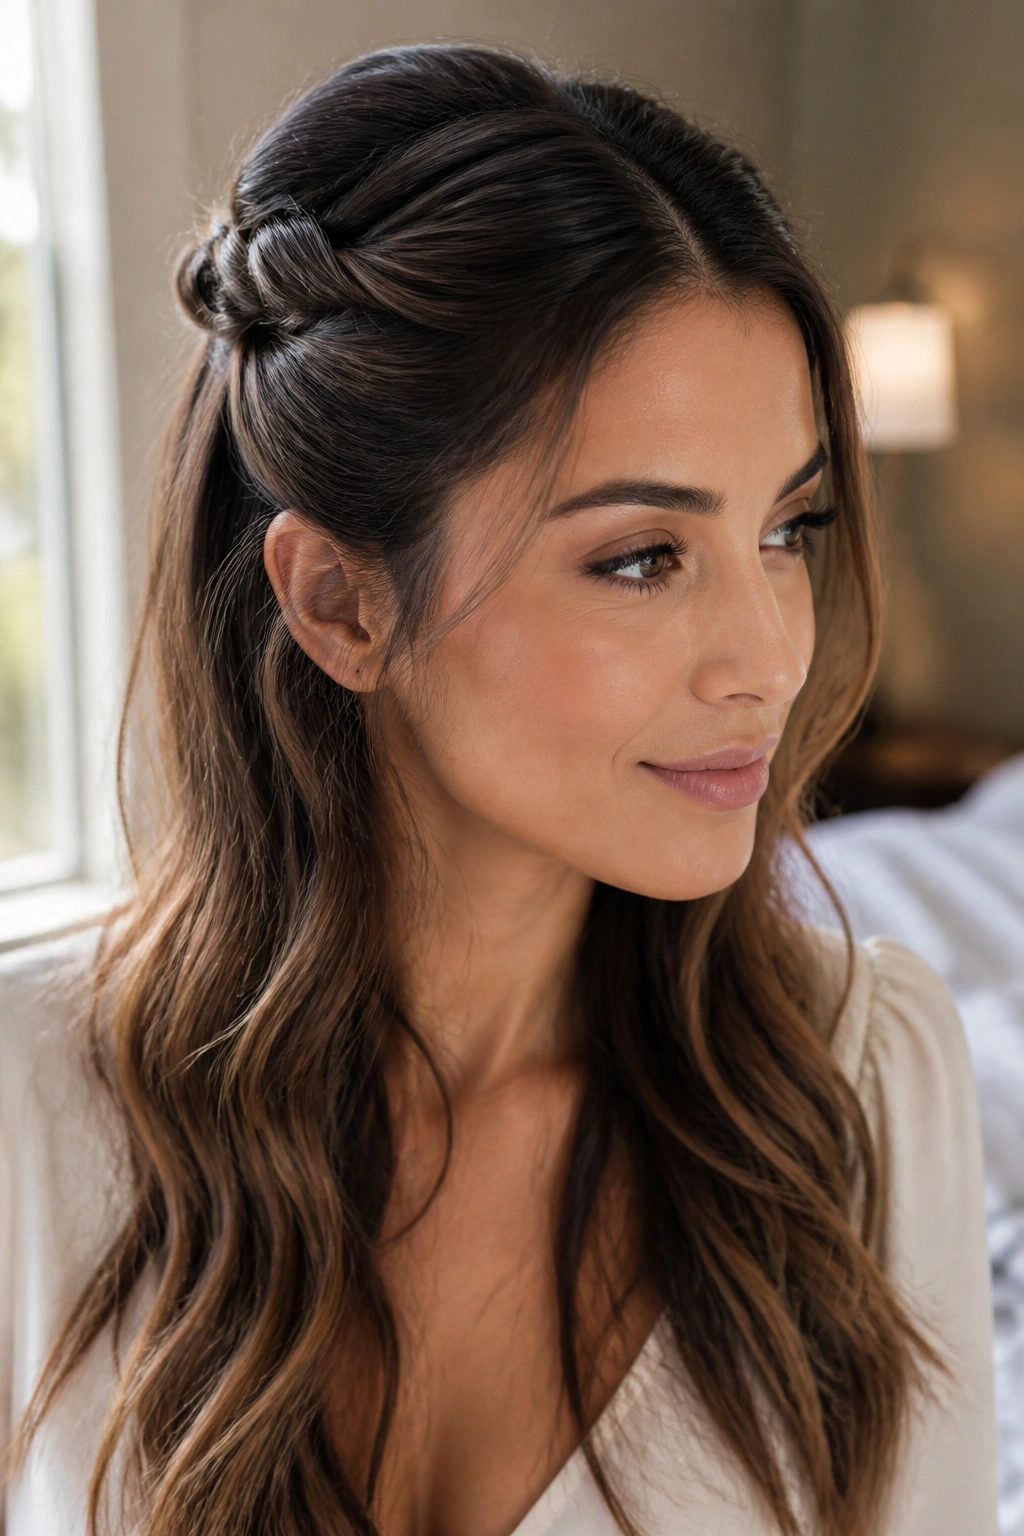
This is the easiest way to make a half-up style look deliberate without making it look stiff. Take a section from each temple, twist it back toward the center, and pin the two pieces together just below the crown. The whole look depends on small, even twists — not giant ropes that pull at your scalp.
Why It Works
The twist gives you a clean line at the front and leaves the length loose, which keeps the style from feeling too formal. It also hides the fact that you may have skipped a wash. I say that with love.
A little grit helps here. If your hair is slippery, mist the roots with dry shampoo or texture spray before you start. The twists hold better, the pins stay put longer, and the whole style feels less likely to slip apart by lunchtime.
- Takes about 4 to 6 minutes
- Works best on shoulder-length hair and longer
- Needs 2 bobby pins or 1 small claw clip
- Looks best with slight texture at the roots
Pro tip: cross the bobby pins in an X instead of laying them flat. That tiny move keeps the twist from sliding down the back of your head.
2. Claw-Clip Half Updo for Busy Mornings
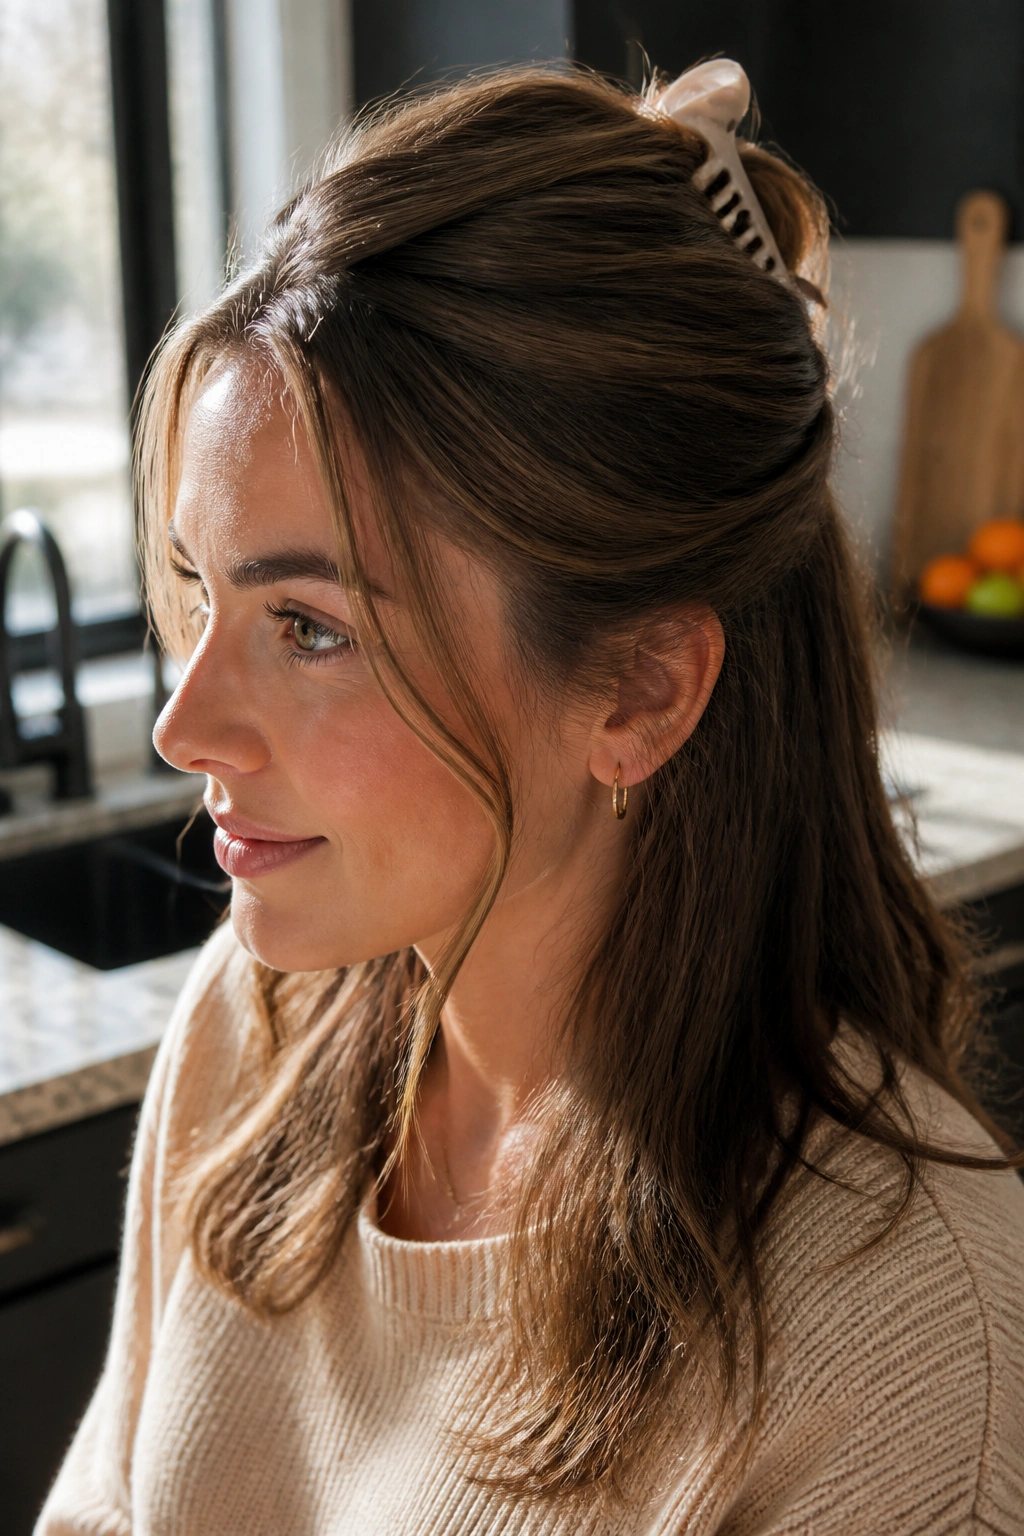
A claw clip can save the day when your arms are tired and your hair refuses to cooperate. Gather the top half of your hair, twist it once or twice, then fold it up and clamp it in place with a medium clip. The trick is not overloading the clip with too much hair.
If your clip is too small, the style falls apart. If it is too big, the shape gets sloppy in a bad way. I like a clip that grabs the center section without swallowing the whole back of the head. That keeps the ends loose and gives the top a little lift without making a heavy lump.
This is the style I’d pick for a quick coffee run, a school drop-off, or any day when you want hair off your face and do not want to think too hard. Leave a few front pieces out if you want softness, or tuck everything back for a cleaner line.
A small note: fine hair usually holds better in a matte clip than a slick, shiny one. Grip matters more than looks here. Always has.
3. Braided Half Updo for Straight Hair
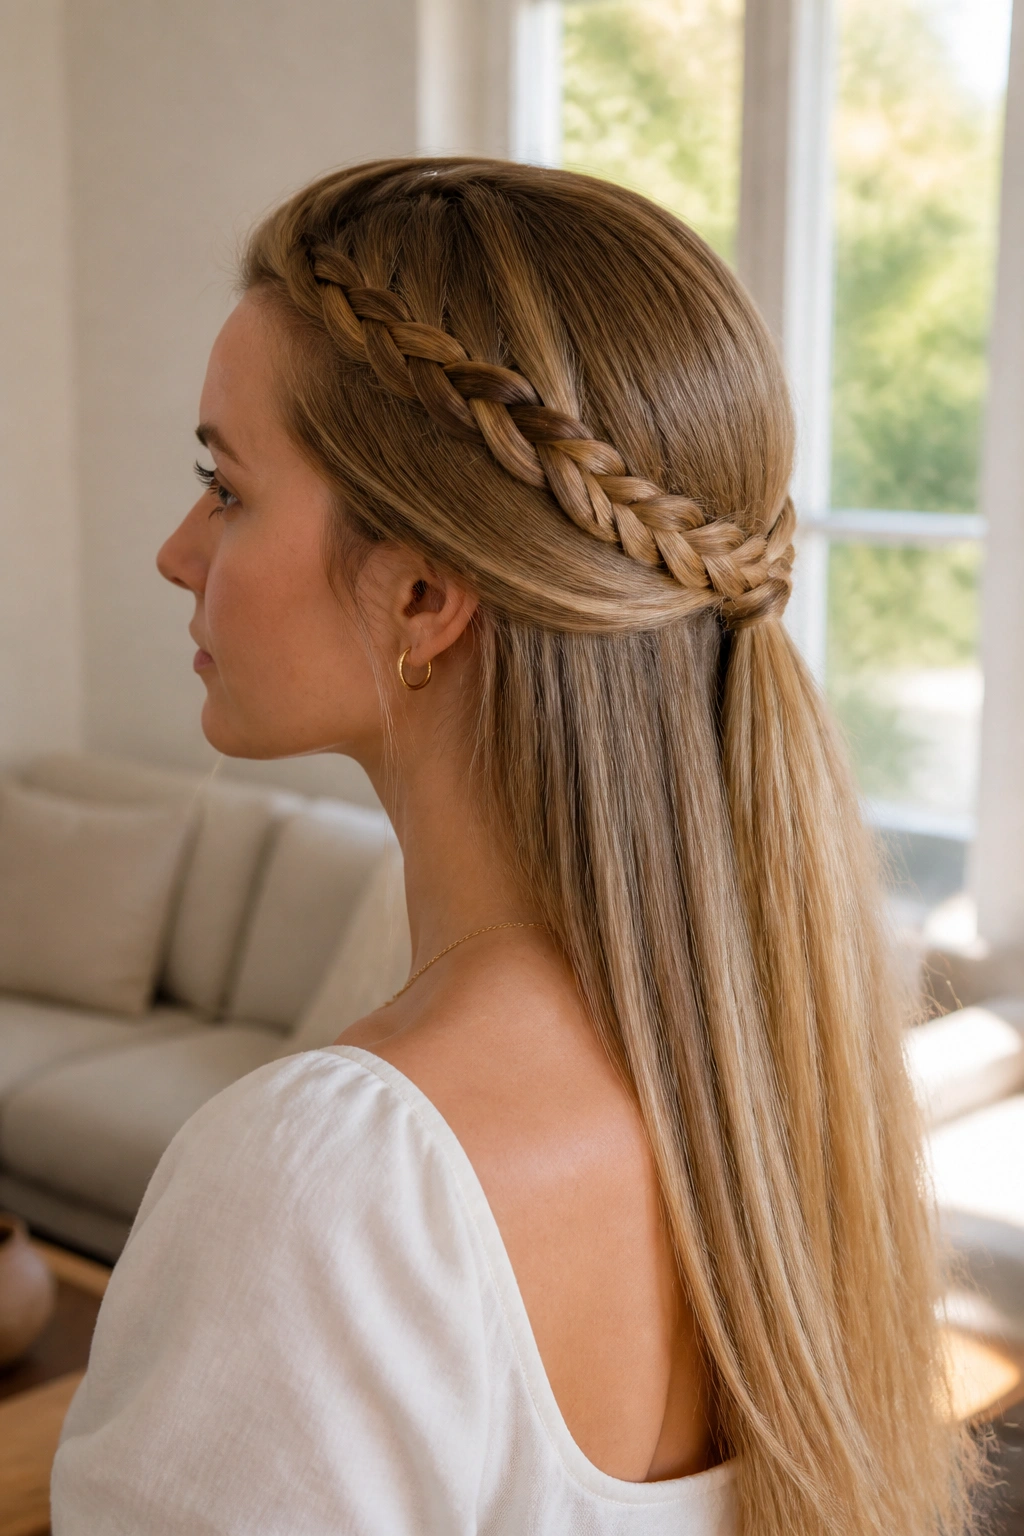
Why does a braid make straight hair behave better? Because it adds texture where straight strands usually slip right through pins and elastics. A simple three-strand braid from each side, joined in the center, gives you that little bit of hold that plain twisting sometimes misses.
This is the style I’d hand to anyone who says their hair is “too flat” for half-up looks. It isn’t. It just needs a bit more structure at the back. Keep the braid loose, then gently tug the outer edges with your fingertips to widen it. That one move makes the braid look fuller without turning it into a frizzy mess.
How to Wear It
Start the braids right above the ears if you want a lifted look, or lower if you want something softer and more relaxed. Pin the ends under the joined section so they disappear instead of hanging awkwardly.
A very light mist of hairspray on the braid itself helps, but do not soak it. Straight hair can go stringy fast. A little hold is enough.
4. Bubble Half Ponytail
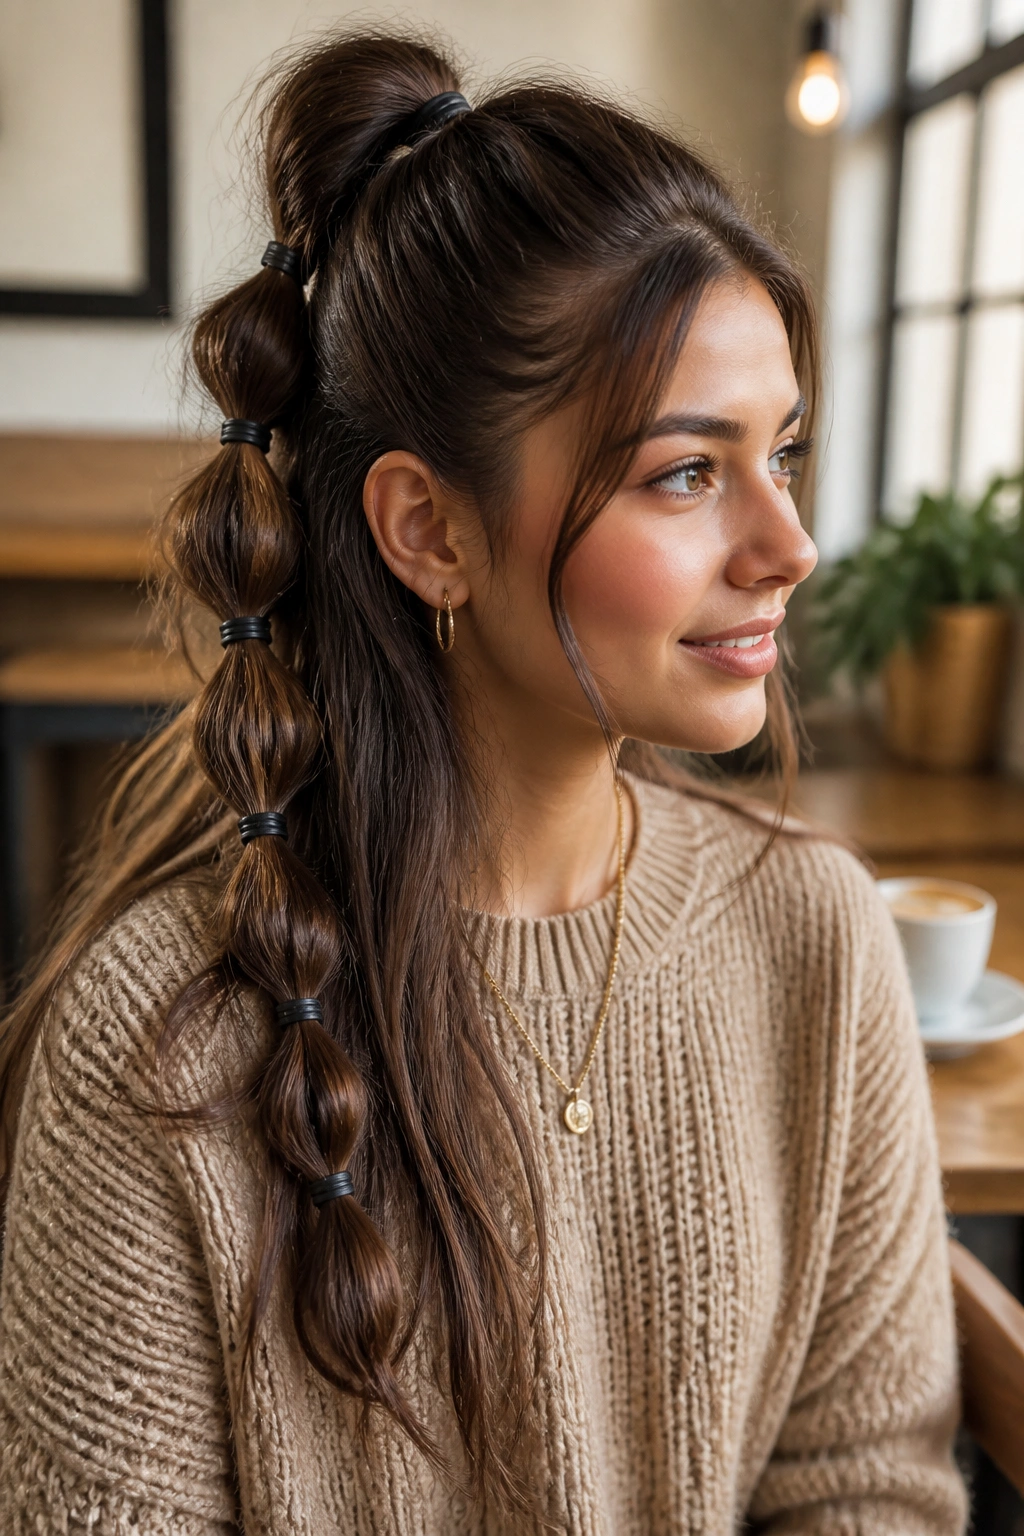
Picture hair that is a little flat at the crown and a little puffy at the ends. The bubble half ponytail fixes both problems in one shot. You make a half-up ponytail first, then add small elastics every inch or two down the length and tug each section so it puffs into a rounded shape.
That shape is the whole point. It gives the style movement, and it also hides uneven layers better than a plain pony. I like this one when hair is long enough to show the “bubbles” clearly — the effect disappears a bit on very short hair.
- Use clear elastics if you want the focus on the shape
- Space each band about 1 to 2 inches apart
- Tug each section evenly so the bubbles match
- Keep the crown section slightly loose for softness
The style looks playful, but it can still be neat if you keep the bubbles even. If one section gets too puffed, pinch it back down before moving on. That tiny adjustment makes a bigger difference than people expect.
5. Mini Top Knot Half Updo
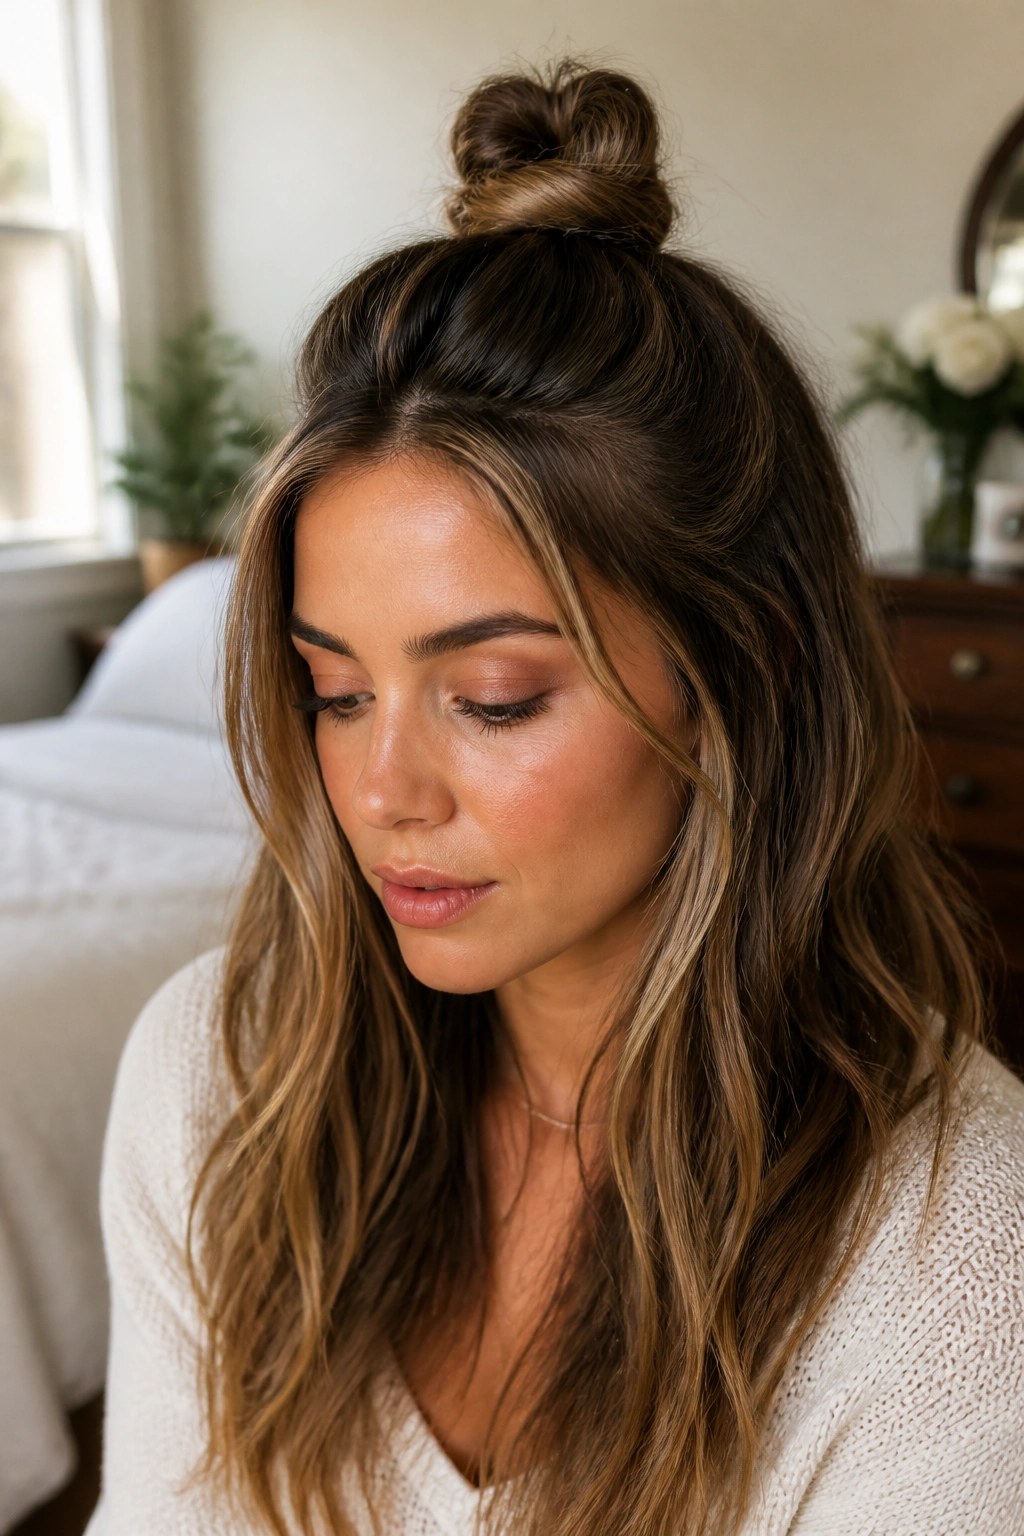
A small top knot gives you height without turning the whole style into a full bun. Gather the top section of your hair, twist it once, coil it into a tiny bun, and secure it with a tie or two pins. Leave the rest down so the contrast between “pulled up” and “loose” stays obvious.
This one is especially good when your crown is flat. The knot gives instant lift, which is useful if you woke up with hair lying a little too close to your scalp. It also works nicely on thick hair because the knot can be compact instead of bulky.
The mistake people make is pulling too much hair into the knot. Then it becomes heavy, and the whole thing starts drooping toward the back of the head. Keep the knot small and centered. If you need more hold, pin it from underneath instead of tightening the elastic until your scalp aches.
I also like this style when the ends are a little messy. The bun does the neat part, and the loose hair handles the rest.
6. Ribbon-Tied Half Updo
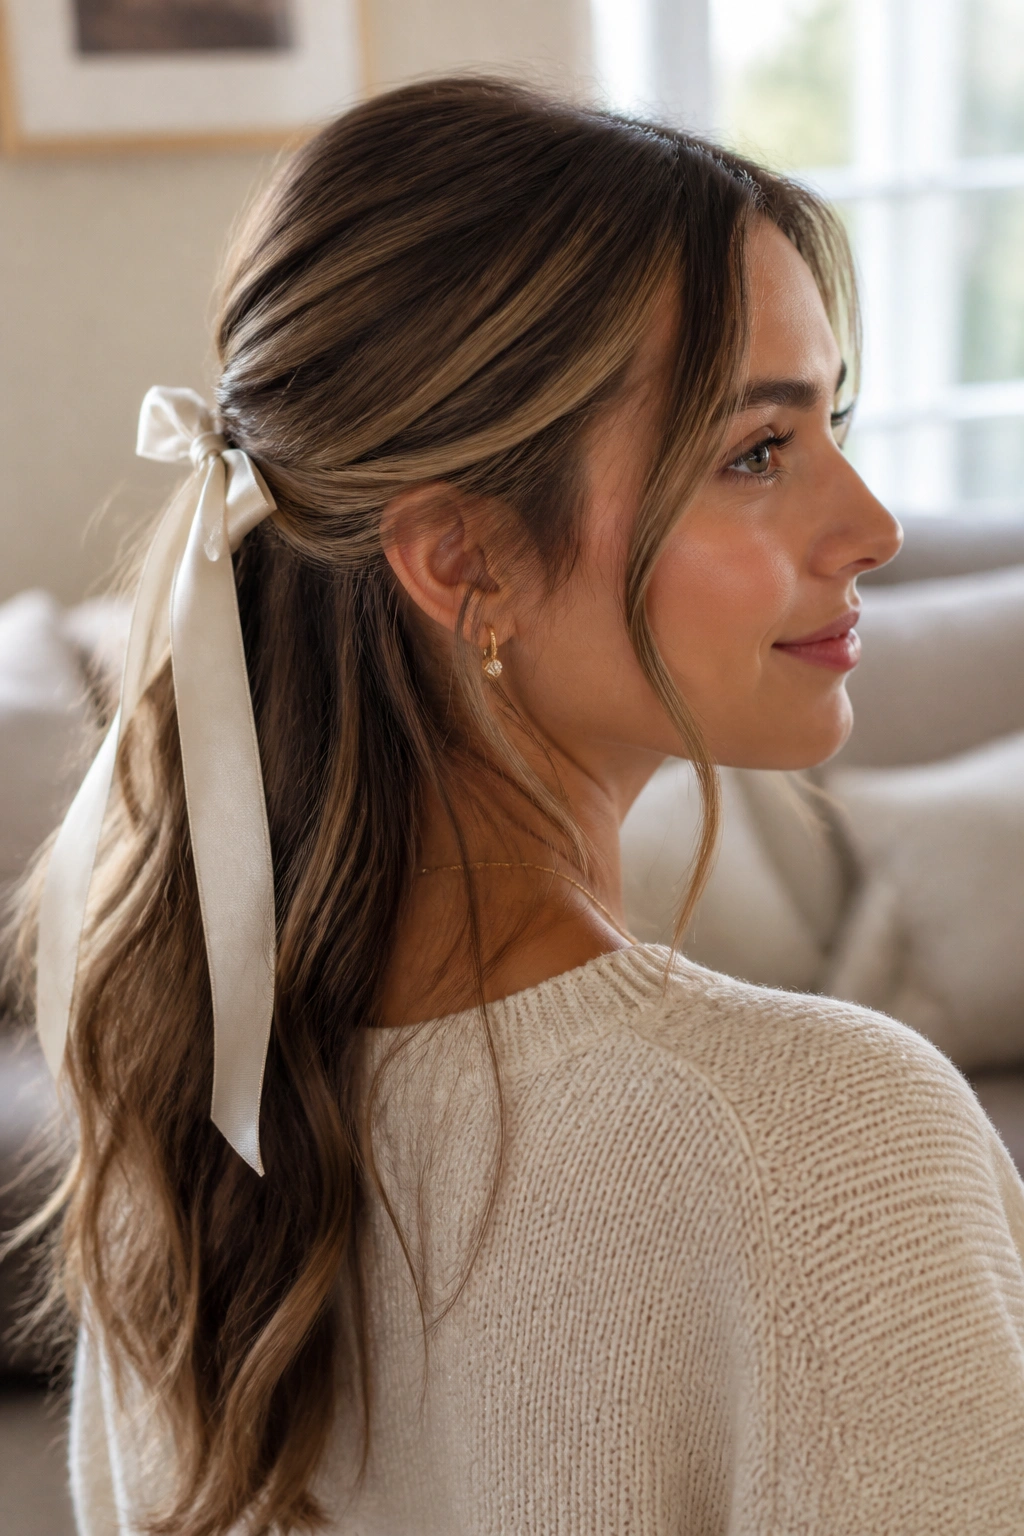
A ribbon changes the mood fast. Same hair, different feeling. Instead of securing the half-up section with a plain elastic, tie a satin or grosgrain ribbon around the base and let the ends trail down the back. It looks softer than a standard tie and takes almost no extra time.
This is one of those styles that works best when you want something simple but not boring. A ribbon gives the half-up shape a clear finish, and it hides the elastic too. I prefer a ribbon that is about half an inch wide; narrower ribbons can vanish into thick hair, and wider ones can feel fussy.
It suits straight hair, waves, and loose curls alike. If your hair is very silky, tie the ribbon after securing the section with a clear elastic first. That keeps everything from slipping while you adjust the bow.
A small satin ribbon in black, cream, or a muted color is easy to keep around. It takes up almost no drawer space. Handy little thing.
7. Fishtail Half Updo with Soft Ends
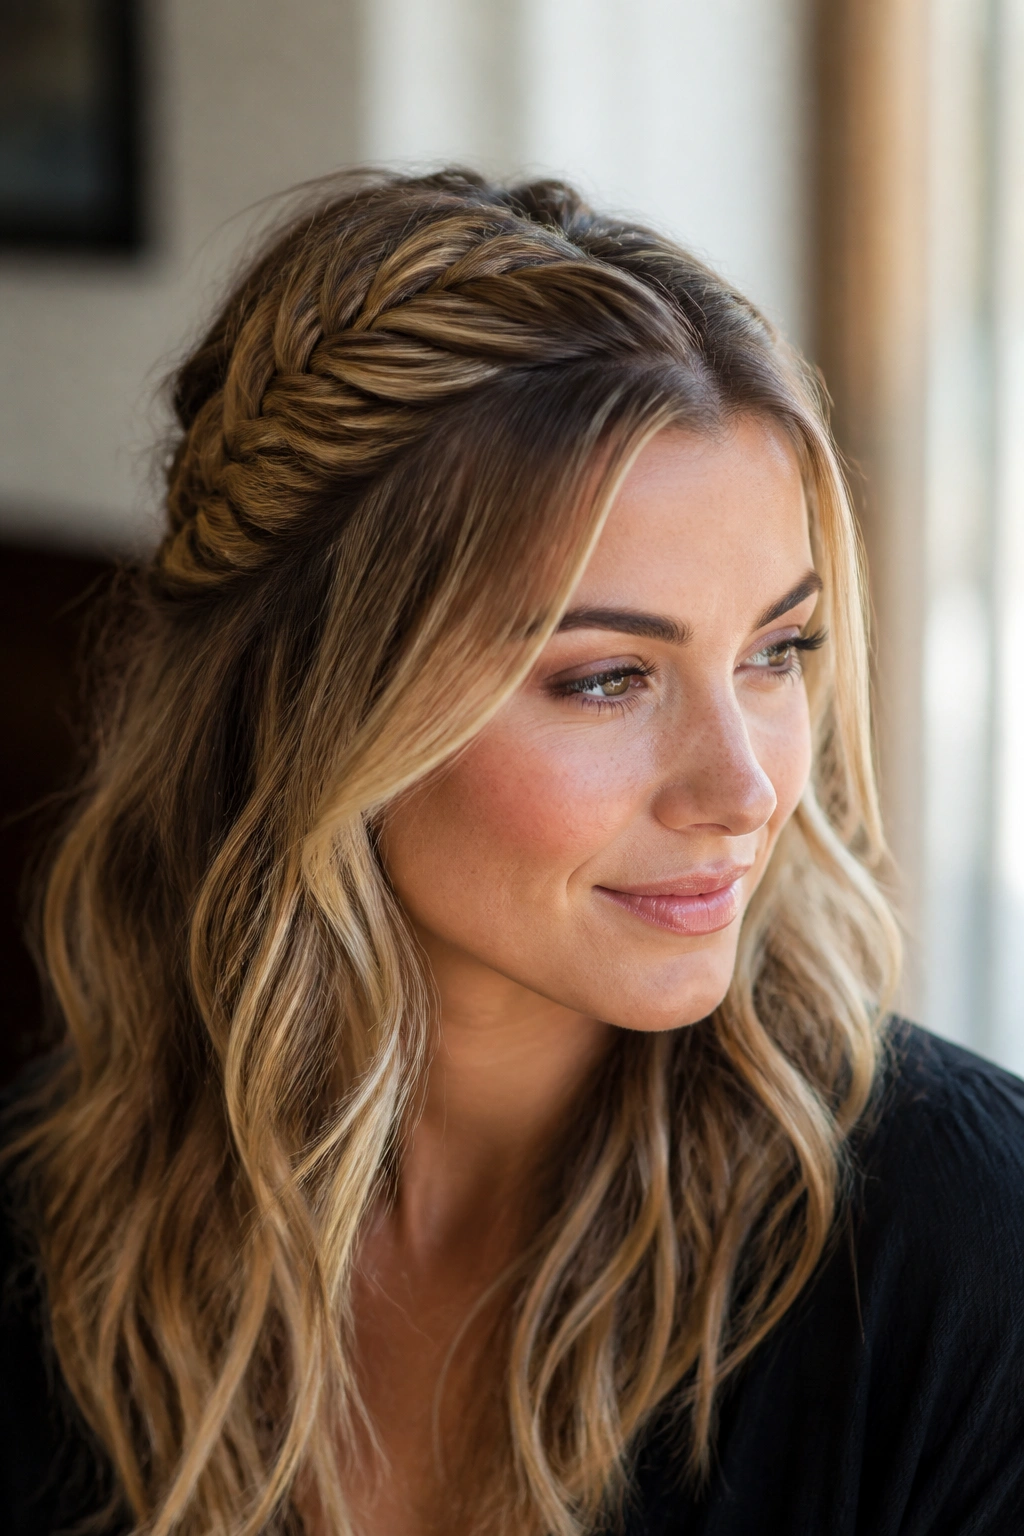
A fishtail braid in a half-up style looks more involved than it really is. That’s the best part. You only braid the top section, not the whole head, so the rest of the hair stays loose and the style stays wearable for an ordinary day.
What Makes It Different
A fishtail gives you a finer, almost woven texture that sits somewhere between a braid and a twist. It’s especially nice if you have layered hair, because the texture hides those little uneven pieces that can make a standard braid look choppy. Keep the braid loose enough that it doesn’t pull the front hairline tight.
This style works well if you want something a bit more detailed but not formal. That detail sits at the back, where it can be seen when your hair moves, and the loose lengths do the rest.
Quick Tips
- Start with a small section at the crown
- Split it into two equal pieces
- Pull tiny outer strands across to the opposite side
- Pancake the braid gently once it’s secure
- Pin the tail under the braid so it disappears
Best move: tug the outer edges just enough to make the braid wider. Stop before it turns into fluff.
8. Face-Framing Half-Up Pony
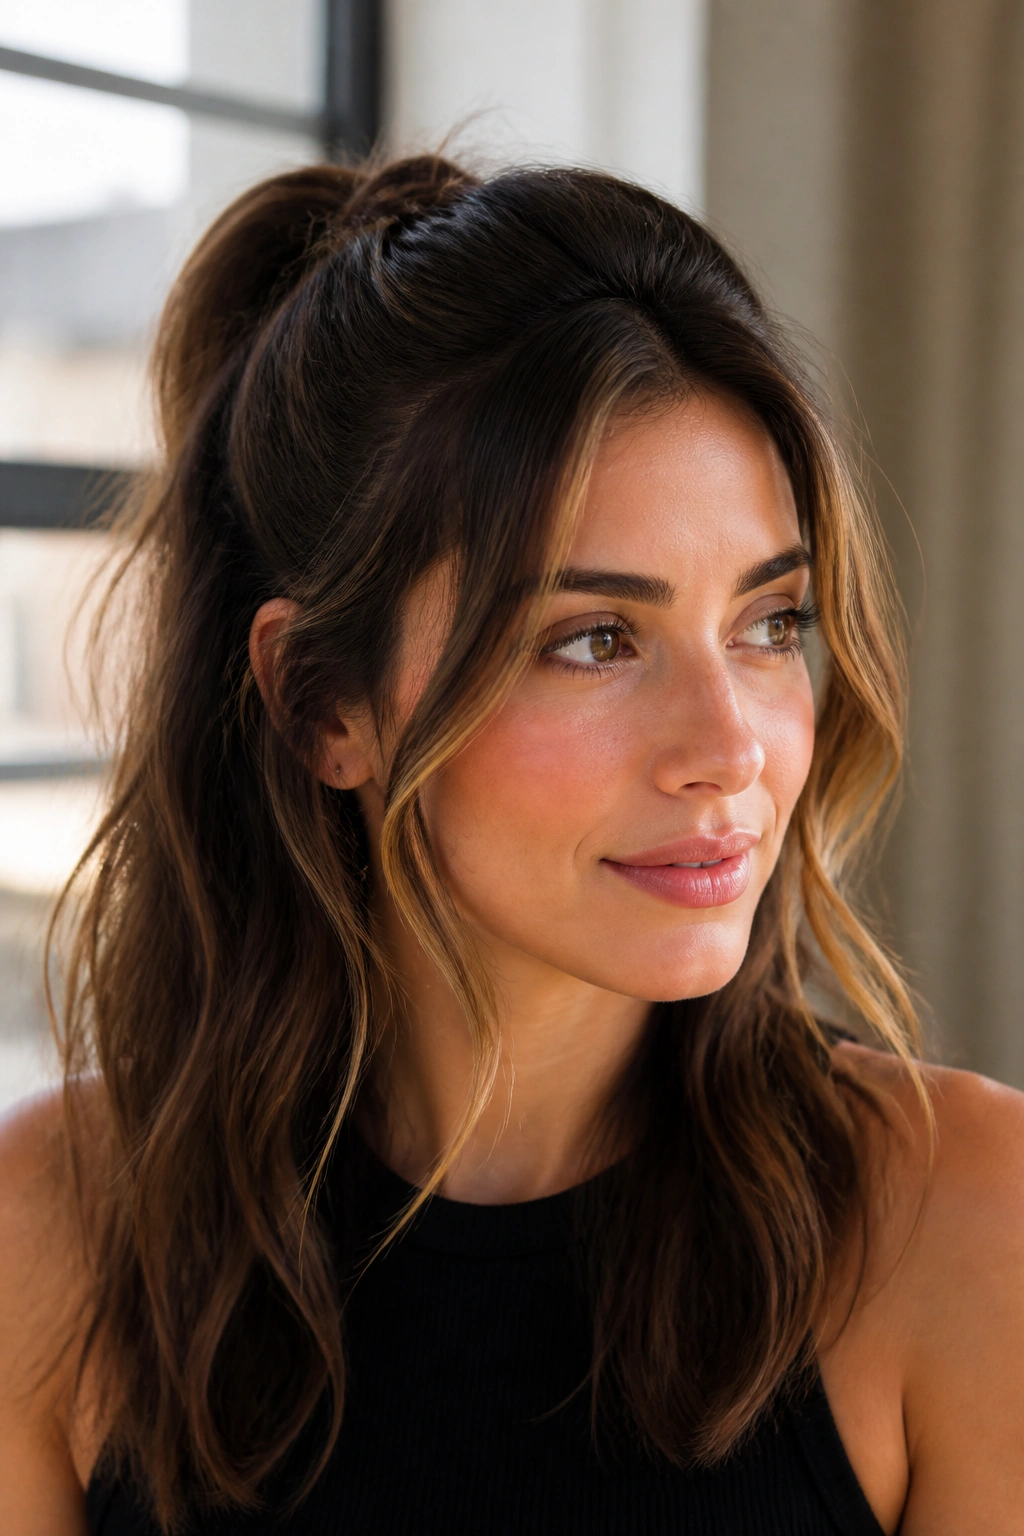
Sometimes the simplest half-up style is the smartest one. Pull the top section into a small ponytail, leave the front pieces loose, and let the hair around your face do the softening. That’s it. No braid. No knot. No little decorative tricks needed.
This version is good when you want your hair out of your eyes but still want the length to show. It also gives you a little lift at the sides, which makes the whole head shape look more open. I like to anchor the pony slightly above the ears so it doesn’t sag low and awkward at the back.
Wrap a thin strand of hair around the elastic if you want the finish to look cleaner. Pin the end underneath the ponytail. That tiny cover-up takes maybe 30 seconds, and it gets rid of the obvious “I grabbed an elastic and hoped for the best” look.
If your hair is fine, keep the pony small. Big half ponies can drag the crown down. Small ones stay perky.
9. Halo Braid Half Updo
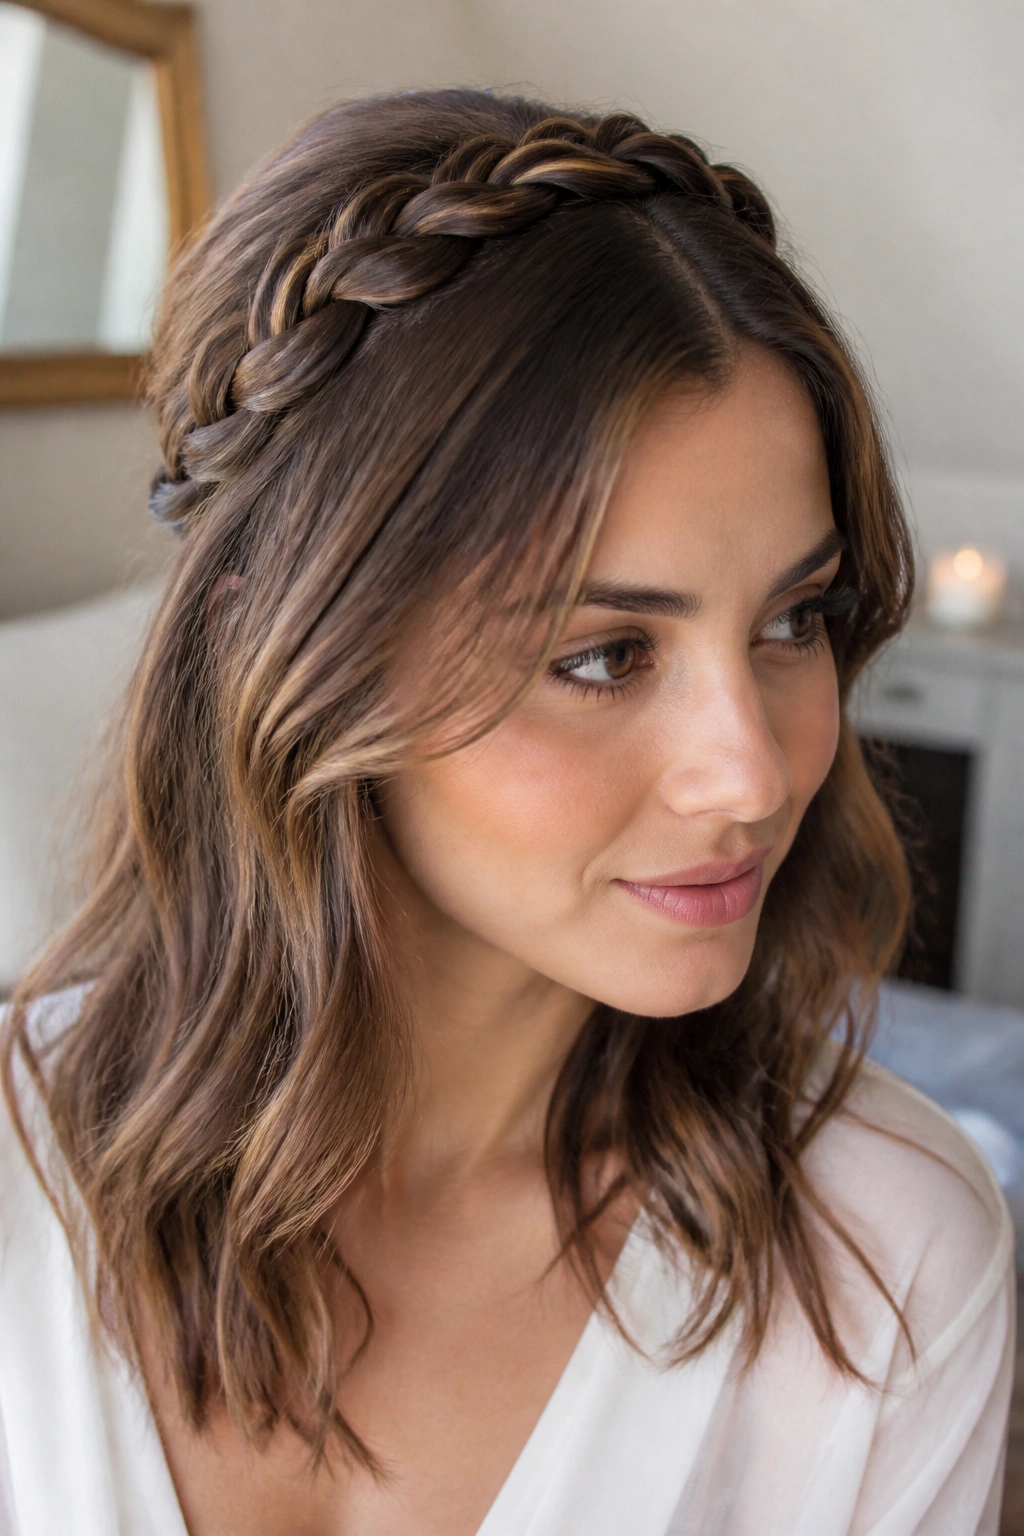
Why does a halo braid look polished even when the rest of the hair is loose? Because the braid sits right on the edge of the face and frames everything in a clean circle. It takes the place of a headband, but it’s made from your own hair, which feels a bit more interesting.
This style works especially well on medium to thick hair, since the braid needs enough bulk to stay visible. If your hair is layered, braid a slightly larger section so the shorter pieces have something to hold onto. A tight braid can look too hard, so keep the tension gentle and let the hairline breathe.
How to Wear It
Braid from one temple across the crown and stop near the opposite ear, then pin the tail underneath the loose hair. If the braid starts to look too perfect, pull it apart a little with your fingers. The goal is not a rope. The goal is shape.
A little wave through the loose lengths helps, but this style can also work on straight hair if the braid has enough texture. It’s one of the few half-up looks that can make a plain outfit feel finished without much fuss.
10. Half-Up Space Buns
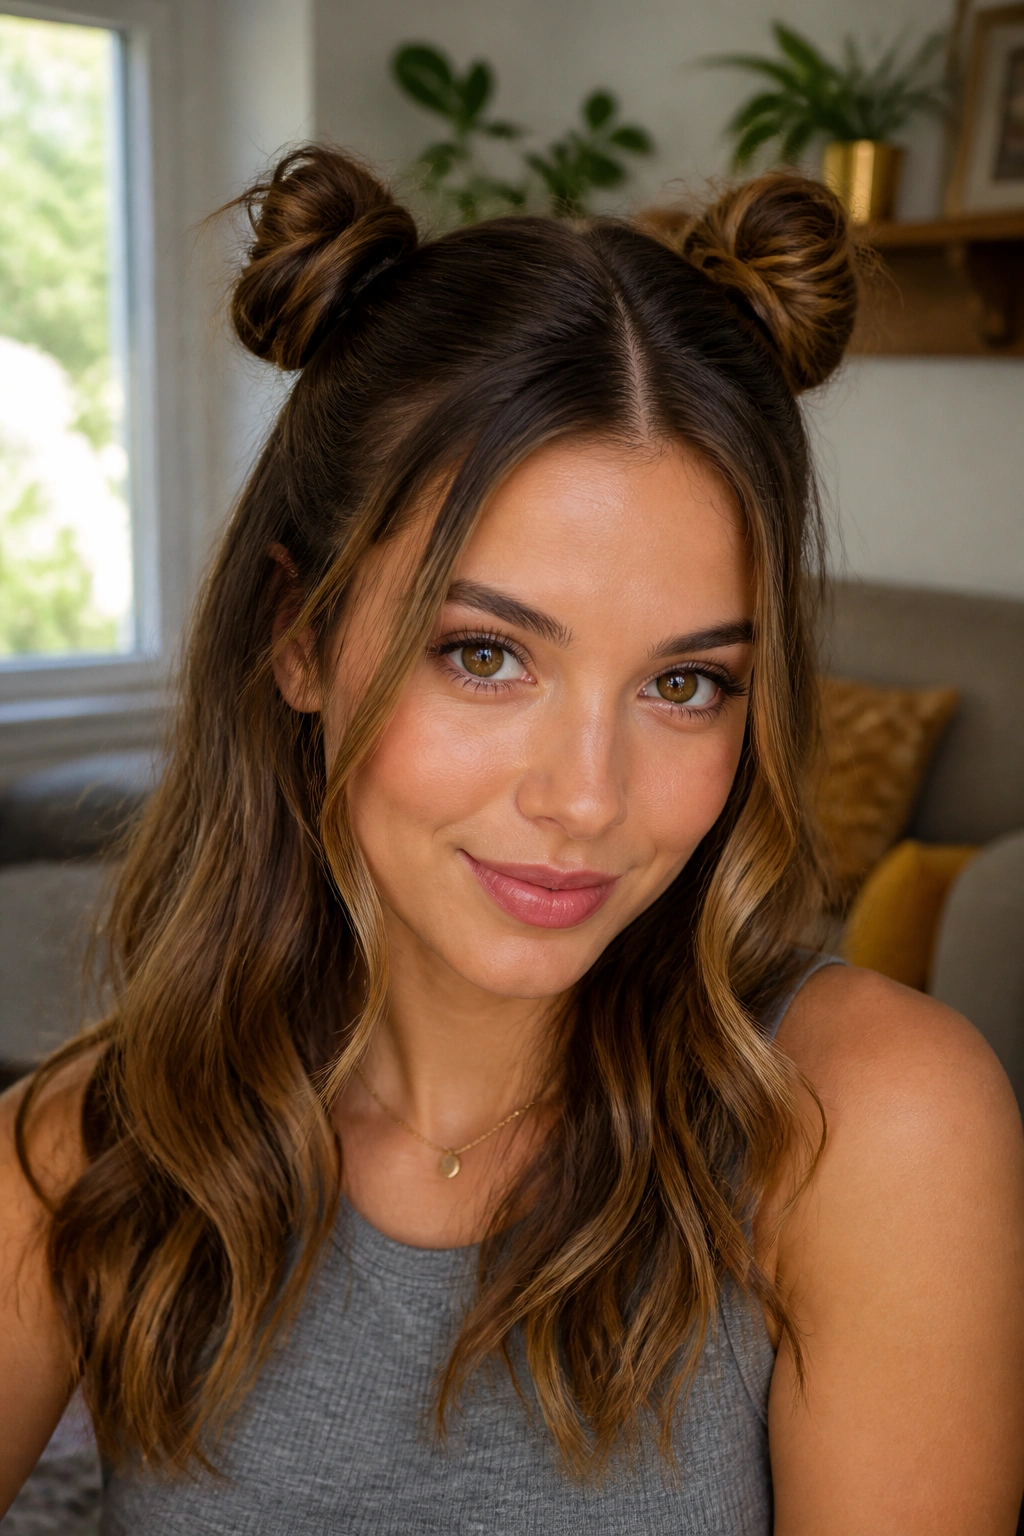
Two tiny buns beat one big bun when you want the style to feel playful instead of heavy. Section off the top half of your hair, split it into two equal parts, and twist each one into a small bun above the ears. Leave the rest down so the look stays half-up, not fully pulled back.
This one is easiest on second-day hair because the hair has a little grip and the buns hold their shape better. If your hair is freshly washed and slippery, add a touch of dry shampoo first. Then the buns stay put instead of creeping loose after an hour.
- Keep the buns small and balanced
- Use 2 elastics and 4 to 6 pins
- Leave the buns a little loose for a softer shape
- Let curls or waves stay in the back if you have them
The style can go from cute to chaotic fast, so resist the urge to make the buns giant. Small works. Small is the point.
11. Bow-Tied Half Updo
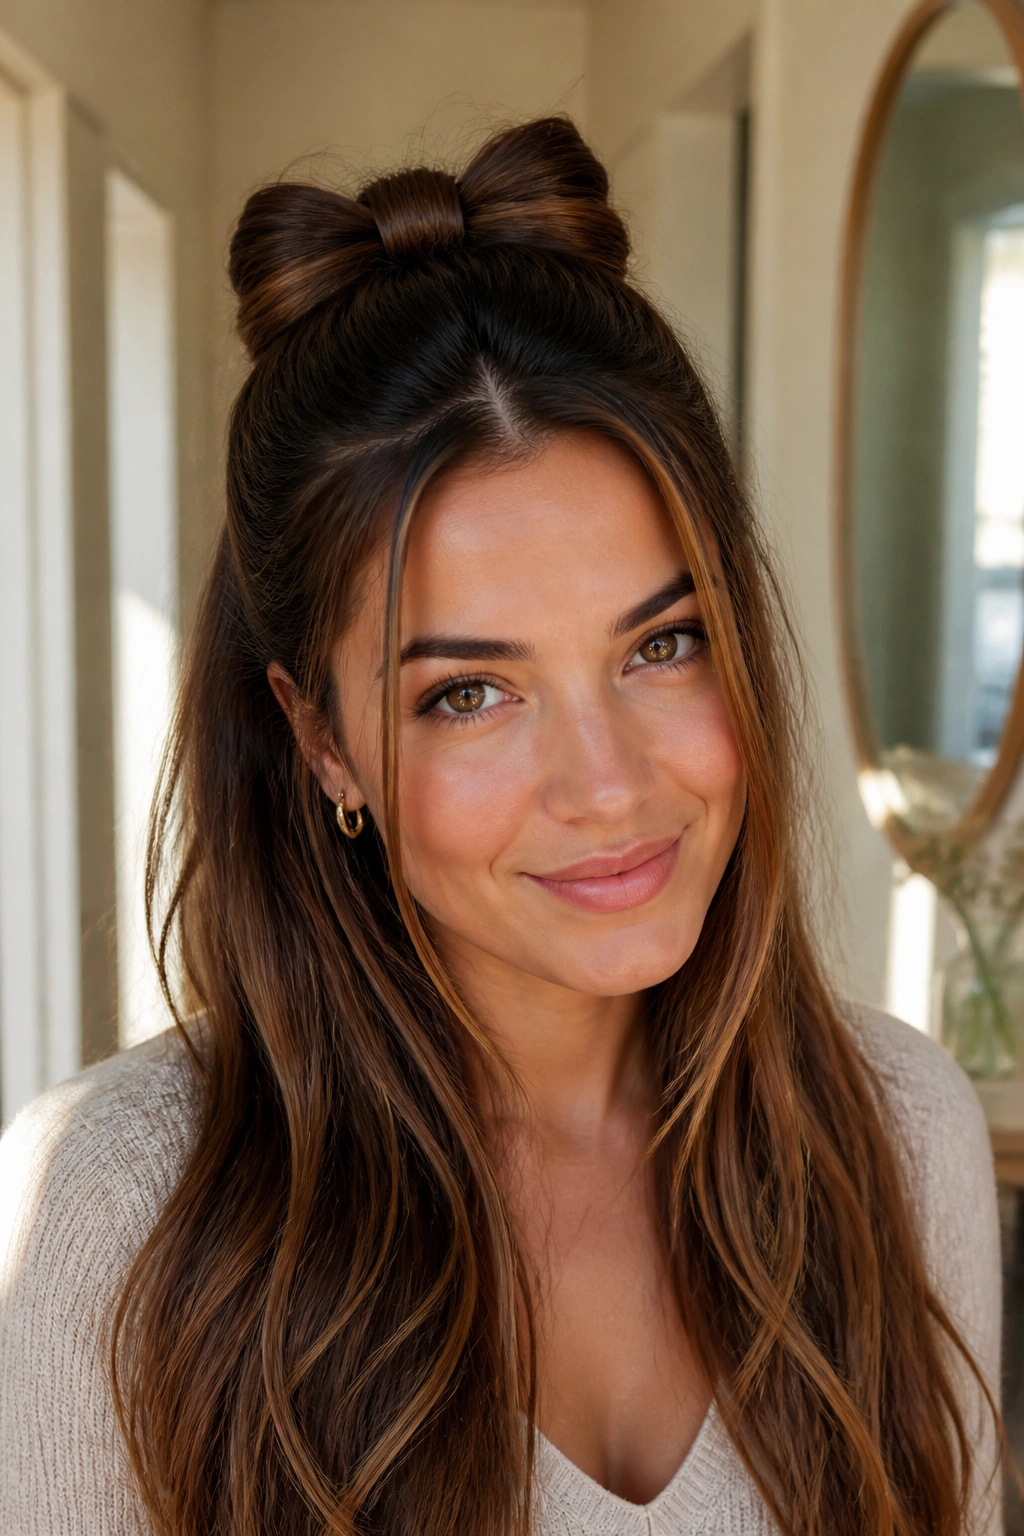
A hair bow sounds fussy until you try it once and realize it can be done with a small, ordinary section of hair. You gather the top half, make a loop, split it into two little loops, and wrap a thin strand around the center to form the bow. That sounds more complicated than it is.
I like this one for shoulder-length or longer hair because the bow needs enough length to show its shape. On very short layers, the loops can collapse before they’re secured. A touch of styling cream on your fingers helps keep flyaways from sticking out in every direction.
The bow doesn’t need to be huge to read clearly. In fact, a modest bow often looks better because it sits flatter against the head and holds longer. Pin the center from underneath and check both sides before you walk away from the mirror. If one loop is bigger, the whole thing starts looking lopsided.
It’s a sweet style, sure, but it isn’t fragile. Done right, it survives a normal day without turning into a knot.
12. Crisscross Half Updo
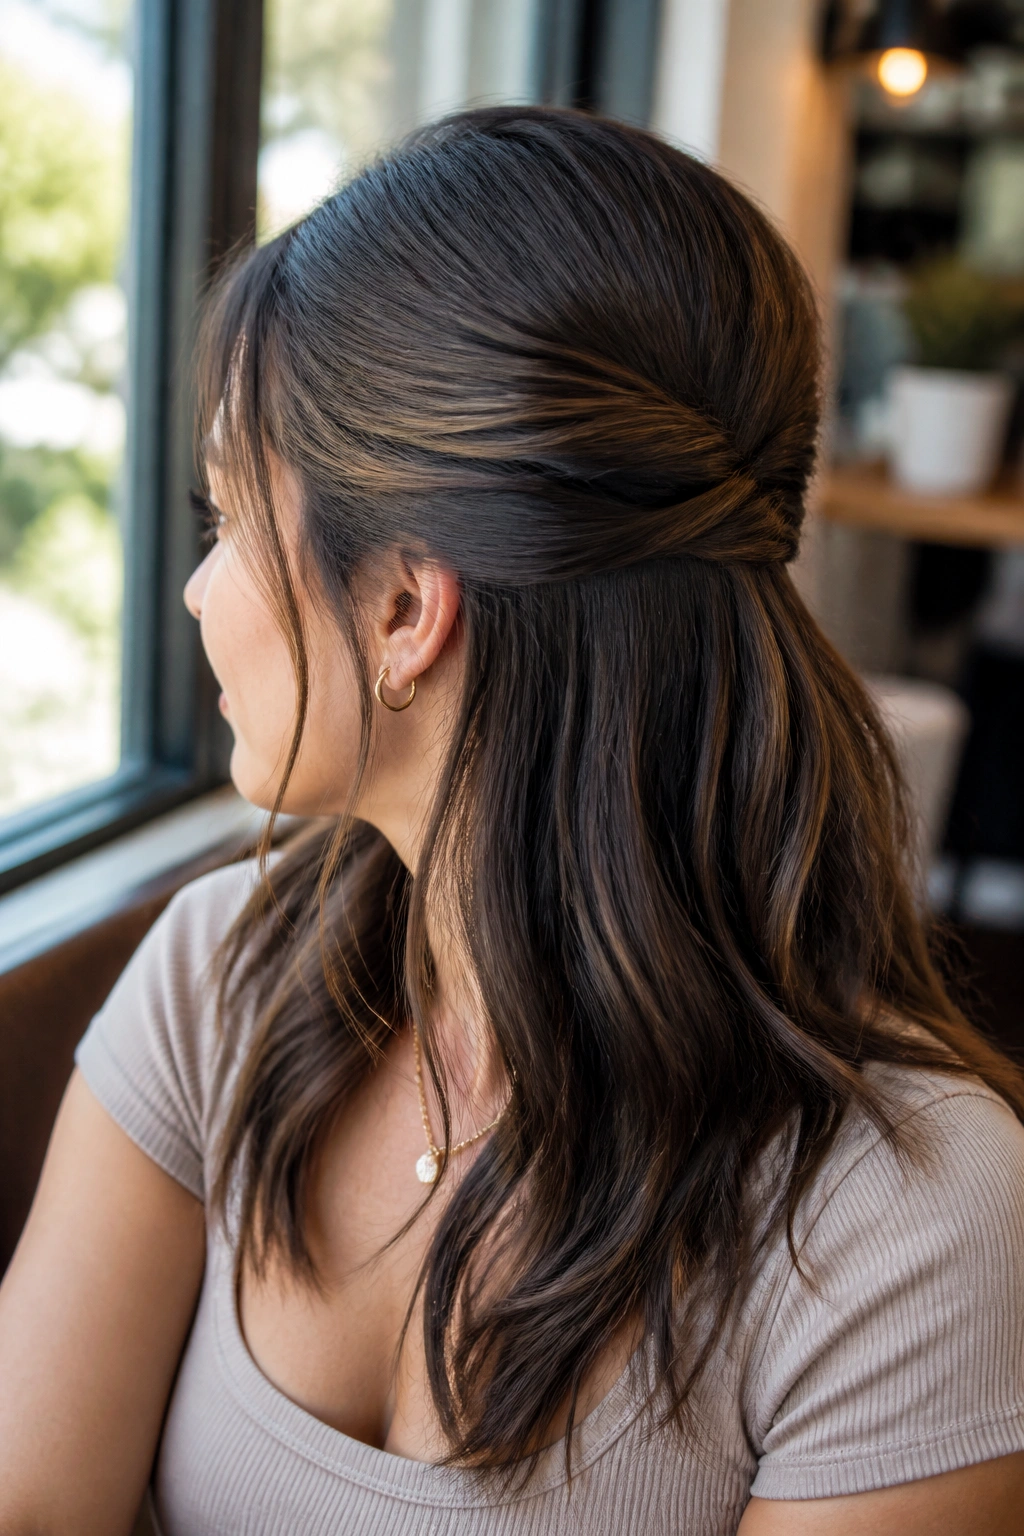
Unlike a braid, a crisscross half updo keeps the sections visible. That makes it a good pick if you like structure but don’t want the woven look of a braid. Take one section from each side, cross them over one another at the back, and pin them where they overlap.
The effect is neat without being stiff. It also works well on straight hair that slips out of braids, because the crossover gives you a few firm points to pin. Use four pins if your hair is thick, or two if it’s fine and light. The pins should disappear under the overlap, not sit on top like little metal markers.
This style is also nice for layered hair because the crossed pieces hold the shorter strands a bit better than a plain ponytail. If you want a little softness, leave the front corners loose. If you want a sharper finish, comb the sides back before crossing them.
I keep coming back to this one because it looks like effort. It just doesn’t take much.
13. Knotted Half Updo
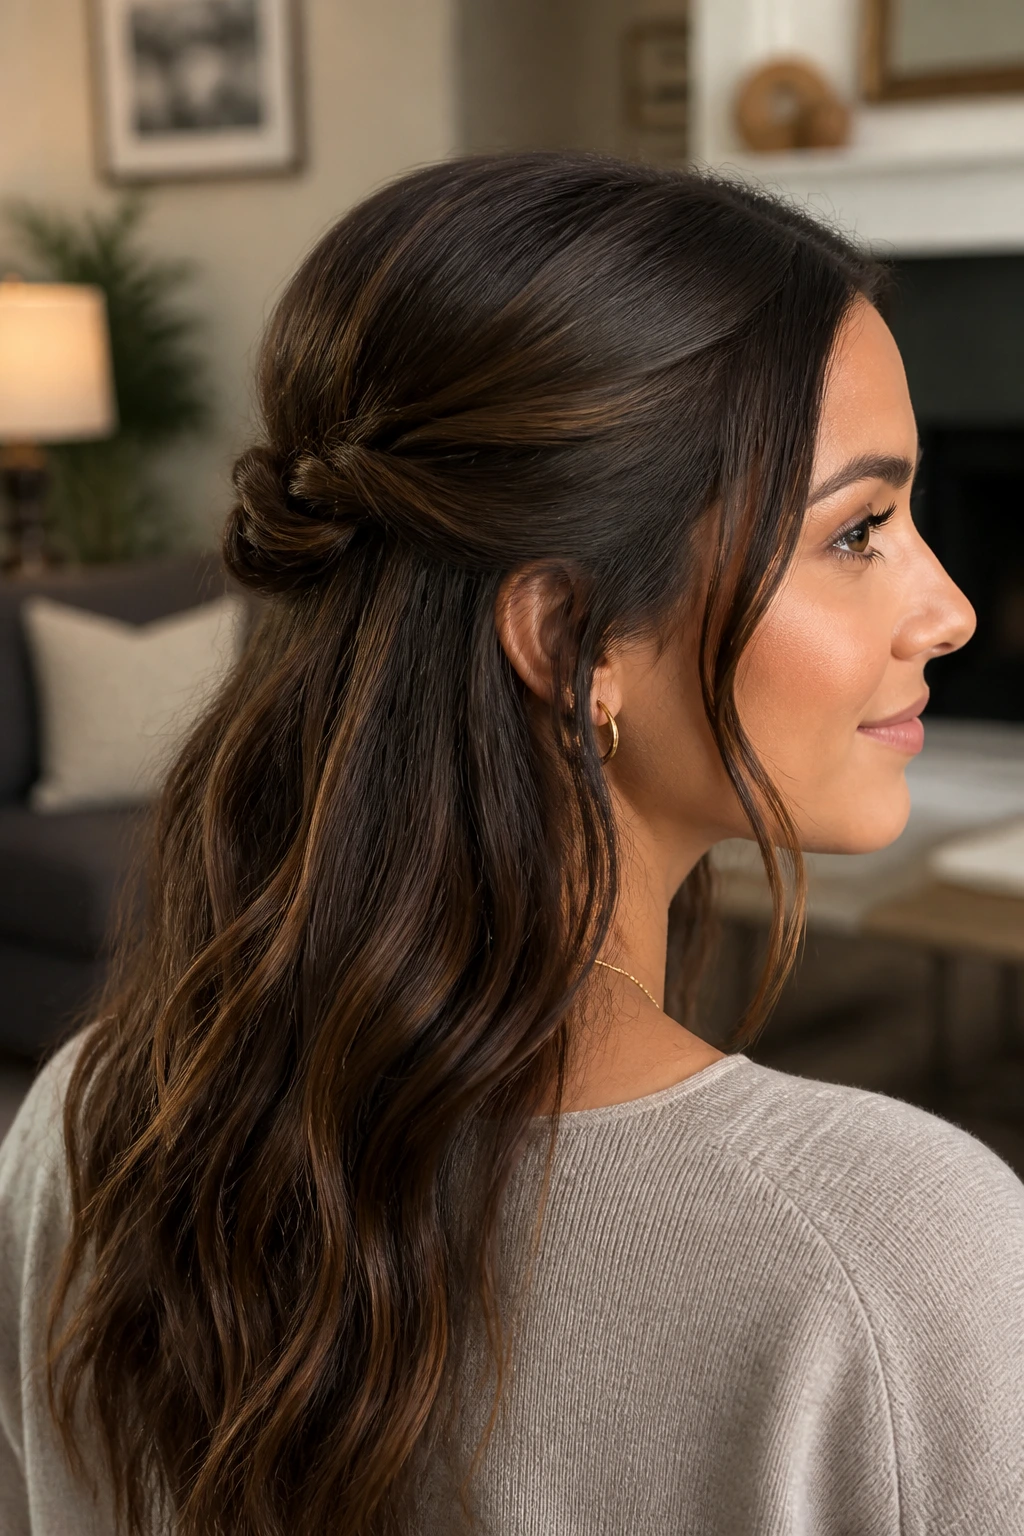
A knot is one of those rare hair tricks that looks smart and takes almost no brain power. You take two side sections, tie them together once like a simple knot, then secure the ends underneath with pins. That’s the whole move. No braiding. No curling. No special hand skills.
The shape sits somewhere between a twist and a bun, which is why I like it for easy days. It feels less polished than a braid and less messy than a loose clip style. If your hair has a little texture, the knot stays put better and gives the back some shape.
Why It Works
The knot creates a natural center point, so the eye lands on the middle of the head instead of the frizz around the edges. That’s helpful on days when your hairline is not cooperating. Keep the knot low enough to feel casual, but not so low that it disappears into the rest of the hair.
- Use 2 pins to anchor the ends
- Keep the knot flat, not bulky
- Works well with wavy or slightly dirty hair
- Looks good with layers left loose around the face
One warning: do not over-tighten it. A hard knot can pull uncomfortably, and there is no reason to do that to yourself.
14. Sleek Half-Up with a Deep Part
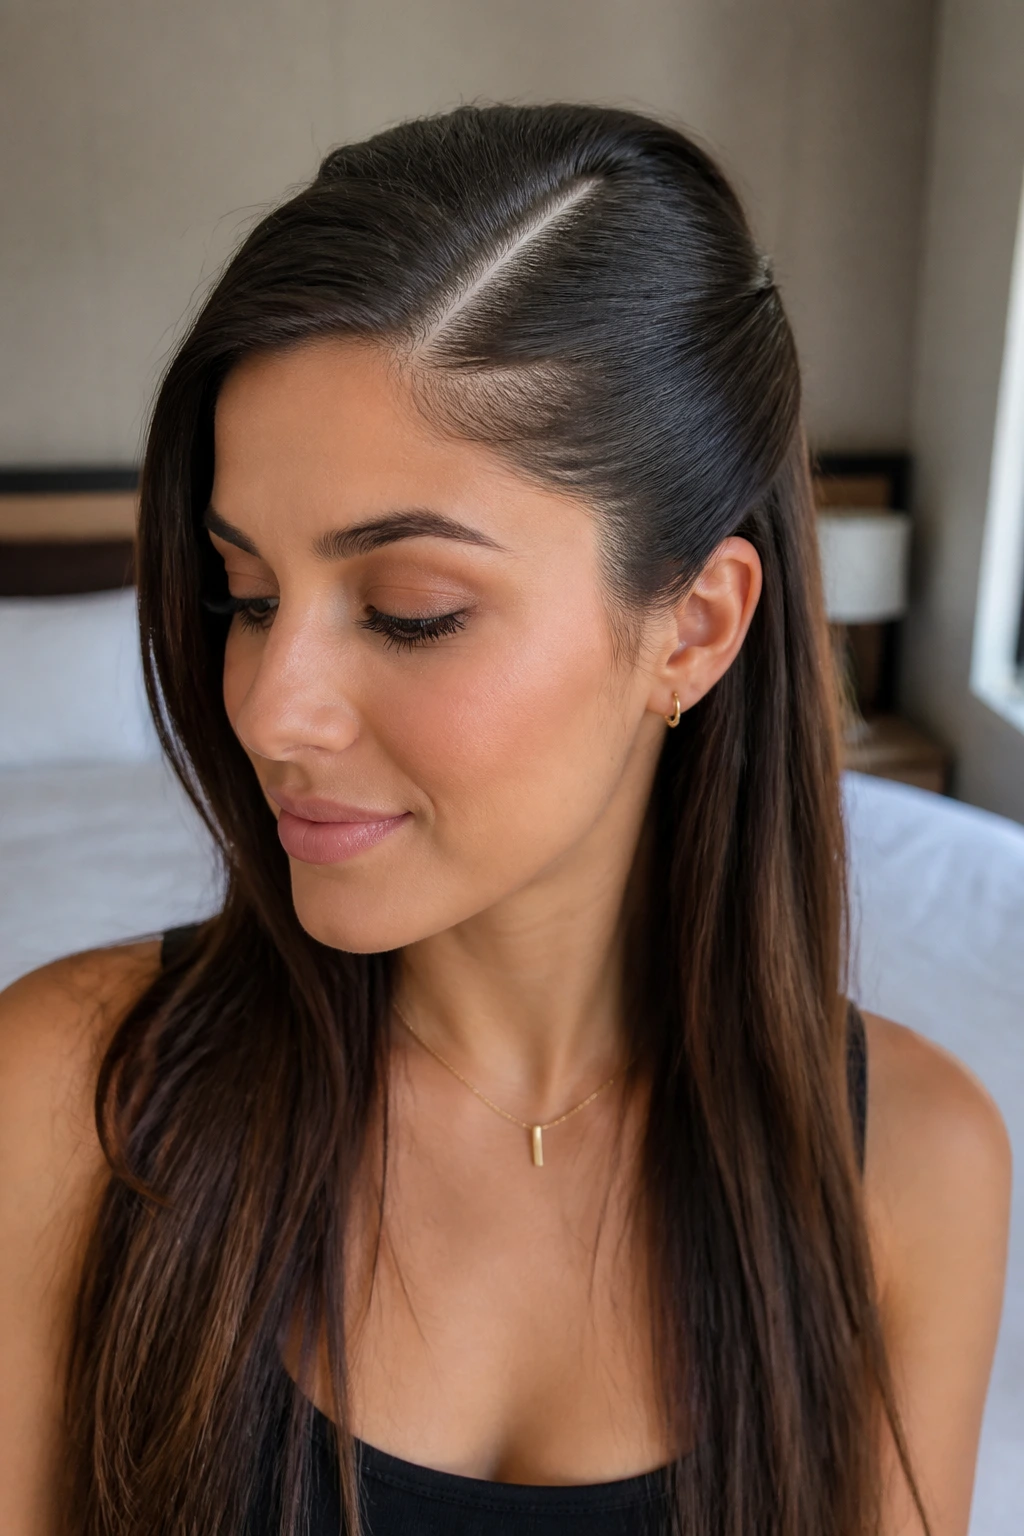
A deep part changes everything. Pull one side back into a sleek half-up section, keep the other side softly parted, and smooth the crown with a little gel or styling cream. The result feels cleaner than a messy style, but it still leaves enough hair down to keep it relaxed.
This is the version I’d pick when you want your hair to look tidy without losing movement. A deep part creates a line that feels intentional, and the half-up piece stops the style from looking too severe. It’s a nice balance, especially with straight or slightly wavy hair.
The important part is not flooding the hair with product. A pea-sized amount of cream on the palms is usually enough for the front and sides. Work it through the top layer, then comb the hair back with your fingers so it keeps a bit of softness. If the roots look wet, you’ve gone too far.
Wrap a small strand around the elastic if you want the finish to look cleaner. That little detail makes the style feel finished without adding more steps.
15. Curly Half-Up Pinned Back
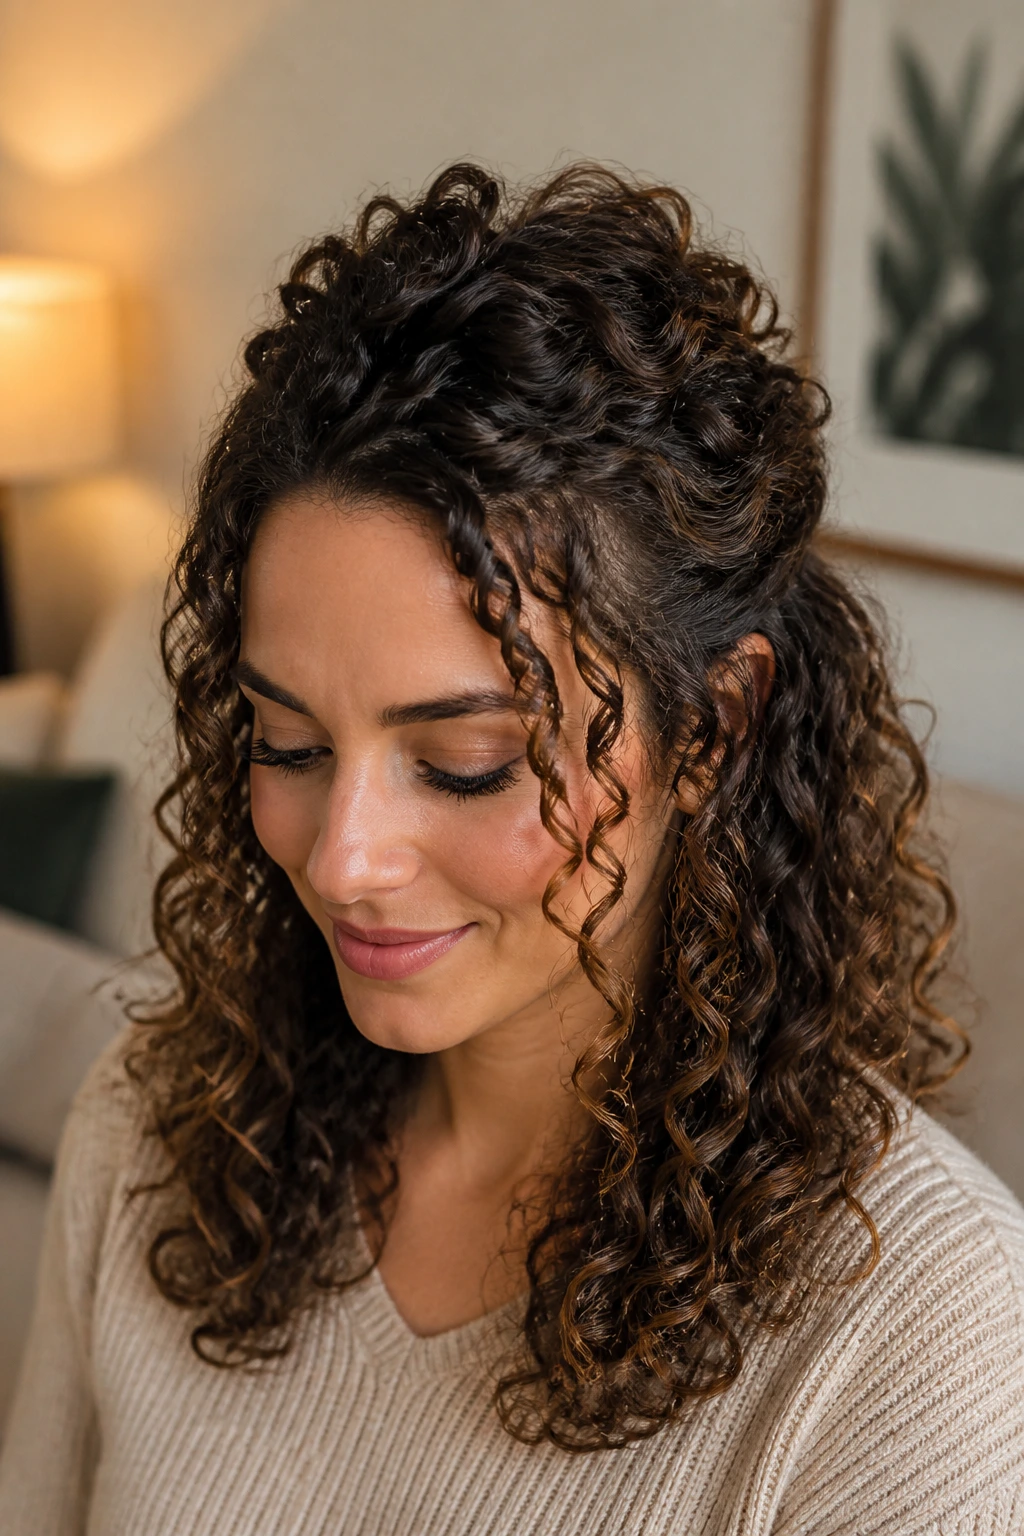
Do curly styles need more control? Not really. They need space. A curly half-up pinned back style lets the curls keep their shape while lifting the front off your face, which is usually the only thing you need on an easy day.
The biggest mistake is brushing curls smooth first. Don’t. That turns the hair into a puffed-out halo before you even start. Instead, use your fingers to gather the top section and pin it back loosely. Let the curls live a little. They know what they’re doing.
How to Wear It
Gather only the top third of the hair, not half the head. That keeps the style light and avoids crushing the curl pattern underneath. Use two or three pins on each side, placed in a crisscross shape, so the section stays anchored without being mashed flat.
A curl cream or light gel can help if the front pieces frizz fast, but skip anything heavy. You want definition, not a sticky helmet. This style works best when the curls are already in good shape and you’re just giving them a job to do.
16. Scarf-Wrapped Half Updo
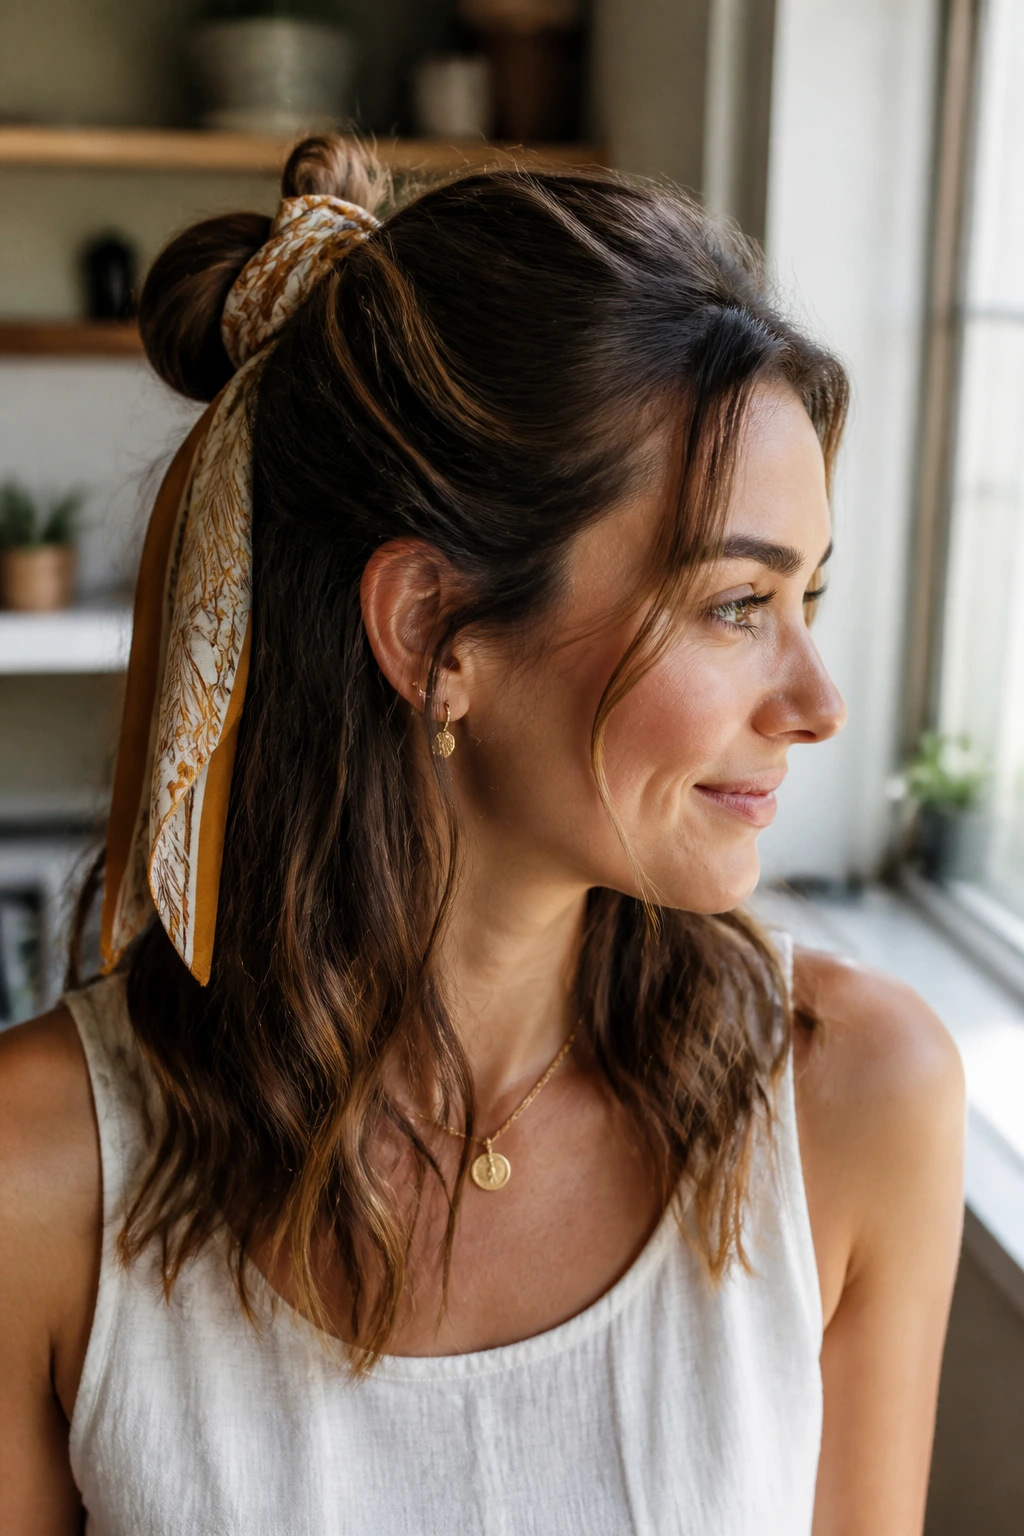
A scarf changes the shape fast, which is useful when your hair feels flat and you want the style to look planned. Fold a silk or cotton scarf into a narrow band, tie the top half of your hair back, and wrap the scarf around the base or through the gathered section. Leave the ends hanging or tie them into a bow if you want more color.
This is one of the easiest ways to make a half-up style feel finished without relying on complicated sectioning. The scarf acts like an accessory and a cover-up at the same time. It hides the elastic, softens the crown, and gives you a clear focal point.
- Fold the scarf into a strip about 1 to 2 inches wide
- Tie the hair section first, then add the scarf
- Keep the knot off-center if you want a looser look
- Choose a scarf that feels smooth against the hairline
A scarf is also helpful on days when you want less heat styling. The accessory does enough visual work on its own. That’s the whole appeal.
17. Low-Twist Half Updo
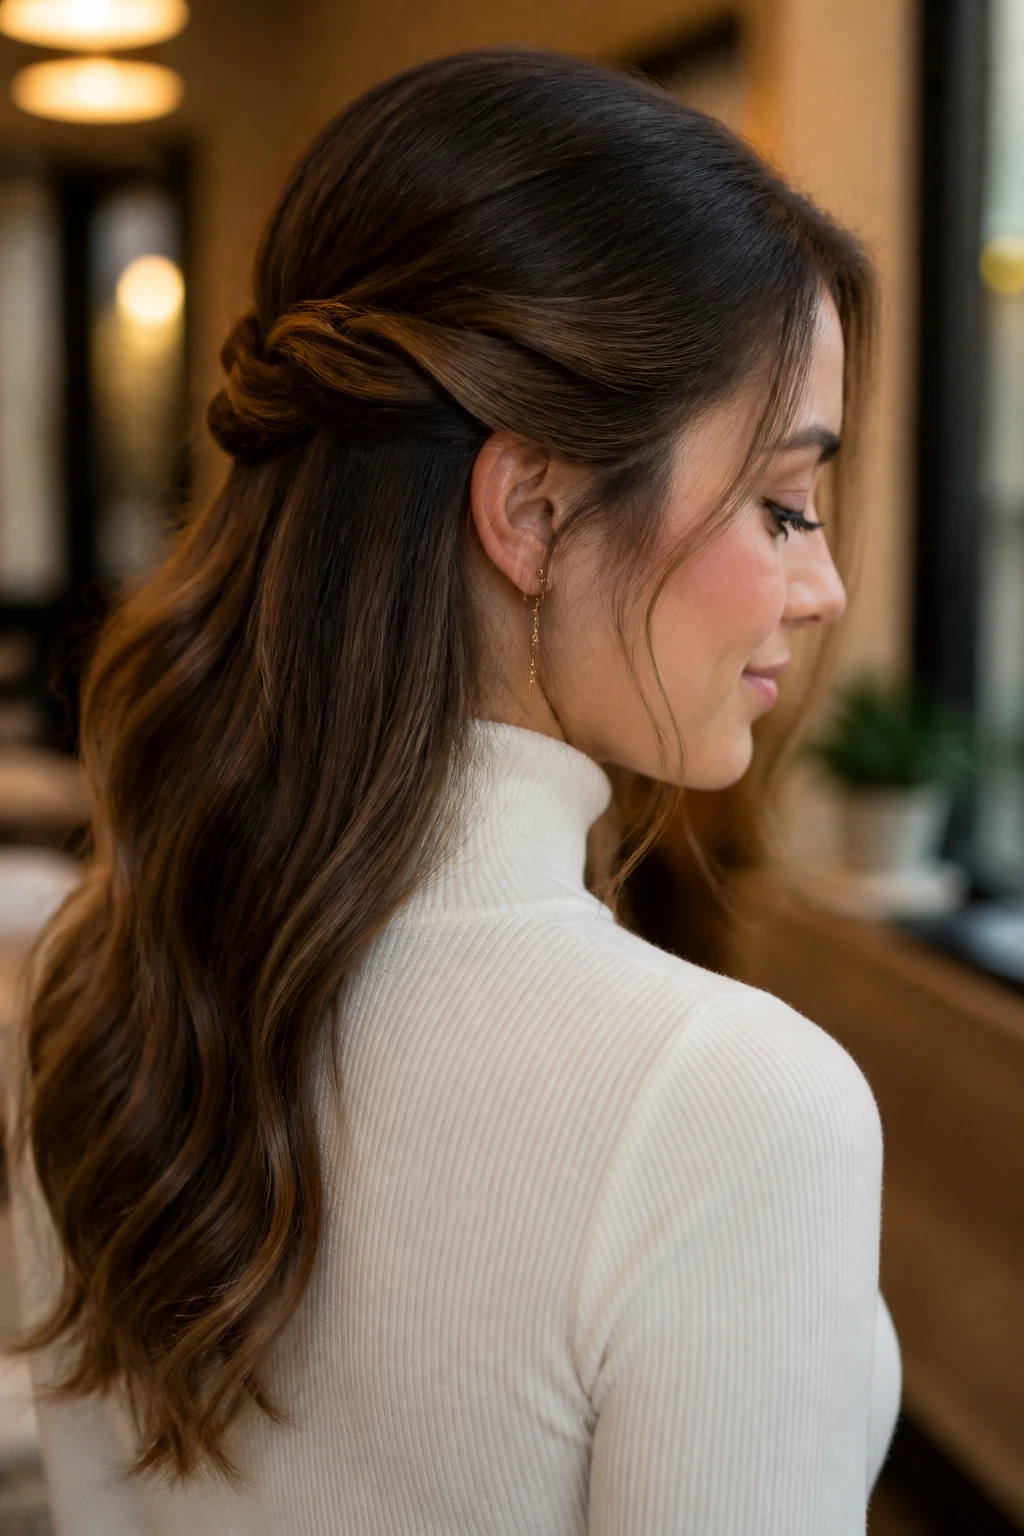
Low is underrated. A low-twist half updo sits closer to the back of the head than a crown twist, and that makes it feel softer right away. Take the side sections, twist them back just above the ears, and join them at the back with a pin or small tie.
This version is especially good if you have layers around the face, because a lower placement lets those shorter pieces fall out in a natural way. It also suits people who like their hair to stay close to the head instead of floating high at the crown.
A low twist is easier to wear under a jacket collar or with a shirt that has a higher neckline. The style doesn’t fight your clothes, which is more useful than people admit. I also like it on days when the roots are a little flat but not dirty enough to need a full wash.
Keep the twists loose and slightly uneven if you want a softer finish. That tiny bit of irregularity makes it look like hair, not architecture.
18. Messy Half Updo with Statement Clips
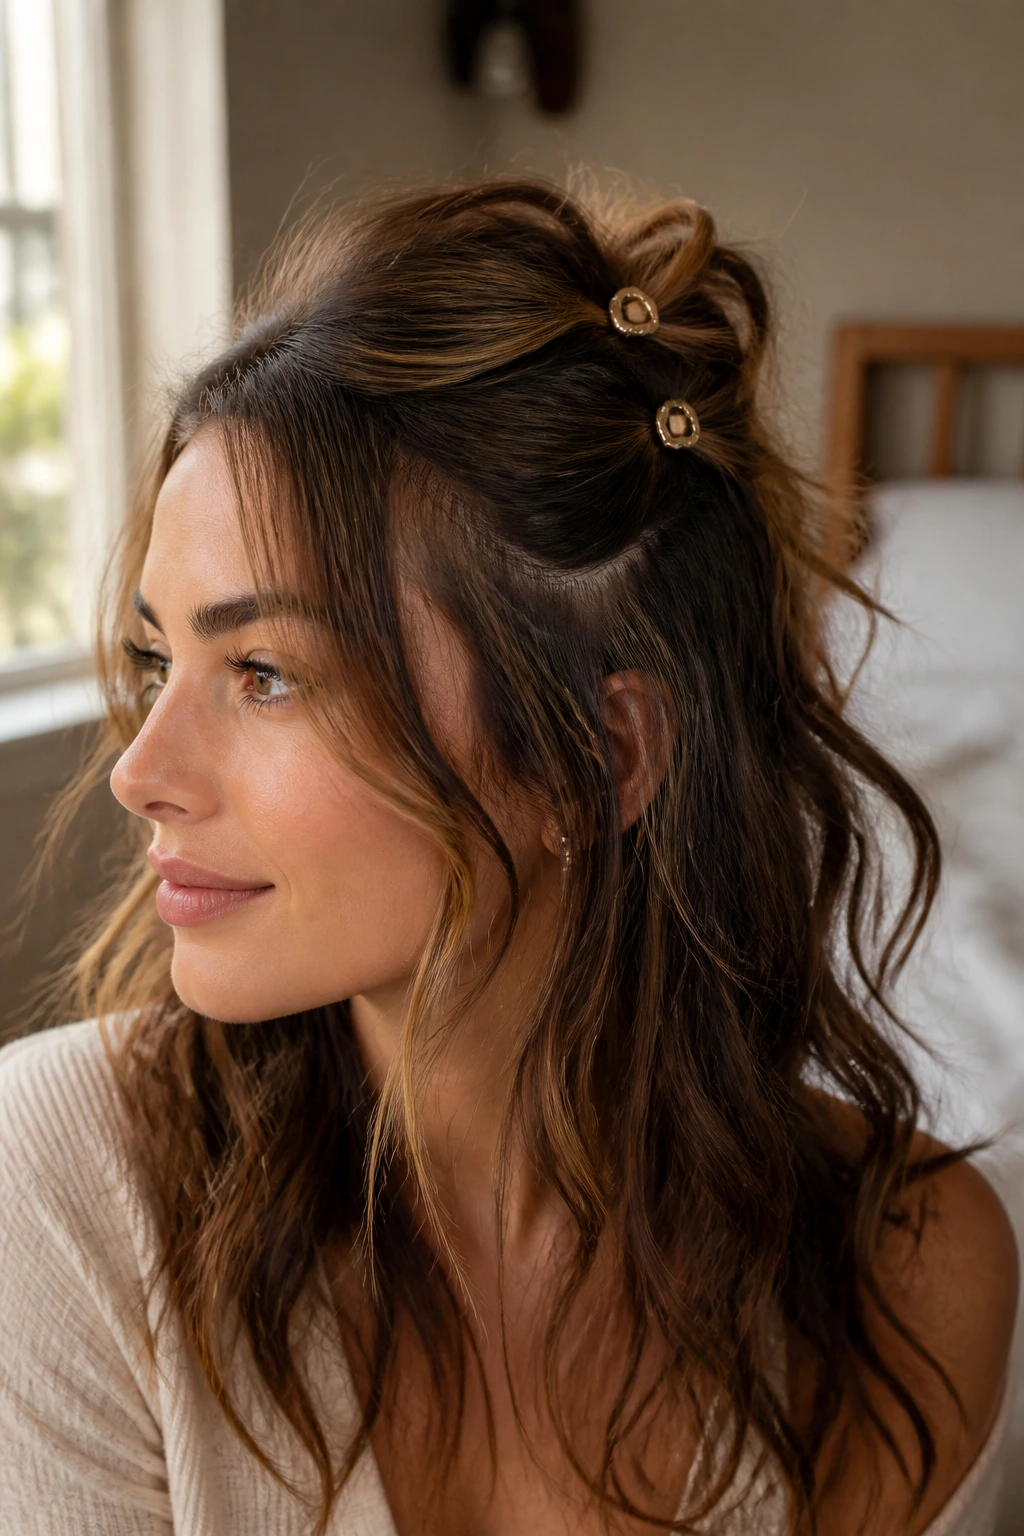
A messy half updo with clips is the style for days when your hair refuses to stay neat, so you stop asking it to. Gather two or three small sections from the sides or crown, twist them loosely, and secure them with statement clips instead of one central tie. The clips do the visible work, which is half the fun.
Unlike a polished half pony, this style does not need clean lines. In fact, a little mess helps. The shape looks better when some pieces are loose and when the clips sit at slightly different angles. That makes it feel worn-in instead of overworked.
This is the best option for fine hair, layered hair, or any cut that falls apart fast in a single elastic. Multiple clips give you more anchor points, so the style holds better than one big piece pulled back with force. I’d use two medium clips or three smaller ones rather than one oversized barrette.
If your hair keeps slipping, add a tiny bit of dry texture spray before clipping. Not much. Just enough for grip.
Final Thoughts
Half-up styles earn their keep because they solve a specific problem: you want your hair out of your face, but you do not want to give up the length. That little compromise is why these looks work on ordinary mornings, long afternoons, and the kind of days when your mirror time is limited to whatever you can manage with one eye open.
The nicest part is how little precision they need. A twist that sits a little low, a braid that isn’t perfectly even, a clip that shows a bit — none of that ruins the look. In a lot of cases, it makes the style better.
Keep a small elastic, two bobby pins, and one good clip in the same drawer. That tiny habit saves more mornings than any complicated routine ever will.
