



Side swept hairstyles for long hair have one job that straight-down styles often miss: they give all that length a direction. Long hair can be gorgeous, but it can also get heavy, flat, and a little too polite if you leave it hanging in the same place every time. Sweep it to one side and suddenly the shape changes, the neckline opens up, and the whole style feels more deliberate.
That little shift matters more than people think. A good side sweep can soften a sharp jaw, make layered cuts show up properly, and give thick hair a way to move without swallowing your shoulders. It also helps with the practical stuff — earrings show better, collars sit cleaner, and a style that looked too simple from the front can read as polished once it turns.
The trick is not just tossing hair over one shoulder and hoping for the best. Long hair needs an anchor point. Sometimes that means a hidden pin near the temple, sometimes a braid that keeps the weight from sliding, and sometimes a side part so deep it becomes the whole shape of the look. Get that right, and even the easiest version holds up far better than it has any right to.
Some of the styles below are clean and glossy. Others are loose, a little messy, and much more forgiving on real hair that has layers, texture, or a stubborn cowlick. Start with the ones that match your hair’s natural behavior, then work toward the more structured looks once you know how your length likes to fall.
1. Loose Hollywood Waves Swept to One Side
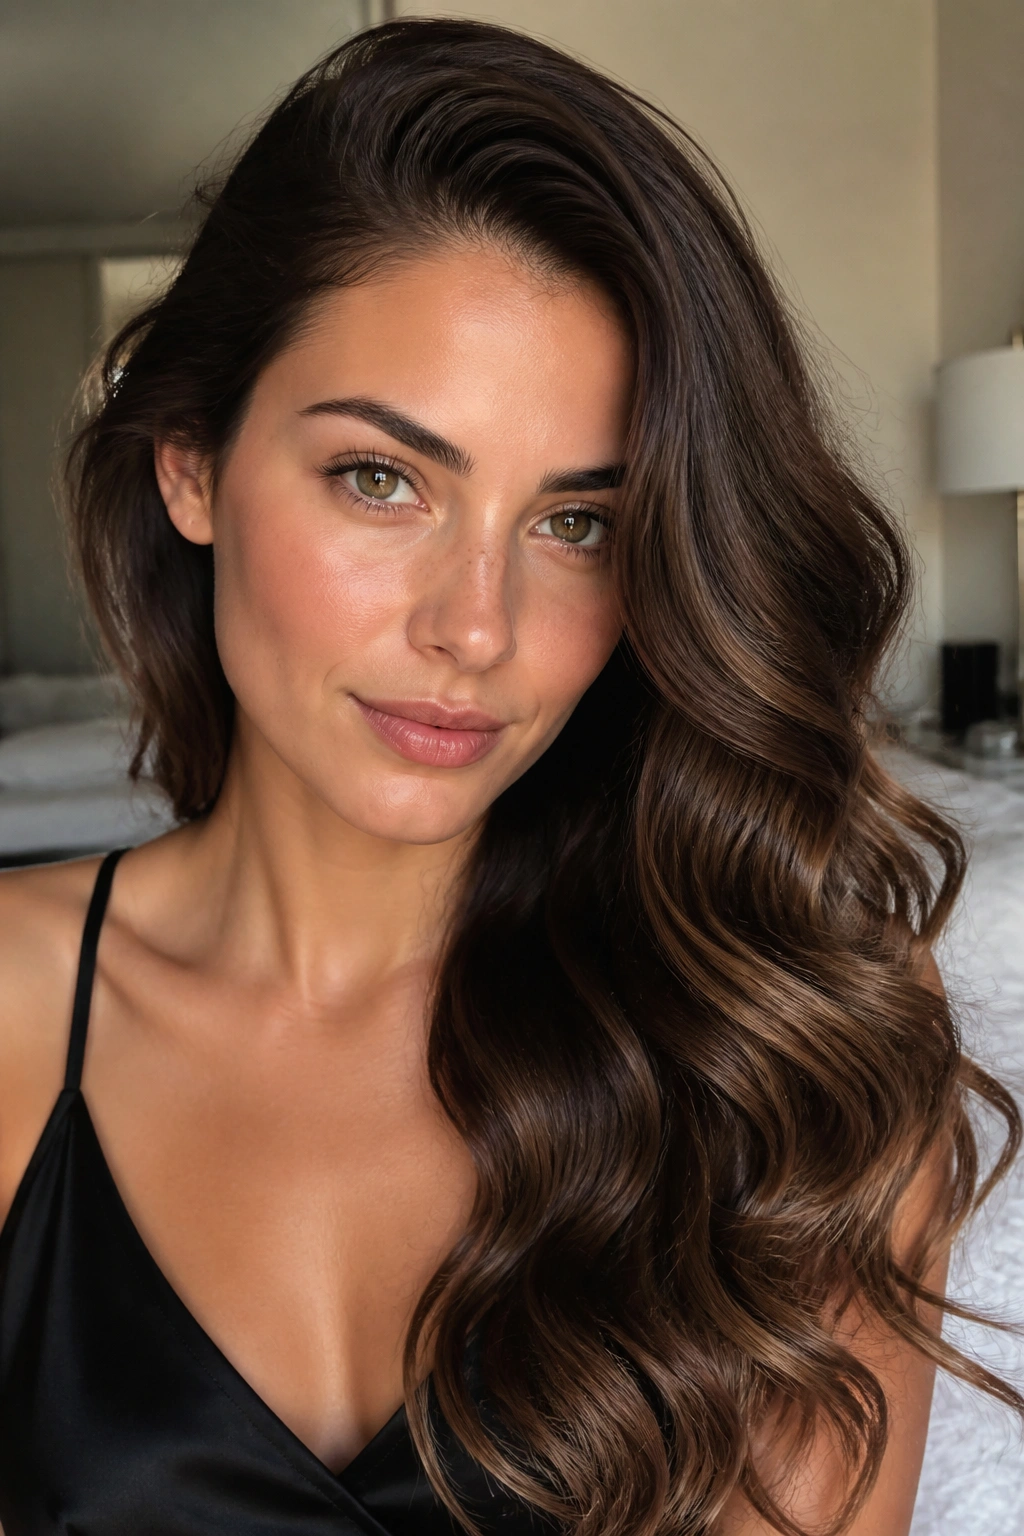
If you only learn one of the side swept hairstyles for long hair, make it this one. It’s the style that flatters almost everyone because it keeps the softness of loose waves while giving the whole look a clear shape.
The secret is in the direction. Curl every section away from the face with a 1 to 1.25-inch curling iron, let the curls cool fully, then brush them out with a boar-bristle brush or a wide-tooth comb. After that, create a deep side part and move the bulk of the hair to the heavier side, pinning just behind the ear with two crossed bobby pins so it does not slide forward every ten minutes.
Why It Stays Pretty Instead of Puffy
A lot of people stop too soon and end up with curls that look like they were copied from a prom photo. That’s the wrong finish. The better version has a soft bend through the ends, a little lift at the crown, and enough brushing that the wave reads as movement instead of ringlets.
Use a light mist of flexible-hold hairspray before you brush, not after. That gives the wave some memory without making it crunchy.
- Curl in 1-inch sections for tighter waves, or 1.5-inch sections for a softer finish.
- Let each curl cool in your palm before dropping it.
- Tuck the front section behind one ear if you want the side sweep to hold all night.
- Add a tiny bit of serum only to the ends; too much near the roots will collapse the shape.
One good pin placement beats a dozen loose ones.
2. Side Braided Low Ponytail
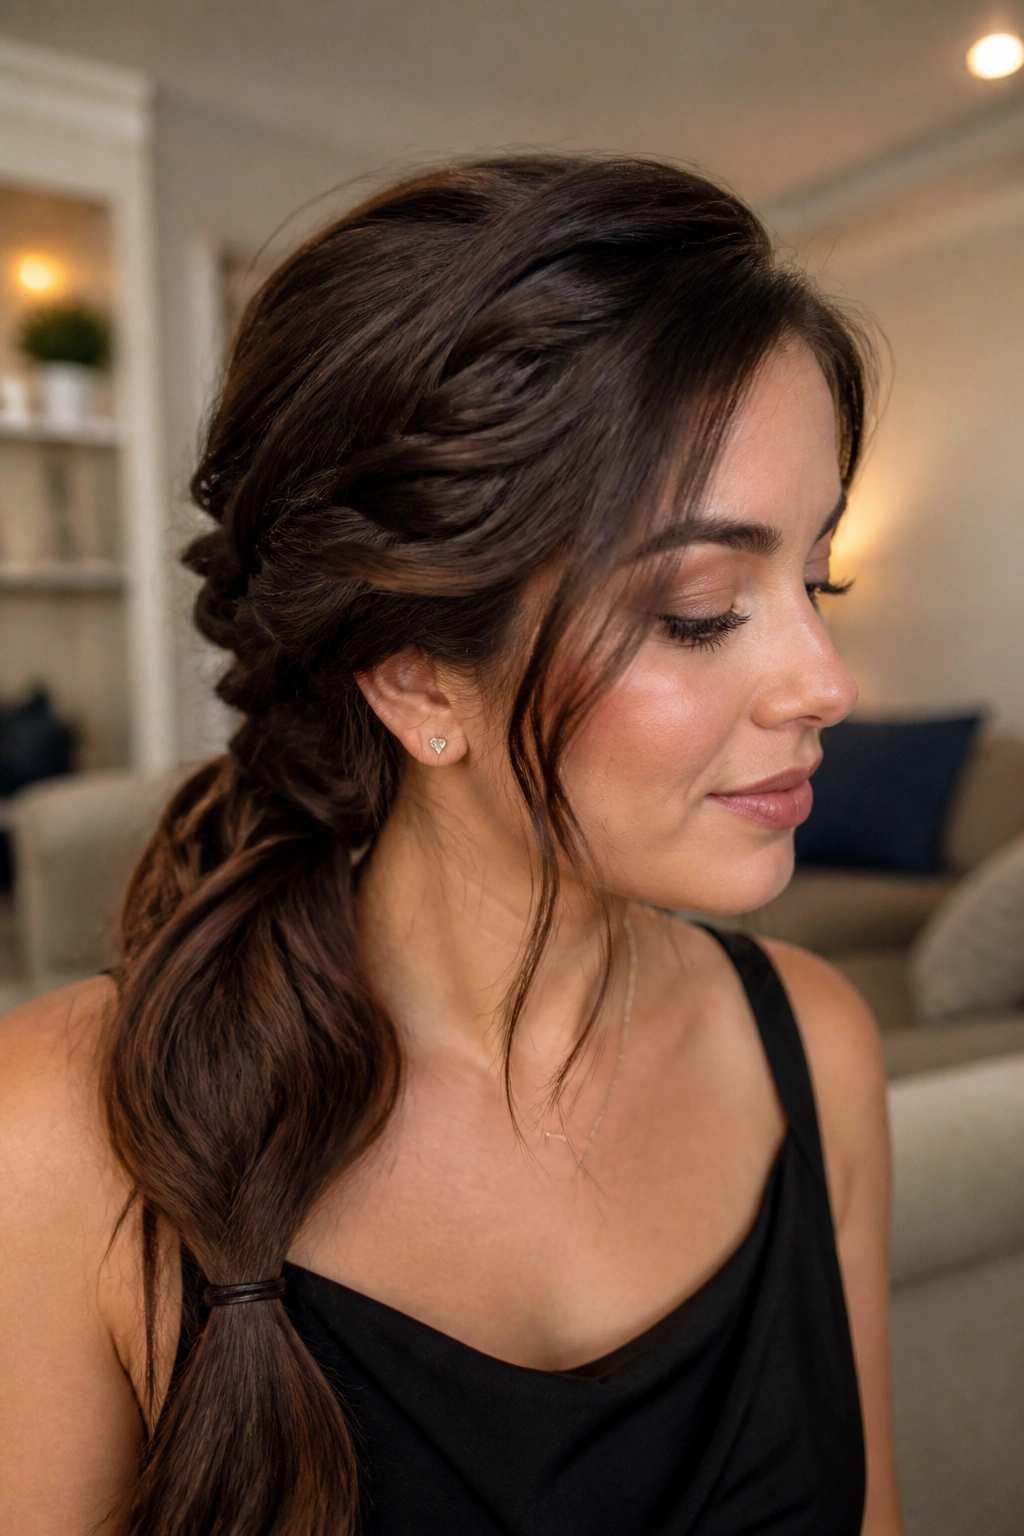
A side braided low ponytail is one of those styles that looks like effort and behaves like practicality. It keeps long hair controlled, but it still moves. That matters if your hair is thick enough to feel heavy by midday.
Start with a low ponytail placed just behind one ear or slightly below it at the nape. Secure it snugly, then braid the tail in a classic three-strand braid, fishtail, or rope braid depending on how much texture you want. I like this version best on second-day hair, because a bit of natural grip keeps the braid from slipping apart.
The cleanest result comes from smoothing the crown first and leaving the braid itself slightly fuller. Too sleek at the top and too tight at the tail can make the whole thing look severe. Too loose everywhere and it turns fuzzy fast.
A small elastic that matches your hair color helps. So does a thin ribbon wrapped around the base if you want the style to feel less sporty and more finished. That little detail can change the mood in a hurry.
3. Twisted Side Chignon
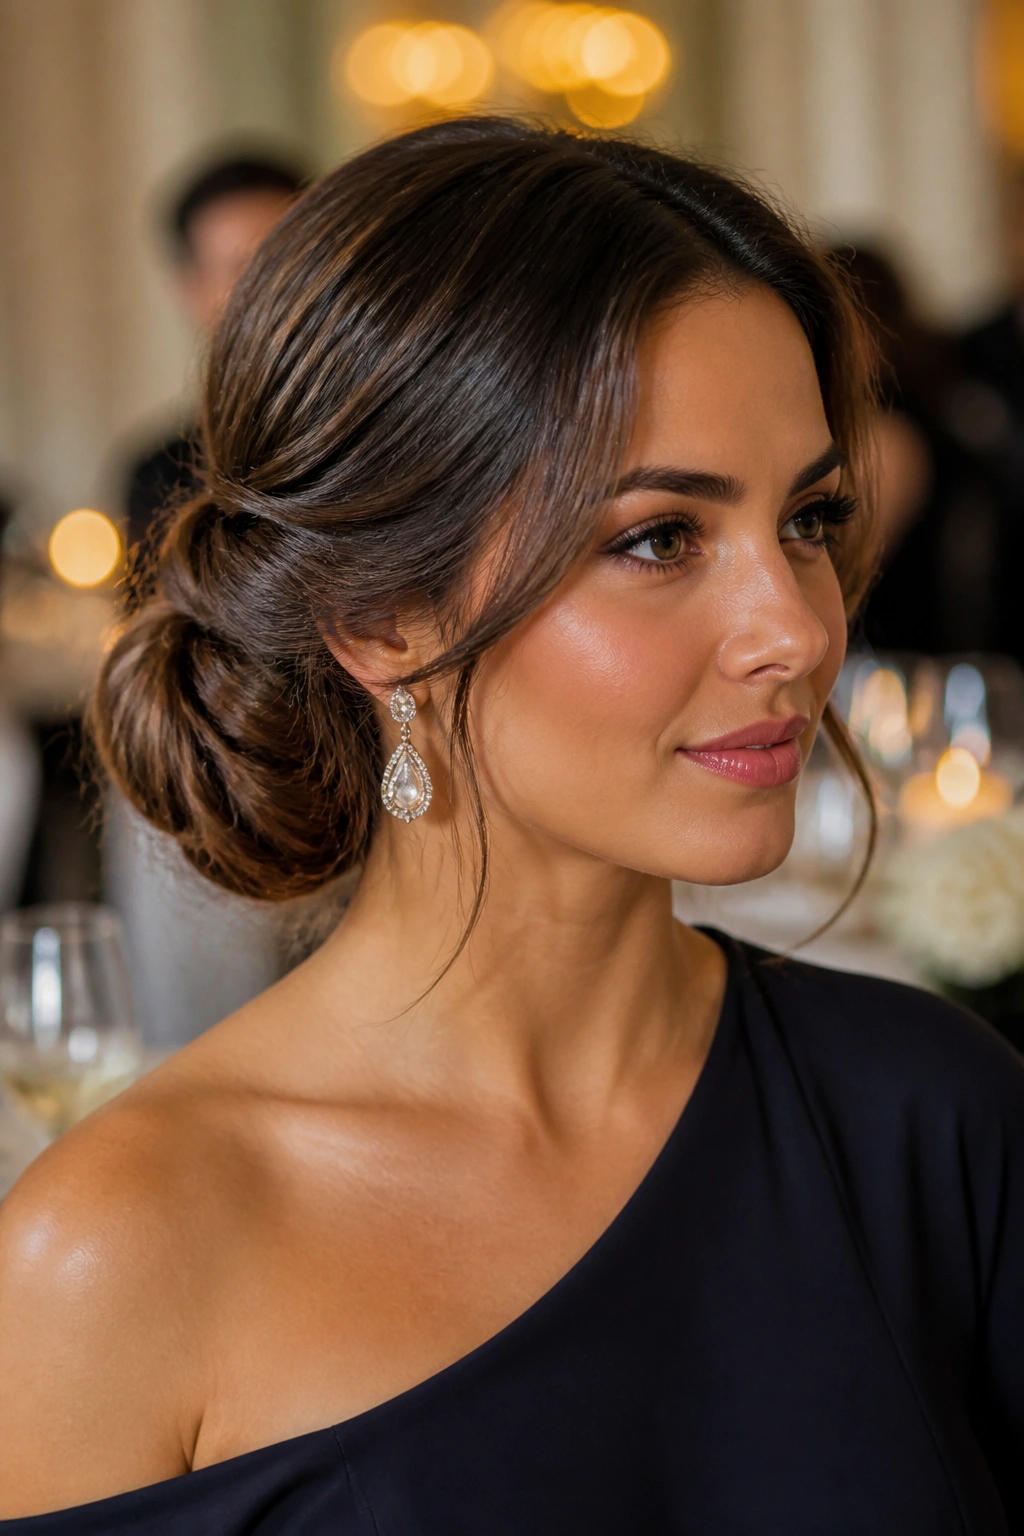
Want something neater without going full bun-head? The twisted side chignon is the elegant answer, and it works especially well when long hair needs to be contained for a dinner, a wedding, or a day when you simply do not want your ends touching your jacket collar.
Part the hair deeply to one side, then gather it low and off-center at the nape. Split the tail into two sections, twist each one separately, and wrap them around each other before coiling the length into a compact knot. Pin through the middle first, then around the edges, because the center is where long hair usually tries to escape.
Pin It Like You Mean It
This style lives or dies by pin placement. If the pins only catch the outer layer, the knot looks fine for about ten minutes and then starts to sag. If they go through the base of the twist and into the hair underneath, the chignon feels locked in without looking helmet-like.
- Use 6 to 10 bobby pins for average-density long hair.
- Insert each pin in a crisscross direction for better grip.
- Leave one slim piece of hair free around the face if you want a softer finish.
- A light dusting of texturizing spray gives the twists something to hold onto.
It’s neat, but not stiff. That balance is the whole point.
4. Half-Up Side Sweep with Cascading Waves
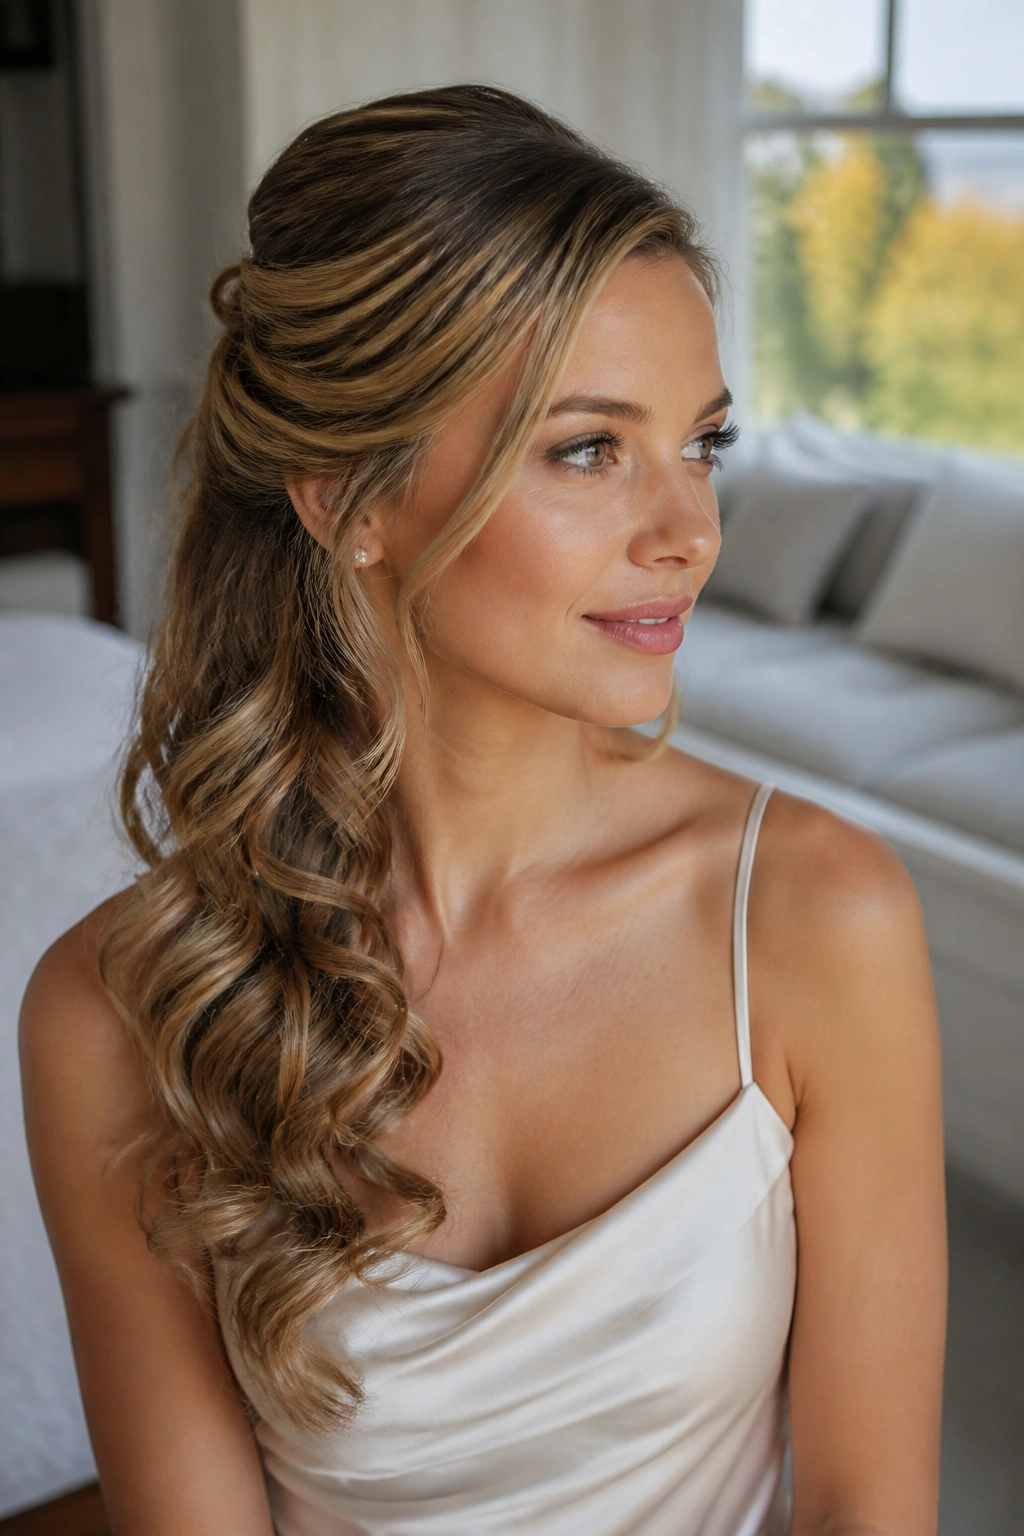
If your hair is long enough to feel heavy but healthy enough to show off, this is a smart place to put the weight. A half-up side sweep lets the top section pull back cleanly while the rest spills over one shoulder in loose waves or soft bends.
The style starts with a side part and a gentle lift at the crown. Take the front sections from both sides, pull them back toward the lower side of the head, and secure them with a small clip, a clear elastic hidden under a wrap of hair, or two crossed pins. The lower section stays loose, which is the whole point. You get shape at the front and movement through the length.
This works best when the top half is not overworked. A little volume at the roots matters. Too much teasing can make the style look dated, and too much smoothing can make the side sweep slide flat. I usually prefer a soft backcomb at the crown, then a quick brush over the top layer.
Best Hair Types for This Look
- Long layers that fall in pieces
- Hair with a slight wave or bend
- Fine hair that needs help staying off the face
- Thick hair that you want to feel lighter around the neck
It is a good compromise style. Not too done. Not too casual. Exactly the sort of look that saves you when you want your length visible but not in the way.
5. Fishtail Braid Over One Shoulder
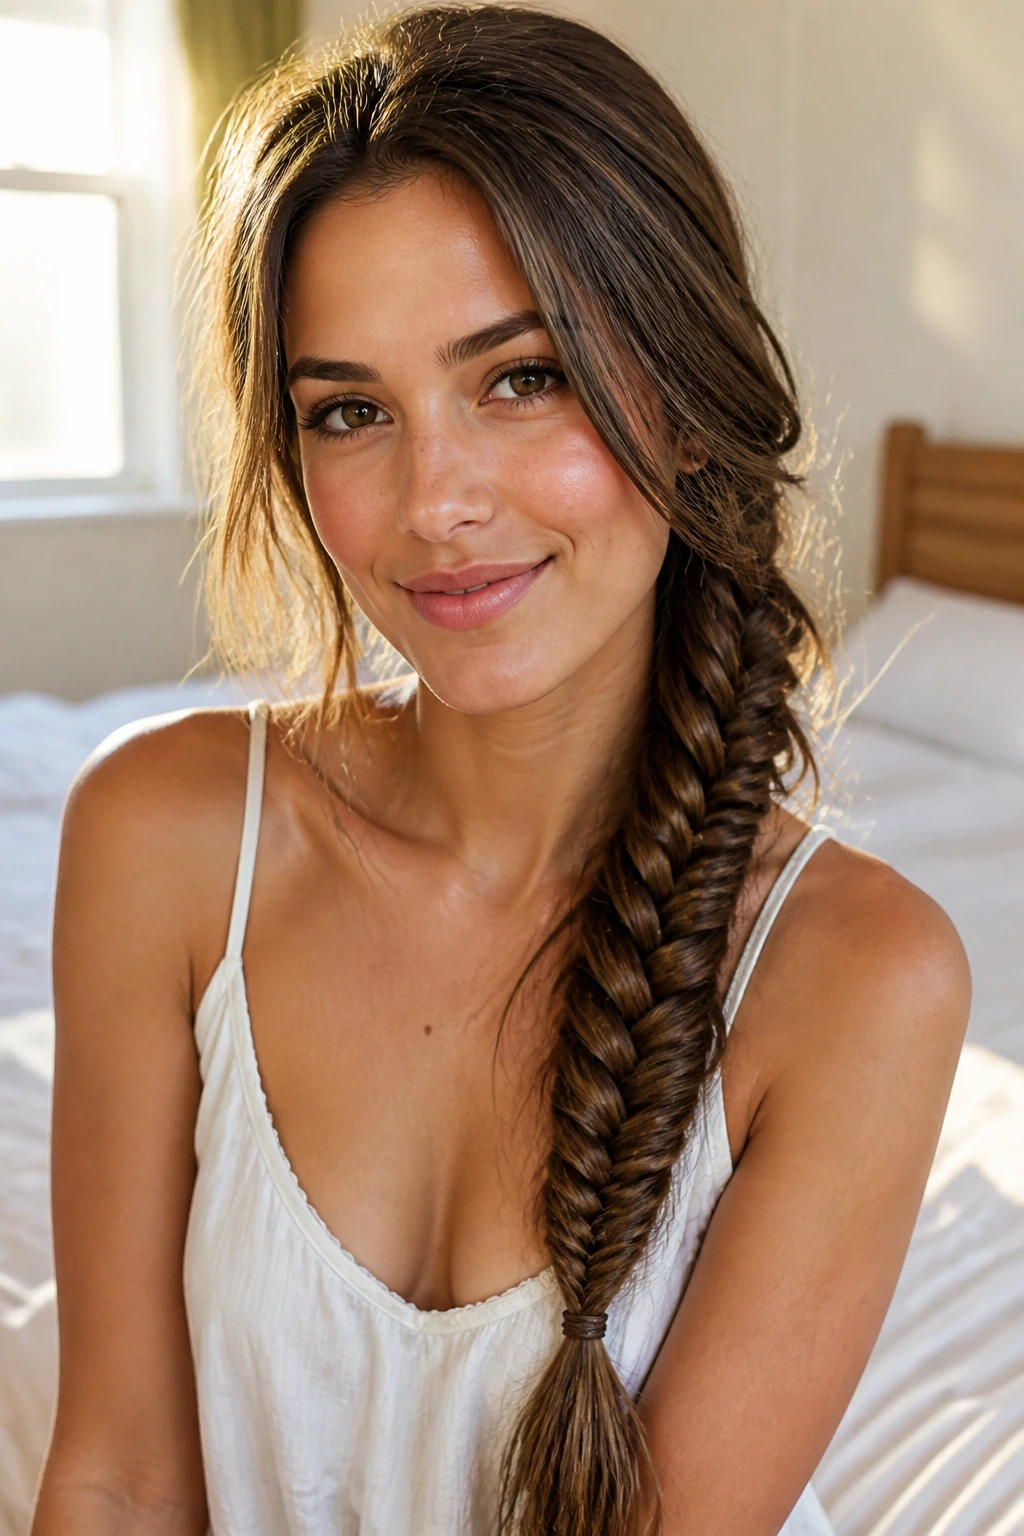
The fishtail braid looks fussy until you stop trying to make it perfect. Then it gets good. A loose fishtail draped over one shoulder gives long hair texture, detail, and that slightly undone finish people usually spend too much time pretending not to work for.
Start by gathering the hair to one side and dividing it into two large sections. Pull a thin piece from the outside of the left section, cross it over, then do the same from the right. Keep going. That’s the whole braid. The trick is to keep your hands steady and your tension even, not tight. Once the braid is finished, tug gently at the outer edges to widen it.
That loosening step matters. A skinny fishtail can look neat, but a fuller one looks richer and more dimensional on long hair because the weave shows better. If the hair is slippery, prep it with a matte texturizing spray first. Clean, silky hair can make this braid unravel before you finish your coffee.
What to Watch For
- Very smooth hair needs grip spray first.
- Layers may pop out near the face; pin those back if needed.
- A side fishtail looks best when the braid starts low, not at the crown.
- Pull the braid apart a little at a time, not all at once.
The style has a nice tension between pretty and practical. That’s why it keeps showing up.
6. Sleek Side Part with Tucked Ends
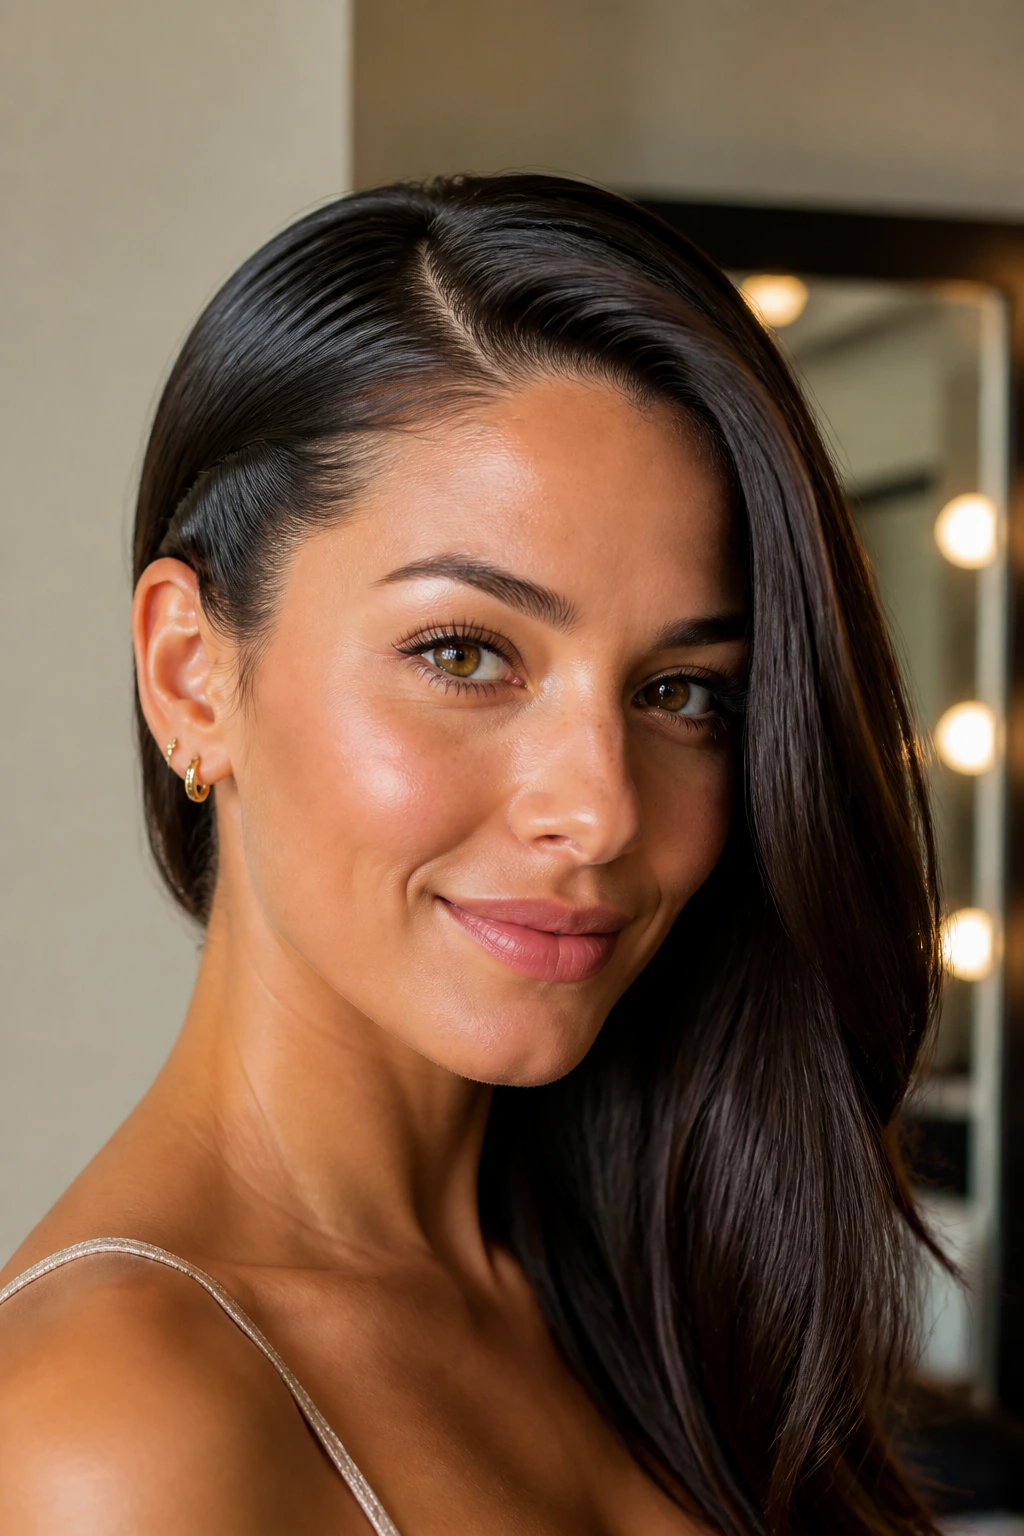
A sleek side part sounds simple, and that is exactly why it works so well. Long hair can sometimes feel too much when it is all volume and no direction. A clean side part, smooth lengths, and tucked ends bring the whole thing back into focus.
This one depends on prep. Blow-dry with a paddle brush or a large round brush until the roots lie flat and the lengths are smooth. Work a pea-sized amount of smoothing cream through the mid-lengths, then comb everything into a deep side part while the hair is still warm. If the ends curl awkwardly, run a flat iron over the last few inches and bend them slightly under or away from the face.
The tuck is the detail that makes the look feel finished. Slide the smaller side behind one ear and secure it with a single hidden pin if needed. The larger side should sit neatly over one shoulder, not spread across the chest like a curtain.
Tools Worth Reaching For
- Fine-tooth comb for a crisp part
- Smoothing cream for the surface
- Shine spray applied from arm’s length
- A toothbrush and a little gel for flyaways at the hairline
I like this style when I want long hair to look intentional without asking it to do too much. It is calm, clean, and a little sharp in the best way.
7. Voluminous Side-Swept Blowout
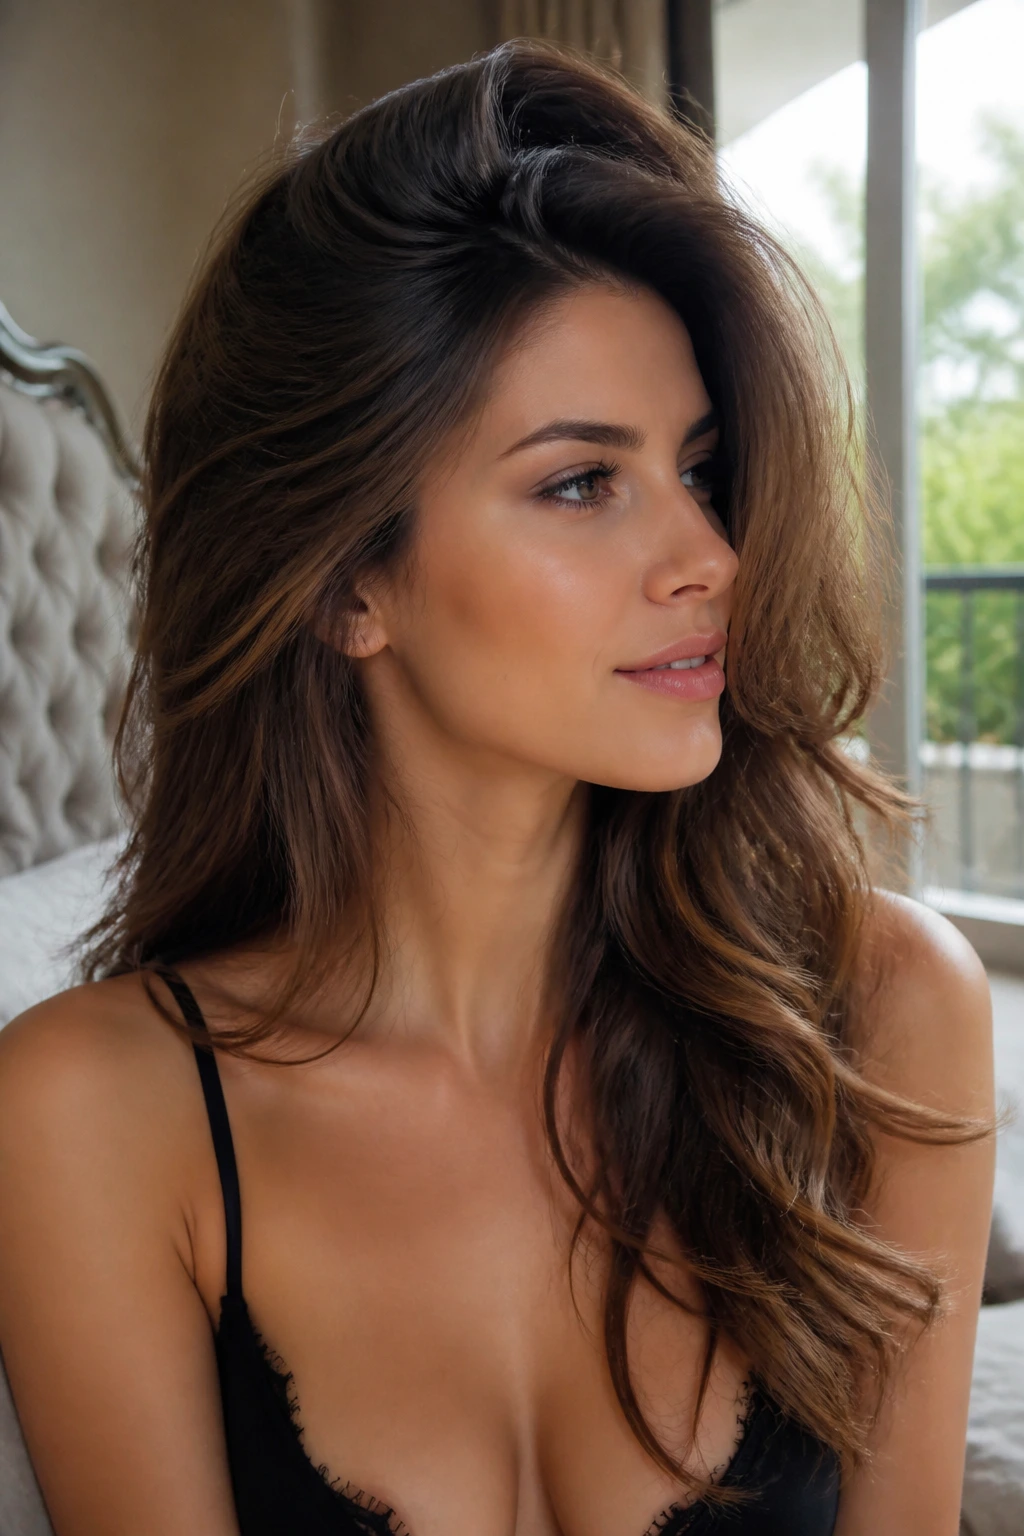
The best side-swept blowout has movement at the roots, not just the ends. That detail changes everything. Long hair can collapse into a flat sheet if the crown is ignored, and once that happens, no amount of brushing the lengths over one shoulder will save it.
Set the style with a volumizing mousse at the roots, then blow-dry using a large round brush. Direct the front sections away from the face, roll them over the brush, and clip them in place for five to ten minutes while they cool. That cooling step matters more than most people think. Heat shapes the hair, but cooling keeps the shape.
Once the blowout is ready, sweep all of it to one side and brush only the surface layer. Leave some bounce underneath. You want lift, not stiffness. If your hair is very thick, a light mist of dry texture spray at the roots on the heavier side helps keep the style from sinking back toward the center.
It smells like heat protectant and a clean brush, and the finish should feel soft to the touch, not sticky. That’s the sweet spot.
And no, it does not need perfect symmetry. It looks better with a bit of natural imbalance anyway.
8. Side-Swept Bubble Ponytail
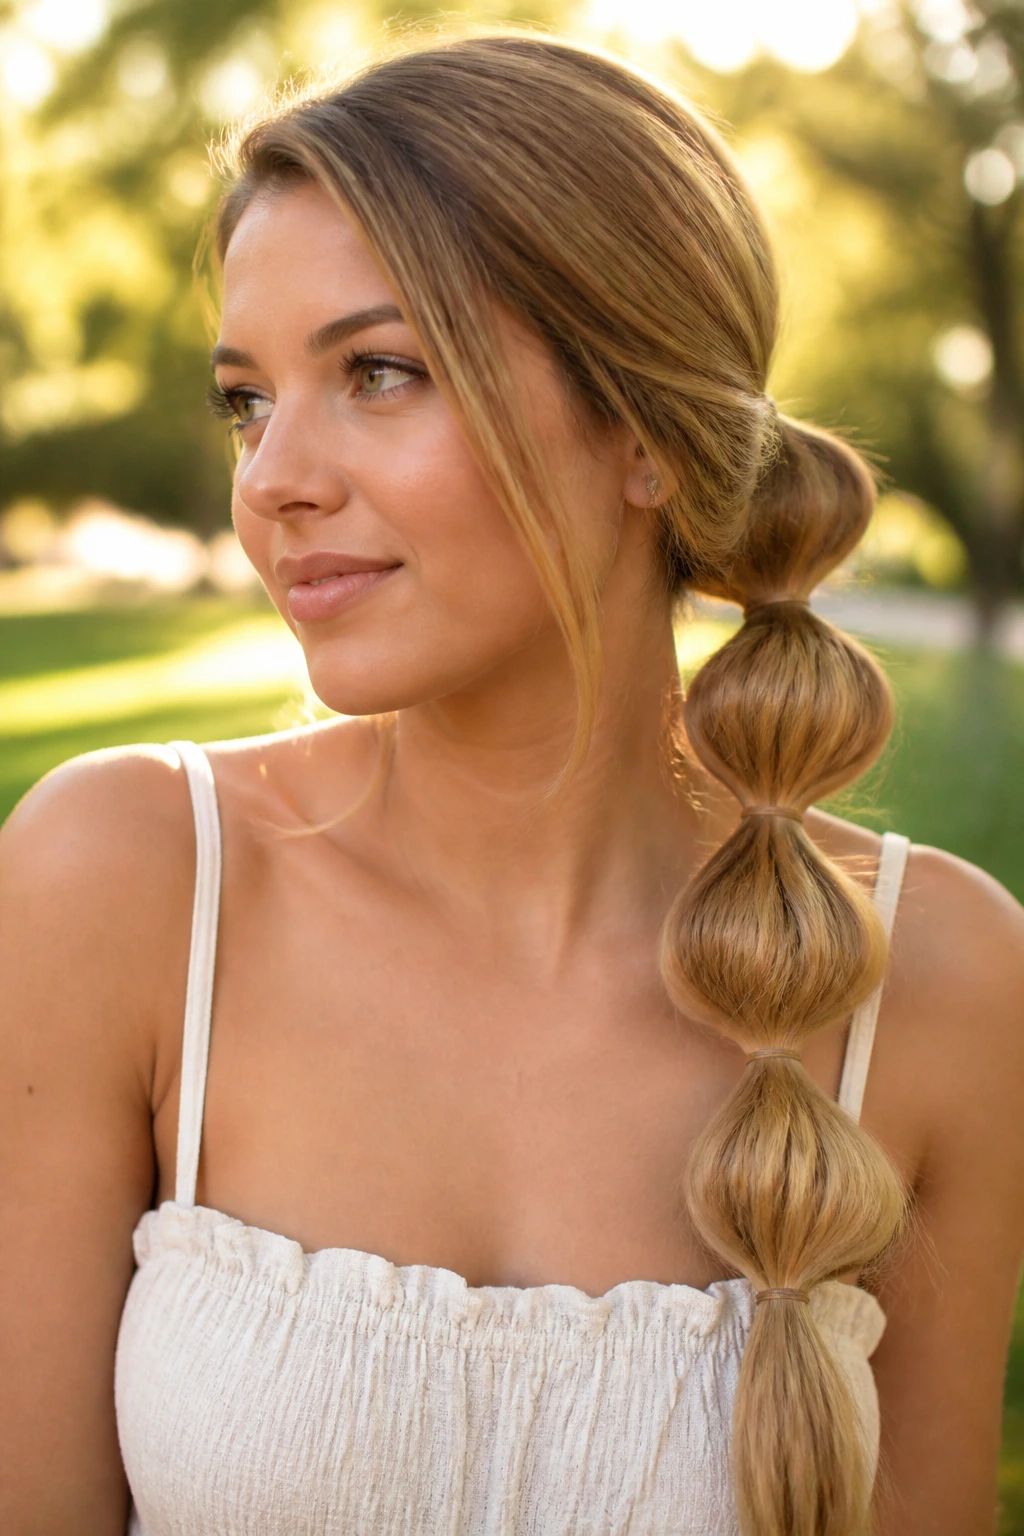
Bubble ponytails solve a problem that long hair creates all the time: the length is nice, but the weight flattens everything. A side-swept bubble ponytail breaks that long line into sections, which gives the style shape without asking your hair to hold a complicated braid.
Pull the hair into a low ponytail off to one side, then add elastics every 2 to 3 inches down the tail. After each elastic goes in, gently tug the section between elastics to puff it out. Not too much. You are making rounded bubbles, not sausage links. A little fullness is enough to change the whole look.
This style is especially useful when the ends of your hair are one of two things: very straight or a little frayed. The bubbles distract the eye from both. They also work well on layered hair because the sections keep the shorter pieces from slipping entirely out of place.
Small Adjustments That Help
- Wrap a thin strand of hair around each elastic for a cleaner finish.
- Start the first elastic low, around the nape or just behind one ear.
- If the bubbles lean flat, pinch the sides and tug upward at the center.
- Use clear elastics for a subtle look, or black ones if your hair is very dark and the bands disappear.
It is playful without being childish. That’s a harder balance than it sounds.
9. Rope-Braid Side Ponytail
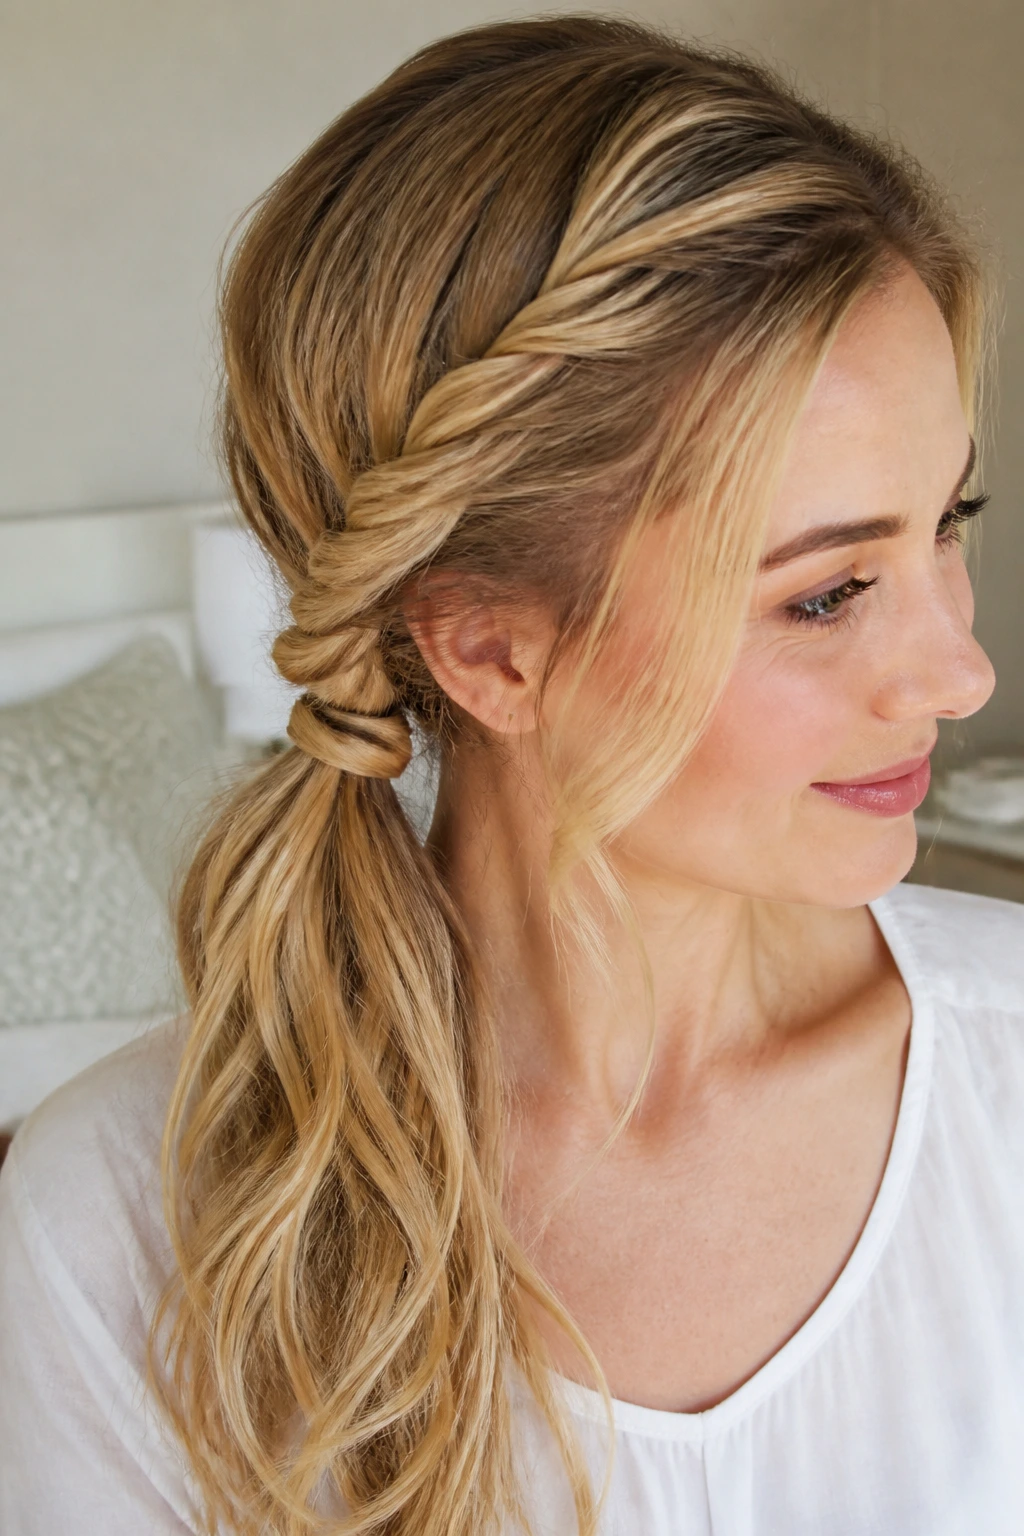
A rope-braid side ponytail is one of the easiest ways to make long hair look organized without spending forever on it. The braid itself uses only two sections, twisted in opposite directions and then wrapped around each other, which is why it feels faster than a regular braid once your hands learn the rhythm.
Gather the hair low and to one side, secure it with an elastic, then split the tail into two equal pieces. Twist each section clockwise, then cross them counterclockwise around each other. That opposite motion is what makes the rope hold. If both twists go the same direction, the braid loosens too quickly and starts to look sloppy in a bad way.
This style is great when hair is slippery or freshly washed. A small amount of mousse or a light gripping spray before styling gives the strands enough friction to stay put. You do not need a lot.
How to Keep the Ropes Even
- Keep both sections the same size from start to finish.
- Tighten the twist near the base before the length begins to slide.
- Pin the elastic base under a small wrapped section if you want a more finished look.
- Stop and smooth the surface every few turns so the braid does not twist itself into a lump.
It is a neat little style. Quietly useful. And faster than most people expect.
10. Side-Swept Messy Bun with Face-Framing Pieces
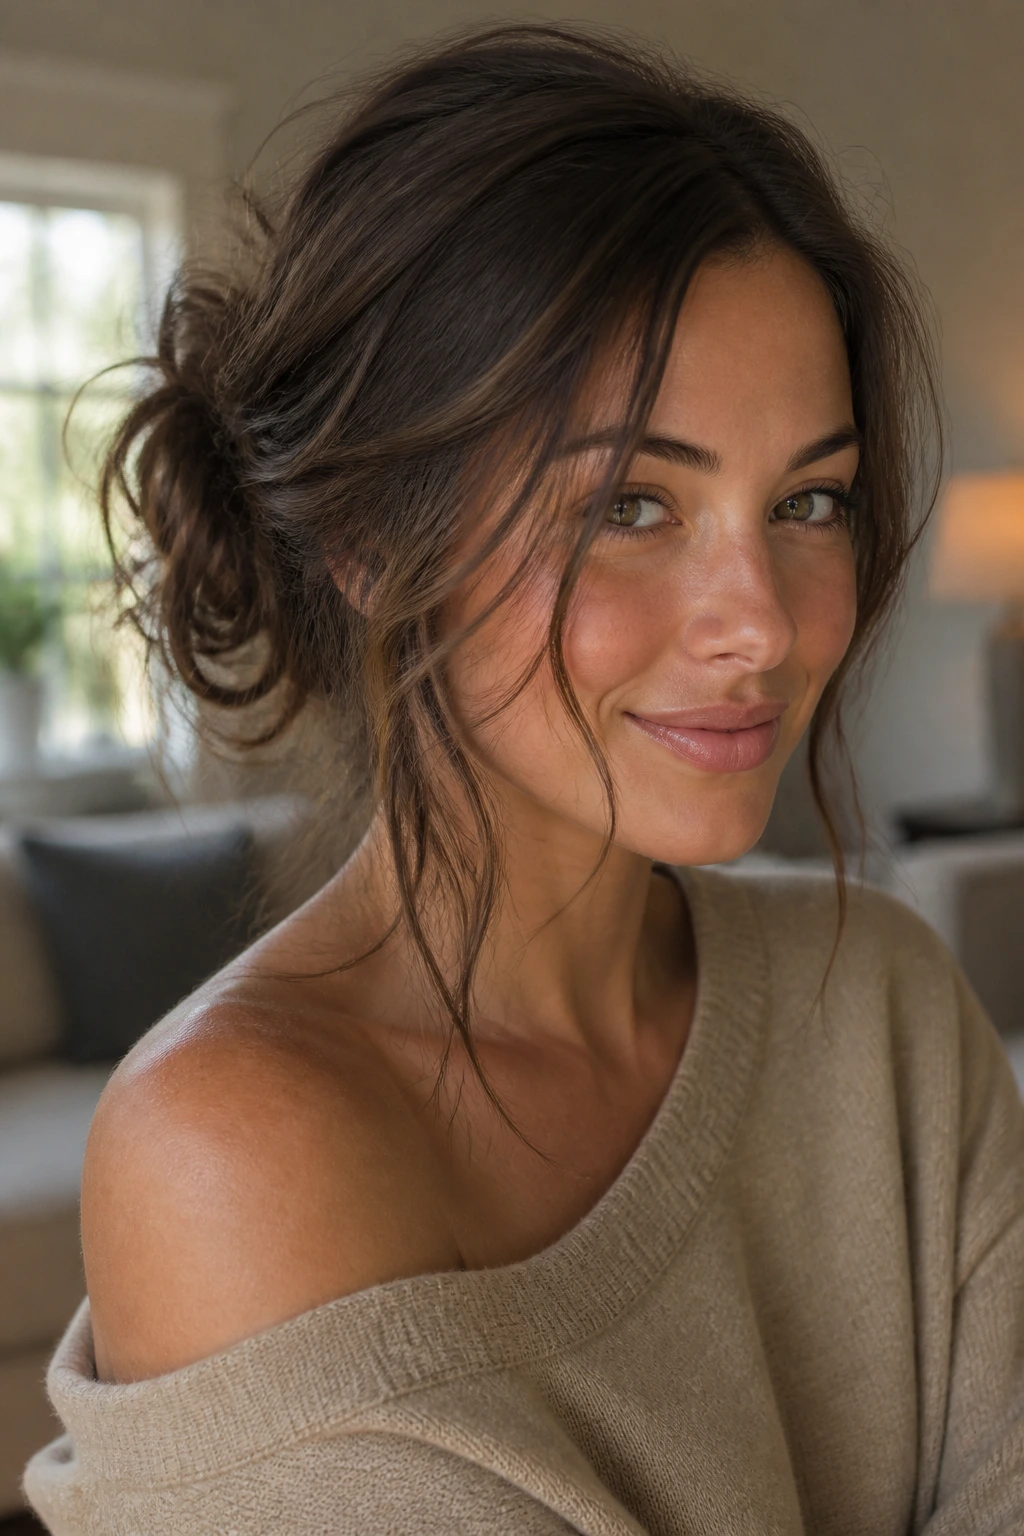
Some styles look better the moment they stop trying so hard, and this is one of them. A side-swept messy bun works because it lets long hair stay soft around the face while moving the bulk low and off-center, where it feels less bulky.
Pull the hair into a loose side ponytail at the nape or just below the ear, then twist it into a bun and pin it in place with a few open bobby pins. Do not build the bun too tightly. Leave the shape a little loose and let a few pieces fall out near the temples. Those strands should be intentional, not accidental. About half an inch to an inch around the face is enough for softness.
I like this style best when the crown has a small amount of volume. If the top is too flat, the bun can look droopy. If it is too teased, the whole thing turns stiff. Somewhere in the middle is the spot.
It’s a good one for dinner, errands, or a day when your hair has one more day left before washing. Long hair can look romantic here, but only if the bun stays low and the pieces around the face are controlled. Otherwise it just looks like you gave up halfway through.
11. Crown Braid Feeding into a Side Bun
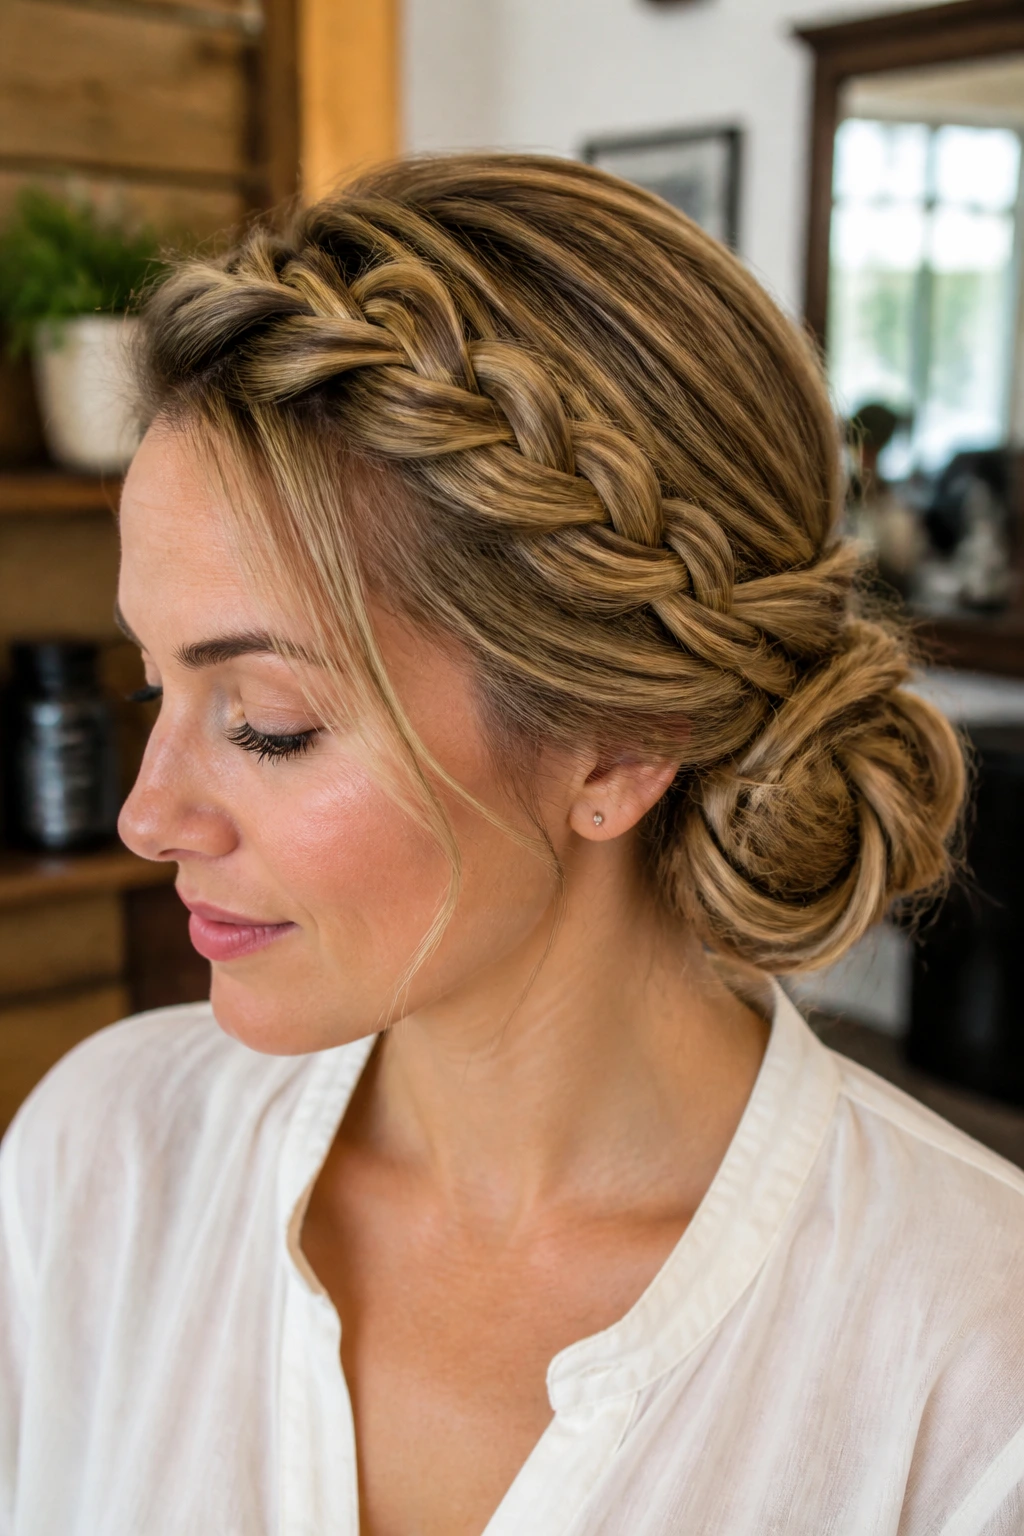
A crown braid feeding into a side bun gives you the polish of an updo without making the hair disappear completely. The braid creates the frame; the bun keeps the shape low and wearable. On long hair, that combo works because the braid uses the top section to control volume before the length gets unruly.
Start a braid along one side of the hairline, move it across the crown, then gather the remainder into a side bun near the nape or just behind the ear. That transition matters. If the braid ends too high, the bun can look disconnected. If it ends too low, the braid loses its shape before it gets a chance to show.
Where to Pin It
- Use pins inside the bun first, then around the outer curve.
- Anchor the braid to the bun base, not just the surface.
- Tuck the tail under the bun so it does not stick out like a spare piece.
- Leave the bun slightly loose if you want the braid to stay visible.
This style is a bit more formal than the messy bun, but not stiff. It has structure, which long hair often needs. And because the braid feeds into the bun rather than sitting beside it, the whole thing reads as one shape instead of two separate ideas fighting for space.
12. Waterfall Braid with Loose Side Length
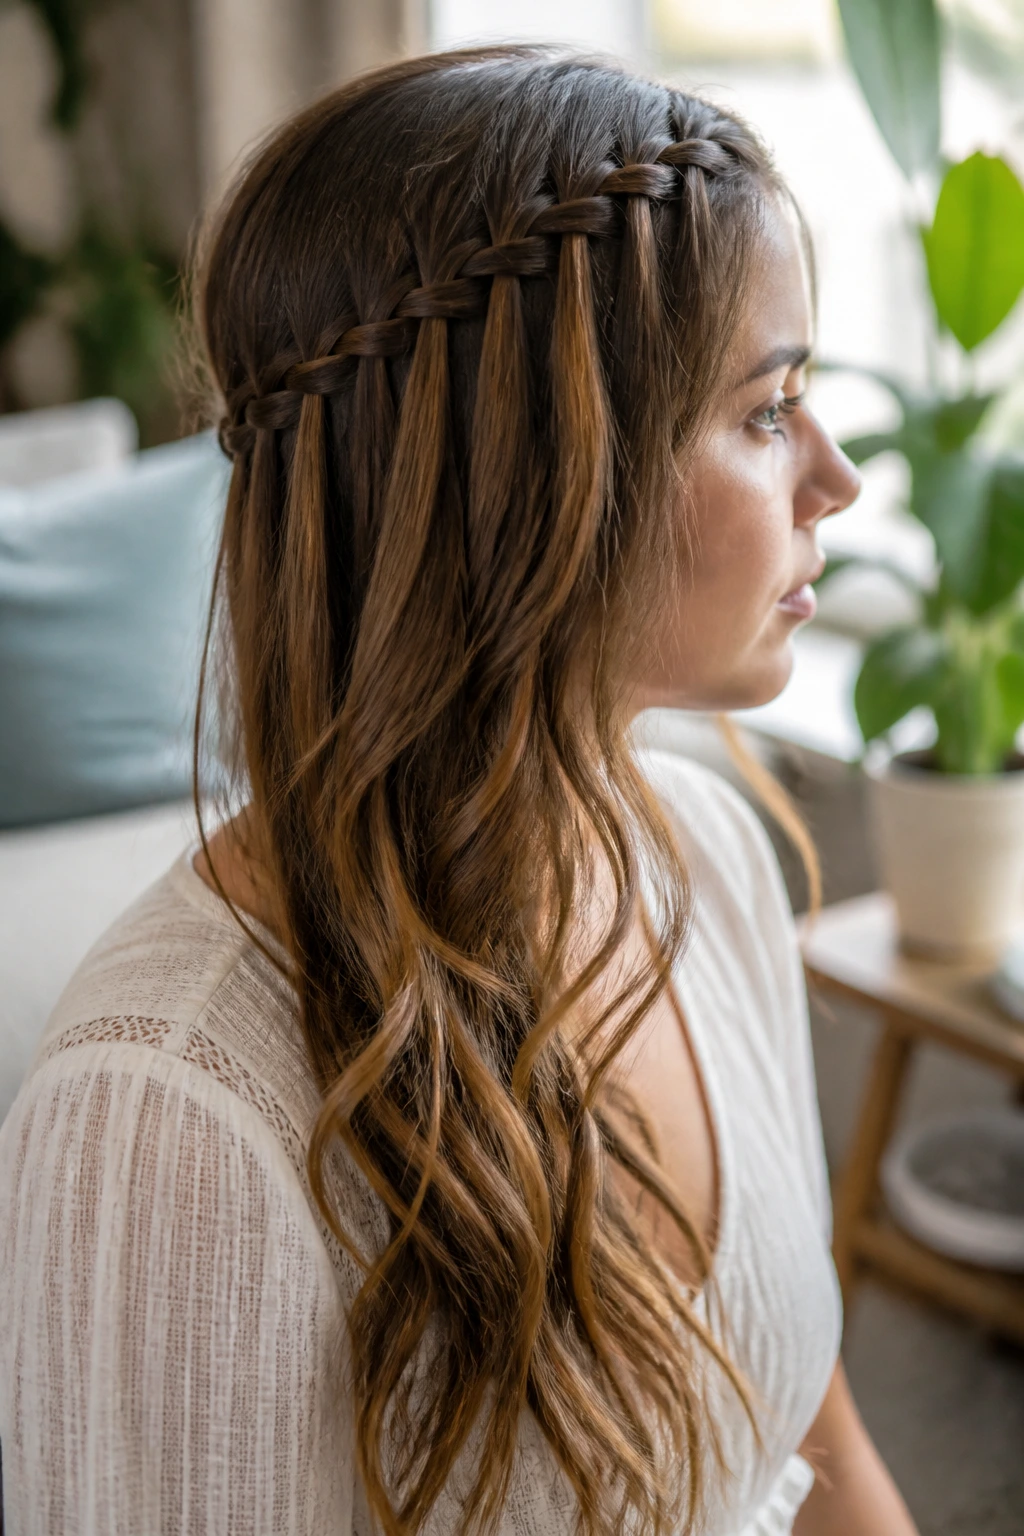
The waterfall braid is the one people assume is too fussy for real life. It isn’t, though it does ask for a steady hand and hair that can hold a little curve. On long hair, the braid creates a pretty line across the head while leaving the rest of the length free to drape over one shoulder.
The braid works by dropping one section as you go, then picking up a new one to replace it. That creates the “falling” effect. Keep the dropped pieces smooth and even, or the braid starts to look patchy. A soft wave underneath helps a lot because it gives the loose lengths a shape that feels connected to the braid.
This is one of those styles that benefits from layers, but it can still work on one-length hair if you curl the ends first. Straight ends can make the braid look too sharp. A little movement softens the whole thing.
When to Skip It
- If the hair is freshly washed and too slippery
- If you need a style that can survive heavy wind
- If your arms get tired fast; the braid takes patience
- If the front layers are too short to hold cleanly
It is pretty in a very specific way. Not casual, not stiff, and best when the rest of the hair stays loose enough to balance the detail above it.
13. Side-Swept High Ponytail
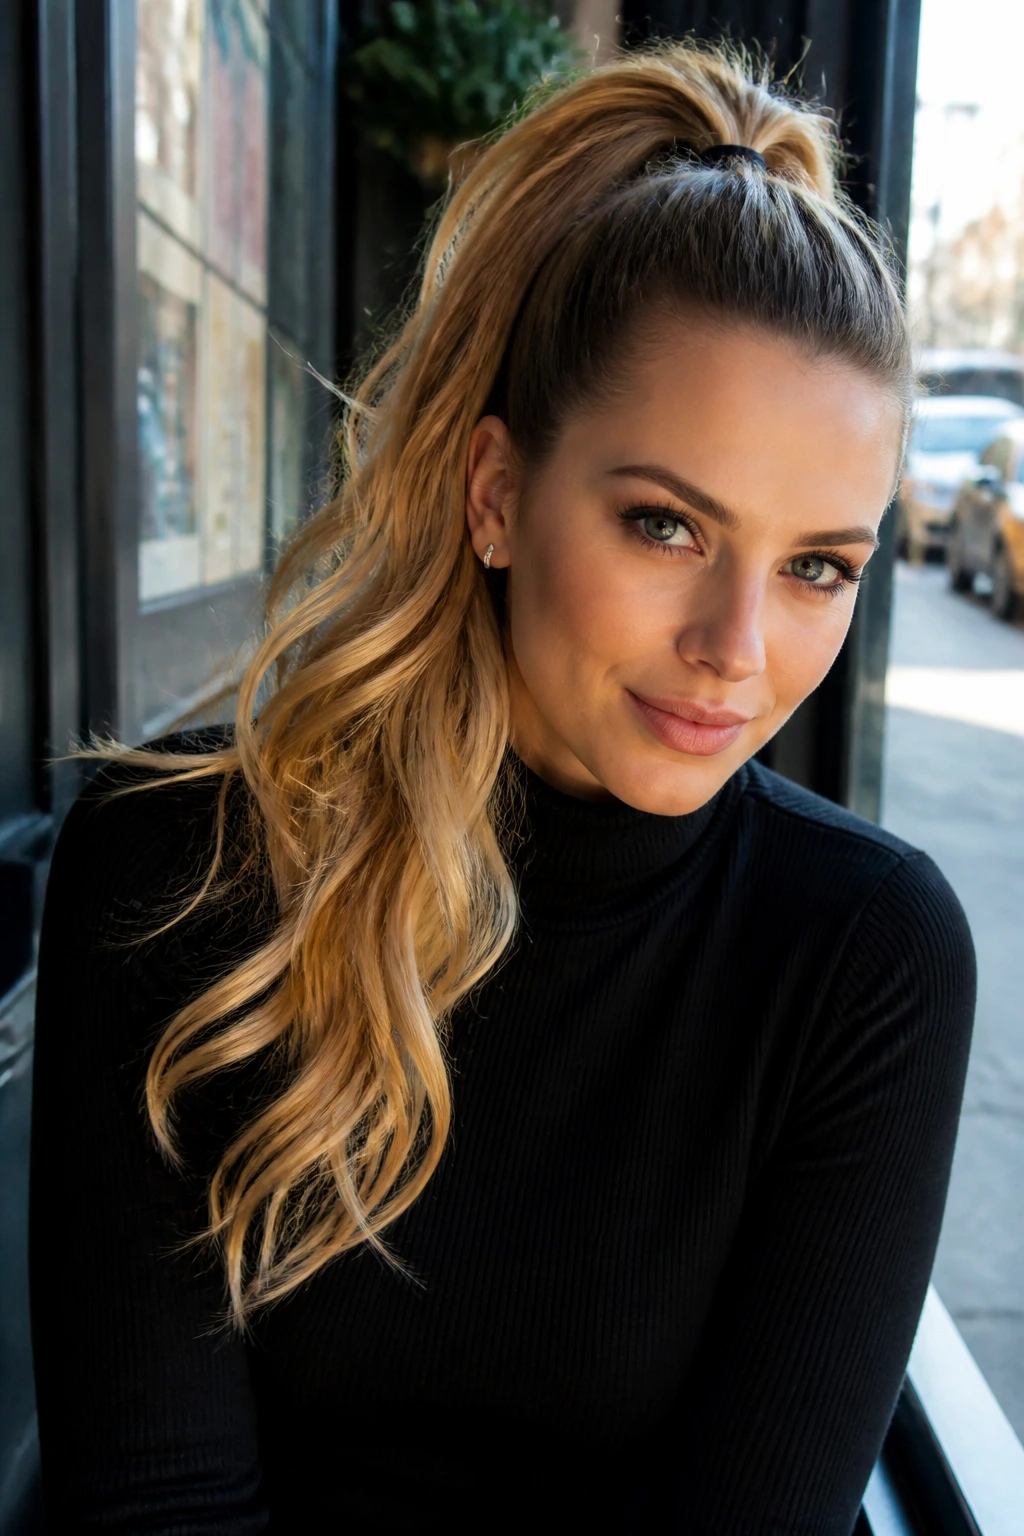
A high ponytail can still read as side swept if the base sits slightly off center and the tail falls over one shoulder. That off-center placement gives the style more shape than a straight-back ponytail, and on long hair it keeps the length dramatic without looking too strict.
Brush the hair up and back, but not directly to the middle. Aim the ponytail toward the side of the crown closest to the part, then secure it firmly with a strong elastic. Wrap a small section of hair around the base to hide the band. From there, smooth the top with a boar-bristle brush and add a little hold spray where the crown tends to puff.
The angle is what changes the look. Too centered and the style loses the side-swept effect. Too far to the side and the ponytail droops. A slightly off-center perch gives the lift you want without pulling the head shape sideways.
The Height Rule
- High enough to lift the face
- Low enough to keep the tail from collapsing forward
- Firm base, loose tail
- One clean sweep over the shoulder at the end
This works well when you want energy, not softness. It has more attitude than the low versions. And yes, it can get tense if you pull too hard at the scalp, so keep the tension firm but not painful.
14. Side-Swept Mermaid Braid
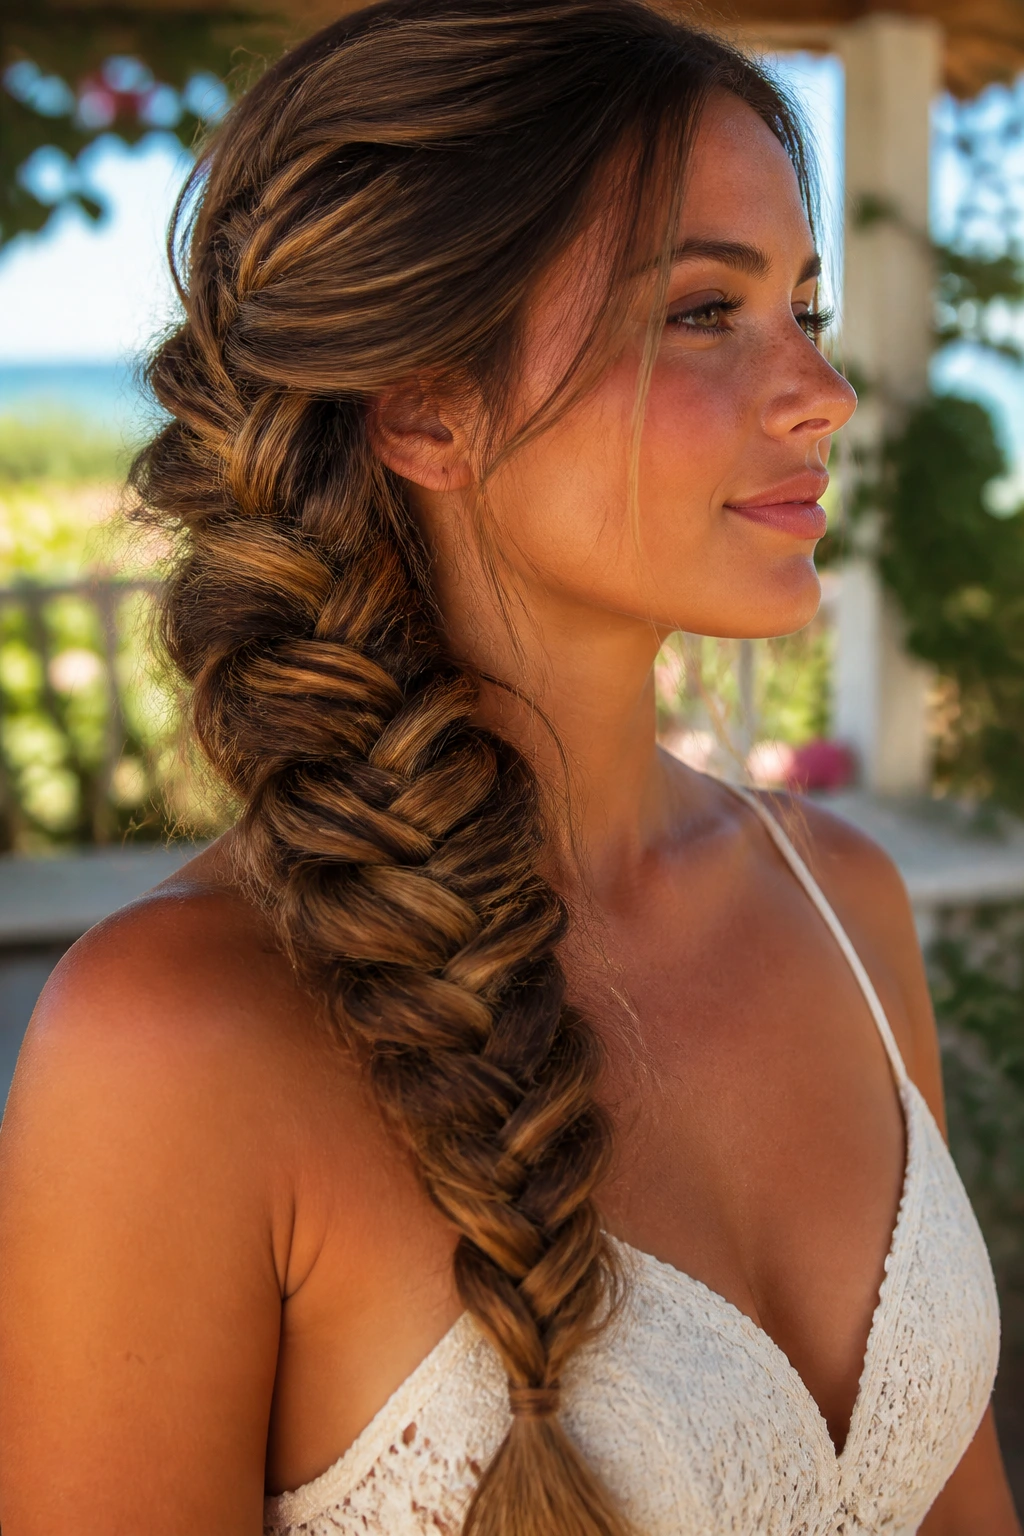
A mermaid braid is basically a thick, textured braid that looks like it has more strands than it does. On long hair, that extra width is the whole point. Swept to one side, it becomes a heavy, visible line of texture that can look dramatic without needing precision down to the millimeter.
Start with a loose side braid or a pull-through braid if your hair is very long and layered. Once the braid is secure, tug the edges outward in small sections so it gets wider and softer. The final shape should feel full, almost rope-like, with a few face-framing pieces left out if you want movement near the cheekbones.
I like this braid most on hair that has a little grit. Freshly washed, ultra-slick hair can fight you the entire time. On hair with a bit of dry shampoo or second-day texture, the braid holds its shape and keeps the wide, rippled look that makes it special.
It is not a delicate braid. That’s why it works. The visual weight sits well on one shoulder, and the long length helps the style keep going without looking thin halfway down.
15. Low Side Knot with a Deep Part
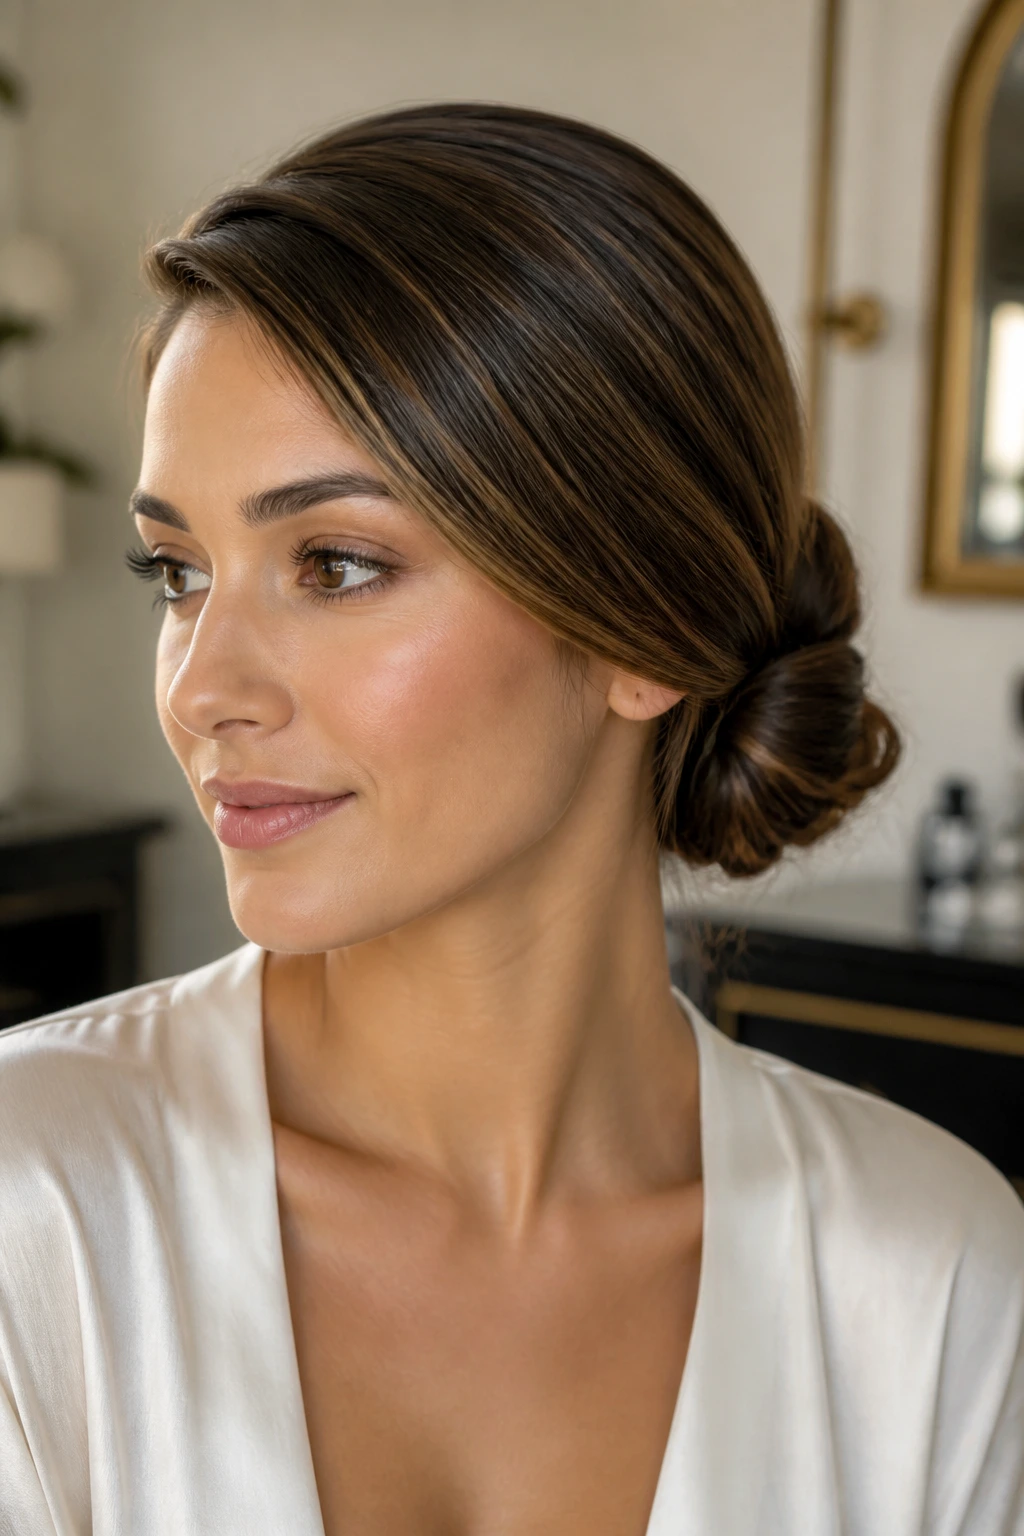
The low side knot is the quiet one in the group, and honestly, I reach for it more than people expect. It’s neat, fast, and flattering on long hair because the deep side part gives the front some structure while the knot keeps the back compact.
Create a deep side part, smooth the hair toward the lower side, and gather it just behind the ear or at the nape. Twist the length once or twice, fold it into a knot, and pin it through the base and the center. If the hair is very long, the ends may need a second wrap before pinning. That is fine. Better to hide the tail properly than let it poke out.
This style is especially good when the hair is thick and you want the shape to sit close to the head. It also suits straight hair better than loose curls, because the knot needs the surface to stay smooth.
A tiny bit of shine cream on the top layer makes it look cleaner. Too much product near the knot, though, and the pins will slip. That part matters. Clean, dry grip is what keeps the whole thing from sagging by the end of the day.
Final Thoughts
Side-swept hair works because it gives long length a clear direction. That sounds small, but it changes the whole feel of the style. Hair that falls over one shoulder has shape. Hair that is anchored low, tucked, braided, or swept with intention feels finished instead of accidental.
The styles that last best usually have one thing in common: they do not rely on wishful thinking. They have a deep part, a firm base, or a braid that holds the weight before it can slip. That is the part people miss when they copy a photo and wonder why it falls apart so fast.
Pick the version that matches your hair’s texture first. Smooth hair likes pins and grip spray. Thick hair likes anchoring and structure. Wavy hair can get away with less effort, which is rude, but true.
