



Hair updo ideas for women save more mornings than most people admit. A good updo can turn second-day hair, humid frizz, or a growing-out cut into something that looks deliberate instead of improvised.
That matters because the right shape does more than keep hair off your neck. It changes the whole feel of an outfit, which is why a sleek bun can look sharp with a blazer, while a loose twist can make a plain dress feel softer and more relaxed.
The details matter more than most people think. A few extra pins at the nape, a cleaner part, or a one-inch section of hair wrapped around an elastic can be the difference between “I threw this together” and “I know exactly what I’m doing.”
Some updos want polish. Some want a bit of mess. A few are fast enough for a rushed weekday, and a few are worth the extra ten minutes when you want hair that stays put and doesn’t collapse the second you step outside.
1. Sleek Low Chignon
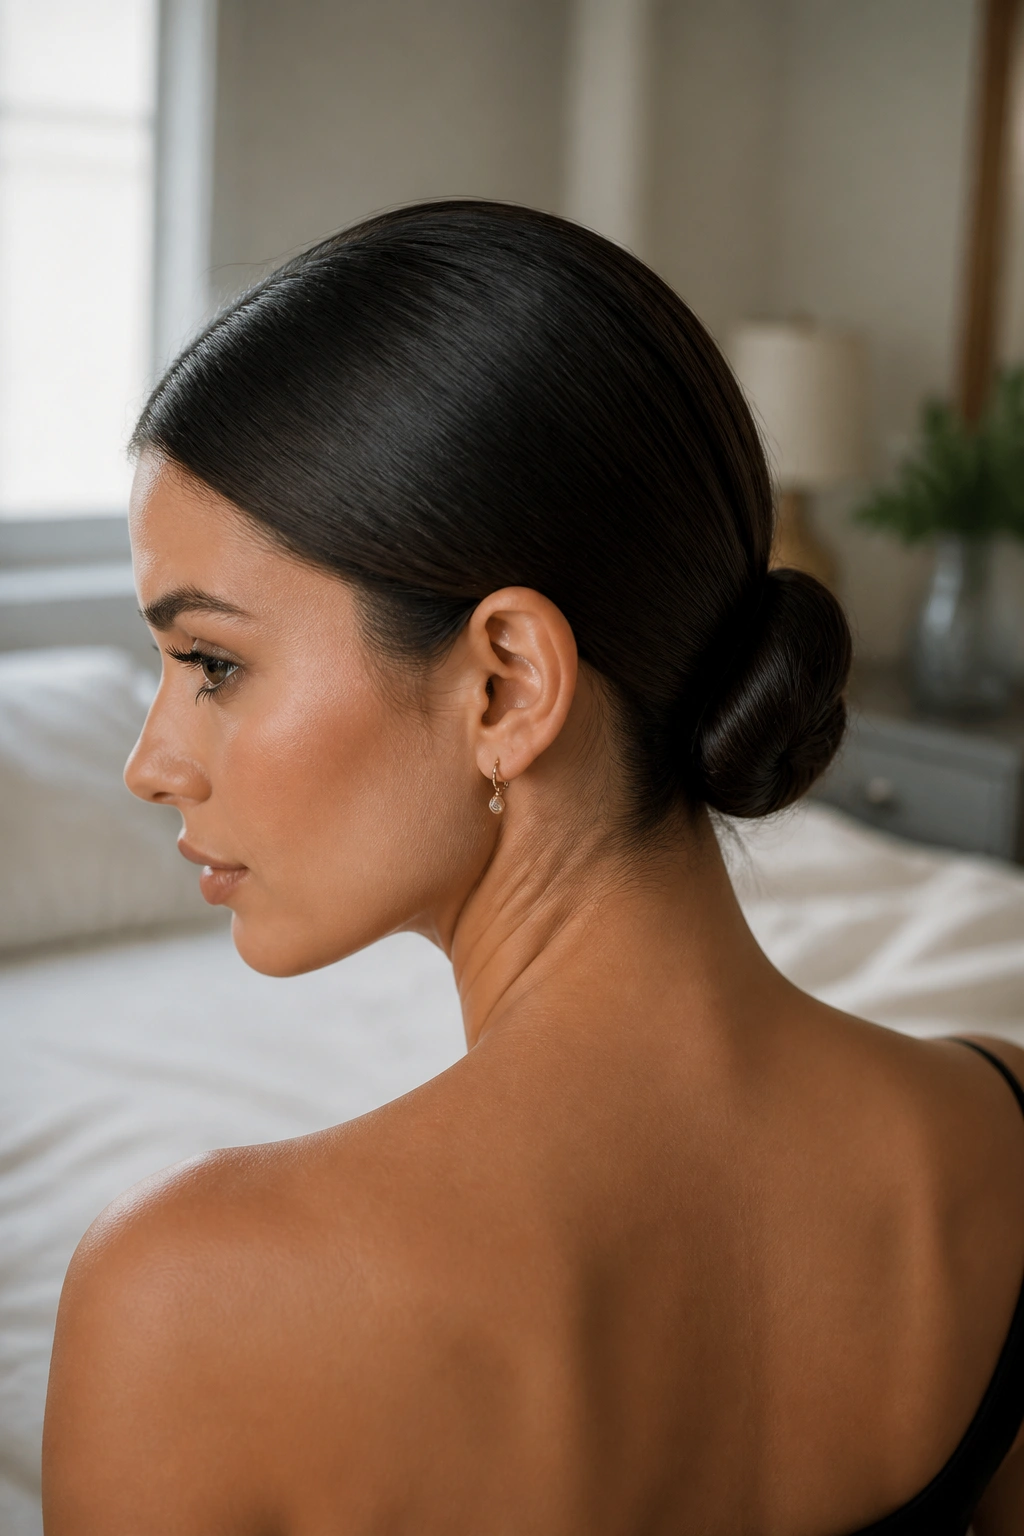
A sleek low chignon is one of those hair updo ideas for women that never looks out of place. It sits close to the nape, feels tidy without being stiff, and has that quiet kind of structure that works with a sharp collar, a simple knit, or a dress with a clean neckline.
Why It Stays So Neat
The shape works because the hair is gathered low, twisted into itself, and pinned tight against the head instead of left to sag. That low placement keeps the weight centered, so the bun doesn’t drag down as the day goes on.
A smoothing cream at the roots helps, but don’t drown the hair in product. A pea-sized amount spread through the top layer is enough for most medium lengths. Too much, and the whole style goes flat and greasy.
- Part hair cleanly down the center or slightly off-center.
- Brush it back with a boar-bristle brush for a flatter finish.
- Twist the length into a coil at the nape.
- Secure with 4 to 6 bobby pins crossed in an X shape.
Tip: Leave the very ends hidden inside the roll. Exposed tips make the bun look rushed.
2. Messy Top Knot With Face-Framing Pieces
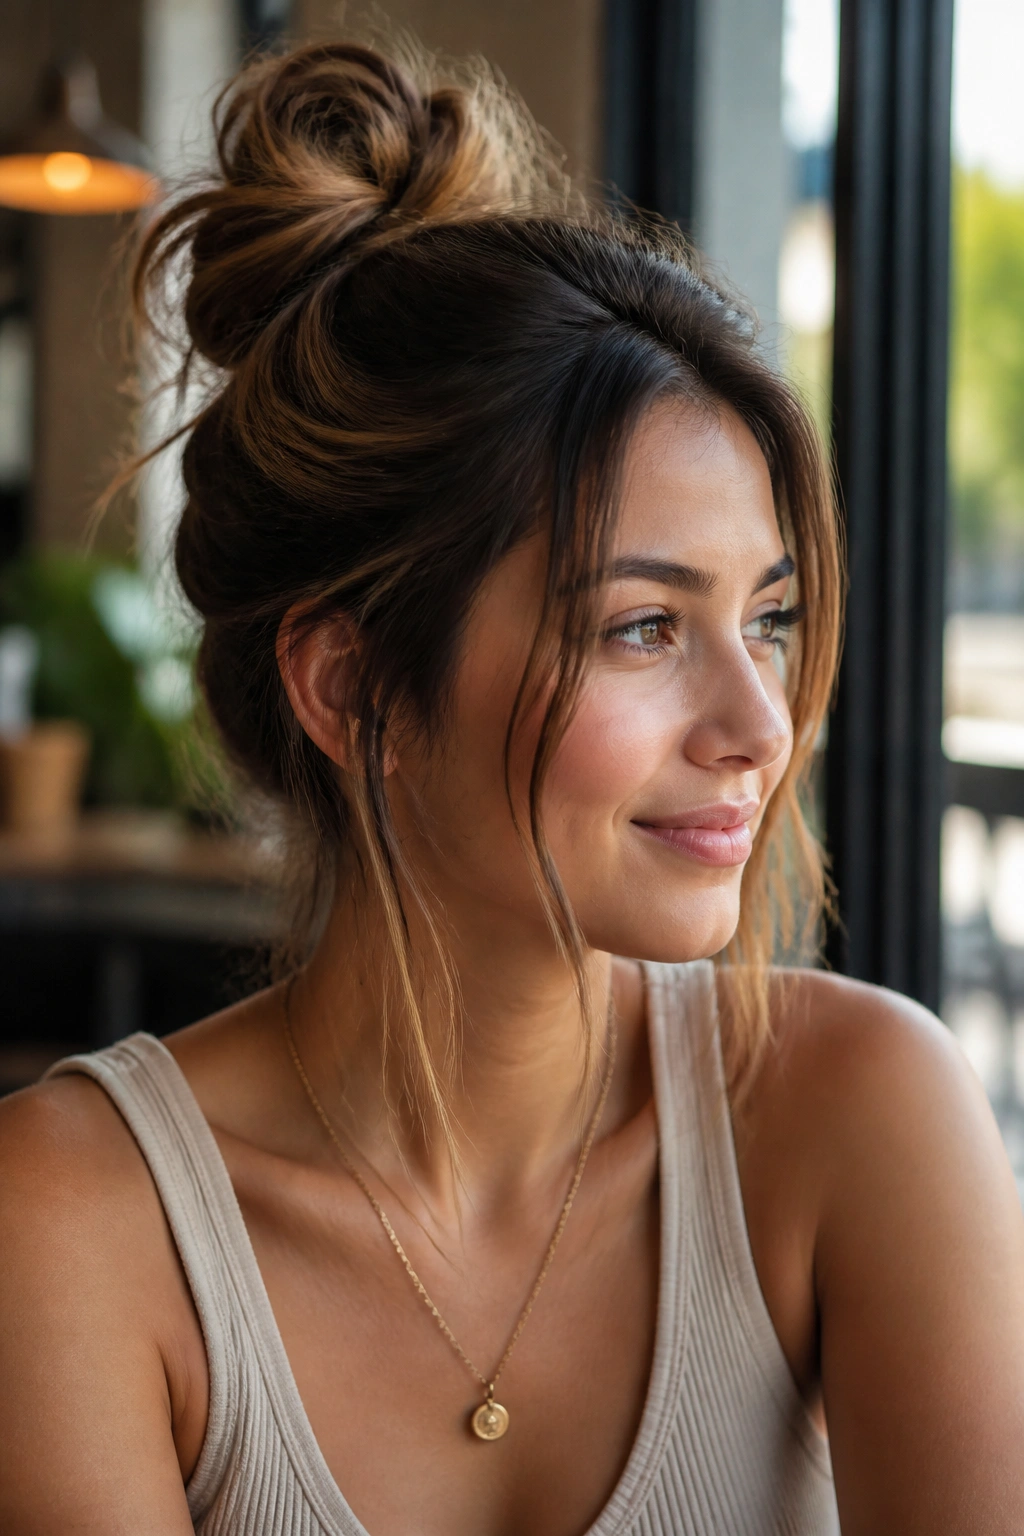
A top knot can go bad fast if it’s too tight or too high, but the looser version has real charm. Picture a knot perched at the crown, with two slim pieces left out near the cheekbones and a bit of texture at the roots. It feels casual without looking like you forgot to finish your hair.
The Trick Behind the Shape
The key is volume at the crown and restraint everywhere else. If you brush the hair too smoothly before you twist it up, the knot can look thin and small. A little roughness gives it life.
Dry shampoo helps on freshly washed hair. So does a quick mist of texturizing spray at the roots, then a light backcomb with your fingers near the crown. Not a rat’s nest. Just enough grip.
- Gather hair high, but not at the very top of the head.
- Twist it once, then wrap it into a loose coil.
- Secure with an elastic, then tuck 2 or 3 pins underneath.
- Pull out two slim front pieces before you set the knot.
One thing to avoid: Keep your fingers out of it after you pin it. Too much fiddling makes the knot collapse.
3. Braided Crown Updo
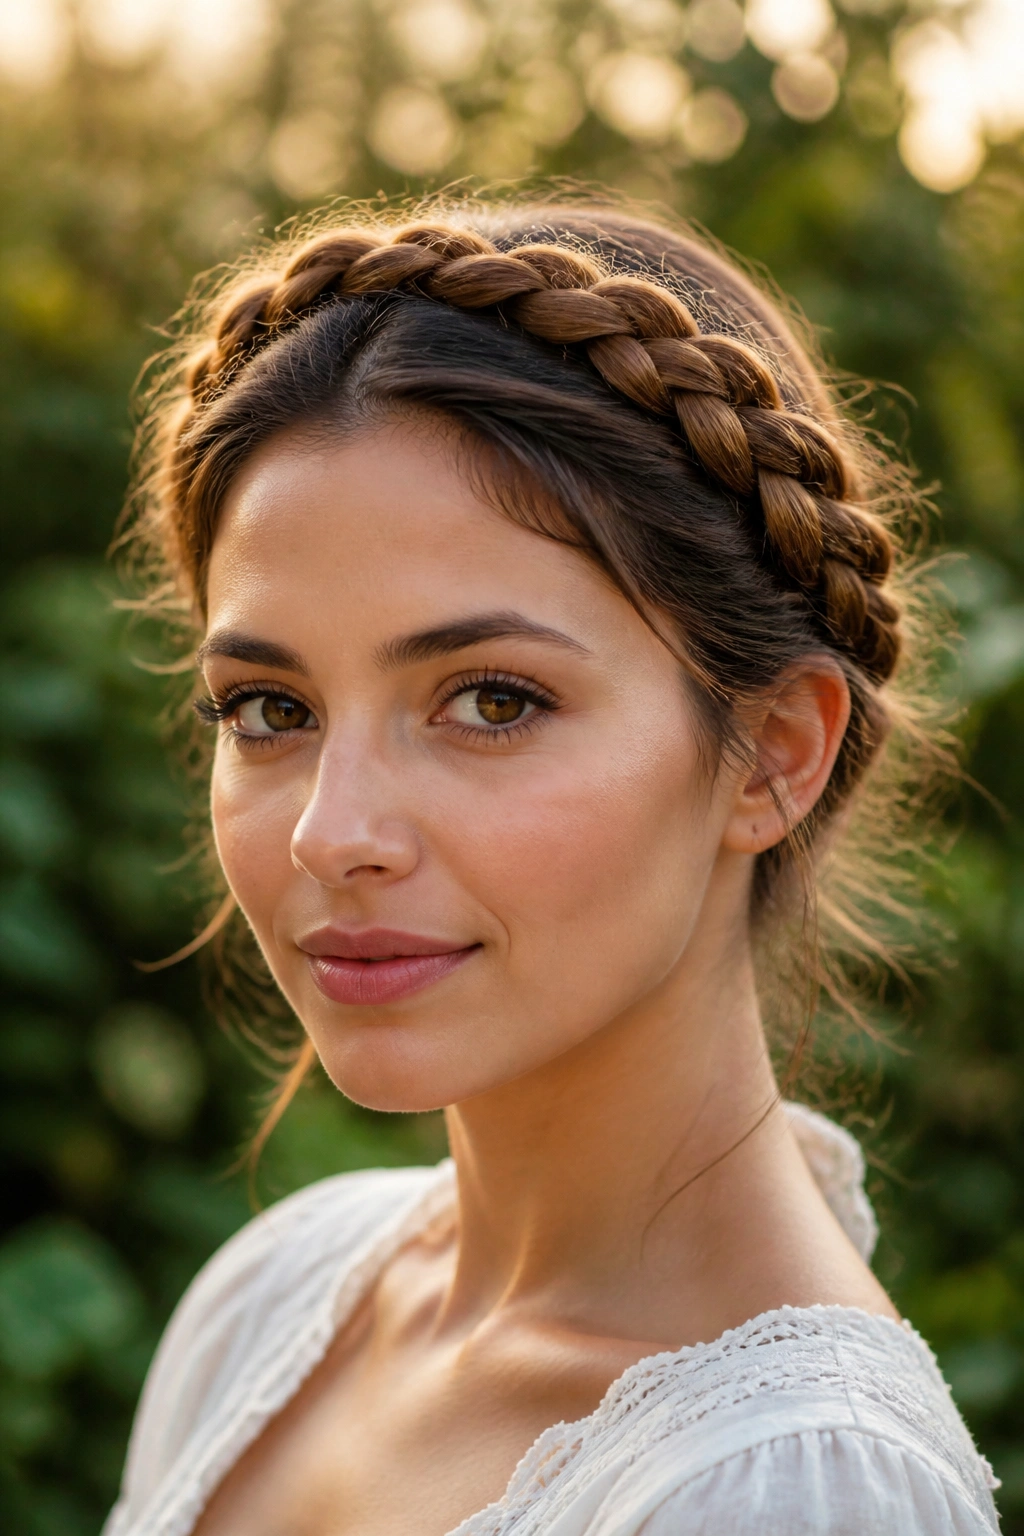
A braided crown updo has a different energy from a bun. It wraps around the head like a frame, so the style looks finished from every angle, not just the front. That makes it a strong pick for long hair that tends to slip out of ponytails or for layered hair that needs more control.
The braid itself can be tight and neat or soft and loose. I prefer the version that sits just above the ears and travels around the hairline, because it keeps the face open without looking severe. It also handles second-day hair better than most styles, since hair with a little grit holds the braid more cleanly.
The one catch is time. A crown braid takes more patience than a basic bun, and your arms will tell you so by the end. Still, the payoff is worth it when you want a style that stays put for hours and does not need much rescue work.
If the ends are too short to braid all the way around, pin them under the braid at the back and hide the join with a small barrette. That little finish matters.
4. Twisted Low Bun With a Side Part
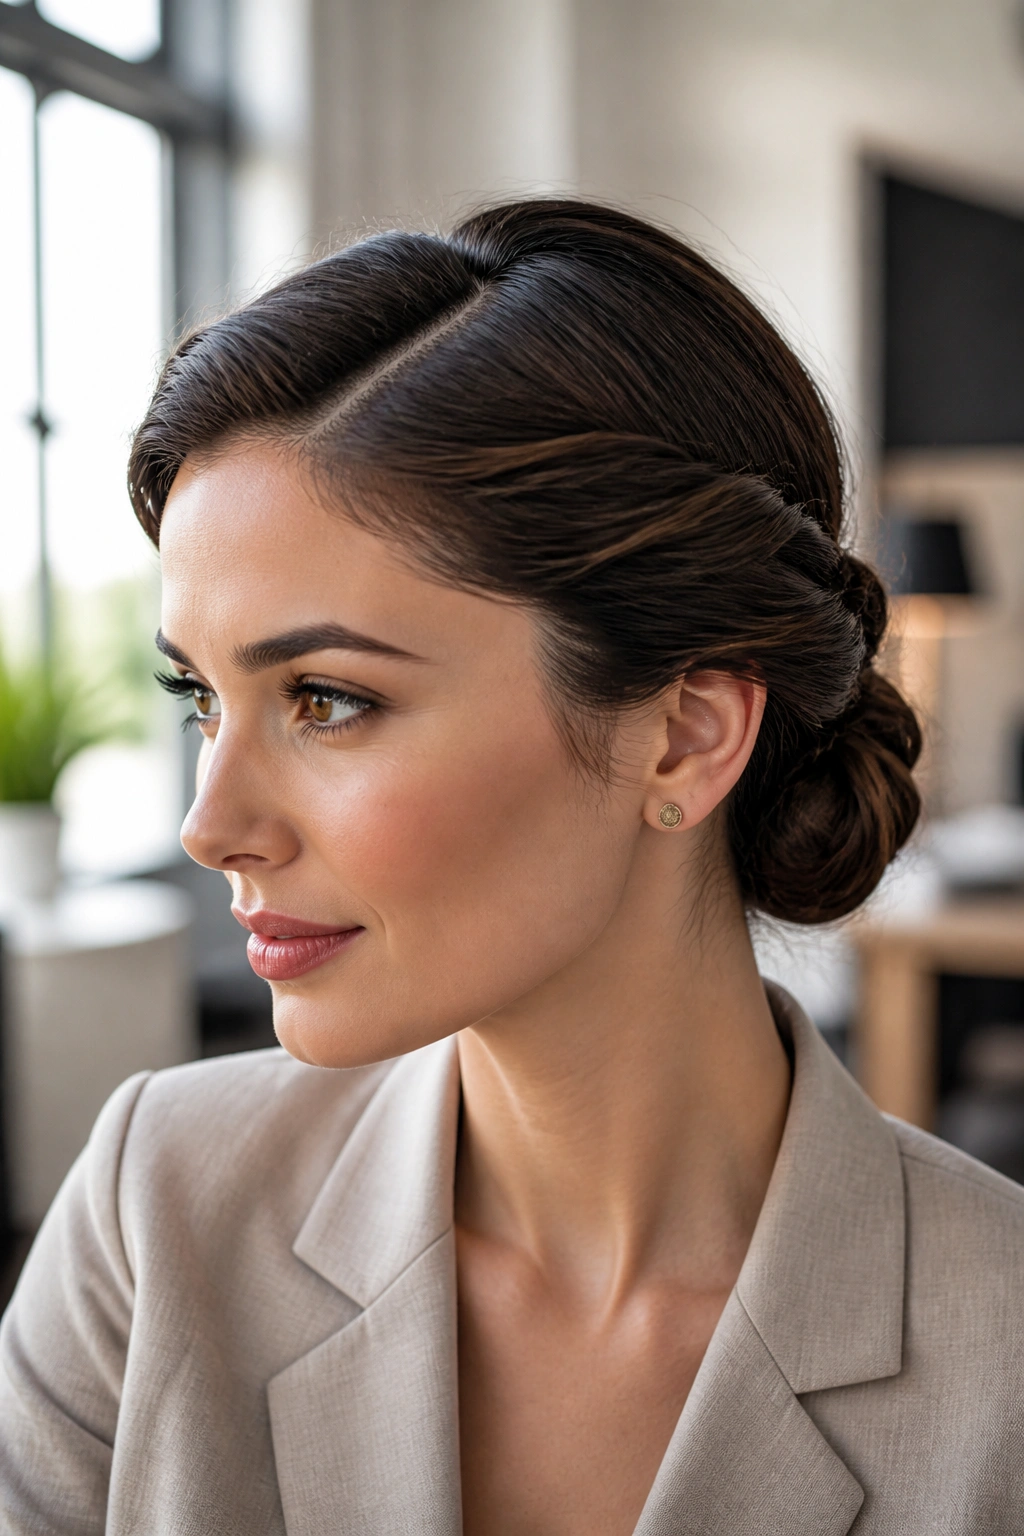
Why does a side part change the whole mood of an updo? Because it breaks up the symmetry before you even start twisting, and that small shift makes the bun feel less severe. A twisted low bun with a deep side part has a softer line than a center-part version, which is handy when you want polished hair that still feels relaxed.
How to Wear It
Start by carving out the side part while the hair is damp or lightly misted. Then smooth the larger side back toward the nape and twist both sides into one low bun, letting the twist sit a touch behind one ear instead of dead center.
A little cream or balm through the top section keeps flyaways down. If your hair is very fine, clip the crown for a few minutes before you pin the bun so the lift stays in place. If your hair is thick, split the twist into two smaller ropes and pin each one separately. That keeps the bun from bulking up too much.
This one does well in offices, dinners, and long days where you need your hair off your neck but still want shape around the face. Simple. Useful. Done right, it looks expensive without trying to.
5. High Polished Ballerina Bun
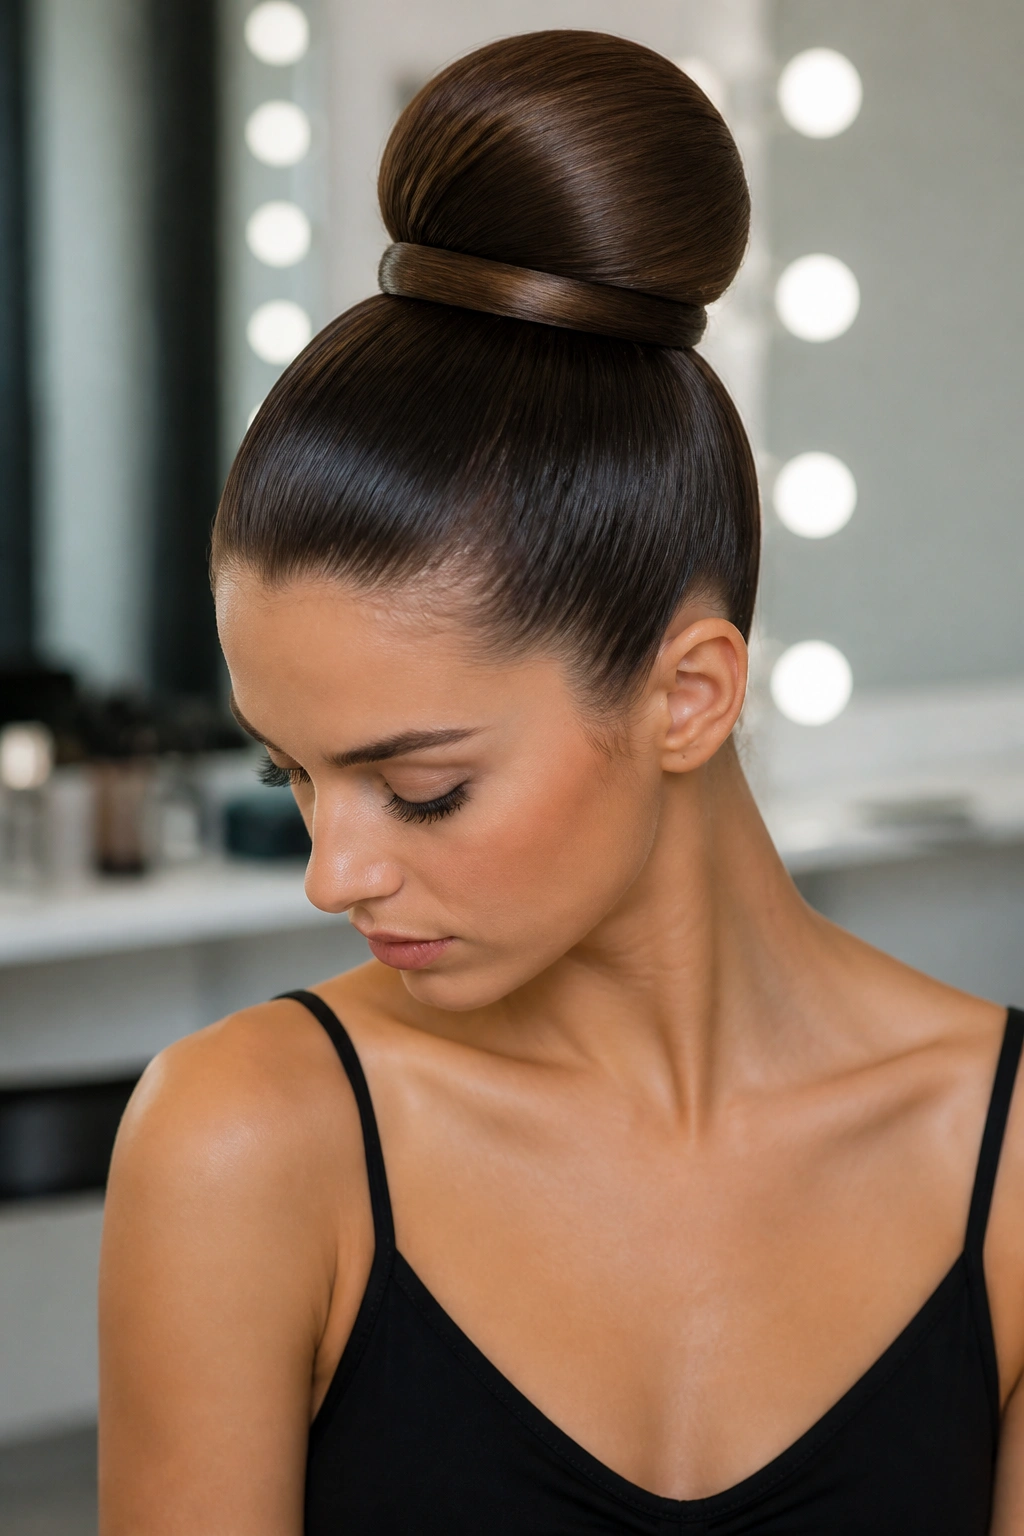
A ballerina bun is the blunt instrument of updos, and I mean that as a compliment. It’s clean, high, and controlled, which makes it one of the strongest choices when you want your hair out of the way and still want the style to look intentional.
The reason it reads so sharply is the placement. Up high on the crown, the bun lifts the face and makes the neck look longer, which is why it often shows up with evening clothes, dancewear, or anything with a high neckline. A donut cushion can help if your hair is thin, but a tightly wrapped coil works fine too.
Brush the hair upward with a firm hand, secure it with an elastic, then wrap the length around the base in one direction only. Pin the ends under the bun with U-pins if you have them. They grip better than standard pins and leave a cleaner surface.
It’s not a lazy style. That’s the point.
6. Bubble Ponytail Updo
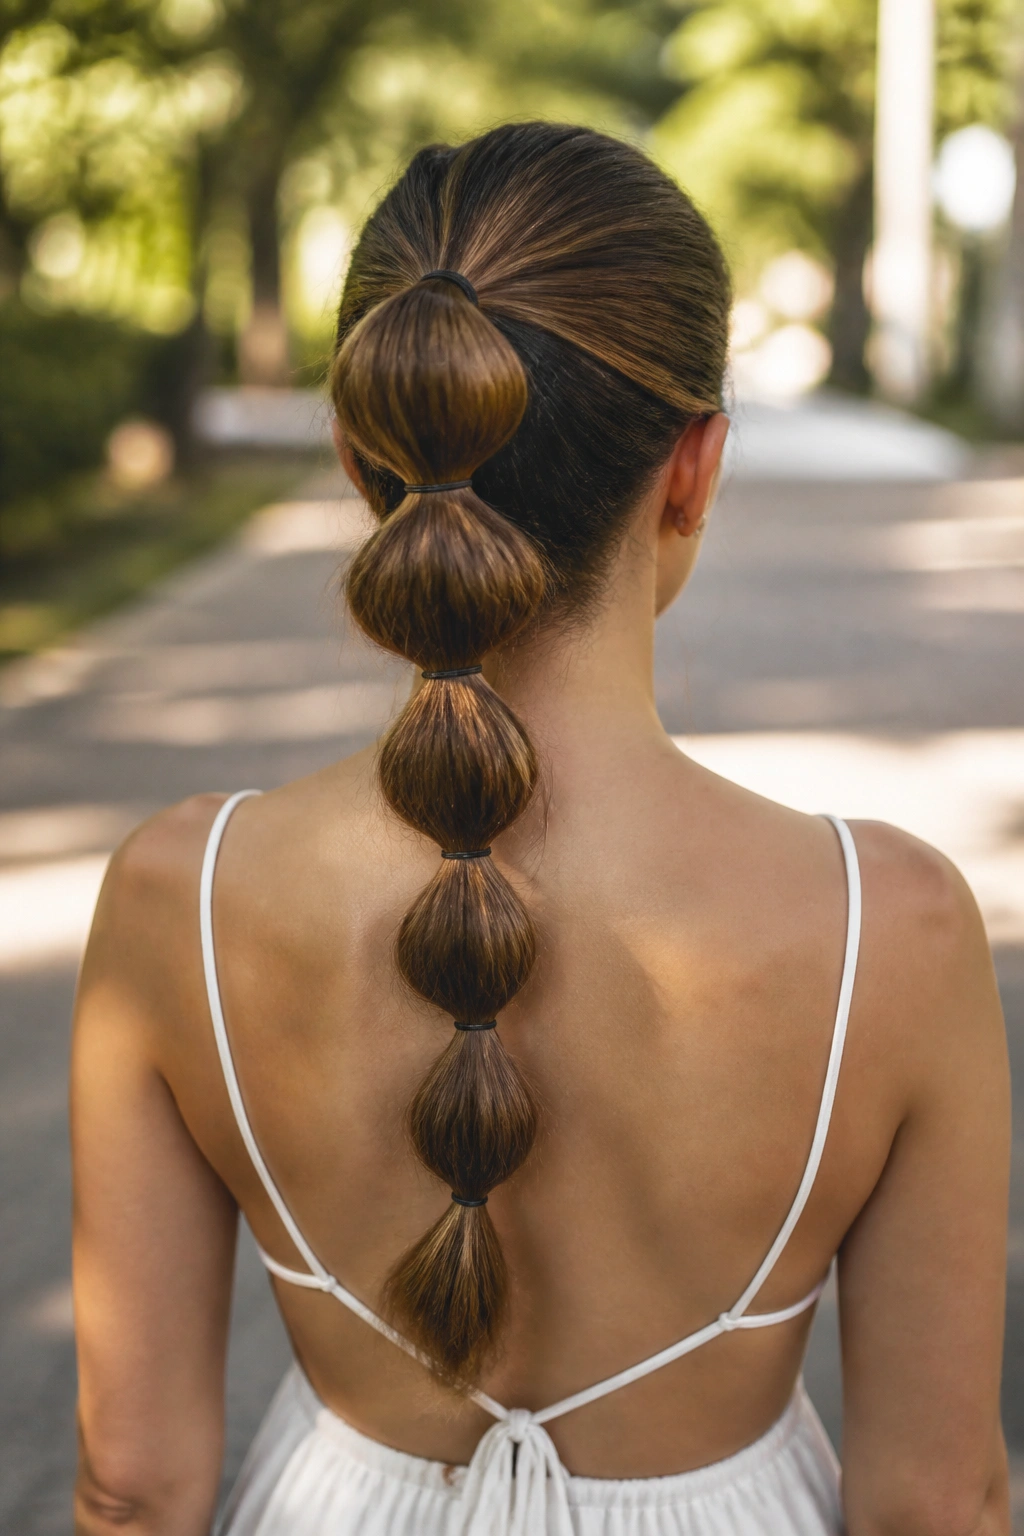
A bubble ponytail looks playful, but it has real structure. Compared with a plain ponytail, it gives you several sections of shape down the length, which makes the whole style feel finished even when the hair itself isn’t layered or especially thick.
What Makes It Different
You need 3 to 5 elastics, spaced about 2 to 3 inches apart, depending on hair length. After each elastic, gently tug the section between bands so it rounds out into a bubble. Don’t yank. A few soft pulls are enough.
This is one of those styles that works especially well on medium to long hair because the sections have room to puff out. If hair is silky, rough it up first with dry shampoo or a matte spray. Otherwise the bubbles can slide down and lose their shape.
It’s a smart option for days when you want movement instead of a rigid bun. The style also hides the fact that your roots are a little oily, which never hurts. Wrap a small strand around the top elastic, pin it underneath, and the whole thing looks more finished.
7. French Twist
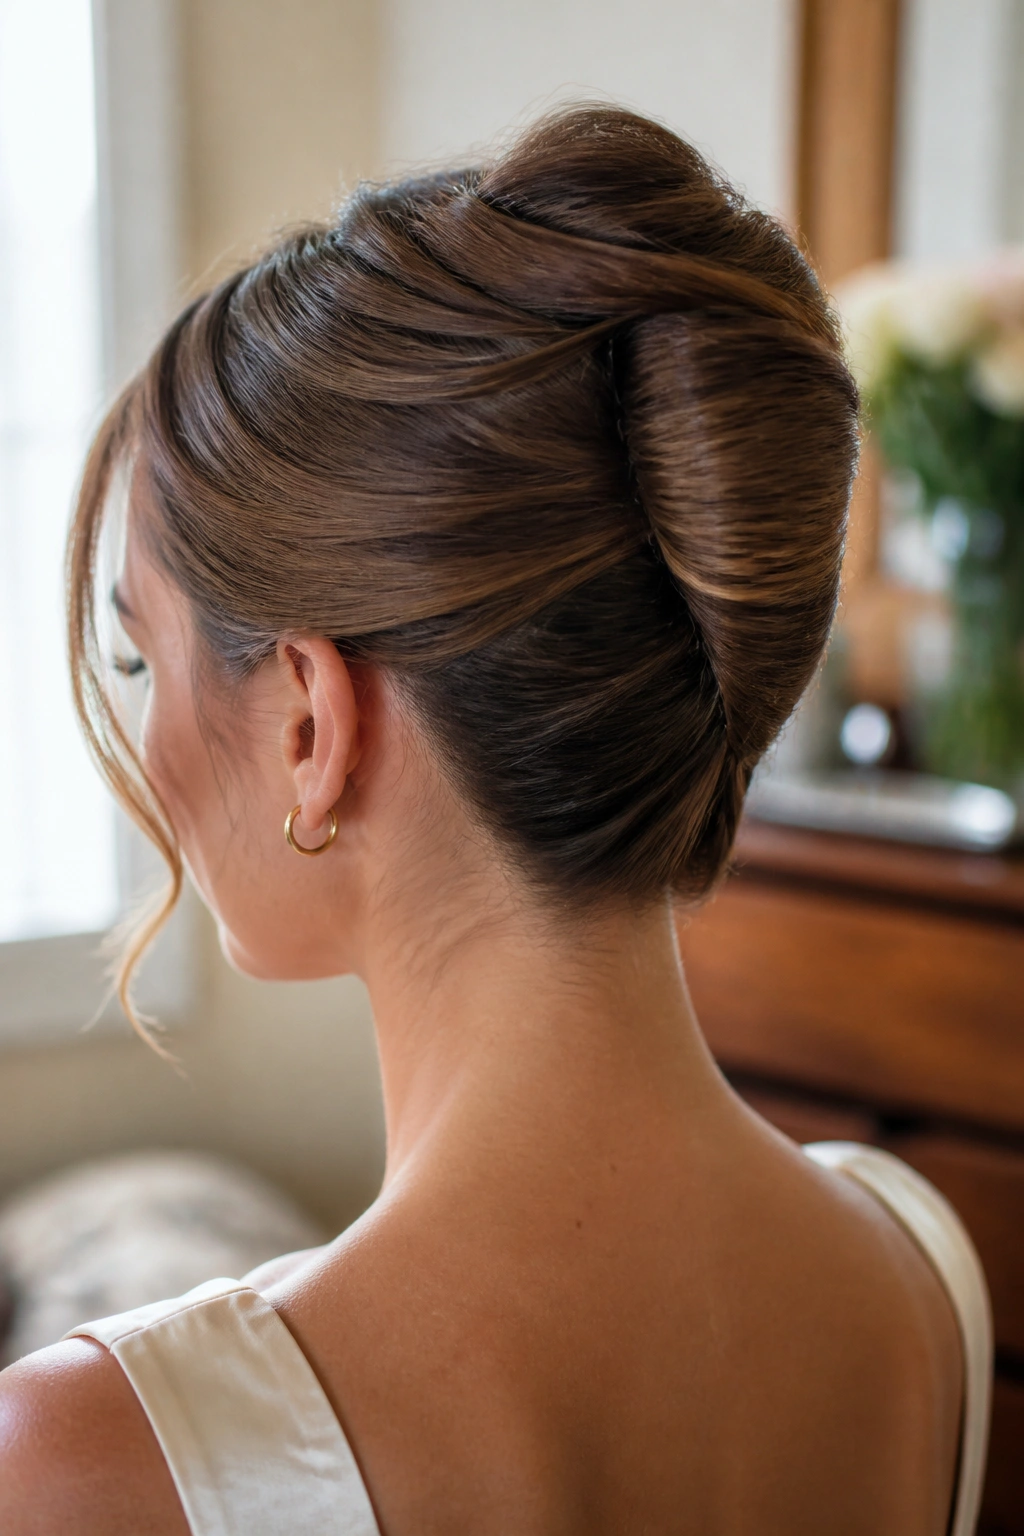
The French twist is old-school in the best way. It’s vertical, narrow, and polished, but it doesn’t have to feel formal or fussy if you leave a little softness at the top and keep the shell of the twist smooth rather than stiff.
A good French twist starts with a gathered section at the back, then folds upward and inward so the hair rolls along itself. Long pins hold the seam in place. The shape should look like one continuous fold, not a lump with clips fighting to keep it closed.
I like this style on shoulder-length hair and longer, especially if the ends are blunt enough to tuck in cleanly. Very layered hair can still work, but you’ll need more pins, and probably a little patience. Not glamorous. Necessary.
If your hair is slippery, prep the length with a little spray wax before twisting. That tiny bit of grip changes everything.
8. Double Dutch Braid Bun
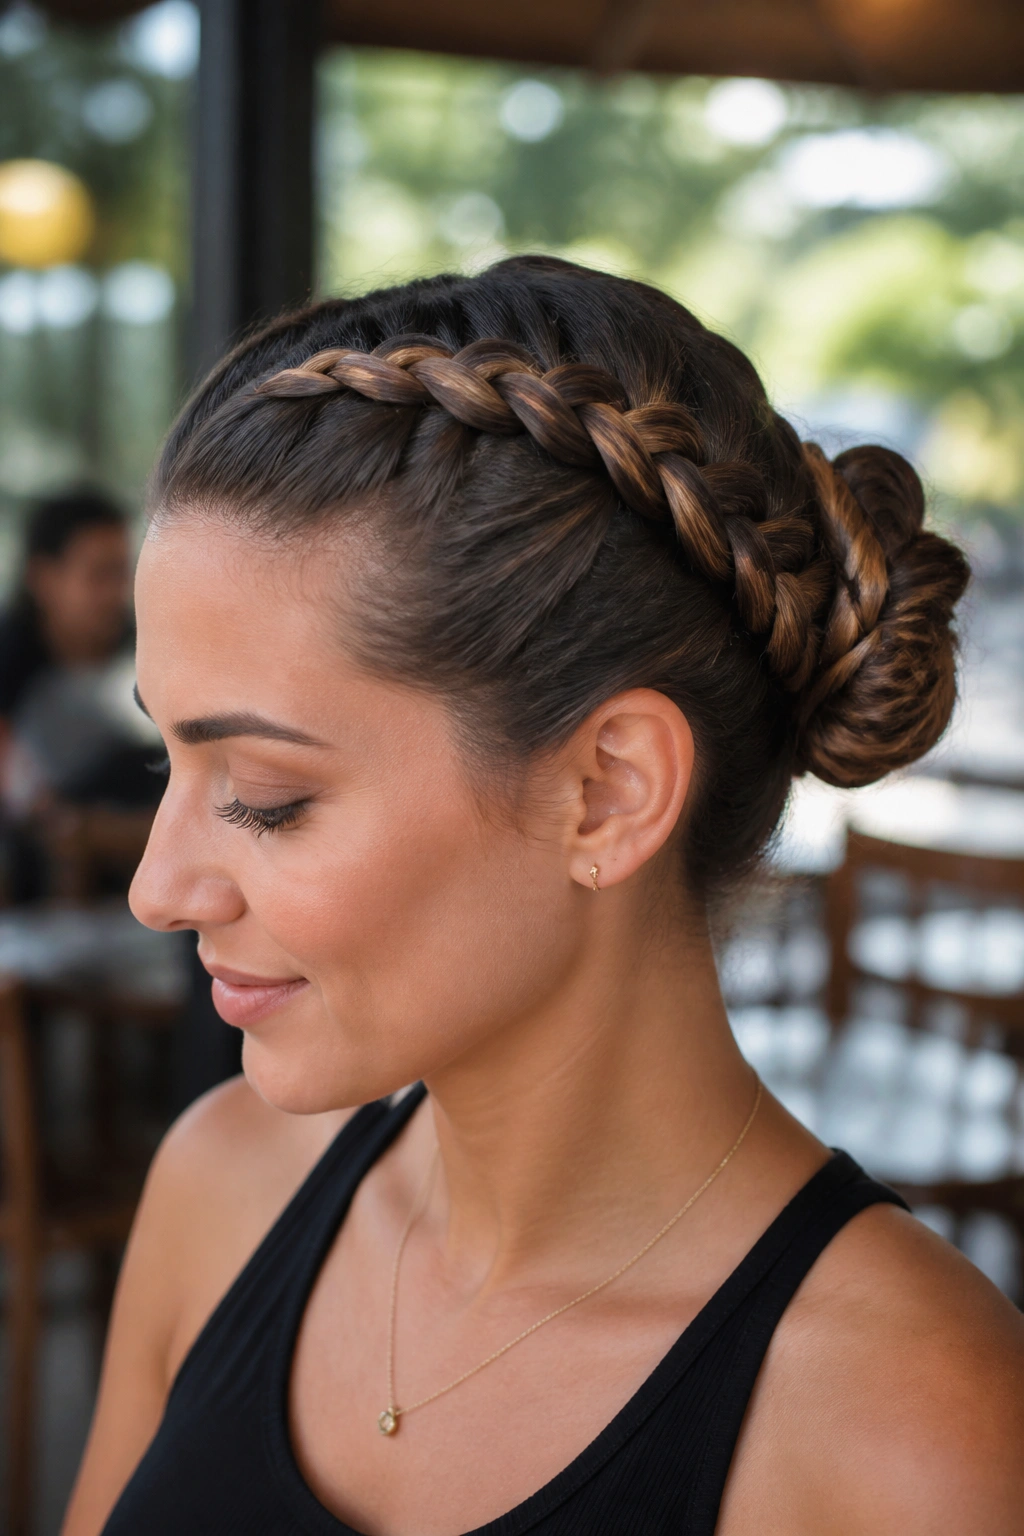
Why does a double Dutch braid bun stay on better than a simple bun? Because the braids build a track of tension that anchors the hair from the scalp down, which means the bun has something solid to sit on. That matters when you want an updo that can survive a long day without sagging.
How to Use It
Part the hair down the middle and create two Dutch braids from the hairline back toward the crown. Dutch braids pop outward more than French braids, so the shape has a little more texture. Once both braids hit the back of the head, twist the lengths into one bun and pin them flat.
This style is a gift for thicker hair, but it also works on medium textures if you pancake the braids a little with your fingers. That makes the braid rows wider and softer. It’s one of the few braided updos that can look sporty and dressed up at the same time.
Use small elastics at the braid ends, not bulky ones. The bun sits better when the finish is slim.
9. Claw Clip Twist
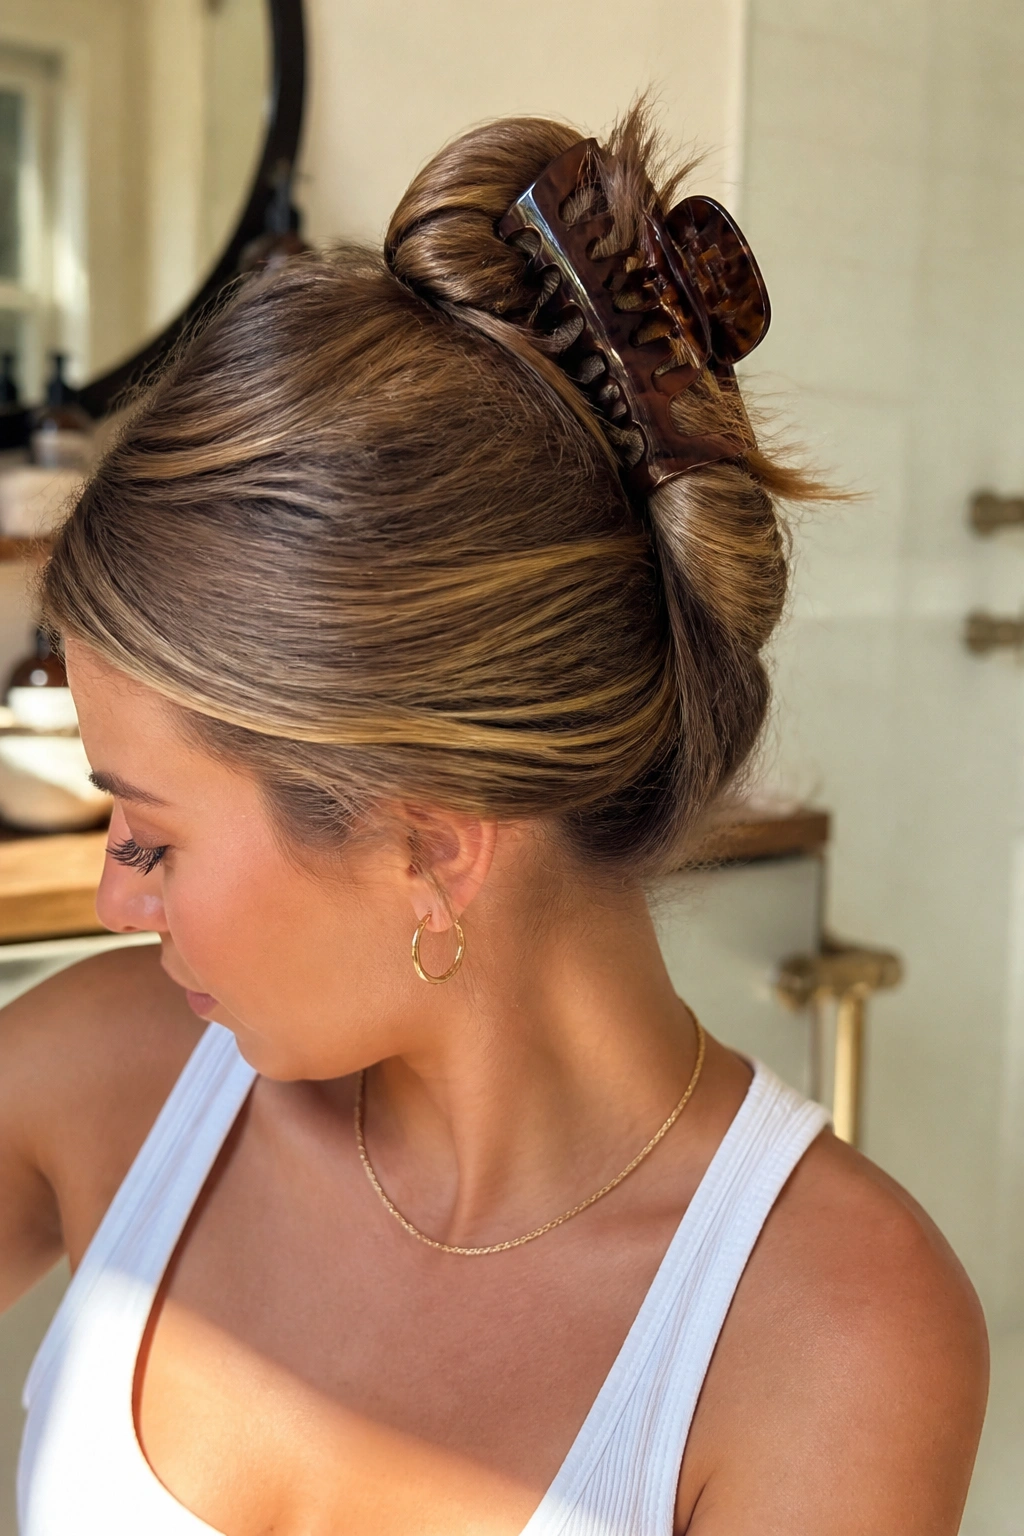
A claw clip twist can look lazy or sharp depending on how you place it. Clip it vertically, and it feels modern. Clip it crooked or too low, and it falls apart visually, even if it technically holds.
The move is simple: twist the hair upward, fold the length once, then catch the twist with a strong clip that grips close to the scalp. The ends can poke out a little, or you can tuck them under for a cleaner line. Both are fine. The difference is mood.
What to Watch For
- Use a medium or large claw clip for shoulder-length hair.
- Choose one with teeth that actually grip, not just decorate.
- Smooth the crown before clipping so the style doesn’t look puffed out.
- Let a few ends fall free if you want a looser finish.
This one is useful on days when you want an updo idea that takes under two minutes. And yes, it counts. Hair updos do not need to involve seventeen pins to be useful.
10. Knotted Ponytail
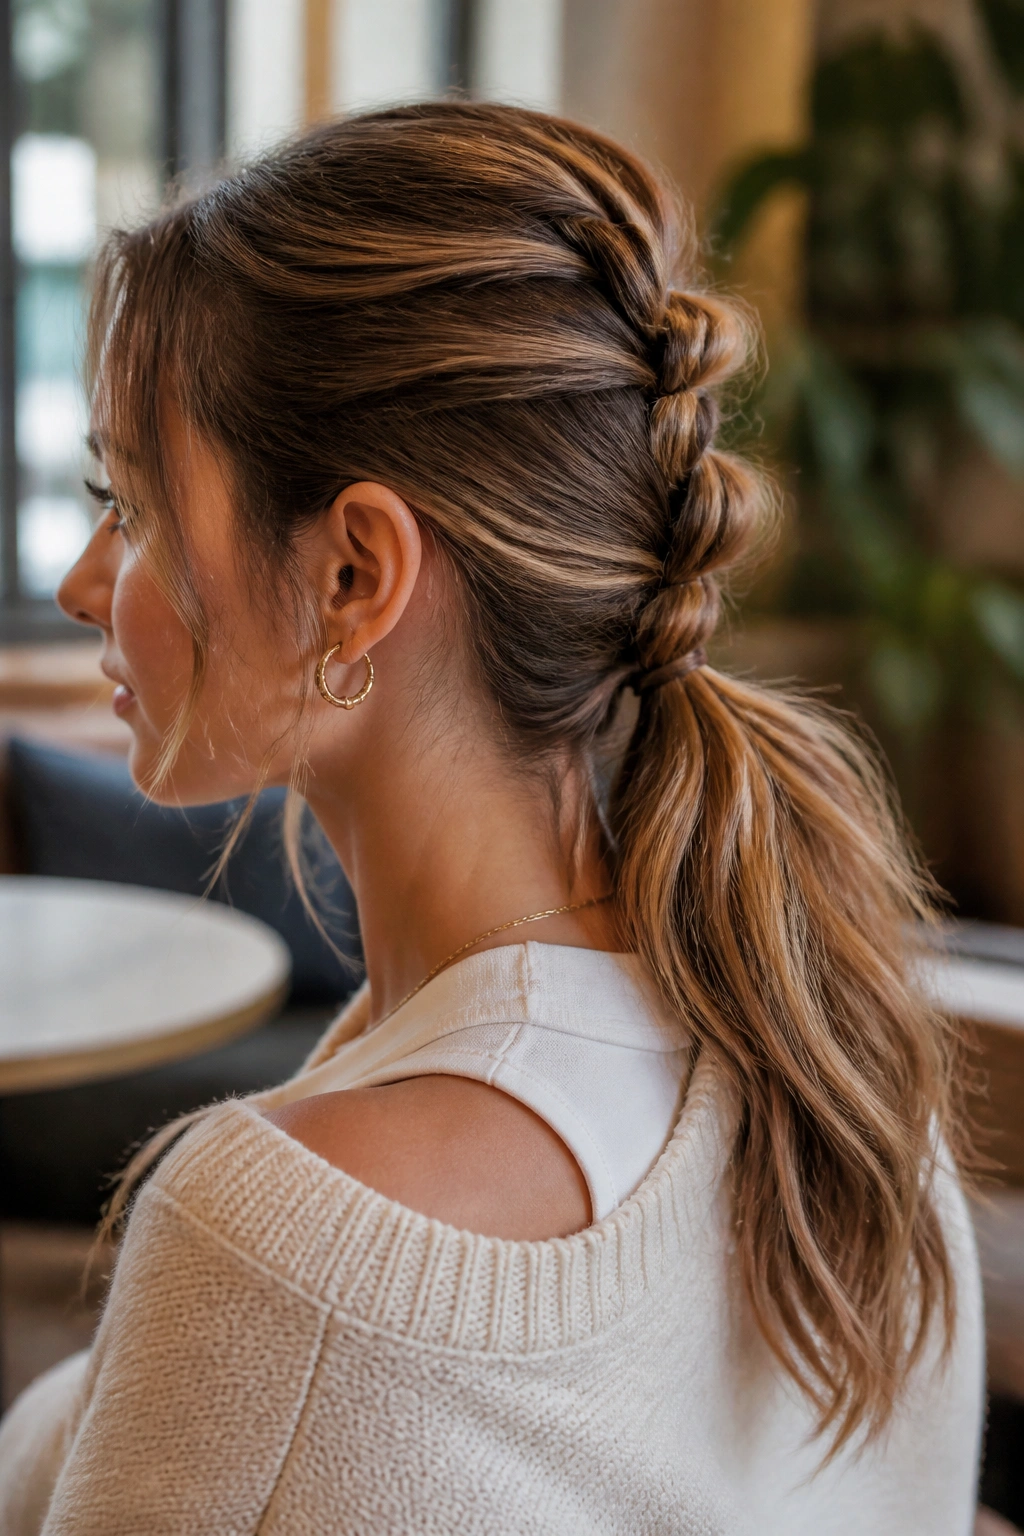
A knotted ponytail looks like you did more work than you did. That is one reason I like it. The shape comes from sectioning the hair into two or three parts and tying them into soft knots before securing the tail low or mid-height, which gives the style texture without any heavy braiding.
The trick is to keep the knots flat and close to the head. If they sit too high, the look turns bulky in a hurry. Once the knots are done, gather the remaining length with a clear elastic or a wrapped strand of hair so the base disappears a little.
This style suits long hair best, especially hair with a bit of wave. Straight hair can do it too, but you may need a touch of texturizer first so the knots hold their shape. A light mist, not a stiff shell.
It has a lived-in feel that works for coffee runs, dinners, and weekend events where you want your hair up but don’t want a strict bun staring back at you.
11. Side-Swept Braided Bun
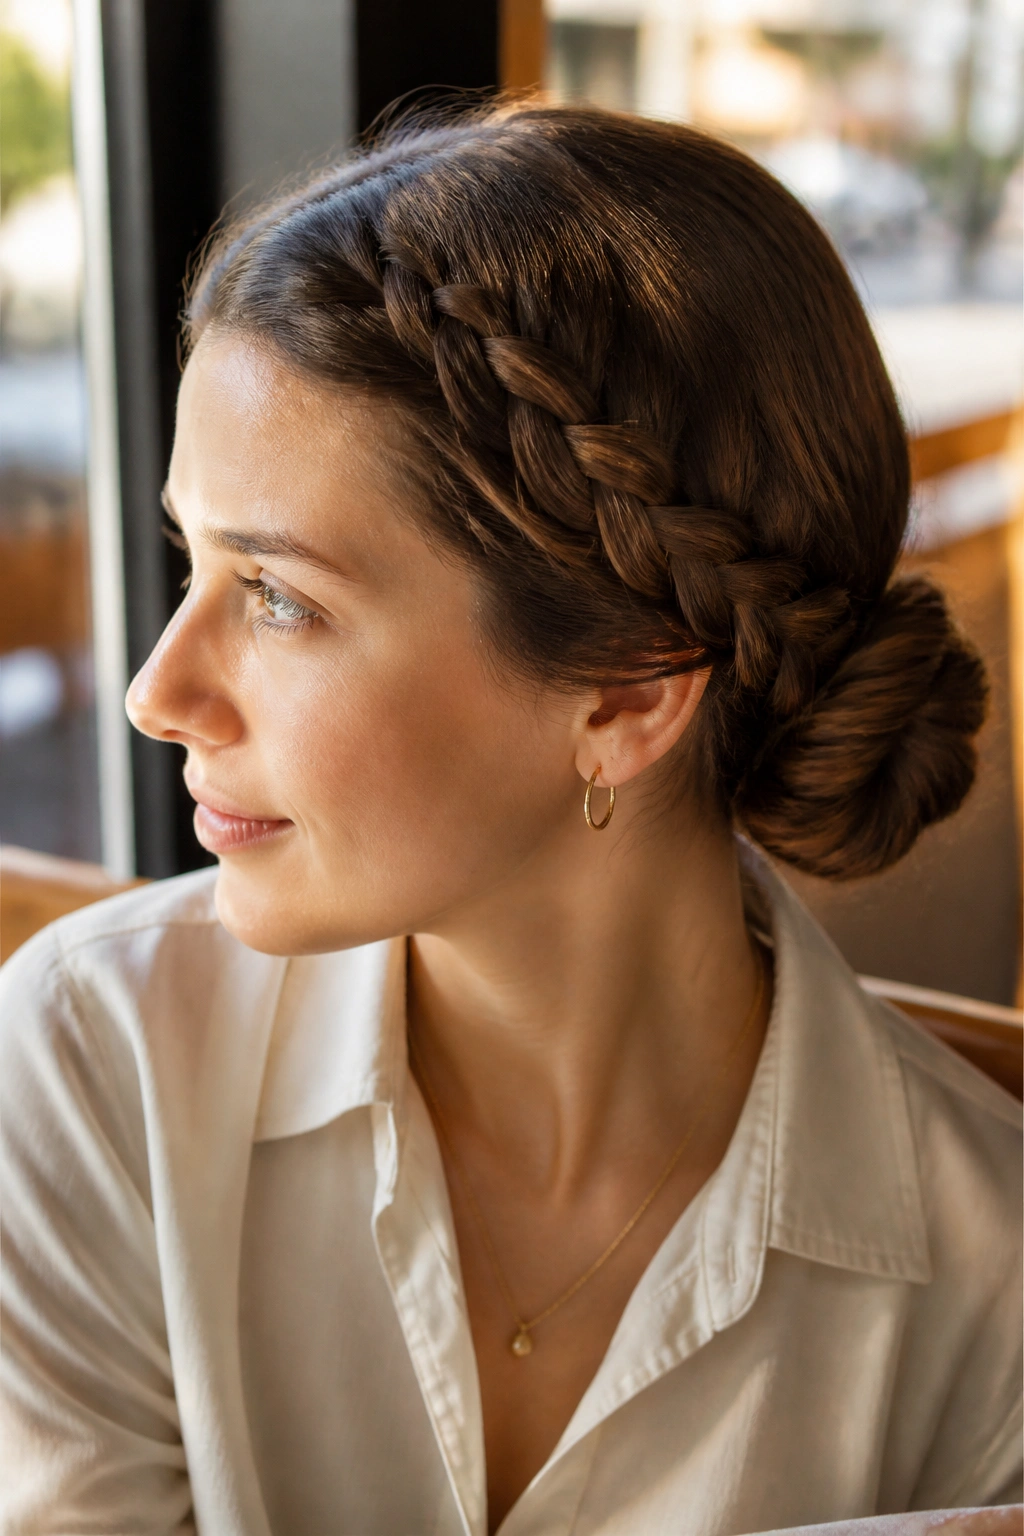
A side-swept braided bun changes the balance of the whole head. Instead of sitting dead center, the braid starts from one side and sweeps into a bun just behind the ear or slightly lower at the nape. That offset makes the style feel softer and more detailed than a straight-on bun.
What Makes It Different
The braid acts like a visual line. It pulls the eye across the head, then drops into the bun, which keeps the style from looking flat from the front. I like this especially on longer layers because the braid keeps the shortest front pieces under control.
You can use a standard three-strand braid, a fishtail, or even a rope braid if you want a smoother look. The bun itself should stay compact. If it gets too big, the side sweep loses its point.
A small comb tucked near the bun can be enough. No need to load it with ornaments unless the rest of the outfit is plain and you want the hair to carry more of the load.
12. Rolled Tuck-Under Updo
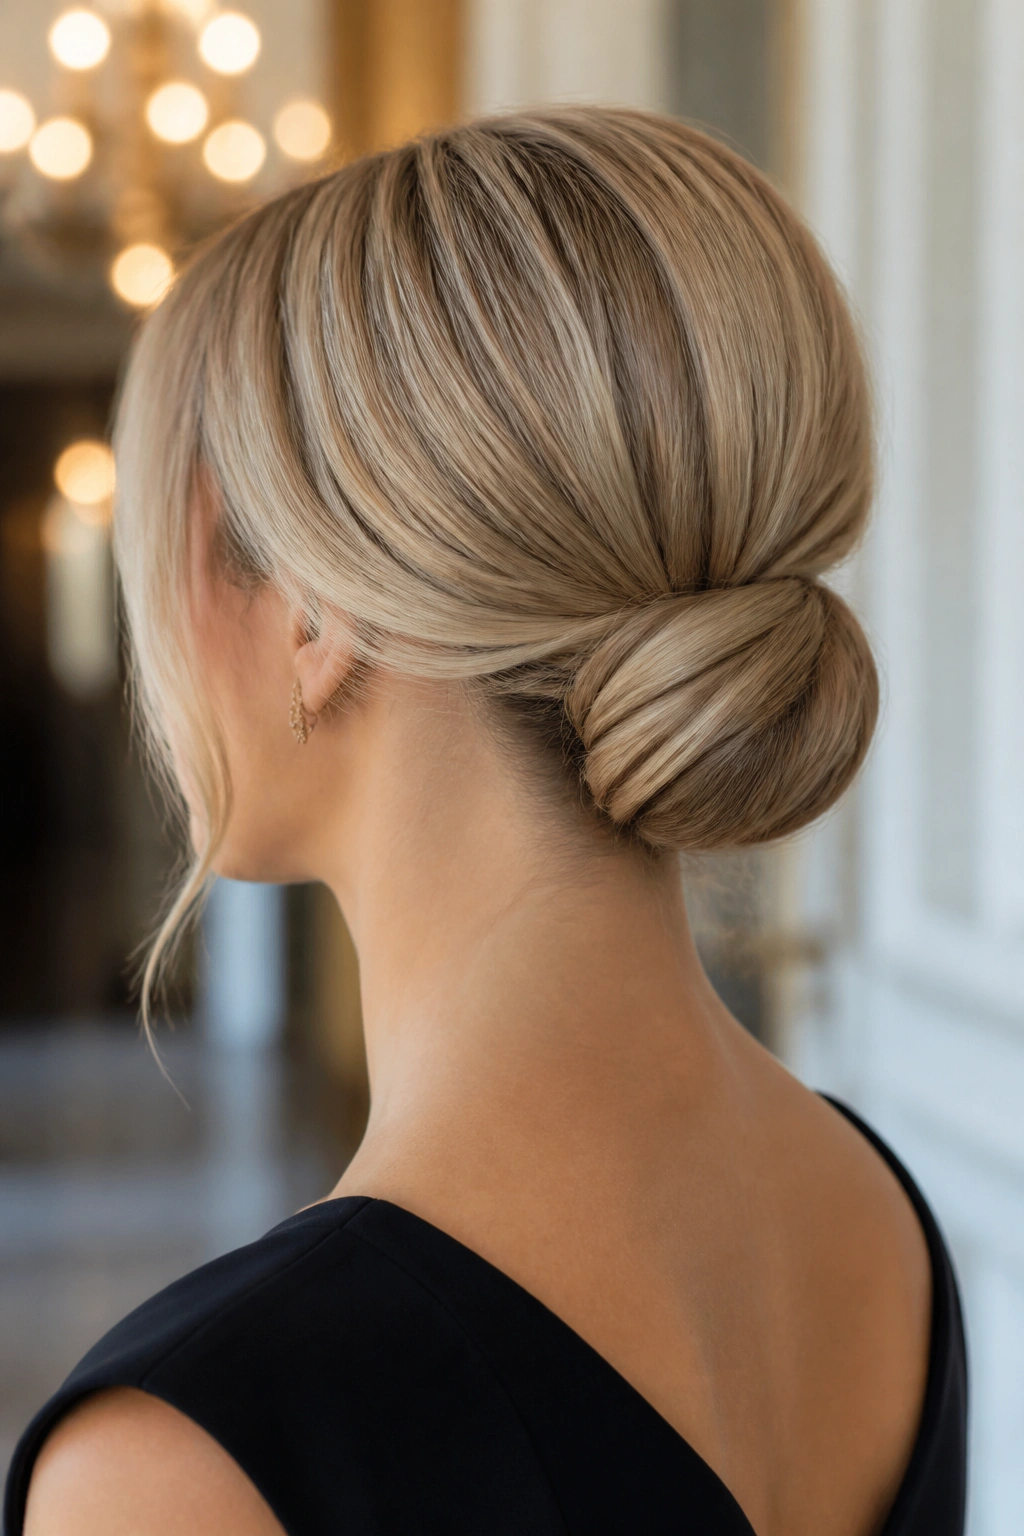
A rolled tuck-under updo is one of those styles that looks harder than it is. Hair gets folded inward at the ends, tucked under itself, and pinned into a low roll that sits close to the neck. It has a neat, almost tailored shape that can read classic or fresh depending on how smooth you make the surface.
If your hair is freshly washed and slippery, this style gets easier with a little grip powder or texture spray at the roots. That gives the roll something to cling to. Without it, the tuck can slide before you get the pins in.
- Gather the hair low at the back.
- Roll the length upward and inward.
- Pin from the middle outward to lock the shape.
- Tuck any loose tips under the roll so they disappear.
Practical note: A few longer pins hidden diagonally hold better than one giant clip.
13. Wrapped Ponytail With Curled Ends
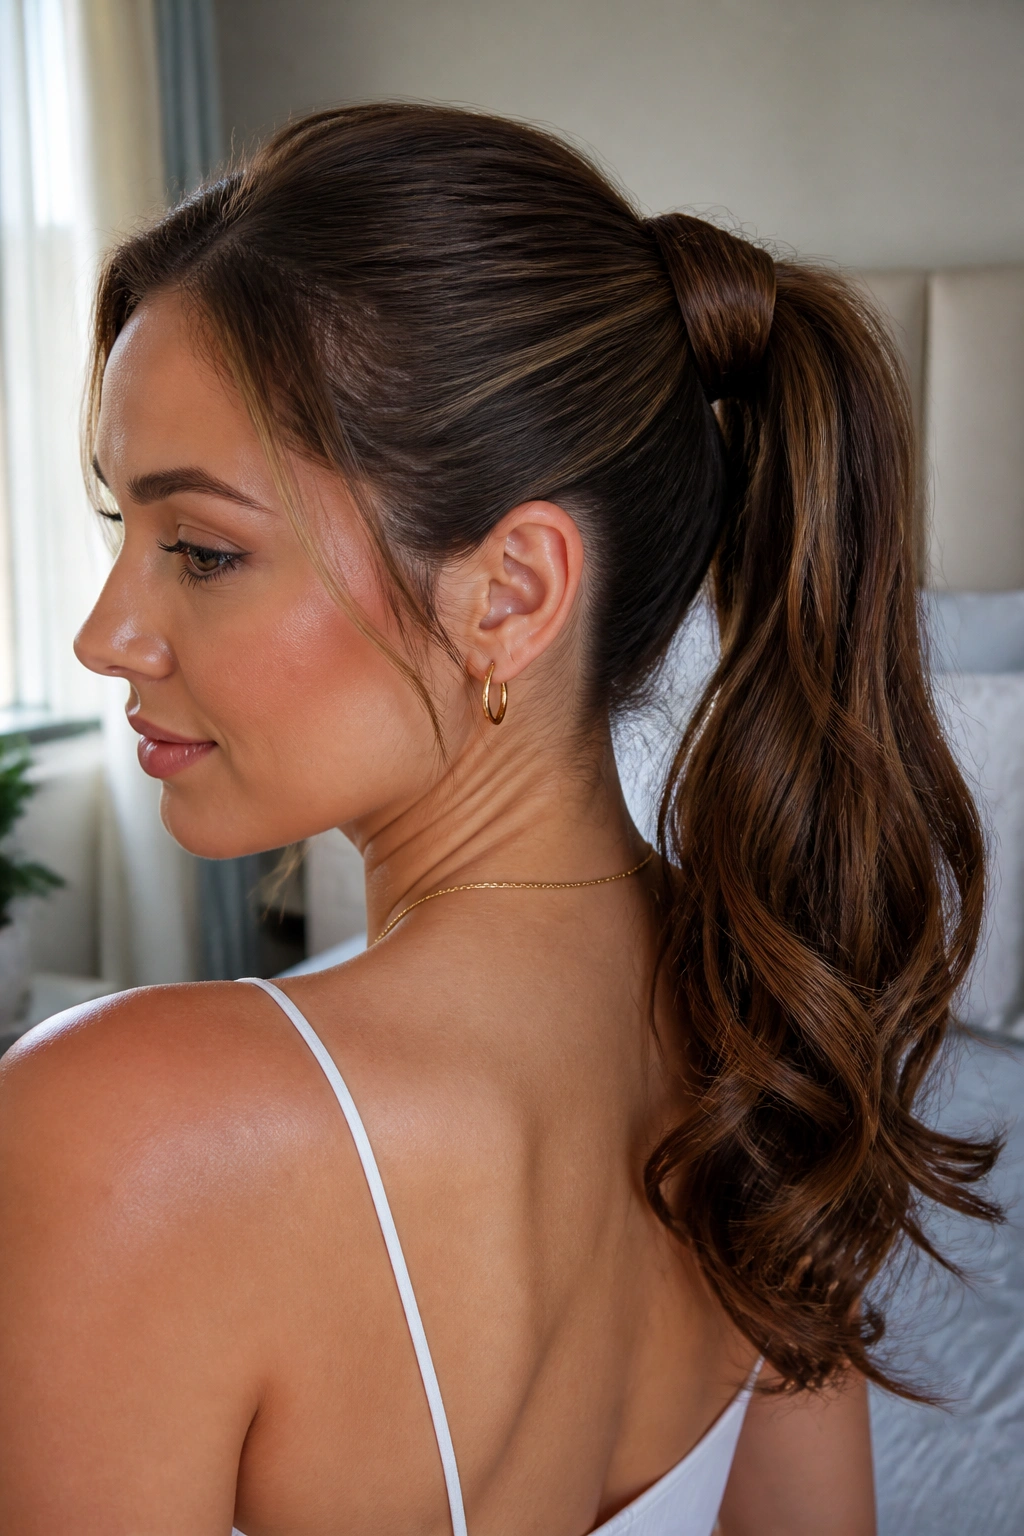
A wrapped ponytail earns its place because it turns a simple pony into a real updo idea. The base is hidden by a strip of hair wrapped around the elastic, and the ends are left polished, often with a soft curl or bend that gives the whole style a little movement.
The height can change the mood fast. Set it low for something elegant. Set it mid-high for a cleaner, more energetic feel. Either way, the wrapped base is the part that makes it look finished, not accidental.
I’d use a curling iron with a 1-inch barrel if the ends are straight and you want a soft bend, not a tight ringlet. Hold each section for about 5 to 8 seconds, then let it cool before brushing it out with fingers. That keeps the finish loose.
This style is especially good when you want the look of an updo without giving up the length on the tail. It keeps the face open and still gives you a little swing in the back.
14. Infinity Braid Bun
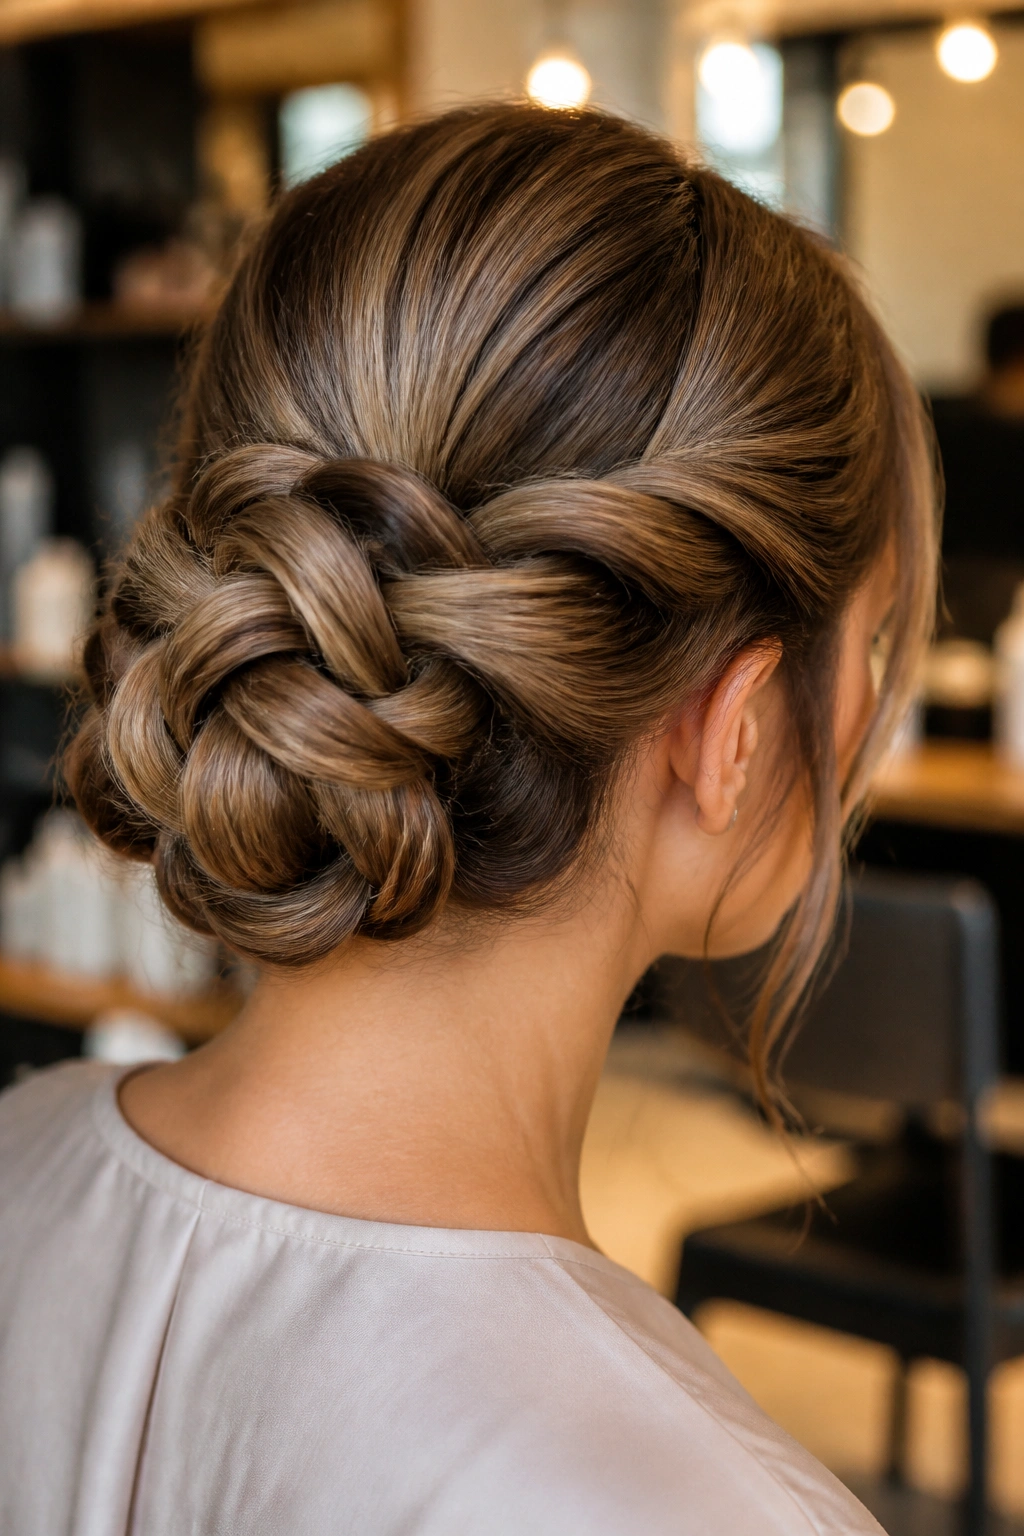
An infinity braid bun is for the days when you want a braid to do more than sit there looking pretty. The braid pattern loops over itself, then folds into a bun, so the final shape has more texture than a standard braid twist and less bulk than a heavy chignon.
Why It Stands Out
The looped braid creates a built-in design line. That sounds fancy, but what it really means is the bun has visible detail even before you add pins or accessories. On thicker hair, that can be the whole look. On finer hair, it gives the illusion of more structure than there actually is.
- Start with three sections, then weave them in an infinity pattern.
- Secure the end with a tiny elastic.
- Wrap the braid into a bun at the back.
- Pin through the thicker folds, not just the loose tail.
A mistake I see a lot is making the braid too tight too soon. Leave a little softness in the loops. The braid needs room to be shaped into the bun without fighting itself.
15. Textured Low Knot With Visible Pins
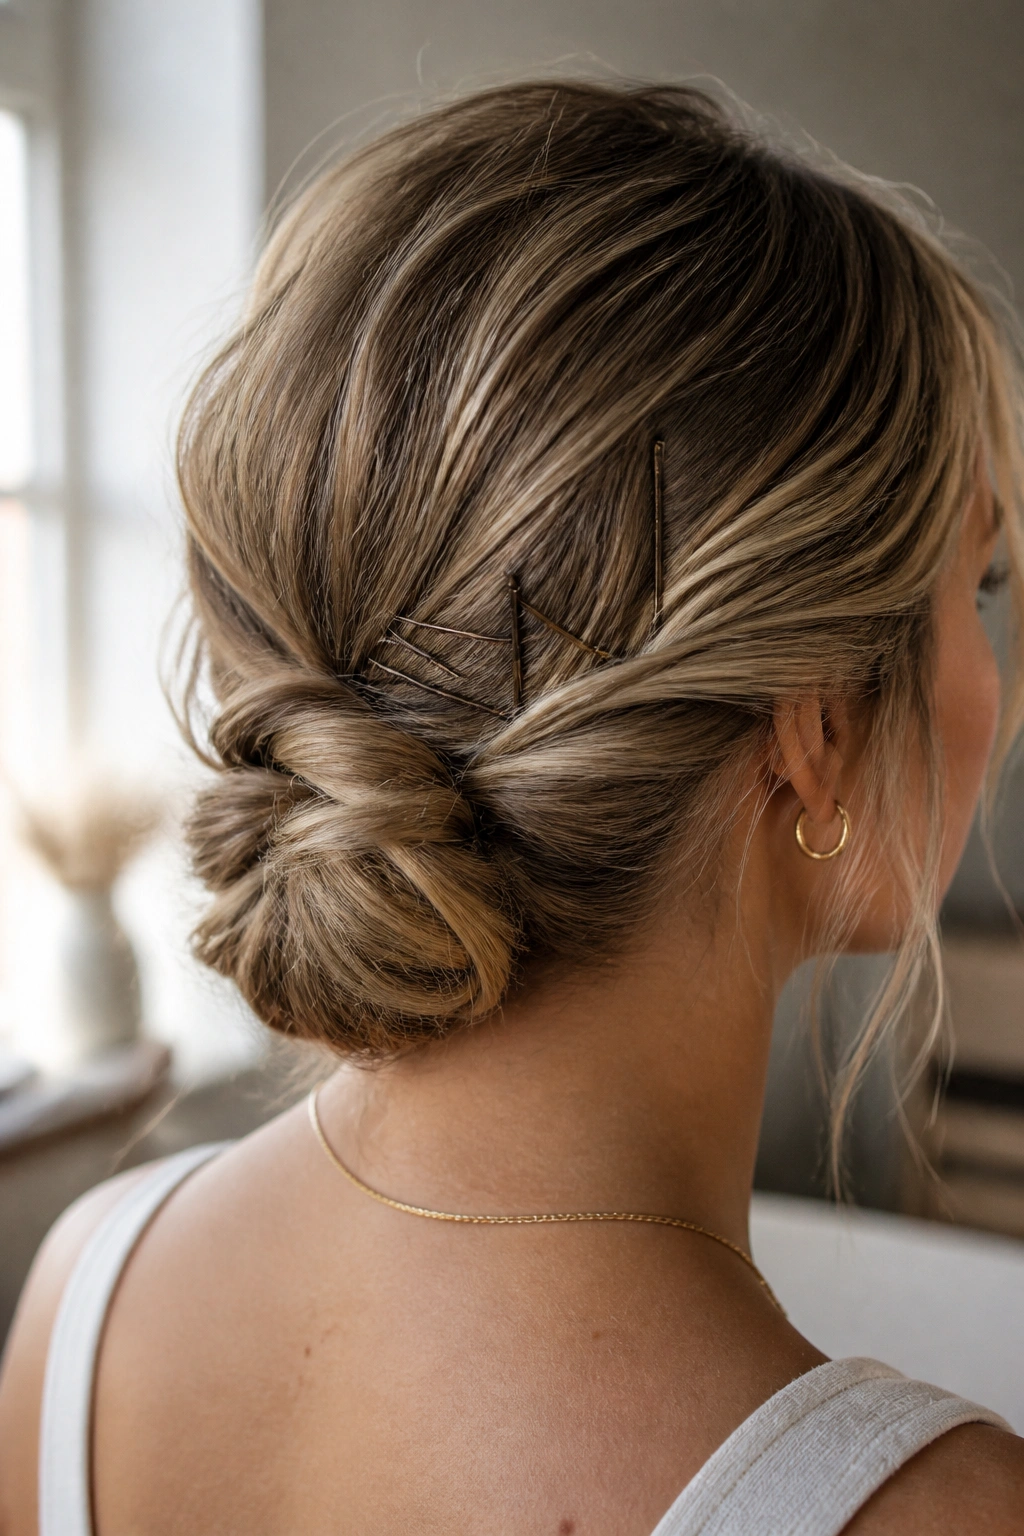
Why do visible pins work here? Because the style is built to look a little undone on purpose. A textured low knot with matte pins showing through feels relaxed, almost editorial, and the pins become part of the design instead of something to hide.
The hair should have some movement before it goes up. Day-two texture helps, as does a light wave through the lengths. Then gather the hair low, twist it once or twice, and fold it into a knot that sits just above the nape. Leave a few ends loose around the crown or near the ears if you want softness.
How to Get the Most From It
Use 5 to 7 pins, depending on thickness. Cross them at angles so they catch both the knot and the hair underneath. Straight, parallel pins slide more easily.
This style is ideal when the outfit is simple and the hair needs to bring some shape. It also handles imperfect texture better than a strict bun, which is part of why I keep coming back to it.
16. Scarf-Woven Bun
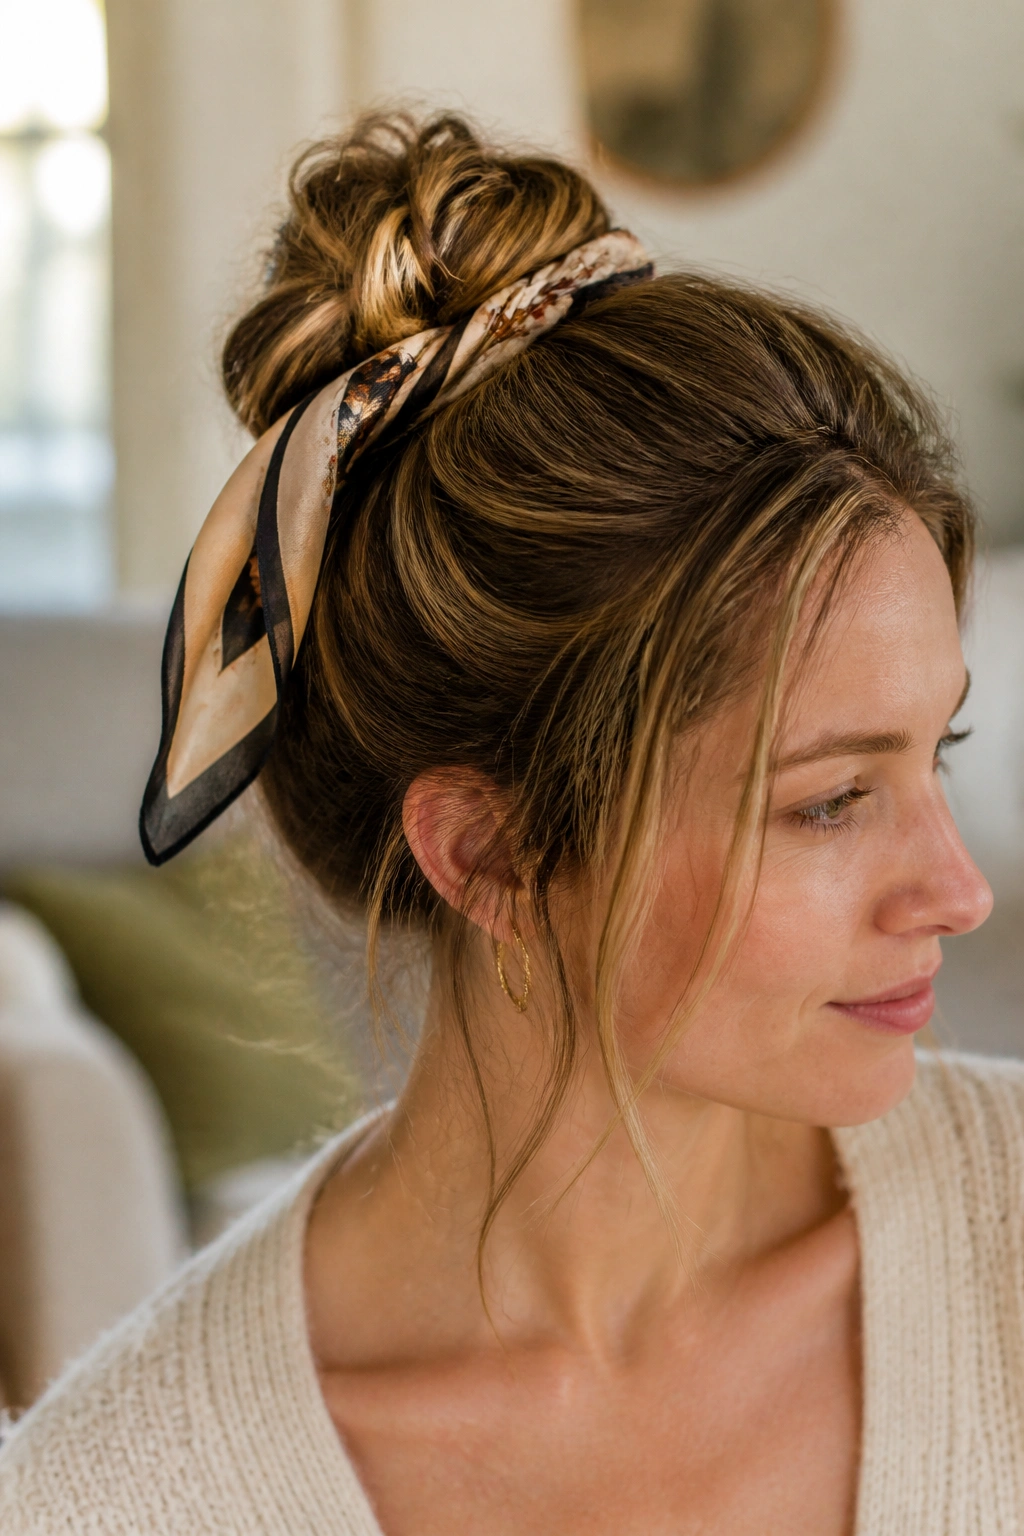
A scarf-woven bun has a little more personality than most updos, and that’s the point. A silk or satin scarf threaded through a bun adds color, but it also changes the way the hair sits, because the fabric gives the style a softer line and can help hold finer strands in place.
Fold the scarf into a strip about 1 to 2 inches wide before weaving it into the ponytail or bun. If it’s too wide, the style gets bulky fast. If the scarf is slippery, knot it under the bun where the tension is strongest, then let the ends hang or tuck them inside depending on the look you want.
I like this one with low buns and loose twists more than with high, rigid shapes. It feels more natural that way. The scarf can hide a rough elastic, cover thinning at the base, or just give the style a little lift without needing another pin.
The main thing is balance. If the scarf is bold, keep the bun simple.
17. Sleek High Ponytail With a Coiled Base
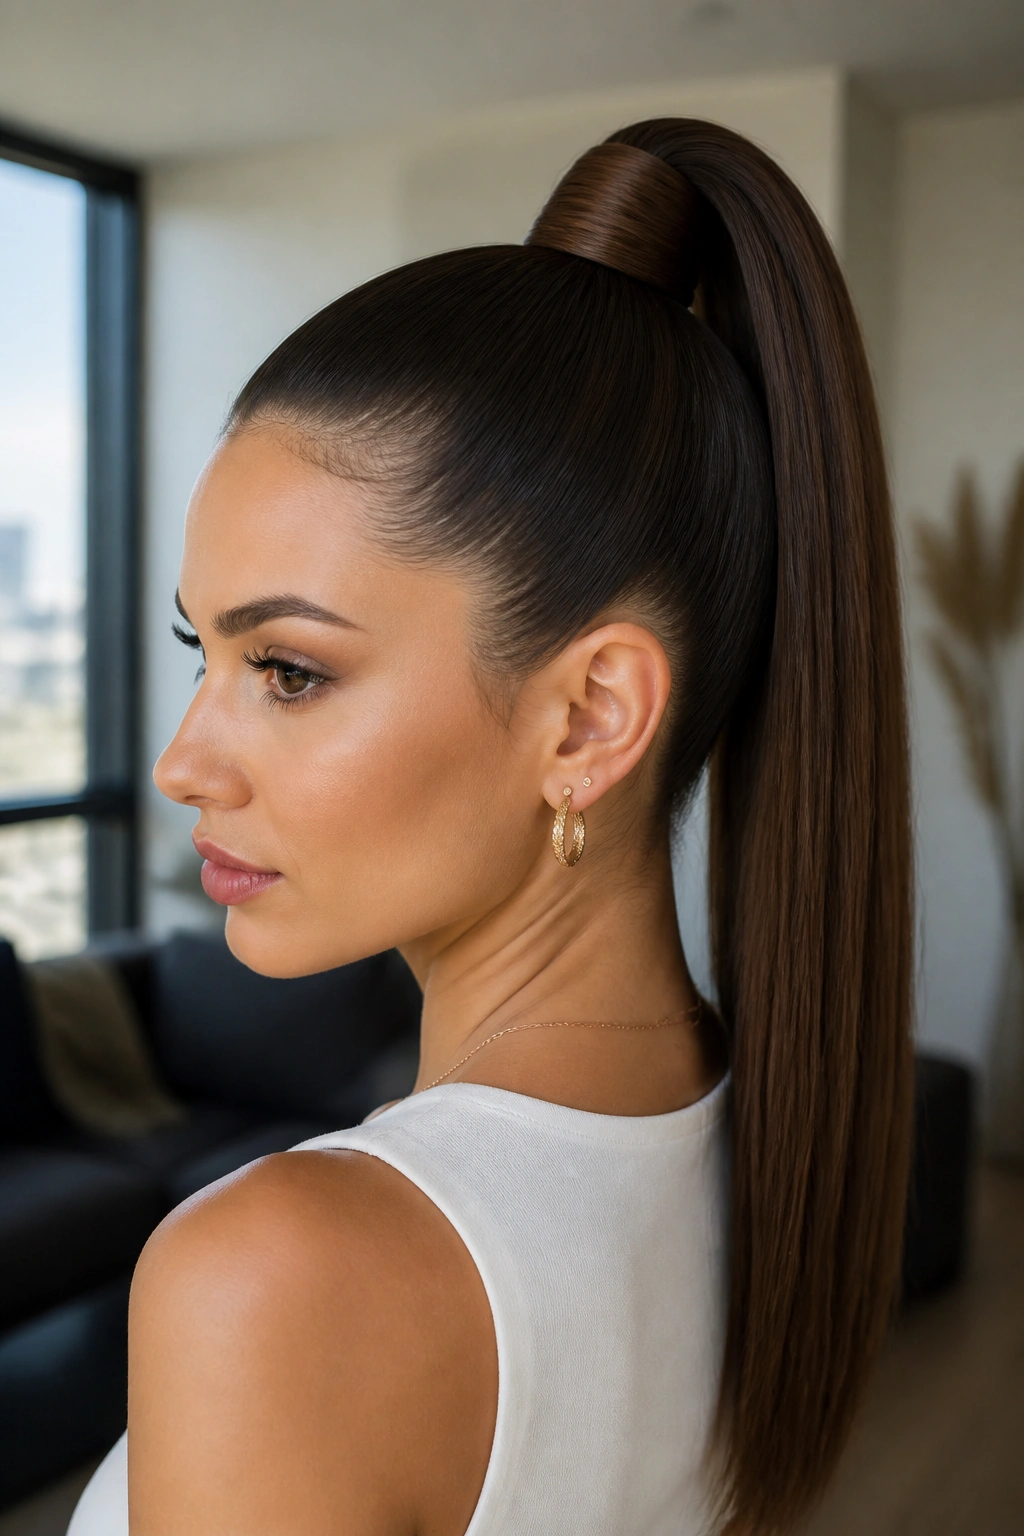
A sleek high ponytail can count as an updo when the base gets finished properly. Once the hair is pulled high and smooth, wrap a section around the elastic, coil the tail a little at the base, and pin it flat so the pony looks intentional rather than gym-bound.
The height matters. High on the crown gives lift, and the coiled base hides the mechanics. That makes the style feel sharper than a standard ponytail, especially if the hair is straight or has been smoothed with a flat brush and a little serum.
If your hair is thick, use two elastics stacked one over the other before wrapping the strand. That keeps the pony from sagging after an hour or two. If it’s fine, tease the underside at the crown very lightly before brushing the top smooth. Tiny lift. Big difference.
This is one of the easiest updo ideas for women who want a strong shape without a full bun. Clean, fast, and useful.
18. Gibson Tuck
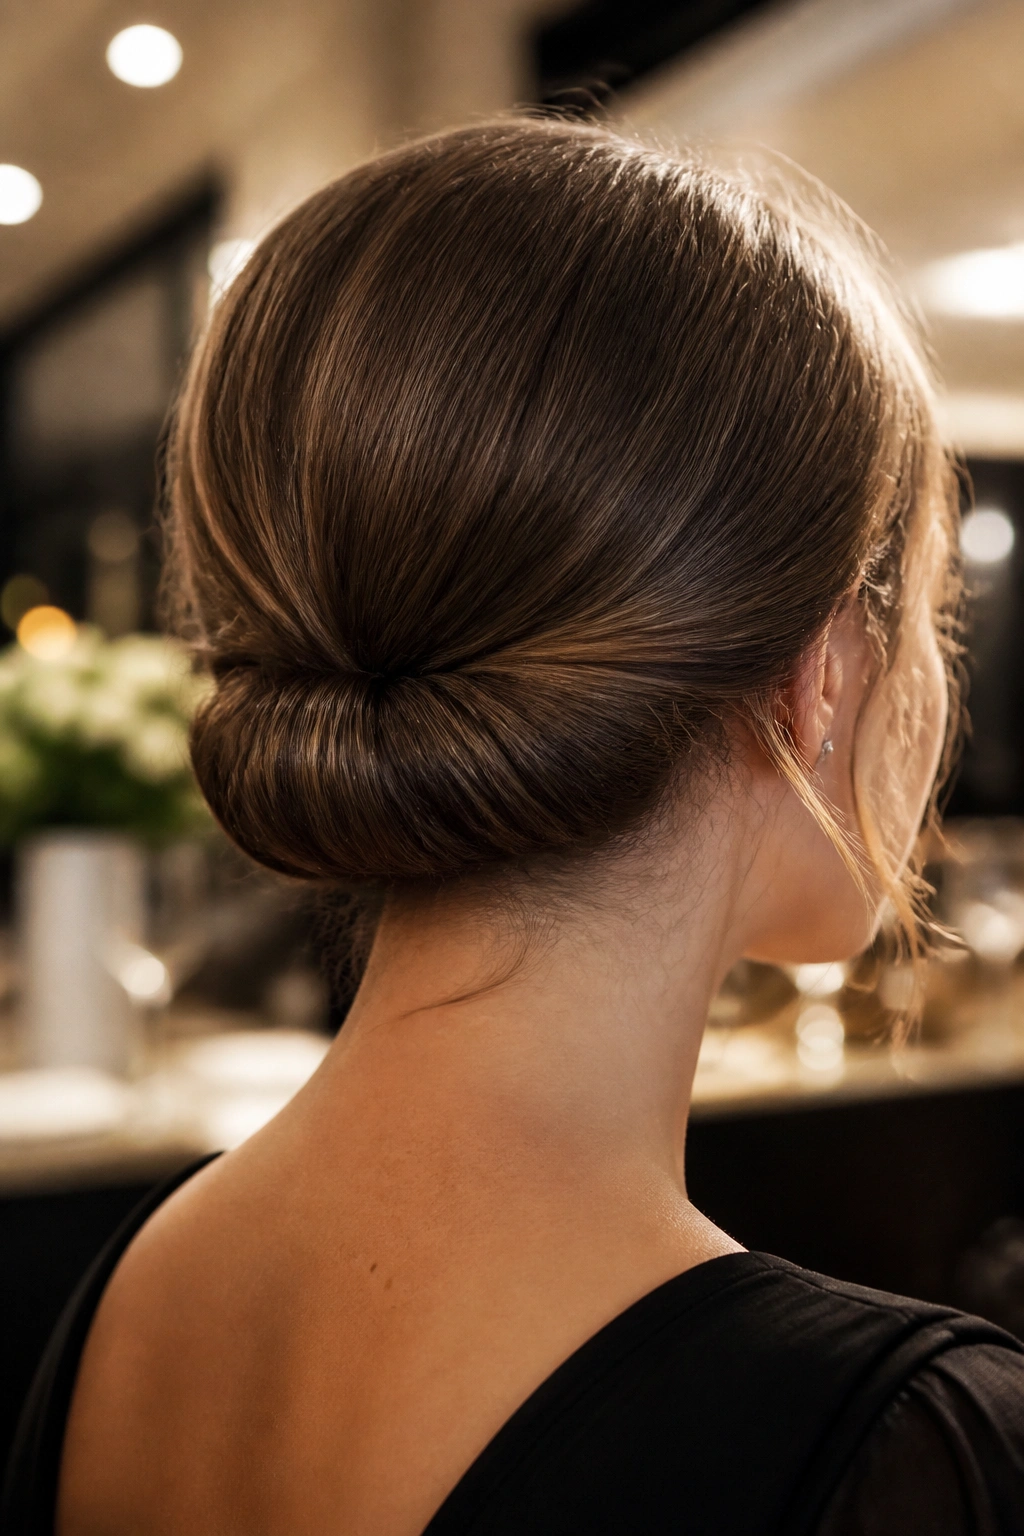
The Gibson tuck has an old-fashioned name, but the shape is easy to like. Hair gets rolled upward from the nape and tucked into itself, creating a soft horizontal roll that stays low and looks neat without feeling severe.
It’s especially nice on medium-length hair that sits at or below the shoulders. Shorter layers can work if they reach the nape, but you’ll need extra pins to hold the roll in place. A little texture through the ends helps, because hair that is too silky can slip out of the tuck before you get everything secured.
A Small Detail That Helps
A narrow comb or decorative pin at one side can anchor the roll and keep it from flattening. I prefer one accent piece rather than a pile of clips. Too many and the shape gets busy.
The Gibson tuck suits dinners, work functions, and any day where you want a low updo that feels slightly more thoughtful than a basic bun. It has a quiet polish that comes from the fold itself.
19. Braided Space Bun Pair
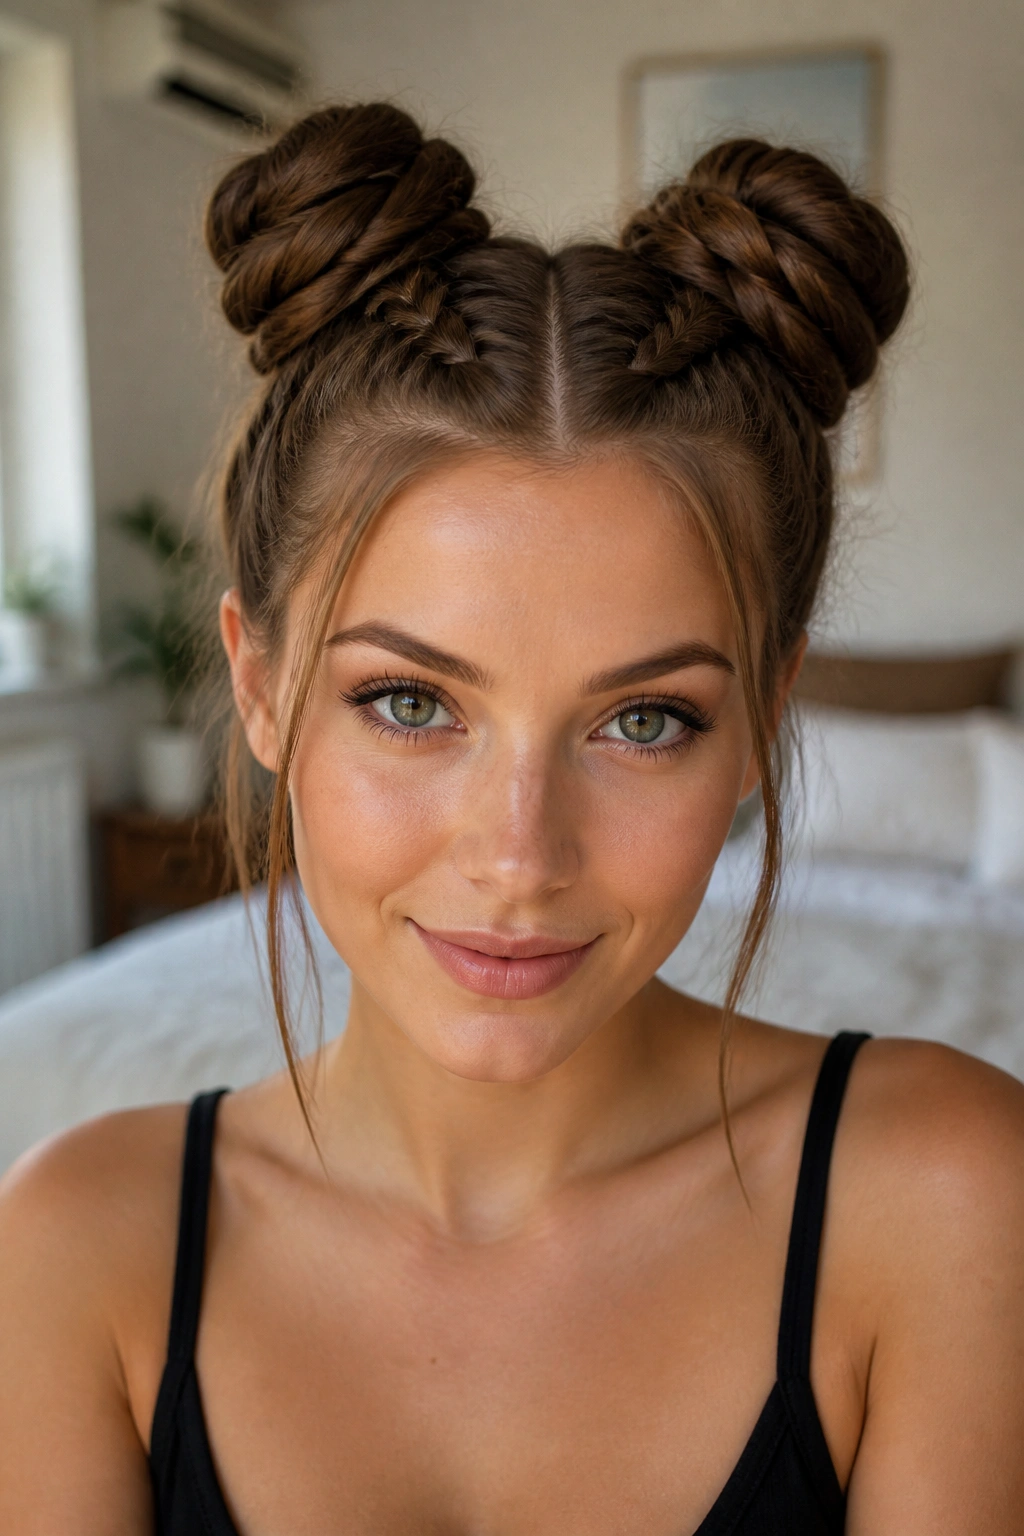
Braided space buns are not just for festival hair. Done neatly, they’re one of the most practical updo ideas for women who want all the hair up, a little symmetry, and a style that stays where it’s put. Two buns instead of one also spread the weight out, which helps if your hair is thick.
A center part gives the cleanest base. From there, braid each side toward the crown or just behind the ears, then coil each braid into its own bun. The buns can sit high for a bolder look or lower for something a little calmer. Both versions work.
This style is forgiving if the braids are not perfectly even. A few loose pieces near the temples can soften the shape, but keep the buns secure. Pin through the braid itself so the bun doesn’t loosen as the day goes on.
I’d use this when a single bun feels too plain and a ponytail feels too exposed.
20. Soft Low Bun With a Center Part
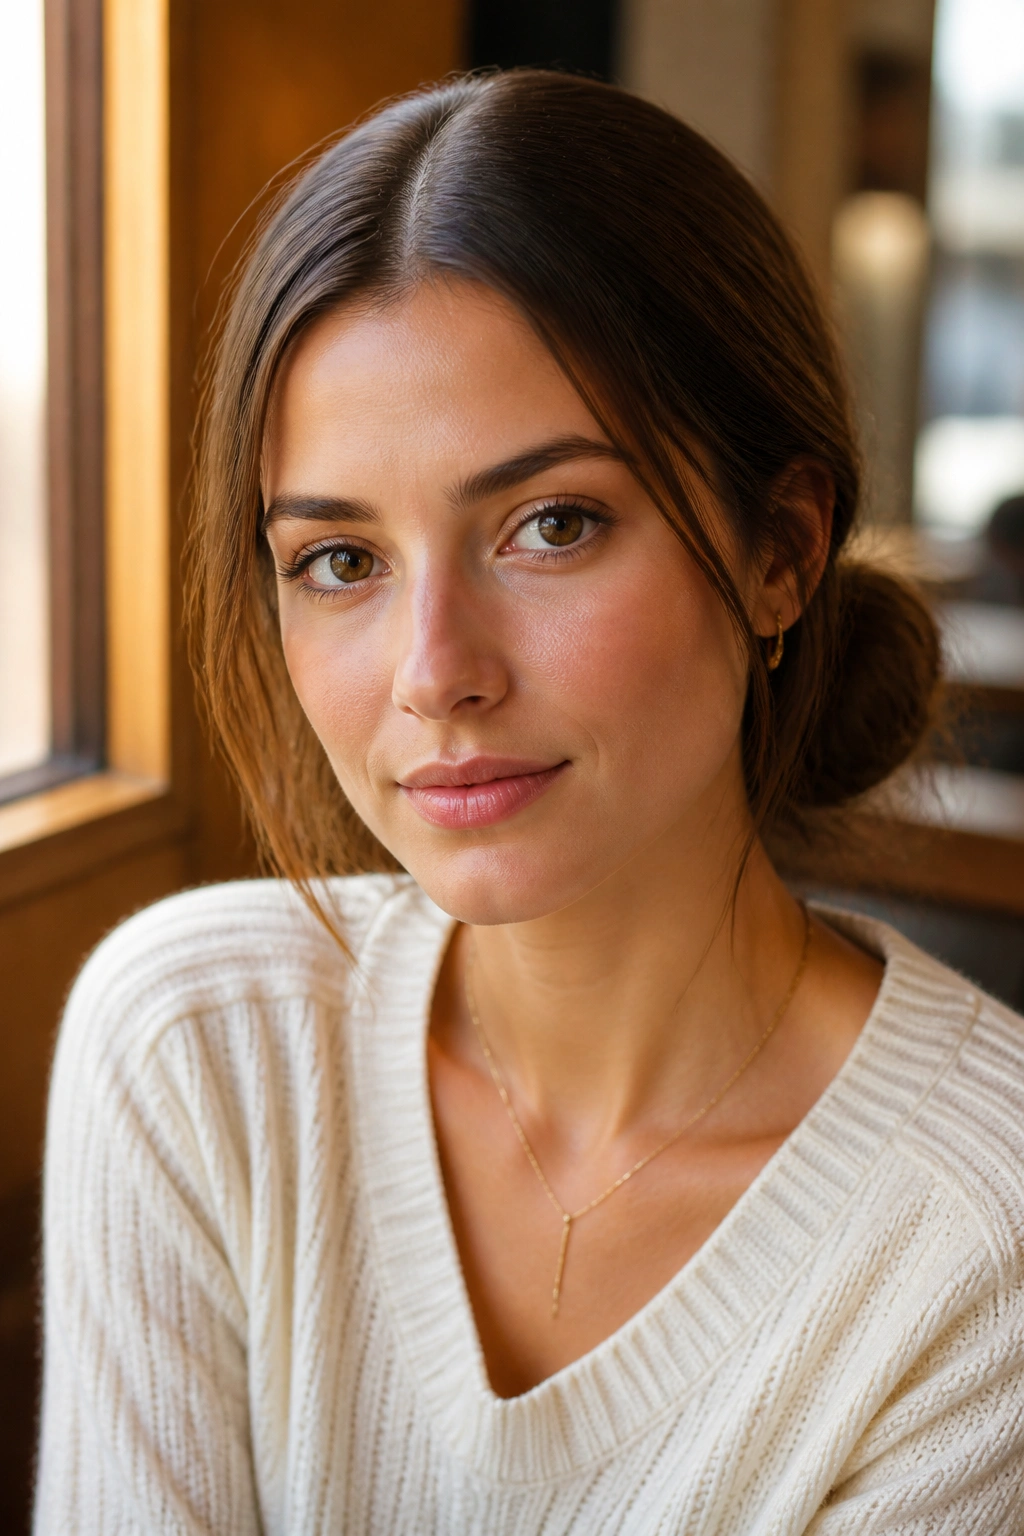
A soft low bun with a center part is the style I’d hand to someone who wants one updo that works in nearly any setting. It’s calm, balanced, and easy to dress up or down, which is why it shows up so often in real life and not just in photos.
The center part gives the front a clean line, while the bun itself stays loose enough to avoid looking hard or severe. Let the bun sit low and slightly off the neck, then ease out a few tiny pieces around the temples. Not too many. You want shape, not fuzz.
A small amount of cream through the top keeps the part neat, and a few pins hidden underneath the bun hold the weight. If the hair is especially fine, a tiny padded insert under the bun can help it look fuller without turning it into a helmet.
It’s the sort of style that forgives a lot. That alone makes it worth keeping around.
