



When the morning is crowded—coffee, laptop, inbox, keys—the low ponytail usually wins. It keeps hair off your face, sits neatly under a blazer collar, and doesn’t ask for a perfect blowout before you’ve even answered your first email. Among low ponytail styles for work days, the ones worth keeping are the ones that look calm without looking stiff.
The trick is never the ponytail itself. It’s the details around it: where you place the part, how tightly you smooth the crown, whether the elastic shows, and whether the ends look tidy or a little tired. A low ponytail can read sharp, lazy, romantic, severe, or soft depending on those tiny choices. That is why the same basic style can carry you through a boardroom, a long commute, and a lunch meeting without feeling out of place.
Hair type matters, but not in the dramatic way people sometimes make it sound. Fine hair often needs a touch of lift at the crown so the style does not collapse by noon. Thick hair usually behaves better when it’s split into smaller sections and secured with an elastic that can actually grip. Curly hair looks strongest when it keeps some of its shape instead of being forced into a flat little line at the nape.
The good part? You do not need a bag full of tools. A tail comb, a few bobby pins, a couple of snag-free elastics, and a light styling cream will get you through most of these. Pick the version that fits the day you actually have, not the day you wish you had.
1. The Clean Center-Part Low Ponytail
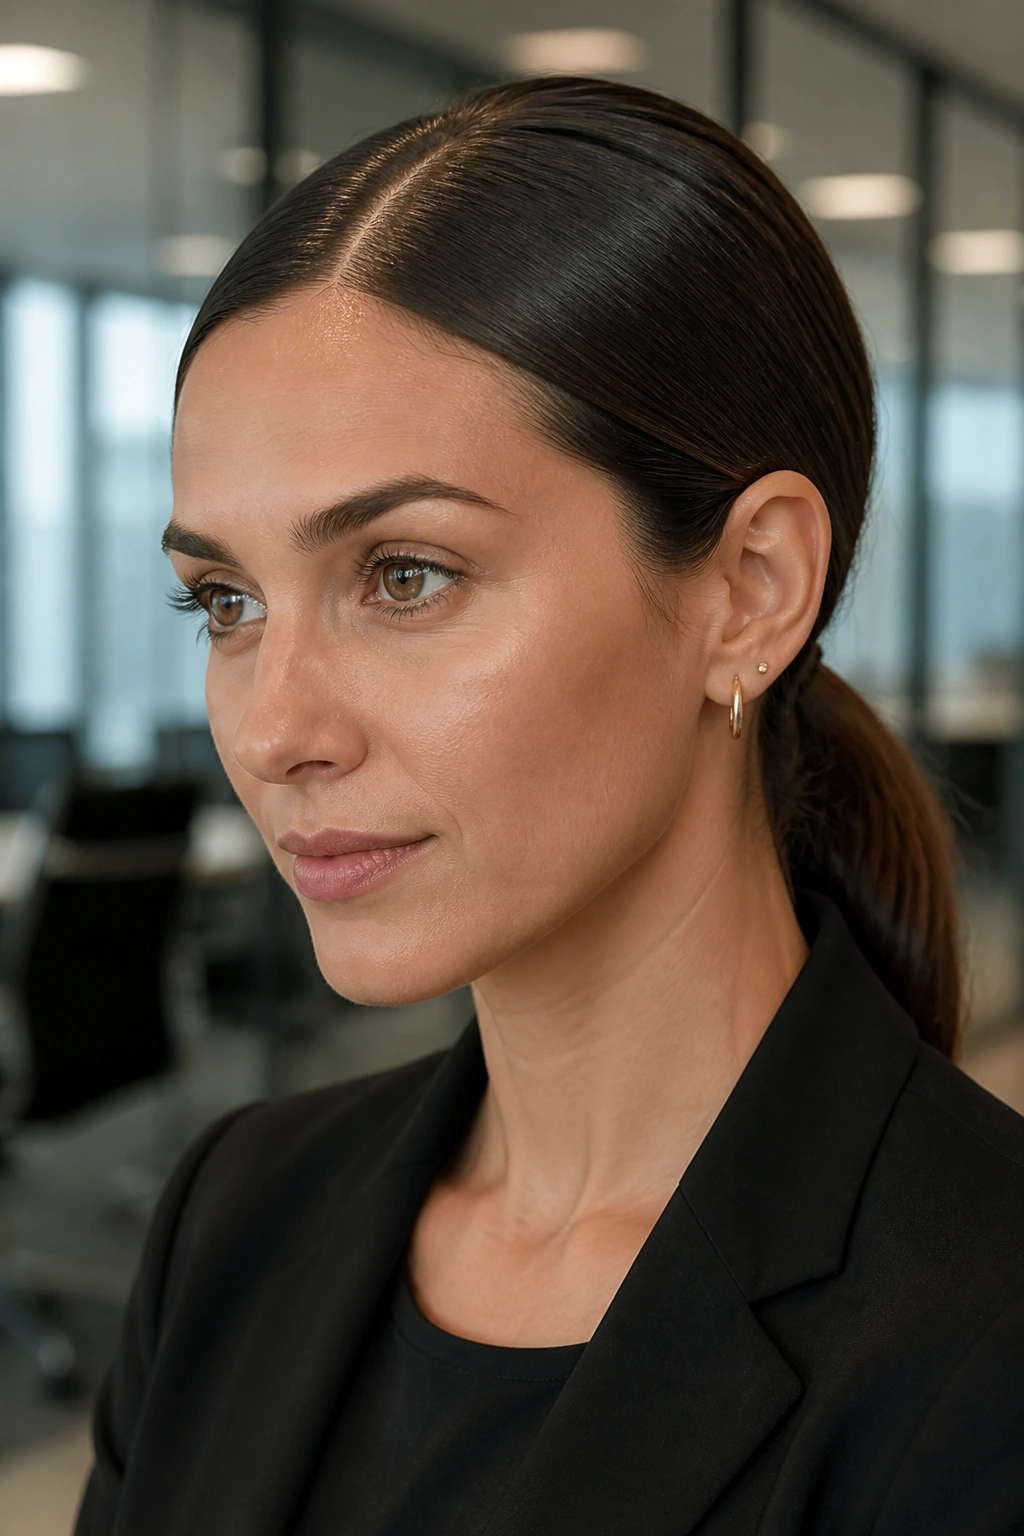
A clean center part gives the low ponytail a sharper edge than people expect. It looks deliberate in a way that reads well in a meeting, and it takes less effort than trying to fake volume everywhere.
Why it looks more polished than it sounds
The center part draws a straight line through the face, which makes the rest of the style feel controlled. Keep the ponytail at the nape, or just a hair above it, and the whole thing feels tidy instead of school-gym plain. The base matters more than the length of the tail.
If your hair is a little frizzy at the crown, mist the top lightly with water or a leave-in spray before smoothing it down. Then use a tail comb to press the part straight back from the middle of the forehead to the crown. Do not overwork the sides. Too much brushing makes the style puff up in the wrong places.
How to get the line right
- Part the hair from the center of the nose bridge straight back.
- Smooth each side with a soft brush, not a rough one.
- Secure the ponytail at the point where the back of the head starts to curve.
- Wrap a thin section of hair around the elastic if you want a cleaner finish.
One careful part beats ten minutes of fussing.
2. The Wrapped-Band Low Ponytail
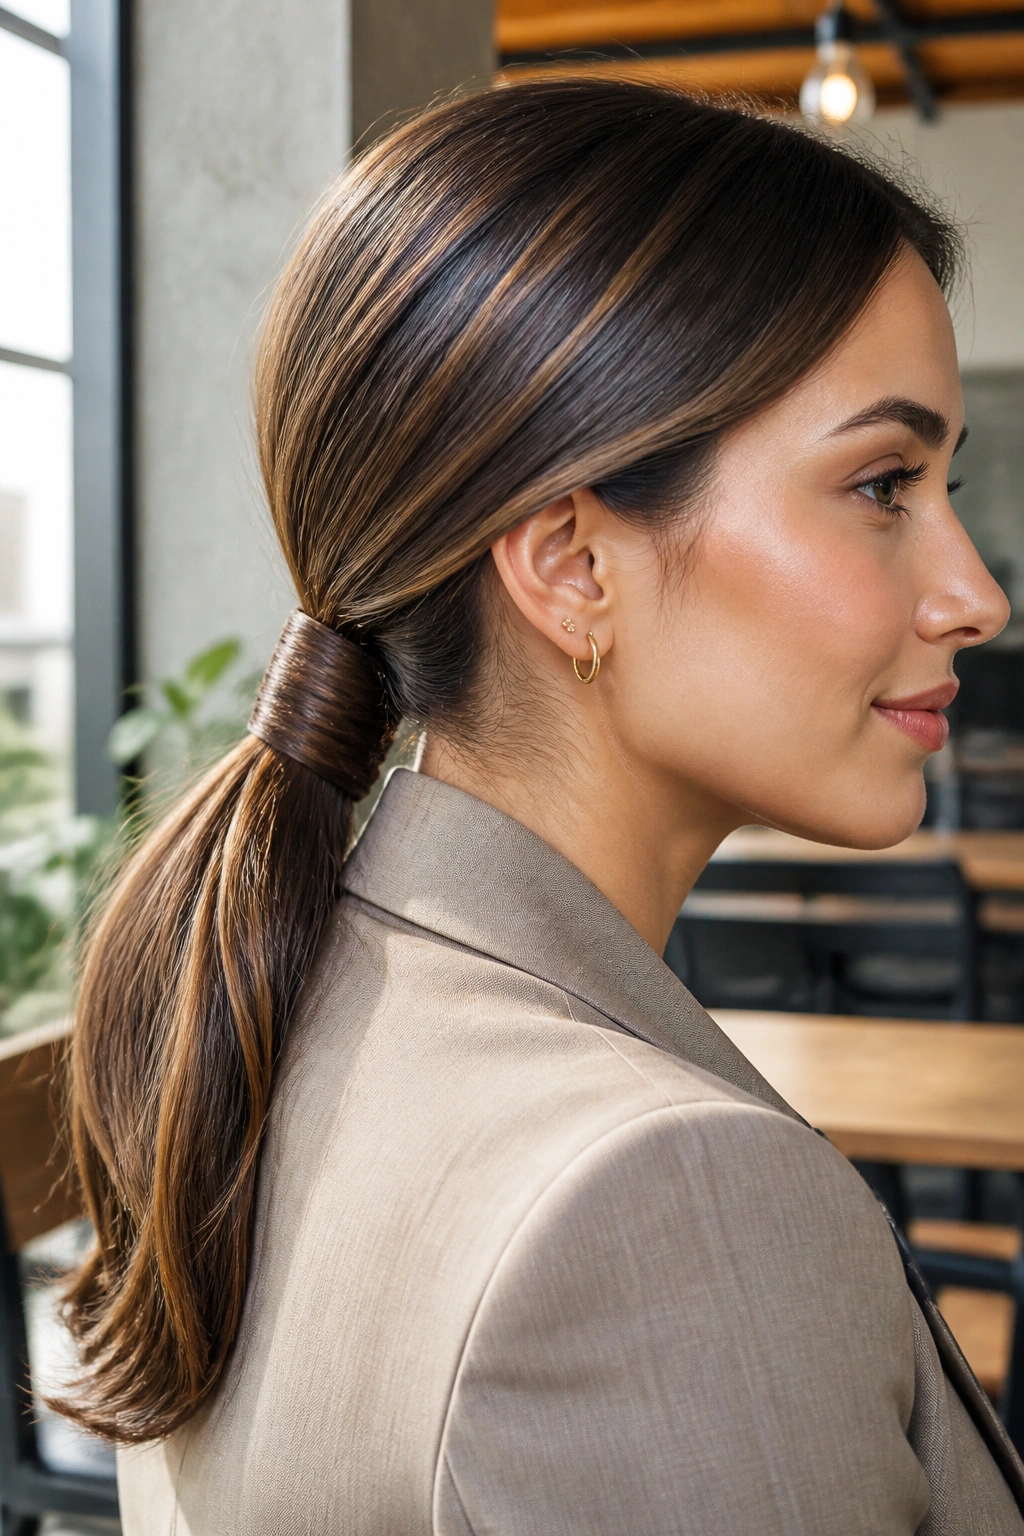
A wrapped base hides the elastic and changes the whole mood of the style. Suddenly the ponytail looks planned, even if you made it in four minutes while standing in front of a mirror with one eye open.
This is the version I’d pick for client days, presentations, or any morning when you want your hair to look finished without adding extra shape. Gather the hair low, tie it with a strong elastic, then take a narrow section from the underside of the ponytail and wrap it around the base until the band disappears. Slide a bobby pin upward through the wrapped piece and tuck the end under the ponytail so it stays put.
The neat part is how little hair you need for the wrap. A strip about half an inch wide is enough on most heads. If the section is too thick, the wrap turns bulky and starts to look like you’re trying too hard. You’re not. You’re hiding the elastic, not building a sculpture.
3. The Soft Side-Swept Low Ponytail
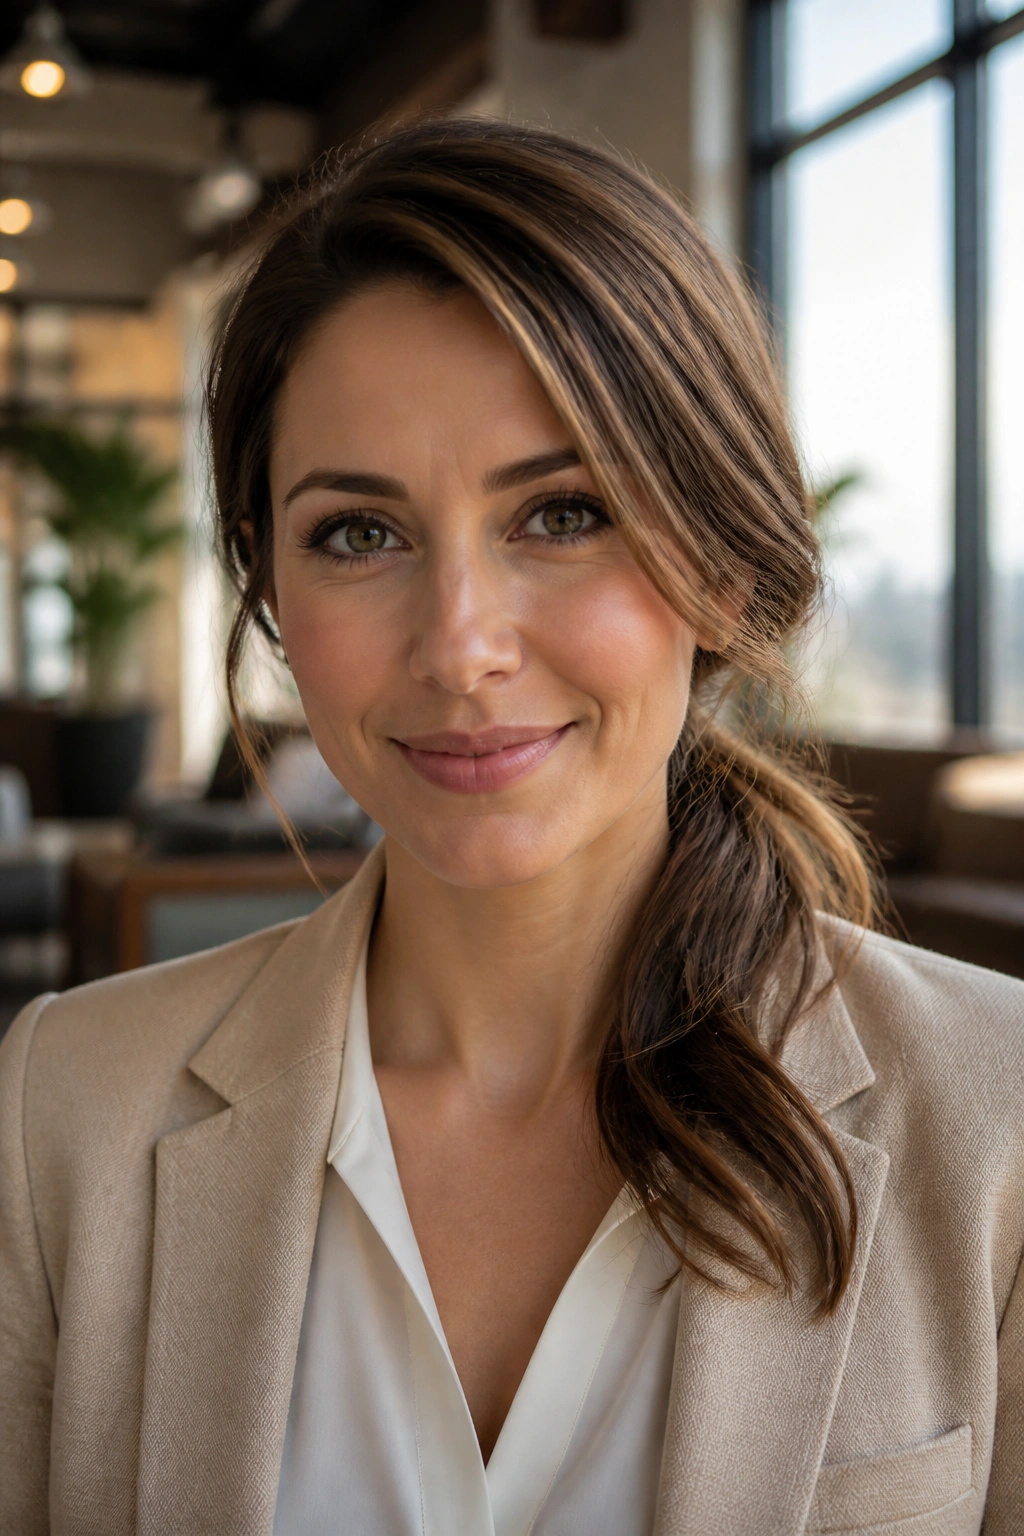
Why does a side part change the mood so much? Because it softens the line at the front and makes a ponytail feel less strict. The whole style looks a little more relaxed, which can be helpful on days packed with calls, deadlines, and too much screen time.
Start the part just above the arch of one eyebrow and sweep it back toward the crown. Then gather the hair low, slightly off-center rather than directly in the middle. That tiny shift matters. It gives the ponytail a quieter, more flattering shape around the cheekbones and jaw.
How to place the part
- Use the tail of a comb to trace the part while the hair is still slightly damp.
- Pin the heavier side for two or three minutes if it won’t stay where you want.
- Keep the ponytail low and a touch behind the ear on the fuller side.
- Finish with a light mist of hairspray, aimed at the part line only.
This version is one of the easiest ways to make second-day hair cooperate. It does not demand perfect shine, and it forgives a little texture at the roots.
4. The Low Ponytail With Hidden Crown Volume
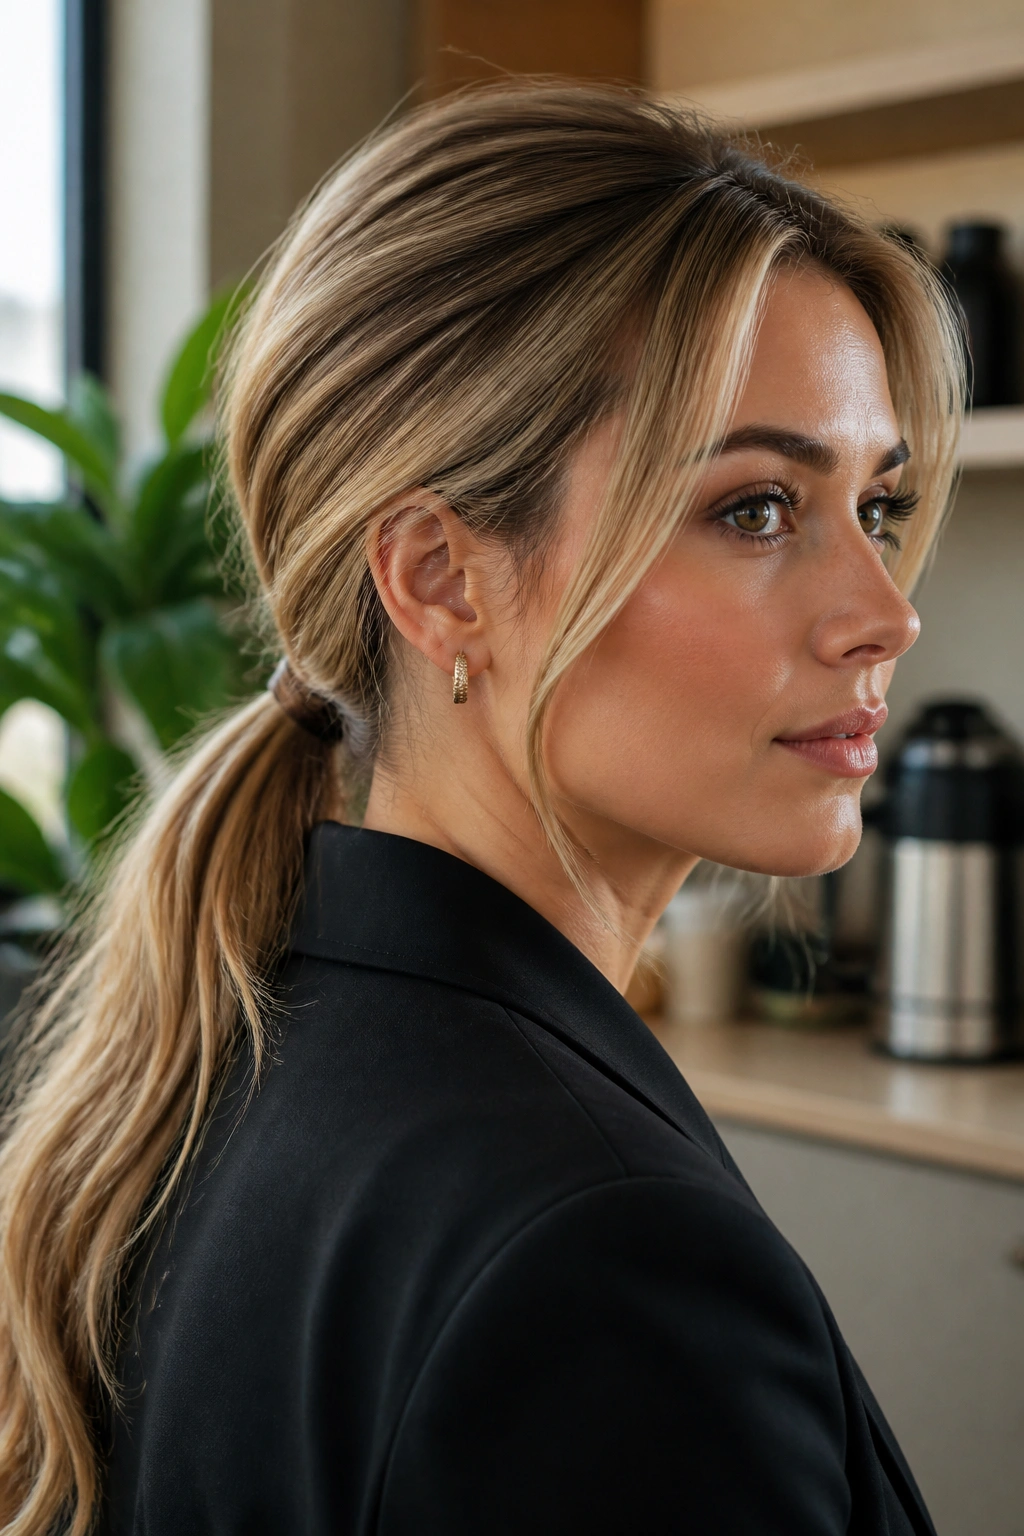
If your crown goes flat by lunch, this is the move. A little lift up top makes the ponytail look like it belongs on purpose, not like you gave up and tied your hair back.
Start by taking a 2-inch section at the crown and teasing it gently from the underside with a fine comb. Gently is the key word. You want a soft cushion, not a bird’s nest. Smooth the top layer over the teased section, then gather the rest of the hair low and secure it without pulling the crown too tight.
A small clip-in bump piece can help if your hair is very fine or extra slippery, but you often do not need one. A bit of dry shampoo at the roots gives grip, and the ponytail holds better than people expect. Just do not place the bump too high. It should lift the silhouette, not shout from across the room.
A quick rule helps here: if you can see the tease from the side, it’s too much.
5. The Twisted Low Ponytail
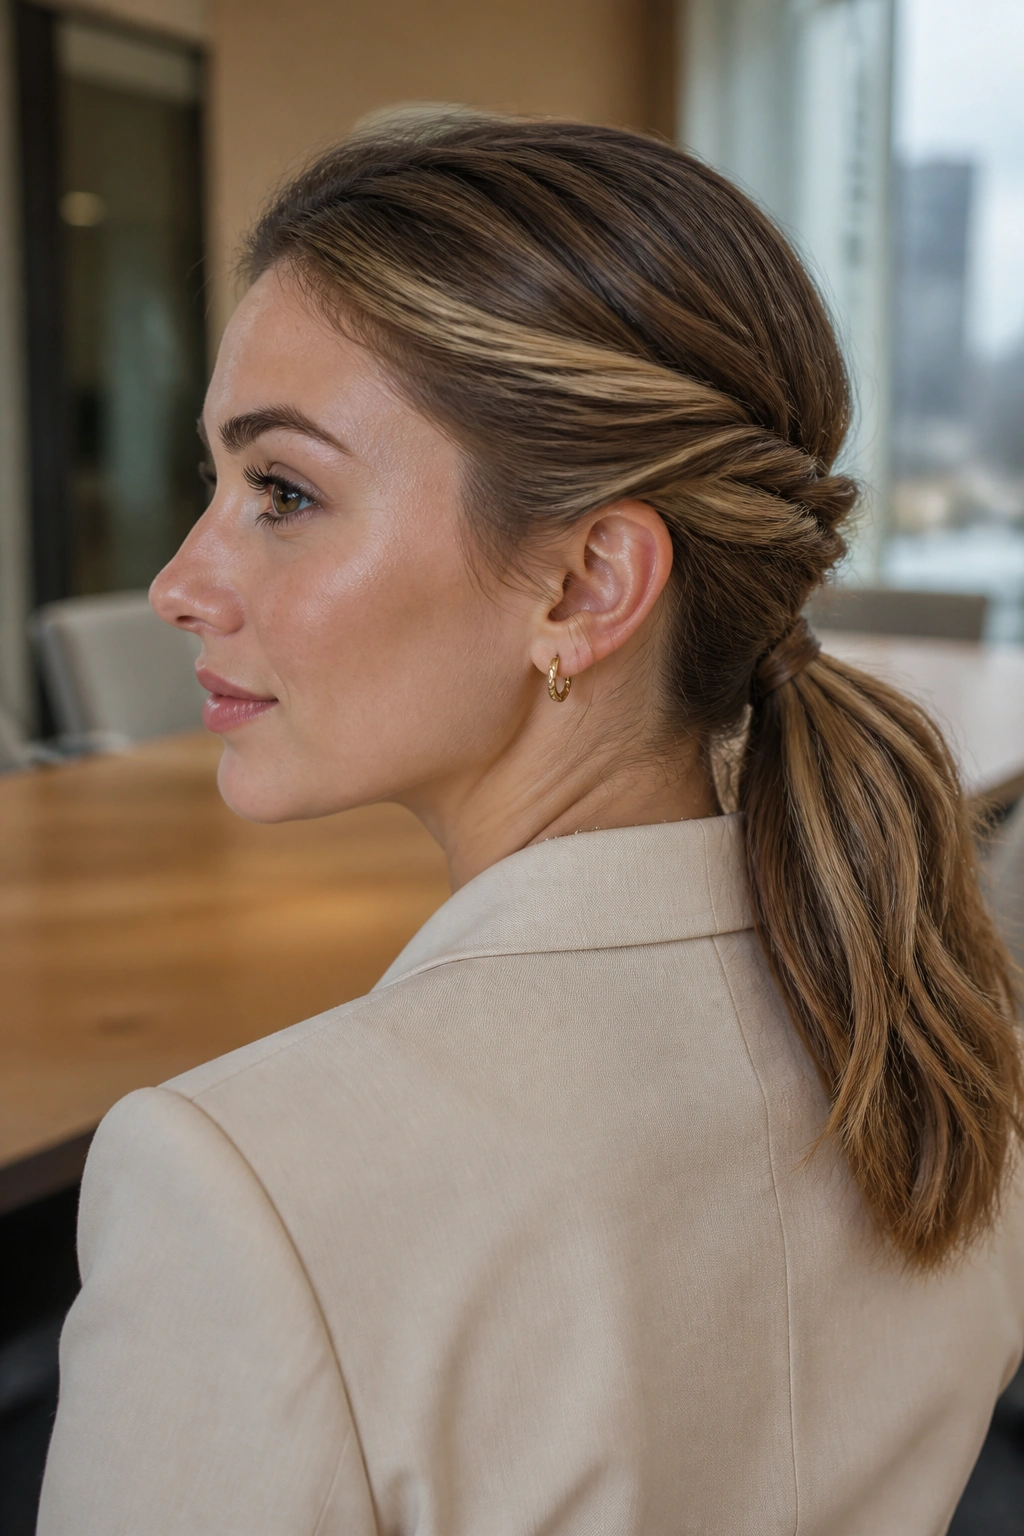
Twists give a low ponytail texture without asking for braids, curls, or a curling iron. That makes this one a good middle ground when you want something a little prettier than a plain tie-back but still low-maintenance enough for a workday.
Take a section from each temple, twist it backward once or twice, then pin or cross those pieces behind the head before gathering everything into a ponytail. The result is neat at the front and a little more interesting from the side. It also works well on hair that has some layer to it, because the twists hide shorter pieces better than a flat style does.
If your hair is shoulder length or longer, this version can look especially clean with a low elastic and a tiny wrap around the base. Shorter layers may slip out, so keep a few pins nearby. Tiny twists, tiny pins. That’s the whole game.
There’s a nice bonus too: the style holds up under headphones better than a bulky ponytail. That sounds minor until you’ve spent a day with one side of your hair mushed by a headset.
6. The Sleek Glass-Finish Low Ponytail
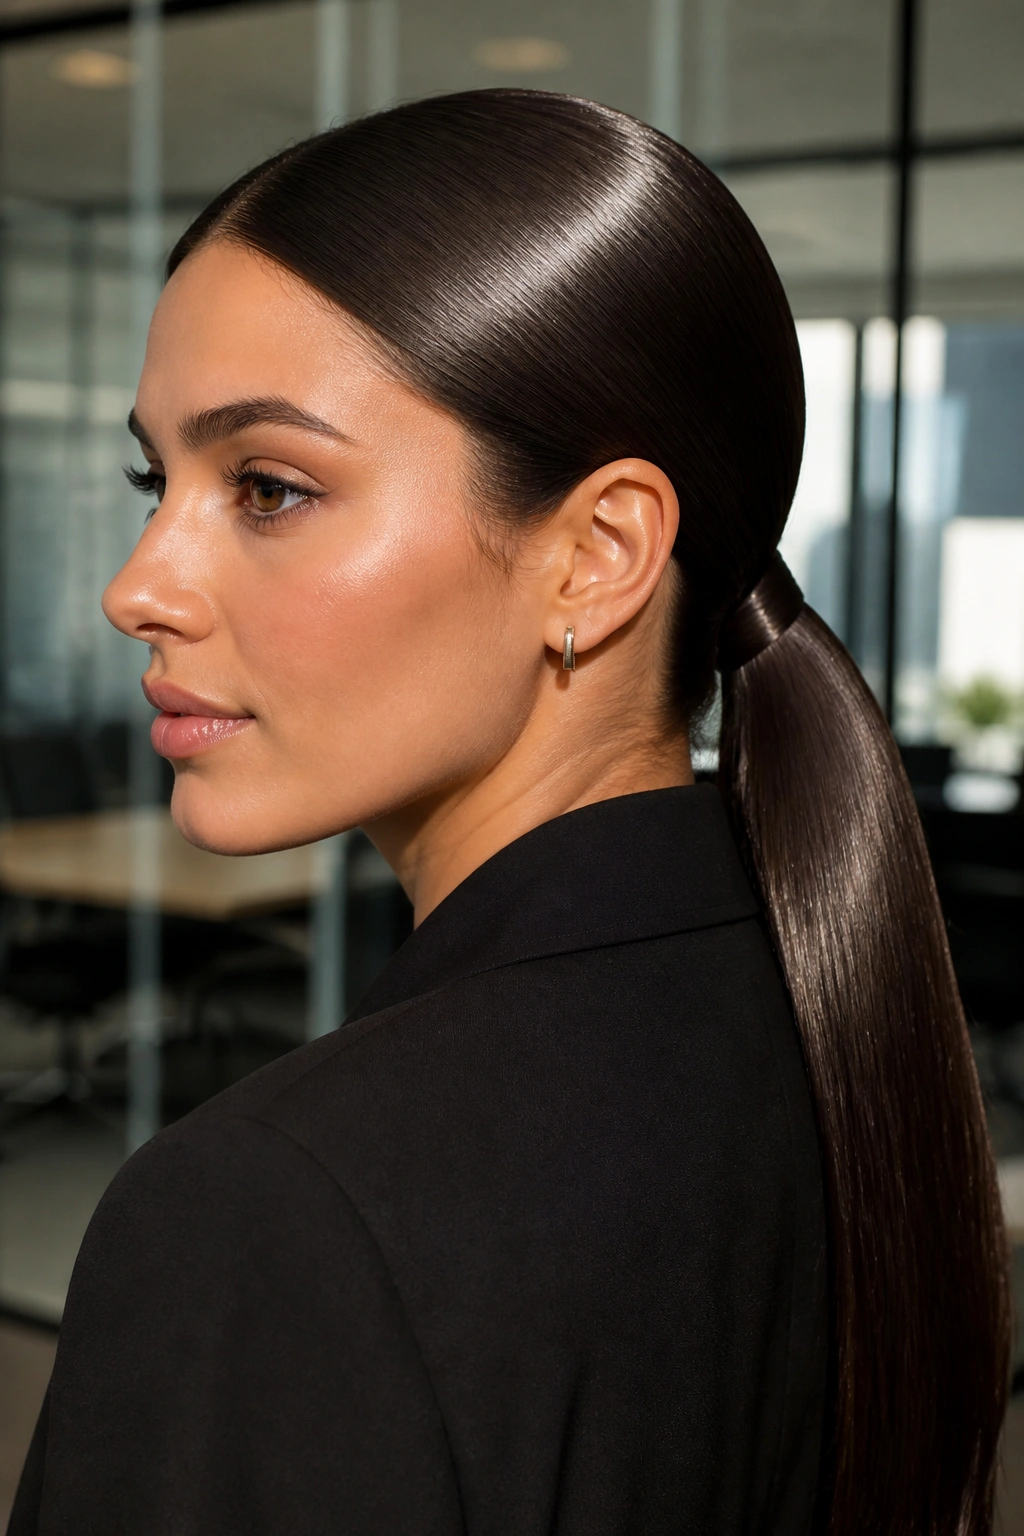
A sleek low ponytail can look serious in the best way. It’s the one to reach for when you want your hair to look calm, shiny, and tightly under control without calling too much attention to itself.
Unlike a fluffy ponytail, this version depends on a smooth surface. Work a small amount of leave-in cream or serum through the mid-lengths first, then brush the hair back with a soft-bristle brush. Keep the product light at the roots or the style can look greasy by the end of the morning. That is the downside nobody likes to say out loud.
The best finish comes from brushing in stages. Smooth the top first, then the sides, then the nape. If you rush it and grab everything at once, little ridges show up near the temples. They’re not dramatic, but they make the style look half-done.
Best for
- Straight hair that frizzes at the crown
- Blowouts that need a second-day reset
- Interviews, presentations, or dressier office settings
- Hair that stays smoother when it’s secured firmly
A sleek ponytail does not need to be severe. It only needs clean lines and a controlled base.
7. The Low Ponytail With Face-Framing Pieces
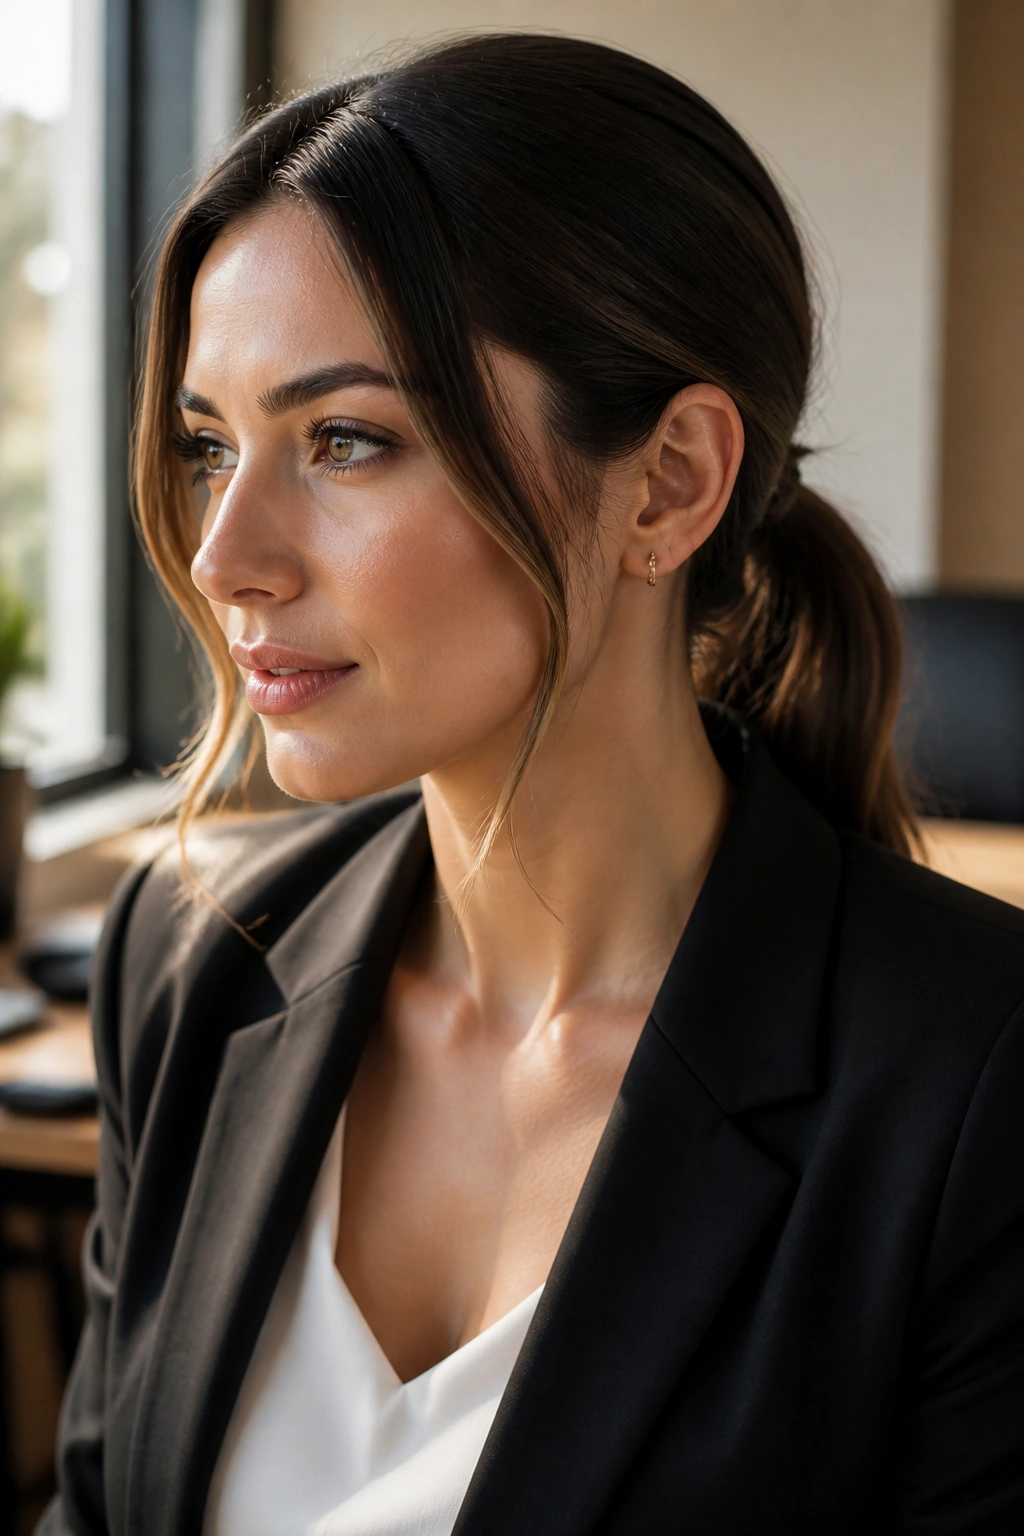
A few loose strands can soften a ponytail fast. The key is choosing them on purpose instead of accidentally letting half your hair fall out and pretending it was a choice.
Leave out two thin pieces near the temples, about a quarter-inch wide each, before you gather the rest of the hair. Keep them smooth and slightly bent toward the face, or curl the ends just a little if your hair is straight and stubborn. The rest of the ponytail can stay neat and low. That contrast is what makes the style work.
Which pieces to leave out
Start with the sections that naturally fall forward when you shake your head. Those are usually the least annoying to manage. If you have layers, borrow the shortest pieces from the front and let them skim the cheeks.
How to keep them smooth
- Use a small round brush or flat iron on low heat.
- Aim the curve away from the face, not straight down.
- Finish the ponytail first, then shape the loose pieces.
- Stop before they get too curled. Soft is better here.
This style is a good choice when you want a little softness around the face but still need the hair contained. It’s office-friendly, not overly styled, and it survives a long afternoon better than it looks like it should.
8. The Braided-Base Low Ponytail
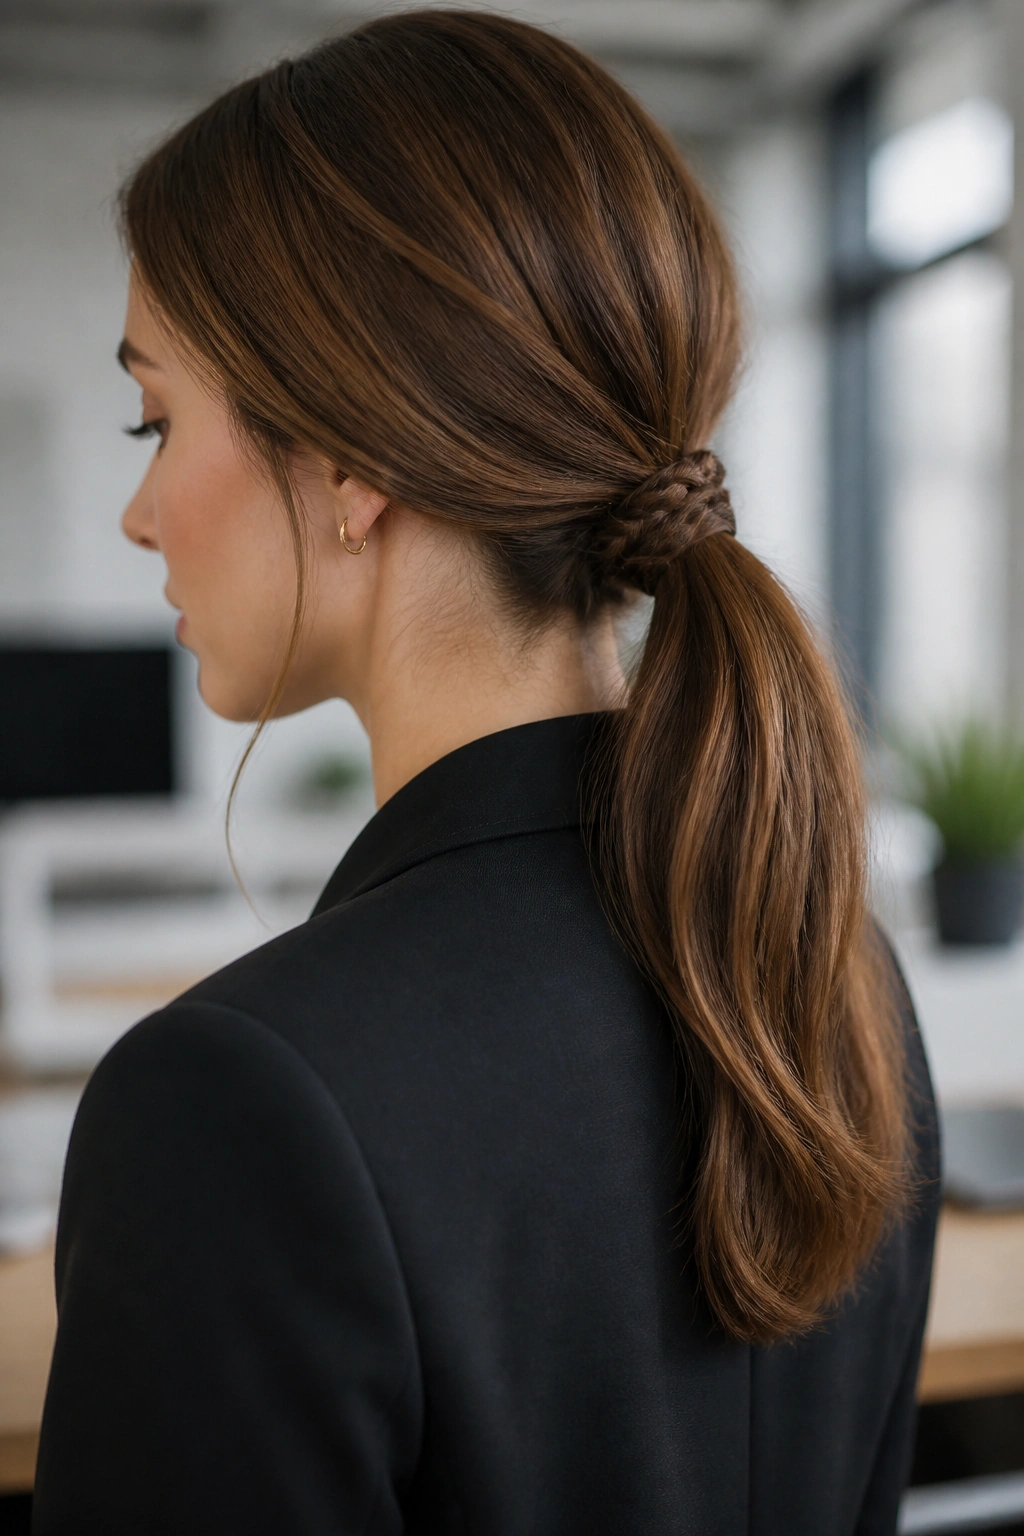
Why braid the base instead of the tail? Because the braid gives the style texture right where most ponytails look plain. It’s a small change, but it pulls the eye upward and makes the whole shape feel more finished.
One easy version starts with a narrow section at the back, just above the nape. Braid it into a slim three-strand braid, then gather that braid with the rest of the hair into a low ponytail. You can also braid a one-inch piece from one side and wrap it around the base, which gives a similar effect with less fuss.
How to keep the braid neat
Use a bit of dry texturizing spray on slippery hair before you braid. If the strands are too silky, the braid loosens before lunch and the base starts to look fuzzy. Secure the braid with a tiny elastic that matches your hair color, then hide it under the ponytail if you can.
This style suits people who want detail without sparkle or accessories. It’s calm, practical, and a little more interesting than the standard tie-back. No extra decoration needed.
9. The Bubble Low Ponytail
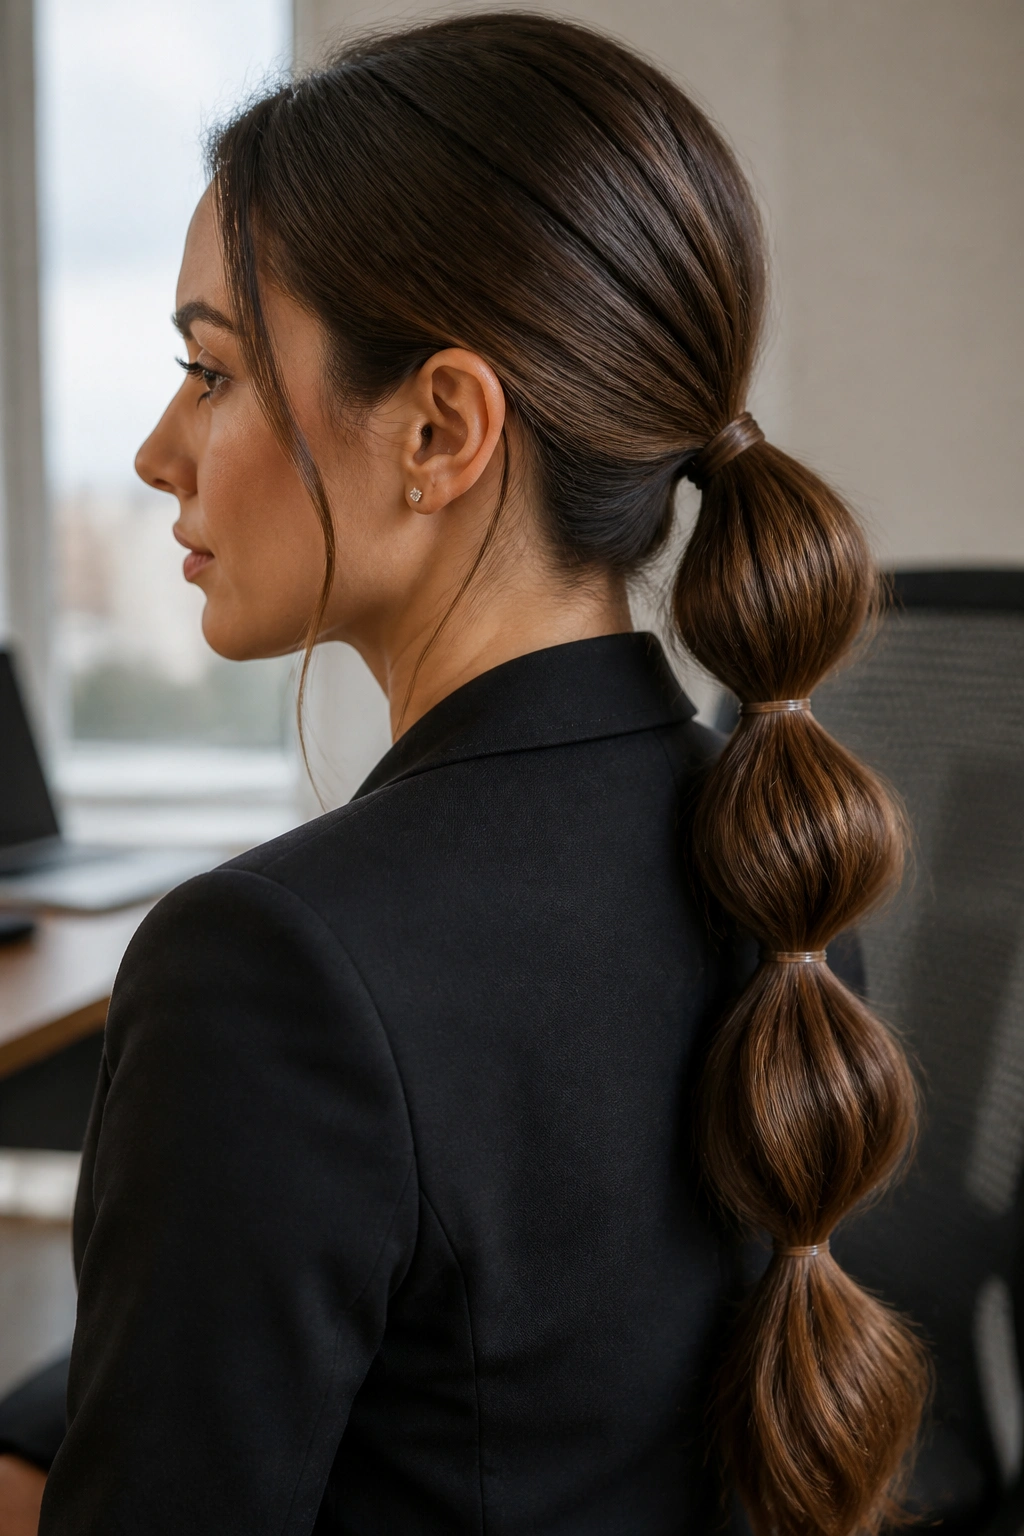
Long hair that tangles against a chair back can turn into a mess by mid-afternoon. A bubble ponytail keeps the tail structured so it doesn’t fall flat, and it adds shape without needing hot tools.
Tie the hair into a low ponytail first, then add clear elastics every 2 to 3 inches down the tail. Gently tug each section between the elastics to create the bubble shape. Keep the bubbles even, but not perfect. Slight unevenness looks more natural and less stiff.
- Use snag-free elastics so the hair does not break when you remove them.
- Start with one elastic at the base, then space the rest evenly.
- Pull each bubble from the sides, not the center.
- Stop stretching when the shape is rounded, not wide and saggy.
The style works especially well on thicker hair because it holds shape on its own. Fine hair can wear it too, but the bubbles should stay smaller so they don’t collapse. A little shine spray at the end helps the sections look intentional instead of fuzzy.
10. The Knot-Detail Low Ponytail
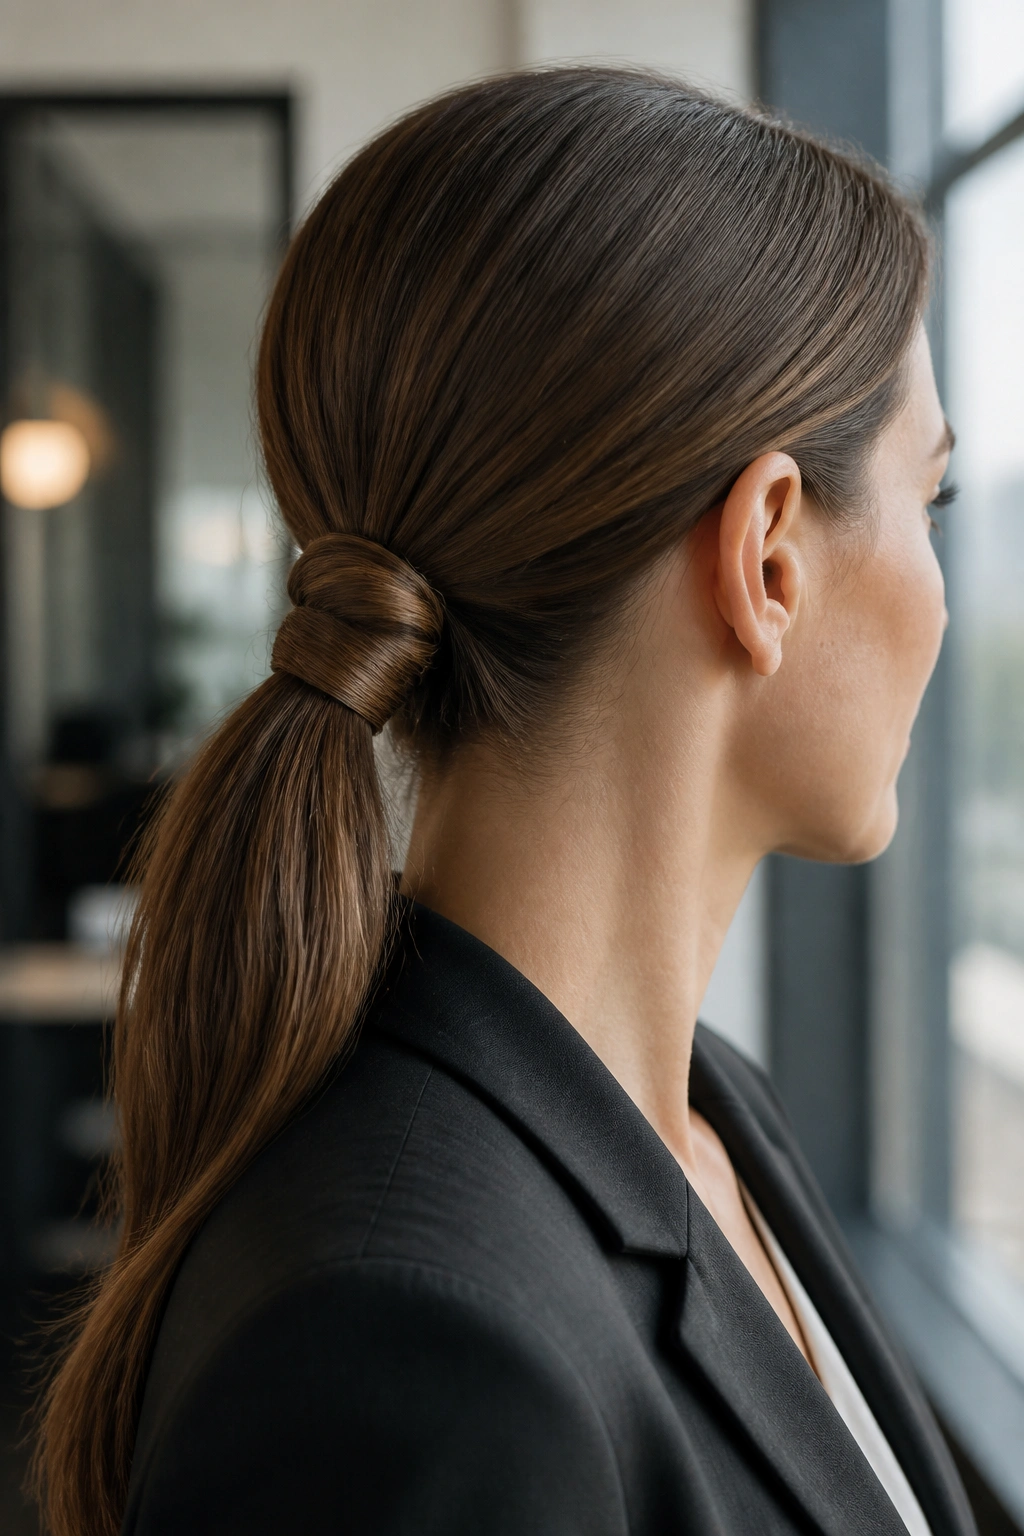
A knot detail gives you polish without any extra accessories. It’s one of those styles that looks like it took more effort than it did, which is always useful on a workday with too many moving parts.
Split the hair into two equal sections at the nape, cross one over the other, and tie a simple knot before securing the rest into a ponytail. If your hair is long enough, you can knot the tail once more for a slightly more sculpted look. The key is to keep the knot flat against the head so it doesn’t poke out like a small lump.
This style suits medium to long hair best, especially hair with a little texture. Very silky hair can slip unless you prep it with a touch of grip spray or light mousse. A little texture helps the knot stay put.
The knot detail works well when you want something cleaner than a braided style but less plain than a standard ponytail. It also avoids the “I only had 90 seconds” look, which is a relief on days when you actually did spend 10 minutes on your hair.
11. The Low Ponytail for Curly Hair
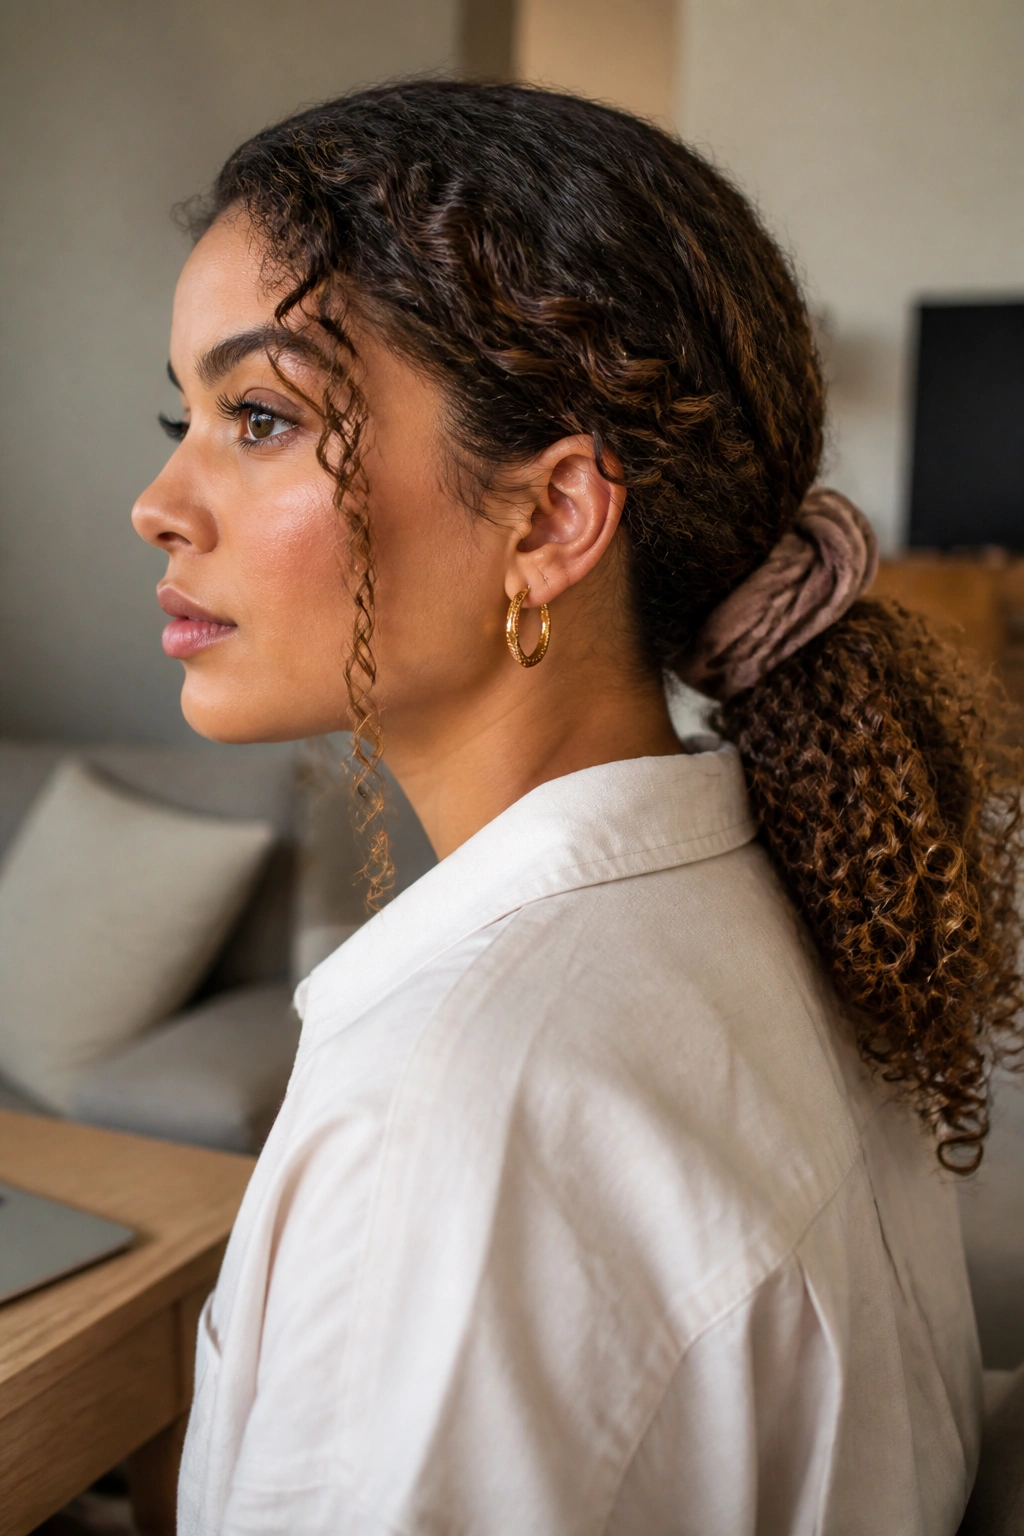
Can a low ponytail look neat on curls without flattening them? Yes, and it looks better when you stop trying to make every curl behave the same way.
Start with hydrated curls. A small amount of leave-in conditioner or curl cream keeps the crown from frizzing up when you gather it back. Use your fingers or a wide-tooth comb instead of a fine brush, because brushing out curls often creates more puff than control. Gather the ponytail low and secure it with a satin scrunchie or a soft elastic that won’t carve a hard line into the hair.
What to do at the hairline
If the front needs tidying, smooth only the top layer and leave the curl pattern underneath intact. A tiny bit of gel along the temples can tame baby hairs, but use it sparingly. Too much and the style loses the natural movement that makes it look good in the first place.
This version is nice because it respects the texture you already have. It does not fight it. And that usually means less daily frustration, which counts for more than people admit.
12. The Low Ponytail With a Scarf Accent
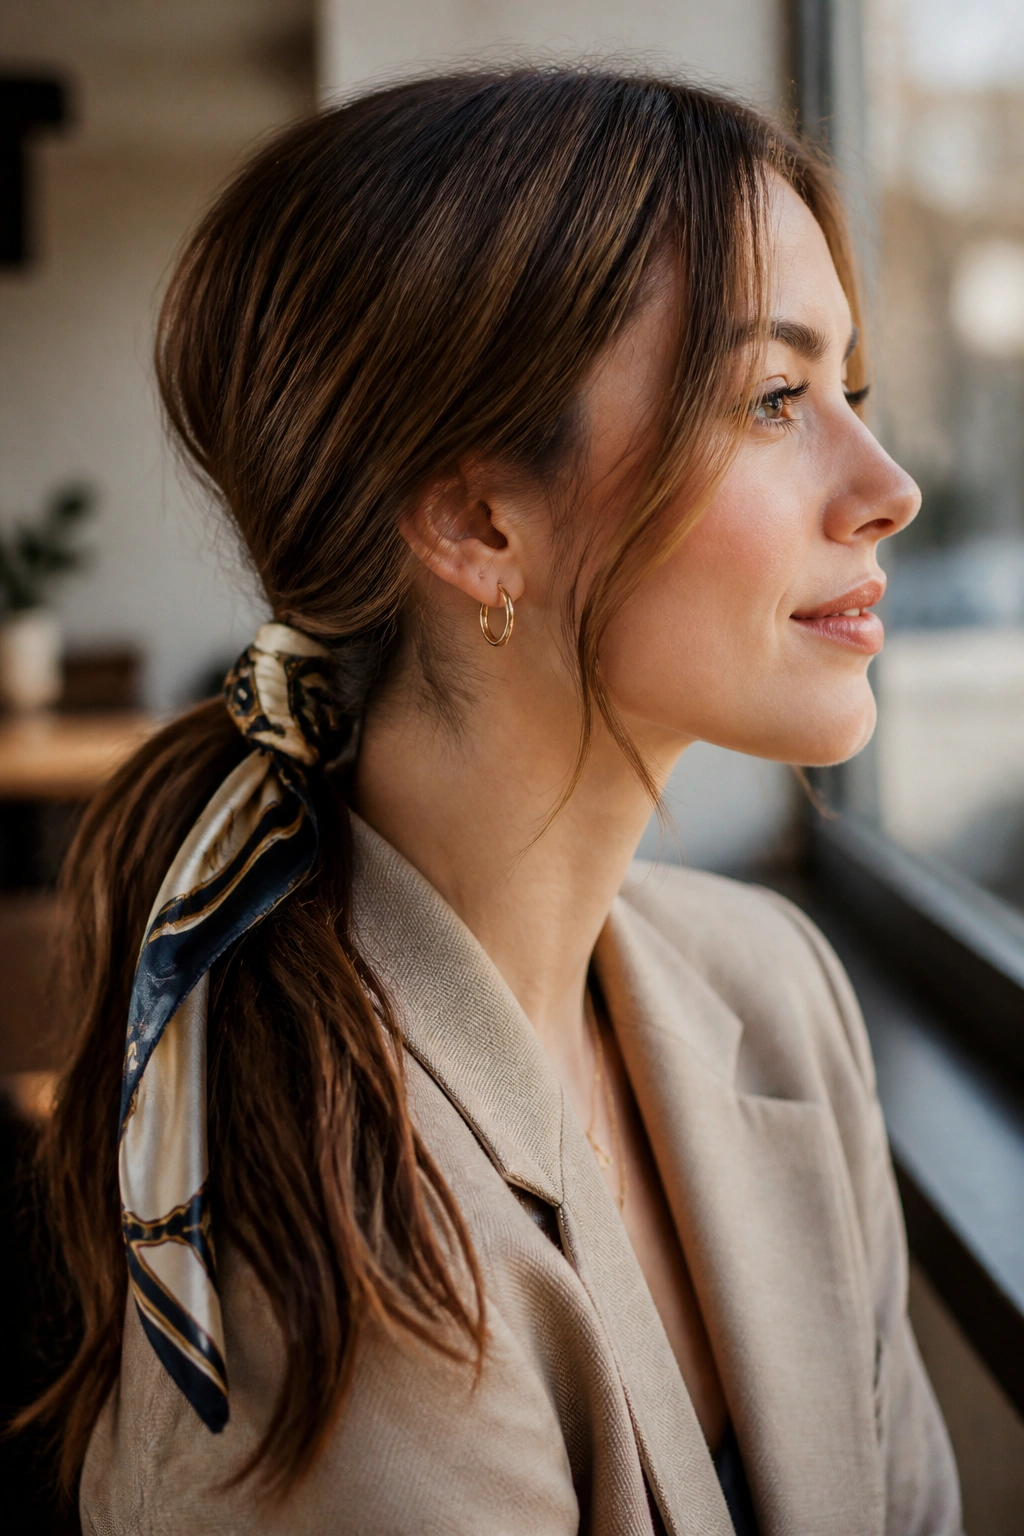
If a metal clip feels too hard-edged, a silk scarf changes the whole read. The ponytail still does the same job, but the scarf adds color, softness, and a little personality without going over the top.
Tie the low ponytail first, then wrap a narrow scarf around the base and knot it slightly off-center. A scarf that is about 1 to 2 inches wide works better than a huge one because it stays tidy and does not overwhelm the style. Let the ends hang short or tuck them under the knot if you don’t want them catching in your coat.
What works best
- Silk or satin scarves glide over hair more easily than cotton.
- Solid colors look sharper for office settings.
- Small prints can work if the rest of your outfit is quiet.
- Keep the scarf knot flat so it does not dig into the back of your neck.
This is a nice option when the outfit feels plain and you want one small detail to carry the look. It’s still workplace-appropriate, but it has a little more mood than a bare elastic. That’s sometimes all you need.
13. The Deep Side-Part Low Ponytail
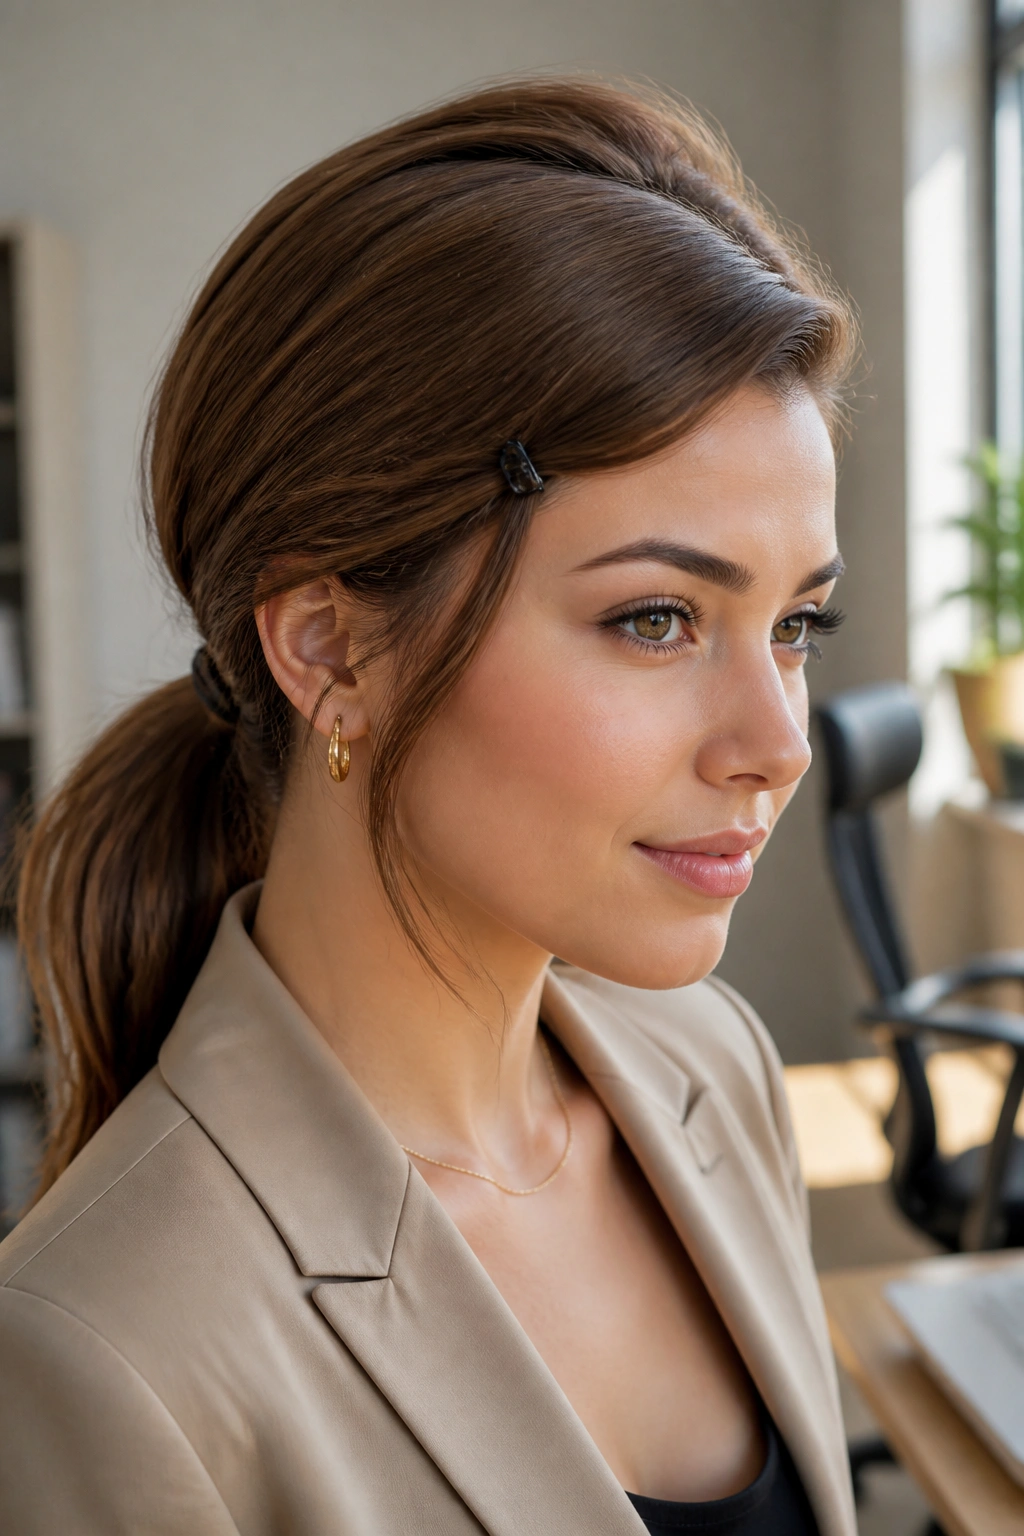
A deep side part gives a low ponytail more shape at the front, and it can be a good fix when the crown looks tired or the hair has lost its lift. The part itself does half the work.
Use the tail of a comb to draw the part from the outer arch of one eyebrow toward the crown. Sweep the heavier side back across the head, then secure the ponytail low and slightly off-center. The sweep creates a soft diagonal line that flatters the forehead and keeps the style from looking too formal.
It helps to clip the front section for a minute while you gather the rest. That keeps the part from drifting while you work on the base. If your hair is stubborn, a little dry shampoo or light spray at the roots can give the part some staying power.
This is one of my favorites for hair that has grown out a bit between trims. The side part hides uneven layers better than a center part does, and it can make a basic ponytail feel more deliberate without changing the whole shape of the style.
14. The Tucked-In Low Ponytail
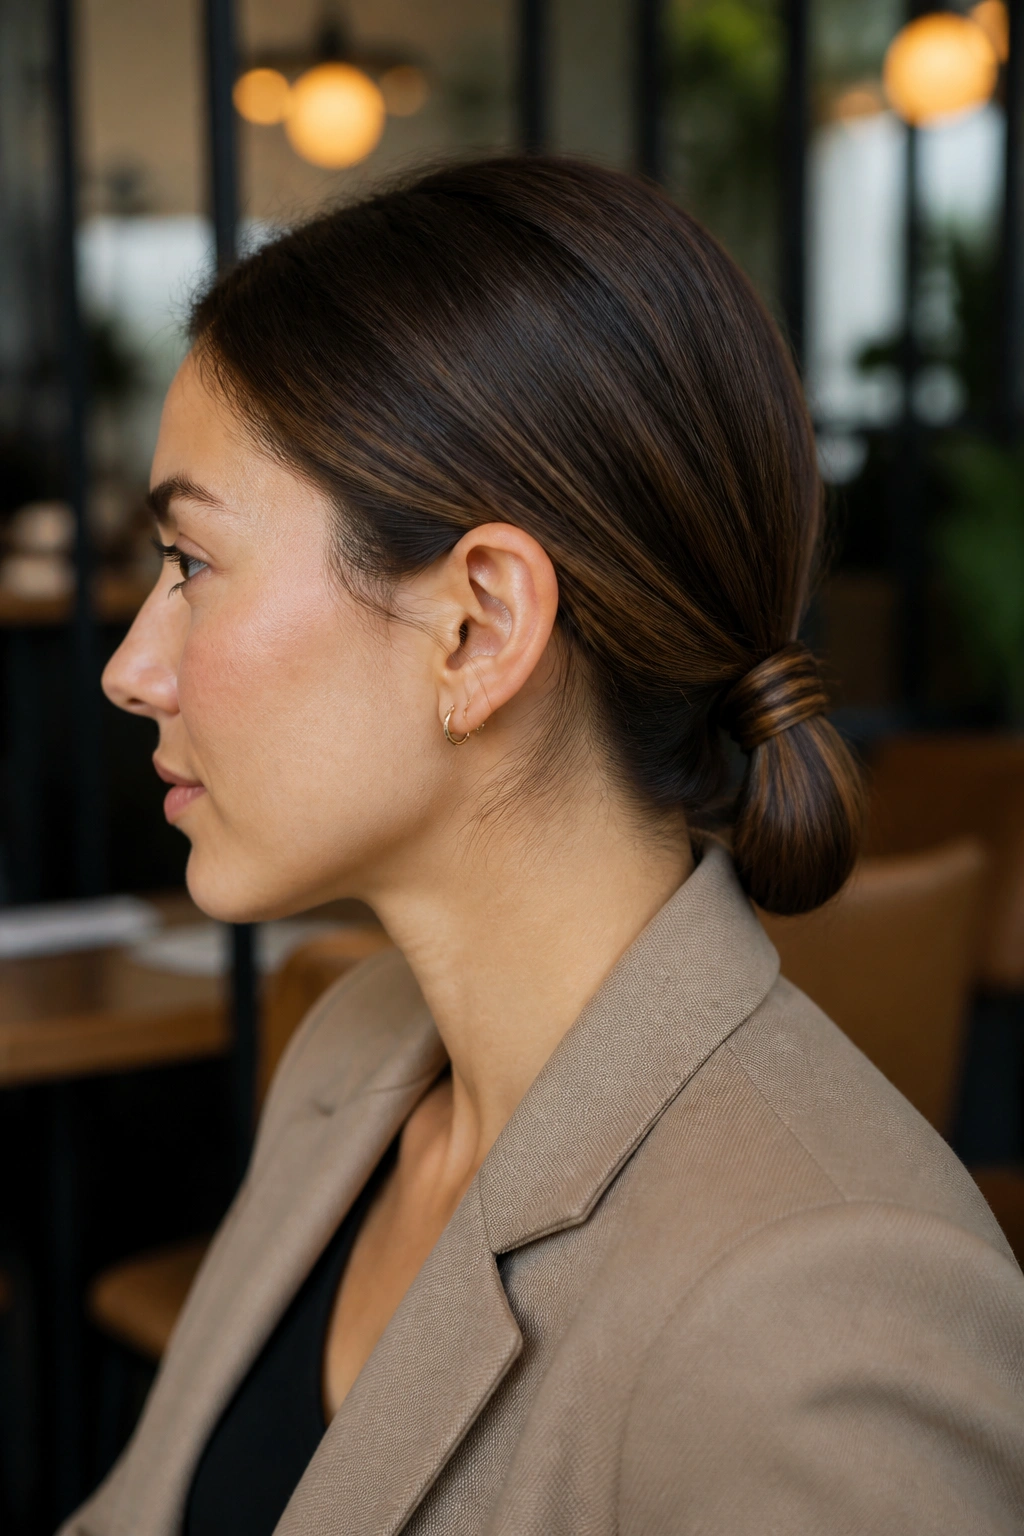
A tucked-in low ponytail is a good fix when you want a neat shape and your ends are a little dry or frayed. Instead of letting the tail hang straight, you fold or tuck it upward so the length sits closer to the nape.
Start with a low ponytail, then create a small opening just above the elastic and loop the tail through once, almost like a topsy tail. Keep pulling until the folded section sits snugly and the ends are hidden or mostly hidden underneath. Secure the tucked part with two or three bobby pins if needed.
What makes it work
- Best on medium-length hair or long hair with a clean finish.
- Use pins that match your hair color.
- Smooth the top first so the tuck looks intentional.
- Leave the folded section a little loose if you want a softer shape.
This style is especially useful under high collars, structured jackets, or anything that rubs at the back of the neck. The tucked shape stays out of the way and still looks neat from the side. It’s one of the easiest ways to make old ends disappear.
15. The Low Ponytail With a Barrette Stack
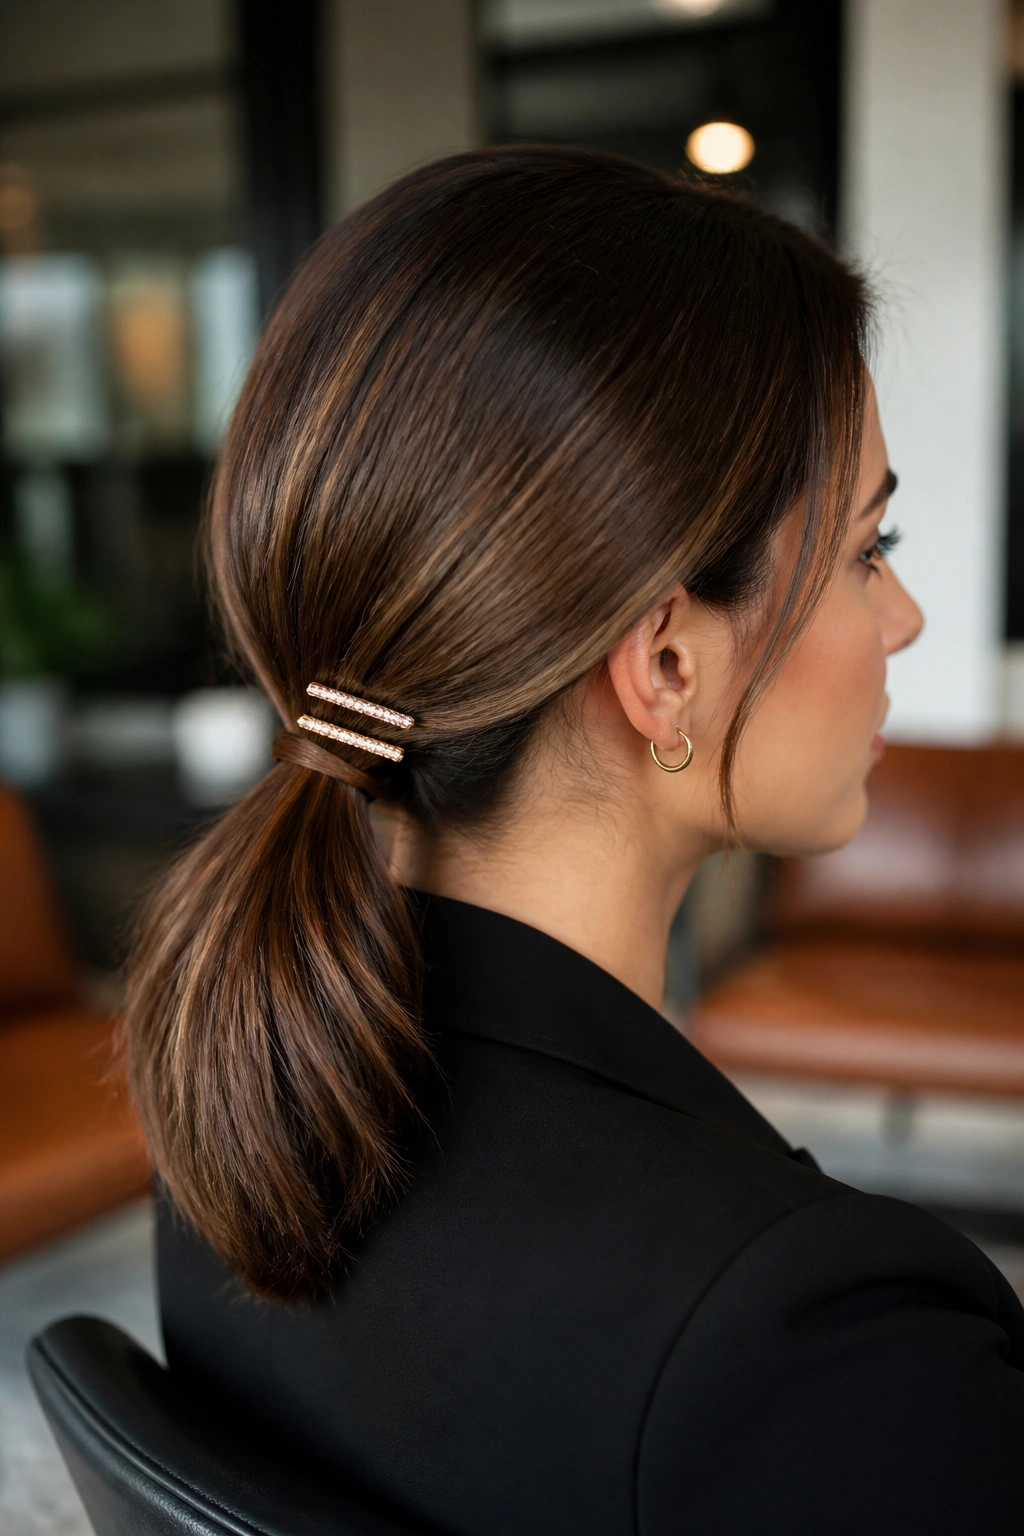
Two slim barrettes can turn a plain ponytail into something that feels finished. The trick is to keep the hardware quiet and place it where it adds shape instead of clutter.
Tie the ponytail low, smooth the crown, then stack two narrow barrettes vertically on one side of the base or just above the elastic. A small metal clip works well, but tortoiseshell or matte resin can look softer against darker clothing. Keep the spacing tight so the clips read as one detail rather than a messy cluster.
This style is handy when you want a little shine but do not want to wrap hair around the elastic or fuss with braids. It also stays simple enough for office settings, which matters more than people give it credit for. Too many hair accessories start to look like a costume. Two is enough.
If you like a little structure at the sides, this is the one to try on a day with back-to-back meetings. It holds its shape well, sits comfortably against a chair back, and still looks awake by late afternoon.
Final Thoughts
The best low ponytail for work is the one that matches the day in front of you. Some mornings call for a clean center part and a wrapped base. Others want a little softness around the face, a scarf, or a side sweep that keeps the style from feeling too tight.
A good rule: if you are short on time, pick a style that changes one thing well instead of five things badly. A smart part, a smooth crown, and a tidy base do more for a workday ponytail than a pile of extra steps ever will.
And if your hair is acting difficult, don’t fight every strand. Pick the version that works with the texture you already have, secure it cleanly, and move on with your day. That’s usually where the best-looking hair comes from anyway.
