



Nothing gives away a weak hairstyle faster than the tiny ache of a pin slipping out at hour three. You start the day feeling tidy, then one side loosens, the crown lifts, and by late afternoon you’re quietly negotiating with your own hair in a bathroom mirror.
The best updo hairstyles that hold all day usually don’t rely on luck. They lean on smart sectioning, enough grip at the roots, and pins placed where the hair actually wants to stay. That’s the part people miss when they chase a pretty photo and skip the structure underneath.
Freshly washed hair can be slippery. Second-day hair tends to cooperate better, especially if you add a little dry shampoo or texture spray at the roots before you start twisting, braiding, or coiling.
Some of the styles below are sleek and polished. Others are softer and a little undone. All of them are built to survive a long workday, a long dinner, or a wedding dance floor without falling apart before you’re ready.
1. Sleek Low Chignon
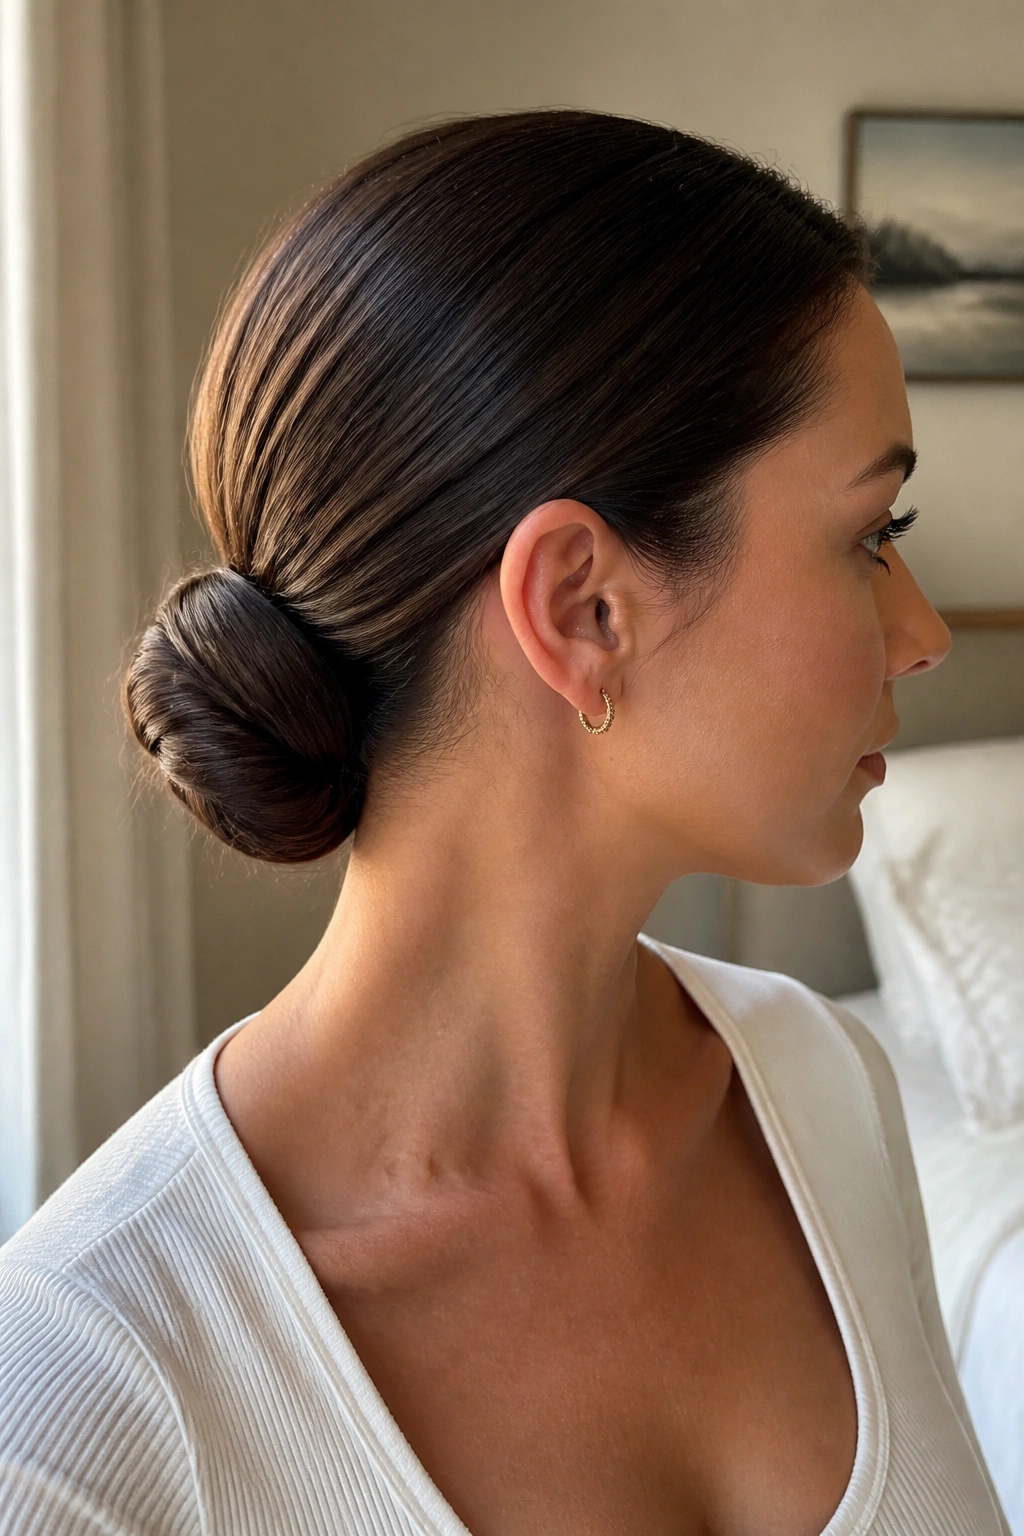
A sleek low chignon is the style I trust when I want hair to look calm, not fussy. It sits close to the nape, which means there’s less movement for the shape to fight against as the day goes on.
Why It Stays Put
The hold comes from the low placement and the tight first ponytail. Once the base is secure, the twist only has one job: stay wrapped. That’s easier than it sounds.
- Smooth the roots with a light cream or serum.
- Build a low ponytail at the nape.
- Twist the length into a compact coil.
- Pin the coil under itself in two directions.
Best trick: slide one pin in, then a second pin across it in an X. That tiny crossing buys you a lot of staying power.
2. French Twist with Hidden Pins
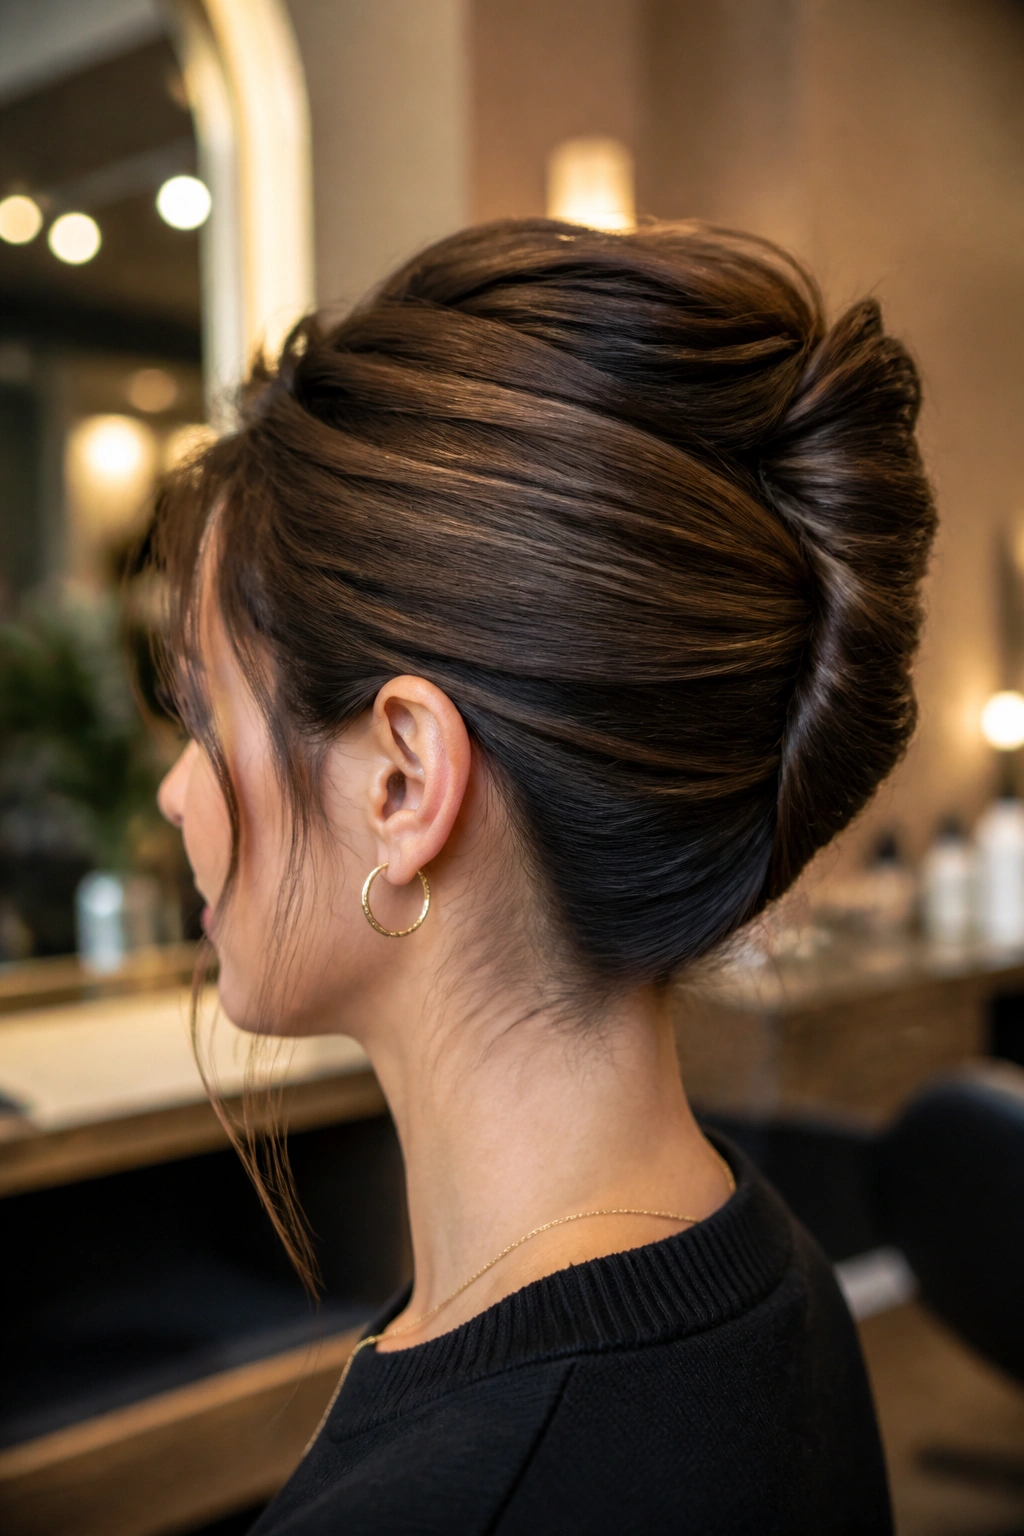
The French twist looks delicate, but it can be one of the most stubborn styles in the room. It’s a little like architecture for hair: tall, narrow, and surprisingly stable when the seam is pinned correctly.
What keeps it from collapsing is the roll itself. Hair is folded upward and inward, so the outer layer keeps pressing the inner layer into place. If your hair is very silky, a touch of texture spray at the roots helps more than people expect.
Start by gathering the hair low on one side, twist it upward, then tuck the ends into the roll. Use long pins along the seam, not just at the top. That seam is the whole game. Miss it, and the style loosens. Catch it, and the twist can sit cleanly through a full day without drama.
3. Braided Crown Bun
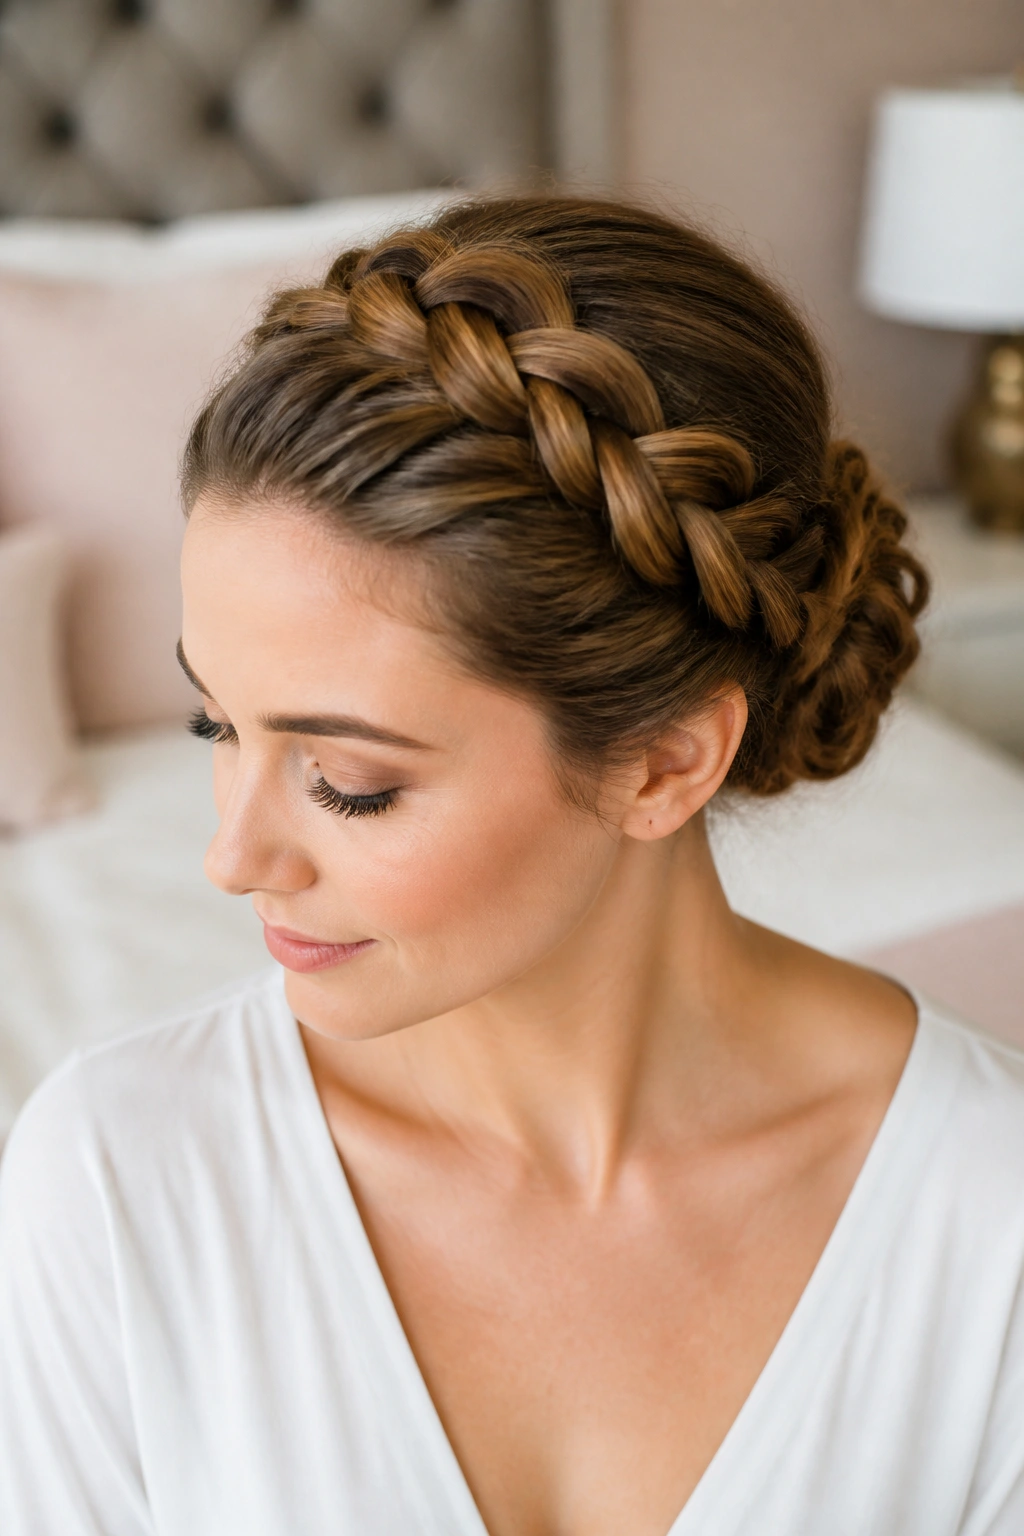
Why does a braided crown bun outlast a plain bun so often? Because the braid acts like a built-in headband before it ever reaches the bun.
The crown braid keeps shorter layers from escaping around the face, and it gives the bun a bit of scaffolding at the back. That matters on windy days, or on days when you keep pulling your hair back with your fingers and hoping for the best.
How to Wear It
Braid from behind one ear, travel along the hairline, and wrap toward the opposite side. Gather the remaining lengths into a bun at the nape, then tuck the braid tail underneath. If your hair is fine, pinch the braid slightly wider as you go so it has more surface area to grip pins later. A soft mist of spray over the finished braid helps, too.
4. High Ballerina Bun
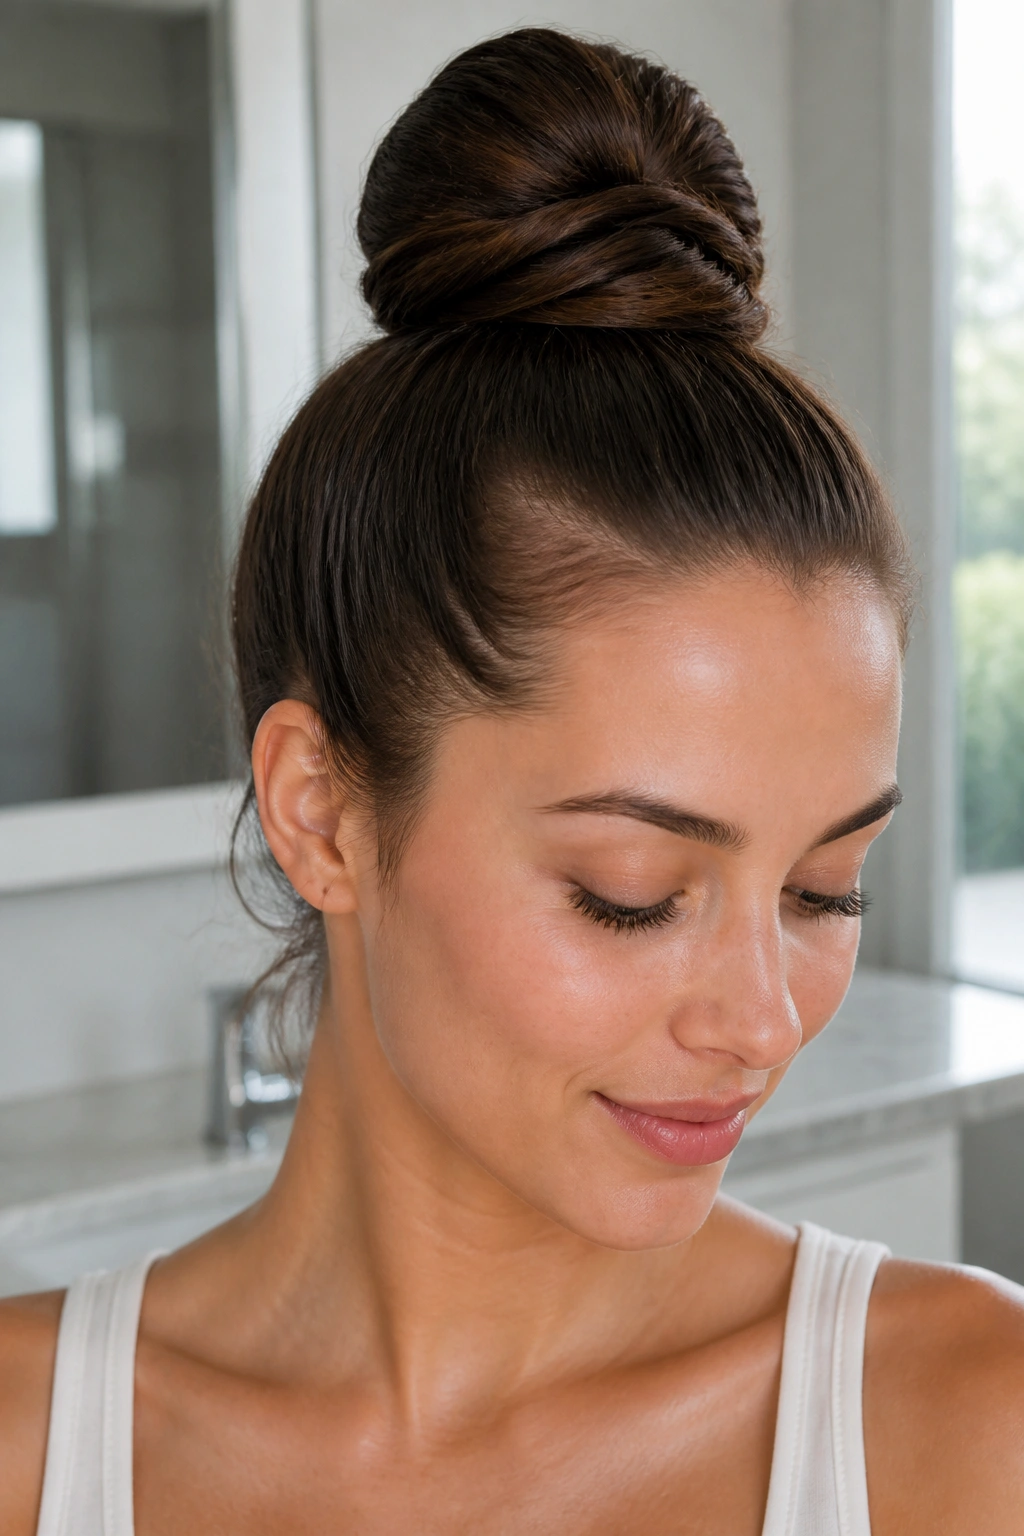
Picture a morning when you need your hair off your neck before you even finish coffee. That’s where the high ballerina bun earns its keep.
This bun holds because the center of gravity is small and high. The hair is pulled into a tight ponytail first, then wrapped around a strong base, often a donut or a doubled elastic. Once the outer coil is smooth, the pins do the real work underneath.
- Use a firm elastic, not a floppy one.
- Make the ponytail at the crown, not halfway down.
- Wrap the length evenly so the bun doesn’t lean.
- Pin at the base, not only on top.
- Finish with light spray under the bun.
The style looks clean, but the secret is tension at the base. That’s the part that keeps it from sagging by lunch.
5. Double Dutch Braid Bun
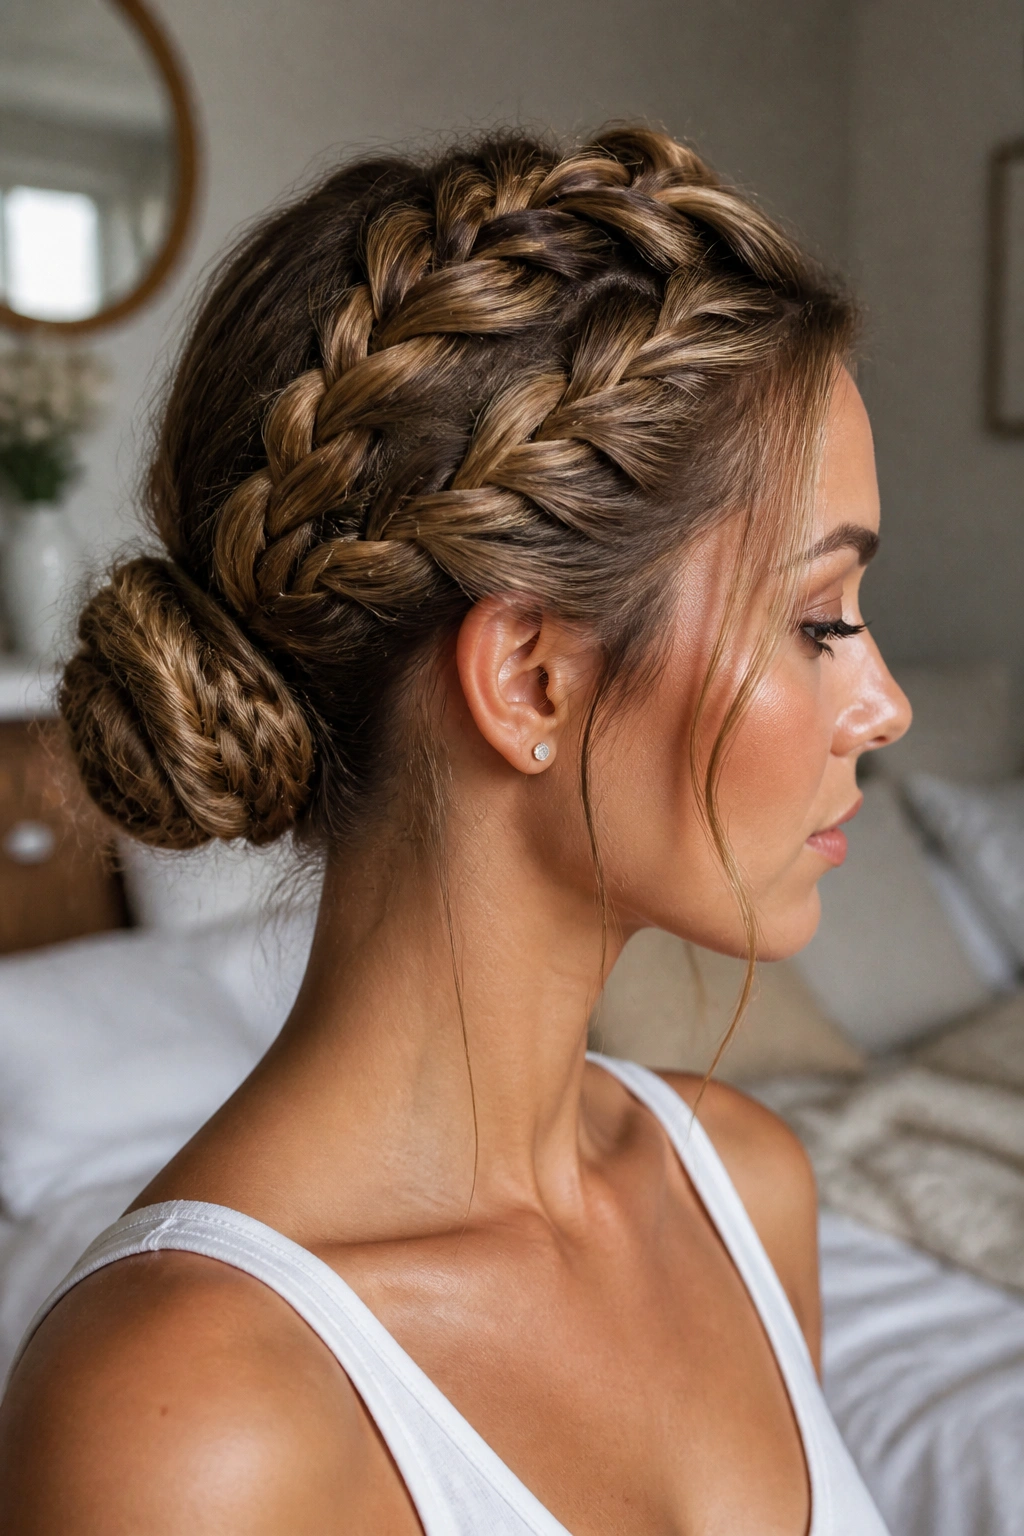
Two braids give you something a single bun never quite matches: grip from both sides of the head. That’s why this style feels almost unfair on busy days.
The Dutch braids feed texture straight into the bun, which means the hair already has structure before it gets wound. Thick hair loves this. So does hair that slips out of ordinary pins. The braids create lanes for the ends to tuck into, and that makes the final coil hold much better than a soft twist.
I like this one when the day involves movement. Long walks, errands, an event where you’re in and out of chairs, even travel. It doesn’t feel fragile. It feels built.
The only real downside is that it takes a little more time than a plain knot. Worth it. Every time.
6. Bubble Ponytail Knot
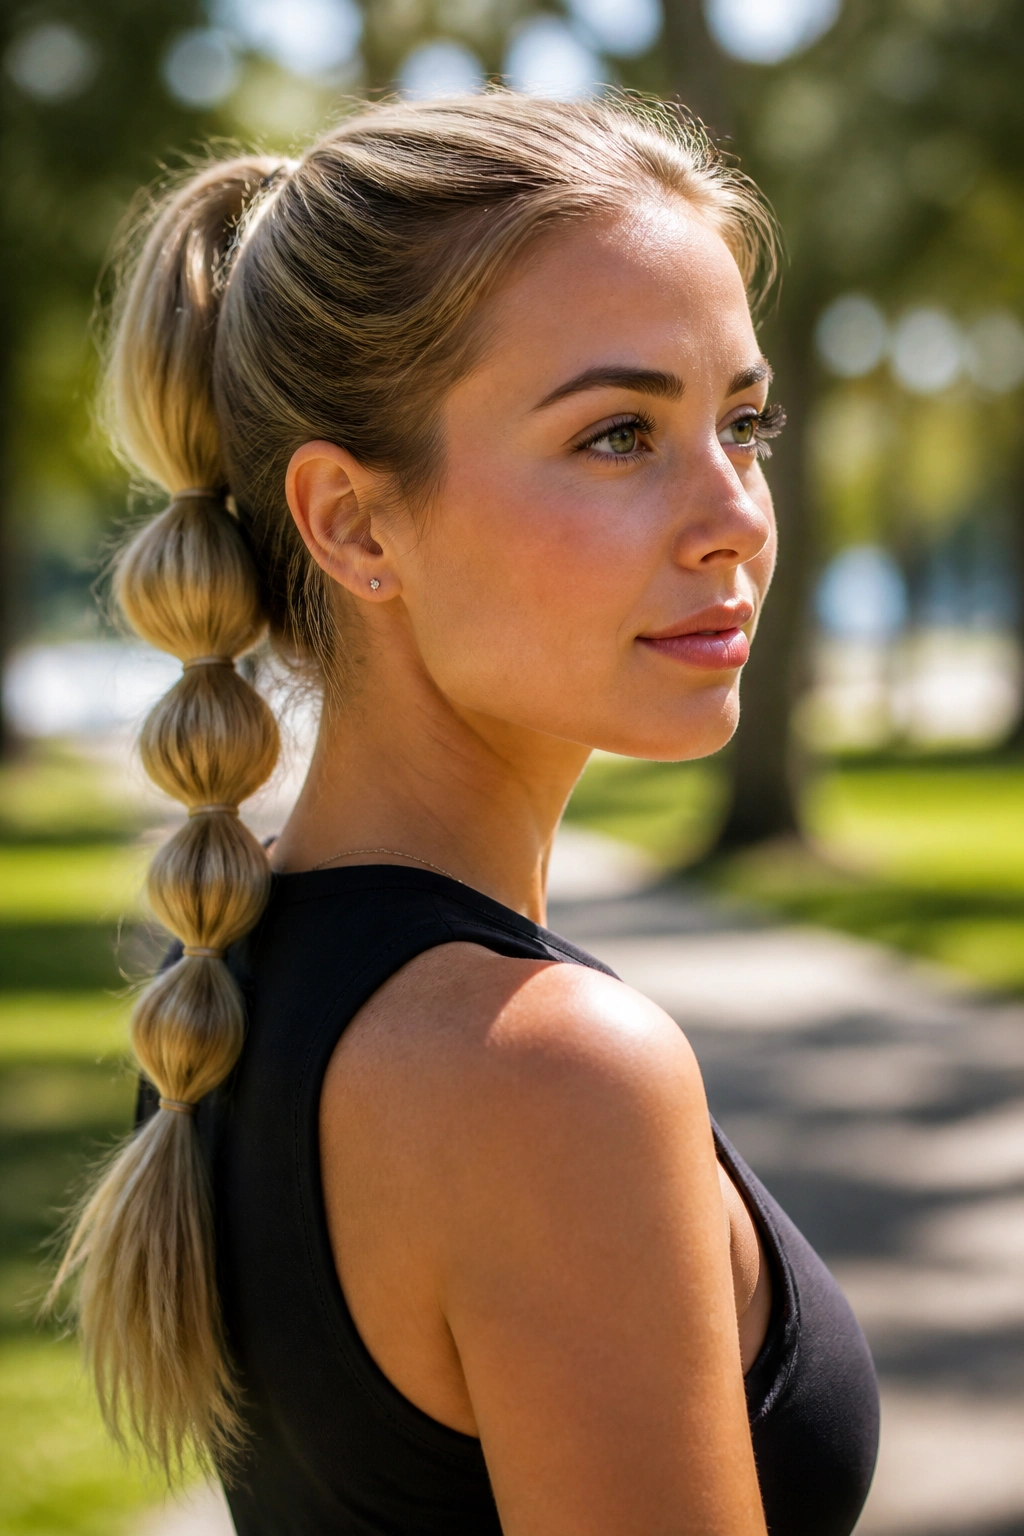
Unlike a standard ponytail, the bubble version gives you a series of small anchors down the length. That matters when you turn the tail into a knot, because the elastics keep the hair from sliding as one smooth rope.
It’s a good choice if you hate braiding but still want something that reads styled. Start with a ponytail, add small elastics every 1 to 2 inches, then gently pull each section wider so it looks rounded. Fold the tail upward or around the base and pin it into a knot.
This style likes long hair best, though medium length can work if the bubbles are tight. If you want a little more polish, wrap a thin strand around the first elastic and hide it with a pin. Tiny move. Big payoff.
7. Gibson Tuck
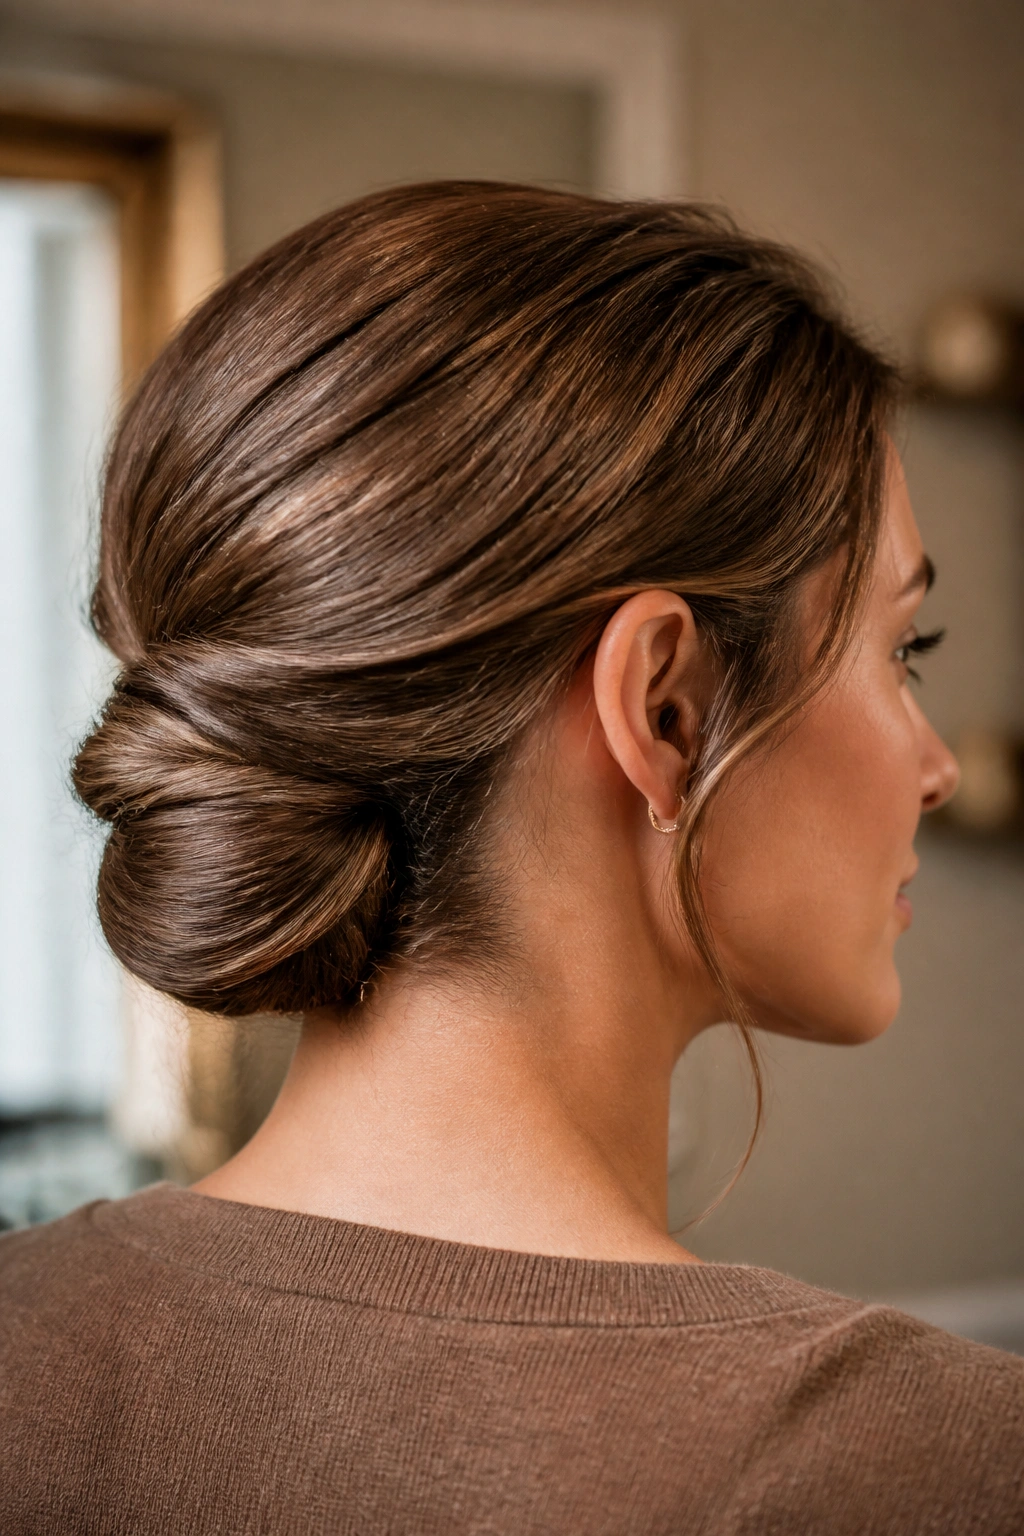
A Gibson tuck has a kind of old-school poise that I never get tired of seeing. It looks soft, but the tucked roll sits close to the head, which makes it less likely to unravel than it first appears.
The style works especially well with shoulder-length hair, where a full bun can feel bulky. Hair is rolled upward into the hollow above the nape, then pinned flat along the curve. The trick is not to shove the whole length in at once. You build the tuck gradually, like rolling a towel.
What Helps It Last
A little texture at the roots helps the roll grip. Fine hair may need a couple of extra pins, and very slippery hair does better with a thin hairnet hidden inside the tuck. That sounds fussy. It isn’t. It’s the difference between a style that stays neat and one that starts sagging at the back before dinner.
8. Rope-Braid Low Bun
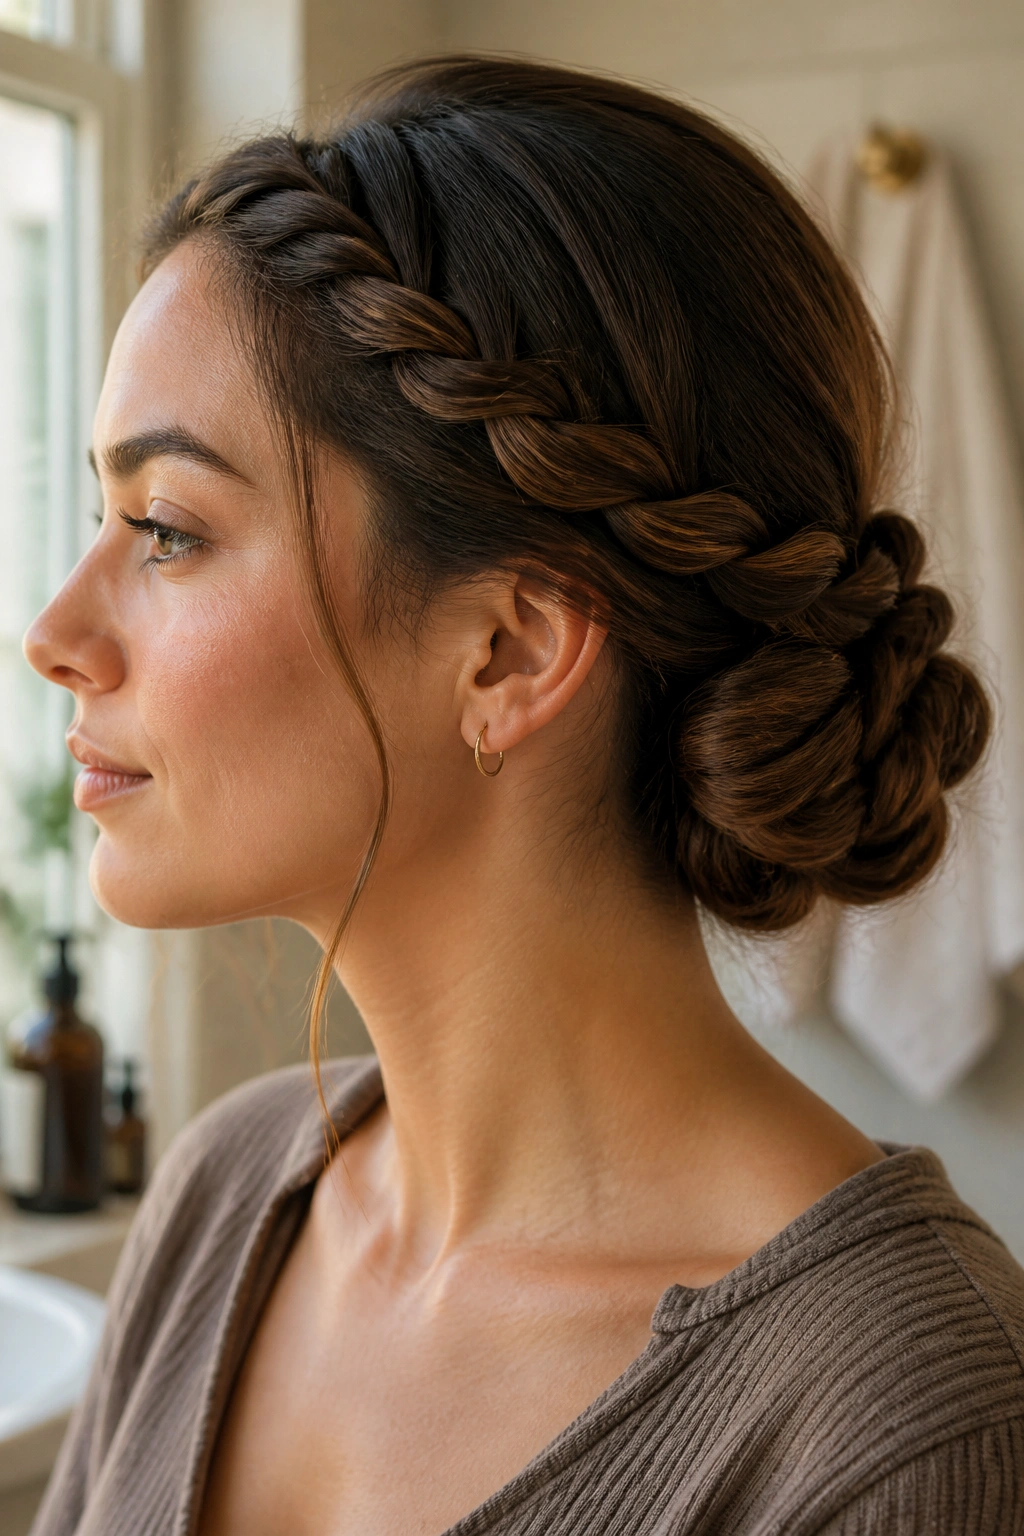
A rope-braid low bun holds because the hair twists around itself in two directions before it ever gets pinned. That gives the style a tight, cord-like shape that resists loosening better than a loose three-strand braid in many cases.
To do it, split the hair into two sections, twist both sections in the same direction, then wrap them around each other in the opposite direction. The result is a rope that has a built-in spring. Coil that rope at the nape, pin the edges, and keep the bun low and compact.
I like this one for medium to long hair that needs a quick fix but not a sloppy one. It’s tidy, it’s sturdy, and it doesn’t need much more than a couple of pins plus a light spray. If your hair is layered, tuck the shortest ends under the coil before you pin the outside.
9. Messy Knot with Anchor Braid
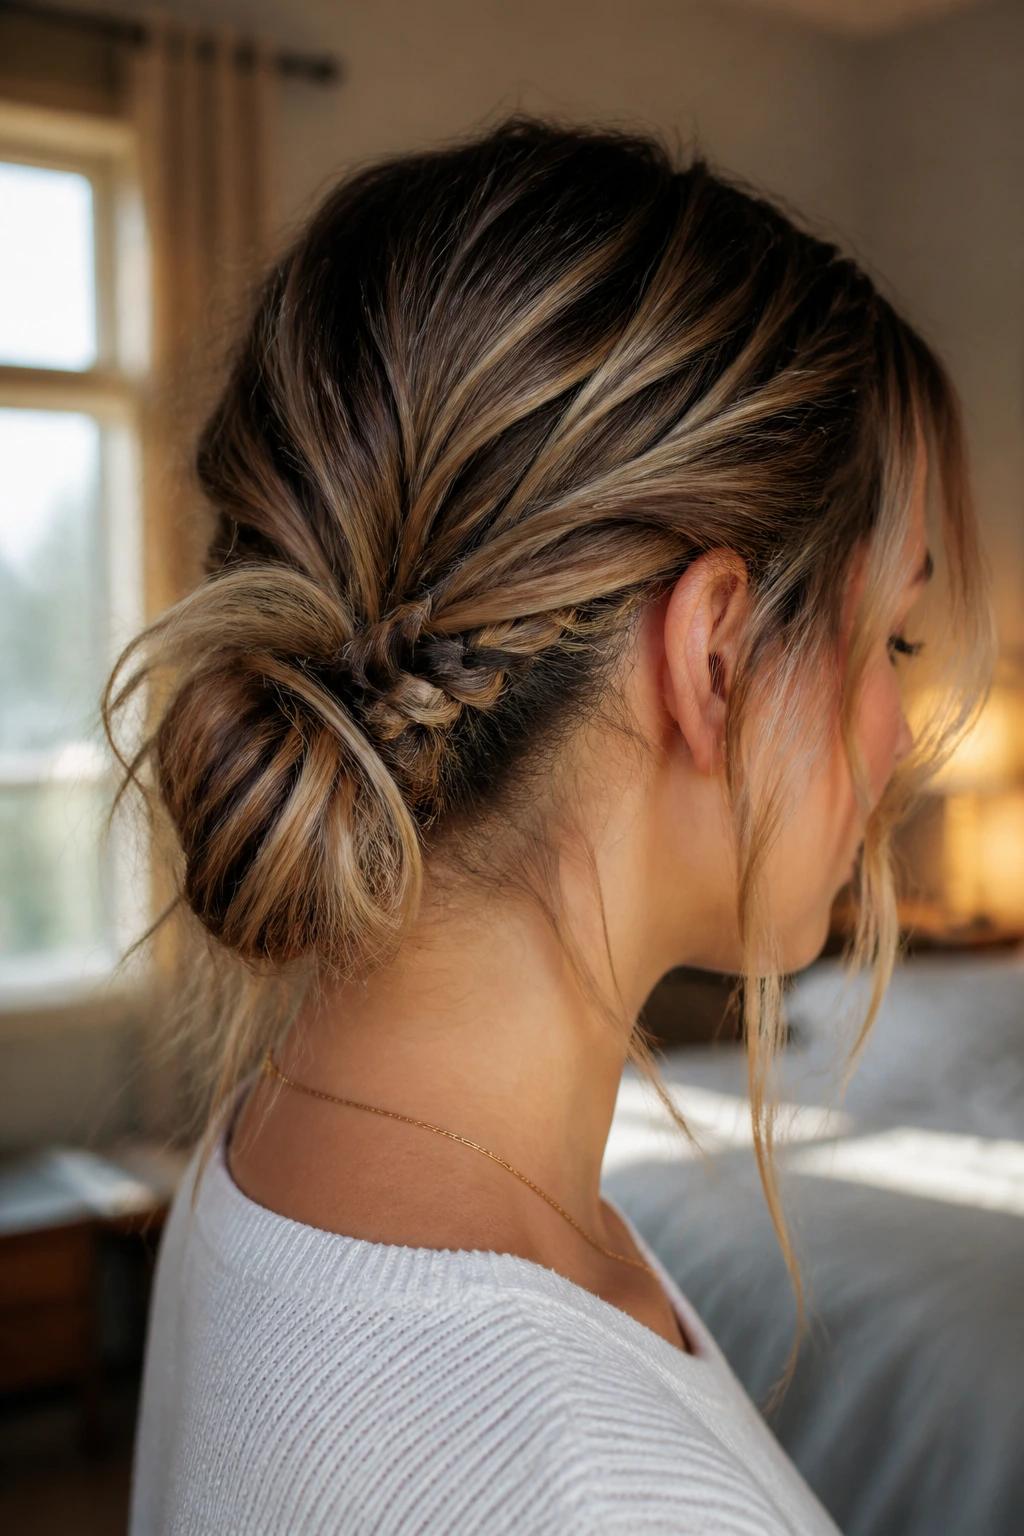
Why does a messy knot fall apart less when it’s built on a braid? Because the braid gives the knot something to bite into.
That little hidden braid at the nape is the part nobody sees, and honestly, it does more than the fluffy top section ever will. Braid a narrow strip of hair first, secure the rest into a loose knot, then wrap the braid around the base like a seatbelt.
How to Use It
- Keep the braid small and tight.
- Leave the knot loose enough to look soft.
- Pin the braid tail underneath the knot.
- Pull a few face pieces free only after the base is secure.
This is the style I reach for when I want “done” without “stiff.” It looks casual, but the braid keeps the whole shape from sliding down the back of the head.
10. Sleek Ponytail Folded Bun
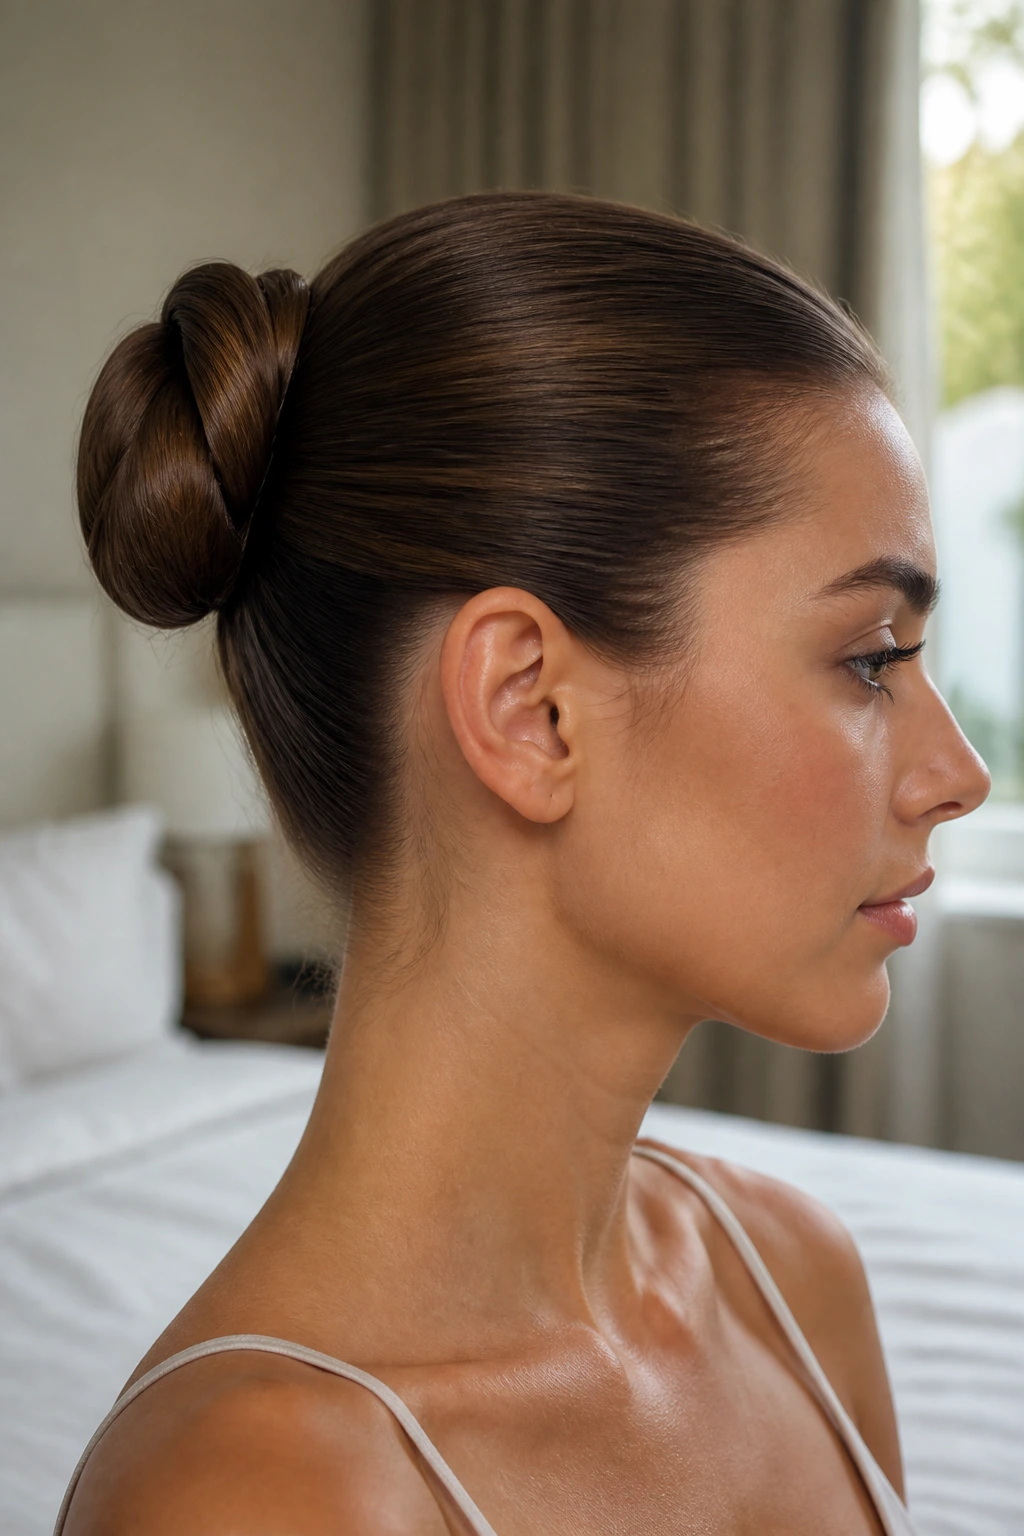
There’s a clean little efficiency to this style. It starts like a ponytail, ends like a bun, and stays put because the fold creates a locked loop rather than a loose coil.
Make the ponytail tight first. Then pull the length halfway through the elastic on the last loop so you get a folded shape with the ends tucked back toward the base. Wrap a thin section of hair around the elastic if you want it to look finished instead of gym-ready.
Use two clear elastics if your hair is thick. One usually isn’t enough. A quick pass of spray under the fold helps the underside stay flat, which matters more than people think because that’s where the looseness usually starts first.
11. Halo Braid Tucked Bun
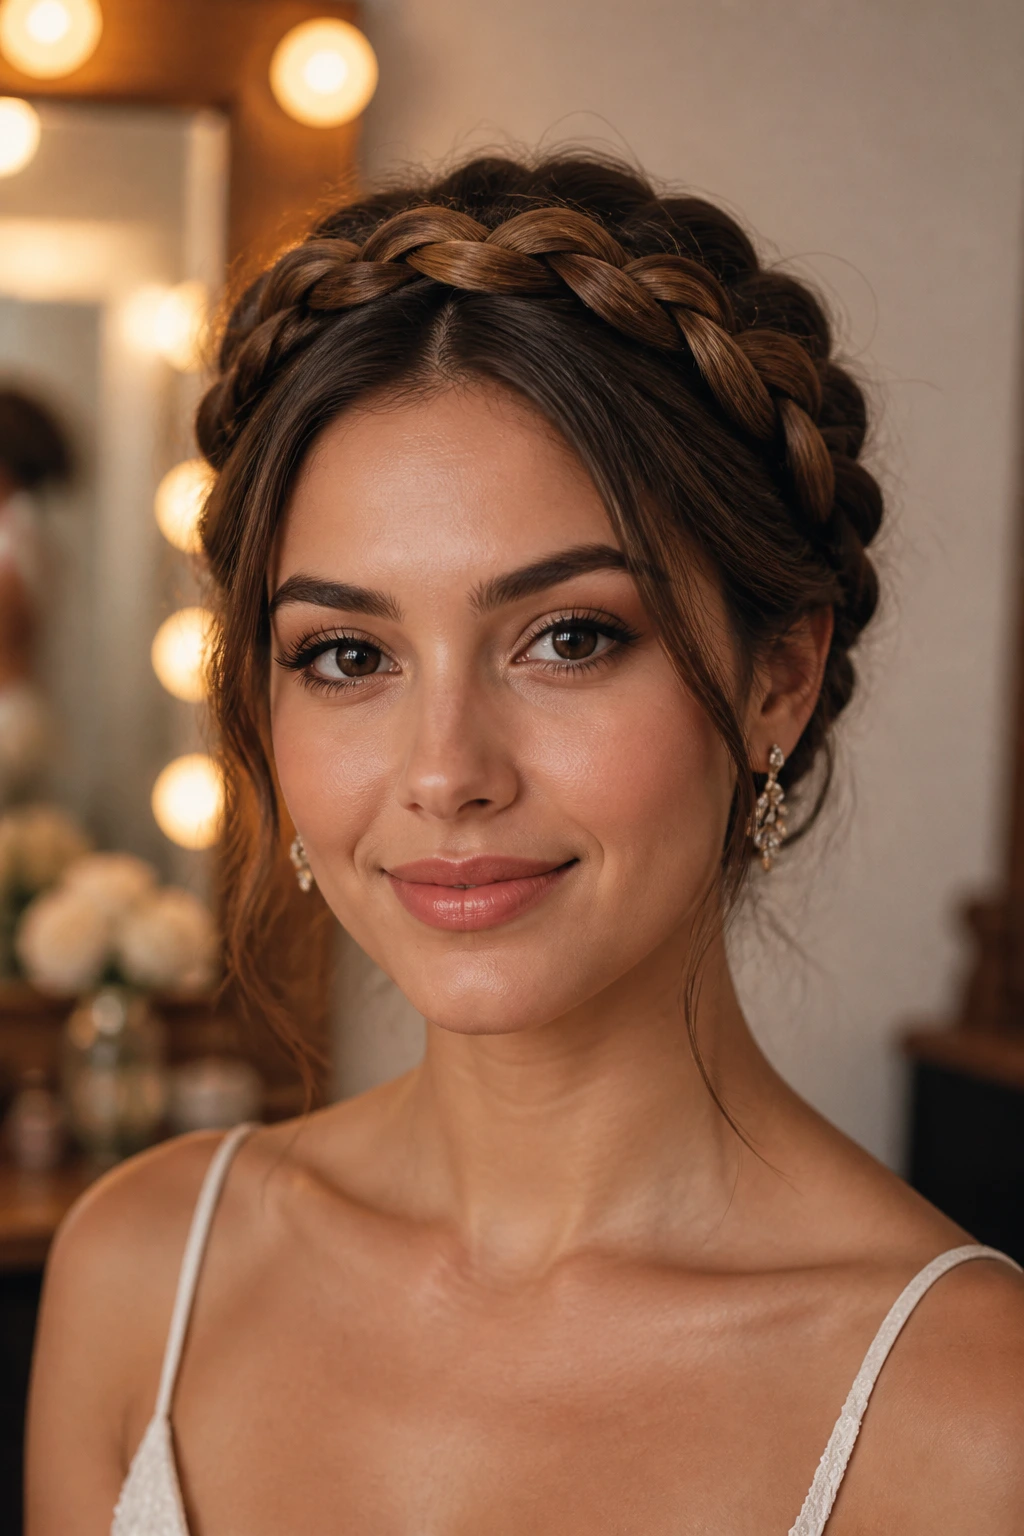
A halo braid does a lot of heavy lifting before the bun even appears. It keeps the front clean, pushes the shape toward the center of the head, and stops shorter layers from popping out around the temples.
That’s why this style wears so well through a long day. The braid frames the face, and the bun at the back acts like the anchor point. You’re distributing hold across the whole head instead of relying on one tight elastic at the nape.
I’d choose this for a dressier event or any time you want hair off the face without losing softness. It reads polished from every angle. If your hair is especially fine, a little powder at the roots before braiding gives the braid more bite and makes the tuck at the back much steadier.
12. Twisted Side Chignon
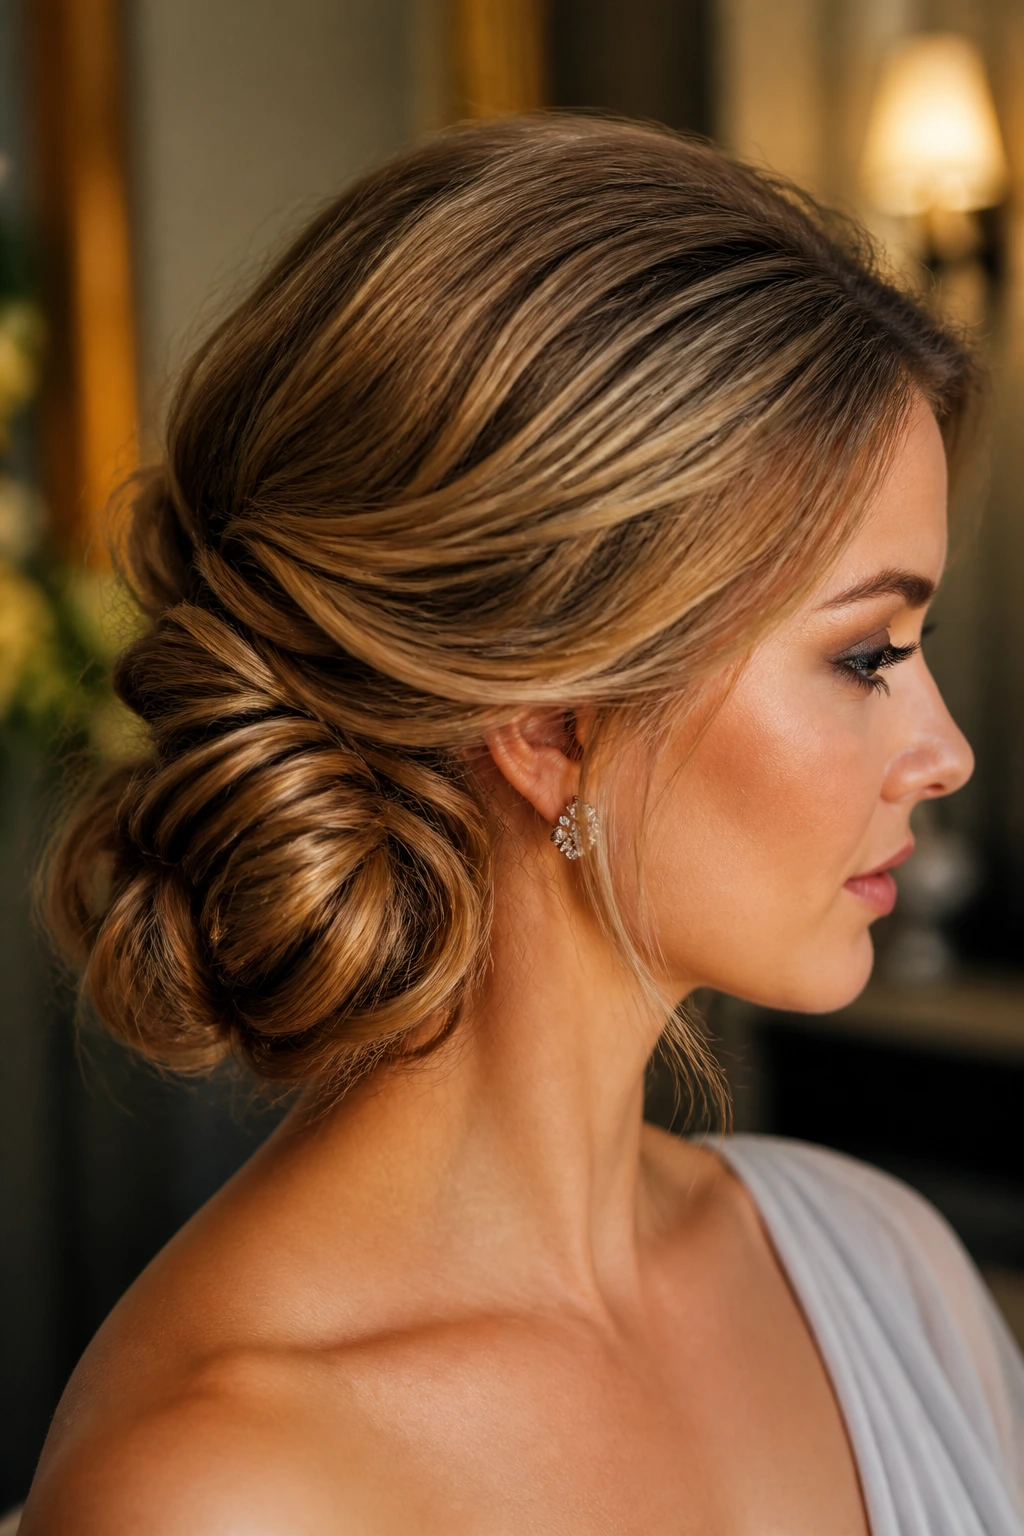
A side chignon gives you control on one side and softness on the other, which is a nice trick when you want the style to feel deliberate instead of severe. It also makes the bun easier to support because the weight sits lower and slightly off-center.
Start with a deep side part, twist the heavier side back toward the ear, and secure the lengths into a chignon near the jawline or just below it. The asymmetry is doing the visual work, so the bun itself can stay compact and strong.
This is a good pick for fine hair that struggles with tall styles. It’s also kind to statement earrings, which is no small thing. A few pins behind the ear and one or two across the base are usually enough, as long as the twist is snug before you coil it.
13. Minimalist Nape Knot
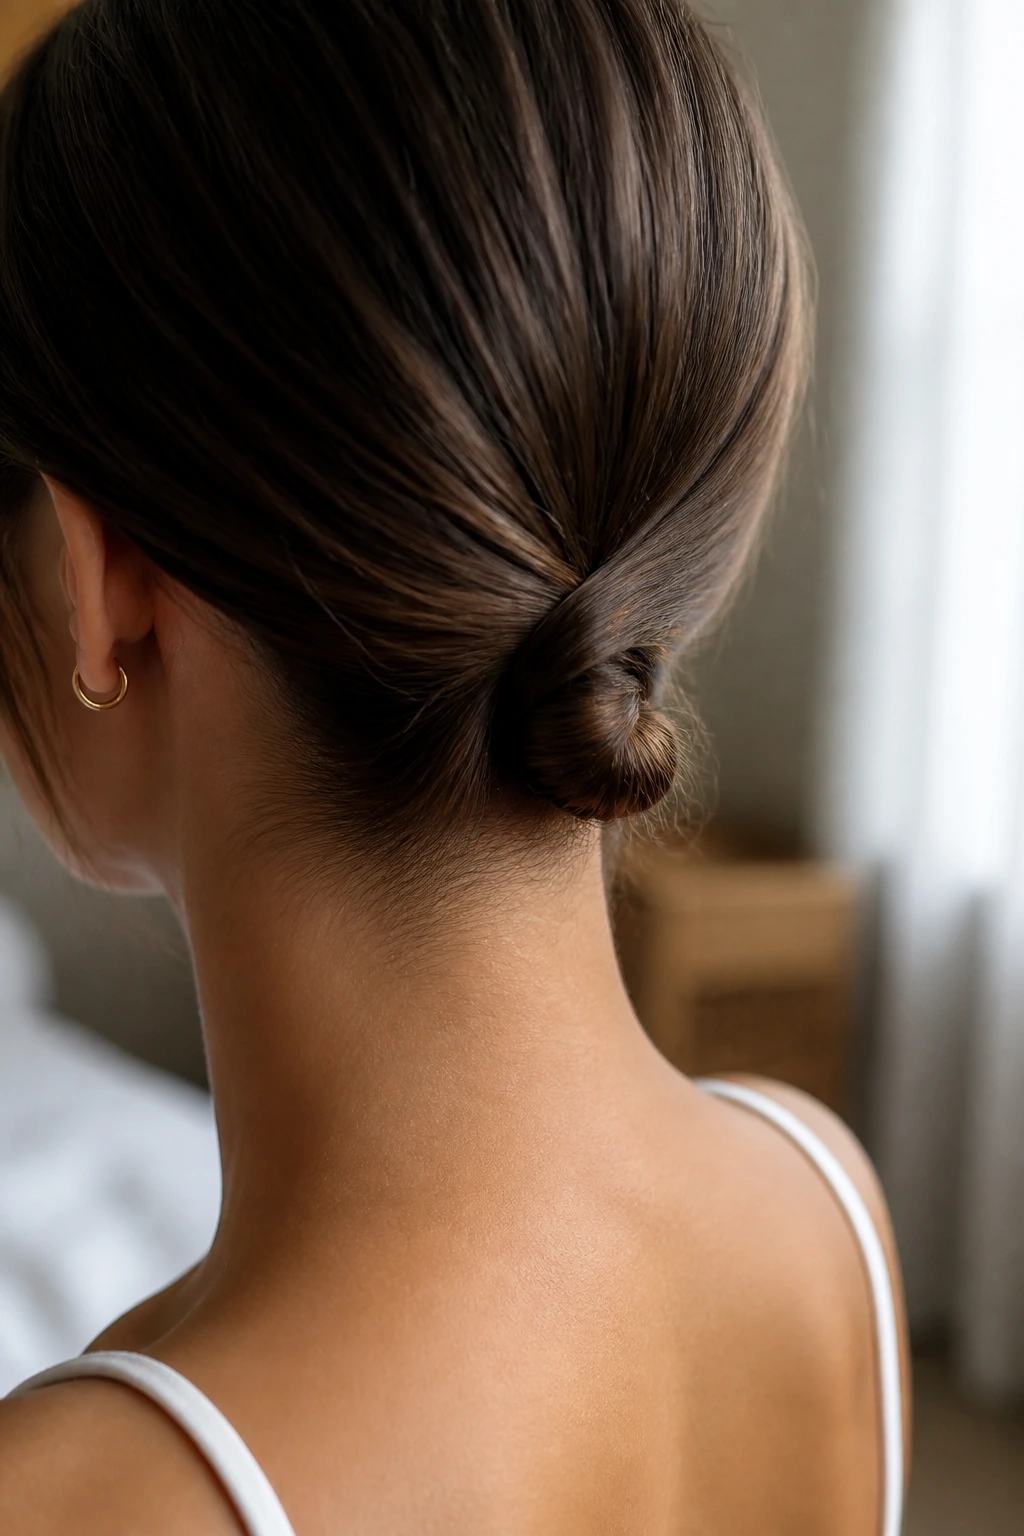
A tiny knot at the nape looks almost too easy to matter. That’s the funny part. Built on tension, it can be one of the strongest low styles in this whole list.
The key is to start with a smooth base and twist only once or twice, not four times. Over-twisting makes the knot bulky and unstable. Keep it close to the head, fold the ends under, and pin flat against the scalp.
Quick Facts
- Works best on short to medium hair.
- Needs a tight first elastic.
- Loves texture spray or dry shampoo.
- Usually holds better when the knot sits just above the collar line.
Small tip: if your hair is layered, pin the shortest pieces first. The rest of the knot can hide them cleanly.
14. Faux Updo with a Claw-Clip Base
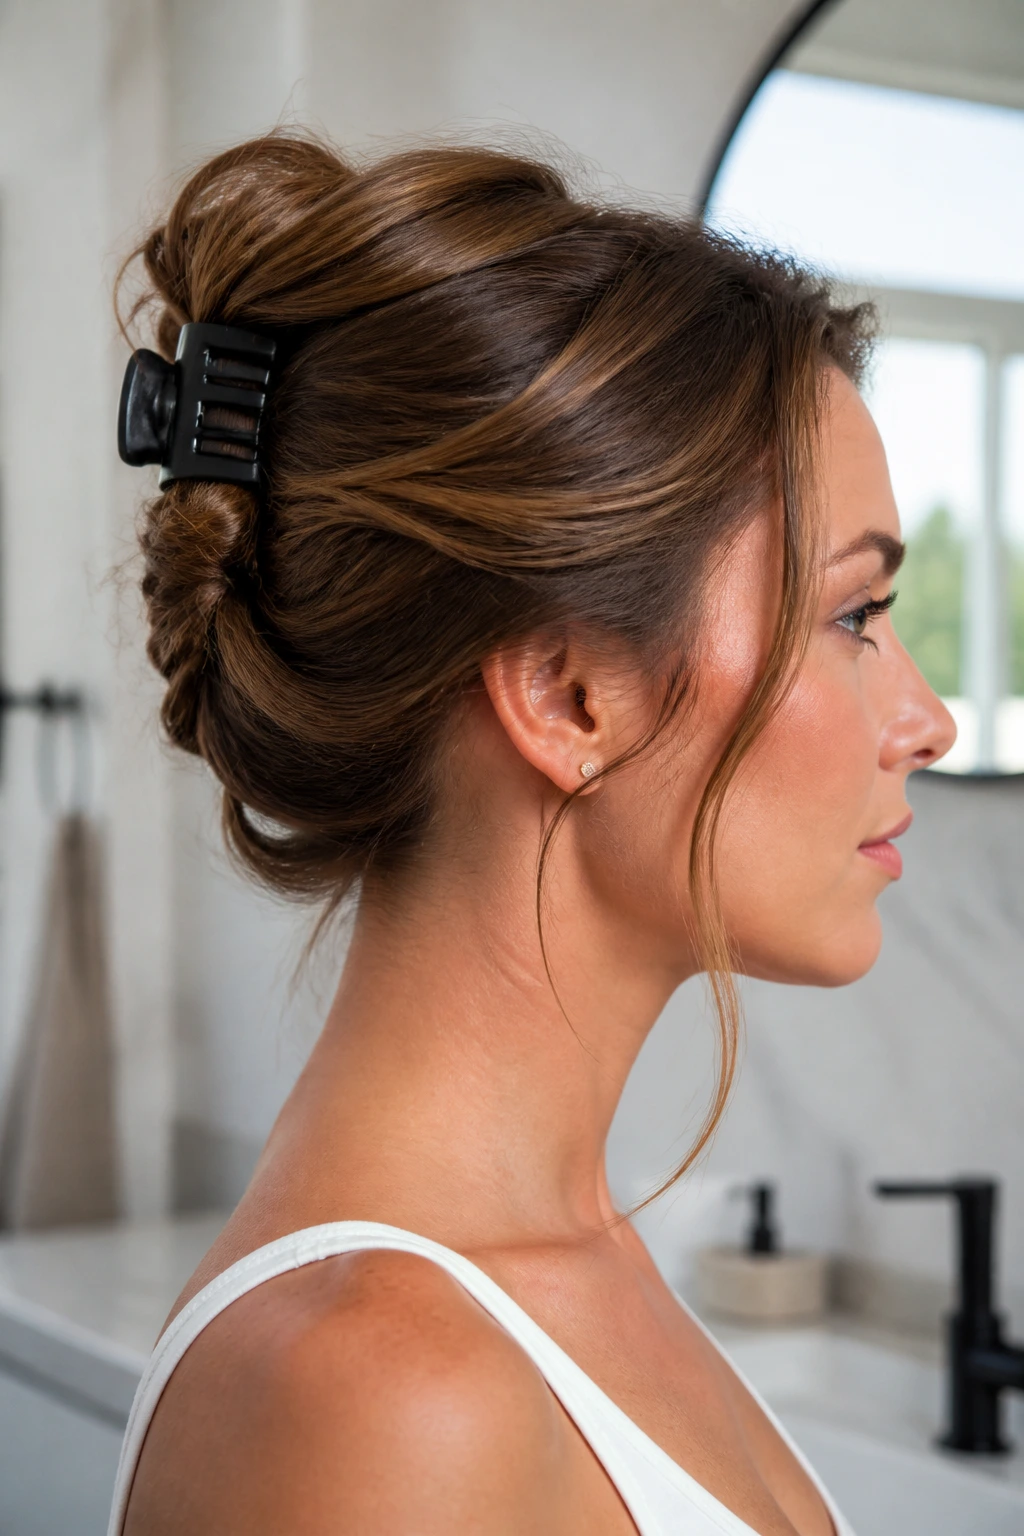
A claw clip isn’t the finished style here — it’s the scaffold. That’s what makes this version more secure than the messy clip-and-go look people rush into.
The clip grabs the center section, then the loose sides get twisted back and pinned around it so the whole shape stops wobbling. The result is a faux updo that looks soft but has a hard little backbone under the surface.
I prefer a matte clip with a strong spring. Shiny plastic ones with slick teeth tend to slide, especially on straight hair. Once the clip is in place, tuck the ends upward, not downward, and pin them just under the clip body. That keeps the weight from dragging the shape open by the end of the day.
15. Braided Ponytail Bun
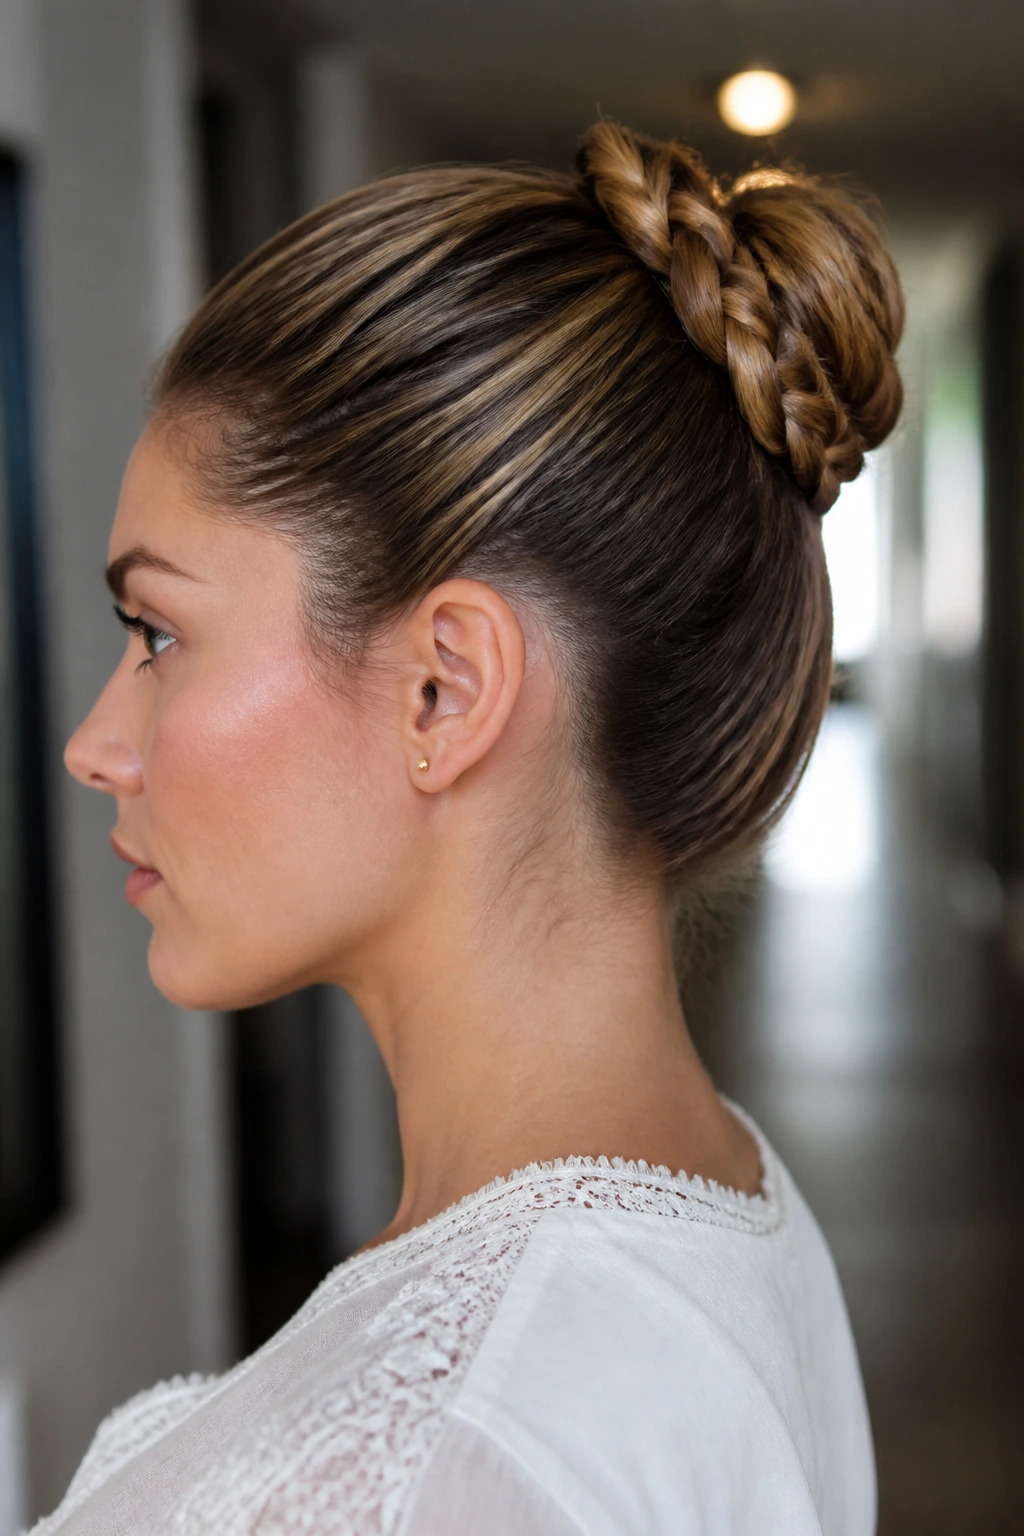
Why is this more reliable than a plain wrapped bun? Because the braid stops the ponytail from turning into a smooth, slippery rope.
Braid the ponytail partway or all the way to the ends, then coil the braid around the base and pin the tail underneath. The braided texture gives the pins something to catch, which is the whole point.
How to Get the Most From It
- Use a tight elastic at the base.
- Braid firmly, but not so hard that the hairline aches.
- Wrap the braid flat against the head.
- Cross two pins at the outer edge of the bun.
- Finish with spray only after the shape feels set.
This style is especially good for travel, long events, or any day when you know you’ll be taking your hair down late and want it to still look decent when you do.
16. Topknot with Crisscross Pins
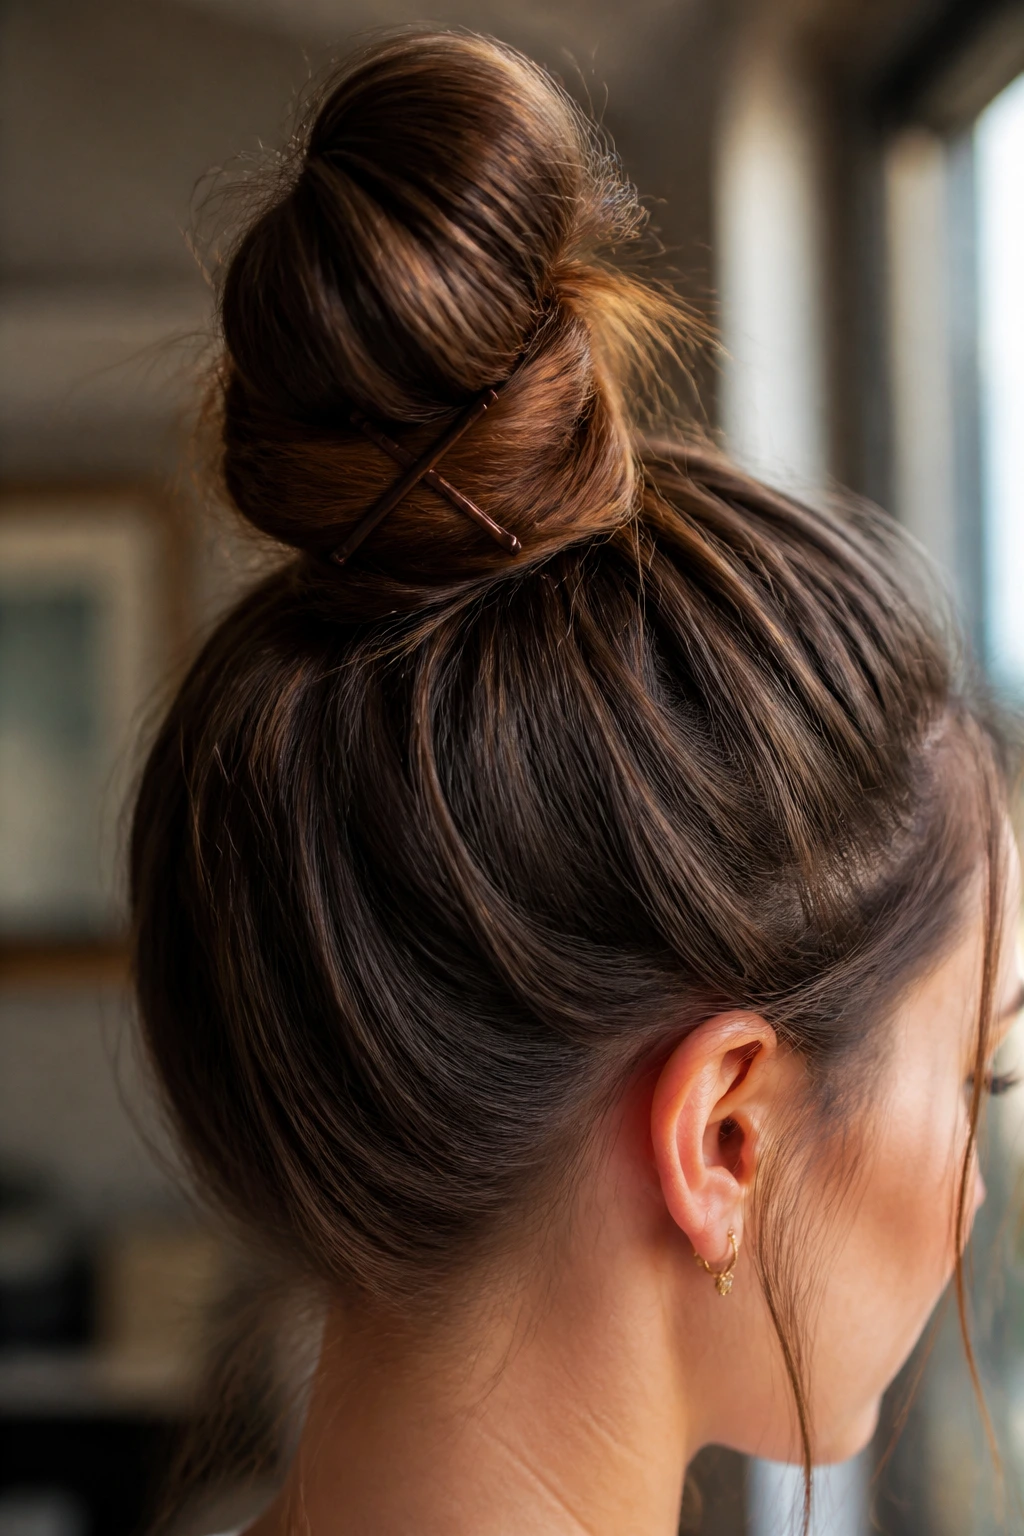
A topknot can drift if it sits on a weak base. The fix is simple: crisscross the pins so the knot can’t rotate.
Start with a high ponytail, twist the tail around itself, and build the knot at the crown. Then place one pin from the outer edge toward the center, and a second pin crossing the first like an X. That tiny move changes everything. It locks the knot in two directions instead of one.
This style is a good choice when you want the face open and the neck bare. It suits thick hair well, though fine hair can wear it too if you rough up the roots first. I’d skip a perfectly slick finish unless your hair is naturally textured; a little grit gives the knot something to hold onto, and that matters more than shine.
17. Scarf-Wrapped Bun
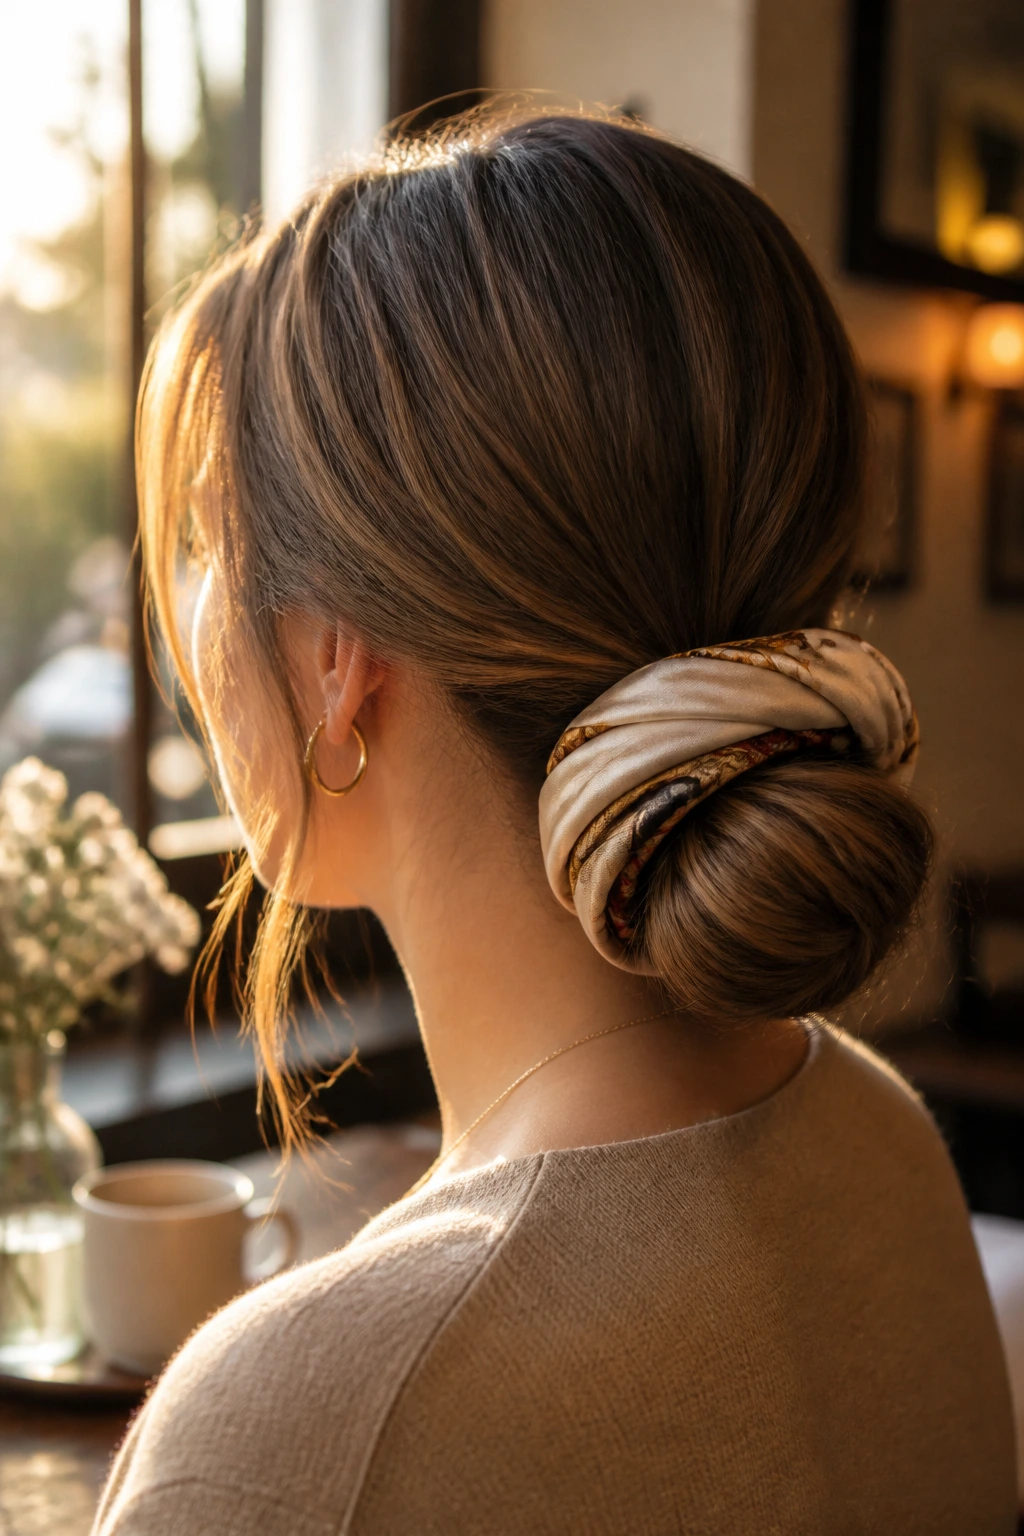
The scarf isn’t only decoration here. It compresses the base, keeps the bun from loosening, and helps pins stay where you put them.
Fold a silk or cotton scarf into a band, wrap it around a low bun or ponytail, and knot it snugly under the hair rather than on top of the most visible section. The scarf should sit close to the head, almost like a soft belt. If it rides too high, the style starts to look puffy instead of controlled.
This is a smart option for days when your hair is a little past its best and you still want a finished shape. It also works well with medium hair that tends to fall flat on its own. Use the scarf to hide the elastic, then let the bun do the quiet work underneath.
18. Braid-Wrapped Low Bun
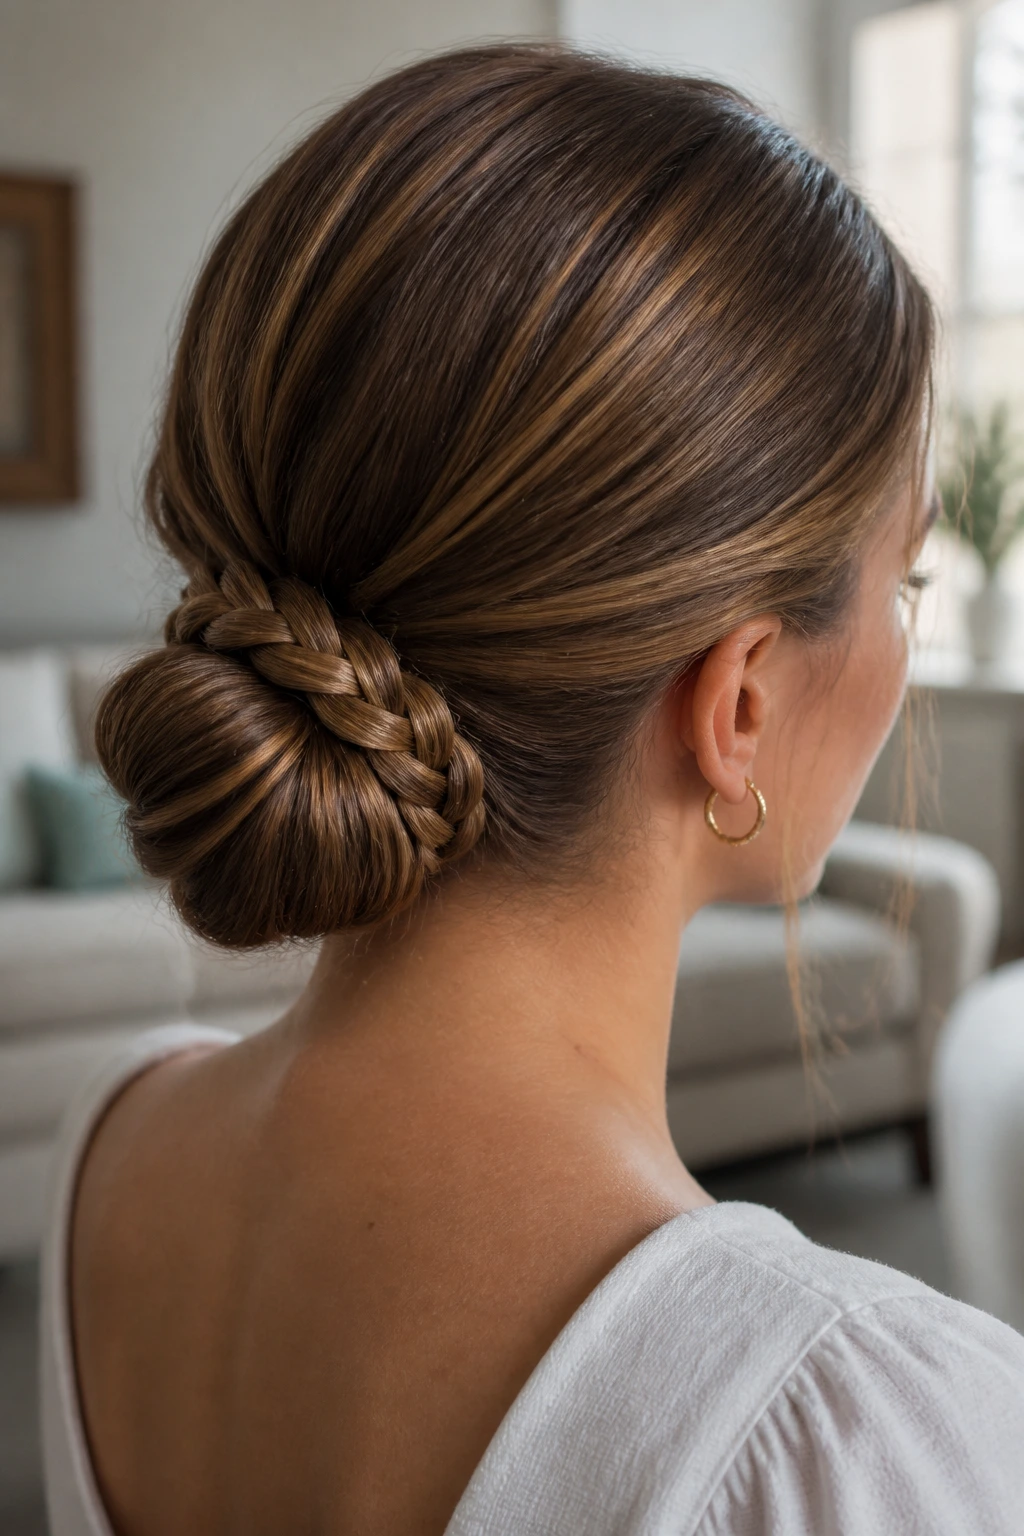
Unlike a plain wrapped bun, this version gives you an extra braided layer that acts like ribbing inside a jacket. It looks smoother, but it also grips better.
Build a low ponytail, divide the length, and braid one section or braid the whole tail before you wrap it around the base. The braid gives the bun texture, which makes pin placement easier. Pins don’t slip through braided hair the way they can through a slick twist.
Who It Suits
- Thick hair that likes to bulge out of ordinary buns.
- Layered cuts with shorter pieces around the face.
- Long events where you need the shape to last past dinner.
- People who want a bun that feels secure without looking stiff.
If you want a slightly softer finish, pull the braid edges out just a touch before wrapping. Not too much. You still want the structure.
19. Crown Twist with Nape Bun
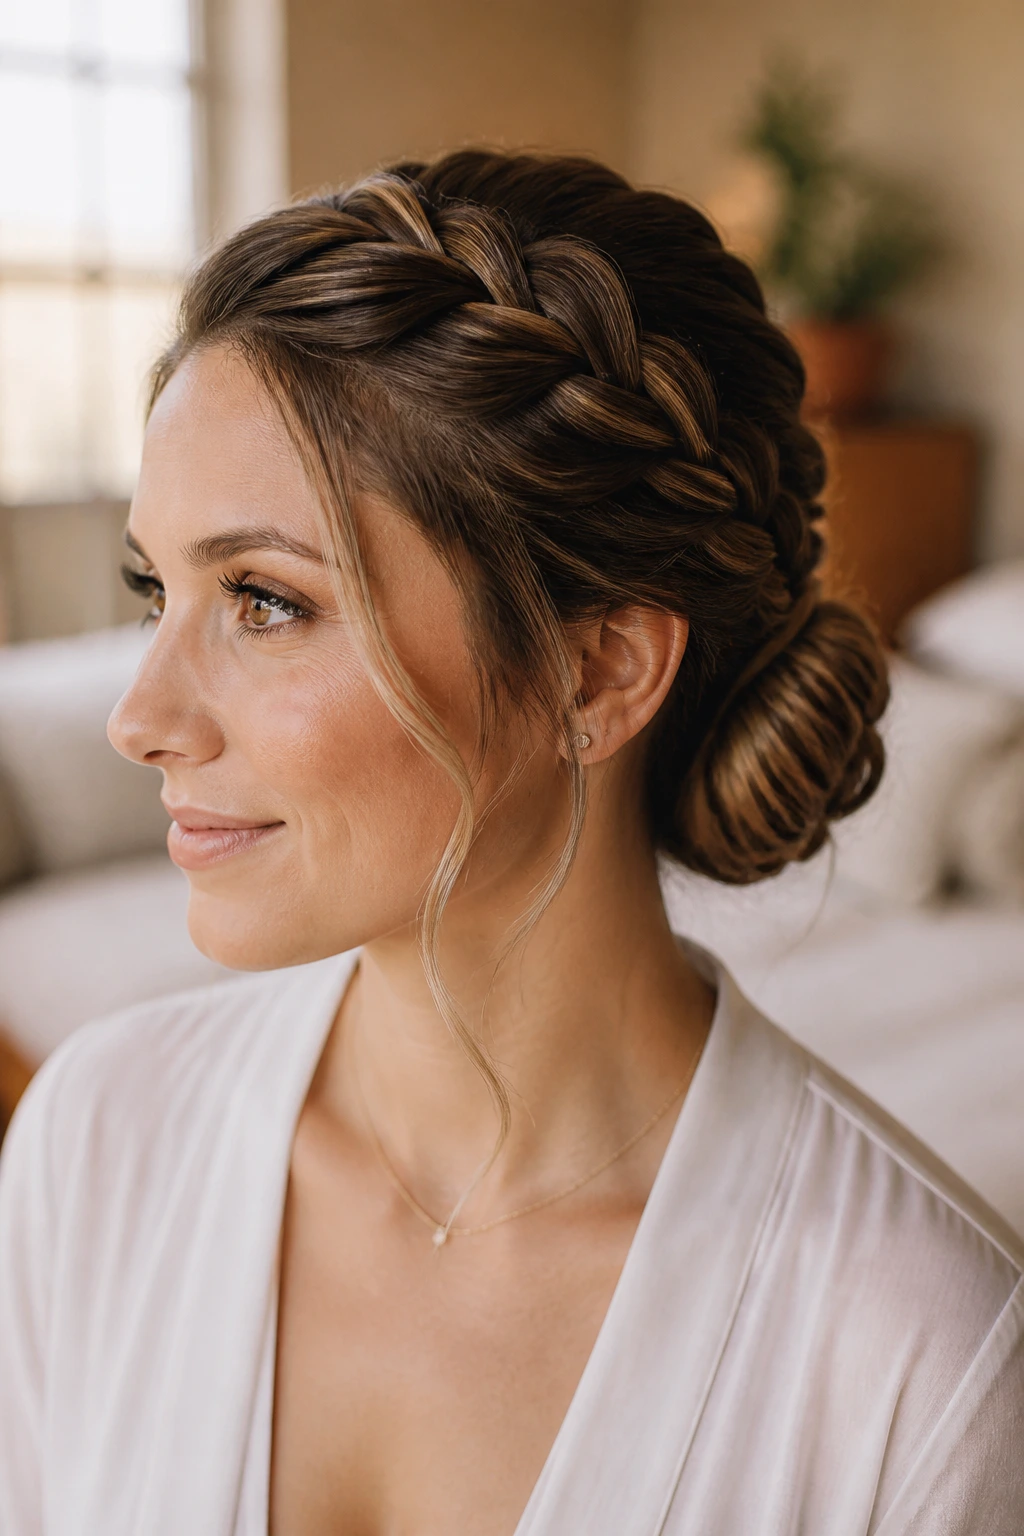
This one has a nice balance to it. The front stays tidy, the back stays grounded, and the whole style feels stable without looking severe.
Twist both temple sections back along the hairline, then gather the lengths into a low bun at the nape. Those front twists act like a headband made out of your own hair, which means they’re doing double duty: holding the sides in place and feeding the bun at the back.
What Makes It Different
The shape is useful for hair that slips loose around the temples first. It’s also a good move if you want to show off earrings or a neckline. Pin the twists before the bun goes in, not after. That sequence makes the whole style easier to control.
A light spray at the temples and a couple of hidden pins beneath the bun are usually enough. No need to overbuild it.
20. French Roll
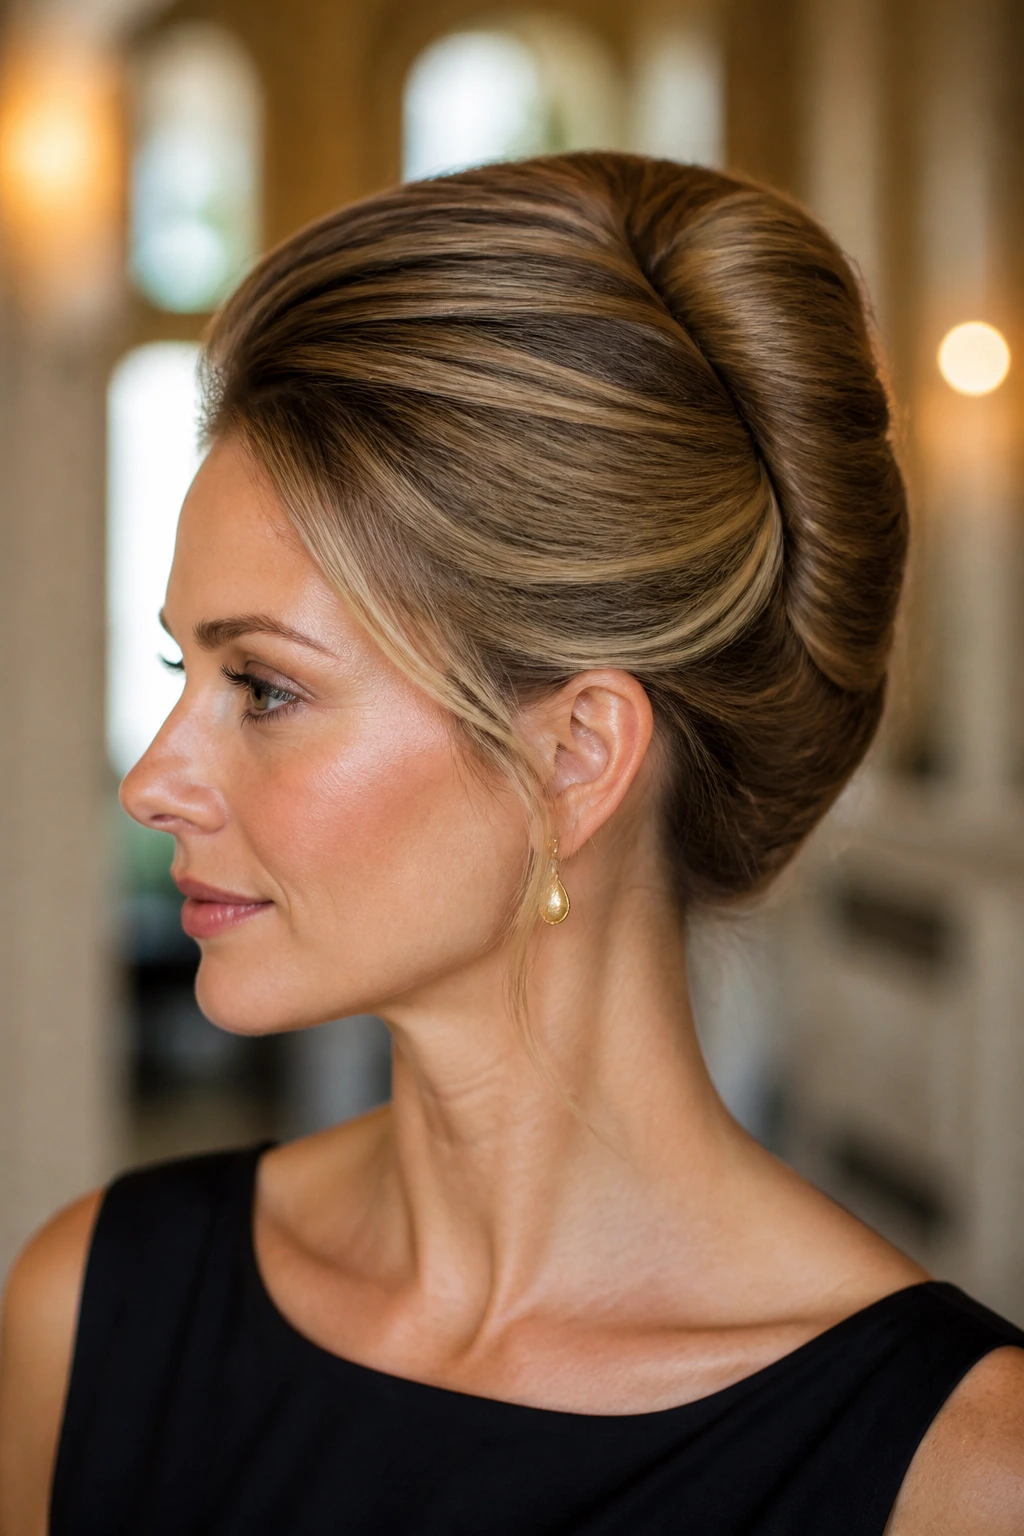
If you want polish without a hard shell of spray, the French roll is hard to beat. It’s sleek, but it doesn’t have to look frozen in place.
The hair is swept upward diagonally, folded into a vertical roll, and pinned along the seam. The shape itself does the work. Once the seam is secure, the outer surface can stay smooth without needing to be glued down with product.
I prefer this on straight or softly waved hair, though a little root texture makes it hold better on slippery strands. The roll needs a clean line, but it does not need to be flat as a board. That’s where people go wrong. Leave the shape supple enough to move a little, and it tends to last better than a style that’s pulled too tight from the start.
21. Side-Swept Braided Bun
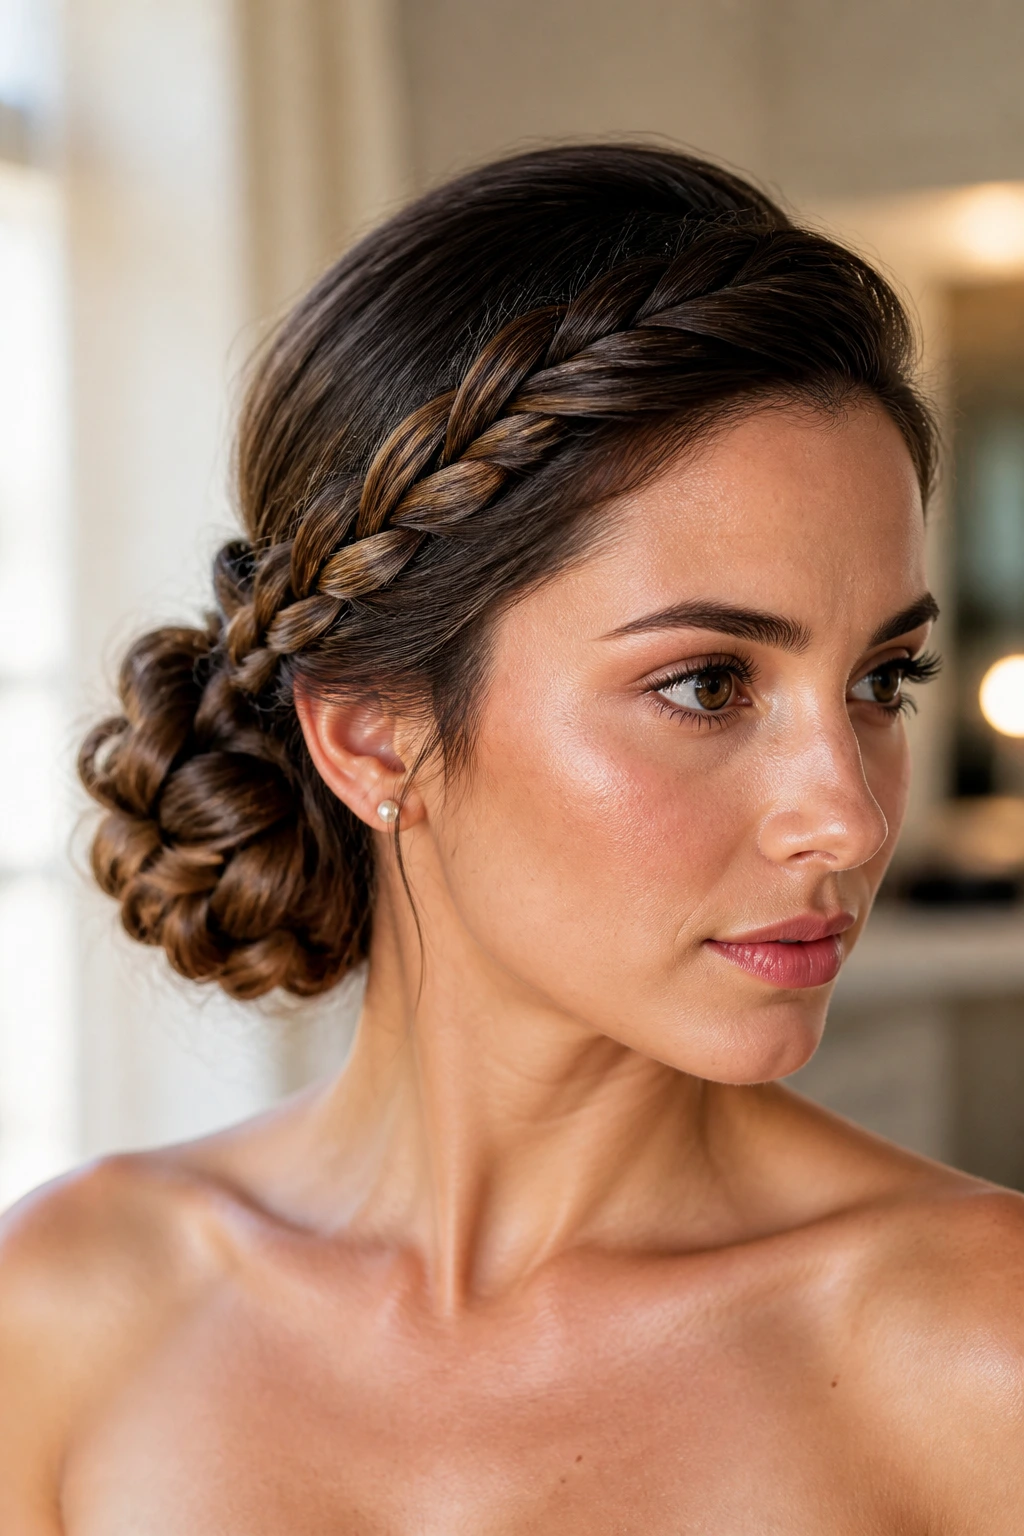
What if you want volume on one side and control on the other? This style gives you both.
A side-swept braid travels across the front or side of the head, then feeds into a bun placed off to one side at the nape. The braid keeps the front contained, while the bun stays compact and easy to pin. It’s a nice choice for dresses or tops with one exposed shoulder because the hair mirrors that shape instead of fighting it.
How to Wear It
Keep the braid firm through the first few inches near the part. That’s the area that slips first. Once it reaches the back, gather it with the rest of the hair and twist into the bun. Finish with pins tucked under the fold, not only around the outer edge. The outer edge looks neat; the underside is where the real hold lives.
22. Pin Curl-Inspired Updo
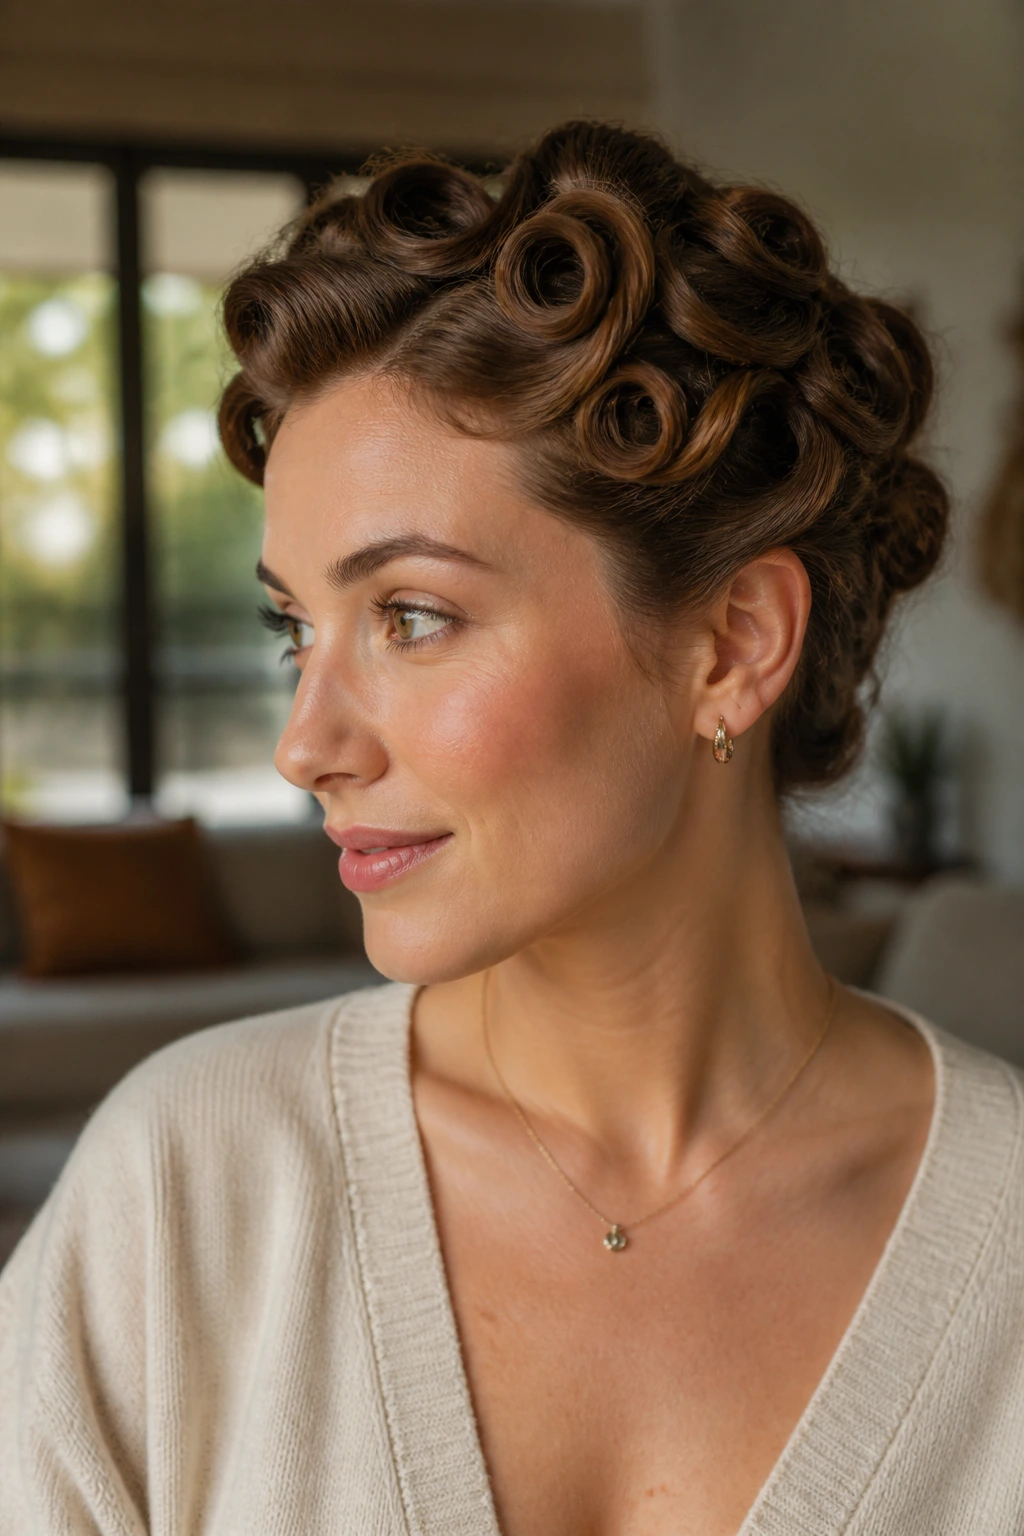
You do not need an actual vintage set to borrow this shape. A pin-curl-inspired updo uses tiny rolled sections to create a lot of anchor points, and that makes it sturdier than it first appears.
Roll small pieces inward toward the scalp, pin them flat, and build the style section by section. The result is compact and textural, with far more grip than a single large twist. It’s especially useful if your hair is short to shoulder length, where bigger buns can feel awkward.
- Use 8 to 12 bobby pins, depending on length.
- Roll each section the same direction.
- Keep the sections small, about 1 inch wide.
- Spray each roll lightly before pinning.
- Smooth the surface only after all pins are set.
The style looks finished, but it’s really just a neat pile of tiny locked sections.
23. Sleek Braided Bun for Thick Hair
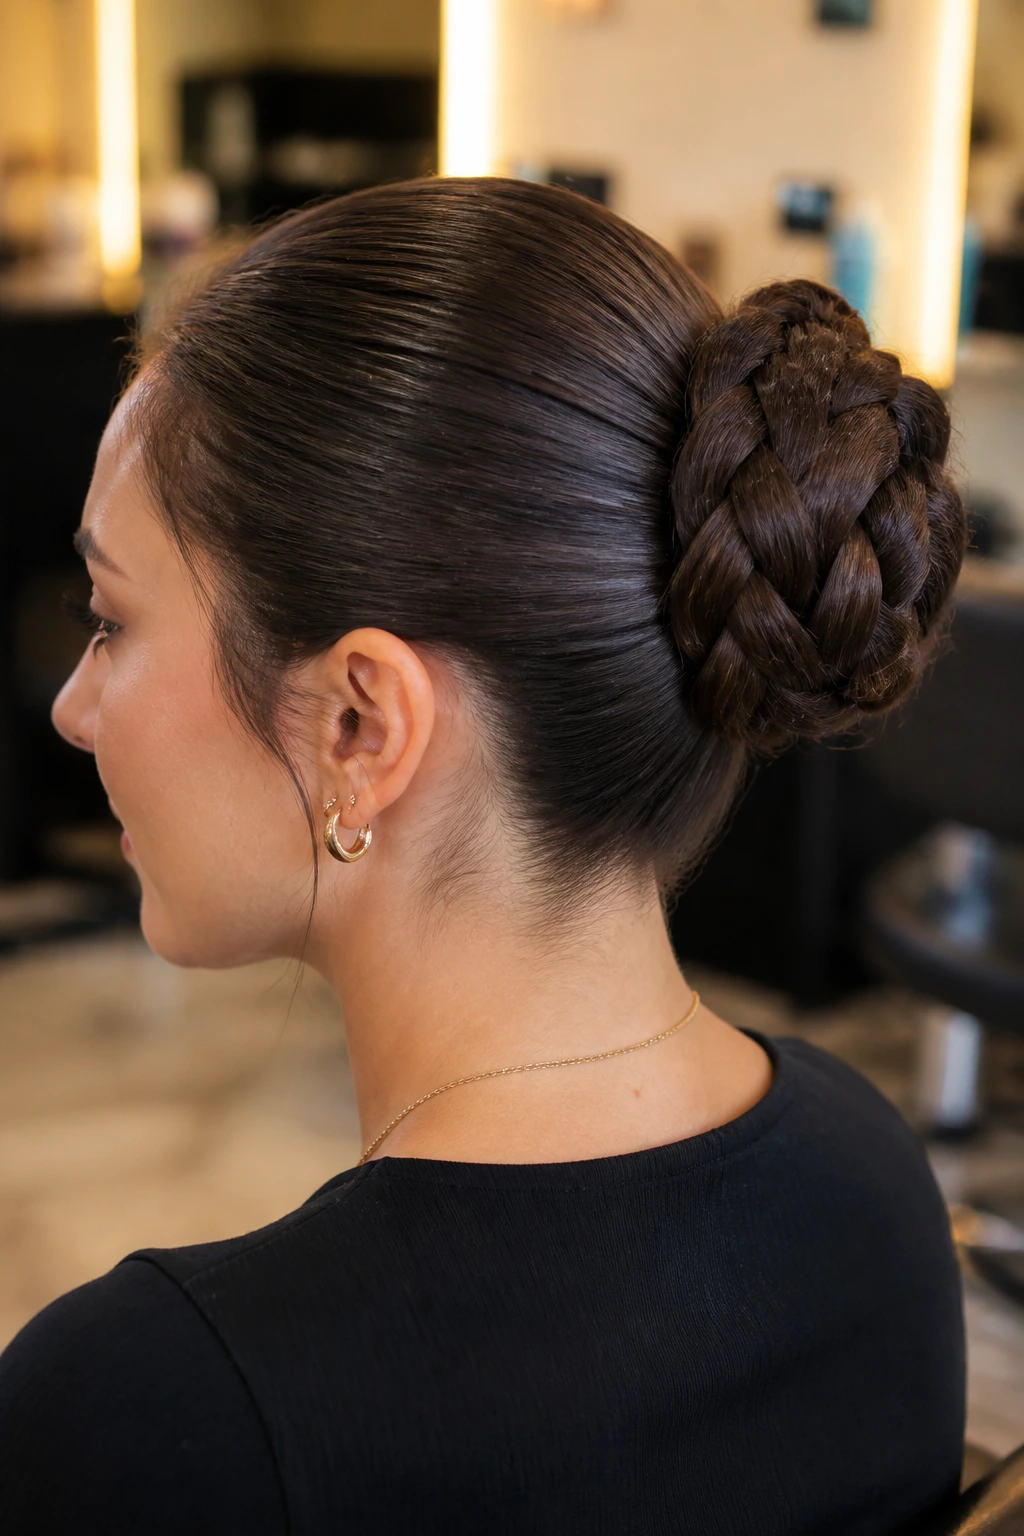
Thick hair needs containment, not just decoration. That’s why a sleek braided bun works so well: the braid reduces bulk before the bun gets built.
A single braid can be enough, though two braids often make the shape easier to control if the hair is very dense. Once braided, coil the length tight and secure it under itself. The braid keeps the ends from exploding outward, which is what thick hair loves to do when it gets tired of being civilized.
I’d use a heavy-duty elastic and at least four pins for this one. Maybe five if your hair is long. A hair net under the surface can help, especially if the strands are coarse. It sounds old-fashioned. It is. It also works.
24. Coiled Low Bun for Short Hair
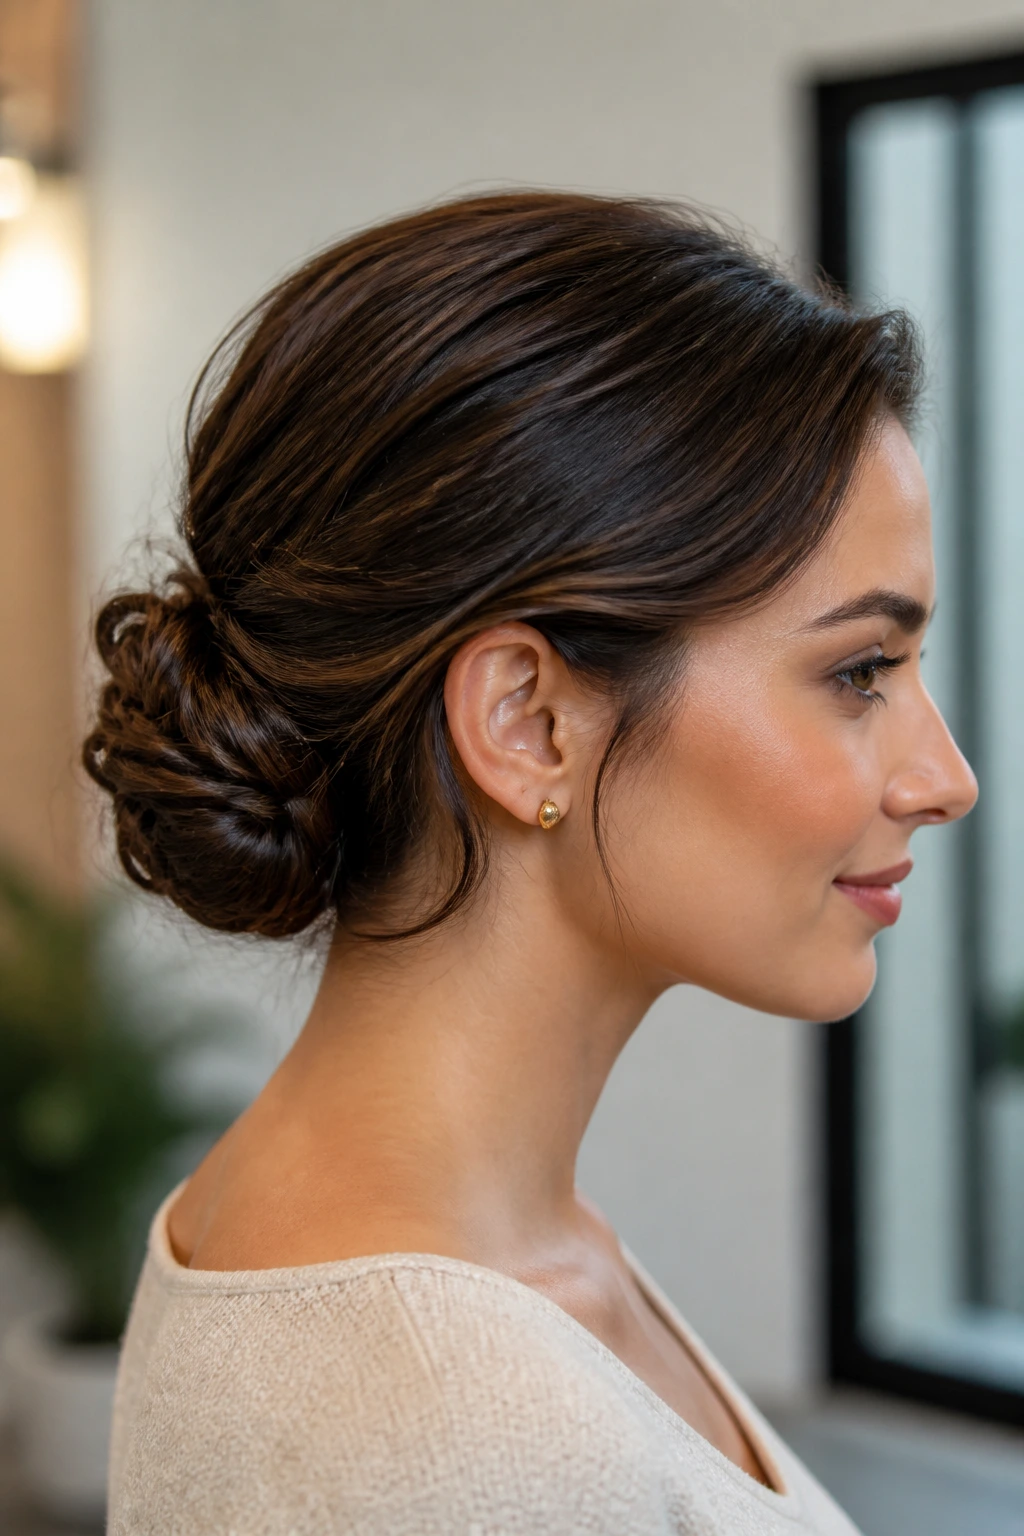
A small bun built from short hair has to be smarter about placement. You’re not trying to make more length appear out of nowhere. You’re stacking coils close to the scalp and letting the structure do the work.
Unlike a big bun built from long hair, this version uses narrow twists or loops pinned into a compact circle. Short layers tuck in more easily when they’re coiled in little sections instead of one large wrap. That makes the style feel neat rather than puffed out.
Best Details to Watch
- Keep each section about 1 to 2 inches wide.
- Pin each coil before moving to the next.
- Spray the roots, not the ends.
- Use flat pins that lie close to the head.
If your bob barely reaches the nape, this style is still worth trying. It just needs patience and a few extra pins.
25. Twisted Ponytail with Looped Ends
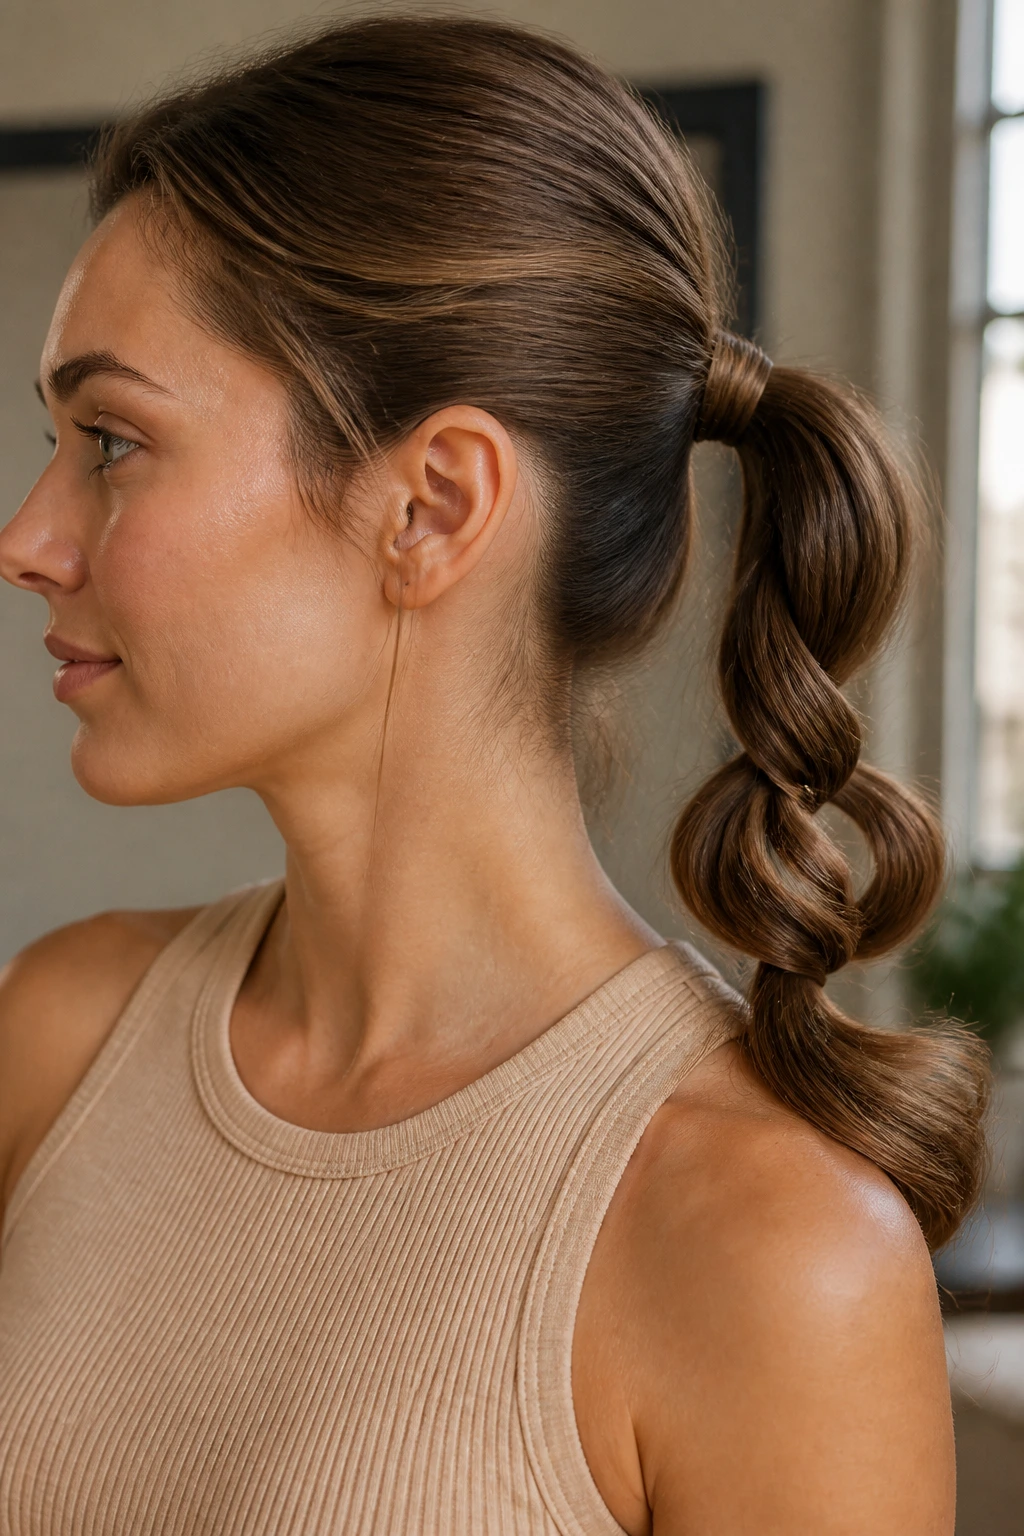
A looped ponytail can look playful and still stay put if the base is tight enough. The shape is simple, but the hold is better than people expect because the twist creates friction along the length.
Start with a snug ponytail, twist the tail, then fold it into one or two loops rather than a full coil. Wrap a thin piece of hair around the elastic to hide it. That small finishing move keeps the style from reading too casual.
Why It Lasts
- The twist adds texture.
- The loop keeps the tail from swinging.
- The wrapped base locks the elastic down.
- The style works well with medium to long hair.
If you want it to look softer, tug the loops a bit wider after pinning. Don’t overdo it. A little looseness reads pretty; too much makes the whole thing sag.
26. Elegant Three-Section Bun
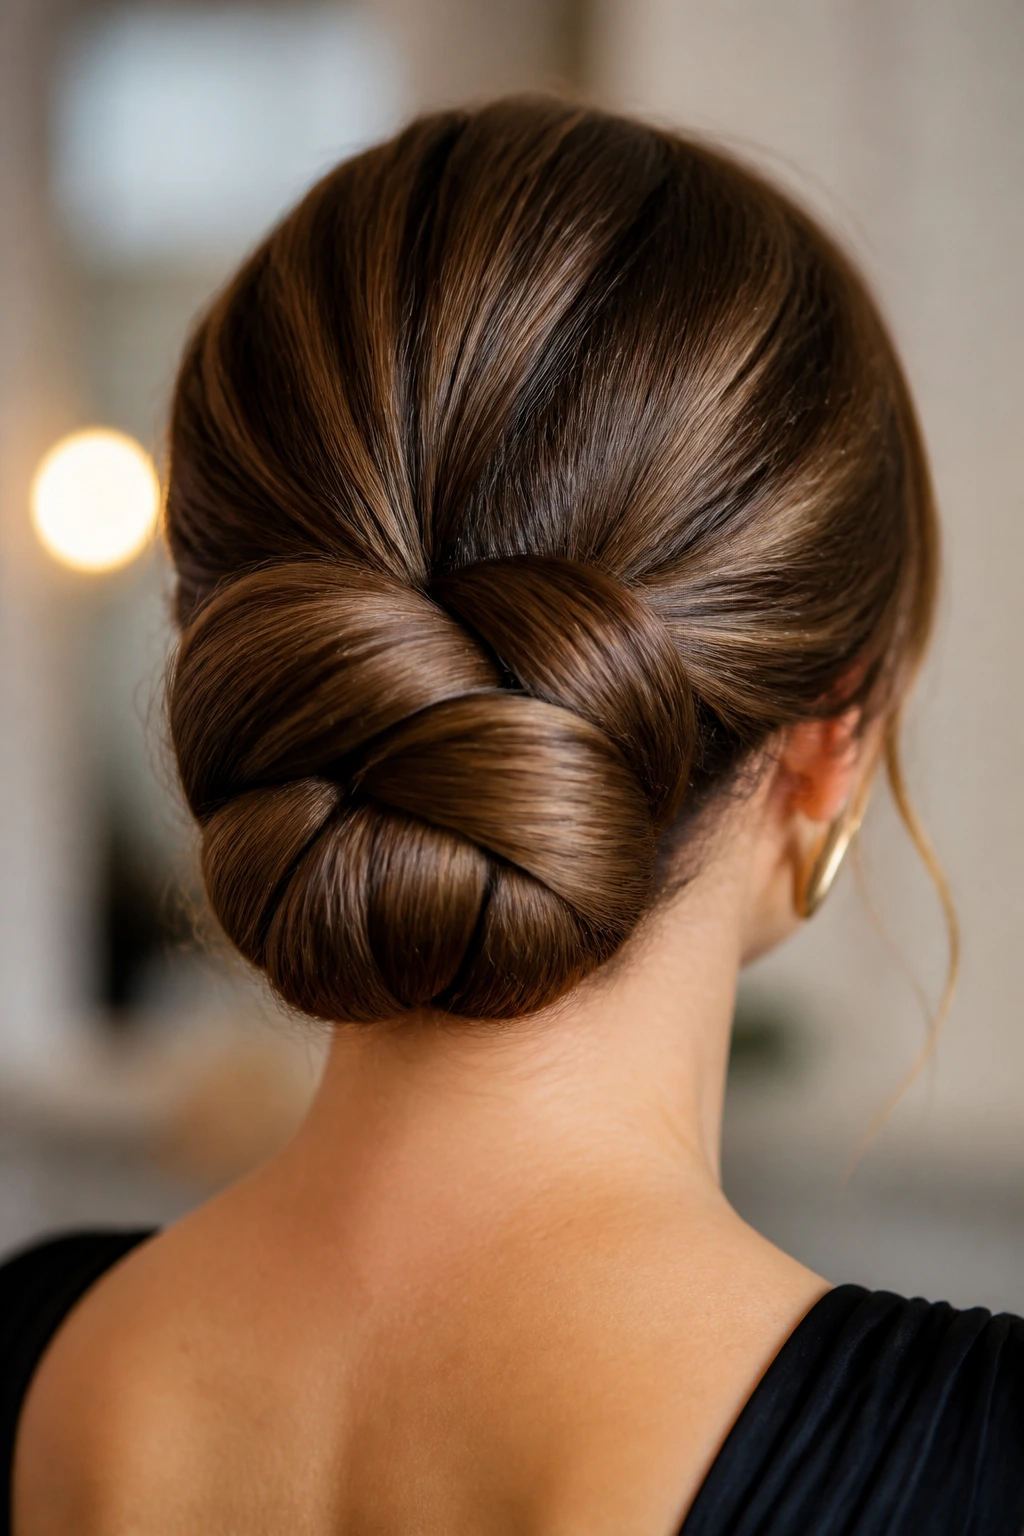
Splitting the hair into three sections gives a bun a stronger spine. Each piece supports the others, and that makes the shape easier to keep compact through the day.
Twist each section in the same direction, then wind them together into one bun at the back or slightly off-center. Because the sections are interlaced, they resist unraveling better than a single twisted rope. It’s a small thing, but it matters.
This is a good option if your hair is long and layered, because the sections let you tuck the shorter bits in gradually. A little smoothing cream on the ends helps them sit flat. I’d use this when I want the bun to look intentional from every angle, not just straight on.
27. Sports-Ready Braided Knot
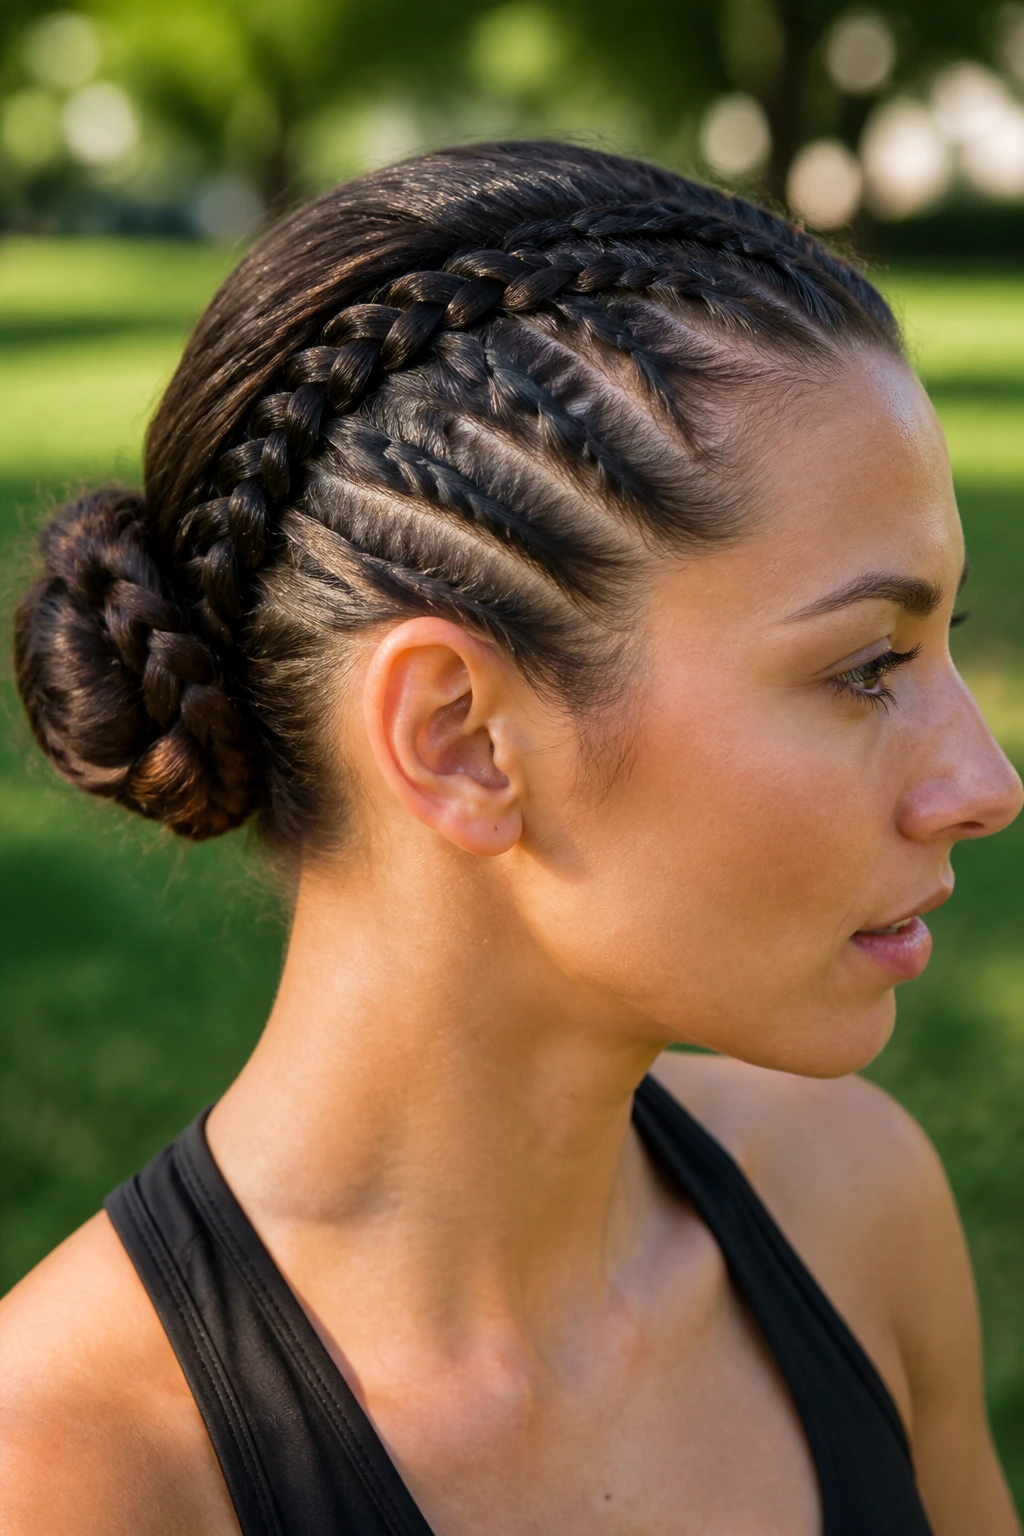
Need a style that won’t quit during a long day of errands or actual movement? This is the one.
The hair gets braided tight along the scalp or through the sides, then gathered into a knot that sits low or mid-height, depending on how much coverage you want. The knot isn’t the star. The braid base is. It keeps the hair from shifting and gives the elastic something solid to cling to.
How to Use It
A lot of people make this style too loose in the name of comfort. That’s a mistake. Tight enough to stay put does not mean painful. It means snug at the scalp, with no empty space at the base. Secure the knot with crossed pins, then mist the outer surface only. If you’re going to be active, skip face-framing pieces that need constant fixing.
28. Soft Shell Bun with Center Part
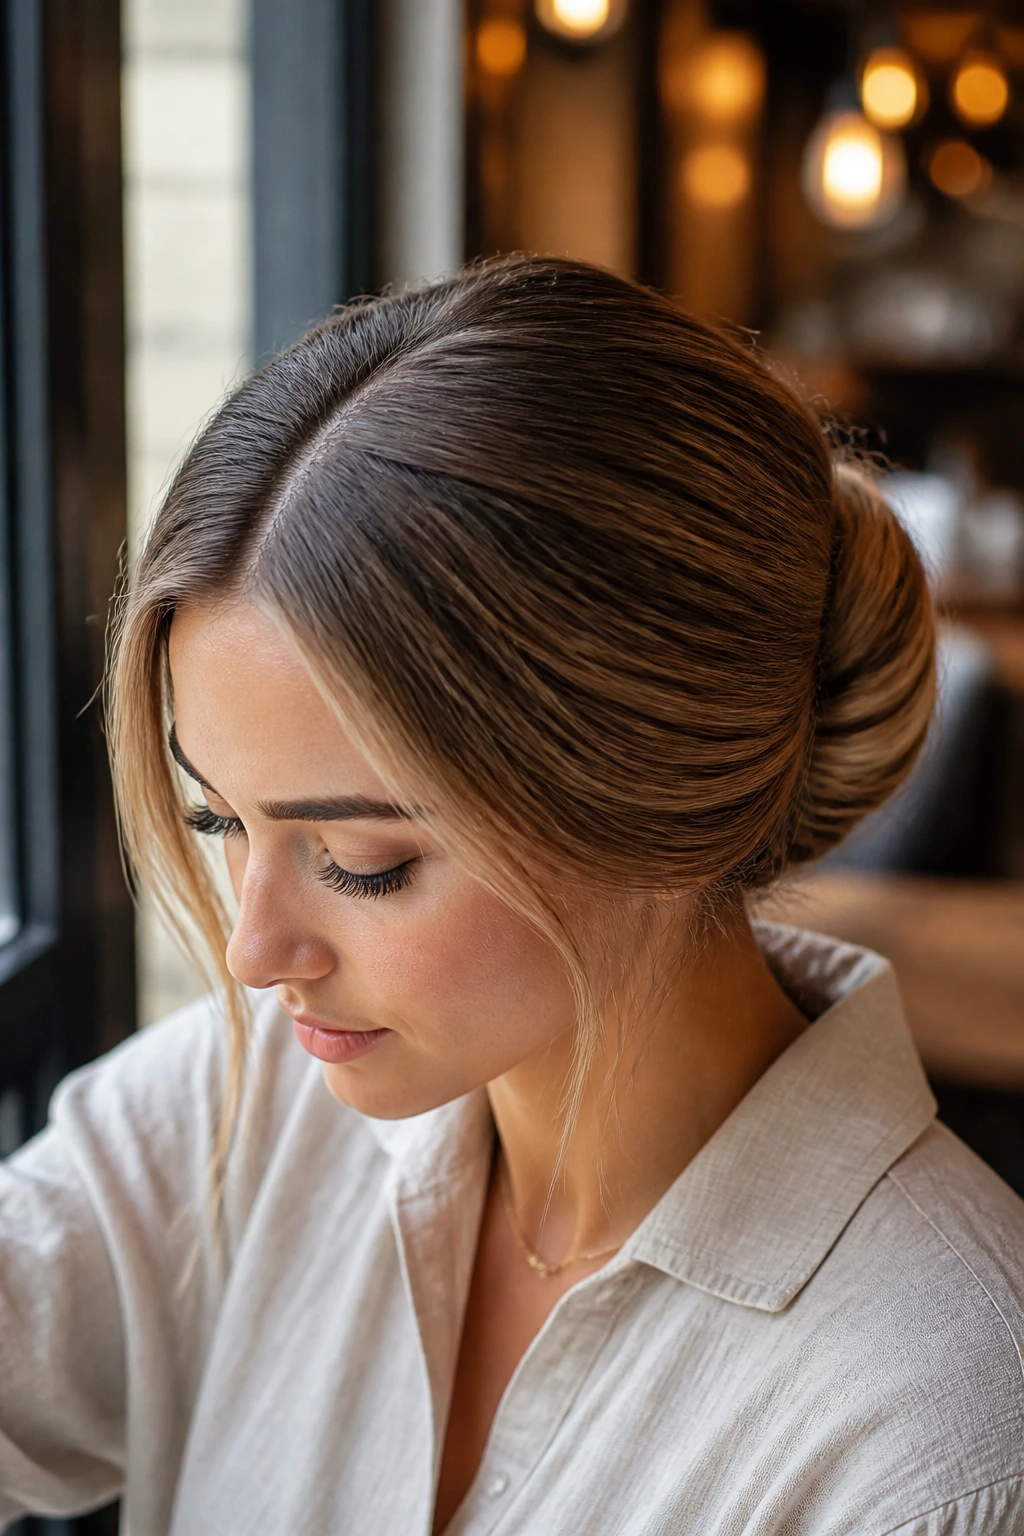
A center part keeps the front clean. The shell shape keeps the back compact. Together, they make a style that feels calm and balanced without looking plain.
This bun starts with two smooth front sections that sweep back from the part. Those sections fold into a rounded shell-like shape at the nape, where the ends disappear underneath. The symmetry helps it stay in place because both sides are working together instead of fighting for space.
- Best for medium hair that doesn’t love huge volume.
- Works nicely with straight or lightly waved texture.
- Looks especially good with simple earrings or a high neckline.
- Holds better when the front is smoothed before you pin the back.
I like this one for occasions where you want the hair neat but not severe. It’s quiet in a good way.
29. Half-Up Braided Chignon
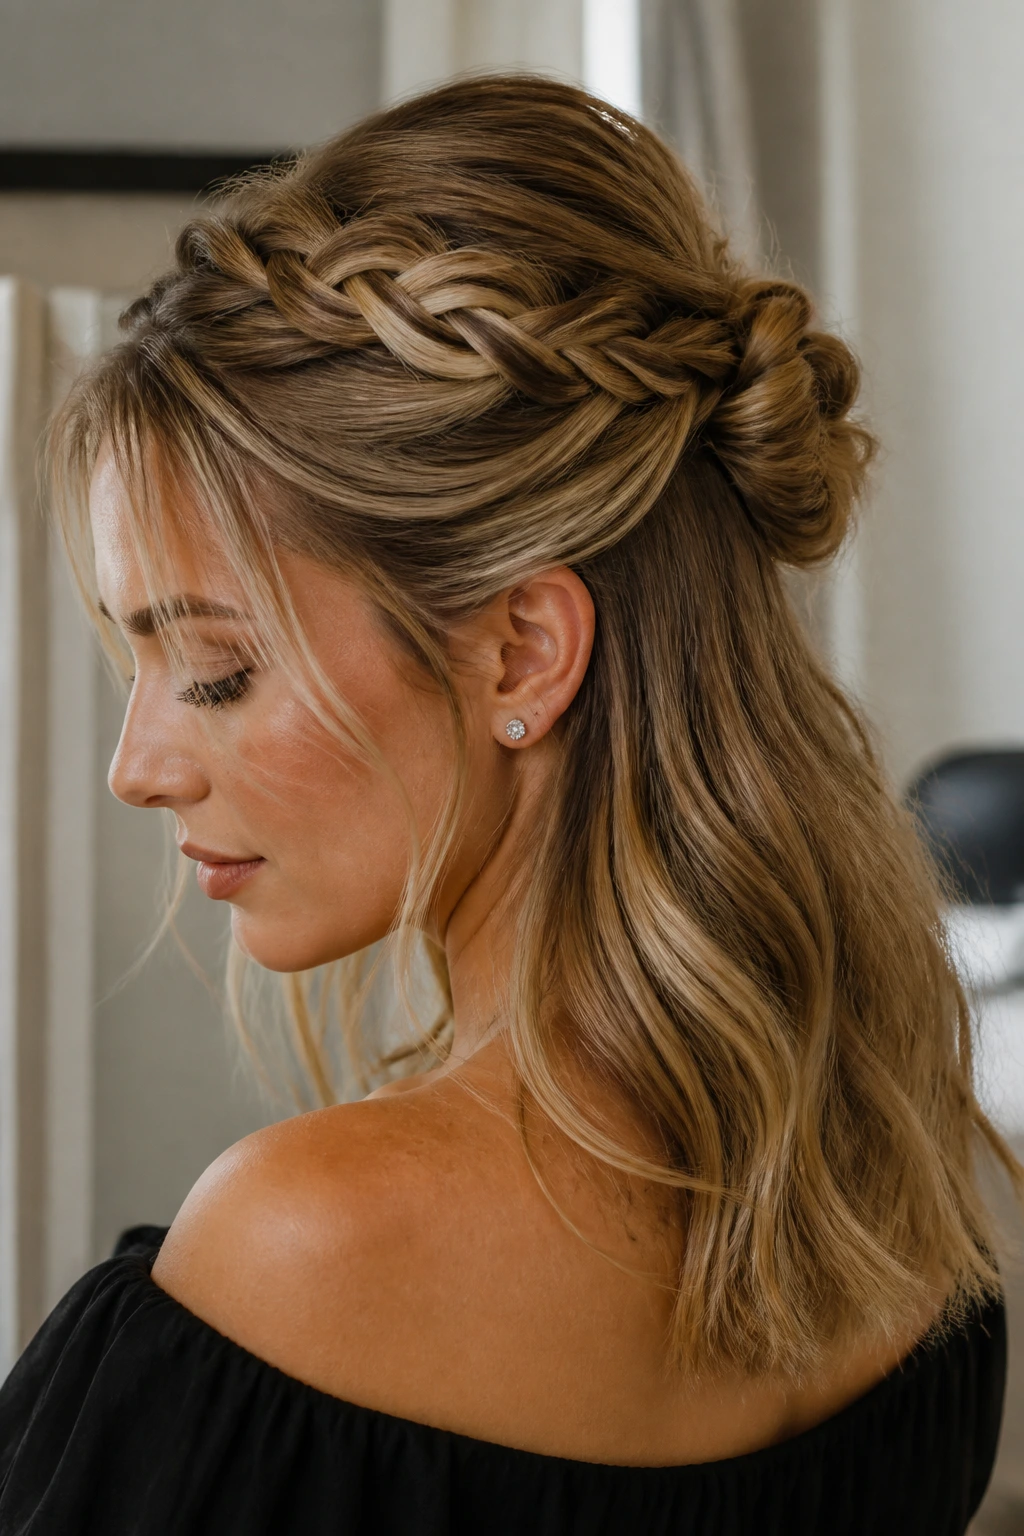
Half-up styles often get dismissed as too soft to last, but a half-up braided chignon can hold far better than people expect when the top section is anchored properly.
The trick is to braid the upper half tightly, then fold that braid into a small chignon while leaving the lower length free to support the shape underneath. That free length actually helps. It balances the weight and keeps the top from pulling forward.
This is a smart choice for shorter layers, shoulder-length hair, or days when you want some movement left in the style. The braid keeps the top clean, and the chignon gives the whole look a finished center. Use two or three pins at the base of the braid and one across the fold. That’s usually enough unless the hair is very silky.
30. Oversized Woven Low Bun
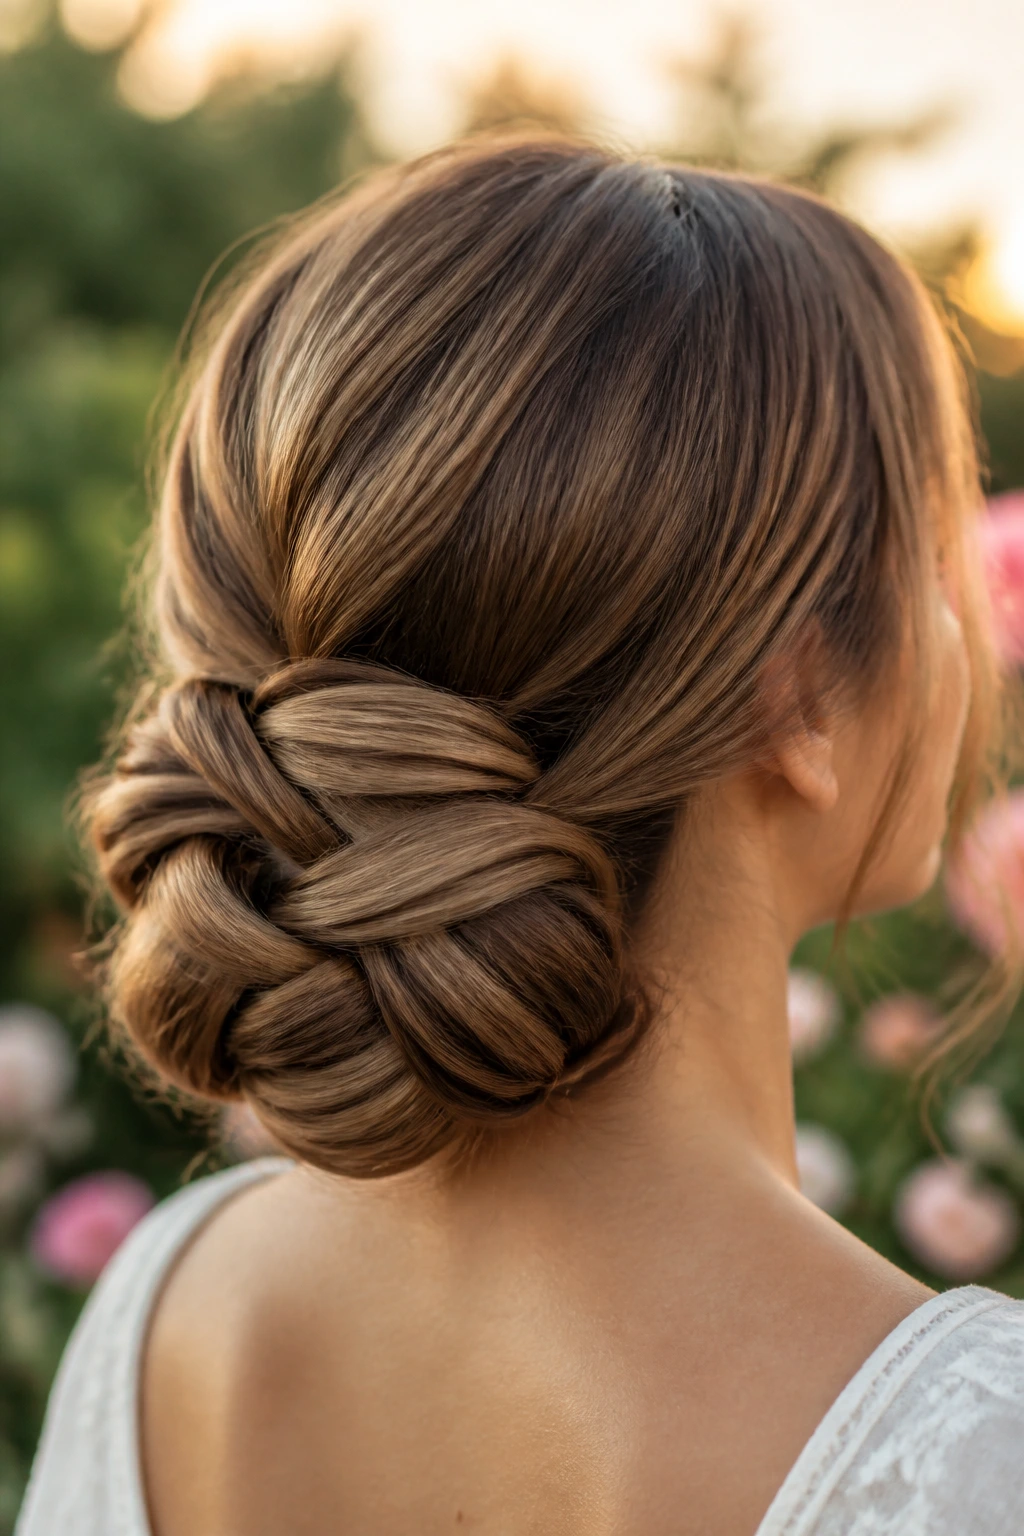
Unlike a simple bun, the woven version gives you overlapping strips of hair that lock each other in place. That makes it one of the strongest options if you want size and security at the same time.
Section the hair into four parts, weave or twist them over and under around a low base, and keep the bun compact enough to pin through. The overlapping pattern creates built-in friction, which is why the style tends to stay neat even when it looks soft.
Who It Works Best For
Long hair. Heavy hair. Hair that needs to look fuller at the nape without turning into a loose cloud by midafternoon. Use texture spray before sectioning, then finish with a firm mist only after the bun is pinned. If you want the woven pattern to show, widen the outer strands slightly before you lock them in. Tiny adjustment. Big visual effect.
Final Thoughts
The styles that last usually have one thing in common: they’re built from the inside out. A good base, a smart pin pattern, and a little texture at the roots will carry a hairstyle farther than extra spray ever will.
If your hair tends to slip, start with the most structured options first — French twists, braided buns, low chignons, anything with a real anchor. Softer styles can last too, but they need more help from the prep work.
Carry two spare bobby pins in your bag. Seriously. That tiny backup fixes more bad hair moments than any miracle product ever has.
