



Messy side bun hairstyles are what I reach for when hair needs to look finished and not too finished. They solve the old problem of hair that’s too clean to leave down, too flat to feel good up, and too awkward for another round of brushing.
A side bun sits low and off-center, usually near one ear or tucked along the nape, so it softens the face in a way a straight-back bun often doesn’t. It also gives you a little forgiveness. A few flyaways? Fine. A shorter layer that slips free? Fine again. The look usually gets better when it’s a little imperfect.
The real trick is shape, not neatness. A small elastic, a handful of bobby pins, a bit of dry shampoo, and one deliberate twist can do more than ten minutes of fussing with a brush. Hair that has some grip tends to stay put; hair that’s too slippery needs a touch of texture first. That part matters more than most people think.
And yes, side buns work across a wide spread of lengths and textures. Fine hair needs a different approach than thick curls, and straight hair behaves differently from wavy hair, but the basic idea stays the same: anchor the base, loosen the shape, then stop touching it. The first style is the easiest place to start.
1. Loose Messy Side Bun With Twists
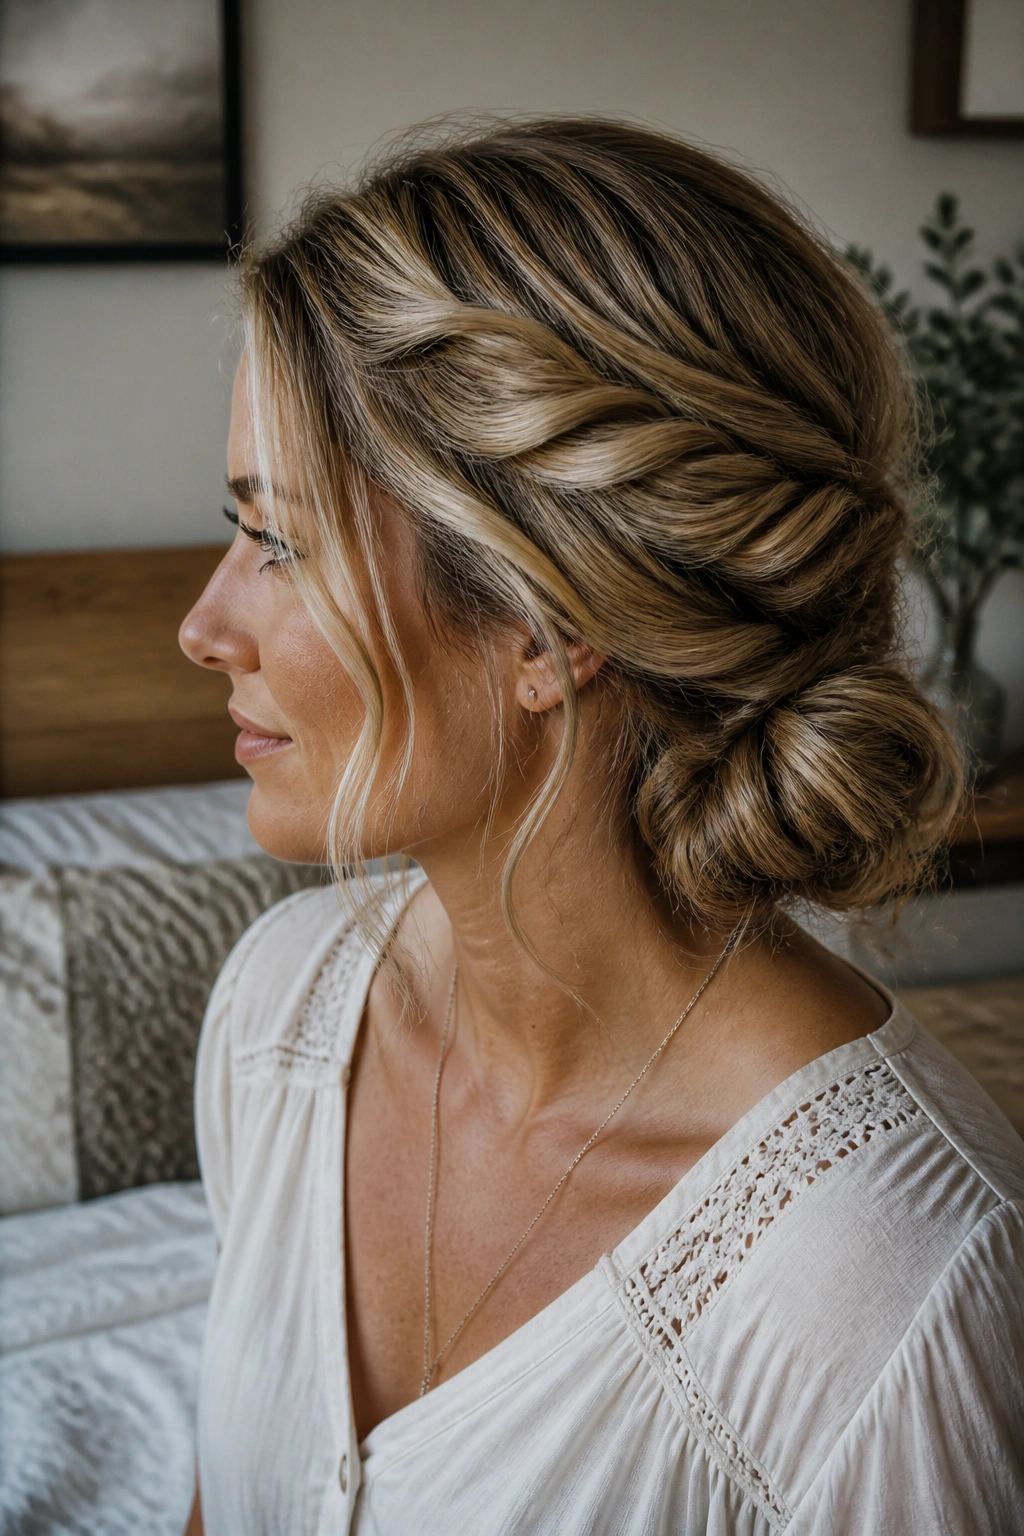
This is the one I’d call the dependable starter. It looks relaxed without looking unfinished, and it takes little more than a low side ponytail, a twist, and a couple of pins. If your hair has some natural bend in it, even better.
Why the twist matters
The twist gives the bun enough structure to stay in one place. Without it, the hair tends to sag toward the shoulder and lose its shape fast.
A tiny elastic at the base helps, but don’t cinch it like you’re tying up a parcel. Leave a little give so the bun can spread out and look soft.
- Works well on medium hair and shoulder-length layers
- Needs 1 small elastic and 4 to 6 bobby pins
- Looks best with a little texture at the roots
- Leave one side piece loose near the cheekbone
Tip: Pin the bun from underneath, not from the outside. Hidden pins make the style look calmer.
2. Messy Side Bun With Face-Framing Pieces
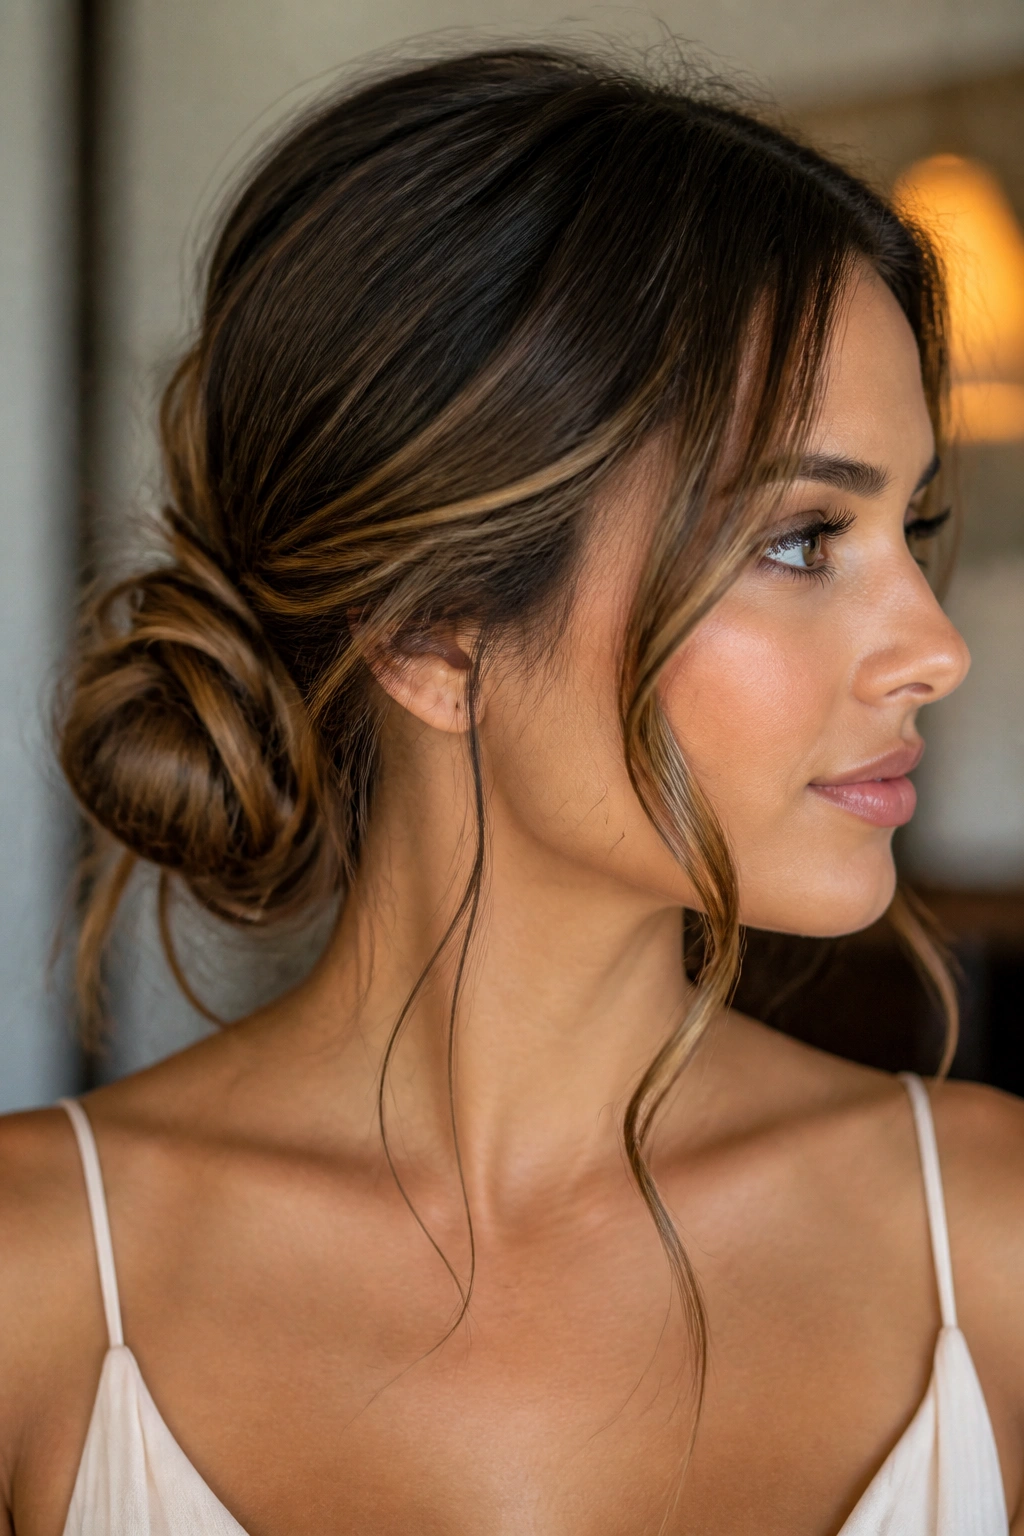
Why does this one flatter so many faces? Because it keeps the shape low and soft while letting the front pieces do the visual work. The bun itself can be loose and imperfect, and the front pieces carry the polish.
That little strip of hair near the cheek and jaw changes the whole mood. It makes the style feel lighter, and it stops the bun from looking like it was pulled back in a hurry.
How to style it
Start with a side part, then gather the hair low on the heavier side of the part. Before you pin anything, pull out two thin pieces around the face — one on each side if you like symmetry, or only on the dominant side if you want a more casual feel.
- Curl the front pieces away from the face with a 1-inch iron
- Keep the bun low enough to sit below the ear
- Use a light mist of hairspray only at the front pieces
- Tug the crown with your fingertips to keep it from going flat
A little movement near the face helps. Too much, though, and the style gets fuzzy fast. That line is thin.
3. Braided Side Bun That Stays Put
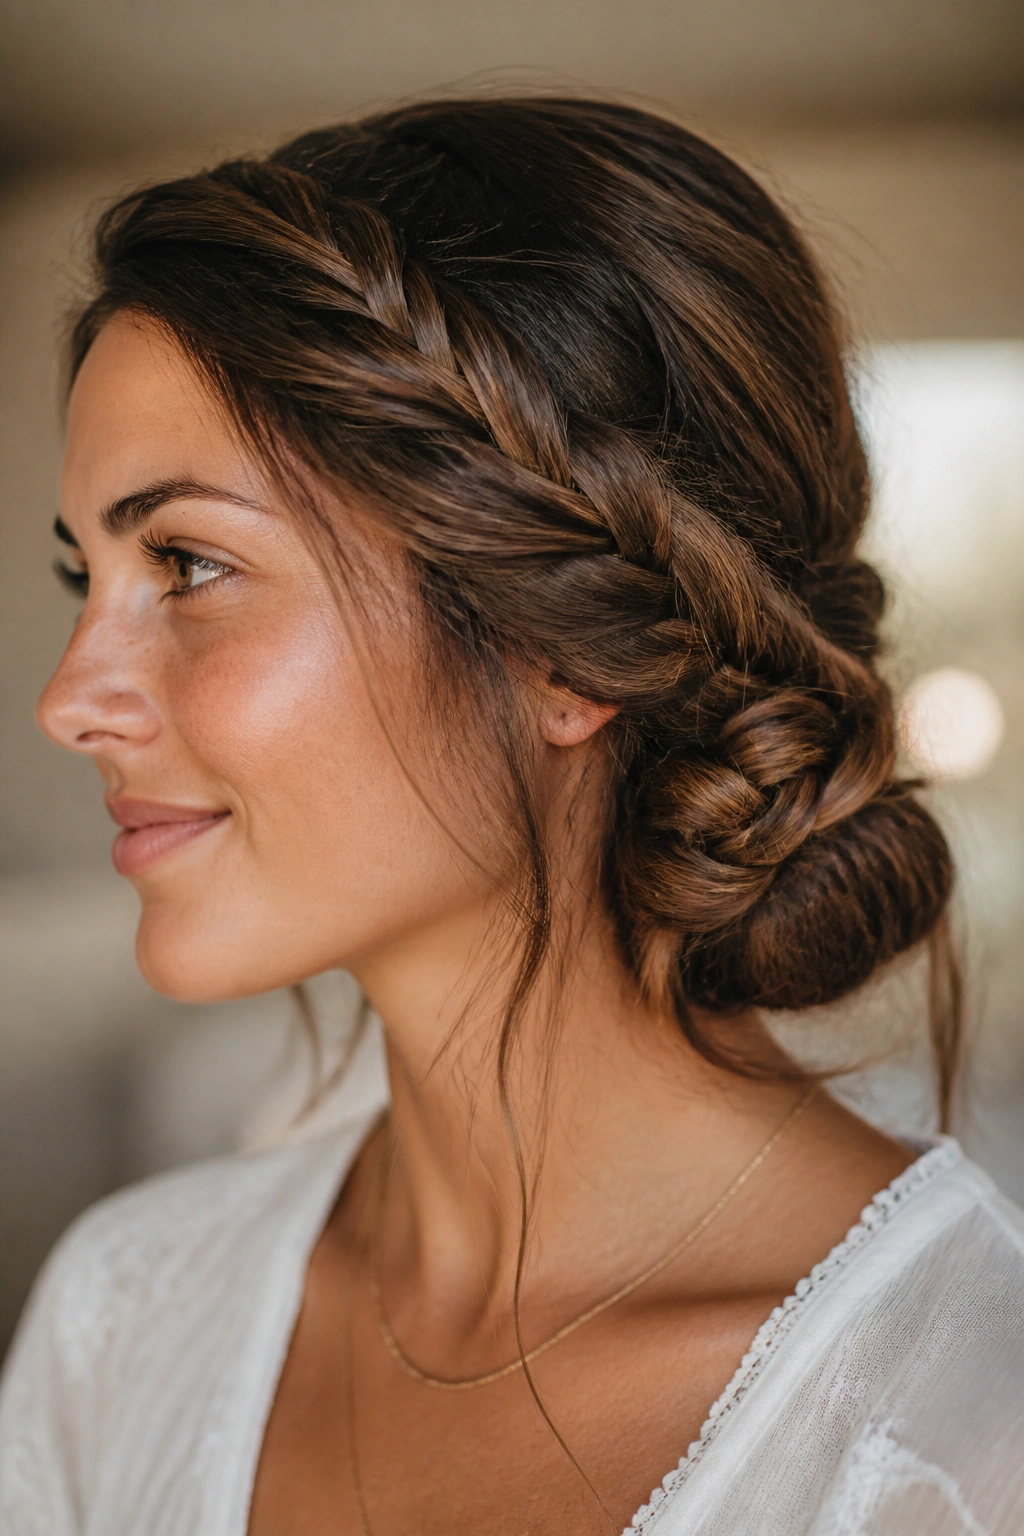
A braid is the easiest way to make a side bun last through a long day without turning to mush. It gives the bun grip, which is gold if your hair is fine, slippery, or freshly washed.
I like this one for errands, school runs, or any day when you know you will be bending, lifting, and moving around a lot. It has a built-in hold that a plain twist can’t always match.
- Braid the length into a loose three-strand braid first
- Wrap the braid around itself near the ear
- Pin through the braid’s thickest spots so it does not unravel
- Pull a few loops free after it is secured
A braid does not have to be tight to work. In fact, a loose braid often gives the bun a better shape because the strands puff out a little when you wrap them. That puff is what keeps it from looking hard or stiff.
4. Knotted Side Bun With Soft Ends
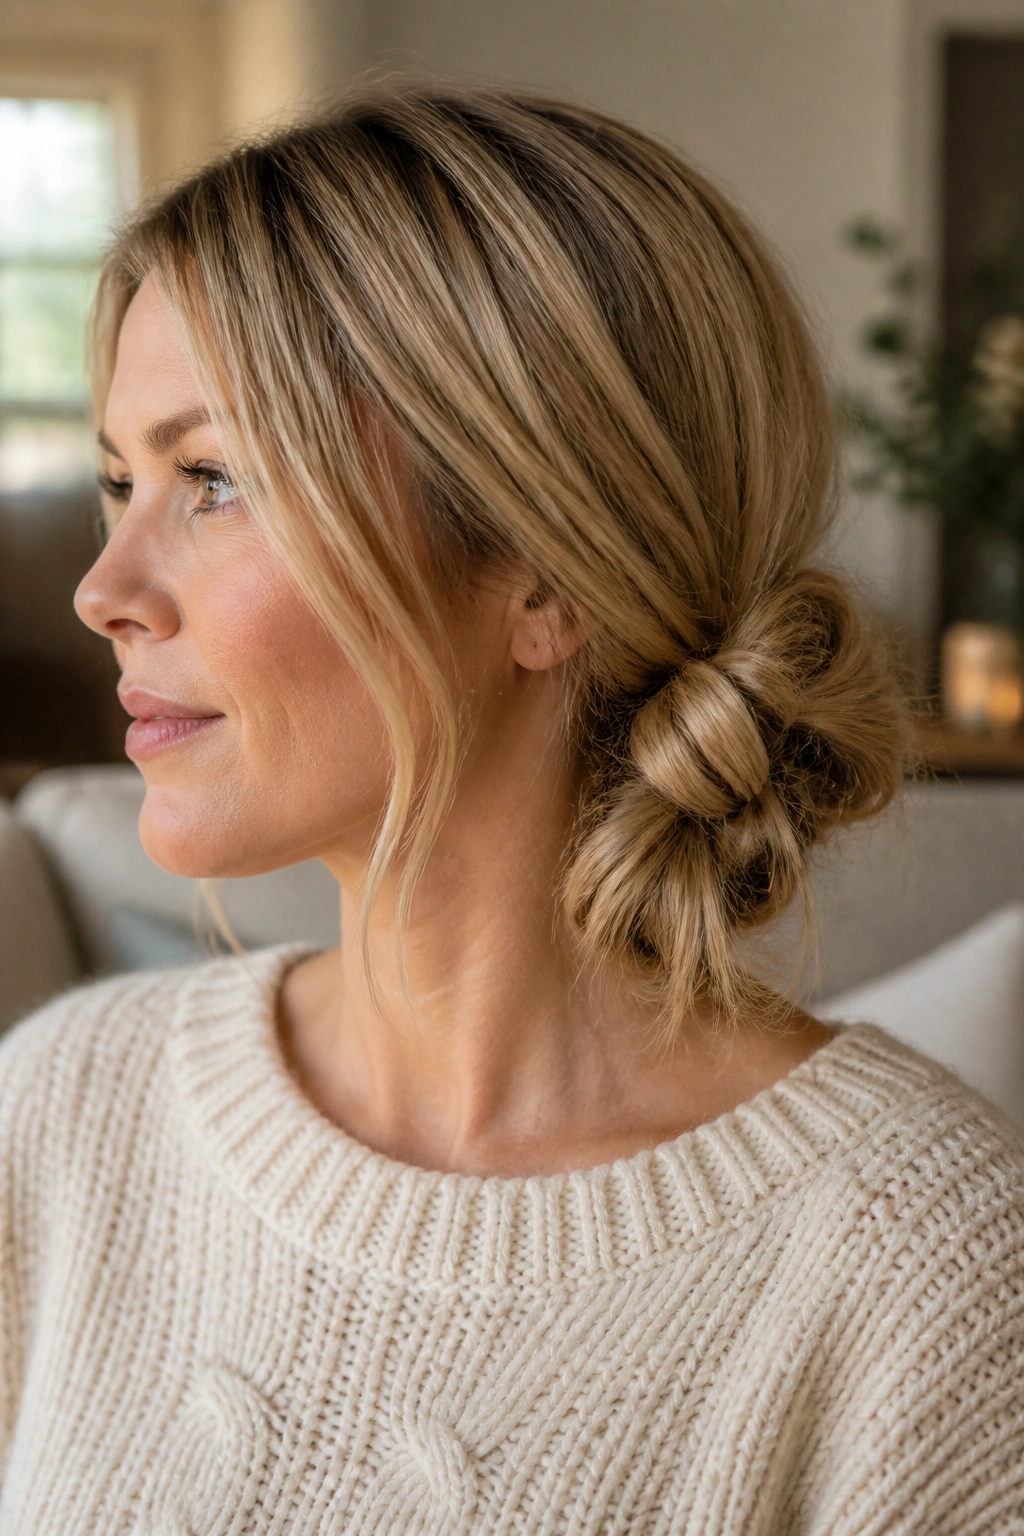
This one has a slightly undone feel that I like a lot. Instead of wrapping the hair around itself the usual way, you tie or loop the sections into a soft knot and let the ends disappear into the base.
It sounds fussy. It is not. The knot gives the bun a natural stop-and-start shape that keeps it from looking too round or too perfect.
The key is not to overwork the ends. If they are tucked in too tightly, the bun can get bulky in the wrong spot and start sticking out by the ear. A few loose ends at the bottom are enough.
One clean elastic at the base is enough here. Then use two or three pins to catch the knot from underneath. The bun should feel secure, but not helmet-like. That tight, shellacked look has its place. This is not it.
5. Textured Side Chignon
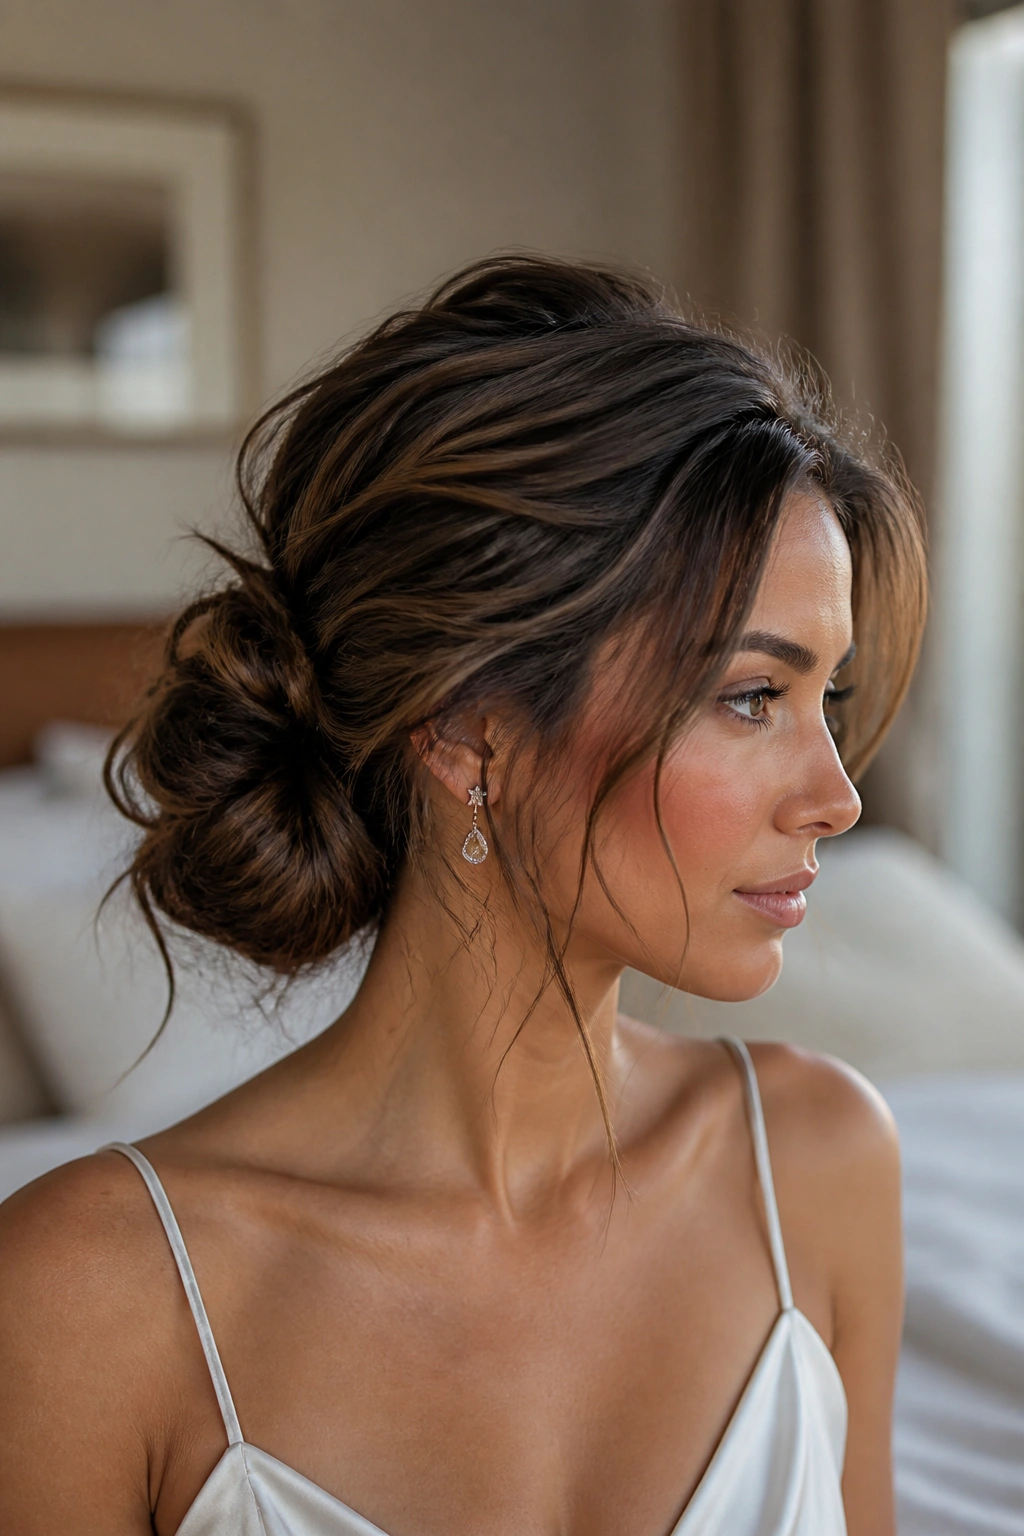
A side chignon does not have to be sleek to count as a chignon. That’s the part people get wrong. A little roughness gives it life, and once the crown has some lift, the whole style looks much more expensive than it actually is.
This version works especially well when hair has been blown out the day before and gone a bit soft around the edges. You can use that softness to your advantage.
If your hair is very clean, dust the roots with dry shampoo and wait a minute before styling. That pause matters because the powder needs a moment to grab.
The chignon itself should sit low and slightly off to one side, tucked in rather than rolled tight. If the bun looks too smooth, pinch the outer layer and pull it apart a touch. That’s enough. Stop there.
6. Messy Side Bun for Curly Hair
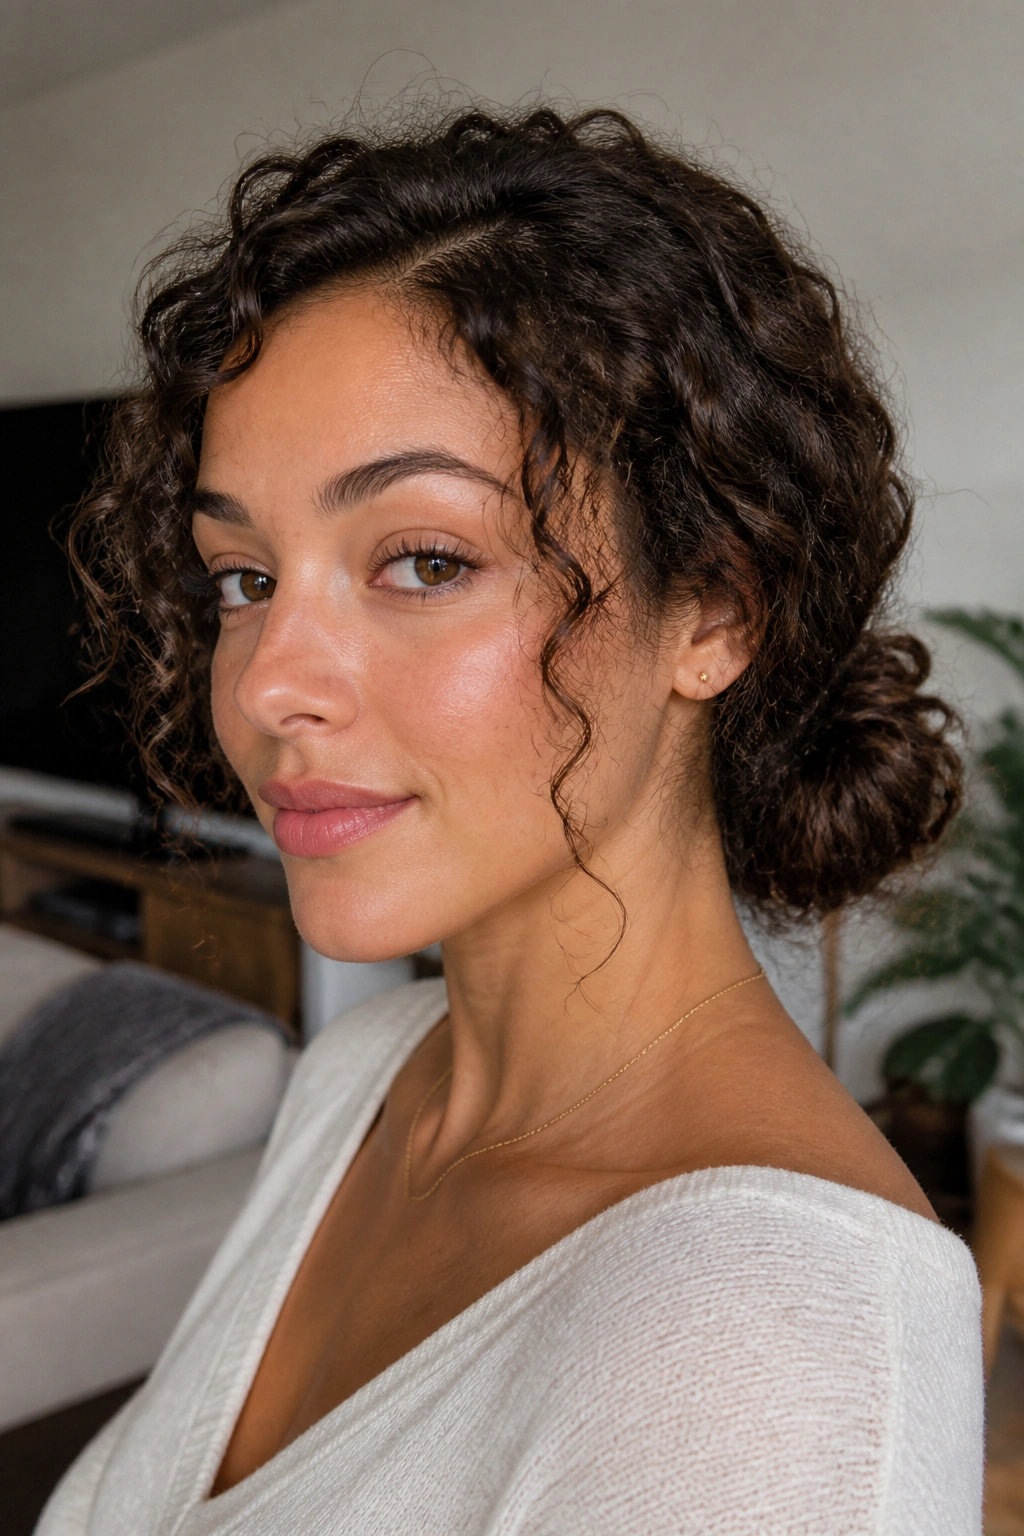
Curly hair brings its own shape, and that shape should not be fought. This side bun works because it keeps the curl pattern visible instead of brushing everything into a puff of frizz.
Keep the curls intact
Start with curls that are already dry and separated. If you pull them apart too much, the bun loses definition and starts to look fuzzy by lunchtime.
Use your fingers, not a brush, to gather the hair. A brush breaks the curl clumps, and those clumps are the whole reason this style looks good.
Where to place the bun
Set the bun low near the back of one ear, then pin the denser curl pieces first. The lighter curls can stay loose around the temple and neckline.
What to finish with
A pea-sized amount of curl cream on the ends is enough. More than that can weigh the bun down and make it feel sticky.
Leave the crown alone. Curly hair usually looks best when it has a little air at the top and shape around the face. Flat curls are not the goal here.
7. Sleek Crown, Soft Bun
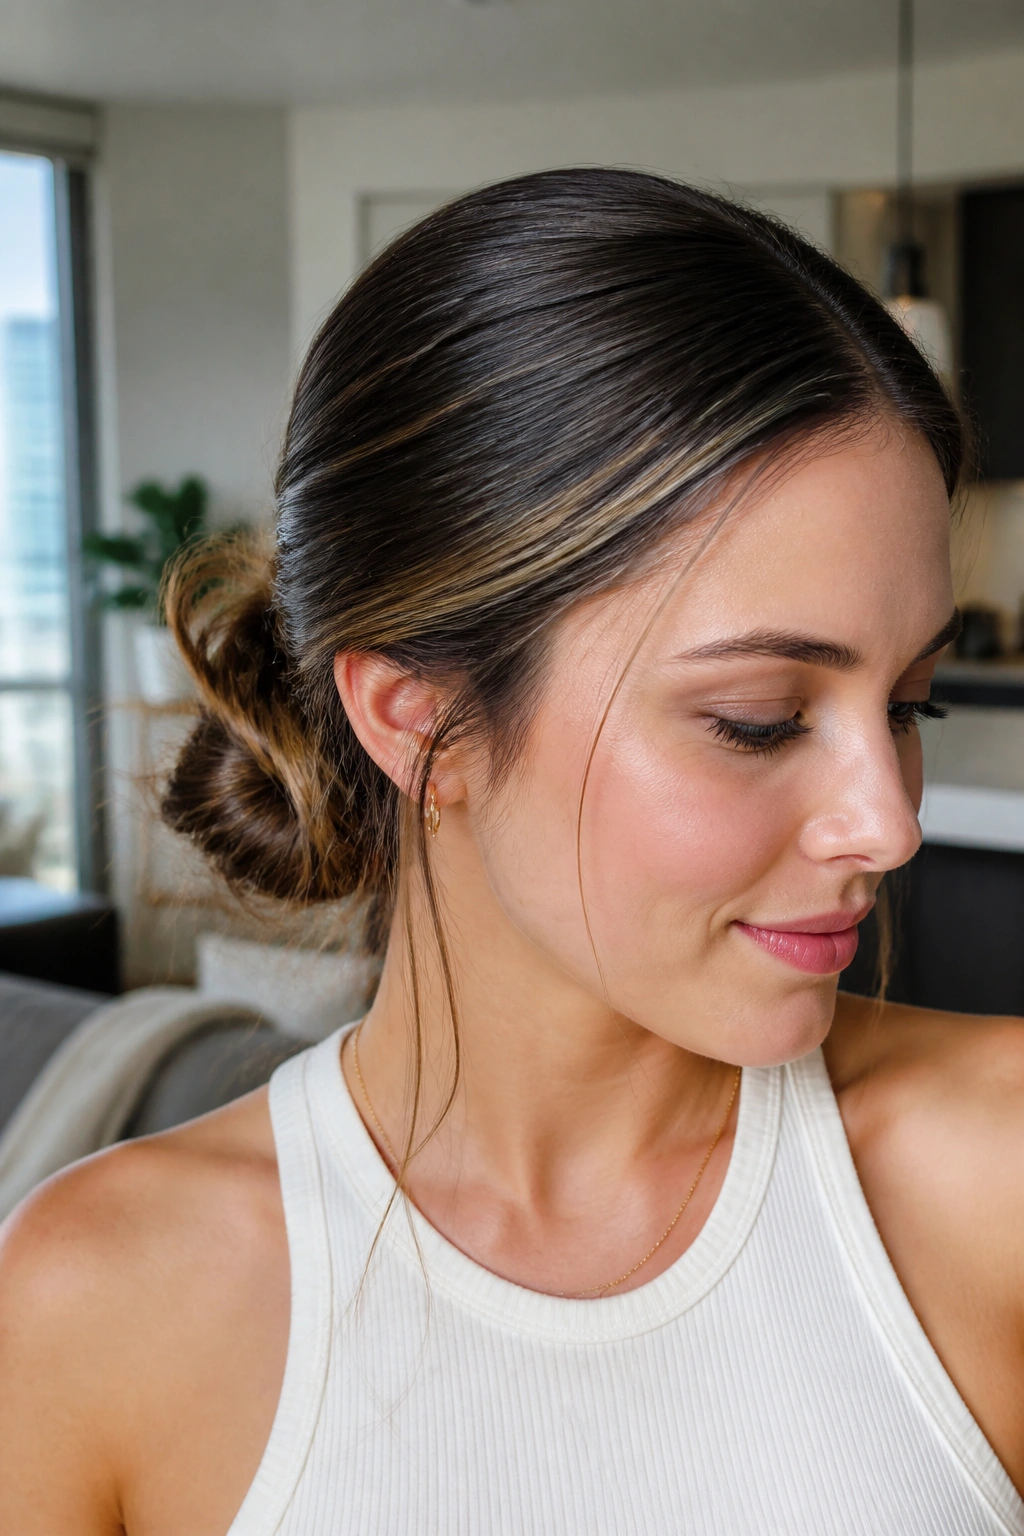
Some mornings call for order on top and softness at the end. This style gives you both. The crown stays smooth, the side bun stays loose, and the contrast makes the whole thing look deliberate without feeling stiff.
I like this one when flyaways are getting noisy. A boar bristle brush or a fine-tooth comb at the top can calm the crown fast, but the bun itself should stay relaxed and a little messy.
One small warning: if you slick the top too hard with gel, the style can tip into severe territory. That’s not the mood. A light hand is better.
The bun sits low and off to the side, with the ends tucked loosely instead of wound tight. A soft bun against a neat crown creates enough structure that you do not need much else. Maybe one earring. That’s about it.
8. Double-Twist Side Bun
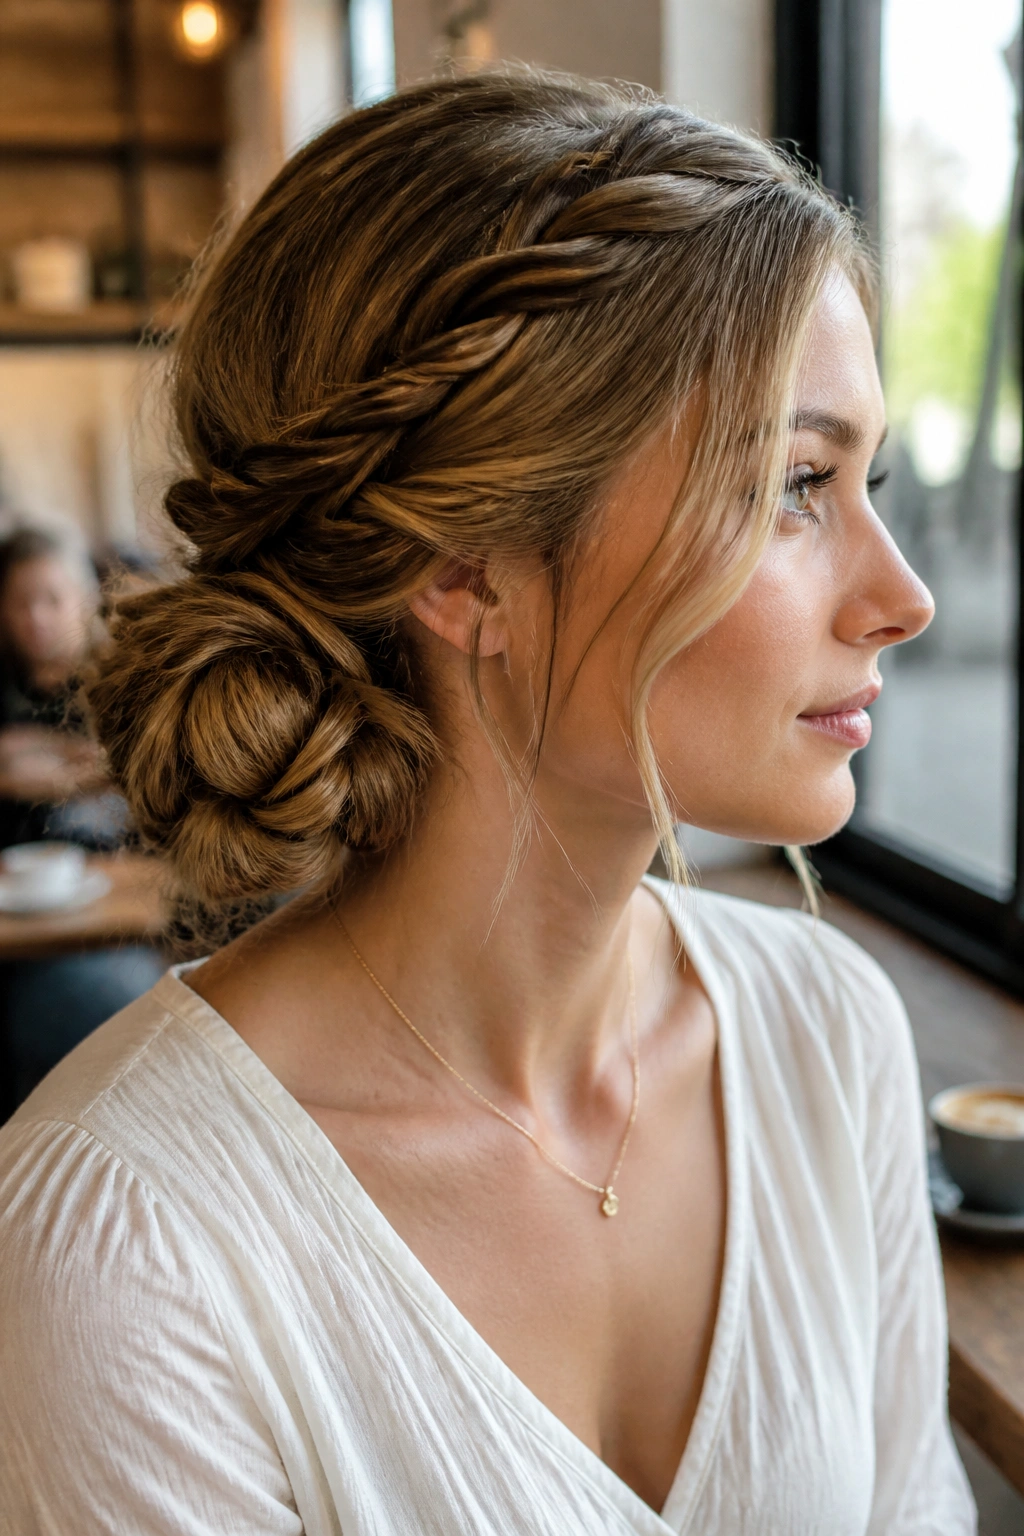
Unlike a single twist, this version uses two sections of hair twisted separately before they meet at the bun. That gives the style more shape and a little more lift, which helps if your hair is medium thick and tends to collapse when it’s bundled too quickly.
It also makes the bun look fuller without teasing the crown to death. Good tease, bad tease — there’s a difference. Here, you can skip most of it.
- Split the hair into two side sections
- Twist each section toward the bun
- Cross one twist over the other before pinning
- Loosen the outer edges with your fingers
This style is a smart choice when you want the bun to look a little more built, but not formal. It has enough detail to read as styled, which means you can wear it with a plain tee and still look like you meant business.
9. Fishtail Side Bun
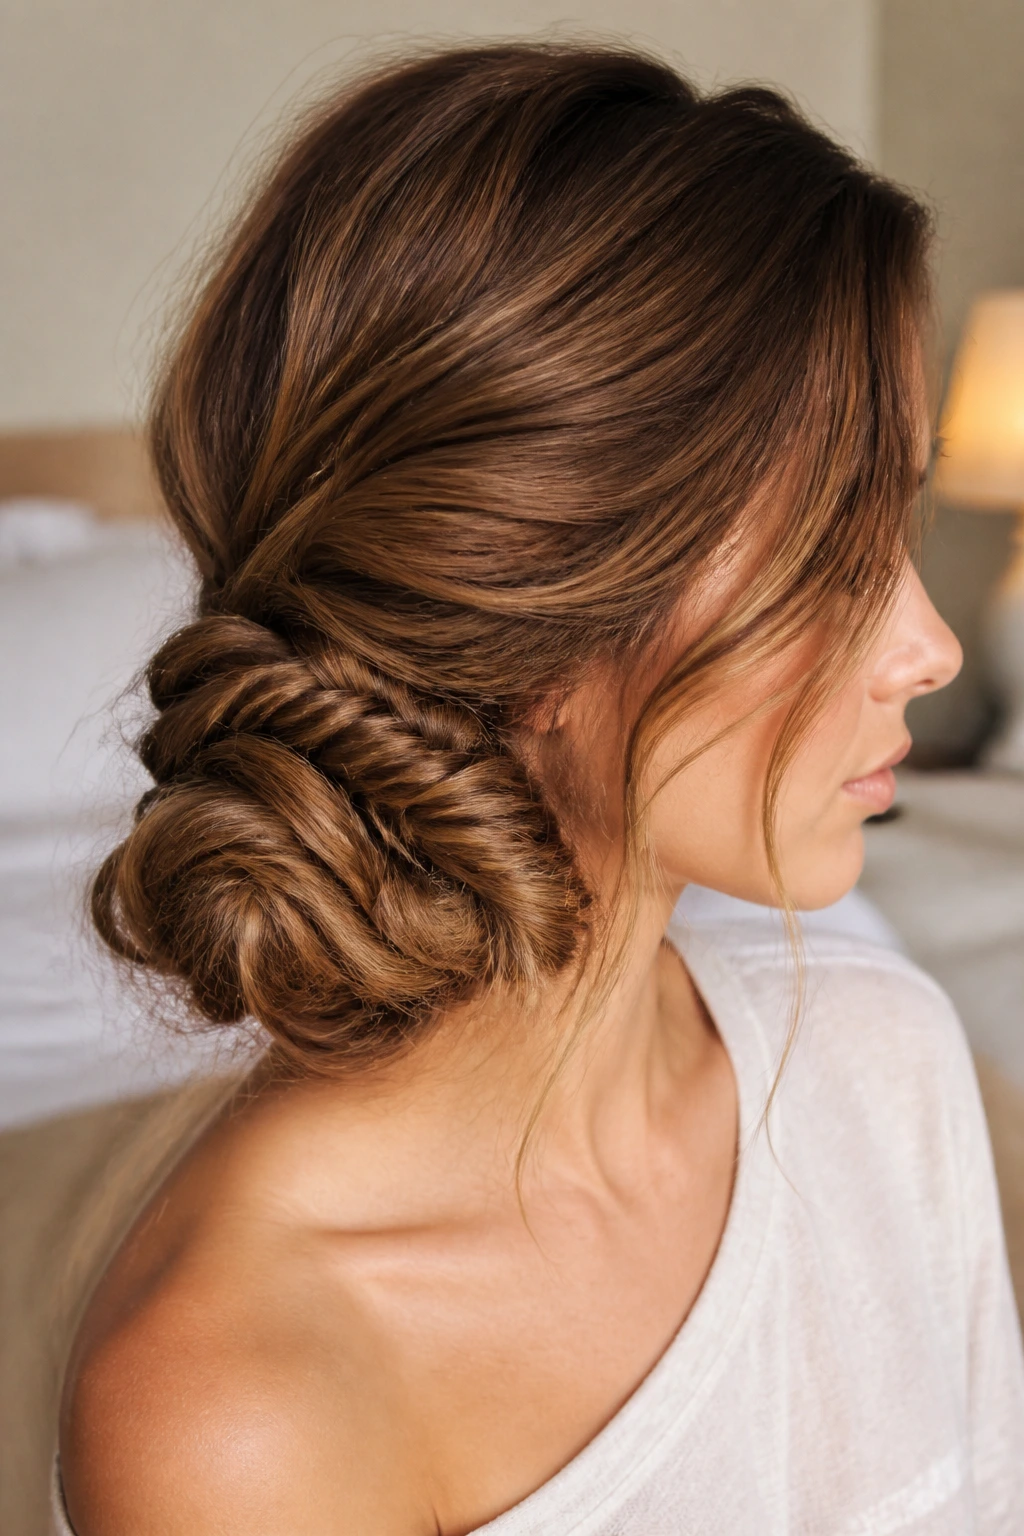
What if you want texture that looks more intricate than a regular braid? Fishtail does that. It gives the side bun tiny, woven detail without making the whole look heavy.
It takes a little more patience than a three-strand braid, but not much. The payoff is that the bun has a tighter, more layered surface, which photographs well and holds a soft shape.
How to wear it
Begin with a low side ponytail, then fishtail the length loosely. Don’t pull the braid too tight; the point is texture, not perfection. Once it’s braided, wrap it around itself and pin the braid end under the bun.
A fishtail bun works best when the braid is a little wide and a little imperfect. If the braid is too neat, the style can feel fussy. If it’s too loose, the bun loses structure. That middle ground is where it lives.
10. Side Bun With a Scarf Wrap
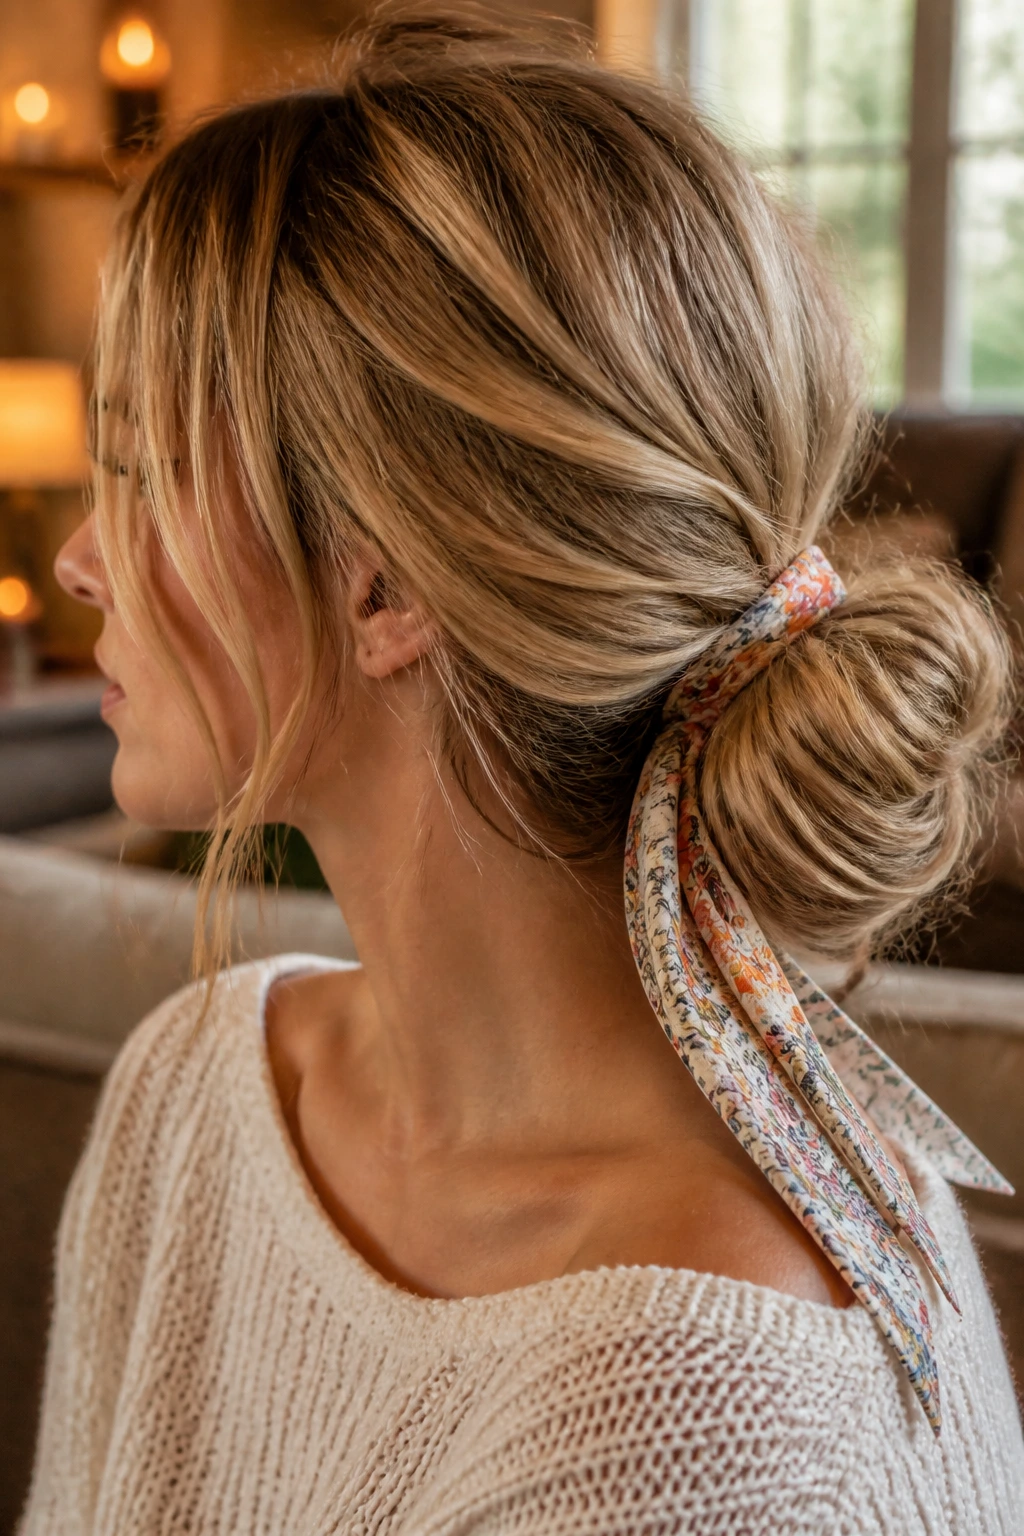
A scarf can rescue a side bun that feels plain. It adds color, hides a rough elastic, and gives the whole style a bit of personality without much effort.
Use a skinny scarf or a narrow silk strip, not a thick winter scarf situation. The fabric should sit close to the bun and not swallow it whole.
Tie the scarf around the base after the bun is pinned, then let the tails hang or tuck them in under the knot. I prefer the ends slightly uneven. A little asymmetry makes the bun look less staged.
This style is especially nice with simple clothes. White tee, jeans, side bun with a printed scarf — done. It has just enough detail to keep the hair from feeling like an afterthought.
11. Rolled Side Bun for Shoulder-Length Hair
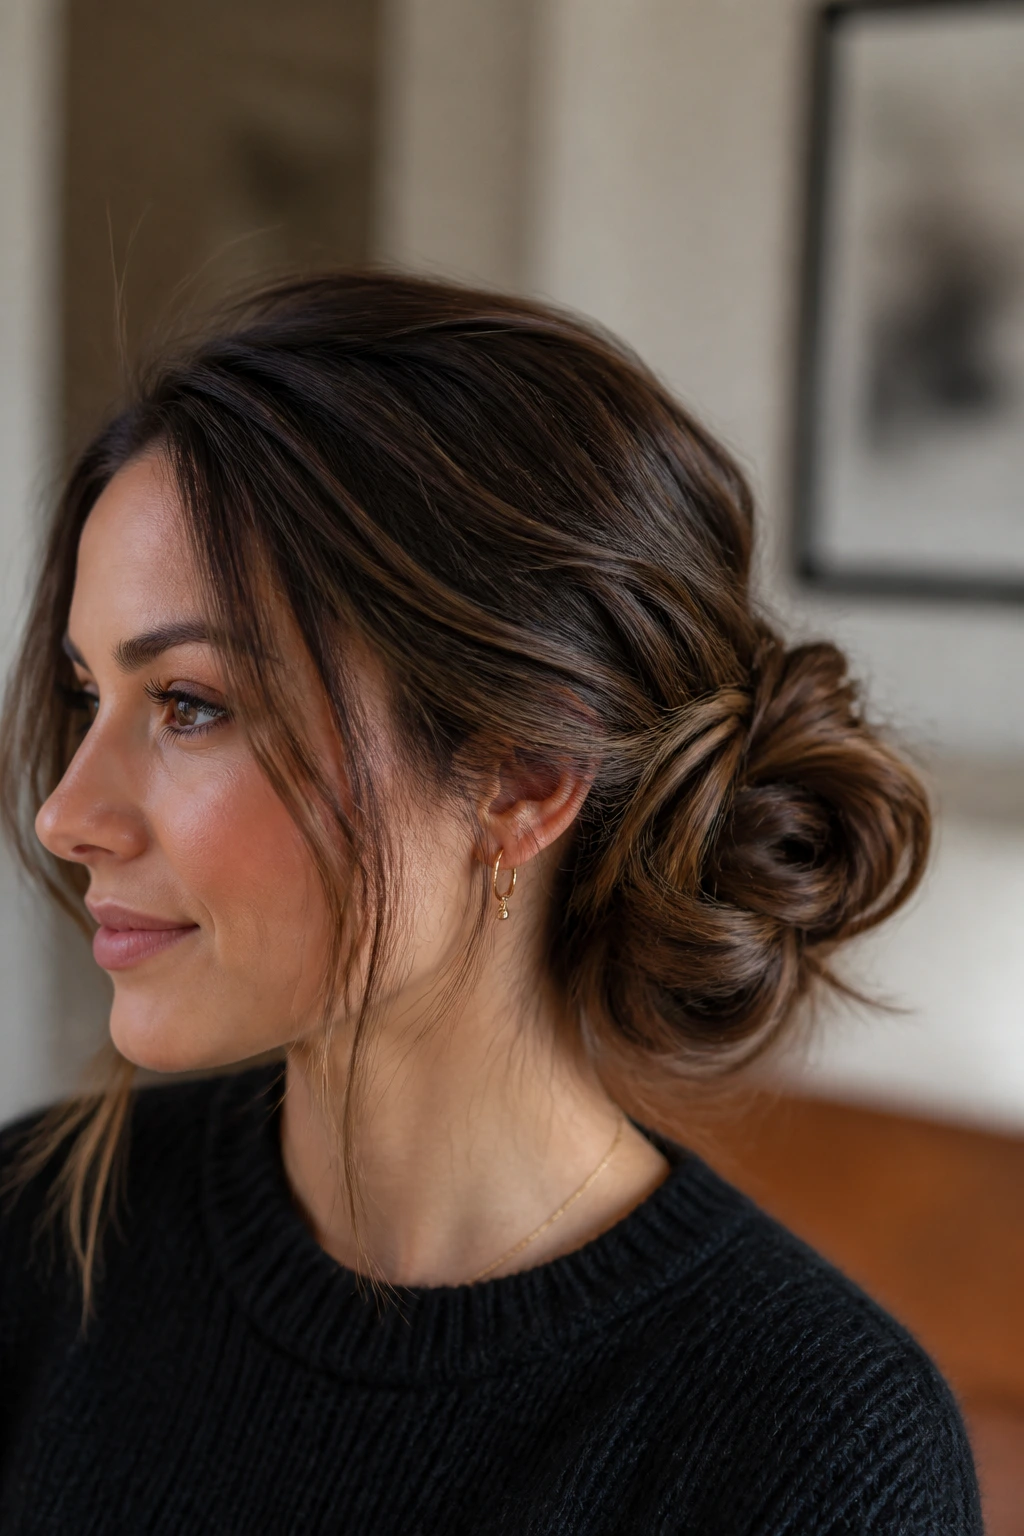
This one is a gift for shoulder-length hair that refuses to wrap into a clean bun. Instead of forcing a long coil, you roll the ends inward and build the shape in layers.
That rolling motion helps shorter lengths stay inside the bun instead of escaping around the ear. It also makes the bun look fuller than it is, which is useful when the hair is on the fine side.
Use a small elastic to anchor the side ponytail, then roll the tail upward and inward toward the scalp. Pin each roll as you go. If you try to pin the whole thing only at the end, it tends to slip.
Shorter hair can do this style. Really. It just needs a little patience and a few hidden pins placed close to the scalp.
12. Pin-and-Tuck Side Bun
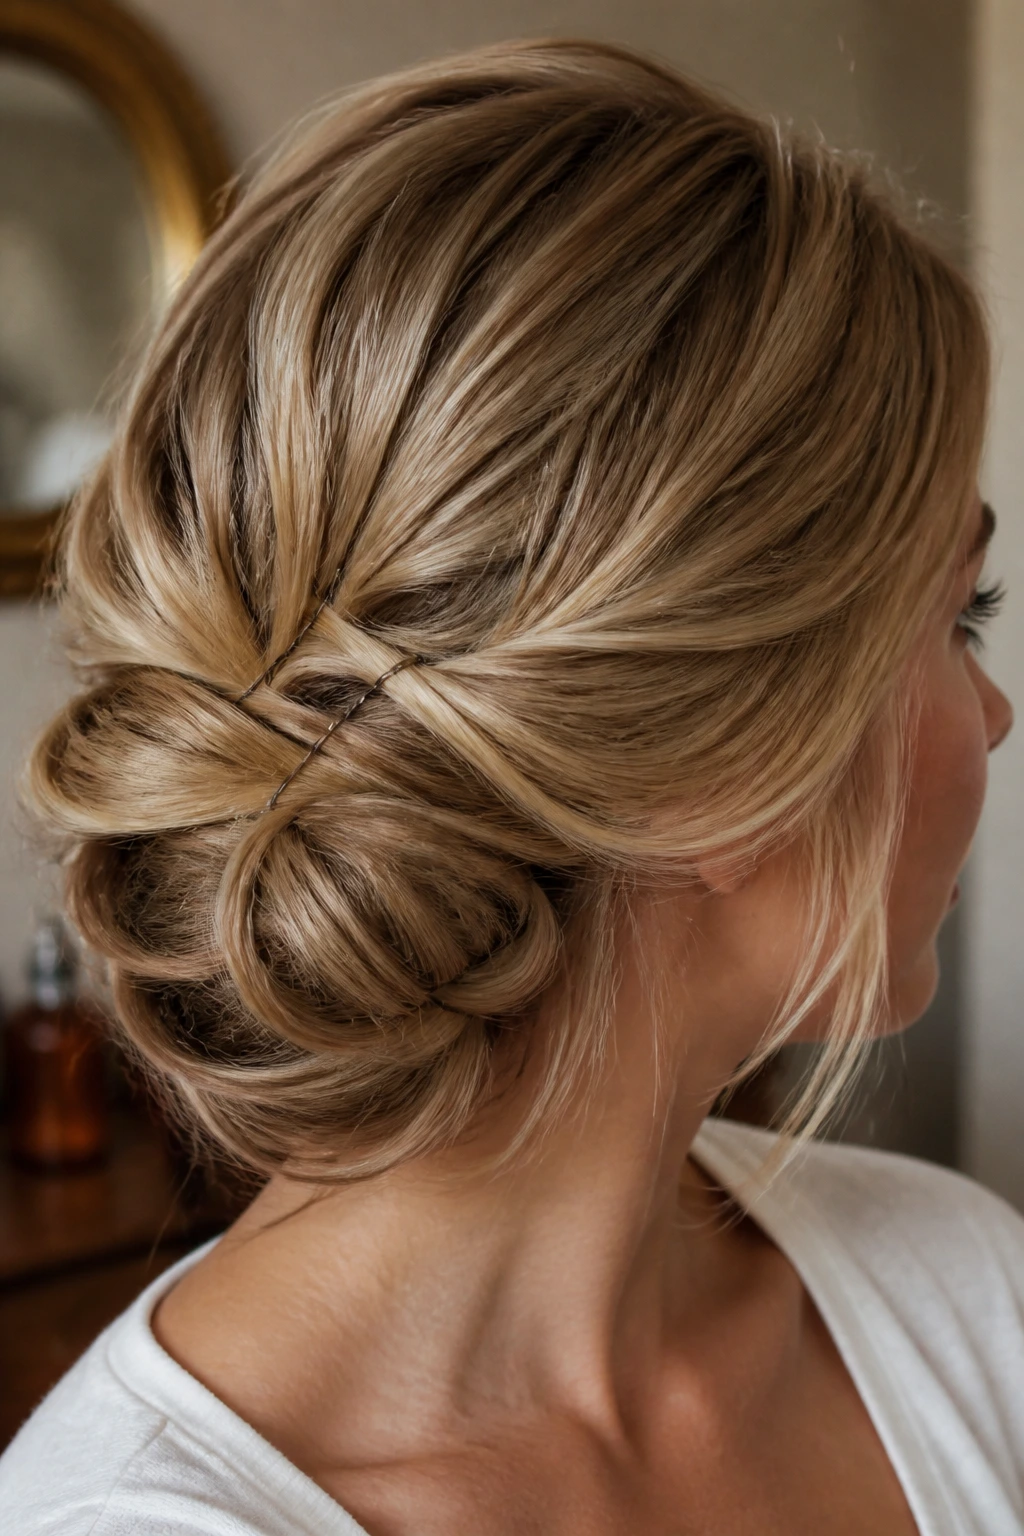
This is the style for layered hair and awkward grow-out stages. You take small sections, tuck them inward, and pin them one by one until the bun holds its own shape.
The result is softer than a wrapped bun and more controlled than a freeform knot. That middle ground is useful when layers keep falling out no matter what you do.
The best part? You do not need every strand to behave. If one layer escapes near the temple, leave it there. The style looks better with a tiny bit of disruption anyway.
Use matching pins if you can, because a dozen shiny pins scattered across the head can distract from the bun itself. You want the eye to land on the shape, not the hardware.
13. Voluminous Side Bun for Thick Hair
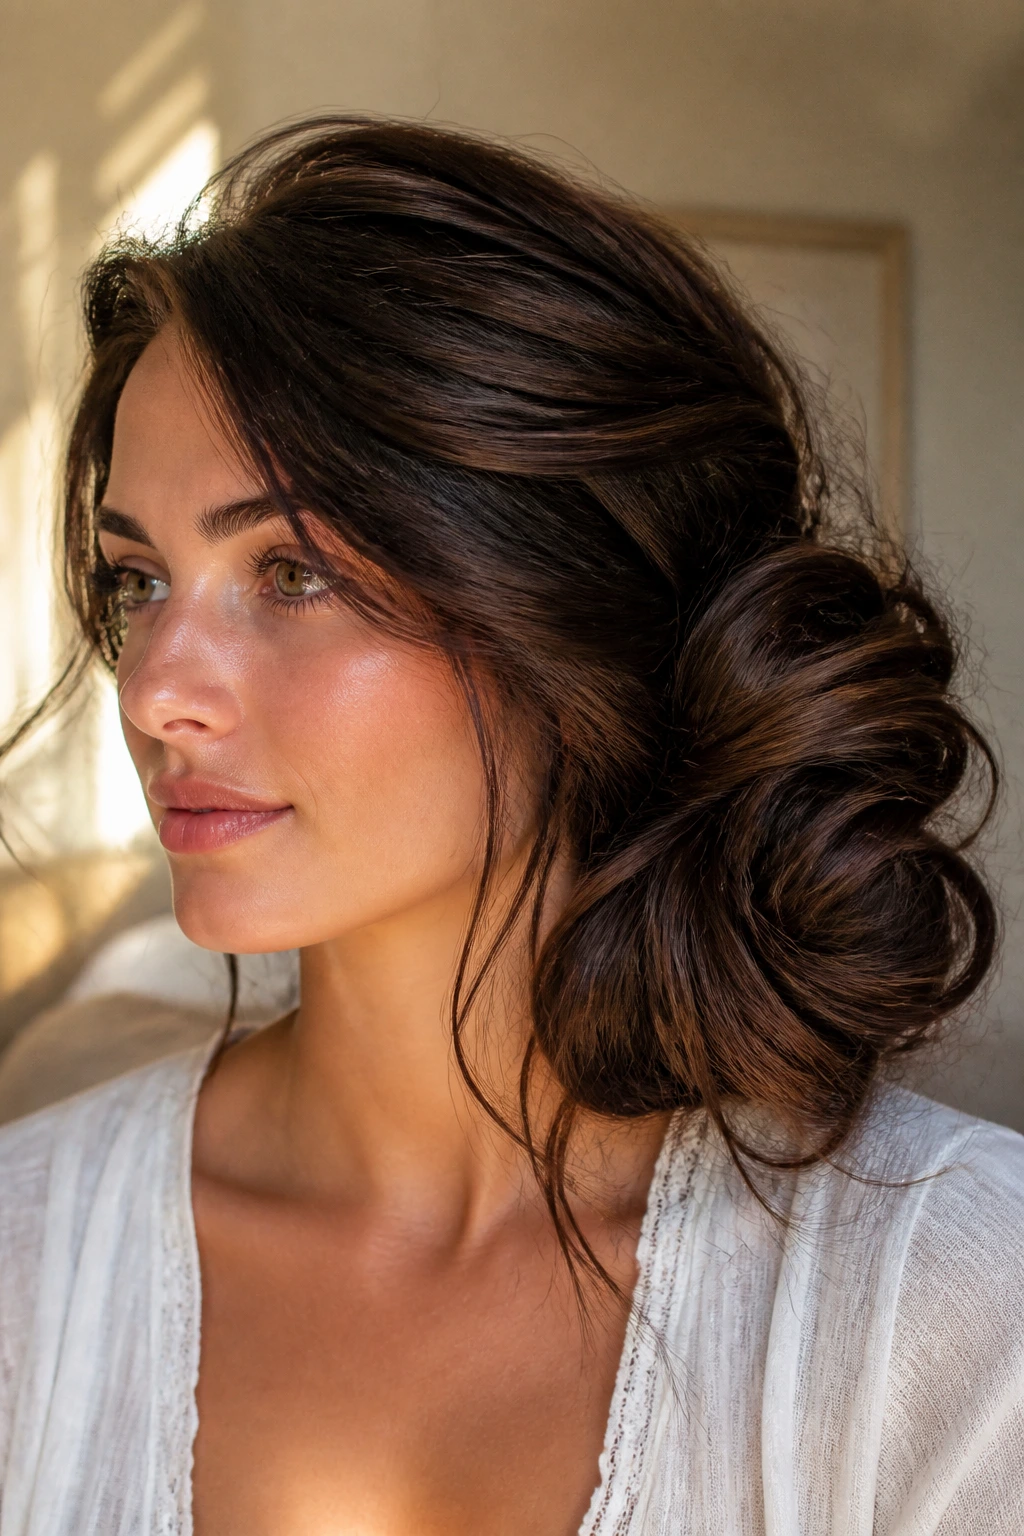
What thick hair needs is space, not more product. That is the first thing to remember. If you cram too much hair into one tight coil, the bun gets heavy and starts pulling at the scalp.
This version works by splitting the length before you build the bun, so the weight is spread out. It feels easier on the head and looks better from the side.
- Make a low side ponytail with a strong elastic
- Divide the ponytail into two sections
- Twist each section loosely before wrapping
- Pin close to the base so the bun does not sag
The volume should come from the hair itself, not from backcombing every inch of it. A little lift at the roots is enough. Any more and the bun can start looking boxy, which is not flattering on thick hair.
14. Mini Side Bun for Short Hair
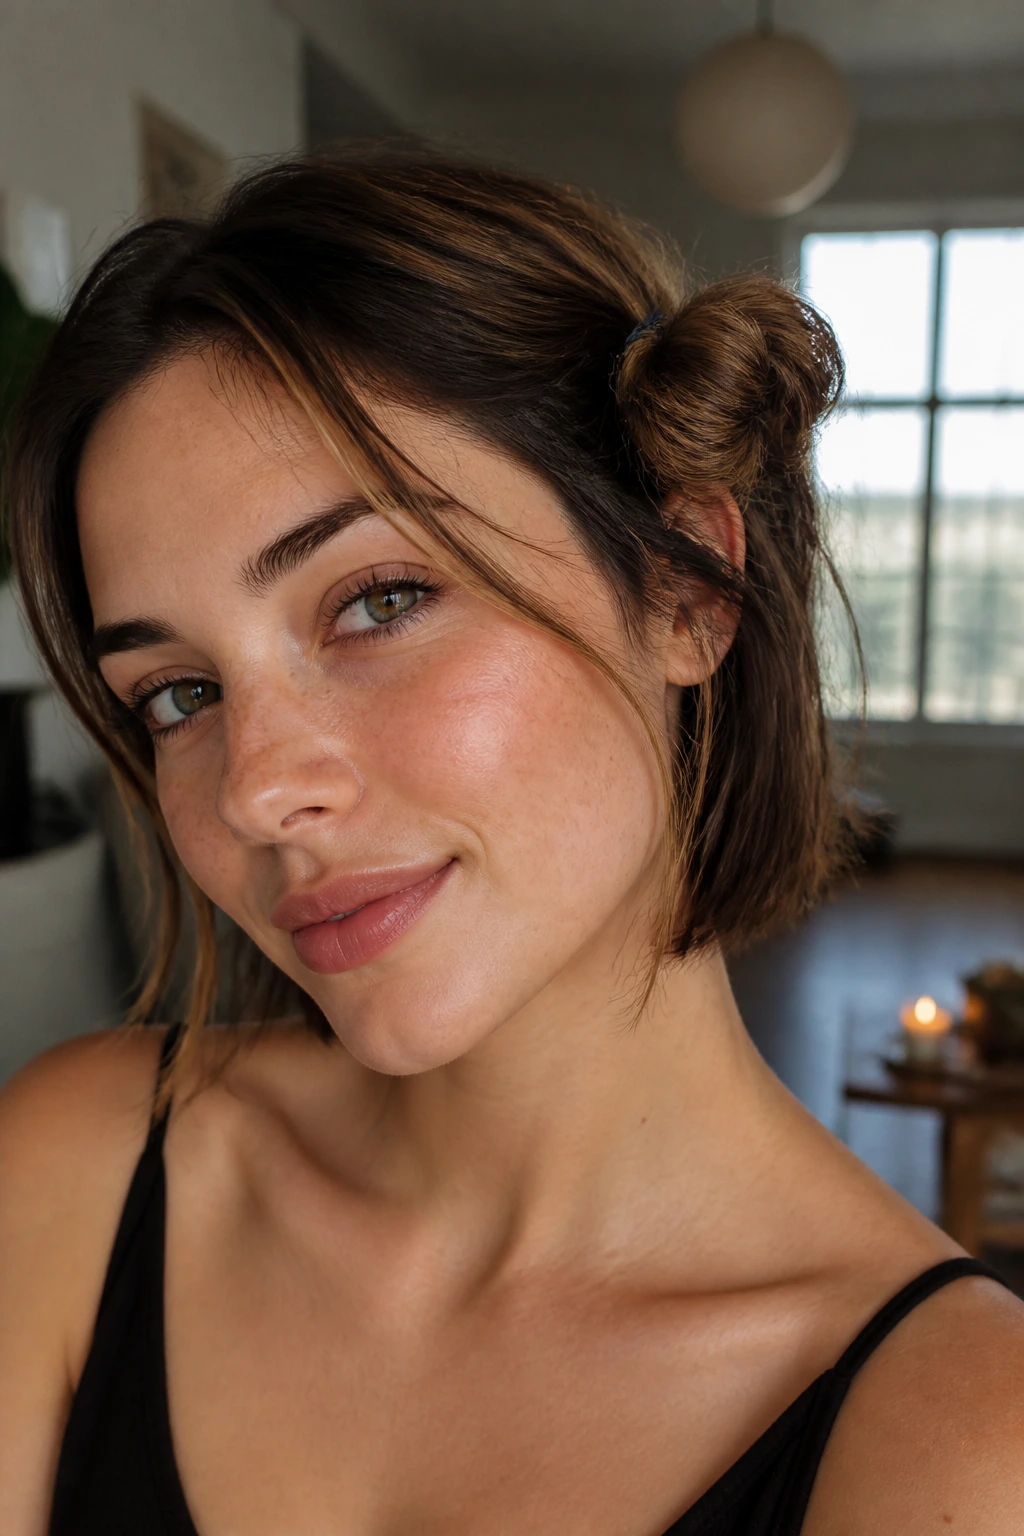
I like this one when the hair stops at the collarbone and refuses to cooperate with bigger buns. A mini side bun uses only part of the length, so you are not fighting the haircut.
It usually works best as a half-up or low-side-updo, with the ends tucked in rather than wrapped around and around. That keeps it compact and stops it from drooping.
The bun can be small. That’s fine. Small buns often look sharper on short hair because they do not pretend to be more hair than you actually have.
A few face pieces help here, especially if the rest of the hair is tucked close to the head. Short hair looks best when the style feels intentional, not like a compromise. There is a difference, and you can see it right away.
15. Soft Side Bun With Loose Waves
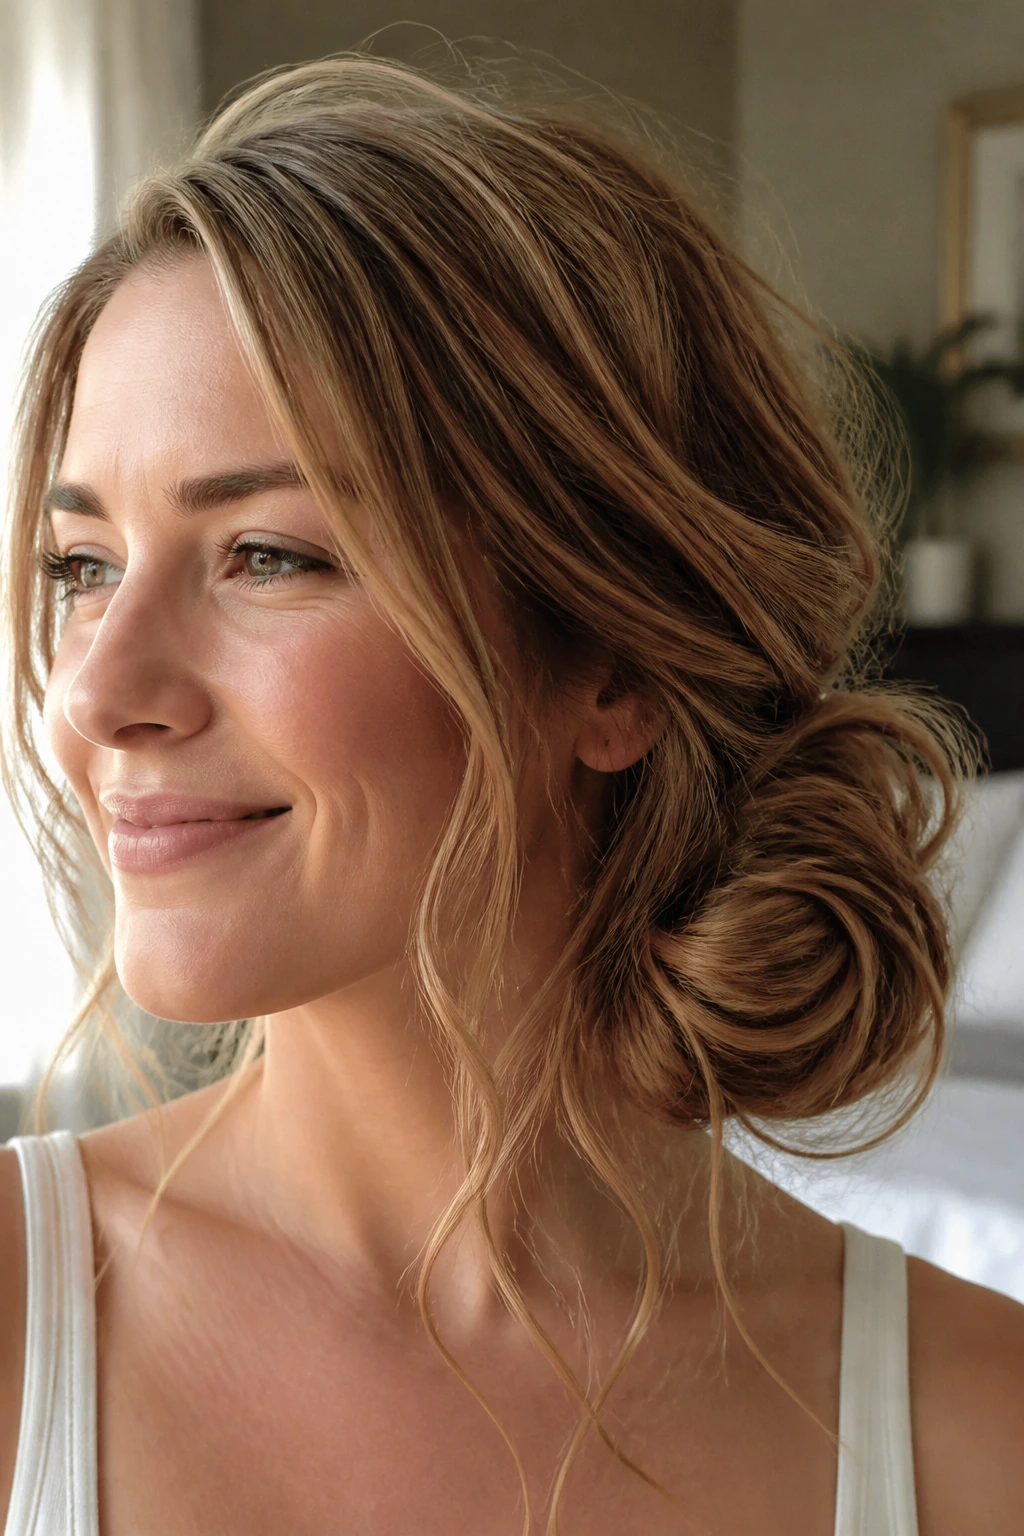
If your hair is already wavy, this style is easy to love. The waves do half the work before you even pick up a pin, and the side bun lets the texture stay visible instead of flattening it out.
If your hair is already wavy
Start with a light wave spray or a touch of mousse through damp hair. Then let it dry with movement. You do not need pin-straight hair here.
How to keep it soft
Gather the hair loosely to one side and twist only the lower half. Leave the waves near the face and at the crown alone. That keeps the shape airy.
Finish
Pin the bun lightly and stop before it feels too controlled. A couple of loose strands around the ears make the style feel lived in, not lazy.
The danger with wavy hair is overdoing the brushing. Brush too much, and the waves fall apart. Leave them alone, and the bun gets that soft bend that looks good from every angle.
16. Offset Side Bun With Hidden Elastic
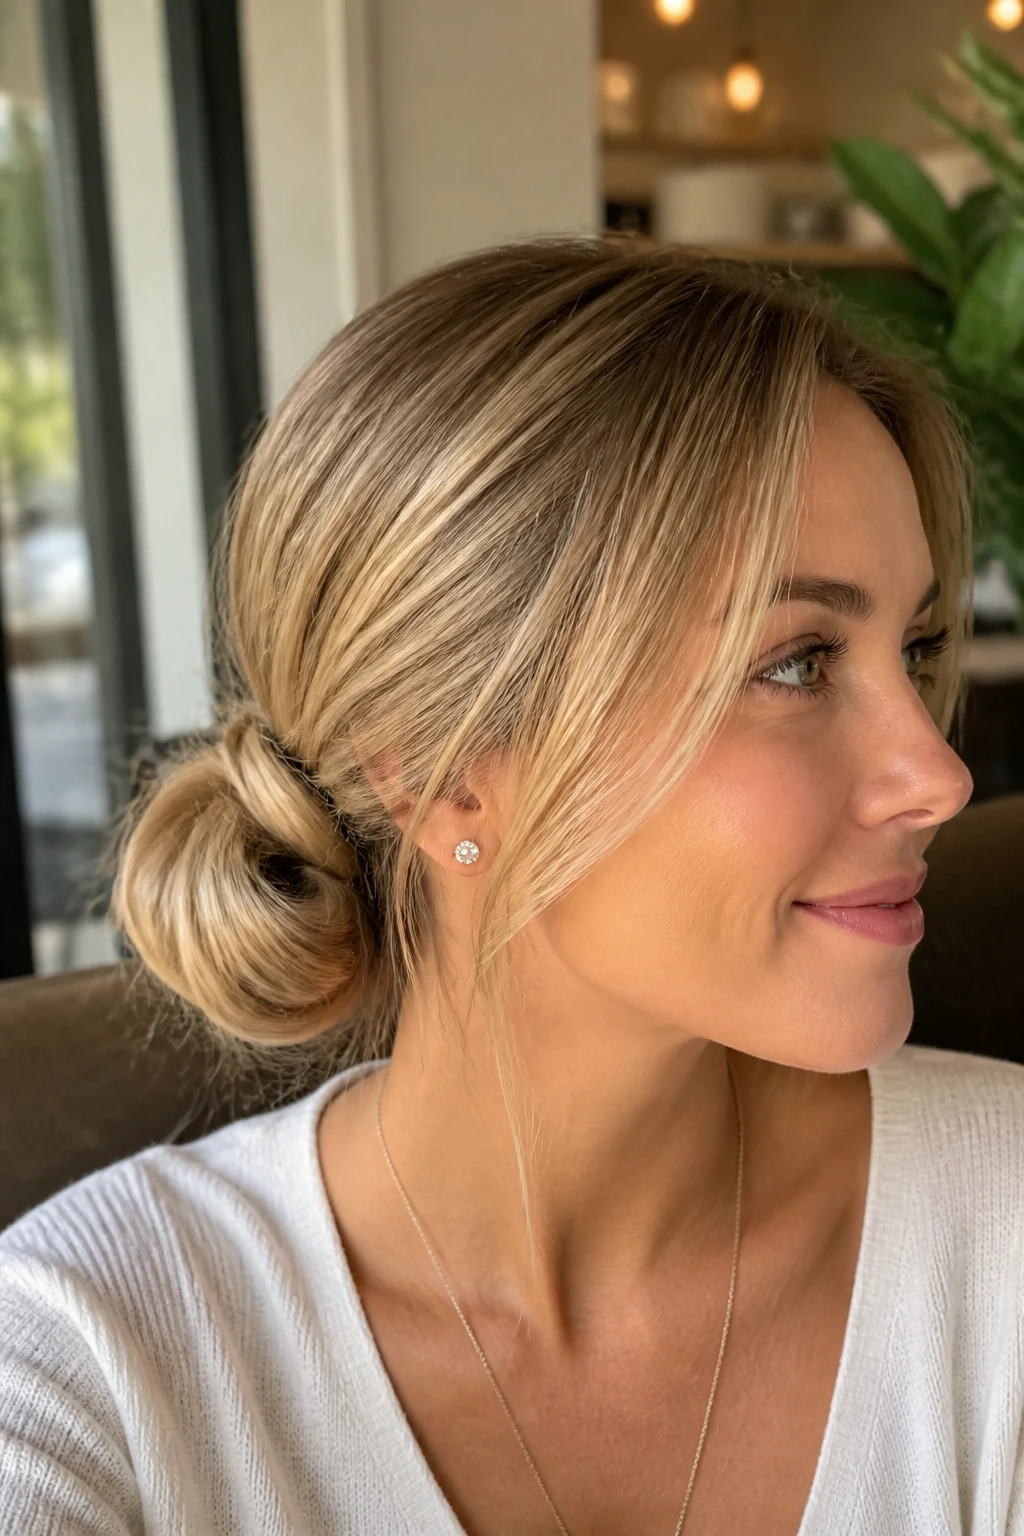
This style sits a little farther back than people expect, which is why it works so well. The bun lives just behind the ear line, and the elastic disappears under a wrapped section of hair.
That hidden base makes the whole style look calmer. You see bun, not tie. Small thing. Big difference.
Use one section of hair to wrap around the elastic and cover it fully, then pin that wrap underneath. If the cover piece is too thin, the elastic shows through. If it is too thick, the bun gets bulky. Aim for a strip about one to two inches wide.
I like this one for days when a side bun needs to look neat without going formal. It lands in that good middle place. Clean enough for dinner, loose enough for errands.
17. Rope-Braid Side Bun
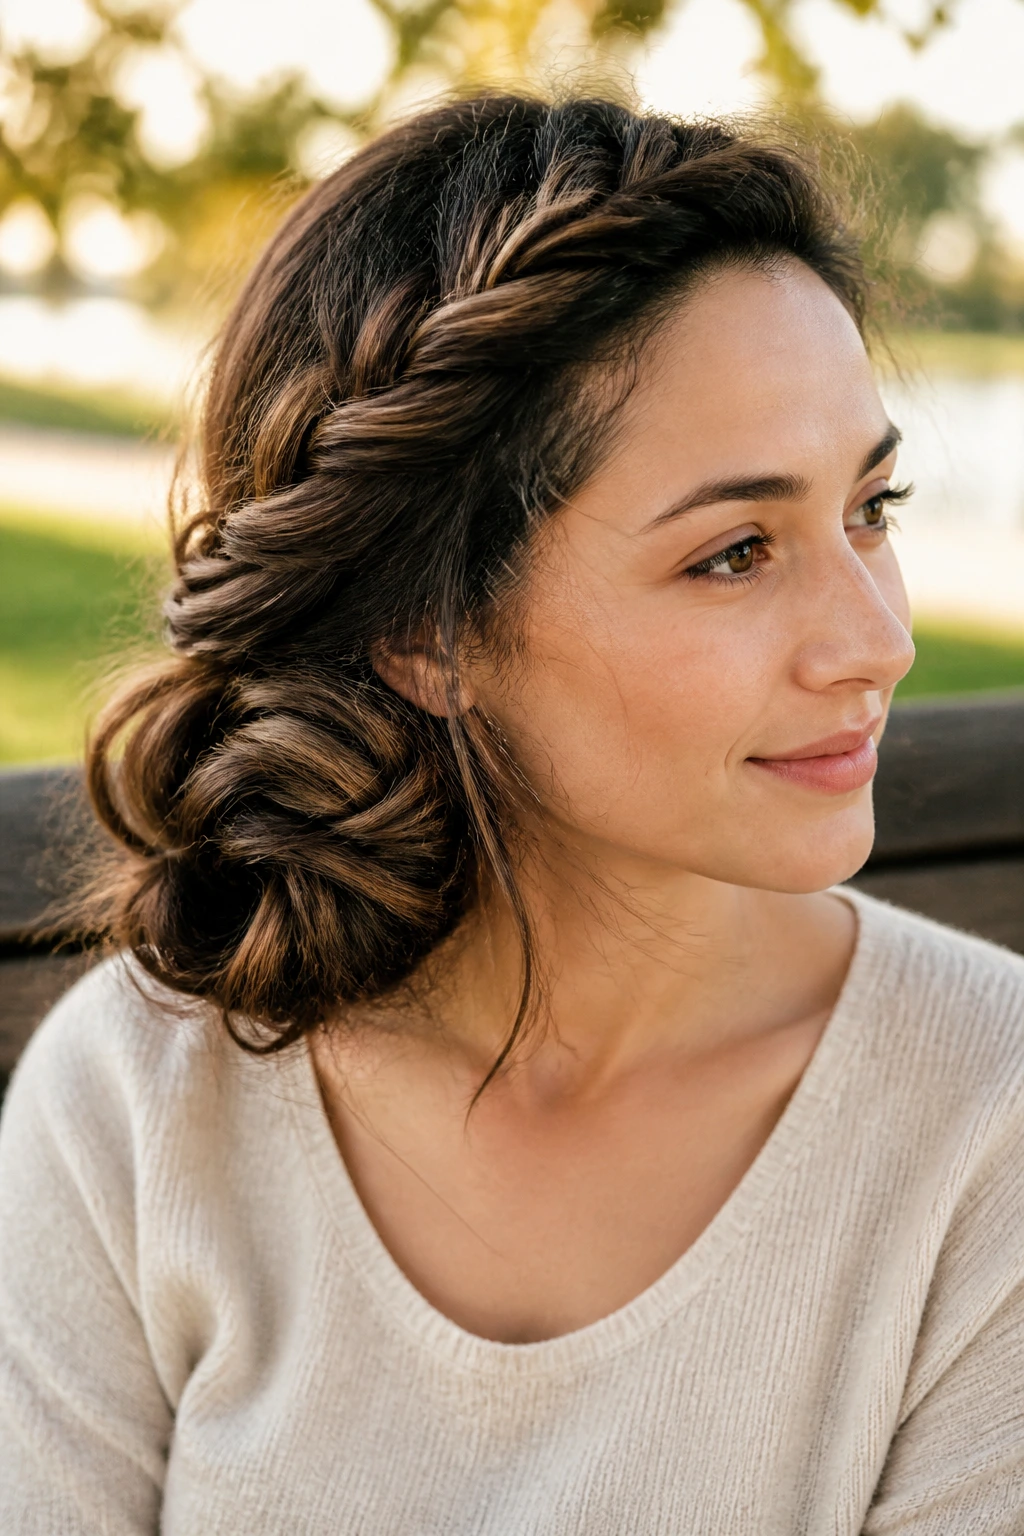
A rope braid gives the bun a cleaner twist than a regular braid. Two strands twisted around each other hold their shape well and usually make the bun look more polished, even when the finish is loose.
This is a smart choice for straight or lightly wavy hair because the rope texture keeps the hair from slipping apart. It also works fast once you get the motion down.
- Divide the hair into two equal sections
- Twist each section in the same direction
- Wrap them around each other in the opposite direction
- Coil the rope into a side bun and pin
That opposite-direction trick matters. It keeps the rope from unraveling. Miss that part, and the style loosens much faster than it should.
18. Crown-Volume Side Bun
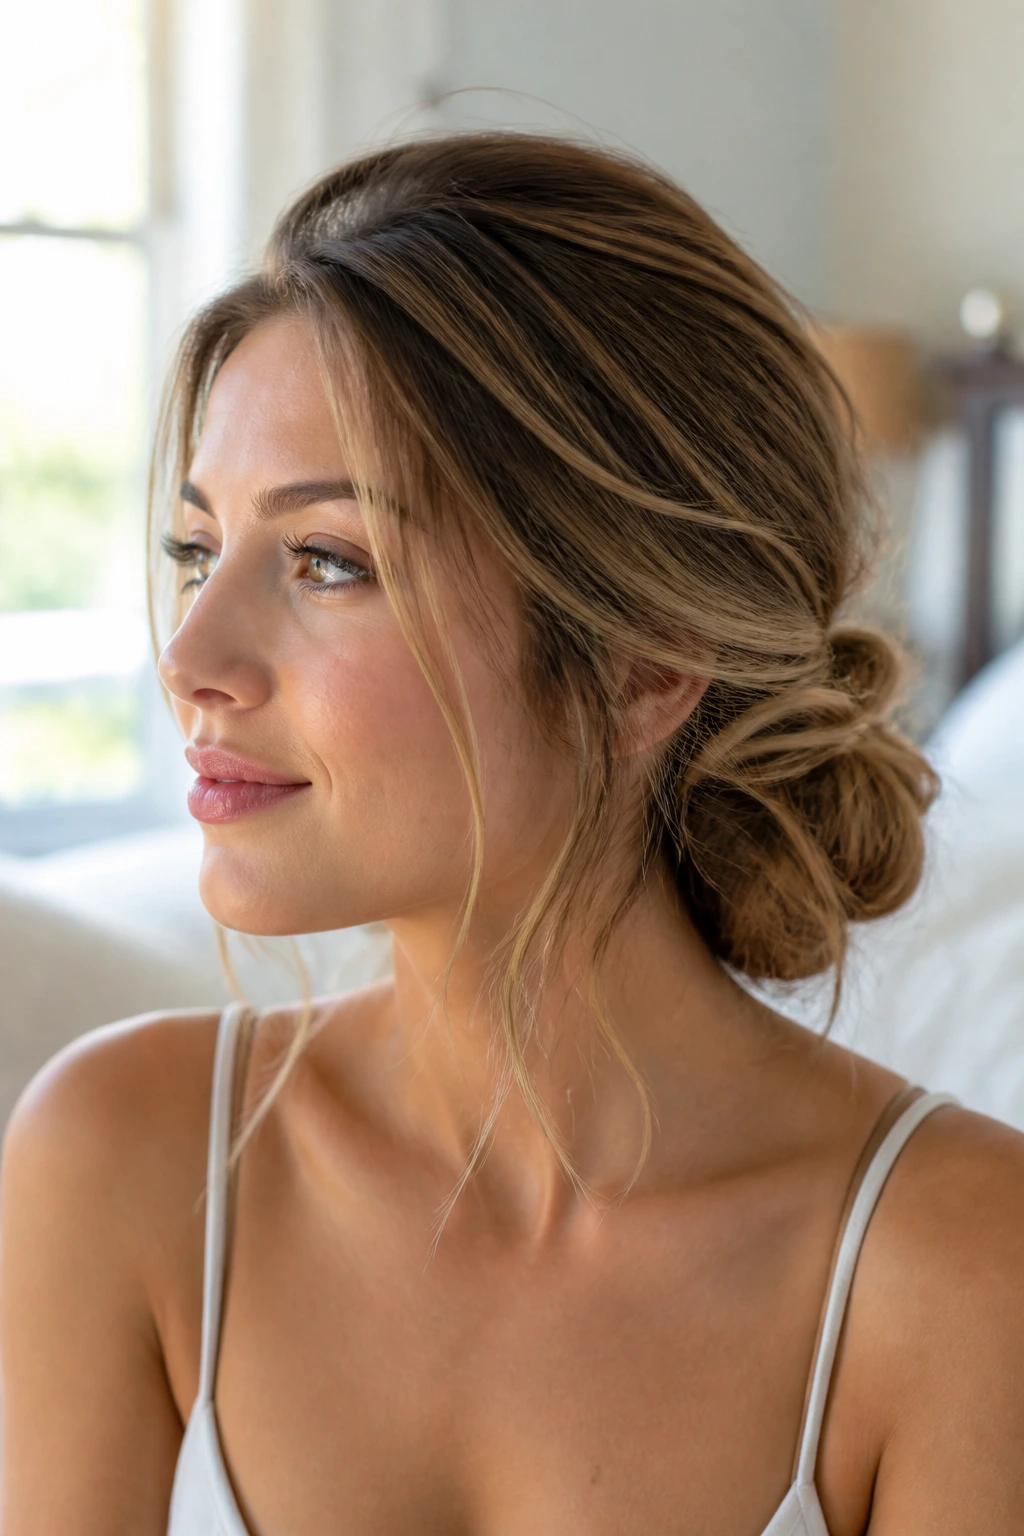
How do you keep the crown from going flat? You lift it before the bun is finished. That is the honest answer. A little root volume changes the whole silhouette of the style.
You do not need to tease the whole top section. Just lift a few small pieces near the part and lightly push the roots upward with your fingers or a tail comb. Tiny movement. Not a rat’s nest.
The bun itself can stay soft and low. The volume lives at the top, where it helps balance the off-center shape. Without that lift, the style can hug the head too tightly and look tired.
A dry texture spray helps here more than hairspray does. Hairspray freezes the shape; texture spray gives it some grip. Different jobs. Different result.
19. Low, Lived-In Messy Side Bun for Second-Day Hair
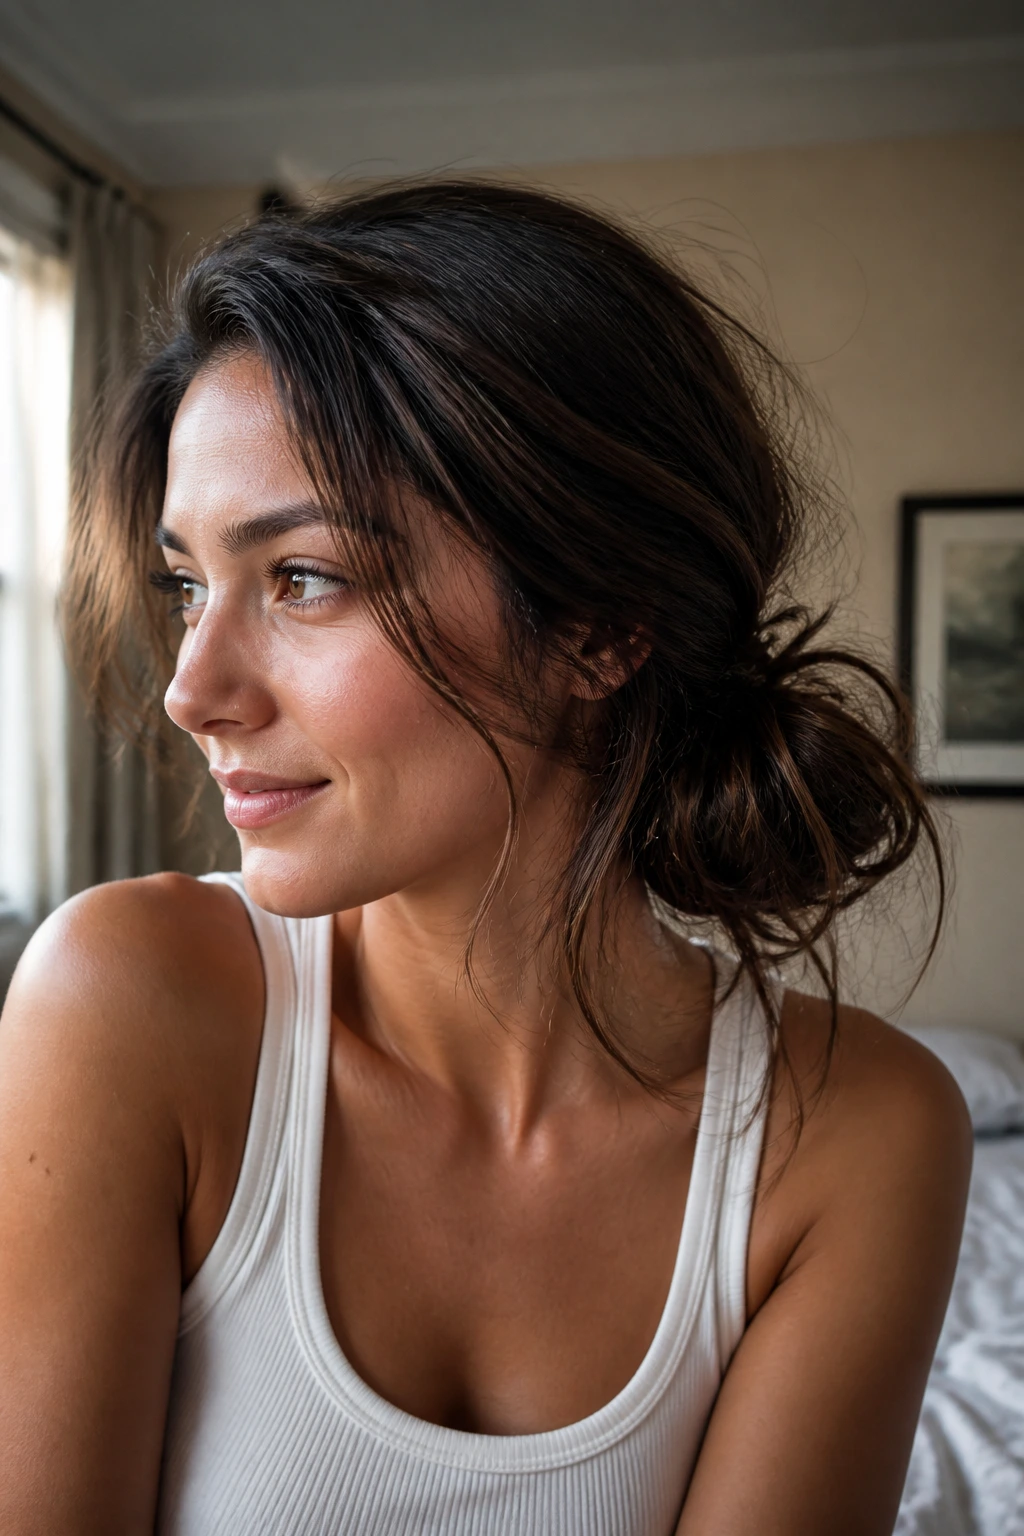
Second-day hair is where this style earns its keep. Slight oil at the roots, a little bend in the ends, maybe one side that always falls flatter than the other — all of that works in your favor here.
You are not trying to erase the texture. You are trying to use it. That’s the whole point.
A side bun on second-day hair usually needs less product than fresh hair does. Too much dry shampoo can make the hair feel chalky, and that makes pinning harder. A light dusting at the roots, then a quick shake with the fingers, is enough.
This is the kind of style that looks better after an hour. The loose pieces settle, the bun softens, and the shape stops looking newly made. Some styles improve with a little time on them. This is one of those.
20. Romantic Side Bun With Natural Curls
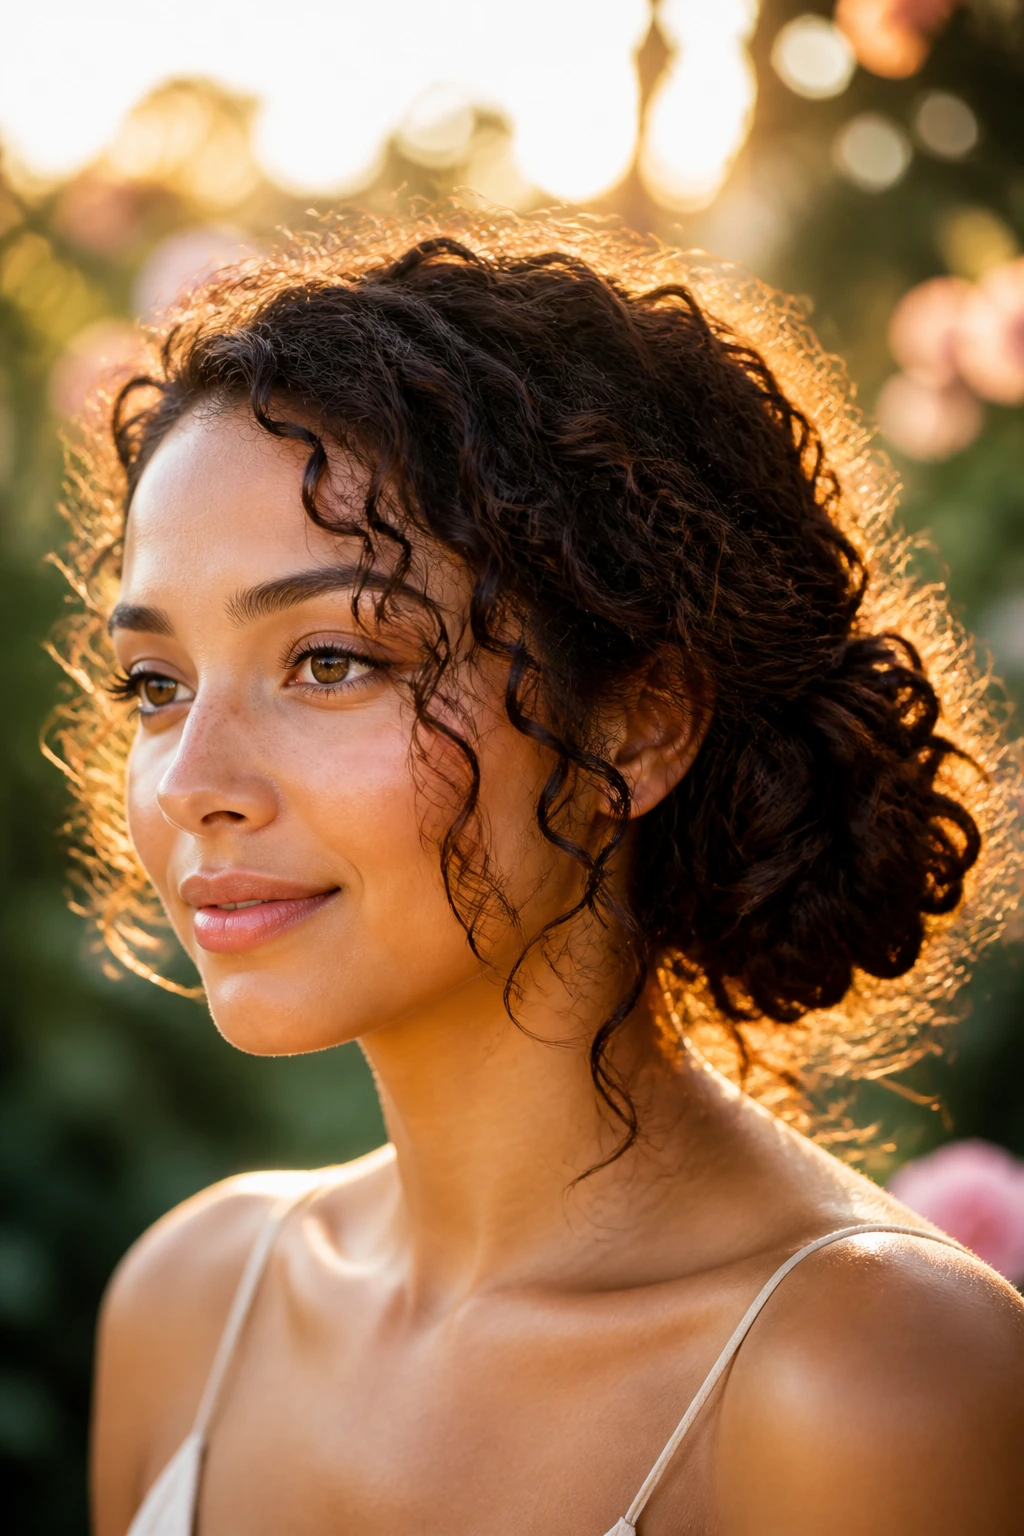
Curls make this style feel softer from the start, which is a nice place to begin. The trick is keeping the curl pattern visible while guiding the hair into one side.
Let the curls stay
Do not brush them out. Use your fingers to separate only the biggest clumps, then gather the hair loosely toward the side you want the bun to sit on.
Where to pin
Pin the heavier curl sections first, close to the scalp. After that, tuck in the outer curls one at a time. You want the bun to hold its shape without crushing the texture.
What to skip
Skip heavy waxes and sticky gels. They flatten the curl surface and make the bun feel dense. A light cream or leave-in is plenty.
The bun should look soft at the edges and full in the middle. If a few curls bounce free near the neckline, I’d leave them alone.
21. Five-Minute Emergency Side Bun
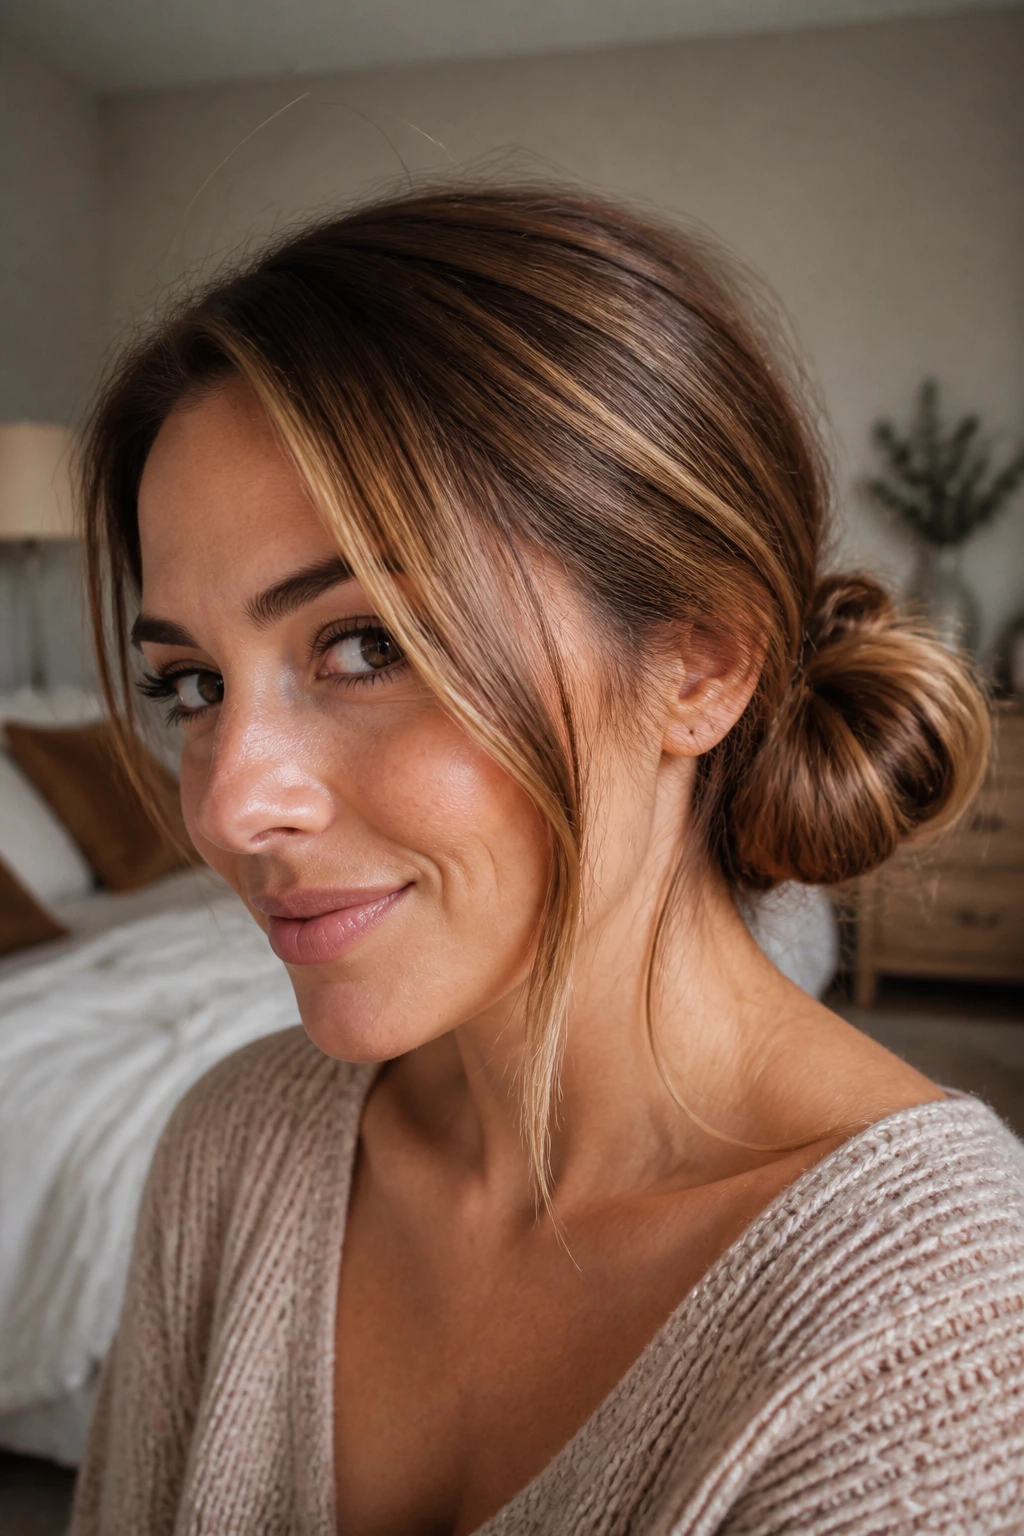
This is the one for days when you are already late and hair is making things worse. It is not fancy. It is fast, and that counts for a lot.
Pull the hair low to one side, twist it once, and secure it with a small elastic. Then wrap the length into a loose bun and pin the center from underneath. Done.
- Keep 2 bobby pins in your bag
- Use dry shampoo only at the roots
- Leave one front piece loose if you have time
- Stop fixing it once it stays in place
A five-minute bun works because it respects the clock. If you start chasing perfect symmetry, you lose the whole point. A little unevenness reads as intentional when the shape is solid.
22. Barely-There Side Bun
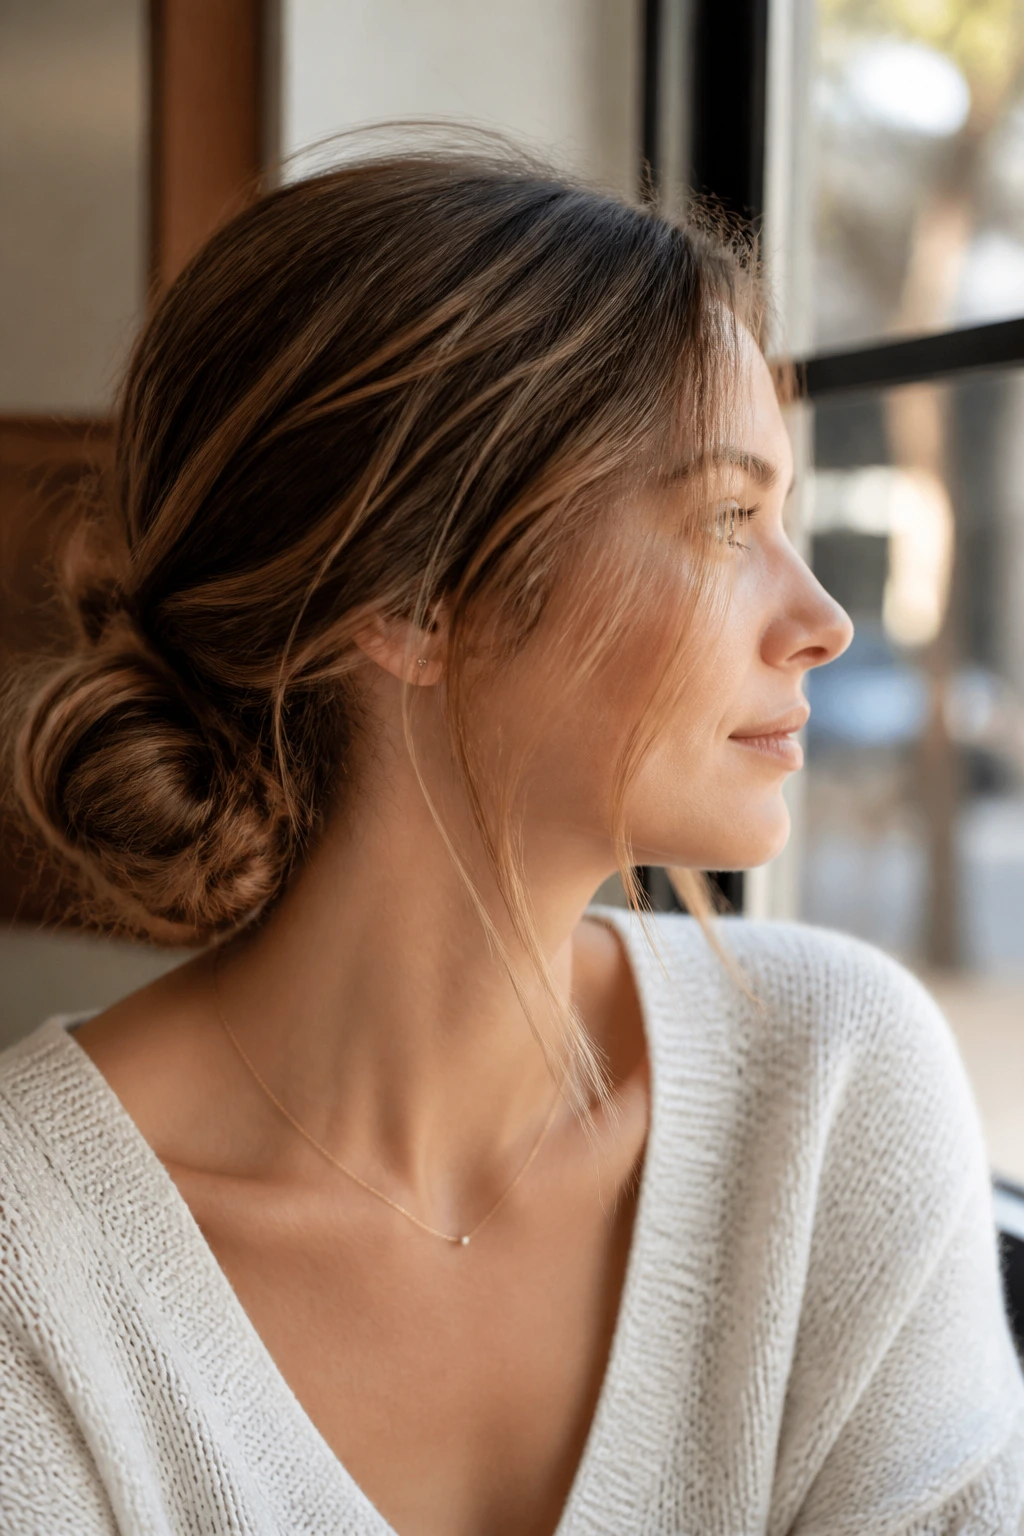
This version looks best when it seems like it could fall apart, but never does. The bun sits low, the ends stay soft, and the whole style has that light, unfinished edge people usually overwork into the ground.
It suits fine hair, soft waves, and anyone who wants the side bun to feel more like a gesture than a statement. That sounds delicate because it is. The bun should not dominate the face.
A small twist, one elastic, and a few loose pins are enough. Pull out one or two wisps near the cheek and leave the rest alone. Seriously. The more you fiddle, the less interesting it gets.
I like this one when the outfit is simple and the hair should stay in the background. It does its job, then gets out of the way.
Final Thoughts
Messy side buns work because they leave room for texture, movement, and a little human error. That is not a flaw in the style. It is the thing that makes it useful.
Pick the version that matches your hair, not the one that looks prettiest on a mannequin head. Thick hair wants different pinning than fine hair. Curly hair wants different handling than straight hair. Once you stop forcing every bun into the same shape, the whole thing gets easier.
Keep one small elastic, a few bobby pins, and a texture spray nearby. That tiny kit solves more bad-hair mornings than a drawer full of tools ever will.
