



A long curly wolf cut solves a very specific problem: your hair wants volume, but not in the pyramid shape nobody asked for. The cut keeps length, breaks up heaviness, and gives curls room to rise at the crown instead of hanging flat on top and puffing out at the bottom.
That balance is why this shape works so well on curls. It sits somewhere between a shag and a mullet, but on curly hair it reads softer, airier, and less staged than it does on straight hair. The trick is not chopping random layers into the head and hoping for the best. Curls need placement. They need weight removed where it helps, and left alone where the shape still needs support.
A lot of curly cuts miss that. They thin the wrong spots, cut the bangs too short, or carve layers so high that the whole style frizzes into a halo by lunch. A good wolf cut for curls does the opposite. It keeps the length you like, builds lift where your hair goes limp, and lets the curl pattern do the heavy lifting.
So the cut is never one-size-fits-all. Loose ringlets, dense spirals, fine curls, and thick coils all want a different version of the same idea. These 15 takes lean into that difference, and each one has its own way of making curly hair look fuller without looking puffy.
1. Long Curly Wolf Cut with Crown Lift
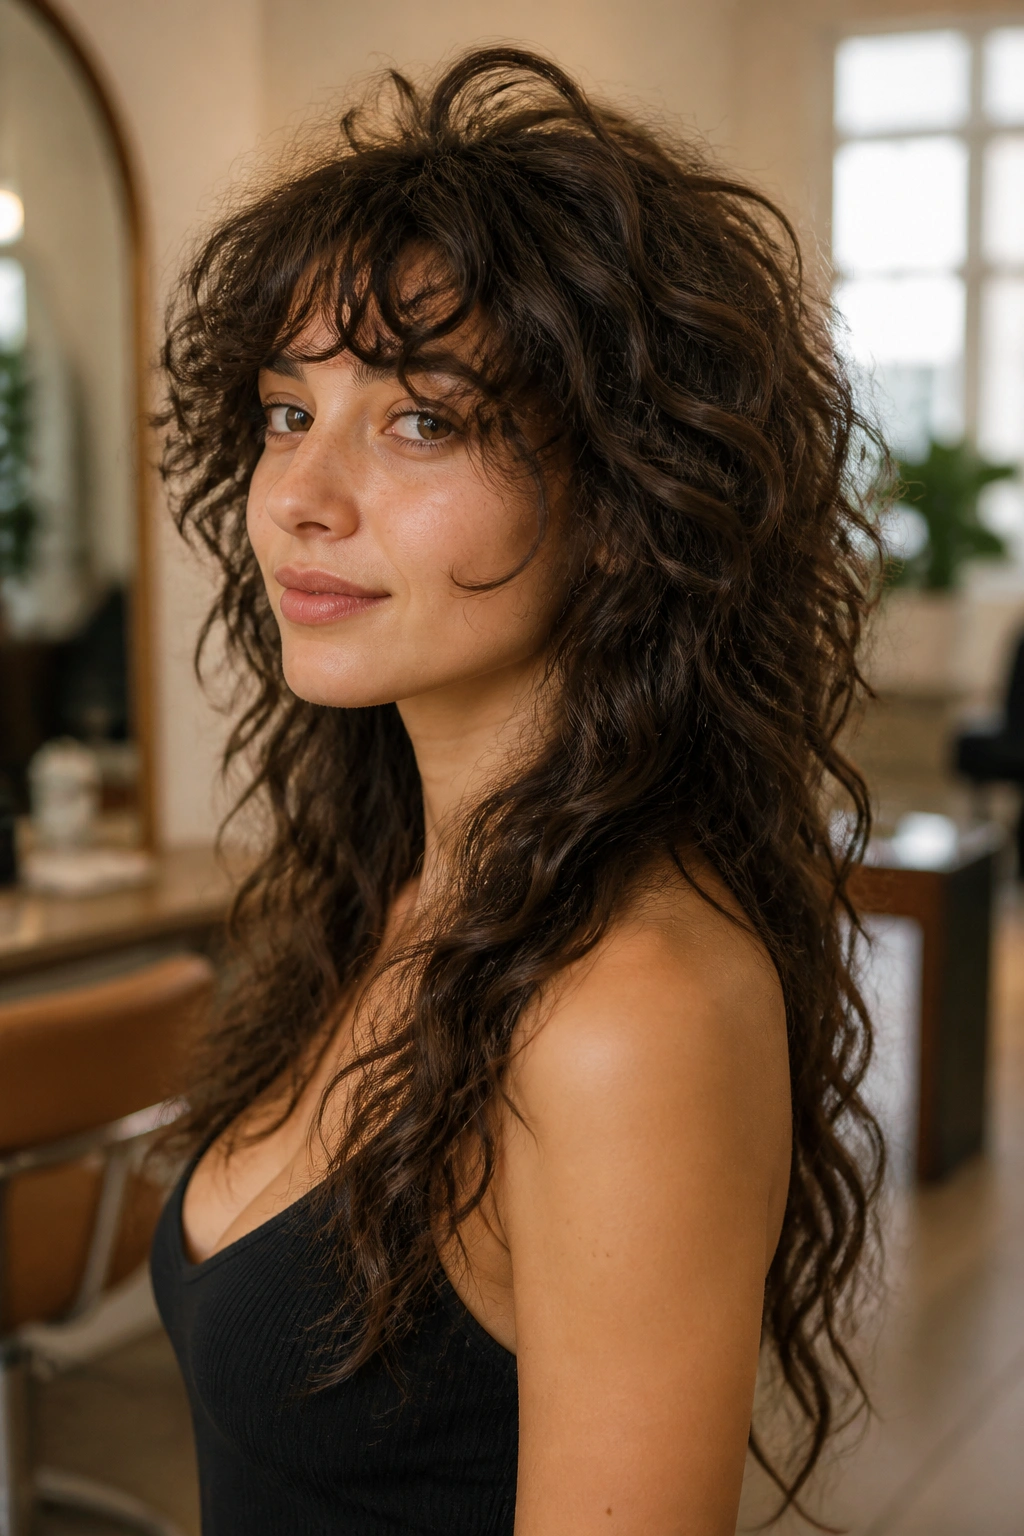
This is the version I reach for when curls look heavy at the roots and flat up top. The whole point is to keep the lower length intact while taking enough weight out of the crown that the hair can actually rise. If your curls collapse by noon, this is the first shape worth looking at.
Ask for the shortest layer to sit a few inches below the top of the head, not right on it. That small shift matters. Too much height at the crown and you lose the drape; too little and the cut won’t move. The best result usually comes from dry cutting or cutting curl-by-curl so the stylist can see how much each section springs up.
I like this one on loose ringlets and mixed textures because it makes the top half feel lighter without turning the ends stringy. The silhouette stays long. It just stops feeling dragged down.
Best detail to request: keep the perimeter long and place the first internal layers where the crown starts to feel dense, not where the hair is already thin.
A little mousse at the roots helps here. So does diffusing upside down for the first few minutes, then finishing upright so the shape doesn’t get too wild.
2. Long Curly Wolf Cut with Bottleneck Bangs
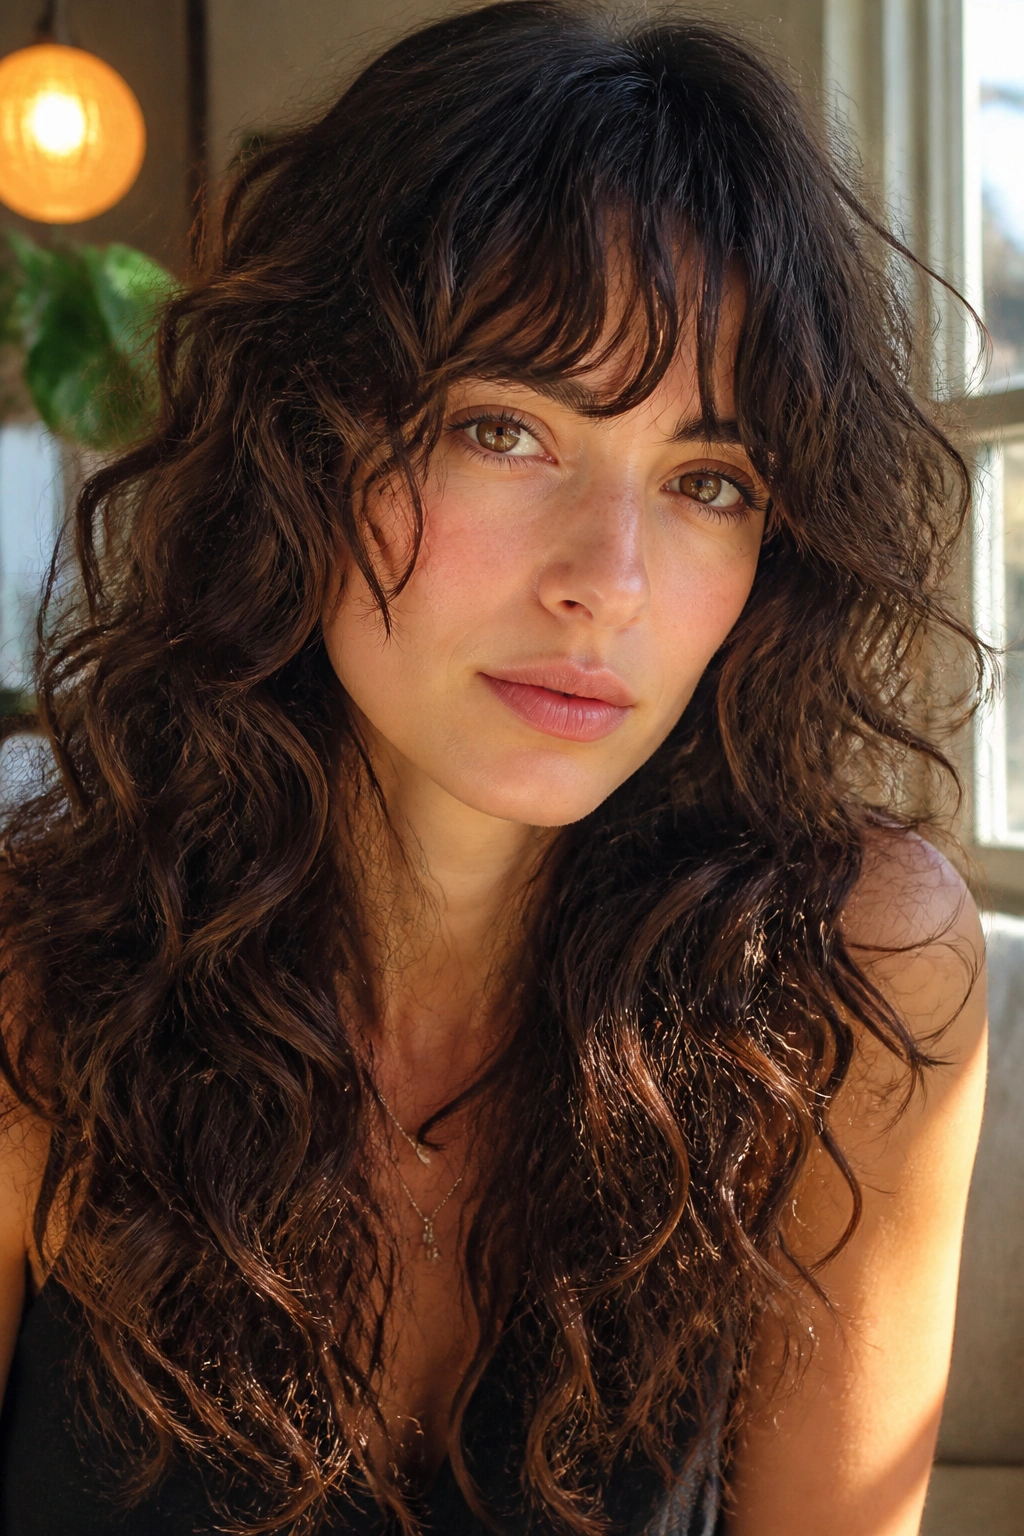
Bottleneck bangs do a lot of work on curly hair. They open the face without swallowing it, and they give the front of a wolf cut that soft, broken-up edge that makes the whole shape feel fuller. Straight-across bangs can get heavy fast. These don’t.
The magic is in the taper. The center pieces stay a touch shorter, then the sides lengthen toward the cheekbones. On curls, that creates a nice frame without boxing in the forehead. It also helps the volume read higher, because the eye follows the bangs upward into the crown layers.
What to ask for
- Keep the shortest point at or just below the brow when dry.
- Let the side pieces hit around the cheekbone or slightly below.
- Avoid a dense, blunt fringe unless your curls are very tight and springy.
- Ask for the bang area to be cut with the curl pattern in mind, not stretched straight.
- Leave enough length to tuck the bangs to one side on days you want less face.
This version works especially well if your face feels a little long and you want the cut to add width without losing vertical lift. It’s a small detail, but a smart one.
And yes, you’ll need a trim sooner than with no bangs. That’s the trade.
3. Rounded Perimeter With Cheekbone Layers
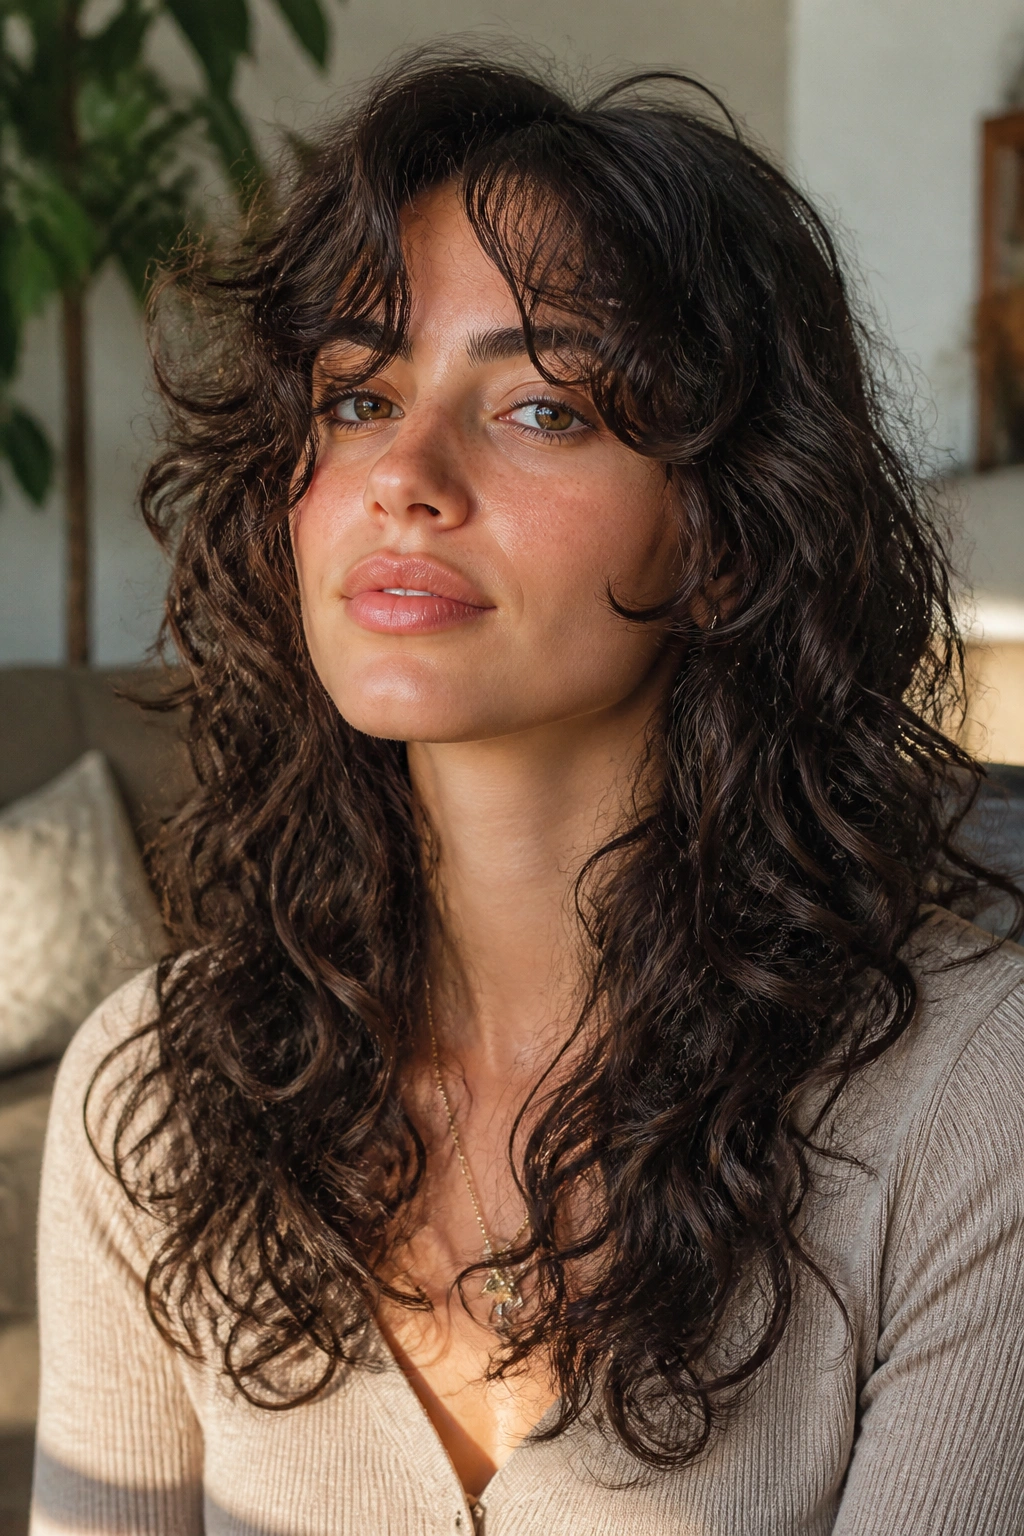
Why does a rounded perimeter help a wolf cut? Because curly hair looks fuller when the ends have somewhere to land. A hard V-shape can make the bottom look too narrow, especially once the curls separate. A rounded edge keeps the silhouette soft and lets the layers stack instead of fight each other.
The cheekbone layers are the part that gives this cut its face shape. They start high enough to show movement around the front, but not so high that the style loses length. If your curls are medium to thick, that line can make the whole cut feel lighter without turning it into a cloud.
How to get it
- Keep the outer line softly curved, not sharp.
- Place the shortest face frame around the cheekbone.
- Let the back stay a little fuller so the front doesn’t overpower everything.
- Ask for point cutting on the ends if your hair tends to look blunt or boxy.
I like this version for people who want volume that feels controlled. Not stiff. Not messy. Just full in a way that looks like the hair belongs to your head.
It’s also one of the easier shapes to grow out. The curve hides a lot of awkward stages.
4. Hidden Weight Removal for Thick Curls

Thick curls can look huge for about twenty minutes after wash day, then collapse into a bulky triangle that eats your neck. This cut handles that by taking weight out from the inside, not by chewing up the outline. That difference matters more than people think.
The cleanest approach is internal layering with point cutting. Some stylists also use slide cutting in the mid-lengths, but only if they know how your curl pattern reacts. I would be cautious with aggressive razor work on coarse curls; it can make the ends frizz out faster than you want.
The goal is simple: let the surface stay long, while the middle loses some of the drag that pulls curls downward. Done well, the hair moves when you turn your head. Done badly, it turns into fluff with no shape.
A few things to watch for:
- Too many short layers near the crown can create a mushroom shape.
- Over-thinning the ends can make thick curls look see-through.
- Heavy creams can bring the cut down again, so keep styling products light.
- A diffuser with low heat keeps the volume from getting crushed.
This is the version for people who want hair that feels lighter but still looks full from every angle.
5. Airy Halo Layers for 3A Curls
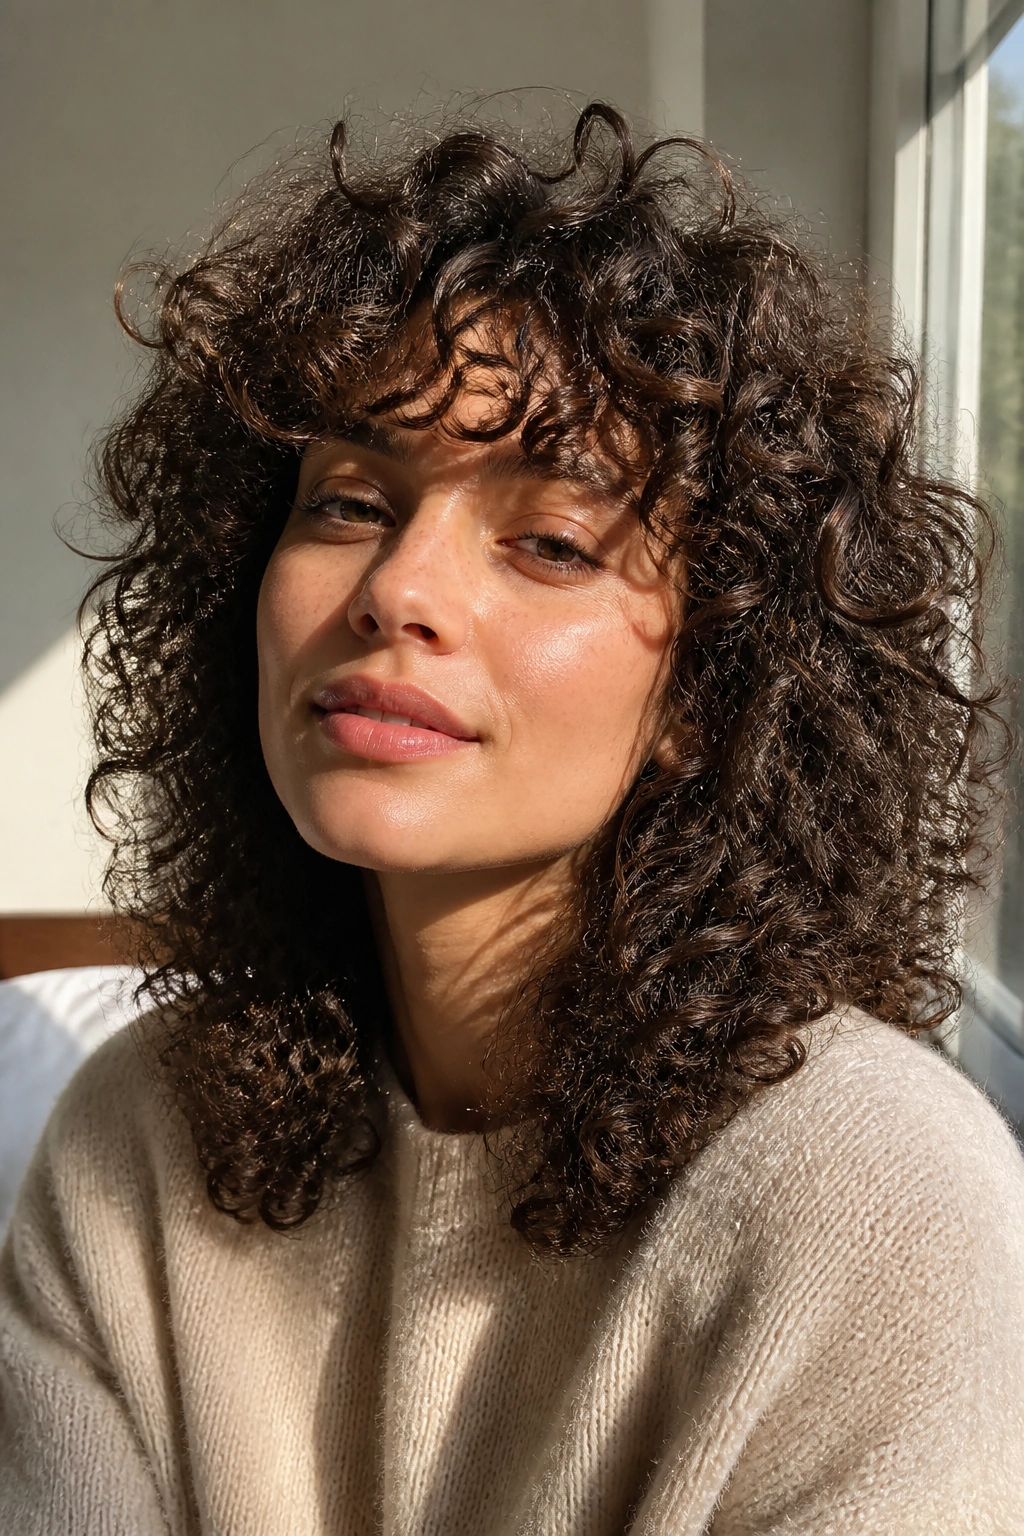
Some cuts are about edge. This one is about lift that feels soft all the way around the head. Airy halo layers work beautifully on 3A curls because the curl pattern already has bounce, so you do not need a lot of aggressive carving. You need placement. That’s the whole game.
The shortest pieces sit high enough to create a halo effect around the top and sides, but they’re blended so the shape doesn’t look chopped. The ends keep length, which gives the style a nice swing when the curls dry. On the right texture, it looks almost cloudlike without becoming fuzzy.
I like this cut when someone wants volume that reads from the front, the side, and the back. Some curly styles only look good head-on. This one has more depth than that. You get a little lift at the temples, some movement through the crown, and enough weight at the bottom to stop the whole thing from floating away.
It’s a forgiving cut, too. If your hair has a few loose sections or uneven curl clumps, the halo shape hides a lot of that.
One warning: don’t flatten it with a heavy buttercream curl product. That wipes out the lightness you paid for.
6. Deep Side Part Volume Cut

A center part can be tidy. It can also be a volume killer. A deep side part changes the whole mood of a long curly wolf cut by shifting weight off the middle and letting one side rise higher than the other. That little asymmetry gives the style instant lift.
This version is especially good if your curls go flat at the root and you want to fake more crown height without shortening the hair. A side part exposes more of the top layer, which makes the roots look taller. It also helps the front pieces fall in a way that feels looser and less heavy.
The cut itself doesn’t need dramatic difference from the standard wolf shape. The styling does a lot of the work. Clip the part while your hair is damp, diffuse the roots for a few minutes, and then let the front settle naturally. If you flip back to center after the hair is dry, the volume usually stays. Handy trick. Cheap, too.
This one flatters round and heart-shaped faces because it breaks up the symmetry around the cheeks. But honestly, the bigger reason I like it is simpler: it makes curly hair look alive.
That matters.
7. Feathered Face Frame for Long Hair
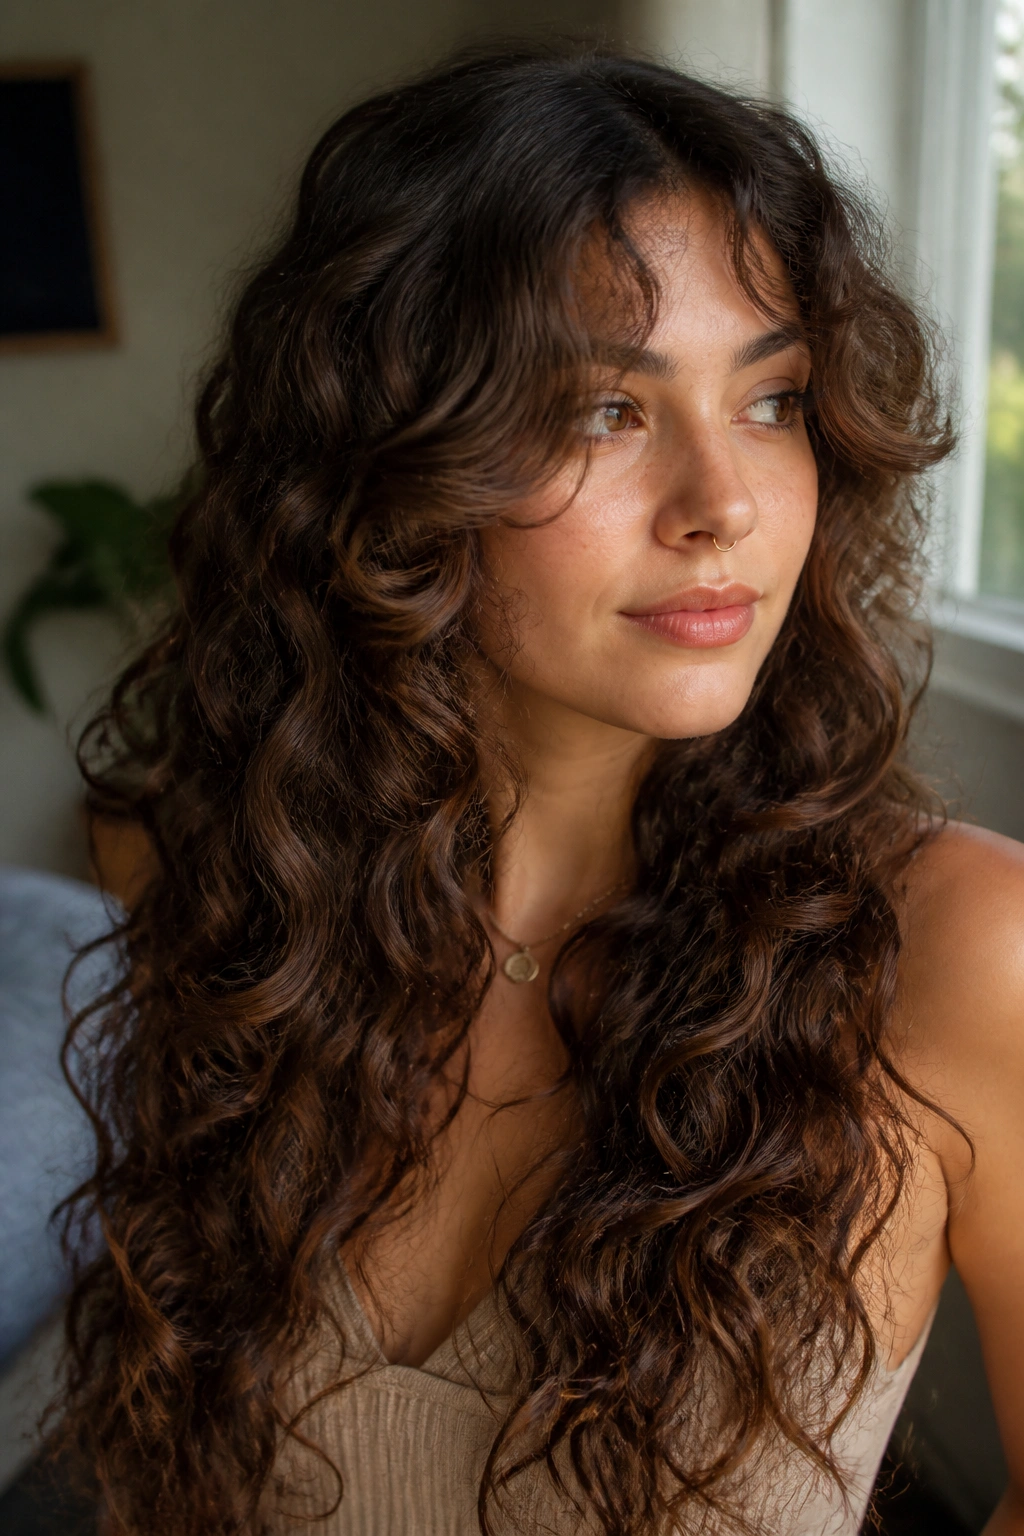
Feathered face-framing layers are the part of the wolf cut that makes people stop and say the hair looks lighter. They soften the front without stealing the length from the back, which is exactly what you want if you’re trying to keep long curls from feeling bottom-heavy.
Where the shortest pieces land
For most curl types, the first face-framing piece should fall somewhere between the lip and the cheekbone when dry. That range gives enough shape to notice, but not so much that the front looks disconnected from the rest of the hair.
Why feathering helps
A blunt face frame can make curls cluster in one heavy slab. Feathering breaks that up. The ends move a little when you turn your head, and the shape feels less boxed in. It also keeps the cut from looking too severe when the curls shrink up.
How to style the front
Finger-coil the front pieces while they’re damp if they tend to split apart. If they’re wider curls, scrunch them with a little gel and leave them alone. Over-touching the front usually makes it frizz before the back even dries.
This is one of those details that seems minor on paper and makes a big difference in the mirror.
8. Internal Layers for Dense Ringlets
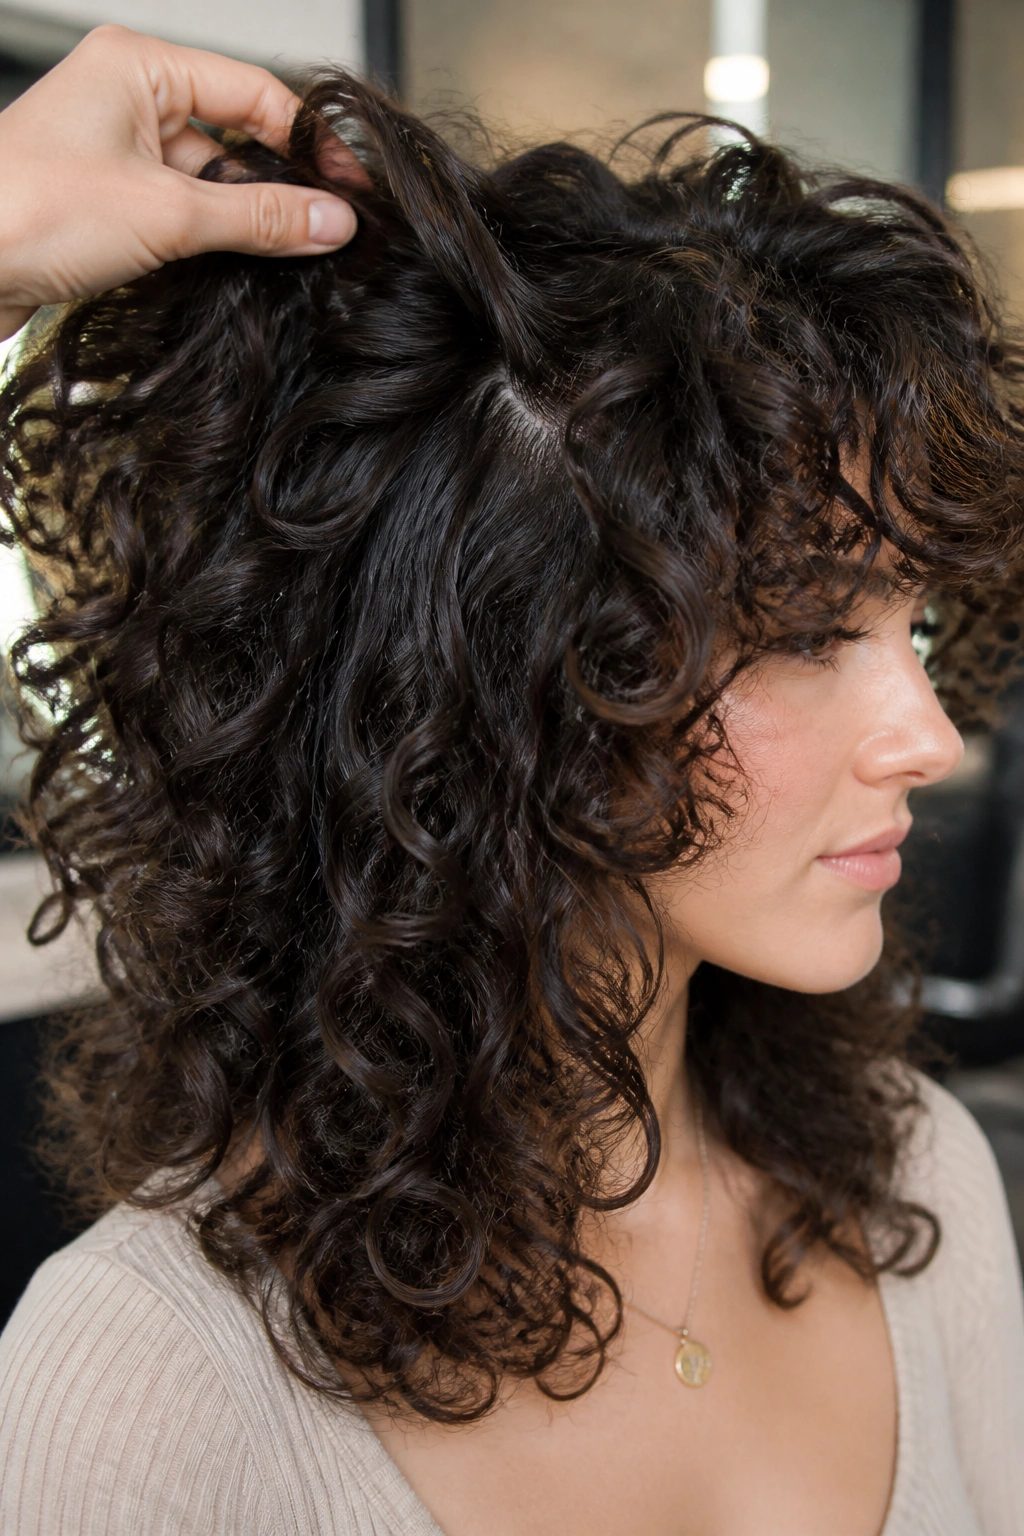
Dense ringlets need hidden layers more than they need drama. If the outside of the hair already looks full, cutting a lot of visible choppiness on the surface can actually make the style less flattering. Internal layers solve that problem quietly.
The idea is to remove bulk where curls stack on top of one another, while leaving the outside shape intact. That means the hair still looks long and rich, but it stops ballooning out at the sides. If you have a lot of density, this is often the cleanest way to build volume without adding width.
I prefer this version for people who want the curl pattern to stay the star. The cut should support the curls, not fight them. A good stylist will section the hair and shape the inside panels so the top can lift while the perimeter still feels solid.
A simple styling routine helps too:
- Use a lightweight foam or mousse at the roots.
- Scrunch in gel only where the curls need hold.
- Diffuse until the roots are about 80 percent dry.
- Leave the hair alone while it sets.
No rough towel. No over-brushing. No fussing once the shape starts to form.
That restraint is what makes the volume last.
9. Chin-Skimming Front Pieces
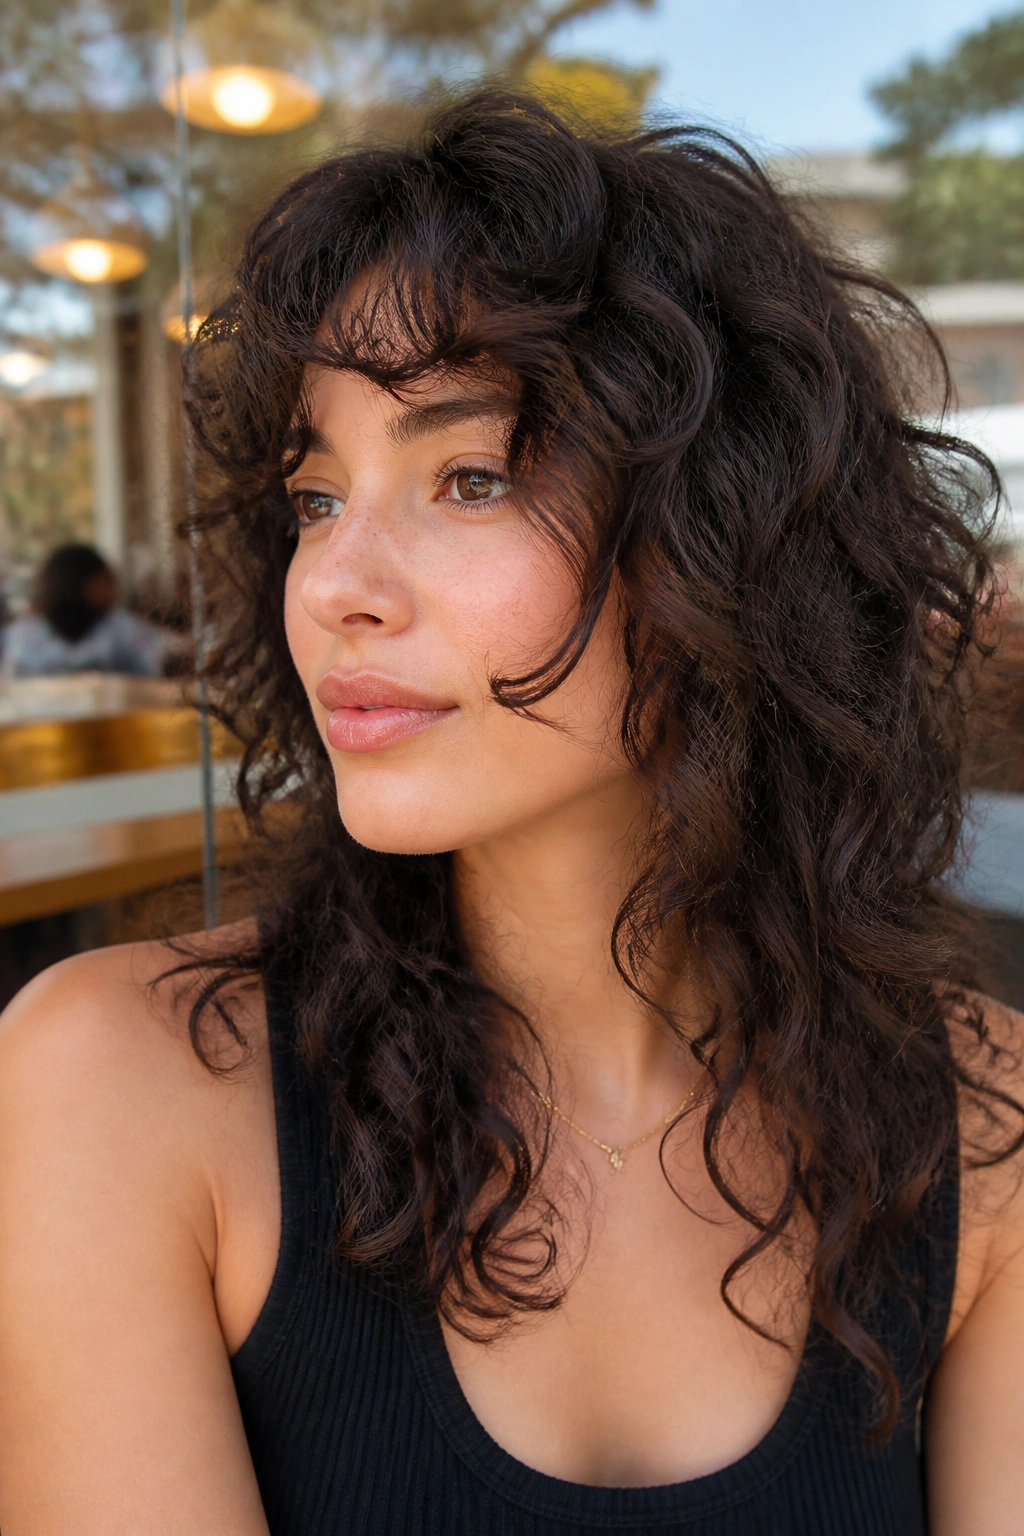
When the front of your hair disappears into the rest of the cut, the whole style can look flat even if the back has plenty of body. Chin-skimming front pieces fix that fast. They draw the eye forward, create movement around the face, and keep the long curly wolf cut from feeling too heavy in the front.
This is a strong choice if your curls stretch out a lot when wet. Cut too short, and those front pieces jump up into awkward little springs. Keep them around the chin when dry, though, and they settle into a very flattering frame.
Quick details that matter
- Start the front pieces a little longer than you think.
- Angle them softly, not in a sharp diagonal.
- Let the pieces near the ears stay longer so the shape doesn’t spike outward.
- Pair the cut with a slight off-center part for more movement.
I like this look on people who wear their hair down most of the time. It gives the face a little architecture without requiring daily sculpting. If you tuck one side behind the ear, it still holds its shape. If you wear glasses, even better. The pieces sit around them instead of crowding them.
Small tip: ask for the front to be checked dry before the final trim. Curly hair lies.
10. Razor-Soft Ends for Wave-Curl Mixes
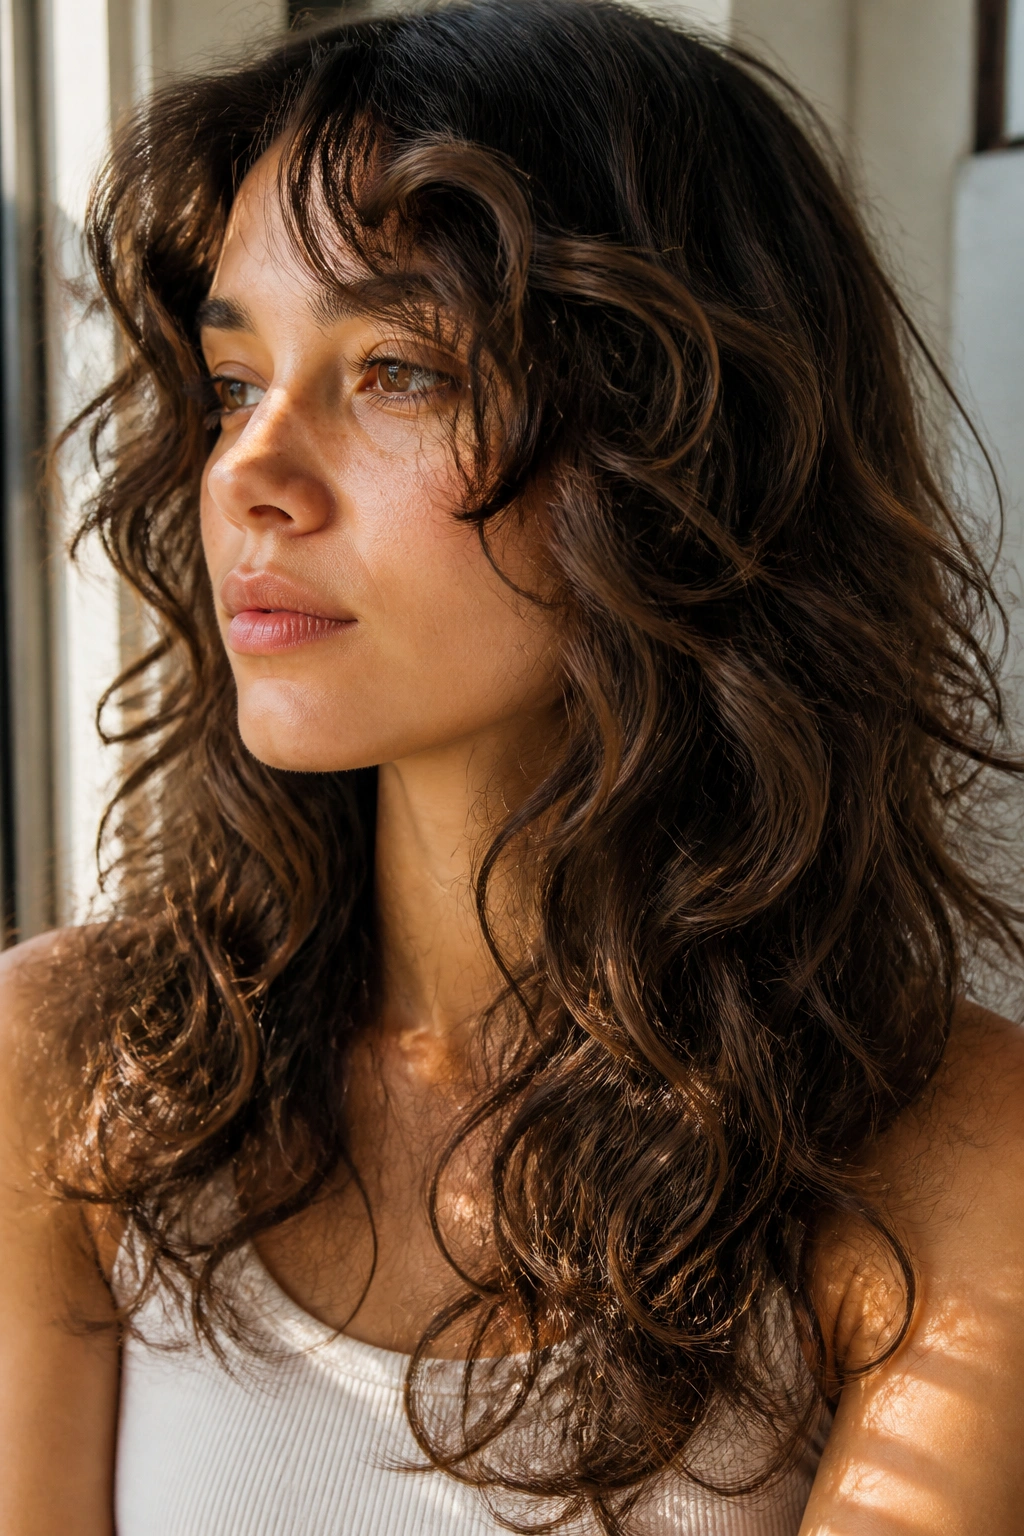
A clean scissor line can feel too heavy on a wave-curl mix. The ends sit there like they’re waiting for permission. Razor-softening changes that. It gives the outer inch or two a lighter finish, so the layers can move and separate instead of hanging in one blunt block.
This works best when the hair is thick enough to handle it and the stylist knows how your texture reacts to a razor. I’m picky about this. Very picky. On rough, frizz-prone hair, a bad razor pass can look chewed up for weeks. On the right hair, though, it creates a softer edge that helps the whole wolf cut feel more buoyant.
The texture you want is airy, not shredded. Think of the ends as broken up, not thinned to nothing. That’s a small difference on paper and a huge one in real life.
A razor-soft finish also helps if your curls change shape from root to tip. The lighter edge gives the bottom some flexibility, which keeps the cut from feeling stiff on humid days.
If you prefer low-effort styling, this version is nice because it doesn’t need perfect curl clumping to look intentional.
11. Tapered Nape Layers for Coily Hair
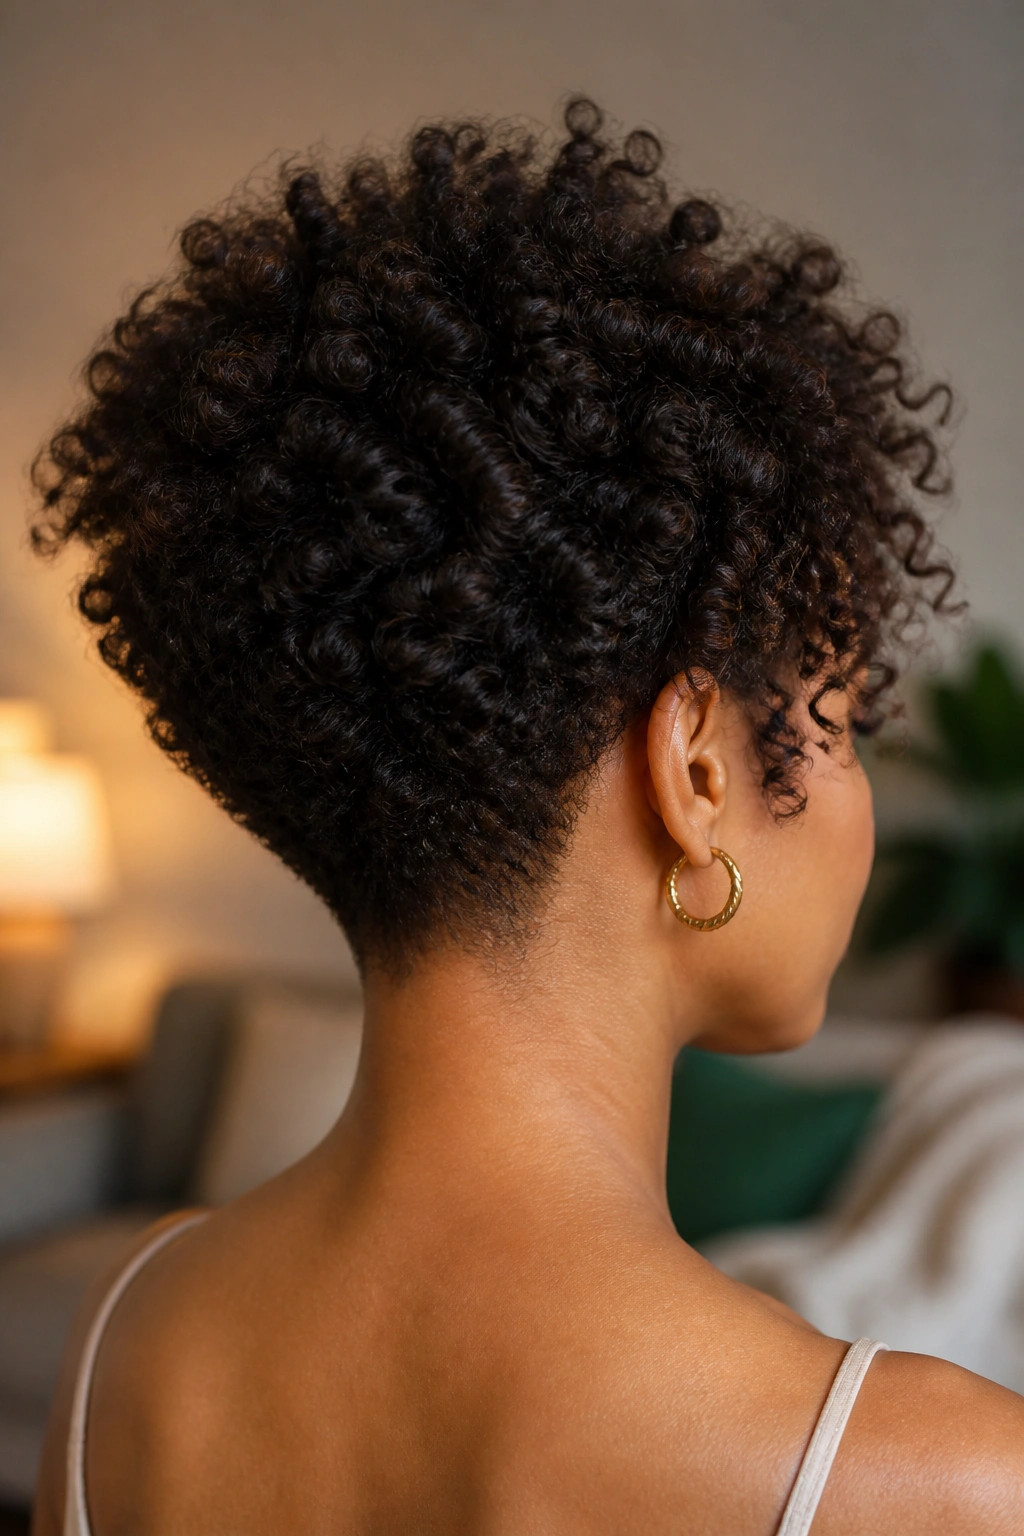
Why bother tapering the nape on a long curly wolf cut? Because the back of the neck can get bulky fast, and once it does, the whole silhouette loses lift. Tapering the nape trims just enough length near the base to keep the back from forming a shelf.
For coily hair, that small change can make the crown look higher and the silhouette cleaner. The top still has room to expand. The sides still keep their shape. The bottom just stops building a heavy block against the neck.
This version needs a careful hand. I would not ask for a severe taper unless you like a sharper outline. A soft taper of about an inch to an inch and a half is usually enough to keep the shape light while preserving enough coverage in back.
When it works best
- Hair that puffs heavily at the nape.
- Coils that shrink a lot after drying.
- Long hair that feels too triangular from behind.
- Styles that need room for a hooded diffuser or a gentle stretch.
One extra note: stretch the roots slightly while drying if you want to show off the taper. A little tension goes a long way.
12. A Blunt-but-Broken Perimeter
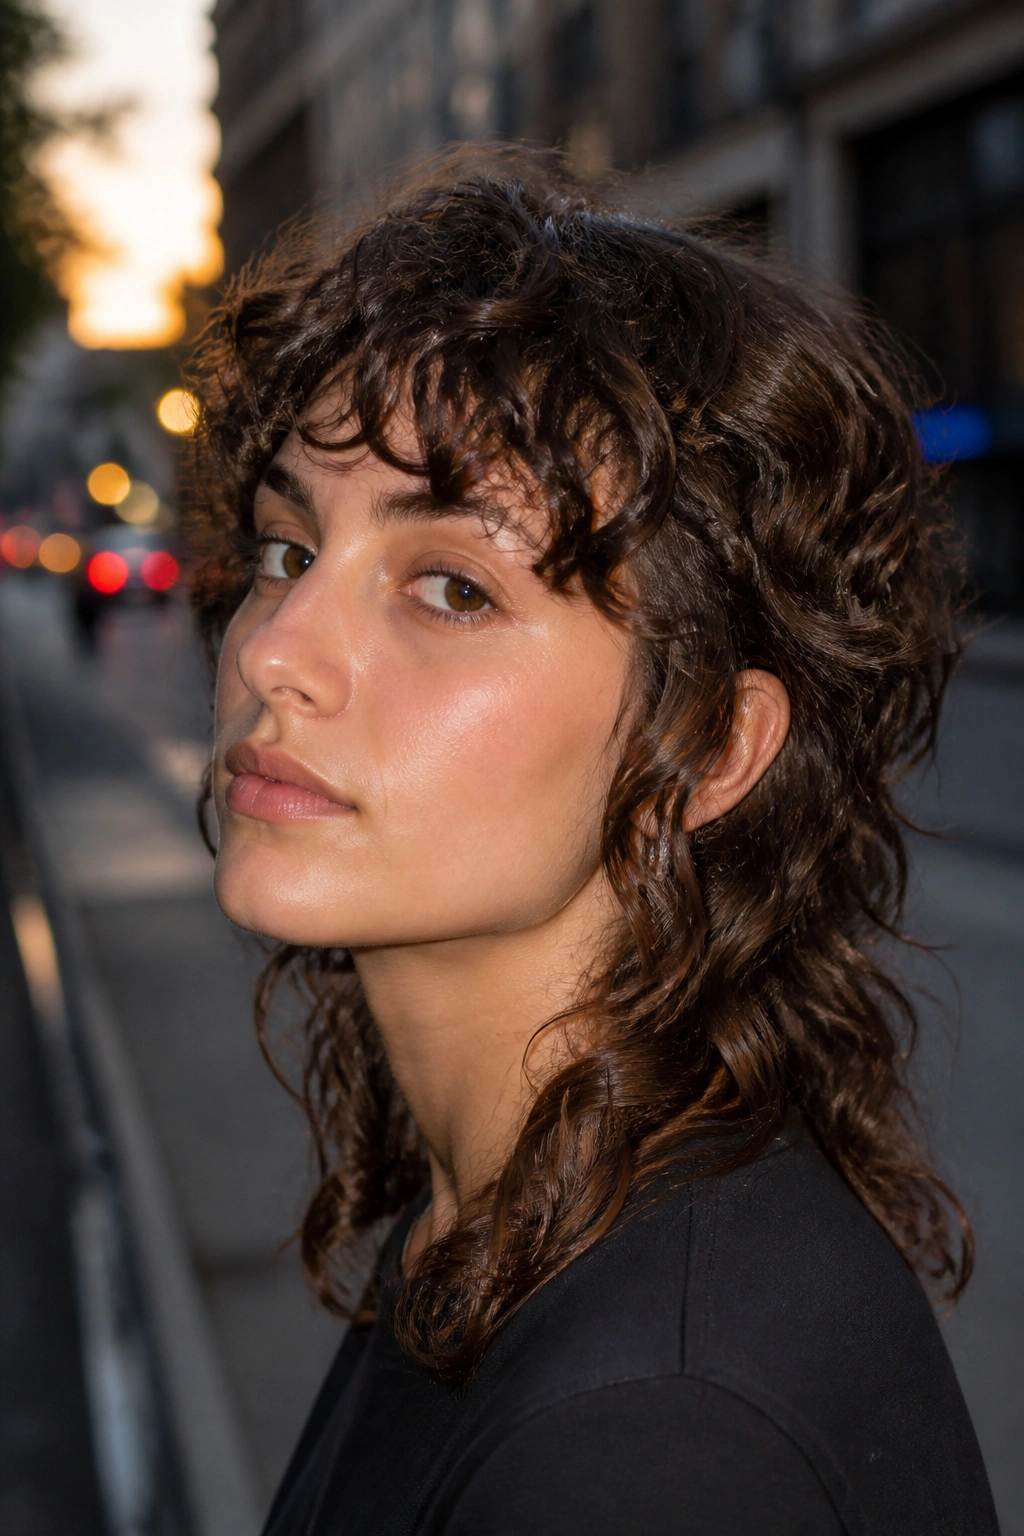
This is the contrarian version, and I like it a lot. A little bluntness at the perimeter is not the enemy of volume. Sometimes it’s the thing that keeps the cut from looking too wispy.
The trick is to keep the outline solid enough that the curls have a base, while breaking the edge just enough that it doesn’t read as heavy. That can mean tiny point cuts at the very ends, or a micro-softening of the last half-inch. The shape still feels strong. It just doesn’t look boxed in.
This is a smart option for finer curls that disappear when over-layered. Too many short layers on fine hair can make the ends look sparse. A broken perimeter gives the eye a fuller line and lets the volume build where the hair can support it.
I also like it for people who want their curly wolf cut to look polished on workdays and messier on weekends. The stronger outline gives the style some structure when you’re wearing it smooth. Shake it out, scrunch it, and it gets looser.
It’s one of the more underrated approaches in this whole group.
13. Curly Shag-Wolf Hybrid With a Narrow Waist
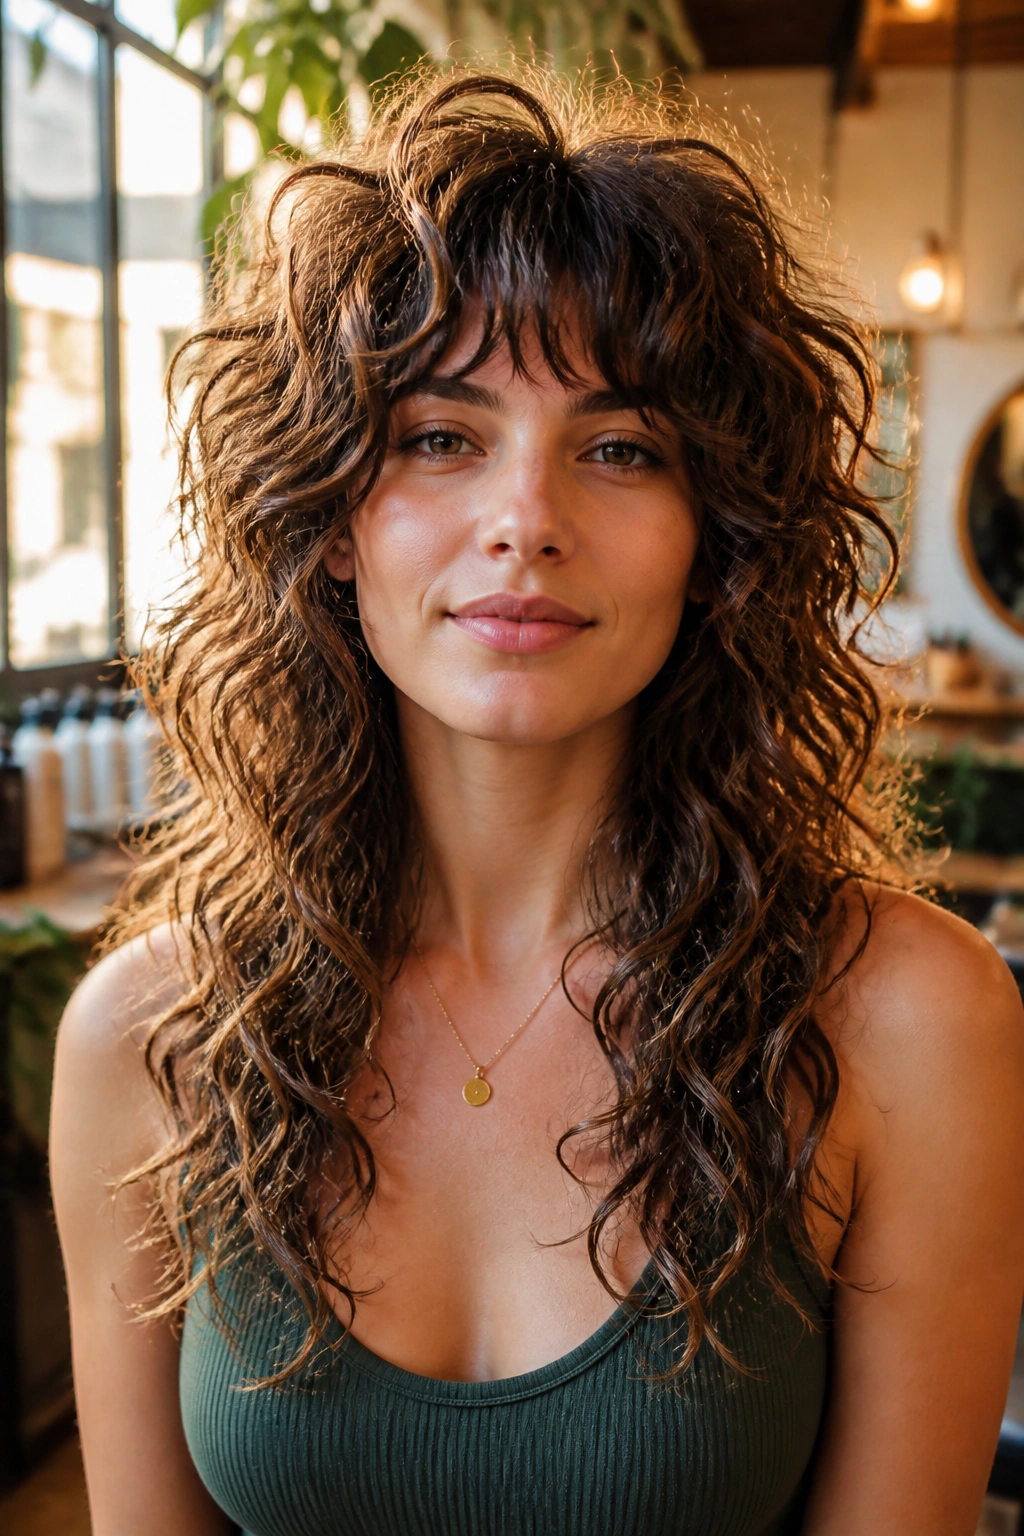
Picture the silhouette of the hair as an hourglass. Fuller up top, a bit narrower through the middle, then long and soft at the ends. That’s what this cut tries to do, and it looks especially good on long curls that need more shape than blunt layers can give.
The “narrow waist” effect comes from removing bulk in the mid-lengths while keeping the crown and perimeter supported. So the hair doesn’t puff out in a straight column. It bends inward a little, then opens again at the bottom. Weird description. Good haircut.
Why it works
- It creates movement without sacrificing length.
- It keeps the midsection from looking square.
- It gives curls room to separate into visible clumps.
- It looks good both air-dried and diffused.
This one sits close to a shag, but I’d call it a wolf cut when the top layers are slightly more pronounced and the ends stay a touch longer. It’s a nice middle ground if you don’t want anything too mullet-heavy.
Ask for the stylist to check the balance from the front and side. The side view is where this shape either works or falls apart. If the waist is too tight, the cut looks segmented. If it’s too loose, the volume just spreads everywhere. There’s a sweet spot.
14. Micro-Layers for Fine Curls
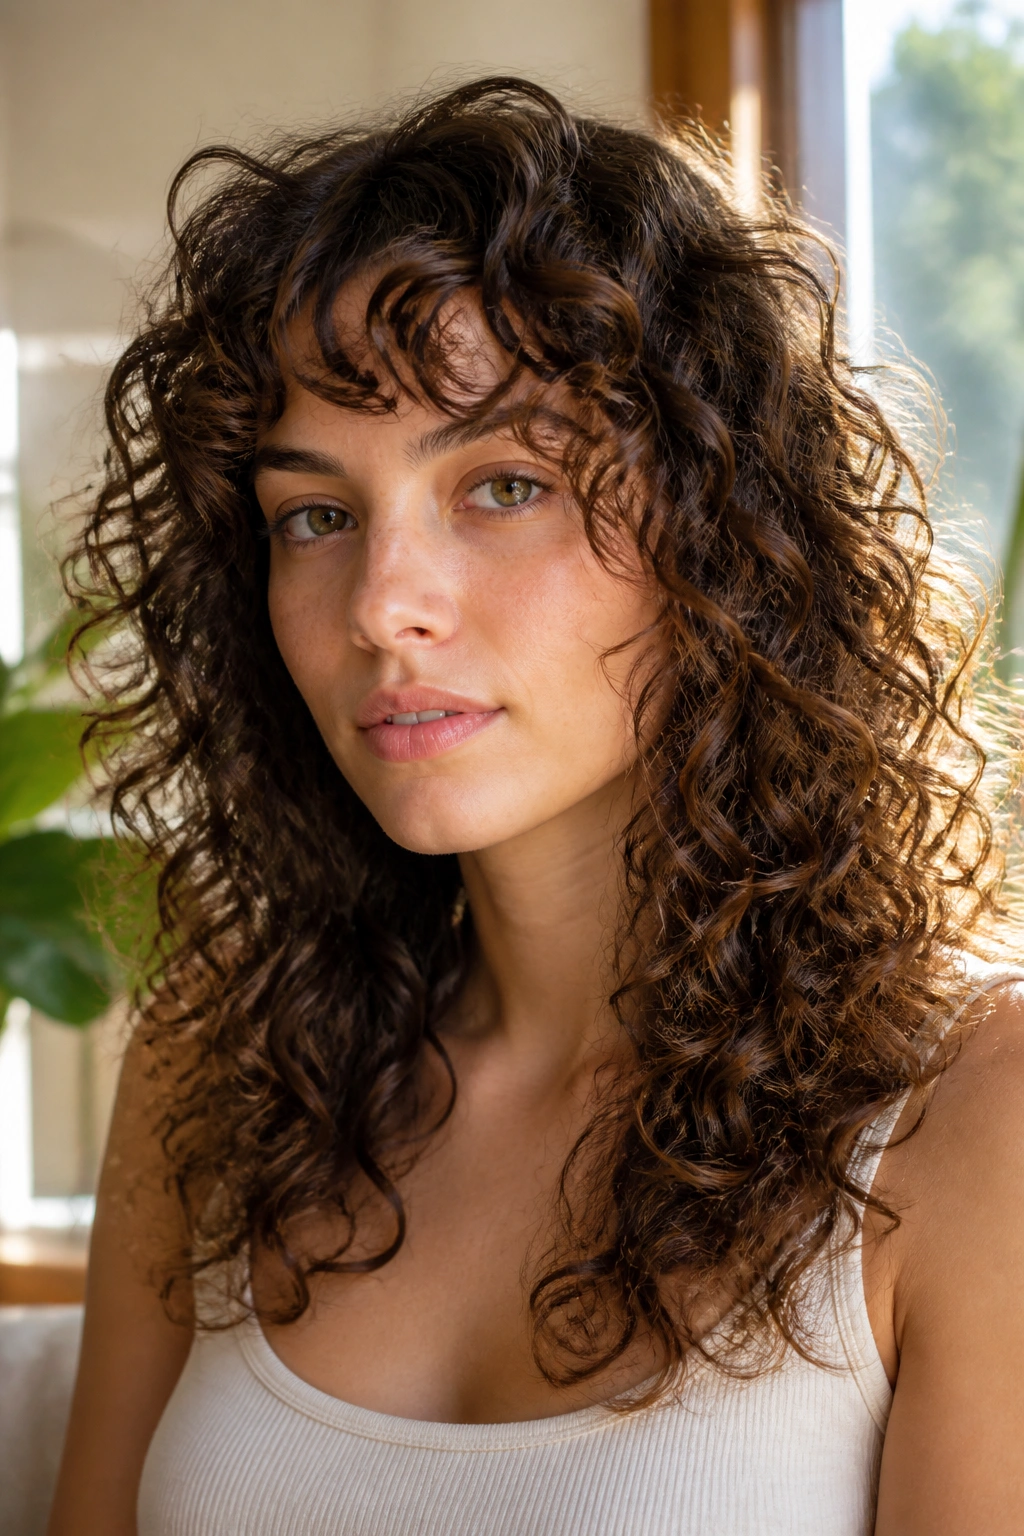
Fine curls need a different kind of volume. Big, aggressive layers can make them look thin at the ends and airy in the wrong way. Micro-layers solve that by making small adjustments instead of big ones. The shape still changes, but the hair keeps enough density to look full.
This is the version I’d suggest if your curls are delicate and you hate the see-through effect some layered cuts create. The shortest pieces should be only a little shorter than the surrounding sections, not dramatically chopped. That tiny shift adds lift without taking away the body that fine hair depends on.
What makes it different
A dense-curl wolf cut can survive more internal removal. Fine curls usually cannot. They need careful layering, softer edges, and a little patience with styling. A mousse or foam usually works better than a rich cream, because heavy products flatten the shape fast.
What to skip
- Big undercut-style removal at the crown.
- Heavy oils near the roots.
- Too many bang pieces around the forehead.
- Over-diffusing until the pattern frays.
This is also the cut where a good finishing routine matters most. If you rough-dry it, you lose the lift. If you diffuse gently and stop when the roots are set, the hair looks fuller than it has any right to.
15. Long Curly Wolf Cut That Grows Out Softly
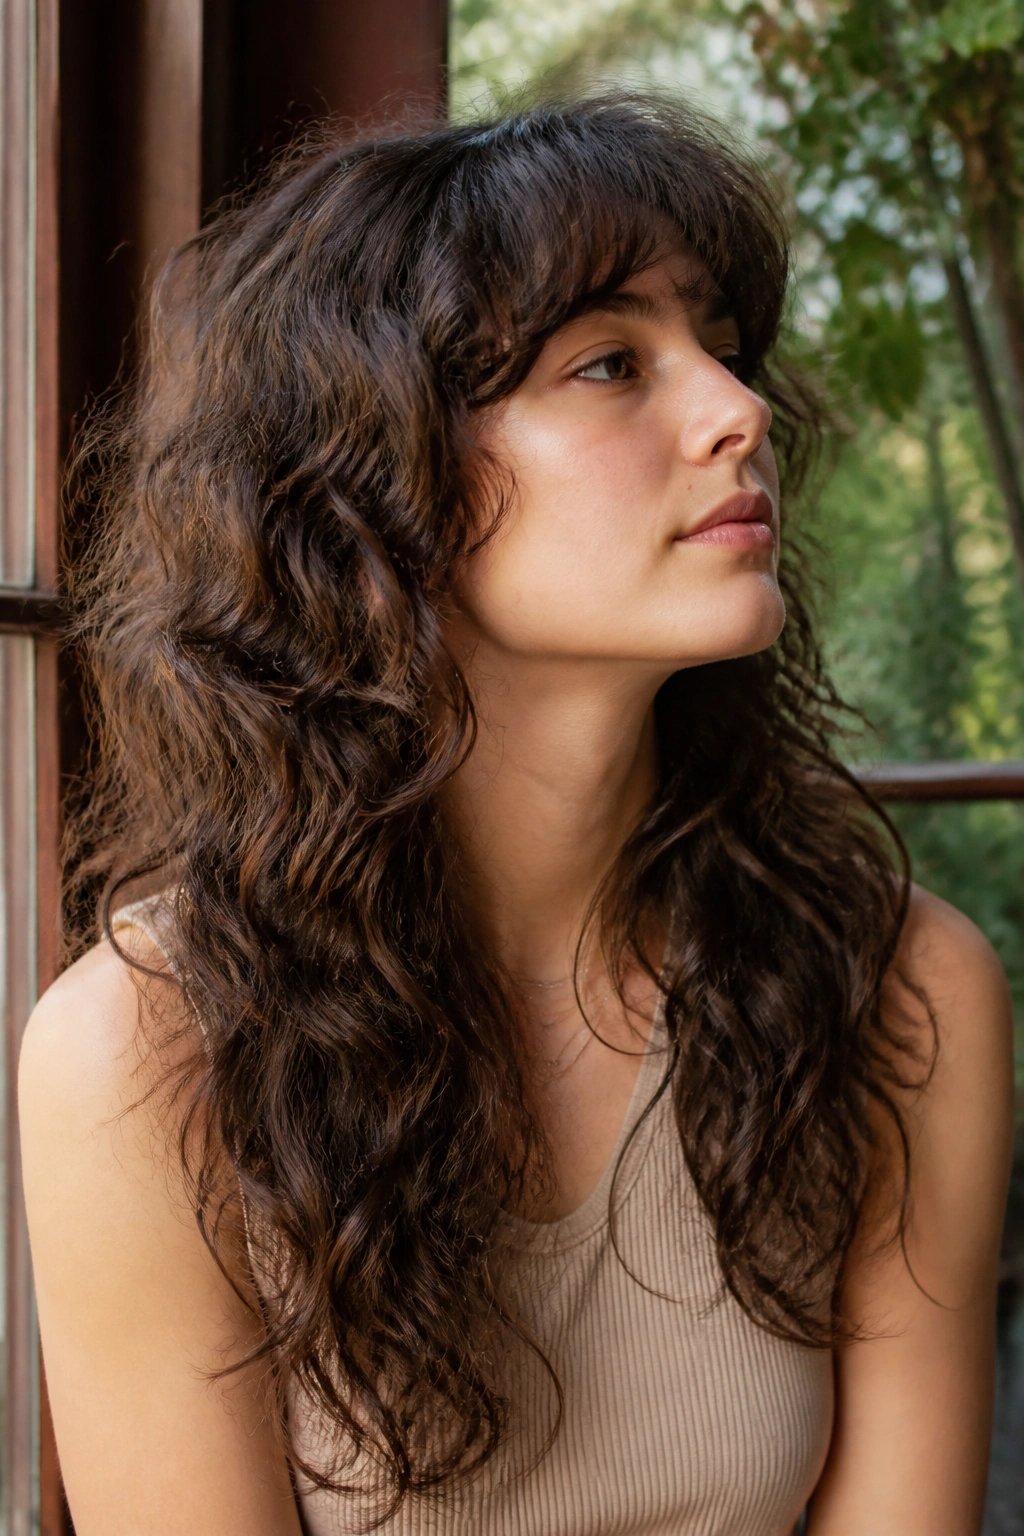
The version I keep coming back to is the one that still looks good six to eight weeks after the haircut has started to settle. That means soft transitions, long layers that don’t jump too high, and enough perimeter left in place that the shape doesn’t go weird when the curls stretch.
A grow-out friendly long curly wolf cut is less dramatic than the internet makes wolf cuts look. That’s a good thing. It gives you movement and crown lift without locking you into constant trims. The layers blur into each other as the hair grows, which keeps the style from turning blunt or lopsided.
If you want the low-maintenance version, ask for softly connected layers instead of hard separations. Ask your stylist to check the cut dry, and ask them to leave the ends thick enough to support the shape. That single choice saves you from the “my hair got fluffy, then flat, then strange” stage.
This is the one I’d hand to someone who wants volume but doesn’t want to babysit their hair every morning. A little root lift, a little shape around the face, and enough length left over to tuck behind a shoulder or throw into a clip. Clean. Easy. And it still looks like curly hair, which is the point.
