



Front thinning hair can make an otherwise good haircut feel unfinished. The front is the first place people notice when you talk, laugh, or lean forward, so a sparse hairline has a way of taking over your whole mirror routine.
The fix is rarely “more hair.” It’s better shape. A little lift at the root, the right part, softer front pieces, and some movement through the top can change how dense the hair looks without pretending the hairline is something it isn’t.
A hard center part, tight slick-backs, and blunt front lines usually do the opposite. They stretch the eye straight to the scalp. They also make thin corners at the temples stand out faster than they should.
So the goal is simple: create softness where the eye lands, and keep the front from looking boxed in. Some of these styles are short and sharp. Some use bangs. Some rely on clever parting or a bit of bend through the lengths. The common thread is that they make the front look intentional, not exposed.
1. Deep Side Part for Front Thinning Hair
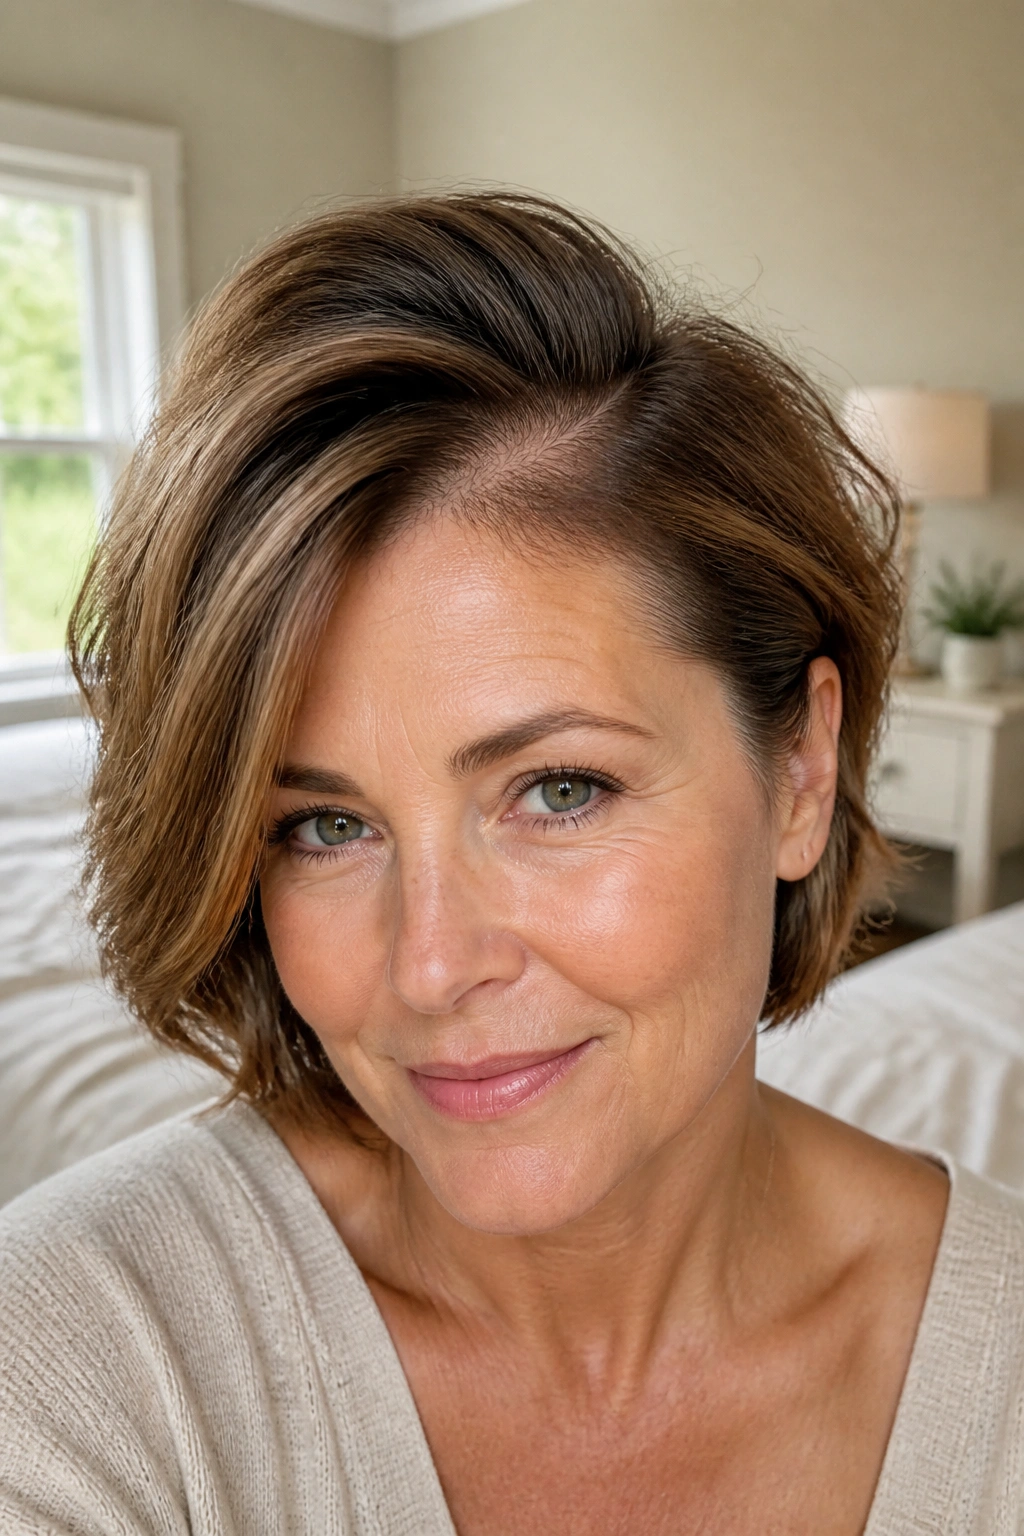
A deep side part is one of the easiest ways to make the front look fuller without cutting off much length. It works because the bulk of the hair shifts across the forehead, which blurs a sparse temple area and gives the roots some lift right where you need it.
Why it works
The part should sit off the center line, but not so far over that one side collapses. About a finger-width above the arch of your brow is a good starting point. Any deeper than that, and you can expose more scalp instead of hiding it.
A side part also gives you a built-in diagonal line. The eye follows that line across the face instead of stopping at the hairline. That matters more than people think. Straight, flat front sections have nowhere to hide.
How to style it
- Blow-dry the front in the opposite direction first.
- Use a lightweight mousse or root spray at damp roots.
- Flip the hair back into place with your fingers, not a brush.
- Finish with a small mist of dry texture spray at the crown.
Tip: Keep switching which side gets the heavy sweep every few days. That keeps the front from training into one flat groove.
This works especially well on fine straight hair and soft waves. If your front hair is thick but a little sparse at the edges, it still helps because the lift keeps the roots from clinging to the scalp.
2. Curtain Bangs for Front Thinning Hair

Curtain bangs are a safer bet than a blunt fringe when the front feels thin. They split in the middle and move away from the temples, which gives the hairline room to breathe while still adding coverage where it counts.
The sweet spot is usually around cheekbone length, sometimes a touch longer. Too short, and they flip up in a way that can make the forehead look bigger. Too thin, and they disappear into the rest of the cut. You want enough weight to read as a bang, not just a few stray pieces pretending to be one.
The reason this style keeps showing up is simple: it softens the top of the face without building a hard line across it. That hard line is the problem with many bangs on front thinning hair. A curtain fringe breaks the line up and gives you movement instead.
Ask for bangs that start longer near the center and blend into face-framing layers. Then style them with a round brush or a blow-dry brush aimed away from the face. A quick cool shot at the end helps the bend stay put.
If your hair is pin-straight, use a pea-sized touch of lightweight cream on the ends only. Skip heavy oils at the roots. They make thin front pieces separate faster, and separation is not your friend here.
3. Textured Pixie with a Forward Sweep
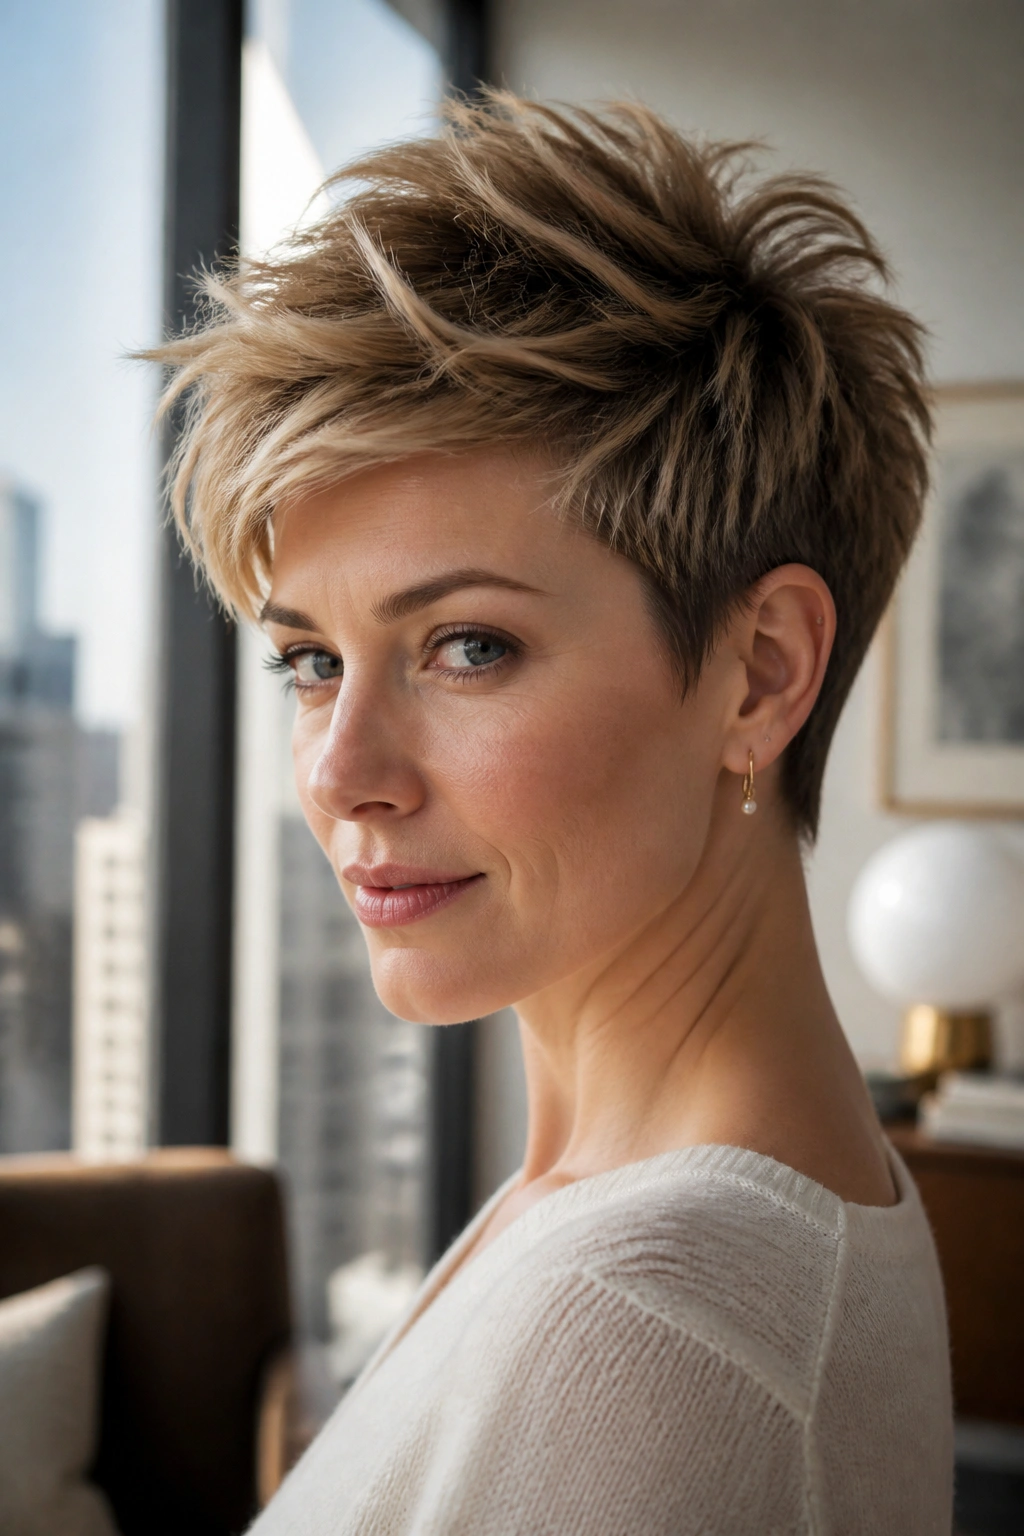
Can a short cut help front thinning hair? Yes. When the shape is right, a pixie can make the front look denser because you stop fighting long, see-through lengths that cling to the scalp.
The key is keeping the top long enough to move. You want about 2 to 3 inches on top, with the front section cut so it can sweep forward or diagonally across the hairline. Sides should stay tight enough to create contrast, but not shaved so close that the top looks disconnected.
What to ask for at the salon
- Leave the top longer than the sides by at least 1 to 2 inches.
- Add point-cut texture instead of blunt, choppy ends.
- Keep the front soft, not spiked.
- Avoid a razor-thin fringe if the hairline is already delicate.
That forward sweep matters. It gives the eye something to land on before it gets to the temples. A little matte paste, warmed between your palms, is usually enough. Press it into the roots and push the front slightly forward with your fingertips.
This cut is not for everyone. It does need regular shaping, and if you hate using product, it can fall flat fast. But on fine or thinning hair with decent density at the crown, it can look sharper than long hair ever will.
4. Soft Shag with Broken-Up Layers
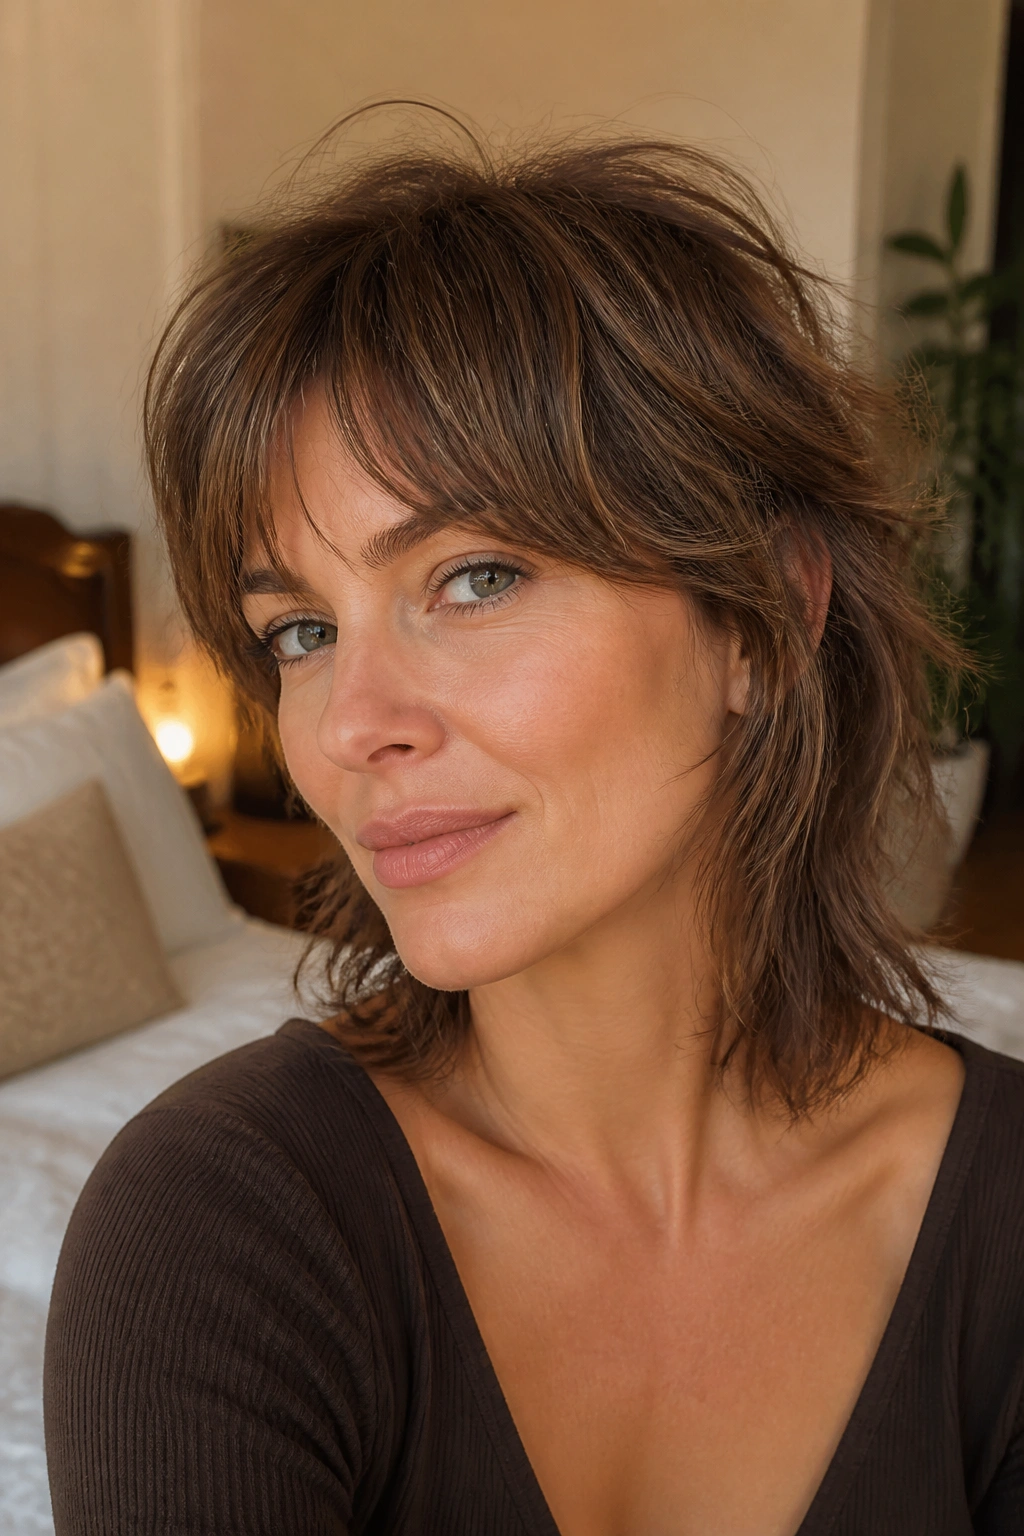
If your hair goes limp at the front by lunchtime, a soft shag can pull the whole look back together. The point isn’t to make the hair wild. It’s to give the front enough piecey movement that the scalp doesn’t become the center of attention.
A shag works because the layers create different lengths around the crown and sides. That unevenness makes the hair catch on itself a little, which reads as fullness. But the front needs care. Ask for the shortest face-framing pieces to begin lower, around the chin or cheek, rather than cutting them right at the temples.
Loose, broken-up texture helps the front blend into the rest of the style. Sharp little layers at the hairline can backfire. They may look modern in a photo, then separate into skinny wisps once the hair settles. Been there. It is not a flattering look when the front is already weak.
Use a light mousse on damp hair, then scrunch or rough-dry with your fingers. If your texture is wavy, let it air-dry about 70 percent of the way before touching it. If it’s straight, a quick bend with a flat iron through the mid-lengths keeps the cut from lying too neatly.
Best for: wavy hair, thick hair, and anyone who likes a little mess.
Avoid: over-thinning near the temples. That can make the front line look thinner than it is.
5. Chin-Length Bob for Front Thinning Hair
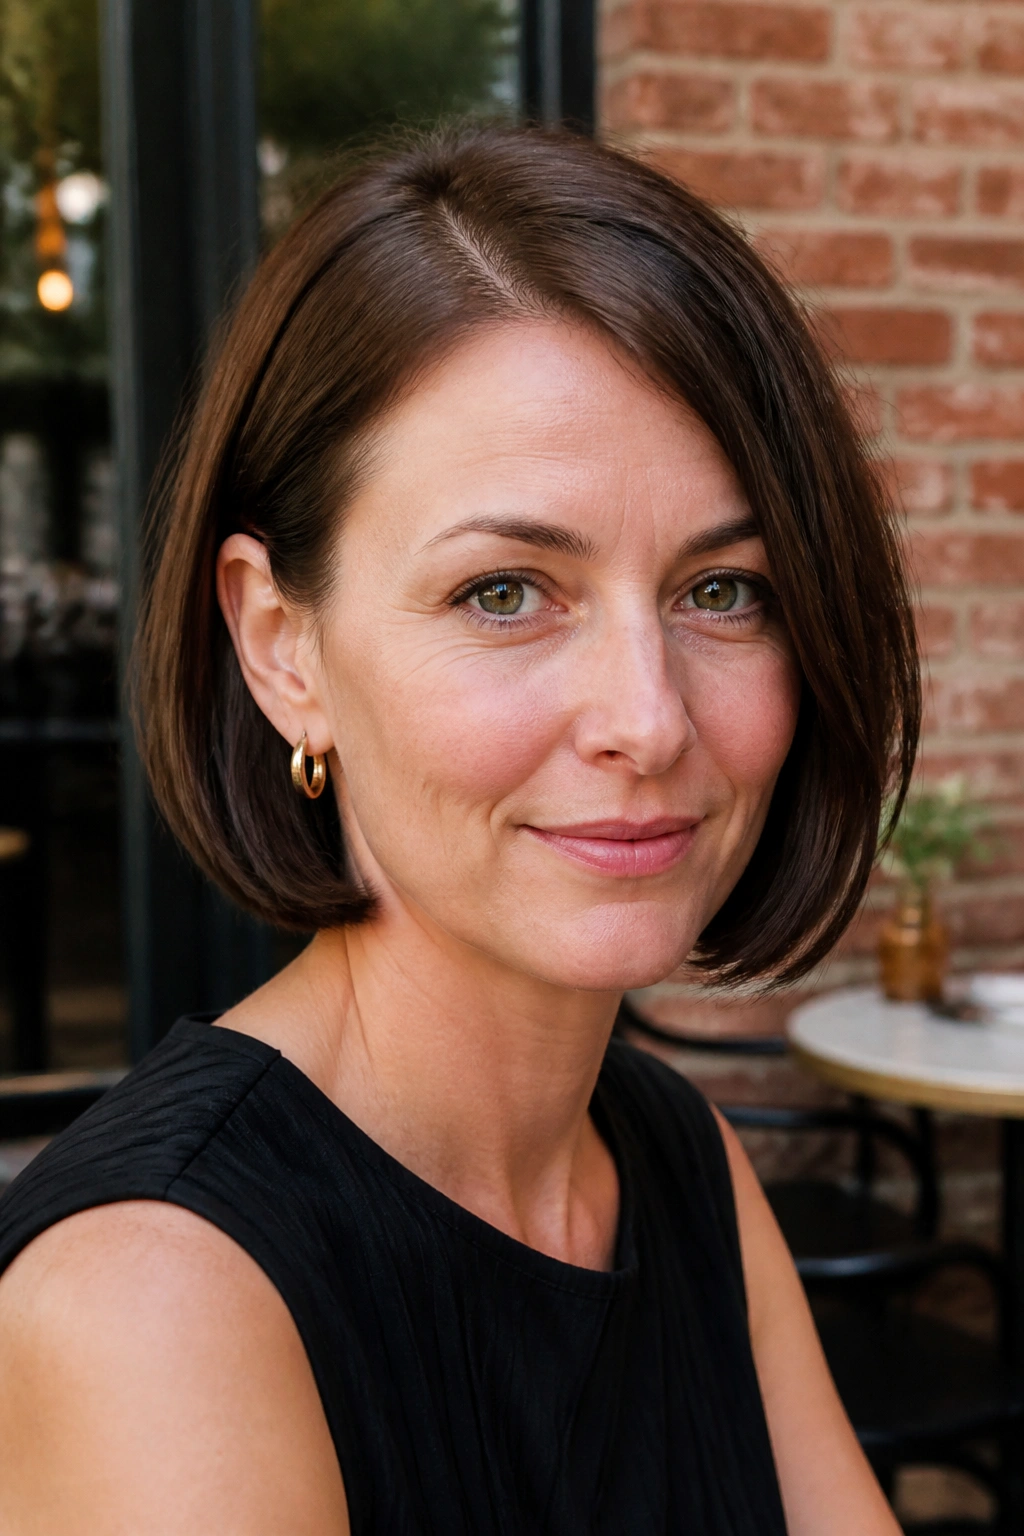
I like a chin-length bob more than people expect. It sounds simple, almost plain, but that is exactly why it works. The cut lands right where the jawline starts to do some visual work, so the eye stops staring at the front hairline and starts reading the shape of the face instead.
Keep the bob clean at the ends. Not stiff. Clean. A blunt edge has enough weight to look dense, which helps if the front is wispy or the temples are a little weak. If the line is too feathered, the bottom can look scraggly, and that is the last thing you want.
A side tuck makes this cut even better. One side can sit behind the ear while the other falls forward a bit. That small shift adds asymmetry and prevents both sides from exposing the hairline at the same time. It also gives the style a little polish without making it feel fussy.
This cut likes a gentle bend under the ends. Use a paddle brush or a round brush while blow-drying, then tuck the fuller side behind one ear once the hair cools. If your hair has a slight wave, that natural bend helps a lot. If it’s pin-straight, keep the part off-center so the front doesn’t split cleanly down the middle.
For anyone whose thinning is strongest at the corners of the forehead, this is a strong option. The length is short enough to feel fresh, but not so short that the front line gets exposed from every angle.
6. Wispy Bangs and Shoulder-Length Layers
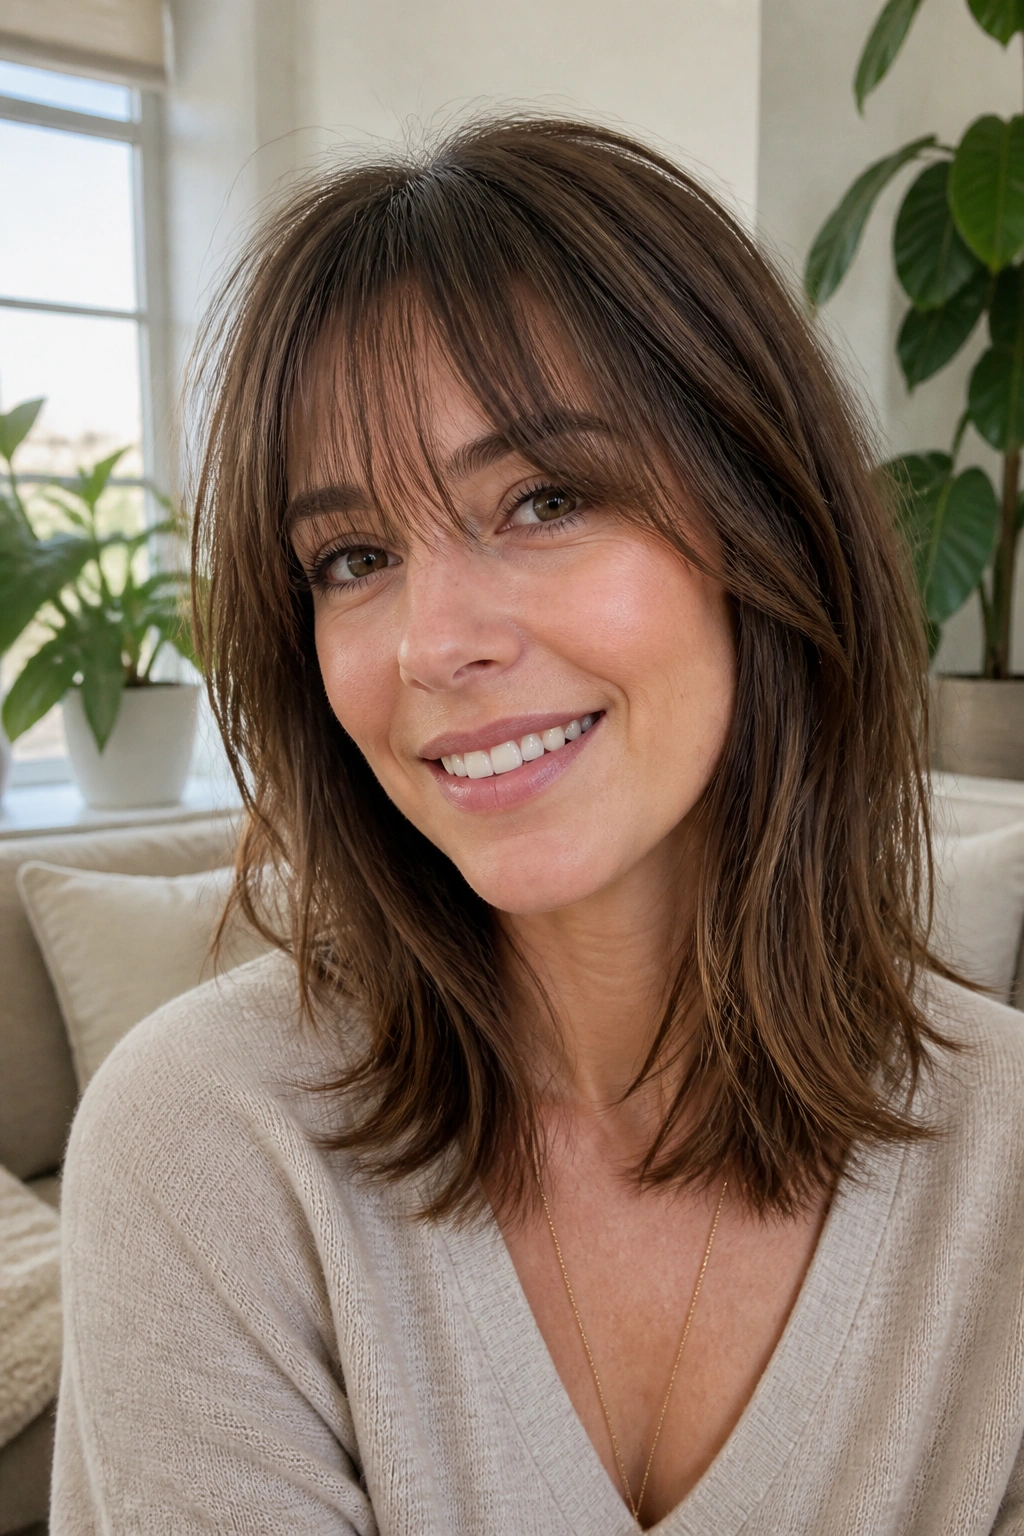
Wispy bangs are for people who want some forehead coverage without the weight of a full fringe. They don’t sit there like a wall. They flutter a little, which is the whole point. The front still looks soft, and the hairline gets a break from being fully on display.
The best version of this cut is not ultra-thin. Thin bangs that are too sparse can look accidental, like the hair just gave up. You want a light fringe that still has enough strands to read as deliberate. Usually that means bangs that sit somewhere around the brow or just above the lashes, with longer side pieces melting into shoulder-length layers.
Unlike blunt bangs, these don’t need a lot of daily fuss. They do need shaping, though. A quick blow-dry with a small round brush, rolling the bangs slightly under or to the side, keeps them from splitting in weird places. If the front is oily, a touch of dry shampoo at the roots helps more than a heavier styling cream.
This style works well if your front thinning is mild and you still want to keep some softness around the face. It’s less useful if the hairline is very sparse in the center, because wispy bangs can separate and show scalp there.
Shoulder-length layers give the rest of the cut enough movement to balance the fringe. Otherwise the bangs can feel like they belong to a different haircut. And that mismatch shows.
7. Asymmetrical Bob with a Longer Front Piece

Asymmetry is useful when one temple looks thinner than the other. It gives you a reason for the difference instead of letting the eye read it as imbalance. A longer front piece on one side can skim over a weaker corner and make the whole cut feel planned.
The back of the bob should stay a bit shorter so the shape keeps some lift. If the back and front are the same length, the style can fall straight and lose that diagonal line that helps disguise sparse areas. One front side can sit at jaw level while the other drops lower by an inch or two. That small shift does a lot.
This cut does ask for maintenance. Grown-out asymmetry tends to look sloppy faster than a standard bob, so trims matter. If you hate regular salon visits, keep that in mind. I’d skip this one if you want a cut that forgives months of neglect.
What makes it different
- The eye moves diagonally instead of straight across the forehead.
- One side can cover a thinner temple.
- The shorter back keeps lift at the crown.
- It works well with a smooth blowout or a soft bend.
Who should try it
People with straight or slightly wavy hair usually get the cleanest result. Very curly hair can do it too, but the shape needs to be cut with the curl pattern in mind or it will puff unevenly.
8. Loose Waves on an Off-Center Part

Why do loose waves help when tighter curls sometimes don’t? Because loose bends overlap. They create shadow, and shadow makes hair look denser. Tight curls often separate into little lanes, which can expose scalp between the strands and draw attention to the front.
An off-center part makes the wave pattern look less exact. Even a shift of an inch or so can change how much of the front stays covered. The hair falls in a softer diagonal, and that little angle helps more than people think.
How to get the shape
Use a 1.25-inch curling iron or a similar wand. Wrap each section away from the face, leave the last inch out, and let the curl cool before brushing it out. That cooling part matters. If you brush too early, the waves collapse and the front can look thin again within an hour.
A wide-tooth comb is enough to break up the curl once it sets. Then use a light mist of flexible-hold spray, not a crunchy one. The idea is movement with a little grip, not helmet hair.
This style is especially kind to fine hair that needs help staying full through the front. It also works on second-day hair, which is a gift on busy mornings. If your waves fall too flat, flip your head over for 10 seconds and shake the roots loose before you step out.
9. Half-Up Style with Crown Lift
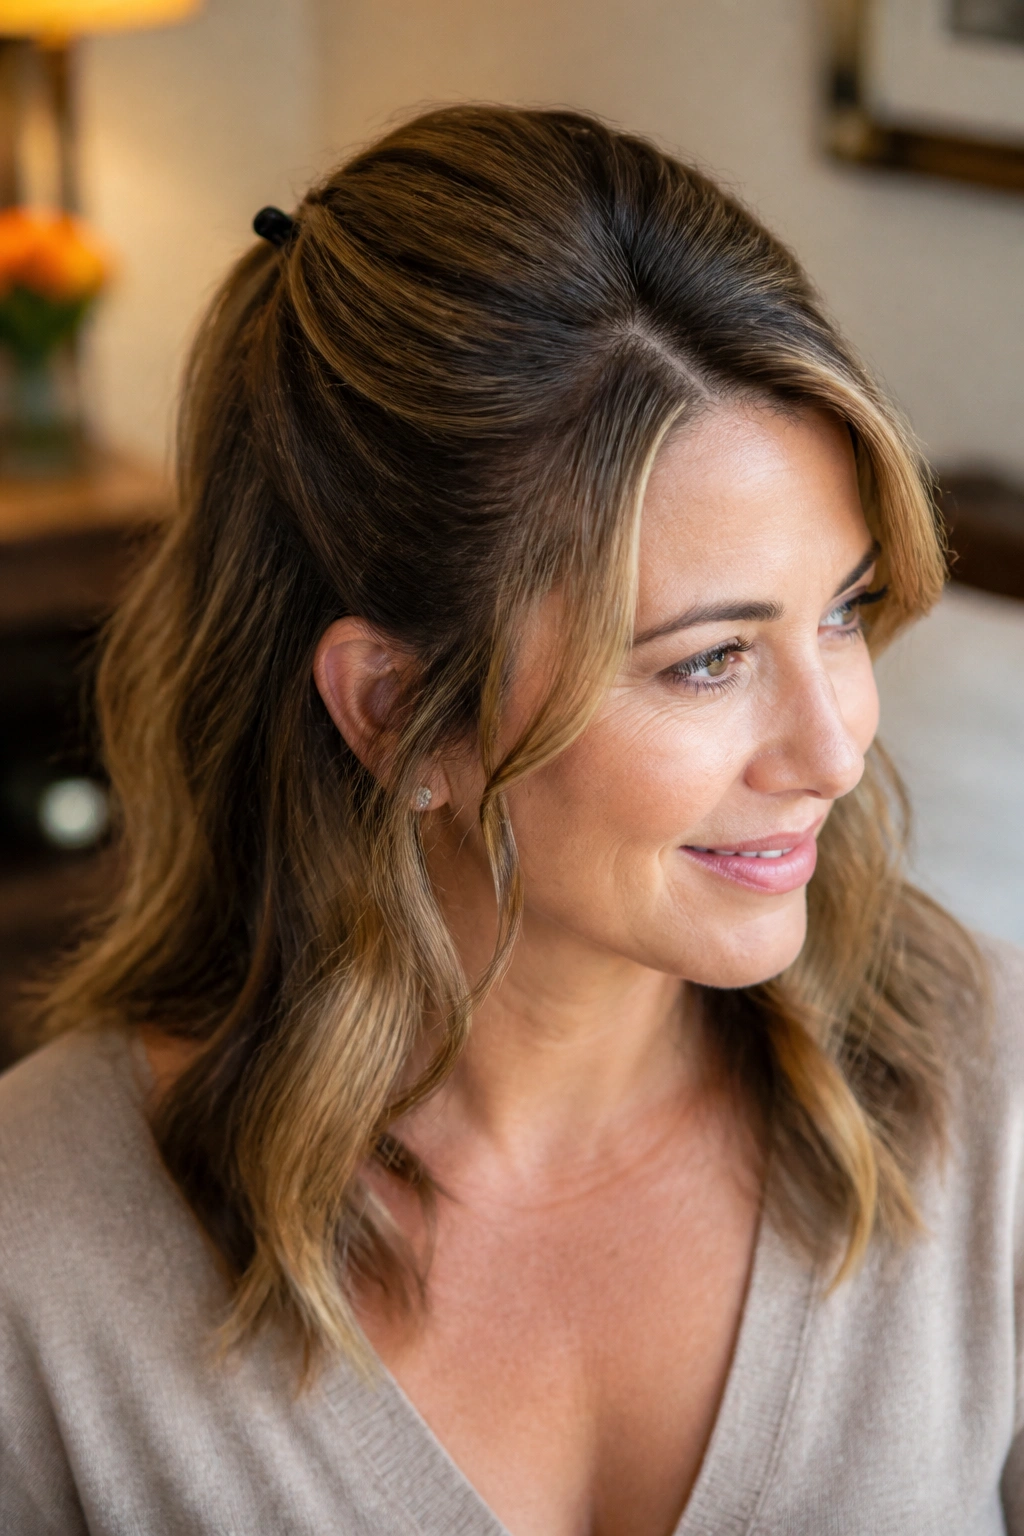
A half-up style is the answer when you want hair off your face but don’t want to pull every front strand tight. The trick is to take only the top third of the hair, not half of the front hairline. That keeps the front soft and avoids the shiny, stretched look that can make thinning show even more.
Start the section a little behind the hairline, around 1 to 1½ inches back. If you grab hair right from the temples, the weak spots come forward. Leave a couple of narrow pieces out near the face. Those soft bits stop the style from looking severe.
A tiny tease at the crown helps too. Nothing dramatic. Just lift the root at the back of the top section with a comb or your fingers before you secure it. That small puff gives height without looking old-fashioned.
- Secure the top section with a small elastic or clip.
- Leave the lower layers loose.
- Pull a few face-framing strands free.
- Mist the crown lightly so it does not sink.
This style is good for straight, wavy, and lightly curly hair. It is also one of the easiest ways to keep the front from falling into your eyes without exposing the entire hairline. That balance is the whole win here.
10. Low Bun with Soft Face Framing
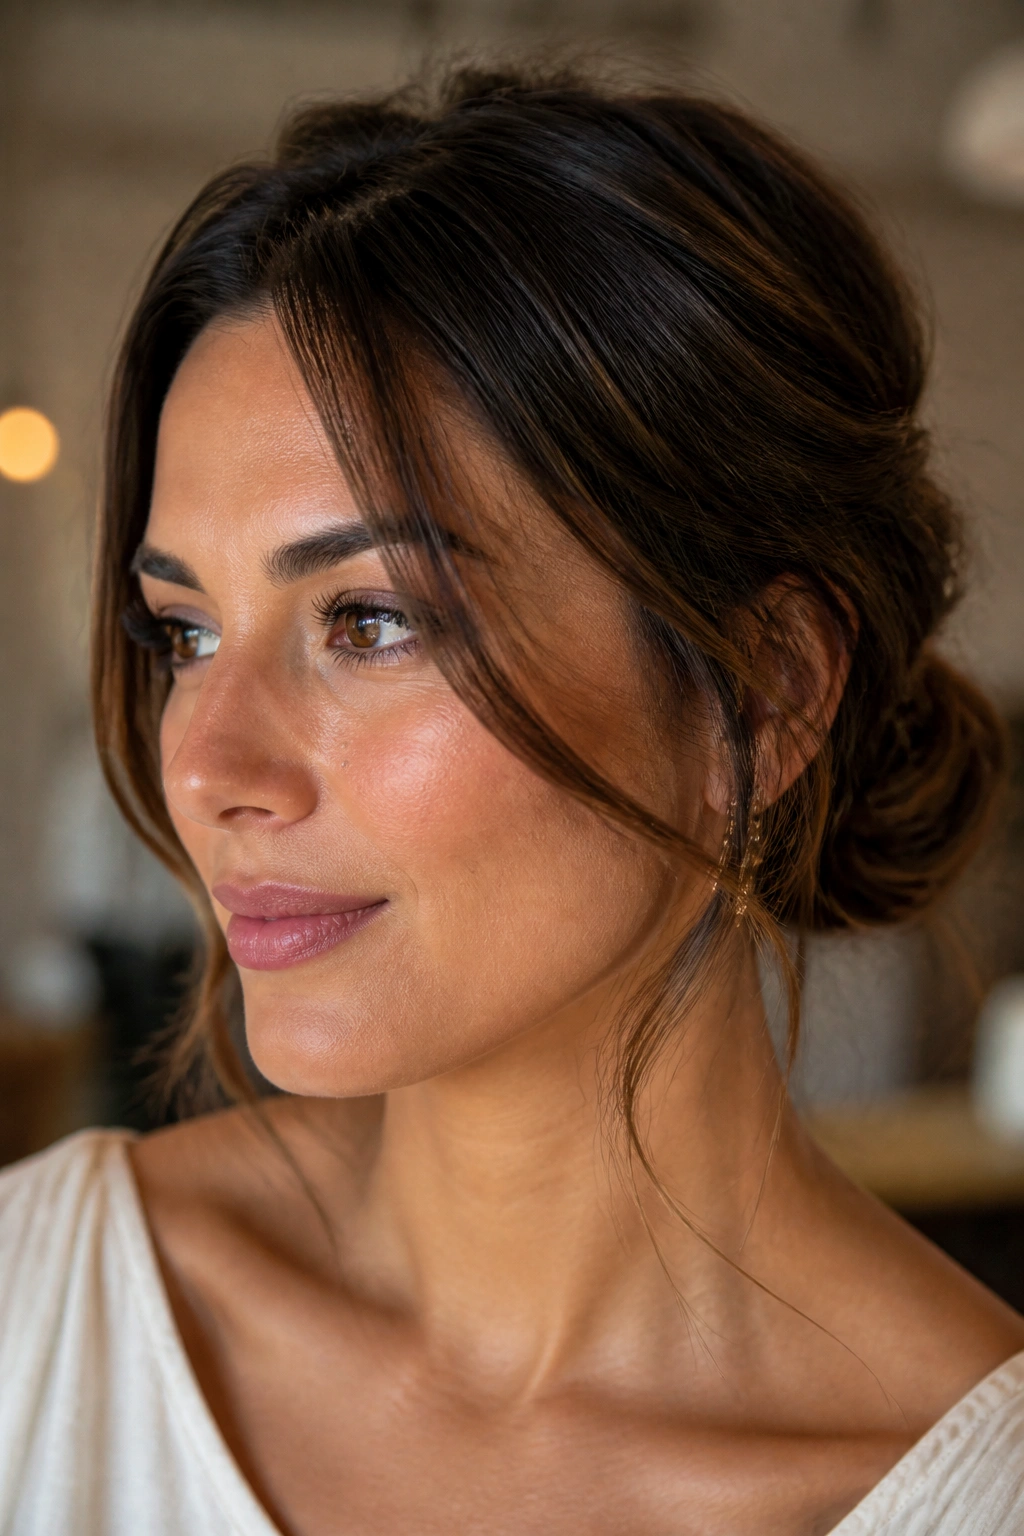
A low bun can look polished or painfully tight. The difference is in the front. If the hair is scraped straight back, the hairline gets put on stage. If the front stays a little loose, the bun becomes graceful instead of harsh.
Keep the bun at the nape, not at the crown. That lower placement lets the front hair stay a little fuller because the hair does not need to be pulled straight from the temples. Add a soft side part and let a few thin pieces fall around the cheeks. Those pieces can be almost invisible in the best way. They just break up the line.
I’d skip the ballet-bun version if the front is sparse. It shows everything. A slightly looser twist, pinned rather than yanked into place, is kinder. You can even rough up the crown with your fingers before securing it so the top has a bit of lift.
This style works well for work, weddings, dinners, and those days when you want the neck clear but still want the hairline to look soft. Use a light mist of spray on the sides only. Too much product near the front can make fine hairs clump in a way that looks thinner, not fuller.
11. Feathered Shoulder-Length Cut
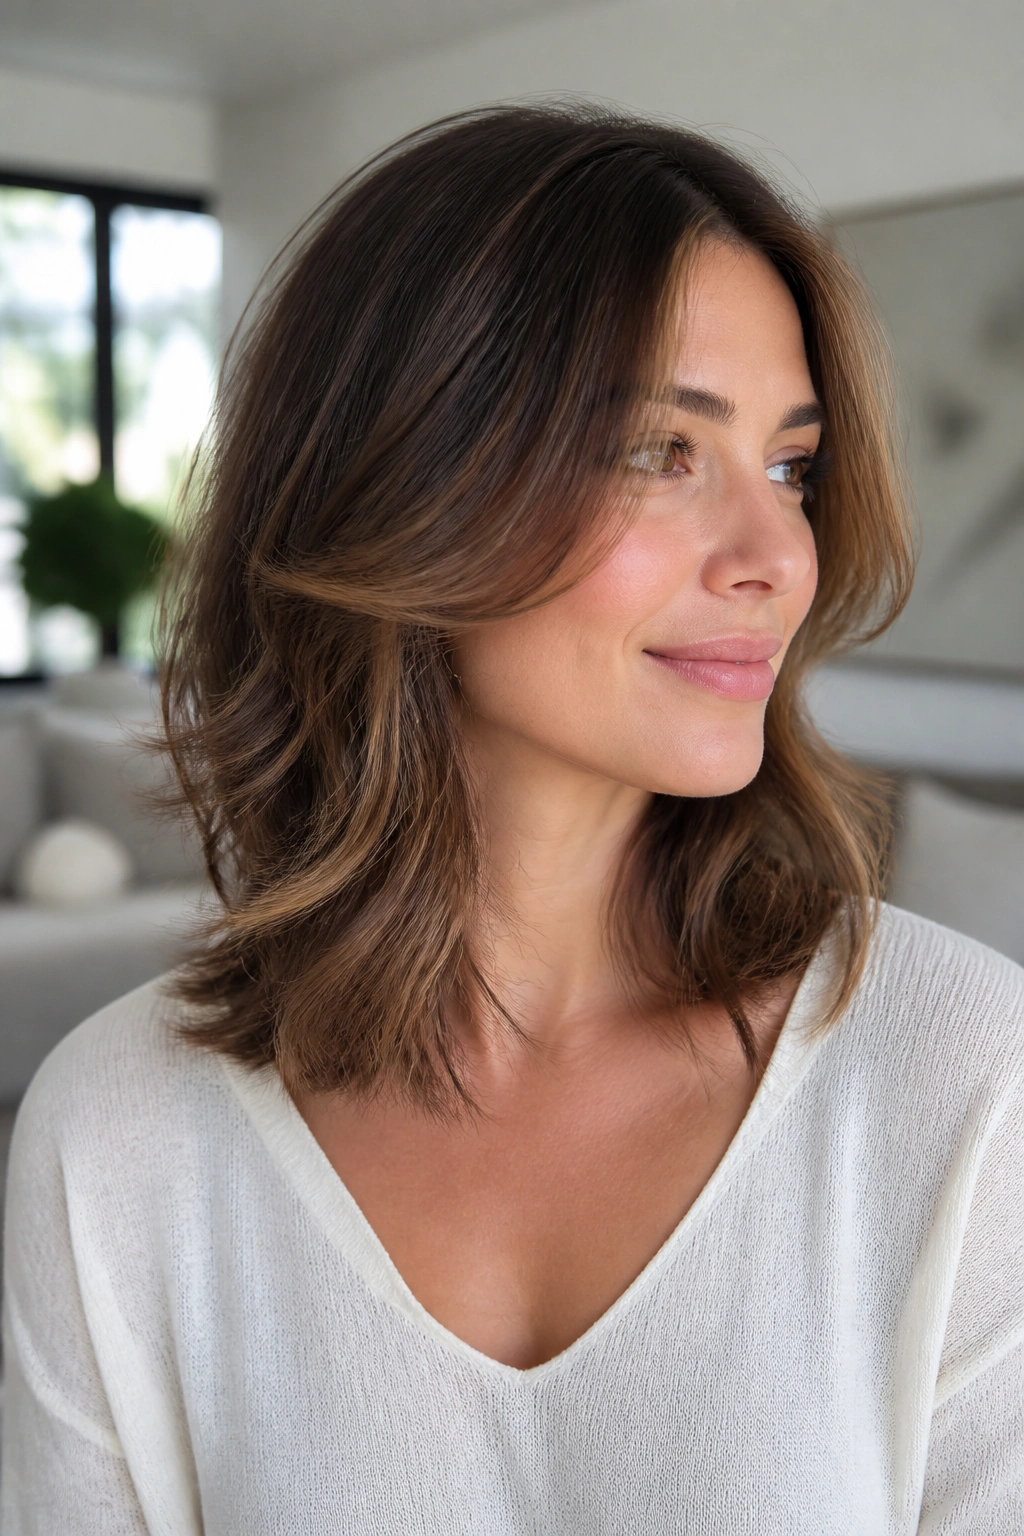
Feathering helps when the front feels heavy at the roots but thin at the edges. It takes some bulk out of the lengths and lets the hair move instead of hanging in one flat sheet. That movement is what keeps the front from looking blunt or tired.
The cut should start its softer layers below the cheekbone, not right at the hairline. If the front gets too many short pieces, the weak spots can show through. Longer, feathered pieces frame the face without putting the scalp on display.
Why the shape helps
Feathering breaks up the perimeter of the hair. That gives the eye little shifts to follow instead of one straight line. Straight hair benefits a lot from this because the cut prevents it from sticking to the head in a single sheet.
Wavy hair does well too, as long as the layers are not too aggressive. If you cut too much out of the front, the wave can bounce into odd little gaps. Nobody wants that.
A medium round brush works well here. Blow-dry the front away from the face, then turn the ends under or slightly out, depending on your preference. I prefer a soft under-bend for everyday wear. It reads cleaner. If you want a bit more shape, a tiny flip at the ends keeps the style from going limp by midday.
12. Piecey Crop with a Light Fringe
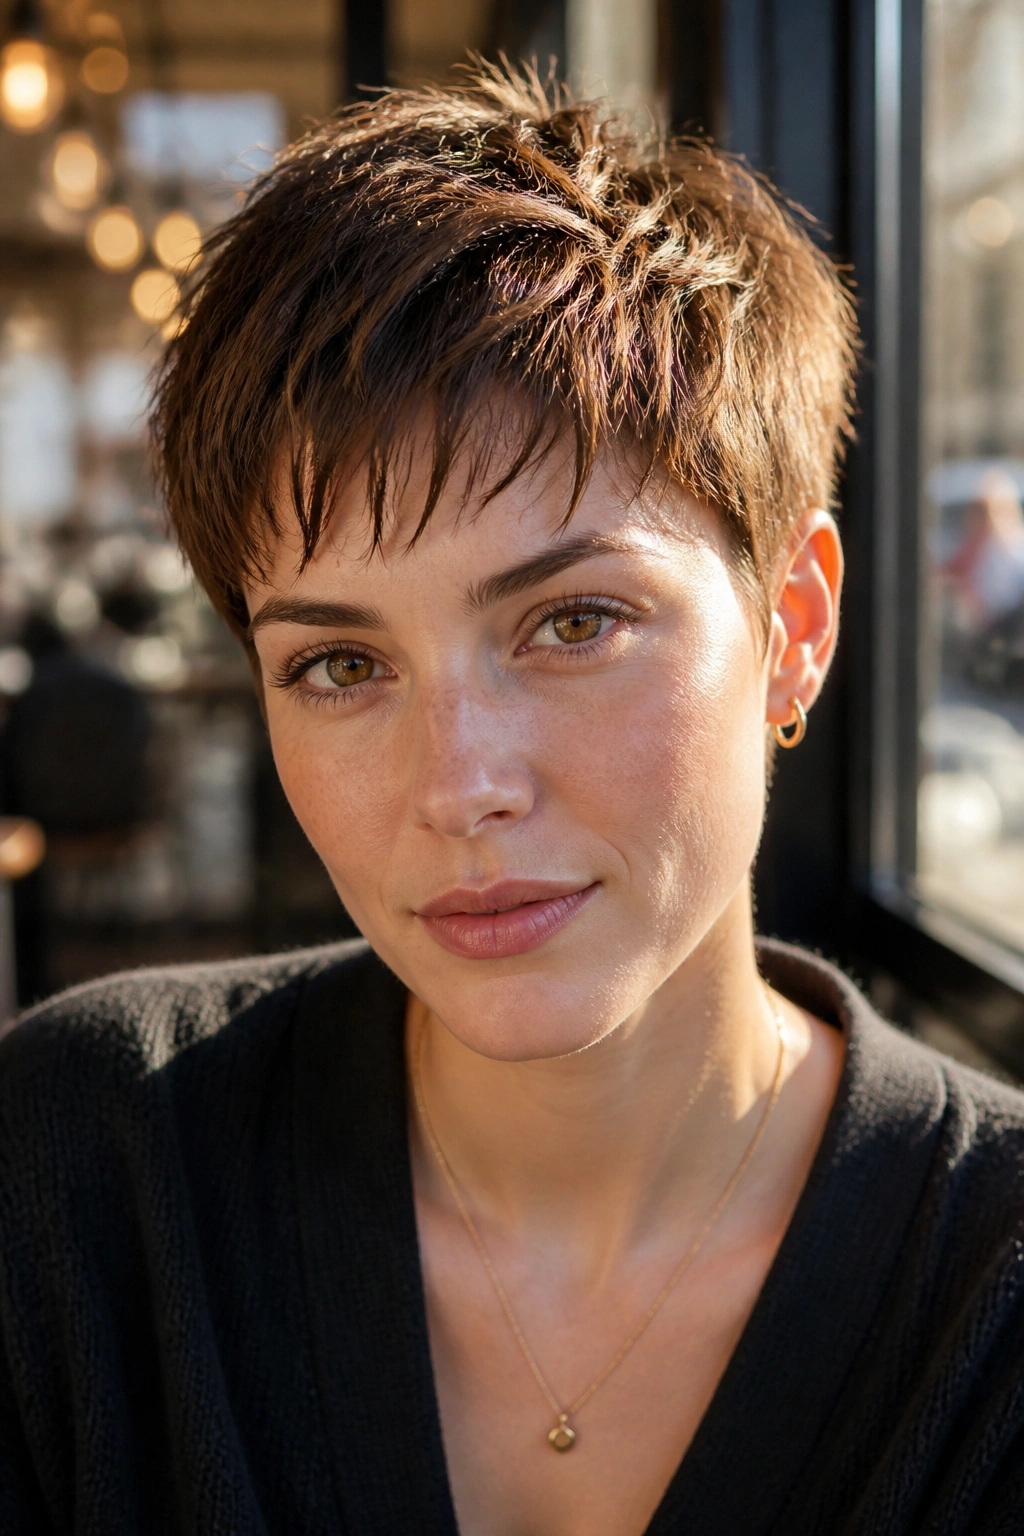
A piecey crop is for the person who wants texture, movement, and a little attitude. It is shorter than a shag, less polished than a bob, and much more forgiving than a blunt front. The key is separation. Not mess. Separation.
Ask for a longer top with short, tapered sides and a light fringe that breaks into sections instead of forming one straight line. The front should look slightly uneven on purpose. That unevenness keeps the eye from tracing every sparse patch at the hairline.
This cut shines on coarse hair, thick hair, and hair with a bit of natural bend. It can work on fine hair too, but the texture needs help from product. A pea-sized amount of matte paste warmed between the hands is enough. Push some forward through the front, then pinch a few pieces into place. Do not comb it flat. That kills the whole effect.
It is a little edgier than the other styles here. Good. Not every haircut has to pretend it is polite. If you like structure but want the front to look less exposed, this crop can be a strong choice.
13. Braided Crown with Loose Front Strands
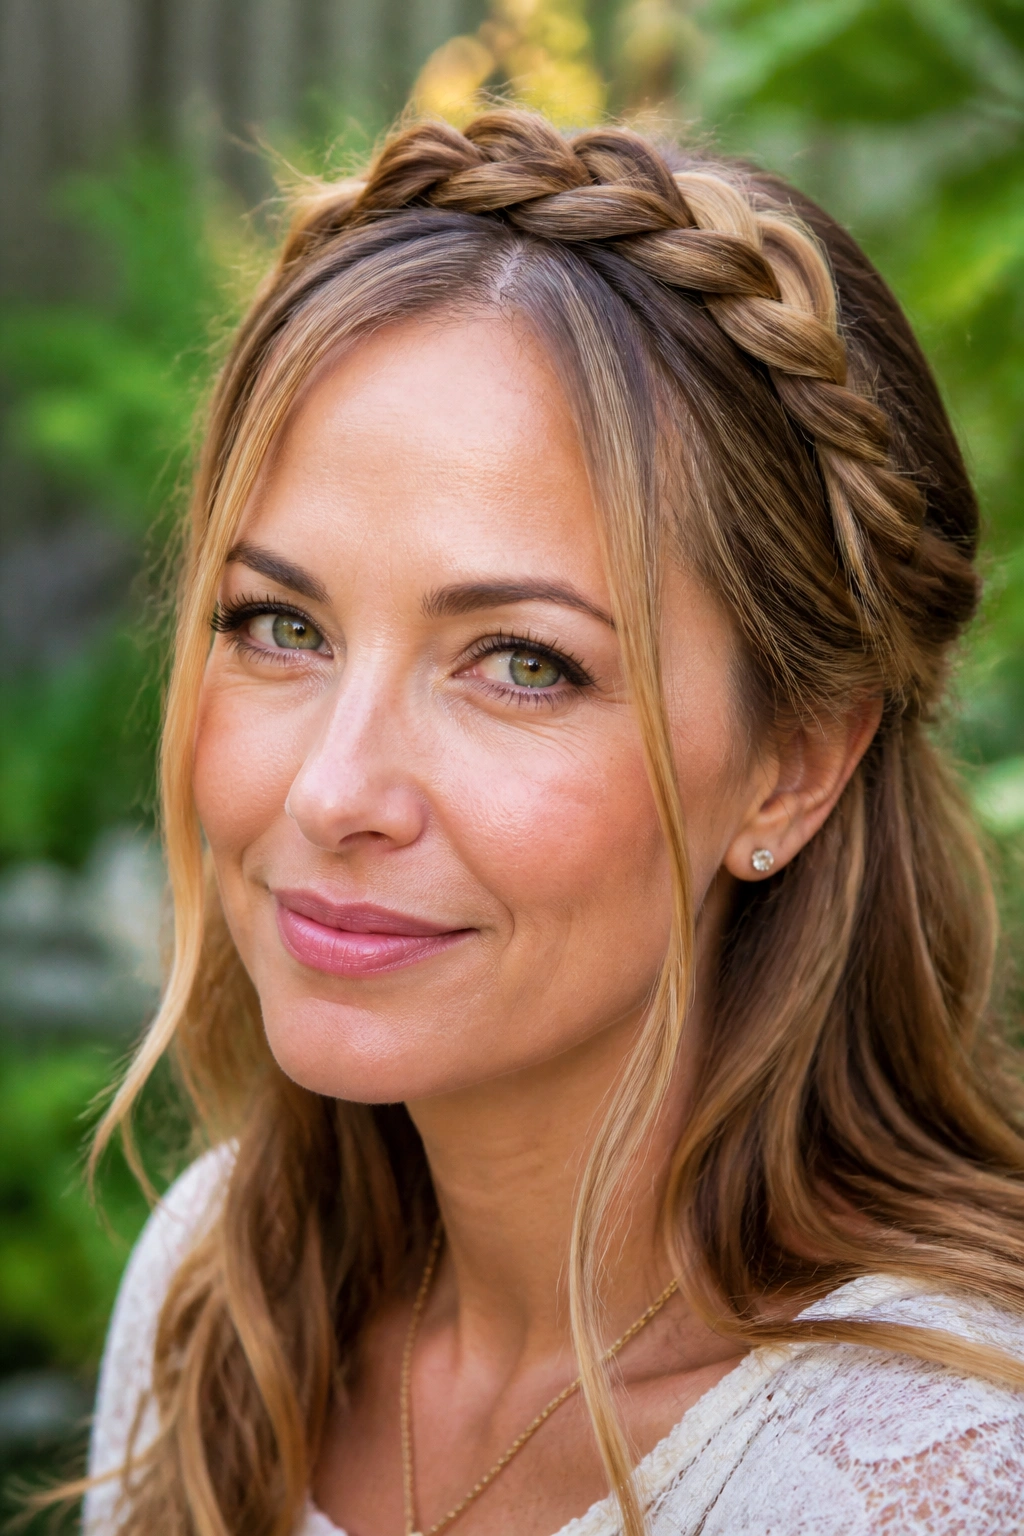
Braids can help front thinning hair, but only if they are loose. A tight braid pulled from the hairline will expose every weak point along the temples. A soft crown braid, started a little farther back, creates a frame instead of a spotlight.
This style works best on medium to long hair. Start the braid behind the most sparse area, not directly at it. That keeps tension off the delicate front and gives the braid some room to sit. Leave two narrow front pieces out, especially if your hairline feels soft or uneven. Those strands give the style a gentler edge.
How to keep it flattering
- Braid loosely, not scalp-tight.
- Pull the braid slightly apart after pinning it.
- Leave a side part or a soft middle part, not a sharp one.
- Use second-day hair if you can; it holds better.
The best part is that this style hides while still looking airy. It is useful for events, hot weather, and days when you do not want to think about your hair every five minutes. If your front is thin because of breakage, keep the braid’s grip light. Pulling hard on fragile roots is a bad trade.
14. Messy Top Knot with Side Volume

A top knot can be useful for front thinning hair, but only if it is not scraped back to the ceiling. The knot should sit high enough to lift the face, yet loose enough that the crown still has some body. If you flatten the front, the style flips from casual to revealing in a hurry.
The side volume is the part people forget. Leave the hair at the temples a little fuller, then gather the knot without dragging everything tight. A few soft pieces around the face help too, especially if the front hairline is uneven. They do not need to be dramatic. They just need to be there.
This is one of those styles that looks better with a little imperfection. A few teased roots, a little texture spray, and a knot that is not perfectly round all help. I would avoid making it glossy and severe. Glossy is unforgiving.
Good for errands. Good for the gym. Good for any day when your hair needs to be up but you still want the front to look intentional. If your hair is very fine, anchor the knot with two pins instead of one elastic. It keeps the shape from slipping without pulling the front tighter.
15. Collarbone Lob with Flipped-Out Ends
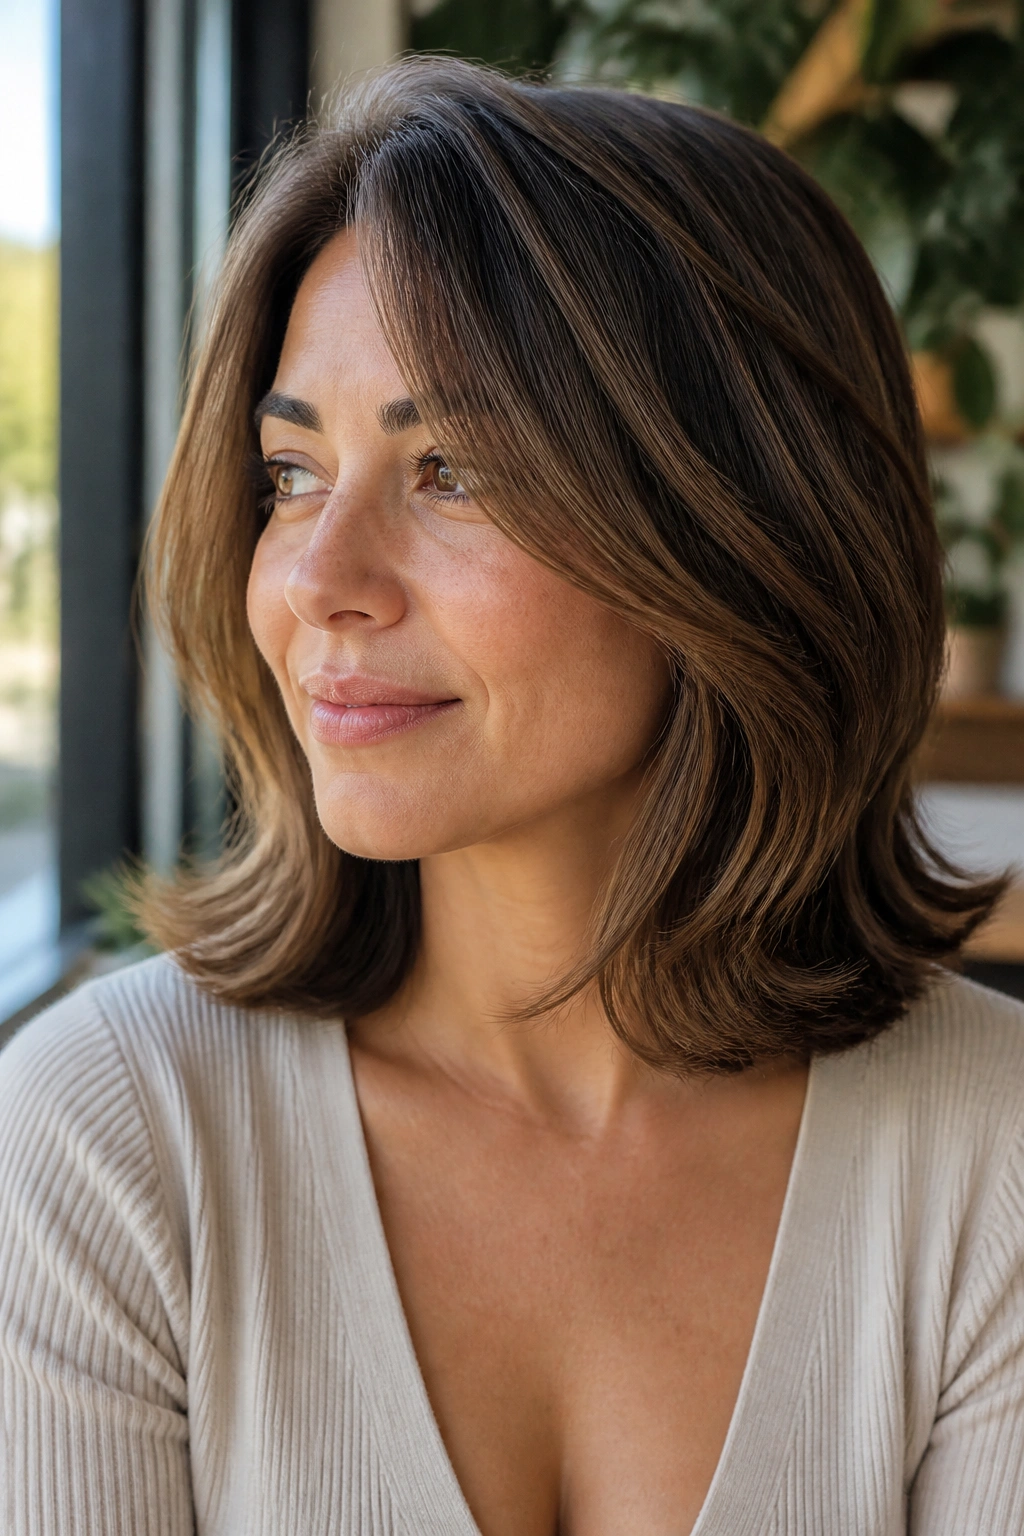
The collarbone lob is the quiet workhorse of this list. It gives you enough length for softness around the face, but not so much that the hair drags flat and reveals every thin patch at the front. The cut sits in that sweet spot where the front can still move forward a little, which helps a lot.
Flipped-out ends keep the style from collapsing. A hair that ends in one straight line tends to look thinner when it settles. A slight outward turn at the ends creates motion and a bit of width through the lower half of the haircut. That width matters. It balances the forehead and makes the whole shape read fuller.
A soft side part helps here too. You do not need a dramatic one. Just enough offset to stop the hair from splitting cleanly down the center. If your face-framing pieces are a little longer than the rest, even better. They can skim the cheekbones and pull attention away from the sparse front line.
This is the one I’d hand to someone who wants a haircut that behaves. It looks good air-dried with a little cream, and it looks even better with a quick pass of a round brush at the ends. No theatrics. Just shape.
A collarbone lob does not shout. It steadies the whole look, which is often what front thinning hair needs most.
