



Flat hair can look tired before breakfast.
That’s the annoying part. A head of hair can be perfectly clean, healthy, and well cared for, and still fall close to the scalp like it has given up on the day. The trick with hairstyles for flat limp hair is not trying to force giant volume where it does not want to stay. It’s about moving weight, changing shape, and giving the eye somewhere else to go.
A lot of people blame product first. Sometimes that’s the problem, sure. Heavy conditioner at the roots, too much oil, too much smoothing cream, or a cut with layers that were thinned out too aggressively can make fine hair collapse even faster. But plenty of the time, the real issue is simpler: the style is working against the hair’s natural fall instead of using it.
I’ve always liked styles that do two jobs at once. They make the hair look fuller, and they also make the whole head look more intentional. That’s a useful distinction. “Bigger” hair can still look flat if it’s shapeless; a smarter style can look good even when the roots are starting to misbehave.
1. The Blunt Collarbone Lob That Makes Hair Look Denser
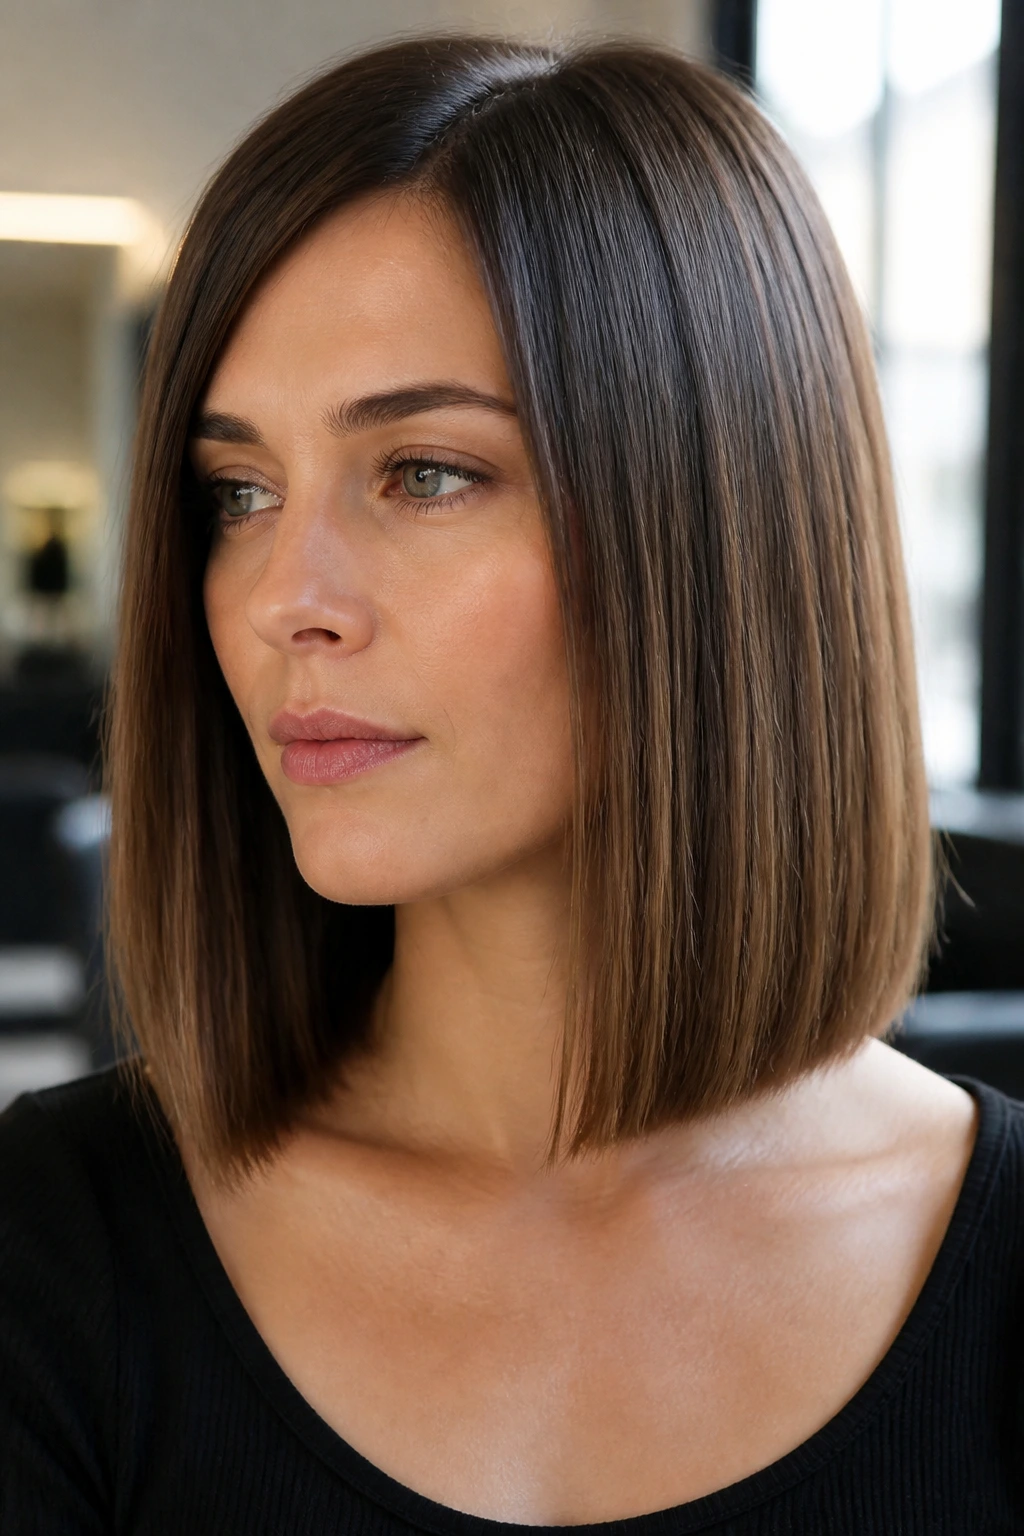
A blunt lob is one of the easiest fixes for flat, limp hair because it removes the wispy ends that make hair look thinner than it is. Hair that falls right around the collarbone has enough length to feel versatile, but not so much weight that it drags everything down.
Why It Works
A blunt edge creates a solid visual line, and that matters more than people think. When the ends are even, the hair looks thicker at the perimeter, which is where limp hair usually needs help the most. Long, heavily layered hair can look airy in theory and stringy in practice. Not my favorite trade.
Ask your stylist for a one-length lob that hits between the chin and collarbone, with only the lightest internal shaping if you need movement. At home, blow-dry with a round brush about 1.5 inches wide, lifting the roots straight up for the first pass and turning the ends slightly under. A little root spray at the crown goes a long way here.
- Best for fine, straight, or slightly wavy hair
- Keeps ends looking fuller instead of see-through
- Works well with a middle part or a soft side part
- Needs only 5 to 10 minutes of styling to look polished
My tip: if your ends are fuzzy, skip heavy serum and use one small drop on the last 2 inches only.
2. The Deep Side Part That Lifts the Crown

A side part can do more for limp hair than a full shelf of volumizing products. Seriously. Shifting the part even 1 to 1½ inches off center changes where the weight sits, and that tiny move can make the top of the head look higher.
The best part is how low-effort it is. If your hair has been trained into a center part for years, your roots may fall flat in that exact line out of habit. Flip the part deeper on the heavier side, then dry the root area in the opposite direction for a minute or two before letting it settle back. That little reversal gives you a cleaner lift at the crown.
I like this style most on straight or slightly bent hair because the contrast is crisp. It also makes a simple ponytail or loose blowout look more finished without adding a ton of texture.
What to Watch For
- Make the part clean with the tip of a tail comb
- Clip the heavier side away while the roots cool
- Use a light mist of dry shampoo at the part, not halfway down the shaft
- Keep the rest of the hair smooth so the lift at the top stands out
If your hair gets oily fast, this is the style that can buy you an extra day of decent-looking roots.
3. The High Ponytail with a Wrapped Base
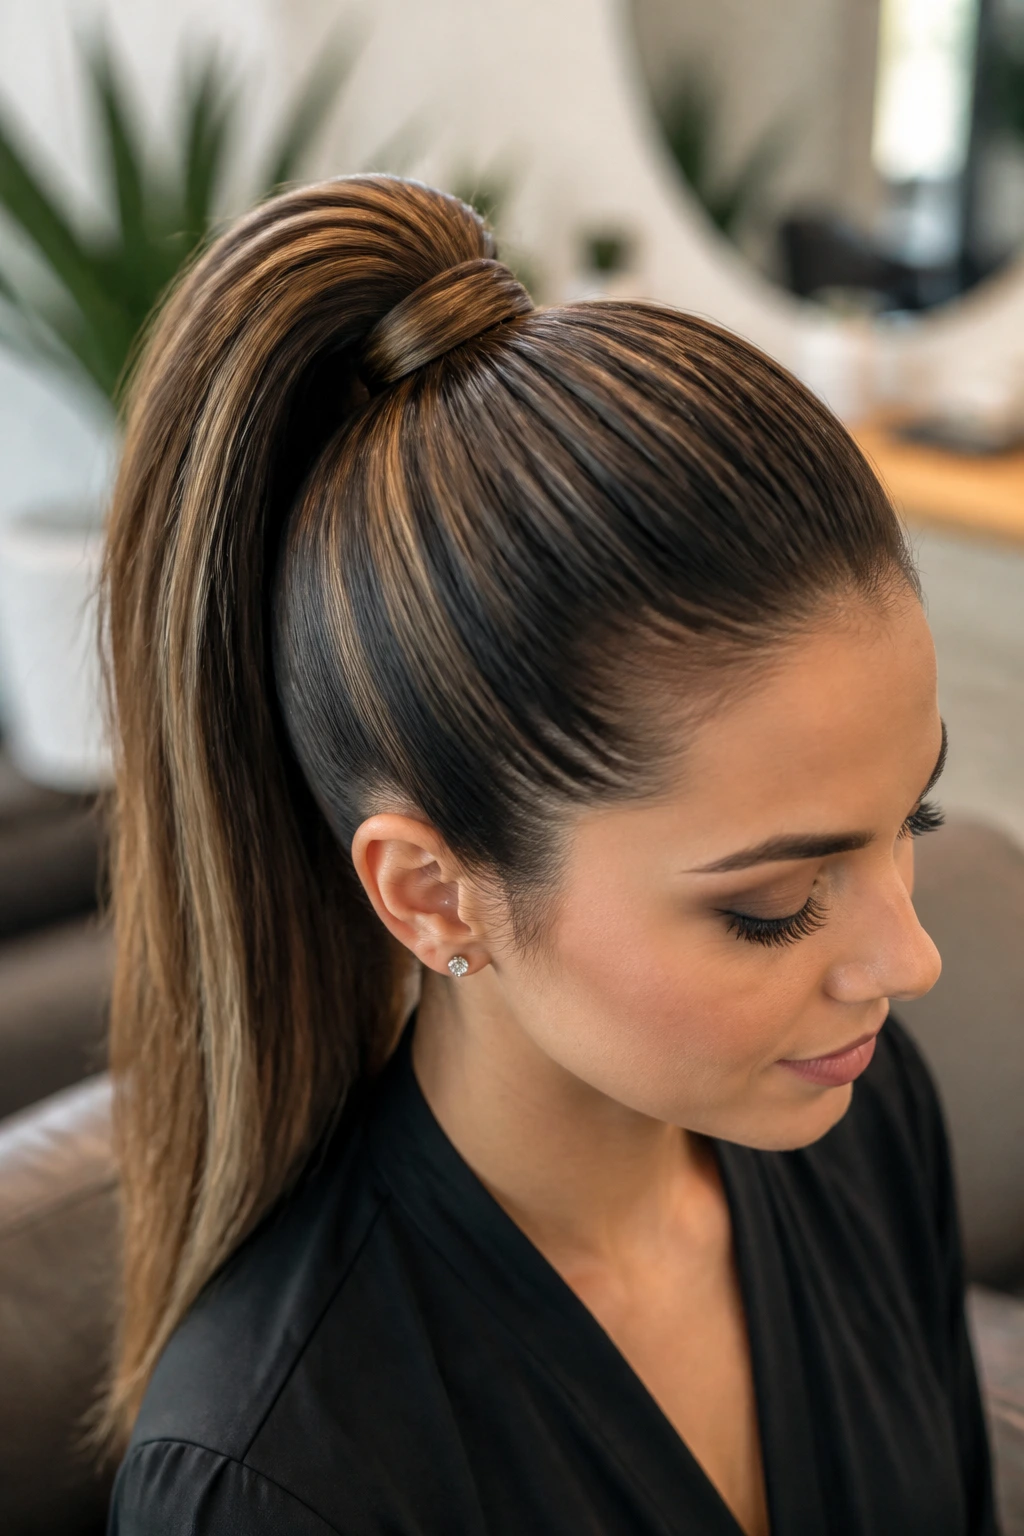
Why does a high ponytail work so well on flat hair? Because it pulls the whole shape upward. The eyes go to the crown first, and that alone creates the sense that there’s more hair than there really is.
The move that makes it look expensive rather than rushed is a wrapped base. Take a small section from under the ponytail, wrap it around the elastic, and pin it underneath. That hides the telltale rubber band and gives the style a cleaner line. If your hair is slippery, secure the ponytail with two elastics stacked together. One elastic tends to slide.
This style is especially good when your roots are flat but the ends still have decent texture. It gives you that lifted profile without forcing you to backcomb the whole head into a mess.
How to Keep It from Sliding
- Start with hair that has some grip — second-day hair is ideal
- Mist the crown with texture spray before tying it up
- Place the ponytail high, near the upper crown, not low at the nape
- Tug the hair just above the elastic to create a tiny puff
One small pull at the top changes the whole thing. Don’t overdo it. You want lift, not a bubble helmet.
4. The Half-Up Knot That Gives the Top Half Height

When your roots are flat and your ends are tired, a half-up knot is a smart compromise. It leaves enough hair down to keep the style soft, while the top section gets a little lift and shape.
This is one of those hairstyles that looks casual in the best way. You pull back the top third of the hair, twist it once or twice, and pin or tie it into a mini bun. The looseness matters. If the knot is too tight or sits too far back, you lose the volume you were trying to create in the first place.
I like this on shoulder-length hair because it keeps the profile from collapsing at the sides. The hair that stays down still frames the face, which helps if the top section is not thick enough to stand on its own.
- Tease the crown gently before gathering the top section
- Leave 2 face-framing pieces loose
- Keep the knot small so it does not drag the head down
- Use a matte pin or clear elastic, not a heavy clip
There’s a nice middle ground here. It’s dressed up enough for dinner, but not so polished that every flat spot shows.
5. The Soft French Twist That Fakes Volume at the Back

A French twist sounds formal, but it’s one of the best ways to handle flat hair when you want height at the back without teasing everything into dust. The twist itself creates a vertical line, and vertical lines are your friend when your hair wants to lie down.
Start with hair that has a little texture. If it’s freshly washed and slippery, dry shampoo or a light texturizing spray makes the pins hold better. Gather the hair low on the head, twist it upward, and tuck the length into the roll. Then pin vertically along the seam with 3 or 4 bobby pins. The point is not to make it stiff. It’s to make it stable.
I prefer a slightly undone French twist over a super tight one because the tiny bit of looseness at the crown makes the style feel fuller. Perfectly smooth can be the enemy here.
The back should look soft and secure, not glued to the scalp. That’s the whole game.
6. Curtain Bangs and Long Layers Around the Face
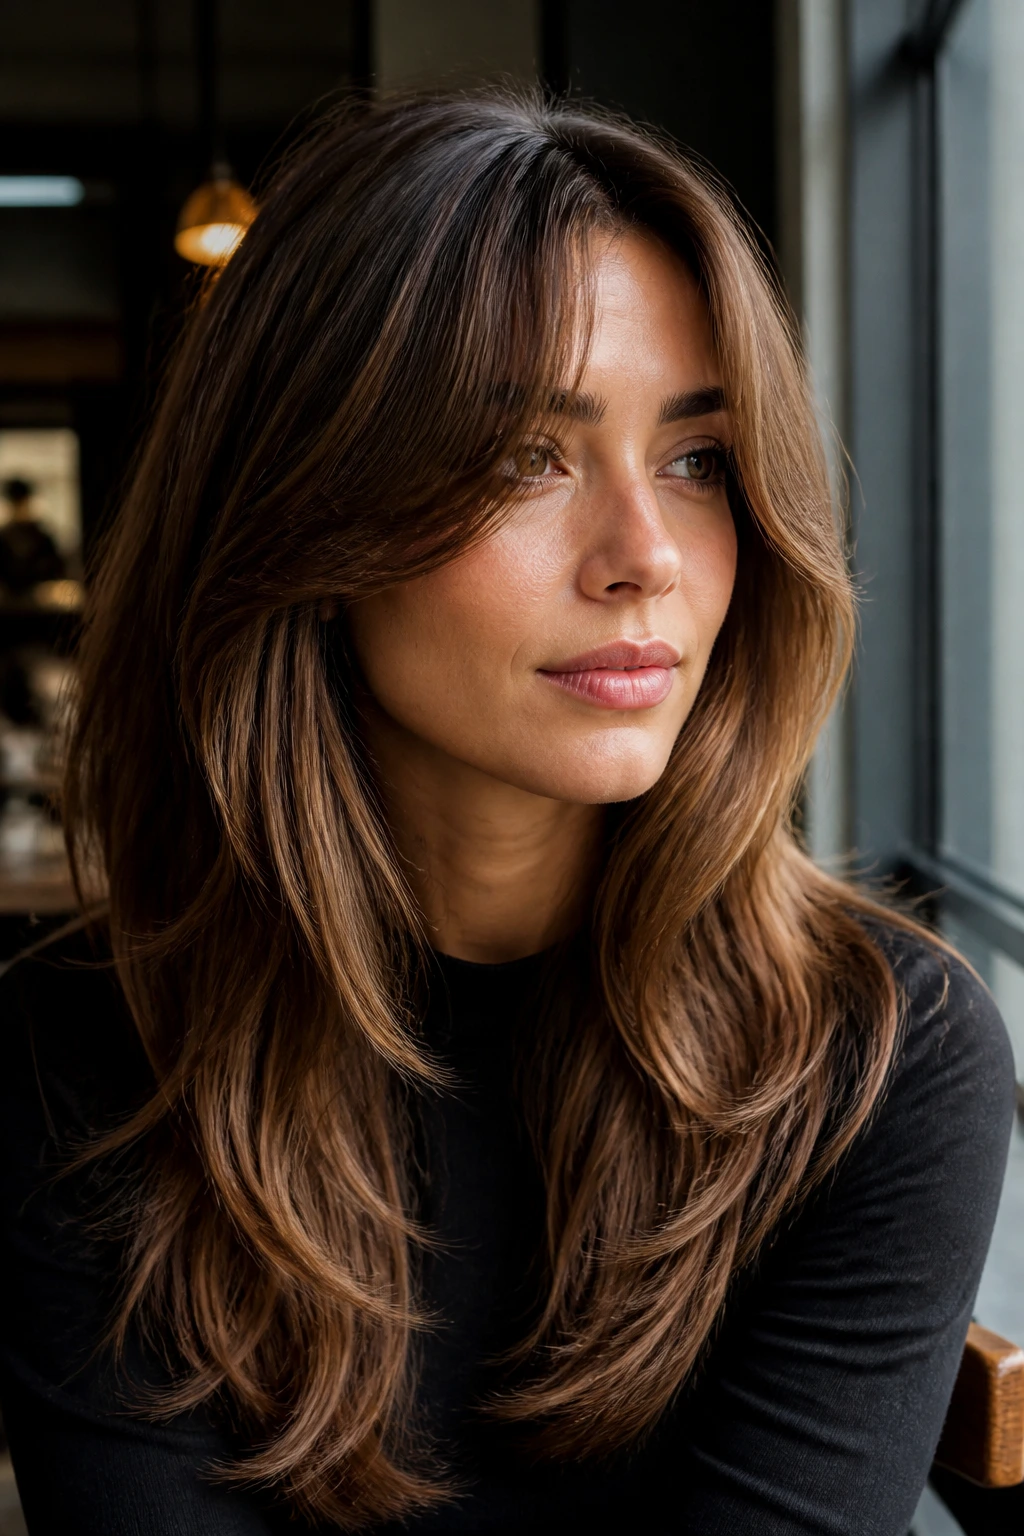
Curtain bangs change the balance of flat hair fast. Instead of letting all the weight hang in one line, they break up the front section and bring motion right where people look first. That matters more than trying to bulk up every strand from root to tip.
Unlike one-length long hair, curtain bangs and face-framing layers give you movement without forcing the ends to do all the work. The front pieces can be styled away from the face with a 1¼- to 1½-inch round brush, then clipped for a minute while they cool. That tiny cooling step helps them keep their bend instead of falling straight the second you stop touching them.
This cut is not for someone who wants zero styling. It does ask for a little effort. But the payoff is that you can tie the rest back and still look like you meant to do something with your hair.
Best For
- Hair that looks flat around the temples
- Longer lengths that need shape near the face
- People who like a soft blowout look
- Anyone tired of hair hanging like a curtain, which is not the good kind
If you want volume without big curls, this is one of the smartest places to start.
7. The Textured Shag That Spreads Weight Out

If flat hair needs one cut with some personality, it’s the shag. The whole point is to spread the weight around so no single section drags the rest down. You get movement at the crown, movement at the sides, and enough separation that the hair never sits as one heavy block.
Here’s the catch: the shag works best when it’s shaped with restraint. Over-thinned layers can make fine hair look frayed instead of full. Ask for soft layers through the crown, a little face framing, and ends that still have some bluntness. That bluntness keeps the style from turning stringy.
At home, this cut likes a mousse at the roots and a tiny bit of texture spray through the mids. Scrunching helps, but don’t turn it into a stiff, crunchy mess. The best shag has movement that bends and settles naturally.
What to Ask for at the Salon
- Layers that start high enough to create lift, not holes
- A crown shape that is soft, not choppy
- Face-framing pieces that sit near the cheekbone or jaw
- Length left at the bottom so the whole cut still has weight
This is the style I recommend to people who are tired of “doing” their hair every morning. It does the heavy lifting for you.
8. Loose Waves with Cool-Set Curls at the Crown
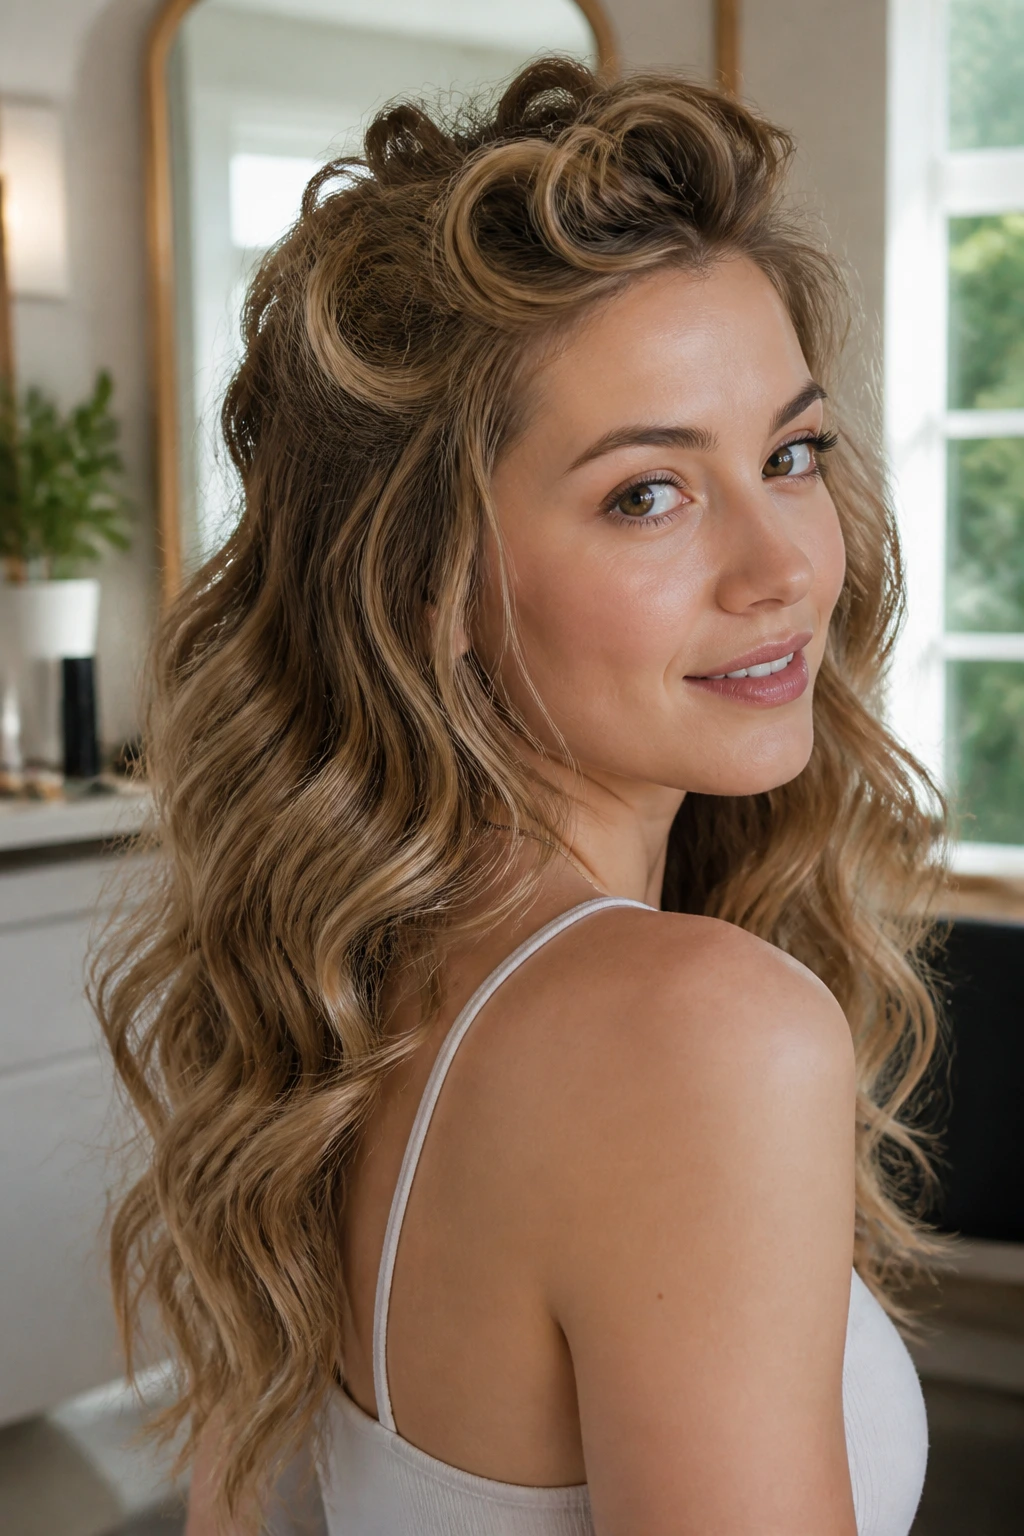
Loose waves can be brilliant for flat hair, but only if you let them cool properly. Heat sets the bend; cooling locks it in. If you brush out curls too soon, they slump, and you’re back where you started.
The easiest version is to curl medium sections with a 1¼-inch curling iron, leaving the last inch or so of the ends out if you want a more relaxed finish. After each curl, coil it back into your hand and clip it to the head for 5 to 10 minutes while it cools. That one move changes everything. The crown keeps more shape, and the wave lasts longer.
I like this style when hair is flat at the roots but can hold a bend in the mid-lengths. It creates width without turning the whole head into a helmet of curls.
The Part Most People Skip
- Use a light mousse before drying if the hair is too soft
- Curl away from the face for a more open look
- Clip the top curls while they cool
- Only brush with a wide-tooth comb or fingers once they’re fully set
The result should feel loose and touchable, not overworked. If you can see the curl pattern without it looking stiff, you’re in a good place.
9. The Claw Clip Twist That Lifts the Top Section
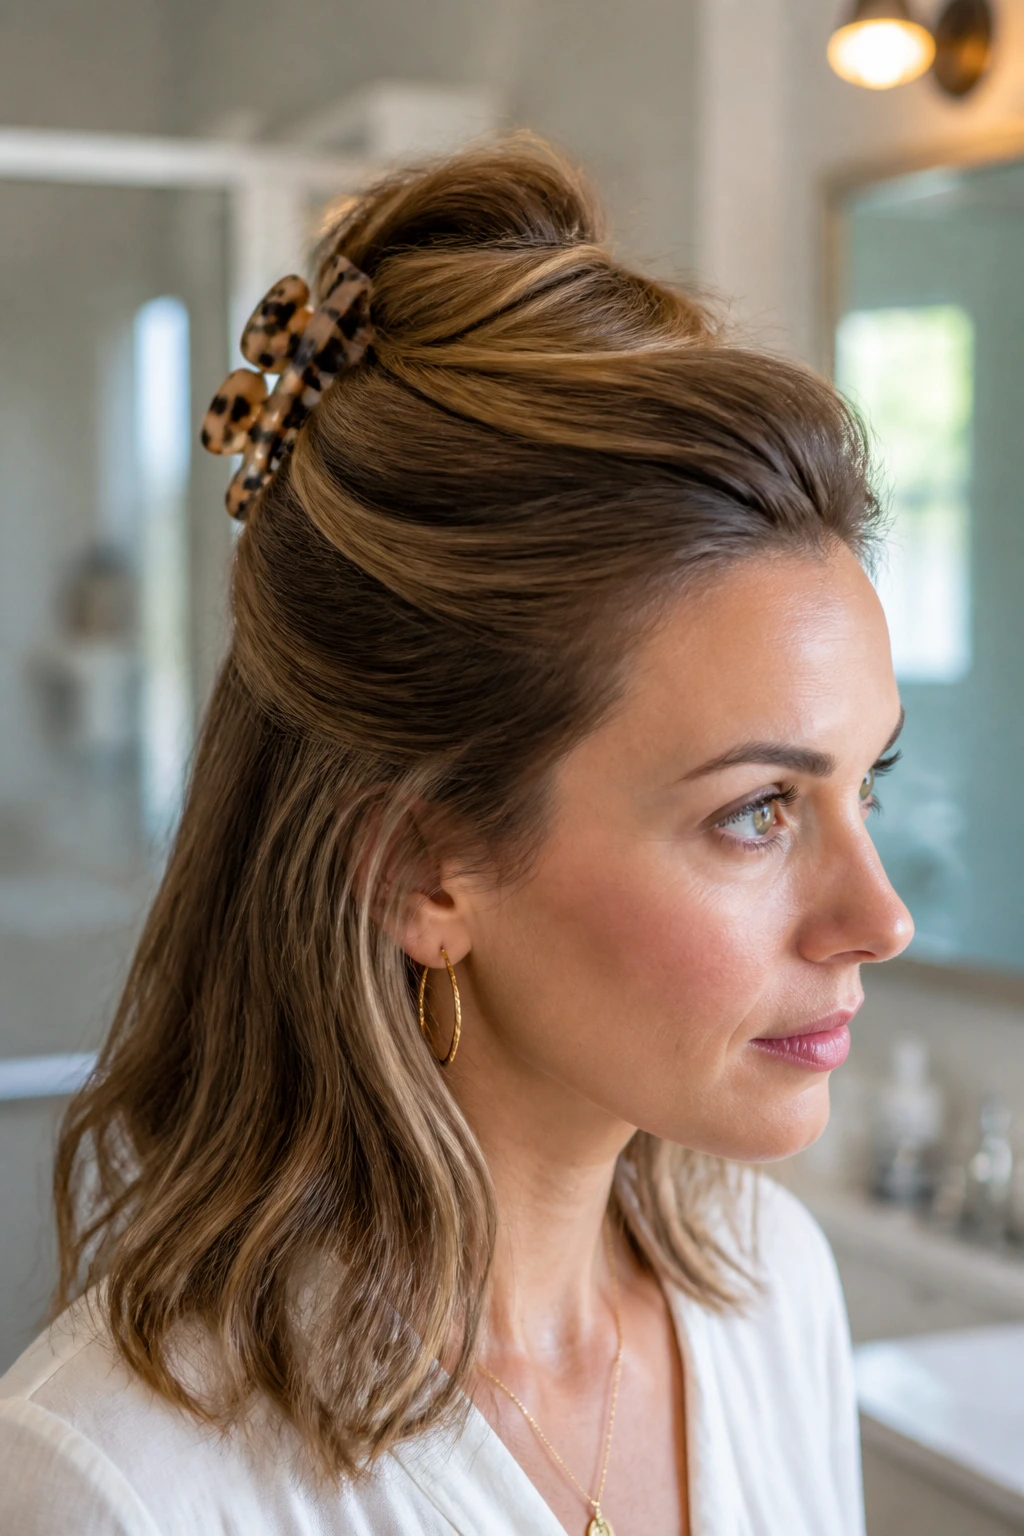
A claw clip can look lazy in the wrong hands. In the right hands, it gives flat hair shape fast. The trick is where you place the twist. If you pin everything low and tight, you flatten the crown. If you gather the hair slightly higher and leave a bit of lift at the top, the whole style looks fuller.
Twist the hair once or twice, fold it upward, and catch it with a medium-sized clip that actually grips the hair. Tiny decorative clips often look cute and do nothing else. Not helpful. You want teeth that hold.
This style is especially good for hair that has some natural slip and refuses to stay in a ponytail. It also lets a few face pieces fall loose, which softens the shape and keeps it from feeling too severe.
What to Watch For
- Place the clip mid-back of the head, not at the nape
- Pull the crown up slightly before clipping
- Use dry shampoo or texture spray if the hair is too slick
- Let the ends fan out instead of stuffing them into a tight knot
It’s fast, and it works when you need your hair off your neck but still want the top to look awake.
10. The Bubble Ponytail That Breaks Up Long Flat Lengths
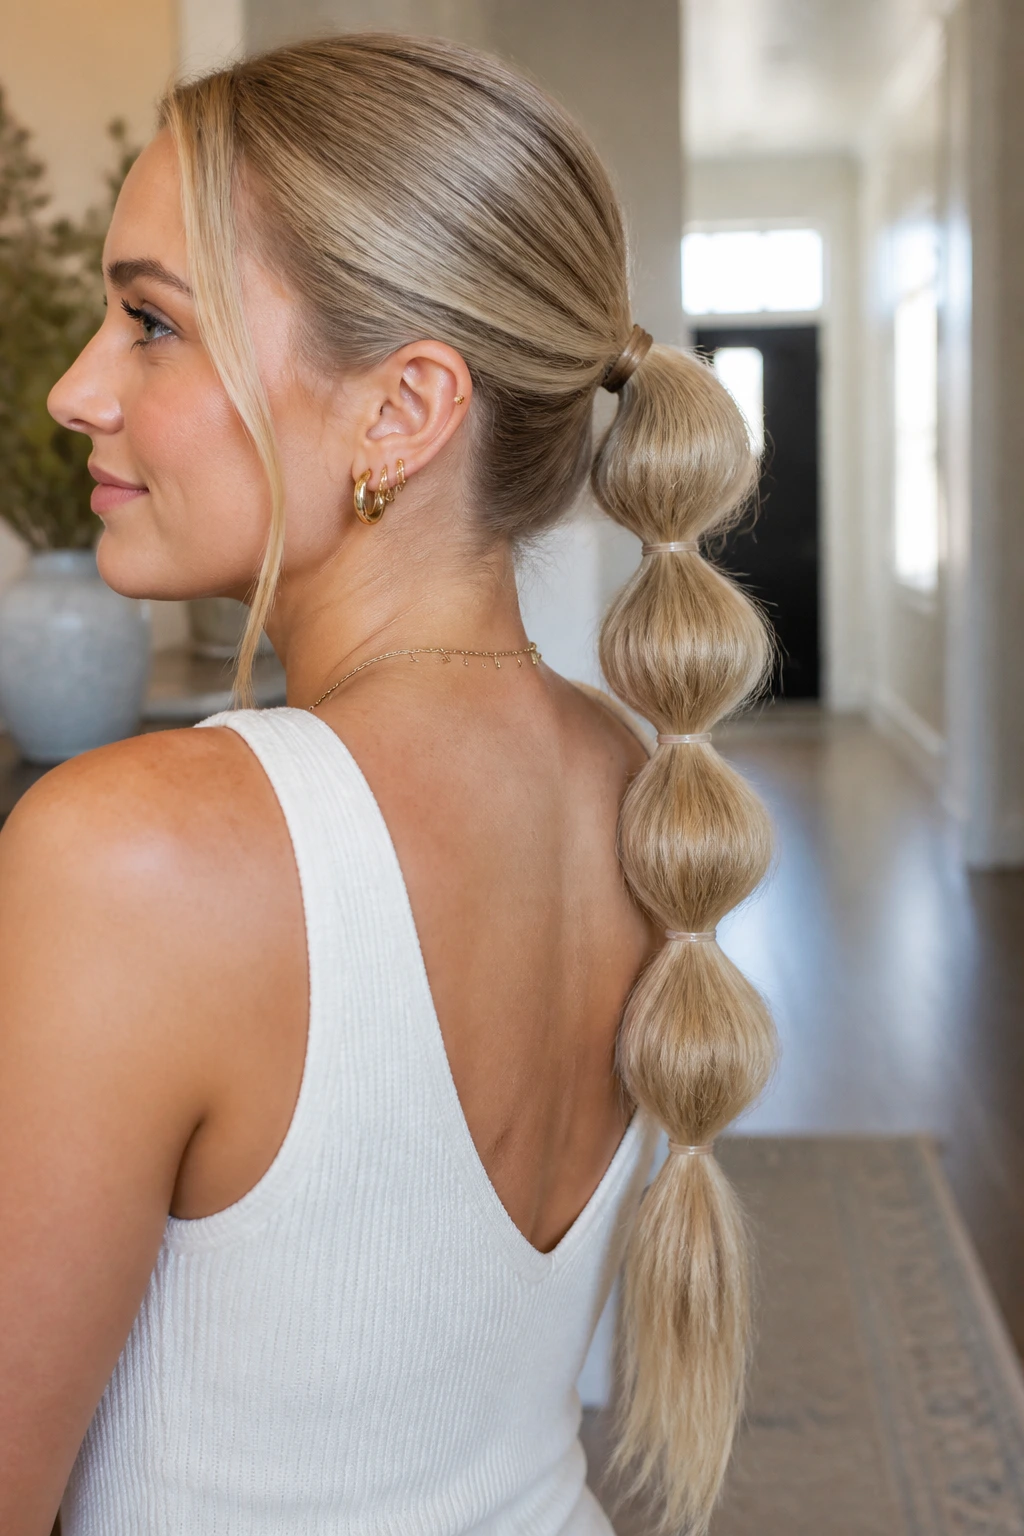
A regular ponytail can make limp hair look even flatter because it creates one long, straight line. A bubble ponytail breaks that line into sections, which gives the illusion of more fullness from top to bottom.
Tie the hair into a ponytail, then add clear elastics every 2 to 4 inches depending on length. After that, gently tug each section outward so it rounds into a bubble. You do not need giant puffs. A little separation is enough to change the shape. Too much tugging makes the bubbles lopsided, and that’s a hard look to defend.
This style works well on medium and long hair, especially if the ends go a little stringy by midday. The segmented shape makes the length feel intentional instead of heavy.
A ribbon or wrapped strand at the base can make it look more finished, but the structure is the real trick. That’s what carries the style.
11. The Braided Crown That Builds Width Across the Head
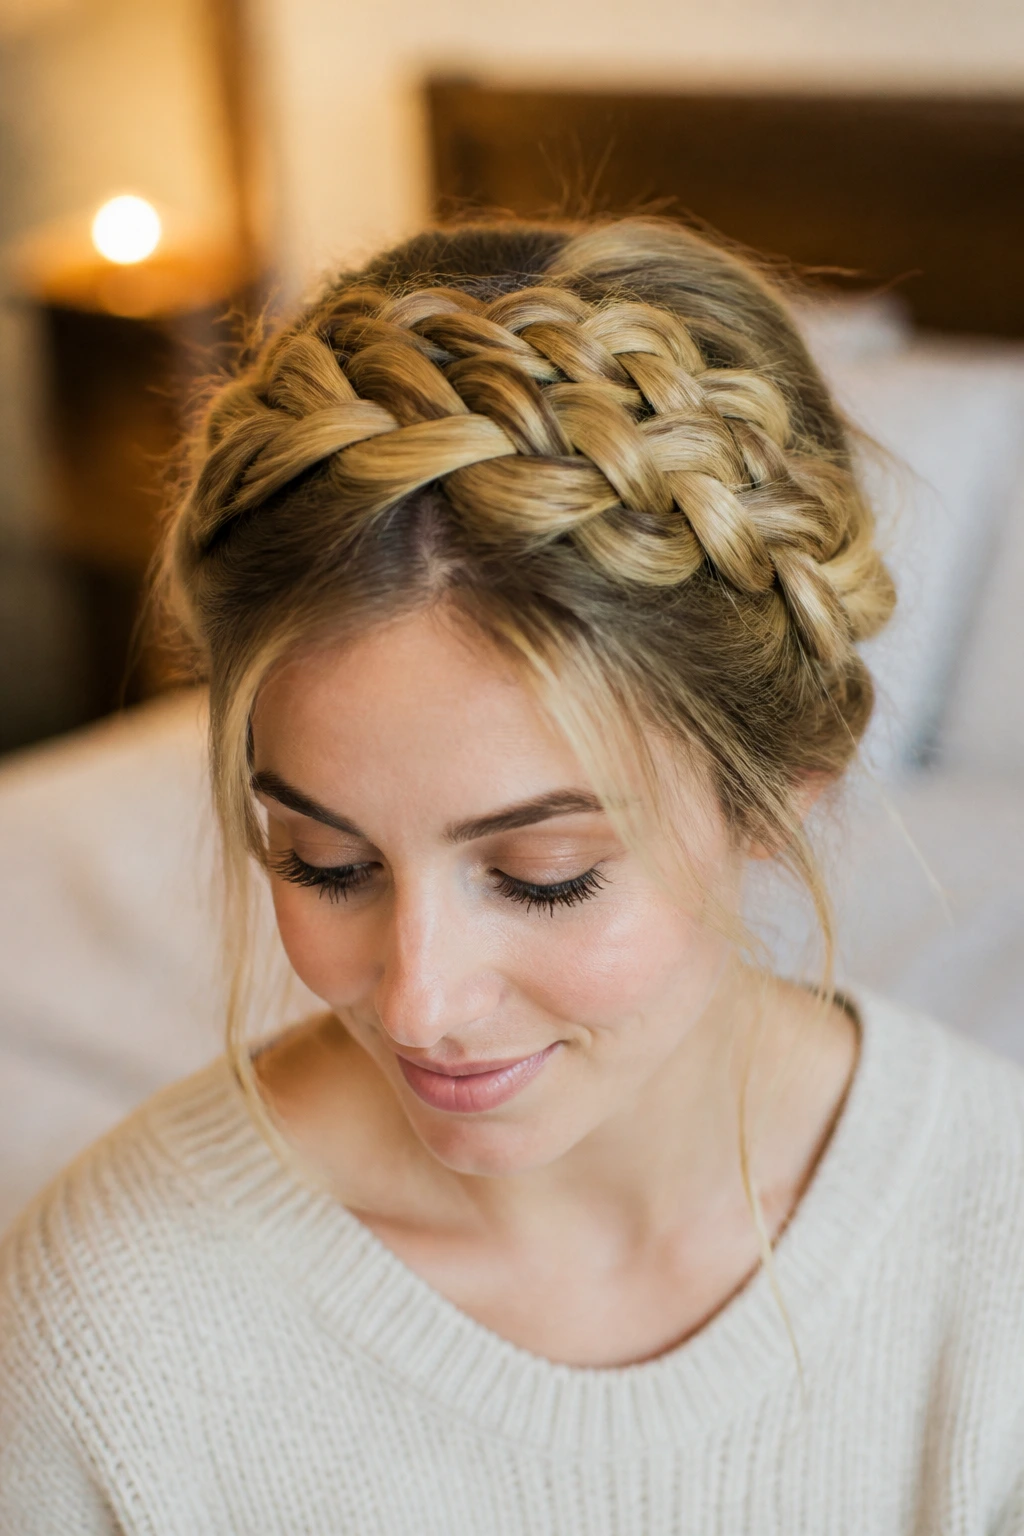
Braids are useful for flat hair because they add texture where the eye wants it most: along the top and sides. A braided crown, whether you use one braid across the front or two braids pinned around the head, creates width without asking the roots to stand up on their own.
Start with hair that has a little grip. Second-day hair is ideal. Braid gently from the temple area or just behind the ear, depending on the look you want, and then loosen the braid loops with your fingers before pinning. That softening step is what keeps it from looking too tight or small.
I like this style because it solves two problems at once. It gives the crown some visual lift, and it hides the fact that the roots may be behaving badly.
How to Keep It from Collapsing
- Spray the hair lightly before braiding
- Pancake the braid by tugging the edges outward
- Pin the braid in 2 or 3 spots, not just one
- Leave a few face pieces loose so the front does not feel severe
If your hair is fine, keep the braid loose and soft. Tight braids can make the rest of the head look smaller, which is the opposite of what you want.
12. The Sleek Low Bun with a Lifted Crown

Sleek does not have to mean flat. That’s the mistake people make. A low bun can look very polished on limp hair if you keep a little lift at the crown and avoid pressing the top down with too much product.
Start by lifting a 1-inch section at the crown with a tail comb, then smooth the sides back with a light cream or a touch of wax. Keep the product away from the top. The bun itself sits at the nape and can be tight or soft depending on the mood, but the crown should keep a small, rounded shape. That shape gives the style life.
This one is good for work, weddings, interviews — all the places where you want your hair controlled but not shoved flat to your head. It looks cleaner than a messy bun and usually lasts longer too.
A tiny amount of height at the top changes the profile from “slicked down” to “intended.”
13. The Piecey Pixie That Stays Light

Short hair can be a gift if your hair goes limp the second it gets any length. A pixie cut removes the weight that drags fine hair down, and piecey styling gives you texture where you need it instead of one smooth sheet of hair.
The key is not overloading the cut with product. Use a pea-sized amount of matte paste or light styling cream on damp or dry hair, then pinch small sections apart with your fingers. Blow-dry the crown forward for lift, then direct the sides slightly away from the face so the shape doesn’t hug the head too tightly.
A pixie is not zero-effort, and it should not be sold that way. It does need trims. But in daily life, it can be much easier than fighting long hair that wants to lie flat by noon.
Why It Works
- Less length means less pull on the roots
- Shorter pieces dry faster and hold shape better
- Piecey separation keeps the style from looking helmet-like
- A tiny bit of lift at the front changes the whole silhouette
If flat hair has been making you resent long styles, this one is worth serious thought.
14. The Padded Headband Sweep That Hides Flat Roots

A wide headband is one of the fastest ways to make flat hair look deliberate. The trick is choosing one with enough width — about 1 to 2 inches — to create shape instead of sitting like an afterthought.
Push the headband slightly back from the hairline, then lift the crown a touch before sliding it into place. If you smooth everything down first, the style can go limp again. A little lift under the band gives the top some body, and the fabric or padding helps disguise roots that are not cooperating.
This is one of my favorite quick fixes for hair that looks greasy faster than you’d like to admit. It also works well when the front is flat but the rest of the hair has some texture.
Best Uses
- Busy mornings
- Second-day hair
- Straight hair that refuses to hold volume
- Times when you want polish without heat
Don’t choose a headband that is too narrow or too stiff. It can pinch the hair flat and create a crease, which is a rude little surprise nobody needs.
15. The Side-Swept Twist That Fills Out One Side

A side-swept twist is a good last-resort style when your hair has gone limp and you still want it to look styled, not rescued. It uses asymmetry to create fullness. One side gets gathered and twisted back, while the rest of the hair falls over the opposite shoulder in a softer shape.
That offset matters. Flat hair often looks worse when everything is centered and obedient. A side sweep breaks the pattern. It gives the head more movement and makes the hair feel wider, even if the actual amount of hair has not changed at all.
Keep the twist loose at the crown and secure it with 2 or 3 bobby pins hidden under the surface. If the top is too polished, you lose the lift. If it’s too loose, the style unravels. There’s a small sweet spot, and once you hit it, the whole thing looks graceful in a way that straight-down hair rarely does.
It’s a neat option for when you want something a little dressier than a ponytail, but not fussy. And flat hair? It suddenly looks like it has shape on purpose.
Flat, limp hair usually needs one of two things: a better shape or a smarter line. The styles that work best are the ones that use movement, asymmetry, and a little controlled lift instead of chasing giant volume that vanishes in an hour.
If your hair never seems to hold anything, start with the blunt lob, the side part, or the crown-lift ponytail. Those are the quiet winners. If you want more personality, the shag, braided crown, or piecey pixie bring a lot more visual life without asking for perfection.
