



A braid that survives the bus ride, gym class, and a backpack strap rubbing across one shoulder is worth more than a style that looks cute for ten minutes. Long lasting hairstyles for busy school days have to handle speed, sweat, and a little chaos without turning into a nest by third period.
I keep coming back to the same rule: the styles that last are not always the fanciest ones. They’re the ones with a solid base, a little grip at the roots, and enough hold to stay put without giving you a headache by lunch. Freshly washed hair is often the most slippery; day-old hair usually behaves better, and that tiny difference changes everything.
Loose waves can fall flat fast. High ponytails can start tugging at the hairline. Braids, buns, twists, and clipped-up styles tend to hold better because the strands are anchored in more than one place, which matters when you’re bouncing from classroom chairs to hallways to sports practice.
Some of the picks below take five minutes. Some take less once your hands learn the pattern. All of them are built for a real school morning, not a staged photo.
1. Sleek Low Ponytail for Busy School Days
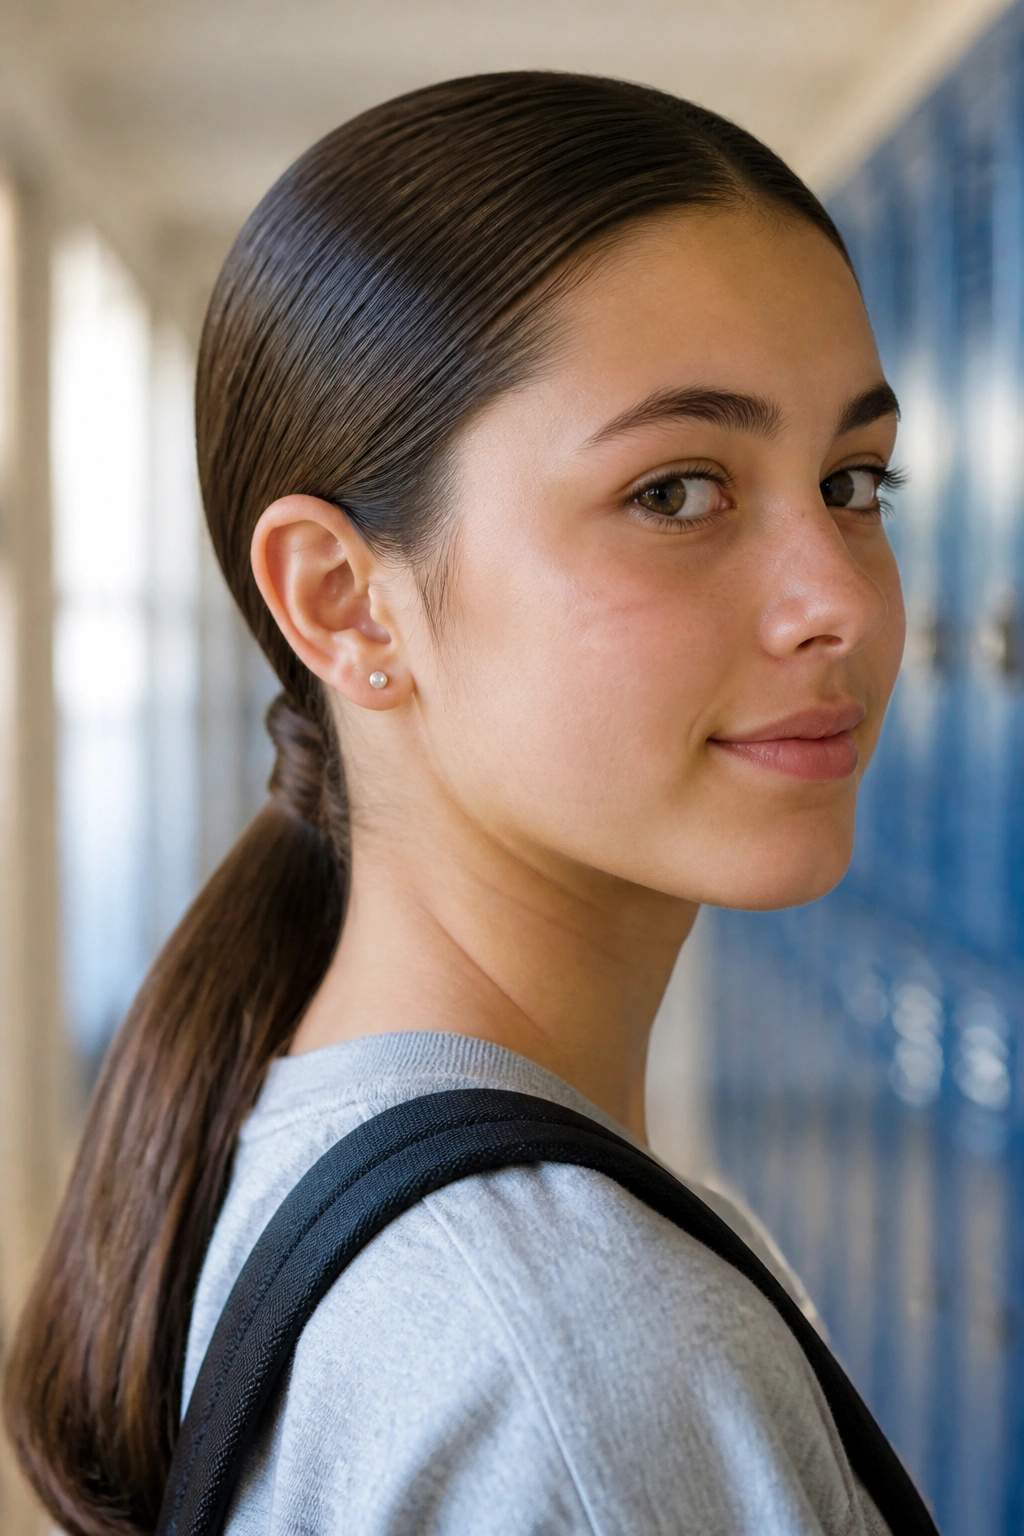
A low ponytail sounds plain until you need your hair to look neat at 7:45 and still make sense after lunch. A clean, low pony at the nape of the neck is one of those styles that works because it stays out of the way and doesn’t fight your backpack straps.
The part that matters is the finish. Smooth the crown with a pea-size dab of gel or a light styling cream, then brush everything back with a soft brush so the top lies flat instead of puffing up by second period. Tie it with a snag-free elastic, then take a 1-inch strand from underneath the ponytail, wrap it around the base, and pin it under the elastic with one bobby pin. That little wrap makes the whole style look more finished.
If your hair slips, stack two elastics about 1 inch apart. It sounds minor. It is not.
2. Double Dutch Braids

Double Dutch braids are the hard-working option when you want hair that will hold through a full day of classes, lunch, and whatever else gets thrown at it. Because the braid sits on top of the hair instead of sinking into it, the style keeps a firm shape and does not collapse the second you lean back in a chair.
Why They Last So Well
The braid grips the hair from the scalp down, so the loose pieces are tucked into the pattern from the start. That makes it sturdier than a simple three-strand braid worn low and loose.
- A clean center part helps both braids stay even.
- A little texturizing spray on freshly washed hair gives the strands more bite.
- Clear elastics at the ends keep the braid from unraveling in a hoodie or scarf.
If you’ve got a long day with PE, a club meeting, or practice, this is the style I’d point you toward first. It’s neat, practical, and honestly hard to wreck.
3. Bubble Ponytail
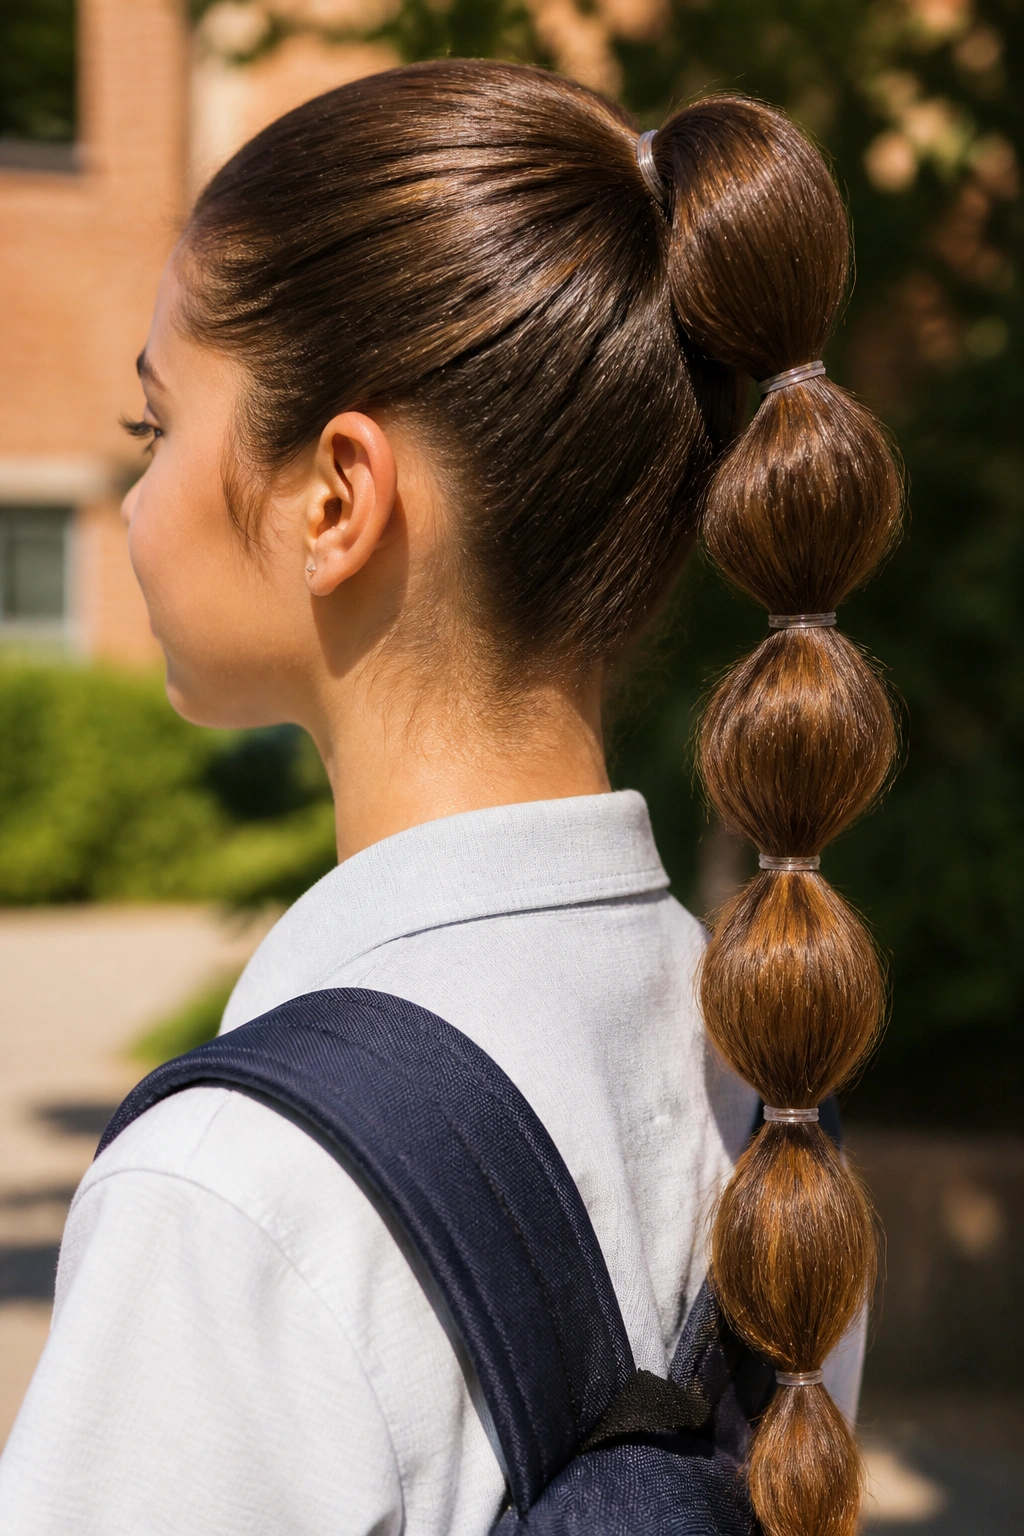
Why does a bubble ponytail hold better than a loose braid sometimes? Because each section is tied off separately, which gives the style more anchors and less chance to slide apart. The shape does the work for you.
Start with a regular ponytail, then add small clear elastics every 2 to 3 inches down the length. Gently tug each section outward until it puffs into a rounded “bubble.” That’s the whole trick. If your hair is fine, pinch the bubbles a little less so they do not look floppy by midday.
How to Keep the Bubbles Even
Use the same gap between elastics all the way down. If one section is twice as big as the next, the style starts to look lopsided fast.
A tiny mist of hairspray on the outer layer helps, but don’t soak it. You want movement, not a helmet. This one looks playful without being flimsy, which is a nice mix when you’ve got a full day ahead.
4. Claw-Clip French Twist
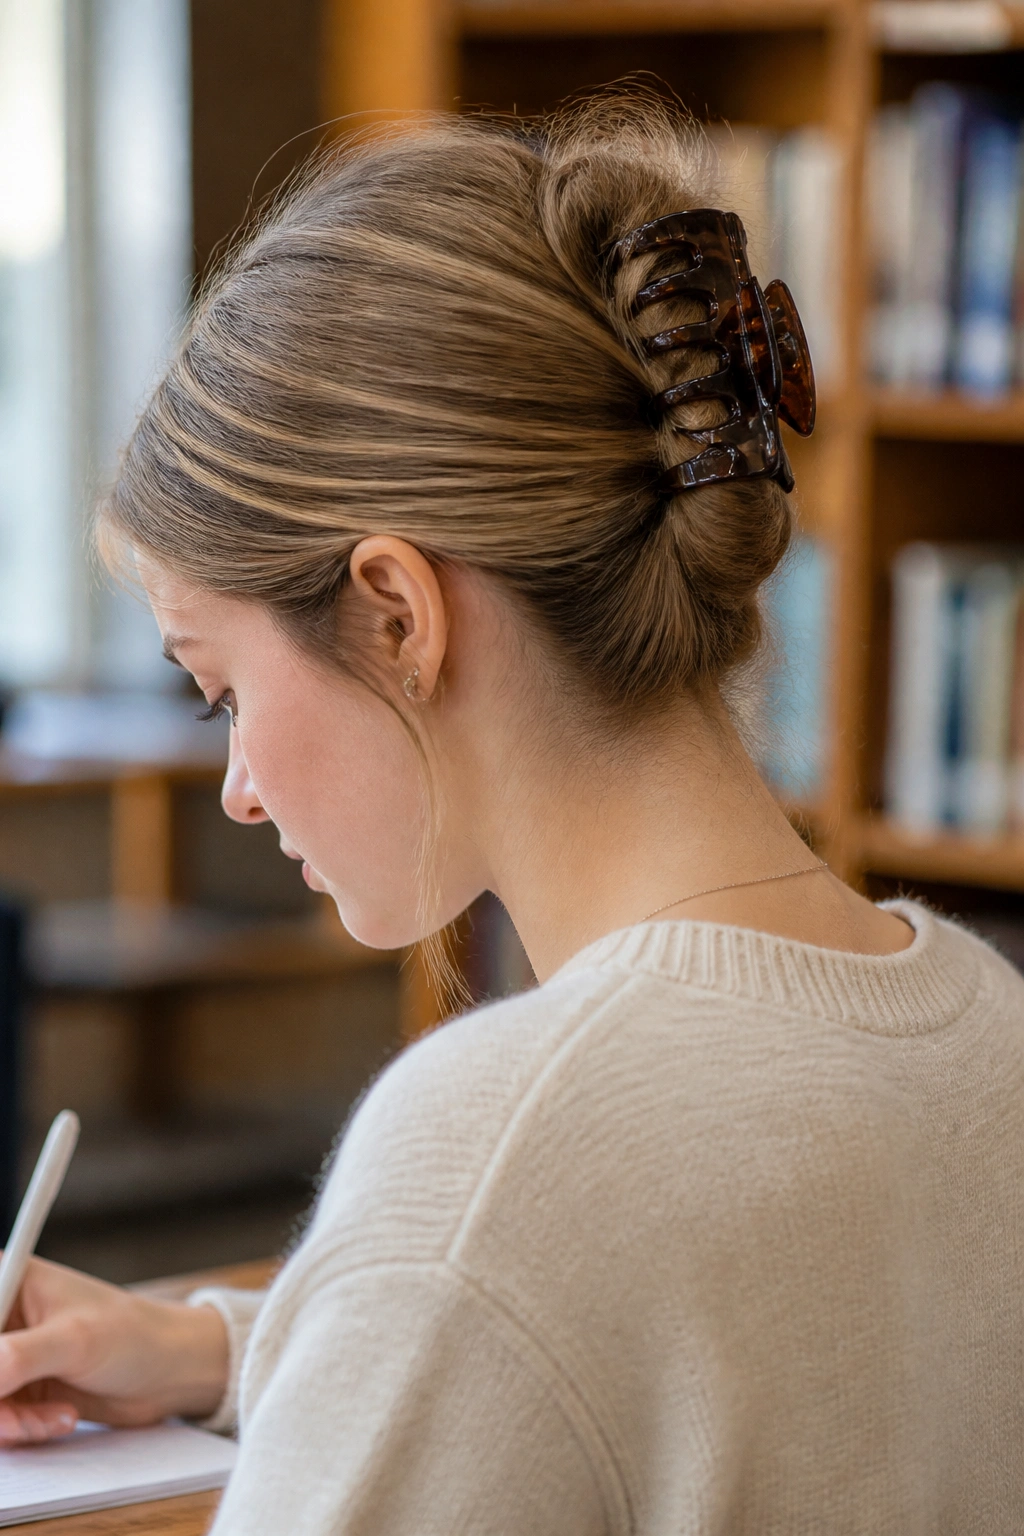
A claw-clip French twist is the style I reach for when I want hair up in under two minutes and I do not want to think about it again. A medium-to-large clip with a strong spring can hold a surprising amount of hair if you twist it the right way.
Gather your hair low at the back, twist it upward against itself, and tuck the ends in before clipping the twist in place. The shape sits close to the head, so it does not snag on collars as much as a loose bun might. If your hair is very silky, rough up the roots with dry shampoo first. That gives the clip something to grip.
- Best on shoulder-length hair or longer.
- Works well when hair is day-old, not freshly washed.
- Needs one strong clip, not three weak ones that slide around.
Some styles look polished because they are complicated. This one looks polished because it is clean and controlled.
5. French Braid Into a Low Bun
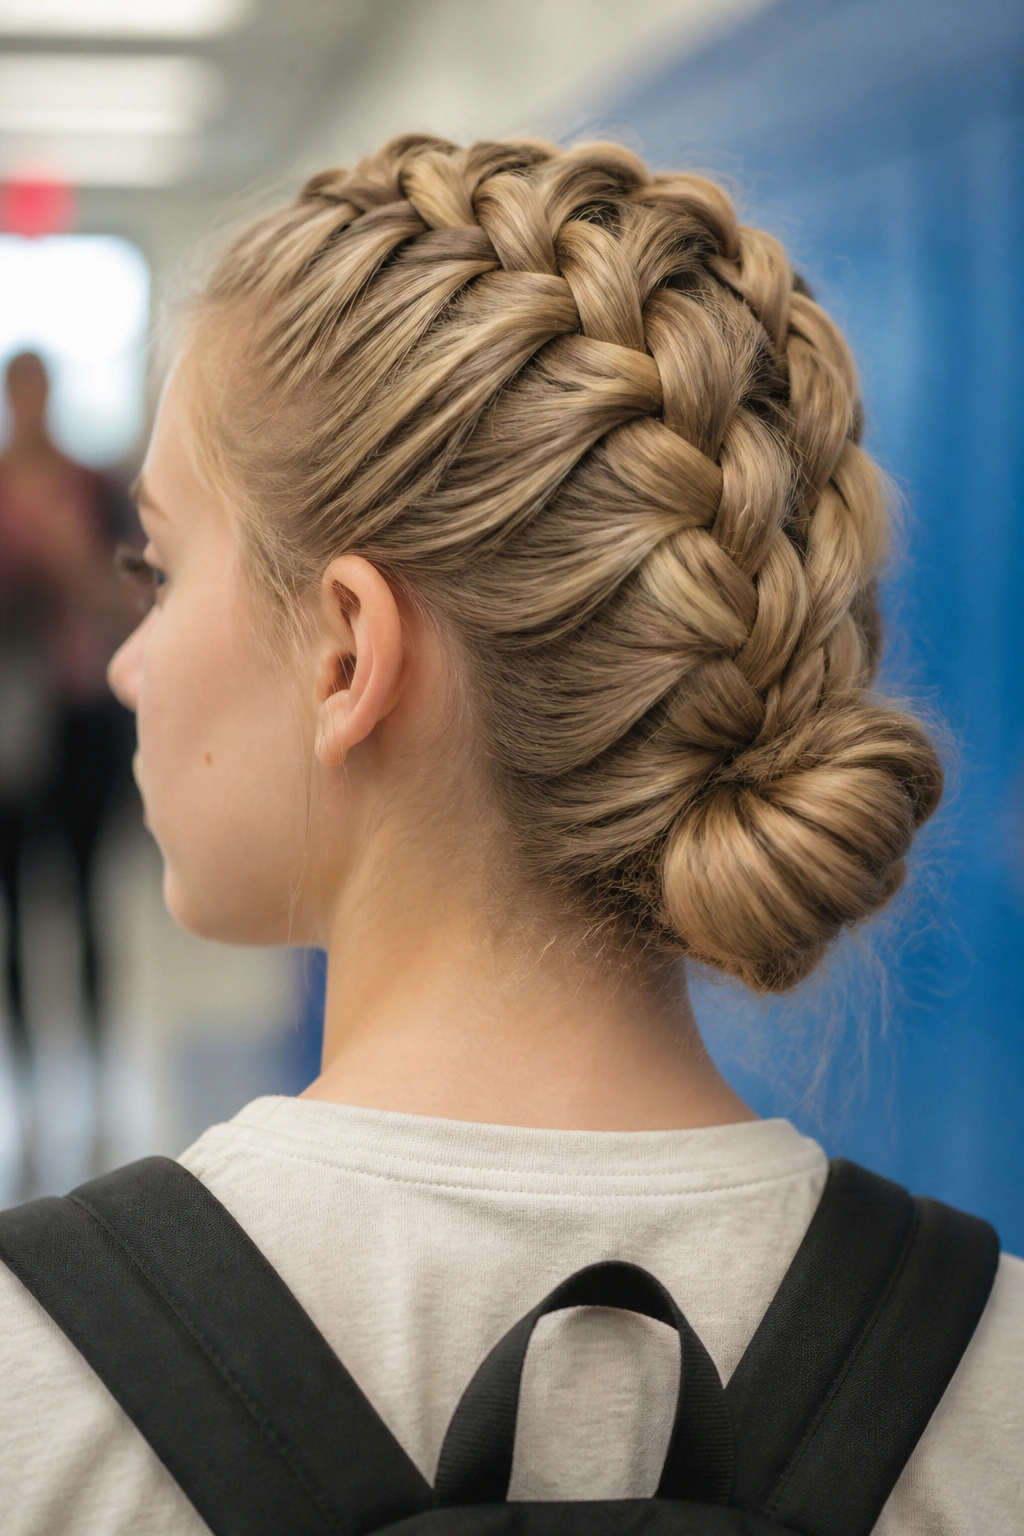
A French braid that ends in a bun gives you two layers of hold, and that is why it works so well on school days that start early and end late. The braid pulls the hair close to the scalp, then the bun keeps the tail tucked away and off your neck.
Start the braid at the crown or a little lower, depending on how much volume you want at the top. Braid straight down until you reach the nape, tie off the ends, then coil the loose length into a bun and pin it with three bobby pins in a triangle shape. That pin placement matters more than people think. Two pins in the wrong spot do less than one pin in the right one.
This style is especially good if your hair has layers. The braid traps the shorter pieces before they can break loose and stick out everywhere. It’s a little more effort than a plain bun, sure, but the payoff is a style that tends to stay neat even when the day gets rough.
6. Space Buns
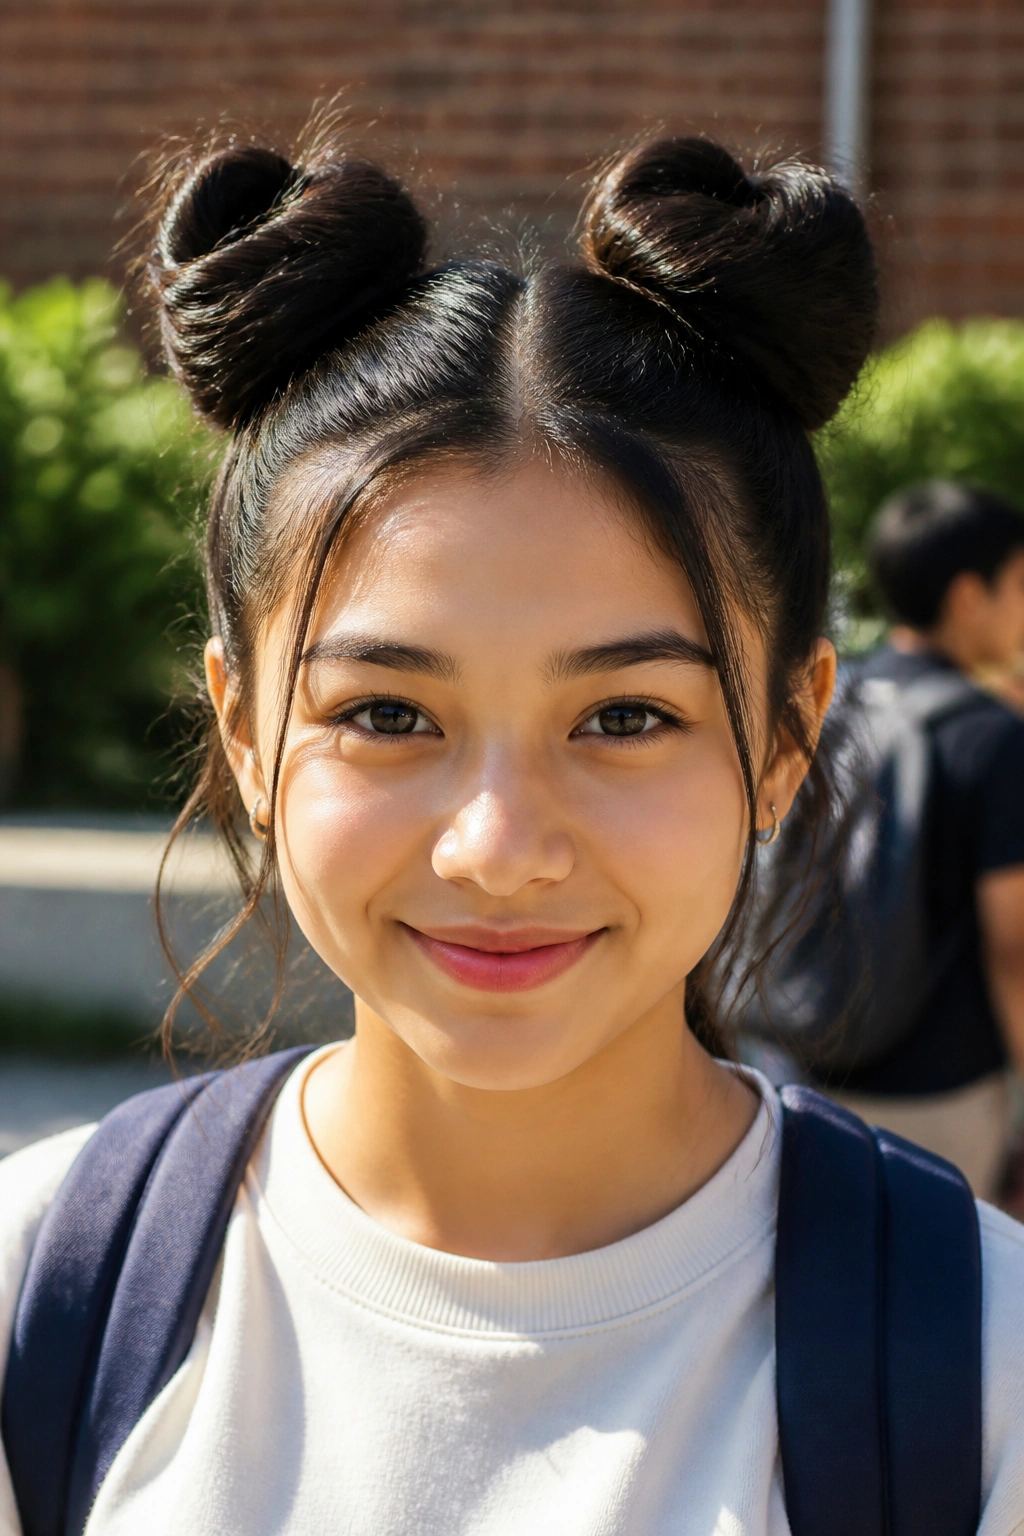
Unlike one big bun, space buns split the weight, which makes them easier to wear if a high bun usually gives you a sore scalp by lunchtime. They’re also one of the few school styles that can look tidy or messy without changing the basic shape.
Part your hair down the middle, make two high ponytails, then twist each tail into a small bun and secure it with another elastic or a few bobby pins. If your hair is thick, keep the buns compact so they don’t sag. If your hair is fine, tug the outer edges a little to give them shape. A quick mist of hairspray around the hairline keeps flyaways from floating free.
I like this style for days that need a bit of personality. It’s practical, but not stiff. And because the buns sit high and separate, they stay balanced better than one oversized knot that keeps slipping sideways.
7. High Braided Ponytail
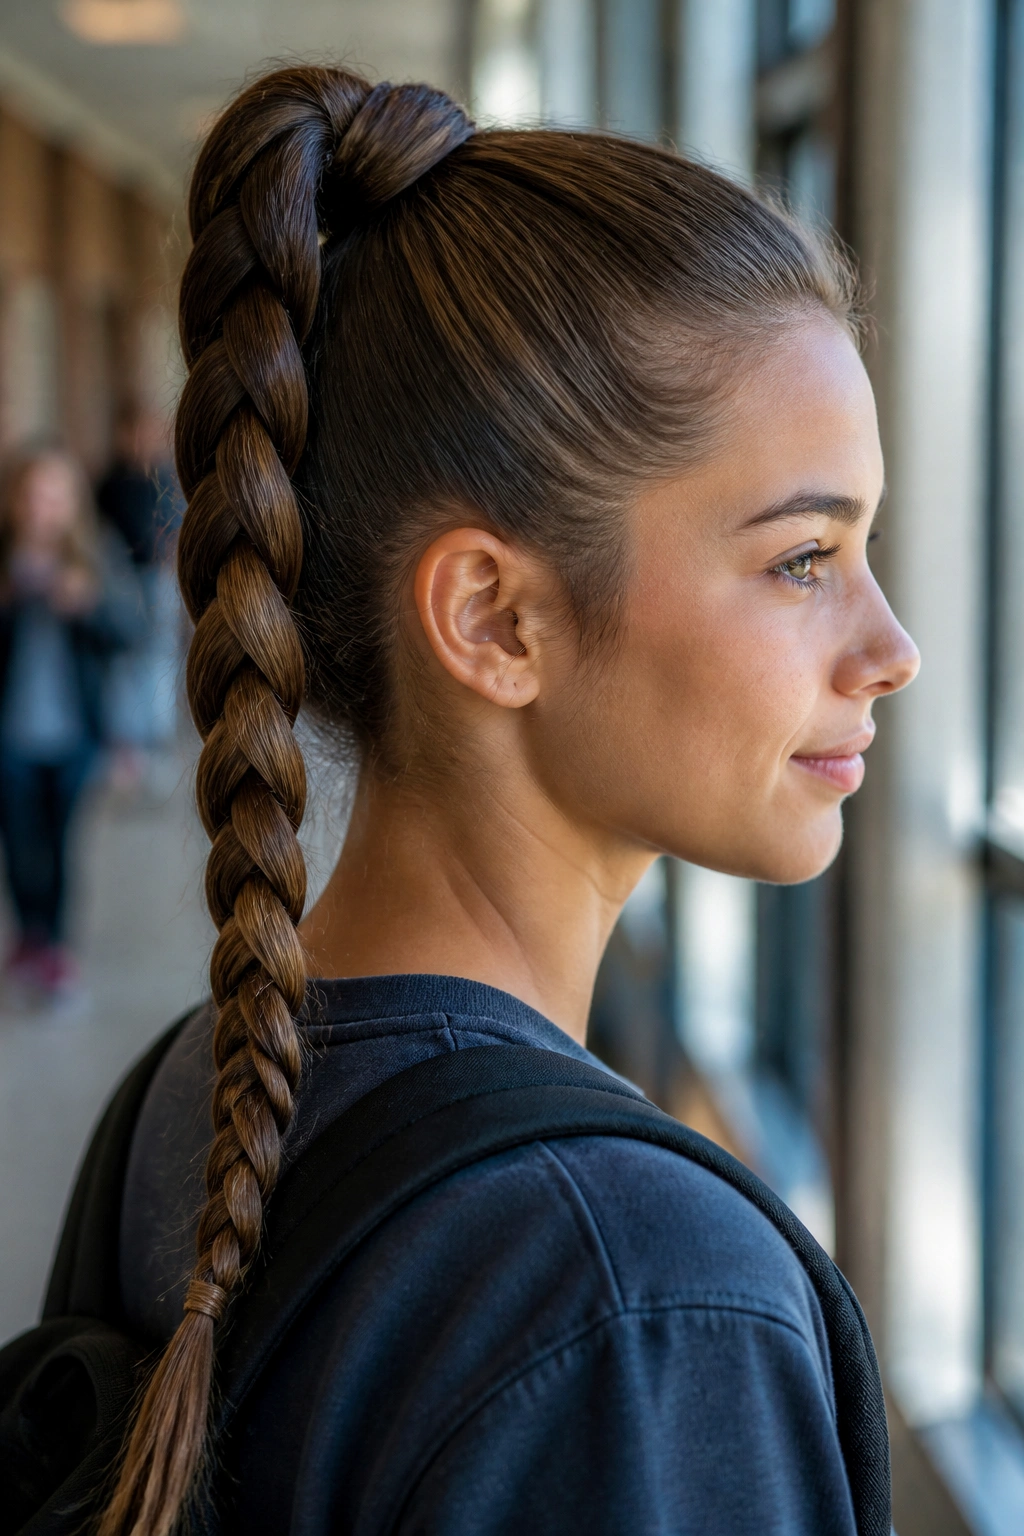
A high ponytail looks sharper when you braid the tail. That extra braid turns a simple style into one that holds its shape through movement, sweat, and the general chaos of a long school day.
Pull the hair up to the crown, secure it tightly with a strong elastic, then braid the ponytail all the way to the ends. If you want the base to look cleaner, take a small strand from underneath and wrap it around the elastic. Pin it under the ponytail, not on top where it can poke out.
What Makes It Different
The height keeps hair off your neck, which is handy in warm classrooms or after PE. The braid keeps the tail from tangling into a giant knot by the end of the day.
A ribbon woven through the braid can be fun, but keep it narrow. Thick ribbon looks nice for five minutes and then starts to flop.
8. Crown Braid

Does a crown braid take a little practice? Yes. Does it pay off? Also yes. A braid that runs around the hairline keeps the front pieces pinned down, so it’s one of the best fixes for flyaways, bangs, and that annoying little layer that never wants to behave.
Start on one side near the temple and braid along the hairline, bringing in small sections as you move around the head. Pin the end under the braid on the opposite side. If your hair is layered, hide the loose tips with two or three bobby pins tucked underneath the braid rather than trying to force them into the pattern.
A Small Detail That Matters
Keep the braid close to the scalp, but not so tight that it pulls at the temples. A crown braid should feel secure, not painful.
This style holds better than loose front pieces because there’s nothing to whip into your face when you turn your head. That sounds small. It isn’t.
9. Rope-Braid Pigtails

Rope-braid pigtails are one of those styles that looks more involved than it is, and I appreciate that. Two twisted sections per side can hold surprisingly well, especially on long hair that tends to fray at the ends.
Split the hair into two even sections on each side, twist each section in the same direction, then wrap them around each other in the opposite direction. That opposite twist is what gives the rope braid its shape. Secure each side with a small elastic and smooth the surface with a tiny bit of serum if the ends puff out.
- Faster than a three-strand braid for many people.
- Good for hair that tangles easily at the neck.
- Easy to make low, mid-height, or high depending on the mood.
This is a good pick when you want your hair contained but do not want the weight of a single braid hanging down your back all day.
10. Low Twisted Bun
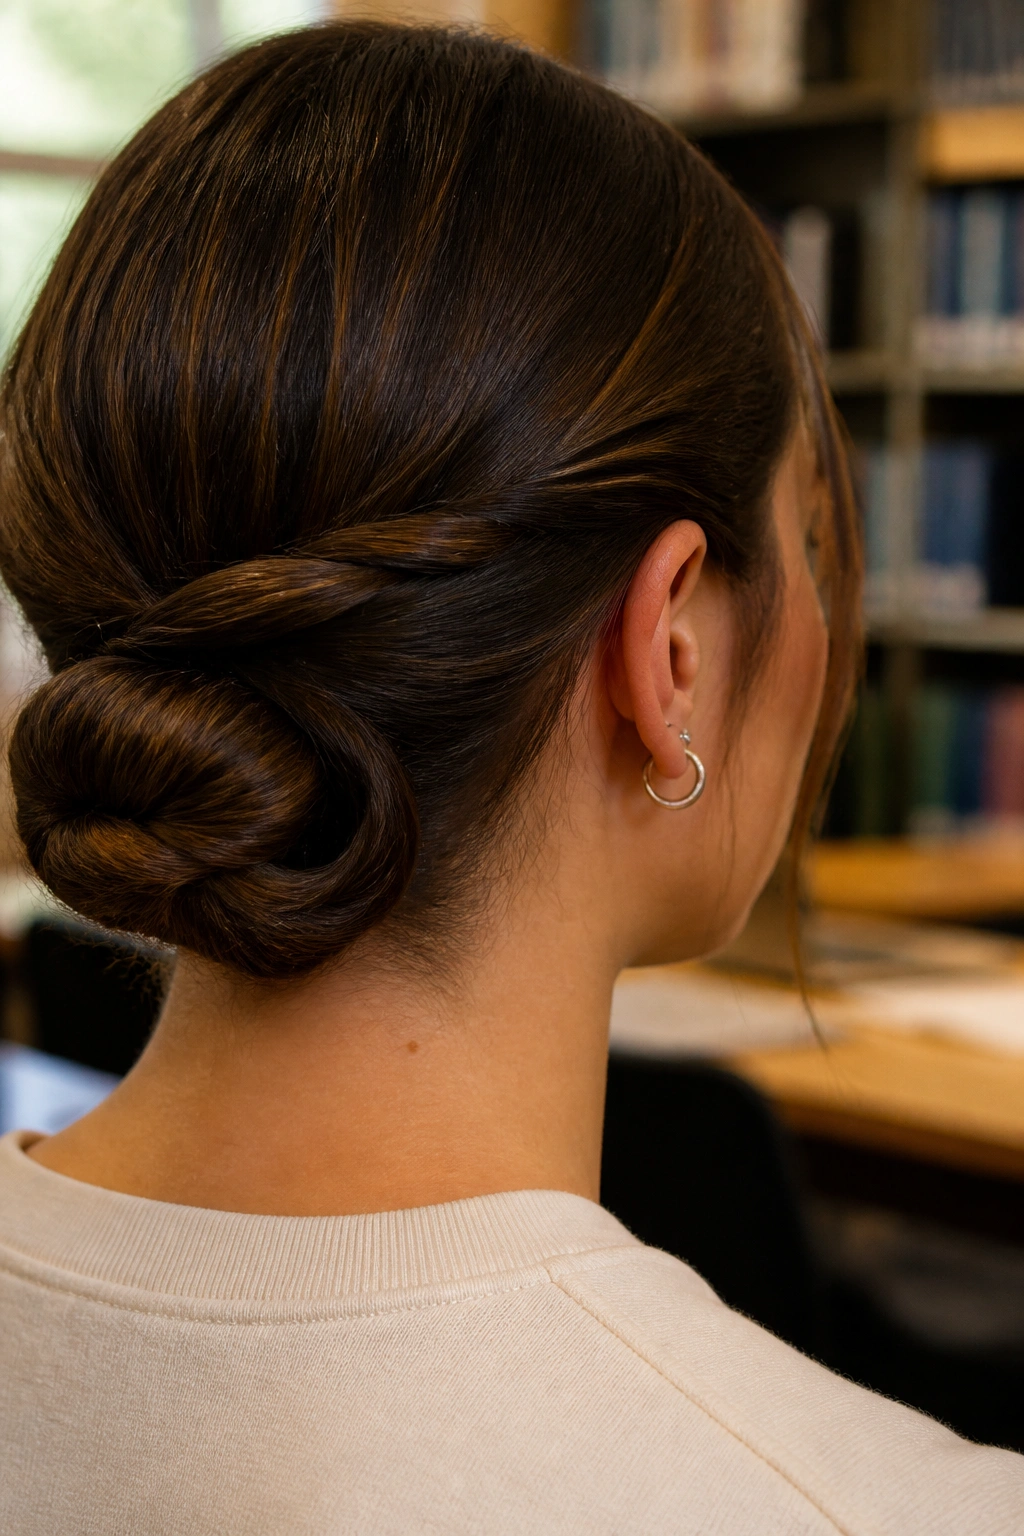
A low twisted bun has a quieter kind of staying power. It sits flat, grips the nape, and stays out of the way, which makes it a solid choice for labs, library days, and long classes where you do not want hair falling forward.
Split the hair into two low sections, twist each section tightly, and wrap them around each other before coiling the length into a bun. Pin it with four bobby pins if your hair is medium thickness, or use U-shaped pins if it’s thick and heavy. The goal is not a giant knot. The goal is a compact bun that does not wobble.
This style works well on hair that is a little dirty, which sounds rude but is true. Clean hair can be too soft and slippery. A day or two of natural texture gives the twists something to hold onto.
11. Half-Up Top Knot

A half-up top knot is the middle ground between “I want my hair down” and “I need it out of my face.” Unlike a full bun, it keeps the length loose while removing the most annoying front pieces.
Gather the top half of your hair from temple to temple, twist it into a knot at the crown, and secure it with a small elastic or two bobby pins crossed in an X. Keep the knot no bigger than a golf ball if you want it to sit comfortably. A huge knot can feel heavy and look awkward once the day gets going.
This style is good on second-day hair because the top section holds better when the roots have a little texture. The lower half can stay wavy, straight, or curly. It doesn’t matter much, which is part of the charm. You get the face-framing lift without sacrificing length.
12. Fishtail Side Braid
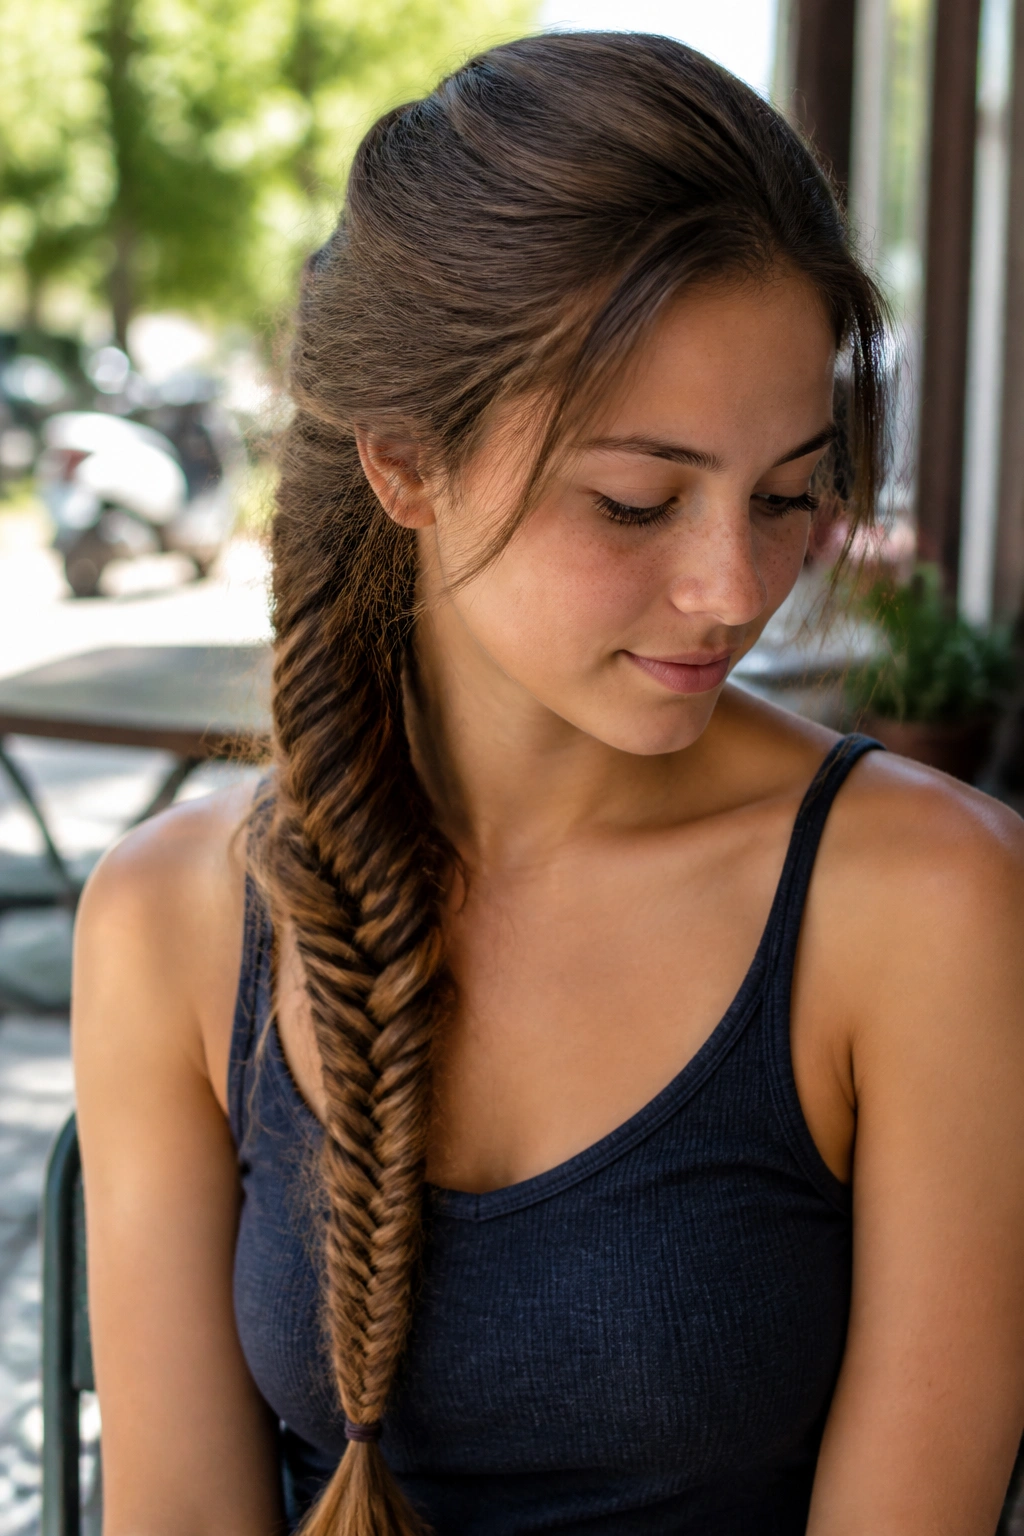
A fishtail side braid looks delicate, but it’s sturdier than it seems. All those tiny crossings create a braid that holds together in a neat, tight line, which is handy when you want hair to stay put for hours.
Bring all the hair over one shoulder, split it into two sections, and take small pieces from the outer edge of each section, crossing them into the opposite side. Keep the pieces small if you want the braid to look detailed. Larger pieces make the braid faster, but they also make it looser.
What I like here is the texture. A fishtail braid does not need to be perfect to look good. A slightly uneven one often feels better because it gives the braid more grip. If your hair is very smooth, a touch of texturizing spray before you start keeps the sections from slipping through your fingers.
13. Slicked-Back High Bun
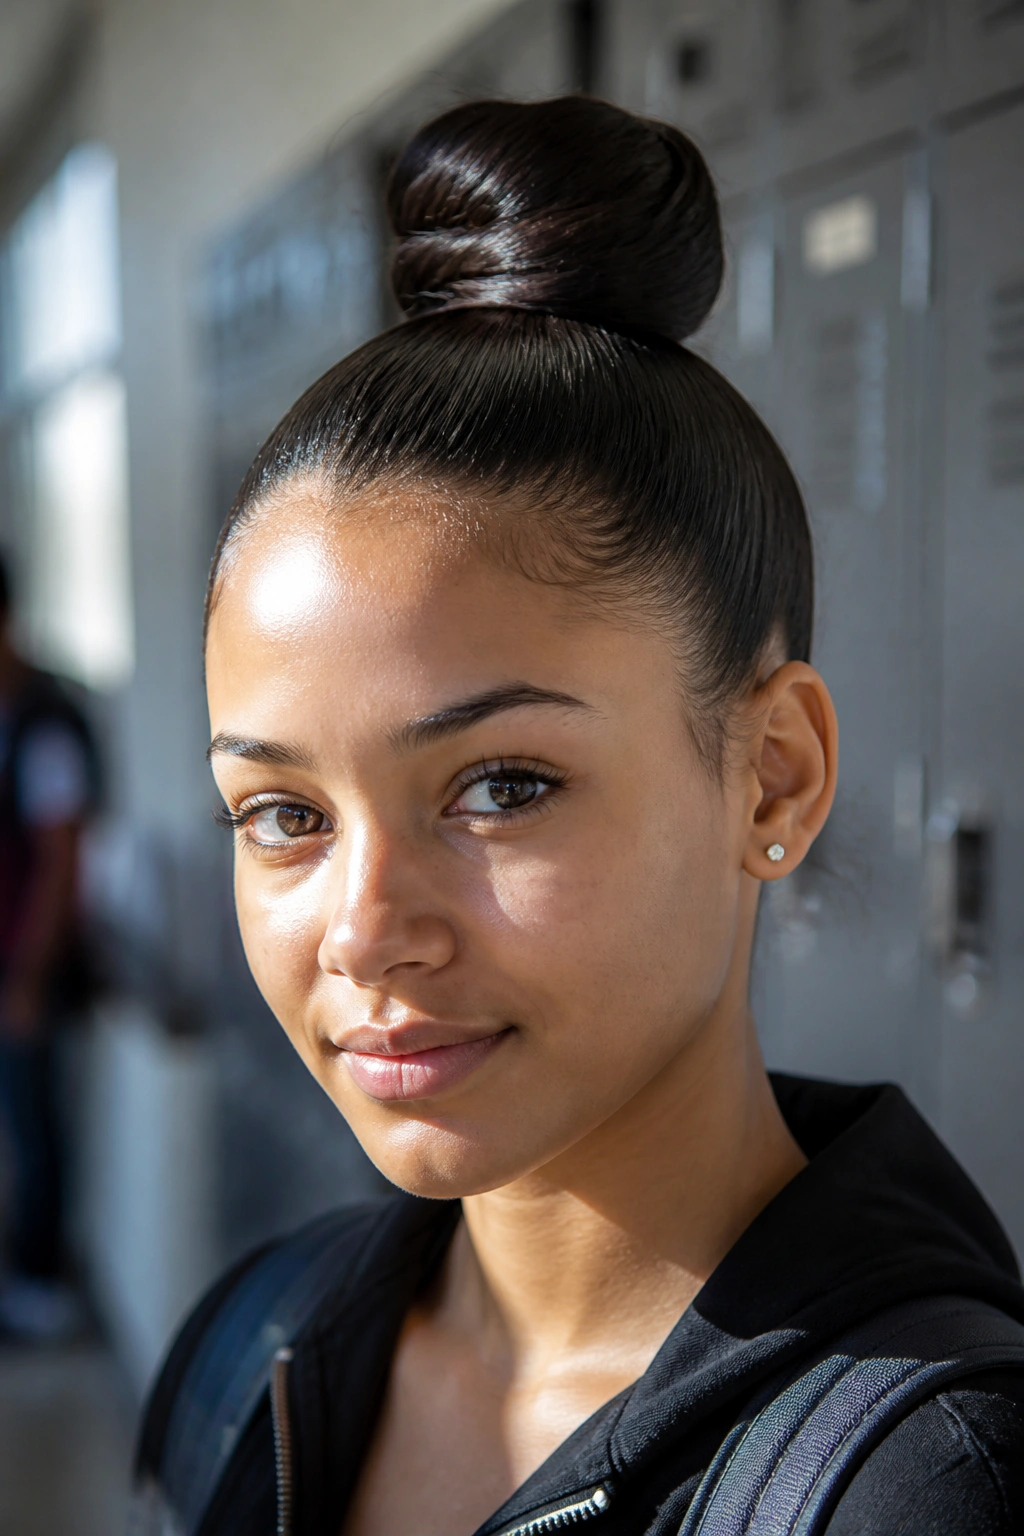
Why does a slicked-back high bun hold so well on a hectic school day? Because there’s almost nothing loose to move around. Everything gets pulled into one compact point at the crown, then pinned down.
Use gel or a strong styling cream on the front and sides, brush the hair back until the surface lies flat, and twist the length into a high bun. Secure it with one elastic first, then pin the bun itself so it does not sag. If you rush this part, the style turns lumpy. Slow down for ten extra seconds and it looks much better.
Where People Go Wrong
They make it too tight at the temples. They use too much product and end up with greasy-looking roots. They place the bun too far back, which makes it fall.
A slicked-back bun is a good fit for test days, performance days, and any morning when you need your hair out of the way and not negotiating with you.
14. Pull-Through Braid
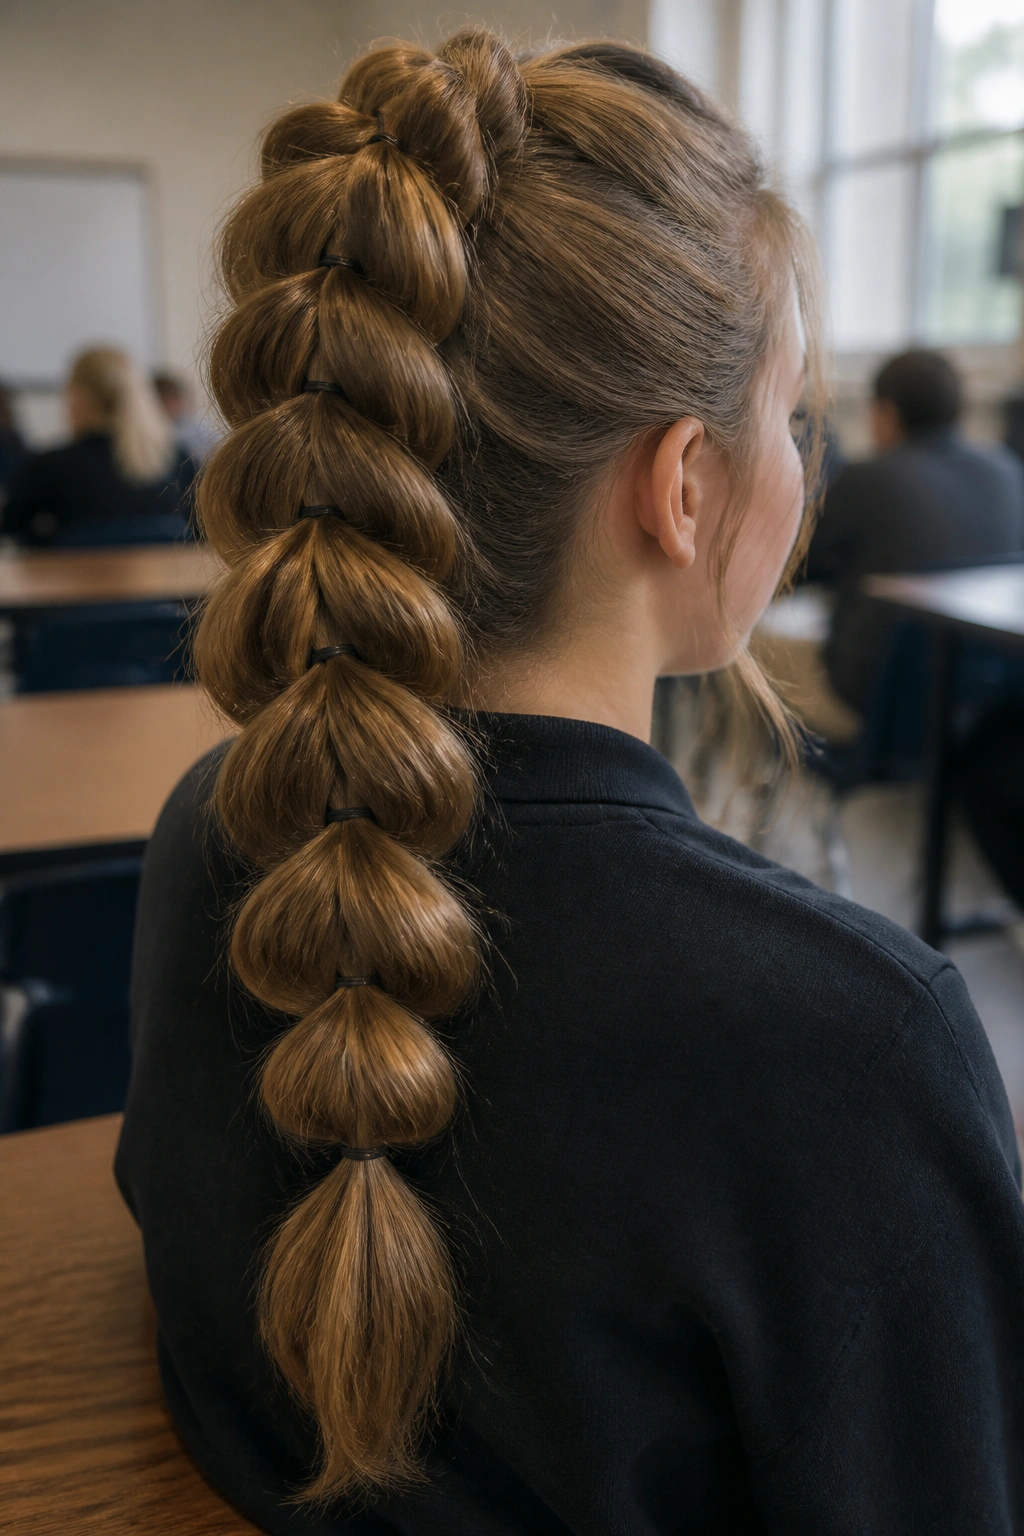
A pull-through braid has the size of a thick braid without needing the same finger gymnastics. It is built from small ponytails stacked one under another, and that structure makes it stay together well.
Start with a small ponytail at the crown, split it in two, and clip it out of the way. Make a second ponytail just below it, then drop the first section over the second and clip the first one away. Keep repeating that pattern down the back. Once you get the rhythm, it moves fast.
- Needs 4 to 6 small elastics, sometimes more for very long hair.
- Works especially well on thick hair or extensions.
- Gives the look of a full braid without complicated weaving.
The finished style has real volume, which is nice if your hair is fine and flat braids tend to disappear. It looks busy in a good way.
15. Headband Braid

A headband braid solves the problem of hair falling into your face without taking the whole style up and away. It leaves the length down while controlling the front section, which is a useful balance for long school days.
Take a section from one side near the temple, braid it across the front hairline, and pin the end behind the opposite ear. Leave the rest of the hair loose, wavy, curled, or straight. The braid acts like a built-in headband, only it does not slide as much. If you have bangs or shorter layers, tuck the loose pieces with one or two hidden bobby pins near the ear.
This style works well when you want something softer than a full updo. It also plays nicely with curls because the front braid keeps the shape neat while the rest of the texture stays free. That contrast is what makes it useful.
16. Tiny Front Braids With Loose Lengths

A couple of tiny front braids can change the whole feel of a style without taking over your morning. They keep the face-framing pieces under control and still let the rest of your hair hang loose.
Braid two thin sections from each side of the face, or just one on each side if you want the look to stay simple. Tie the ends with clear mini elastics so they do not slip apart. The braids can stop at the cheekbone, jawline, or collarbone, depending on how much movement you want.
Why They Work
They tame the pieces that usually escape first. They take under five minutes once your part is clean. They work with straight hair, waves, and curls.
I like this style on days when you want a little detail but do not want to commit to a full braid or bun. It’s small, which is the point. Small details last.
17. Flat Twists Into a Puff
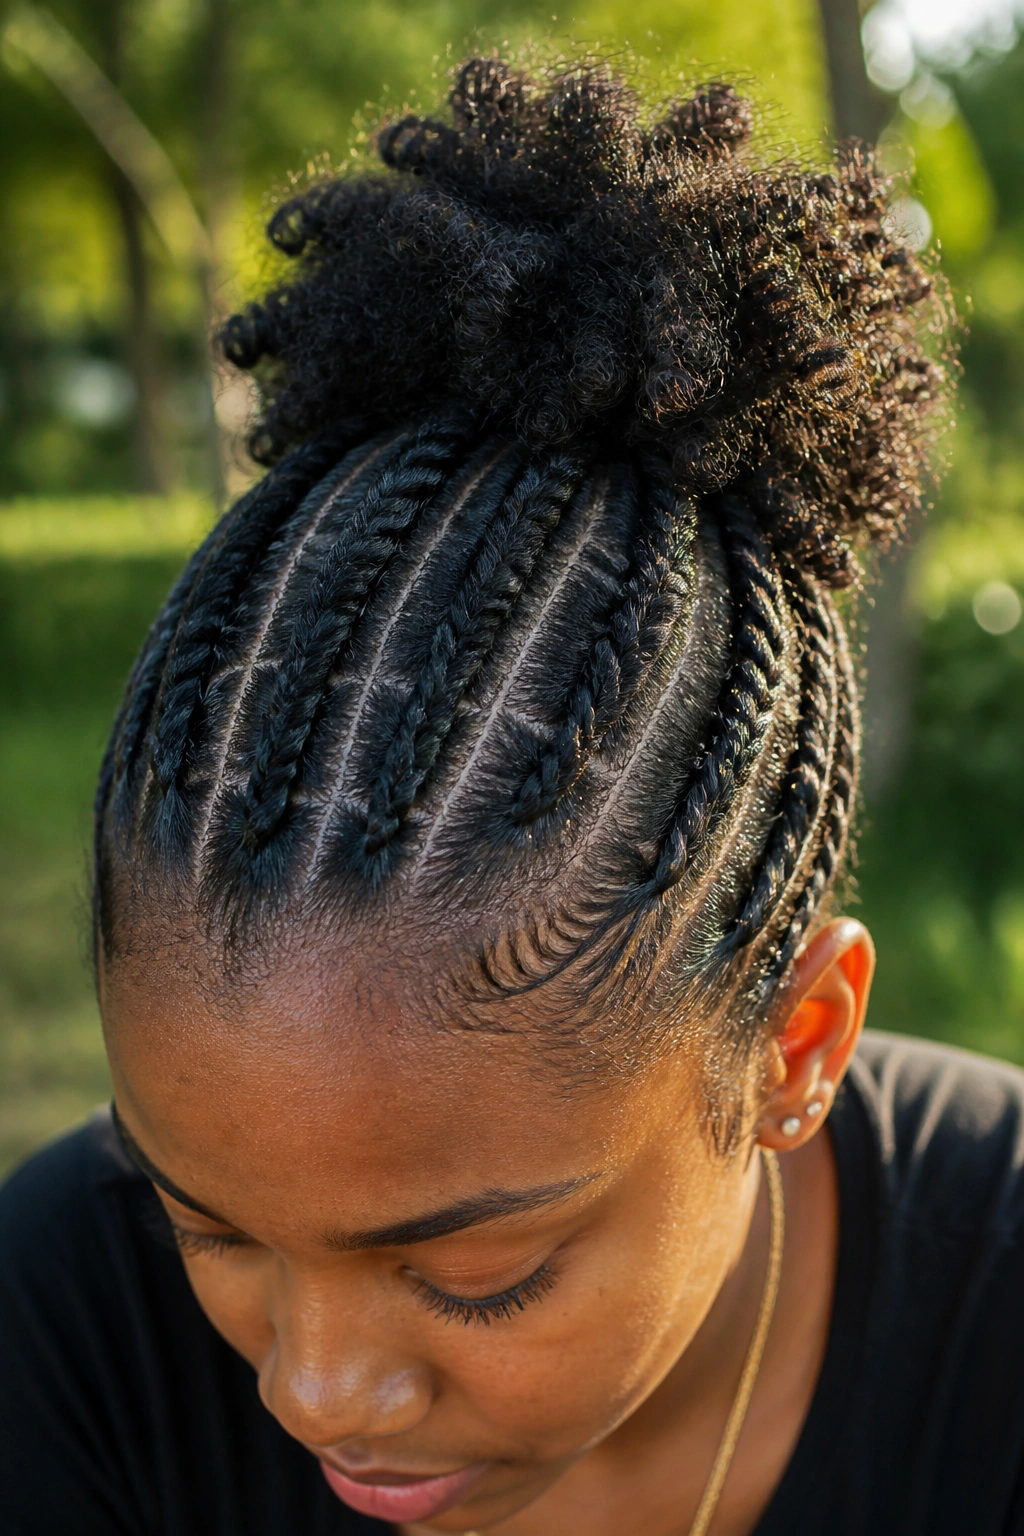
If your hair is curly or coily, flat twists into a puff are one of the smartest long lasting hairstyles for busy school days. The twists lie close to the scalp, and the puff keeps the rest of the hair gathered up instead of rubbing against your shoulders all day.
Part the front into two, four, or six sections, twist each one close to the scalp, and gather the rest into a puff at the crown or mid-back. Use a little gel or cream on the part lines so they stay neat, but don’t coat the whole head. That usually makes the style feel heavy. A soft brush or rat-tail comb helps the parts stay clean without getting jagged.
Why the Front Stays Neat
Flat twists spread the tension across a wider area than a tight braid, so they can feel gentler. The puff lifts the hair away from collars and straps. A satin scarf at night can stretch the style for another day or two.
This one has a practical beauty to it. It’s tidy, secure, and easy to refresh.
18. Box Braids Pulled Into a Low Ponytail
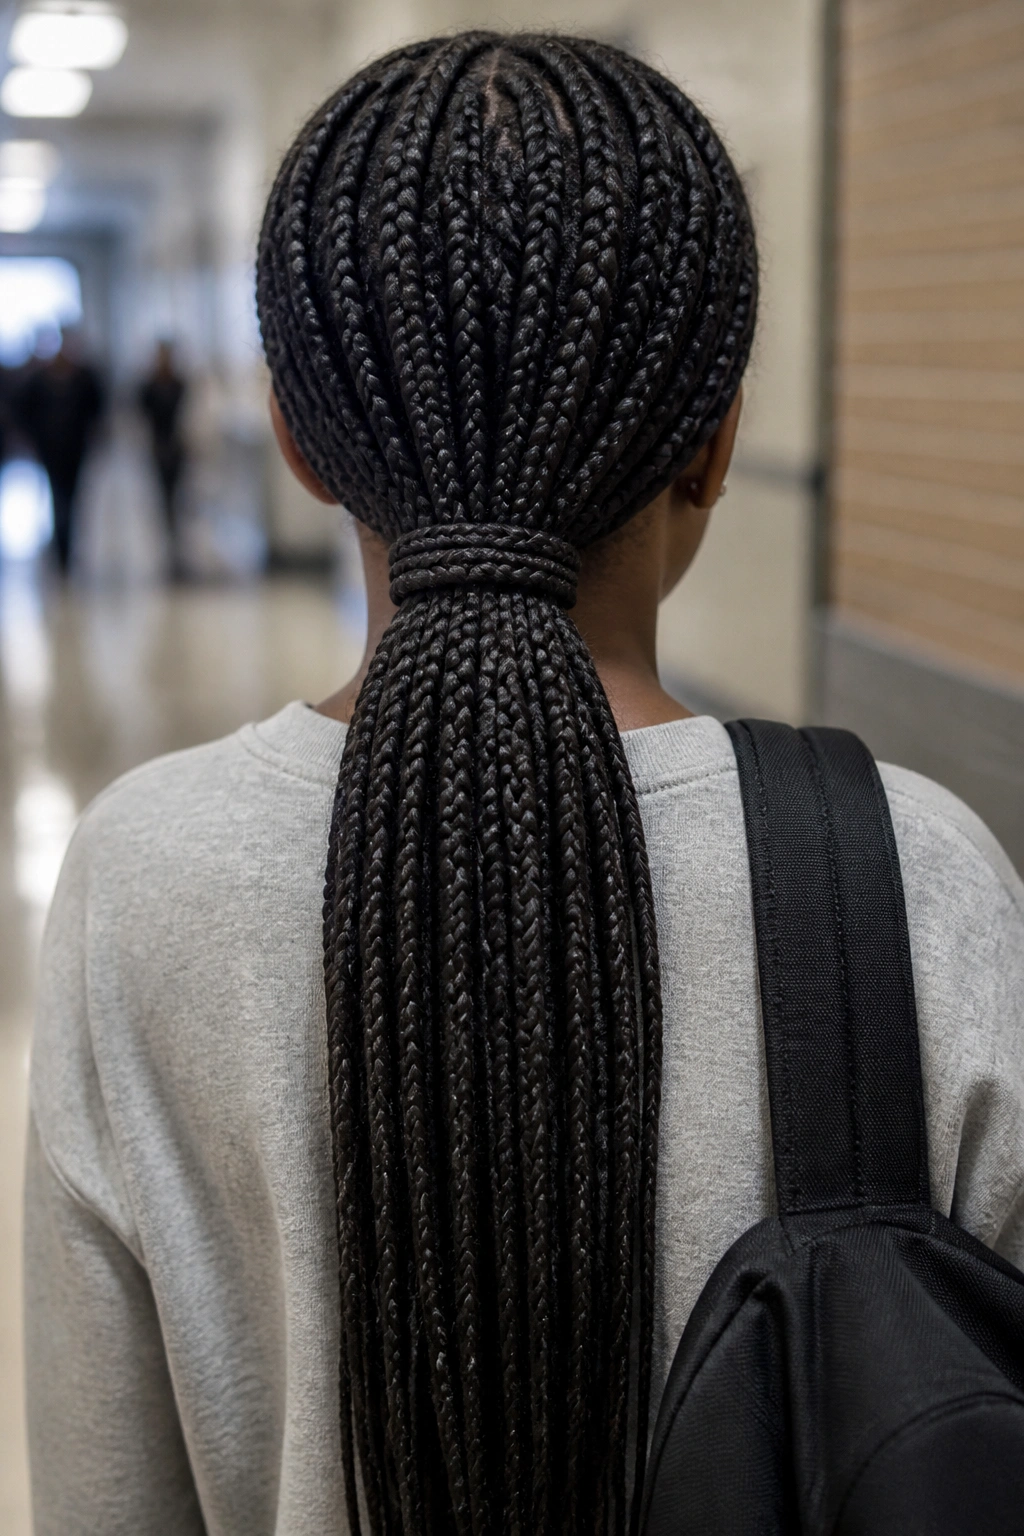
If you already wear box braids, a low ponytail is one of the fastest ways to change the shape without starting over. You get a cleaner silhouette in seconds, and the braids themselves do most of the holding.
Gather the braids at the nape with a wide, soft scrunchie or a sturdy elastic that won’t snag. Wrap one braid around the base if you want to hide the tie, then tuck the end underneath and pin it. You can also split the braids into two low ponytails if you want a softer look. Both versions stay neat because the braids have their own structure.
- Uses almost no extra product.
- Keeps weight low, which helps with comfort.
- Easy to switch back and forth during the week.
This is a style for people who need speed more than drama. It’s efficient, it looks clean, and it lets the braids keep doing their job.
Final Thoughts
The best school-day styles are the ones that survive real movement. Hair that stays neat through backpacks, desk work, and hallway scrambles usually has one thing in common: it’s anchored well and not asked to do too much.
If your mornings are messy, keep a short rotation. A braid day, a bun day, a ponytail day. That alone makes life easier.
One extra tip, and I mean this one: keep a spare elastic and two bobby pins in your bag. They save more mornings than any fancy styling trick ever will.
