



Braids are the ultimate functional accessory. They are a way to manage hair texture, protect ends from breakage, and express personality without needing to reach for a heat tool every single morning. For teens who are balancing school, sports, and a social life, the value of a hairstyle that looks polished for hours—or even days—cannot be overstated. Whether you are aiming for a sleek, precise look for a formal event or a messy, lived-in vibe for a weekend hangout, there is a braiding technique to match.
The beauty of these styles lies in their versatility. A simple shift in tension or the addition of a few hair accessories can change the entire aesthetic of a look. Many of these styles are designed to be “protective,” meaning they keep the hair tucked away, reducing mechanical stress and environmental damage. This is essential for maintaining hair health while experimenting with different looks. Below are eighteen distinct ways to weave, twist, and tie your hair into styles that stand the test of time and activity.
1. Classic French Braids
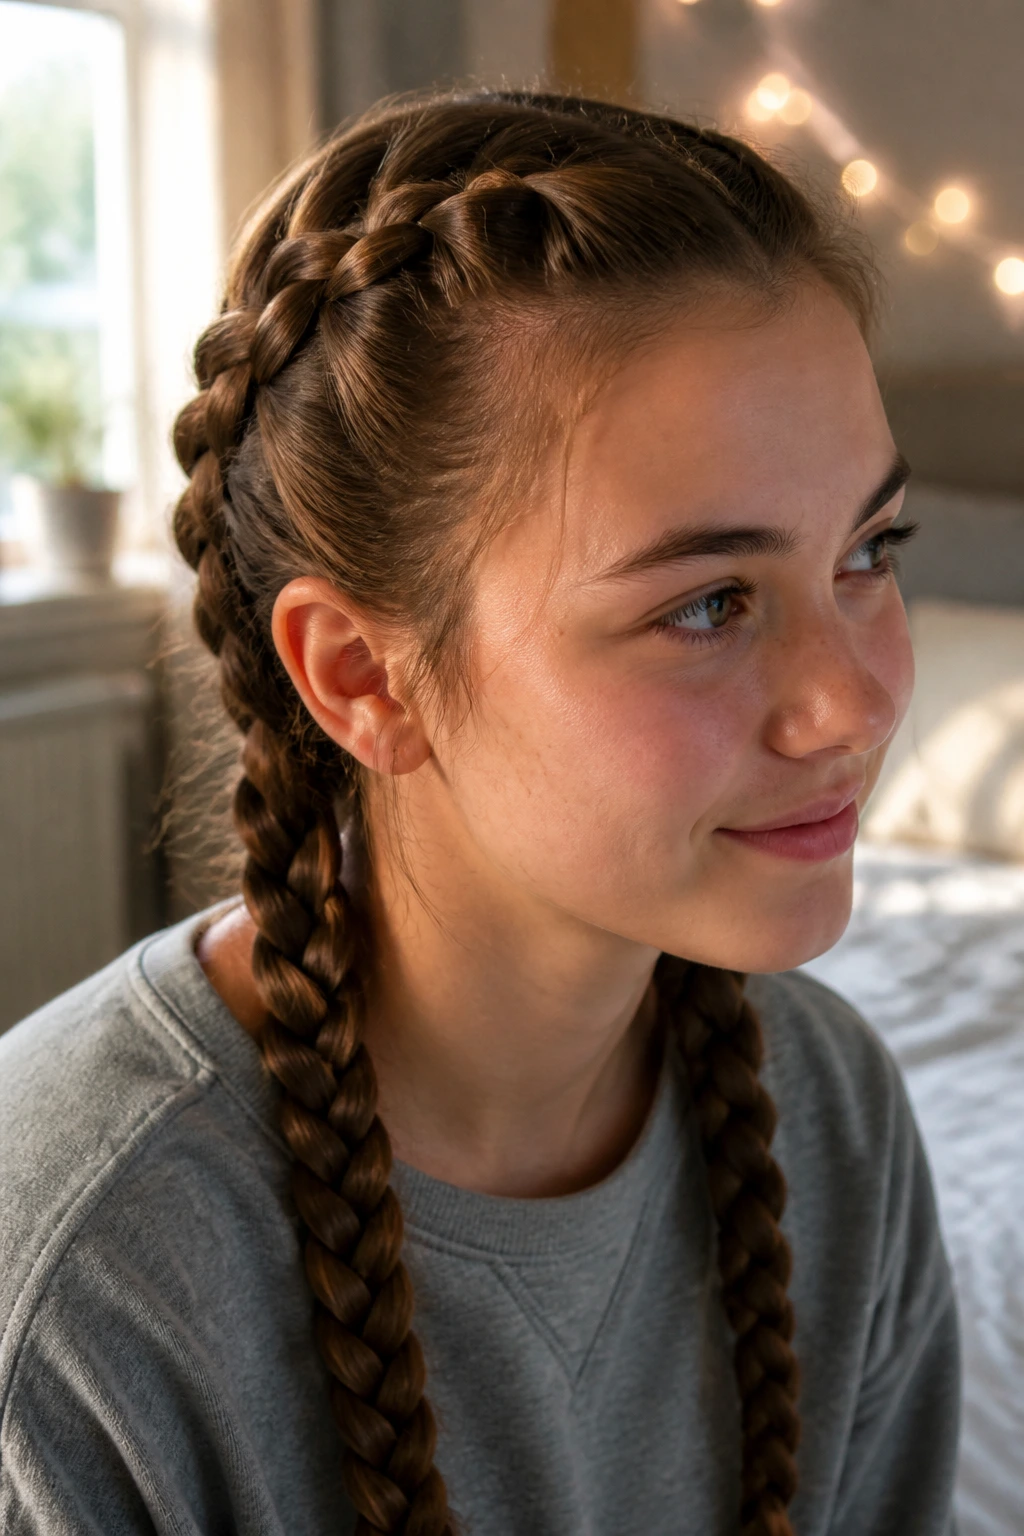
The French braid is the foundation of all intricate styling. It relies on a three-strand plait technique where you add small sections of hair from the sides as you move down the scalp. It creates a smooth, woven look that keeps hair off the face and neck effectively.
Mastering the Tension
The secret to a perfect French braid isn’t the skill in your fingers; it is the tension. You need to keep the hair pulled taut against the scalp, but not so tight that it causes discomfort. If the braid feels loose, it will sag by midday. Aim for consistent pressure. If you are doing this on yourself, looking into a mirror is helpful, but relying on your tactile sense is even better. Feel the strands. Are they roughly equal in size? Consistency is what gives the French braid its iconic, symmetrical appearance.
Why It Lasts
Because the hair is woven close to the scalp, there is very little room for strands to slip out. This makes it a great candidate for sports or long school days. If you find the ends getting frizzy, a light misting of water or a tiny drop of hair oil can help smooth them down before you secure the tail.
2. Dutch Braid Pigtails
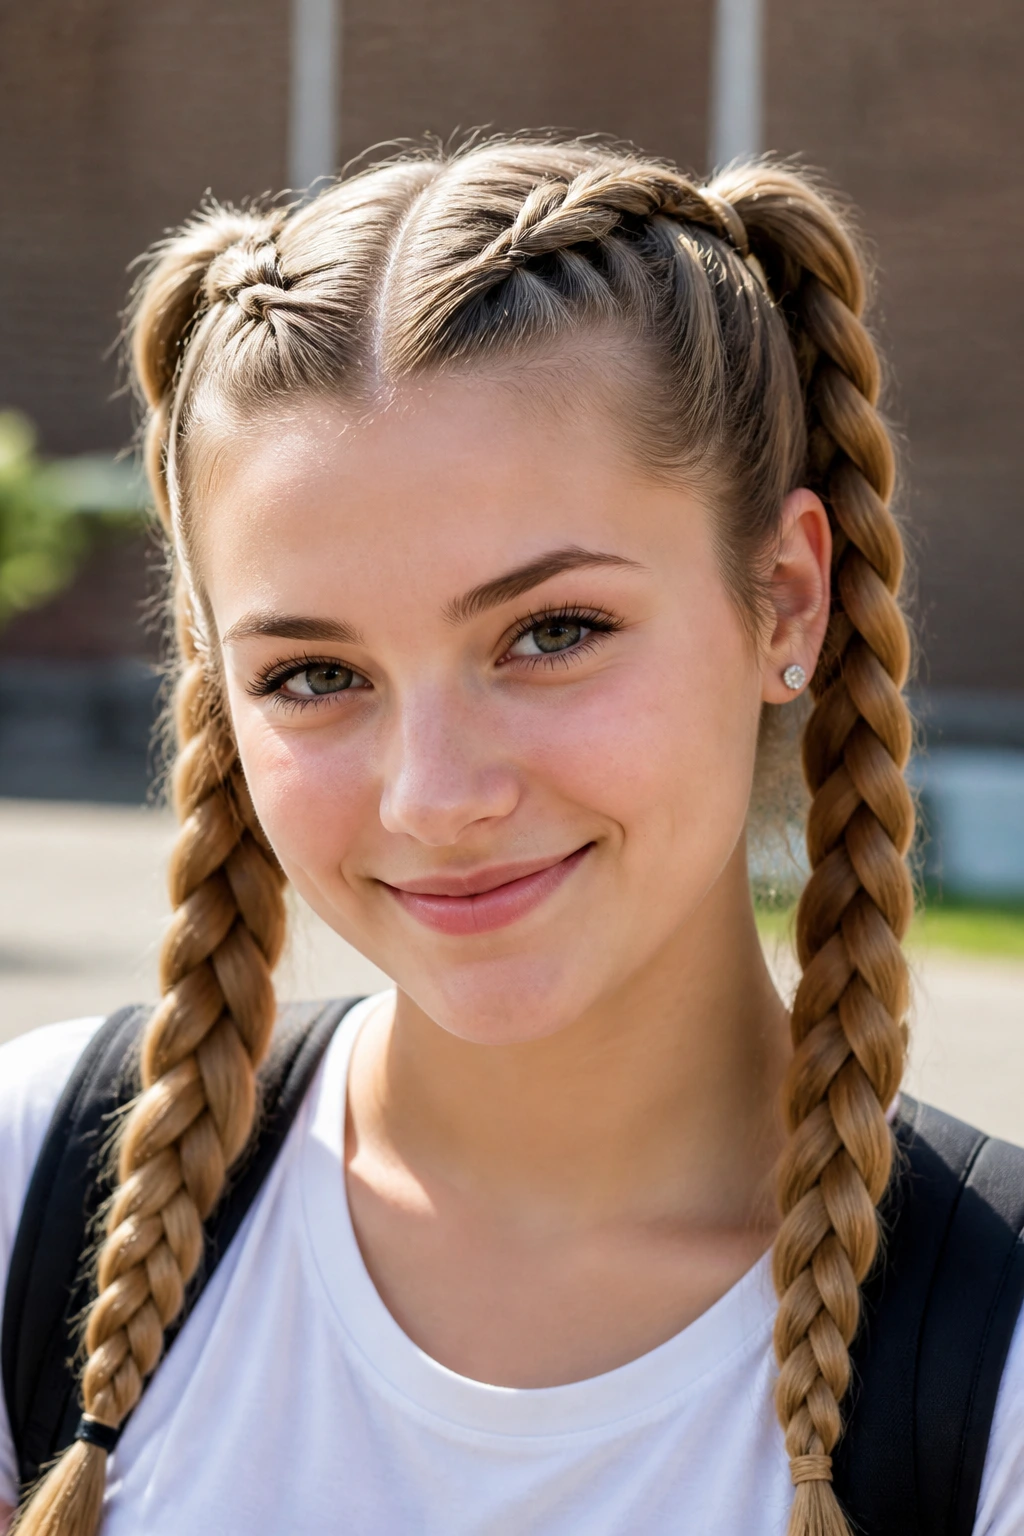
Often confused with the French braid, the Dutch braid is essentially the inverted version. Instead of crossing the strands over each other, you cross them under. This simple adjustment forces the braid to sit on top of the hair, creating a high-relief, 3D effect that looks much thicker than a standard braid.
Adding Volume
Because the Dutch braid stands out from the head, it is incredibly easy to “pancake.” This is a technique where you gently pull at the edges of the braided loops after you have secured the end with an elastic. Start at the bottom of the braid and work your way up to the scalp. This creates the illusion of fuller, thicker hair. It is a cheat code for anyone with finer hair textures who wants a high-impact style.
Styling Tips
These pigtails are rugged. They work well for high-intensity activity because they are anchored firmly on both sides of the head. To make them look a bit more “finished” for a day out, leave a few tendrils of hair around the face and use a curling wand on them for a soft, face-framing effect.
3. Boho Fishtail Side Braid
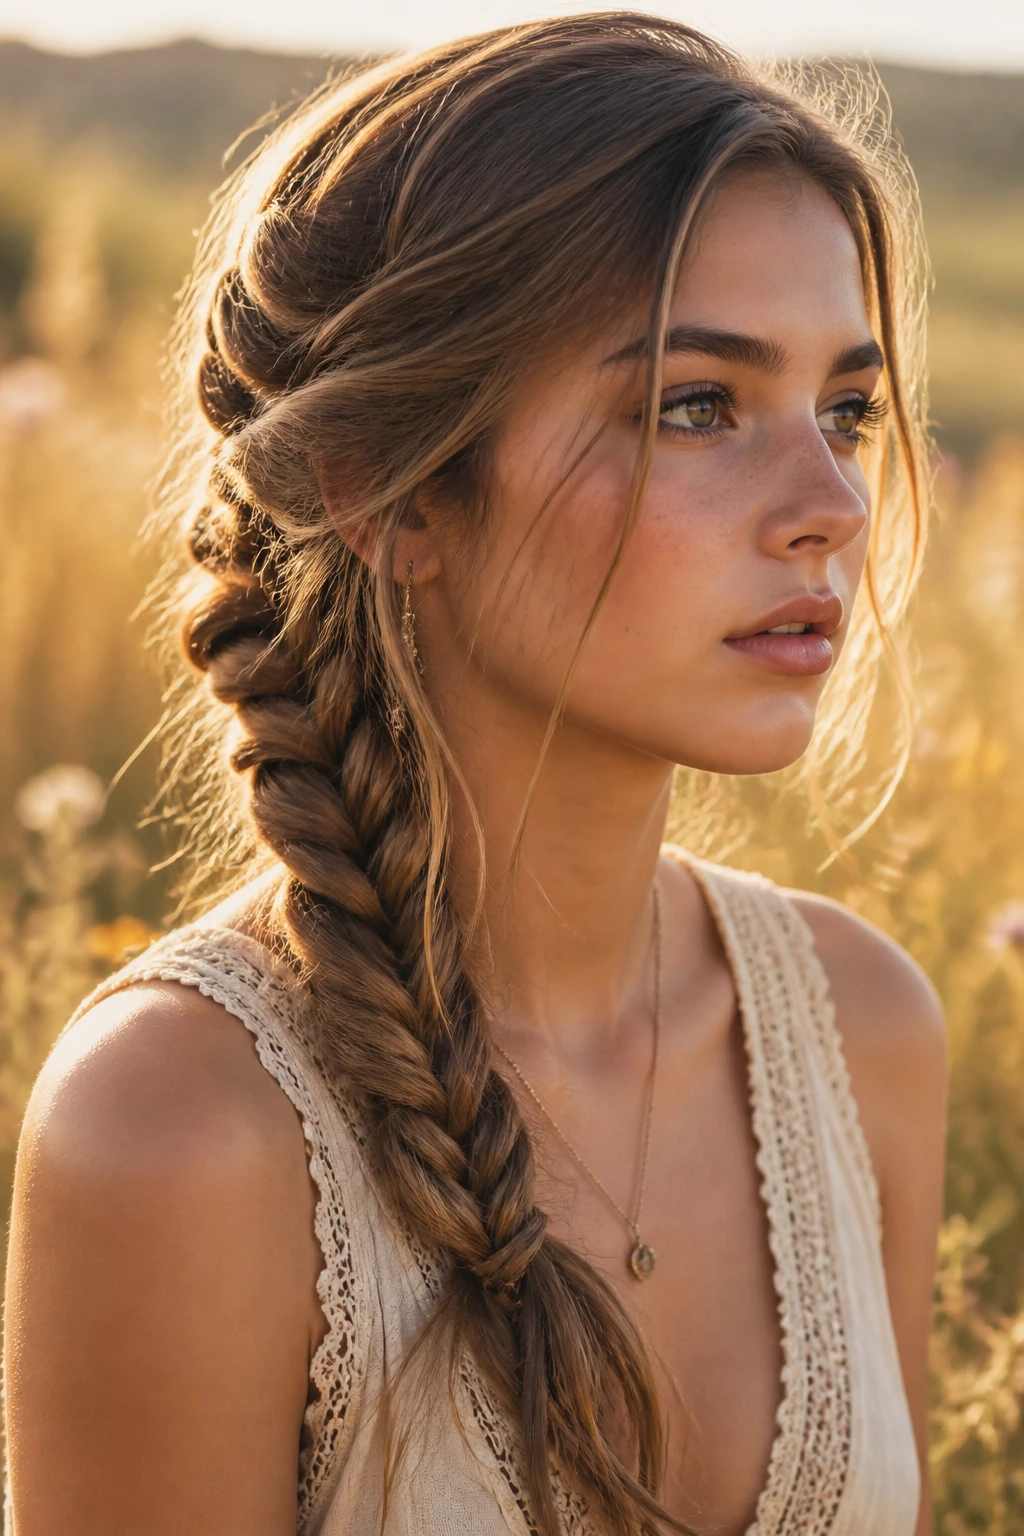
Fishtail braids look complex, but they are surprisingly repetitive. Unlike a standard three-strand braid, the fishtail uses only two sections. You take a thin piece from the outside of one section, cross it over to the other side, and repeat. It creates a tight, intricate pattern that resembles a fish spine—hence the name.
Patience Is Required
This style takes longer than a Dutch or French braid because the sections of hair used are much smaller. If you rush it, the pattern will look messy rather than clean. Set aside some time for this one. It is not a “quick fix” for a busy morning.
Making It “Boho”
The goal here is not perfection. In fact, a perfect fishtail looks a bit stiff. Once you have braided the length, pull the loops apart slightly and let a few pieces fall out. The “Boho” aesthetic thrives on a bit of chaos. It should look like you just finished a long walk through a meadow, not like you spent an hour in front of a mirror.
4. Half-Up Crown Braid
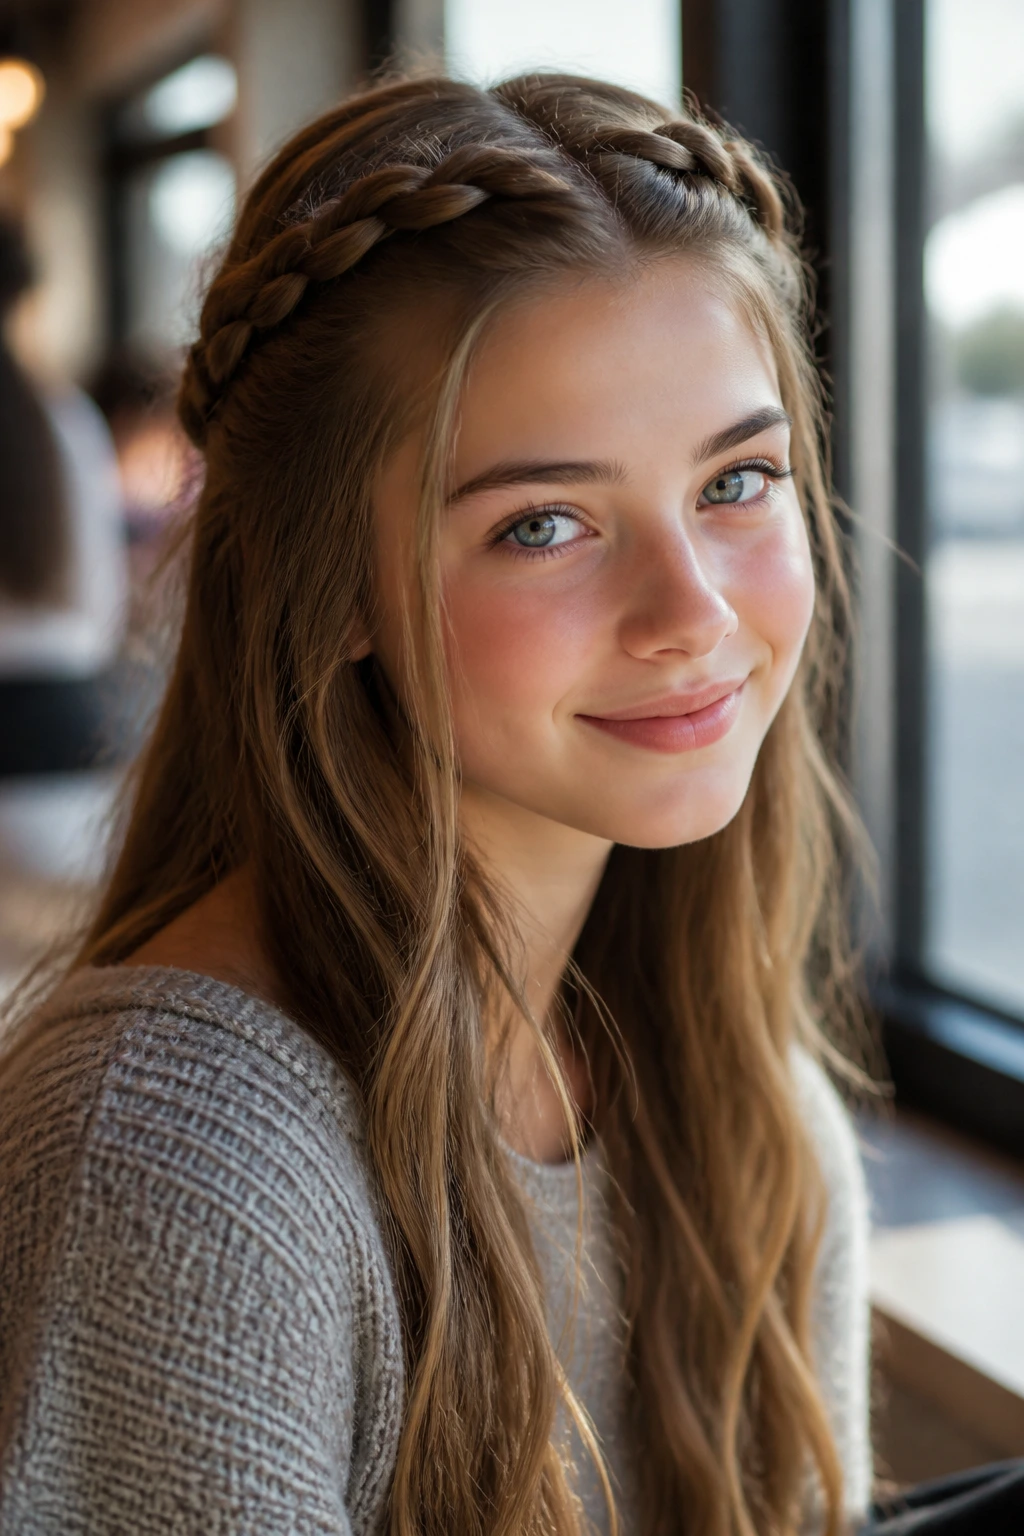
If you want the elegance of an updo but prefer to keep some length loose, the half-up crown braid is the answer. It involves taking two sections from the front, braiding them back, and meeting in the center of the back of the head. It frames the face beautifully and keeps bangs or shorter layers out of your eyes.
Placement Matters
You have two choices for where the braids meet: you can pin them flat against your head, or you can tie them together into a small ponytail. Pinning them allows for a more seamless transition into the loose hair. Use bobby pins that match your hair color to hide the connection point.
Texture Contrast
This style looks best when the loose hair has a bit of texture. If your hair is naturally straight, add a few loose waves with a flat iron before you start braiding. The contrast between the tight, structured braid at the top and the loose, flowing waves at the bottom creates a balanced, romantic silhouette that works for almost any occasion.
5. Bubble Braids
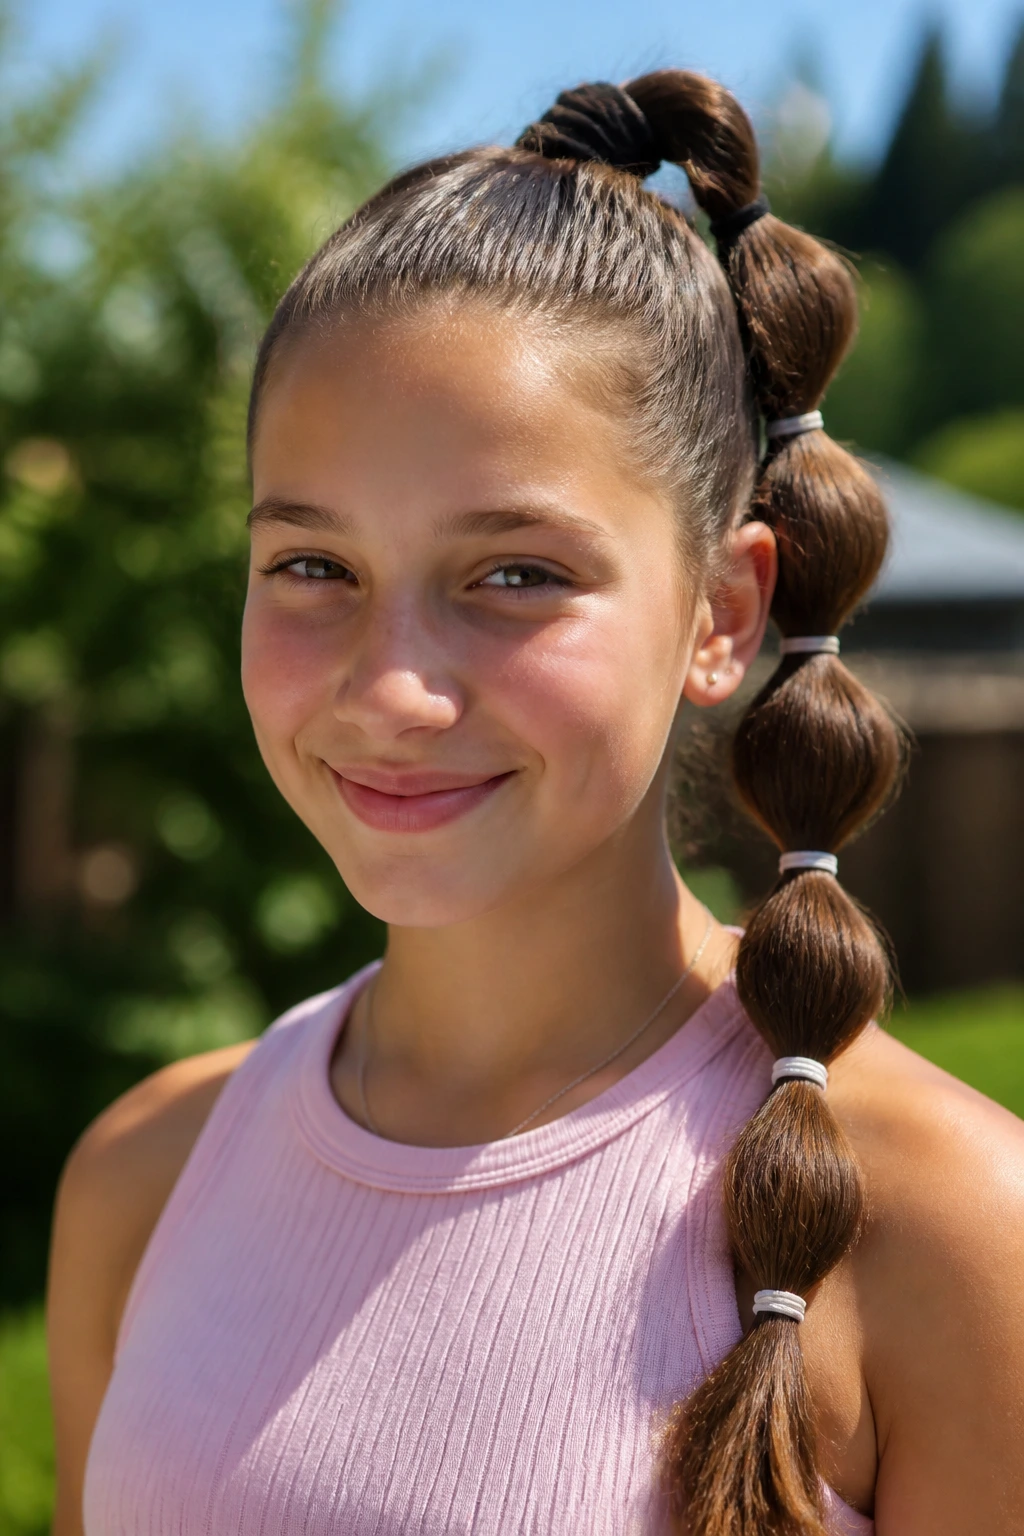
Technically, these are not braids in the traditional sense, but they are a massive trend for teens because they mimic the look of a braid with half the effort. You use small elastic bands to secure sections of hair, then “puff” or “bubble” the hair between the bands to create a round, voluminous shape.
The Elastic Strategy
The key to good bubble braids is the elastics. Use clear, snag-free bands. If you want a pop of color, use tiny rubber bands in neon or pastel shades. Space the bands evenly—about an inch or two apart—down the length of your ponytail or pigtails.
The Puff Factor
Once the bands are in, your work isn’t done. You must gently pull the hair between the bands outwards to create the “bubble.” If you don’t do this, it just looks like a segmented ponytail. The more you pull, the bigger the bubbles. It is a fantastic, low-effort style that takes less than five minutes but looks like you put in significant work.
6. Cornrow Ponytail
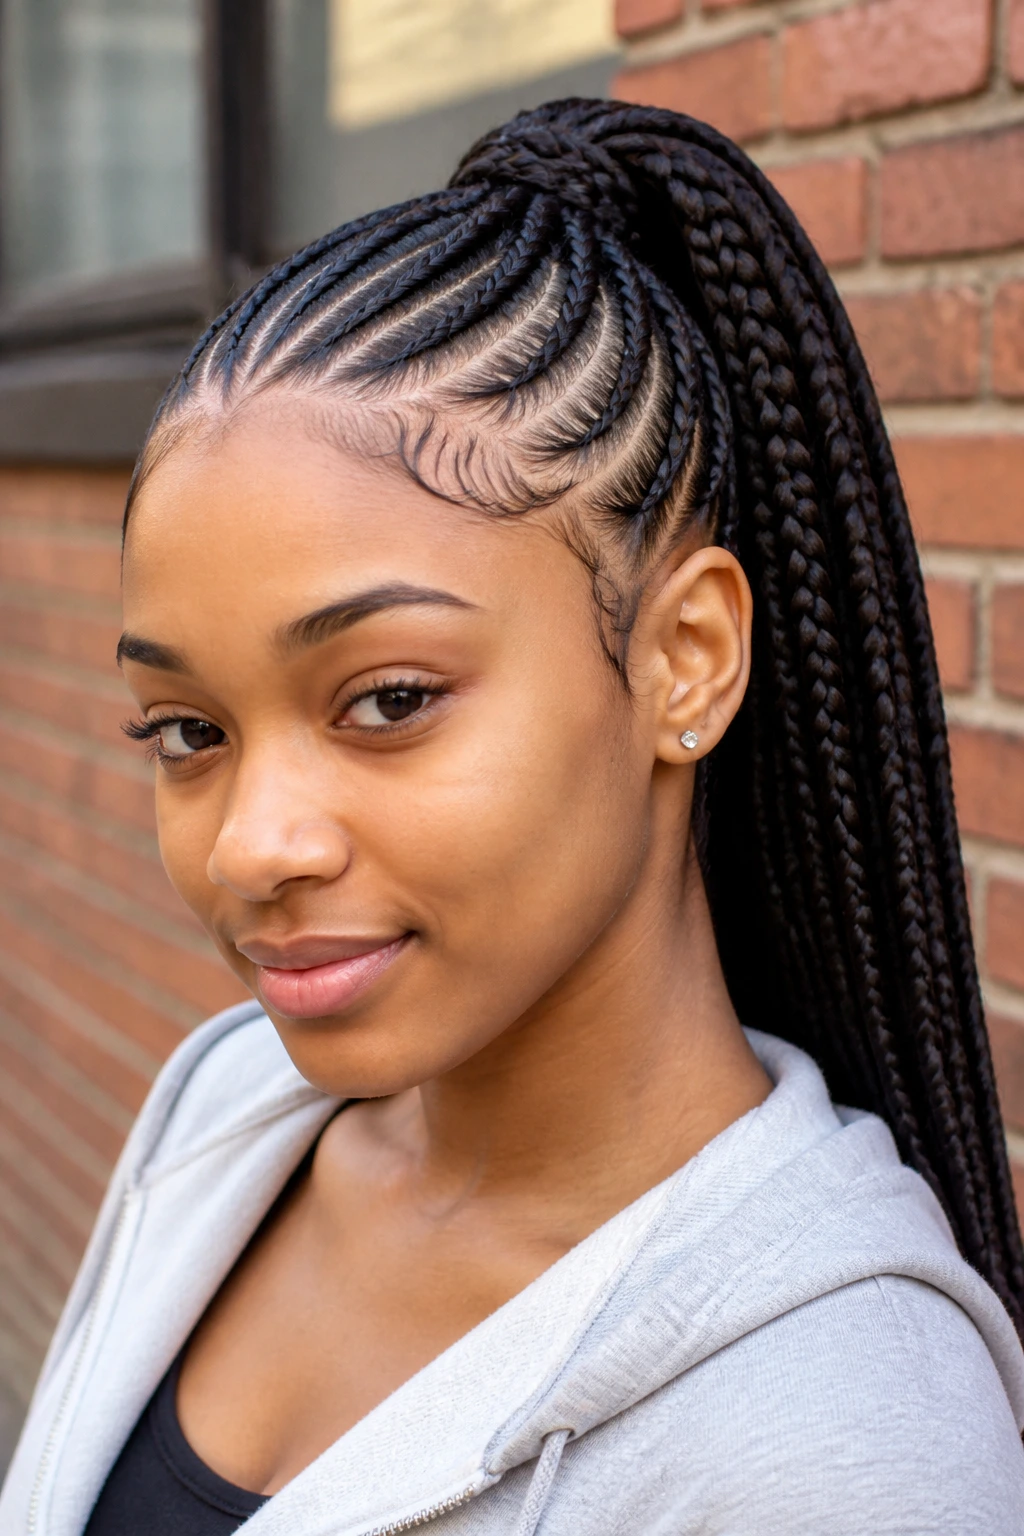
Cornrows are a protective style staple, but when pulled into a high ponytail, they take on a sporty, high-fashion edge. This style involves braiding the hair close to the scalp in straight or curved lines leading to the crown. The remaining hair can be styled into a sleek ponytail or a top knot.
Scalp Prep
Since the scalp is fully visible in this style, you want it to look neat. A little bit of edge control gel or a light pomade along your part lines can clean up the look. Ensure you are not braiding too tightly, especially around the hairline, as that can lead to thinning over time.
Longevity
This is a style that can last for several days if cared for properly. Use a silk or satin scarf at night to keep the braids from frizzing while you sleep. The beauty of this style is its crispness; the sharper the parts, the better the final result.
7. Box Braids with Beads
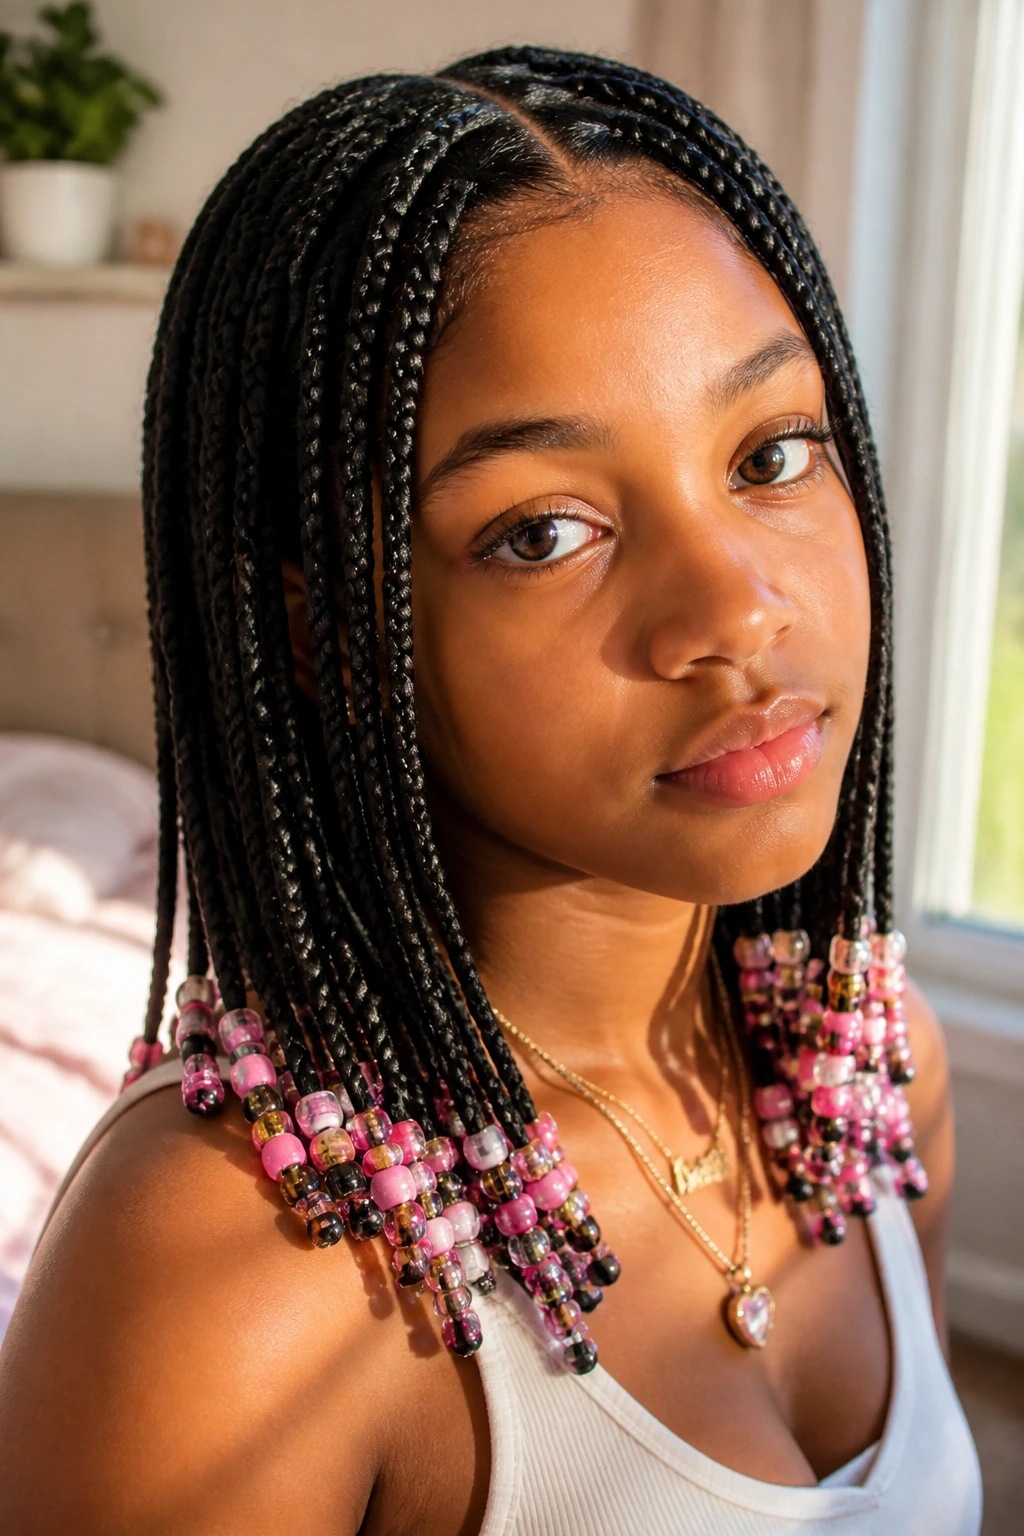
Box braids are iconic. They are individual, square-parted braids that can be styled in endless ways. Adding beads to the ends is a classic way to add personality, weight, and sound to the style.
The Weight Factor
Box braids can be heavy. If you are doing these for the first time, keep the length moderate. Extremely long braids look cool, but they can be a strain on your neck and scalp. Focus on the tension at the roots; if they are too heavy, they will pull on your follicles.
Bead Selection
You can go for clear beads, wooden ones, or colorful plastic spheres. The sound they make when you move is part of the appeal. To ensure they stay on, you can use a small rubber band at the end of the braid, or if you are using synthetic hair, you can seal the ends with hot water.
8. Space Bun Braids
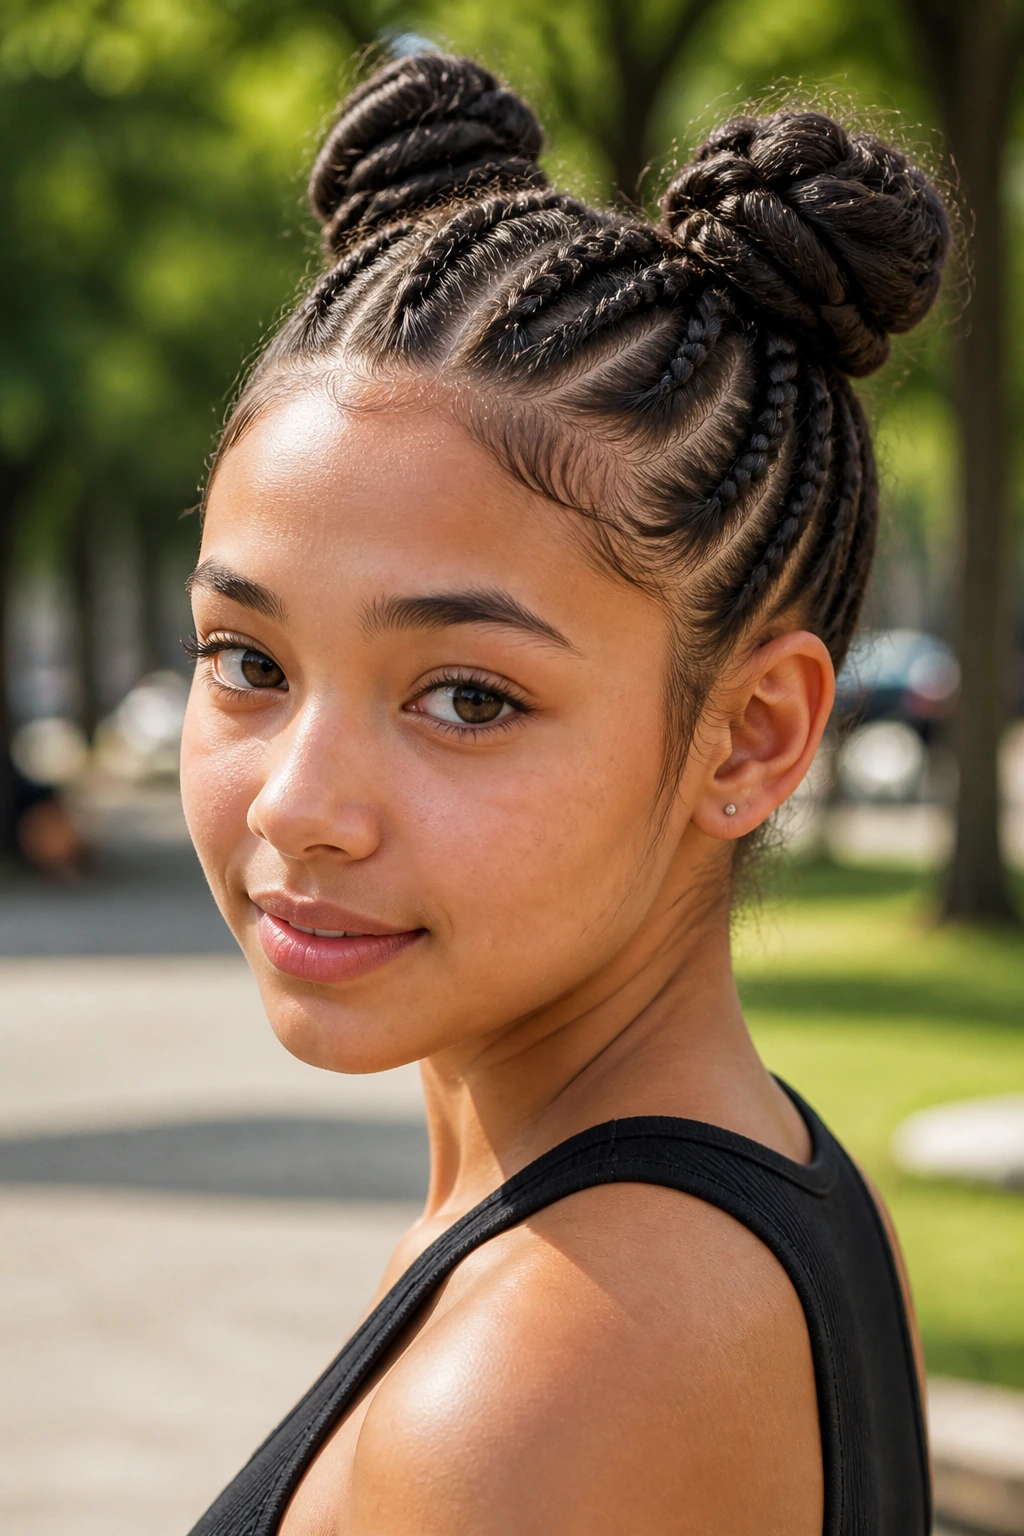
Space buns are two high buns on either side of the head, and adding braids to them gives them a structural element that makes them stand out. You can braid the hair leading up to the buns (from the nape of the neck) or incorporate braids into the buns themselves.
The Upside-Down Technique
To get the braids leading to the buns, flip your head upside down and start braiding from the nape of your neck toward the crown. Once you reach the top, gather the rest of your hair and twist it into the bun. This creates a really cool “surprise” detail from the back.
Managing Layers
If you have layers, they might want to pop out of the braids. A little bit of setting spray or light-hold hairspray is your best friend here. Don’t worry if it’s not perfectly slick; space buns are inherently playful and a little bit of flyaway texture just adds to the vibe.
9. Pull-Through Braid
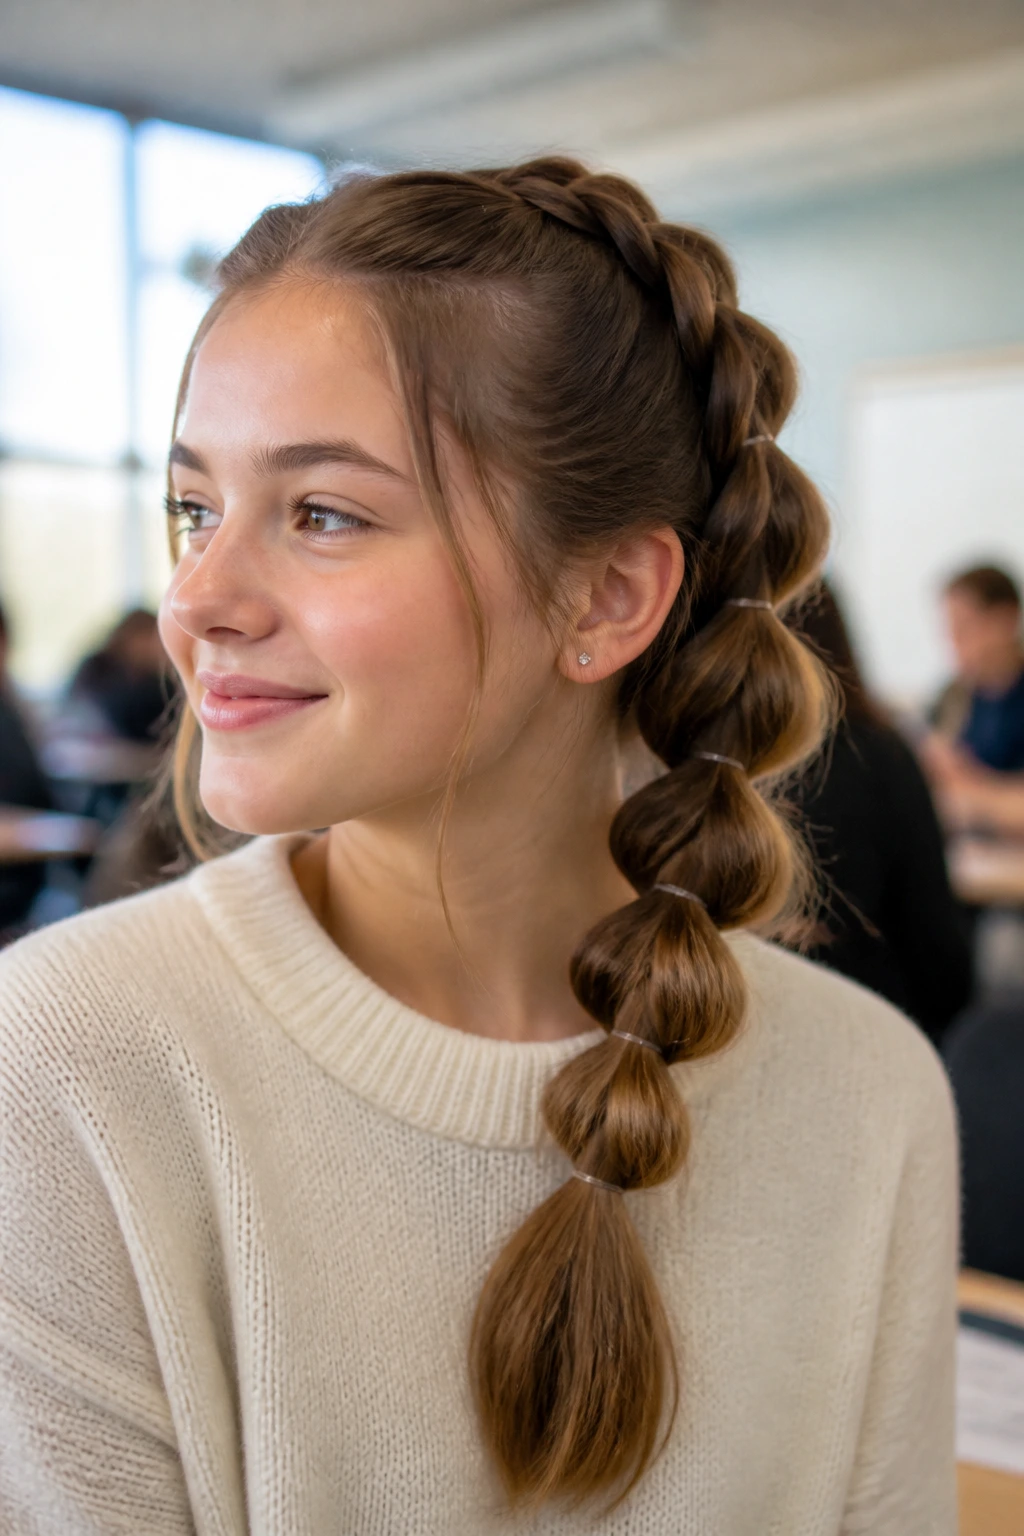
The pull-through braid is the ultimate visual trick. It looks like a complex, woven plait, but it is actually a series of ponytails pulled through each other. Because it relies on elastics rather than interweaving strands, it is much easier to master for beginners.
The Mechanics
Start with a high ponytail. Secure a second ponytail a few inches down. Split the top ponytail in two, pull the bottom one up through the middle, and clip it out of the way. Grab the two halves of the first ponytail, add more hair to them, and secure a new elastic. Repeat this all the way down.
Why It Works
You get the volume of a braid without the fatigue of holding three different sections of hair. It is incredibly secure and stays in place much better than a standard braid, making it ideal for long school days or busy weekends.
10. Viking-Inspired Braided Half-Up
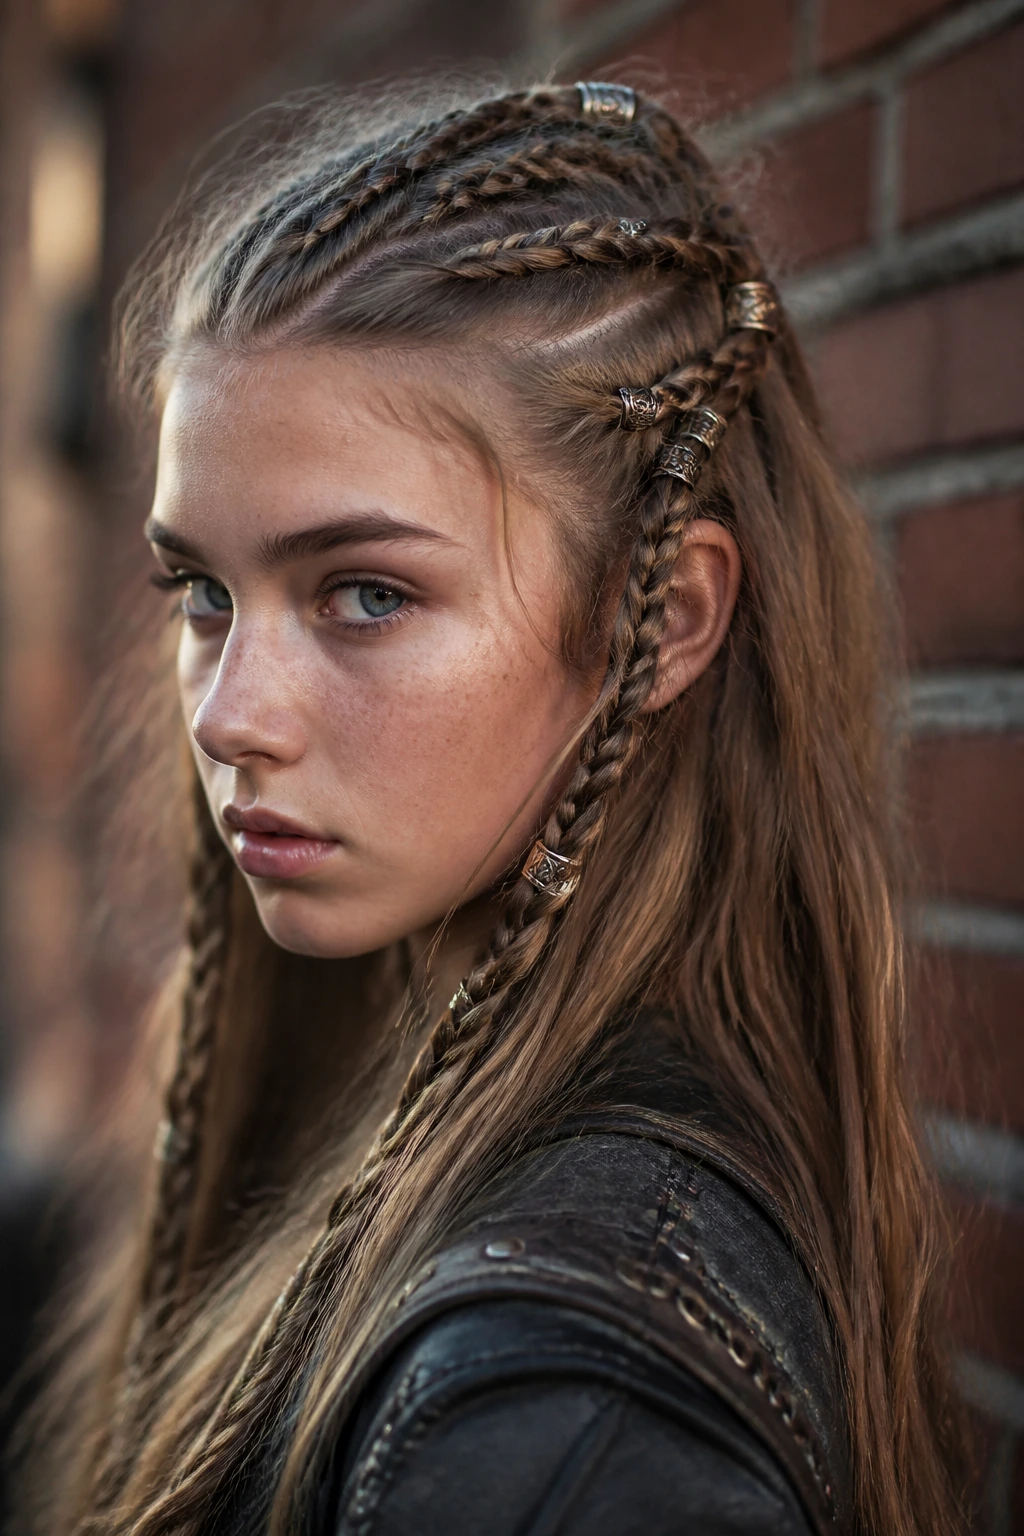
Think texture, grit, and loose, earthy vibes. This style usually features a few small braids mixed in with loose hair, often with some braiding happening right at the roots along the hairline. It’s meant to look a bit rugged and windswept.
Combining Techniques
You can mix a Dutch braid with a three-strand braid. For example, do a Dutch braid on one side of your part and a simple three-strand on the other. Leave the back loose. If you have any beach wave spray, use it. This style is not meant to be sleek.
Accessory Integration
Small metallic clips, leather cords, or even thin ribbons woven into the braids can take this from “messy hair day” to “deliberate styling.” Because the style is so loose, it’s also very forgiving. If a strand pulls out, it just adds to the aesthetic.
11. Messy Top Knot with Braided Accent
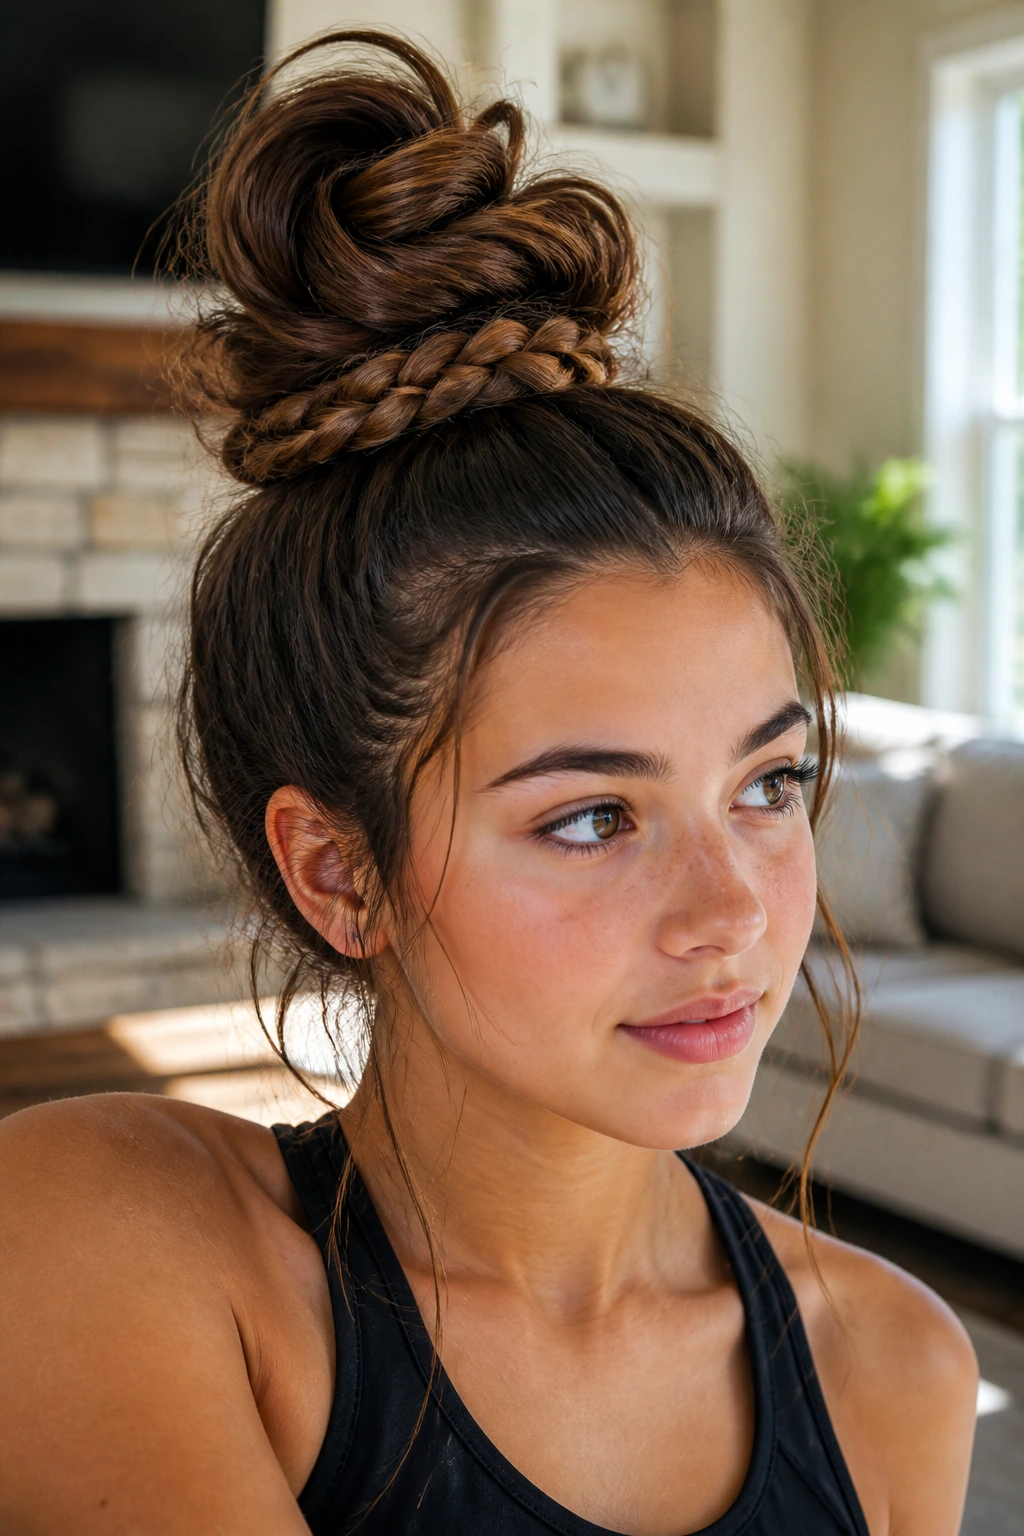
This is the elevated version of the standard gym-class bun. The messy top knot is a staple for a reason, but it can look a bit one-note. Adding a braid—either wrapping around the base of the bun or running up the back—changes the silhouette entirely.
The Base Braid
If you want the braid to run up the back, flip your head upside down and create a Dutch braid from your neck up to where you want the bun. This is the trickiest part, but once you get the braid to the crown, the rest is easy.
The Bun Construction
Don’t overthink the bun. Pull the remaining hair into a ponytail with the braid, wrap the hair around, and secure it with an elastic. Then, pull at the bun to loosen it. The contrast between the tight, structured braid at the back and the loose, messy bun on top creates a perfect balance.
12. Waterfall Braid
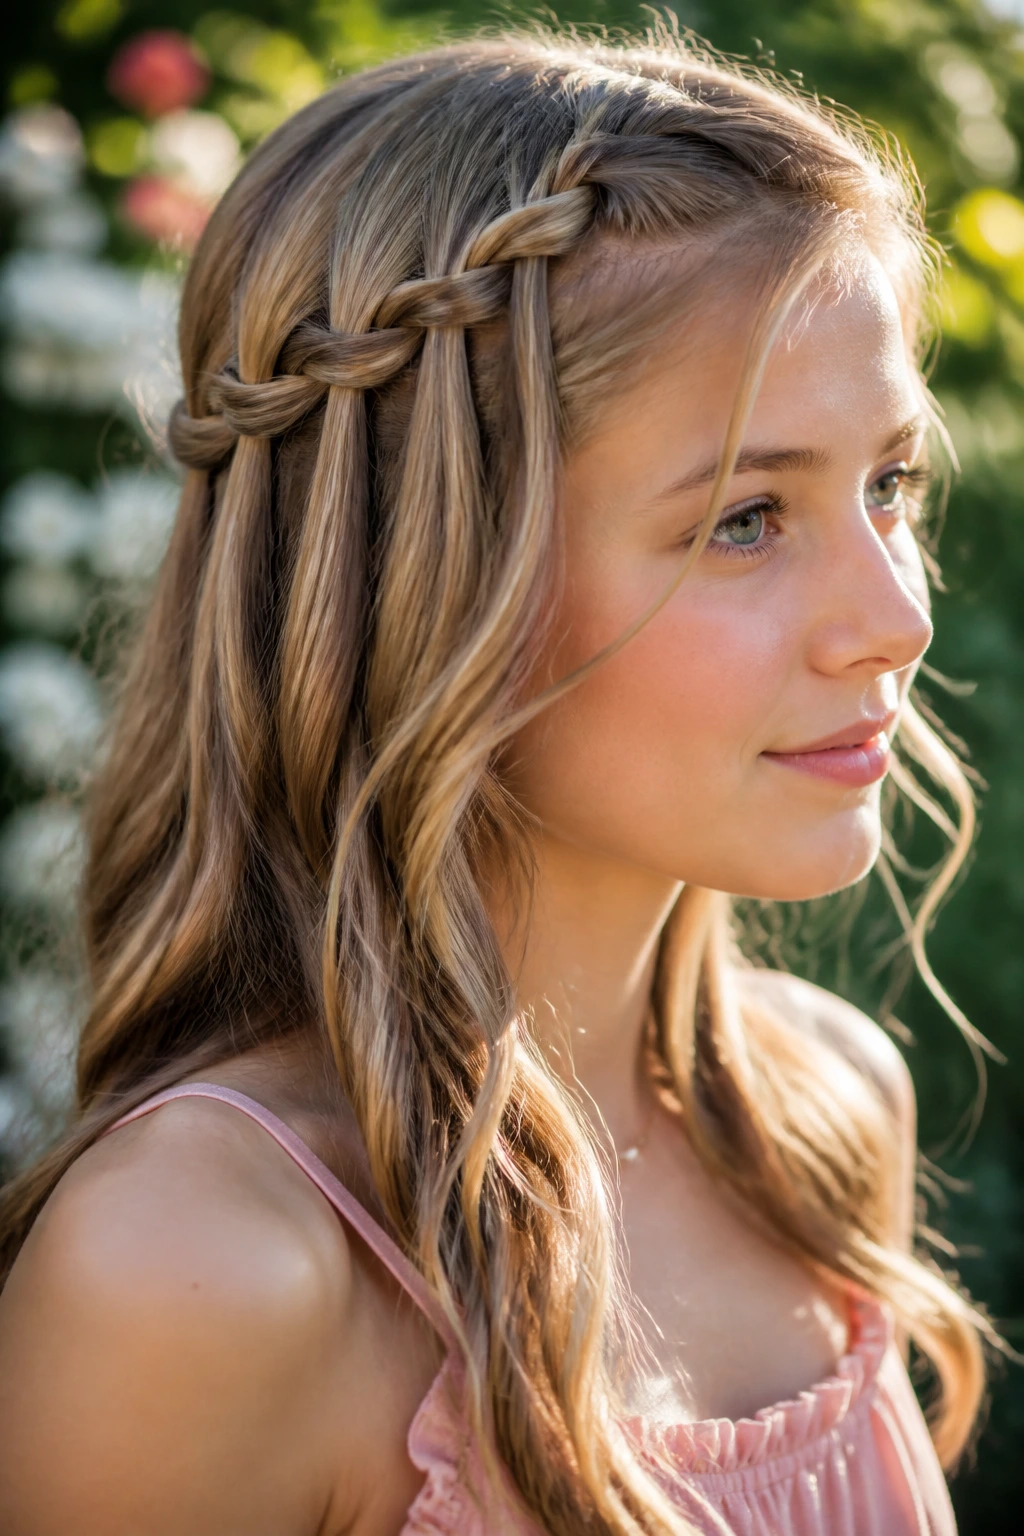
The waterfall braid is arguably the most romantic style on this list. It is a modification of the French braid where, instead of incorporating all the hair into the braid, you “drop” the bottom strand after every cross-over. This leaves sections of hair hanging loose, mimicking the look of a waterfall.
Strategic Sectioning
The key to a waterfall braid is keeping the hair that you “drop” consistent. Make sure the sections you pick up to add to the braid are roughly the same size as the ones you drop. This creates a uniform pattern.
Styling the Ends
Because you are leaving sections of hair hanging out of the braid, the style looks best when those loose pieces are curled. It softens the entire look. This is a very popular style for formal events like dances or family gatherings because it looks significantly more complicated than it actually is.
13. Fulani-Inspired Braids
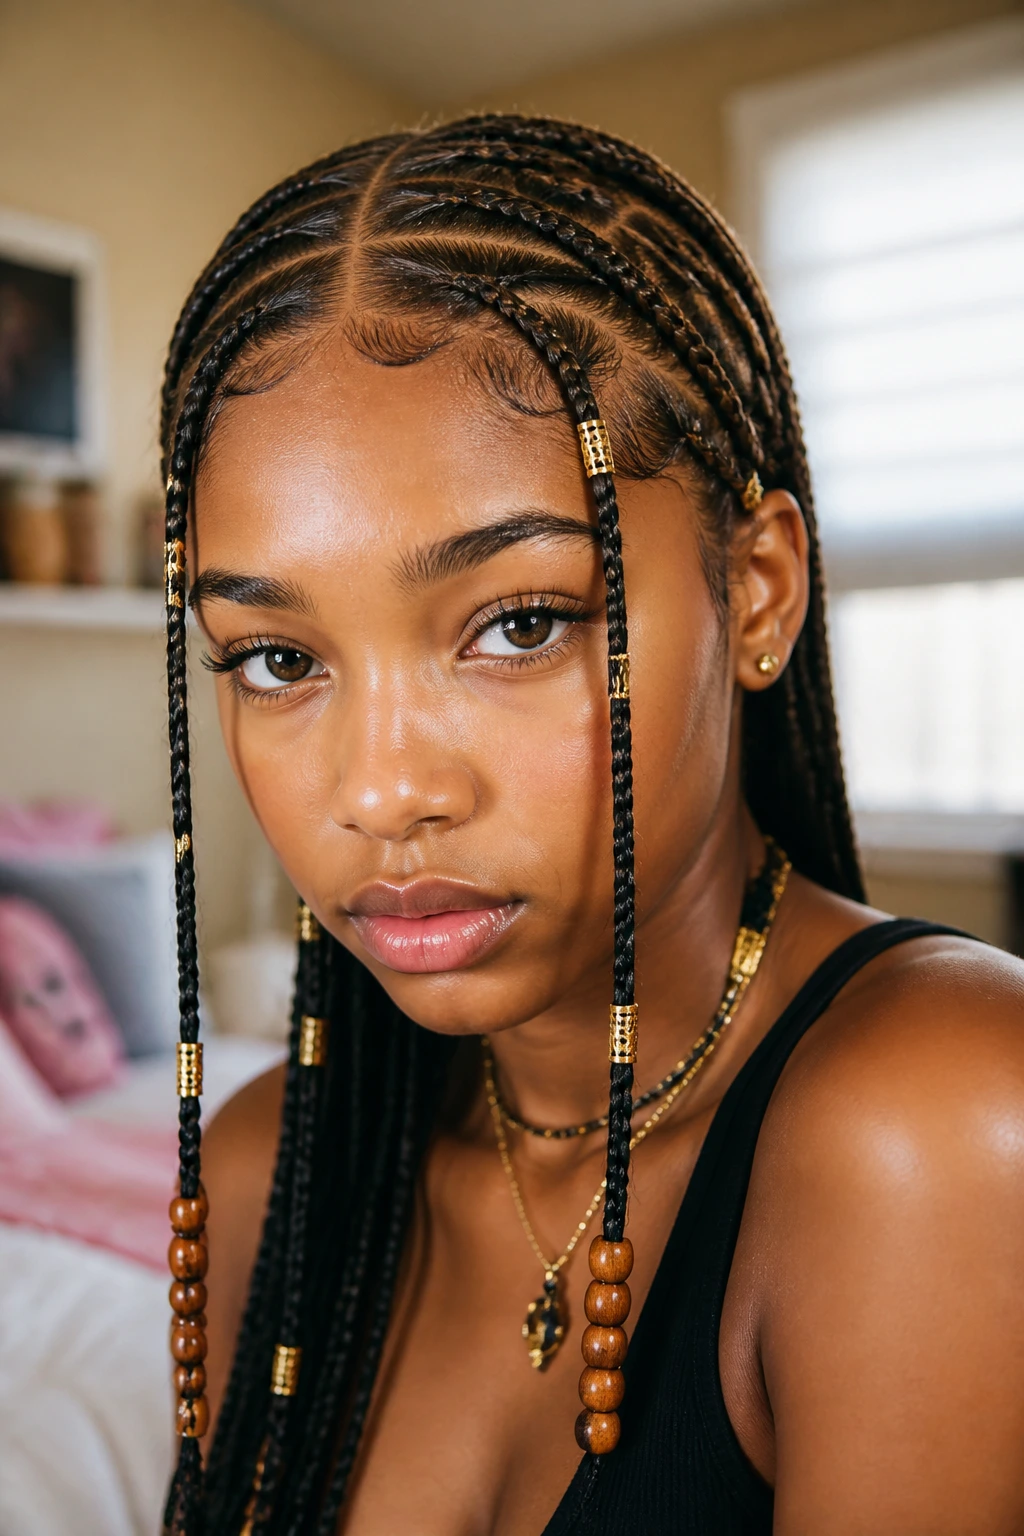
This style is deeply rooted in history and culture. It typically features a center part, braids going back, and a braid or two framing the face, often embellished with beads or cuffs. It is a stunning, high-contrast look that commands attention.
Precision Styling
The parts here are everything. You need a rat-tail comb and a steady hand to create straight, crisp lines. If you aren’t comfortable with parting your own hair, this might be one to practice with a friend or a professional.
Embellishment
The accessories define this look. Gold cuffs are the classic choice, but you can also use silver, wooden beads, or even colorful strings. The key is to distribute them evenly so the style feels intentional rather than cluttered.
14. Rope Twist Braids
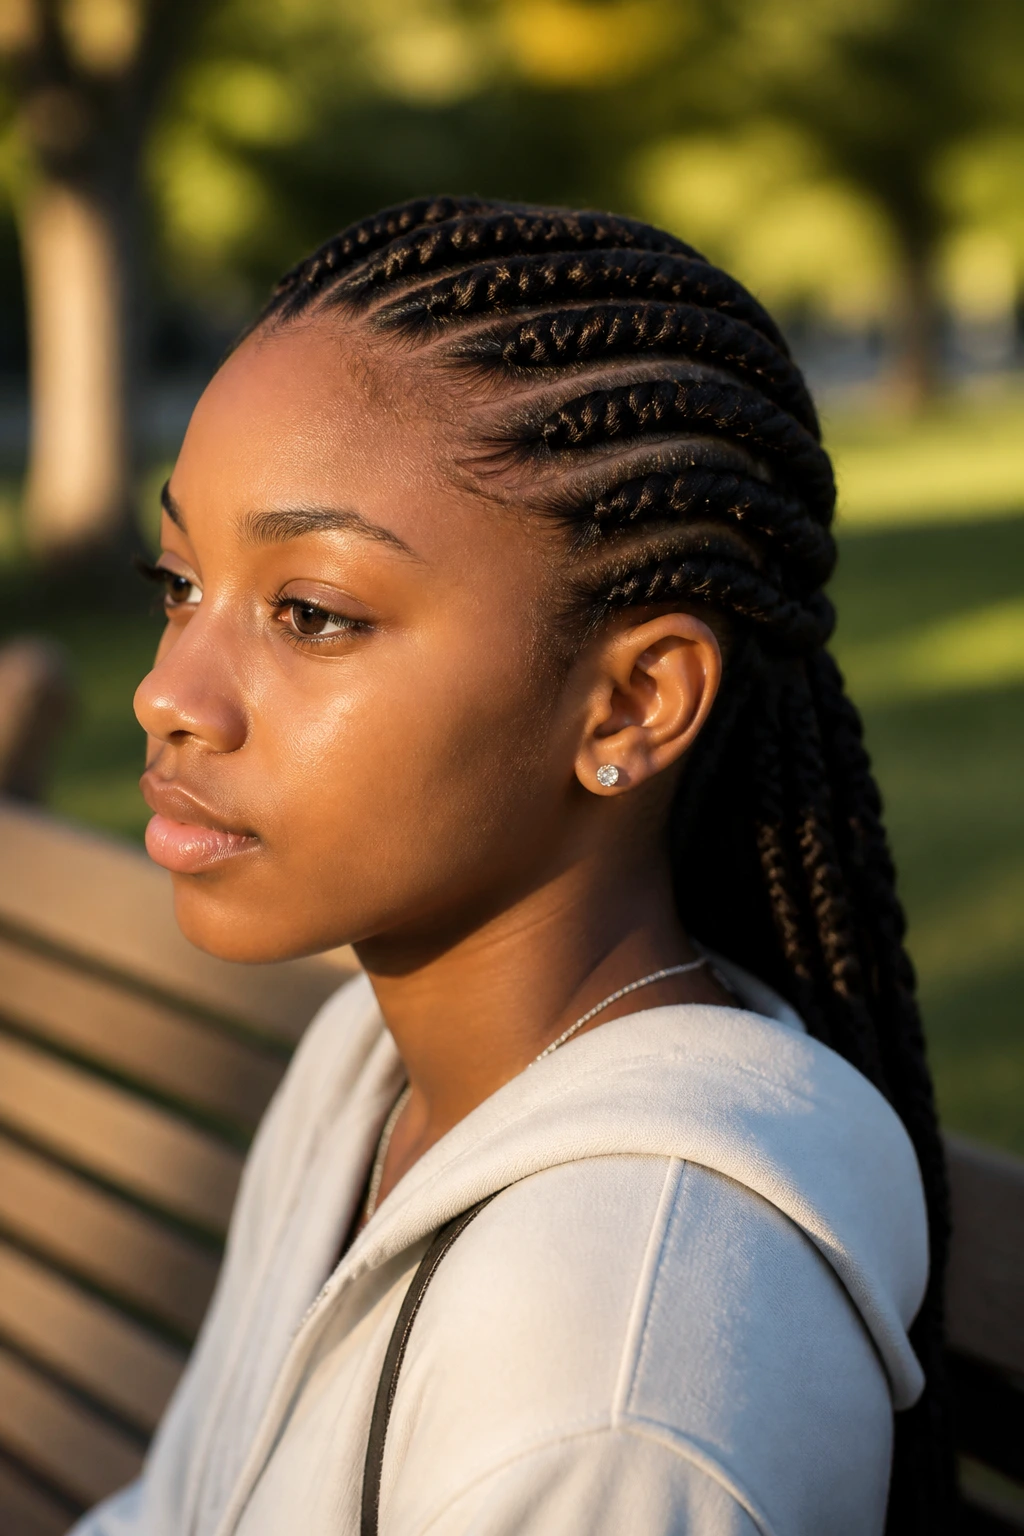
If you struggle with braiding, rope twists are your best friend. They are created by twisting two sections of hair in the same direction and then twisting those two sections around each other in the opposite direction.
The Tension Secret
You have to keep the tension tight. If you don’t twist the individual strands enough before crossing them over, the braid will unravel. It requires a bit of muscle memory, but once you get the rhythm of “twist right, cross left,” it goes very quickly.
Uniformity
This style looks best when the two sections are equal in size. If one side is thicker than the other, the twist will look lopsided. This is a great, low-maintenance style for long hair and looks beautiful in a low ponytail or as a long, singular braid down the back.
15. Braided Headband (Faux)
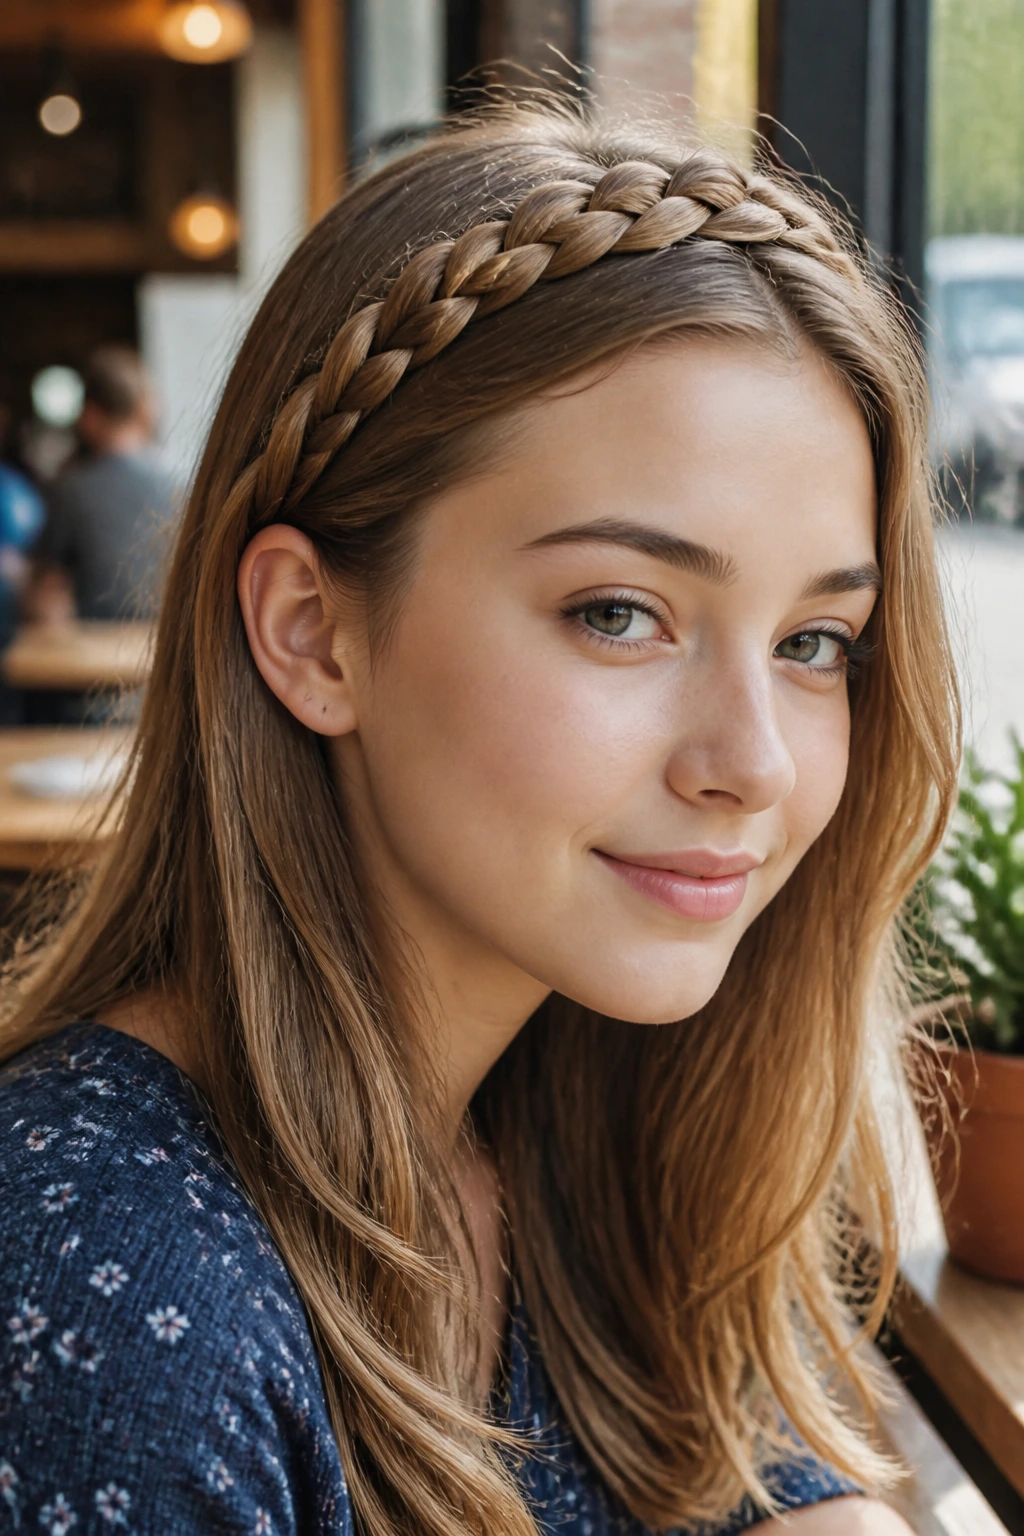
You don’t need a headband to get the headband look. You can create a “halo” effect by braiding a section of hair from one temple, carrying it across the top of your head, and pinning it behind the opposite ear.
Hiding the End
The trick is to tuck the end of the braid underneath the loose hair on the other side. Secure it with a bobby pin pushed upward into the braid so it stays hidden. If you have shorter hair, you might need to use a bit of texture powder to give the hair some grip so the pins don’t slide out.
Volume Control
Don’t braid it flat against your head. Pull at the loops of the braid once it’s pinned to make it look fuller. This adds volume to the crown, which is flattering on almost every face shape.
16. Goddess Braids
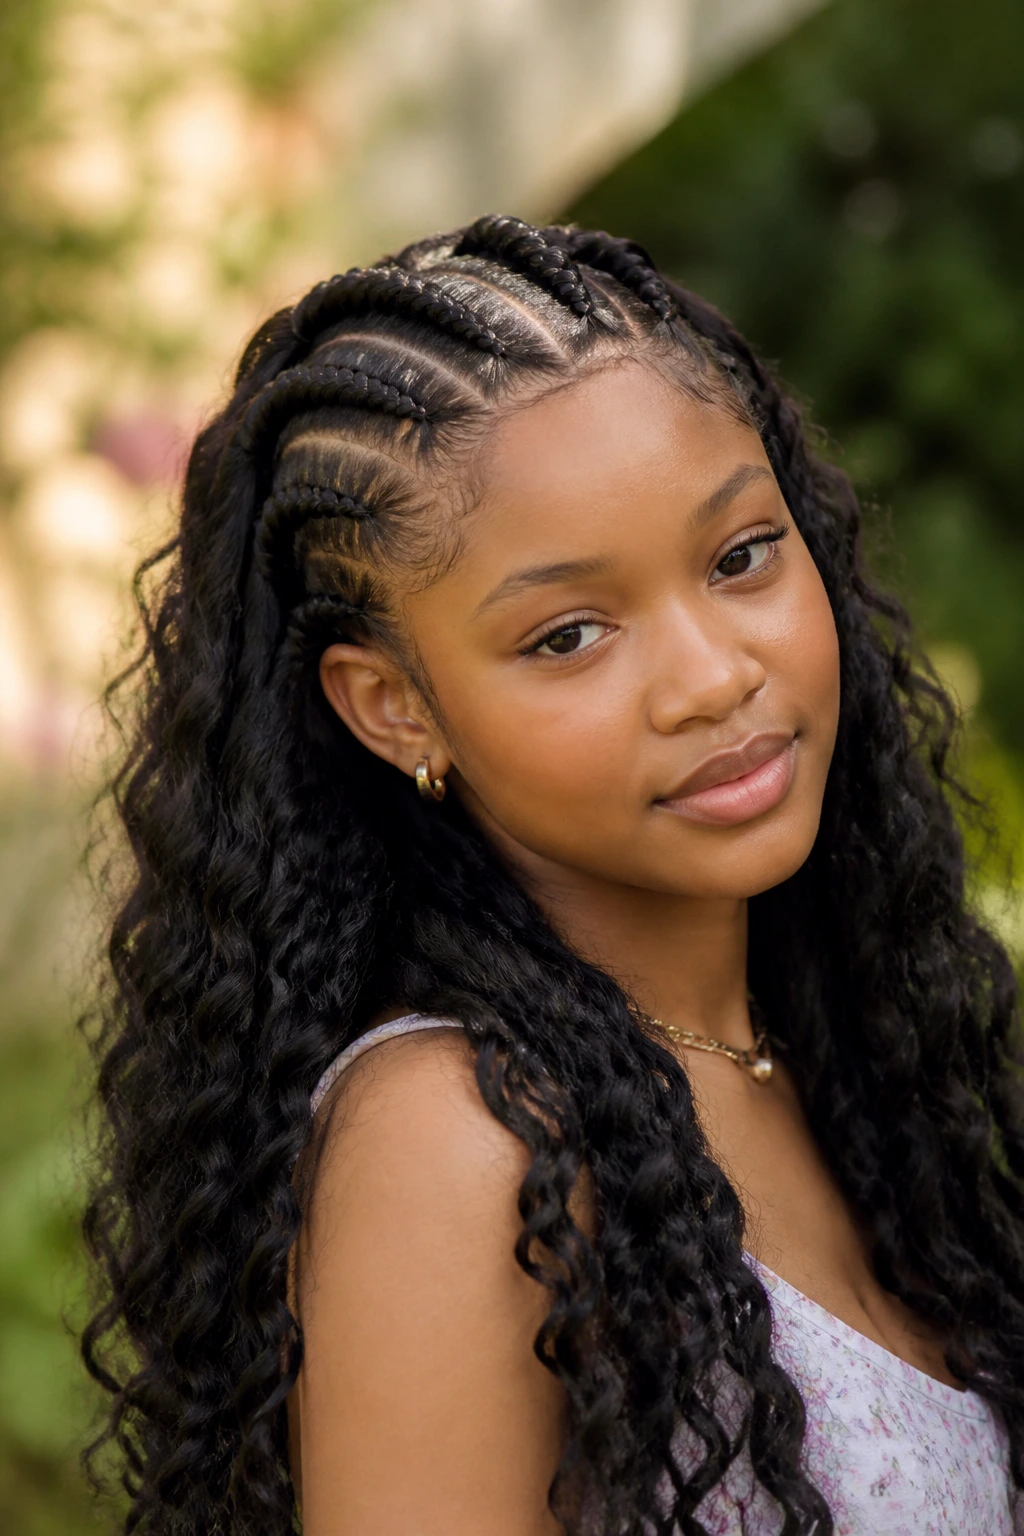
Goddess braids are essentially large, chunky cornrows. They are typically thick and feed into the scalp. They are a fantastic protective style because the larger sections mean less tension on the scalp and faster installation time.
The “Goddess” Element
What makes them “goddess” style as opposed to just large cornrows? Often, it is the addition of loose, curly extensions left at the ends or woven throughout the braid. This adds a soft, ethereal vibe to a structured style.
Moisture Is Key
Since the hair is braided, the scalp can feel dry or itchy. Use a lightweight scalp oil with a nozzle tip to get product right to the skin between the braids. This keeps the hair healthy and the style looking fresh for longer.
17. Double Braid High Bun
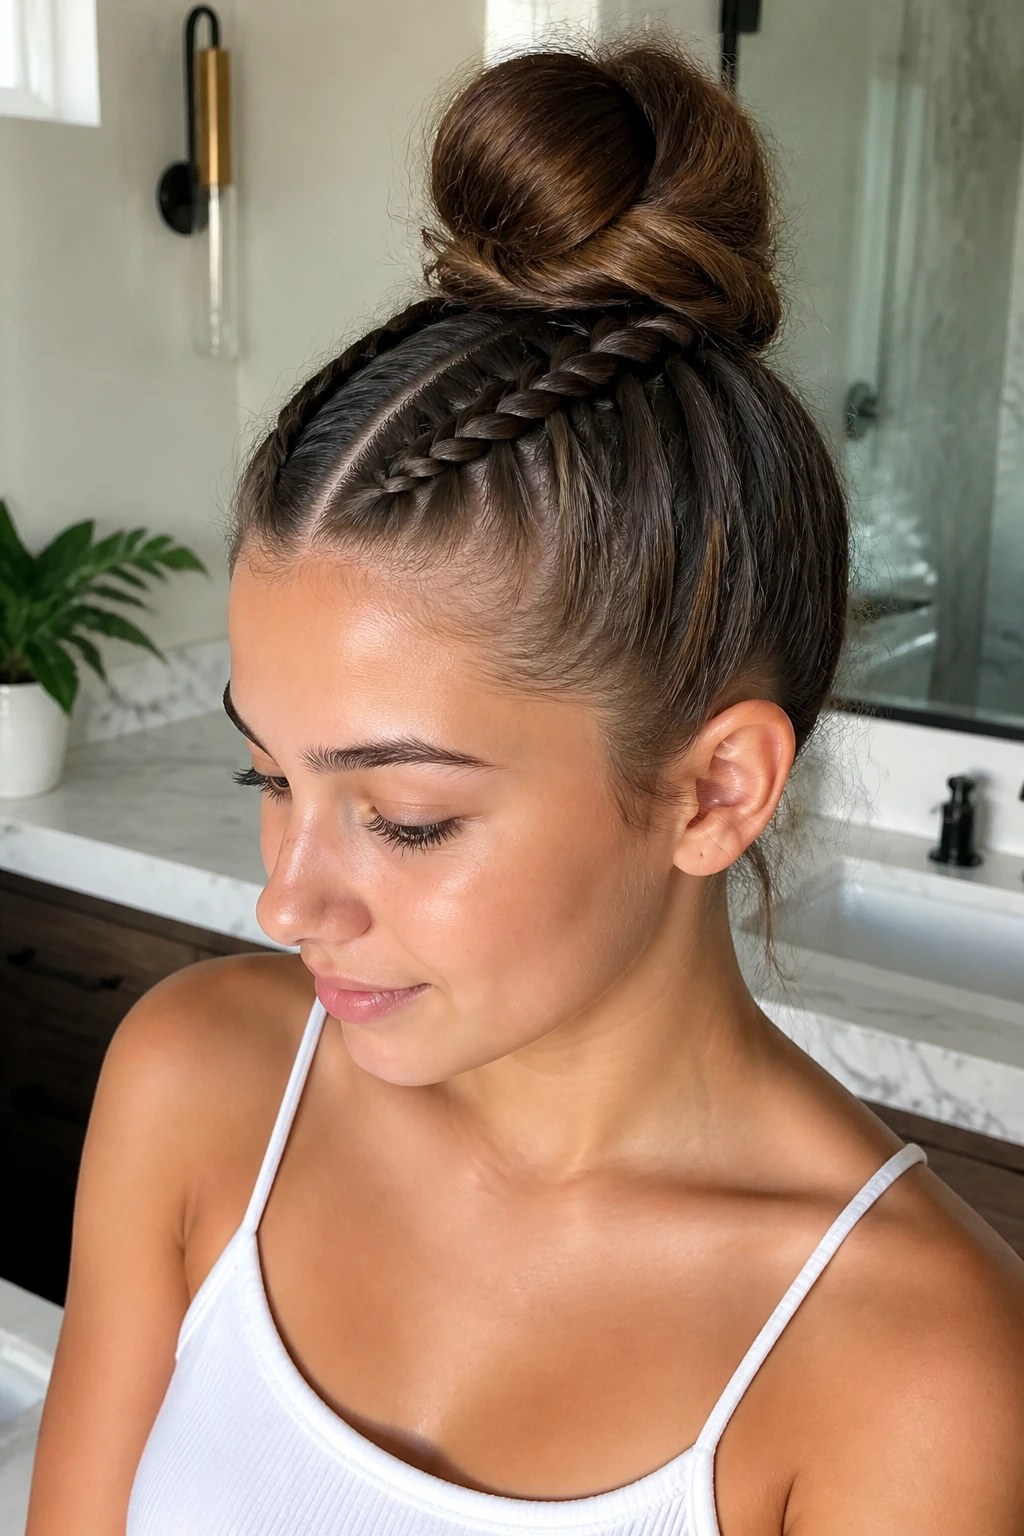
This is a combination style that screams sophistication. You create two Dutch braids—one from the front hairline and one from the back—and meet them at the crown to form a high bun. It is complex, tidy, and perfect for high-activity days where you need your hair completely locked down.
The Meeting Point
The challenge here is the angle. You need to ensure the back braid is pulled tight enough that it doesn’t cause a “bump” at the nape of the neck. When both braids meet at the top, tie them together with the rest of your hair in a high ponytail.
Bun Styling
Twist the ponytail into a bun. Because you already have texture from the braids, the bun will have a lot of visual interest and won’t look like a standard, boring knot. Secure it with a few pins, and you are ready to go.
18. Feed-In Braids into a Low Bun
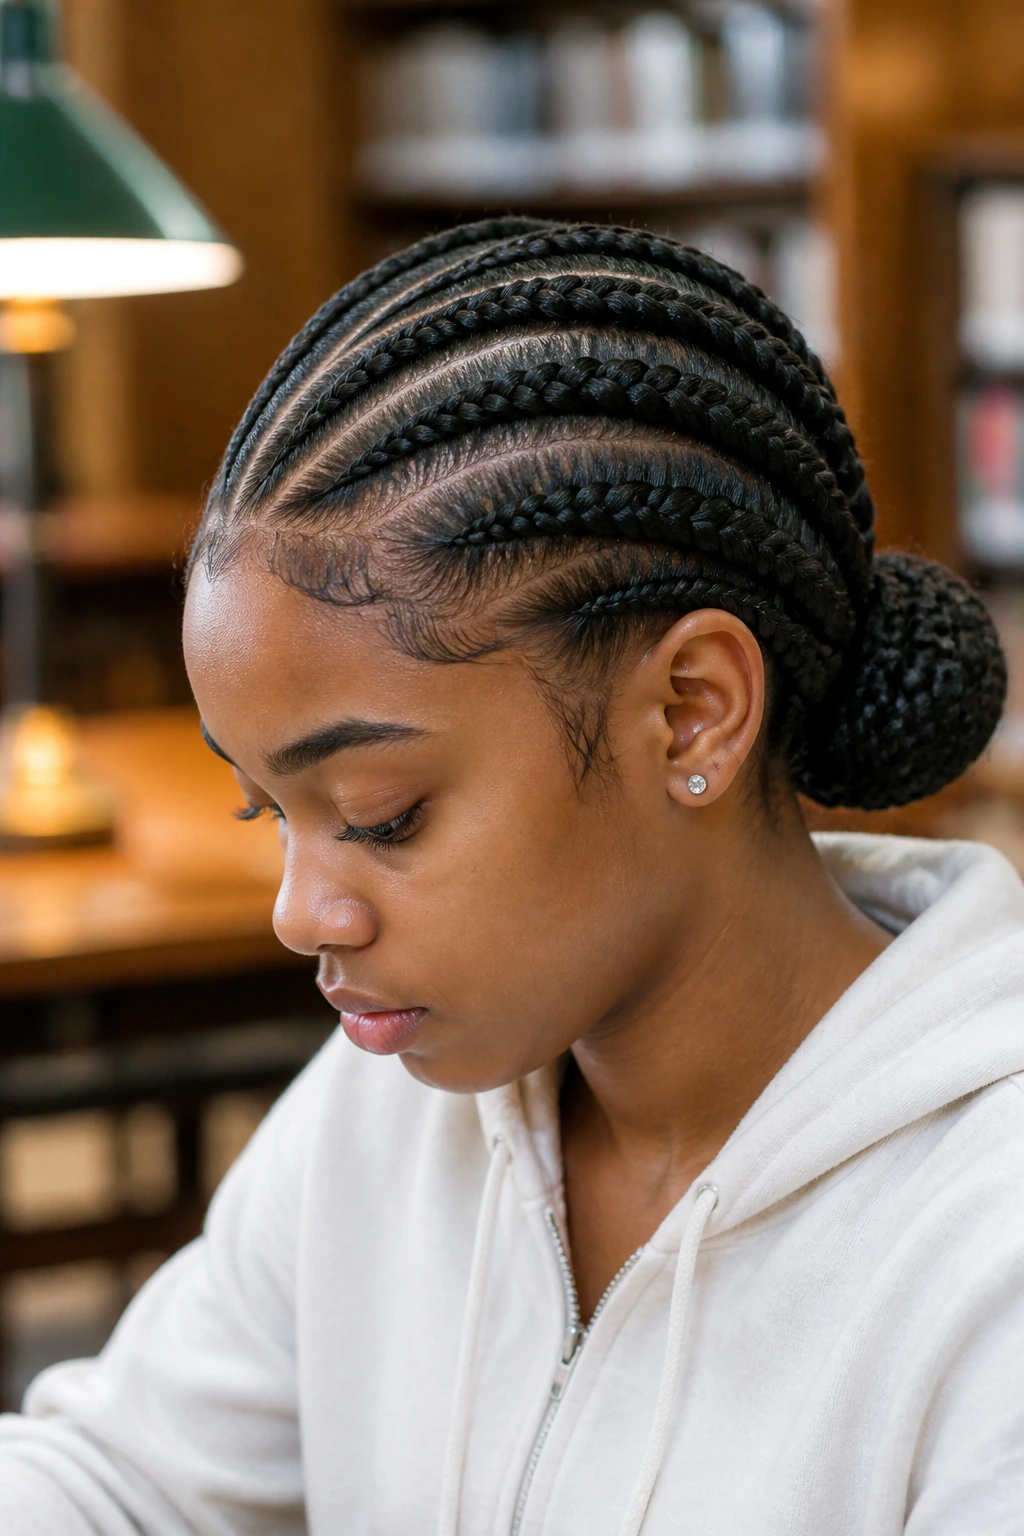
Feed-in braids are a technique where you start the braid with your natural hair and gradually “feed” in extensions to add thickness and length. Pulling these into a low bun creates a sleek, professional, and very mature look.
Starting Small
The “feed-in” technique is what makes this look natural. By starting with just your natural hair, the braid starts thin at the hairline, avoiding that bulky, artificial look right at the forehead. As you move back, the braid gets fuller.
Low Bun Versatility
A low bun is elegant. You can wrap the ends of the braids around the base of the bun to conceal the elastic, which makes the whole style look like a seamless, custom creation. This is a great style for events where you want to look put-together but still show off your personal style.
Final Thoughts
Braiding is a skill that rewards time and patience. It is easy to get frustrated when your fingers won’t cooperate or the tension feels off, but the only way to get better is to keep doing it. Start with the simpler techniques like rope twists or Dutch braids before moving on to complex, multi-strand styles.
Remember that your hair is a canvas. Don’t be afraid to mix these techniques. A fishtail braid inside a Dutch braid? Absolutely. Beads on a bubble braid? Why not. The best styles are the ones you make your own. Keep your tools clean, don’t over-tighten, and enjoy the process of turning a tangled mess into something beautiful. Your hair health, and your style, will thank you for it.
