



4C hair is defined by its incredibly tight, dense, and fragile coil pattern. It shrinks more than any other hair type, often retracting significantly when it touches water, which leads many to believe their hair is not growing or that it is unmanageable. The truth is actually the opposite. 4C hair is versatile, resilient, and beautiful, but it requires a different playbook than looser curl patterns. If you treat it like straight or wavy hair, you will end up with breakage. If you respect its need for moisture, protective tension, and gentle handling, you open the door to styles that are both practical and visually striking.
The key to navigating 4C hair is understanding the importance of moisture retention and manipulation control. Because the hair strands twist so tightly, sebum from the scalp struggles to travel down the shaft. This means you must manually add oils and butters and protect the ends. The styles listed here focus on minimizing daily styling, which is the primary cause of breakage. By putting your hair in a style and leaving it alone for a few days—or even weeks—you give the hair the structural support it needs to thrive.
Let’s look at the options available. These are not just aesthetic choices; they are functional decisions for hair health.
1. Mini Twists
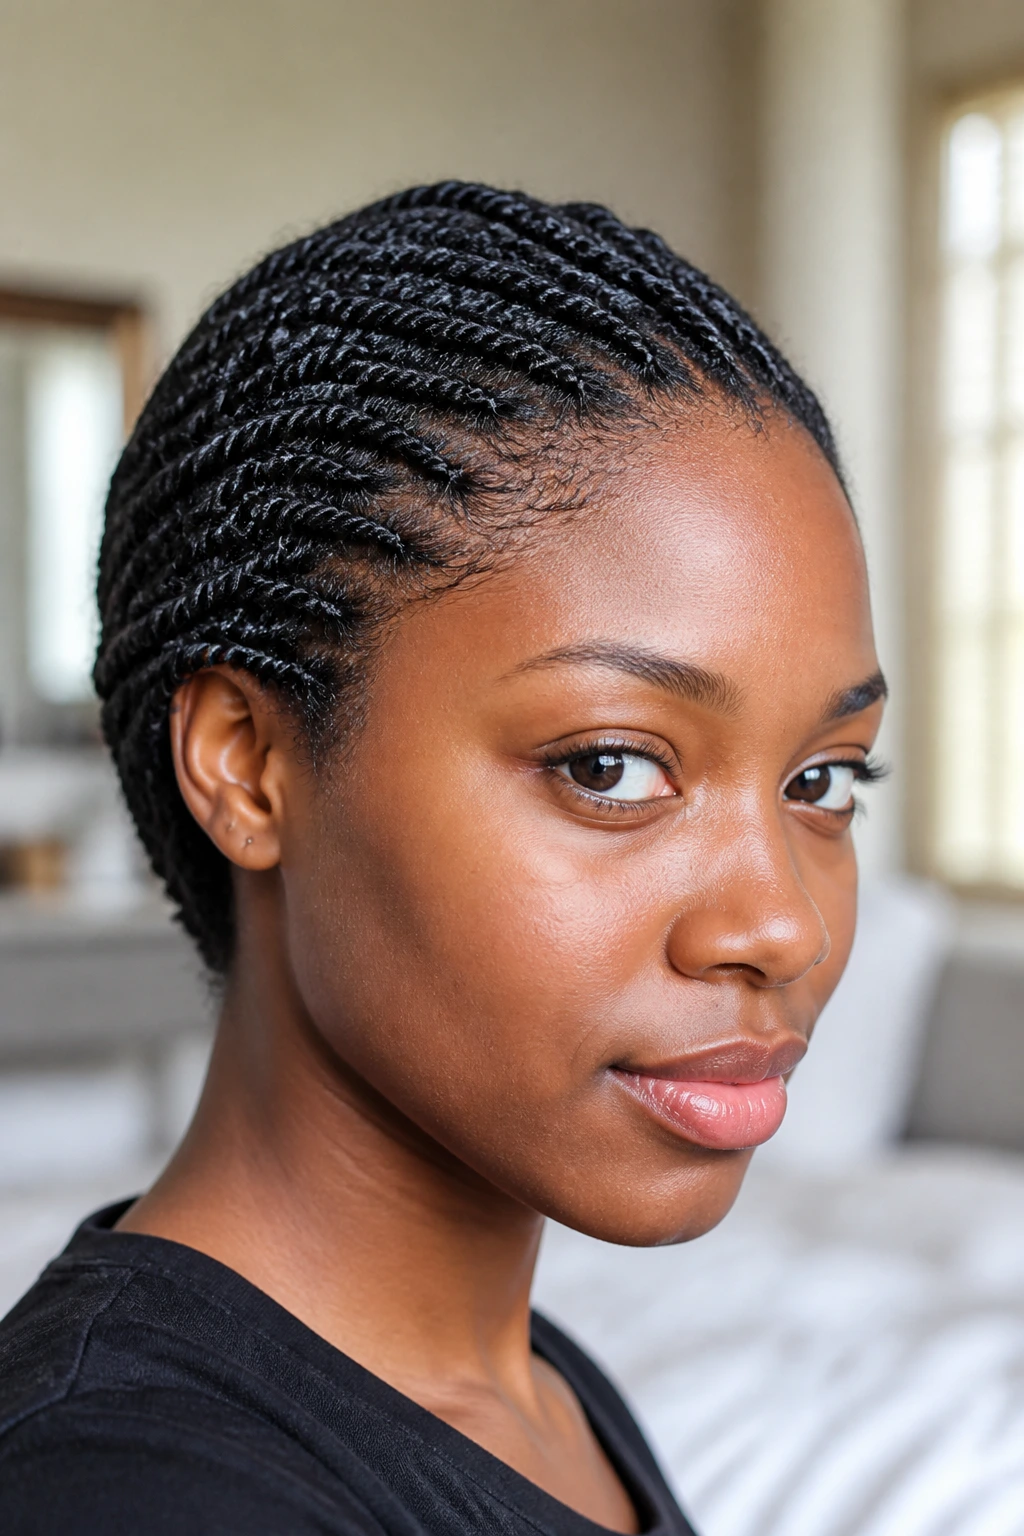
Mini twists are arguably the best protective style for 4C hair because they mimic the hair’s natural texture while keeping the ends tucked away and protected from friction. Unlike larger twists, mini twists take time to install, but the payout is significant. You can leave them in for weeks, and they look better as they age and get a little fuzzy.
Why They Work for 4C Hair
The primary benefit is low manipulation. Once your hair is in mini twists, you are not combing, brushing, or pulling on it daily. This prevents the mechanical damage that often stunts length retention. You can wash your hair while it is in the twists, which is a major advantage for keeping your scalp clean without unraveling your work.
Styling Tips
- Keep the sections small: If the sections are too large, they won’t look like twists; they will look like bulky ropes. Small sections create that full, lush look.
- Use a good sealant: After applying your leave-in conditioner, use a thicker butter or a heavier oil to seal the moisture into the twist.
- Don’t over-manipulate: Resist the urge to redo the front ones every day. The fuzzier they get, the more natural they look.
2. High Puff with Bangs
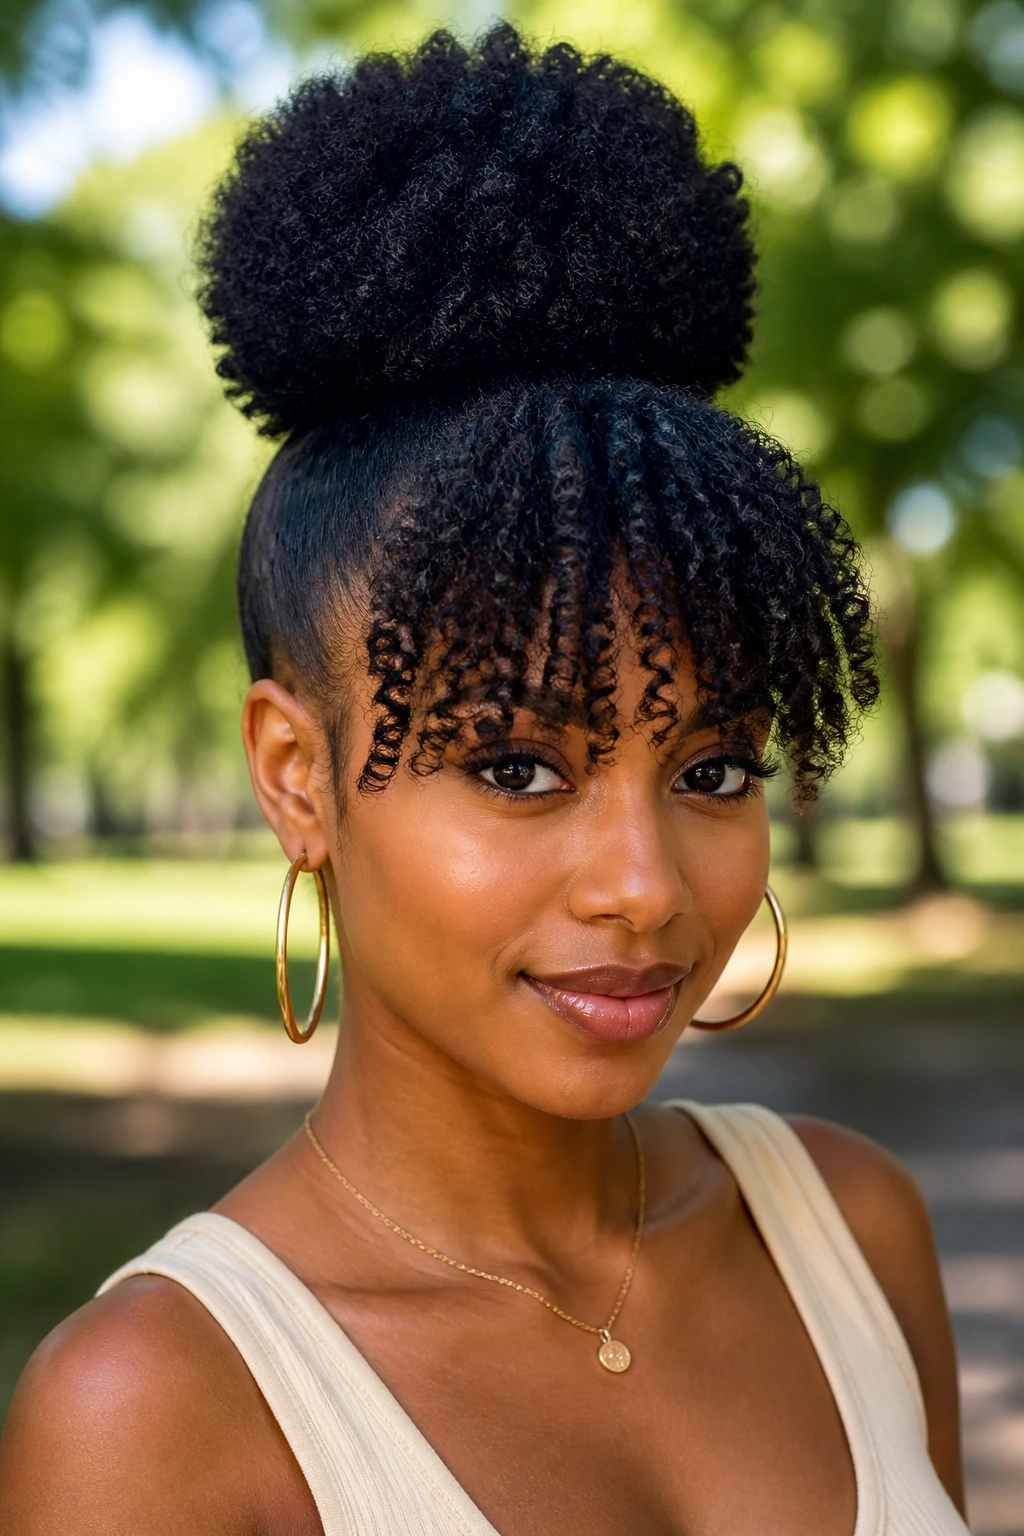
Sometimes you just want to get your hair off your neck and face without doing a complex braid pattern. A high puff is a classic, but adding bangs transforms the look from a “lazy day” style to something intentional and chic. It highlights the face and lets your natural texture shine at the crown.
The secret to a good high puff is the base. You need to gather your hair into a ponytail without pulling it so tight that you compromise your edges. Use a satin-lined scrunchie rather than a standard elastic band—standard elastics are notorious for snagging 4C hair and causing breakage at the hairline. Once the puff is secure, you can use bobby pins to shape your hair into a rounded, voluminous shape.
For the bangs, pull a section of hair from the front. You can twist these sections, braid them, or leave them as free-flowing coils. If you want more definition, use a tiny bit of curling custard on the ends of the bangs. This style is perfect because it takes less than ten minutes to pull together on a busy morning.
3. Two-Strand Twist Out

If you want to wear your natural hair out but need definition, a two-strand twist out is the gold standard. It creates a crinkle pattern that lasts for days, provided you protect it at night. This style is less about the twist itself and more about how you unravel it.
The Unraveling Process
- Wait until it is 100% dry: If you take your twists down while damp, you will get frizz.
- Oil your fingers: Put a light oil on your fingertips before you begin. This prevents the friction that creates flyaways.
- Twist in the direction of the pattern: Don’t just pull the twist apart; unwind it the same way you twisted it.
The beauty of a twist-out is the volume. On day one, it might look a bit flat or tight. By day three, as the hair expands and gets bigger, it often looks even better. This style thrives on the “bigger is better” philosophy.
4. Flat Twists with Ends Tucked

Flat twists are essentially cornrows but with a two-strand twist technique. They are often easier to install than traditional braids if you are self-styling, and they place less tension on the scalp. Creating a design where the ends are tucked away—meaning you twist them until the hair is gone and pin the tails—creates a sleek, polished look.
I have found that flat twists work better than braids for many 4C hair types because the twisting action creates a stronger grip on the hair strands. Braids can sometimes slip or unravel if the hair is very short or slippery with product. With flat twists, you are locking the hair into itself. These can be worn as a base for a wig or as a style on their own.
5. Halo Braid
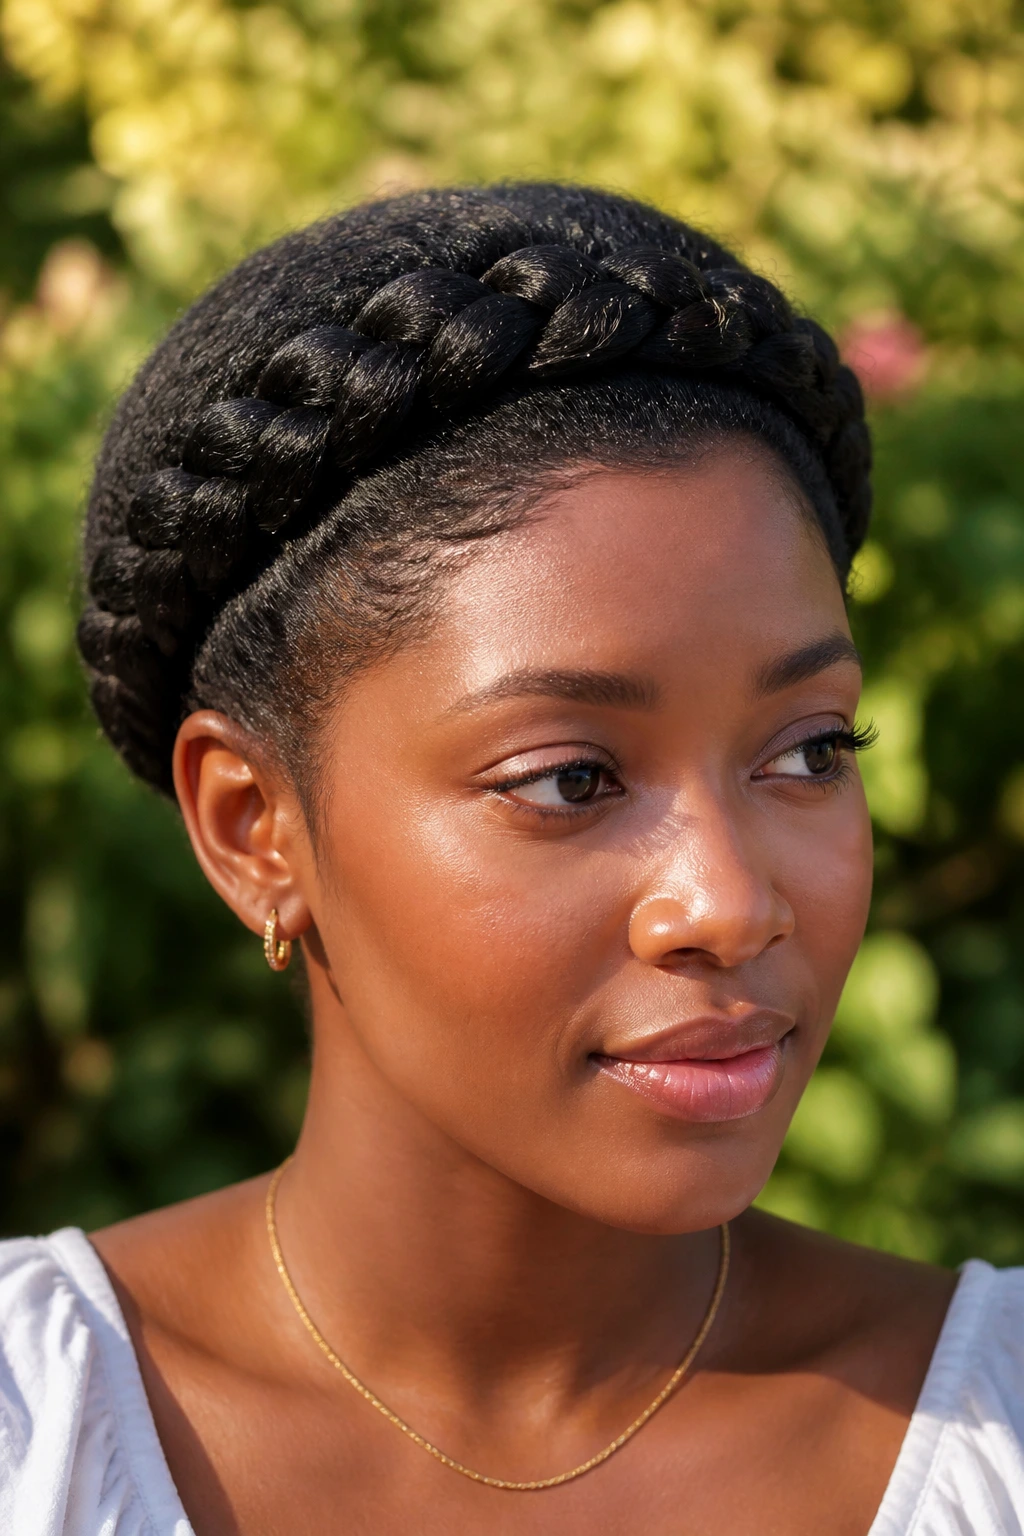
The halo braid is a crown braid that encircles your head. It is sophisticated, elegant, and perfect for events where you need a formal look. The challenge with 4C hair is keeping the braid smooth while navigating the density.
How to Achieve a Smooth Halo
- Parting: Start by creating a clean part where you want the braid to sit.
- Moisture: Ensure your hair is well-moisturized before braiding. Dry 4C hair snaps easily under the tension of a tight braid.
- The feed-in method: If your hair isn’t long enough to wrap all the way around, don’t be afraid to feed in extensions. It adds volume and creates that thick, regal halo effect.
- Tuck the tail: Pin the end of the braid underneath the starting point so it is invisible.
6. Bantu Knots

Bantu knots are a cultural staple, and they look incredible on 4C hair. They are essentially small, coiled buns that sit on the scalp. You can wear them as a protective style on their own, or you can wear them for a few days and then take them down to reveal a stunning, spiral curl pattern.
This is a two-for-one style. The knots keep your hair protected and stretched, which is great for length retention. When you release them, the texture is distinct and bouncy. The key is to make sure your knots are uniform in size if you want a consistent look. If you like the eclectic, bohemian vibe, varying the sizes of the knots creates a cool, asymmetrical aesthetic.
7. Afro Puff (The Classic)

There is something undeniably powerful about the classic Afro puff. It is the style that lets 4C hair do exactly what it was designed to do: defy gravity. To keep this looking intentional rather than disheveled, the “shaping” of the puff is everything.
I suggest using a damp sponge or a pick to gently tease the roots of your hair to expand it. Then, use a smooth brush with a tiny bit of holding gel to gently lay down the front hairline—only if you want that sleek look. If you prefer the natural, soft look, just leave the edges alone. The puff should sit high, centered, and round. If it is sitting too far back, it looks like a ponytail; sitting it forward creates that iconic silhouette.
8. Cornrowed Updo

If you want a style that lasts for two weeks or more, cornrows are the answer. A cornrowed updo pulls all the hair away from the face, which is incredibly practical for warmer weather or active lifestyles. The variation here is endless—you can do straight backs, zig-zags, or a circular pattern that meets in the middle of the head.
One specific tip for 4C hair: don’t braid too tightly. It is a common misconception that tighter braids last longer. In reality, tight braids cause traction alopecia, particularly at the hairline. You want the braid to be firm enough to stay put, but you should never feel like your scalp is screaming. If you have trouble gripping the hair, use a light pomade, not a heavy gel, to smooth the hair as you braid.
9. Perm Rod Set

A perm rod set on 4C hair creates a very defined, spiral look. It essentially forces your hair into a pattern it doesn’t naturally have, and it can last for quite a while. This is a great style if you are transitioning from heat damage or if you just want a break from your natural coil pattern.
The Success Factors
- The product matters: You need a high-hold setting lotion or a firm mousse. If you use a product that is too light, the curls will frizz immediately upon drying.
- Sectioning: Take your time with the sections. The rod needs to be completely wrapped with the hair laid flat against the rod. If you bunch the hair, you will get a lumpy curl.
- Drying: Use a hooded dryer. Air drying a perm rod set on dense 4C hair takes forever, and the dampness will cause frizz.
10. Crochet Braids
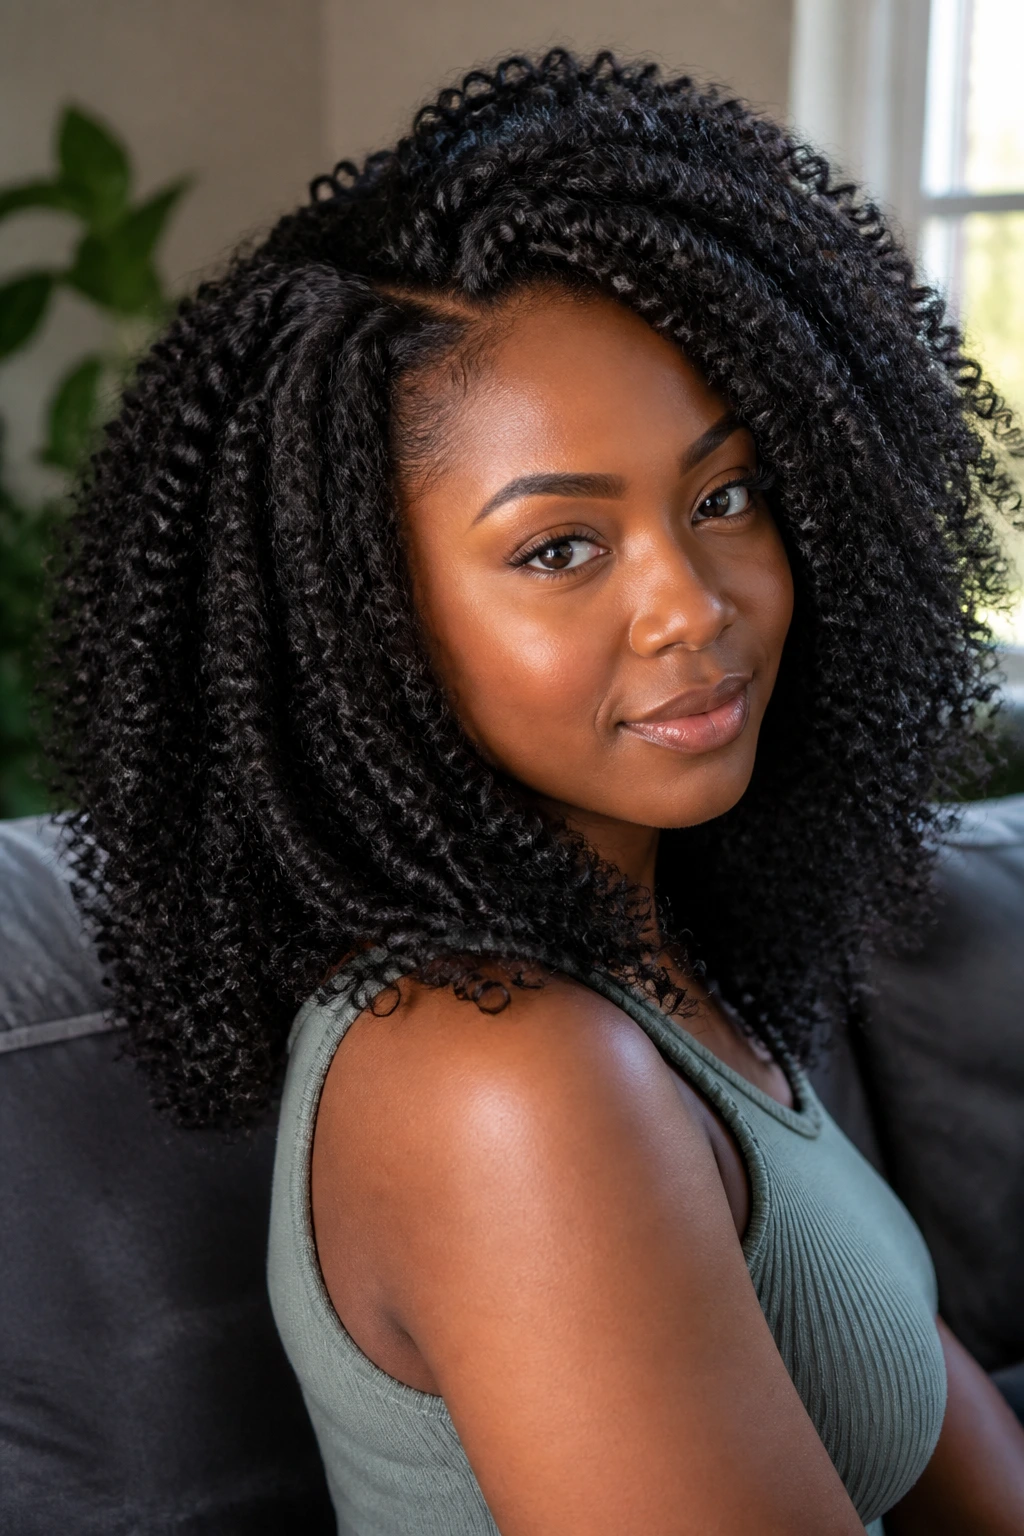
Crochet braids are the “cheat code” for natural hair styles. You cornrow your natural hair down in a simple pattern, and then use a latch hook tool to pull extensions through the braids. The result is a full, voluminous style that looks like a sew-in but puts zero tension on your natural hair.
Why this wins for 4C hair: Your natural hair is completely tucked away. It is not exposed to the elements, and it is not being manipulated. You can easily access your scalp to oil it, which is often difficult with other protective styles. Choose curly or kinky-textured crochet hair that matches your natural pattern—it blends seamlessly.
11. Marley Twists
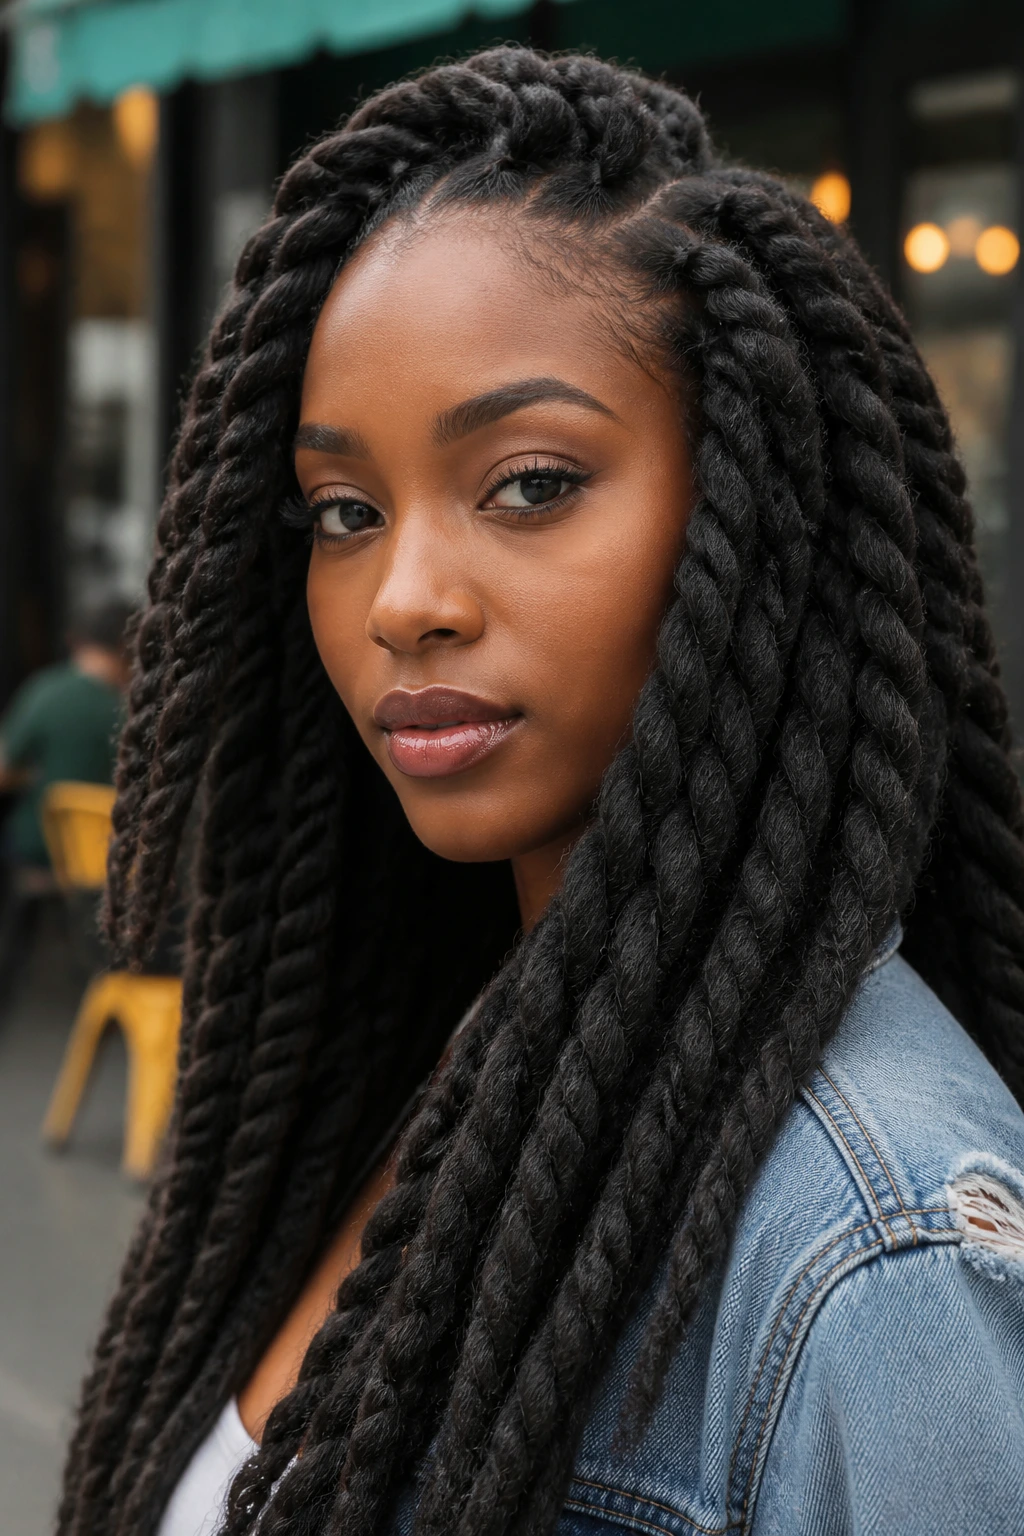
Marley twists are a chunkier, more textured version of the standard two-strand twist using extension hair. They are heavier than regular twists but offer a really rugged, natural look that feels very authentic to 4C texture. Because the hair used is coarse, it mimics the look of natural 4C hair that has been twisted.
These are excellent for when you want a “low-effort, high-impact” style. They are sturdy, they hold up well to washing, and they don’t unravel easily. The weight can be an issue if you use too much hair, so aim for a medium density. You want fullness, but you don’t want a migraine from the weight of your own hair.
12. Chunky Braids (Feed-in Style)

Feed-in braids are a technique where the braid starts with your natural hair and the extension is “fed” into the braid as it progresses. This creates a natural-looking start to the braid, avoiding that bulky knot at the scalp. Chunky feed-in braids are great because they take much less time to install than individual braids.
These are perfect for 4C hair because the scalp is easily accessible for oiling, and the styling options are versatile. You can put them in a ponytail, a bun, or just let them hang. The key to making these look premium is the neatness of the parts. Take your time with the parting—straight parts make a huge difference in the final look.
13. Wash-and-Go with Defined Coils
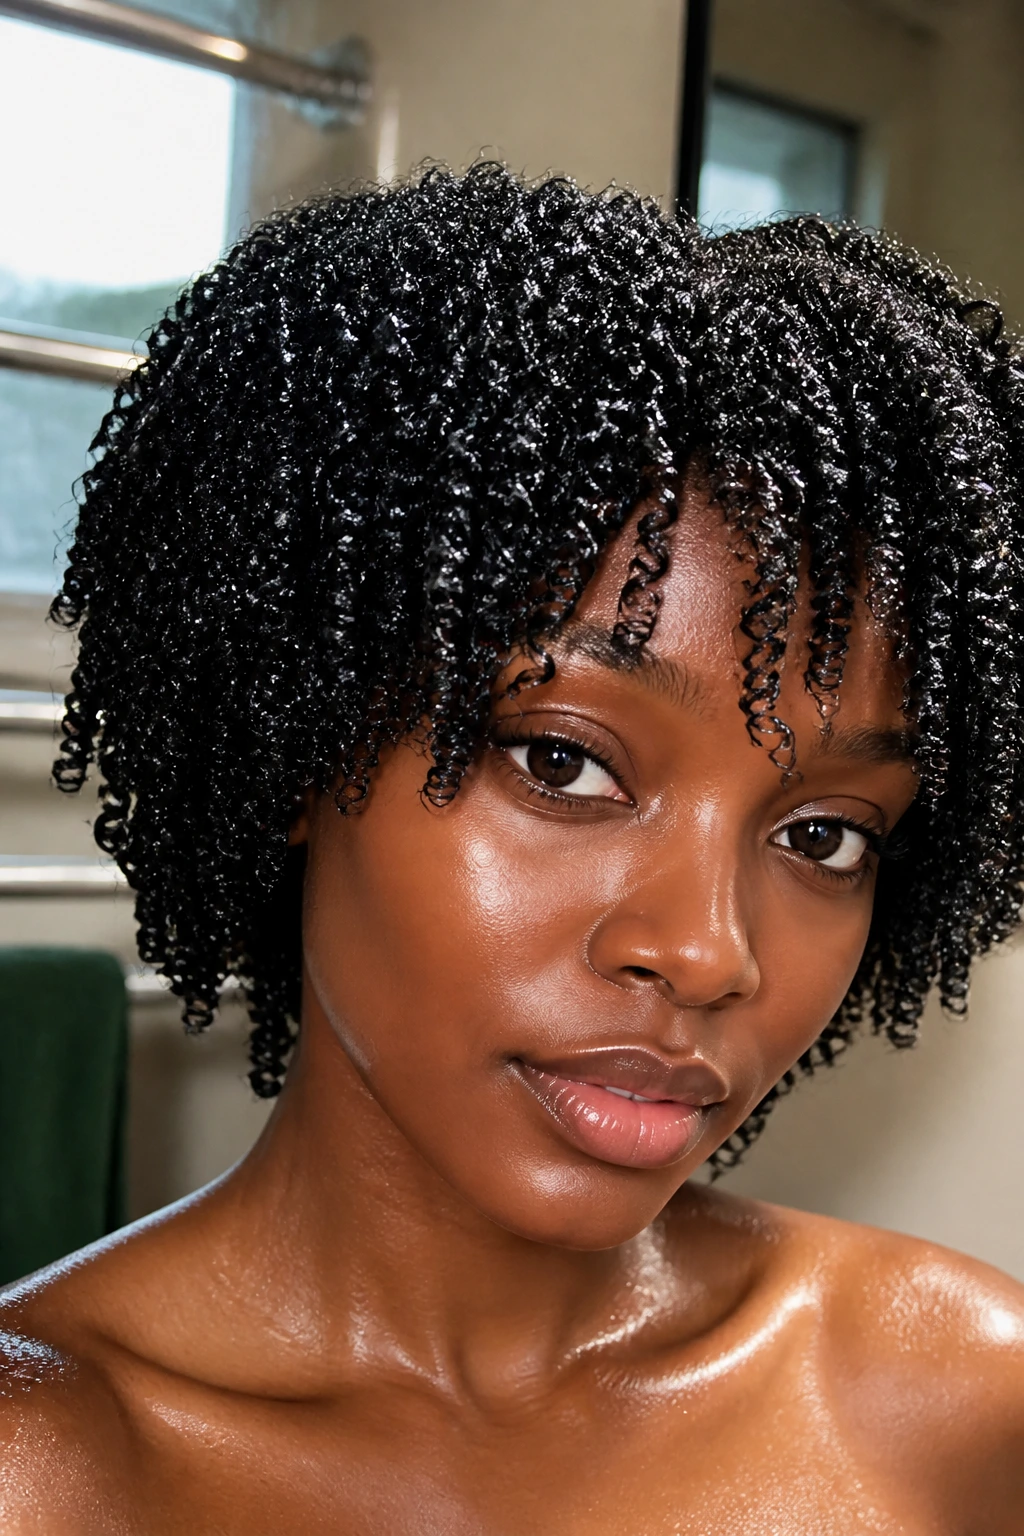
For a long time, the advice was “don’t do wash-and-gos on 4C hair.” That advice is outdated. You absolutely can, provided you understand the shrinkage. A wash-and-go is about defining the coil pattern with water, leave-in conditioner, and gel.
The Method
- Saturate the hair: Work in sections. Your hair must be soaking wet.
- Apply product to wet hair: Do not let it dry before adding product.
- Rake and shake: Use your fingers to rake the product through, then shake your head to encourage the coils to clump.
- Avoid touching: Once it is styled, do not touch it until it is 100% dry. Touching the hair while it is wet creates immediate frizz.
14. Half-Up Half-Down with Bun
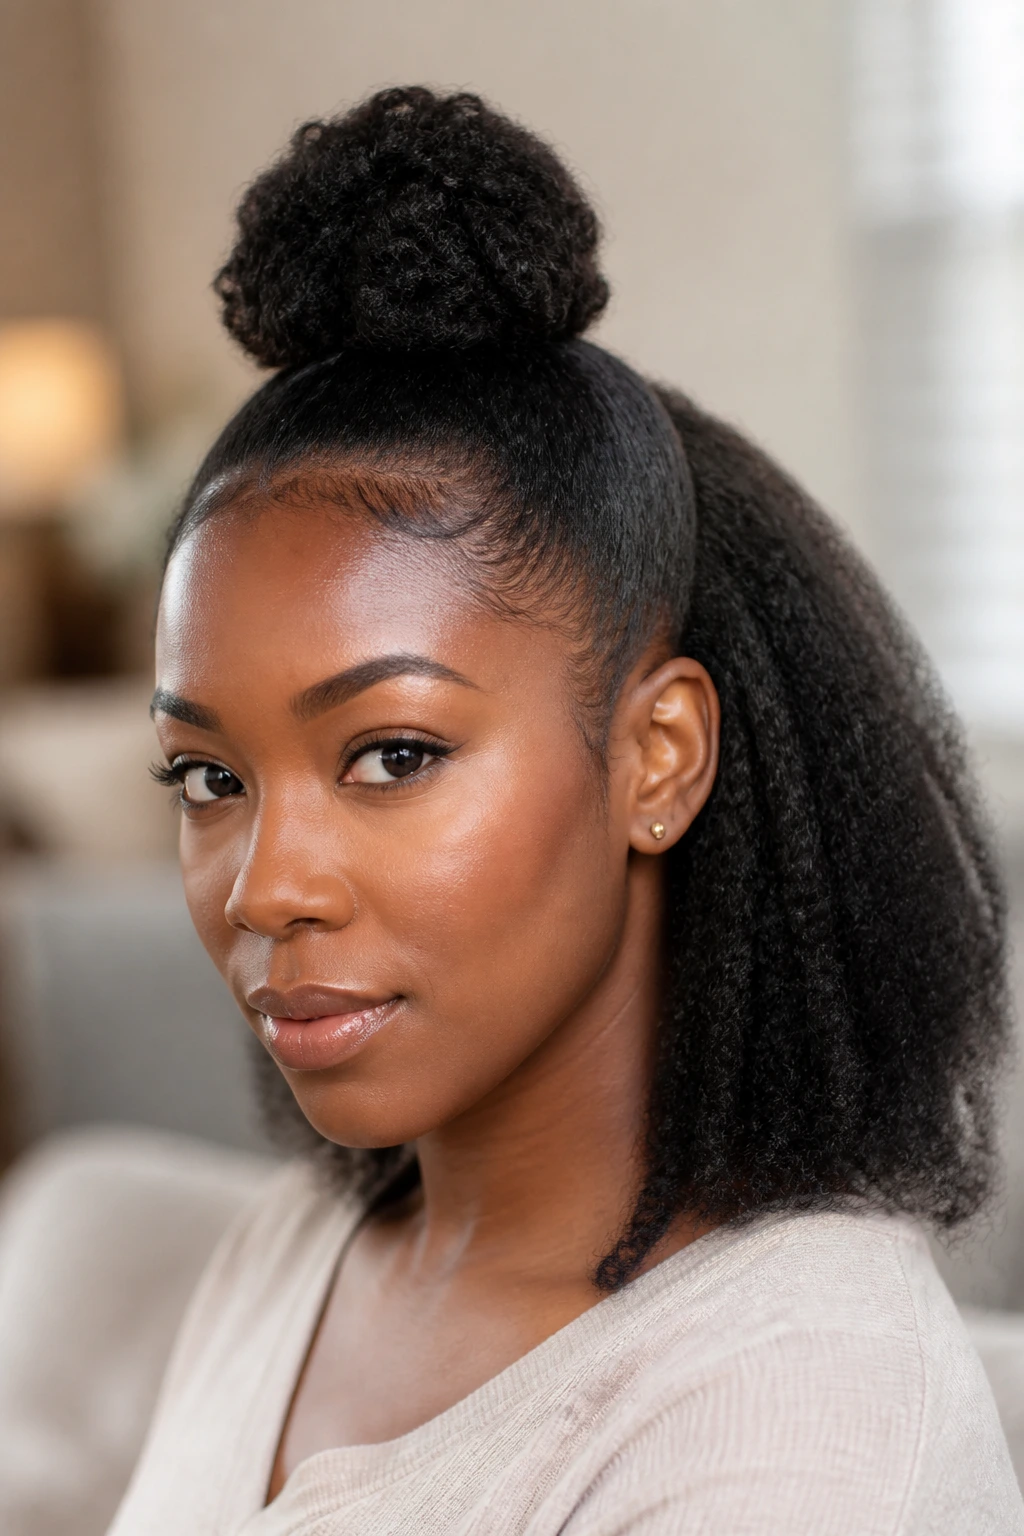
This is a fun, playful style that gives you the best of both worlds: the freedom of having hair down and the practicality of having it off your face. It is especially great for shorter natural hair that is in the “in-between” stage where it’s too short for a full high puff but too long to just leave alone.
The bun at the top adds height and volume, while the hair left down creates a nice frame for your face. To keep the transition between the bun and the loose hair looking smooth, use a little bit of gel to lay down the perimeter of the hair that is going into the bun. Leave the back section looser to allow for natural shrinkage.
15. Faux Locs

If you love the aesthetic of dreadlocks but aren’t ready for the permanent commitment, faux locs are the way to go. They provide the same protective benefits as box braids or twists, with a unique, textured look. Faux locs can be very heavy, so I always recommend the “goddess” style or using pre-looped hair to keep the weight down.
You wrap synthetic or human hair around your natural hair, which is usually braided down first. This creates a sturdy foundation. Because 4C hair has so much natural texture, the hair usually grips the wrapping hair very well, meaning the locs won’t slide off easily.
16. Fulani-Inspired Braids

Fulani braids are characterized by a central braid going down the middle of the head and braids looping toward the temples, often accessorized with beads or gold cuffs. The style is iconic, beautiful, and deeply rooted in tradition.
It works exceptionally well for 4C hair because it mixes cornrowing (which protects the hair) with individual braids (which allow for movement). The cornrows secure the base, and the beads add weight that helps pull the braids down, keeping them from sticking straight up—a common issue with freshly braided 4C hair.
17. Mohawk with Side Twists
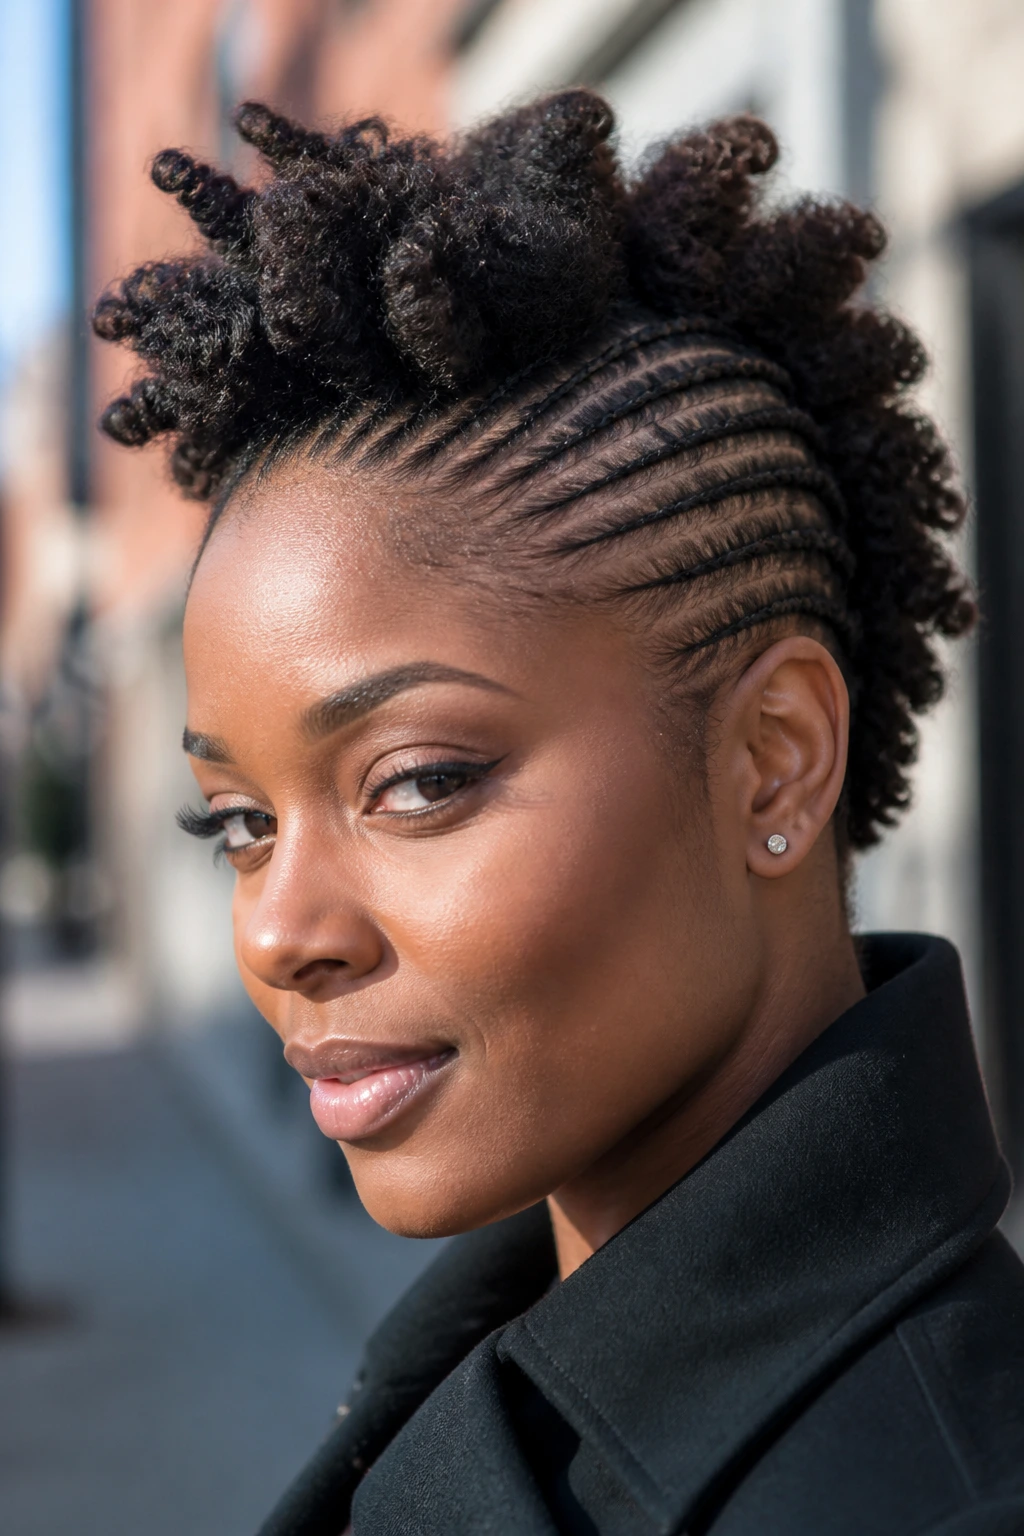
A mohawk is a bold, confident statement. You don’t have to shave the sides of your head to achieve this; you can simply twist or braid the sides upward to create the illusion of a fade. This style is brilliant for 4C hair because it embraces the height and volume that 4C texture naturally provides.
Focus on creating very tight, flat twists on the sides. The more tension you apply to the sides, the sleeker the illusion of the “shaved” side will look. The top, or the mohawk section, can be styled into a series of mini puffs or coiled twists to emphasize the verticality of the look.
18. Sleek Low Bun
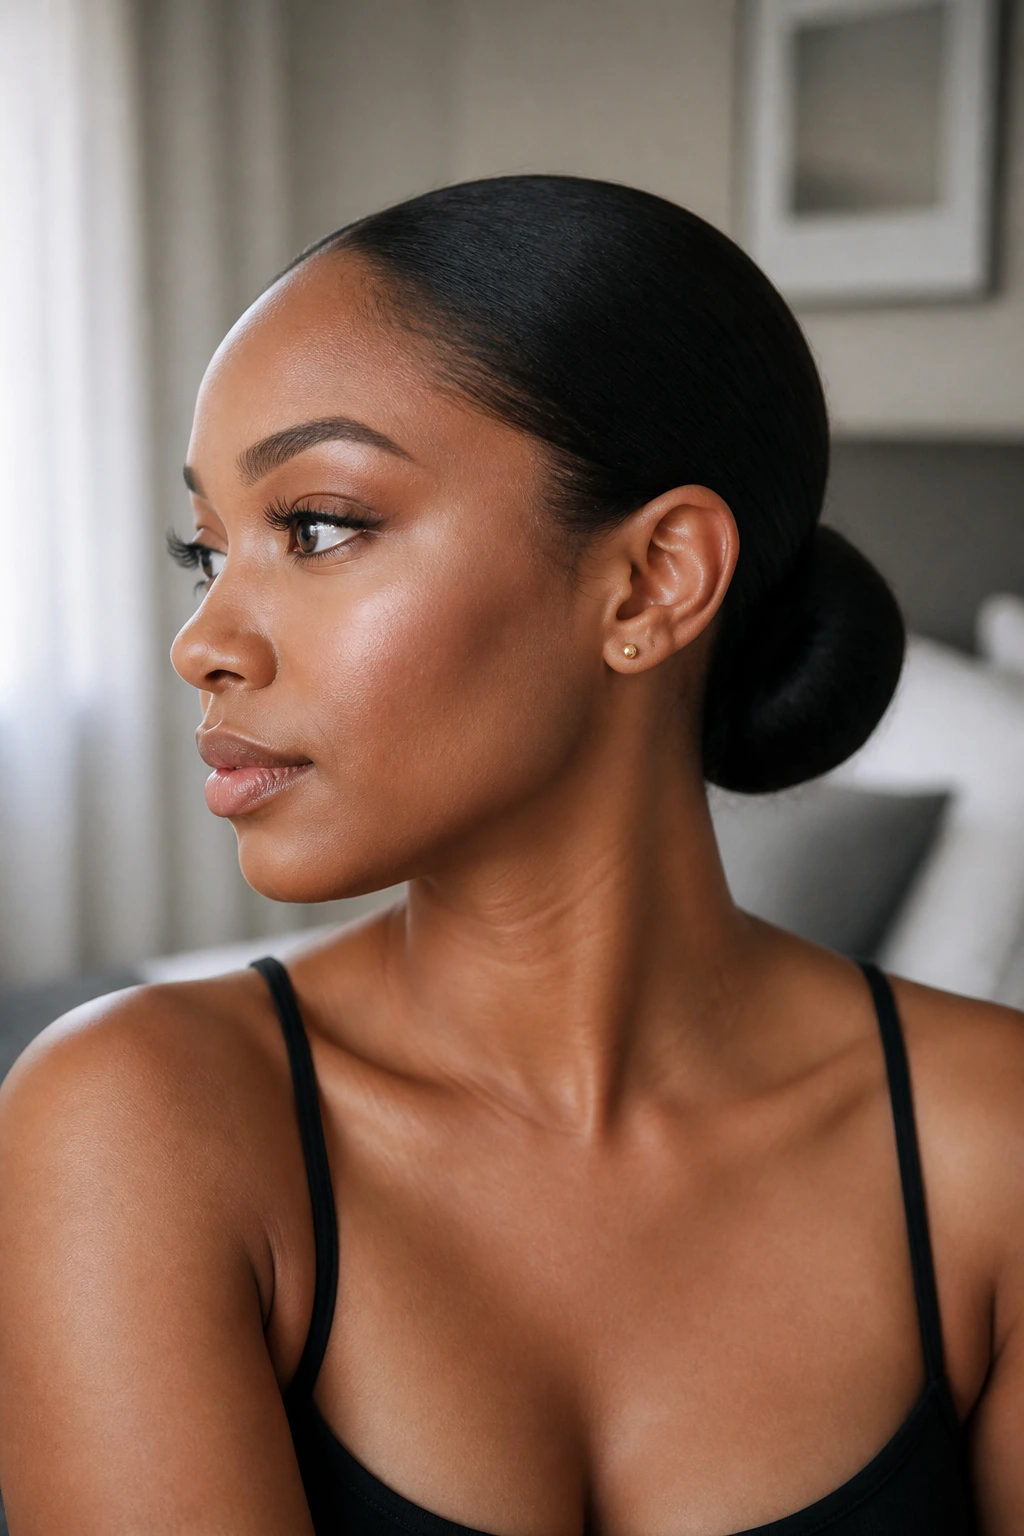
Sometimes simple is best. A sleek low bun is the epitome of understated elegance. It is also the ultimate protective style because the ends of your hair are tucked safely inside the bun, away from the drying air and friction of your clothes.
To get the sleek look without damaging your hair, do not force the hair into a bun. Start by moisturizing thoroughly. Use a soft-bristle brush (boar bristle is good) to gently smooth the hair into a ponytail. Add a little light oil to the ponytail, then roll it into a bun. Secure it with a silk or velvet scrunchie. The key is in the smooth-down process—take your time.
19. Box Braids (Medium Length)
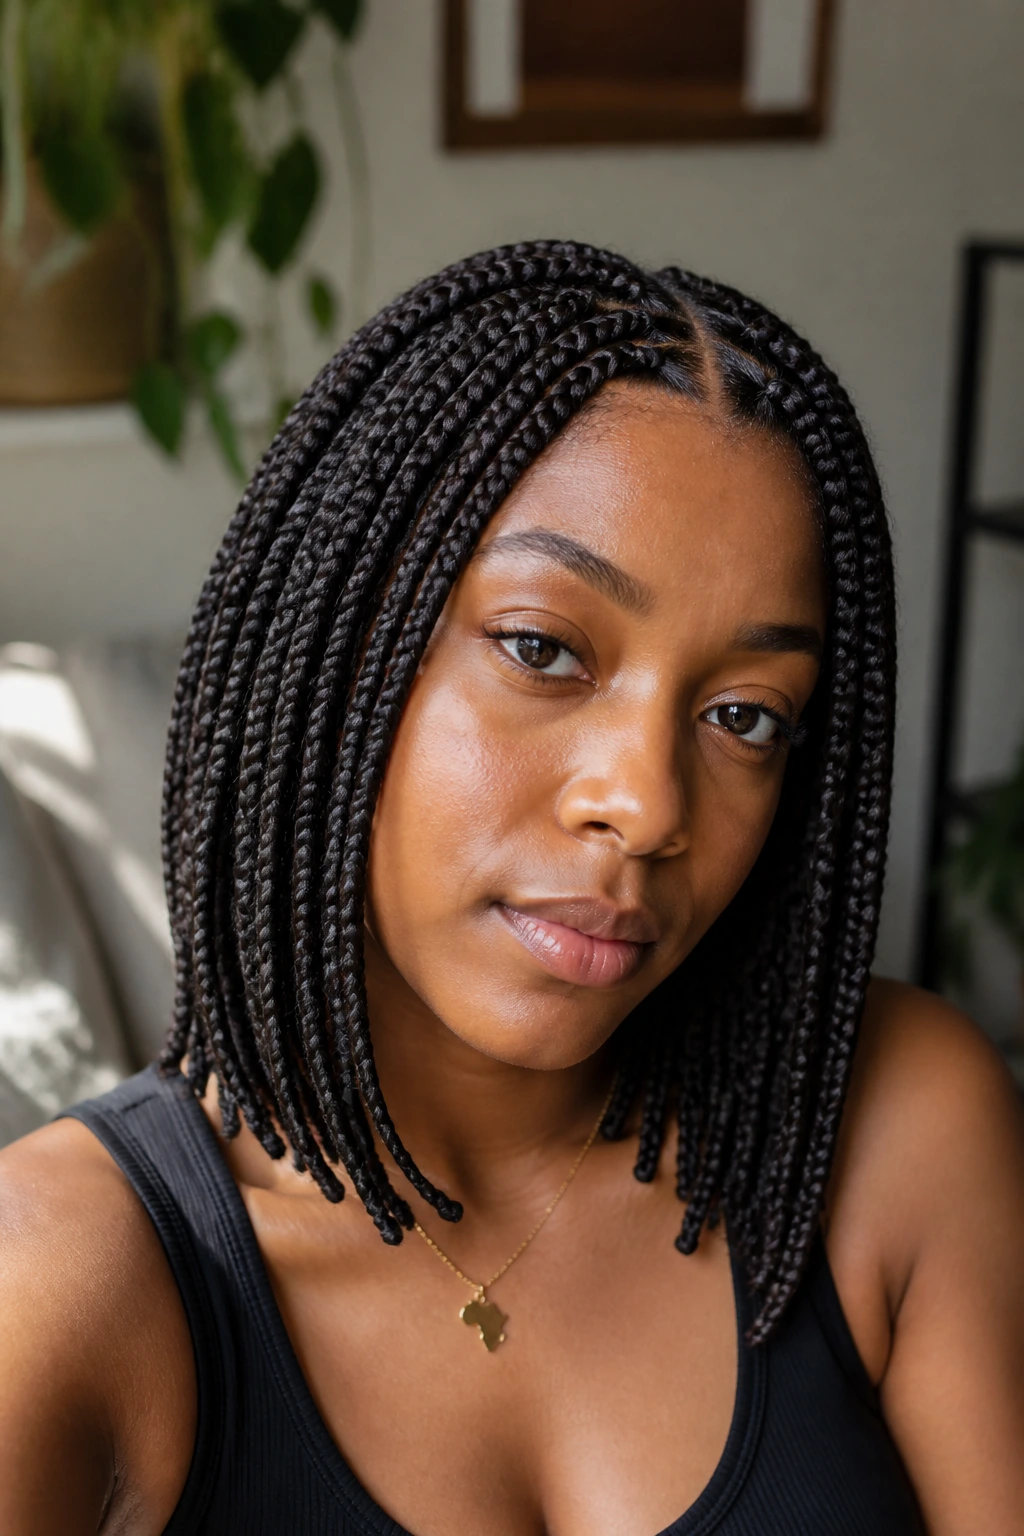
Box braids are the classic protective style for a reason. They last for weeks, require almost zero daily maintenance, and look good in almost any setting. For 4C hair, the trick is to not braid too tightly at the root.
Many people make the mistake of braiding the very first inch of hair too tightly. This is the recipe for hairline thinning. Ask your braider—or yourself—to braid the first few turns loose, then tighten the braid slightly as you move down. Also, soak the ends of the braids in hot water to seal them. This keeps the hair from unraveling and makes the braids feel much softer and more flexible.
20. Passion Twists

Passion twists are a softer, more bohemian alternative to Marley twists. They use “water wave” braiding hair, which is much softer and has more of a curl pattern. The result is a style that looks more romantic and relaxed.
Because the hair is softer, these twists have a tendency to get frizzy faster than Marley twists. Embrace that. The frizz is part of the aesthetic. If you try to keep passion twists looking “perfect,” you will be re-twisting them every two days. Let them do their thing—they look best when they have a little bit of texture and wear.
21. Shingled Coils
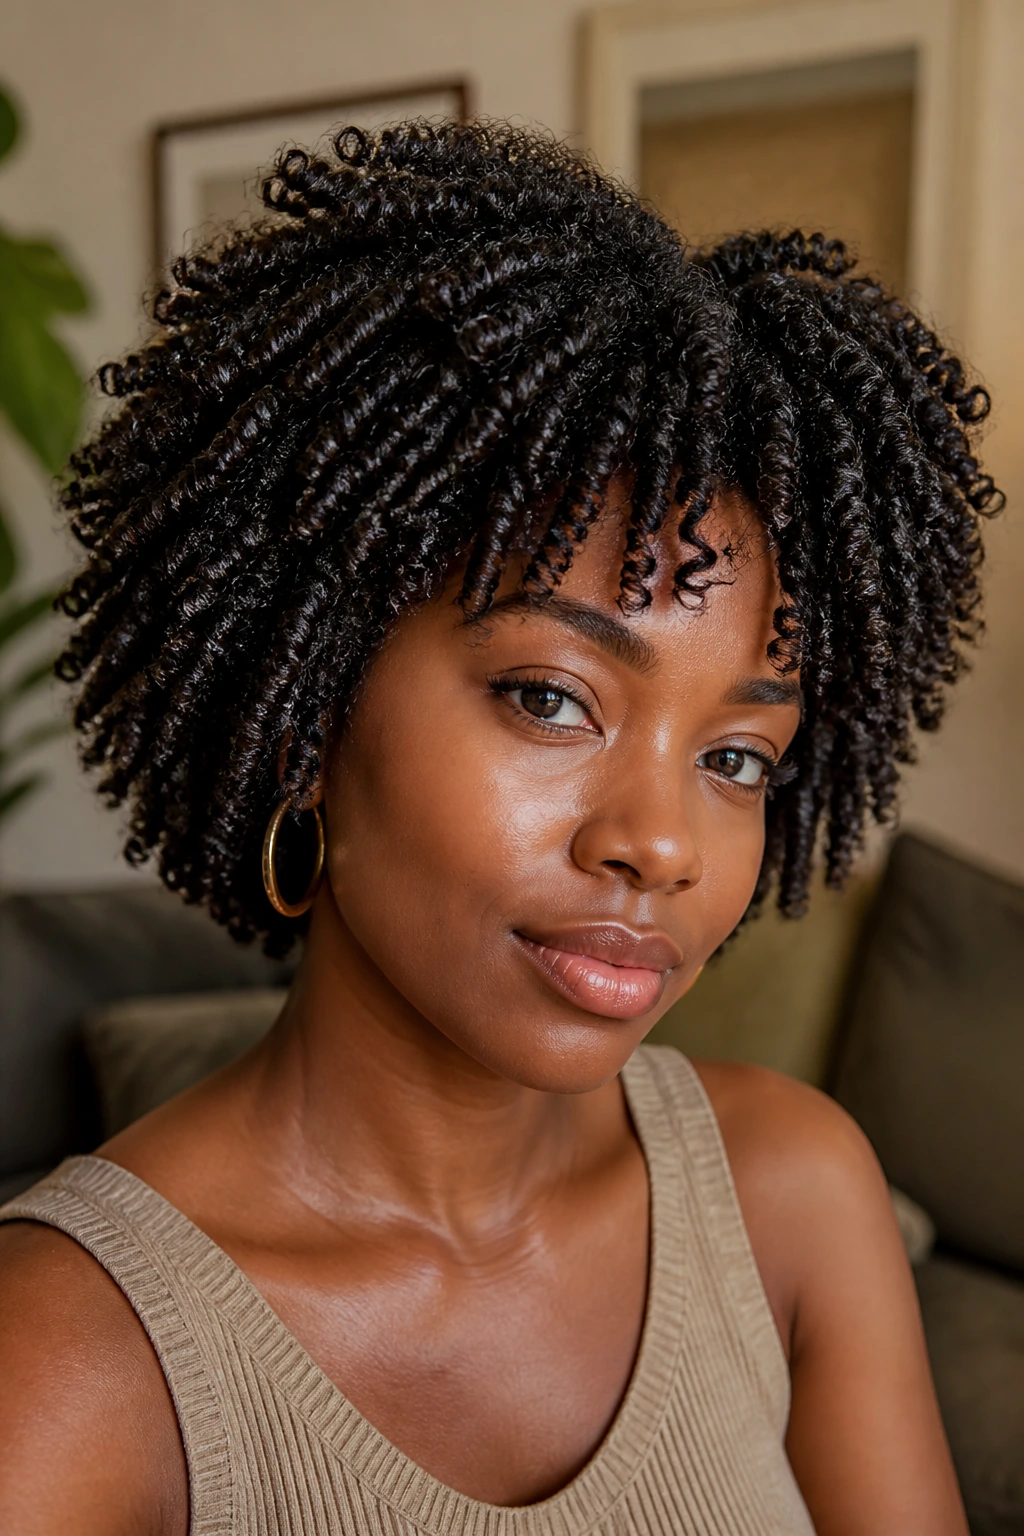
Shingling is a technique that involves separating the hair into tiny sections and applying product to each one to define the individual coils. It is incredibly time-consuming, but the result is a level of definition that is difficult to achieve with any other method.
You need a creamy, defining product for this—something with a bit of “slip” so you can move through your dense coils without snagging. After you have shingled the entire head, sit under a hooded dryer or use a diffuser. Do not touch the hair until it is fully set. The end result is a head full of perfect, springy coils.
22. Headwrap Styling

Never underestimate the power of a beautiful headwrap. Sometimes, the best protective style is one that lets your hair rest completely. A headwrap is not just for days when your hair isn’t “done”—it is a legitimate style choice.
You can tuck your hair away in a simple bun or a few loose twists underneath the wrap. The fabric protects the hair from friction. There are hundreds of ways to tie a wrap, from the classic “high turban” look to side knots. Use a satin or silk scarf underneath the patterned wrap to ensure the fabric doesn’t dry out your hair.
23. Butterfly Locs

Butterfly locs are a variation of faux locs that have a “distressed” or “looped” look. They have little bumps along the length of the loc, giving them a very organic, textured appearance. This style is perfect if you have 4C hair because the texture of the hair used for the locs blends effortlessly with your natural texture.
The installation involves wrapping the hair in a way that creates these intentional loops. They are lightweight, stylish, and can be worn for weeks. Because the locs are distressed by design, you don’t have to worry about them looking messy after a few days—they are supposed to look that way.
24. Tapered Cut
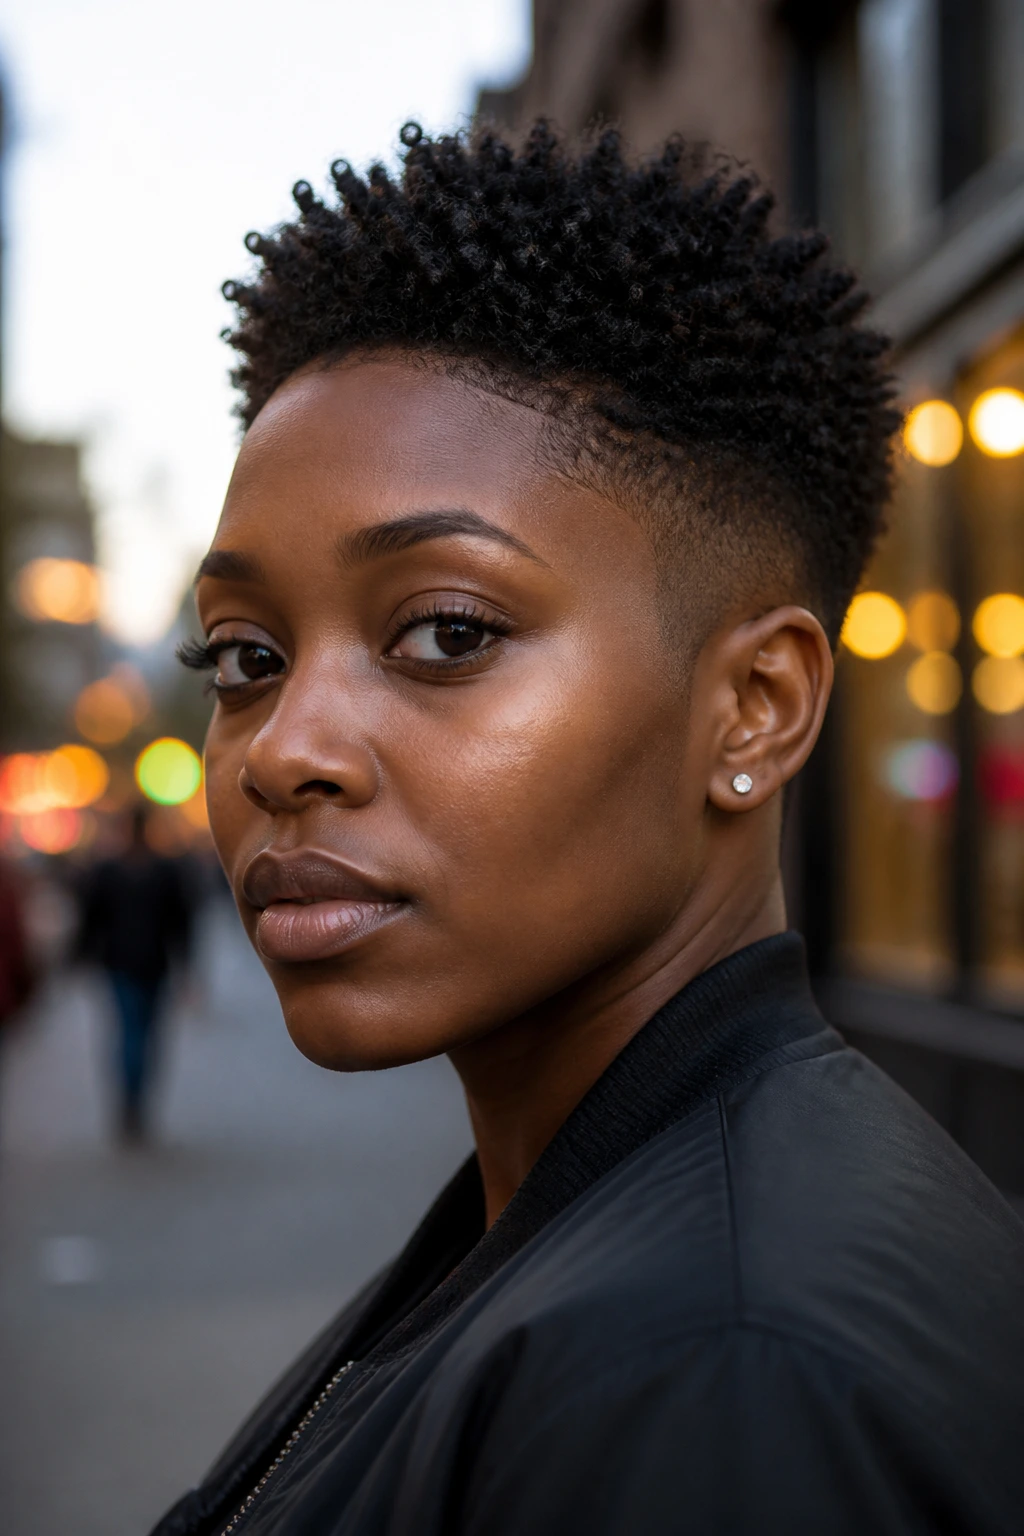
If you are tired of the daily maintenance of long hair, consider a tapered cut. It is a bold move, but it is incredibly liberating. You keep the length on top and fade the sides, creating a sharp, structural look that highlights your face and neck.
This style allows you to embrace your natural texture without the burden of detangling long strands. It is easy to wash, easy to moisturize, and easy to style. You just need a tiny bit of gel on the top to define the curls. It is the ultimate expression of confidence.
25. Goddess Braids

Goddess braids are essentially large cornrows, usually done with extensions, that are styled in an updo or pulled back. They are larger, thicker, and more formal than standard cornrows. They are the “glam” version of braided styles.
Because they are large, they take less time to install. The key to goddess braids is the “goddess” aspect—leaving out little tendrils of curly hair at the start of the braid. This softens the look immensely. Be careful with those curly tendrils, though; they can tangle if you don’t keep them moisturized. A little leave-in spray on the ends of those curls goes a long way.
Final Thoughts
At the end of the day, the best style for 4C hair is the one that makes you feel confident and keeps your hair healthy. Remember that your hair is a delicate fabric, not a chore to be completed. Every time you choose a protective style, you are giving your hair a break from the outside world.
Patience is your greatest tool. Whether you are spending three hours on mini twists or ten minutes on a puff, take your time with the process. Detangle gently, moisturize thoroughly, and protect your hair at night with a satin bonnet or pillowcase. 4C hair is not “difficult”—it is just high-needs, and when those needs are met, it rewards you with incredible volume, texture, and strength. Pick a style that fits your life, keep your routine simple, and enjoy the versatility.
