



Getting to know your natural hair texture is a lifelong journey. It is rarely a straight path from one product to the next, and the way your hair reacts to humidity or tension can change on any given day. Choosing a hairstyle isn’t just about how you want to look at a dinner party or a work event; it is about finding that delicate balance between self-expression and the health of your scalp and strands.
You want something that looks intentional and polished, but you also need to ensure you are not sacrificing your hair’s integrity for the sake of a trend. Protective styles are fantastic, but only when they are installed with care and maintained with consistency. A style that lasts for six weeks can be a blessing for your morning routine, but it can also be a nightmare if the tension is too high or the scalp care is neglected.
Every person’s hair density, porosity, and curl pattern are unique. What works for a friend with 4C coils might sit differently on someone with 3C curls. The key is to look at these styles as frameworks rather than rigid rules. You can adjust the parting, the length, the size of the braids, or the accessories to make any look feel like your own. When you walk out the door, your hair should feel like an extension of your personality, not a constraint.
1. Traditional Box Braids

Box braids are the reliable workhorse of the natural hair world. They are incredibly versatile, allowing you to wear them in a high bun, a half-up style, or simply loose over your shoulders. The key to a clean look is, unsurprisingly, the parting. A rat-tail comb with a metal pin helps ensure the grid is sharp and consistent, which keeps the tension even across the scalp.
Why They Remain a Staple
They are perhaps the most protective of all styles because the natural hair is completely enclosed within the extension hair. This shields your ends from environmental stressors like wind, friction from cotton pillowcases, and the need for daily manipulation. When properly installed—meaning the braid base is not too tight—they give your natural hair a much-needed break from the comb and brush.
Maintaining the Freshness
To keep them looking neat for weeks, invest in a good mousse. Apply a light layer of foam to the braids, tie them down with a silk or satin scarf for about ten minutes, and you will flatten the flyaways instantly. When your new growth starts to fuzz up, resisting the urge to re-braid the roots too tightly is the secret to avoiding traction alopecia.
2. Fulani-Inspired Braids
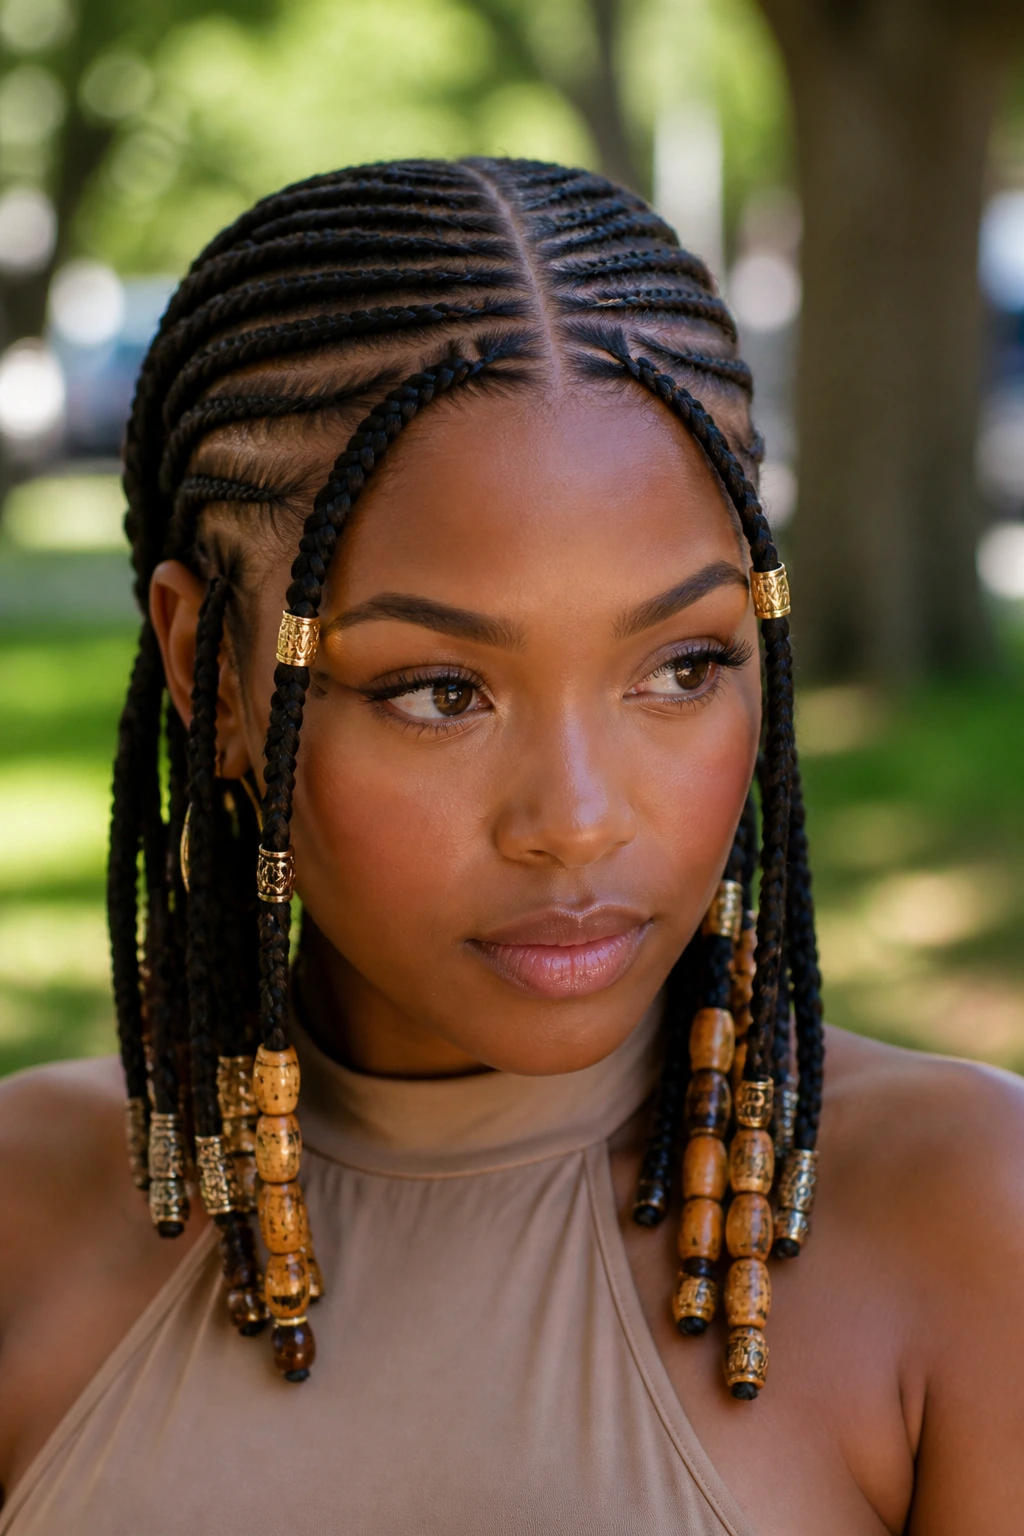
Named after the Fula people of West Africa, this style combines cornrows with bohemian aesthetics. It typically features a center part and a braid going down the middle of the head, with symmetrical braids on the sides. The signature element is the use of beads, cuffs, or shells on the ends or along the length of the braids.
The Art of Placement
The beauty of this style lies in the detailing. You aren’t just braiding; you are curating. If you choose to add gold or silver cuffs, place them at the bends of the braids to add a little bit of glint without weighing the hair down. It is essential to keep the beads lightweight. Too many heavy beads on a single braid can cause the hair to snap, especially near the delicate hairline.
Scalp Care Essentials
Since the cornrow sections expose more of your scalp than full box braids, you have easier access to your skin. Keep a small applicator bottle filled with a mix of tea tree oil and jojoba oil. A quick, gentle massage with this mix every few days will stop the itch and keep your scalp hydrated and healthy without needing to disturb the style.
3. Bantu Knots
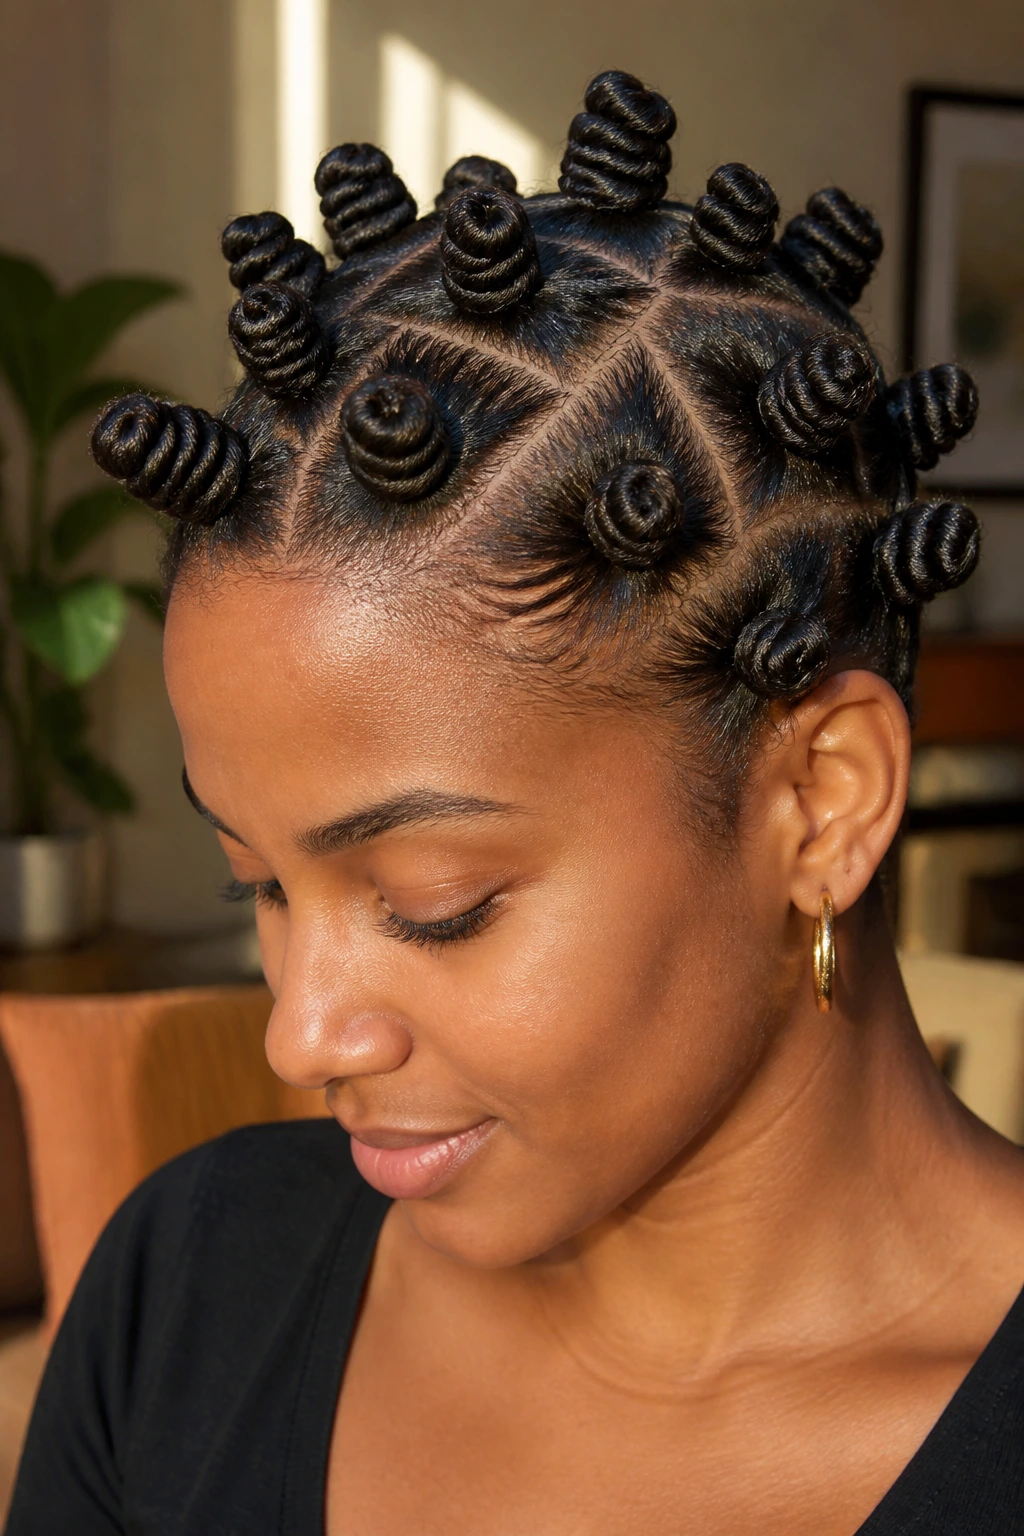
Bantu knots are both a protective style and a styling technique. You section your hair into small, square, or triangular parts and twist or braid the hair before coiling it into a small bun against the scalp. It is a stunning look that highlights your facial features and creates a beautiful, sculptural silhouette.
Turning Knots into Curls
One of the best-kept secrets of Bantu knots is what happens when you take them down. If you perform this style on slightly damp hair with a bit of shea butter or light curl cream and let it dry completely—ideally overnight—you get a tight, defined curl pattern that lasts for days. It effectively doubles the wear of the style.
Tips for Comfortable Knots
If you find the knots are too tight, your scalp will let you know. The goal is to coil the hair around its own base, not to pull it taut against the roots. If you are sleeping in them, use a silk bonnet. The knots themselves can be a little uncomfortable to lay on, so positioning them strategically—avoiding the very center back if you are a back sleeper—makes a significant difference in sleep quality.
4. Passion Twists
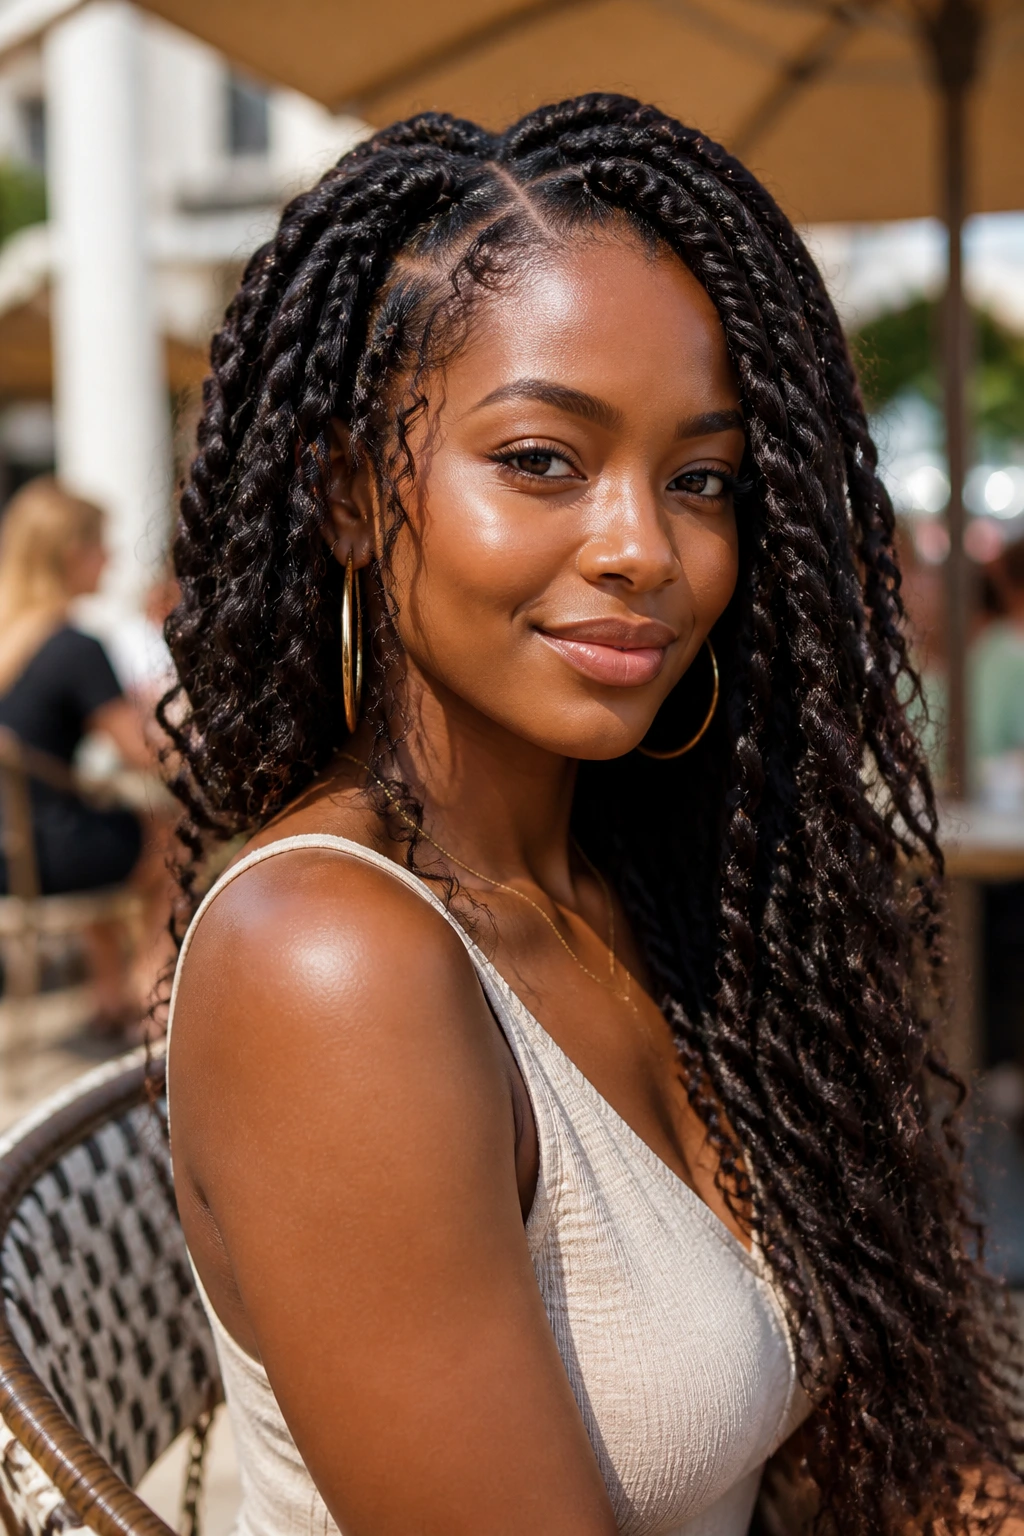
Passion twists offer a softer, more romantic look than traditional Senegalese or Marley twists. They use water wave braiding hair, which is known for its curly, beachy texture. The result is a style that looks slightly messy in the best way possible—it feels effortless and voluminous right from the moment of installation.
Selecting the Right Hair
Not all water wave hair is created equal. Some brands are prone to matting and tangling within the first week. Look for hair that has a slightly synthetic sheen but still feels soft to the touch. If the hair feels plasticky or overly stiff, it will not hold the twist well and will likely unravel sooner than you would like.
Managing the Frizz
These twists are designed to look a bit bohemian, but there is a line between “boho chic” and “bird’s nest.” If the ends start to get frizzy, you can trim them slightly with a sharp pair of hair scissors. A little bit of lightweight silicone-free serum can help smooth down the frizz without causing the twists to lose their signature bounce and shape.
5. Feed-in Cornrows

Feed-in braids have revolutionized the cornrow game. Instead of starting the braid with a bulky knot of extension hair at the root, you “feed” small pieces of hair into the braid as you go. This creates a natural, tapered start that looks like the hair is growing directly out of your scalp. It is incredibly sleek and minimizes tension on the hairline.
The Importance of Tension
Because these braids look so seamless, there is a temptation to make them extremely long or complex. Be wary of the weight. Even if the installation is seamless, too much extension hair can lead to heavy braids that pull on your scalp. Ask your stylist to use less hair at the nape of the neck to balance the weight distribution.
Edge Maintenance
Since your edges are exposed, this style is the perfect excuse to master your edge control routine. Use a soft boar bristle brush to lay your baby hairs, but don’t overdo it with the product. Too much gel will just lead to flaking and build-up, which can be irritating after a few days. A small dab of water followed by a tiny amount of pomade is usually enough.
6. Flat Twists
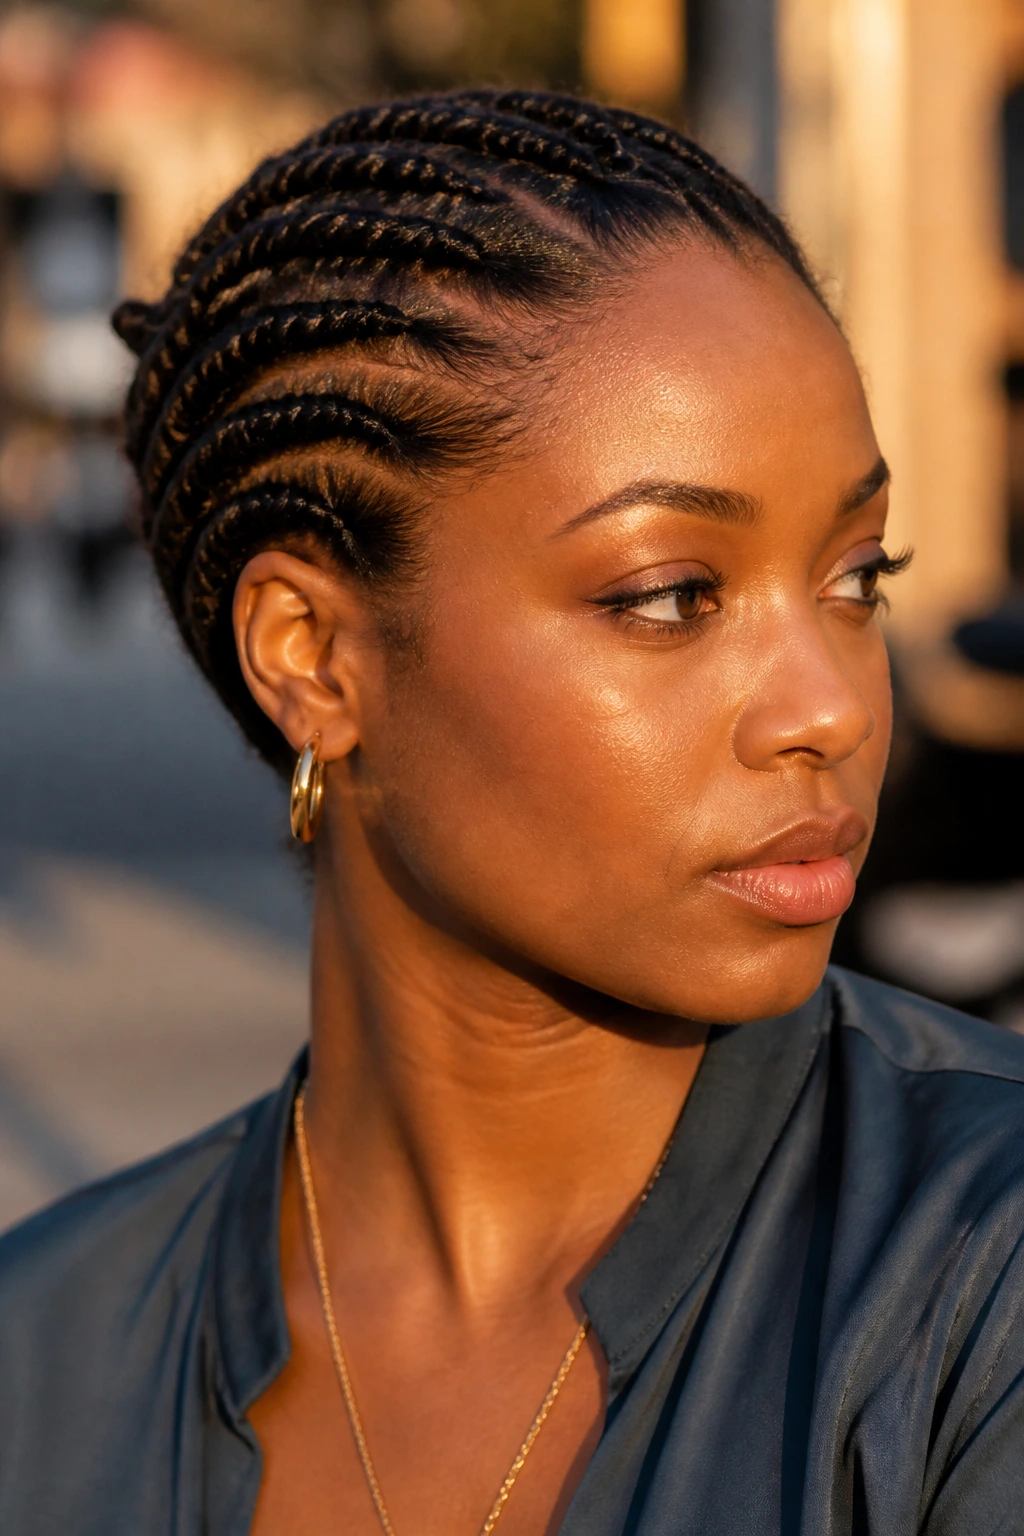
Flat twists are the sophisticated cousin of cornrows. They lie completely flat against the scalp, but because they are made of two strands twisted together rather than three-strand plaits, they often look smoother and more refined. They are excellent for natural hair because they require very little manipulation and put less stress on the cuticle.
Versatility in Styling
You can wear flat twists as a final style, usually pulling the ends back into a low bun or a chignon, or you can use them as a foundation for a sew-in weave. They are also brilliant for creating a heatless curl effect. If you flat-twist your damp hair and let it set, you will have a beautiful, elongated wave pattern when you unravel them.
Technique Matters
The secret to neat flat twists is tension. You want to pick up hair consistently. If you pick up large chunks in one spot and tiny pieces in another, the twist will look lumpy. Keep your hands close to the scalp as you work. This isn’t just for neatness; it also ensures the twist stays secure so you don’t have to redo them every couple of days.
7. Goddess Braids
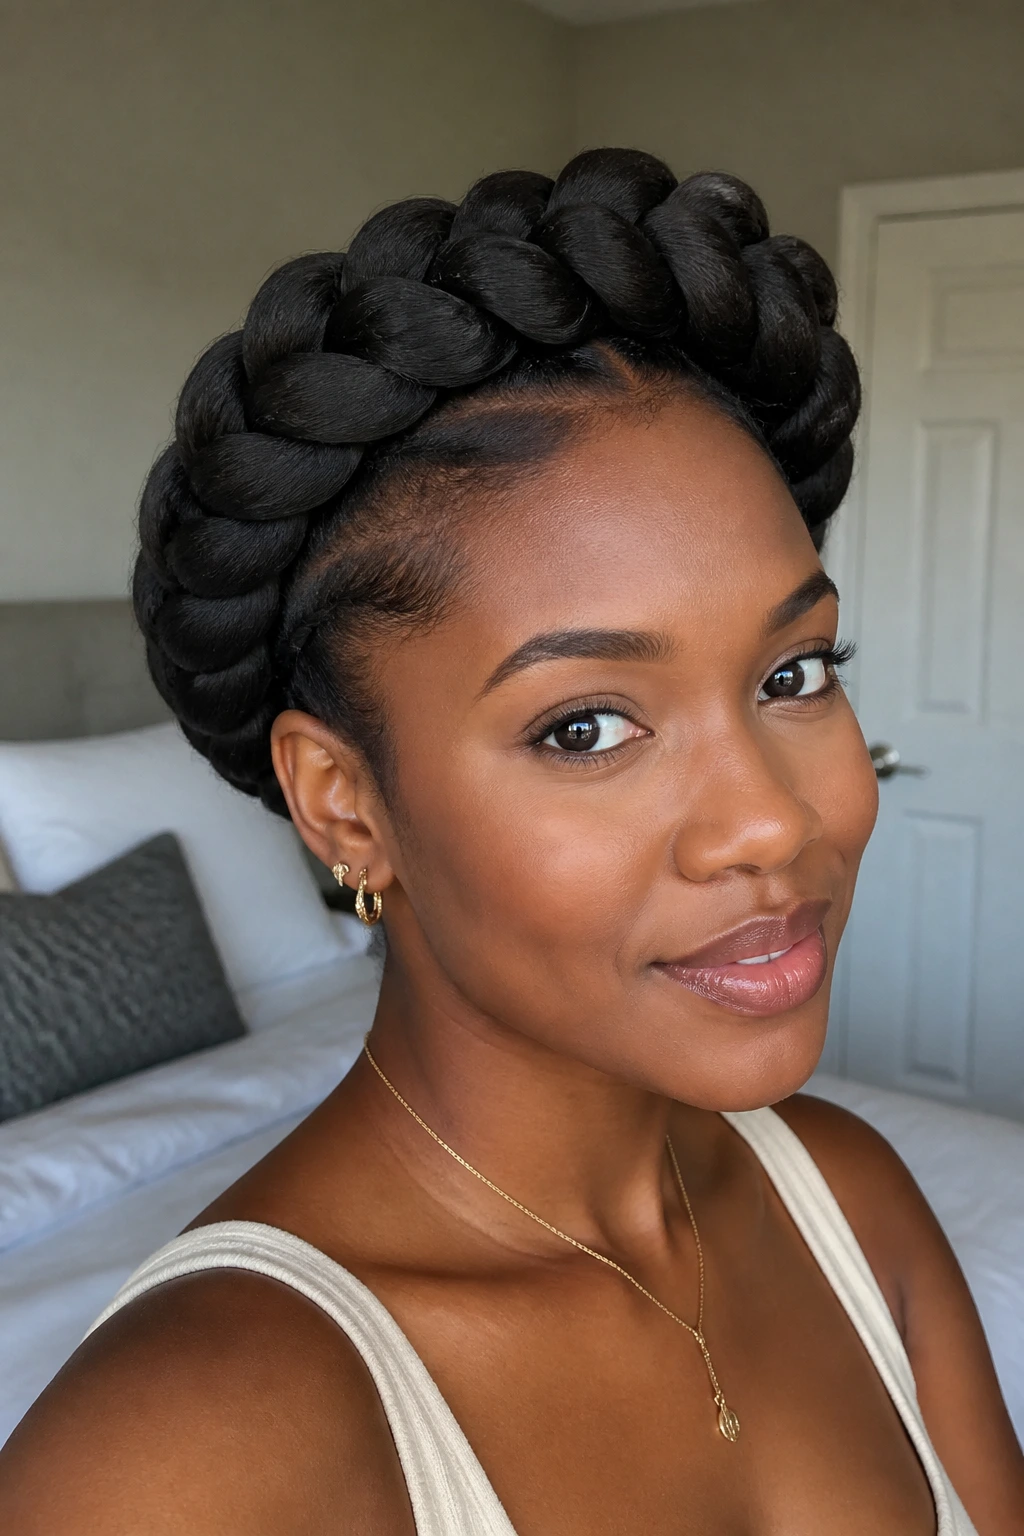
Think of Goddess braids as the jumbo version of cornrows. They are thick, elegant, and often styled in a crown or a sleek, swept-back look. Because they use so much more hair, they are often quicker to install than individual braids. They offer a regal aesthetic that is perfect for events or simply when you want to feel put-together without spending hours in a salon chair.
Styling the Crown
These braids are often styled so that they frame the face or create a halo effect. If you have a rounder face, having the braids swept back can create a beautiful, elongating effect. If you have a more angular face, having a few braids frame the forehead can soften your features. Play with the positioning in the mirror before you settle on a final pattern.
Protecting the Ends
With jumbo braids, the ends are prone to unraveling. You can dip them in boiling water to seal them, but be careful—ensure the braids are long enough that you aren’t dipping the hair too close to your scalp. A safer bet is to use small, clear hair elastics at the very tip of each braid to secure them firmly, then hide the elastic with a small bit of extension hair.
8. Senegalese Twists
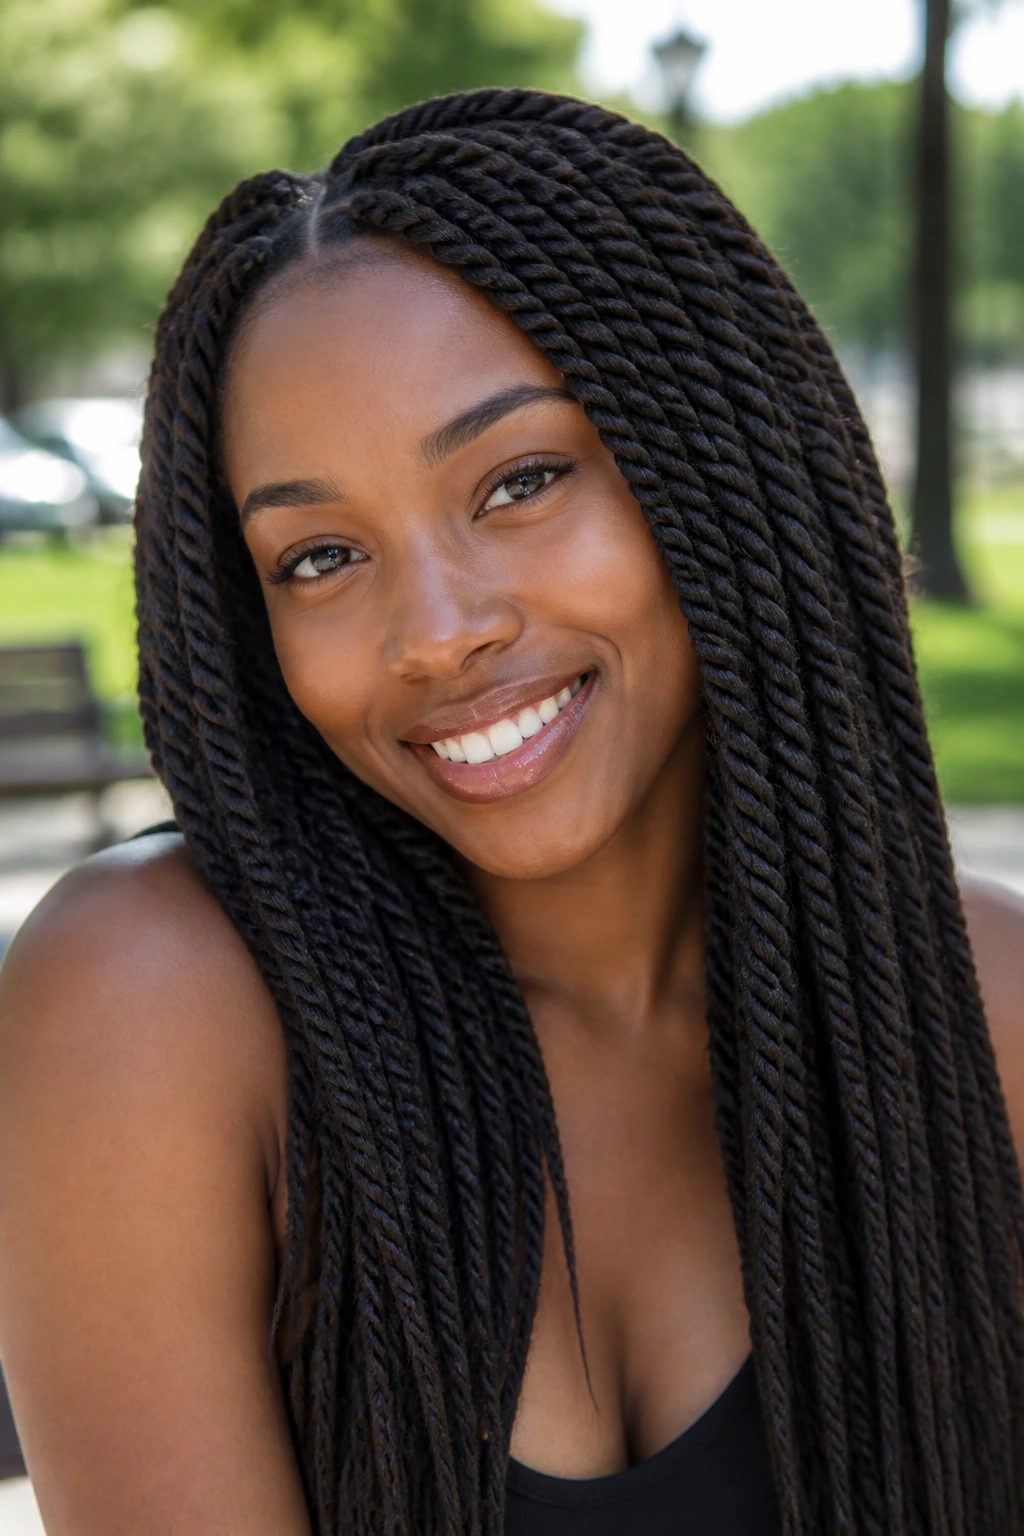
Senegalese twists are rope-like, smooth, and incredibly durable. They offer a very sleek, uniform look that mimics a twist rather than a plait. Because of the way they are installed—using a twisting method that tightens as it goes—they tend to last longer than almost any other protective style.
The Smoothing Secret
The key to that signature rope look is the twisting technique. When you twist the two strands of hair, you also have to twist them around each other in the opposite direction. It takes practice to get the rhythm right. If you are getting them done professionally, look for someone who specializes in twists to ensure they aren’t frizzy right from day one.
Weight Considerations
These twists can get heavy, especially if you go for long lengths. If you find your neck is starting to hurt by the end of the day, try styling them in a high, loose ponytail. Distributing the weight across the top of your head is much easier on your neck muscles than letting them hang down, pulling on your edges.
9. The High Puff
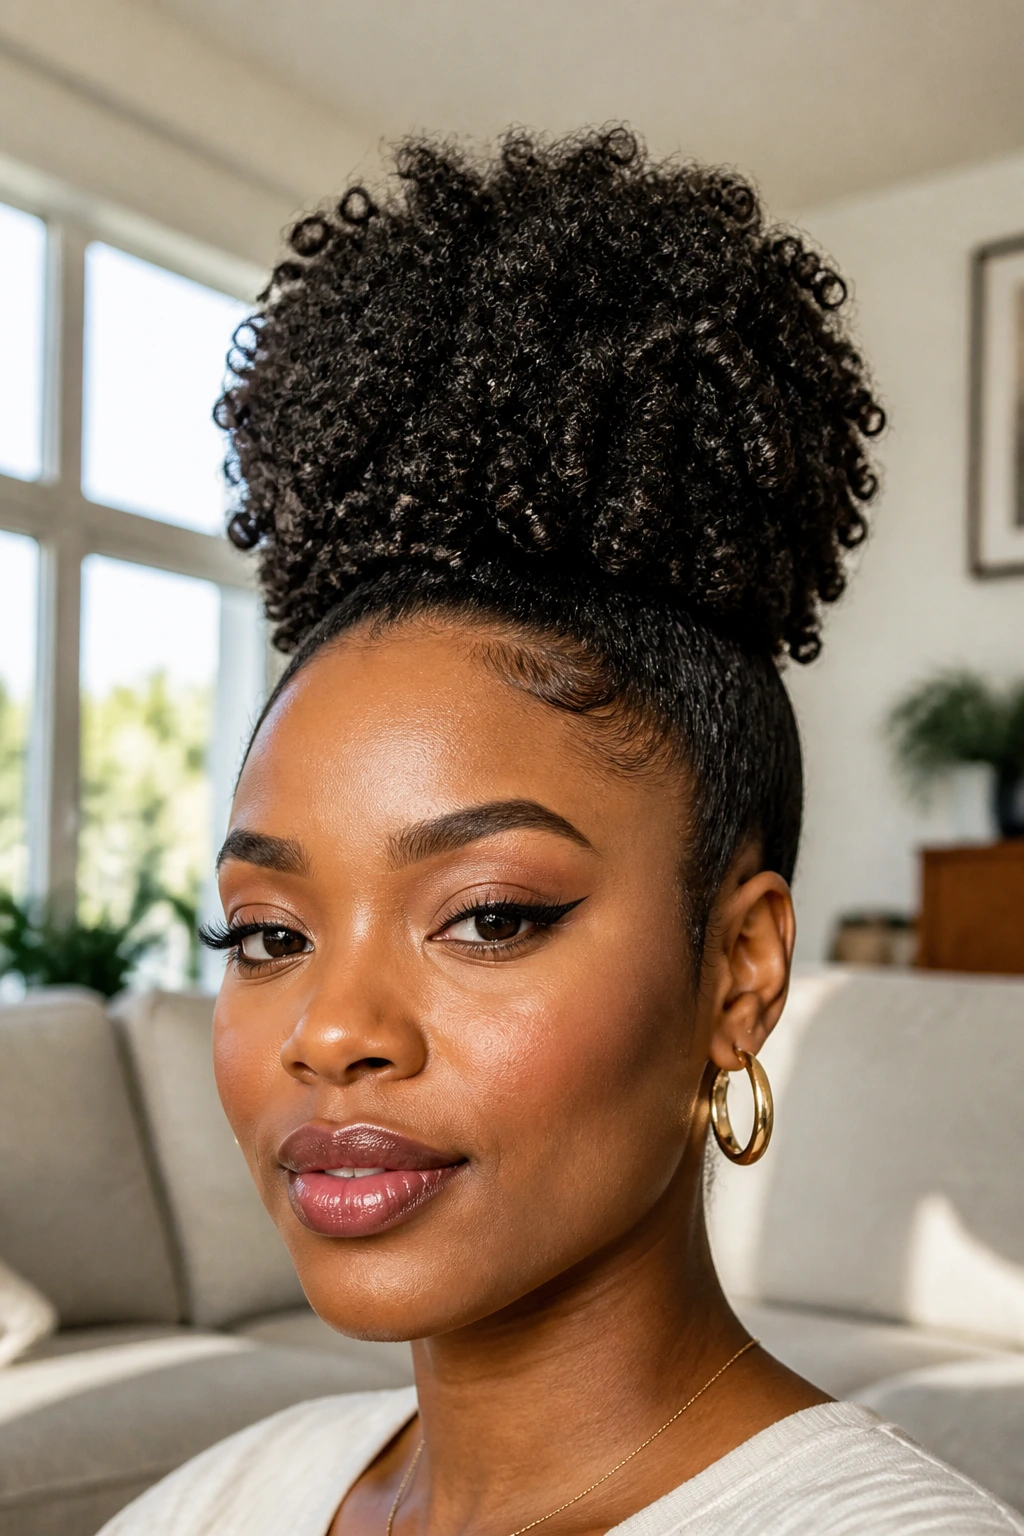
Sometimes the best hairstyle is the one that utilizes what you already have. The high puff is a classic for a reason—it’s quick, it’s chic, and it highlights your natural texture without needing hours of prep time. It works on everything from short, tapered cuts to long, flowing natural hair.
The Right Tools
You will need a reliable, snag-free hair tie or a fabric-covered elastic band. Avoid plain rubber bands at all costs; they will break your hair. A piece of stocking material or a dedicated hair puff band is ideal. You want something with enough stretch to hold the hair securely but not so much tension that it causes breakage around your hairline.
Defining the Texture
While the puff is usually about volume, you can define the curls at the top using a curl custard or a gel. A light spritz of water followed by a curl-enhancing cream will help clump your curls together, giving the puff a more structured, intentional look rather than just a ball of frizz. Use a small brush to smooth down the perimeter for that sleek finish.
10. Crochet Braids
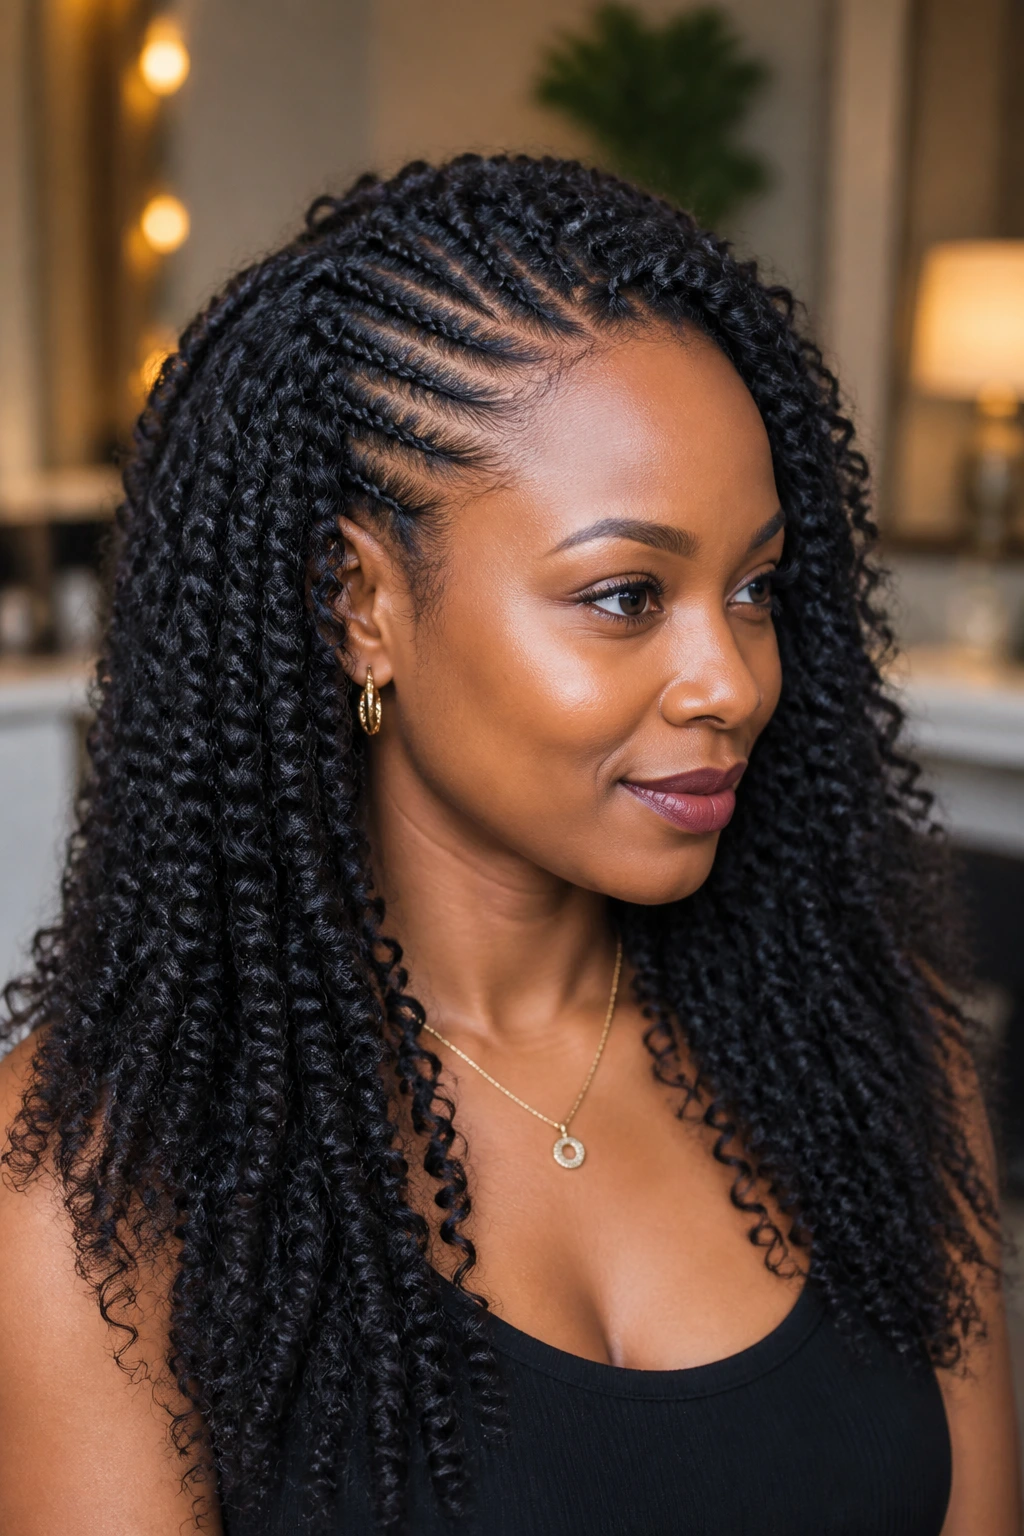
Crochet braids are a method, not just a style. You start with a foundation of cornrows, and then you use a latch hook tool to pull extensions through the braids. The versatility here is endless—you can use box braids, twist hair, or even straight, wavy, or kinky hair textures. It is one of the fastest ways to get a full head of extensions.
The Foundation is Everything
If your cornrow foundation is lumpy or too loose, your crochet style will look bumpy. The braids need to be tight enough to support the hair but not so tight that they pull on your roots. A simple, circular pattern for the cornrows usually provides the best base for most styles, as it hides the tracks well.
Maintenance Tips
The best part about crochet braids is that you can treat your natural hair underneath. You can still use a spray bottle to apply leave-in conditioner or a scalp oil directly to your cornrows. Because the hair is looped on rather than braided in, you can also easily remove the extensions without having to take down your entire foundation, making this a great option for short-term protective styling.
11. Faux Locs
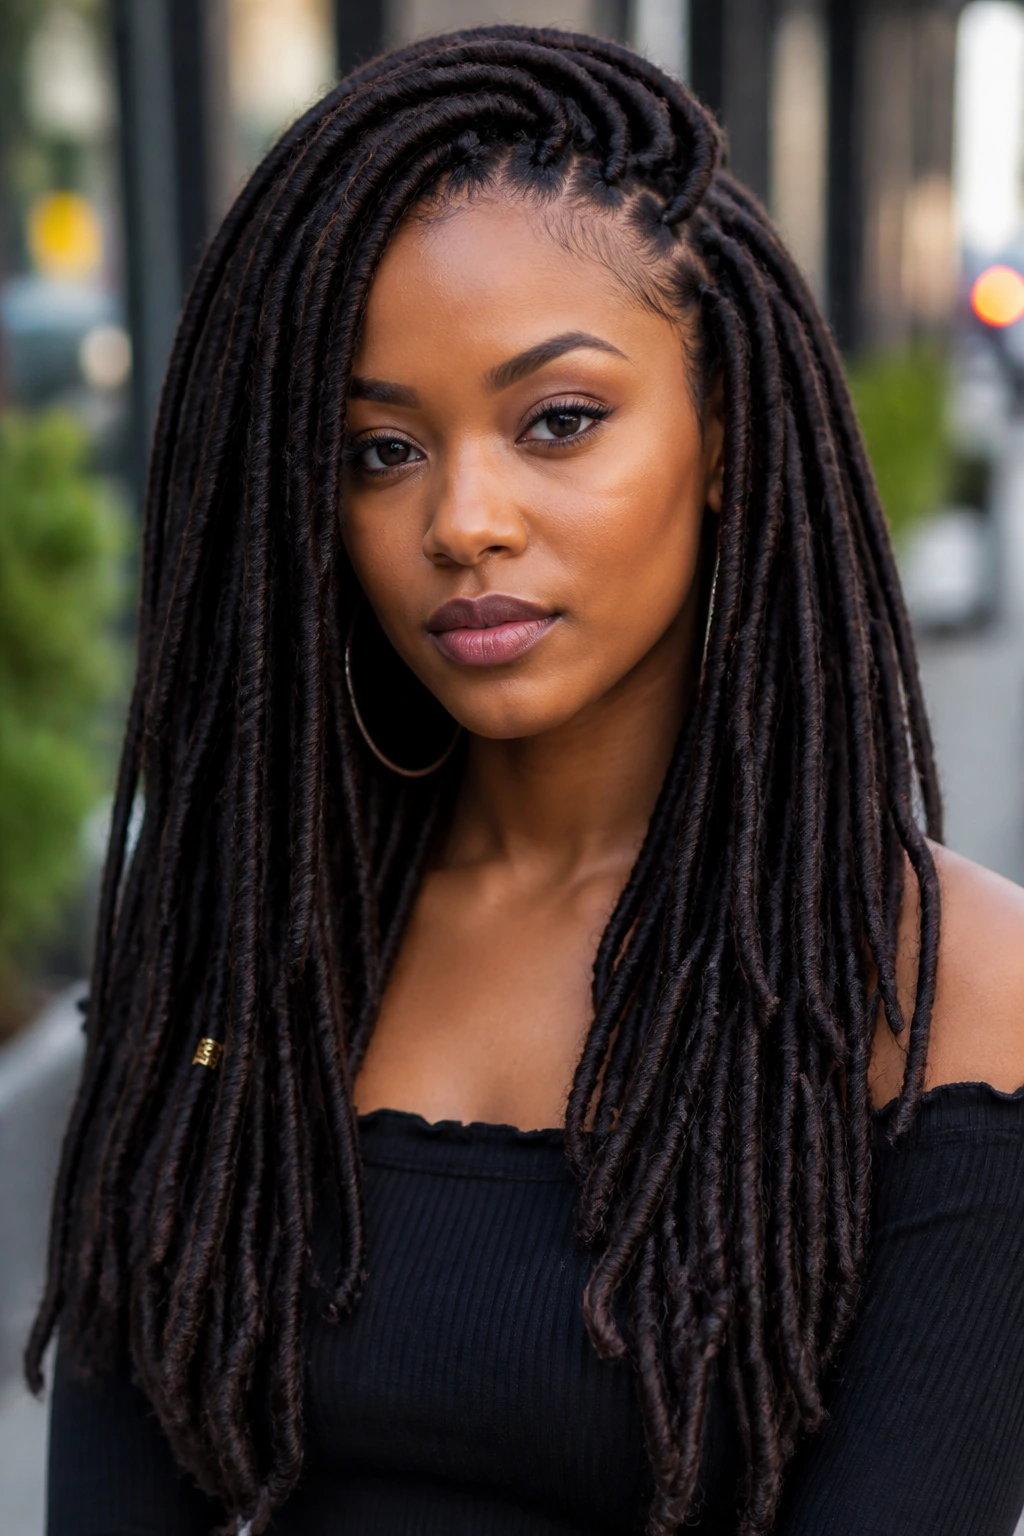
If you have ever wanted the look of locs without the multi-year commitment, faux locs are the answer. You essentially wrap extensions around your natural hair to create a thick, textured, permanent-looking loc. They have a weight and a presence that is really distinct from braids or twists.
Choosing the Hair Type
You can use Marley hair or synthetic braiding hair to wrap the locs. Marley hair has a slightly coarser texture that grips better, making it easier to hide your natural hair underneath. Synthetic hair is smoother and will give you a shinier, more polished loc. If you are doing these yourself, Marley hair is much more forgiving for beginners.
The Weight Problem
Faux locs can be very heavy, especially when wet. If you go for a full-head style, be prepared for some neck fatigue. A great trick is to use lightweight, pre-looped faux locs which are hollow in the center. They provide the full look without the extra weight of the braiding hair filling them out completely.
12. Intricate Halo Braid

The halo braid—often called a crown braid—is timeless. It involves braiding your hair (or extensions) around the perimeter of your head, creating a crown-like effect. It is sophisticated, keeps your hair off your face, and works beautifully for both formal events and everyday wear.
Achieving the Shape
The key to a good halo is symmetry. If you are using your own hair, you might need to use a mirror to check the back of your head. If your hair is not long enough to reach all the way around, you can create two separate braids—one from each side—and pin them together at the top or back.
Securing the Style
You will need a fair number of bobby pins to keep this style in place, especially if you have layers. Make sure you use pins that match your hair color so they blend in. If you want to elevate the look, you can weave a thin ribbon through the braid or tuck in a few small silk flowers for an elegant, bohemian touch.
13. The Twist Out

The twist out is the ultimate natural hair texture experiment. You twist damp, conditioned hair, let it dry completely, and then carefully unravel the twists. The result is a highly defined, voluminous, and soft curl pattern. It is the best way to see the true character of your natural hair.
The Importance of Dryness
If you unravel your twists while the hair is even slightly damp, the whole style will revert to a poof within an hour. You must let it dry 100%. If you are in a rush, a hooded dryer is your best friend. A diffuse dryer can also work, but keep it on a low-heat setting to avoid heat damage and frizz.
Careful Unraveling
When you are taking the twists down, put a little bit of lightweight oil on your fingertips. This reduces the friction between your fingers and your hair, which helps prevent you from causing frizz as you separate the curls. Take your time; the way you separate the curls dictates the final volume.
14. Bantu Knot Out

Similar to the twist out, a Bantu knot out involves creating the knots, letting them set, and then unraveling them. The curls you get from a Bantu knot out are tighter and more coil-like than the wavy results of a twist out. It gives you incredible volume and a very distinctive, springy texture.
Getting the Tension Right
If you wrap the knots too tightly, you will stretch the curl out too much, and the result will be more of a crimped look than a curly one. Aim for a moderate tension—just enough to keep the knot secure. You can also experiment with the size of the knots. Smaller knots will give you tighter, more defined coils, while larger knots will result in looser, wavier curls.
Longevity
Bantu knot outs tend to last a bit longer than twist outs because the curls are more compact. To keep them looking fresh overnight, avoid the pineapple method. Instead, gather your hair into a very loose, high bun and cover it with a large silk bonnet. You want to avoid crushing the curls, so the bigger the bonnet, the better.
15. Complex Braided Updo

When you want to look polished but don’t want to deal with loose hair, a braided updo is the answer. This could involve cornrowing the hair into a pattern that leads to a bun, or braiding individual sections and pinning them into an intricate, woven shape. It is a protective style that looks red-carpet ready.
Preparing the Foundation
To get those crisp parts, you need a rat-tail comb and a bit of holding gel. Even if you are not using extensions, a little bit of edge control or braiding gel helps keep the flyaways at bay. The smoother the base, the more professional the final updo will look.
Adding Accessories
Because this style is so structured, it is the perfect canvas for accessories. You can thread gold cuffs onto the cornrow sections, add beads at the nape, or even pin a decorative hair comb into the bun. Keep it balanced; if the braided pattern is already very busy, stick to subtle, monochromatic accessories.
16. Shaved Sides or Tapered Cut

Sometimes, the best protective style is to simply cut off the damaged ends and embrace a shorter look. A tapered cut—with the sides and back faded or cut short, and the crown left longer—is bold, modern, and highlights your facial structure. It requires very little maintenance, which is a massive plus for anyone with an active lifestyle.
Styling the Crown
With the sides short, your focus shifts entirely to the top. You can use finger coils, a twist-out, or just let your natural curl pattern shine. Because the length is manageable, you can spend more time focusing on the health of the hair that is there rather than trying to preserve a large volume of hair.
The Transition
If you are coming from long hair, this can be a big change. Start with a softer taper—maybe a fade that isn’t quite skin-tight—and see how you feel. You can always go shorter, but you have to wait for it to grow back if you go too short too quickly. It’s a liberating style that feels like a fresh start.
17. Marley Twists

Marley twists are similar to Senegalese twists but use hair with a much coarser, more textured feel. The hair is specifically designed to look like locs or naturally twisted hair. The result is a more rugged, thick, and voluminous look. They are often heavier than Senegalese twists, so keep that in mind when choosing your length.
The “Fuzzy” Aesthetic
These twists are supposed to look a bit fuzzy; that’s part of the charm. If you try to keep them perfectly smooth, you’ll be fighting the natural texture of the hair. If they start looking too wild for your taste, just lightly trim the stray frizzies, but don’t expect them to stay as sleek as traditional braids.
Scalp Health
Because Marley twists can be quite thick and dense, your scalp might get less airflow. Make sure you are cleansing your scalp at least every two weeks with a witch hazel or apple cider vinegar rinse on a cotton ball. This will remove any product build-up or sweat that gets trapped near the roots.
18. Sleek Low Ponytail

There is a timeless elegance to a sleek, low ponytail. It is the perfect style for those days when you need to look professional and put-together without much effort. The focus here is on the smoothness of the roots and the health of the ponytail.
Achieving the Sleekness
To get your roots completely smooth, use a boar bristle brush. Apply a small amount of holding gel or pomade to your hairline and brush it back in sections. Tying a silk scarf around your hairline for 15 minutes while you get dressed will “set” the hair in place, ensuring it stays smooth without needing half a jar of gel.
Protecting the Ends
If your natural hair isn’t long enough for a ponytail, you can add a drawstring ponytail extension. Just be careful with how you attach it. Don’t pull your natural hair too tightly into a bun to serve as the anchor; the tension can damage your hair over time. A looser bun with a secure wrap for the extension is much safer.
19. Mini Twists

Mini twists are the ultimate low-manipulation style. You essentially create tiny, two-strand twists with your natural hair. They mimic the look of braids, but they are generally much softer and put less tension on the hair. You can wear them as a style for weeks, and when you take them down, you get a beautiful, crimped texture.
The Time Commitment
These are not a quick style. They require hours of labor to install, especially if you have high-density hair. However, once they are done, your hair routine becomes almost non-existent. You can wake up, spritz with a little water and oil, and you are ready to go.
Managing New Growth
As your hair grows out, the roots can get a bit fuzzy. This is normal. You don’t need to twist the roots every day. Simply enjoy the natural texture at the base. If it gets too messy, you can pull the twists back into a ponytail, which masks the new growth perfectly.
20. Loc Extensions

If you love the look of locs but don’t have the patience to wait for your natural hair to lock over the years, loc extensions are the answer. These are essentially permanent or semi-permanent extensions that look like mature locs. They provide a mature, established look immediately.
The Professional Install
Do not attempt these yourself unless you are highly experienced. They involve interlocking your natural hair with the extensions, and if done incorrectly, they can cause significant damage or thinning. Find a loctician who specializes in extensions and can demonstrate that they know how to work with natural hair health in mind.
Maintenance
Loc extensions are a long-term commitment. You will need to get them “retightened” or “retwisted” every 6 to 8 weeks as your natural hair grows. Treat them like your own hair—keep the scalp clean, use moisturizing sprays, and protect them while you sleep to prevent the locs from becoming frizzy or unraveled.
21. Finger Coils
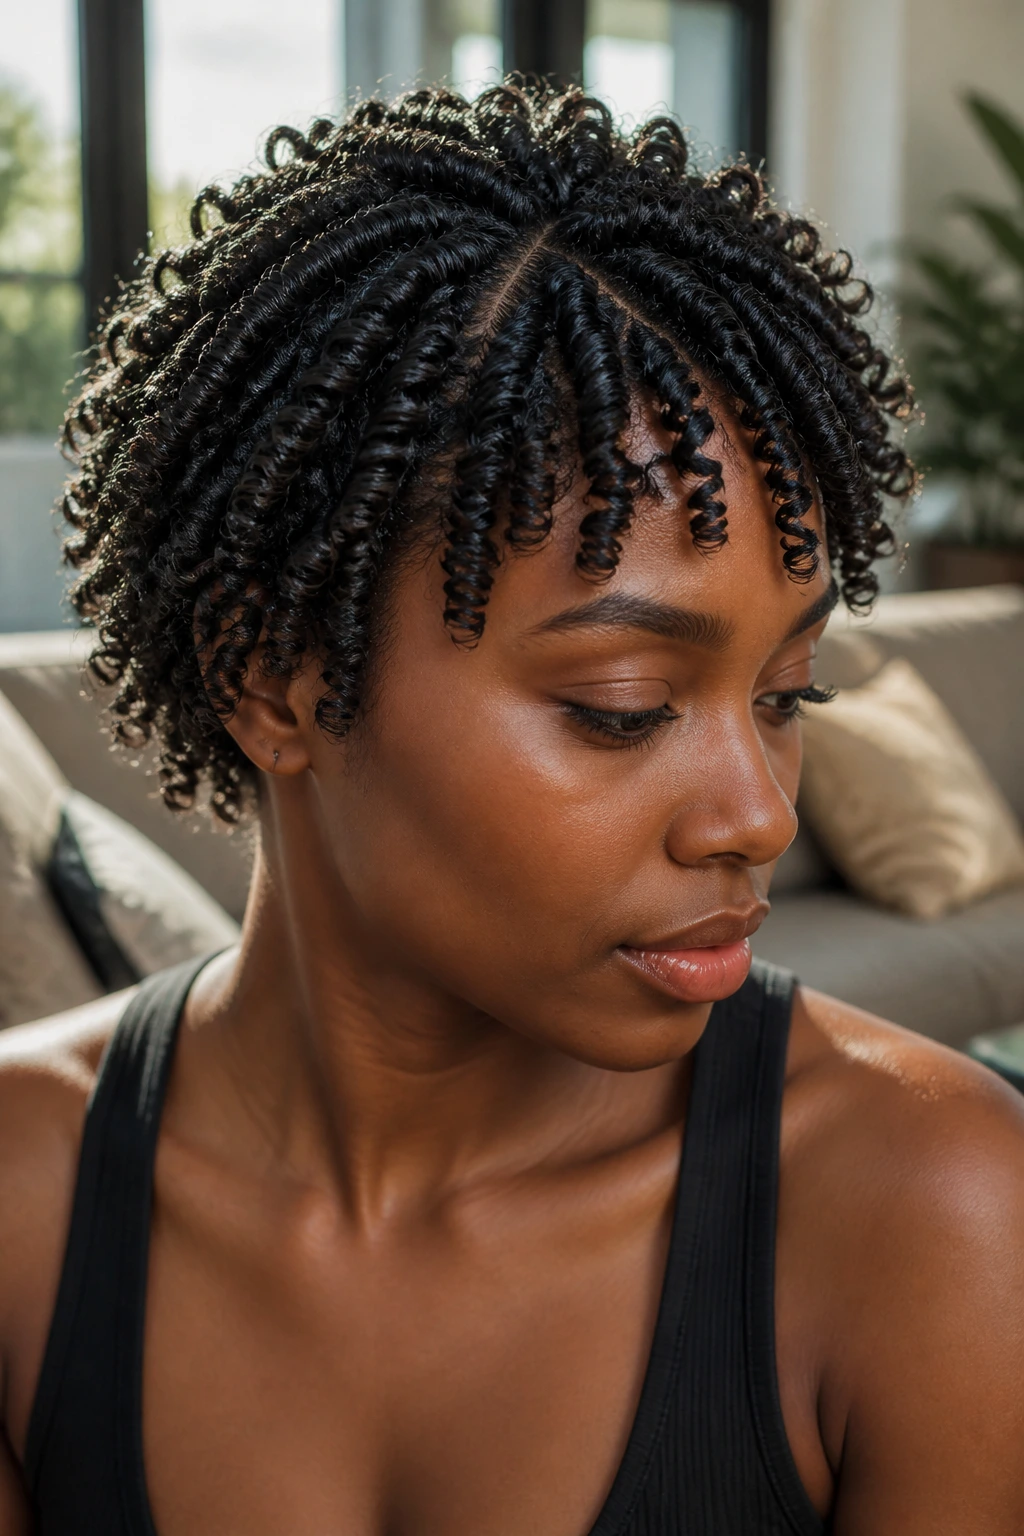
Finger coils are perfect for short-to-medium length hair. You use your fingers to coil small sections of your hair, usually with a generous amount of styling gel or custard. It defines every single strand, creating a look that is uniform, sophisticated, and vibrant.
The Skill Factor
This is a technique that takes practice. You want to make sure your fingers are coated in product so the hair slides easily and doesn’t get tangled. Start from the back of the head and work your way to the front. The tighter you coil the hair, the more definition you will get, but don’t pull too hard on the roots.
Drying Time
These coils take a long time to dry. If you leave the house with wet coils, they will likely frizz up instantly. Using a hooded dryer is the most effective way to “set” the style. Once they are 100% dry, you can gently separate the coils for more volume, or leave them as-is for a more structured, piecey look.
22. Perm Rod Set
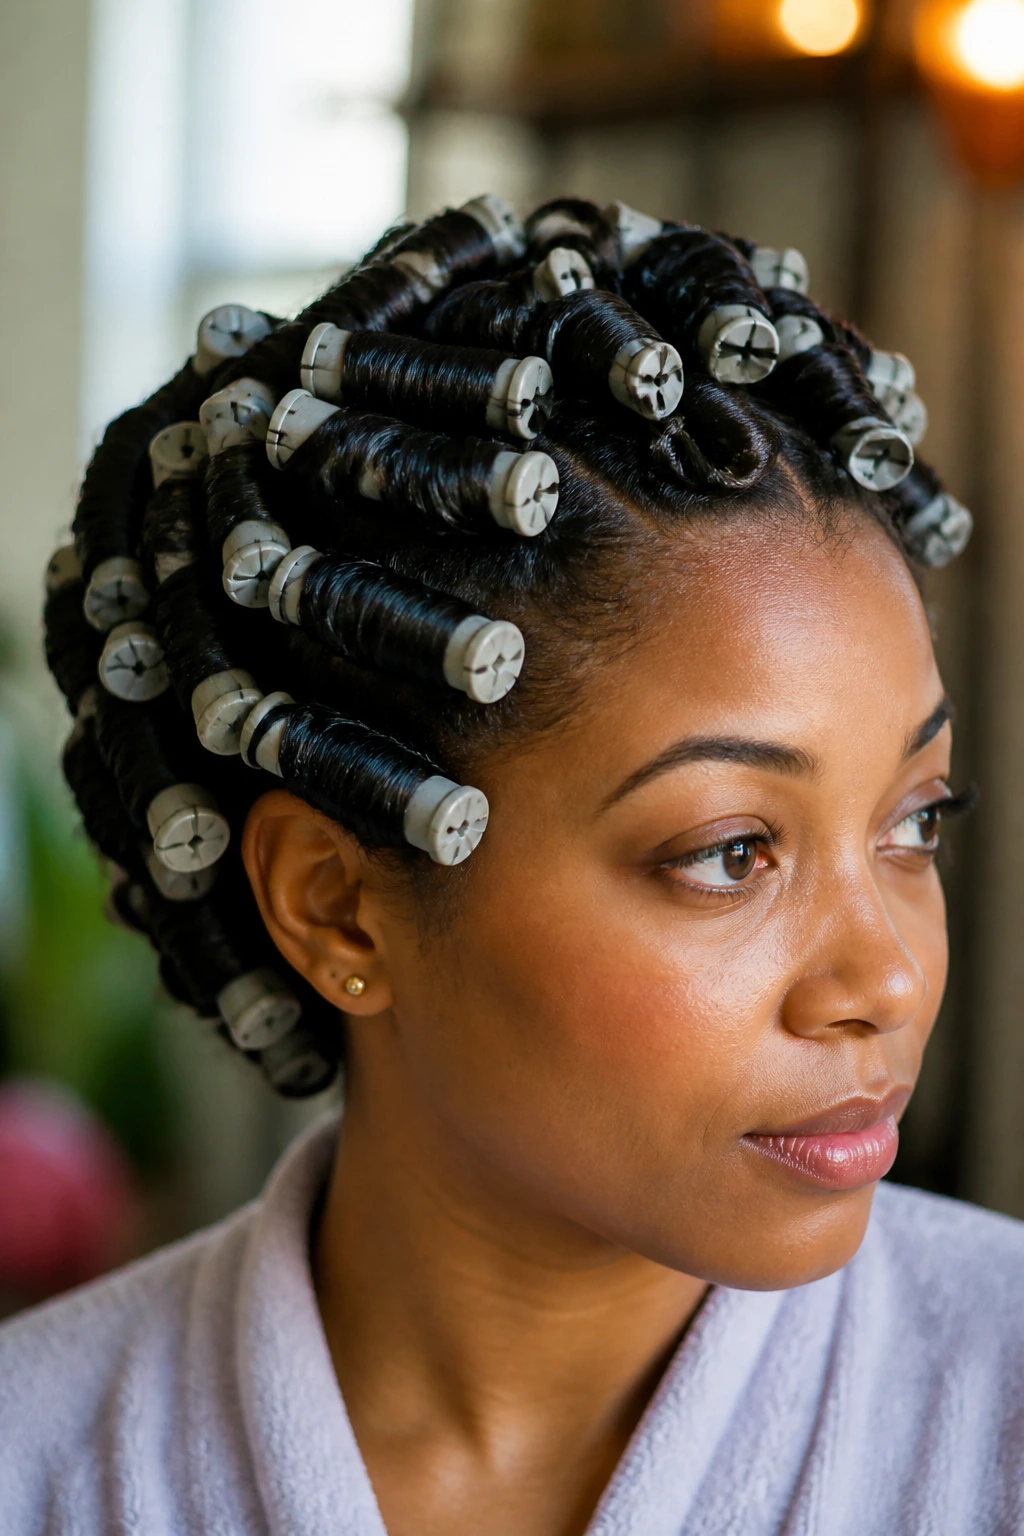
For a look that gives you voluminous, springy curls, a perm rod set is unbeatable. You roll damp, product-coated hair onto small plastic rods and let it dry. The result is a consistent, salon-quality curl pattern that looks nothing like your natural texture.
Choosing Rod Size
The size of the rod determines the size of the curl. Small rods will give you tight, corkscrew curls, while larger rods will give you soft, bouncy waves. You can even mix and match sizes to create a more natural, multi-dimensional look.
The Drying Process
There is no shortcut here—you must let the hair dry completely. If you are using a hooded dryer, keep the heat on a low to medium setting. Check a rod in the back of your head after an hour to see if the hair is dry. If it is still damp, put the bonnet back on. Do not rush this, or the curls will not hold.
23. Butterfly Locs
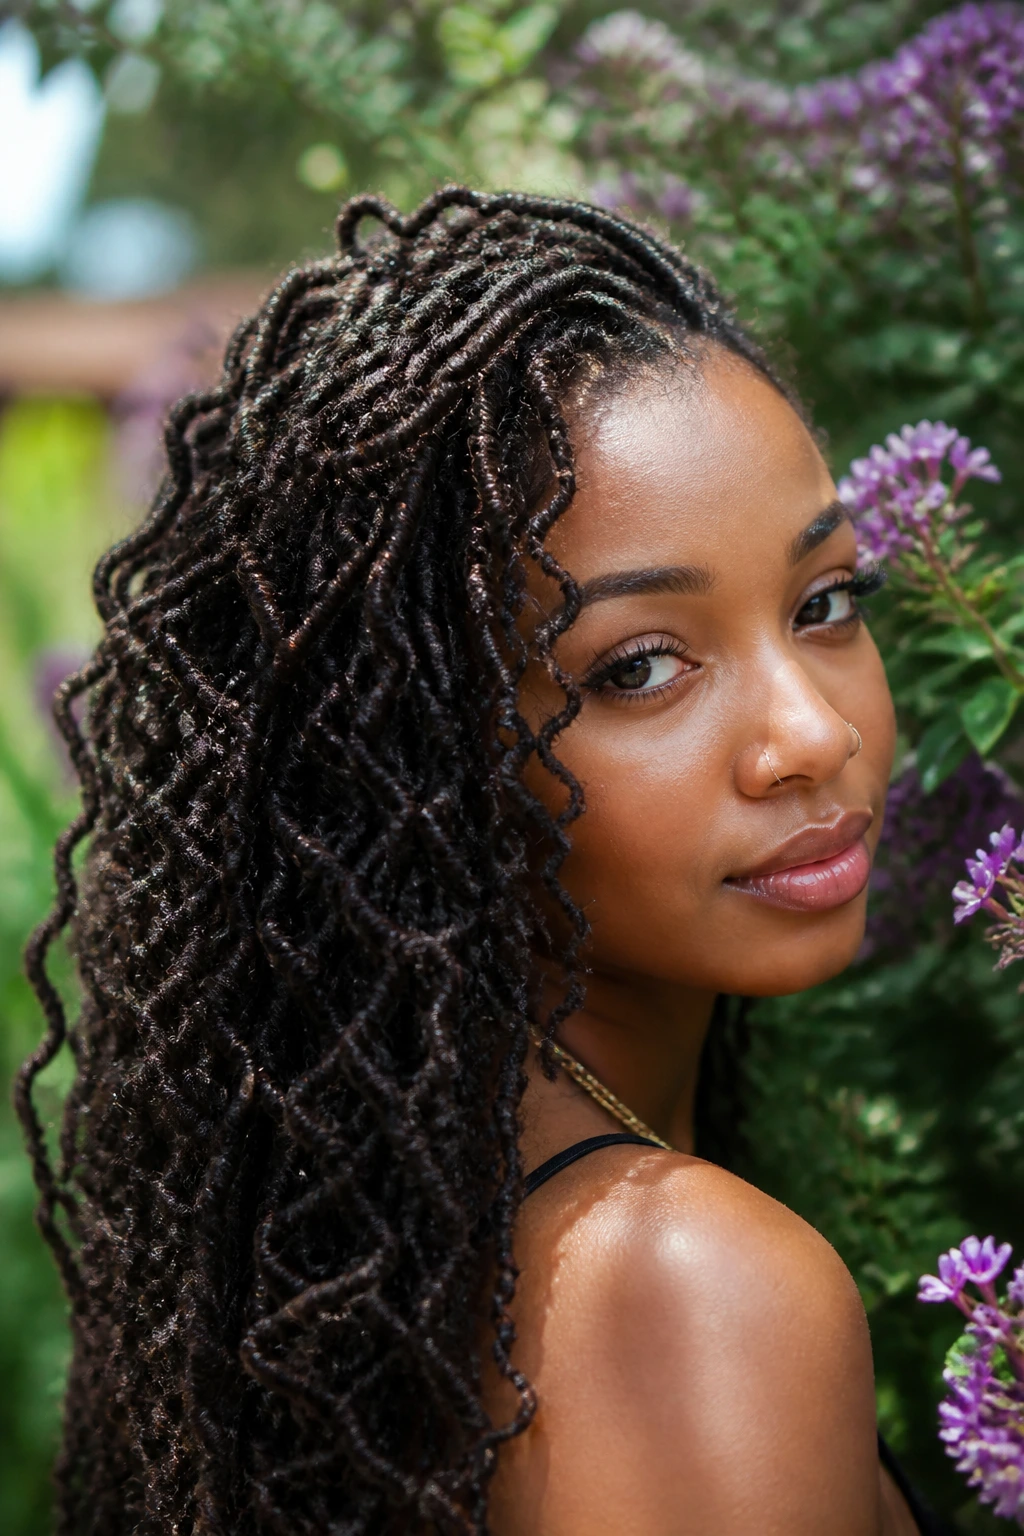
Butterfly locs are a variation of faux locs that feature a distressed, messy, “looped” look. They have a softer, more bohemian vibe and are usually made using wavy crochet hair. They have become incredibly popular because of their relaxed, lived-in aesthetic.
The Looping Technique
The secret to the butterfly look is the way you wrap the hair. You wrap the extension hair around your natural braid, but you periodically pull loops of the hair out to create that “distressed” or “butterfly” effect. It requires a specific wrapping motion that creates that unique, uneven texture.
Weight and Comfort
Because these are usually made with a larger volume of hair to create the distressed loops, they can get heavy. Ensure that your foundation cornrows are sturdy enough to support the weight. If you start to feel neck pain, don’t hesitate to take a few out or re-braid them into a style that distributes the weight more evenly.
24. Half-Up Half-Down Top Knot

This is a classic style that works for almost every hair length and texture. You gather the top section of your hair—from the temples up—and secure it into a bun or a high puff, while leaving the rest of the hair down. It keeps your hair out of your face while still allowing you to show off your length.
Balancing the Sections
The key is to get the proportions right. If you take too much hair for the top knot, the hair left down will look thin. If you take too little, the top knot will look wimpy. A good rule of thumb is to trace a line from the top of your ears to the crown of your head to section off the hair.
Styling the “Down” Part
Since the bottom section is loose, it needs to look maintained. Use a little bit of leave-in conditioner or a curling cream to define those curls. If your hair is in twists or braids, this style looks equally good and perhaps even more secure. Just ensure the hair tie you use for the top knot isn’t too tight, or it will cause tension on your hairline.
25. Fulani-Inspired Feed-in Braids
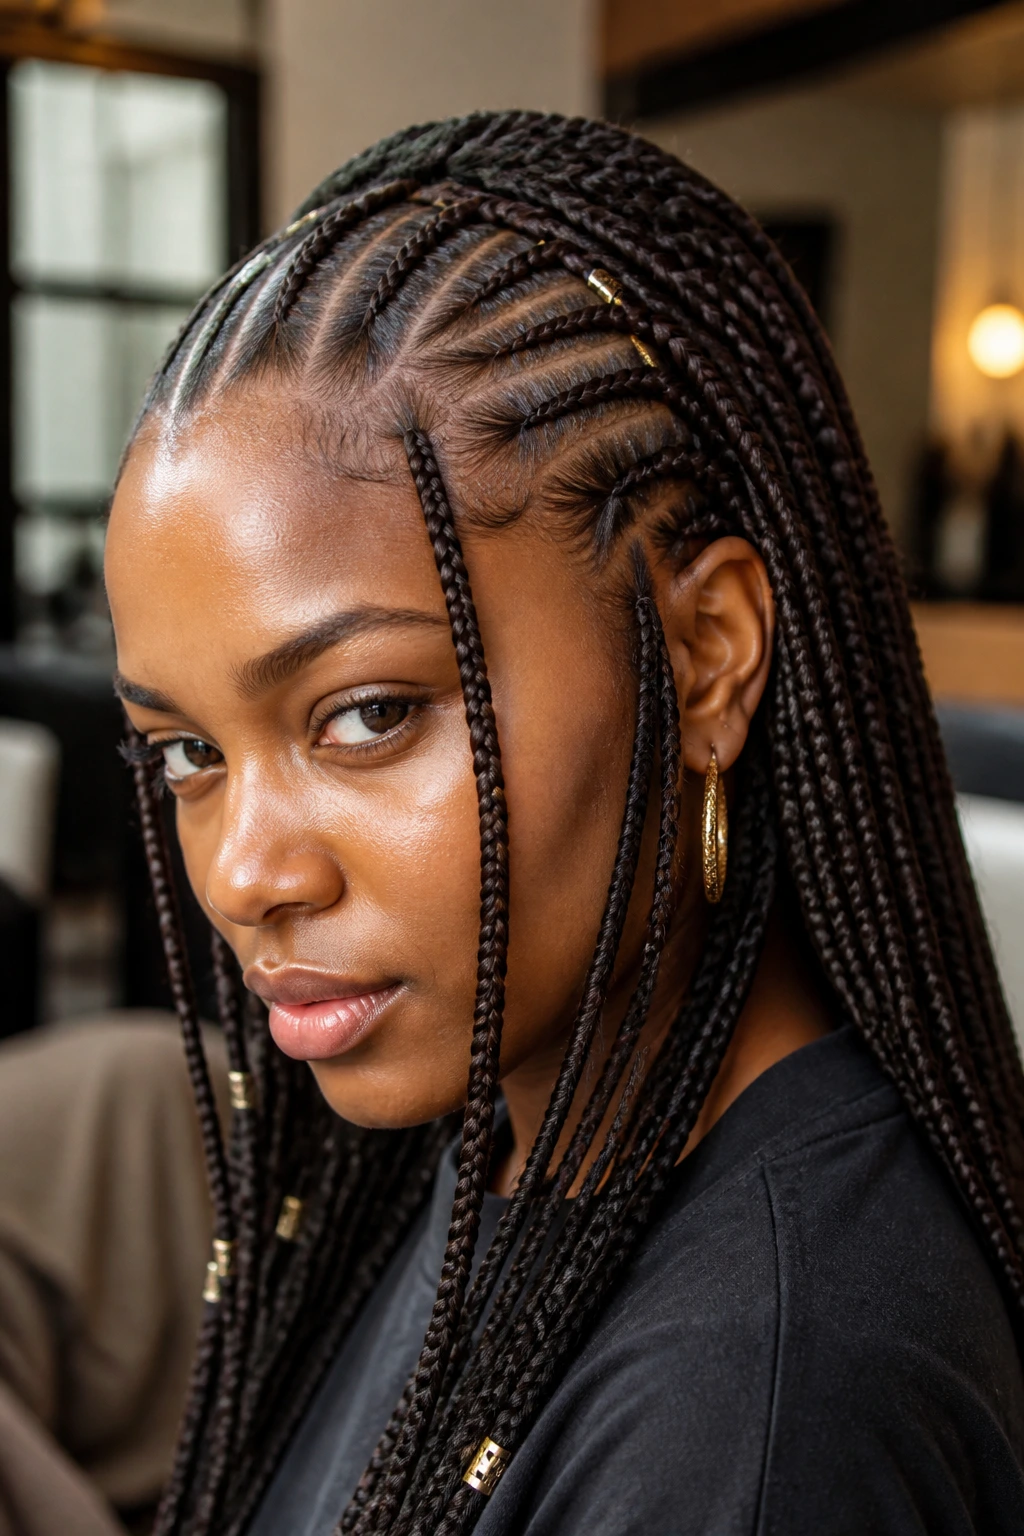
Taking the Fulani concept a step further, these braids incorporate feed-in cornrows at the front with individual box braids or twists in the back. It combines the sleekness of the front-facing cornrows with the versatility and volume of box braids at the back. It is arguably the best of both worlds.
The Transition
The trickiest part of this style is the transition from the cornrows at the front to the individual braids at the back. You need a stylist who knows how to blend these two styles seamlessly so there isn’t a visible gap or a lumpy connection point. When done right, it looks entirely cohesive.
Styling Versatility
Because you have braids in the back, you can still pull your hair up into a bun or ponytail. The cornrows at the front frame your face beautifully, regardless of how you wear the back. It is a very structured, ornate style that holds up well for several weeks, making it an excellent choice for a vacation or a busy season at work.
Final Thoughts
At the end of the day, your hair is an evolving canvas. You might love a particular style for a few weeks, only to find that your scalp needs a break or your ends are feeling dry. Listen to what your hair is telling you. If a style feels too heavy, it is too heavy. If it feels too tight, it is too tight. Do not sacrifice your long-term hair health for the sake of a trend.
The most successful styles are those that you can maintain easily. If you know you are the type of person who won’t wrap your hair at night, styles that are prone to frizz might not be your best bet. If you hate spending time styling in the morning, look toward the protective options like braids or twists that buy you some time back.
Experiment, be patient with your growth, and always prioritize moisture. Whether you are rocking a simple puff or a complex braided updo, the most important thing is that you feel comfortable and confident in the skin—and hair—you are in.
