



Straight hair has a reputation for being easy, and sure, in one sense that’s true. It lies flat. It cooperates with clean lines. It doesn’t usually fight a brush the way curls or waves can.
But that same smoothness can be a little rude. Style it one way and it looks crisp. Style it the wrong way and it goes limp fast, with every bobby pin sitting there like it has no job. That’s why cute hairstyles for straight hair need a slightly different approach: less forcing, more placement, more smart little details that keep everything from sliding apart by lunch.
The trick is not to make straight hair pretend to be something else. It’s to use what it already does well. Sharp partings, glossy lengths, tidy knots, smooth braids, ribbon ties, clipped twists — those are the styles that look intentional on straight hair instead of apologetic. A tiny bit of texture spray at the roots, a few clear elastics, and a handful of pins placed where they actually matter can change everything.
Some of these looks are quick enough for a school morning. Others are better when you have ten quiet minutes and a mirror that isn’t fogged up. All of them work with straight hair’s sleekness instead of arguing with it. That’s the whole game.
1. Sleek Low Ponytail With a Ribbon
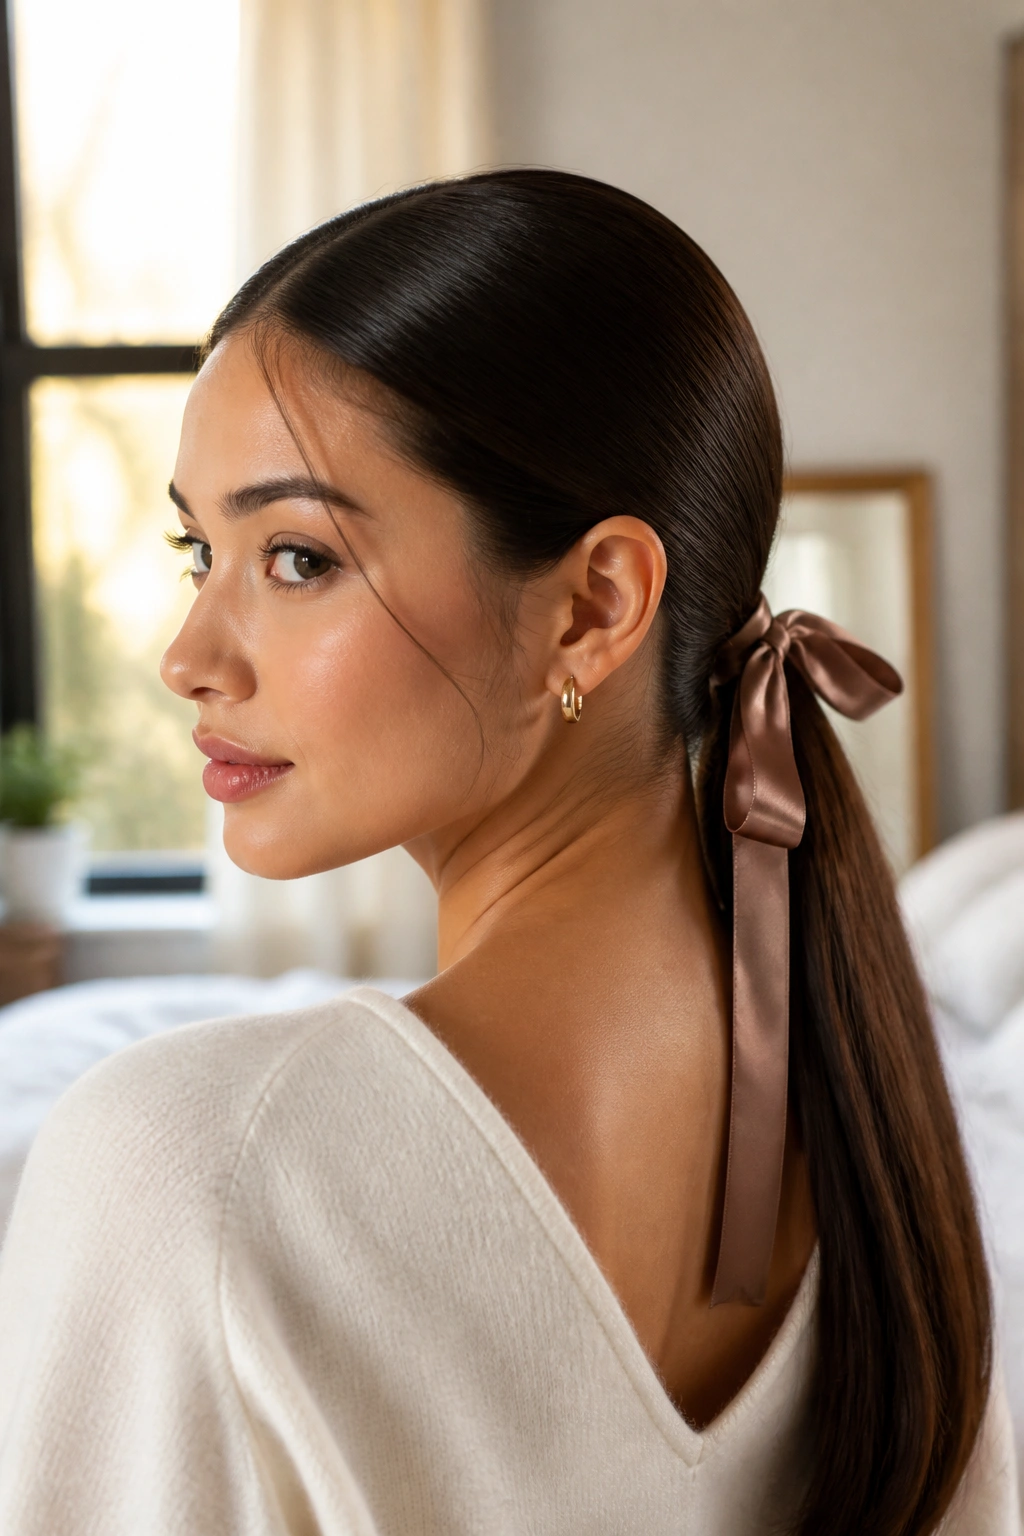
A low ponytail sounds basic until you give it a clean center part, smooth the crown, and tie it with a ribbon that matches your outfit or hair color. Then it stops being basic and starts looking polished in that easy, almost annoying way straight hair is good at.
Why It Works on Straight Hair
Straight hair already gives you the flat, glossy surface this style wants. You do not need to curl the ends or build much texture into the body. In fact, too much fuss can make the ponytail look puffy in the wrong places.
Use a fine-tooth comb, brush the hair back with a little light serum, and secure it at the nape with a snag-free elastic. Then wrap a ribbon around the base and let the tails hang down the back. A 1/2-inch satin ribbon reads soft and pretty; a velvet ribbon feels richer. Both work.
- Best for medium to long hair
- Looks especially nice with a middle part
- Takes about 5 minutes
- Stays neater if you smooth the flyaways with a dab of pomade on your fingers
Quick tip: tie the ribbon over the elastic, not through it. That tiny difference keeps the whole thing from shifting around.
2. Half-Up Claw Clip Twist
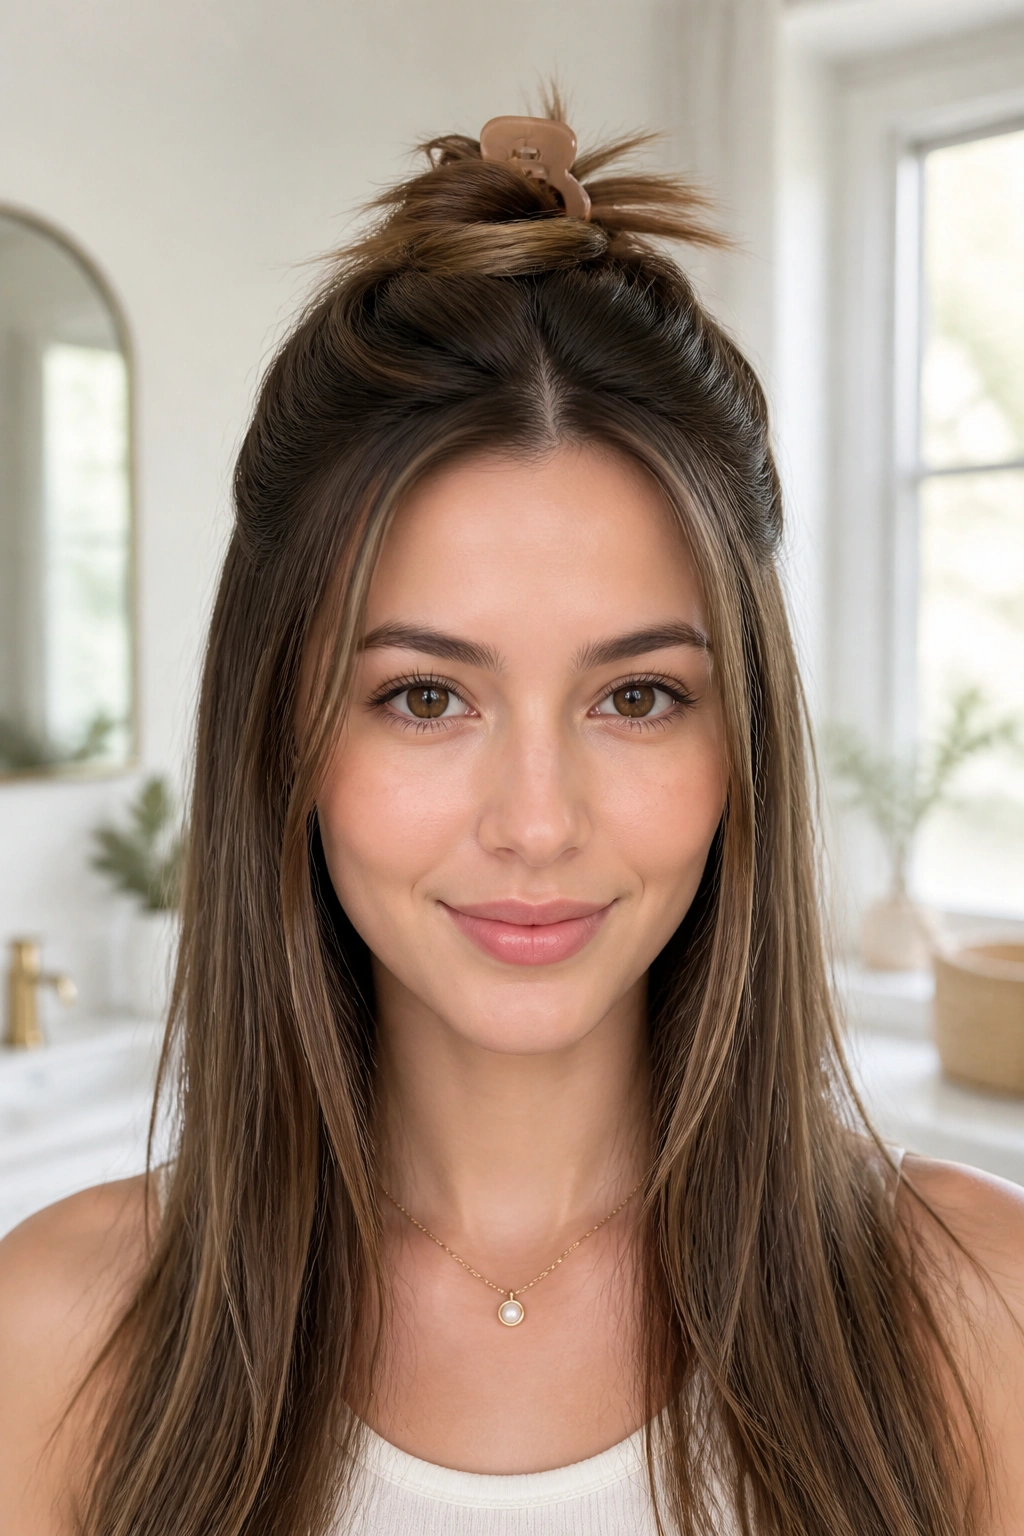
If you have straight hair that slips out of everything, this is the style that earns its keep. The claw clip gives you hold without the tightness of a full updo, and the twist keeps the look from feeling too plain.
The trick is to gather the top half of your hair at the crown, twist it once or twice, and clip it so the ends fan out loosely. You want some structure, not a perfect shell. A small to medium clip works on fine hair; thicker hair usually needs a larger one with stronger teeth.
What Makes It Different
This style is cute because it has contrast. The top is pinned up and tidy. The bottom stays long and straight, which gives you that clean line straight hair does so well. If the clip feels shaky, tease the hair right before you twist it. Not a lot. Two or three gentle backcombs at the root are enough.
A few face-framing pieces make it softer. Leave them at cheekbone length if you want a relaxed finish, or keep everything tucked back if you like a sharper shape.
One warning. If your hair is freshly washed and super silky, the clip may slide. Dry shampoo at the roots helps more than people think.
3. Bubble Ponytail for Straight Hair

Bubble ponytails look playful because they break up the long, straight line of the hair into sections that feel almost graphic. On straight hair, that crisp shape is the whole point.
Start with a mid-height or low ponytail. Add small clear elastics every 2 to 3 inches down the length, then gently tug each section outward to make the “bubble.” You’re not trying to puff it into a huge balloon. Just loosen the sides a little so each section has shape.
How to Get It Right
The cleanest versions start with sleek roots and a combed-through base. If the crown is messy, the style loses its charm fast. A light mist of hairspray before the first elastic gives the hair a little grip.
The bubbles should be similar in size, but they do not need to be identical. That’s part of why this style feels cute instead of stiff. A tiny bow near the top elastic can make it feel more finished if you’re wearing it for something casual.
- Use 3 to 6 elastics depending on hair length
- Space them evenly, about 2 inches apart
- Tug from the sides, not the center
- Smooth the top with a soft brush before you start
It’s one of those styles that looks more complicated than it is. Which is convenient.
4. Mini Braids Along a Center Part

Tiny braids tucked along a straight center part are a sneaky good way to make straight hair look styled without giving up the length. They add detail right where the eye goes first.
Part the hair down the middle. Take one thin section from each side near the front hairline, braid each piece into a small three-strand braid, then secure the ends with tiny clear elastics. You can leave the rest of the hair down and smooth, or tuck the braids back behind the ears.
Why This Works So Well
Straight hair shows braid pattern more clearly than many other textures, which is half the appeal here. The plaits read neat and intentional. They also hold a lot better than people expect, especially if you grip the sections with a little texturizing spray before braiding.
Keep the braids slim. Thick front braids can take over the whole style and feel heavy around the face. Two skinny braids are enough. If you want a softer finish, gently pull apart the braid edges after securing them.
This one is a good choice when you want a small change, not a full updo. It gives plain straight hair a little edge without making it look like you tried too hard. That matters more than people admit.
5. Twisted Half-Up Crown for Straight Hair
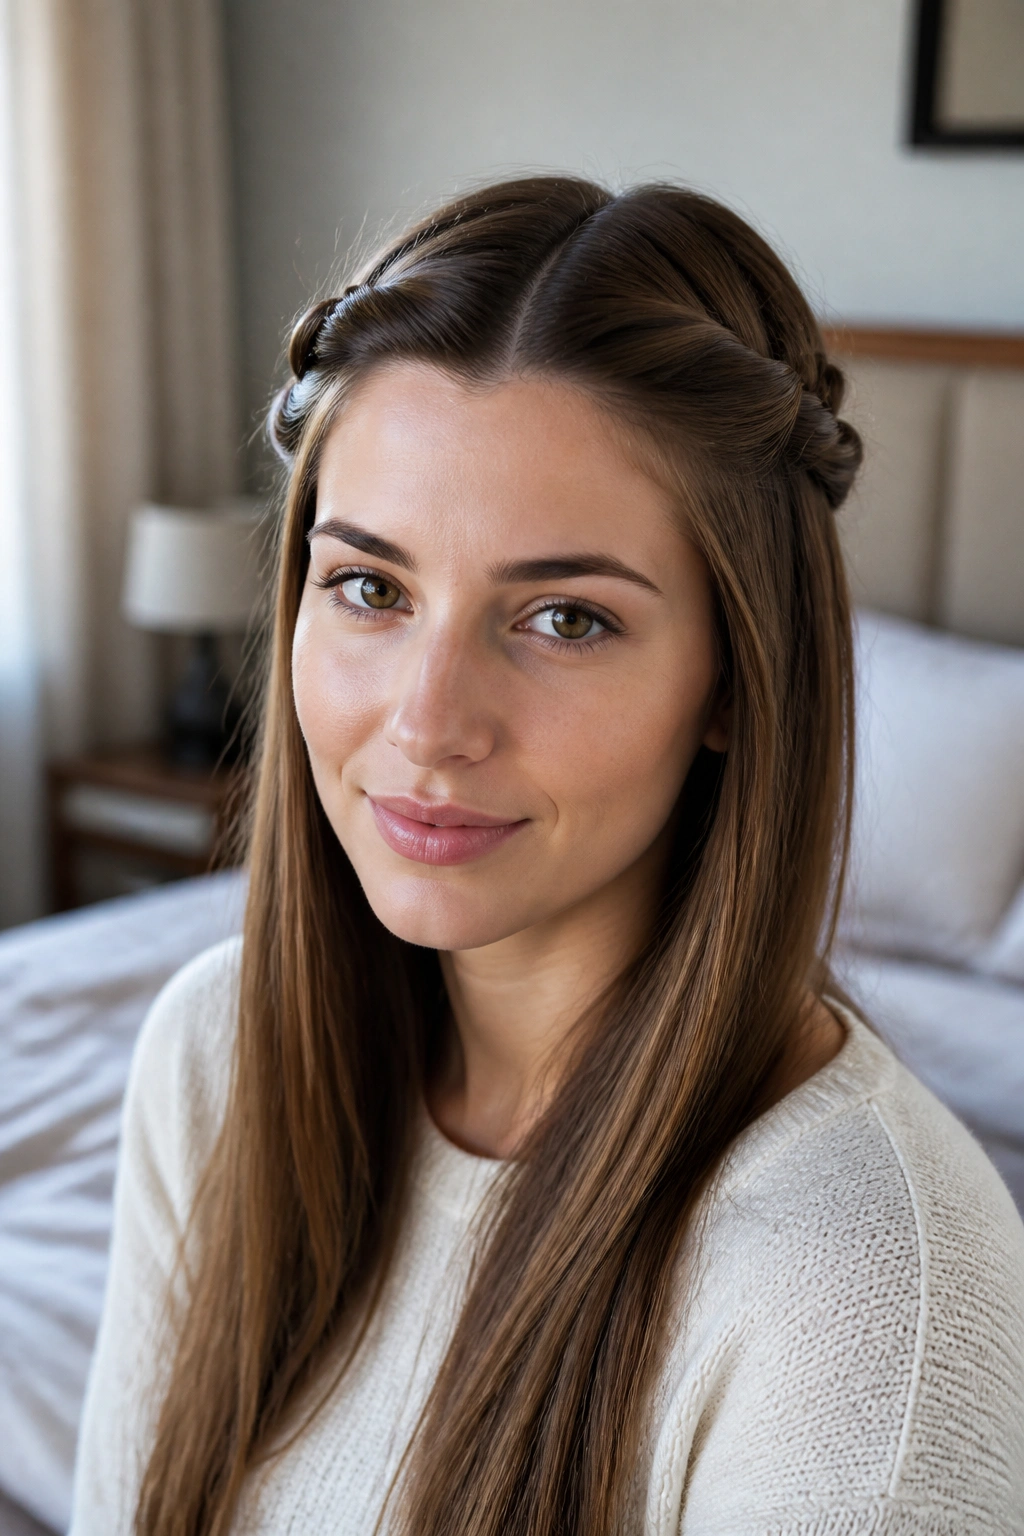
A half-up crown twist gives straight hair shape around the face without taking away the length, which is usually the part people want to keep. It also sits nicely under clips, bows, or small barrettes if you like a little extra detail.
Take a section from each temple, twist them back toward the crown, and pin them where they meet. If your hair is slippery, cross one twist over the other before pinning so the anchor point feels sturdier. Two bobby pins in an X shape work better than one lonely pin every time.
Small Details That Matter
The twists should sit close to the head. If they lift too far away, the style starts to look bulky instead of delicate. Keep the grip tight near the scalp and looser through the ends, then hide the pins under a small top section of hair.
This style looks especially nice on straight hair with long layers, because the ends fall in clean lines underneath the twist. It also works on blunt cuts. The contrast between the sleek crown and the straight ends is the whole charm.
A little shine spray can be lovely here, but use a light hand. Too much and the twists can start to separate. You want smooth, not greasy.
6. Low Chignon With a Deep Side Part
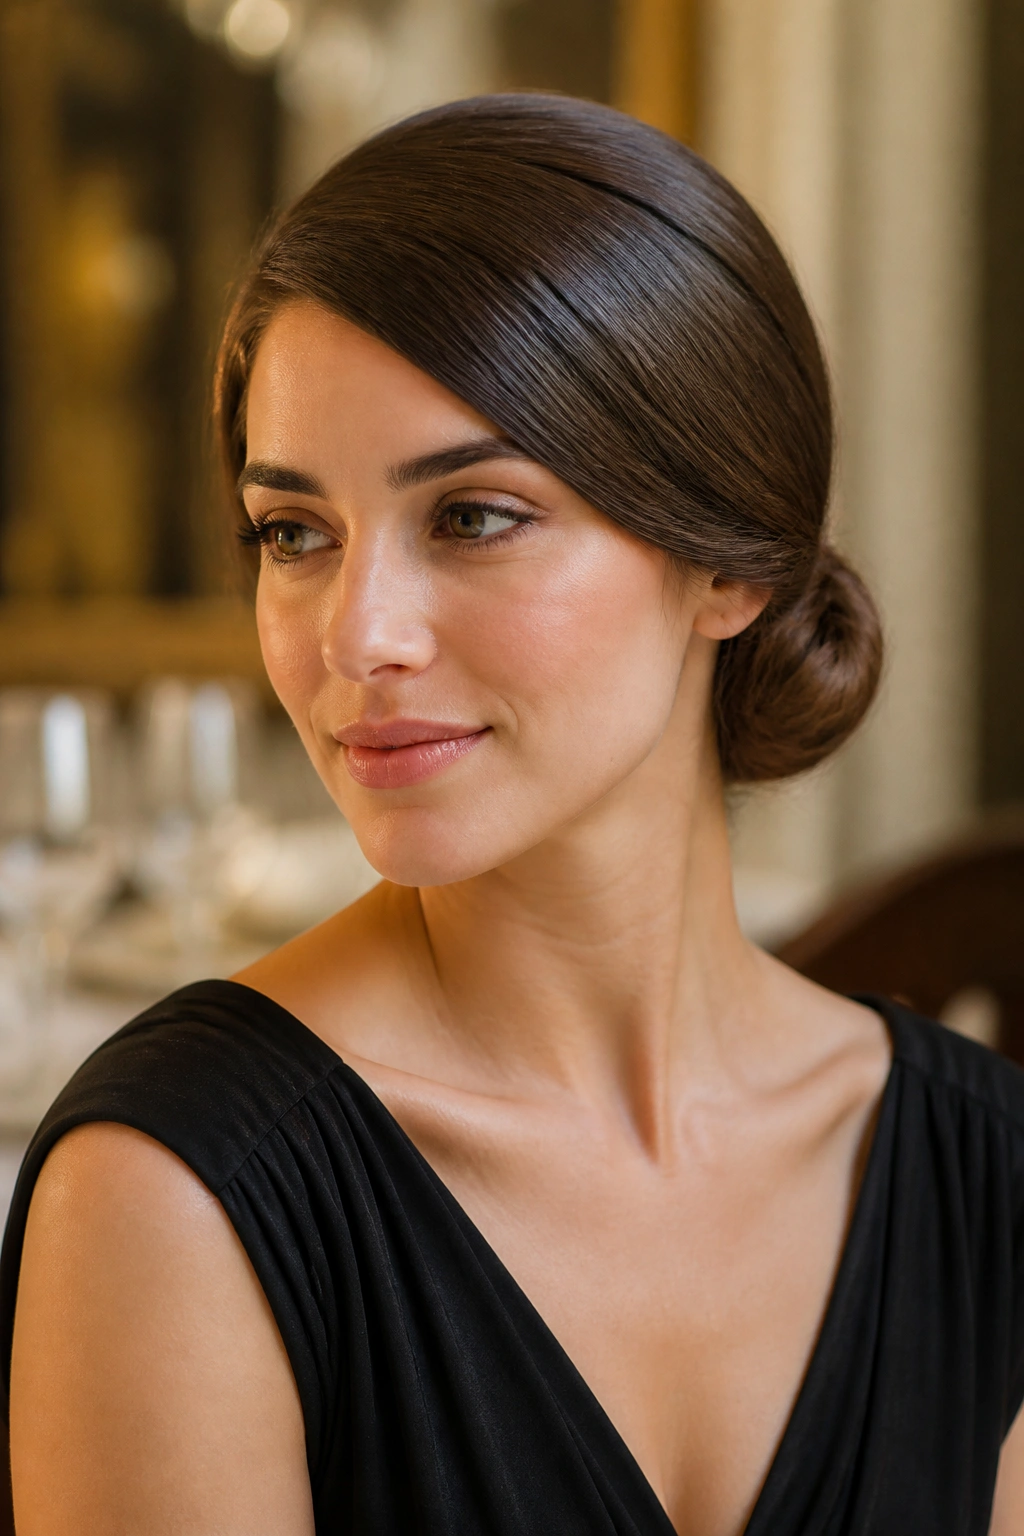
A low chignon is one of those styles that looks calm even when the rest of your day is not. On straight hair, it has a clean, sculpted feel because the strands fold into the bun without a lot of bulk.
Start with a deep side part. Gather the hair low at the nape, twist it into a coil, and pin it into a compact bun. If the bun feels too perfect, pull one small piece free near the temple or the ear. That tiny break softens the whole shape.
When to Reach for It
This is the style for dinners, interviews, family events, or any day when you want your hair off your neck but still want it to look finished. Straight hair is useful here because it lies neatly against the head and keeps the bun from getting fuzzy too fast.
- Works best on medium to long hair
- Needs 4 to 6 bobby pins
- Holds better with a mist of flexible hairspray
- Looks best when the bun sits just above the nape, not halfway up the head
If your hair is very fine, make the ponytail base first and split it slightly before twisting. That gives the bun a bit more body. Otherwise it can disappear into the back of the head. A good chignon should look deliberate, not shy.
7. High Ponytail With a Wrapped Base

A high ponytail can look sporty, yes, but it can also look polished and cute when the base is clean and the hair is wrapped around the elastic. Straight hair gives you that sleek lift without a lot of work.
Brush the hair up to the crown or just above it. Secure it tightly, then take a thin strand from the ponytail and wrap it around the elastic until it’s hidden. Pin the strand underneath with one bobby pin. That one detail changes the whole look.
The Part People Miss
A high ponytail on straight hair tends to sag if the base is loose. Pull the hair upward while you secure the elastic, then tighten it once more before wrapping. It should feel secure at the scalp, not painful, and the length should drop cleanly from the top.
If you want more volume, flip your head upside down for the first brush-up, or lightly tease the crown before gathering it. Don’t overdo the teasing. Straight hair shows knots fast, and those are a pain to smooth out later.
This style works for workouts, errands, and nights out. That range is part of the appeal. It’s neat enough to look intentional, but not so formal that it feels fussy.
8. Face-Framing Half-Up Knot

A half-up knot is one of those hairstyles that looks casual in the best way. It also gives straight hair a little lift where it usually lies flat — right at the crown and around the face.
Pull back the top section from temple to temple, twist it into a small knot, and pin it or tie it with a tiny clear elastic. Leave the rest down. If you want it softer, let two front pieces hang loose near the jawline. If you want it sharper, keep the front smoother and tuck the sides back.
What Makes It Cute, Not Messy
The size matters. A huge knot can make straight hair look like it was folded up in a hurry. A smaller knot, sitting just high enough to show off the length below, feels more balanced.
This style is especially good when your hair is shoulder-length or longer and you want something quick that still looks styled. It also works on second-day hair because a little natural grip helps the knot stay put.
Use a small elastic if the knot is slippery, then hide it with a hairpin if needed. And if you’re dealing with baby-fine hair, spray the top section with dry shampoo before twisting. That extra grit is often the difference between “cute” and “keeps falling apart.”
9. French Twist That Stays Put
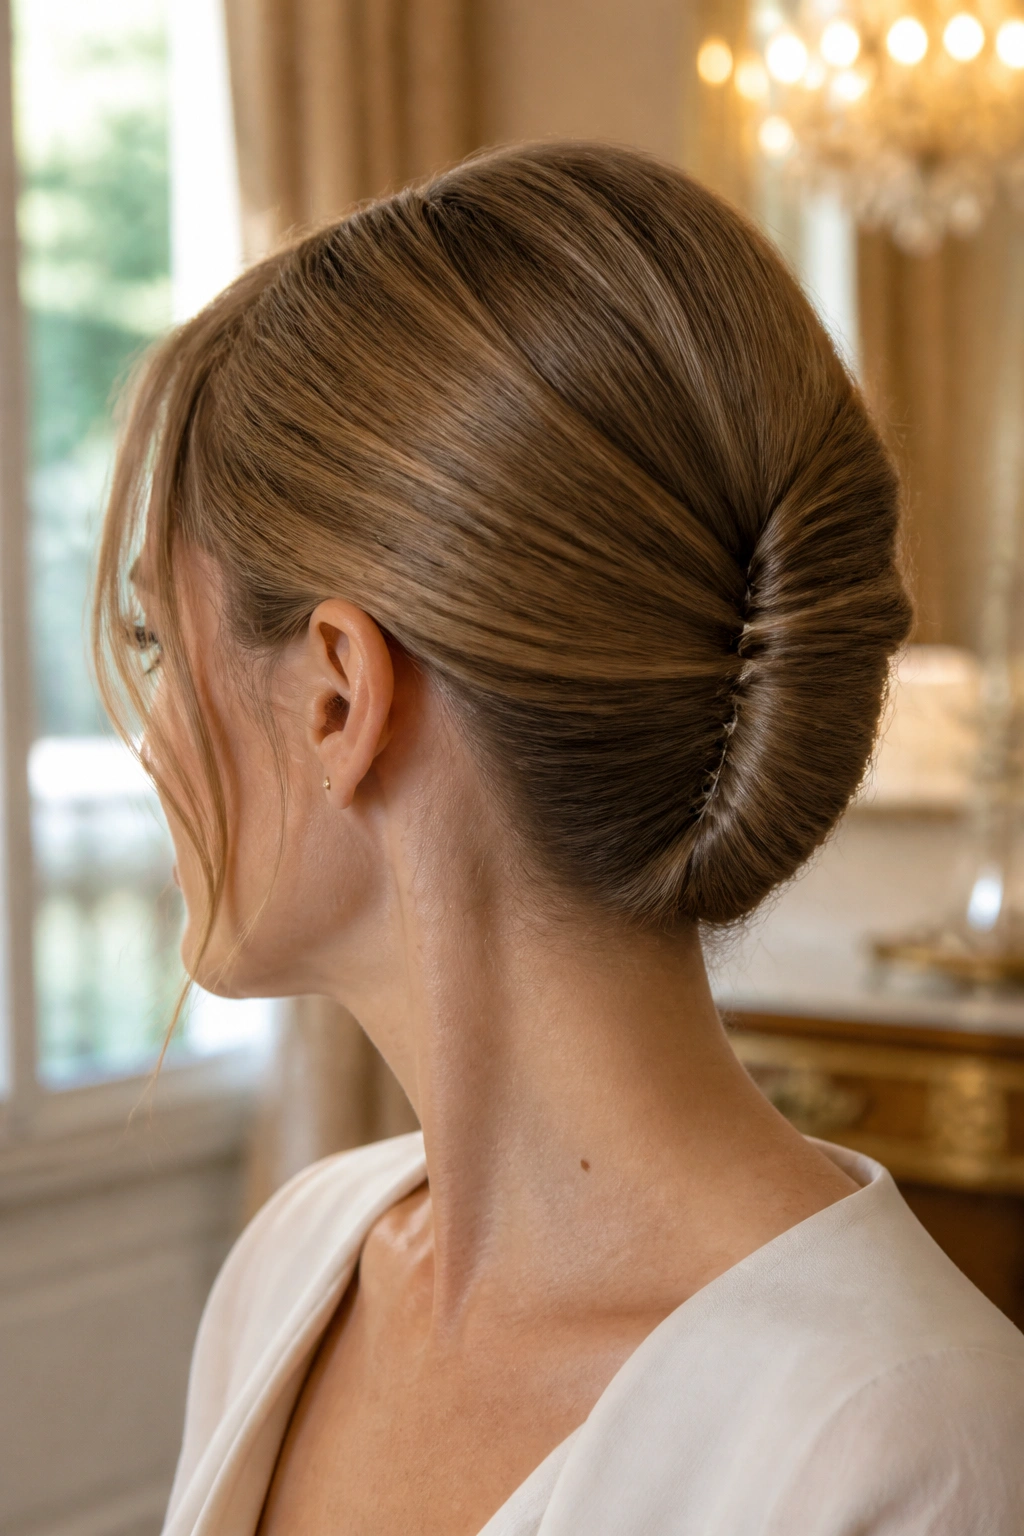
A French twist sounds formal, but on straight hair it can be surprisingly fresh when you keep it a little loose and modern. The shape is sleek. The trick is not making it too stiff.
Brush the hair back, gather it low at the center of the head, and twist it upward so the ends tuck inside the roll. Pin along the seam, not just at the top. That matters. One pin at the crown won’t hold much on smooth hair.
Why Straight Hair Needs a Few Extra Pins
Straight strands slide. That’s the issue. So if you want a French twist to stay, you need enough pins to anchor the fold at several points. Three to five bobby pins is common, and thick or very silky hair may need more.
The finished look should feel clean but not frozen. A little width through the shell of the twist keeps it from looking severe. If there’s a shorter layer escaping at the nape, leave it. Perfect is not the goal here. A slight softness makes the whole thing feel wearable.
This style is a good example of how straight hair can look expensive without being flashy. That sounds like a strange phrase, but you know it when you see it.
10. Double Low Buns for Straight Hair
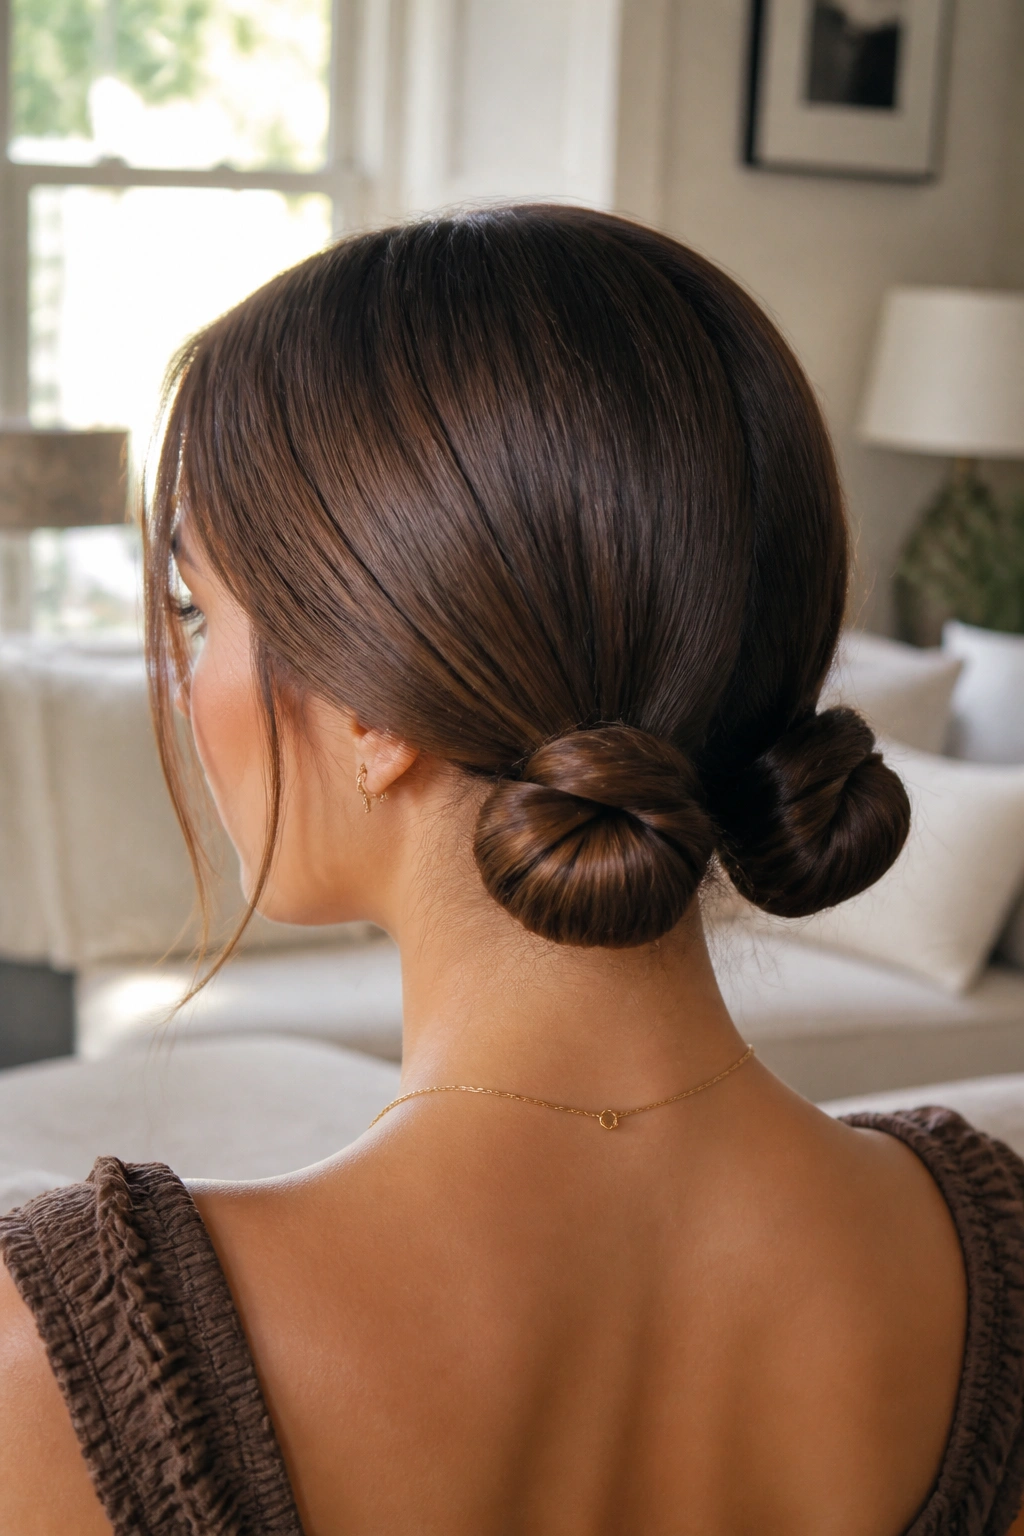
Two low buns can be playful, sweet, and just a little bit retro. On straight hair, they have a crisp shape that reads clearly from across the room, which is part of why they work so well.
Split the hair down the middle and make two low pigtails near the nape. Twist each one into a bun and pin the ends under. Keep the buns compact if you want a neater look, or tug them out slightly for a softer shape.
How to Keep Them Even
The easiest mistake is making one bun higher than the other. Check the symmetry before you pin anything. If one side sits a little off, the whole style feels unbalanced.
Use small elastics first, then bobby pins to secure the shape. Straight hair is smooth enough that a loose bun can unwind fast, especially if you’re moving a lot. A bit of texturizing spray on the mid-lengths helps the buns hold their shape without making the hair crunchy.
- Great for short to medium lengths
- Cute with center parts or slightly off-center parts
- Works well with ribbon or small clips
- Easier on day-two hair than freshly washed hair
This is one of the few styles that can look playful without needing volume. That’s a nice change.
11. Braided Headband With Loose Length
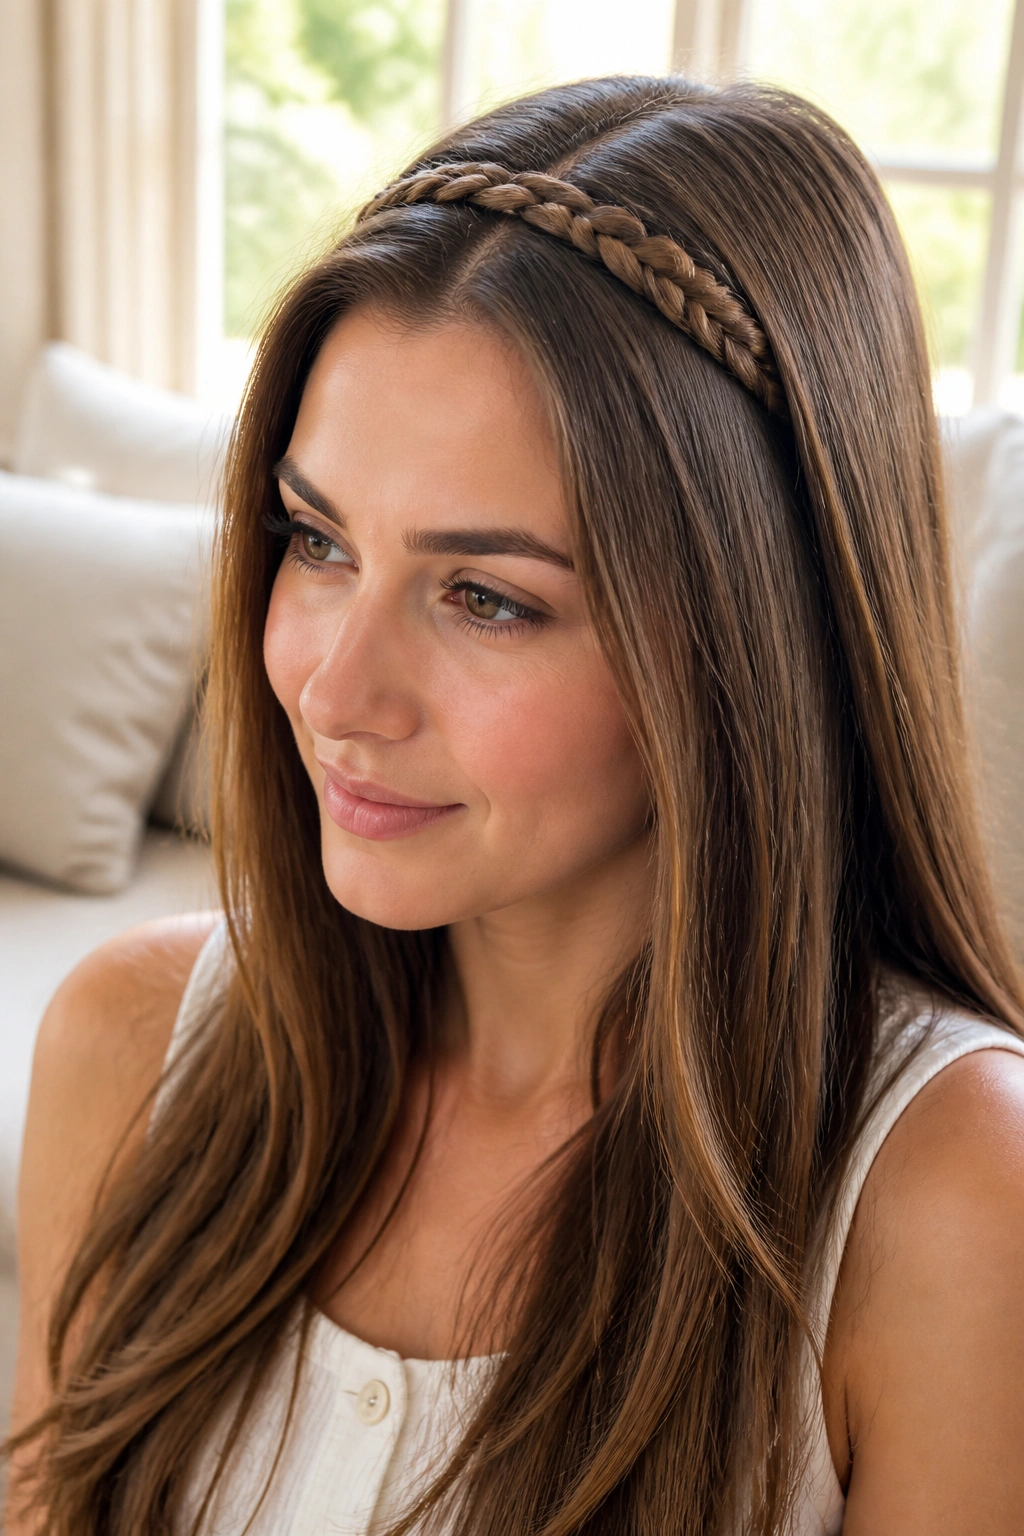
A braided headband is one of my favorite tricks for straight hair because it gives you detail right at the hairline, where plain styles can feel a little flat. The braid acts like a built-in accessory.
Take a front section from one side, braid it across the top of the head like a headband, and pin it behind the opposite ear. Leave the rest of the hair down and smooth. A side braid can look softer, but a braid that crosses the crown gives more shape.
The Best Part
You don’t need a ton of length for this. Even shoulder-length straight hair can pull it off if the braid is thin and placed carefully. If your hair is longer, keep the braid narrow so it doesn’t swallow the rest of the style.
A light mist of hairspray before braiding helps the section stay together. After you pin it, tug the braid edges outward just a little. That widens it and makes the whole thing look more finished. Don’t pull too hard. The braid should look neat, not stretched thin.
This style also works nicely when you want to hide bangs growing out or when you just want something less bare around the face. Small problem solved.
12. Tucked-Under Faux Bob
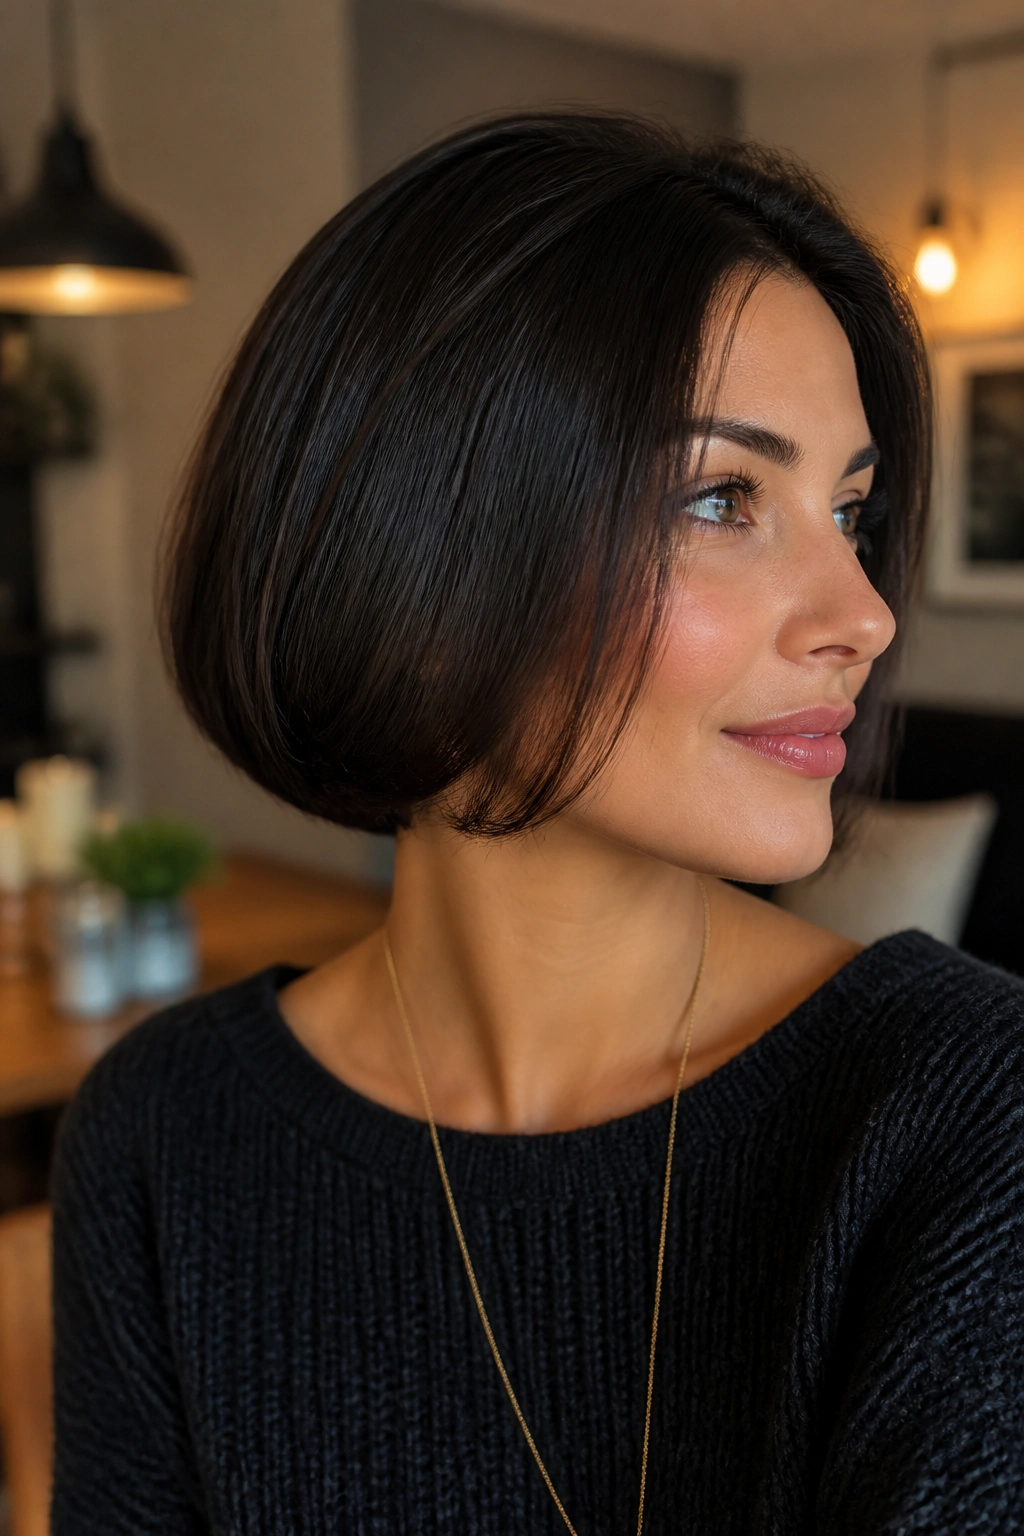
The faux bob is a fun one because it gives straight hair a totally different shape without cutting anything. It’s a good pick when you want a change that feels a little dramatic but still neat.
Start by curling the ends under slightly if your hair is very long and pin-straight. Then tuck the length inward at the nape, folding it under itself and pinning it close to the head. The goal is a short, rounded shape that sits just below the chin or at the jaw, depending on your length.
What to Watch For
The underlayer needs to be pinned flat. If the fold sticks out, the style can look clumsy fast. Use multiple pins hidden in the seam, and check the back with two mirrors if you can. That sounds fussy, but it saves you from a lumpy shape.
This one works best when the top section is smooth and the ends are tucked neatly. If your hair is layered heavily, leave a few face-framing pieces out. Otherwise the shorter layers can spring free and undo the whole illusion.
It’s a clever style for a party or special dinner because it feels unexpected on straight hair. People notice the shape before they notice the trick.
13. Scarf-Wrapped Ponytail

A scarf changes everything. Put it around a ponytail on straight hair and suddenly the whole style feels more styled, even if the base is only a simple low or mid ponytail.
Make a ponytail first. Then tie a silk scarf, cotton bandana, or narrow printed wrap around the elastic. Let the ends hang loose, or knot them neatly on one side. If your ponytail is very smooth, wrap the scarf tightly enough that it doesn’t slide down the shaft.
Why It Works on Straight Hair
Straight hair gives the scarf a clean backdrop. The print stands out, the shape reads clearly, and the ponytail stays sleek beneath it. You don’t need much volume for this to work. In fact, too much fluff can fight the scarf and make the whole look busy.
A scarf also hides a less-than-perfect elastic situation, which is useful on days when you’re rushing. If the ponytail isn’t exactly centered, the scarf distracts the eye. Handy little trick.
Pick the scarf width based on your hair thickness. Thin scarves are enough for fine hair. Thicker hair usually needs a wider wrap so the elastic doesn’t peek through. Easy. Practical. Done.
14. Soft Space Buns With Clean Partings

Space buns can lean costume if you do them too tightly, but on straight hair, soft ones with clean partings feel cute in a more wearable way. The key is keeping the buns small and the partings sharp.
Split the hair into two even sections. Make two high or mid-height pigtails, twist each one into a bun, and secure with pins or small elastics. Leave the bun edges a little loose so they don’t look glued to your head.
Making Them Wearable
The best version starts with a crisp middle part and smooth roots. That contrast keeps the style from looking messy. If you want a softer finish, leave a few thin front pieces loose near the temples.
- Keep each bun about the size of a small orange
- Use matching elastics so the base disappears
- Pin the buns from underneath so the pins stay hidden
- Add a little texture spray if the hair is too slippery
This style is much nicer on straight hair than people think because the buns keep their shape and don’t frizz out as quickly. They also work well on shorter lengths that can’t quite reach a full bun.
There’s a fine line between cute and chaotic here. Stay on the neat side of it.
15. Sleek Side Bun With a Clip
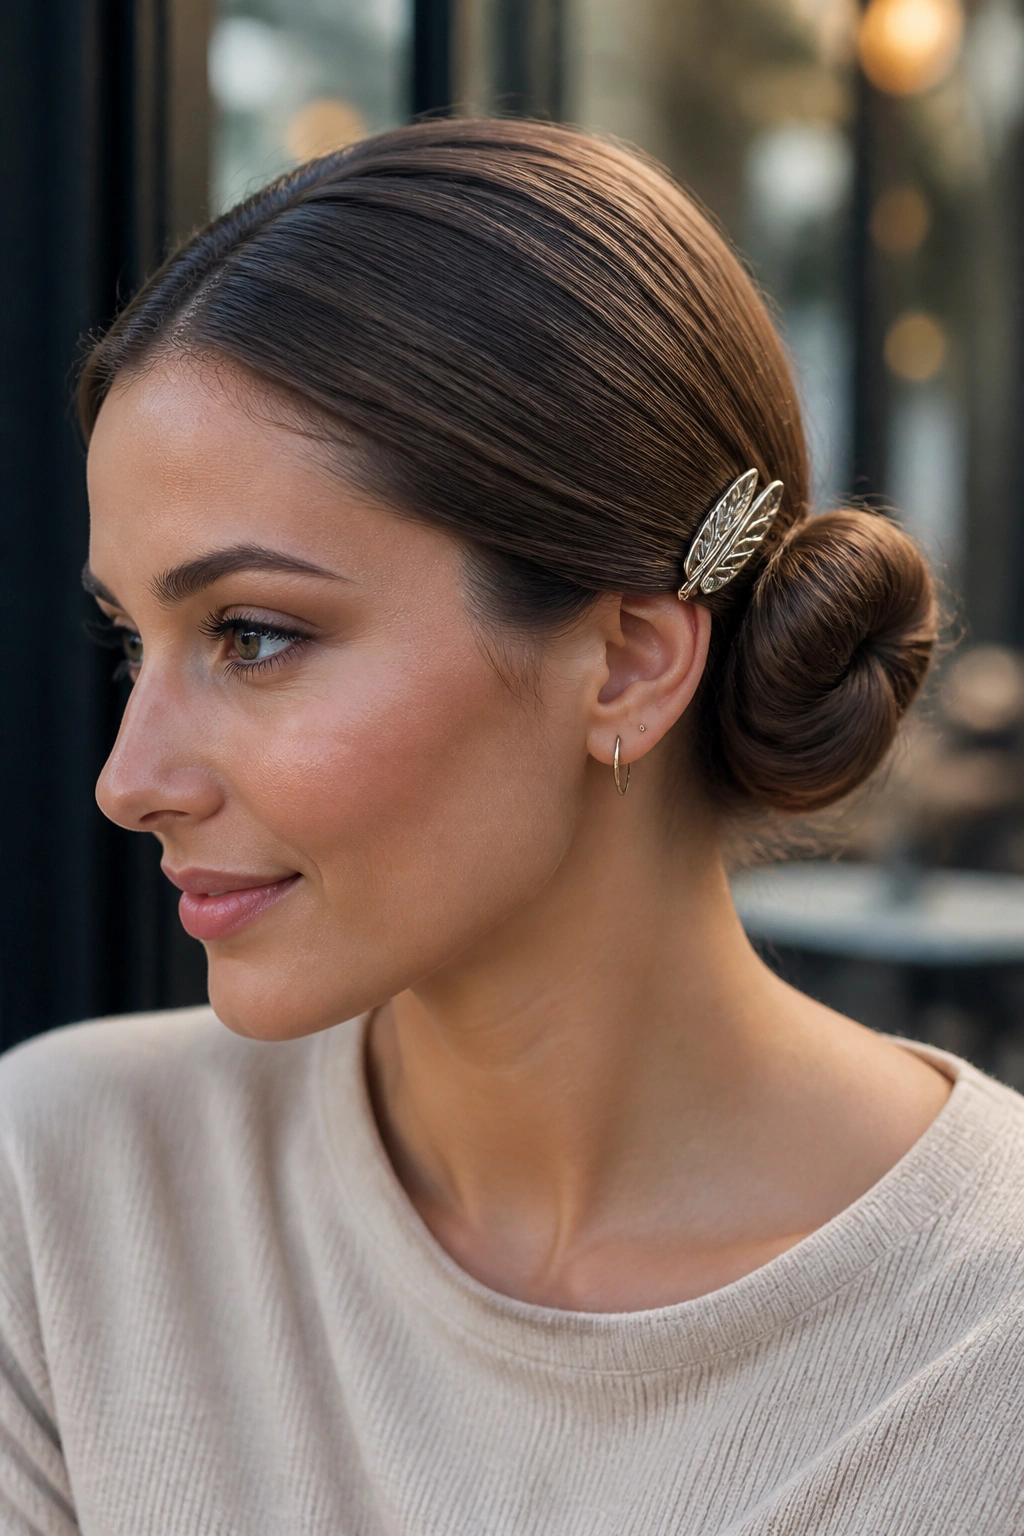
A side bun feels a little softer than a bun at the back, and on straight hair that side placement gives the whole style a graceful line. Add a decorative clip, and it stops looking like a quick fix and starts looking intentional.
Sweep the hair to one side, gather it low near the ear or just below the jaw, and twist it into a small bun. Pin it securely, then place a clip, pearl pin, or plain gold barrette over the top. Keep the bun compact. A huge side bun can overwhelm straight hair fast.
The Small Finish That Changes Everything
The clip is not just decoration. It also hides the pins and makes the style hold together a little better. On slippery hair, that matters more than people admit. A flat clip sits well; a heavy one can drag the bun down, so choose your size carefully.
This is one of those styles that works for a dressier outfit but still feels easy enough for a regular day. It’s clean at the neckline, soft near the cheek, and a little more interesting than a plain low bun.
If your hair tends to fall forward on one side, tuck the front section behind the ear before you pin the bun. That keeps the shape from collapsing into your face. Small adjustment. Big difference.
Straight hair does not need to be fought into submission to look cute. It looks its best when the style respects the way it naturally falls, stays smooth, and reflects light.
The styles that last are the ones with good placement, enough grip, and a finish that feels tidy rather than overworked. Start with one that suits your length and your patience level. The rest is mostly a matter of pinning, smoothing, and not touching it too much afterward.
