



Straight hair can look expensive with almost no effort — or it can look like you forgot to do anything at all. The difference is usually the part, the tension, and what you do with the last 2 inches of the ends. That’s why sleek hairstyles for straight hair work so well: the texture already gives you a clean line, so the styling job becomes more about sharpening, smoothing, and placing everything on purpose.
I’ve always liked styles that look calm from a distance but still hold up when you get close. No fluff. No giant curls pretending to be simple. Just glossy lengths, clean sections, and shapes that stay neat after a commute, a desk day, or a long dinner.
The catch is that straight hair can go flat fast. Use too much oil and it turns greasy. Skip the grip and your ponytail slides down by lunch. Get the balance right, though, and straight hair gives you some of the cleanest, most polished hairstyles around.
1. Glass-Hair Center Part
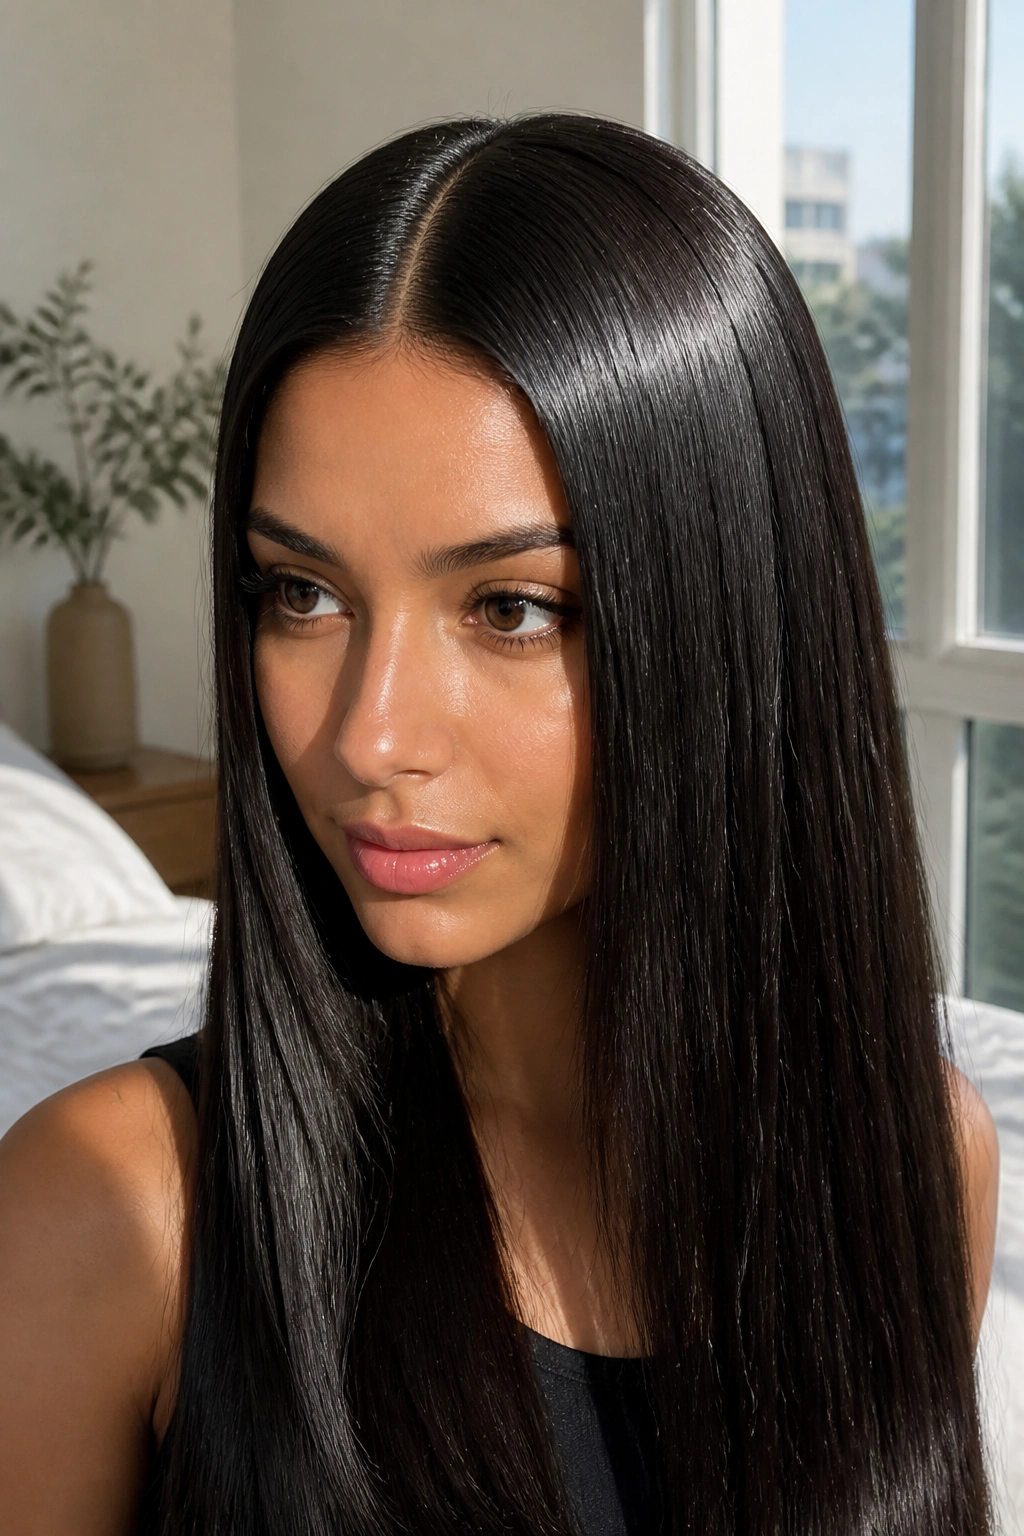
A glass-hair finish is the blunt force object of sleek styling. It works because straight hair already wants to lie down; you’re just polishing the surface until it reflects light instead of scattering it.
Start with a fine-tooth comb, a heat protectant, and a flat iron set to a moderate heat that matches your hair’s thickness. Thin hair usually needs less heat than people think. Thick, coarse strands can handle a bit more, but the goal is smoothness, not frying.
What Makes It Work
- Blow-dry the hair in the direction you want it to fall.
- Take 1-inch sections through the iron, moving slowly once.
- Finish with a pea-sized serum on the mids and ends, not the roots.
- Mist a light shine spray from 8 to 10 inches away.
My favorite part: this style looks clean on both shoulder-length cuts and long hair. It can feel severe in a good way, which is rare.
2. Low Sleek Ponytail with a Wrapped Base

Why does a low ponytail sometimes look chic and other times look like a gym backup plan? Placement, mostly. Put it at the nape, keep the crown smooth, and wrap a small section of hair around the elastic so the whole thing looks finished.
A boar-bristle brush is your best friend here. Pull the hair back in small passes instead of trying to smooth everything in one swipe. That’s how you avoid the little bumps that show up under bright light.
How to Keep It Tight Without Looking Harsh
Shape First
Brush the hair back while it’s still slightly damp or freshly smoothed, then set the ponytail low and centered.
Lock the Base
Use two clear elastics if your hair slips a lot. That tiny extra bit of hold matters more than people admit.
Finish Clean
Wrap a 1-inch strand around the elastic and pin it underneath with a hairpin, not a bulky bobby pin.
This one works for office days, weddings, and lazy days that still need a little structure.
3. Deep Side-Part Tuck

A deep side part gives straight hair instant attitude. One side falls across the forehead, the other gets tucked neatly behind the ear, and suddenly the whole shape feels intentional instead of plain.
I like this style on medium and long lengths because the tuck creates a clean line at the jaw. If your hair is pin-straight, a tiny bend at the ends can keep the style from looking too rigid. Keep the front smooth with a light mist of hairspray on a brush, then press the tucked side flat with your palm.
The small detail that matters most is the ear tuck. Push the hair behind the ear, then add a slim clip or a single decorative pin just above the ear if the strand keeps escaping. Simple. That’s the point.
It’s a good one when you want sleek hair without making a full production out of it.
4. Blunt Lob with Sharp Ends
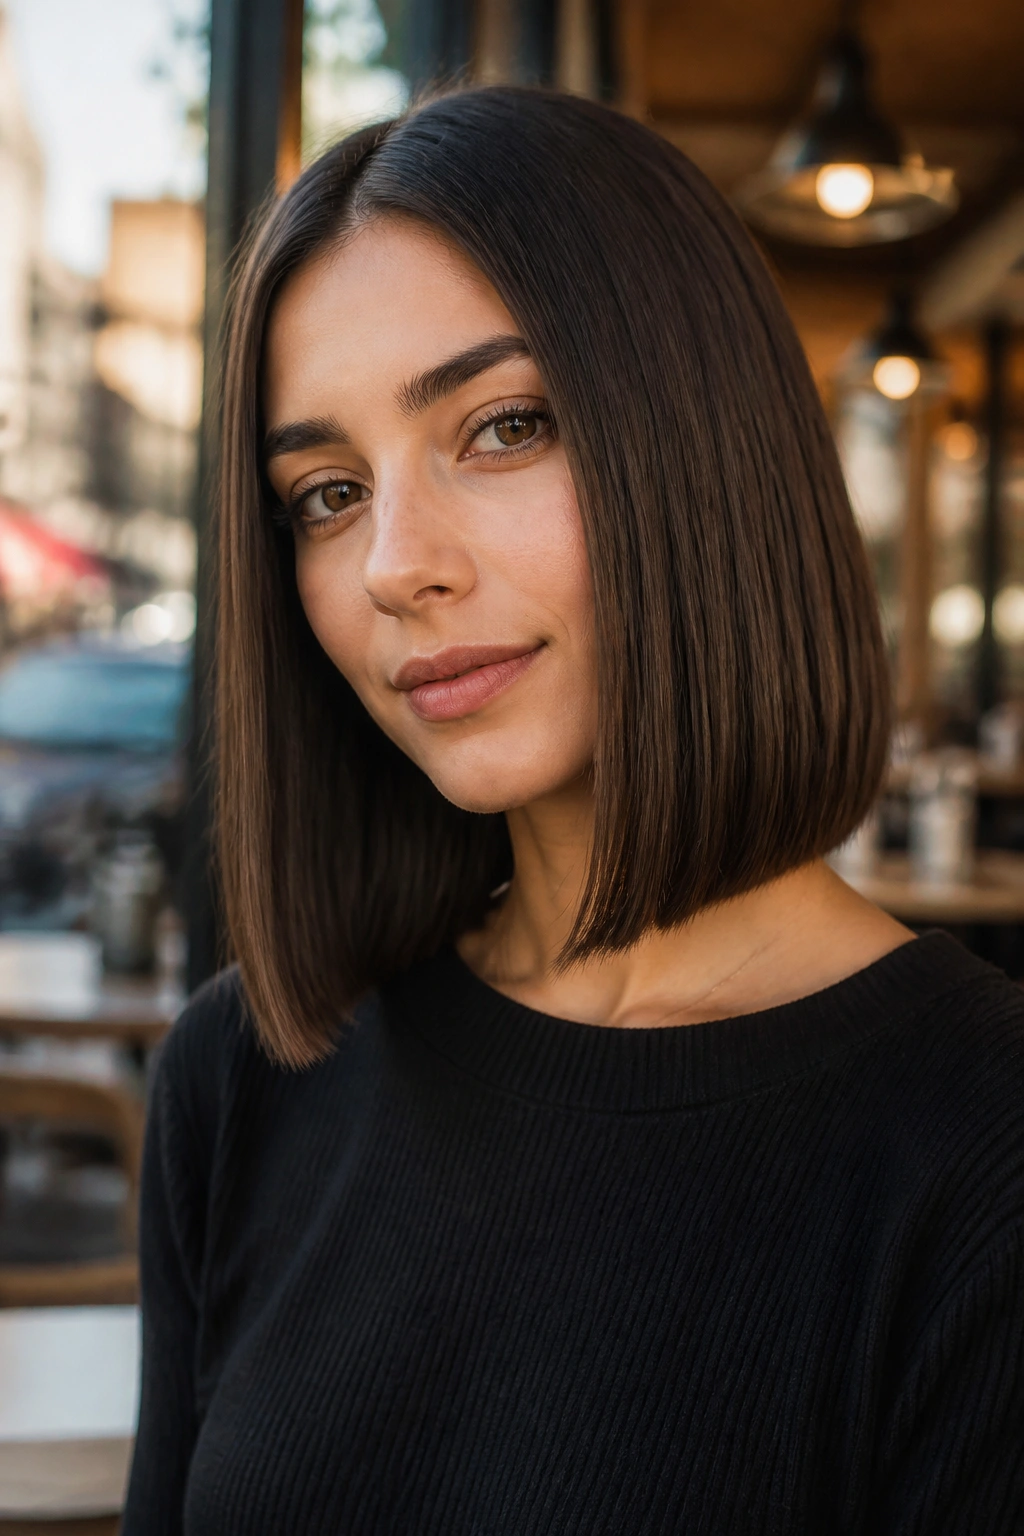
A blunt lob is the haircut version of a crisp white shirt. No layers fighting for attention. No soft volume pretending to be texture. Just a straight edge that makes straight hair look thick and deliberate.
This style really shines when the ends are cut cleanly at one line, usually somewhere between the chin and the collarbone. Too much feathering makes the shape wobble. Too many interior layers can make it lose that sharp, sleek feel.
The reason I like it is simple: it does half the work for you. A blunt perimeter keeps the eye on the shape, and that makes styling easier on rushed mornings. Run a flat iron once, tuck one side behind the ear, and you’re done.
If your hair tends to look wispy at the bottom, this cut is the fix. It gives the whole style weight.
5. Slicked-Back High Ponytail

A slicked-back high ponytail is not subtle. Good. It shouldn’t be. The height lifts the face, the clean base shows off the cheekbones, and the straight lengths trail behind like a neat ribbon.
This is the style that needs the most control at the front. Work a light gel or styling cream through the hairline, then use a comb to sweep everything upward. Stop once the crown is smooth. If you chase every tiny flyaway, the front can start looking stiff and shiny in a bad way.
The ponytail itself should sit at the top third of the head, not the very edge of the crown. Too far forward and it feels cartoonish. Too low and you lose the lift.
A few people hate this look because they think it’s too severe. I get that. But on straight hair, that severity is the appeal. It’s crisp. It has backbone.
6. Low Chignon with a Clean Middle Part

A low chignon looks expensive when the middle part is exact and the bun sits close to the neck. That’s the whole trick. Nothing puffy, nothing fussy, nothing that wiggles out of place halfway through the evening.
Where the Bun Should Sit
The bun works best just above the nape, not halfway up the head. If it sits too high, the style starts drifting into ballerina territory. If it sits too low, it can collapse and look unfinished.
Straight hair makes this style easier because the strands lie flat when you wrap them. Use a tail comb to divide the hair down the center, then smooth each side back before twisting into a knot.
How to Make It Stay
- Secure the twist with two U-pins crossed through the base.
- Spray the top lightly before the final twist.
- Leave the bun slightly compact rather than airy.
This one is a quiet workhorse. It works for formal events, but it also fits a black sweater and gold hoops on an ordinary day.
7. Half-Up Sleek Twist
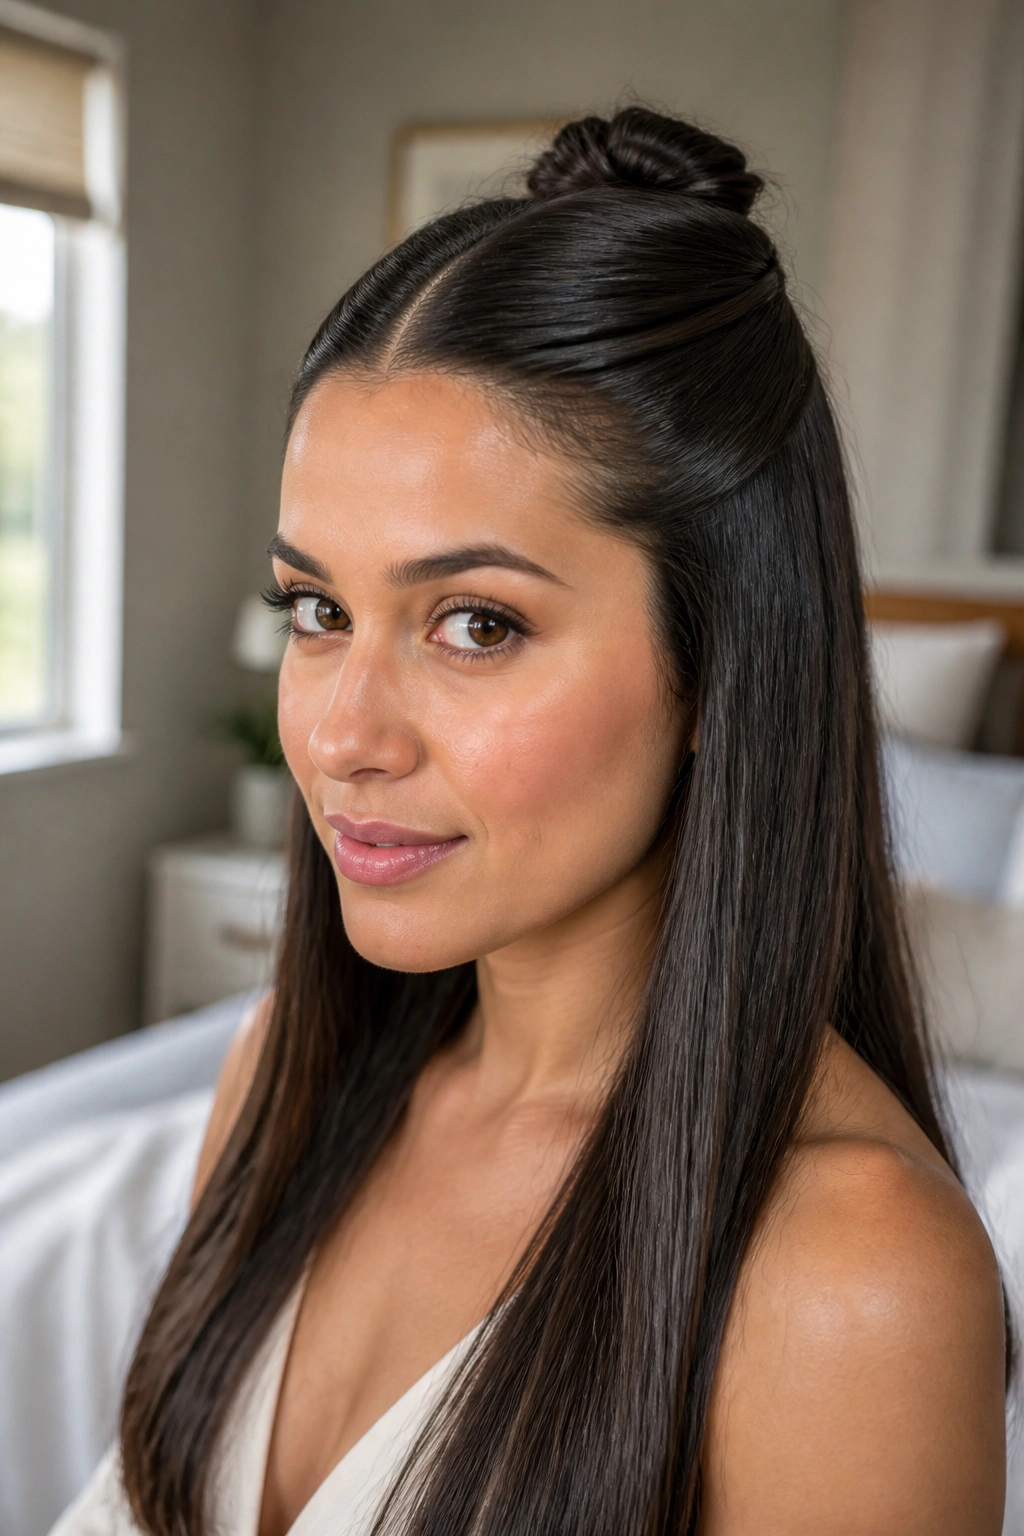
Half-up styles can get childish fast. The sleek twist avoids that by keeping the top section tight and the lower length glossy and straight.
The best version starts with a clean center part. Take the front sections from both temples, twist them back, and anchor them at the crown or just below it. The twist should look flat against the head, not puffy. That’s the line between polished and prom-night.
A small clear elastic disappears better than a big clip, though a narrow barrette works if you want a little shine at the back. Leave the rest of the hair hanging straight. Don’t overdo the ends; the contrast is what makes the style work.
I like this one on second-day hair when the roots need a little discipline but the lengths still look good. It gives you lift without pretending the hair is something it isn’t.
8. Pin-Straight Long Layers with a Center Part

Long layers can look soft, but they can also look razor-clean when they’re ironed flat and parted down the middle. The key is not volume. It’s separation. Each section should fall in its own lane.
This style works especially well if the layers are long enough to frame the face without kicking out at odd angles. Shorter layers can be trickier. They may flip out where you do not want them, which ruins the line.
A few people think straight hair has no movement in this style. Not true. The movement is subtle — more like a shift of sheen when the light catches the ends. That’s enough.
If you want the look to hold, dry the hair with the nozzle pointed downward and finish with a cool blast. The cool air helps the cuticle lie flatter. Old-school trick. Still works.
9. Wet-Look Back-Swept Style

Wet-look hair is the boldest style in this group, and it works because it makes straight strands look almost lacquered. The whole point is controlled shine, not a half-dry slicked-back mess that goes frizzy halfway through the event.
Use a strong-hold gel on damp hair, then comb it straight back from the hairline. Keep the product concentrated at the roots and front sections. If you spread it too far down the length, the hair can clump in a way that looks heavy instead of sleek.
The back can stay loose, pulled behind the shoulders, or tucked into a low knot. Both work. I tend to prefer the loose version because it keeps the look from feeling too rigid.
Touching it is a mistake. So is brushing it after the gel sets. Let the shape dry, then leave it alone. That’s the whole game.
10. French Twist for Straight Hair
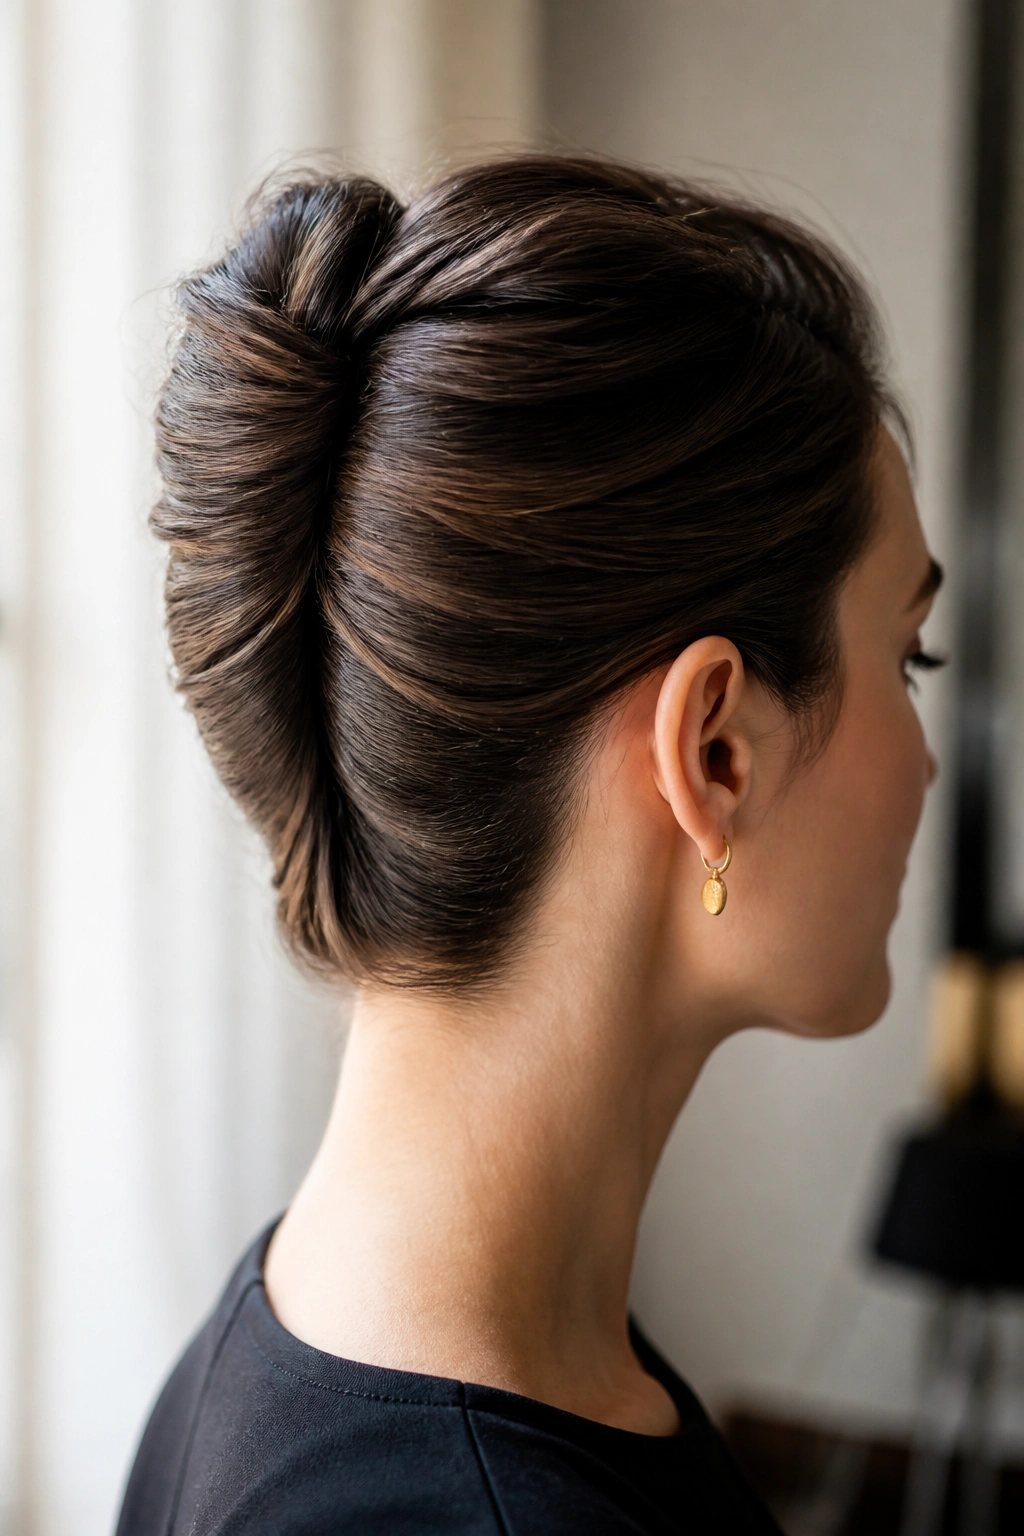
A French twist on straight hair sounds harder than it is. The trick is grip. Straight strands slip, so you need a little texture at the roots before you roll the hair upward.
Start by misting the hair with a light texturizing spray, then brush everything back as if you’re making a low ponytail. Twist the length upward against the back of the head, tuck the ends inside, and secure the whole roll with several long pins placed vertically. One pin never does enough here.
The version I like keeps the top smooth and the roll narrow. If you make it too wide, the twist starts to look bulky. Too many loose pieces and it loses the sharpness that makes it handsome in the first place.
This is one of those styles that looks more complicated than it is. Good news. Once you’ve done it twice, your hands remember the motion.
11. Sleek Bubble Ponytail
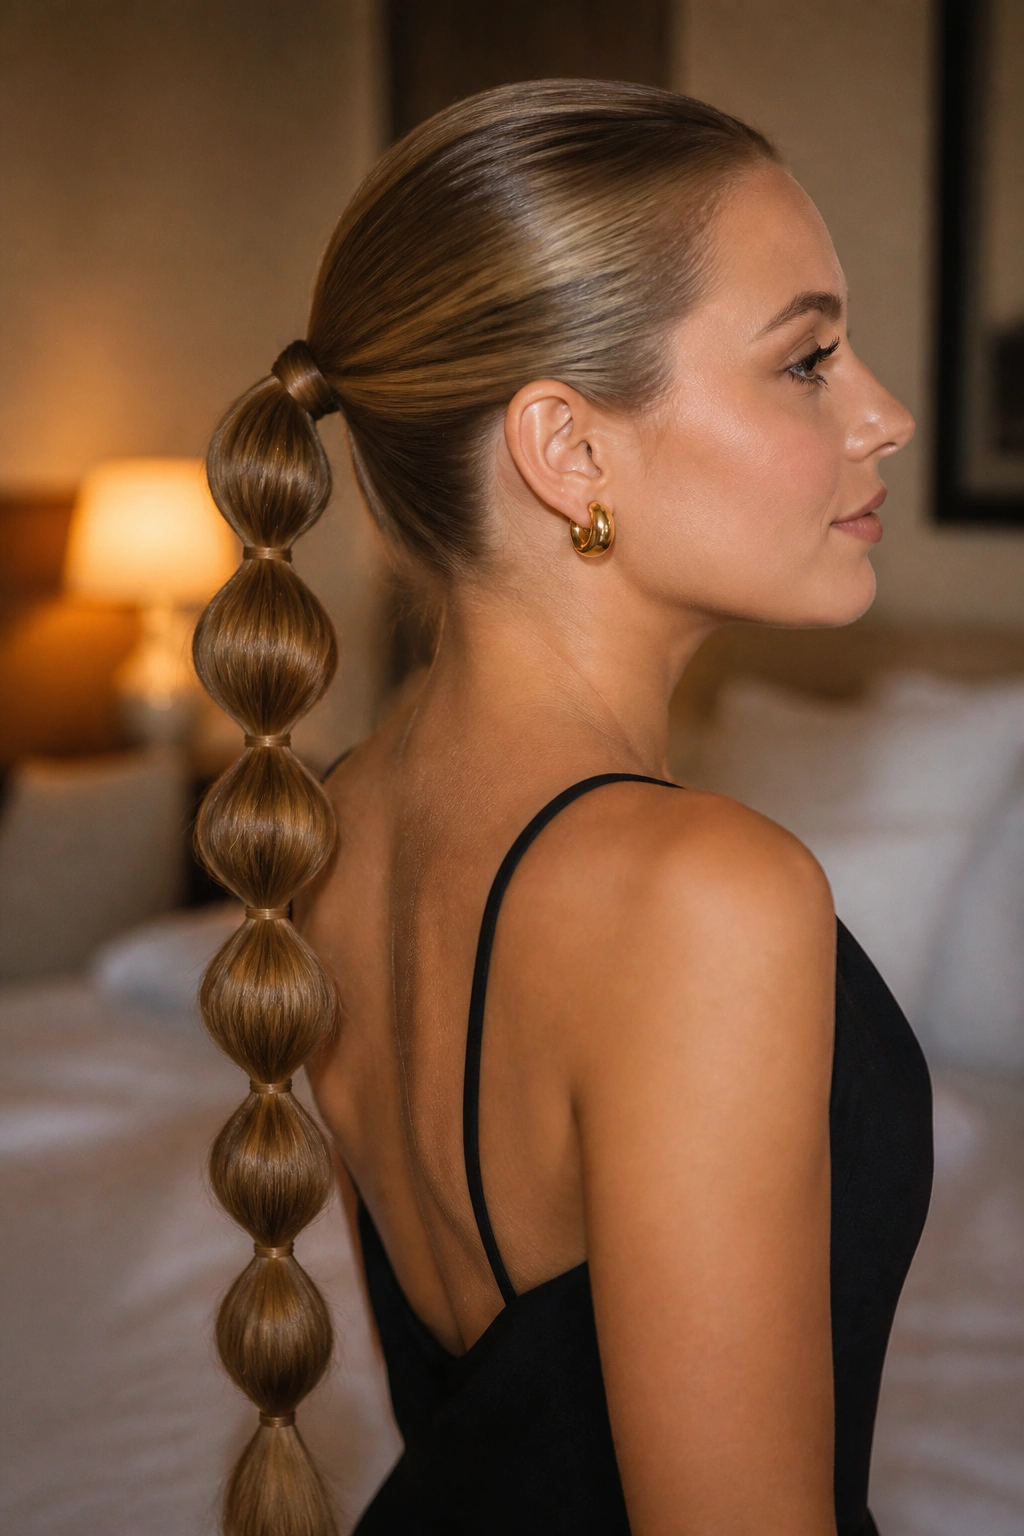
A bubble ponytail is playful, but on straight hair it can still read polished if the base stays tight and the sections stay even. It’s one of those rare styles that can look clean and a little fun at the same time.
The ponytail should begin low or mid-height, then get tied again every 2 to 3 inches with clear elastics. After each tie, gently pull the section between elastics outward until it forms a soft bubble. Don’t yank. You want shape, not distortion.
Small Details That Matter
- Keep the crown smooth before you tie it back.
- Space each elastic evenly.
- Use a light serum only on the tail, not the scalp.
- Tug each bubble the same amount so the shape stays balanced.
This style is a good answer when plain ponytails feel boring but you still want something neat. It’s more interesting than a basic tie-back, and still easy enough for busy mornings.
12. Braided Crown on Straight Hair
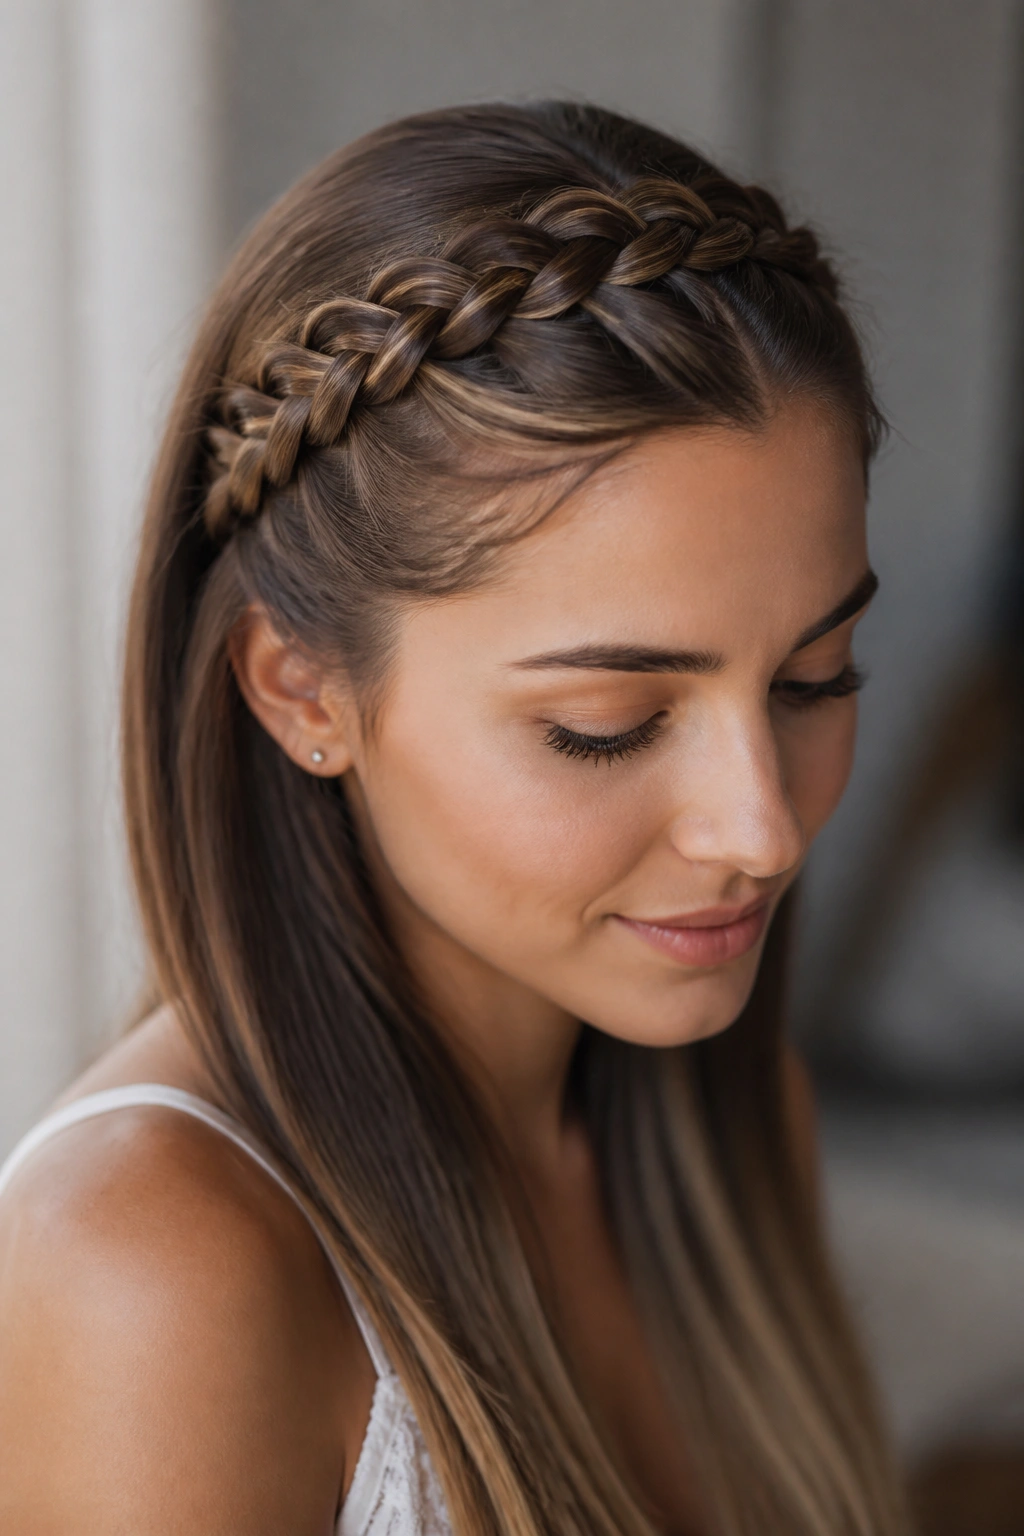
Straight hair can be slippery for braids, which is exactly why a braided crown feels so satisfying when it works. The braid hugs the head, keeps the front smooth, and turns a simple part into the star of the style.
The trick is to prep the hair with a dry texturizing mist before braiding. Not too much. A light mist gives the strands enough bite to hold their shape. Then braid close to the scalp, following the curve of the hairline from one side to the other.
What Helps the Braid Hold
Grip at the Roots
Work with hair that is not freshly conditioned. Slightly lived-in hair grips better.
Pin the Edges
Hide the braid ends under the opposite side and pin them flat with matched hairpins.
Smooth the Finish
Press the top and sides with a brush that has a little hairspray on it.
This style feels special without being fussy. It also keeps hair off the face, which is a bigger win than people admit on long days.
13. Low Knot with a Side Part
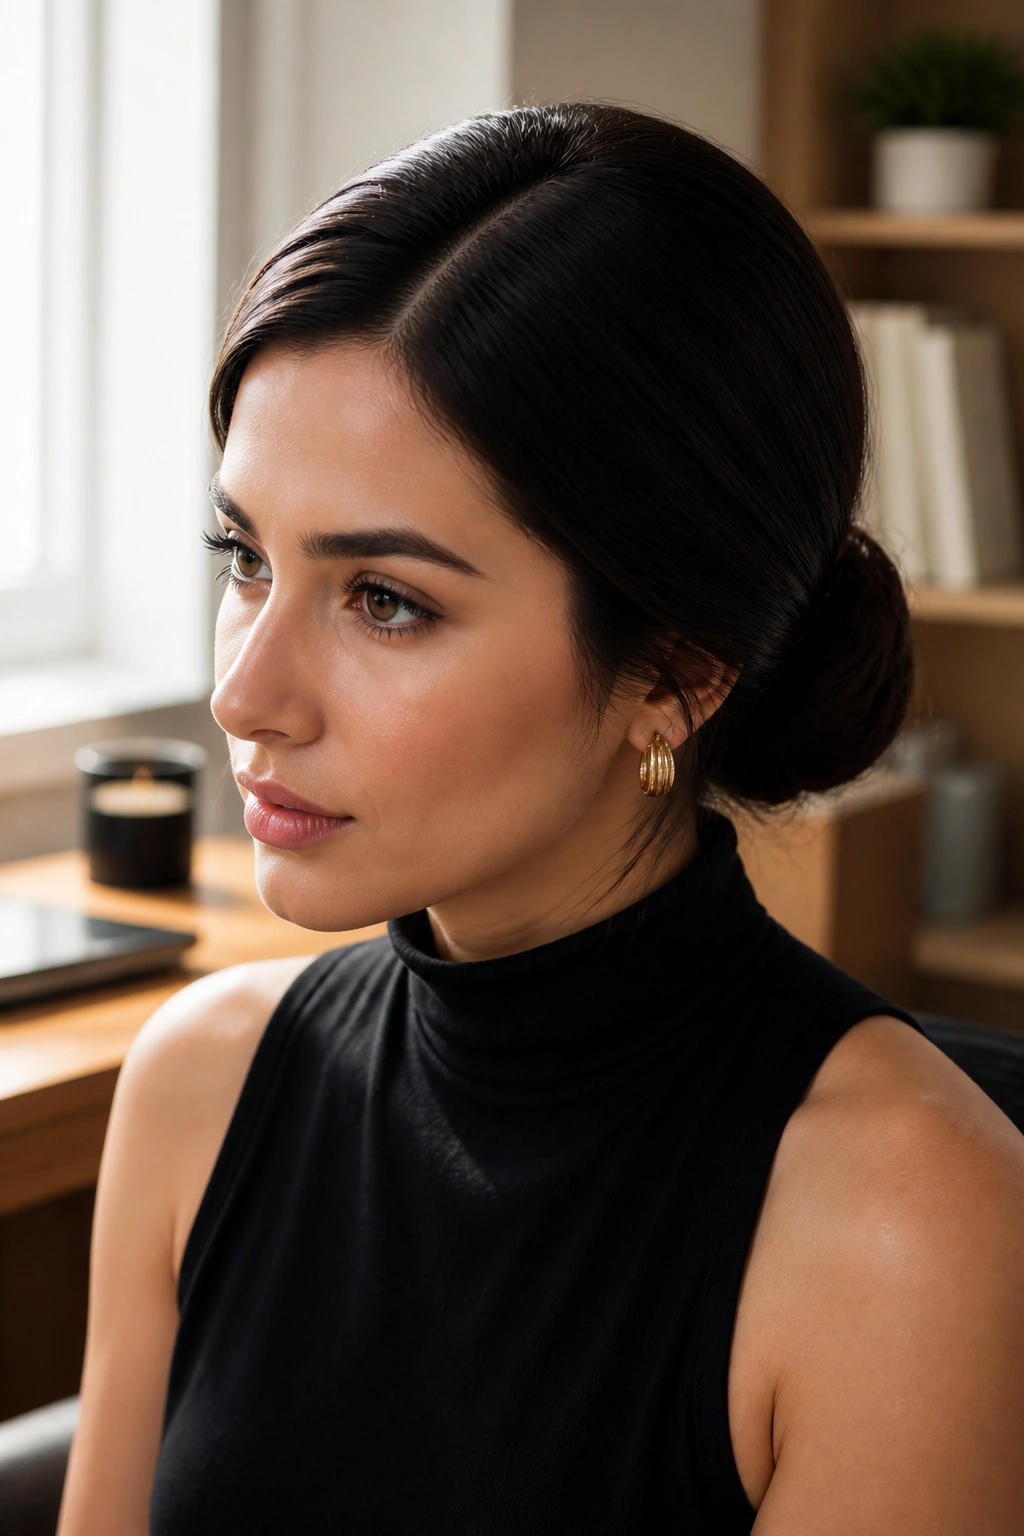
A side part changes a low knot more than you’d think. It softens the front, gives the bun a little asymmetry, and keeps the whole thing from looking too buttoned-up.
I like this one because it can go from office to dinner without changing a thing. Gather the hair low, twist it once or twice, then wrap it into a compact knot near the nape. If the knot sits too high, it loses the low-profile charm that makes it work.
Use a tail comb to define the part before you start. That small detail is what makes the style look deliberate. Without it, the bun can drift into “I just twisted it up” territory.
A side part also helps if one side of your hair has a stubborn cowlick. Use the part to work with it, not against it. That’s a much better fight to pick.
14. Tucked-In Faux Bob
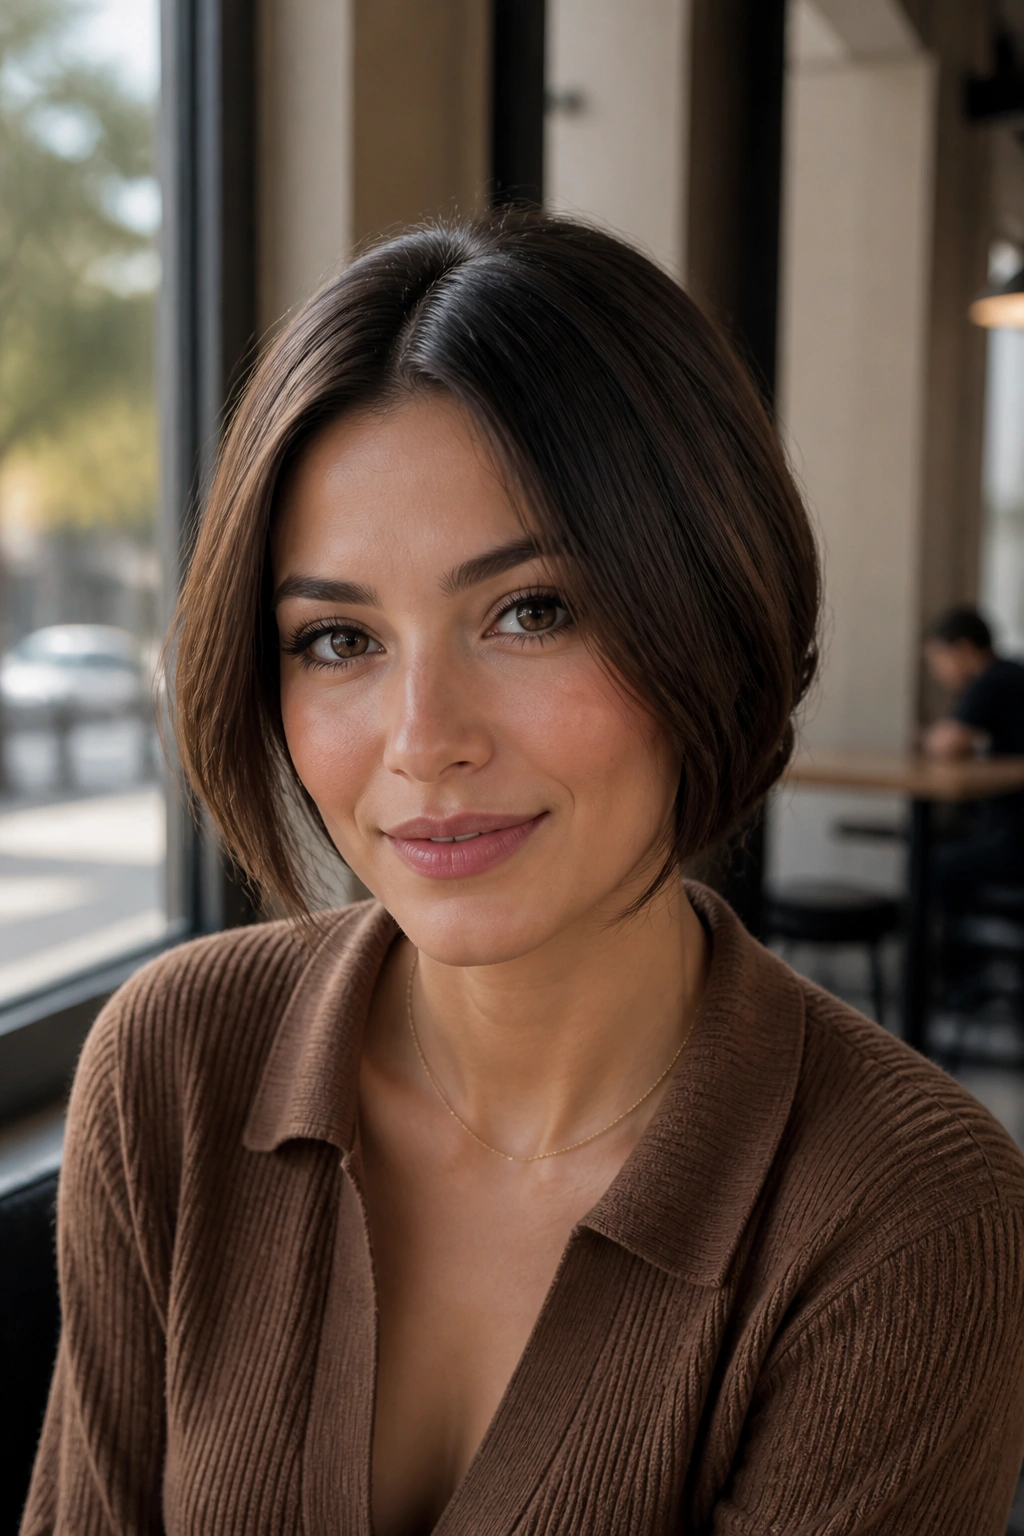
A faux bob is a little bit magic, and straight hair is the best canvas for it. The lengths fold in neatly, the lines stay crisp, and the result looks like a real haircut from the front.
To make it work, create a low loose ponytail, fold the tail upward and inward, then pin the ends underneath the roll. You want the hidden part to stay flat so nothing pokes out. A few long pins are safer than a pile of short ones.
The front should stay smooth with a center or side part, depending on your face shape and mood. I prefer a side part with this style because the extra curve keeps the bob from looking too severe.
This is a good choice if you want the feel of shorter hair for a night without actually cutting it. That said, it can take a minute the first time. Not hard. Just a little fiddly.
15. Straight Hair with a Deep Side Part and Barrettes

Barrettes can save a sleek style from feeling plain. A deep side part creates the line, and a pair of slim metal clips or pearl pins gives the hair a focal point right where the eye lands.
The best placement is above the temple or just behind the brow line on the heavier side of the part. Too low and the clip gets hidden. Too high and it feels like a school picture gone strange. The sweet spot is obvious once you see it.
Quick Placement Notes
- Choose one narrow clip for a subtle finish.
- Use two matching clips if you want a sharper graphic look.
- Keep the rest of the hair flat and tucked behind the shoulders.
- Avoid bulky rhinestone pieces unless the outfit can handle them.
I love this style on sleek lob-length hair because it feels polished without requiring much effort. The accessory does the talking, and the hair just behaves.
16. Braided Low Ponytail
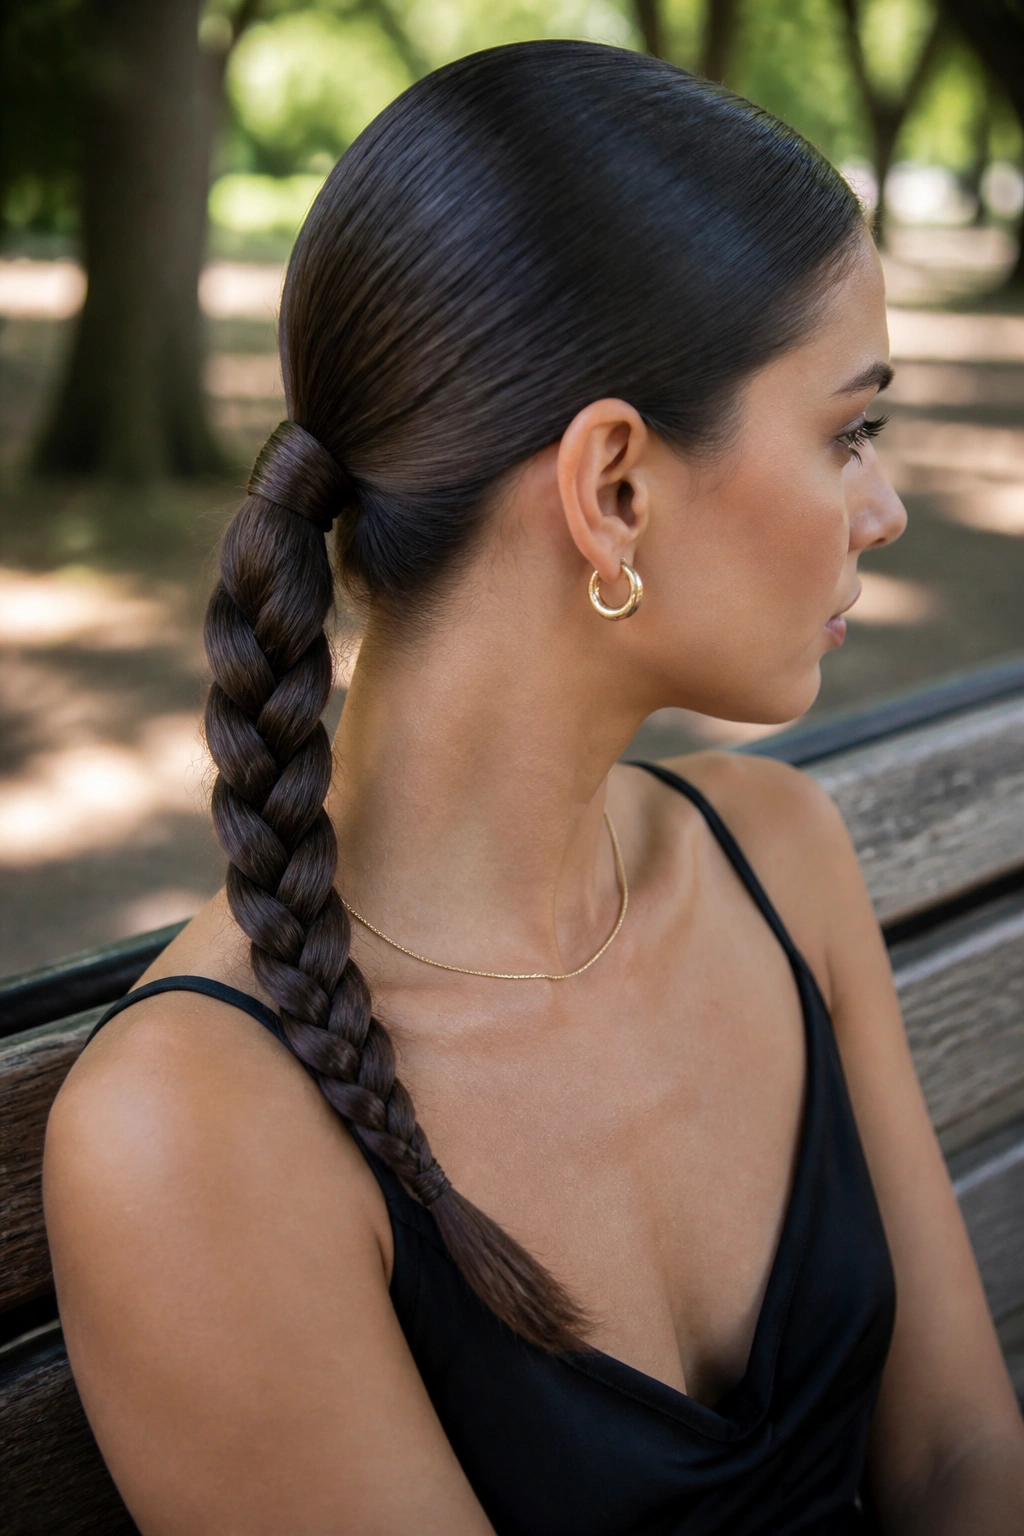
A braided low ponytail gives straight hair structure without making it stiff. You start with a smooth low ponytail, then braid the length all the way down. Simple move. Big payoff.
The base should be tight and low, almost at the nape, so the braid hangs cleanly instead of sticking out. If your hair is fine, lightly mist the tail with a texturizing spray before braiding. That gives the braid a little body and helps the plait hold its shape.
I like this version because it keeps the sleekness at the crown while adding texture only at the end. That contrast stops the style from feeling one-note. It also keeps the braid from unraveling into a sad rope by midday.
If you want a more finished look, wrap a small strand around the elastic before braiding. Tiny detail. Worth it.
17. Half-Up High Knot with Sleek Bottom Lengths

Half-up high knots can look messy fast, so the sleek version needs discipline at the roots. Pull the top section up tightly, twist it into a compact knot, and leave the lower hair straight and smooth.
The knot should sit high enough to lift the face but not so high that it starts competing with the rest of the hair. Around the crown is usually right. A clean section underneath makes the bottom lengths look longer and more glossy by contrast.
This style is handy when the top layer feels oily and the rest of the hair still looks good. You can hide a root problem and still keep the whole thing sharp. That’s useful. Very useful.
If your hair is too slippery to hold the knot, prep the top section with a bit of dry shampoo first. Not a cloud of it. Just enough to give the strands some bite.
18. Sleek Claw-Clip Roll
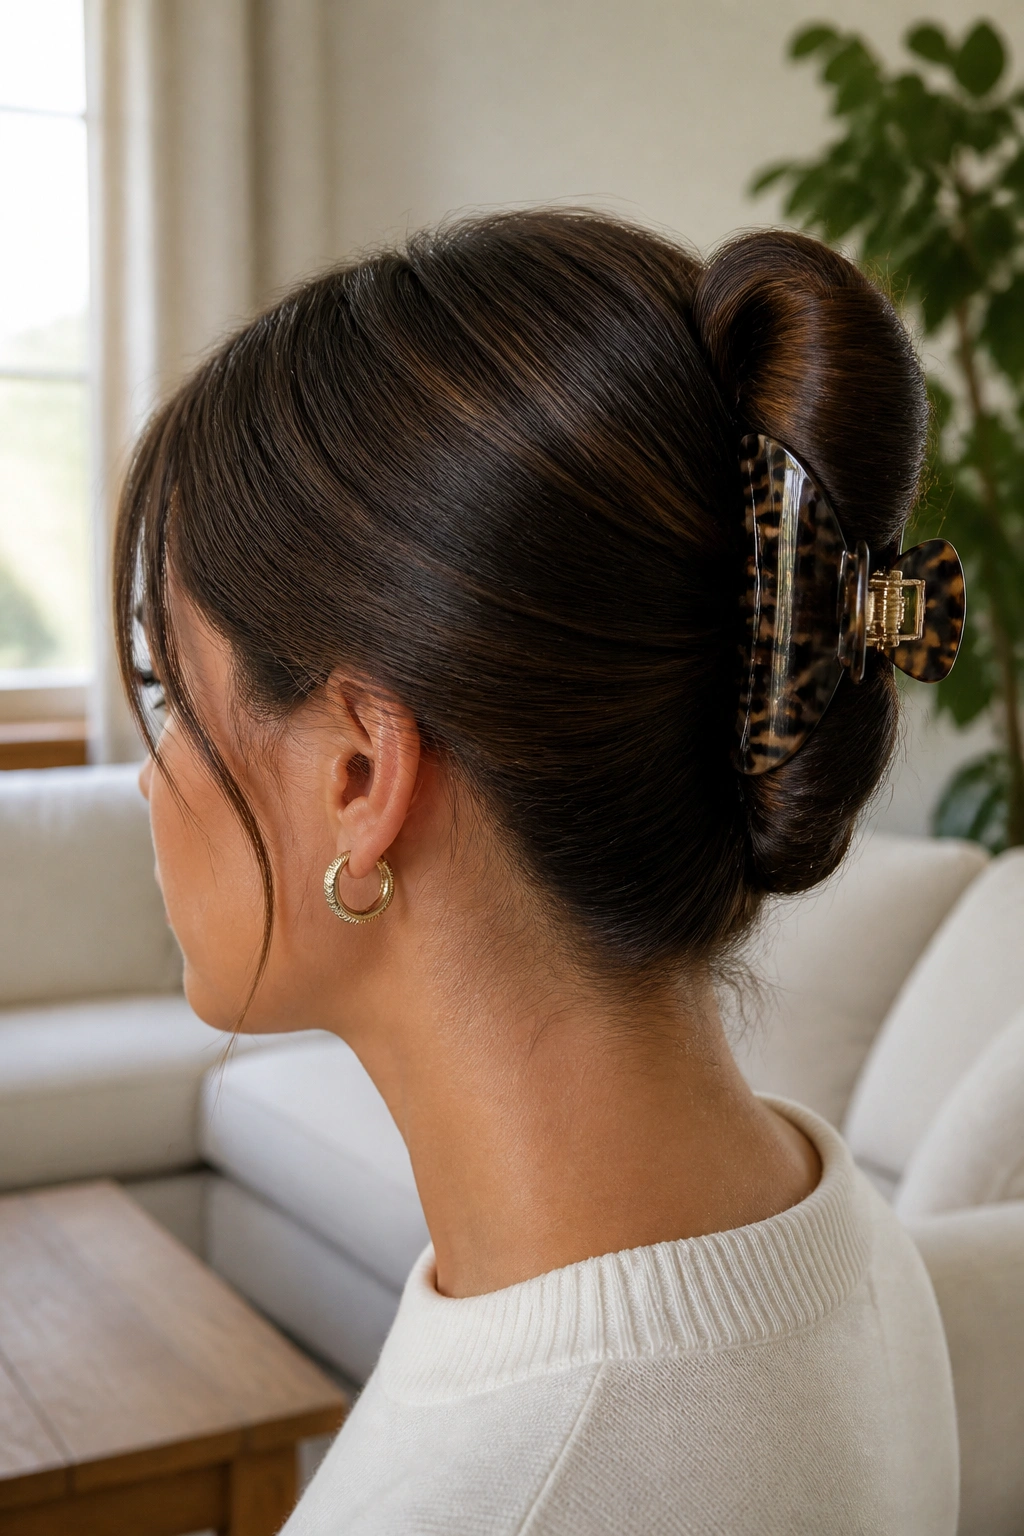
A claw clip can look lazy, or it can look expensive. The difference is how you fold the hair. A neat roll held close to the head will always look better than a loose twist with random ends falling out.
Gather the hair at the middle or low back, twist it upward, then fold the length inward before clamping it with a strong clip. Choose a clip that actually grips the hair all the way across. Weak springs are a waste of money.
What to Watch For
- Keep the twist flat against the head.
- Tuck the ends fully inside the roll.
- Use a medium or large clip for shoulder-length or longer hair.
- Smooth the front first so the clip feels intentional.
This is one of my favorite everyday styles because it can look polished in under a minute. The key is restraint. The less you fuss with the roll, the cleaner it looks.
19. Straight Hair with a Silk Scarf Tie
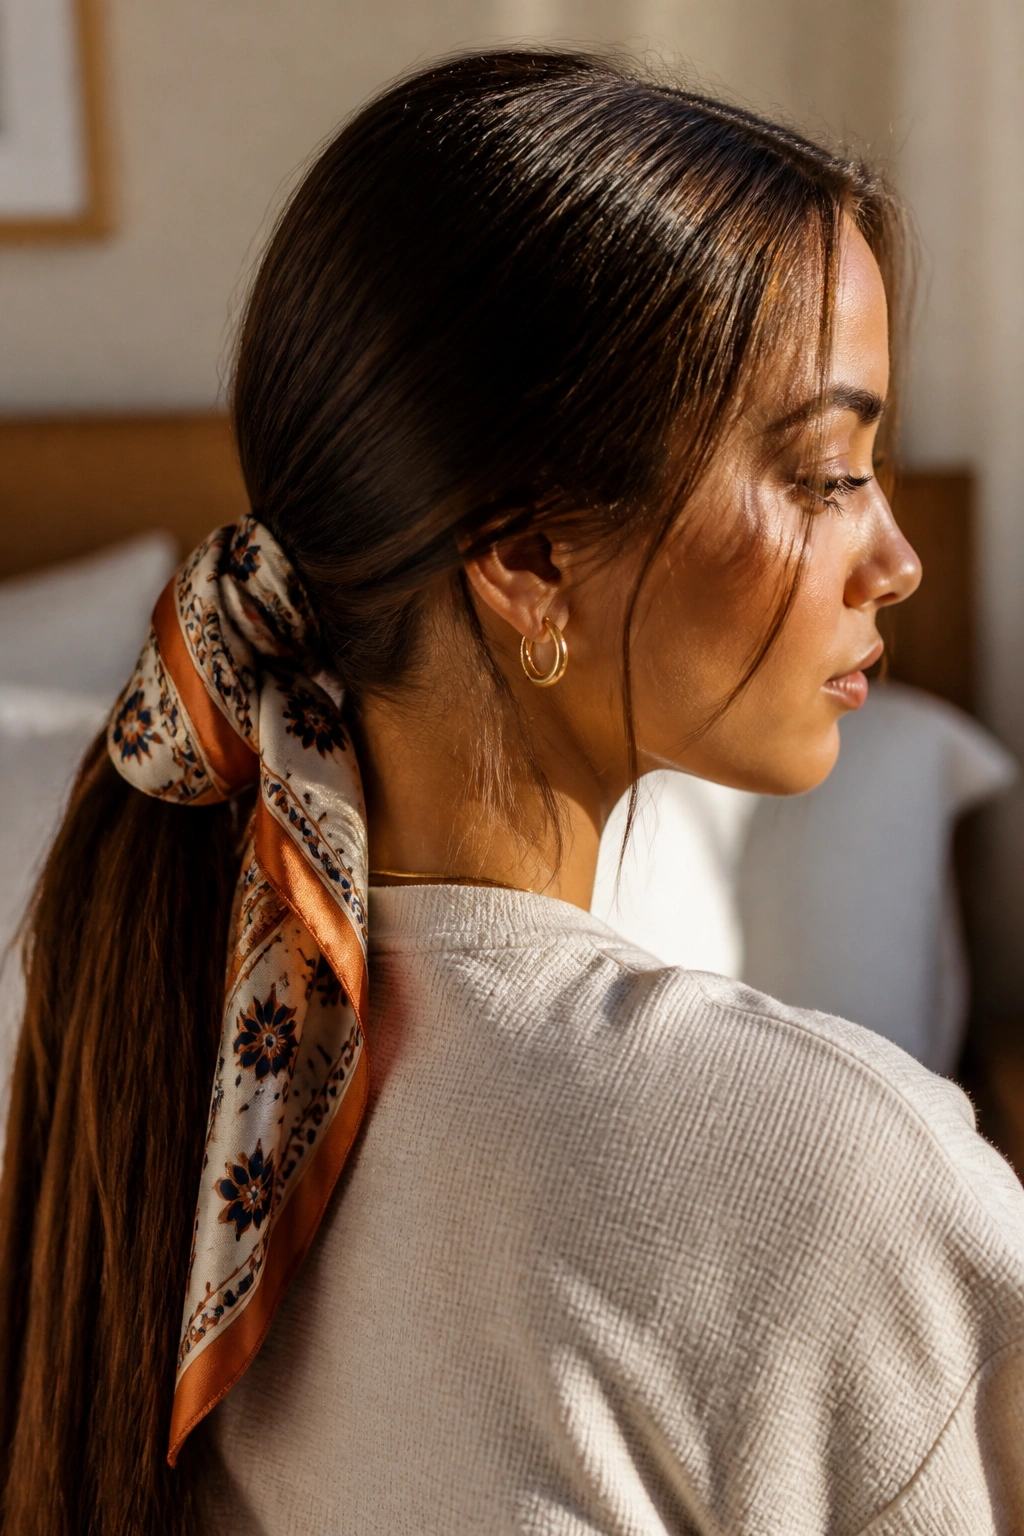
A silk scarf can change the whole mood of straight hair without changing the shape much at all. That’s why it works. The hair stays sleek, and the scarf becomes the point of interest.
Tie it around a low ponytail, knot it at the base of a bun, or weave it through a braid. Keep the rest of the hair smooth so the scarf doesn’t have to fight for attention. If the scarf is too bulky, it can overwhelm the look. A narrow length of silk usually sits better on straight hair than a thick square folded twice.
I like this style because it solves the “my hair is fine but I want it to look styled” problem. The scarf gives weight and color without adding a heavy product layer.
Choose a scarf with a little drape. Stiff fabric sticks out in odd ways, and that ruins the line.
20. Side-Parted High Bun

A high bun with a side part gives straight hair a sharper shape than the usual centered version. The part makes the front look softer, while the bun keeps the rest of the hair lifted and clean.
The bun itself should sit high but not towering. Pull the hair back with a brush, keep the part visible, then twist the length into a compact coil and pin it close to the base. If the bun spreads too wide, the style loses its sleek edge.
This one works particularly well when you want your face fully open but still want something more polished than a ponytail. It also plays nicely with earrings, which is probably why I keep coming back to it.
One small thing makes a big difference: smooth the front first, then build the bun. If you reverse that order, you’ll end up tugging at the style and creating bumps you do not need.
Final Thoughts
Sleek styles work because they respect straight hair instead of fighting it. Clean parts, controlled shine, and smart placement do more than a pile of product ever will.
The styles that hold up best are the ones with a clear shape: a low ponytail, a blunt lob, a chignon, a tight braid. They give straight hair a reason to look intentional.
If you keep one tool nearby, make it a fine-tooth comb. If you keep two, add clear elastics. The rest is mostly judgment, which is the part people skip when they talk about hair and the part that matters most when you’re standing in front of the mirror trying to decide whether to leave it down or pin it back.
