



Short hair has a habit of looking better on day two than on day one. The roots get a little lift, the ends lose that slippery freshly-washed feel, and suddenly a bob or pixie can hold a pin, a clip, or a twist that would slide straight out of clean hair.
That is why second-day hairstyles for short hair are so useful. You are not trying to erase every trace of texture. You are using it. A few well-placed pins, a bit of dry shampoo at the roots, and a light hand with cream or spray can turn sleep creases and loose ends into something clean enough for work, brunch, errands, or a night out.
Short hair also has its own little logic. A chin-length bob needs control at the sides. A grown-out pixie needs lift at the crown. Layered cuts need the shortest pieces tucked where they actually live, not where you wish they lived. Get those details right and the style stops fighting you.
Some days you want sleek. Some days you want a little bend and attitude. Either way, the best styles make the most of what your hair already did overnight, and the first one is the easiest place to start.
1. The Half-Tucked Crown Twist for Second-Day Short Hair
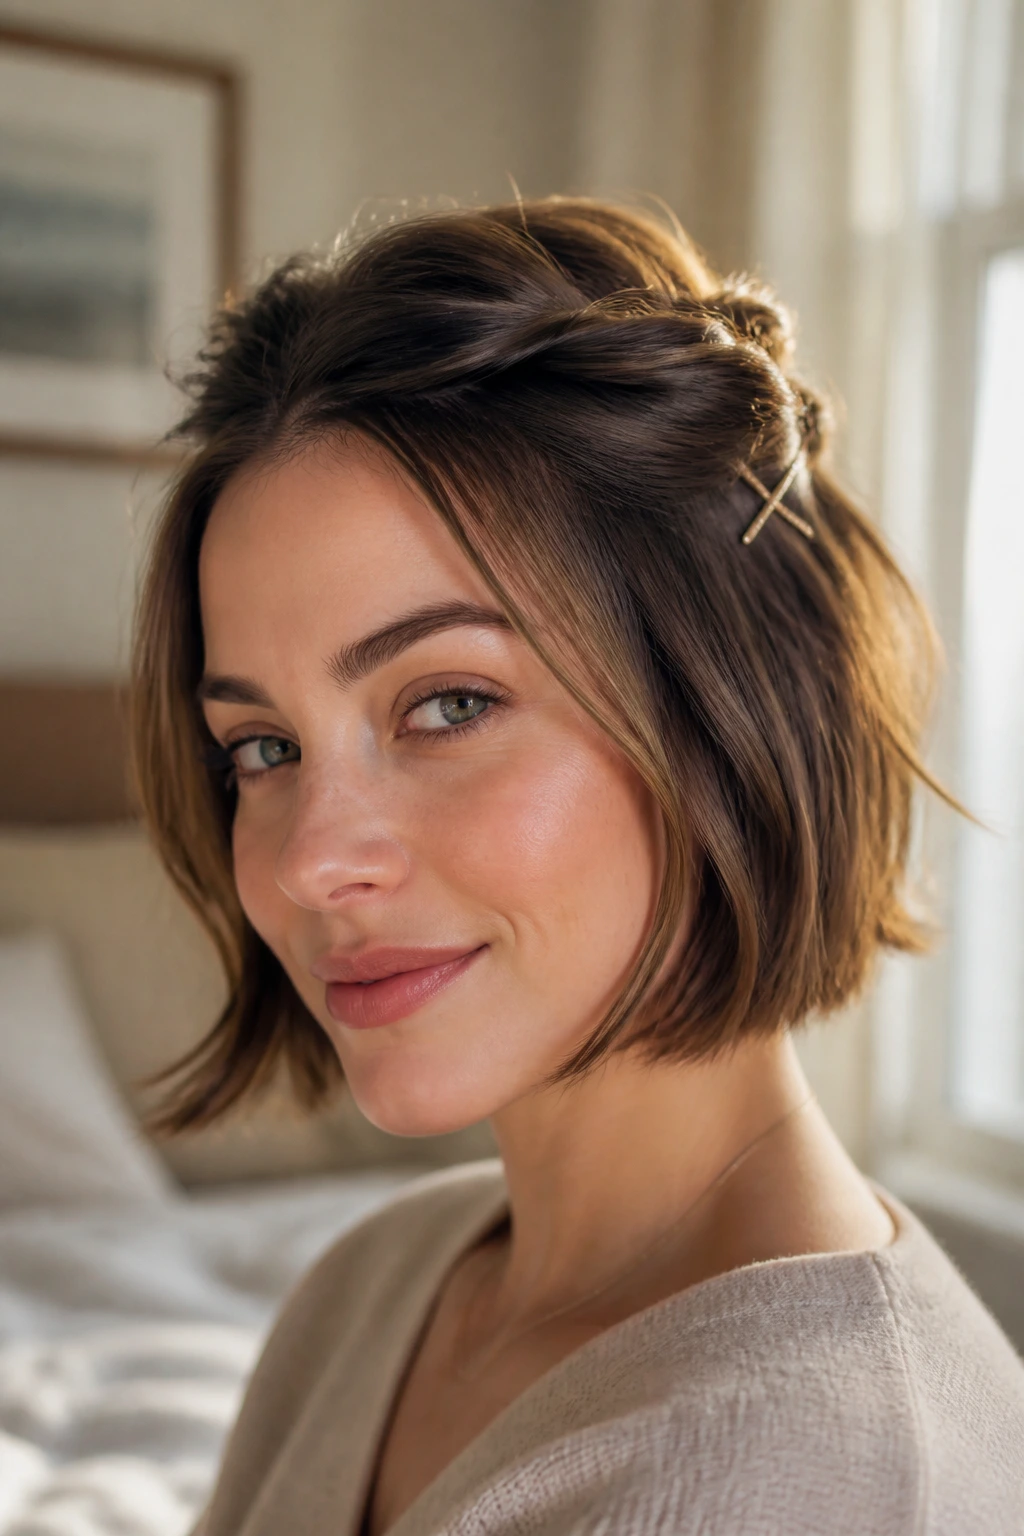
A half-tucked twist is the move I reach for when short hair has gone a little fuzzy but not so messy that you want to start over. It gives you a clean front, keeps the crown from puffing out, and still leaves enough movement to avoid that stiff, overstyled look.
The reason it works so well on day-two hair is grip. Freshly washed hair can be too slick for a twist to stay put, but the tiny bit of natural oil on second-day strands helps the pins bite. That matters a lot on short hair, where even one slippery section can undo the whole shape.
Why It Holds Better Than a Full Twist
- Start with a deep side part so the shorter front pieces lie flatter.
- Twist only the top inch or so from the temple back toward the crown.
- Cross two bobby pins in an X where the twist meets the head.
- Leave the ends slightly loose if the cut is layered; forcing every piece inside makes the style look cramped.
- Use a pea-sized amount of styling cream on the fingers, not the whole head.
I like this one for a jaw-length bob or a grown-out pixie that still has enough length to tuck. If the ends poke out, leave them. A little unevenness looks soft; over-pinning looks like you are negotiating with the mirror.
Best detail to remember: pin into the denser part of the twist, not the wispy edge. That one change keeps the style from slipping by lunch.
2. The Mini Claw-Clip French Twist
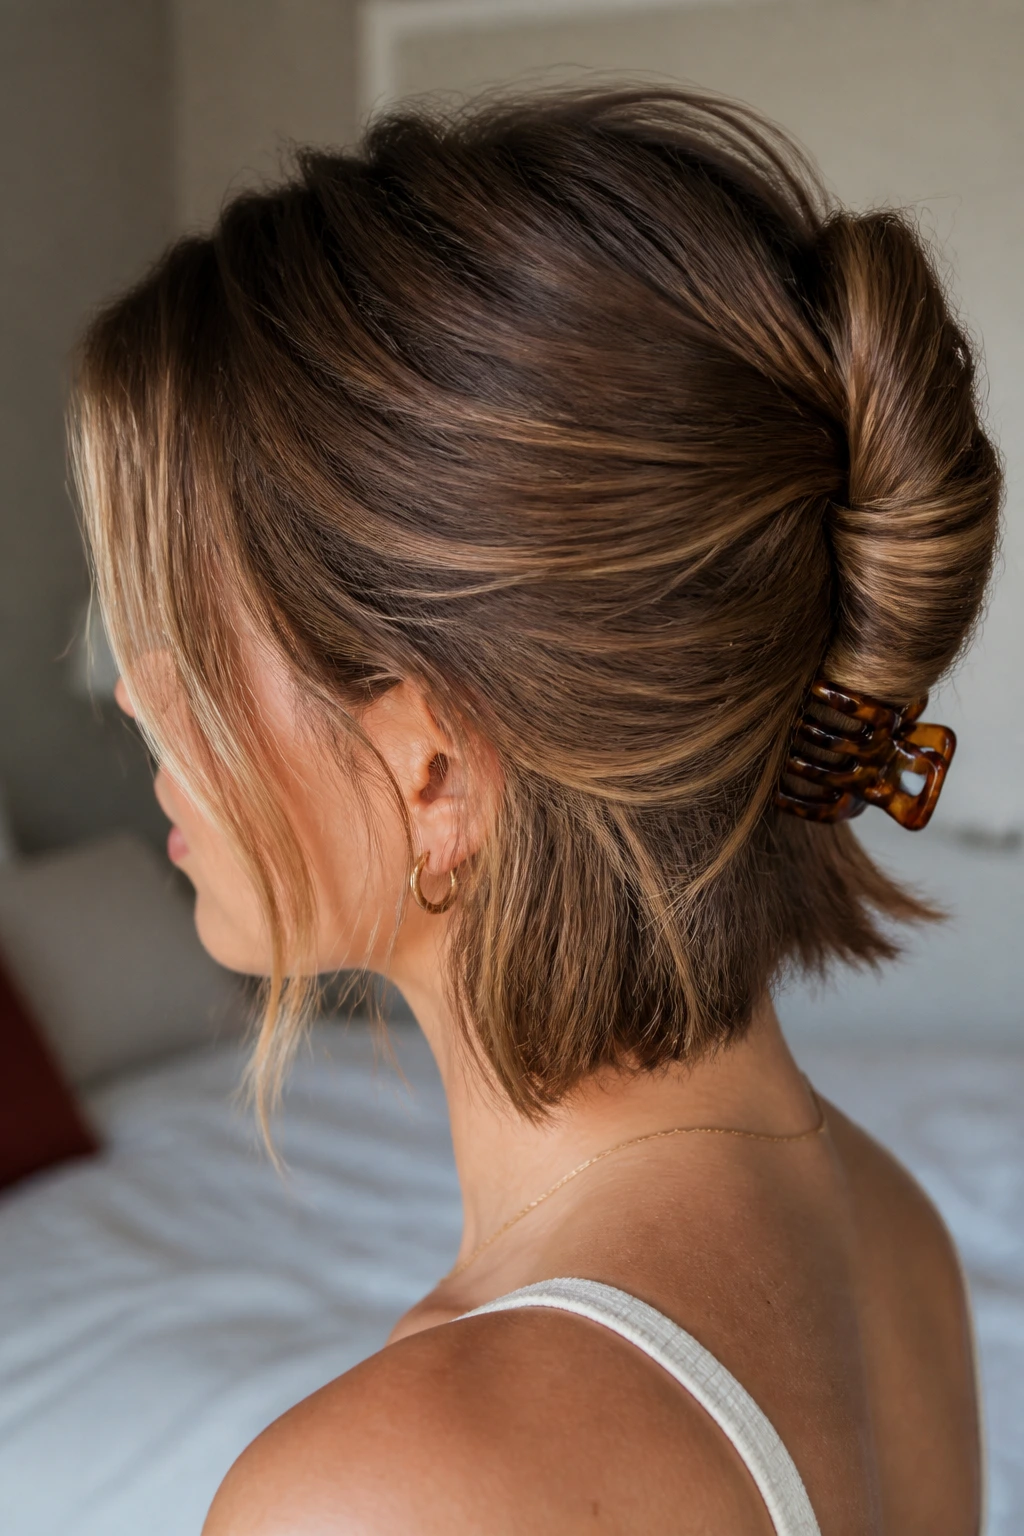
Need something that looks deliberate in under two minutes? A mini claw-clip French twist does the job without asking for much. It is one of those styles that looks fussy in theory and turns out to be plain practical in real life.
Start by gathering the hair at the back of your head with your fingers instead of a brush. That keeps the texture that makes second-day hair useful. Then roll the length upward, tuck the ends under, and catch the fold with a medium claw clip. For very short bobs, the clip should sit lower, almost at the nape, so it can hold the shorter layers instead of crushing them.
A giant clip can swallow short hair and make the whole thing slide. A clip that is too tiny will pop open the second you turn your head. The sweet spot is a medium size with teeth that actually grab. If your hair is thick, use two small clips side by side rather than forcing one clip to do all the work.
I like this style when the back of the head is flat and the sides are just a little bent from sleep. It looks neat, but not severe. And that is the part that makes it useful.
3. The Side-Swept Bobby Pin Row
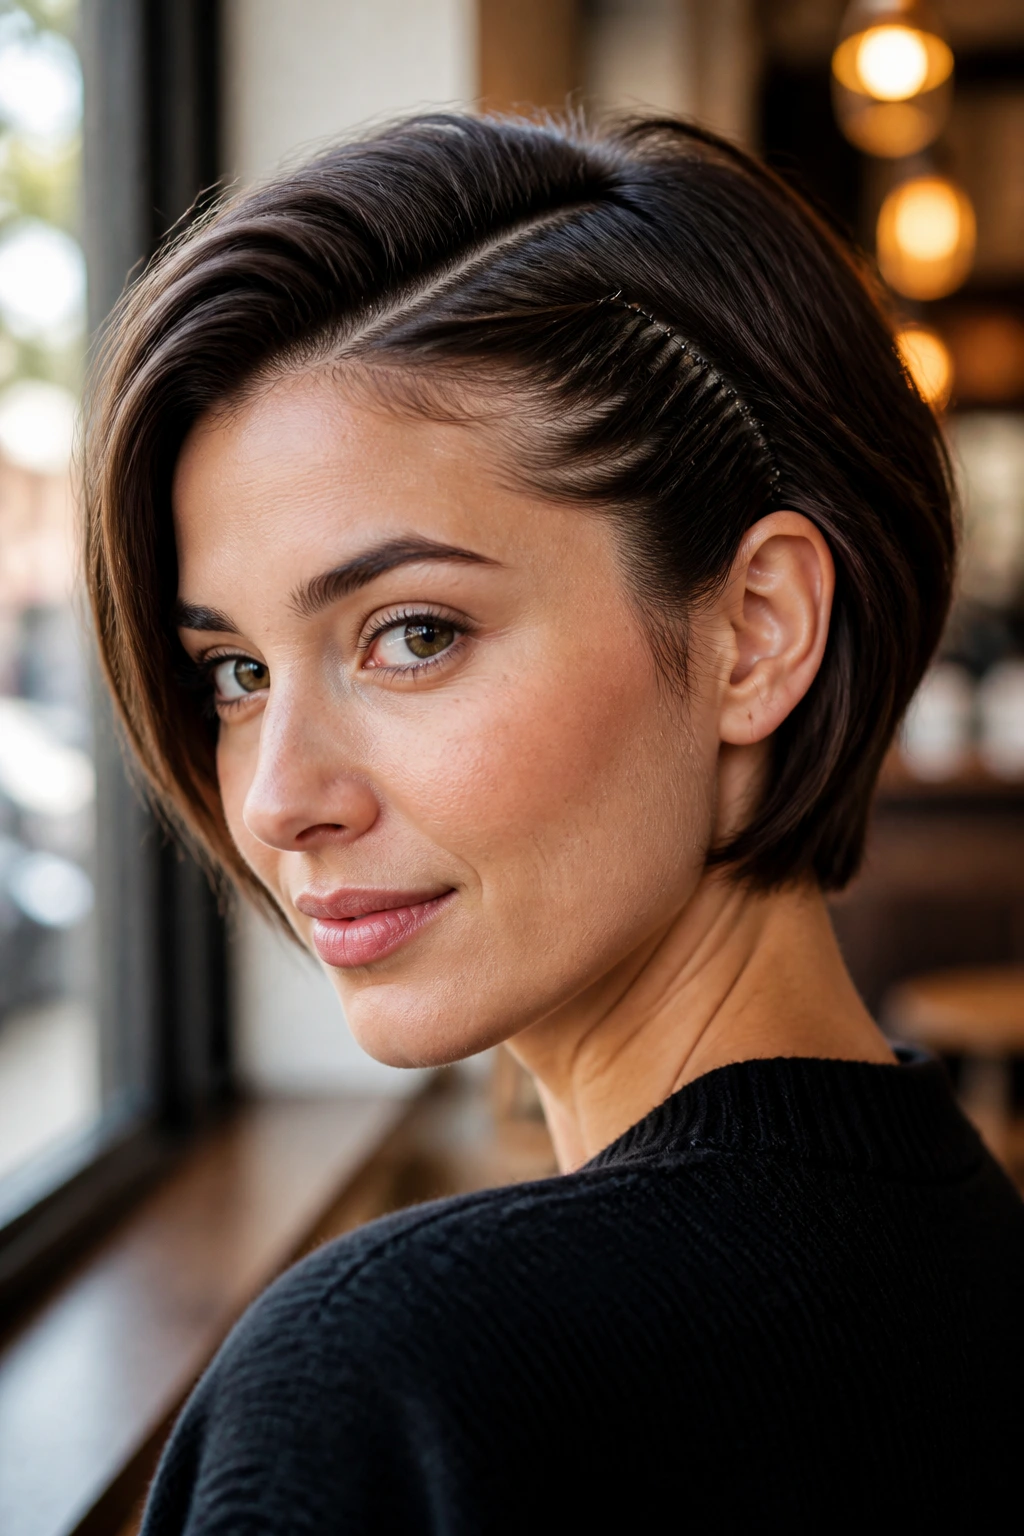
You know the kind of morning where one side is flat, the other side has a weird bend, and your part has wandered off like it has better things to do? That is pin-row territory.
Sweep the heavier side back toward the ear, then lay a row of bobby pins along the curve of the part. I prefer three to five pins, depending on how much hair you need to control. Place them one inch apart and angle each pin slightly toward the back of the head so it disappears into the hair instead of sitting on top like hardware.
Where to Place the Pins
- Start at the front edge of the side part where hair tends to split first.
- Cross the first two pins if the front pieces are extra slippery.
- Hide the last pin under the top layer near the temple.
- Stop before the ear so the row doesn’t tug at the skin.
- Match the pin finish to the look — matte pins feel quieter, glossy ones read more dressed up.
This is one of the easiest second-day hairstyles for short hair because it needs almost no length. Pixies, crops, and bobs all work. If the row feels too plain, swap one pin for a decorative one with a tiny pearl or metal bar. That small shift changes the mood without changing the structure.
A pin row also keeps short layers from kicking out around the face. That is the real win. The style does its job and gets out of the way.
4. The Textured Pixie Quiff
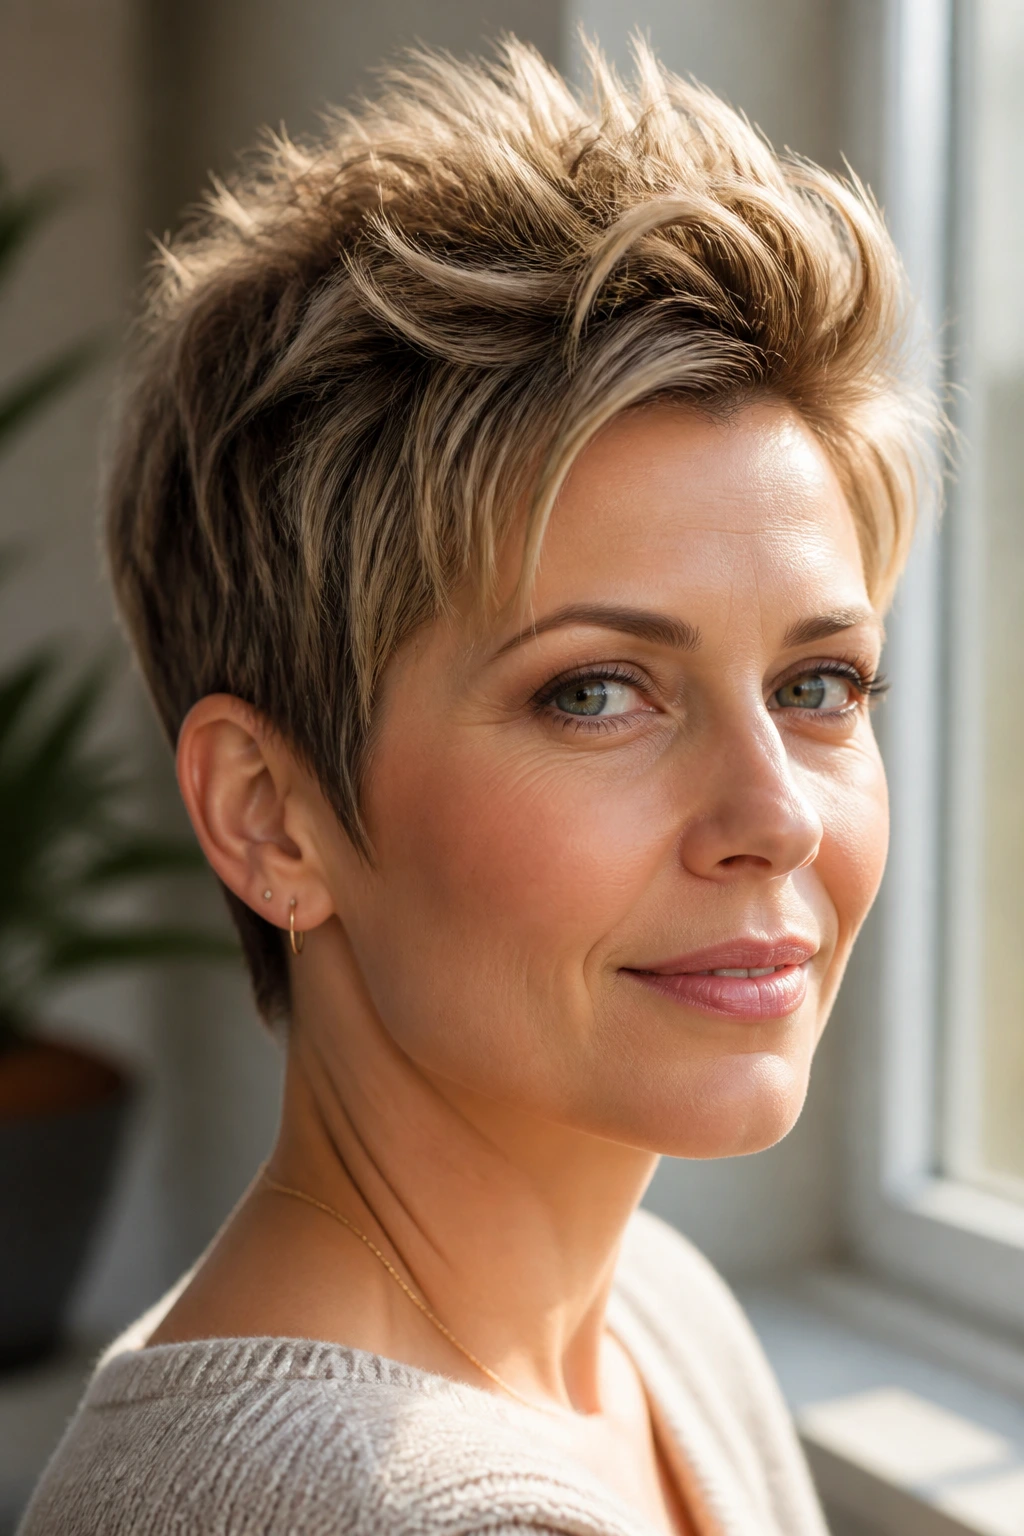
Pixie cuts look sharper with a little rebellion on day two. The slight oil at the roots gives the crown something to stand up against, which means a quiff can look fuller with less product than it needs on clean hair.
Work a small puff of dry shampoo into the roots first and wait half a minute. Then rub a pea-sized amount of matte paste between your fingertips and push the hair upward at the crown, not straight back. That tiny difference keeps the shape soft instead of helmet-like. If your hair lies very flat, lift the roots with the teeth of a tail comb before you smooth the top layer over it.
What to Use
- A pea-sized amount of matte paste for short, fine hair.
- A light dry shampoo mist at the crown and hairline.
- A small round brush if you want a stronger lift at the front.
- Your fingertips if you want the piecey, slightly undone finish.
Do not overload this style with product. Too much paste makes the ends stick together, and then the whole thing turns heavy. A pixie quiff works because the pieces stay separated. That airy, lifted shape is the point.
I also like this one when the front is growing out a little and needs direction. Push the fringe up and slightly to one side. It creates height without looking stiff.
5. The Sleek Wet-Look Tuck
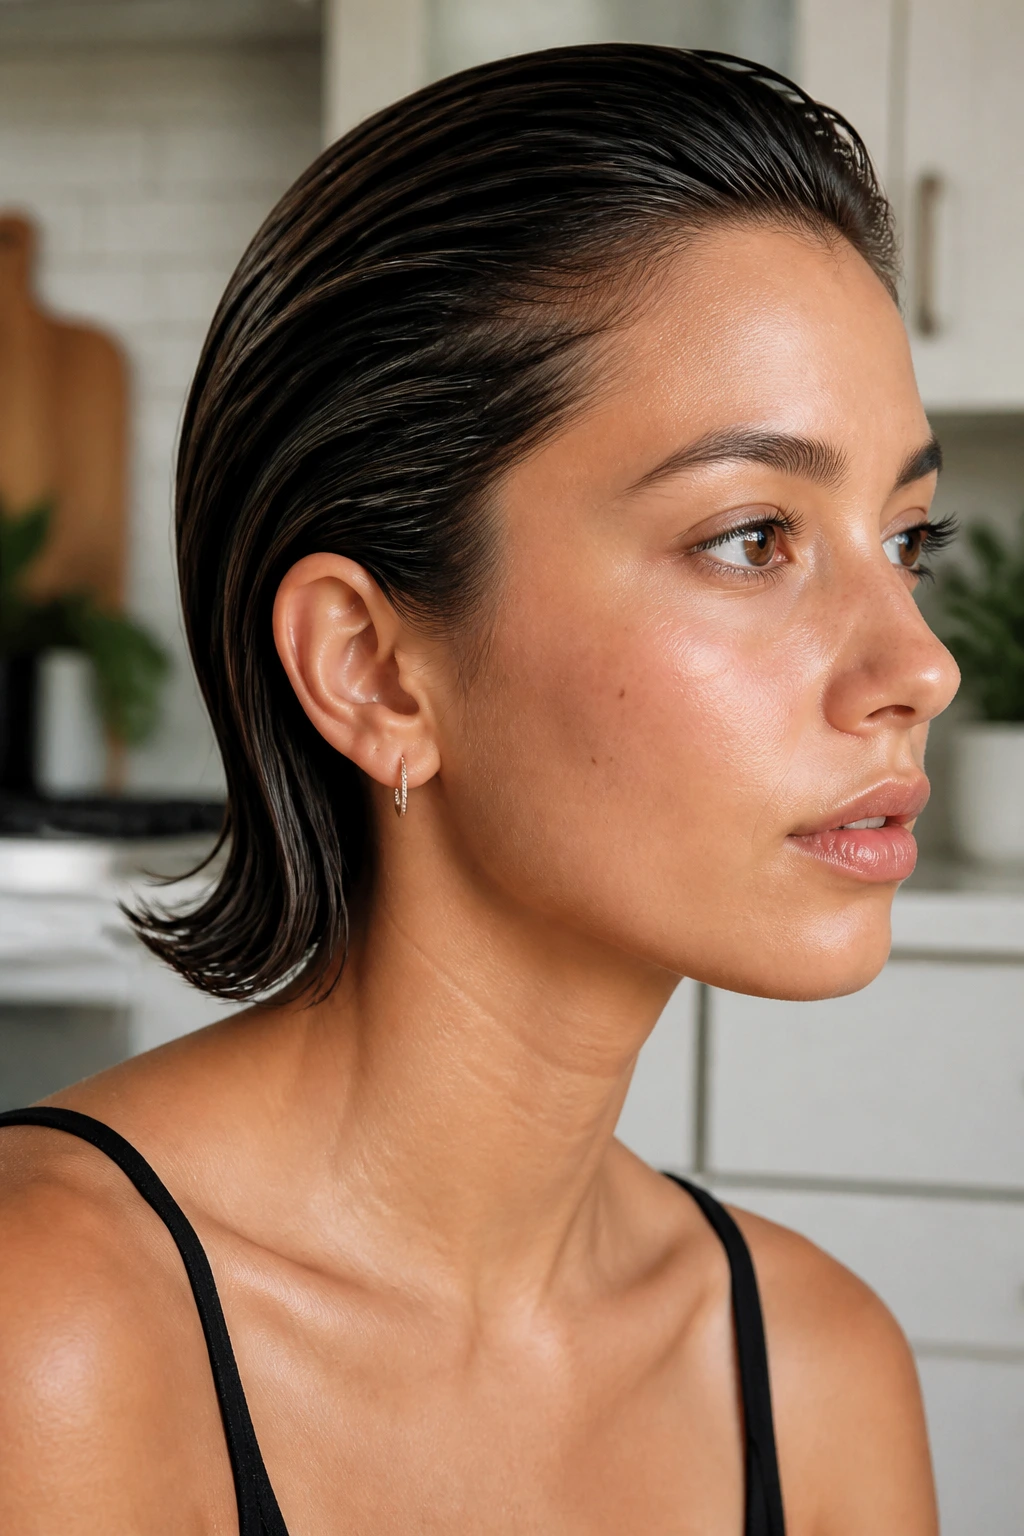
Want the neatest option in the lineup? Pull the sides back and let the shine do the work. A sleek wet-look tuck gives short hair a polished shape even when the cut is uneven or the ends have turned inward from sleeping.
Use a small amount of gel or styling cream on damp fingers, then comb the hair away from the face. For fine hair, a dime-sized amount is usually enough. Thicker hair may need a little more, but go in gradually. You want control, not a slicked-down helmet. Tuck both sides behind the ears and pin them low at the nape if they refuse to stay put.
A deep side part changes this style fast. It makes the finish look intentional and keeps the top from feeling flat in the wrong place. If your hair is chin-length, you can also leave the very ends out for a softer edge. That keeps the style from looking too severe.
Do not flood the roots with gel. That is how short hair ends up looking greasy instead of sleek.
This one is useful when you need the hair off your face and do not want to heat-style anything. It also plays well with earrings, which is a small thing until you realize the whole look depends on that little extra frame.
6. The Mini Braided Headband for Second-Day Short Hair
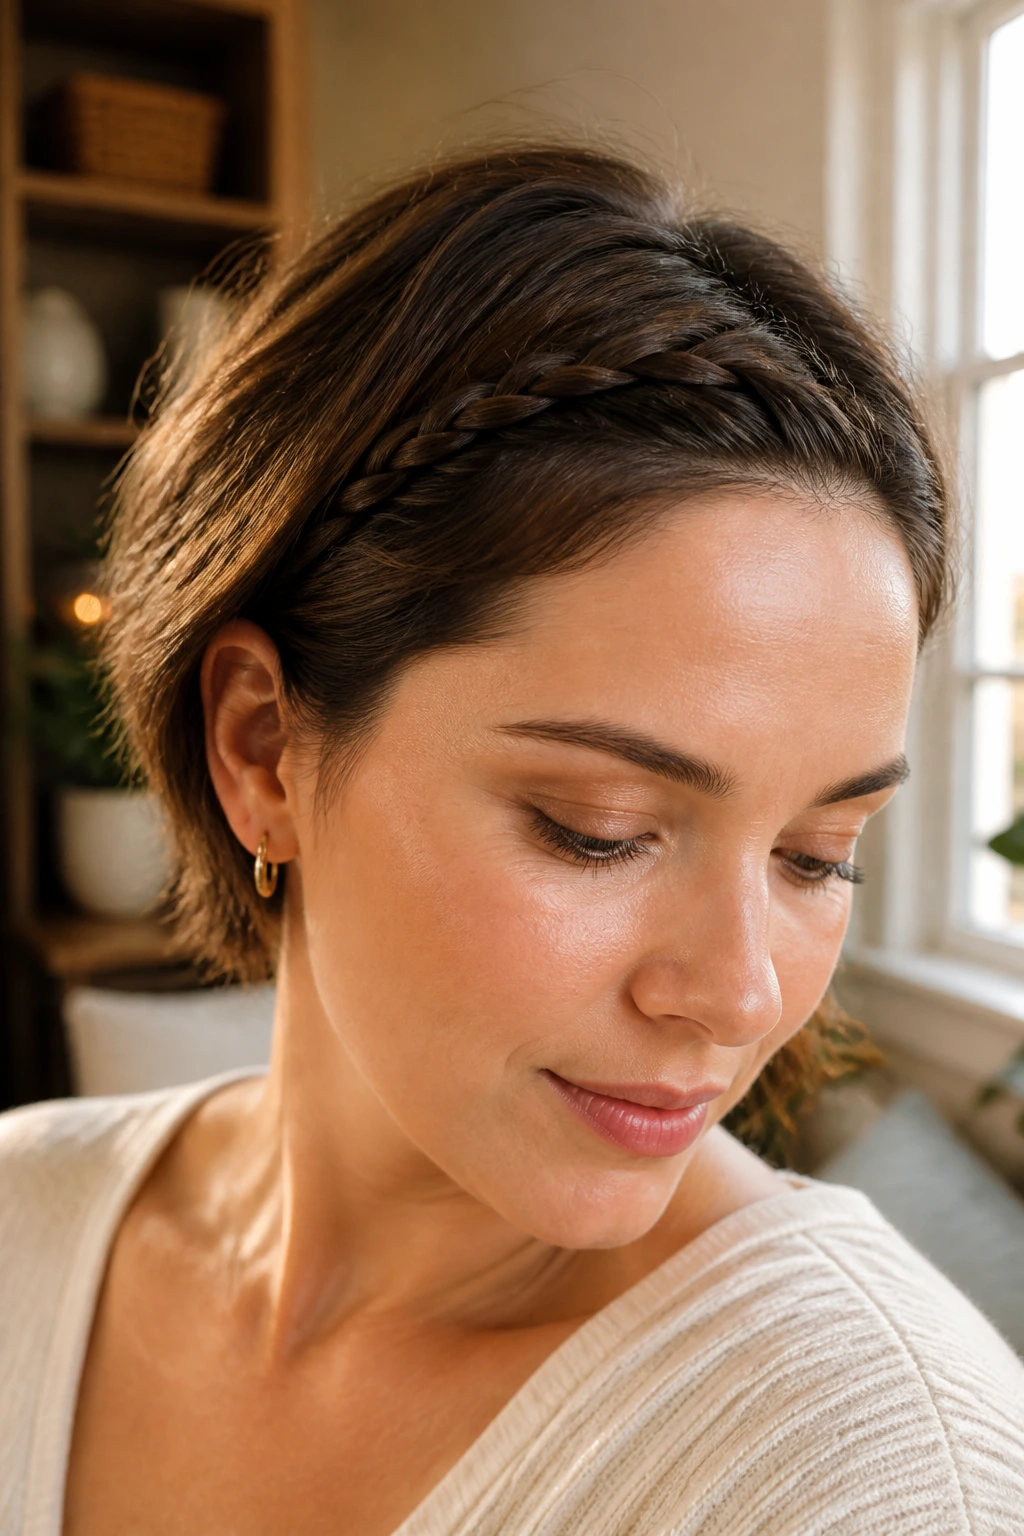
Unlike a real headband, a braid stays where you put it. It does not slide up, pinch behind the ears, or lose its grip the second you move around.
Take a one-inch section from the front near the part and braid it back along the hairline toward the opposite temple. Pin the braid under the top layer, or tuck the end behind the ear if the length is just there. On a bob, the braid usually needs to stay loose and close to the scalp. A tight braid steals too much length and starts to look tiny in the wrong way.
How to Use It
- Choose a slightly gritty section so the braid holds better.
- Mist the hair lightly with water or leave-in spray if it keeps slipping.
- Keep the braid low and flat along the hairline.
- Secure the end with two bobby pins if it is too short for an elastic.
- Pull the braid gently apart once it is pinned for a softer look.
This works especially well on wavy hair, because the texture helps the braid hold its shape. Fine hair can do it too; it just needs a little texture spray at the root first. The braid gives the front of the hair some structure while leaving the rest of the cut free.
It is a small detail, but that is often what short hair needs. One good line at the front changes the whole head.
7. The Soft Flat Twist Along the Hairline
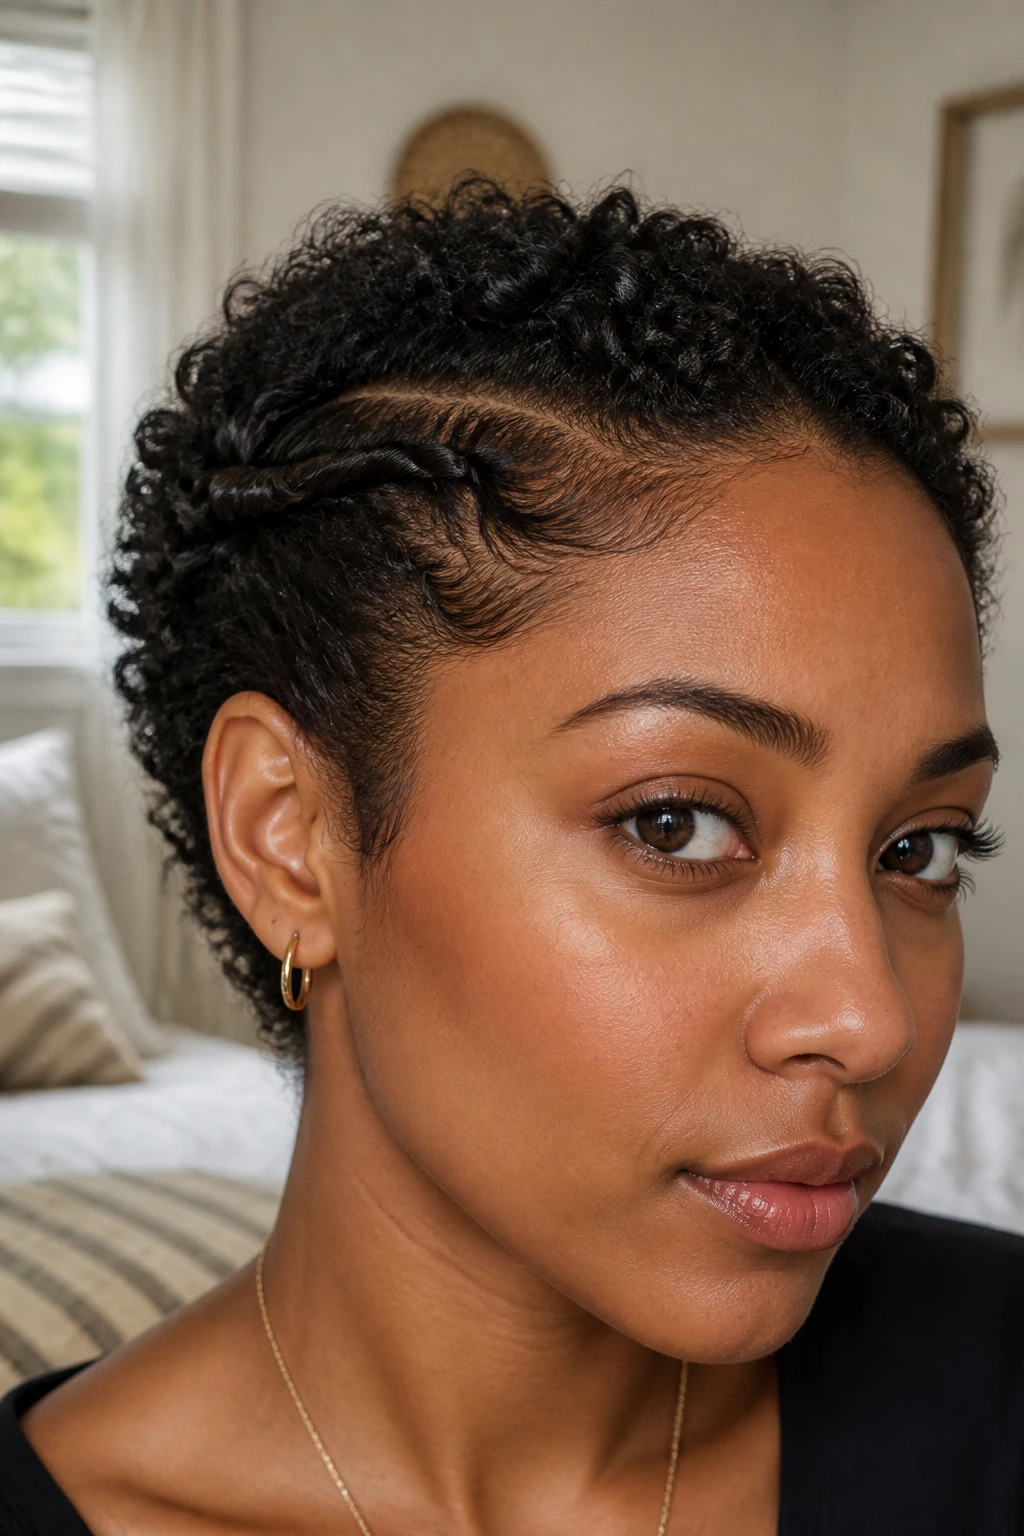
A little curl at the temple can fix a lot. On curly, coily, or textured short hair, a flat twist along the hairline cleans up the front without forcing the whole style into a tight updo.
Start with a damp fingertip or a bit of leave-in conditioner on the section you want to twist. Take a strip of hair about the width of your finger, divide it into two, and twist the pieces over each other while keeping the twist close to the scalp. Pin it down as you move, rather than waiting until the end. That keeps the twist flat and neat.
This style is useful when the crown has good texture but the front pieces keep sticking out. The twist guides those shorter pieces back without flattening the whole head. If the cut is very short, stop the twist at the ear and secure it with two small pins under the top layer. Do not try to force it farther than the length allows.
Small Details That Matter
- Use 2 to 3 pins, not a whole cluster.
- Keep the twist close to the scalp so it does not puff up.
- Add product sparingly; too much leave-in makes the section limp.
- Let a little edge texture show instead of smoothing it into a hard line.
The end result looks calm and controlled without feeling stiff. That balance is hard to fake on short hair, which is why this style earns its place.
8. The Half-Up Knot with Loose Ends
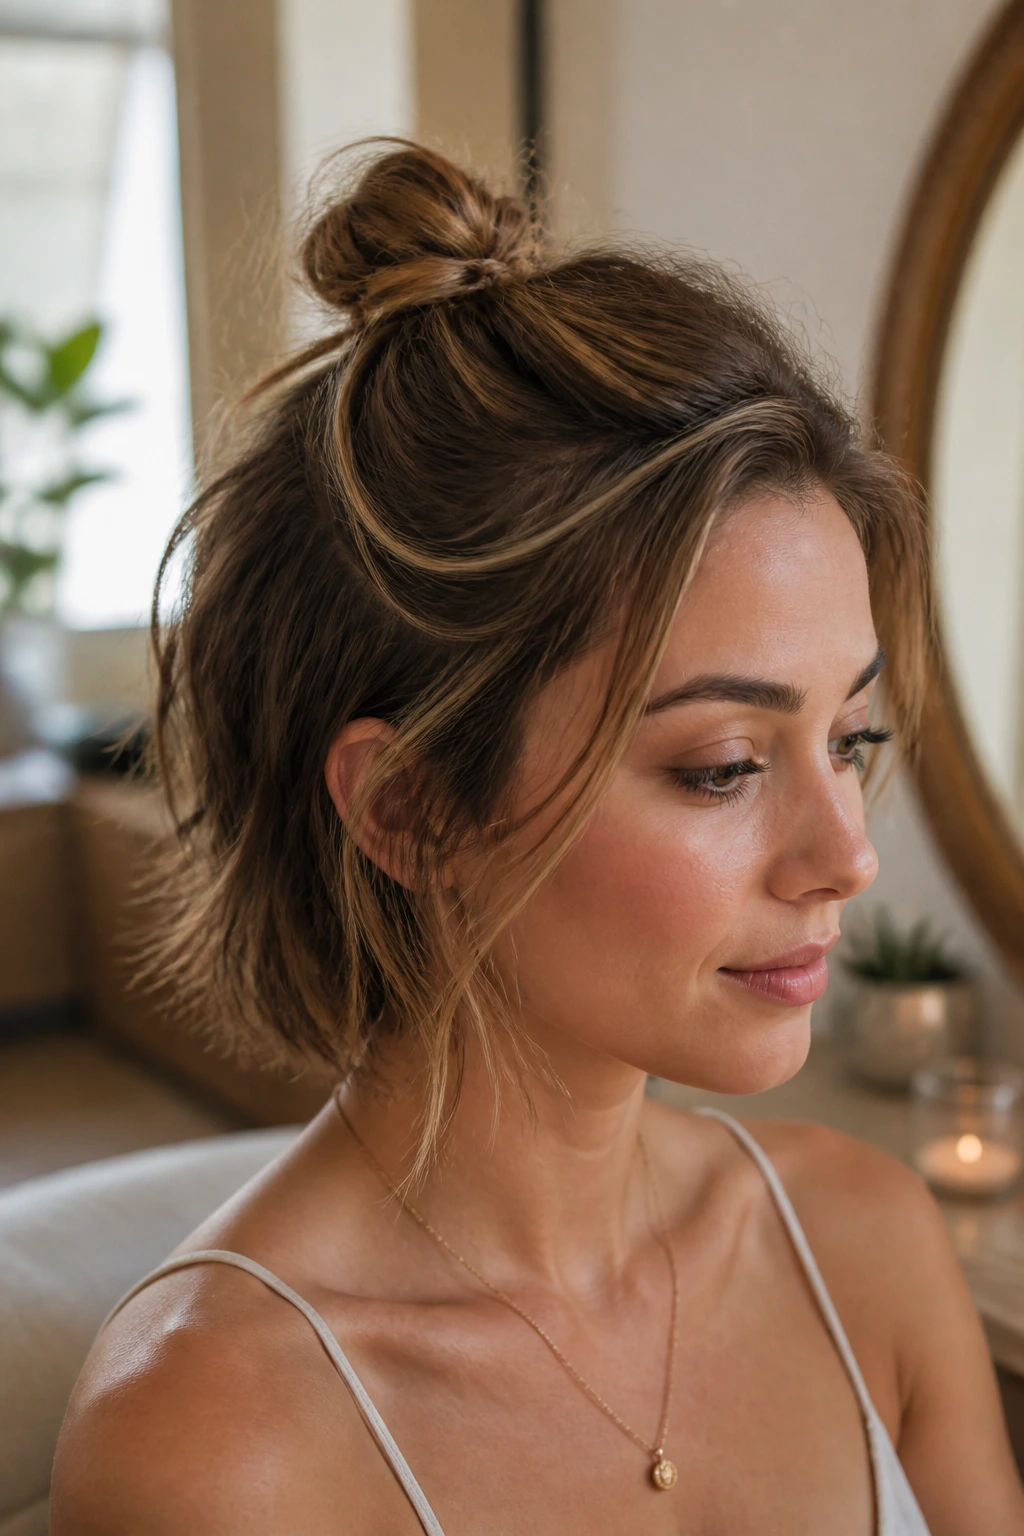
This one is messy on purpose, and that is the point. A half-up knot gives short hair a little height at the top while leaving the bottom pieces loose enough to move.
Gather the top section from the temples back to the crown, twist it once or twice, and secure it with a tiny elastic. If the hair is too short to wrap into a proper knot, make a small loop and pin it flat. Leave the bottom layers out. You want the top to look lifted and the rest to stay soft.
A knot that gets too big starts to look awkward on short hair. A tiny knot, though, feels almost tailored. It works best on layered bobs and longer pixies where the top section has enough length to sit up without toppling over.
How to Keep the Knot Small
- Use only the top third of the hair.
- Stop the twist before it gets bulky.
- Wrap the elastic just once or twice.
- Pin the knot flat if the ends stick out too far.
Face-framing pieces help a lot here. If your hair has layers around the cheekbones, pull out just enough to soften the front. Too many loose pieces make the style look accidental. Two is usually enough.
I like this when the front is flat and the ends still have some bend. It uses both problems instead of pretending they are not there.
9. The Bandana Wrap That Hides Oily Roots
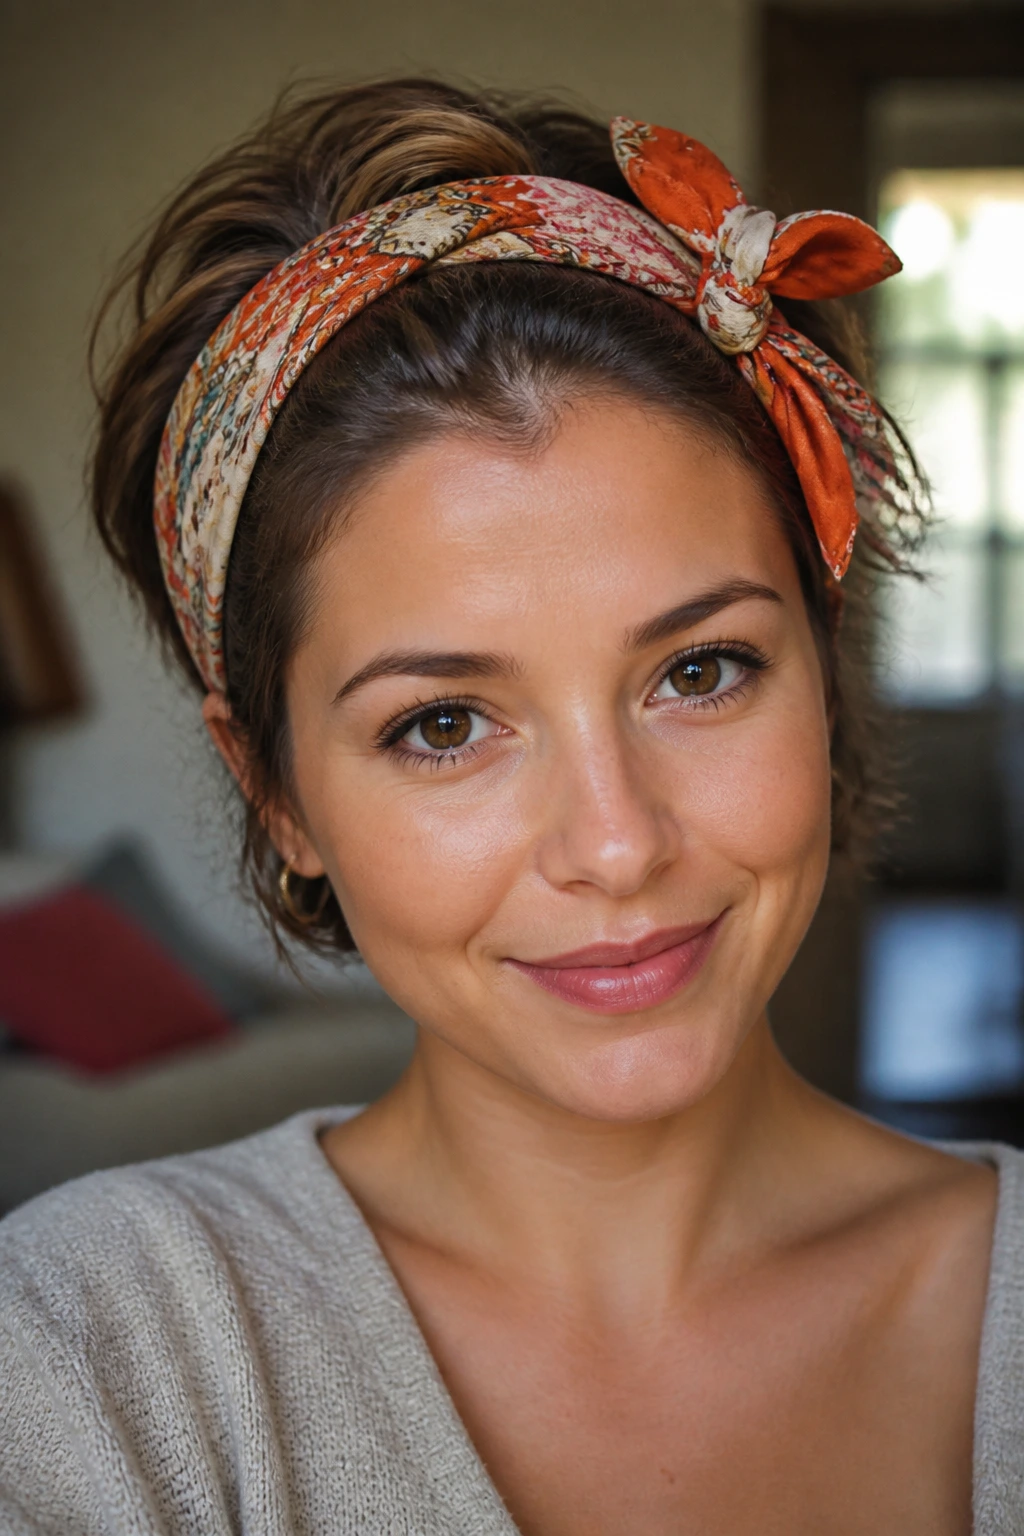
Some days the easiest fix is a scarf. A bandana or silk wrap can save a second-day short-hair style when the roots are oily, the fringe is unsure of itself, and you need the whole thing to look tidy fast.
Fold the scarf into a strip about two inches wide. Place it along the hairline, then tie it at the crown for a retro look or at the nape for something quieter. On a bob, the scarf can sit just behind the ears and hold down the front pieces. On a pixie, it can cover the line where the roots start to shine.
The fabric matters. Cotton gives more grip. Silk feels smoother and reads a little dressier. A scarf with a decent amount of body also helps tame short flyaways around the temples, which is often the part people fight the most.
Short paragraph. Fast fix.
Keep the knot slightly off-center if you want the style to feel relaxed. Dead center can look stiff, and a knot that sits too high can puff up on short hair. If the ends of the scarf are long, tuck them under the fold rather than letting them hang too far down. That keeps the shape clean.
This is the kind of style that works on a day when you need to be out the door and not think about your hair again until evening.
10. The Mini Space Buns for a Bob

Can short hair do space buns? Yes, if the buns are tiny and the part is clean.
Split the top half of the hair down the middle, then make two small ponytails high enough that they sit on the crown rather than the sides. Twist each ponytail into a small bun and secure it with a tiny elastic or two bobby pins. The buns do not need to be huge. In fact, on short hair, smaller usually looks better because the shape stays balanced and does not drag the hair down.
This style works best when there is some texture in the hair already. Day-two grip helps the sections stay where you place them. If the hair is too slippery, spray the roots lightly with dry shampoo first and wait a few seconds before parting.
Spacing Matters
- Keep the center part straight so the buns look even.
- Place the buns high enough that the short ends can wrap around the base.
- Use small elastics that do not create bulk.
- Pin the loose ends under the bun instead of forcing them to disappear.
- Leave the lower half of the hair smooth or wavy depending on what the cut already gives you.
This style can lean playful or neat, depending on how tight you make it. It is useful for weekends, casual events, or any day when the bob needs a little personality.
Tiny buns. That’s the whole trick.
11. The Finger-Waved Side Part

If you want polish without a helmet of product, finger waves are the sweet spot. They work especially well on short hair that has a side part and a little natural bend from sleeping.
Start with a deep side part and a small amount of cream or gel on the front section. Use your fingers or a fine comb to push the hair into an S-shape against the head, then clip each bend in place while it cools or dries. If the hair is stubborn, a half-inch curling iron can help create the first bend before you shape it with your fingers.
This style is worth the time when you want something that looks smoother than a usual tuck but less rigid than a slick-back. It also works on bob lengths that have enough front length to bend without springing free.
What Makes It Hold
- Work in 1-inch sections so the wave stays defined.
- Clip the curve until it sets instead of rushing the next piece.
- Use a flexible spray from about 10 inches away.
- Keep the side part clean; a messy part weakens the shape.
- Stop once the front looks controlled — the rest of the hair can stay softer.
The best finger waves on short hair are not rigid. They have movement. If the wave looks too hard, brush it out lightly with your fingers and soften the gel at the edges. That small adjustment keeps the style modern and wearable.
12. The Polished Low Puff at the Nape for Short Hair
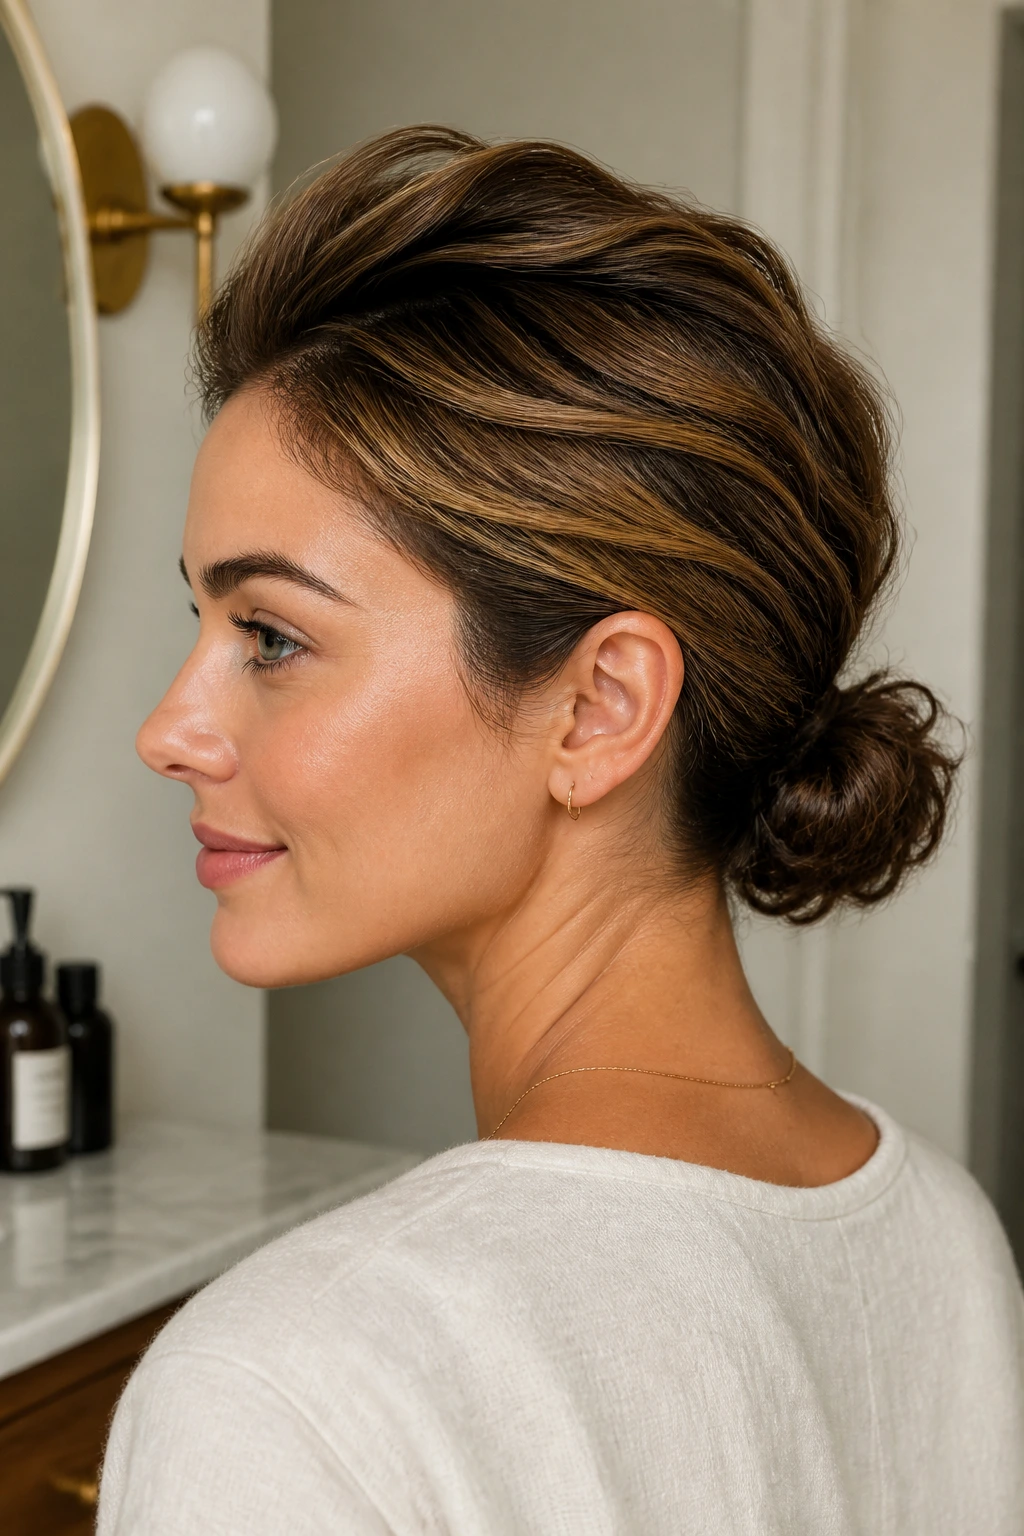
A low puff is not the same thing as a ponytail. On short curly or coily hair, it creates a soft shape at the nape while leaving enough volume up top to keep the cut from looking flat.
Brush or smooth the sides back with a little gel or styling cream, then gather the length at the nape with a soft elastic. If the crown needs lift, gently pull the top forward a touch after securing it. That gives the puff shape without dragging the roots too tight. For hair that is just long enough, the puff may sit low and compact. That is fine. It still reads clean and put together.
I like this option when the hair has dried into a shape that feels too loose for a twist but too short for a full ponytail. It handles shrinkage well, which is useful if the texture tightens up on day two. A satin scarf tied around the sides for five minutes can help flatten the hairline before you go.
How to Shape the Silhouette
- Smooth the sides first so the puff sits neatly.
- Leave a little height at the crown instead of flattening it all down.
- Use a soft elastic that does not snag.
- Fluff the puff gently after tying so it doesn’t look cramped.
- Keep the nape clean; stray pieces there make the style feel unfinished.
This one suits humid days, curlier textures, and anyone who wants a style that feels tidy without losing the hair’s natural shape.
Final Thoughts
The best second-day hairstyles for short hair usually do one of three things: lift the crown, control the sides, or hide the part that has gone oily. That is why a tiny claw clip can work as well as a braid, and why a scarf sometimes beats a whole round of heat styling.
If your hair is stubborn, start with the style that asks for the least effort from the cut itself. A pin row, a tucked twist, or a small knot often holds better than something complicated that fights your layers.
Keep a small kit near the mirror — dry shampoo, a tail comb, six bobby pins, one mini elastic, and a clip that actually grips — and short hair stops feeling like a problem to fix. It starts feeling like something you can shape on purpose.
