



A bixie wolf cut looks best when it seems a little unruly on purpose. Not sloppy. Just sharp enough to feel edgy, with short length around the neck, choppy layers through the crown, and that slightly bitten-off fringe energy that makes people look twice.
That’s the whole appeal of the bixie wolf cut, really. It borrows the cropped ease of a bixie and the movement of a wolf cut, then lands somewhere between polished and wild. The shape can be airy, jagged, shaggy, or razor-light depending on how much texture your hair already has and how much drama you want from a mirror.
I’ve always thought the best versions are the ones that look even better when they’re not overstyled. A good one should still have shape after a quick air-dry, but it also needs enough structure that it doesn’t collapse into a fuzzy triangle by lunchtime. That balance matters. A lot.
The trick is picking the right version for your hair type, your face, and your patience level. Some of these cuts want a diffuser and a little mousse. Others need a flat iron bend and a texturizing spray. A few look better with a hard edge; a few work because they’re softer than they sound. Either way, there’s a version here that can make the style feel like yours instead of a copy of somebody else’s photo.
1. Razor-Choppy Bixie Wolf Cut
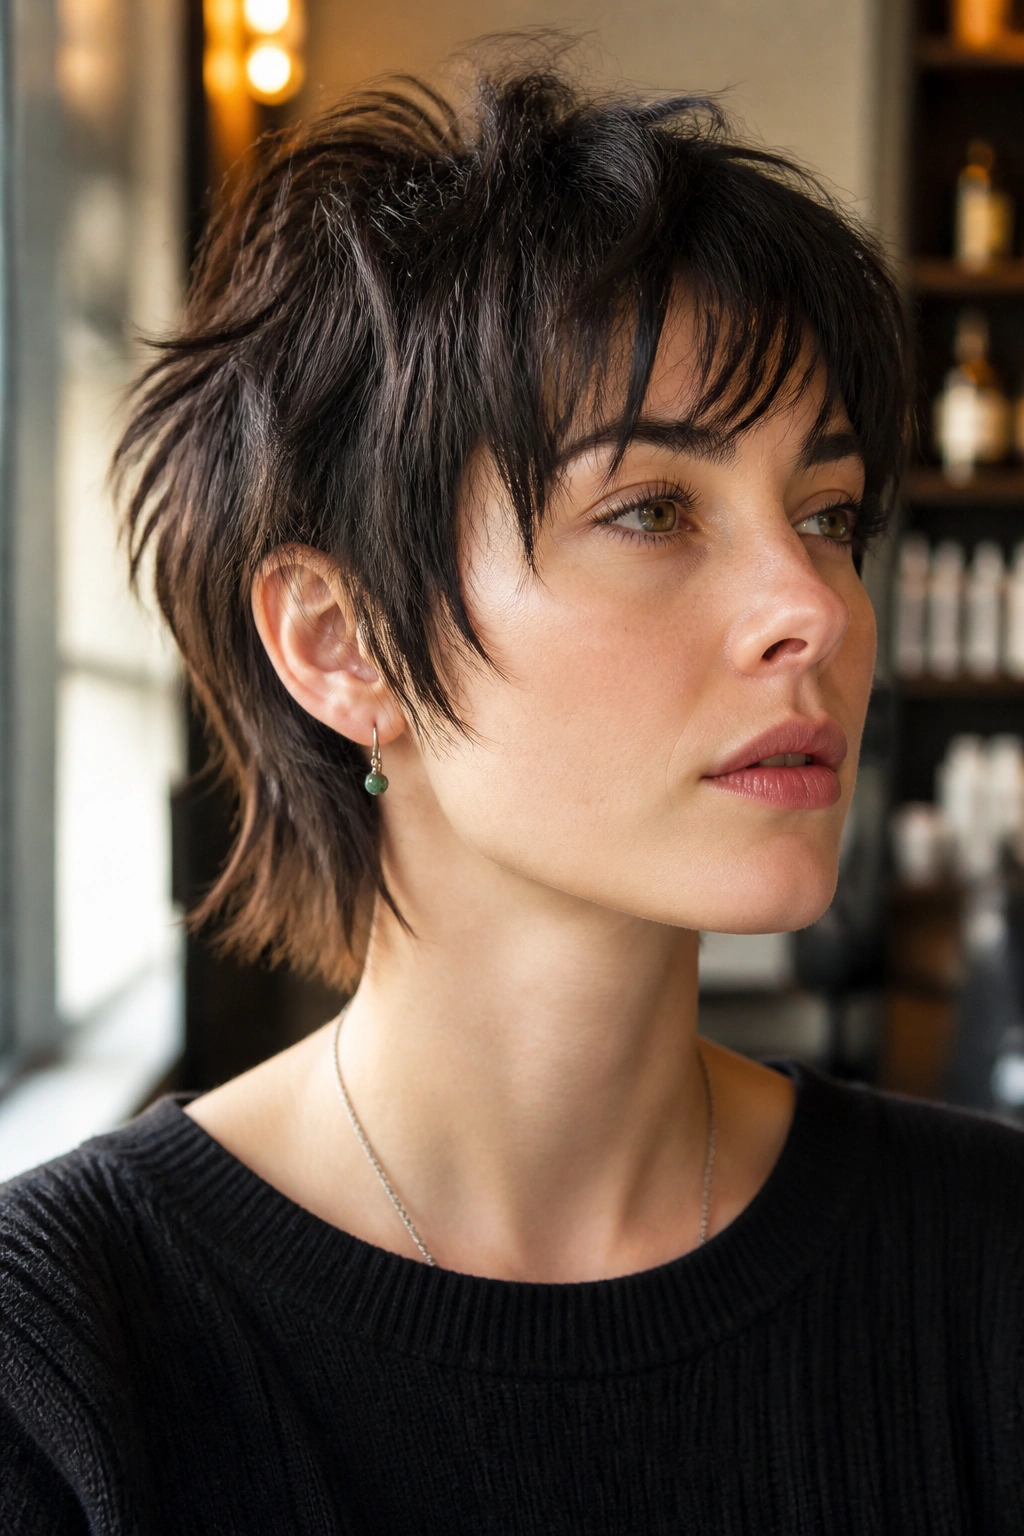
This is the version that looks the most deliberately messy. The razor work softens the ends, but the shape still feels sharp because the layers are cut short enough to stack movement through the crown and cheekbones.
Why It Works
Razor-cut ends give this bixie wolf cut a feathered edge that behaves well on straight or slightly wavy hair. The shape reads edgy fast, because the pieces separate on their own instead of sitting in one heavy block. That matters if your hair tends to fall flat and say nothing.
Ask for short, broken-up layers on top with a nape that stays close to the neck. The best version usually keeps the back cleaner than the front, so the cut has a little swing when you turn your head. If the stylist starts making the whole thing equally shaggy, stop them. Equal shag everywhere can turn into puff.
How to Style It
- Work a golf-ball amount of mousse through damp hair.
- Rough-dry with your fingers until the hair is about 80% dry.
- Add a pea-sized amount of matte paste to the ends.
- Twist a few random pieces with your fingers, then leave the rest alone.
Best for: hair that has natural bend, or hair that goes limp when it gets too much product.
Pro tip: if the front starts looking too fluffy, ask for a touch more weight removal around the temples, not more layers everywhere else.
2. Curly Bixie Wolf Cut with Airy Fringe
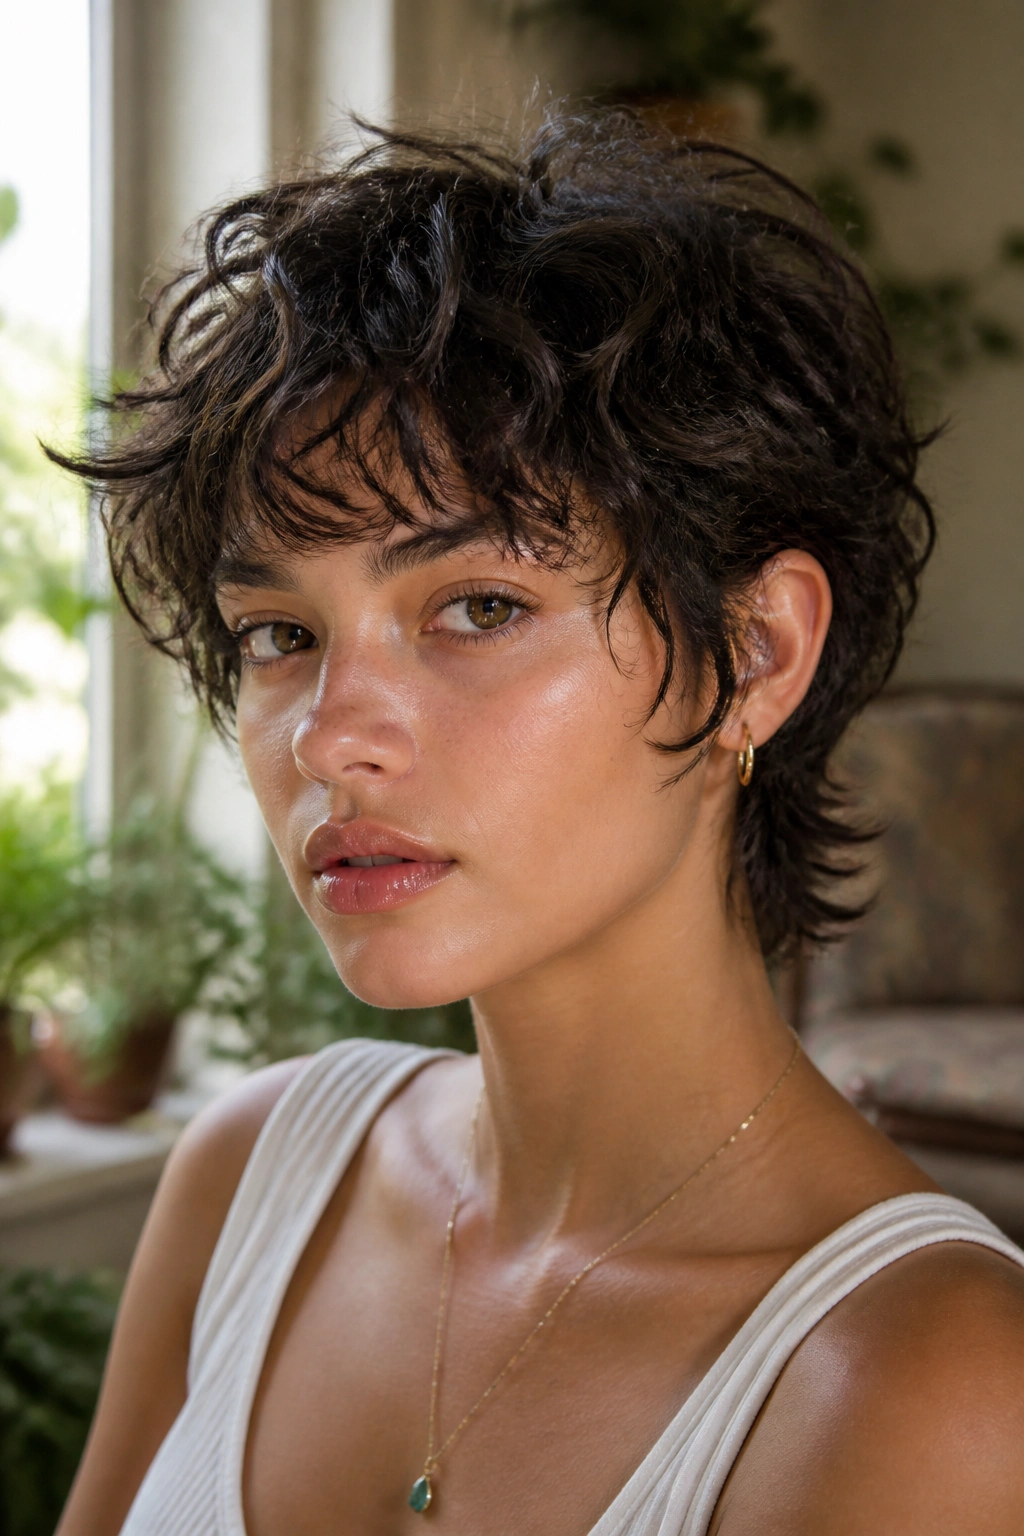
Why does this version work so well on curls? Because it lets the curl pattern do the heavy lifting. Instead of fighting the hair into a blunt shape, the cut uses shape and spacing to make the curls pop in a controlled way.
This is the one I reach for mentally when someone says they want “edgy, but not weird.” The fringe sits light and broken, usually around eyebrow length or just above, so it opens the face without turning into a curly curtain. The sides stay compact, while the top keeps enough length to show the curl spring.
What Makes It Different
Curly hair needs room, but not too much. If the layers are cut too short in the wrong places, the whole cut balloons out at the sides. A better curly bixie wolf cut keeps the crown lifted and the perimeter tidy, which helps the silhouette stay narrow and modern.
Use curl cream first, gel second. That order matters. The cream gives slip and softness; the gel gives hold without turning the fringe into a crunchy helmet. Diffuse on low heat, and stop when the curls are about 90% dry. Touching them too much while they’re damp is how you get frizz that looks angry instead of cool.
Styling Notes
- Scrunch with a microfiber towel or cotton T-shirt.
- Pick up a few front pieces with your fingers and twist them forward.
- Let the fringe air-dry away from the forehead if you want less shrinkage.
3. Micro-Bang Bixie Wolf Cut

You know that feeling when a haircut needs one sharp detail to wake it up? Micro bangs do that job. A bixie wolf cut with tiny bangs feels a little punk, a little fashion, and a lot more intentional than a plain cropped cut.
The fringe usually lands somewhere around 1 to 1½ inches at the center, depending on forehead shape and hair texture. Shorter than that, and it starts to feel severe. Longer, and it loses the point. The rest of the cut can stay soft and shaggy, which is what keeps the whole thing from looking like a costume.
People with strong brows or a long face tend to wear this well, but that’s not the whole story. The real question is whether you like seeing your forehead on display. Some people love it. Some people panic after one shampoo. Be honest with yourself.
A micro-bang bixie wolf cut looks best when the back is kept clean and close, while the top and front are chopped into small, separated pieces. That contrast makes the bangs feel like a choice, not an accident. And yes, you’ll probably want bang trims every 3 to 4 weeks. Short fringe grows fast. Annoyingly fast.
4. Shaggy Bixie Wolf Cut with Curtain Bangs

Curtain bangs do not make this cut softer. They make it look more deliberate. That’s the difference people miss when they think a wolf-inspired bixie has to be all bite and no shape.
This version is a good middle ground if you want movement around the face without going full micro fringe. The curtain bang opens from the center and drops into cheekbone-length pieces, which makes the face look longer and the cut feel less boxed in. It also plays nicely with glasses, which is a bonus people forget to mention.
What to Ask For
- Keep the center fringe long enough to brush the brows when pulled down.
- Let the face-framing layers start around the cheekbone or lip line.
- Leave the crown airy, but not so short that it sticks straight up.
A round brush and a quick blow-dry can make this version look cleaner, but I like it best when the bangs are bent just enough to separate. If you use too much round-brush polish, the cut loses its attitude. A little bend is better. Always.
A dry texture spray at the roots gives the shag part something to grip. Then you can rake your fingers through the front and let the bangs split where they want to split.
5. Wet-Look Bixie Wolf Cut
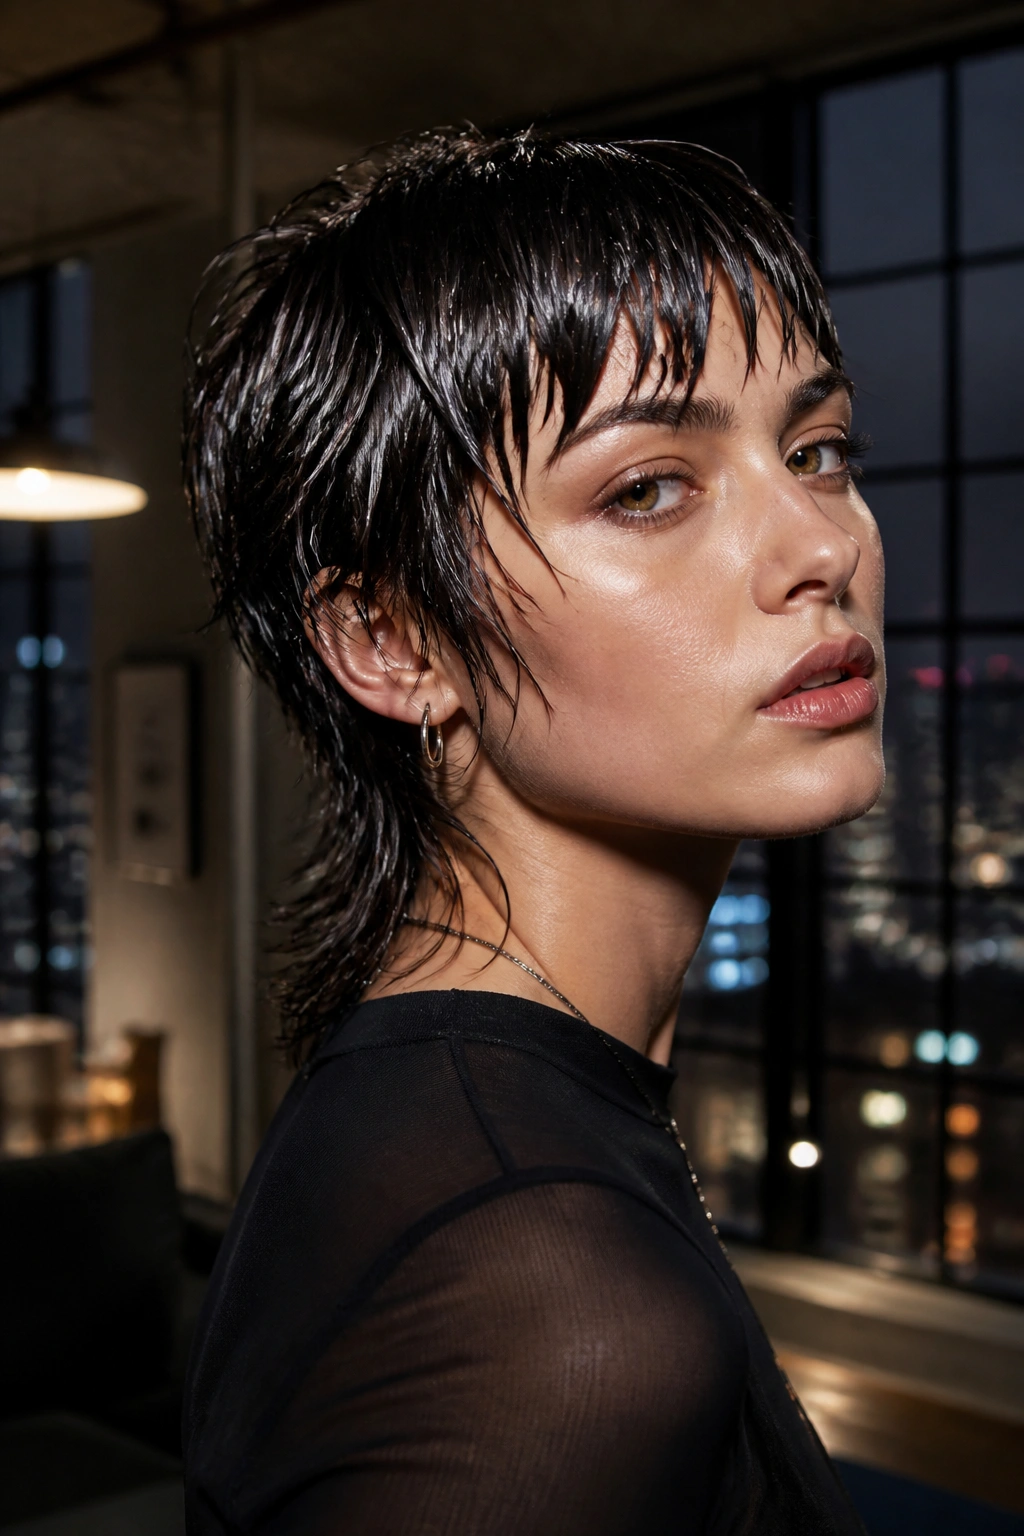
Cold gel. Shine. Sharp edges. This one has a tougher mood than the softer shag versions, and that’s exactly why it works when you want the haircut to feel dressed up without losing its edge.
The wet look is all about controlled separation. You want the layers to show, not explode. That means working on damp hair, not soaking hair, and using enough hold that the shape stays sleek while the front pieces keep their piecey finish. A hard side part can make it feel even more directional.
The Formula
Start with strong-hold gel through the roots and mids, then comb it into place with a fine-tooth comb. Keep the product lighter on the ends so the cut doesn’t look greasy at the bottom. If the hair is very thick, a little leave-in underneath helps the comb glide instead of snagging.
Let it air-dry if you want a truer wet finish. If you’re in a hurry, diffuse on low while leaving the front untouched. That usually keeps the crown sleek and the face pieces slightly separated, which is the sweet spot.
This style is especially good for evenings, editor-style outfits, and anyone who likes a cleaner edge. It’s also the easiest way to make short hair feel expensive without spending forever on it.
6. Soft Mullet Bixie Wolf Cut
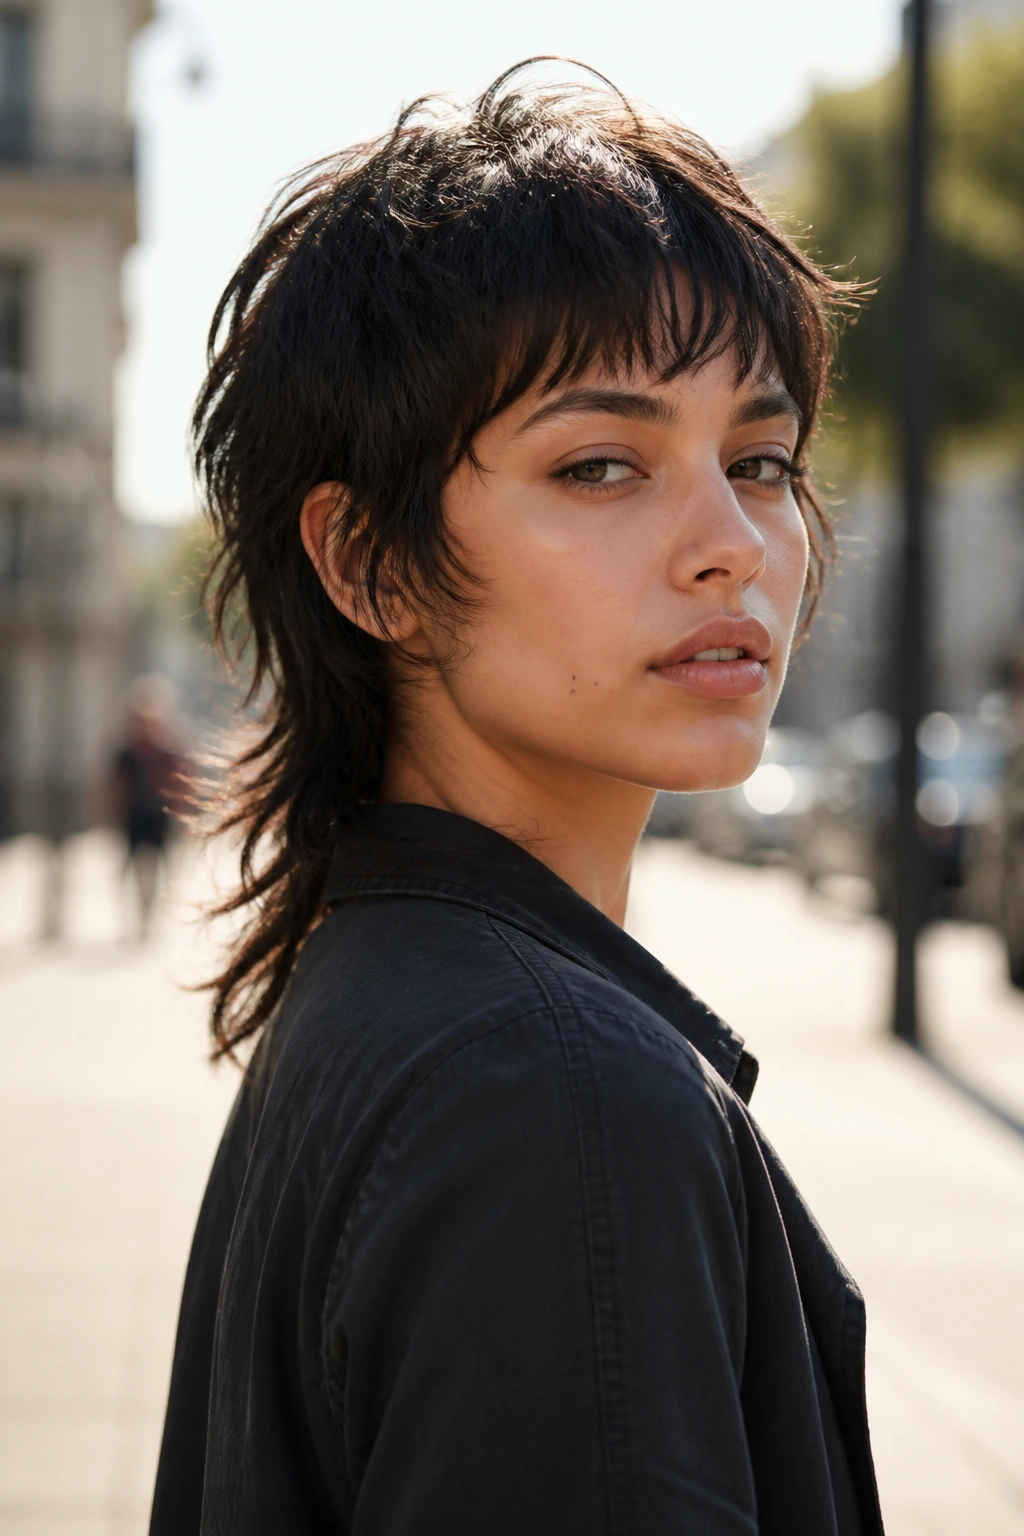
A little shorter in front. A little longer in back. That’s the whole idea, and it’s why this version feels a touch bolder than a standard bixie without going full retro mullet.
The soft mullet shape keeps the top and sides compact, then lets the back dip just enough to create movement at the nape. It’s a good move if you want the cut to grow out gracefully, because that extra tail in the back buys you some time between trims. No one ever complains about a haircut buying them time.
This version works well on oval, heart, and square faces, especially when the front pieces hit around the jaw or cheekbone. The contrast helps sharpen the profile. If your hair is thick, ask for internal removal so the back doesn’t puff up. If it’s fine, keep the back slightly longer so the shape does not disappear.
The best styling move here is a small bend through the ends. Use a 1-inch curling iron or flat iron to flick the front away from the face, then roughen it up with a tiny bit of paste. Don’t overthink it. This cut gets worse when you polish it too much.
7. Piecey Blonde Bixie Wolf Cut
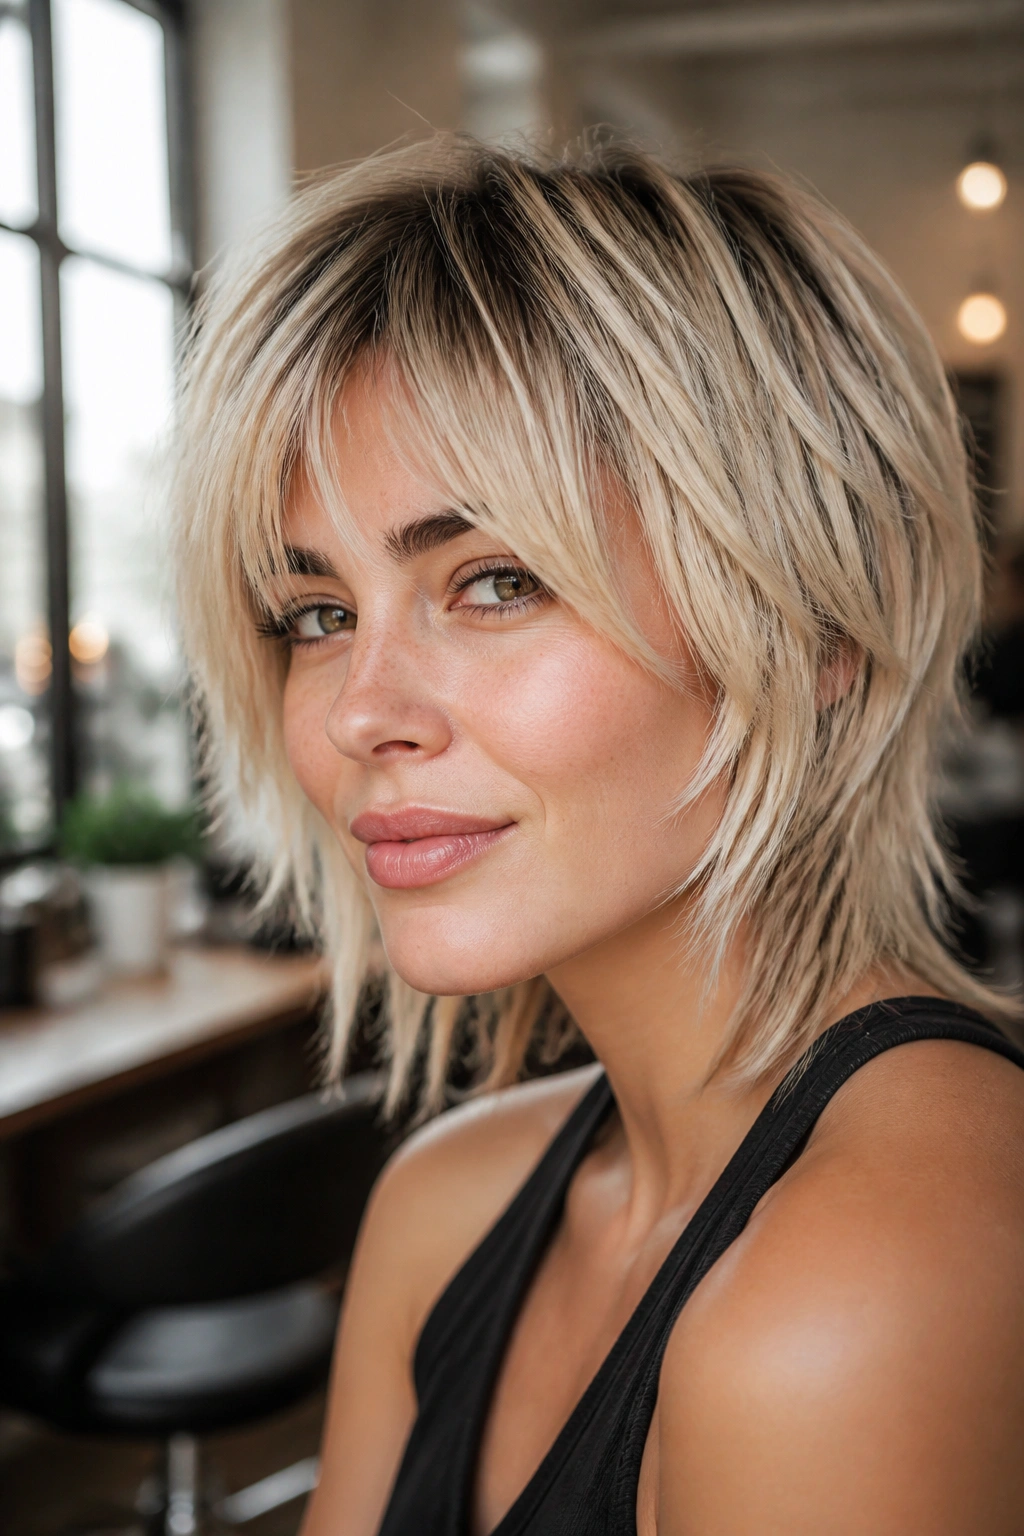
Three things make this version work: brightness, separation, and short layers around the face. The color does half the work here. Blonde catches the eye first, and the chopped shape keeps it from looking flat or too sweet.
A piecey blonde bixie wolf cut looks especially good when the root is a shade darker than the ends. That tiny depth at the scalp makes the layers read better, and it saves you from the helmet effect that happens when every strand is the same light color. The contrast is subtle, but it matters.
I like this one with lived-in blonde, not over-processed platinum. The tone can be beige, sandy, icy, or golden, depending on your skin and how much upkeep you can tolerate. The important part is the texture. If the hair is cut right, the lighter pieces around the cheekbone almost act like contour.
How to Style It
- Use a wax spray on dry hair for grip.
- Bend a few face-framing pieces with a flat iron.
- Shake out the top with your fingers, not a brush.
- Finish with a light mist of flexible hold spray.
The point is separation, not perfection. If every piece sits in the same direction, the cut loses its edge.
8. Dark, Inky Bixie Wolf Cut

I like this version when the cut itself needs to do the talking. Dark hair makes the layers look sharper, the fringe look cleaner, and the whole shape feel a little more expensive without any extra effort.
Black, espresso brown, or blue-black shades work especially well here because the darkness turns the cut into silhouette. You stop noticing the color first and start noticing the line of the nape, the lift at the crown, and the way the front pieces frame the eyes. That’s a nice trick if you want drama without highlights.
The best dark bixie wolf cuts usually keep the ends soft, not blunt. A blunt edge can make dark hair feel heavy and boxy. Soft point cutting gives the look a little movement, which matters even more if your hair is naturally dense. Dense hair loves to look like a brick if nobody checks it.
If your hair is color-treated, use a sulfate-free shampoo and keep heat styling modest. Dark tones lose their shine fast when the cuticle gets rough. A quick gloss or shine serum on the mid-lengths keeps the shape crisp and avoids that dusty finish dark hair gets when it’s been overwashed.
9. Copper Bixie Wolf Cut

If you want the cut to look louder without changing the shape, copper does the job. Warm red tones make every layer more visible, and the bixie wolf cut loves that kind of definition.
Copper is one of those shades that can feel soft or sharp depending on how bright you go. A soft apricot copper reads playful. A deeper auburn copper feels moodier and a bit more grown-up. Either way, the layers benefit because the color creates movement even when the hair is sitting still.
This is a good pick if your skin has warm or neutral undertones and you want a haircut that doesn’t disappear in low light. It also flatters wavy texture because the color catches on the bends. I’ve seen this look turn an ordinary shaggy crop into something that feels much more styled than it really is.
To keep it from going dull, use a color-depositing mask every week or two if your shade fades fast. And try not to fry the ends with high heat. Copper shows damage fast. That’s the tradeoff. The color is worth it, though, because the whole cut gets a little more attitude for free.
10. Wavy Bixie Wolf Cut for Fine Hair
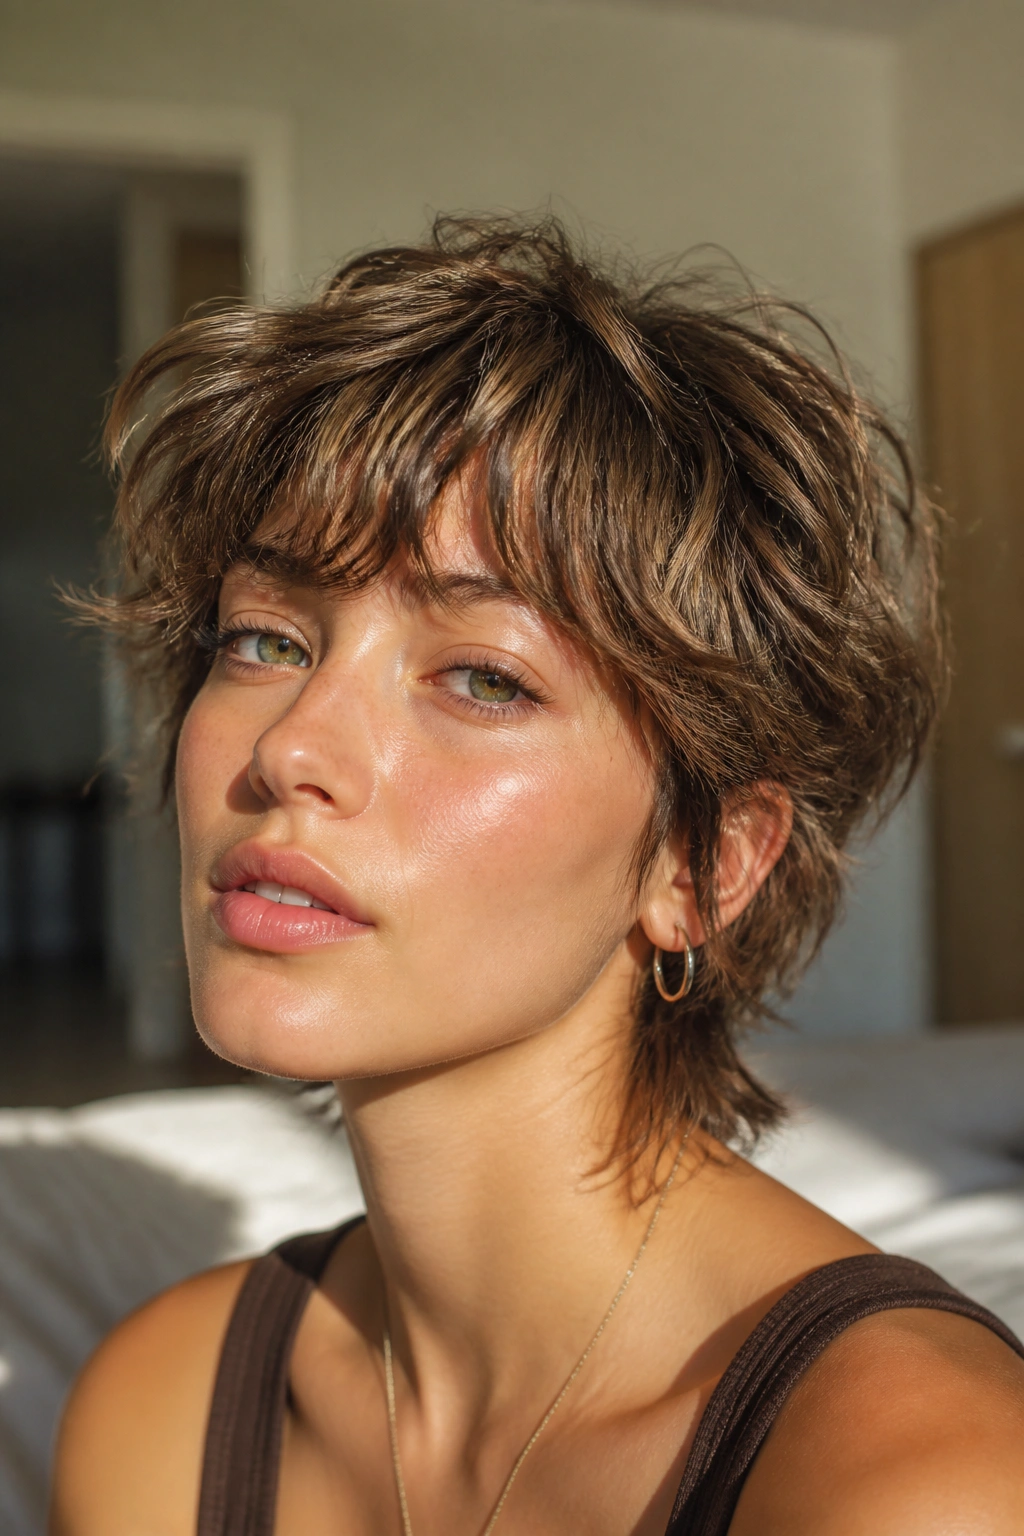
Fine hair needs lift, not weight. That’s the whole rule, and it’s why this version works so well when other shaggy cuts end up looking flat by noon.
The best fine-hair bixie wolf cut keeps the crown short enough to stand up, while the sides stay light and broken so they do not drag the whole shape down. The wave gives the illusion of thickness, which is the real trick here. You do not need more hair. You need the hair you have to sit in the right places.
A lot of people with fine strands make the mistake of over-layering the ends. That can make the tips look thin and frayed. Better to keep the perimeter a little stronger and build movement higher up. The goal is a cut that looks airy, not wispy.
Styling It Without Flattening It
- Apply root-lifting mousse to damp roots.
- Rough-dry until the hair is about 70% dry.
- Wrap random 2-inch sections around a 1-inch iron for loose bends.
- Finish with dry texture spray at the crown only.
Skip heavy oils. They sink fine hair fast. If you want shine, use a tiny drop on the ends and stop there.
11. Thick-Hair Bixie Wolf Cut with Heavy Debulking
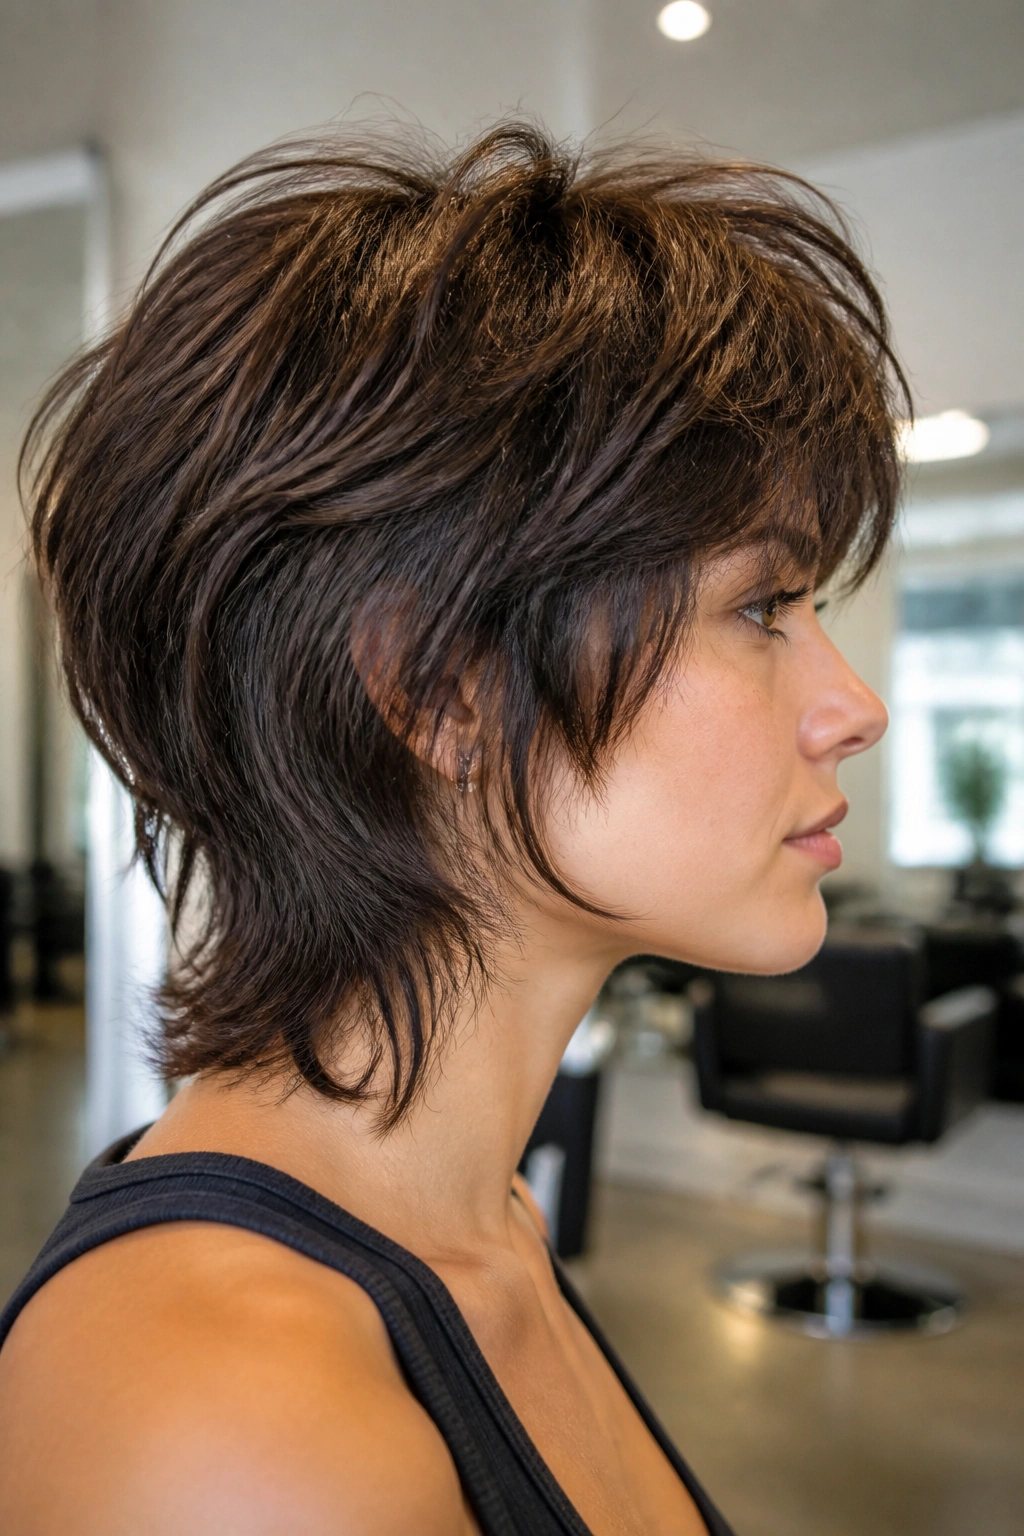
This is the version that saves thick hair from turning into a helmet. When thick hair is cut wrong, it can sit like one solid mass. When it’s cut right, it moves. That difference is huge.
The key here is internal debulking, not just chopping layers on top. The stylist needs to remove weight from inside the shape so the top can lift and the sides can fall in a cleaner way. If they only shave the surface layers, the haircut may look choppy for a day and bulky for the next six weeks. Not ideal.
What to Ask Your Stylist Not to Do
- Do not thin the ends aggressively with thinning shears.
- Do not leave the crown too heavy.
- Do not make the back and sides the same length if your hair is very dense.
- Do ask for point cutting and controlled weight removal through the interior.
A thick-hair bixie wolf cut should still have structure around the neck, but it needs some air in the middle. That’s what stops the puff. It also makes styling easier, because you can direct the layers with your hands instead of fighting a wall of hair.
I’d keep this one slightly longer than a super-short pixie if your hair has a lot of body. Thick hair often looks better when it has a little room to settle.
12. Asymmetrical Bixie Wolf Cut
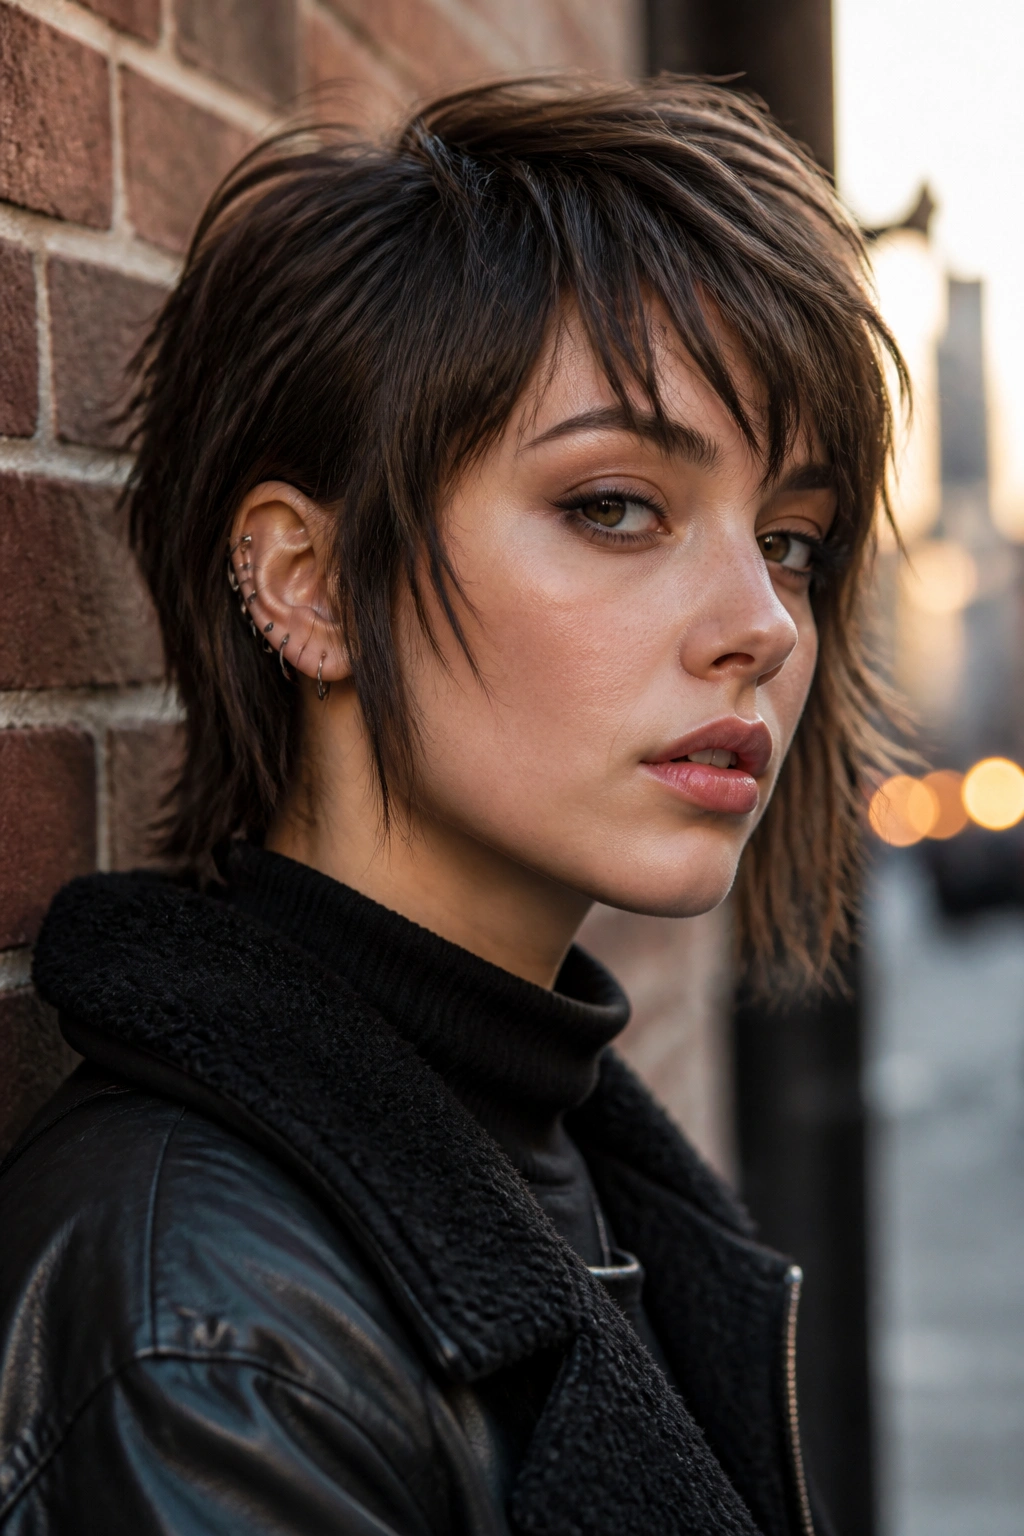
Symmetry can feel safe. It can also feel boring. An asymmetrical bixie wolf cut fixes that in one clean move by letting one side drop longer than the other, usually around the jaw or ear line.
The best asymmetrical versions are not wild in a random way. They have a clear shape. One side might tuck behind the ear while the other side grazes the cheekbone. Or the part might sit deep to one side so the fringe sweeps diagonally across the forehead. That diagonal line does a lot of work. A lot.
This cut is especially good if you like strong earrings, sharp liner, or clothes with clean lines. The haircut becomes part of the outfit instead of fighting it. It also helps balance a face that feels round or very soft, because the angled shape adds structure where you want it.
If you wear this style, a small flat iron is your friend. Not because it needs to be poker-straight, but because you want to control the longer side enough that the asymmetry looks intentional. One or two quick bends are usually enough. Anything more and it starts looking overdone, which is not the point.
13. Low-Maintenance Grow-Out Bixie Wolf Cut
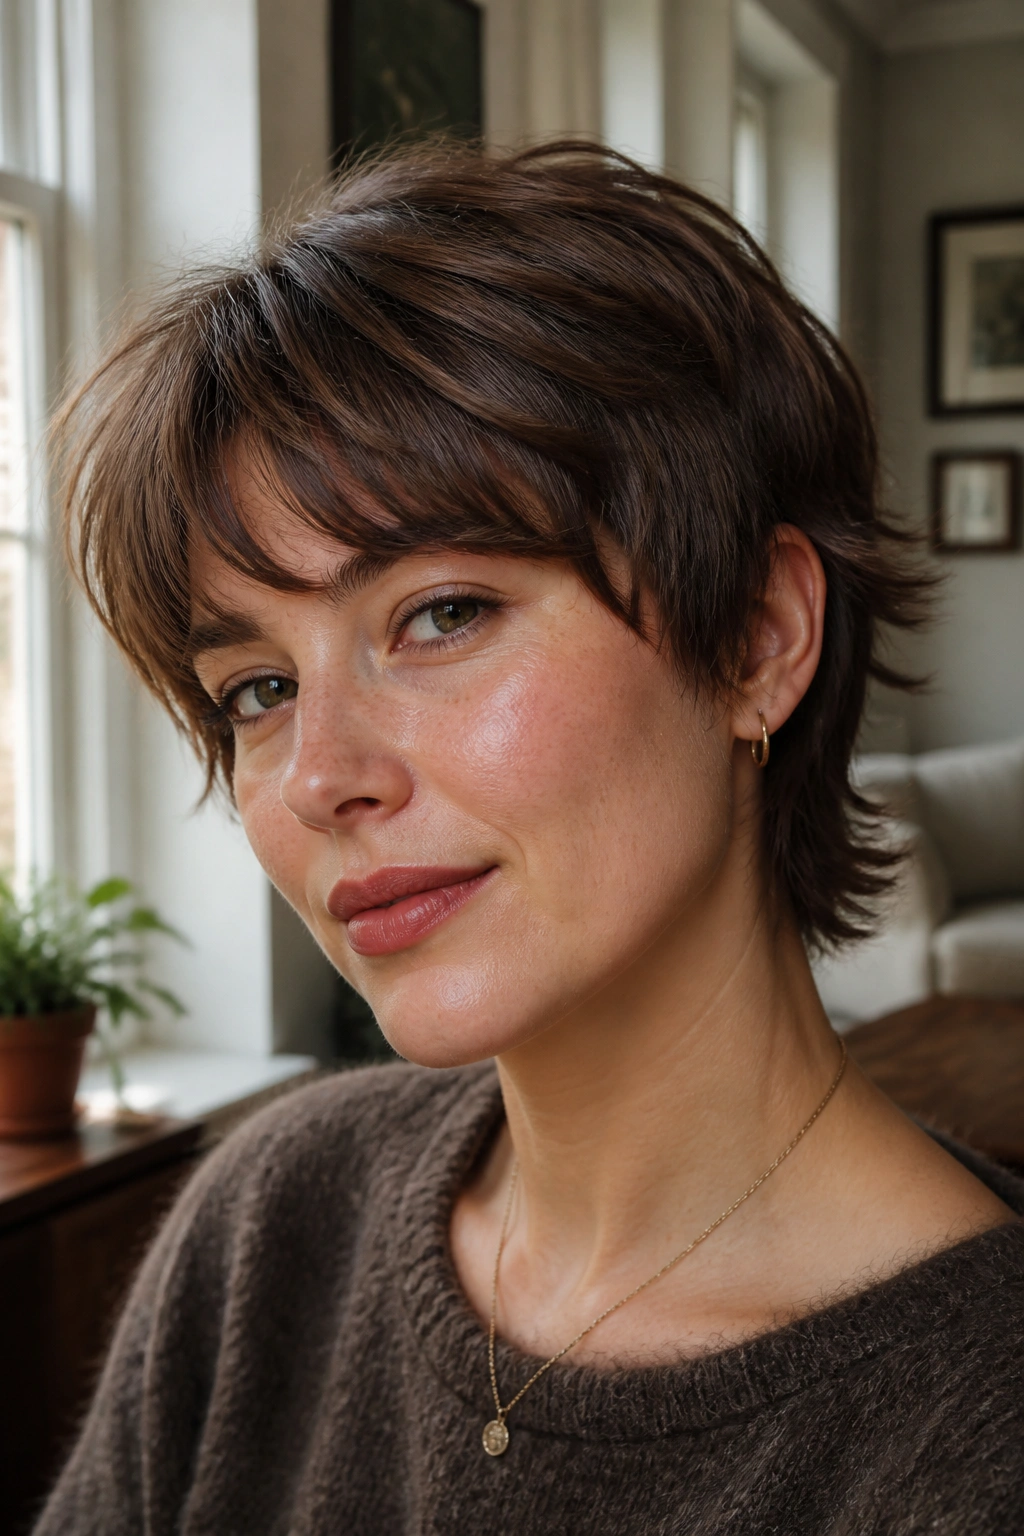
Short enough to feel fresh. Long enough to ignore for a week. That’s why this version keeps showing up in real life, not just on mood boards.
A low-maintenance bixie wolf cut usually has a softer perimeter, fewer harsh disconnects, and a fringe that can be brushed to either side. The crown still gets movement, but the overall shape is forgiving. You can sleep on it, rough-dry it, and walk out the door without a full styling session.
Why It Stays Good Longer
The cut grows out in a way that keeps the outline readable. Instead of losing all shape after a few weeks, it softens in a way that can still look on purpose. That’s partly about the length at the nape and partly about leaving enough weight at the sides so the silhouette doesn’t collapse.
If you hate frequent salon visits, this is probably the smartest place to start. Ask for layers that are visible but not too short, and keep the bang area soft enough to sweep over. A center part can work, but a soft off-center part usually makes the grow-out look cleaner.
A little dry shampoo at the roots and a quick finger-twist around the front pieces is often enough. If a haircut needs a 20-minute routine every morning just to look alive, I’d call that a problem, not a style.
14. Edgy Pixie-Bob Wolf Cut
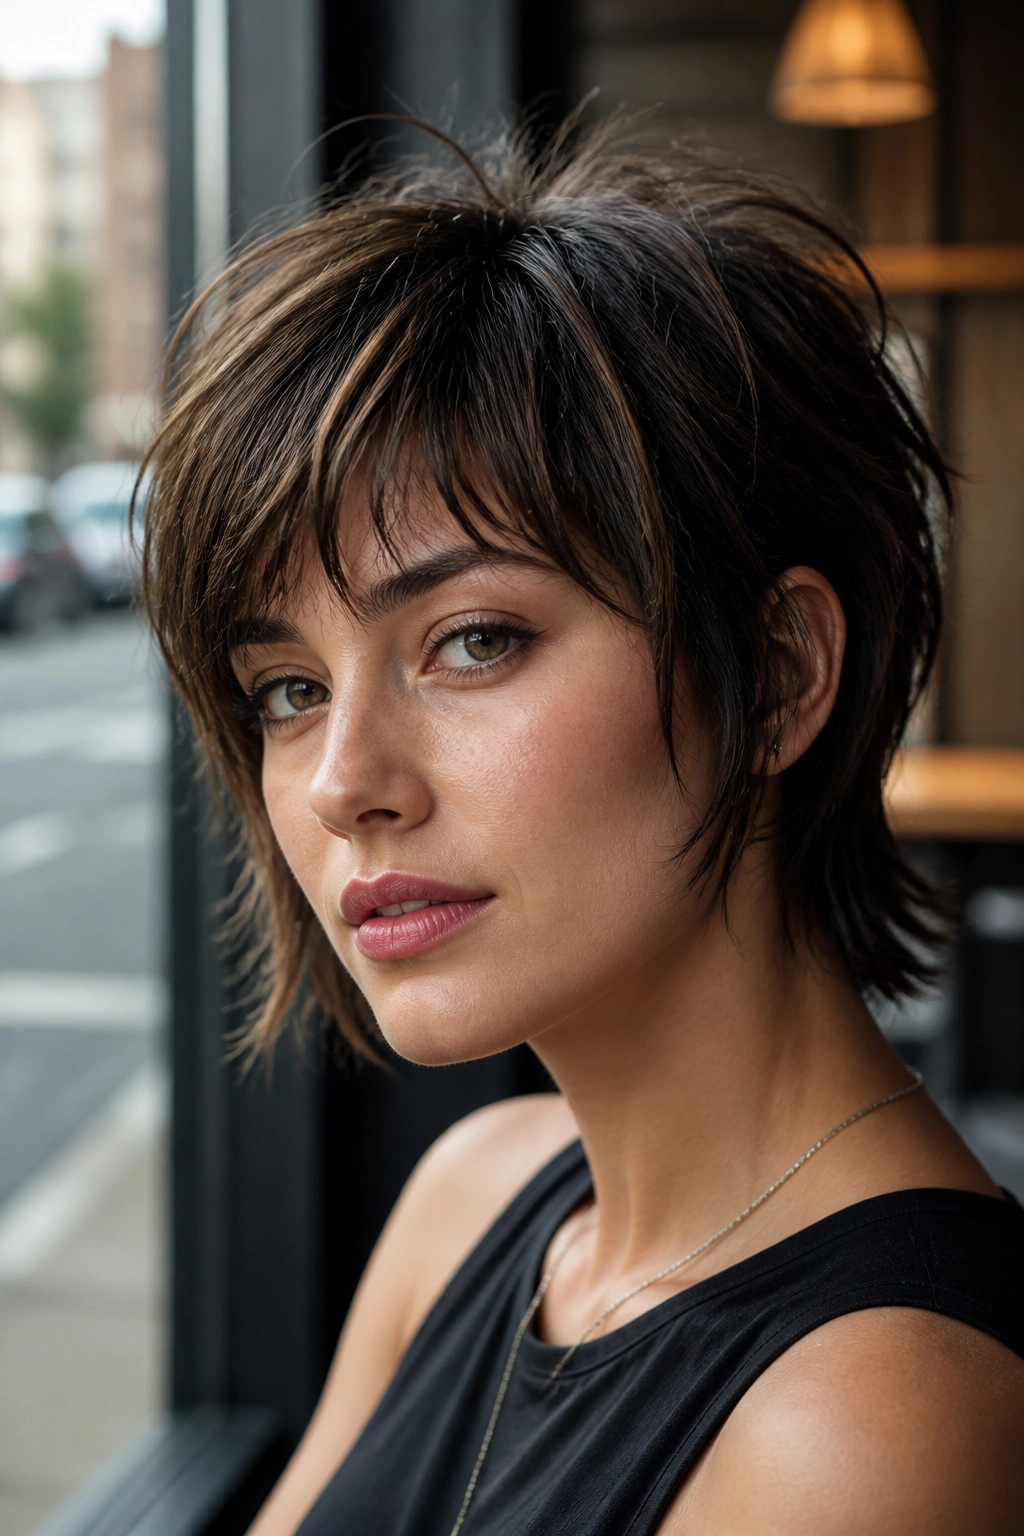
What happens when the bixie gets a little more polished? You get this hybrid: the neatness of a pixie-bob with the jagged movement of a wolf cut. It’s one of the easier versions to wear if you want edge without looking like you committed to a full shag experiment.
The length usually sits between ear and jaw, with a back that stays slightly tucked and a top that has enough lift to feel airy. The front can angle forward a bit, which gives the face a sharper frame. It’s sleek enough for work, but still has that chopped texture people notice.
This is a smart choice if you want to keep some softness around the face while still showing the neckline. It works especially well on oval and long faces, where a little width near the cheeks can feel flattering. On rounder faces, keep the sides slightly tighter and let the fringe do the framing.
A small round brush at the crown and a few passes with a texturizing spray are often enough. Don’t turn it into a rounded bob. The point is the broken edge. That’s what keeps it from looking too neat, and honestly, too neat would ruin the fun.
15. Punky Textured Bixie Wolf Cut with Color Panels
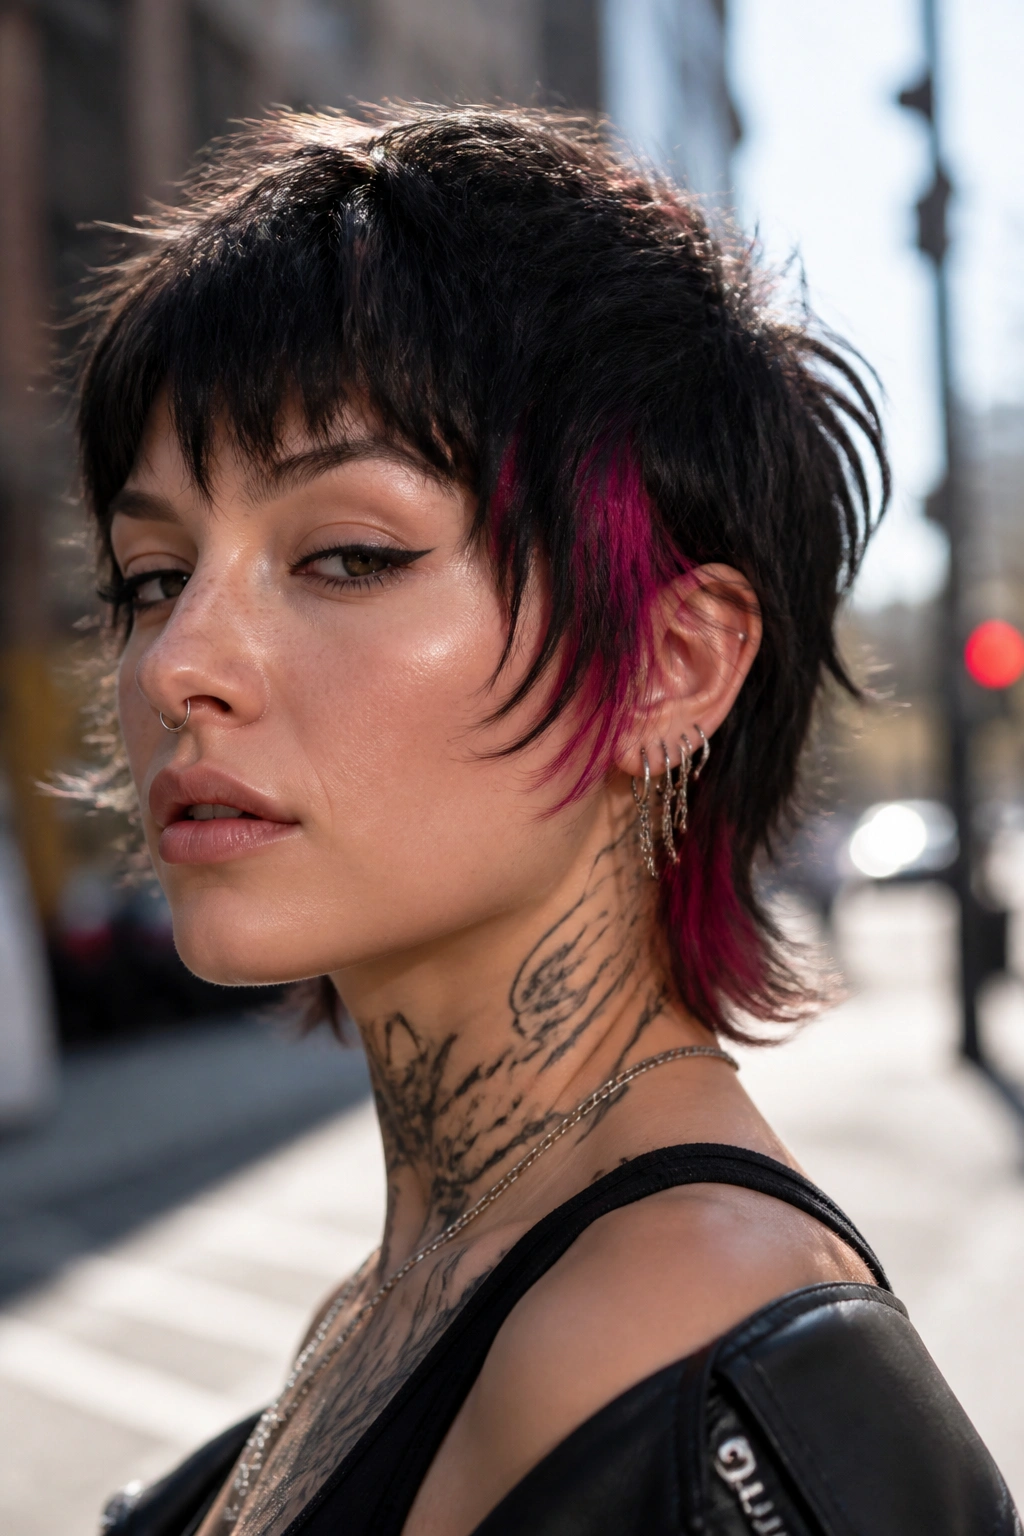
If you want the haircut to look louder without cutting it much shorter, color panels do the heavy lifting. A peekaboo strip, a temple streak, or a bright underlayer can turn a textured bixie wolf cut into something that feels properly rebellious.
I’m talking about color placed where the movement reveals it. Not all over. A hidden panel under the top layers can flash when you tuck the hair behind your ear. A narrow face-framing streak can draw attention to the eyes. A lighter or brighter underlayer can make the top pieces look sharper because the contrast shows each broken edge more clearly.
This version works best when the cut has enough movement to let the color show in pieces. A flat shape will hide the whole point. So keep the layers airy, the crown lifted, and the fringe a bit jagged. If you’re using permanent color on prelightened panels, remember that the hair under the top layer gets hit by heat less often but still needs moisture. It can dry out in sneaky ways.
This is the one I’d choose if the goal is to look edgy without going costume-y. The haircut gives you texture. The color gives you attitude. Together, they can be a little loud, which is exactly the point.
Best for: people who like a bit of commitment and do not mind maintaining color panels every few weeks.
Final thought: the versions that age best are the ones with movement first and gimmick second. If the cut looks good in plain daylight, under bad bathroom lighting, and when you’ve only spent two minutes on it, you probably picked well.
