



A hair show can make a braid look sculpted and a bun look expensive, but the styles that actually leave the show floor and make it into real life are the ones with clean shape and staying power. The best hair show styling ideas women try usually aren’t the loudest looks in the room; they’re the ones that hold up after heat, movement, and a hundred photos taken from slightly too close.
That’s the part most people miss. Under bright lights, small flaws show fast: frizz at the hairline, a curl that drops before lunch, a ponytail that sags by an inch and suddenly looks tired. Stage hair asks for a stronger base than everyday hair, but it still needs to move. Stiff, helmet-like styles age badly. Soft, controlled ones travel better.
I keep coming back to the same rule: pick one thing to emphasize. Shine, braid detail, height, texture, parting, accessories — not all of them at once. Good hair usually has a clear idea behind it. It doesn’t need to do cartwheels.
The styles below cover short hair, long hair, fine hair, thick hair, and a few looks that sound dramatic but are easier than they look. Start with the shape, then tune the finish. That’s where the useful stuff lives.
1. Sleek Low Bun for Hair Show Lighting
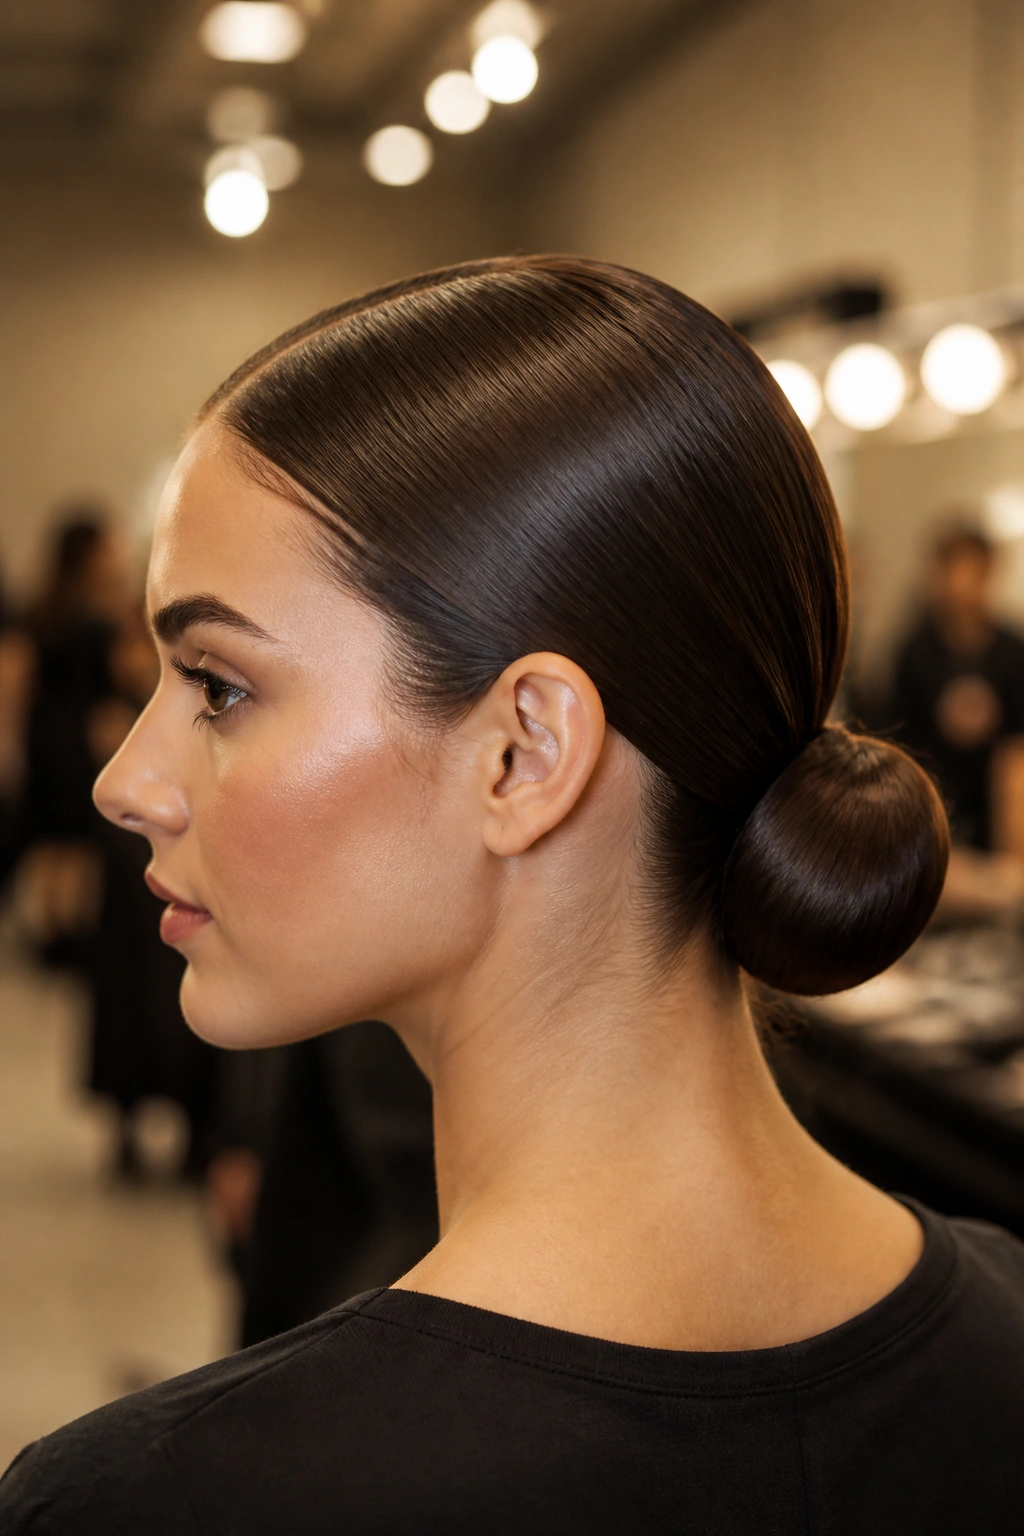
A low bun can look plain in a bathroom mirror and razor-clean under spotlights. That’s why it keeps showing up in hair show styling ideas women try when they want polish without fuss. The center part does half the work. The bun does the rest.
What makes it work is the line from forehead to nape. Brush the hair flat with a fine-tooth comb, keep the part crisp, and set the bun low enough that it hugs the neck. A little smoothing cream goes a long way here. Too much and the hair starts to look greasy instead of glossy.
Why the shape matters
The bun should sit like a knot, not a ball. That detail sounds small. It changes everything.
- Best on hair that’s medium to long, straight to slightly wavy
- Looks strongest when the crown is smooth and the bun is compact
- Hold it together with two or three U-pins, not a cloud of bobby pins
- Finish with flexible spray, not hard shellacking
My favorite trick: leave the ends tucked, not stuffed. The bun looks neater, and the silhouette stays lean from every angle.
2. Wet-Look Ponytail for Hair Show Energy
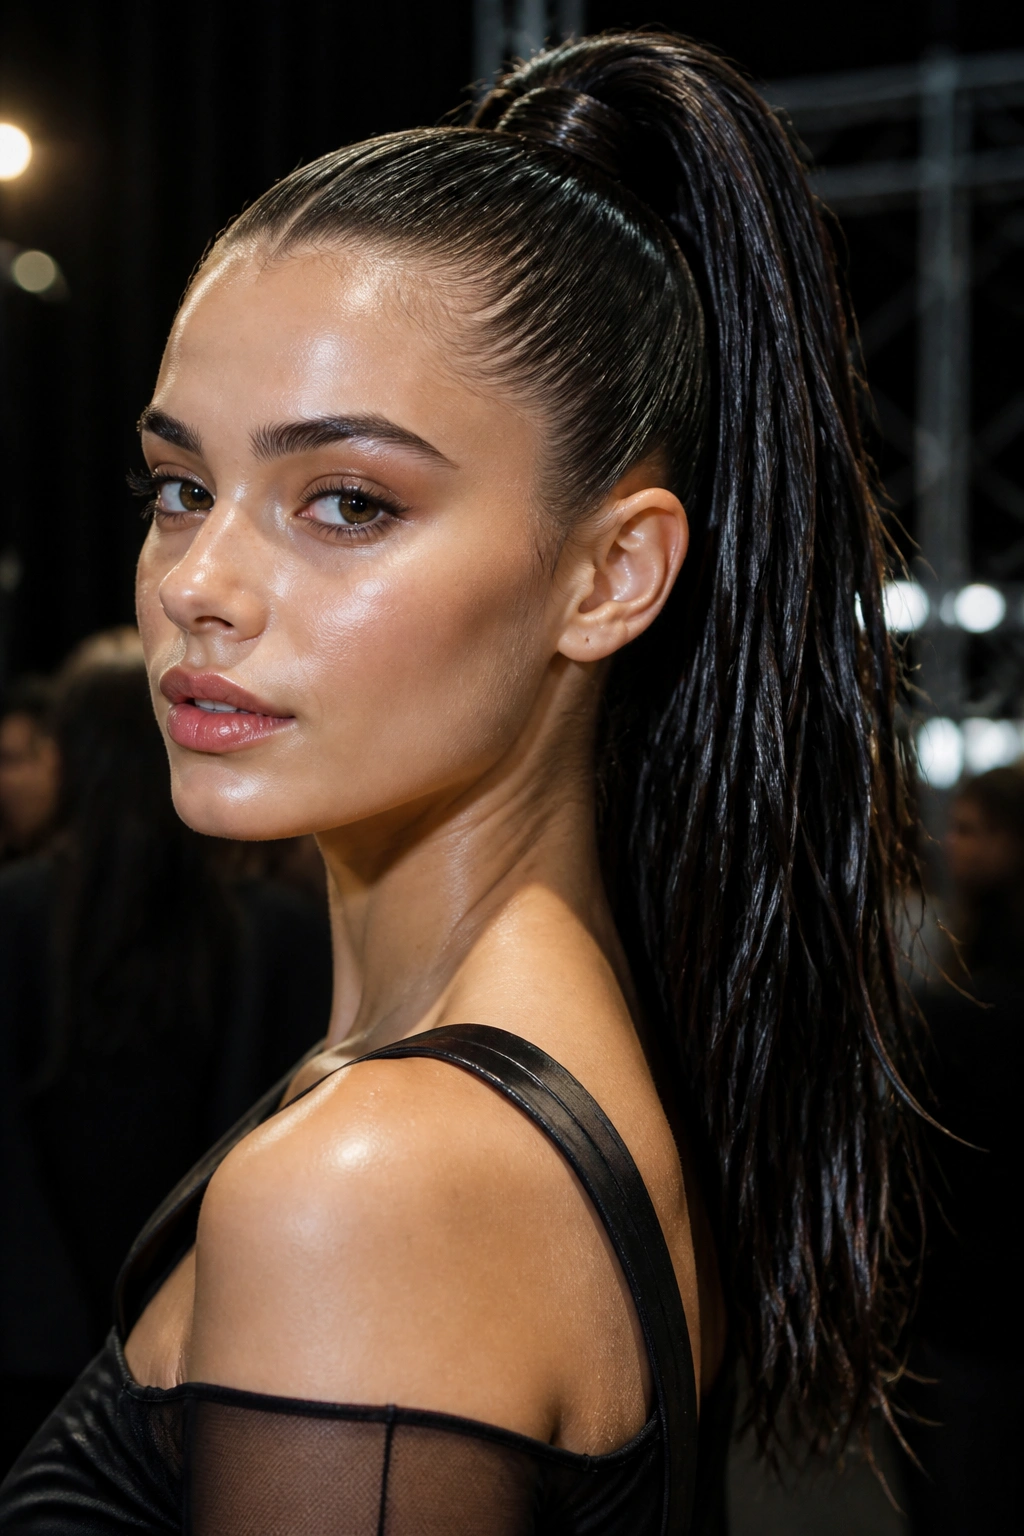
If you want one style that reads sharp from the back row, this is it. A wet-look ponytail carries that glossy, deliberate feel without needing a complicated shape, which is why women keep reaching for it when they want something that feels a little more editorial.
The key is restraint. Use gel at the roots, comb it back in clean sections, then stop once the hairline is smooth. The ponytail itself can sit high, mid-level, or low, but the best versions keep the top sleek and the tail slightly separated so it doesn’t turn into one shiny rope. A drop of serum on the ends helps. More than that is overkill.
Less is cleaner.
I like this style for outfits with clean necklines or strong earrings because the hair gets out of the way and lets the rest of the look speak. It also works well on second-day hair, which has enough grip to stay put. Freshly washed hair can be slippery, so a touch of mousse at the roots helps the ponytail hold its shape without sliding lower by the hour.
3. Soft Hollywood Waves Women Try at Hair Shows
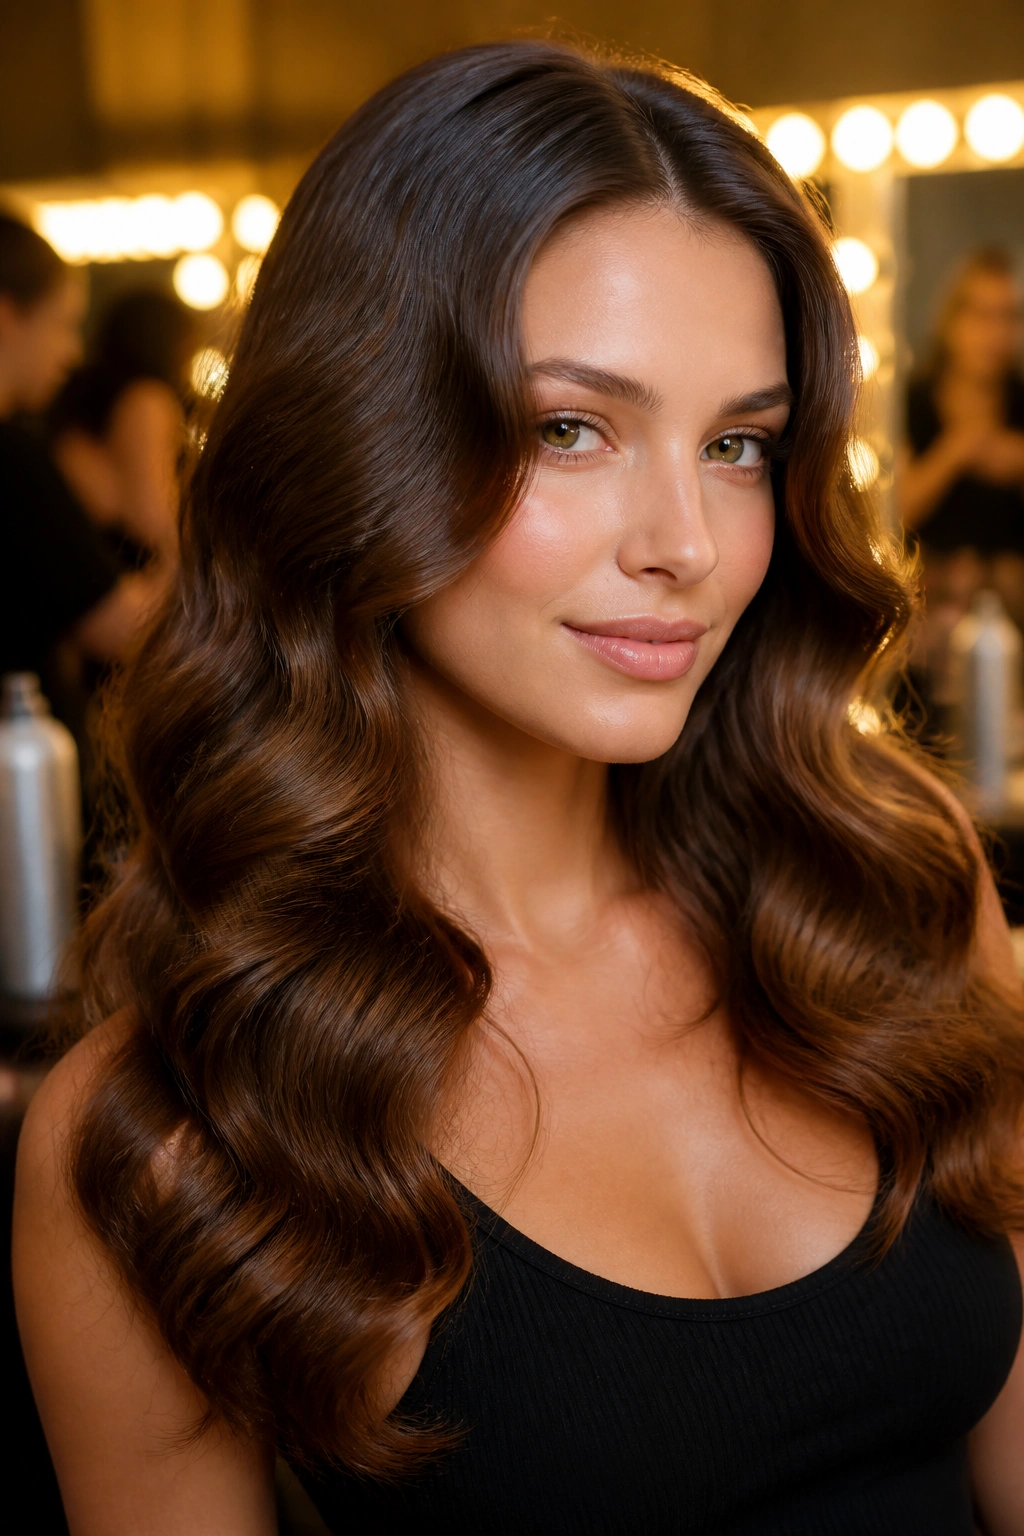
Why do these waves keep coming back? Because they soften the face, frame the shoulders, and still look put together when the room gets bright and busy. A good wave pattern has shape without looking stiff, and that balance is harder to pull off than it sounds.
The trick is in the setting, not the brushing. Curl 1-inch sections away from the face, pin each curl to cool, then brush through only after the hair is fully set. If you skip the cooling step, the wave relaxes too soon and the whole style falls flat. A flexible spray keeps the movement. A heavy spray can make the ends feel crunchy, and nobody wants that.
How to set the bend
- Use a 1- to 1.25-inch curling iron for a softer curve
- Keep the curl direction consistent on each side of the part
- Pin the curls flat against the head while they cool
- Brush with a soft bristle brush, not a paddle brush
Small detail, big payoff: tuck one side behind the ear and leave the other side loose. That tiny asymmetry gives the style a cleaner line.
4. Braided Crown with Loose Ends
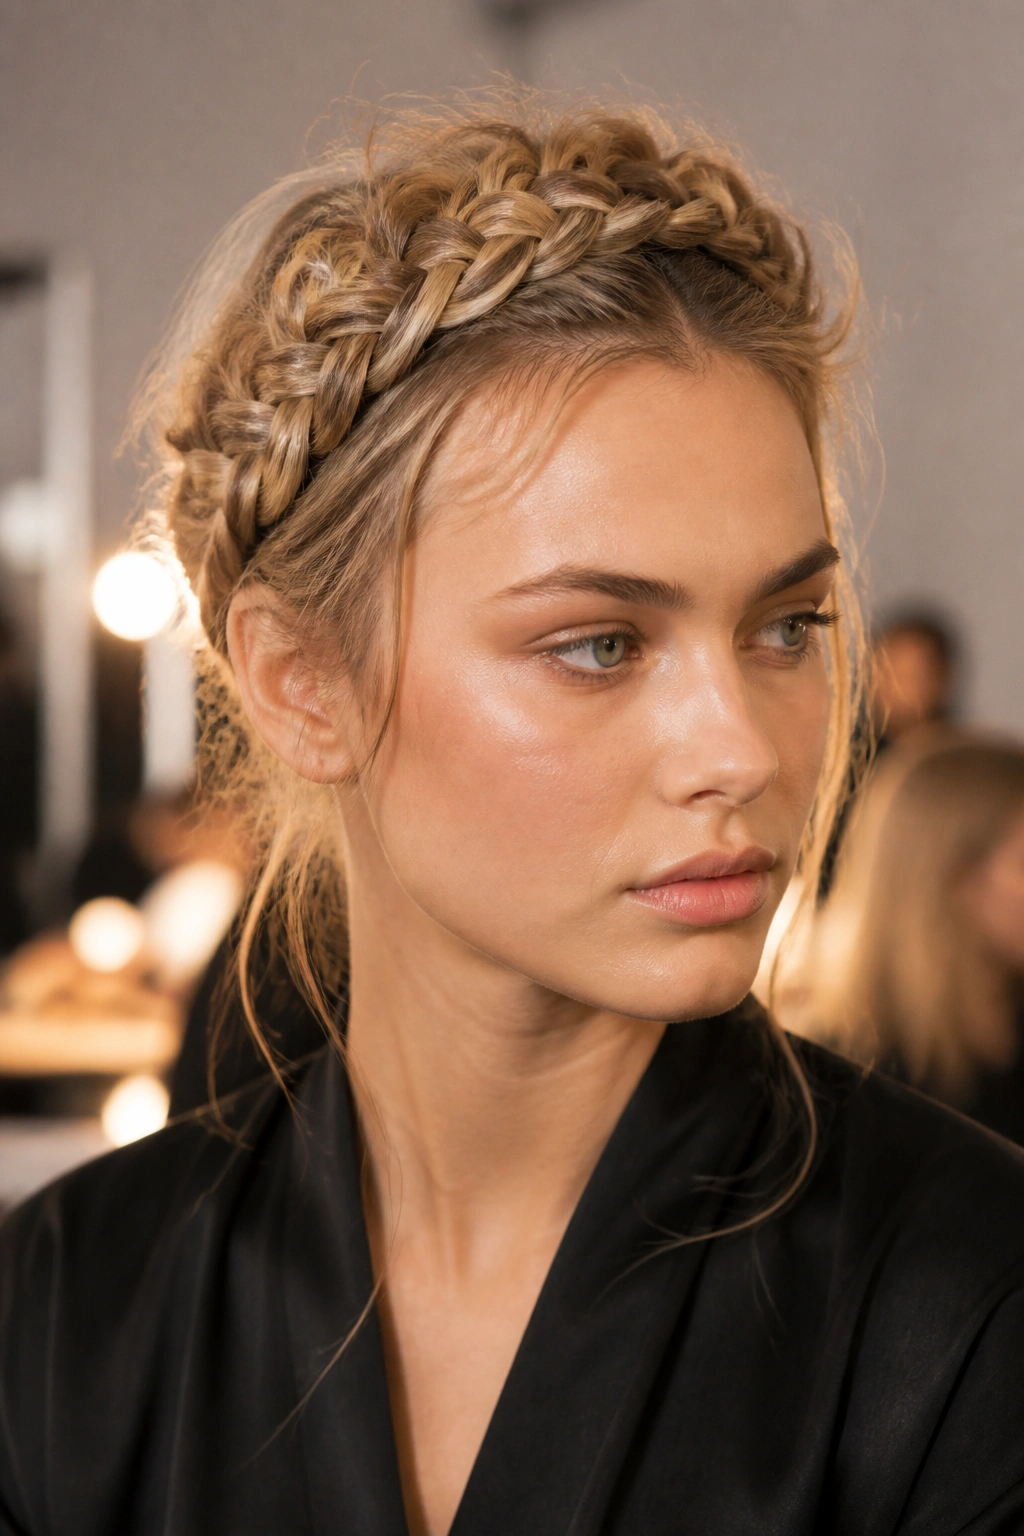
At a busy hair show, this style saves time because the braid does the decorative work for you. A braided crown has structure built in, and the loose ends stop it from feeling too school-pageant or too severe. It sits in that useful middle ground where polished meets wearable.
The braid should wrap along the hairline or just behind it, depending on how much face framing you want. Keep the tension even. A braid that starts tight and loosens halfway through looks unfinished, and that unevenness shows immediately. If the hair is layered, pin the shorter pieces under the braid instead of fighting them. That’s the difference between controlled and messy.
A few practical notes help here:
- Works best on medium to long hair
- Fine hair needs a little texturizing spray first
- Thick hair may need hidden pins every 2 inches
- A satin ribbon woven through the braid changes the whole mood fast
I like this look for daytime events and long presentations. It stays put. It also photographs well from the side, which matters more than people admit.
5. Textured Pixie with Piecey Finish
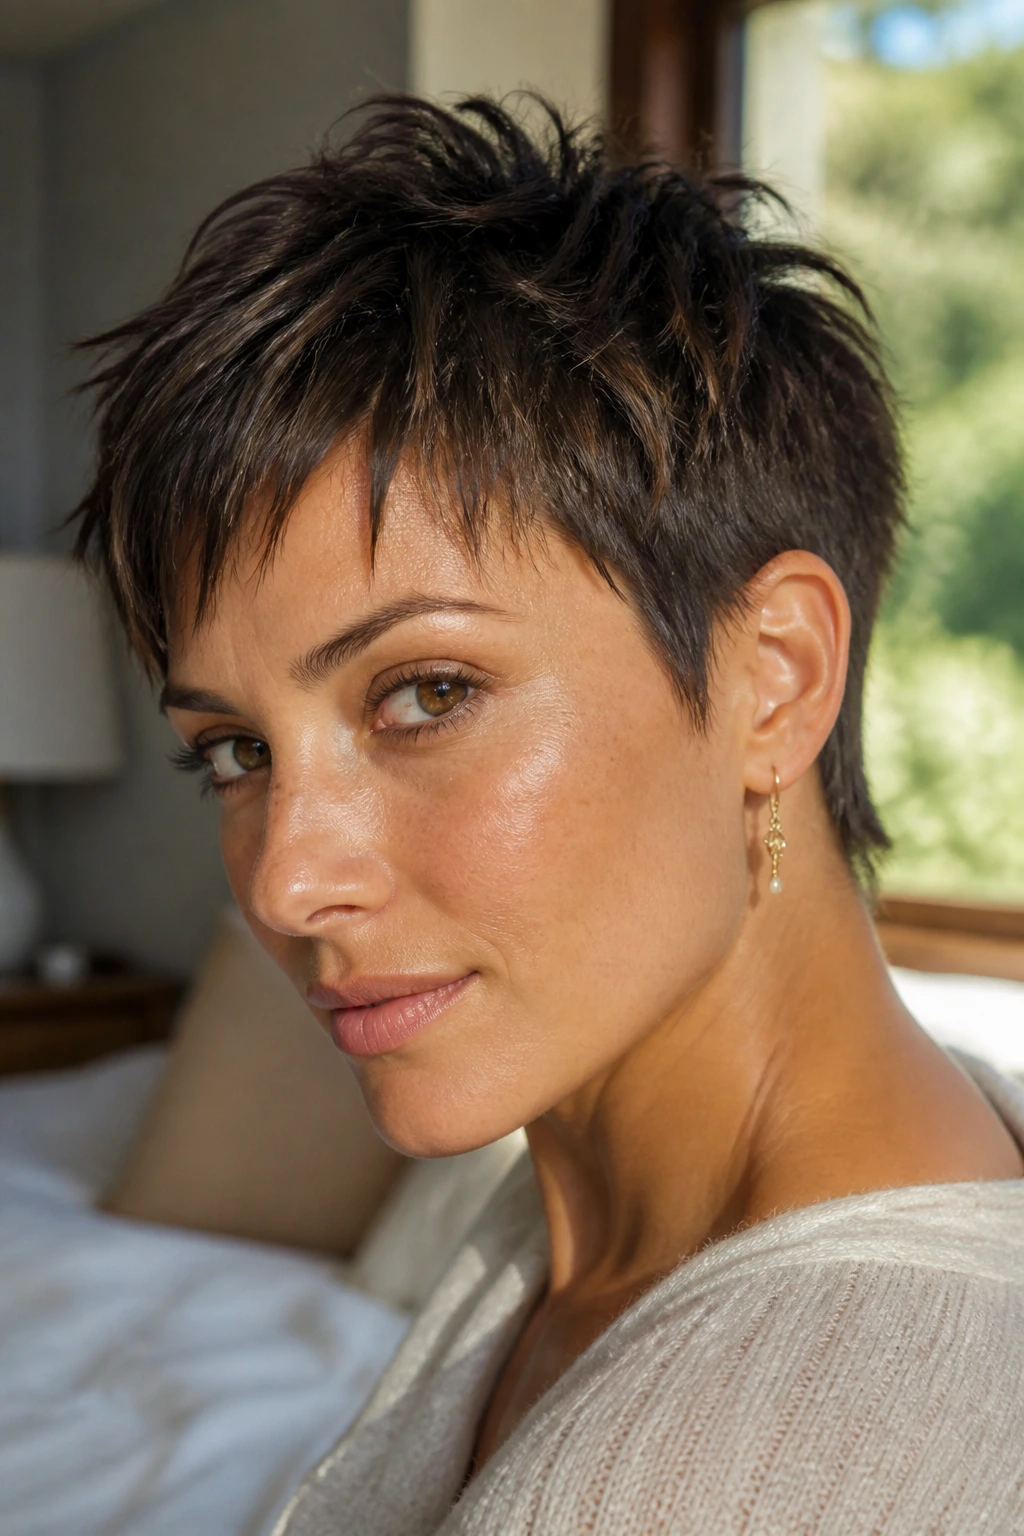
Short hair doesn’t need to act small. A textured pixie can look sharper than a long style if the cut has movement and the finish has a bit of separation at the ends. The whole thing depends on fingertip work, not a brush.
Start with dry hair and a pea-size amount of matte paste or light wax. Warm it between your hands first, then press it into the crown and sweep a few pieces forward at the fringe. The goal is definition, not spikes. You want the hair to look touched, not styled within an inch of its life.
A pixie is also one of the few styles where shine can work against you. Too much gloss flattens the shape and exposes every wrong piece. Matte product gives the cut a little grit, which is useful if the hair is fine or very soft. And if the fringe is long enough, a side sweep creates a cleaner line near the eyes.
Some looks need more hair. This one needs better shape.
6. Bubble Ponytail
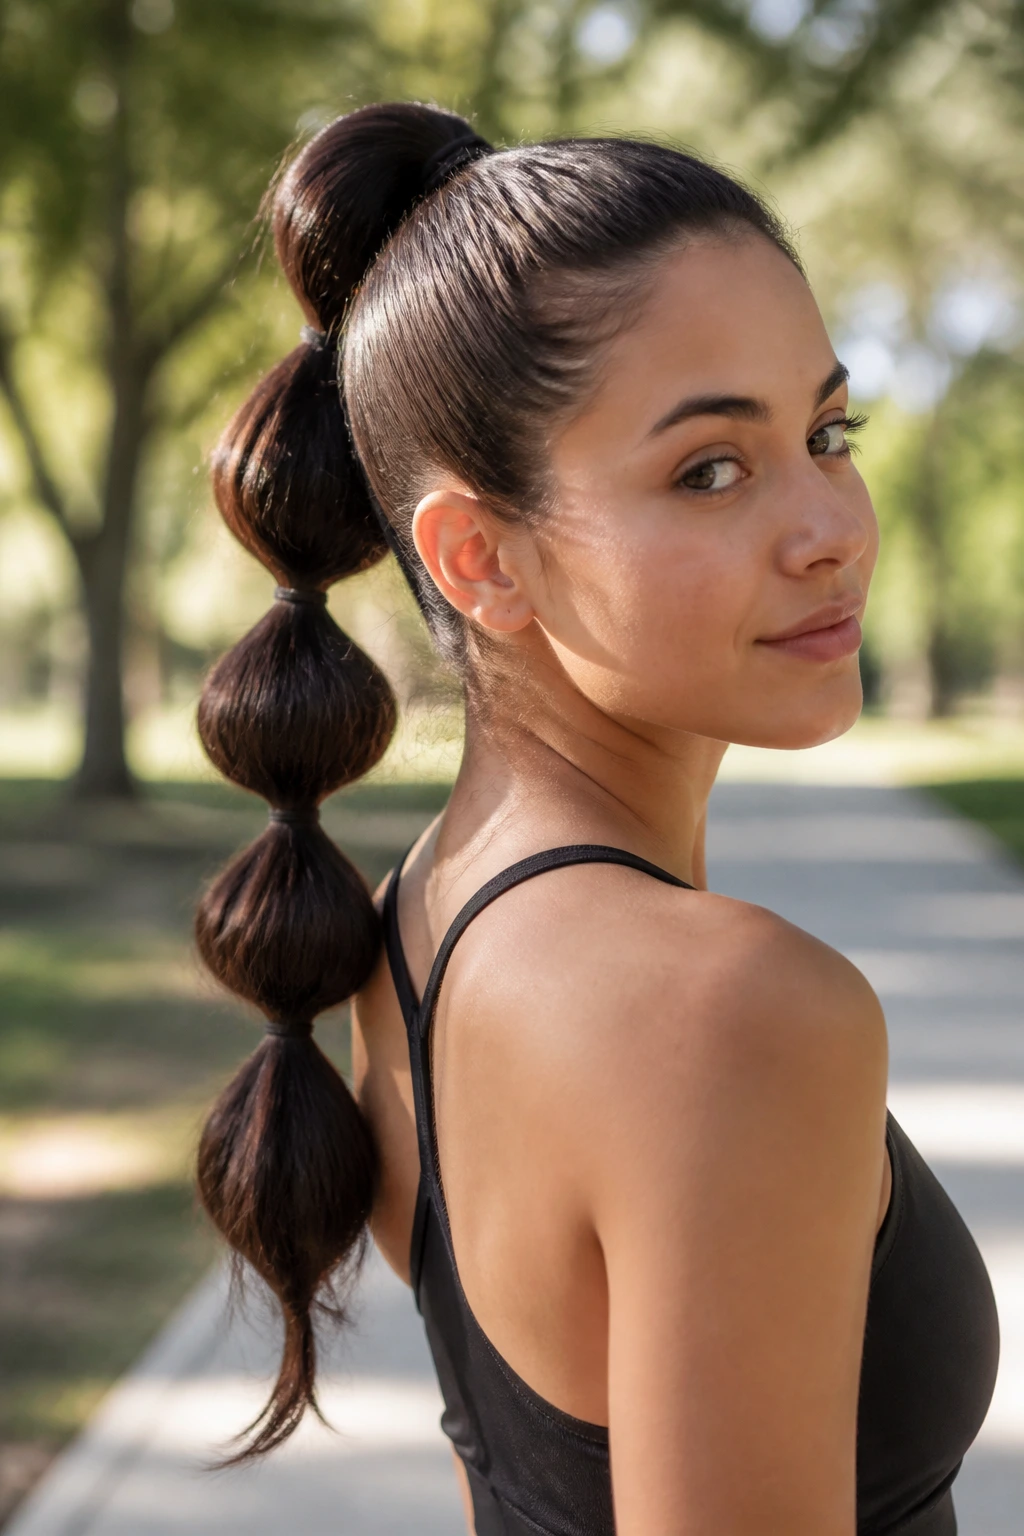
Unlike a standard ponytail, a bubble ponytail builds its own shape as it goes. That’s the whole appeal. It gives long hair structure without asking for a braid, and the sections create a rhythm that looks deliberate even when the styling is quick.
Start with a smooth ponytail and place small elastics every 2 to 3 inches down the length. Then tug each section gently from the sides so the bubbles round out. Don’t yank. You’re making shape, not stretching the hair thin. If the bubbles look lumpy, slide the elastics a little farther apart and loosen each section one at a time.
This style is strongest on long, thick hair because there’s enough length to show the pattern. On finer hair, add a little texture spray before you tie it up, or the bubbles can collapse and start to look sad by the second hour. The finish matters too. A wrapped base makes it look intentional, not like you ran out of time.
It’s a playful style, sure, but not childish when the spacing is neat and the parting is clean.
7. Half-Up Twist with Crown Lift
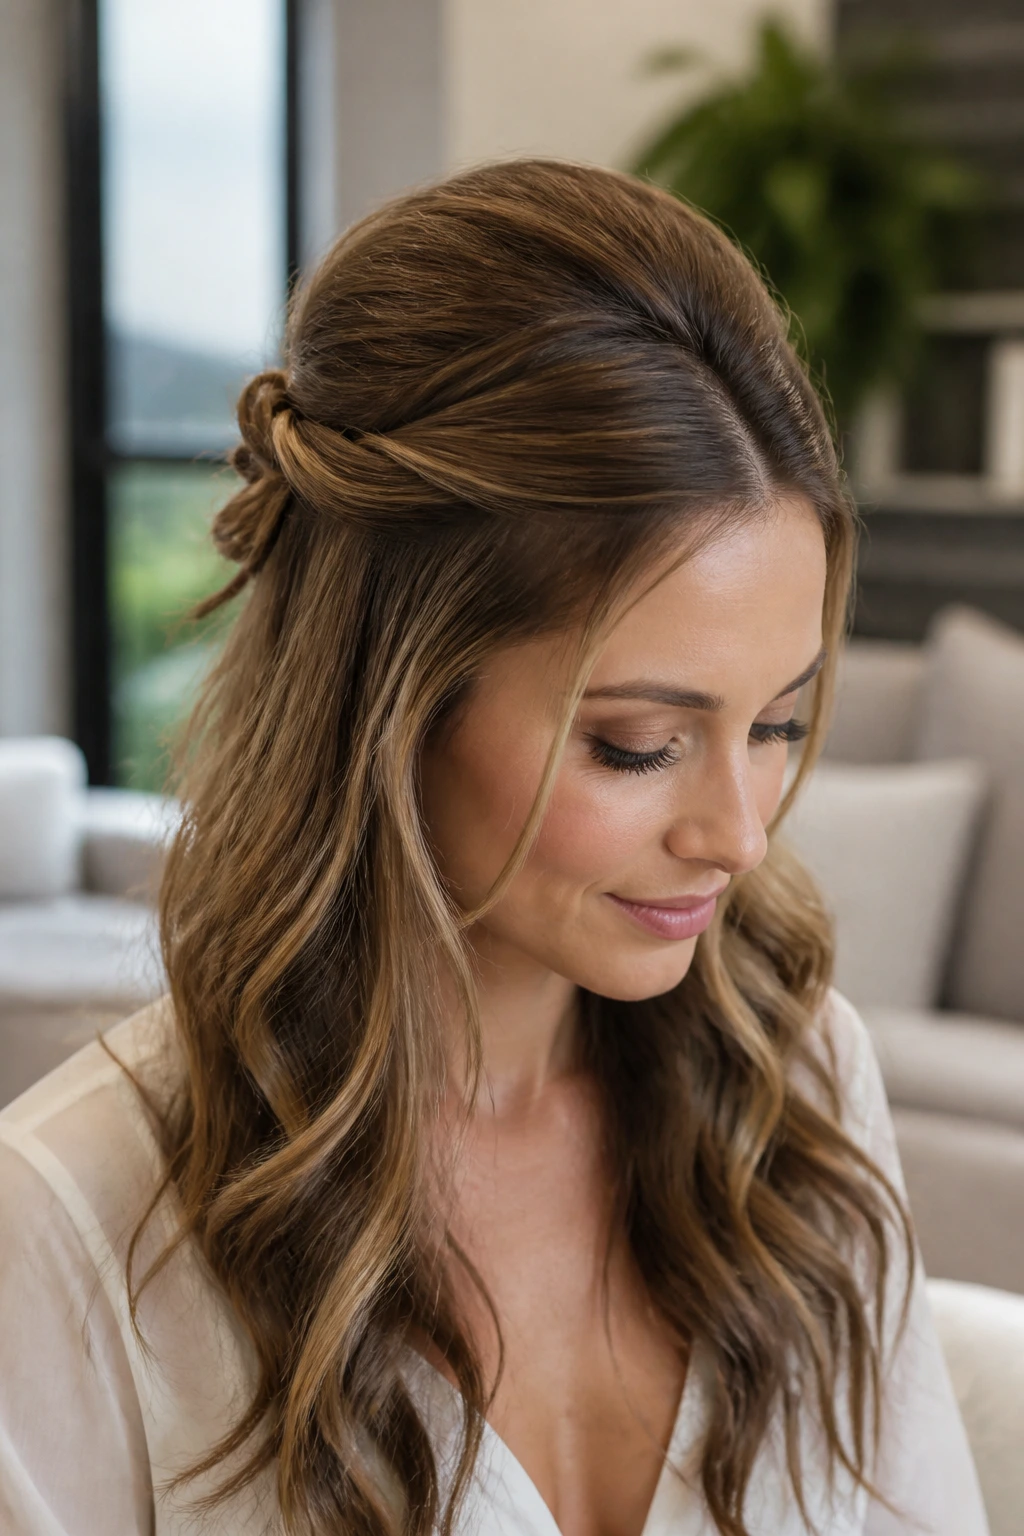
Half-up styles get dismissed too quickly. That’s a mistake, because a good half-up twist solves one of the most common hair problems at events: the crown goes flat while the ends do all the work. A little lift at the top changes the whole silhouette.
Tease only the roots at the crown, and do it lightly. You want support, not a nest. Then pull back two sections from the temples, twist them once or twice, and pin them just above the back of the head. The length stays down, but the top gets height and a cleaner frame around the face. If you have waves or curls, even better. The texture gives the twist something to hold on to.
Where the lift should sit
The lift belongs at the crown, not all the way at the front. If the front gets too high, the style starts looking dated. Keep the volume about two fingers behind the hairline, then smooth the top layer so the tease doesn’t show through.
A small clip or decorative barrette can finish it off, but the style should work even without one. That’s the sign the shape is doing its job.
8. Modern French Chignon
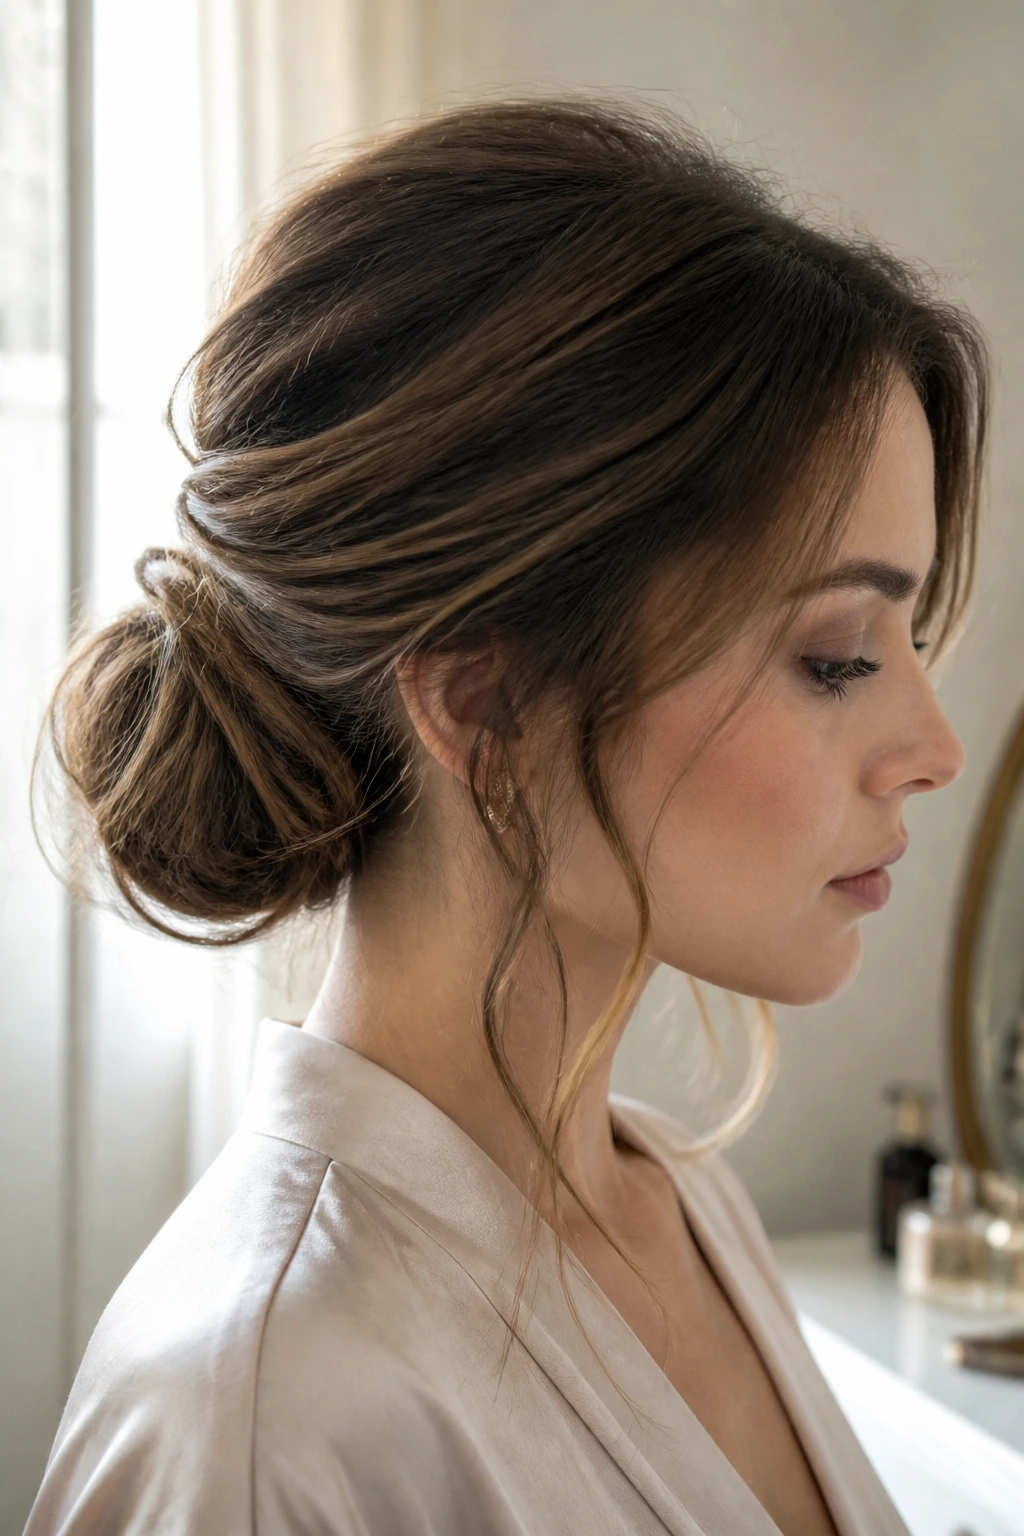
A chignon gets boring only when it is too perfect. The modern version fixes that by loosening the structure a little, softening the sides, and letting a few pieces fall where they want to. It still feels neat. It just doesn’t feel frozen.
The best version sits low at the nape and has a tucked, folded shape rather than a tight little ball. A slight off-center placement helps too. That tiny shift keeps it from looking severe. If the hair is very smooth, rough it up first with a light texture spray or dry shampoo at the roots. The chignon needs grip, or the pins slide and the knot starts slipping lower than it should.
This style looks especially good with tailored clothes, bare shoulders, or a strong collar. It has enough structure for formal settings but doesn’t fight the outfit. I also like it because it holds up when the day runs long. That counts for a lot.
There’s something satisfying about a style that looks calm from the front and complex from the side. A French chignon does that without trying too hard.
9. Crimped Lengths with Shine
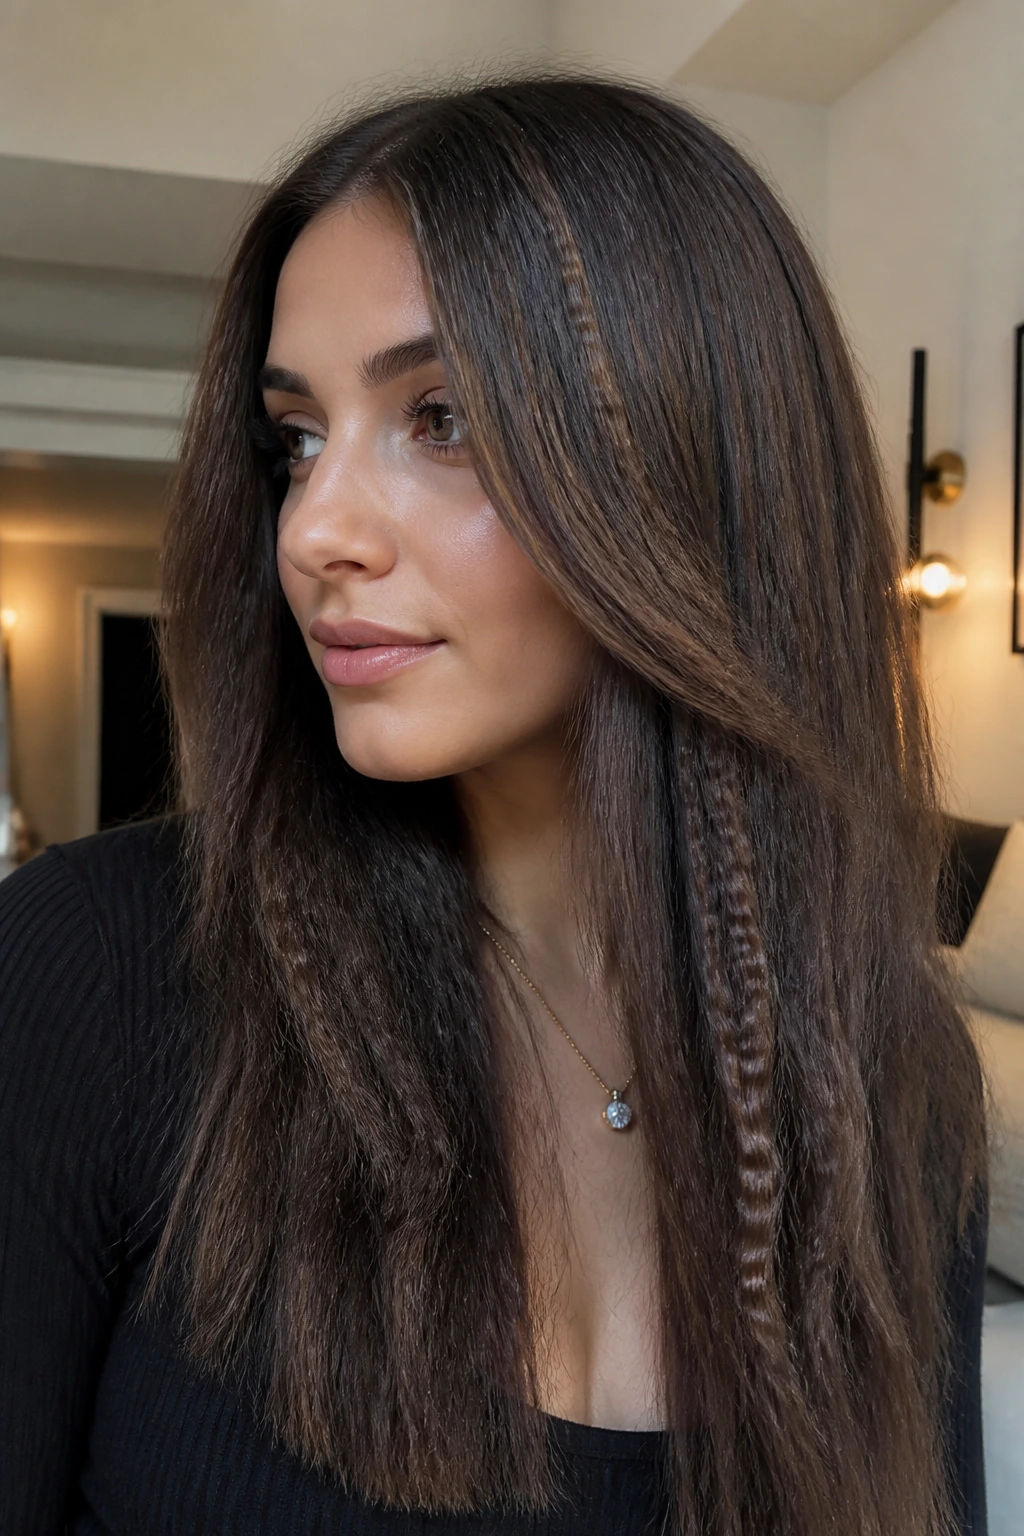
Why do crimped sections show up at hair events at all? Because texture changes the way hair catches the eye. Straight lengths can disappear under stage lighting, but a crimped finish gives the hair grip, movement, and a little attitude. It’s one of those hair show styling ideas women try when they want texture that feels more fashion than fuss.
You do not need to crimp the whole head. That’s where people go wrong. A few sections through the mid-lengths are usually enough, especially if the hair is long. Crimping from root to tip can turn into a lot of volume fast, and not always the good kind. The cleaner choice is to crimp underneath layers, then keep the outer surface smooth and shiny.
How to keep it clean
- Crimp only 4 to 6 sections for a subtle result
- Keep the plates moving so the pattern stays even
- Finish with a light shine spray, not a heavy oil
- Leave the ends straight if you want a sharper edge
I like this style for ponytails and half-up looks because it creates texture without extra bulk. That balance is what saves it from looking costume-y.
10. Braided Ponytail
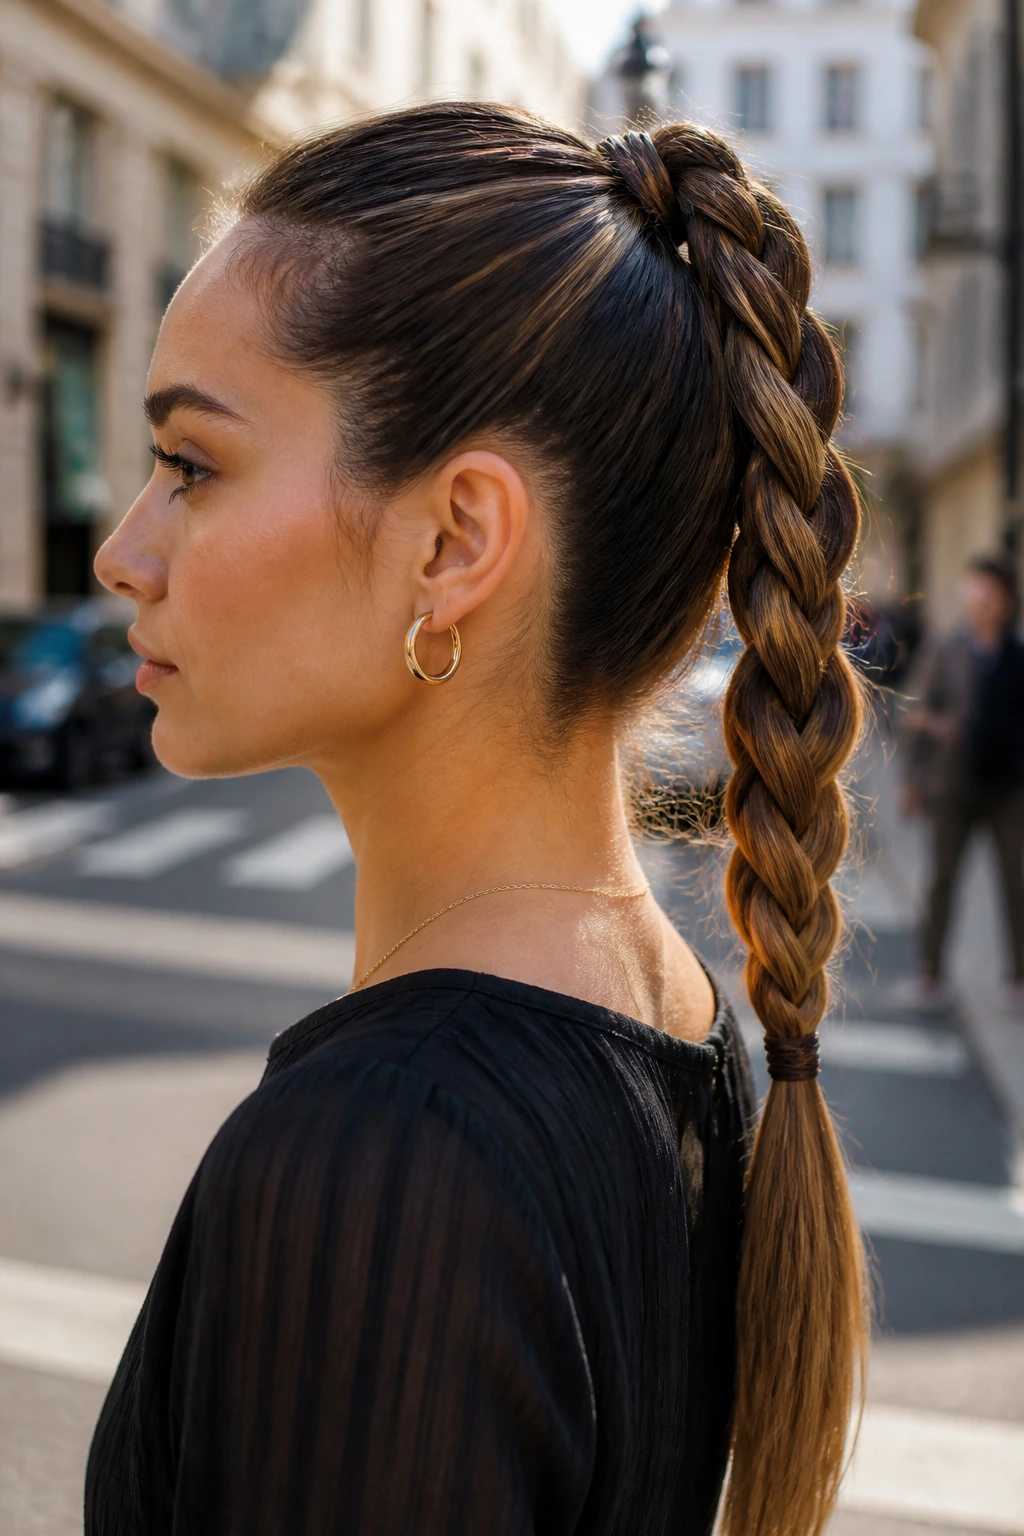
A braided ponytail is what I reach for when the hair needs to stay put and still look planned. It works because the braid locks the length in place, and the ponytail base gives the style height without relying on a lot of teasing.
Start by securing the ponytail high or mid-height, then braid the tail with a three-strand braid or a tighter Dutch braid if you want the pattern to pop. Wrap a small strand of hair around the elastic at the base, pin it underneath, and then pull the braid a little wider with your fingers. That loosens the shape just enough to make the braid look fuller.
A few quick details matter here:
- Best on medium to thick hair
- Use a clear elastic or one that matches your hair color
- Add texturizing spray before braiding if the hair is slippery
- Keep the braid snug at the top and softer through the tail
This is one of the safer choices for humid rooms, active schedules, or long events. It doesn’t collapse easily. And it still has enough shape to read as styled.
11. Faux Bob Tucked Under
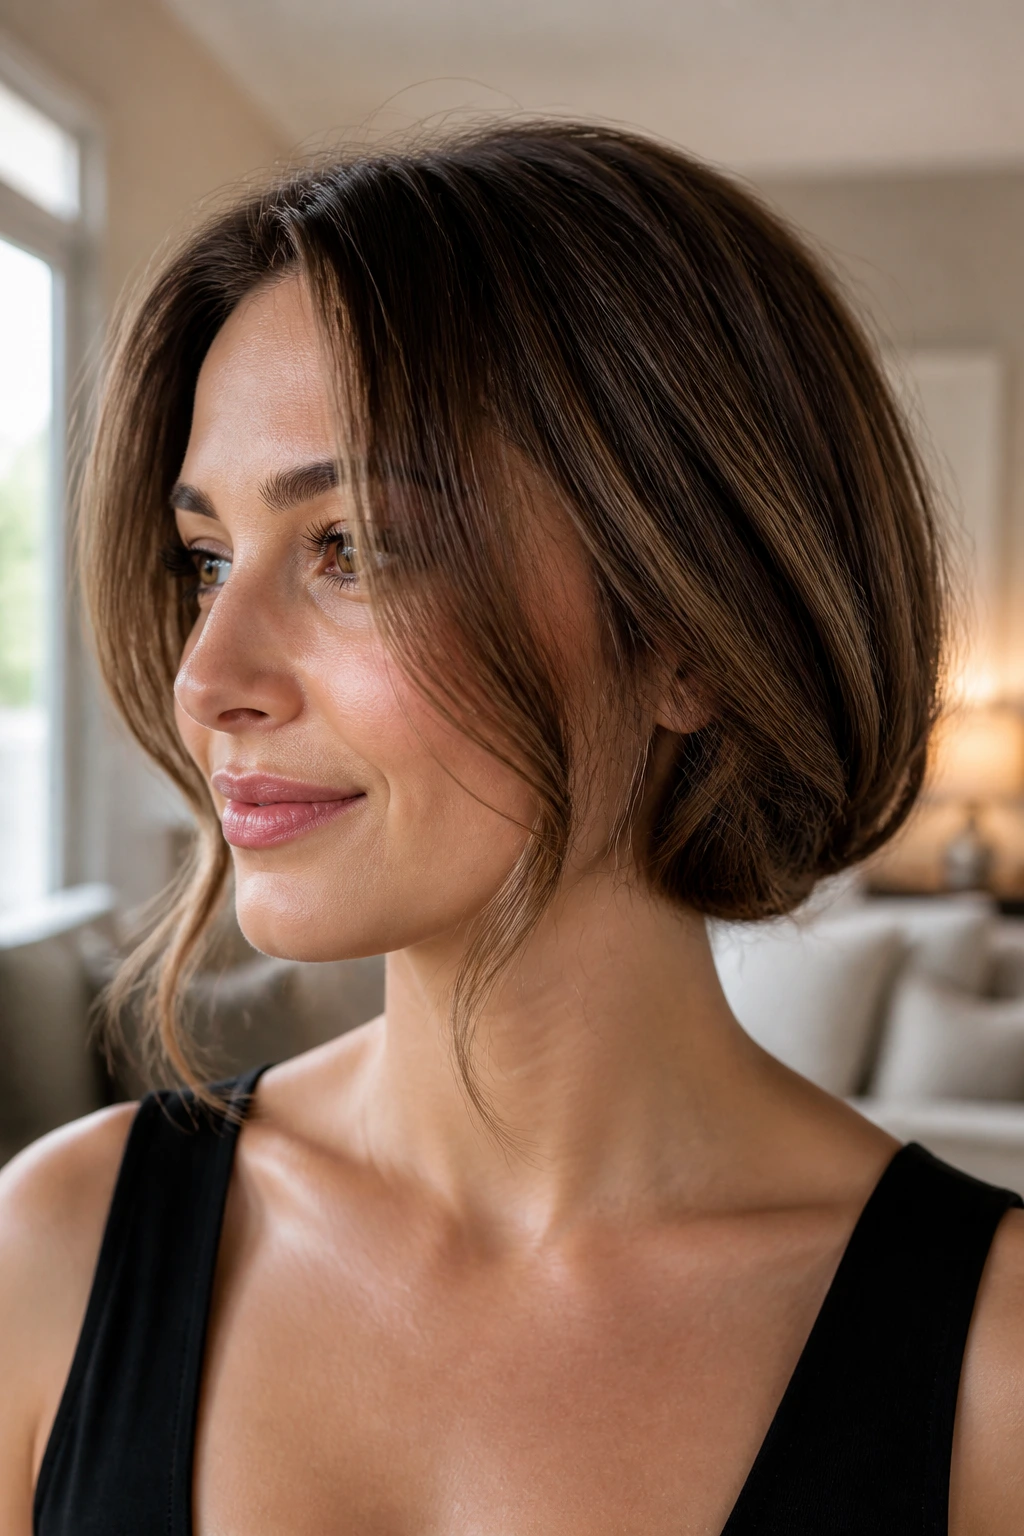
Short hair is not a requirement. A faux bob gives long hair the neat, tucked look of a chin-length cut without the scissors, and that alone makes it worth knowing. It’s a little theatrical, but in a controlled way.
The trick is to curl or wave the ends first, then fold them under at the nape and pin them so the hidden shape disappears. Leave a few front pieces out if you want softness around the face. If every strand gets pinned back, the style can look a touch severe. A loose side piece fixes that in seconds.
This one works best on shoulder-length to long hair with some bend in it. Very straight hair can slip unless you rough it up with a texture spray first. Thick hair needs more pins than people expect — not decorative pins, real pins placed flat against the head. Use enough to anchor the fold, or the bob will unfold before you finish getting dressed.
The payoff is a new silhouette without a real cut. That’s a nice trick to have in your pocket.
12. Statement Headband Style
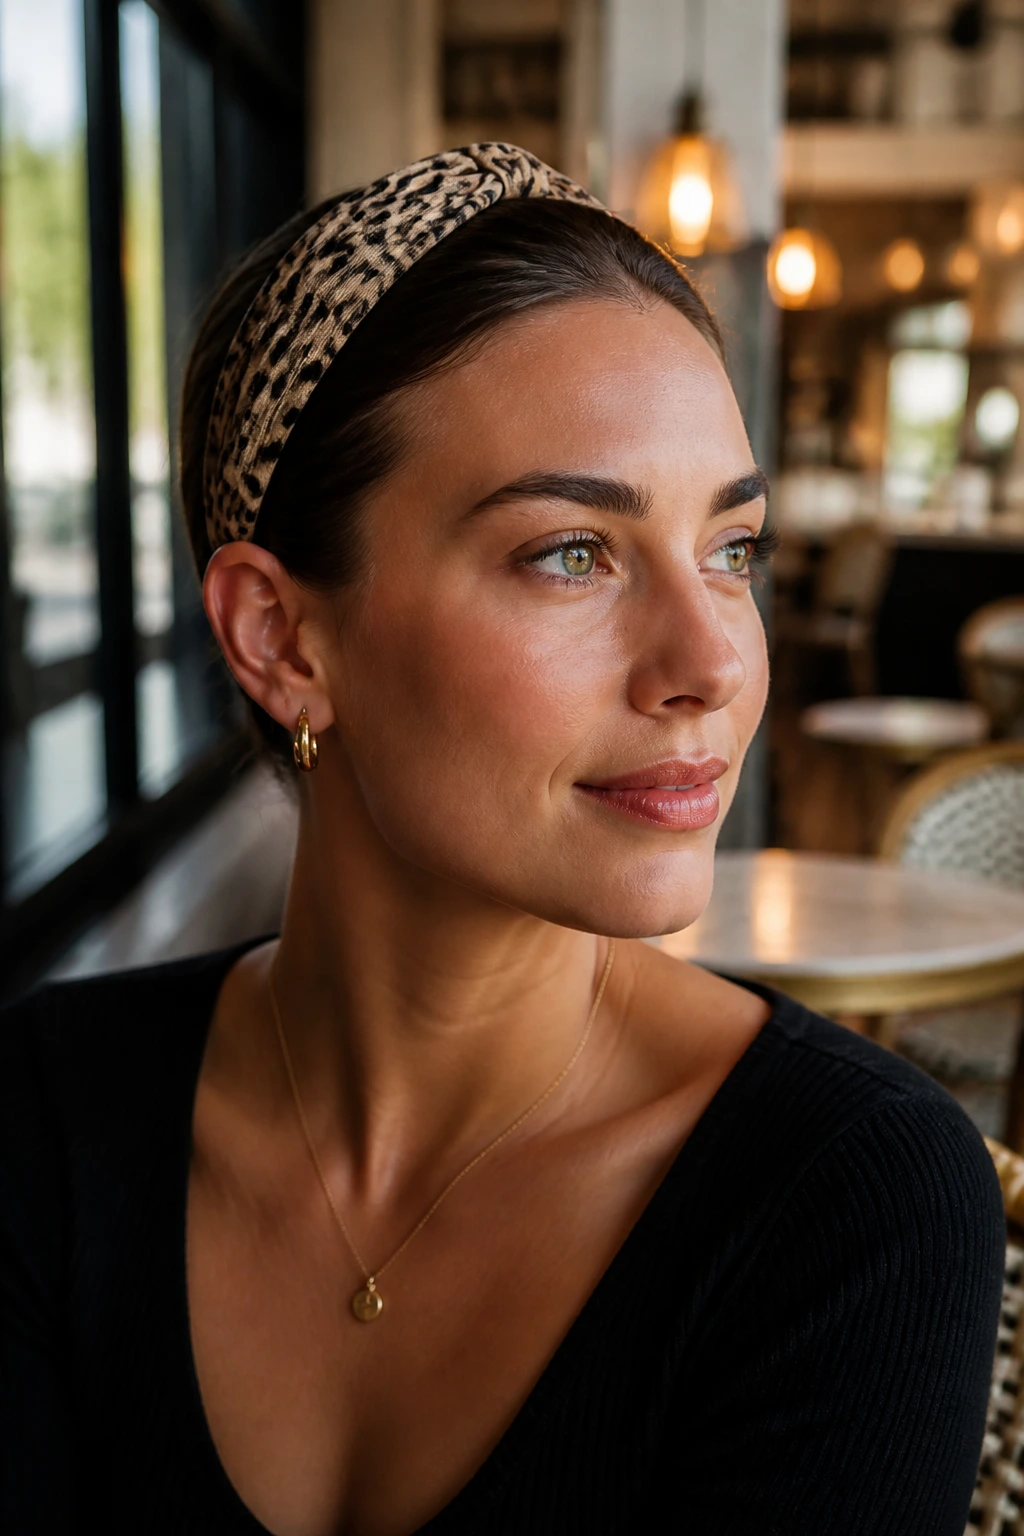
One good accessory can do the job of three weaker ones. A statement headband proves it. Unlike layering clips, pins, and sparkly extras all at once, a single headband gives the hair one clear focal point and keeps the rest of the style from getting noisy.
The shape of the band matters more than most people think. Wide padded bands read bold. Thin metal bands feel cleaner. Satin bands soften everything around them. If the hair is already textured, a smoother band keeps the overall look from getting busy. If the hair is sleek, a little embellishment can carry the whole style.
What to choose and what to skip
- Choose a band that sits flat behind the ears
- Skip pieces that pinch at the temples
- Match the accessory weight to the hairstyle’s volume
- Use a band with grip if your hair tends to slide back
A headband also lets you keep the length simple. Straight, softly waved, or loosely pinned back — all of it works. The band becomes the point, and the hair supports it instead of competing with it.
13. High Ponytail with Wrapped Base
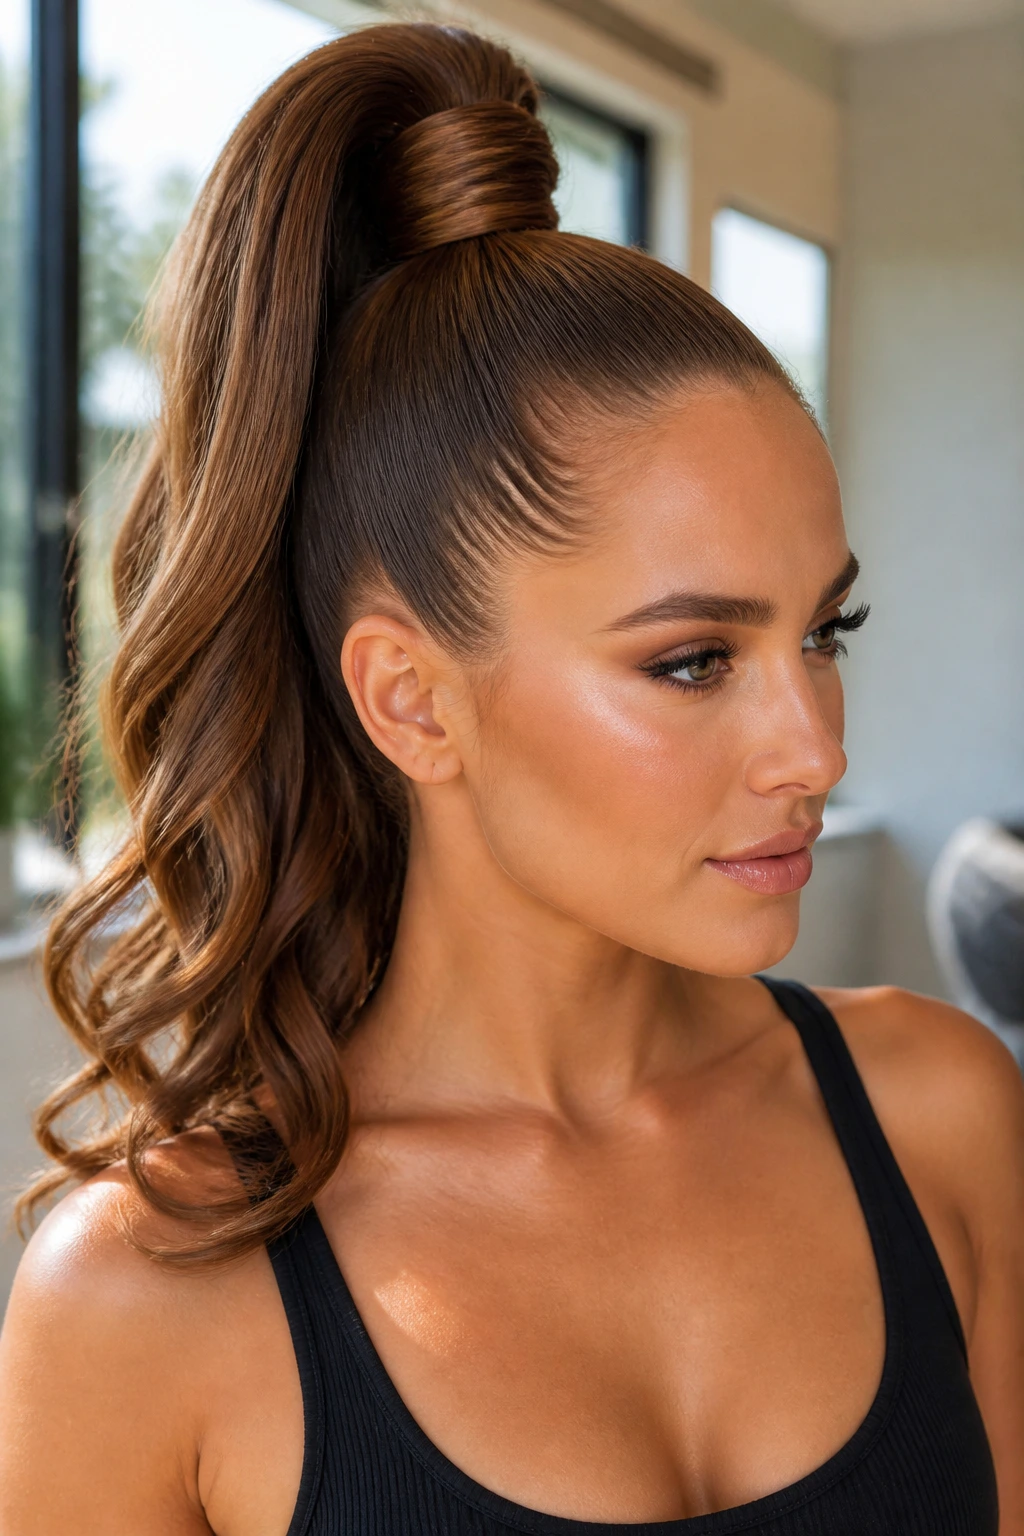
A high ponytail is one of those styles that looks basic until the placement is off by half an inch. Put it too low and it drags. Put it too high and it starts to feel cartoonish. Get it right, though, and the whole face lifts.
Brush the hair straight up toward the crown, secure it firmly, then take a small strand from underneath and wrap it around the elastic. That little wrapped base is worth the extra minute. It hides the tie and gives the ponytail a finished edge. If the hair is very smooth, mist the roots with a light spray before you pull it up. That keeps the top from slipping.
Where the ponytail should sit
The sweet spot is usually just above the crown, not at the front hairline. That gives lift without making the style look too severe. If you want the ponytail to feel softer, curl the ends in loose bends. If you want it sharper, keep the tail straight and glossy.
Either version works. The base needs to be tight, though. Loose roots make the whole thing sag fast, and sagging hair never looks planned.
14. Side-Swept Old School Glam
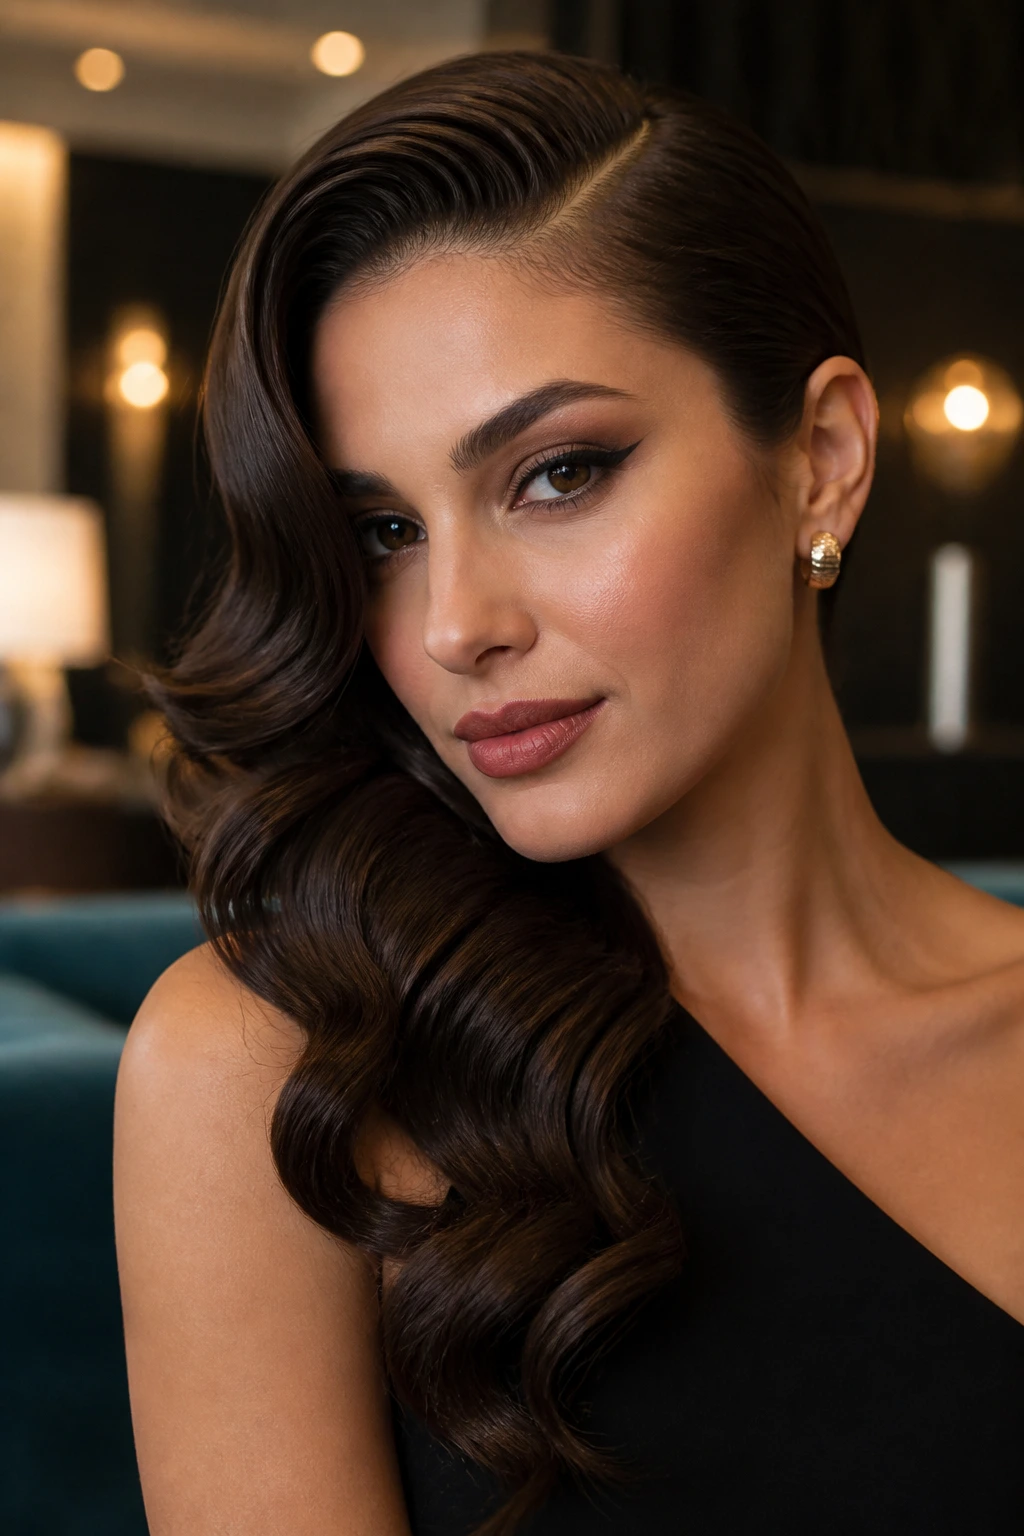
Side-swept waves make a stronger entrance than straight volume ever could. There’s a reason they keep coming back when a look needs drama without extra ornament. The deep side part creates a line, and the sweep over one shoulder makes the shape feel finished.
The style works best when the heavier side has enough wave to stay in place. Brush the top smooth, then pin the flatter side behind the ear or at the nape so the wave can fall cleanly across the front. A large earring helps, but it isn’t required. What matters is the contrast between the smooth side and the fuller side. That contrast gives the style its punch.
This is one of those looks that likes structure. Soft waves are good; floppy ones are not. If the curl is too loose, the hair loses its outline. A medium iron and a set spray with flexible hold keep the wave shape intact while still letting the hair move when you turn your head.
It has old-school glamour, sure. It also has a clean, modern edge when the part is deep and the finish is controlled.
15. Space Buns with Polished Edges
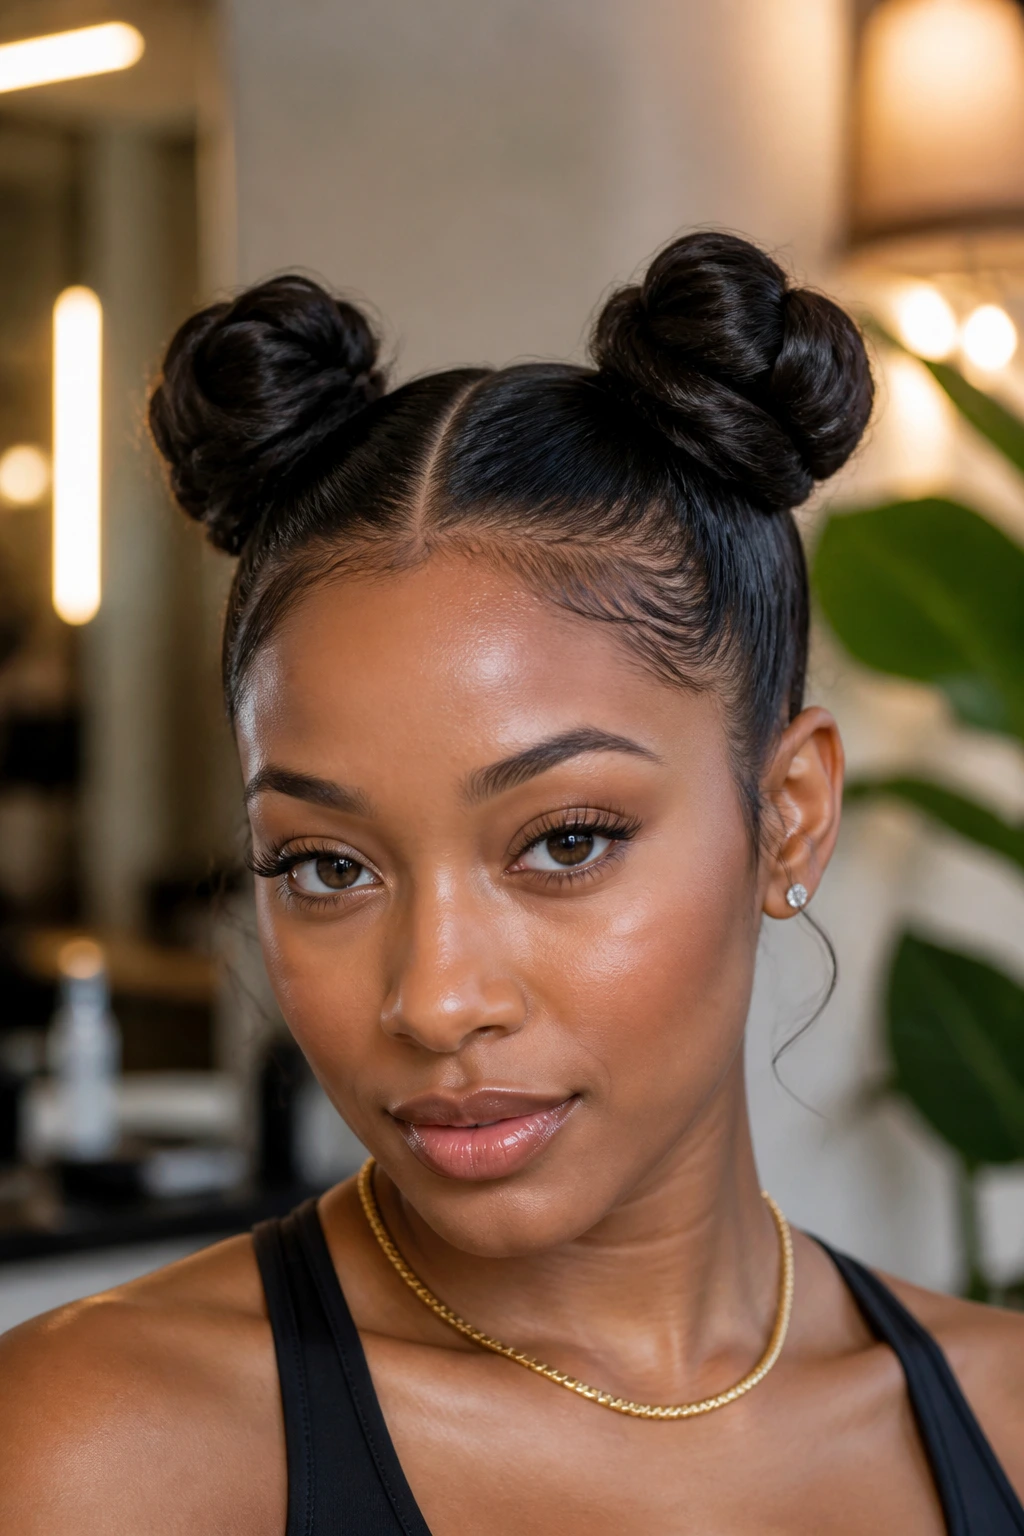
Can space buns read polished? They can, if the parts are clean and the buns stay small. The trick is to keep the lines neat so the style feels intentional instead of playful in a rushed way.
Part the hair down the middle, smooth the sides back tightly, and place the buns high enough to show the shape but not so high that they wobble. If you want the style to feel more grown-up, keep the buns compact and tuck the ends under. If you want a softer finish, leave a few tendrils near the temples or curl the front pieces slightly.
Keep the look controlled
- Use a center part that’s straight from forehead to crown
- Match the size of both buns before pinning them
- Add gel at the roots if flyaways are heavy
- Keep the buns small if the hair is thick; big buns can throw off the balance fast
This style works especially well when the outfit is simple and the hair needs to do the talking. It has shape, symmetry, and a little personality. That’s a rare combination.
Final Thoughts
The strongest hair show looks have one thing in common: a clear shape. They do not try to win on every front. A low bun wins on clean lines. A wave wins on softness. A ponytail wins on height or shine. Pick the one idea that matters most, then let the rest support it.
That’s also why the most wearable hair show styling ideas women try tend to be the ones with a practical center. They survive heat, movement, and long hours without falling apart. Fancy is fine. Fragile is not.
If you’re testing one at home, check the style from the side before you leave the mirror. That angle tells you more than the front ever will.
