



Long hair has a funny way of looking polished and unruly at the same time. It can fall like a curtain, then land in your coffee, your zipper, and the strap of your tote bag before lunch. That’s exactly why easy hairstyles for long hair matter so much: the best ones don’t ask for a curling wand, twelve pins, or a 20-minute mirror session. They just need a brush, a few elastics, and a decent sense of where the hair should sit.
I’ve always had a soft spot for styles that look more deliberate than they are. A low ponytail with one wrapped strand can look cleaner than a complicated updo that’s half-falling apart by noon. A loose braid can save you on second-day hair. A claw clip twist can take you from “I gave up” to “I meant to do this” in less than a minute.
Long hair gives you options, which is the blessing and the headache. There’s more weight, more movement, more chance for tangles, and more room for a style to either hold beautifully or collapse into a crooked mess. The trick is choosing shapes that work with that length instead of fighting it.
Some of the styles below are office-safe, some are better for errands, and a few are the kind of thing you throw on before dinner and somehow keep wearing the next morning. The first one is as simple as it gets, but I still think it deserves a top spot.
1. The Low Wrapped Ponytail

A low wrapped ponytail is the hairstyle I recommend when someone says they want something clean, quick, and not boring. It’s still a ponytail, sure, but the wrapped base changes the whole mood. That little detail makes it look finished instead of accidental.
The best version sits at the nape of the neck, not in the middle of the back of your head. Use a brush to smooth the crown, tie the ponytail with a tight elastic, then take a thin strand from underneath and wrap it around the band until only the ends need pinning. One bobby pin tucked under the ponytail usually does the job.
The small trick that matters most: keep the wrap strand flat and taut. If it twists loosely, it starts to look messy in a bad way, not a casual way.
I like this one for long, straight hair and for hair that has already been stretched a bit by a blow-dry. It also works well when you want to wear statement earrings. The hair stays out of the way, and the style has enough structure that it doesn’t read as gym hair.
2. The Claw Clip French Twist
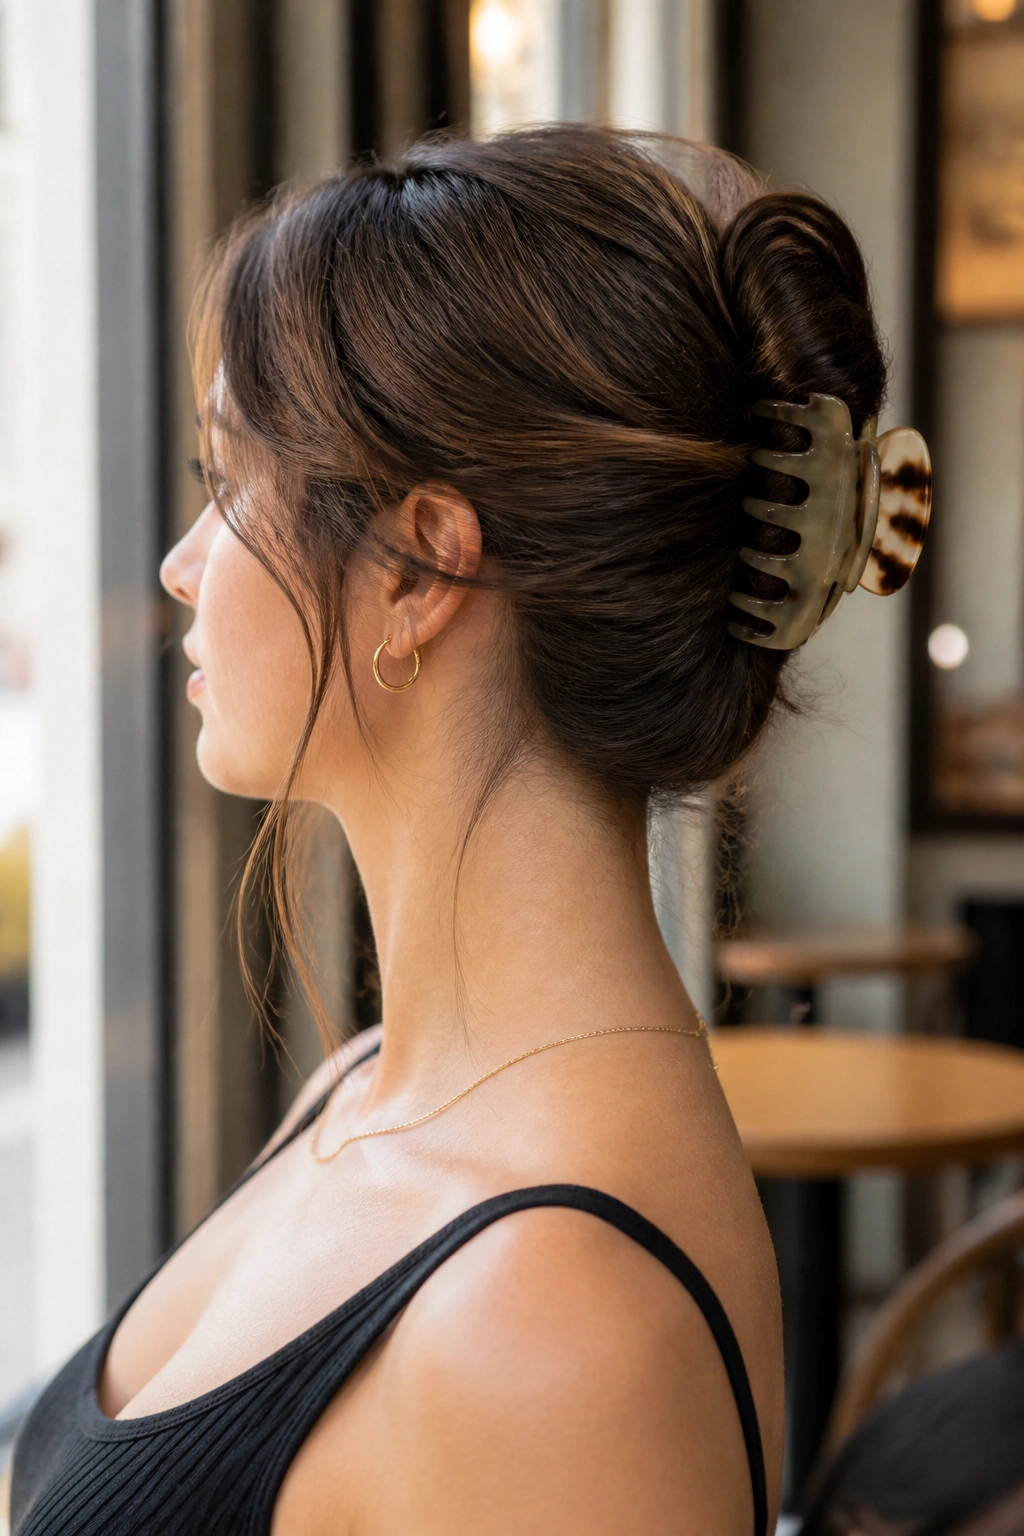
Why does a claw clip look so good on long hair? Because the length gives the twist something to grab onto. Shorter hair can slip out or feel too stubby to pin cleanly. Long hair, on the other hand, folds into itself and makes the clip look intentional.
Why It Works
You’re not trying to cram every strand into one giant knot. You’re folding the hair upward, tucking the ends in, and letting the clip hold the middle. That creates a shape with height at the back of the head and softness around the sides.
A medium or large clip works best here. If your hair is thick, look for one with a strong spring and wider teeth. Tiny decorative clips tend to crack under the weight.
How to Do It
- Gather your hair as if you were making a low ponytail.
- Twist it upward against the back of your head.
- Fold the ends down and tuck them under the twist.
- Clamp the clip over the folded section so it catches the twist and the tucked ends.
- Pull out a few face pieces if you want it softer.
This is one of those styles that can look polished with almost no heat and almost no skill. That’s not an insult. That’s the point.
3. The Half-Up Top Knot
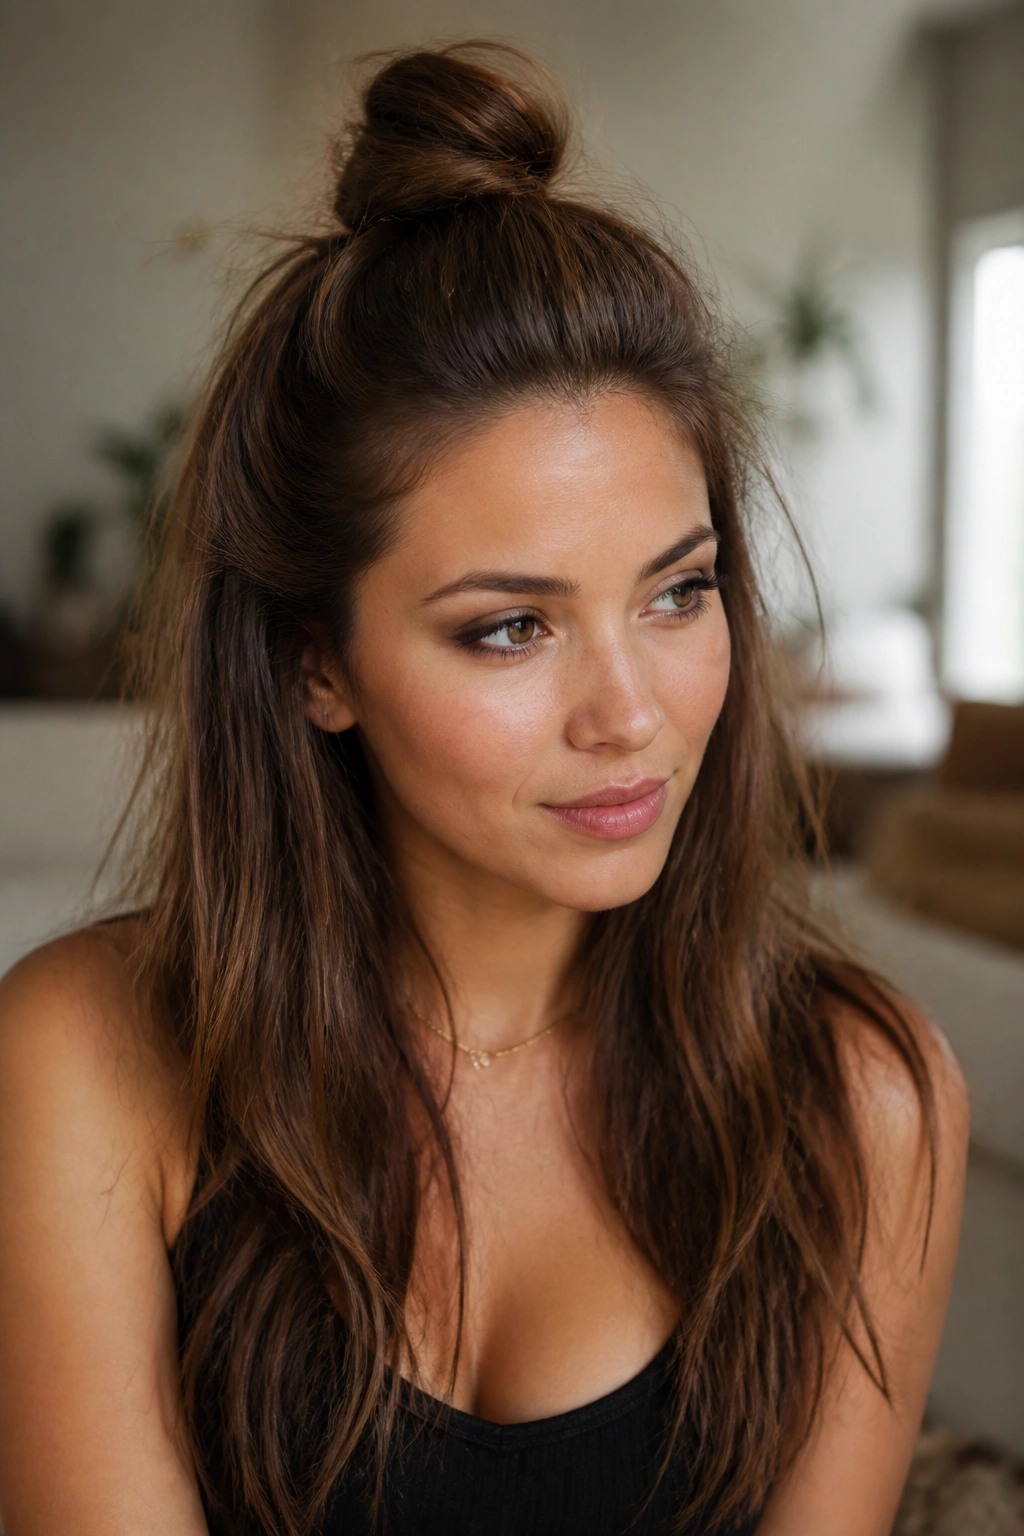
There’s a reason the half-up top knot keeps showing up in real life and not just in mirror selfies. It fixes the two things long hair does most annoyingly: it falls in your face, and it flattens the crown when you want a little lift.
The version that works best starts with the top section only — think from the temples back to the crown. Gather that hair high enough to create shape, but not so high that it looks like a tiny fountain sprouting from your scalp. Twist it into a knot, secure it with a small elastic or two pins, and let the rest of the length stay loose.
This is especially good for hair that has a little texture. Slight wave, soft bend, day-two frizz — all of that helps. Clean, slippery hair can make the knot slide around, so a touch of dry shampoo at the roots usually helps. Not a cloud of it. A light mist. You want grip, not gray dust.
I reach for this when I want my hair off my face but don’t want the full commitment of an updo. It’s one of the easiest hairstyles for long hair because it works with whatever the rest of your hair is doing that day. The top knot gives the illusion of effort. The lengths can be as lazy as they want.
4. The Loose Three-Strand Braid

A loose three-strand braid is the plain white T-shirt of long hair. Nothing flashy. Still useful. And if you do it with enough softness around the edges, it can look quietly pretty instead of school-photo stiff.
The important part is tension. Tight braids pull the face back and show every little bump in the sectioning. Loose braids let the hair fall a little, which makes the whole style feel easier and more relaxed. Start at the nape, braid all the way down, and stop before the ends get too skinny. A clear elastic or a tiny satin tie keeps the finish neat.
What Makes It Feel More Modern
A lot of people braid too tightly and then forget to soften it. After tying the end, tug the outer edges of each braid section just a little. Not enough to wreck it. Just enough to make it look fuller.
- Use a detangling brush first so the braid lies flat.
- Add a tiny bit of leave-in conditioner to dry ends if they look rough.
- Hold the braid as you pull the edges apart, or it will loosen too much.
- Leave a few shorter layers out near the front if you want movement.
This braid works best when you need your hair contained without looking severe. It’s a good one for travel days, humid weather, and those mornings when your hair is clean but not cooperating.
5. The Bubble Ponytail
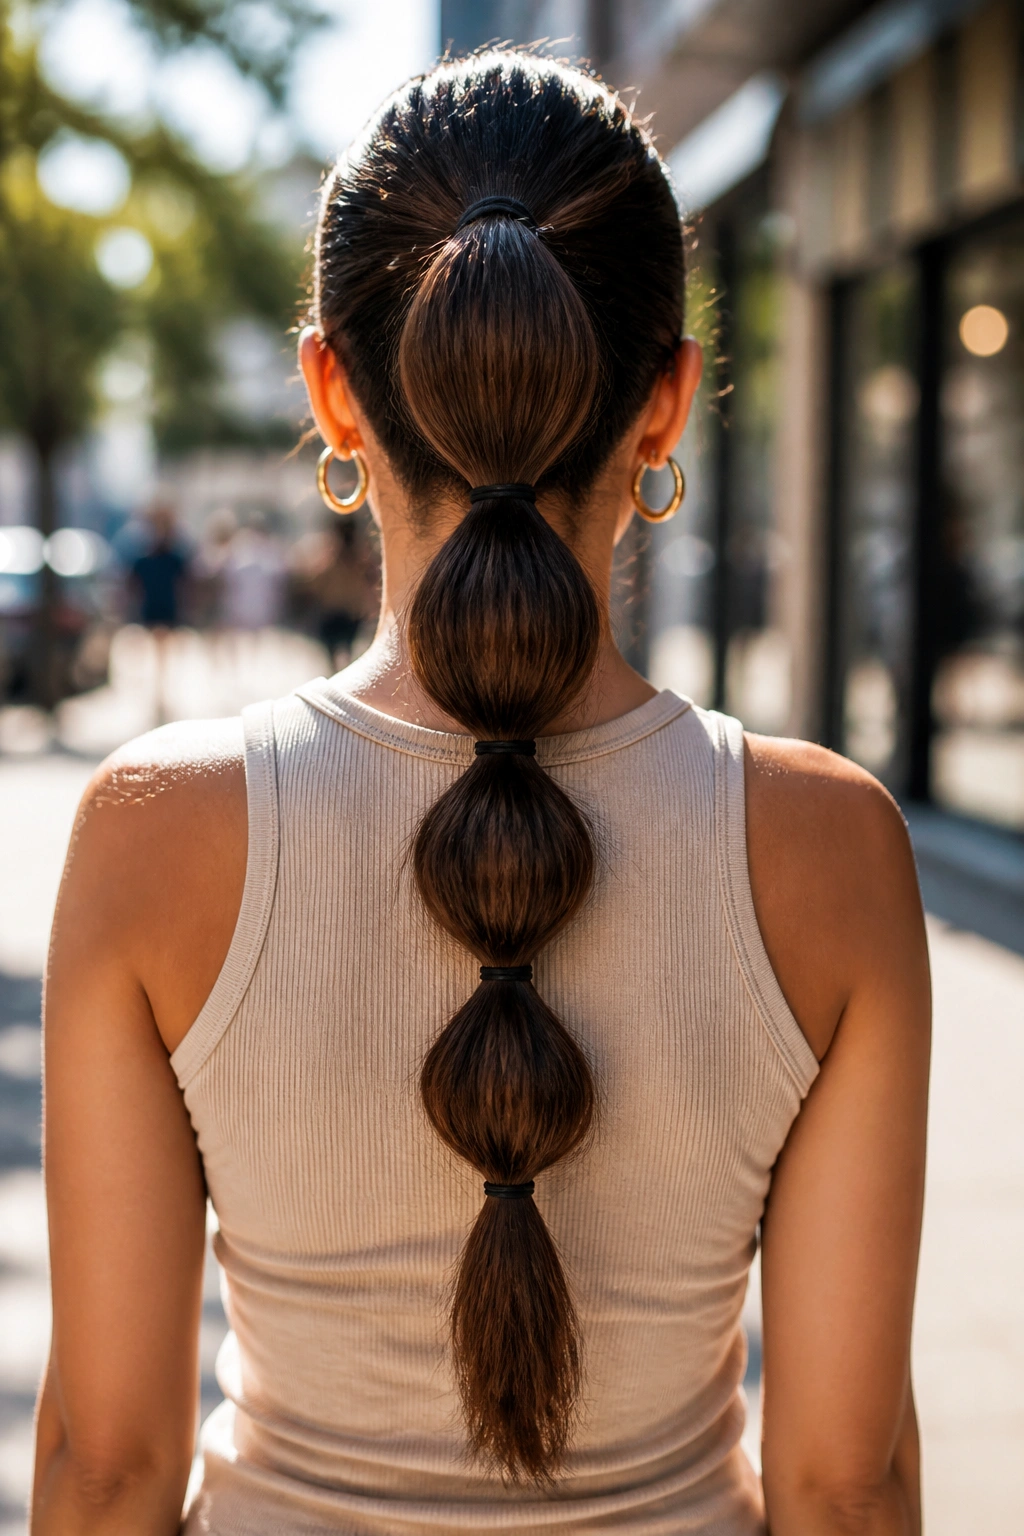
A bubble ponytail is one of those styles that looks playful without being fussy. It also has a nice side effect: it makes long hair look even longer. The sections create shape down the length, and that’s a gift if your hair tends to sit flat in one long curtain.
Start with a ponytail at the height you like. Low feels calm. Mid-height feels casual. High feels sharper. Then add small elastics every 2 to 3 inches down the tail. Gently tug each gap so it rounds out into a bubble. That’s the whole trick.
The secret is spacing. Too close together and the bubbles look cramped. Too far apart and the style loses its rhythm. I usually use four to six elastics, depending on how much length I’m working with. If your hair is very long, you may want more. If it’s layered, fewer sections can keep the ends from sticking out in weird ways.
This style does a nice job hiding second-day texture. A little volume at the roots helps, and a dry shampoo mist at the crown keeps the base from looking limp. It feels cheerful, yes, but it also holds up. That combination is rare.
6. The Low Messy Bun

A low messy bun is not actually messy when it’s done well. That’s the part people miss. The best ones have shape, a few loose ends, and enough pinning to survive more than a quick photo.
If your hair is freshly washed and too slippery, don’t fight it. Add texturizing spray or a little dry shampoo first. Then gather the hair low, twist it loosely, and coil it into a bun right above the nape. Pin it with 3 to 5 bobby pins, depending on thickness. The bun should feel secure, but not squashed.
I prefer this style with a few soft pieces left near the ears. Not chunks. Just enough to break up the shape. A perfectly tight bun can look severe on long hair, while a slightly undone one feels easier and more flattering.
This is one of my go-to low-maintenance looks because it tolerates imperfection. If a strand falls out, it usually looks charming rather than wrong. And that matters on busy days.
7. The Rope Braid
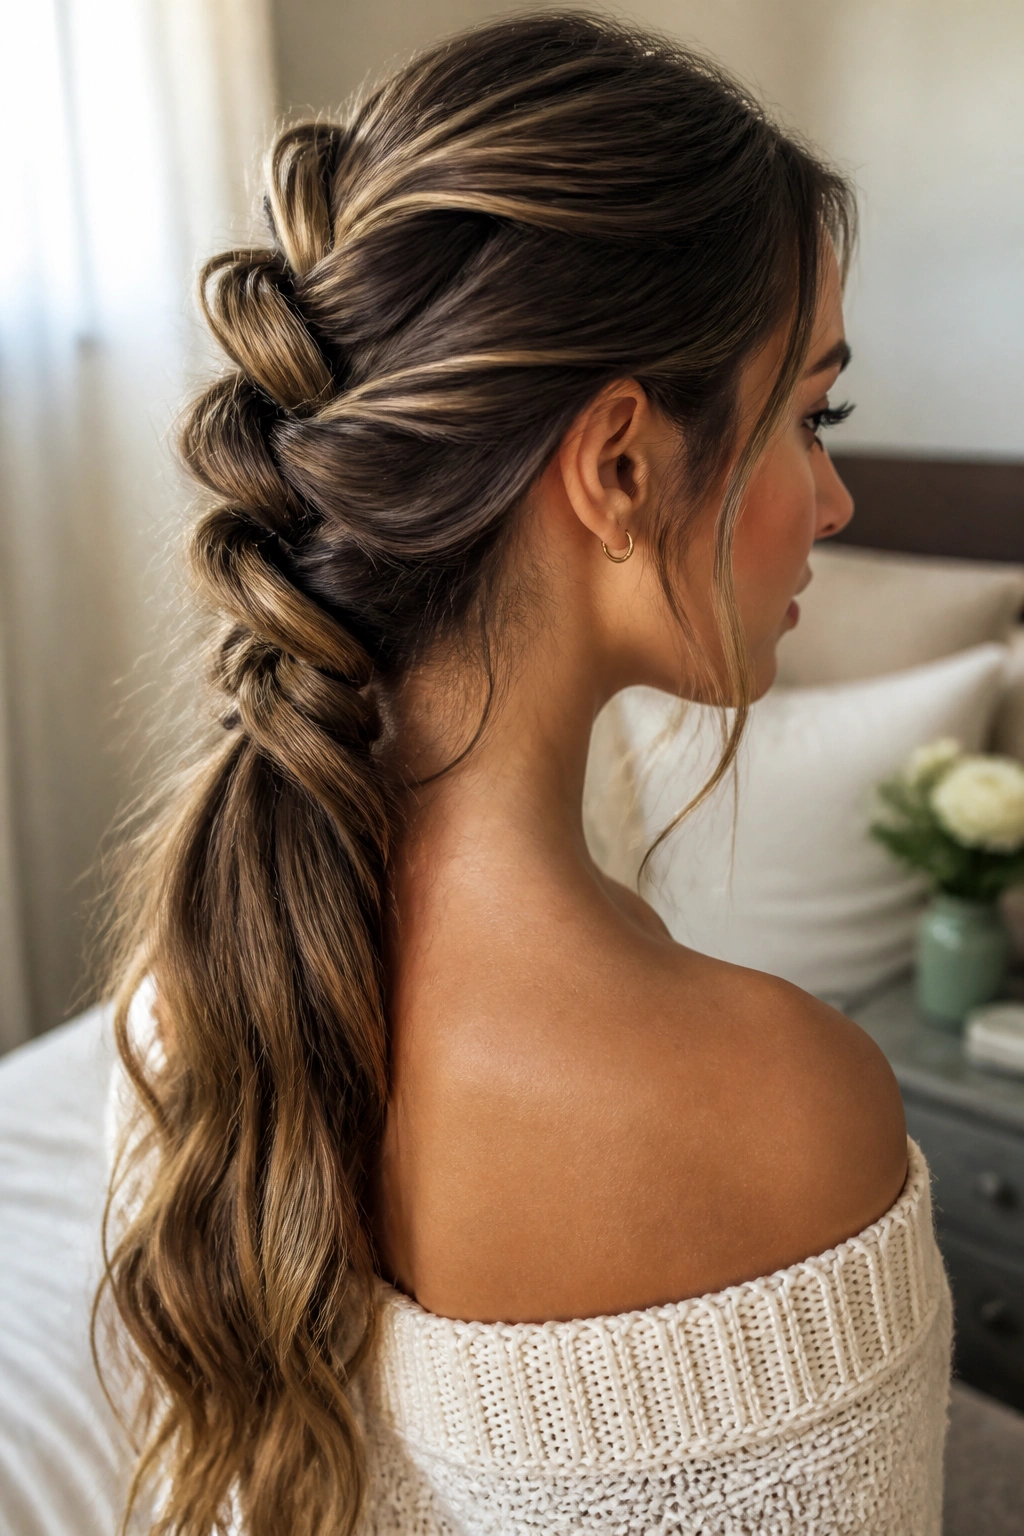
A rope braid has a clean twist to it that regular braids don’t quite match. It looks neat, almost sculpted, and long hair makes it even better because the extra length shows off the spiral.
Here’s the basic idea: split the hair into two sections, twist each section in the same direction, then wrap them around each other in the opposite direction. That opposite-motion part matters. Skip it, and the braid can loosen or unravel faster than you’d like.
The Tiny Detail That Matters
Keep steady tension while you twist. If one side gets looser than the other, the braid starts to lean. It’s a small thing, but it shows.
A little smoothing cream helps if your hair is frizzy or layered. For slick, straight hair, a touch of dry texturizer at the mid-lengths gives the braid something to hold. You can finish the end with a clear elastic or a small ribbon if you want it to feel softer.
I like this braid because it looks more complicated than it is. That’s a fair trade in my book. It works for school, office days, and dinners where you want your hair to stay put without looking plain.
8. The Side Twist and Tuck
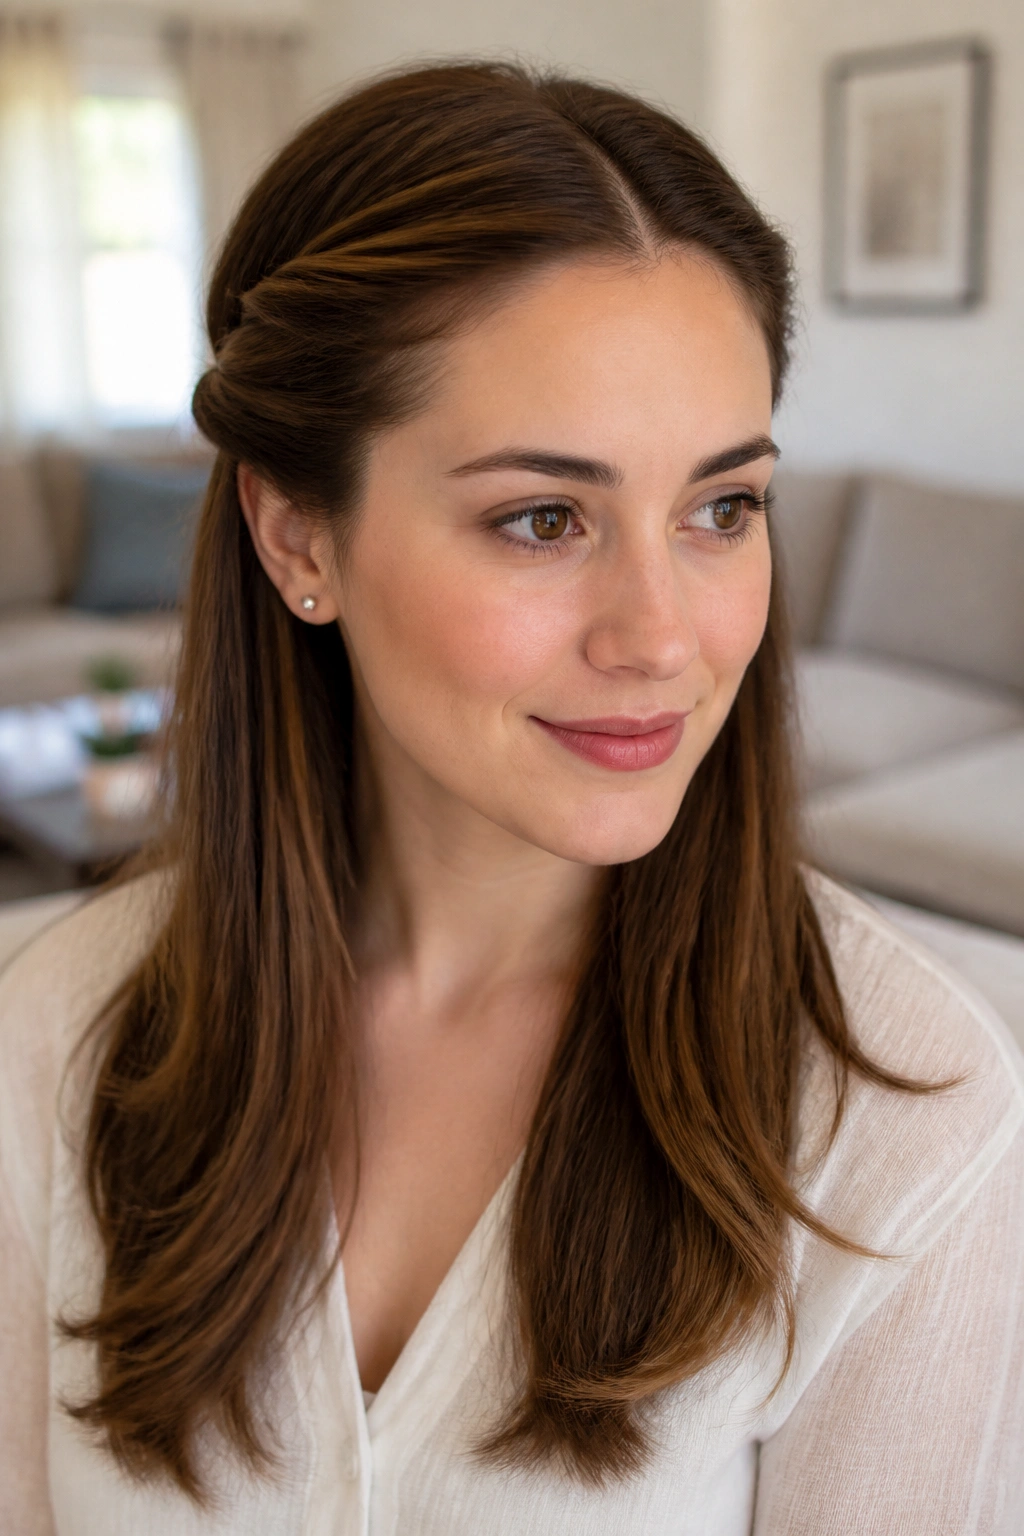
Sometimes the easiest move is not a full hairstyle at all. It’s a small fix at the front. A side twist and tuck keeps hair off one side of the face and gives long hair a little shape without changing the whole head.
Take a section from the front hairline on one side, twist it back toward the ear, and pin it underneath the rest of your hair. Do the same on the other side if you want balance, or leave one side twisted for a softer asymmetrical look. It works especially well with layers and curtain bangs because it keeps them from falling straight into your eyes.
This style is useful when you want the hair down but not completely loose. It’s also one of the better options if you’re growing out bangs. The twist blends them into the rest of the style instead of forcing them to behave.
Two bobby pins in an X shape usually hold better than one straight pin. That detail saves a lot of slipping, especially on fine hair. Small things. Big difference.
9. The High Sleek Ponytail

A high sleek ponytail is one of the fastest ways to make long hair look sharp. Not soft. Sharp. It pulls the face up, shows off the length, and gives the whole style a clean line from forehead to tail.
The base needs to sit high enough to lift the crown, but not so high that it feels like a cheer routine unless that is the look you want. Use a boar-bristle brush or a firm paddle brush to smooth the hair back. A pea-sized amount of styling cream or gel at the hairline helps tame flyaways. Then secure the ponytail with a strong elastic, and wrap a strand around the base if you want the finish to look cleaner.
Unlike a loose ponytail, this one depends on control. The crown should be smooth, the sides even, and the elastic tight enough to hold the weight of the length. If your hair is thick, use two elastics stacked on top of each other. That little extra support keeps the pony from sagging halfway through the day.
I like this style when I want my hair to look intentional in five minutes. It’s simple, but it has attitude.
10. The Half-Up Braided Crown

Need something that looks more involved than it is? A half-up braided crown is a strong answer. It gives you the feel of an updo without locking all your length away.
Where to Start
Take two small sections from near each temple and braid them back along the sides of your head. You can use simple three-strand braids, which is what I usually do when I’m in a hurry. Once both braids reach the back, cross them over each other and secure them with a small elastic or two pins.
The braids don’t need to be perfect. A bit of looseness makes the crown look softer and more lived-in. If you want the style to feel fuller, gently pull at the outer braid edges after you secure them. Just a little. Too much and the braids go puffy in an unhelpful way.
How to Get the Most From It
- Mist the front sections with texturizing spray before braiding.
- Keep the braid lines close to the hairline if you want the crown shape to show.
- Tuck the ends under the back hair so they disappear.
- Leave the rest of the hair down and smooth, or give it a loose wave.
This one is lovely for longer events because it stays put better than a loose half-up style. It also plays well with earrings, which I always appreciate.
11. The Double Space Buns

Double space buns can be cute, sure, but they can also be neat and grown-up if you keep them small and low enough. The trick is not to make them too cartoonish unless that’s exactly the point.
Part your hair down the middle. Gather each side into a small ponytail, twist it, and coil it into a bun. Pin or elastic each one so it sits close to the head. Long hair helps here because the extra length gives each bun enough material to feel solid rather than stubby.
I think this style works best when the buns are slightly behind the top of the ears, not perched too high. That placement keeps them balanced and stops the whole look from feeling costume-y. If your hair is thick, braid each ponytail first and then wrap it into a bun. It gives more control and a better shape.
This is a fun option for concerts, weekends, and any day when a regular bun feels too serious. It’s not subtle. That’s part of the charm.
12. The French Braid Into a Ponytail
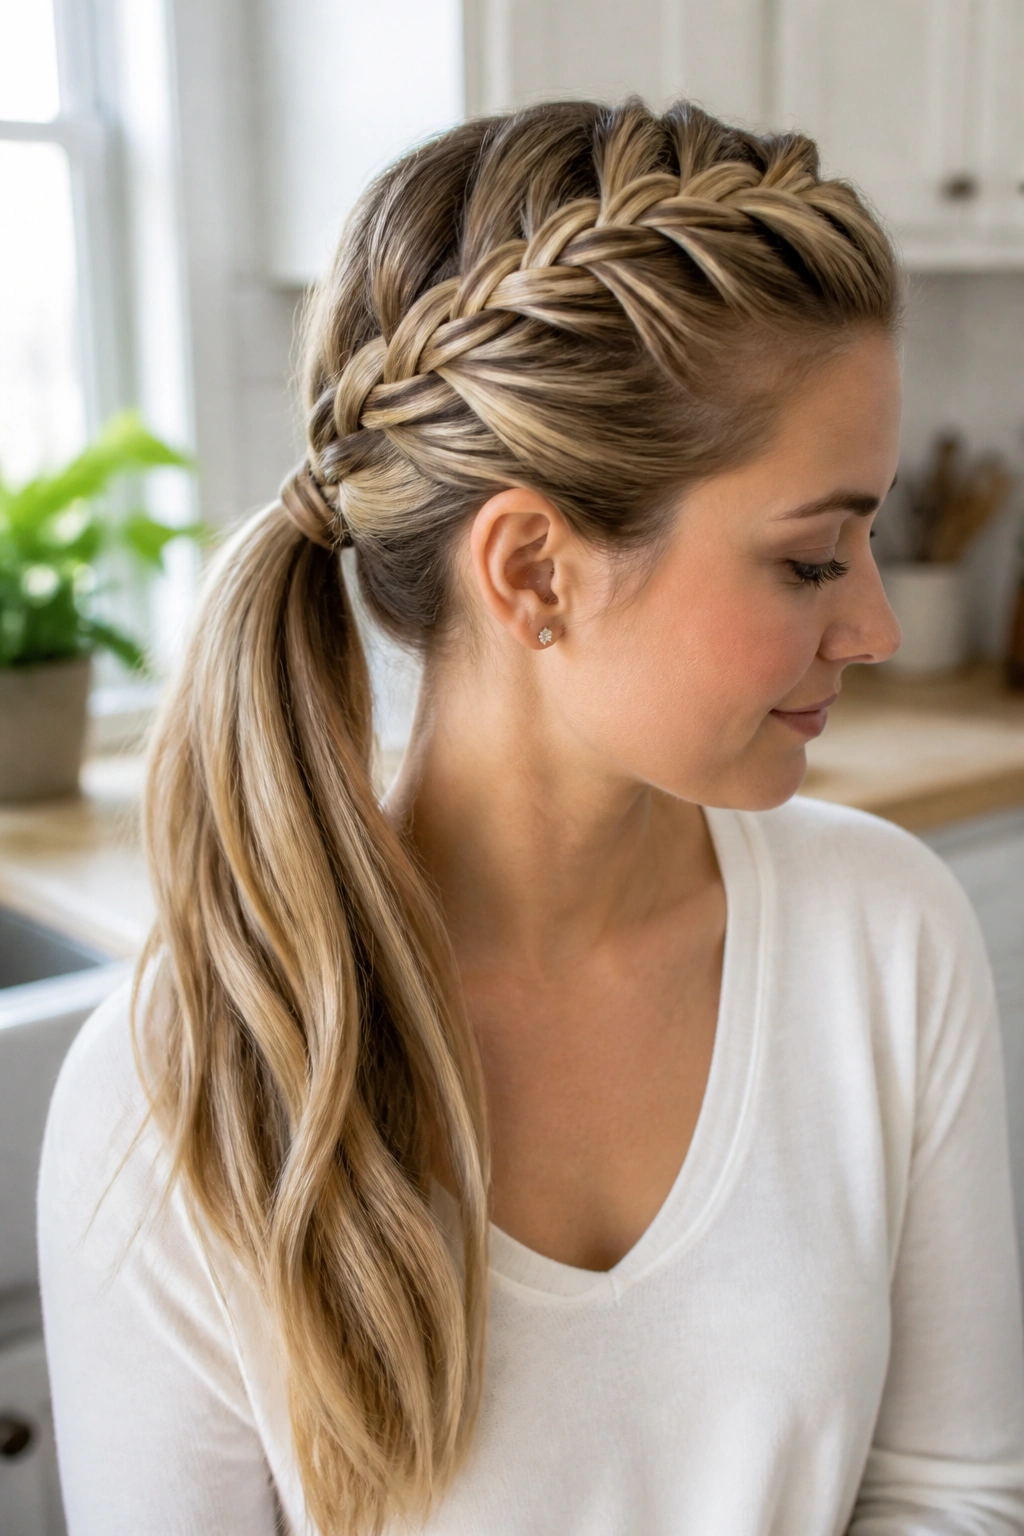
A French braid into a ponytail is one of the smartest easy hairstyles for long hair because it gives you two things at once: control at the top and freedom at the bottom. The braid keeps the front from falling forward, and the ponytail lets the length do its thing.
Start braiding at the crown and add hair as you move down toward the nape. Stop once you’ve braided the top section and tie the rest into a ponytail. That’s it. You get the neatness of a braid without spending ten extra minutes weaving all the way to the end.
What to Watch For
If the braid is too loose at the top, it starts to slip. If it’s too tight, it can feel stiff and show every bump. Aim for steady pressure and keep the braid centered unless you want it off to one side.
This style is especially good for active days. Running errands, walking outside, working at a desk, chasing kids, anything like that. It holds better than a plain ponytail, and it still looks like you meant to wear your hair down later.
A small elastic at the end keeps the tail tidy. If your hair tangles easily, brush out the ponytail halfway through the day. Long length can knot at the ends faster than people expect.
13. The Scarf-Wrapped Ponytail

A scarf changes a ponytail almost instantly. Same base, different energy. A plain ponytail can look a little too functional; a scarf-wrapped one looks like you made one small styling choice and let it do all the work.
Tie your hair into a low or mid ponytail first. Then knot a narrow scarf around the elastic, letting the ends hang down the length of the hair. If the scarf is slippery, tie it in a double knot so it stays put. Cotton and silk both work, but they behave differently. Cotton grips a little more. Silk slides more easily and feels softer against the hair.
I like this when the roots are fine or the ends are dry. The scarf draws the eye away from the parts of the hair that need a break. It also helps cover an elastic that has seen better days, which is a small mercy on rushed mornings.
One caution: choose a scarf that isn’t too thick. A bulky knot can sit awkwardly and make the ponytail feel heavier than it should. Thin to medium-width scarves usually sit best.
14. The Braided Low Bun
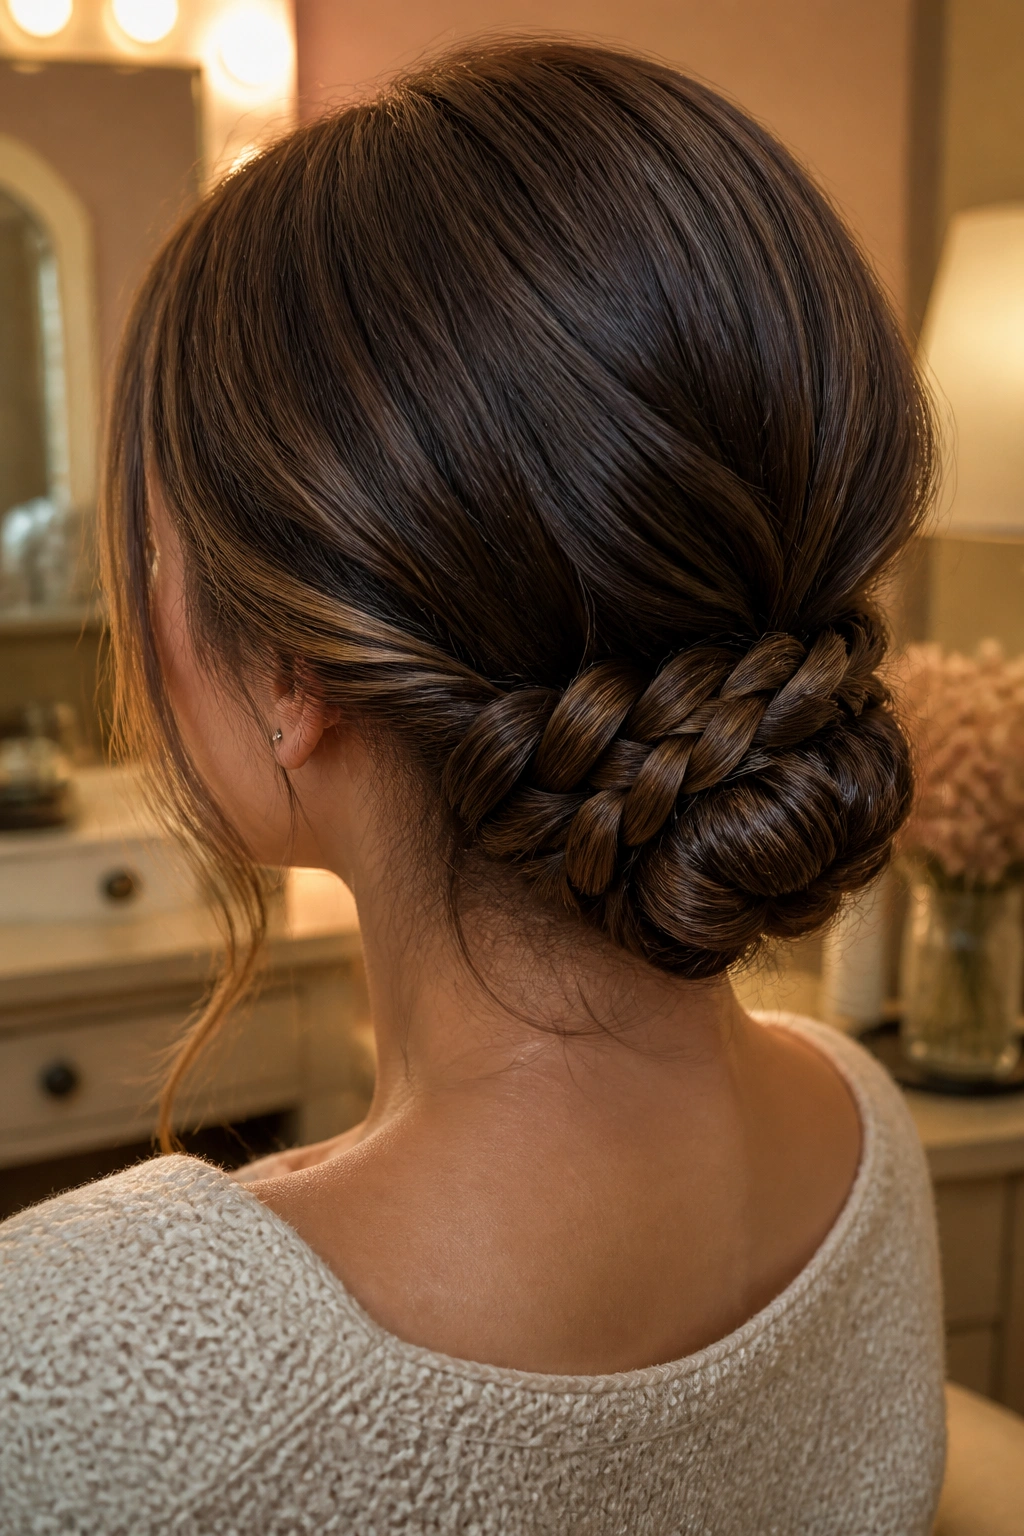
A braided low bun is one of those styles that looks formal enough for a dinner out but is still easy enough for a Tuesday. Braiding first gives the bun texture, and that texture makes the final shape hold better.
Braid the hair into one low braid, then wrap that braid around itself at the nape and pin it in place. You can keep it tight and clean or loosen it slightly after pinning for a softer feel. The braid gives you a built-in pattern, so the bun doesn’t need much else.
This style is a quiet problem-solver. It works on hair that is too heavy for a floppy bun and too slippery for a loose twist. It also handles long layers better than a plain coiled bun because the braid keeps shorter pieces tucked in.
Use 6 to 8 bobby pins if your hair is thick. Less if it’s fine. Pin across the direction of the braid, not just along it, so the bun anchors from more than one angle. That’s the part that keeps it from sagging by the end of the day.
15. The Twisted Half-Up With Face-Framing Pieces

If I had to pick the easiest style in the bunch, this might be it. Two twists, a quick pin, and a couple of face-framing pieces. Done. It’s the hairstyle equivalent of opening a window when a room feels stuffy.
Take a small section from each side of the face, twist them back toward the crown, and secure them together with a clear elastic, clip, or pair of bobby pins. Leave the rest of the hair down. Pull out two narrow pieces near the front if you want the style to feel softer and less strict.
This works on straight hair, wavy hair, and curly hair without asking for much from any of them. If the hair is very clean, a little texture spray at the roots helps the twists stay in place. If the hair is day-two or day-three, it usually holds on its own.
There’s a reason people keep coming back to this kind of half-up style. It solves the “my hair is everywhere” problem without hiding the length you actually want to show off. And some days, that’s enough.
