



Straight hair can be a blessing and a pain in the same breath. It shows off clean lines, crisp parts, and shiny finishes like nothing else, but it also tattles on every crooked pin, every flat root, and every elastic that sits half an inch too high. That’s why the best hairstyle ideas for straight hair are the ones that use that smooth texture on purpose instead of pretending it needs help it doesn’t want.
I’ve always thought straight hair looks best when the shape is clear. A style with a hard center part, a tucked end, or a clean twist can look more polished than something that took twice as long and used three more products. The trick is grip. Straight hair slips, and it slips fast, so little things like dry shampoo at the roots, a light mist of texturizing spray, or a bobby pin placed under tension matter more than people like to admit.
The good news is that straight strands are built for sharp shapes. Ponytails look sleeker. Braids look neater. Clips sit flatter. Even a basic bun can look expensive if the part is right and the finish is deliberate. Once you stop fighting the texture, the list gets fun.
1. Sleek Middle-Part Low Ponytail for Straight Hair

A low ponytail with a center part can look sharper than a fancy updo. Straight hair gives it that clean, reflective finish, and the whole style reads as deliberate the second the part line is clean. I like this one when the hair is fresh, the ends still have a little weight, and you want something that looks put together without a lot of fuss.
Why It Works on Straight Hair
- A center part keeps the shape balanced and gives the ponytail a neat, symmetrical frame.
- A low placement, about 1 to 2 inches above the nape, keeps the ponytail from puffing out.
- Wrapping a 1-inch strand around the elastic hides the messy part and makes the style look finished.
- A tiny amount of shine serum on the last 3 inches keeps the tail smooth without turning it limp.
Best move: smooth the sides with a boar-bristle brush, then tap a little hairspray onto the brush itself and swipe it over the part line.
If your hair tends to slide out, mist the roots with dry shampoo first and wait 20 to 30 seconds before you comb. That one pause gives the hair a touch more grip, and yes, it matters more than people think.
2. Mirror-Smooth Blunt Bob With Tucked Ends

Why does a blunt bob look so expensive on straight hair? Because the shape does the talking. A sharp line at the jaw or just below it gives straight strands a crisp edge, and tucked-under ends make the whole cut feel intentional instead of plain.
The trick is to bend the last half-inch of hair under with a round brush or a flat iron, not curl it. You want a quiet curve, not a flip that steals the shape. A pea-size bit of smoothing cream through the mids and ends keeps the bob neat, and a heat protectant before styling keeps the finish glossy instead of fried.
This style works especially well if your hair is fine and you want it to look fuller at the perimeter. It also plays nicely with strong earrings or a high neckline. That line at the bottom is the whole point.
3. Half-Up Claw Clip Twist

Why does a half-up claw clip twist work so well on straight hair? Because straight hair tends to lie flat at the crown, and a clip gives it instant shape without asking for much effort. The twist lifts the top section just enough to create a little height, while the rest of the hair stays loose and smooth.
I like this style for second-day hair because it holds better when the roots have a bit of texture. Gather the top half of your hair from temple to temple, twist it once or twice, then clip it vertically instead of laying the clip flat. That keeps the twist from slipping after an hour.
How to Wear It
- Leave the ends straight and visible; that contrast keeps the style from looking stiff.
- Use a medium claw clip with teeth that grip, not a tiny decorative one that slides.
- Pull out two thin face-framing pieces if you want a softer finish.
- Spritz the crown lightly with texture spray before clipping if your hair is very slippery.
That last step saves the style. Every time.
4. Bubble Braid Down the Back
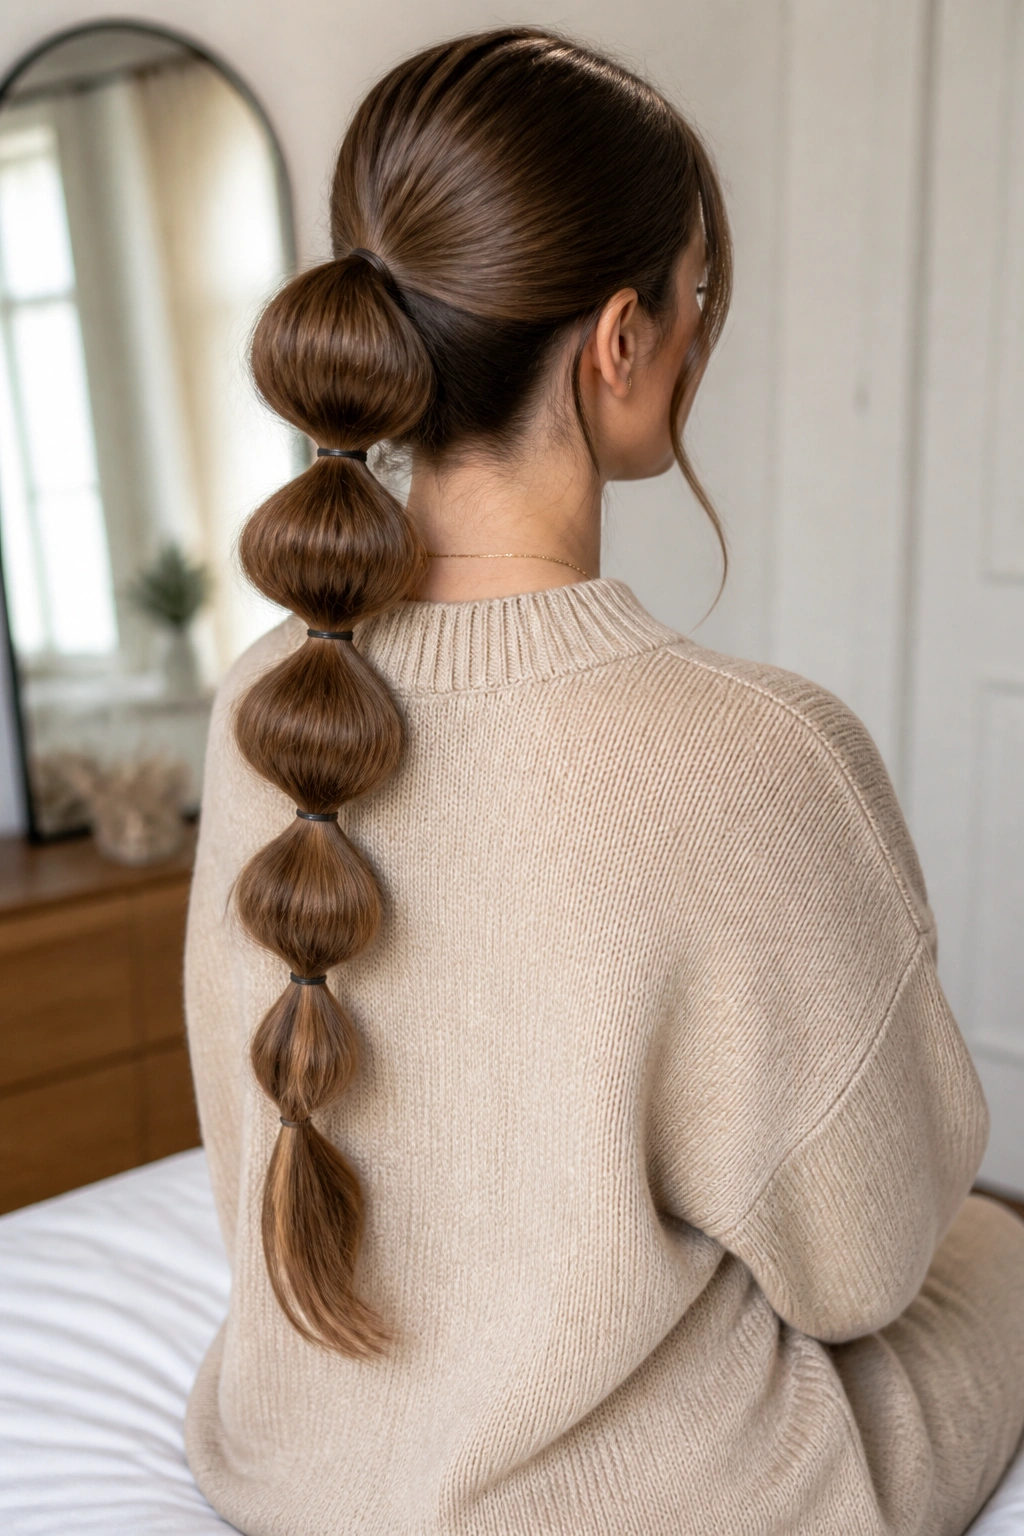
Straight hair makes a bubble braid look fuller than a regular three-strand braid, and that’s exactly why I keep coming back to it. The sections pop out cleanly, the elastic bands show off the shape, and the whole style has a bit of playful energy without looking fussy.
Start with a low ponytail, then add clear elastics every 2 to 3 inches down the tail. After each band, gently tug the sides of that section until it rounds out. Do not yank the whole thing apart. You want a soft puff, not a frayed mess. If your hair is fine, mist each segment with texturizing spray before you fan it out.
A bubble braid is one of those styles that looks better in person than on a flat photo. The little shadows between the bubbles create depth, and straight hair gives the sections a clean outline. That clean edge is what makes it work.
5. Ribbon-Tied Low Braid

A ribbon changes a low braid from plain to thoughtful in about ten seconds. On straight hair, the braid itself stays tidy, so the ribbon gets room to do the styling work. I prefer satin or grosgrain in a width around 1/2 inch to 1 inch because it sits nicely without swallowing the braid.
Braid the hair low at the nape, then tie the ribbon around the base before weaving it through the length or letting it trail from the knot. If your hair is long, a narrow ribbon looks neater; if your braid is thick, a slightly wider ribbon keeps the proportion right. Dark hair likes contrast here, and lighter hair can handle a muted tone that blends in.
That little detail matters. A ribbon softens the line of straight hair without hiding the texture, which is why this style feels prettier than a plain elastic braid. It looks like you cared, but not in a loud way.
6. Deep Side Part With One Ear Tucked
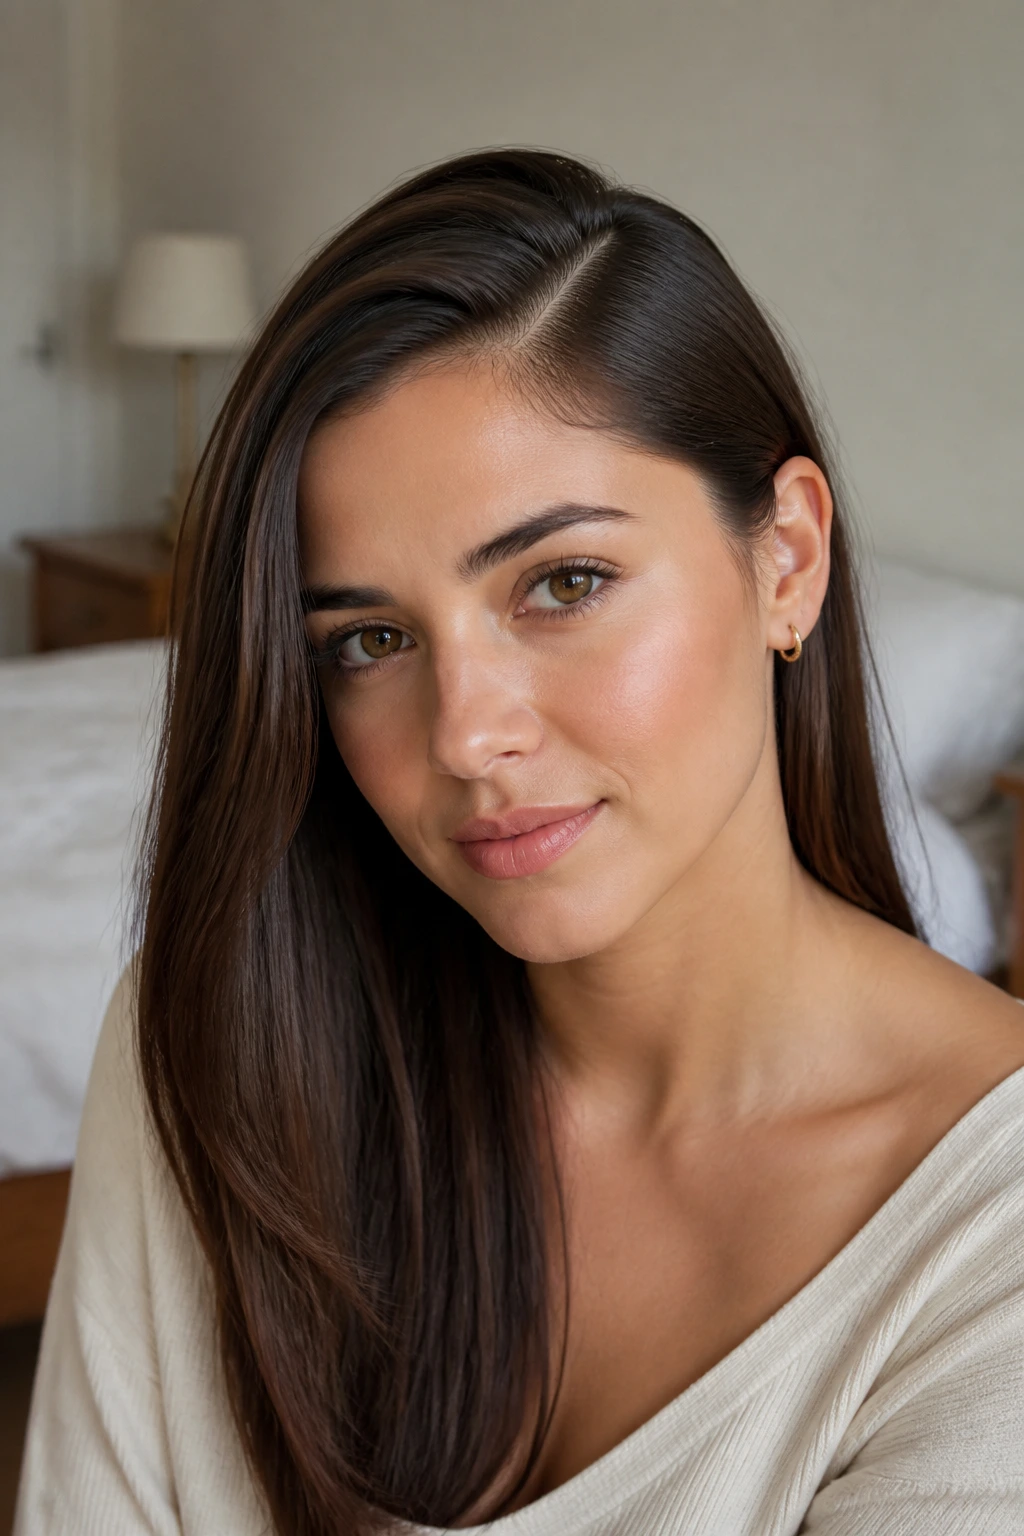
Unlike a hard center part, a deep side part changes the whole mood fast. It pushes straight hair into a soft diagonal, and when you tuck one side behind the ear, the face opens up without needing layers or curls. This is the style I reach for when a middle part feels too severe.
The best version starts with a clean part that sits about 2 to 3 inches off center. Use a tail comb to sharpen the line, then smooth the heavier side back with a little pomade or gel at the roots. Tuck one side behind the ear and let the other side fall forward. That asymmetry is the point.
It works especially well with straight hair that sits flat near the temples, because the tucked side makes the shape feel lighter. If the part wants to drift, set it while the hair is still warm from blow-drying. A warm part holds better than a cold one.
7. Curtain Bangs and Long Layers for Straight Hair

Curtain bangs can make straight hair look more alive without asking for a dramatic cut. They split softly at the center, skim the cheekbones, and blend into long layers that move instead of hanging in one heavy sheet. On straight hair, that movement matters.
The styling is more important than people think. Blow-dry the bangs forward first, then sweep them away from the face with a round brush so they bend at the ends rather than sitting stiff. A light mist of flexible hairspray is enough. Heavy spray turns them into a helmet, and nobody wants that.
How to Keep Them Looking Good
- Dry the bangs before the rest of the hair so they do not dry flat against the forehead.
- Use a small round brush, not a big one, so the curve stays soft.
- Trim the ends every 6 to 8 weeks if you want the center split to fall cleanly.
- Add a touch of dry shampoo at the roots if they separate too much during the day.
This cut is one of the strongest hairstyle ideas for straight hair because it adds shape without forcing texture that is not there.
8. Slicked-Back Low Bun

A slicked-back low bun is what I call a no-nonsense style. It looks clean, it stays put, and straight hair is actually perfect for it because the surface smooths down with less effort than curly or wavy hair usually needs.
Start with gel at the front hairline and brush everything back into a low ponytail at the nape. Twist the length into a bun and pin it with two or three strong bobby pins crossed underneath. If the bun feels too small, loop the ponytail around twice instead of once. That gives it a thicker look without adding volume where you do not want it.
This style works best when the roots are completely smooth and the nape sits tight. If one side lifts, the whole look changes. A fine-tooth comb helps here, and so does a little patience. The bun itself is simple. The finish is what makes it look sharp.
9. Mini Space Buns

Why do mini space buns work so well on straight hair? Because the hair holds their clean round shape without getting fluffy too fast. The style feels playful, but the straight texture keeps it neat instead of messy in a teenage-festival way.
Part the hair straight down the middle, then make two small ponytails high on the head, just above the temples or slightly higher. Twist each ponytail into a compact bun and pin underneath with one or two bobby pins. Leave the rest of the hair smooth, or pull out a few thin face-framing pieces if you want the look to feel less rigid.
A Few Things to Watch
- Keep the buns small if your hair is long; huge buns can pull the style off balance.
- Use clear elastics first so the buns have a firm base.
- Slightly backcomb the ponytail base if your hair is very soft.
- Avoid pulling the buns too far apart unless you want a more dramatic, lived-in look.
It’s a goofy style in the best way. And yes, that’s part of the appeal.
10. Side-Swept Straight Ponytail

Picture a ponytail that sits low on one side instead of in the center. It sounds minor, but on straight hair, that shift changes everything. The diagonal line feels softer and a little more dressed up, especially if the ponytail is wrapped at the base.
Sweep all the hair to one shoulder, gather it just behind the ear, and secure it low with an elastic. Then take a small strand and wind it around the elastic until the band disappears. A flat iron pass through the tail can keep the ends sleek if they flip unevenly. I usually leave the very last inch with a tiny bend so it does not look too stiff.
This style is good when you want polish but not severity. It also plays well with one statement earring or a high-collared top. Straight hair gives the side sweep a clean fall that looks neat from every angle.
11. French Twist With Polished Ends
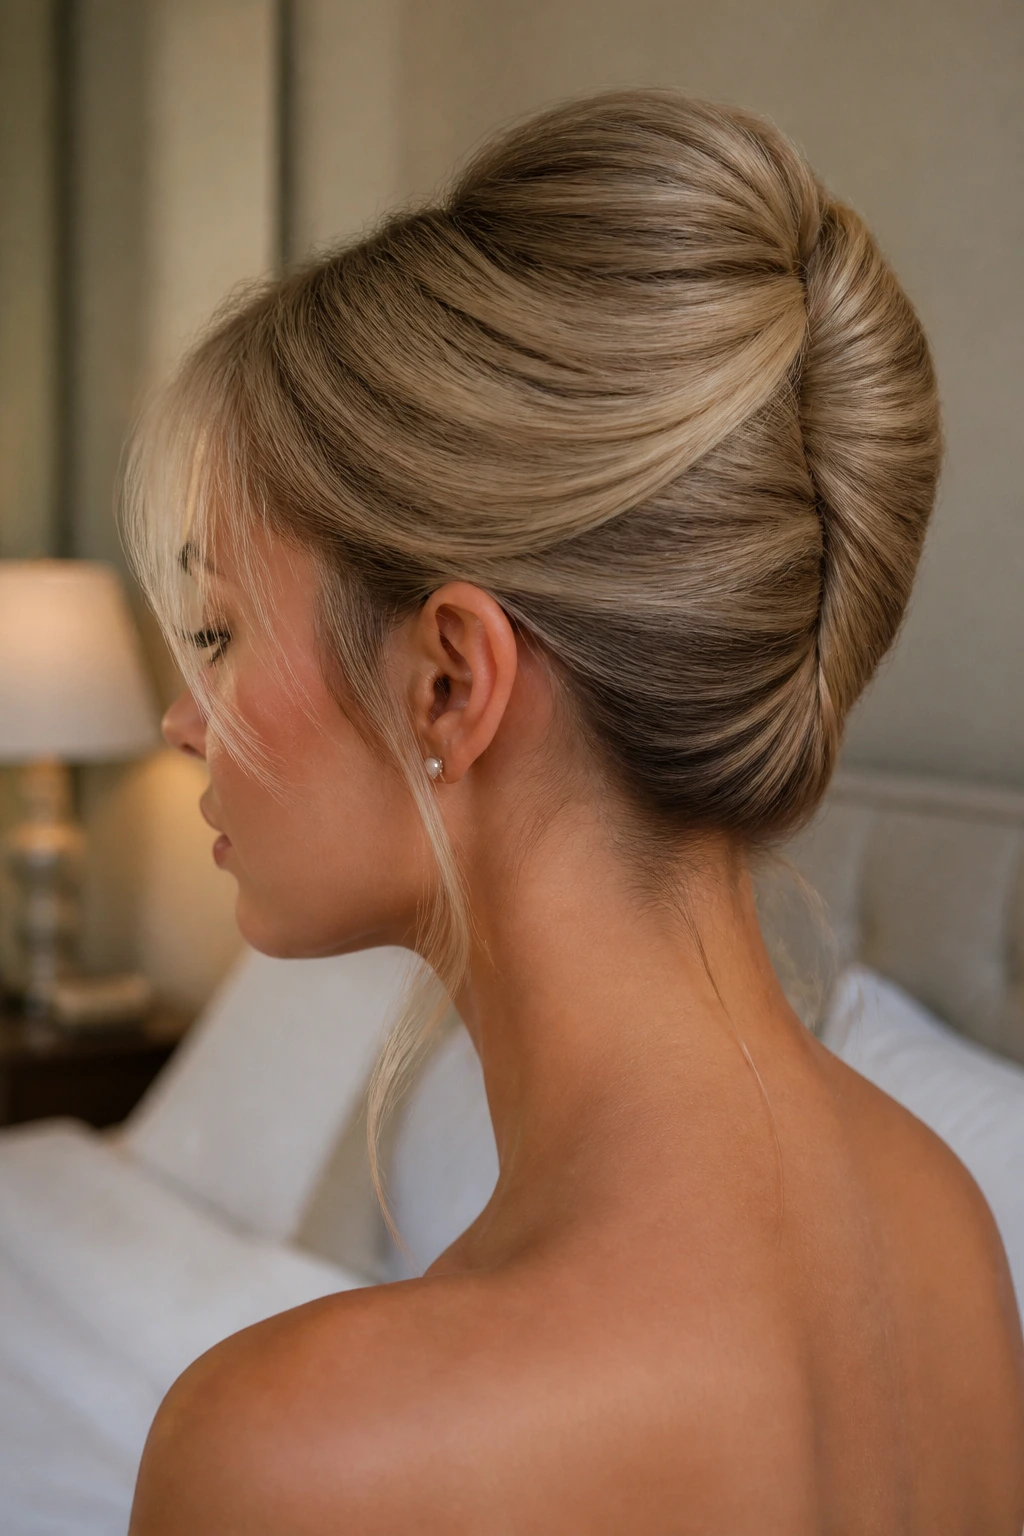
A French twist is not only for weddings and formal events. On straight hair, it can look modern if you keep the finish smooth and the twist slightly loose through the middle. The ends matter here, because they should disappear cleanly instead of poking out in weird little lines.
Brush the hair back, gather it at the center of the head, and twist it upward so the roll sits vertically. Pin along the seam with long bobby pins, then tuck the ends inside. If your hair is too silky to stay put, rough up the roots with a touch of dry shampoo before you start. That gives the pins something to bite into.
I like this on medium-length straight hair because the shape reads clearly without needing extra bulk. One neat twist, a few pins, done. No drama.
12. Barrette Stack on One Side

A barrette stack turns plain straight hair into something with personality. One clip is nice. Three clips in a tidy line on one side? Much better. The shine of the metal or resin catches the eye, and straight hair gives the clips a flat surface to sit on.
Part the hair slightly off center, then tuck one side back and stack two or three barrettes in a vertical or slanted line above the ear. Keep the clips spaced about 1/2 inch apart so they do not crowd each other. You can leave the rest of the hair loose and straight, or tuck one side back and let the other side frame the face.
This is the style I reach for when I want something decorative without spending 20 minutes styling. It works on short hair, long hair, blunt cuts, layers, and everything between. The more precise the placement, the better it looks.
13. Headband Tuck
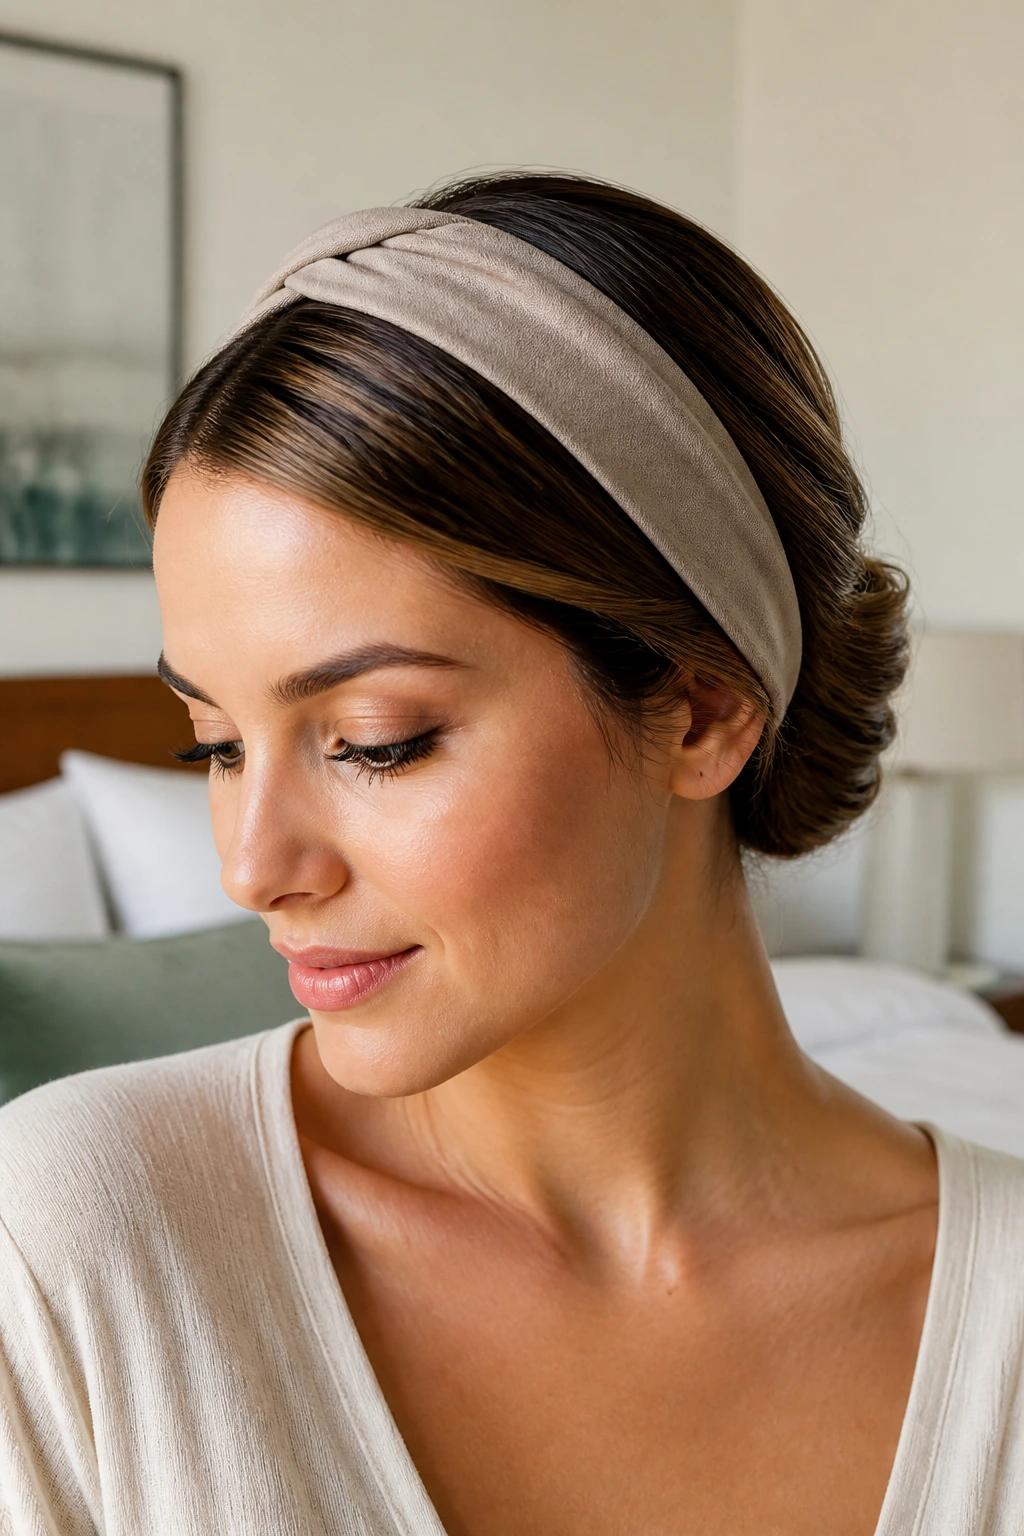
A headband tuck has old-school charm, but on straight hair it reads clean rather than fussy. The headband holds the front smooth, and the tucked lengths create a soft roll at the back that feels neat without looking too set.
Choose a wide, comfortable headband that does not pinch behind the ears. Slide it on, then tuck the hair under the band in 2-inch sections until the back forms a smooth fold. If your hair is long, leave the ends a little loose at the nape rather than stuffing every strand in. That little slack keeps the shape from looking tight.
What Makes It Work
- Best on shoulder-length or longer straight hair.
- Looks cleaner when the hair is brushed through first, not after the band is on.
- A fabric-covered headband grips better than a slick plastic one.
- A few face-framing strands keep the style from feeling too rigid.
It has a nice balance of tidy and easy, which is rare.
14. Flipped-Out Ends for Straight Hair
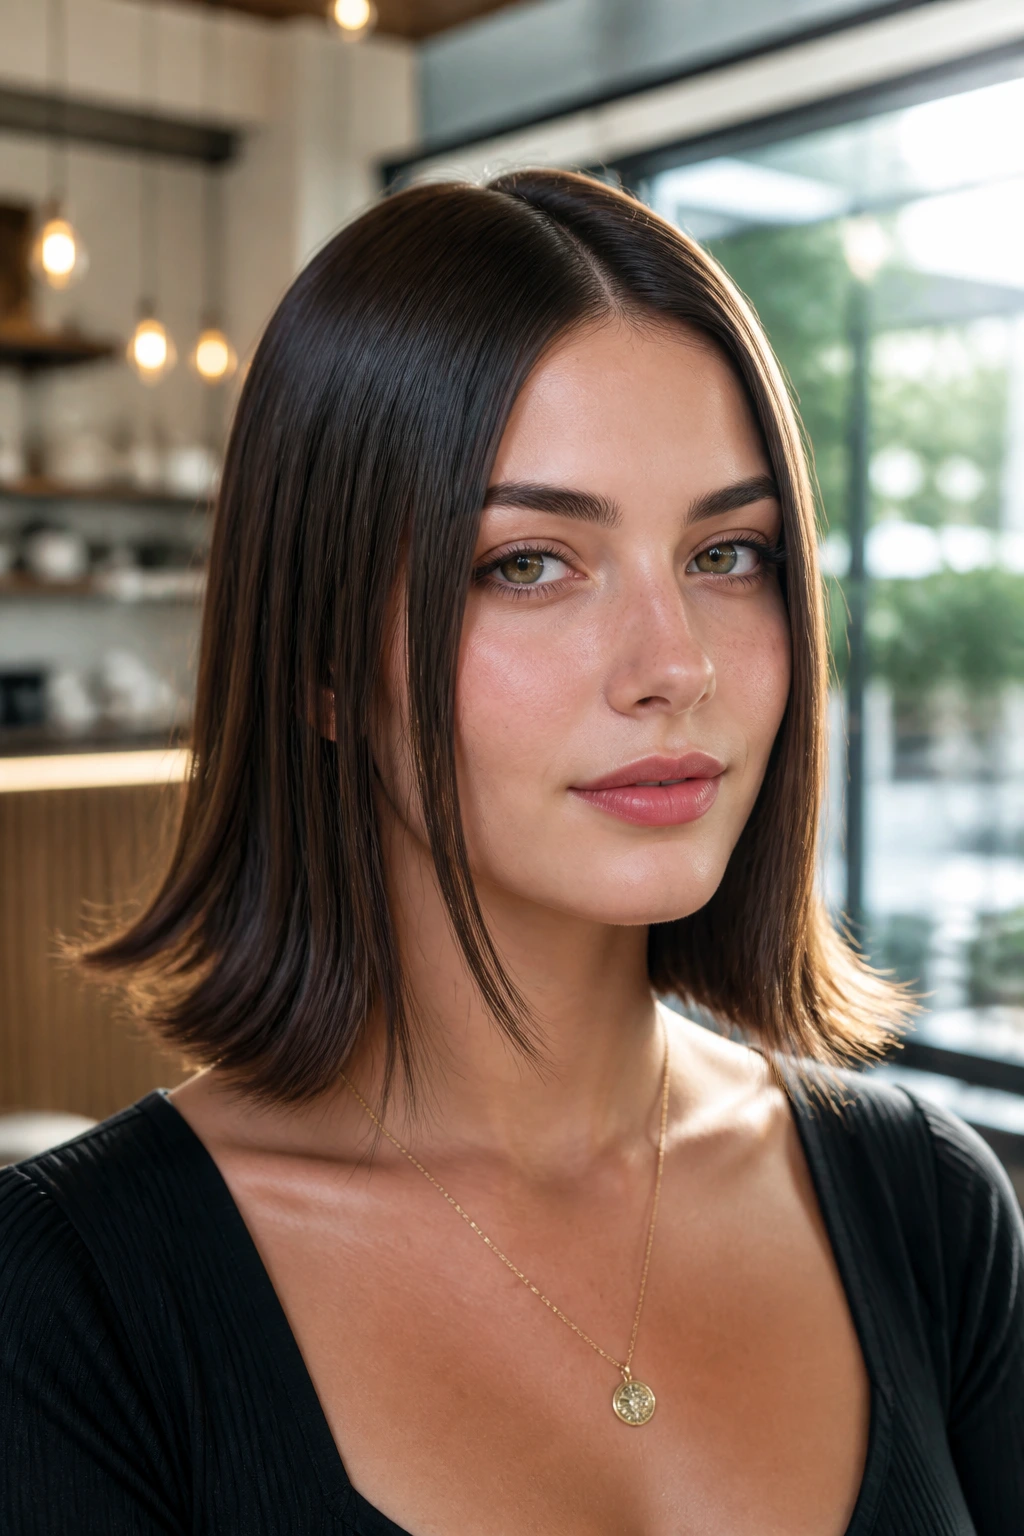
Flipped-out ends give straight hair a bit of attitude without changing the whole shape. The style works on bobs, lobs, and longer cuts, but it looks best when the flip is small and controlled, not giant and retro for no reason.
Use a flat iron or round brush to turn just the last 1/2 inch to 1 inch of the hair outward. The root and mid-lengths should stay smooth. That contrast is what makes the flip pop. If you want the look to last, let the ends cool in the turned-out shape before touching them. Hot hair changes shape fast, and that is where people ruin it.
I like this style because it wakes up a blunt cut. It also looks smart with a center part and a tucked-behind-ear moment. A little flip goes further than a big one.
15. Low Knot With Face-Framing Pieces

Why does a low knot look softer than a full bun? Because it sits at the nape and leaves the ends tucked in with a little less polish, which makes straight hair feel less severe. If you leave two thin pieces out at the front, the whole style gets a gentle frame.
Gather the hair low, twist it into a knot, and secure it with pins or a coil-free elastic. Then release two pieces about 1/4 inch wide around the face. I usually curl just the front inch of those pieces with a flat iron bend, not a full wave, so they curve away from the cheeks instead of hanging straight down.
This style is easy, but the balance is what makes it work. Tight knot, soft front pieces, clean nape. That combination keeps the look from sinking into plain territory.
16. Micro Braids Woven Into Straight Hair

Micro braids can break up a sheet of straight hair in the best way. A few tiny braids near the front or along one side add texture without changing the whole style, and the rest of the hair stays long and sleek.
The best version uses two or four narrow braids, each one about pencil-width or thinner. Braid them close to the hairline and secure them with tiny clear elastics or a drop of styling cream at the ends. If you want them to stand out, place one braid near the part and another just above the ear. If you want a more subtle look, tuck them into the rest of the hair.
Key Details
- Work on dry hair so the braid lines stay crisp.
- Use a tail comb to separate clean sections.
- Keep the braids small; chunky braids can overpower straight hair.
- Finish with a light mist, not a heavy spray, so the rest of the hair stays movable.
It’s a small move with a big payoff. Nice little trick.
17. Sleek Pigtails

Pigtails are not childish when the lines are clean. On straight hair, they can look sharp, almost graphic, especially if the parts are even and the tails sit low or mid-height. I like this style with a middle part and very smooth roots.
Split the hair into two equal sections, then secure each side with an elastic that matches your hair color. If you want a more grown-up finish, wrap a thin strand of hair around each elastic. You can also keep the pigtails low and tight for a very polished feel, or set them higher if you want a more playful shape.
The important part is symmetry. Straight hair makes uneven pigtails obvious, so take the time to line them up. A mirror on both sides helps more than guesswork.
18. Braided Crown Over Straight Lengths

A braided crown gives straight hair structure up top while letting the length stay smooth and long. That contrast is the reason it works. The braid frames the face and the crown, while the rest of the hair falls straight and glossy underneath.
Take a section from one side of the hairline, braid it along the top of the head, and pin it behind the opposite ear. If your hair is layered, use a bit of styling cream on the braid so shorter pieces do not poke out. You can keep the braid tight for a neat look or loosen it slightly for a softer line.
This style is especially good when you want something that feels more finished than a half-up style but less formal than a full updo. It also hides greasy roots near the part if you need a quick fix.
19. Claw Clip French Twist

A claw clip French twist is the casual version of the classic twist, and straight hair is perfect for it because the roll stays smooth inside the clip. It gives you that lifted shape in seconds, but it does not look too careful.
Gather the hair at the back, twist it upward, fold the length in once, and clamp a medium claw clip over the twist so the teeth catch both the fold and the loose ends. If the clip feels slippery, choose one with stronger teeth and a matte finish. Glossy clips can slide on very smooth hair.
How I’d Wear It
- Use this on day-two hair for better grip.
- Leave the very ends peeking out a little if you want a softer finish.
- Keep the twist centered; a crooked twist looks accidental fast.
- Pin the sides if the clip is not strong enough on its own.
It’s one of those styles that looks more complicated than it is. I love that.
20. Satin Scarf Ponytail

A satin scarf can turn a basic ponytail into something with a little personality, and straight hair shows off the fabric well because the tail falls in a smooth line. The scarf also hides the elastic, which is always a win.
Tie the hair into a low or mid ponytail, then knot the scarf around the base so the tails hang down with the ponytail or drift to one side. A silk or satin scarf feels the nicest, but any soft fabric with enough length will work. I like a scarf that is at least 24 inches long so the knot does not shrink into nothing.
This style is especially nice when you want color near the face without changing the haircut. It also works on fine straight hair, where a scarf can make the ponytail feel fuller at the base. One fabric strip, and the whole look changes.
21. Looped Bubble Ponytail
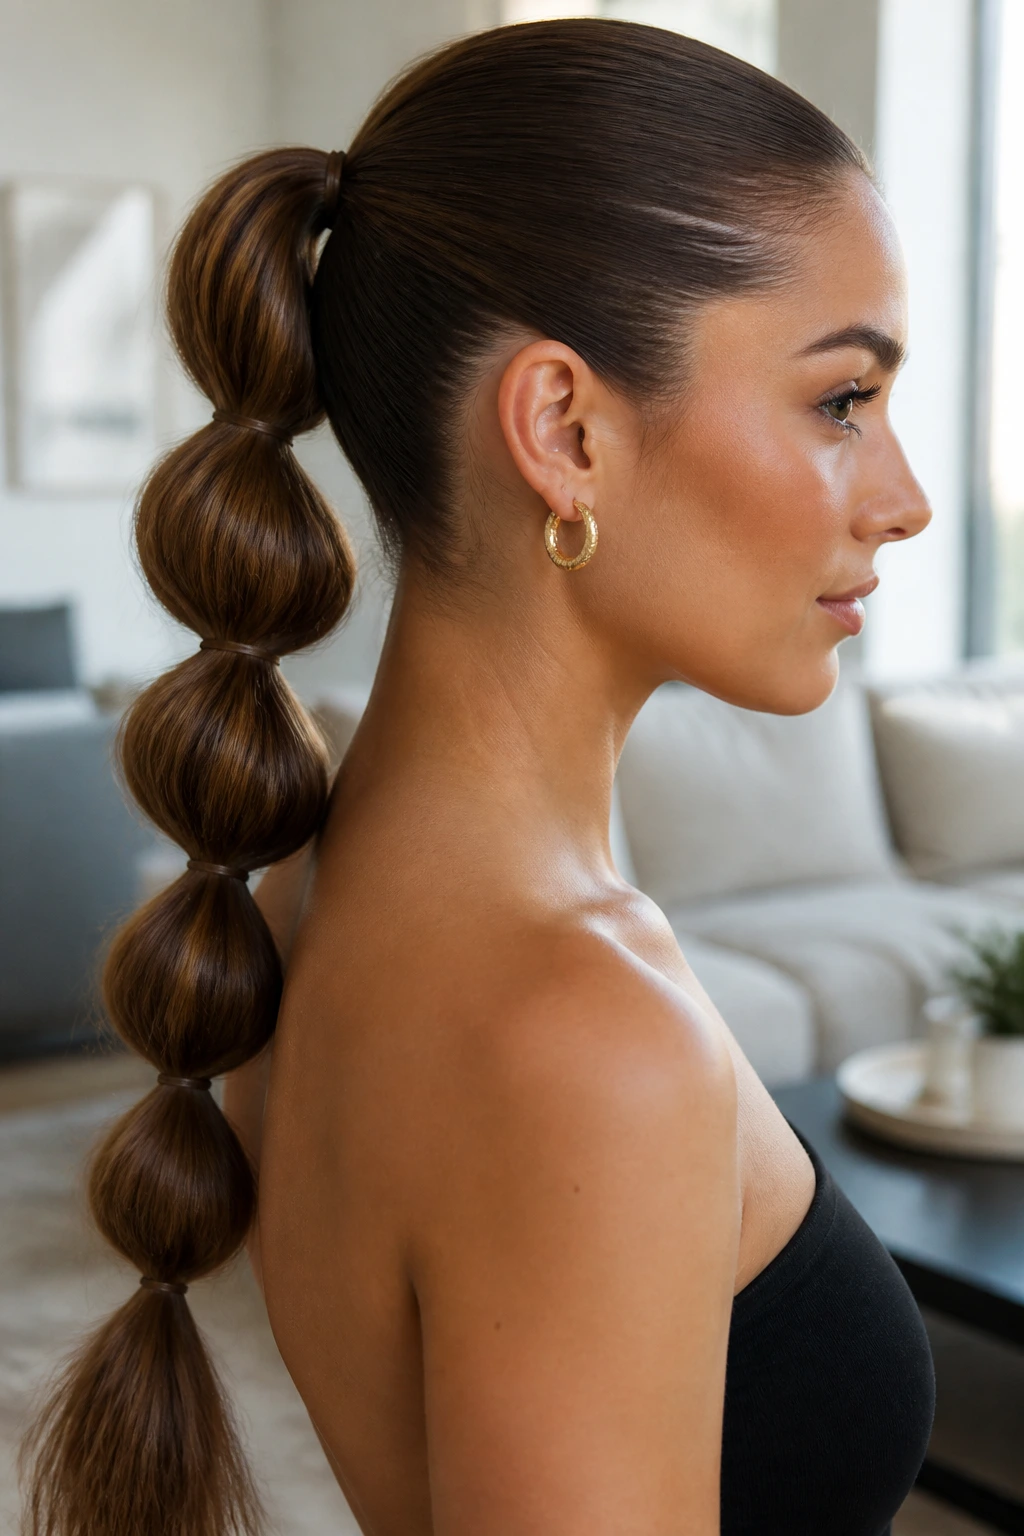
A looped bubble ponytail is a cleaner, sleeker cousin of the classic bubble braid. Instead of fanning out every section, you create gentle loops that stay more contained, which is helpful if your straight hair gets frizzy at the ends.
Start with a ponytail and place a second elastic a few inches down. Pull the hair between the elastics only halfway through, so it forms a loop. Repeat every 2 to 3 inches. The result looks modern and tidy, not frilly. A little smoothing cream on the tail helps the loops stay even.
What to Watch For
- Keep the spacing consistent so the loops look intentional.
- Use small elastics that match your hair color.
- Don’t pull every loop to the same size if your hair is very long; slight variation looks more natural.
- Finish with a light gloss spray on the outer surface only.
This style is neat enough for a workday and playful enough for dinner. Not bad for one ponytail.
22. Half-Up Top Knot

A half-up top knot is one of the easiest ways to keep straight hair out of your face without losing length. It gives a little lift at the crown, and because the rest of the hair stays straight, the style never feels too busy.
Take the top third of the hair, gather it at the crown, twist it once or twice, and pin or tie it into a small knot. Leave the bottom half straight and loose. If your hair is very smooth, rough up the crown first with dry shampoo or a tiny bit of texture powder. That keeps the knot from sliding down as the day goes on.
The beauty of this style is that it takes five minutes and still looks planned. You can wear it high and playful or lower and neater. Small change, big payoff.
23. Low Ponytail With a Wrapped Hair Tie

A wrapped hair tie is one of the easiest upgrades in hair styling, and straight hair is the best canvas for it because the wrapped section lays flat and clean. The style is simple, but it reads finished in a way that a plain elastic never does.
Pull the hair into a low ponytail, secure it tightly, then take a 1/2-inch strand from underneath and wind it around the elastic until nothing shows. Pin the end under the ponytail with a small bobby pin. If you want the ponytail to look fuller, gently pinch the hair at the crown before wrapping the base. Just a little lift, not a bump.
This is the style I use when I want the hair to feel neat without looking severe. It’s the kind of detail that people notice without knowing why. Those are the best kinds of details.
24. Hair Stick Bun

A hair stick bun gives straight hair an elegant shape that feels a little old-world and a little practical. If the hair is long enough and has enough grip, a stick can hold the bun better than people expect. The finish looks clean, but not stiff.
Twist the hair into a coil at the nape or slightly higher, then slide a hair stick through the bun at an angle so it catches the base and the opposite side of the coil. The key is tension. If the bun is too loose, the stick slips. If it’s too tight, the shape gets lumpy. A medium-sized stick works better than an oversized decorative one for most hair lengths.
Who This Suits Best
- Medium to thick straight hair with enough length to twist twice.
- People who like a secure bun without a lot of pins.
- Straight hair that needs a polished shape for dinner or work.
- Anyone who wants a bun that feels a little different from the usual clip or elastic.
It is quietly cool. And practical, too.
25. Pin-Straight Long Layers With a Center Part

Pin-straight long layers can look almost architectural when the part is exact and the ends are even. On straight hair, layers keep the length from feeling heavy, but the center part gives the whole shape a clean spine. This is one of those hairstyles that works because nothing is fighting the natural texture.
Use a flat iron only if you need to smooth a bend, not to flatten every inch into submission. A pass through the mids and ends is enough. Then tuck a touch of serum into the bottom 4 inches so the layers separate a little instead of clumping. That separation is what makes the cut visible.
Why It Belongs on This List
- The center part gives the hair a strong frame.
- Long layers stop the ends from feeling like one heavy sheet.
- Straight hair shows each layer line clearly.
- The style works with loose, minimal styling or a full blowout.
If you want a low-effort style that still looks considered, this is one of the strongest choices.
26. Half-Up Twisted Crown

A half-up twisted crown takes the simple half-up idea and gives it a little structure. The front sections twist away from the face, meet at the back, and create a soft crown shape while the rest of the hair hangs straight.
Take a 2-inch section from each temple, twist each one back once or twice, and pin them together at the back of the head. Keep the twists low enough that they do not bunch near the crown. Straight hair helps here because the twists stay neat and the ends disappear into the pinned section more cleanly than they do on fluffier textures.
This style works best when the twists are a little loose. Tight twists can pull and feel severe. Loose ones feel softer, and that matters if you are wearing the style all day. The crown should frame, not squeeze.
27. Sleek High Ponytail

A high ponytail on straight hair can look almost sporty and sharp at the same time. The height gives lift, the smooth roots show off the shine, and the tail falls in one clean line. It’s a strong style when you want the face fully open.
Brush the hair upward from the temples and nape, then secure it at the crown or just above it. A little gel at the hairline helps keep flyaways down, and a wrapped elastic hides the base. If the ponytail feels too flat, backcomb the underside of the tail in two tiny sections near the base. That gives it a fuller look without making it messy.
I like this one because it is a little bossy. In a good way. Straight hair makes the height look sharper, not bigger.
28. Side Braid With Loose Straight Ends

A side braid with loose straight ends gives you the best of both worlds: structure at the top and movement at the bottom. Instead of braiding all the way down, stop halfway and leave the tail straight so the contrast shows.
Sweep the hair over one shoulder, braid from just below the ear, and secure it when you still have a good 8 to 10 inches of hair left loose. If your hair is long, you can braid only the top third and let the rest fall straight. That partial braid keeps the style from feeling heavy. A little styling cream through the loose ends keeps them smooth and separate.
This style is good when you want something softer than a full braid but less plain than wearing the hair down. It also works well with layered straight hair, where the braid gives the shorter pieces something to sit against.
29. Tucked-Under Lob for Straight Hair
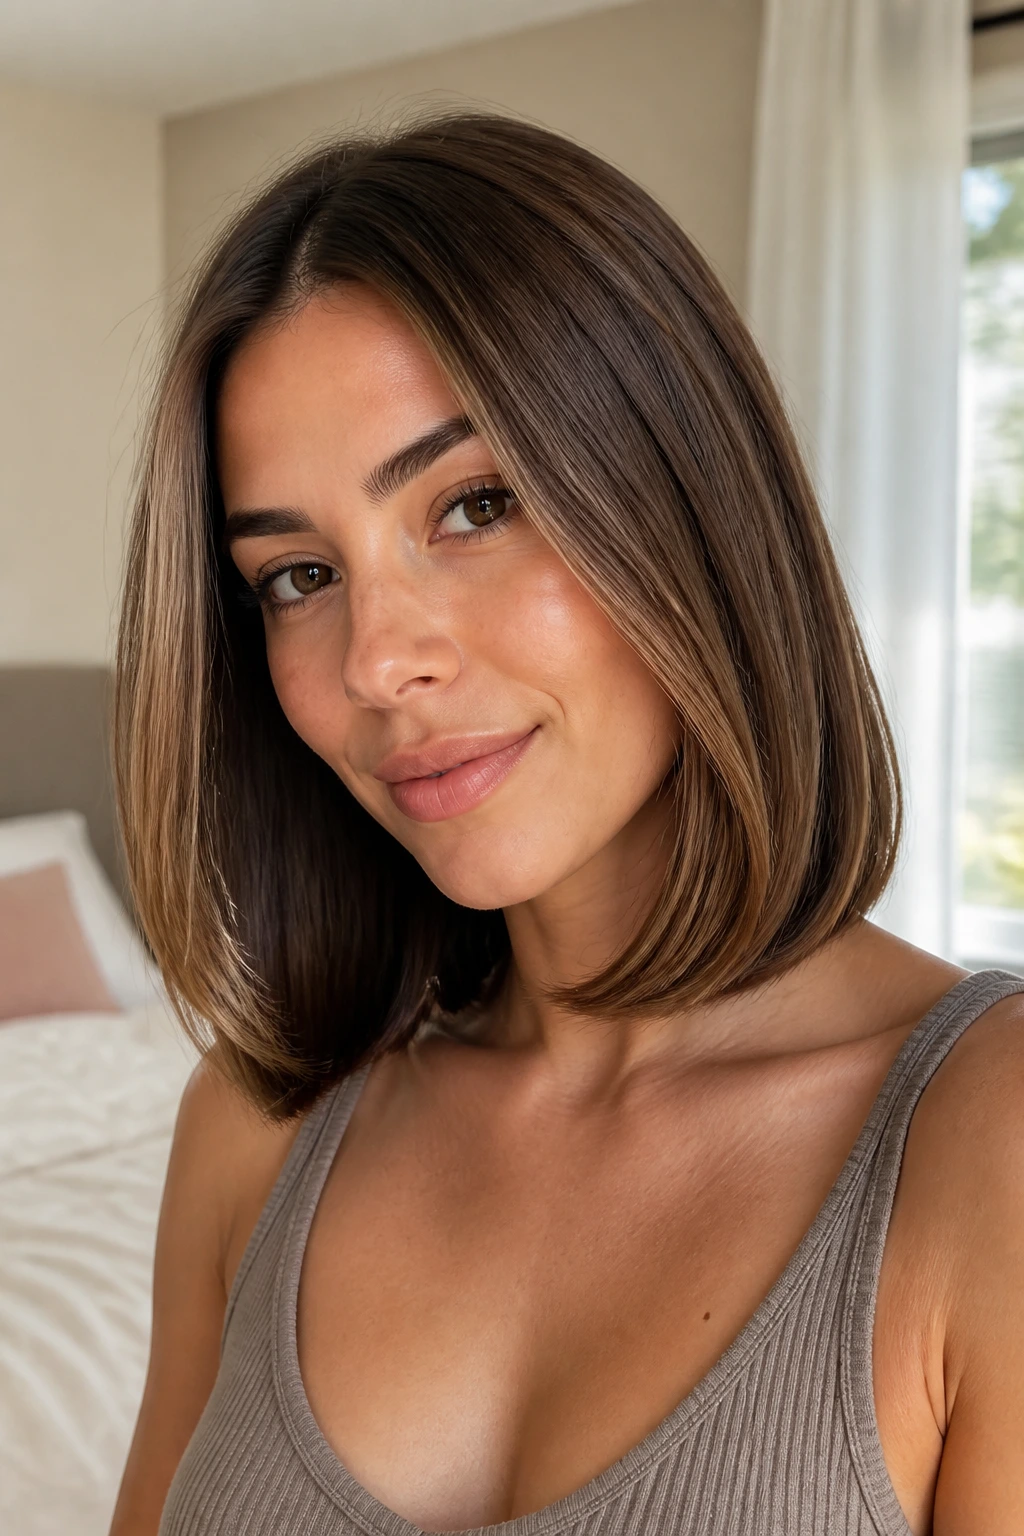
A tucked-under lob is one of my favorite hairstyle ideas for straight hair because it makes a shoulder-length cut look tidy without making it boring. The ends turn inward just enough to create a rounded outline, and the length sits neatly at the collarbone or just above it.
Blow-dry with a round brush, or use a flat iron to bend the bottom inch under toward the neck. The curve should be soft. Too much curl turns the lob into a different haircut altogether. A lightweight cream through the mids and a touch of shine spray at the ends keep it smooth without making it collapse.
This style is especially nice when you want polish with almost no visible styling effort. It works for office days, dinners, and any moment when you want the hair to look orderly and fresh. The tucked edge is the quiet part that does the work.
30. Statement Bow Ponytail
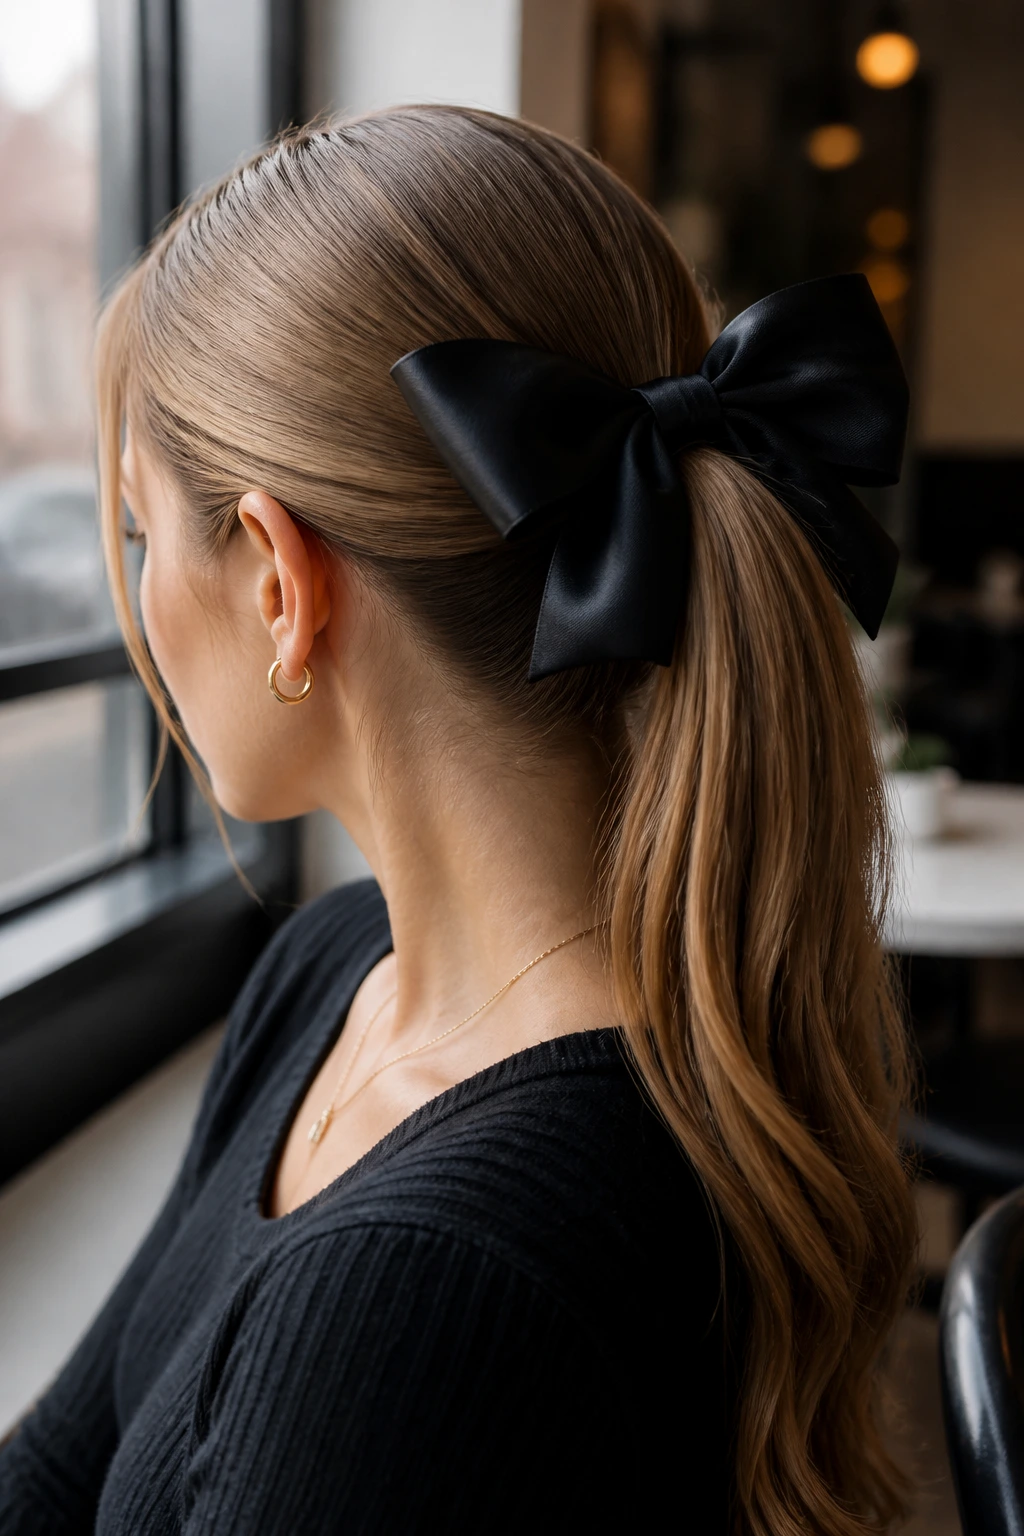
A statement bow ponytail is playful, a little theatrical, and far easier than it looks. Straight hair gives the ribbon or bow a clean backdrop, so the accessory does not fight with too much texture. The ponytail stays simple, and the bow does the talking.
Tie the hair into a low or mid ponytail, then attach an oversized bow or tie a wide ribbon into a crisp knot. Keep the tail smooth so the accessory sits on top like a feature, not an afterthought. If the ponytail feels too sparse, wrap a small section of hair around the base first to thicken it before adding the bow.
What Makes It Different
- It turns a basic ponytail into a finished style fast.
- A bow about 4 to 6 inches wide has enough presence to show up.
- It works best when the rest of the outfit stays simple.
- Straight hair keeps the accessory visible from every angle.
It is a little dramatic, sure. That is half the fun.
Final Thoughts
Straight hair gives you a clean slate, but that does not mean every style should look the same. The best looks use the texture on purpose: a sharp part, a smooth bun, a braid with clear edges, or a ribbon that sits flat and neat.
Pick one style that matches your mood, not just your schedule. Some days call for a slick ponytail. Other days want a clip, a braid, or a bow that does most of the work for you. Straight hair behaves best when the shape is clear, and that is honestly the part I love most about it.
