



Day-two hair is where long hair gets honest. The roots have a little oil, the ends have a small bend from sleeping on them, and the whole head has enough grip to hold pins better than a fresh wash ever does.
That is why day two hairstyles for long hair often look easier than they are. Braids stay in place. Claw clips stop slipping. Even a plain ponytail can look more polished when the hair has a little texture instead of that slippery, salon-fresh finish.
Long hair likes structure.
The move is to work with what the hair is already doing. A touch of dry shampoo at the crown, a wide-tooth comb through the ends, and one good elastic usually do more than a shelf full of sprays that promise miracles and leave hair stiff.
Some days call for neat. Some days call for soft. And some days call for the kind of style that keeps your hair out of the way without pretending you had forty extra minutes to get ready. The styles below do all three, in different ways.
1. Low Bubble Ponytail
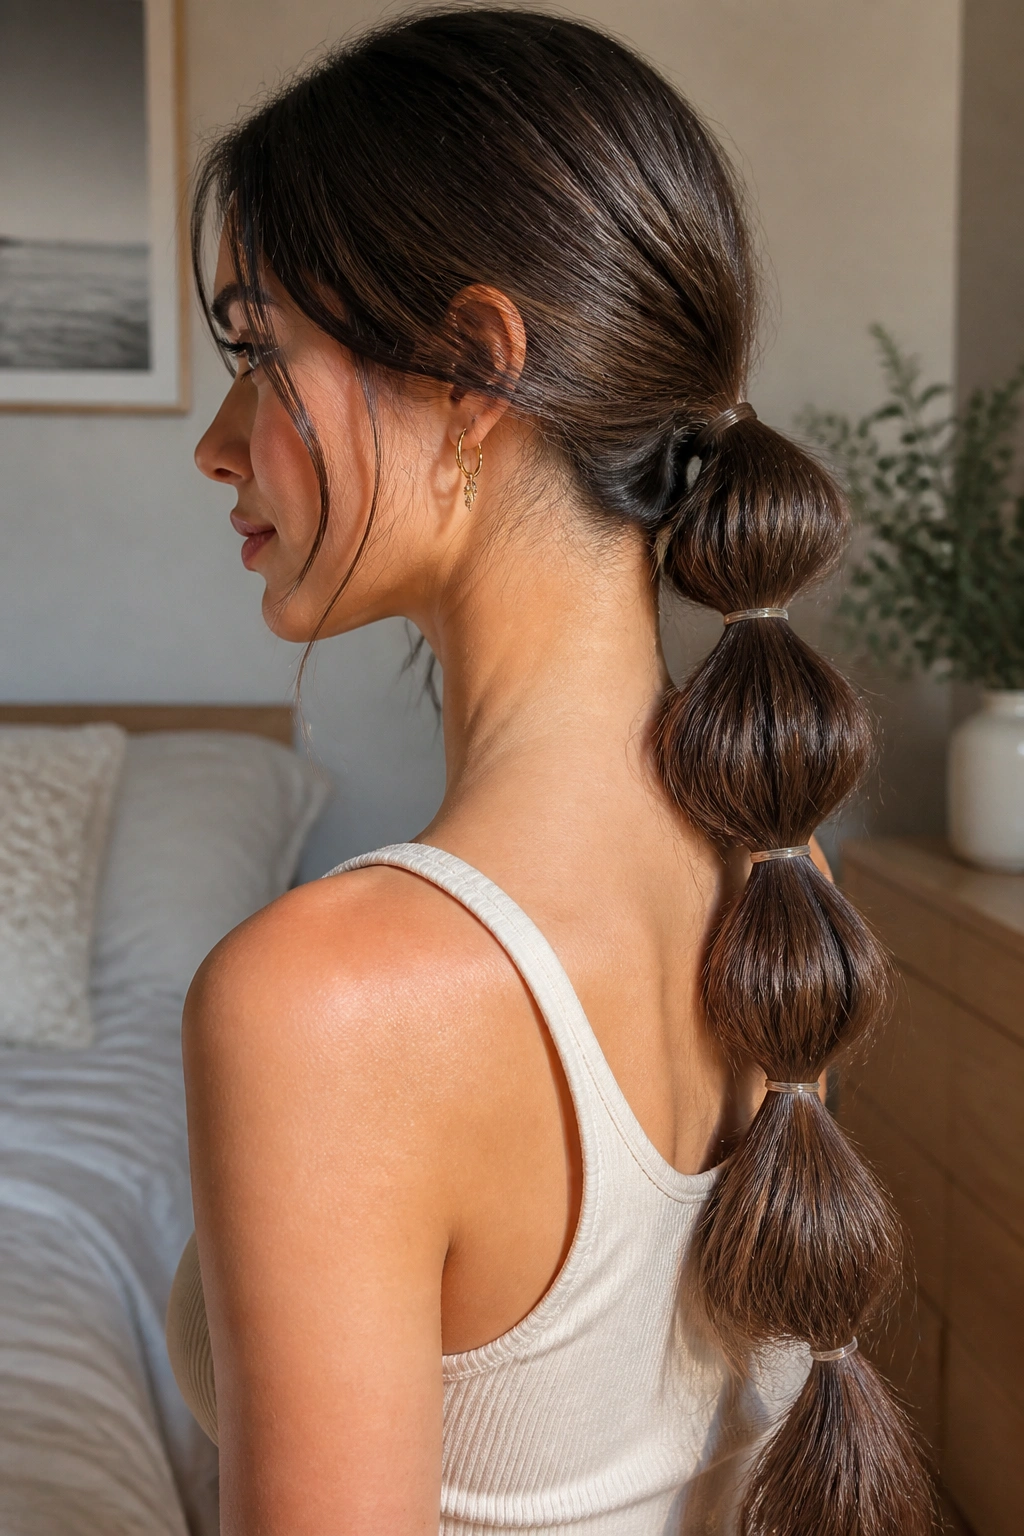
A low bubble ponytail is one of those styles that makes second-day texture look deliberate instead of accidental. It sits well on long hair because the added oil at the roots gives the base a little grip, and the loose bends from sleep help the sections puff out instead of collapsing flat.
Why It Works on Day-Two Hair
The trick is space. If the hair is freshly washed, the bubbles can slide and look limp by lunch. On day two, the strands have enough roughness to hold each elastic line, which makes the shape stay round longer.
Keep the first tie low at the nape, then add clear elastics every 2 to 3 inches down the tail. Tug each section gently from the sides until it looks full, not squeezed. If the bubbles are uneven, that is fine. A little irregularity reads softer and less stiff.
- Use a small clear elastic or a thin elastic that matches your hair color.
- Pull the sides of each bubble outward, not the center.
- Leave the crown a little loose if you want height.
- Wrap a tiny strand around the base if you want the elastic hidden.
Best move: Mist the tail with a light texturizing spray before you start. It gives the bubbles a little grit and keeps the ponytail from sliding down by the end of the day.
2. Loose Claw-Clip Twist
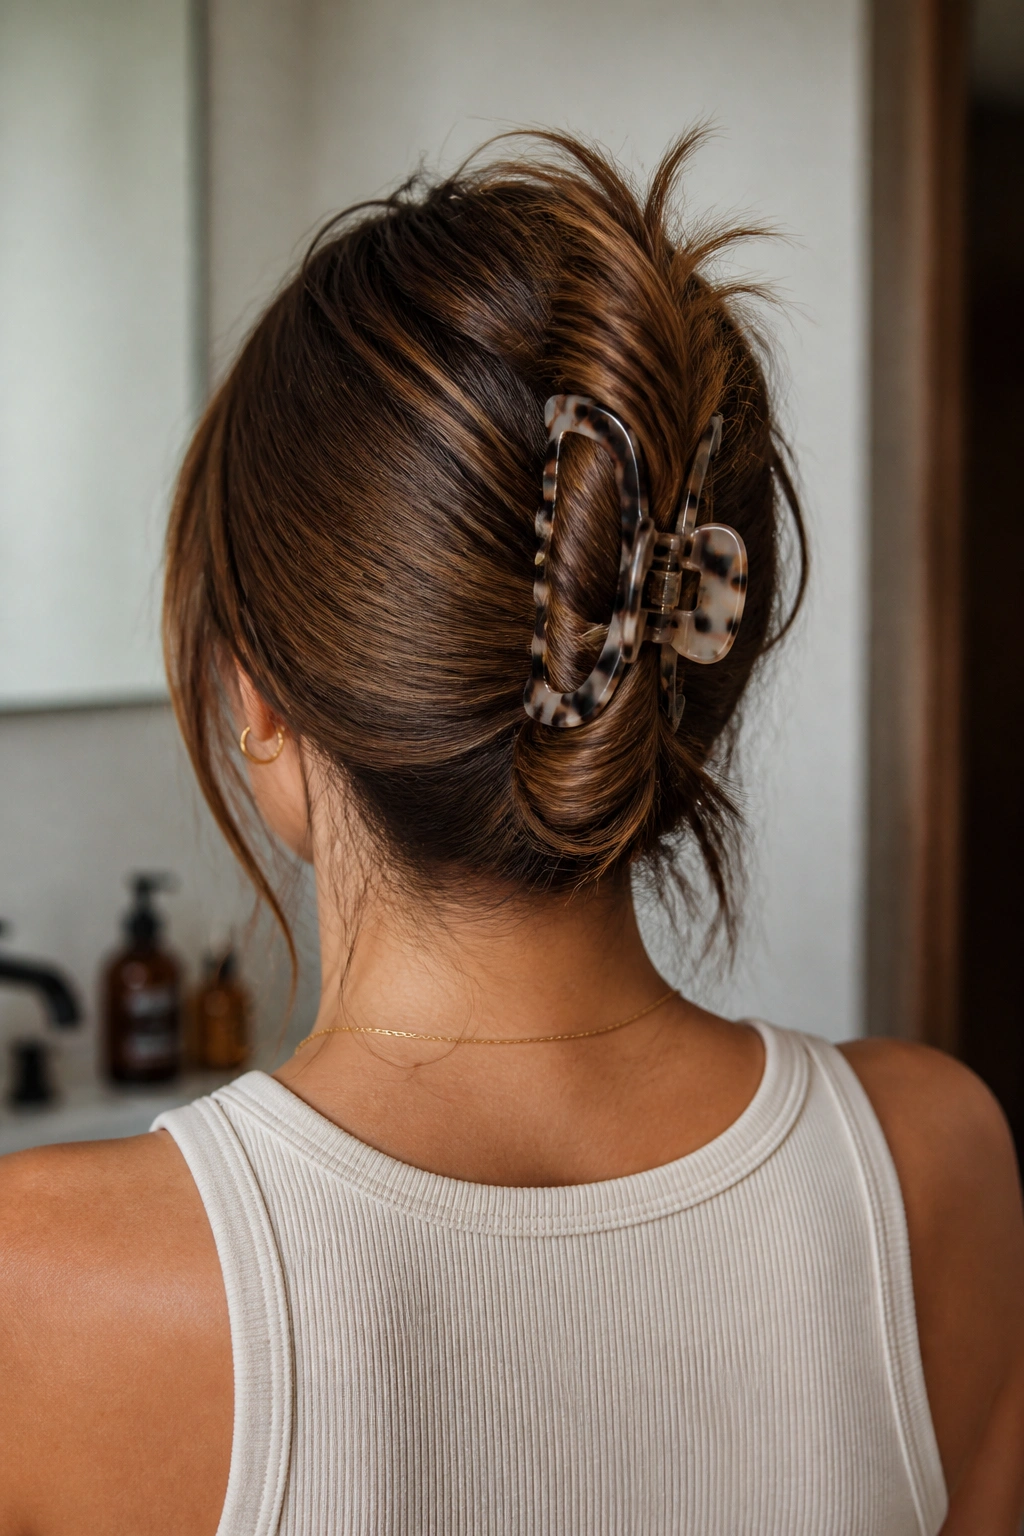
Why do claw clips work so much better on day two than on fresh hair? Because slightly lived-in hair has enough friction to stay put. Clean hair can slide right out, especially if it is long, silky, and heavy.
This one is simple, but it depends on placement. Gather the hair at the back of the head, twist upward once, fold the twist in half, and clip it where the hair feels fullest. A medium or large clip usually works better for long hair than a tiny one, since the weight needs something solid to lean on.
How to Make It Stay
A lot of people place the clip too low. That is the mistake. Lift the twist a little higher, then let the ends fan out or tuck them under, depending on the shape you want.
If the front layers are slippery, cross two bobby pins just under the clip. That tiny move makes a bigger difference than another spray ever will. And if your hair is thick, twist it loosely instead of winding it tight; a tight twist tends to pop open.
A claw clip looks nicer when it feels a little relaxed. Not sloppy. Relaxed.
3. Half-Up Rope Braid
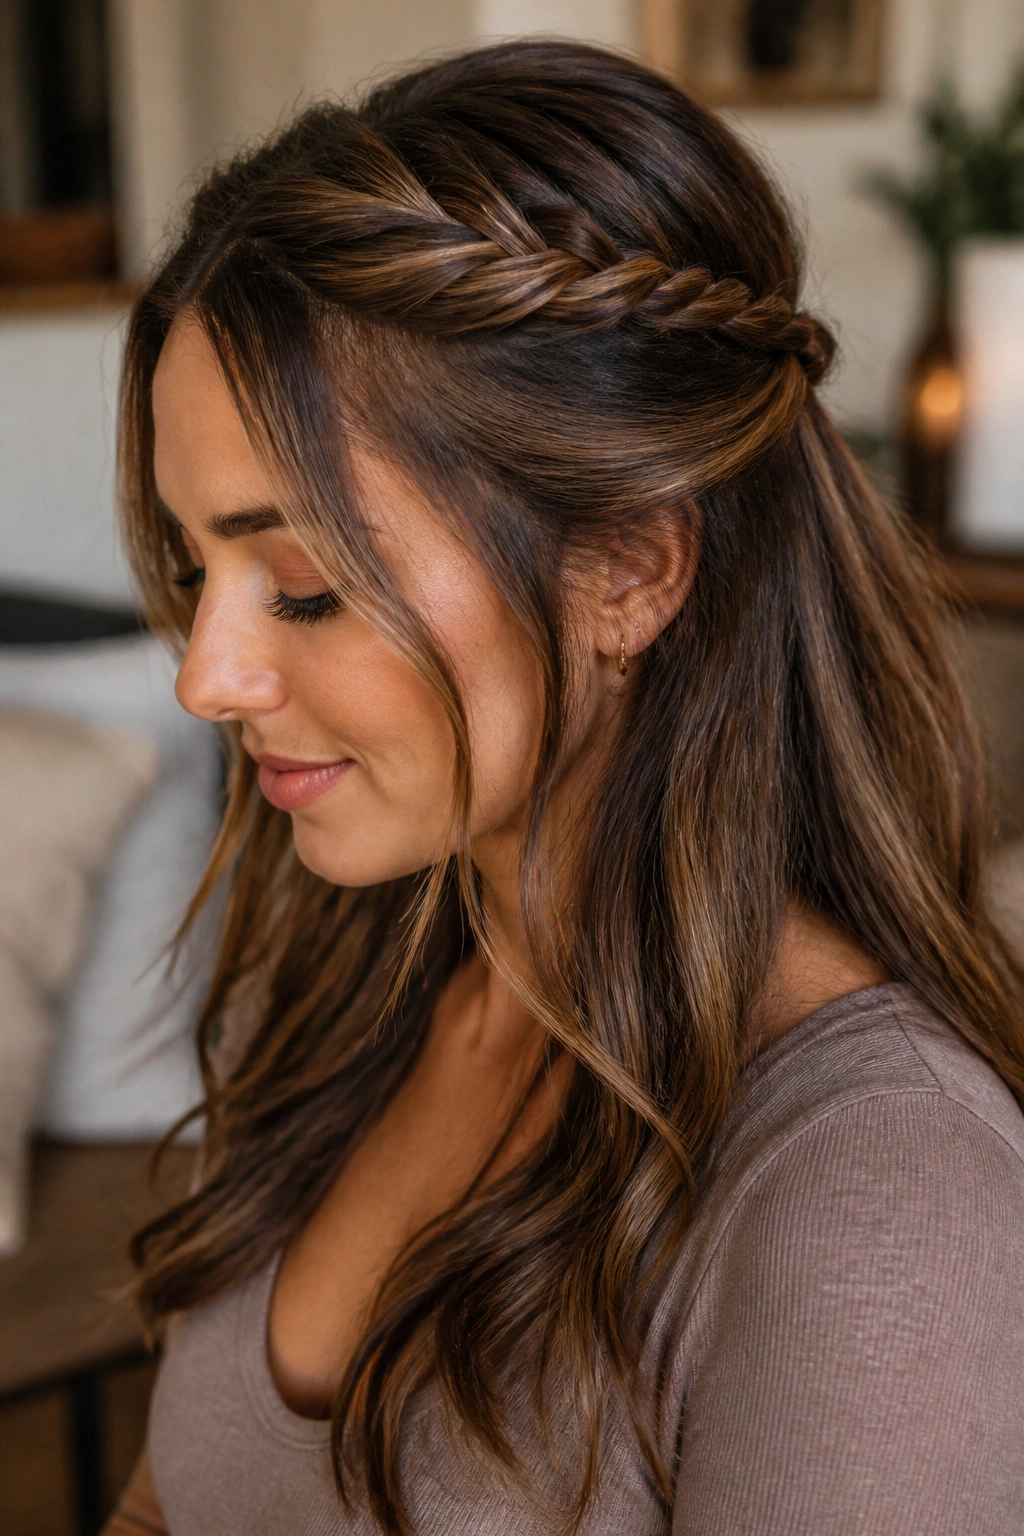
A rope braid is one of my favorite shortcuts for long hair that needs a lift. It looks more detailed than a plain twist, but it does not ask for perfect sectioning, which is a relief on a day when your hands are not cooperating.
Take two pieces from the front, twist each one away from your face, then wrap them around each other in the opposite direction. That opposite motion is what keeps the braid from unraveling. Secure it at the back with a small elastic, then pinch the rope braid outward a little so it looks fuller.
What Makes It Different
- It takes under five minutes once you get the hand motion down.
- It works well on layered hair because the front pieces are already textured.
- It keeps the top half controlled while leaving the length down.
- It looks polished even when the ends are a bit dry.
If your hair is very straight, start with a tiny bit of dry shampoo at the roots and a mist of texturizing spray on the front pieces. That gives the braid something to hold onto. A rope braid can look too tight if you pull it hard, so leave it soft enough to move when you turn your head.
Tiny upgrade: Wrap the elastic with one thin strand of hair and pin it underneath. It takes almost no time and makes the whole style look finished.
4. Sleek Low Bun with Face-Framing Part
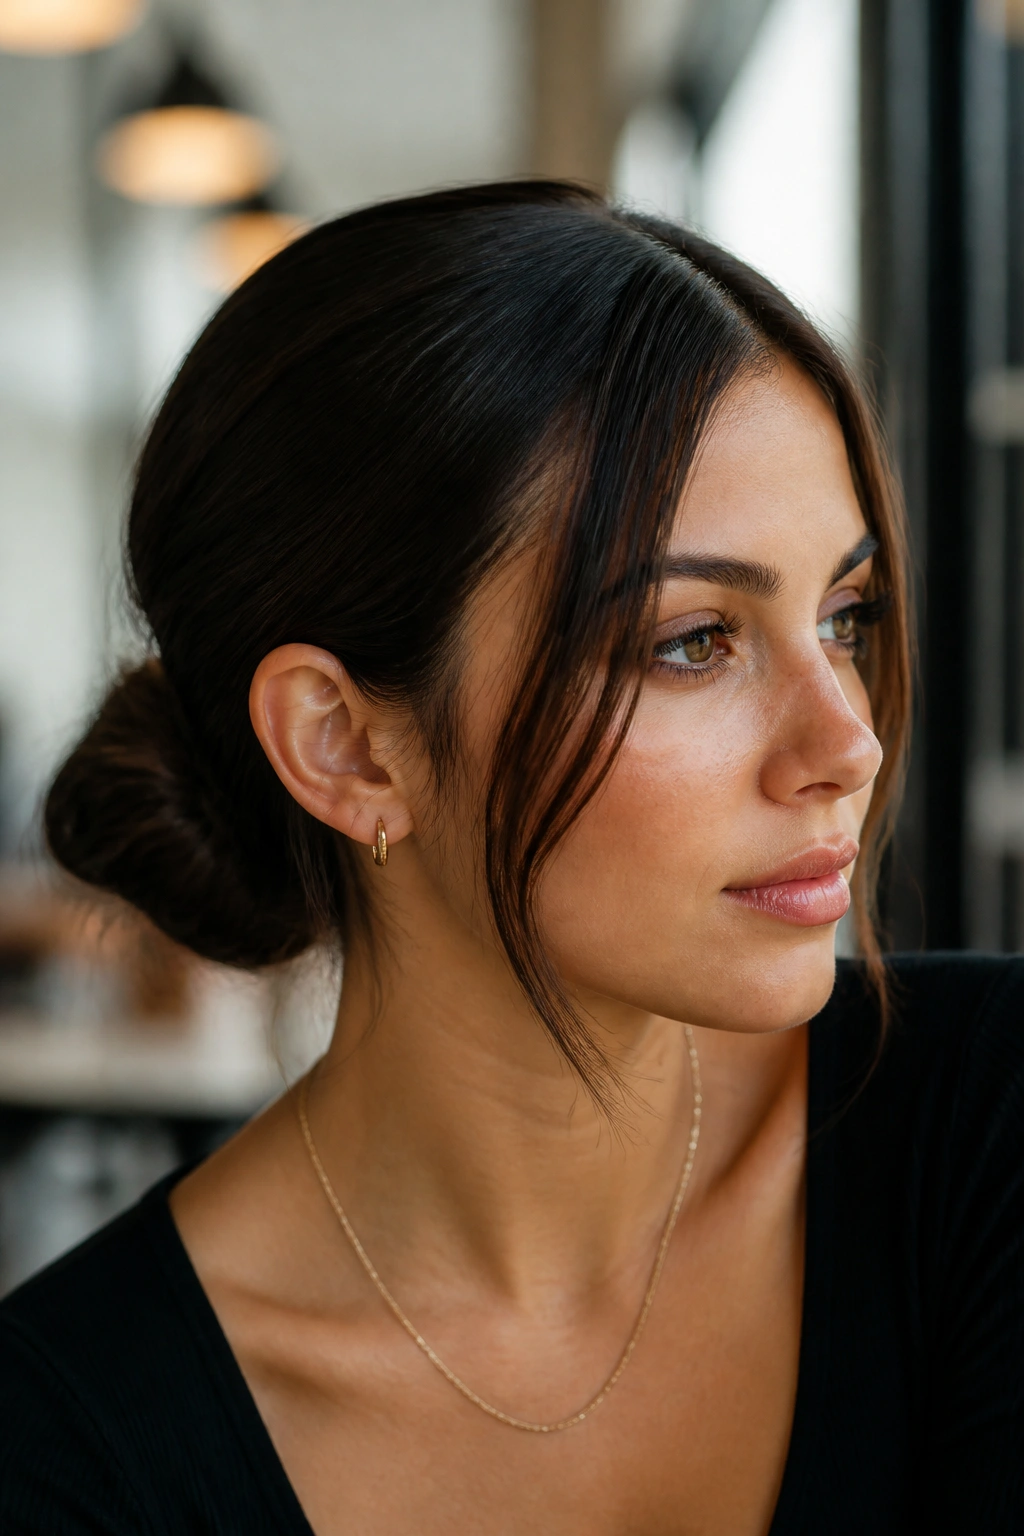
Freshly washed hair is not always the best hair for a sleek bun. In fact, a little day-two grit often makes this style behave better, because the strands stay where you place them instead of slipping loose the second you bend over.
Start with a clean middle part or a slight off-center part, then smooth the sides back with a boar-bristle brush. A pea-sized amount of smoothing cream on the temples and the surface of the hair is enough. You want control, not helmet hair. Gather the hair low, twist it into a bun, and pin it close to the base so the shape sits flat against the head.
The face-framing part matters. It softens the bun and keeps the style from looking too severe. Two narrow pieces around the cheeks are usually enough. If they are too thick, they can drag the whole look into “I gave up” territory. Too thin, and they disappear.
Use this style when you want something neat, but not stiff. It works for meetings, dinners, and any day where long hair would be a distraction.
5. Braided Crown Tucked Into a Low Knot
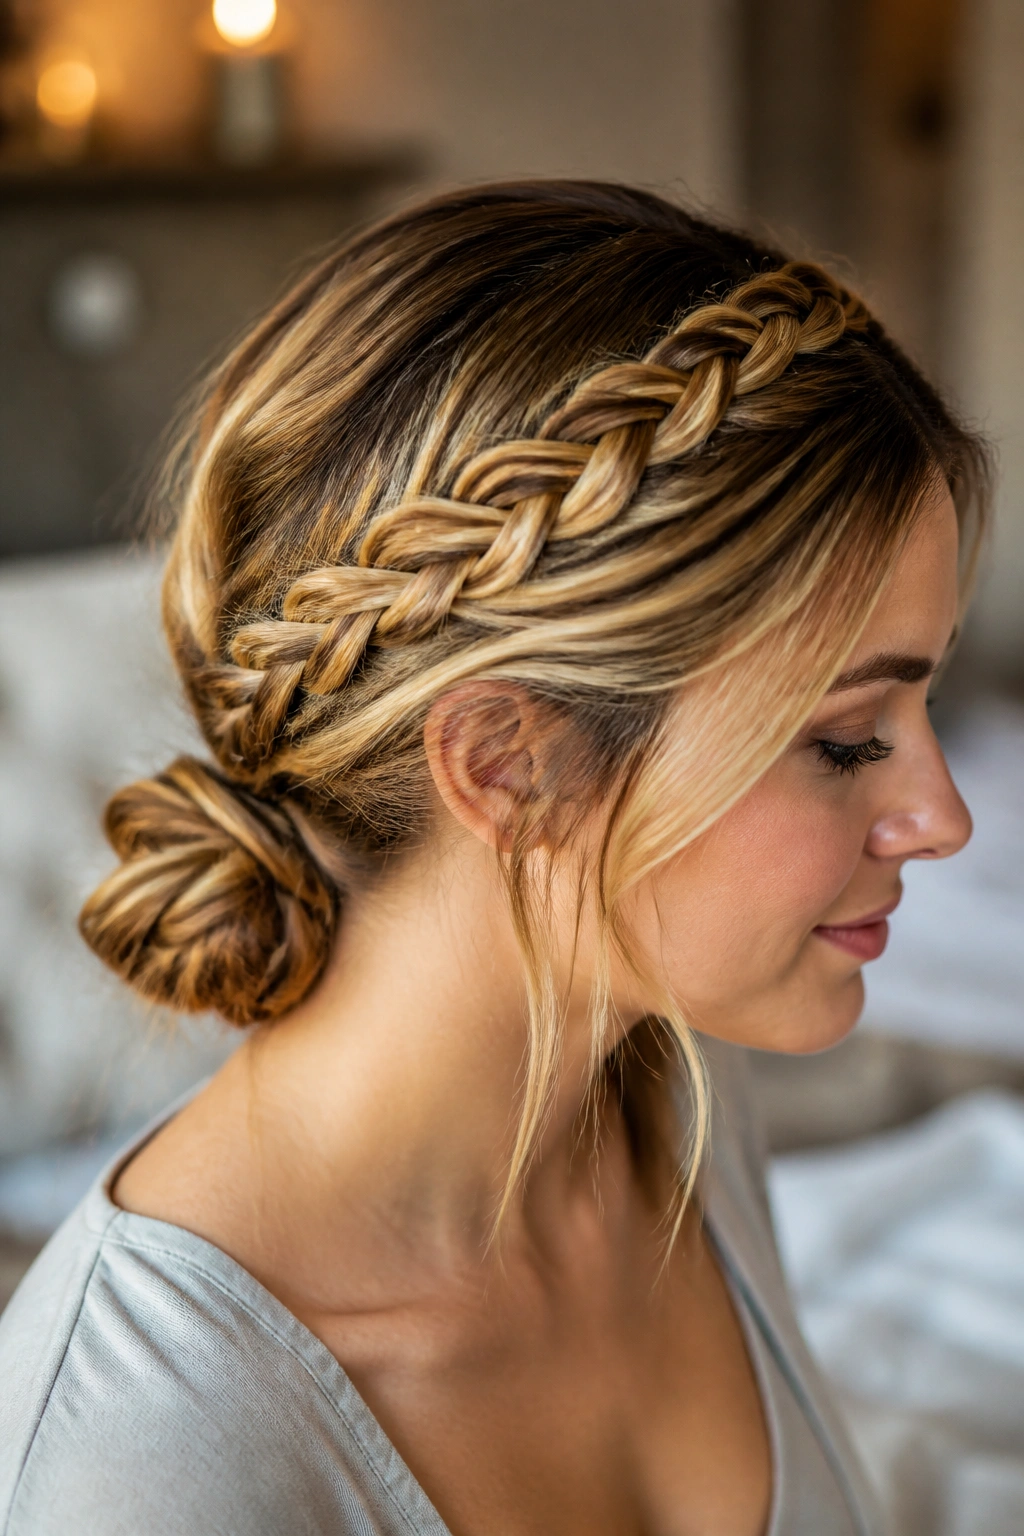
You know that moment when your hair keeps falling into your eyes, but a simple ponytail feels too plain? This is the answer. A braided crown gives the front of the style some interest, and the low knot at the back keeps all that length under control.
Take a section from each temple and braid or twist it back toward the crown. You do not need a perfect crown braid that circles the whole head. Even a partial braid gives the same useful effect. Pin both sides into the back, then gather the rest of the hair into a low knot just above the nape.
Good Things to Keep in Mind
- Use 3 to 5 bobby pins if your hair is thick.
- Cross the pins in an X shape so the knot does not slide.
- Leave a few soft pieces around the ears if you want the style to feel less strict.
- If the ends are dry, tuck them into the knot so they stay out of sight.
This style is a little more work than a ponytail, but it lasts. That matters on long hair, because long lengths can pull a simple knot downward if the base is not anchored well. The braid helps distribute the weight, which is the part people forget.
6. Headband Tuck
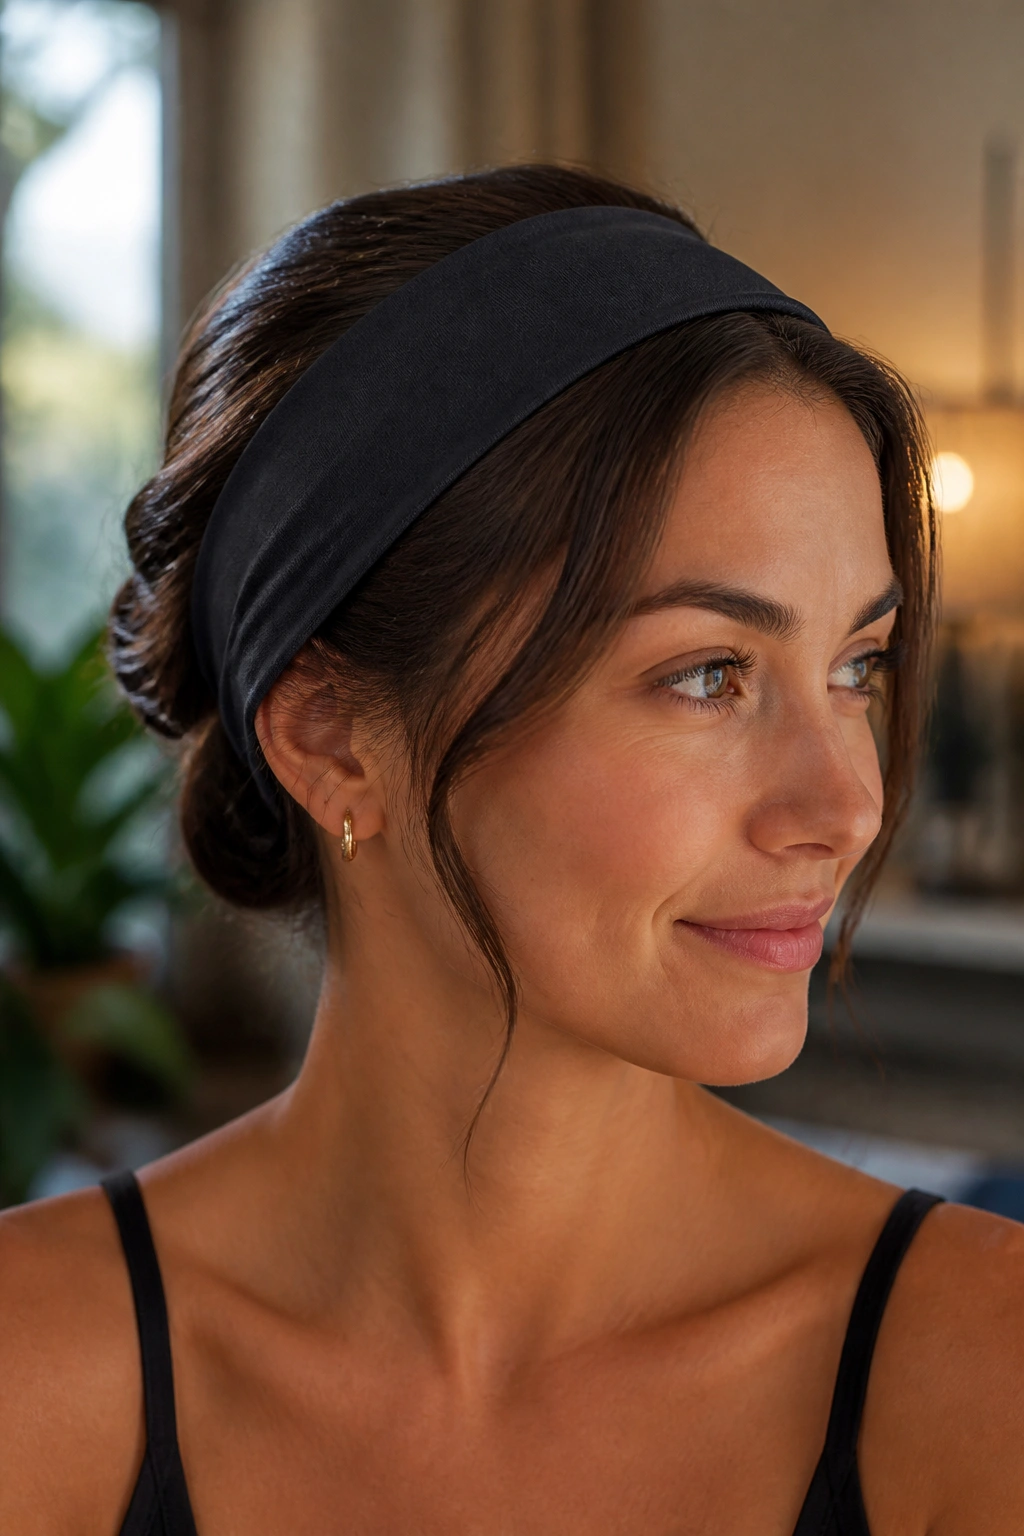
A headband tuck is the quickest way I know to make day-two hair look styled without making it look overworked. Unlike a bun, it keeps some length visible. Unlike loose hair, it gets the front pieces off your face.
Slip on a stretchy headband or a padded one that sits securely behind the ears. Then tuck sections of hair up and under the band, working from the nape toward the crown. On long hair, it helps to tuck in smaller sections rather than trying to feed the whole tail through at once. The shape ends up neater, and you do not get that bulky roll at the back.
This style shines on wavy or slightly bent hair, because the texture helps the tucked sections hold. If your hair is very straight, pinch the ends with a few drops of lightweight oil first so they do not look frayed. And if your layers are shorter in the front, leave them loose around the face. They soften the shape and stop it from feeling severe.
Some styles are for speed. This one is for speed with a little charm.
7. Side-Swept Fishtail Braid
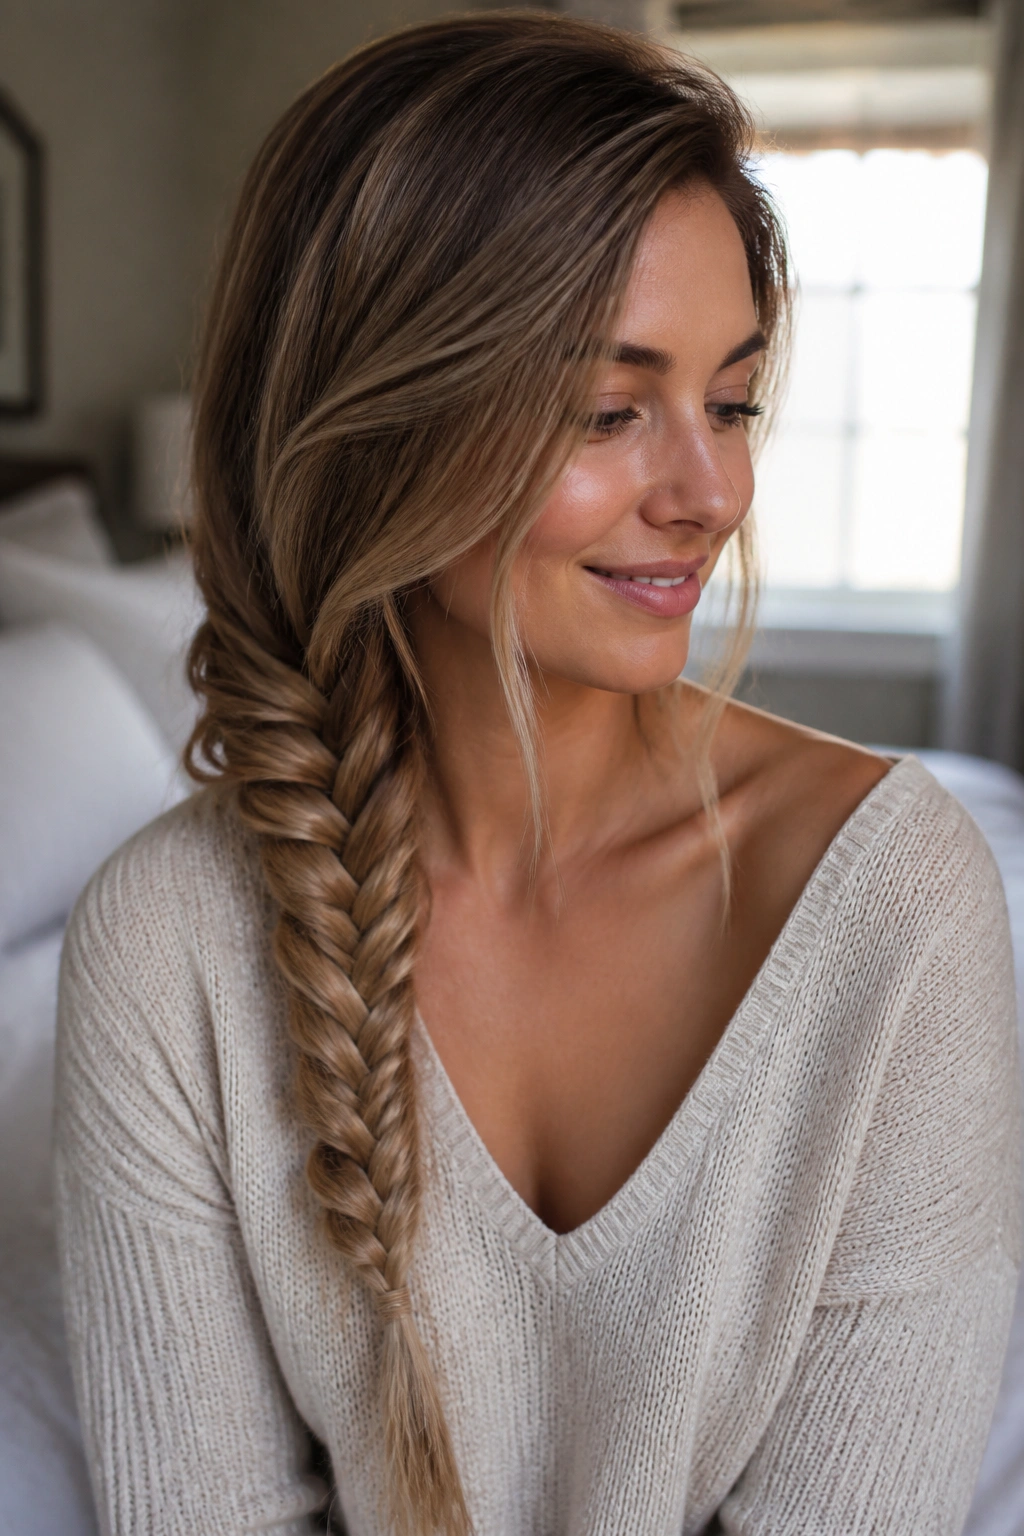
A fishtail braid on second-day hair has a nice, almost quiet grip to it. The texture makes the tiny pieces easier to catch, and the braid looks fuller than it would on hair that has been washed and blown out to a slip.
Sweep all the hair over one shoulder, then divide it into two sections. Pull a small piece from the outside of the left section and cross it into the right, then do the same from the right side back into the left. Keep the pieces small. That is what gives a fishtail its woven look. Large chunks turn it into something else entirely, and not in a good way.
How to Keep It Soft, Not Stiff
Pull the braid apart gently after you secure it with a small elastic. Start at the top and work down a little at a time, tugging only the outer edges. A little widening makes the braid feel fuller and more casual.
If your hair is very long, stop the braid before the very ends and let the last few inches hang straight. That little contrast looks nice, especially if the ends have a soft bend from sleeping. A fishtail is one of those styles that rewards a patient hand. Rush it, and it shows.
8. Double Mini Buns
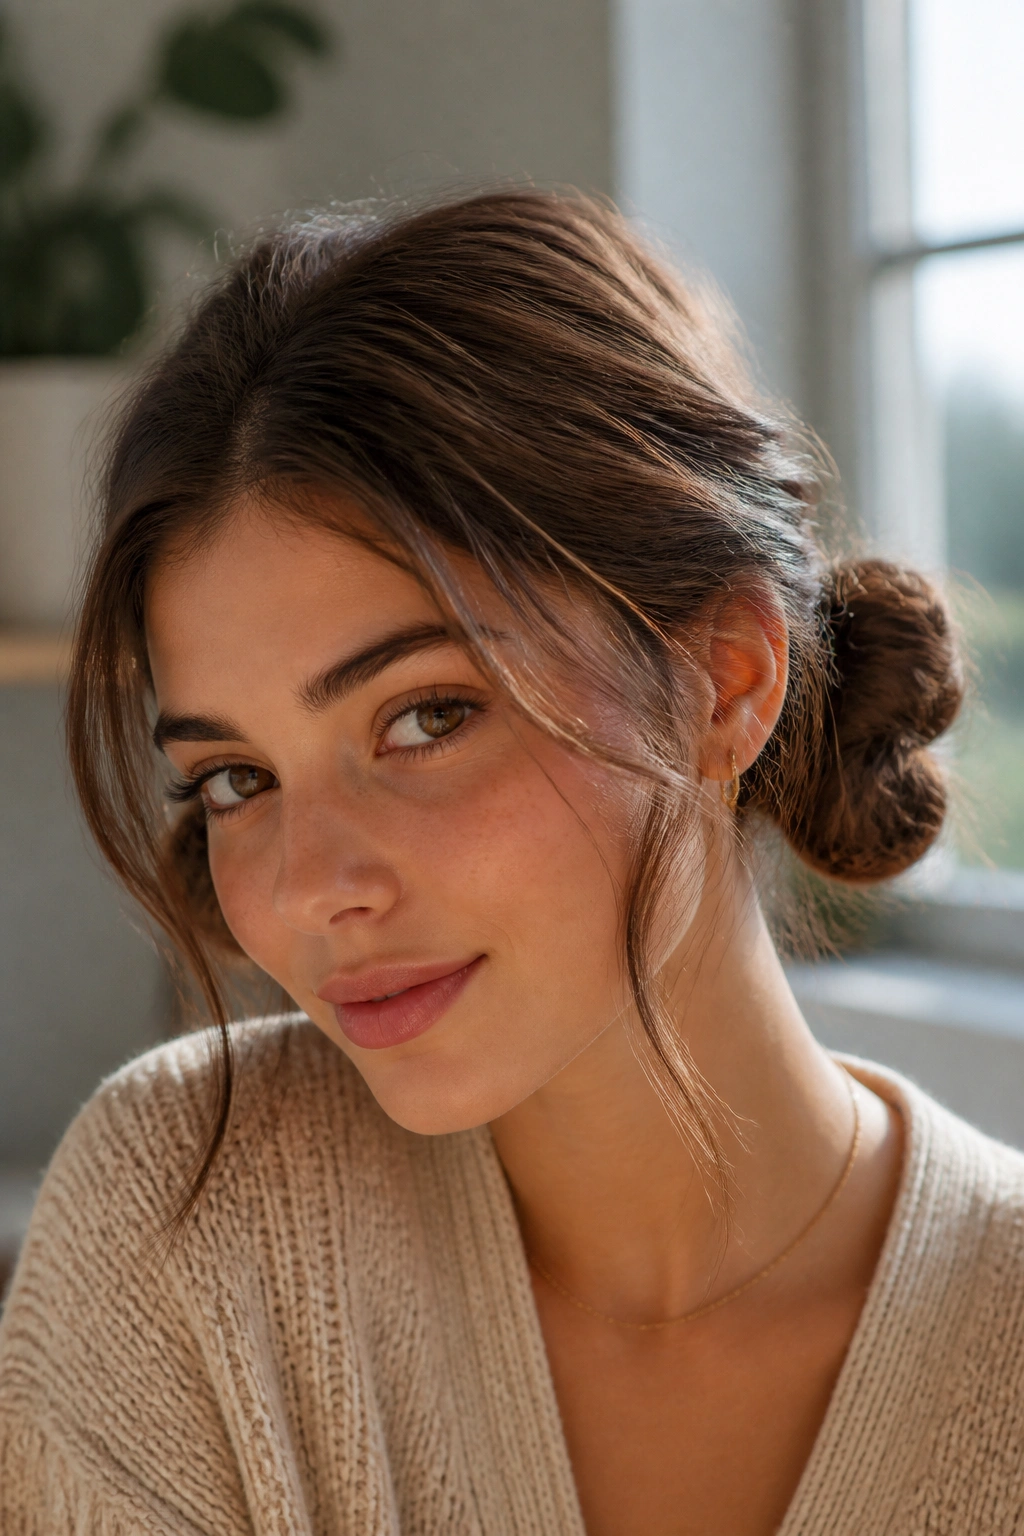
Need your hair off your neck but do not want one heavy bun sitting in the middle of your head? Double mini buns solve that. They spread the weight out, which matters more than people think when the hair is long and thick.
Part the hair down the middle, then make two low pigtails or two high pigtails, depending on the mood. Twist each tail into a small bun and pin or tie it close to the base. If the buns look uneven, that can actually work in your favor. Too symmetrical and they start to feel costume-like. A little looseness keeps them wearable.
What Makes Them Hold
- Start with slightly gritty hair, not silky-fresh hair.
- Use two small elastics instead of one large one if the hair is dense.
- Pin the bun base before you tuck the ends.
- Pull a few strands loose around the temples if the style needs softening.
This style is useful when you want something playful but still practical. It keeps long hair from sticking to your back, and it handles uneven texture better than a single bun does. On very heavy hair, place the buns a little lower so they do not pull on the scalp.
9. Scarf-Wrapped Low Ponytail
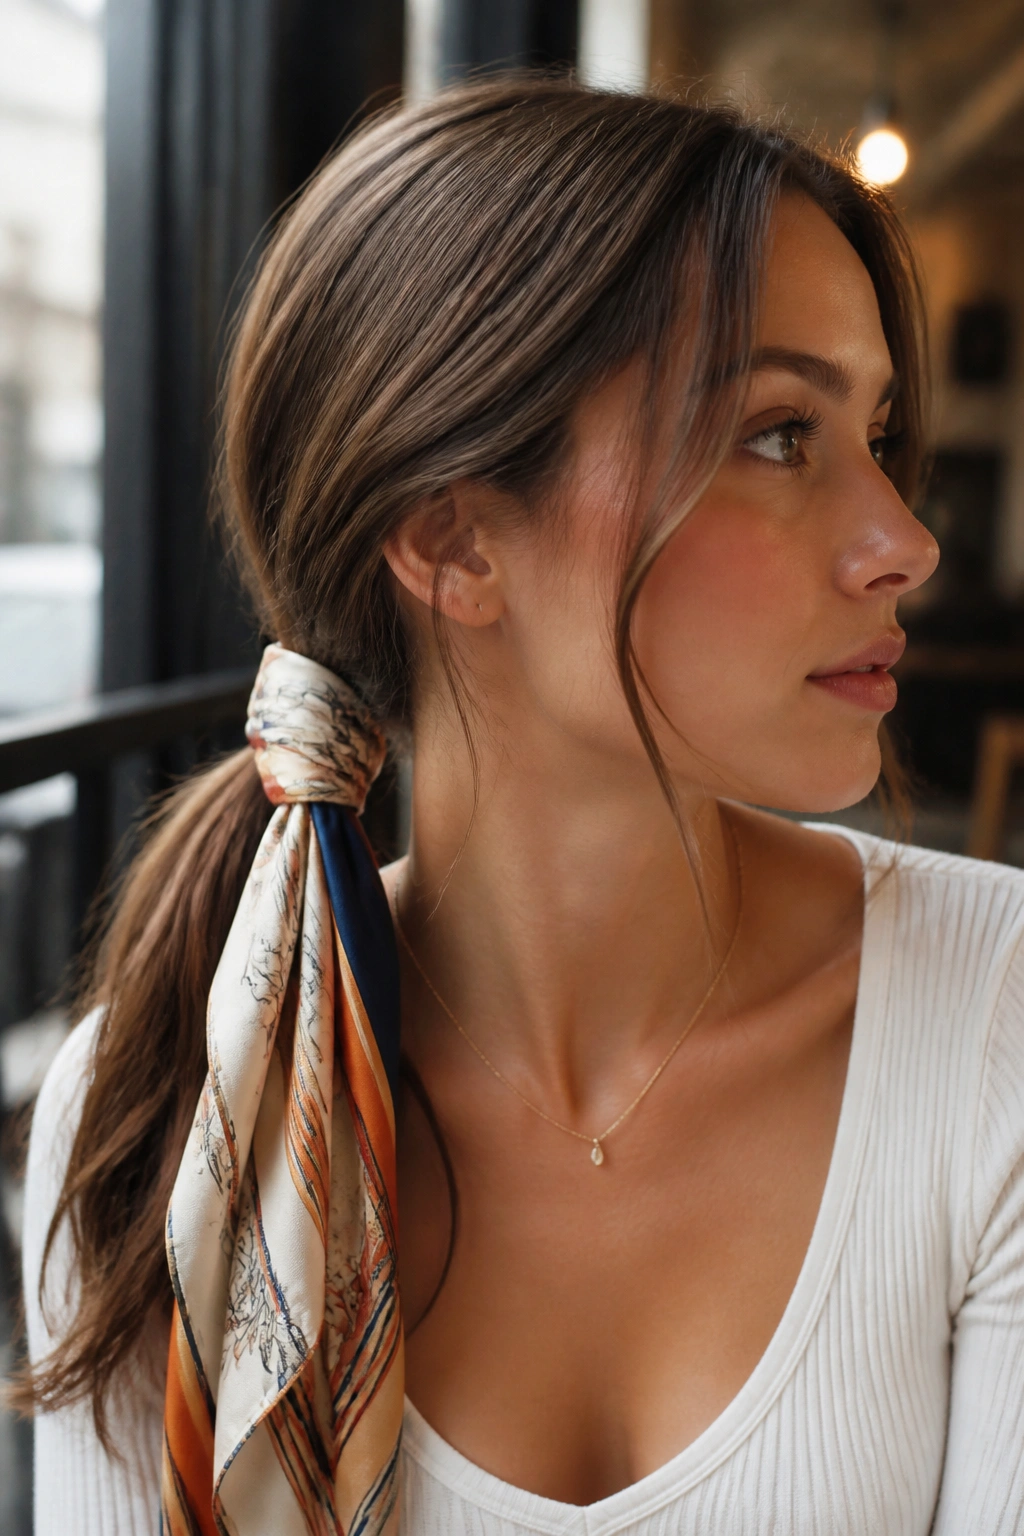
Can a scarf make a ponytail look intentional? Absolutely. A scarf-wrapped low ponytail is one of the easiest ways to disguise day-two roots while still keeping the length visible.
Start with a low ponytail at the nape. Use a thin elastic and secure it firmly. Then tie a silk or satin scarf around the base, either in a knot to one side or with the ends trailing down. The scarf hides the elastic and gives the whole style some color and movement without asking for a lot of effort.
How to Tie It Without Bulk
Keep the scarf narrow if your hair is very thick. A huge scarf can overwhelm the ponytail and make the base feel bulky. If the ponytail itself is full, let the scarf sit flat against the head and save the knot for the side.
This style works especially well when the roots are a little oily but the lengths still look decent. The scarf distracts the eye from the crown and draws attention to the ponytail shape instead. It also gives you a good excuse to use the scarf you keep folding and never actually wear.
A smart ponytail beats a fussy one.
10. Crisscross Bobby Pin Half-Up
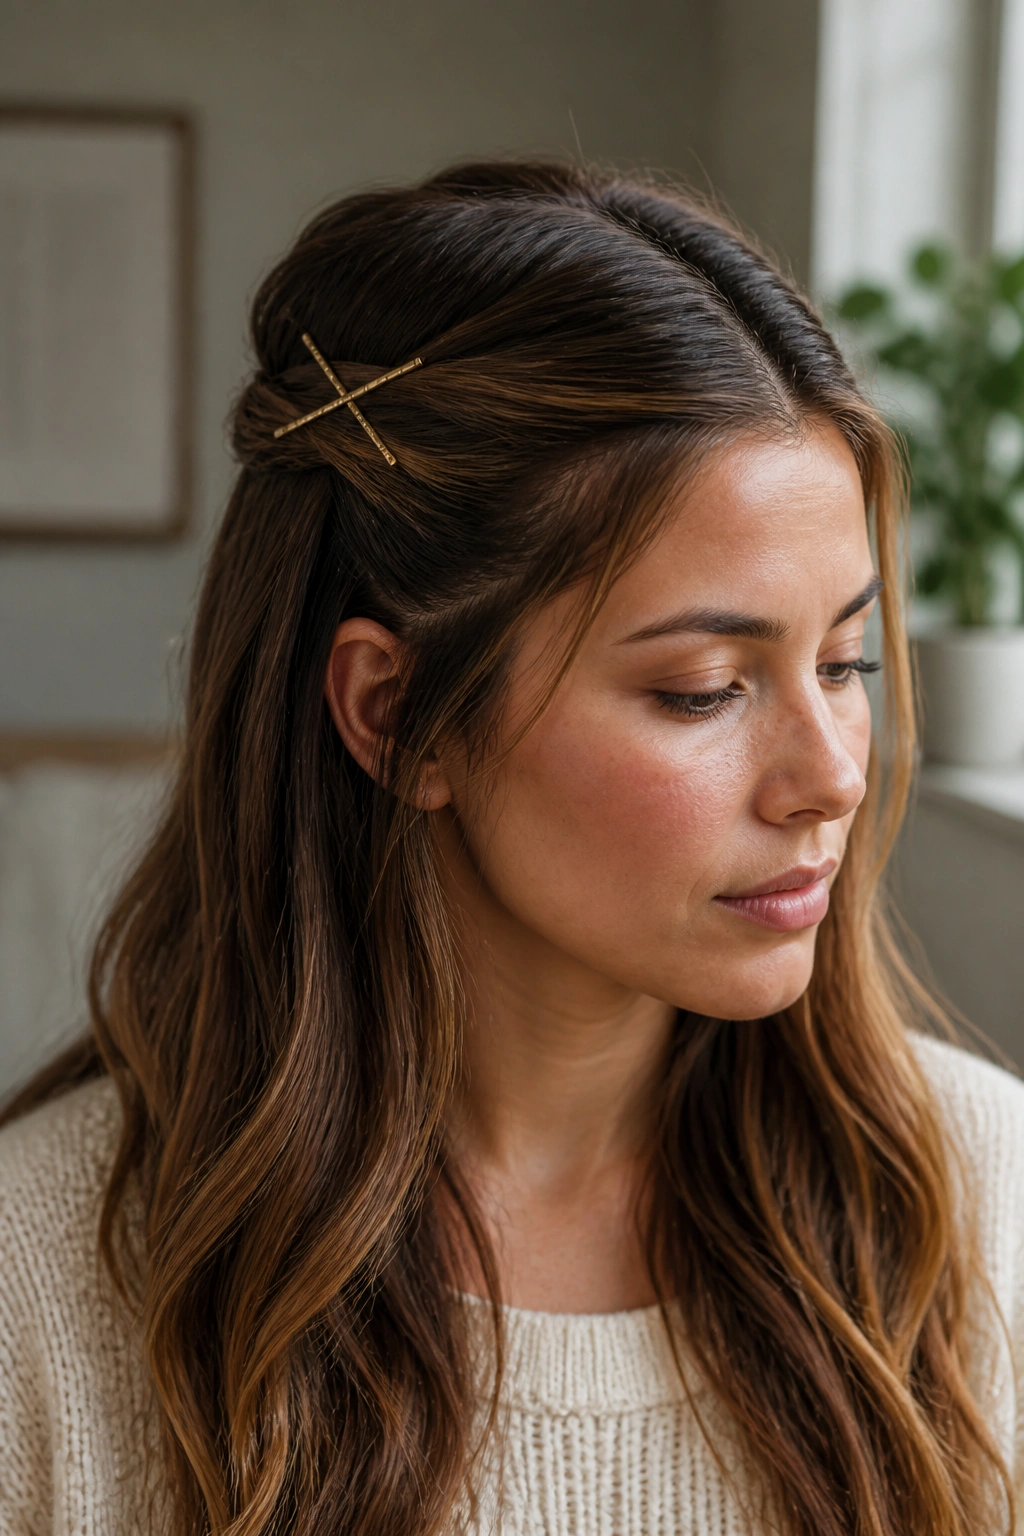
This is one of the fastest ways to make day-two hair look styled. It takes less time than a braid, but it still gives you that pulled-back feeling in the front.
Take two thin sections from each side of the face, bring them back, and secure them with a bobby pin on one side. Then cross a second pin over the first so the two form an X. Repeat on the other side if you want a more balanced shape. The crisscross detail is small, but it reads clearly, especially on long hair where the top section can otherwise feel flat.
A Few Details That Matter
- Use matte pins if your hair is slippery.
- Match the pin color to your hair when you can.
- Place the pins slightly above the ears so the crown still has lift.
- Tease the section under the pins a little if the front is too flat.
This style is especially good when the ends are still fine but the top needs help. It keeps hair out of your face, shows off the length, and does not ask you to redo your whole head. Sometimes that is exactly the point.
11. Loose Dutch Braid
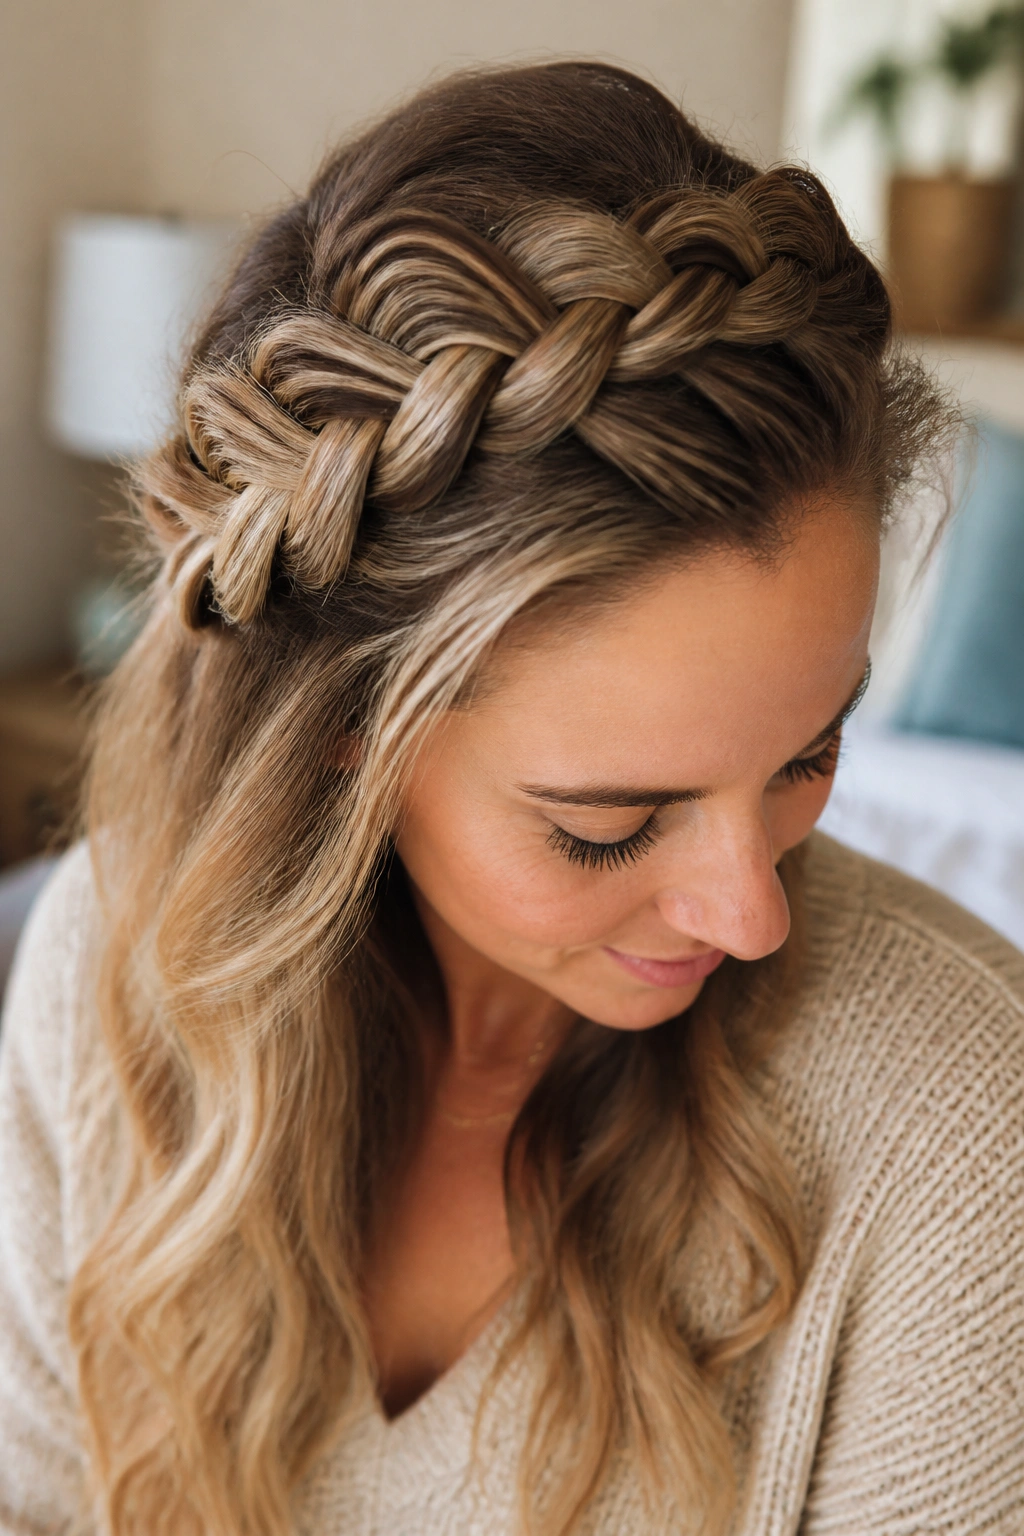
A loose Dutch braid is what I reach for when hair needs to stay put for hours. The braid sits on top of the hair instead of sinking into it, which gives it a stronger shape and makes long lengths feel easier to manage.
Start at the hairline and braid under, not over, so the braid rises from the scalp. Keep the sections even, but do not choke them tight. A braid that is pulled too hard tends to look flat and can tug at the scalp by midafternoon. Once you reach the nape, keep braiding all the way down or stop there and tie the rest into a small tail.
What to Watch For
A little dry shampoo at the roots makes the braid easier to handle. If the hair is too clean, the sections slip and the braid gets messy in the wrong way. If the hair is very layered, hold the shorter pieces in with a bit of styling cream before you begin.
Pancake the braid at the end by pulling the outer loops gently outward. That gives long hair a fuller shape and keeps the braid from looking skinny. It is a simple move, but it changes the whole feel of the style.
12. Twisted Half-Up with Volume at the Crown
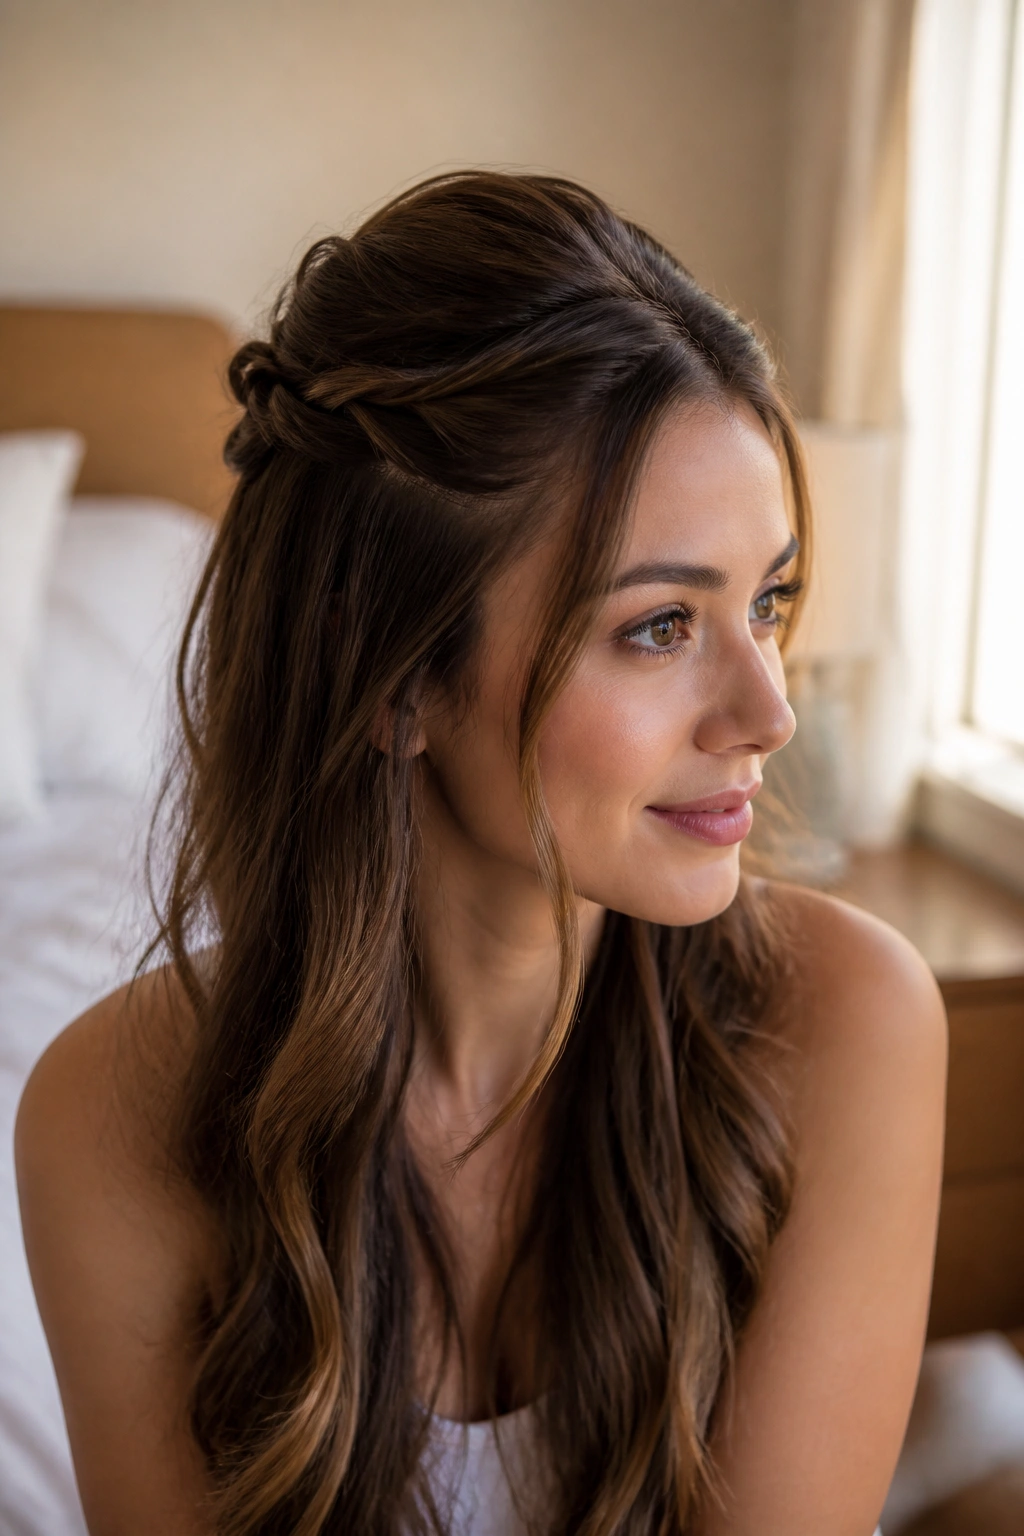
If a braid feels like too much work, two twists give you nearly the same lifted shape with less fuss. That is the honest appeal of this style. It is quick, and it flatters long hair that has a little wave or bend in it.
Take a section from each temple, twist each one back toward the center, and pin them together at the crown. Before you pin, lift the hair just a little at the roots so there is some height up top. A flat crown can make long hair look heavy; a little lift keeps the style airy.
This one works especially well when the front layers are grown out and need direction. The twists collect them instead of letting them fall into your face every five minutes. If the ends of the twists want to stick out, let them. Tucking every hair into place can make the style feel too tight.
The shape is soft, but it still gives you a finished look. That mix is what makes it so useful.
13. Low Knot with a Wrapped Strand
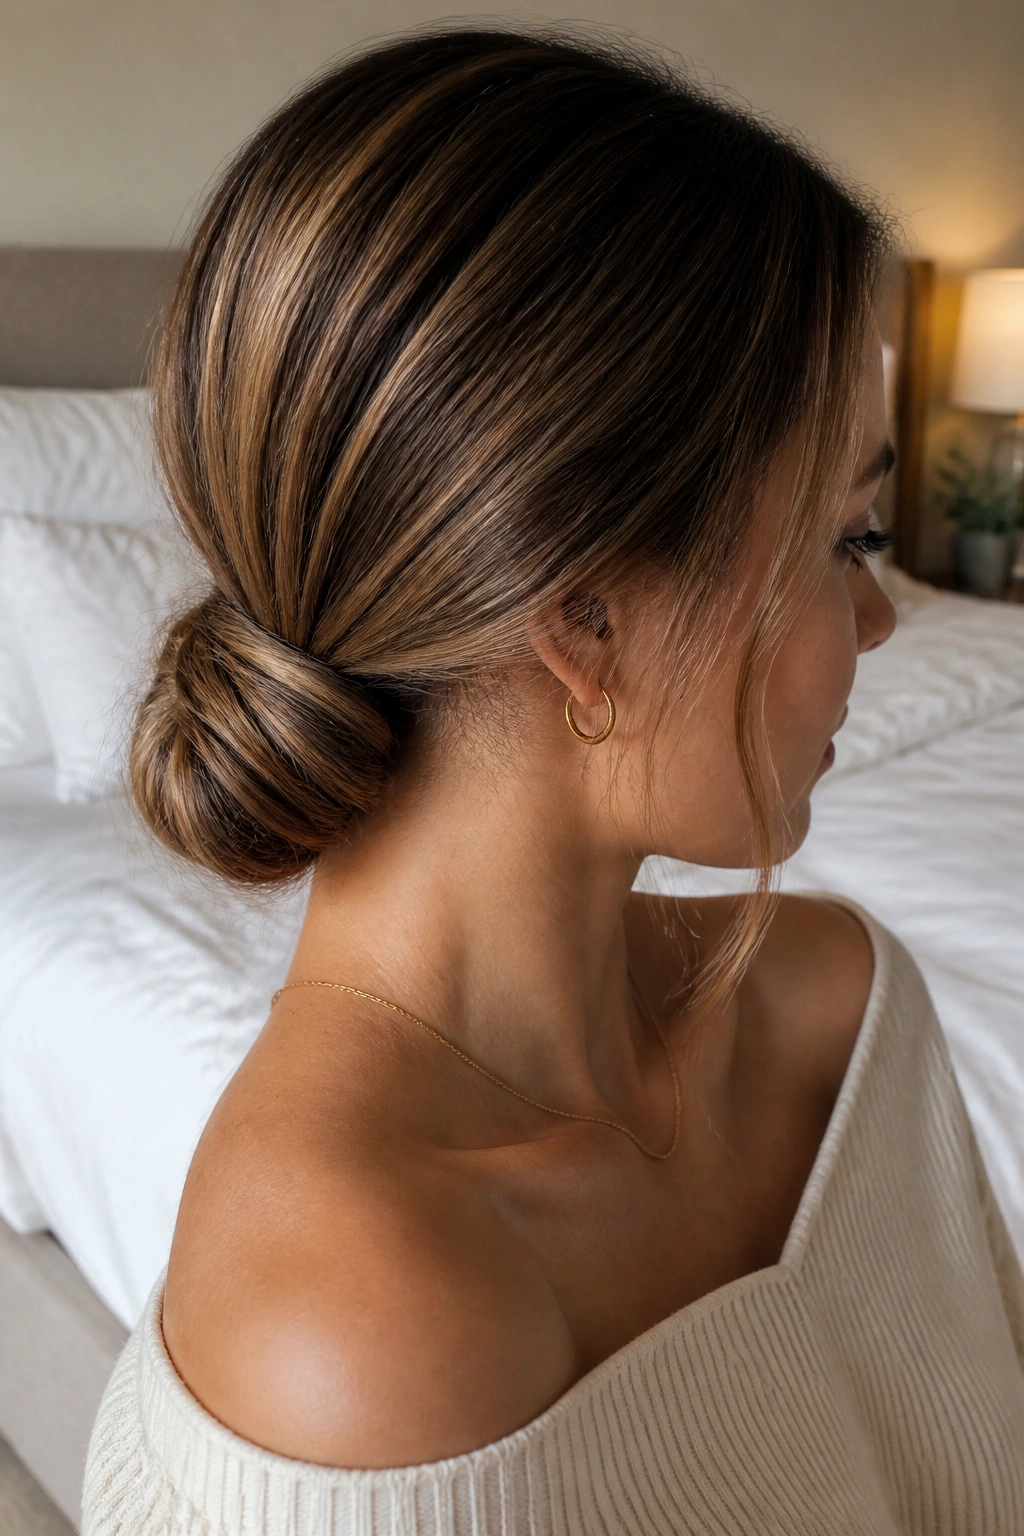
The low knot is what I reach for when I want long hair off my shoulders and I do not want to think about it again for the rest of the day. It is cleaner than a messy bun, but it does not need to be perfect to look good.
Pull the hair into a low ponytail, twist the tail, and wrap it around itself into a knot. Fasten it with a thin elastic or two bobby pins, then take a small strand from underneath and wrap it around the base to hide the tie. That wrapped strand is the part that makes the style look finished.
If your hair is thick, split the ponytail into two sections and knot each half separately before pinning them together. It keeps the bun from bulking up too far from the head. If the hair is fine, backcomb the ponytail lightly at the base before you twist so the knot has more body.
The wrapped strand is not a big trick. It’s a small one. But small things matter when the hair is long enough to swallow a style whole.
14. Sleek Center-Part Ponytail
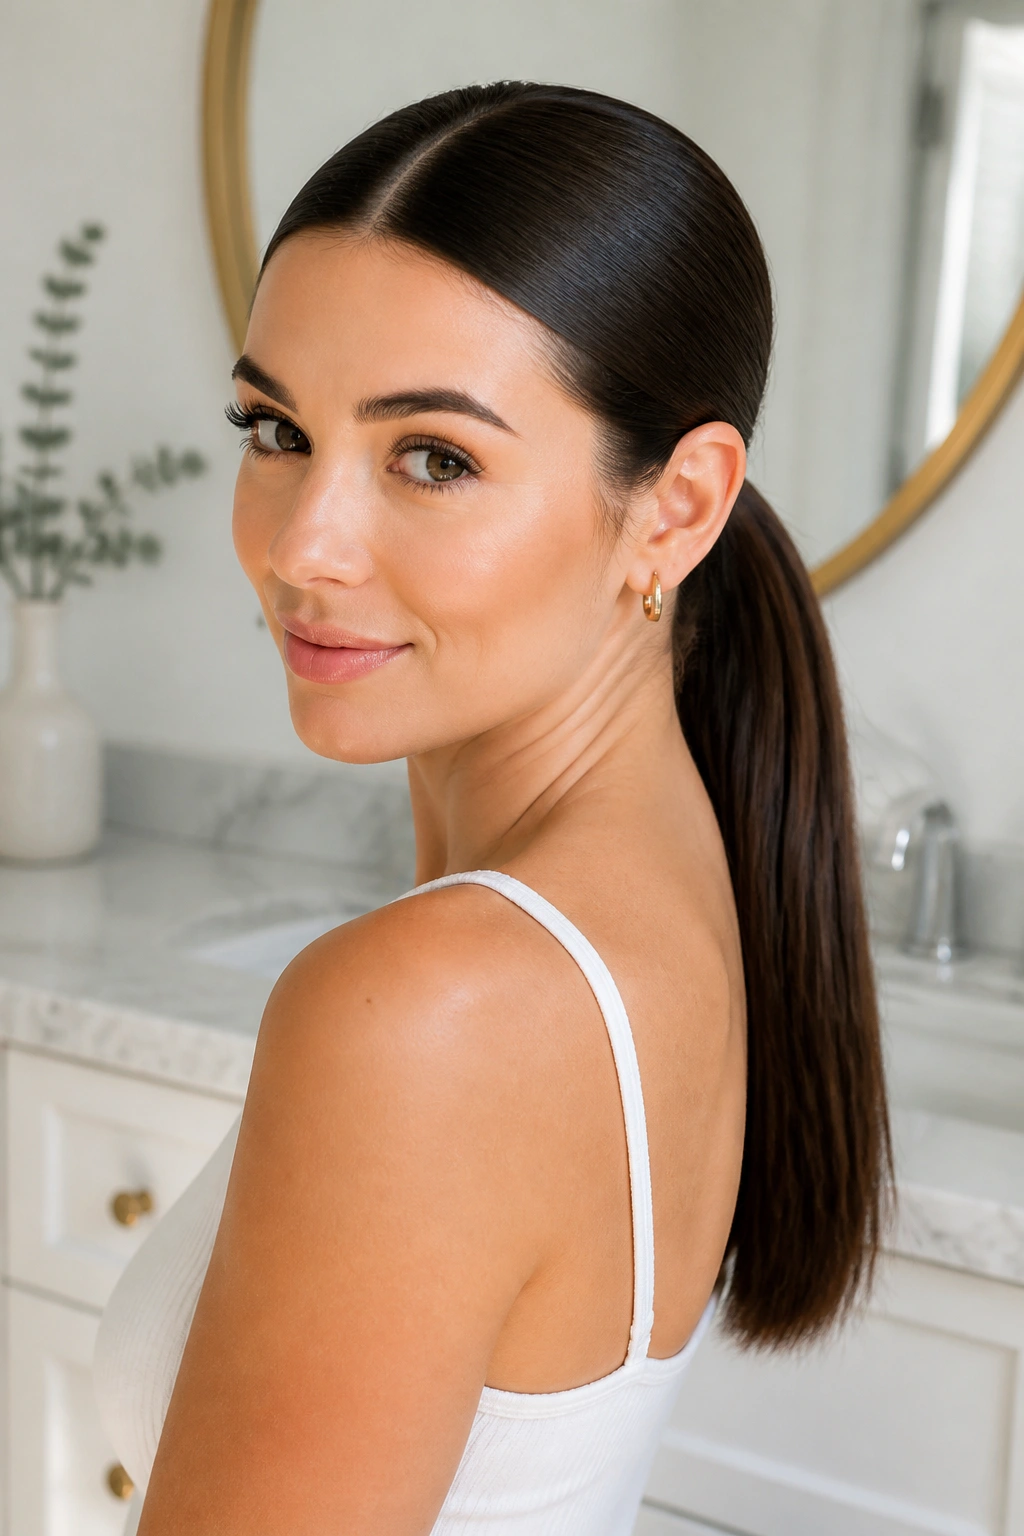
A middle part changes the whole mood of a ponytail. It makes the style feel cleaner, sharper, and a little more deliberate, which is useful when your hair has been worn overnight and needs a reset.
Brush a center part straight back from the forehead to the crown, then smooth the sides with a light serum or cream. Keep the product off the roots if they are already oily. Gather the hair low or at mid-height, depending on how formal you want it to feel. A low center-part ponytail looks more polished. A mid-height one feels a bit more open.
One sentence matters here: don’t flood the ends with product. Long hair can go stringy fast, and once that happens the whole ponytail looks tired. A small amount through the mid-lengths is enough to tame frizz and keep the tail from puffing out.
This is a style for days when you want simple lines. No fuss. No extra shape. Just clean and direct.
15. Soft Top Twist with Long Ends
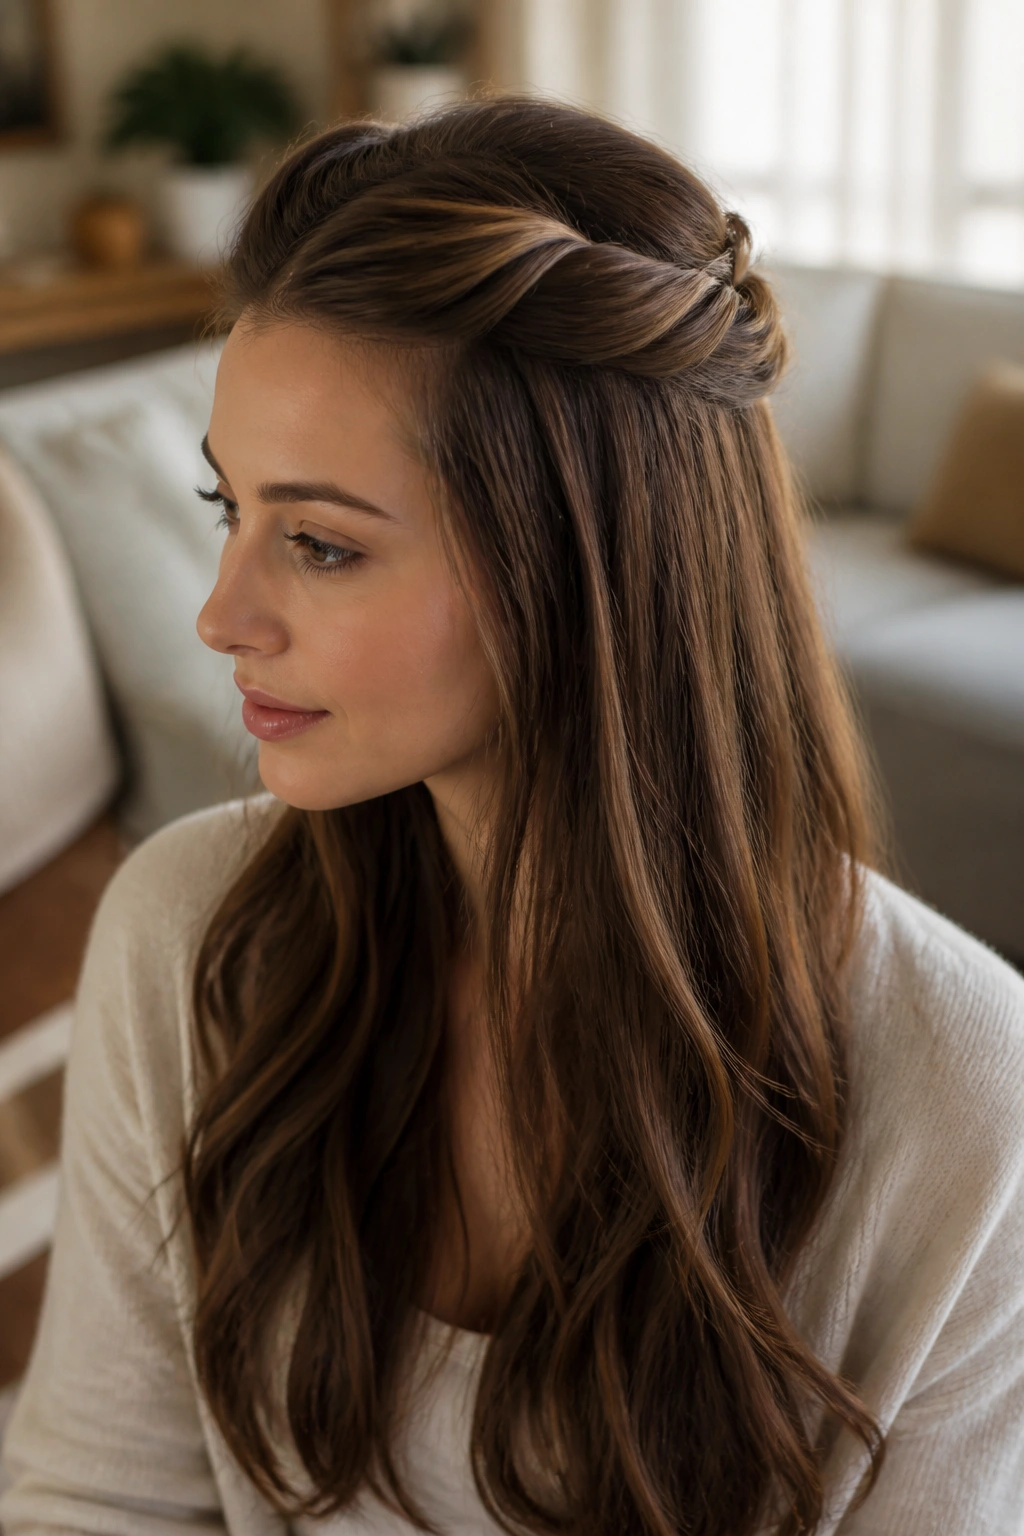
Sometimes the best move is to leave most of the hair alone. That sounds too easy, but on long hair it makes sense. If the ends still look decent and the roots need help, a soft top twist gives you control without hiding the length.
Take the front section from temple to temple, twist it back once or twice, and clip it at the crown with a claw clip or pin it with two crossed bobby pins. Leave the rest of the hair down. If the lengths are wavy, let them be wavy. If they are straight, a quick bend at the ends is enough. The point is to keep the front off your face while letting the long lengths do their own thing.
This style works especially well when your hair is on day two but not ready for a full updo. It keeps the crown from looking flat and gives you a little lift right where people notice first. And because the rest stays down, it still feels like long hair, not a compromise.
That is the real trick with second-day styling. Use the texture. Don’t apologize for it.
