



Thin hair at medium length can look gorgeous, but it can also turn flat fast if the cut is working against it. A clean collarbone lob behaves very differently from a heavily layered shoulder cut, and that difference shows up the second you leave the chair. One keeps a solid outline. The other can leave the ends looking wispy and tired.
The best medium length hairstyles for thin hair do two jobs at once. They make the hair look denser, and they keep the shape from collapsing by lunchtime. That usually means smarter lines, lighter layering, a little root lift, and a hard pass on anything that shreds the ends into nothing. Too many layers can sound flattering in theory and look patchy in real life.
Medium length is a useful sweet spot. You get enough weight for movement, but not so much length that the strands hang like wet spaghetti. The trick is to choose a shape that gives the hair a stronger outline, then style it in a way that makes the top look fuller without making the whole head feel overworked. The styles below do exactly that.
1. The Blunt Collarbone Lob

If I had to pick one cut first, it would be the blunt collarbone lob. It’s the safest bet for thin hair, and I mean that in the best way. A blunt edge gives the eye one clean line to follow, which makes the whole head look thicker than it is.
Why It Works
A collarbone length keeps the hair long enough to move, but short enough that it doesn’t drag itself down. Ask for the ends to stay blunt and the perimeter to sit right around the collarbone or just below it. That little bit of weight at the bottom matters.
- Keep the ends blunt, not wispy.
- Ask for minimal internal layering.
- Blow-dry with a round brush for a slight bend.
- Finish with a light root spray, not heavy oil.
Skip razor-thin ends. They sound airy and end up looking see-through.
2. The Soft Layered Lob
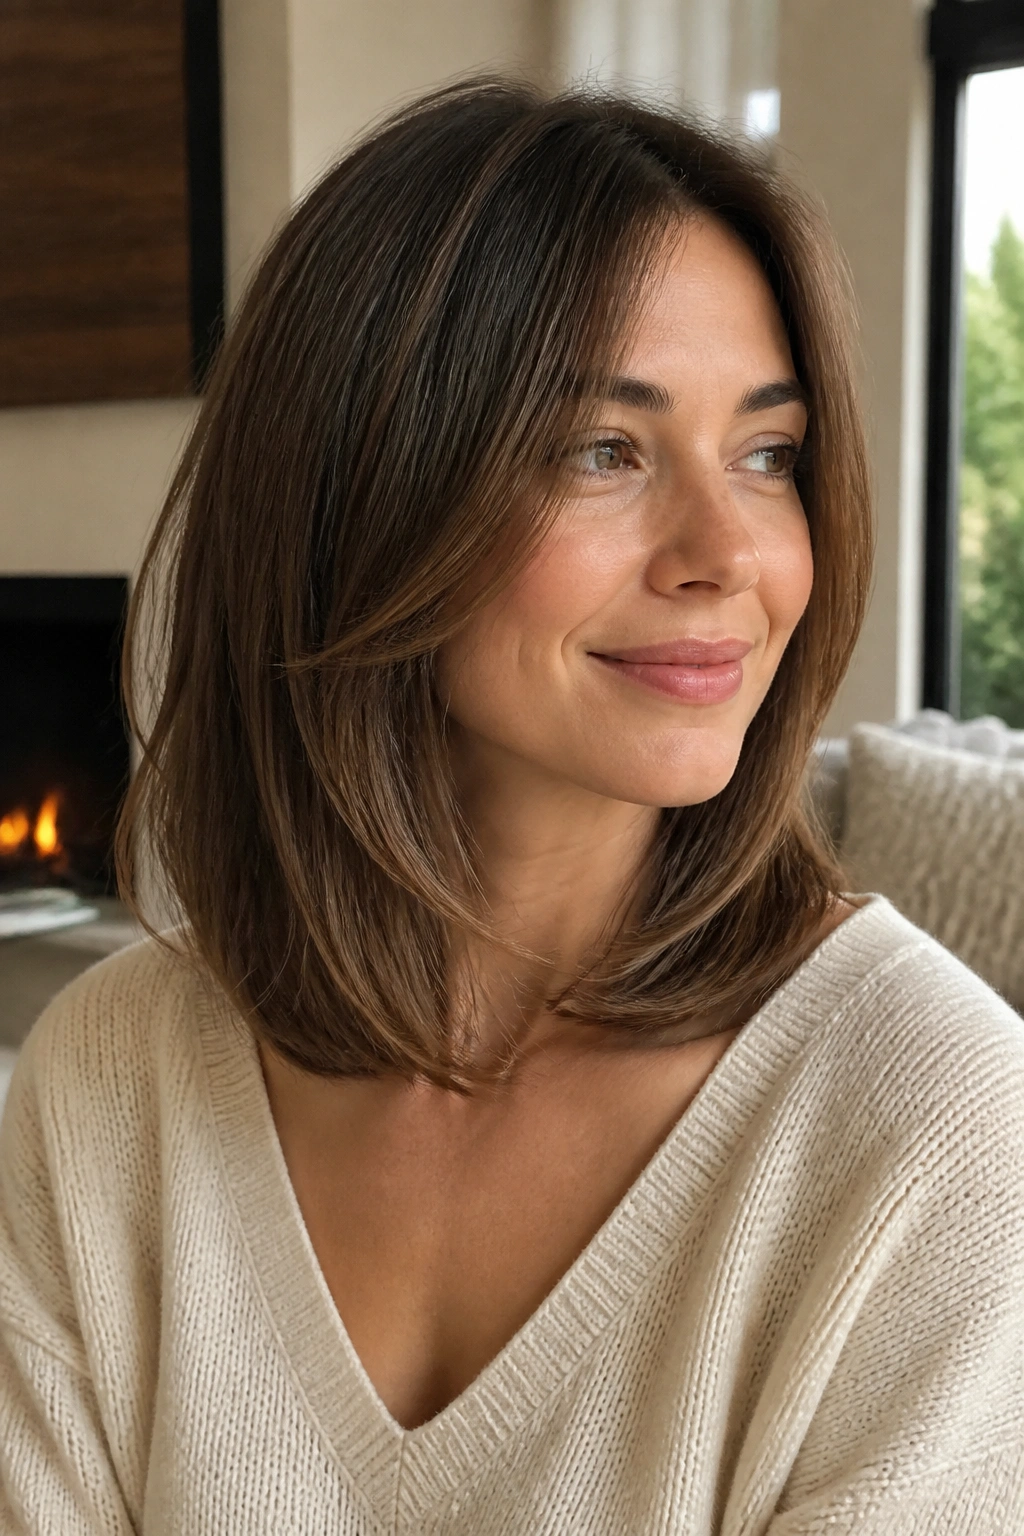
A little layering can help thin hair, but only if the layers are hidden. That’s the part people miss. Soft, long internal layers keep the shape from feeling heavy while still protecting the fullness at the ends.
I like this cut on hair that has a tiny wave or a bit of natural bend. It moves without looking shaggy. The key is where the layers begin. If they start too high, the bottom half can lose its shape fast. If they start lower, the cut feels lifted but still solid.
Ask for the longest layers to begin below the chin, then keep the outer line full. That’s the whole game. It looks relaxed, not chopped up.
3. Curtain Bangs With Shoulder-Length Ends
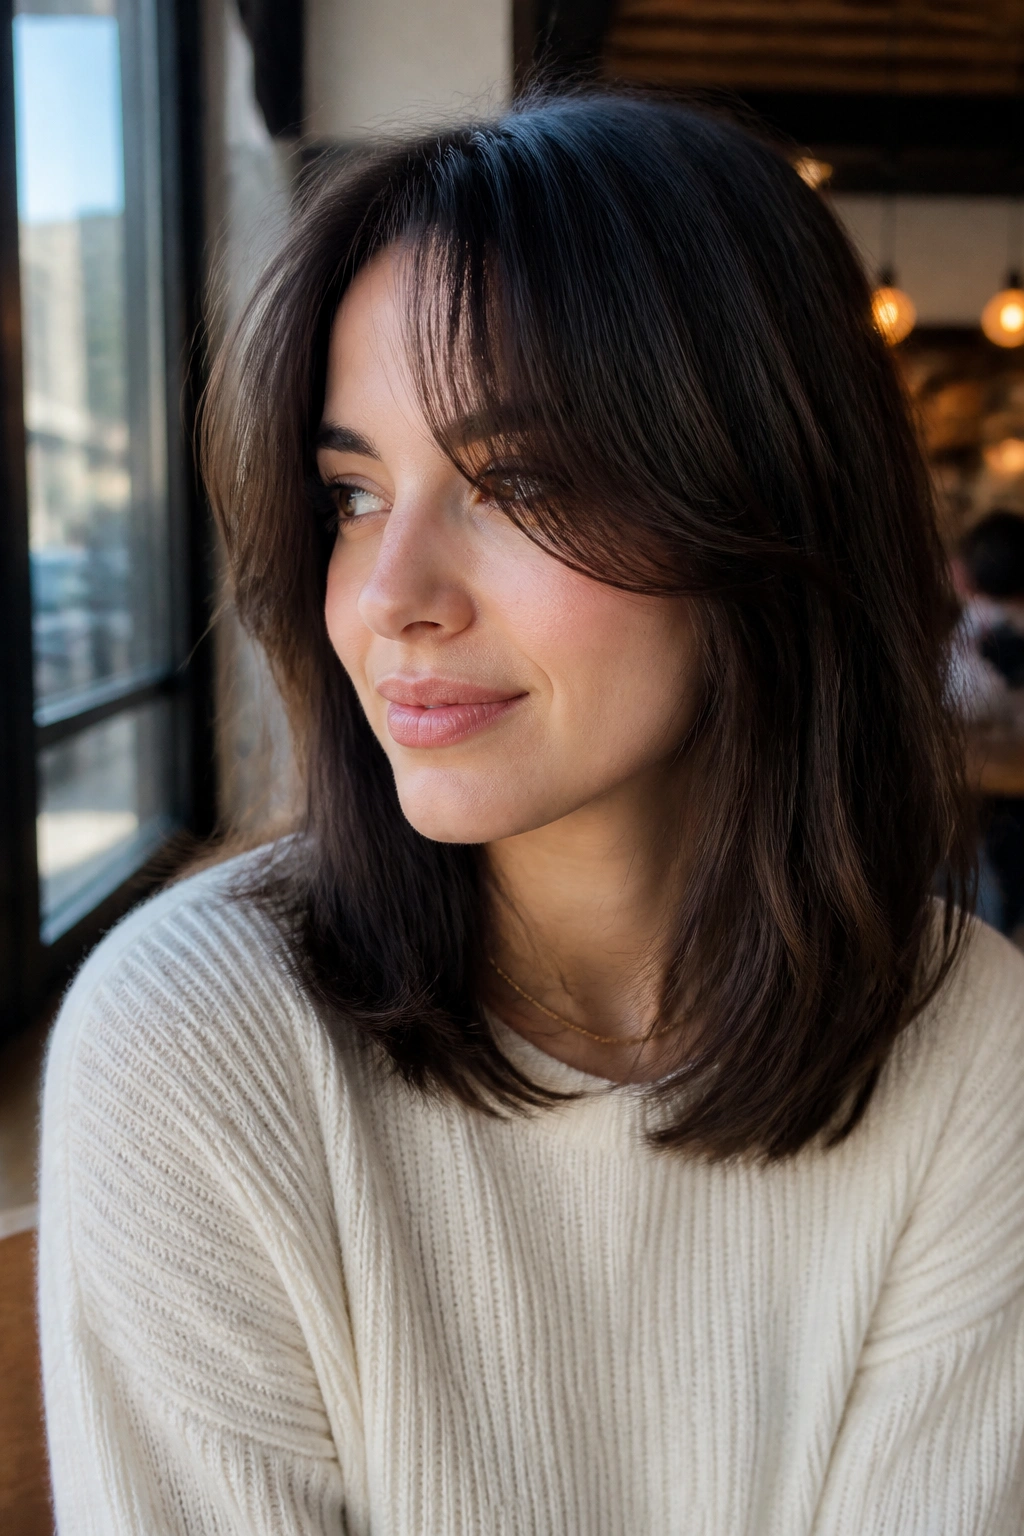
Why do curtain bangs keep showing up for thin hair? Because they put softness around the face without stealing too much density from the sides. They also make the top section look more styled, which helps when your roots tend to go flat.
How to Ask for It
Tell your stylist you want bangs that part in the middle and sweep out around the cheekbones. The shortest point should not be too short unless you enjoy styling them every morning. I usually prefer them to hit around the cheekbone or upper lip, then blend into shoulder-length ends.
A few things matter here:
- Keep the fringe airy, not blunt.
- Leave enough length to tuck or pin.
- Style with a medium round brush or a large barrel brush.
- Use a tiny amount of mousse at the roots.
The face-framing shape is doing a lot of work here. Quietly. That’s why it works.
4. The Deep Side Part With One Tucked Side

Flat roots need a nudge, not a lecture. A deep side part gives thin hair instant lift at the crown because the hair has to travel farther before it falls. Tucking one side behind the ear makes the opposite side look fuller by comparison. Simple trick. Big payoff.
What Makes It Look Thicker
The asymmetry creates movement without needing extra length. I like this style best on second-day hair, when there’s a little grit at the roots. A quick hit of dry shampoo at the part line helps the lift stay put.
- Part your hair where the arch of your eyebrow begins.
- Rough-dry the roots in the opposite direction first.
- Tuck one side behind the ear and let the other side fall forward.
- Add a soft wave through the lengths if you want extra body.
A style like this works because it stops the eye from reading the hair as one flat sheet. That’s the whole point.
5. Loose Waves From a 1.25-Inch Iron

Loose waves are the classic move for thin hair, and I still think they earn their place. The trick is not making them too neat. Tight curls shrink the length and can make fine hair look smaller than it is. Loose bends create width without screaming for attention.
A 1.25-inch iron is the sweet spot for most medium lengths. Wrap sections away from the face, leave the last inch out, and let the waves cool before you touch them. That cooling part matters. If you rake through warm curls, they fall fast and turn fuzzy.
I also like to alternate the direction of a few pieces near the back. Not all of them. Just enough to keep the wave pattern from looking stamped on. Then brush it out once, lightly, with fingers or a wide-tooth comb.
The result should feel soft and a little undone, not beach-cliché and not stiff.
6. The Shoulder-Length Shag

A shag can be brilliant on thin hair, but only if it’s cut with restraint. Too much texture and the ends vanish. The right shag keeps the volume around the crown and cheekbones, which is where thin hair usually needs help most.
Unlike a blunt lob, this cut is built for movement. The shape is looser, the layers are more visible, and the whole thing has a touch of rock-and-roll without needing much styling. It’s especially good if your hair already has a wave that shows up when you air-dry.
The downside? It asks for a little more upkeep. If you hate styling your hair at all, this one may annoy you. But if you like a rough-dry, a bit of mousse, and some finger-tousling, it can look excellent.
7. Face-Framing Layers Around the Cheekbones

Face-framing layers are one of my favorite low-risk moves for medium hair. They don’t remove much density from the bottom, but they break up the outline around the face so the style feels lighter and more alive. Thin hair needs that kind of help.
Where the Layers Should Land
The best version starts near the cheekbones or jawline, not up around the temples. That keeps the front pieces soft without turning the cut into a mess. If the hair is straight, these layers give it shape. If it waves, they make the wave pattern more obvious.
A few styling notes help:
- Blow-dry the front pieces away from the face.
- Use a small round brush for the first two inches.
- Keep the ends slightly bent, not pin-straight.
- Add a light mist of texturizing spray only at the mid-lengths.
This is one of those cuts that looks better on day two. A little lived-in texture helps the layers show.
8. Flipped-Out Ends
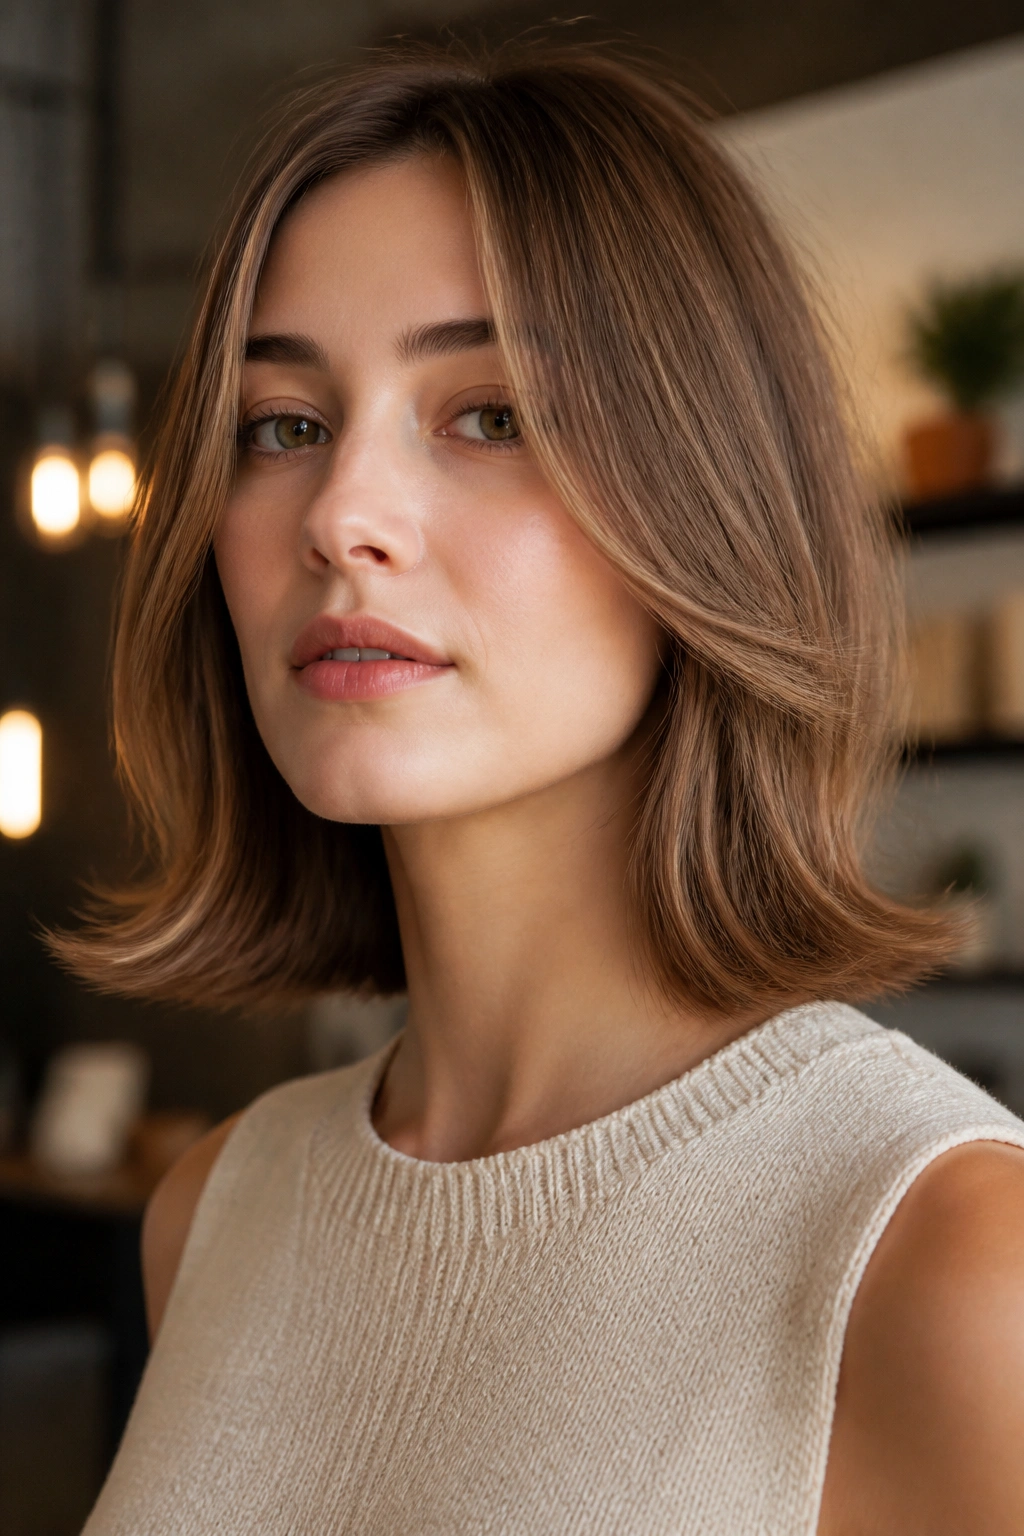
Flipped-out ends can do more for thin hair than another round of layers. That outward bend widens the shape at the bottom, which makes the whole cut look fuller. It also keeps medium length hair from hanging straight down in a way that feels limp.
This style has a slightly retro feel, but that’s not a bad thing. In practice, it’s just a clean way to create movement where thin hair usually needs it most. You can flip the ends with a round brush, a flat iron, or even a quick twist of the wrist at the bottom of the section.
The best version is subtle. I’m not talking about giant pageant wings. Just a small outward flick that changes the silhouette. One inch of bend can matter more than three extra layers.
9. The Sleek Center-Part Lob

Can a center part work on thin hair? Yes, if the cut is clean. A sleek center-part lob looks sharp because it gives the hair a tidy frame and keeps the weight balanced on both sides. That balance matters when the strands are fine.
How to Wear It
The cut should still have enough bluntness at the ends to hold shape. If the line is too broken up, the center part can make the hair look sparse. I like this style with a little shine serum on the mid-lengths and ends, never at the roots.
A small blow-dry trick helps here:
- Blow the roots up and away from the part first.
- Press the hair smooth only after the crown has some lift.
- Keep the section width small for a cleaner finish.
- Finish with a flat brush pass if needed.
It’s polished, yes, but not fussy. That’s why it works.
10. The Half-Up Mini Bun at the Crown

There are days when the top half of the hair needs to disappear, at least a little. A half-up mini bun at the crown lifts that section off the face and gives the illusion of more height on top. Thin hair benefits from that visual trick every time.
The key is keeping the bun small and loose. If it’s too tight, the scalp shows through and the style starts looking mean. Leave a bit of softness around the temples and pull a few face pieces free. That keeps the look from turning severe.
I like this style when the rest of the hair is left in soft bends or a loose straight finish. It gives the crown a little structure while keeping the length casual. Very little effort. Quite a lot of payoff.
11. The Low Ponytail With Crown Lift

A low ponytail sounds plain until you give the crown some lift first. That’s the secret. A little teasing at the roots, or even a puff of dry shampoo and some finger-lifting, changes the whole feel of the style. Suddenly it looks fuller and more deliberate.
This is one of the easiest medium length hairstyles for thin hair because it doesn’t fight the hair’s natural fall. The ponytail sits low and elegant, while the top section keeps a soft bit of height. Wrap a small piece of hair around the elastic if you want it to look finished without much work.
The best part is that this style doesn’t need perfect texture. Slightly messy is fine. Clean and flat is not.
12. Feathered Layers With Side Bangs
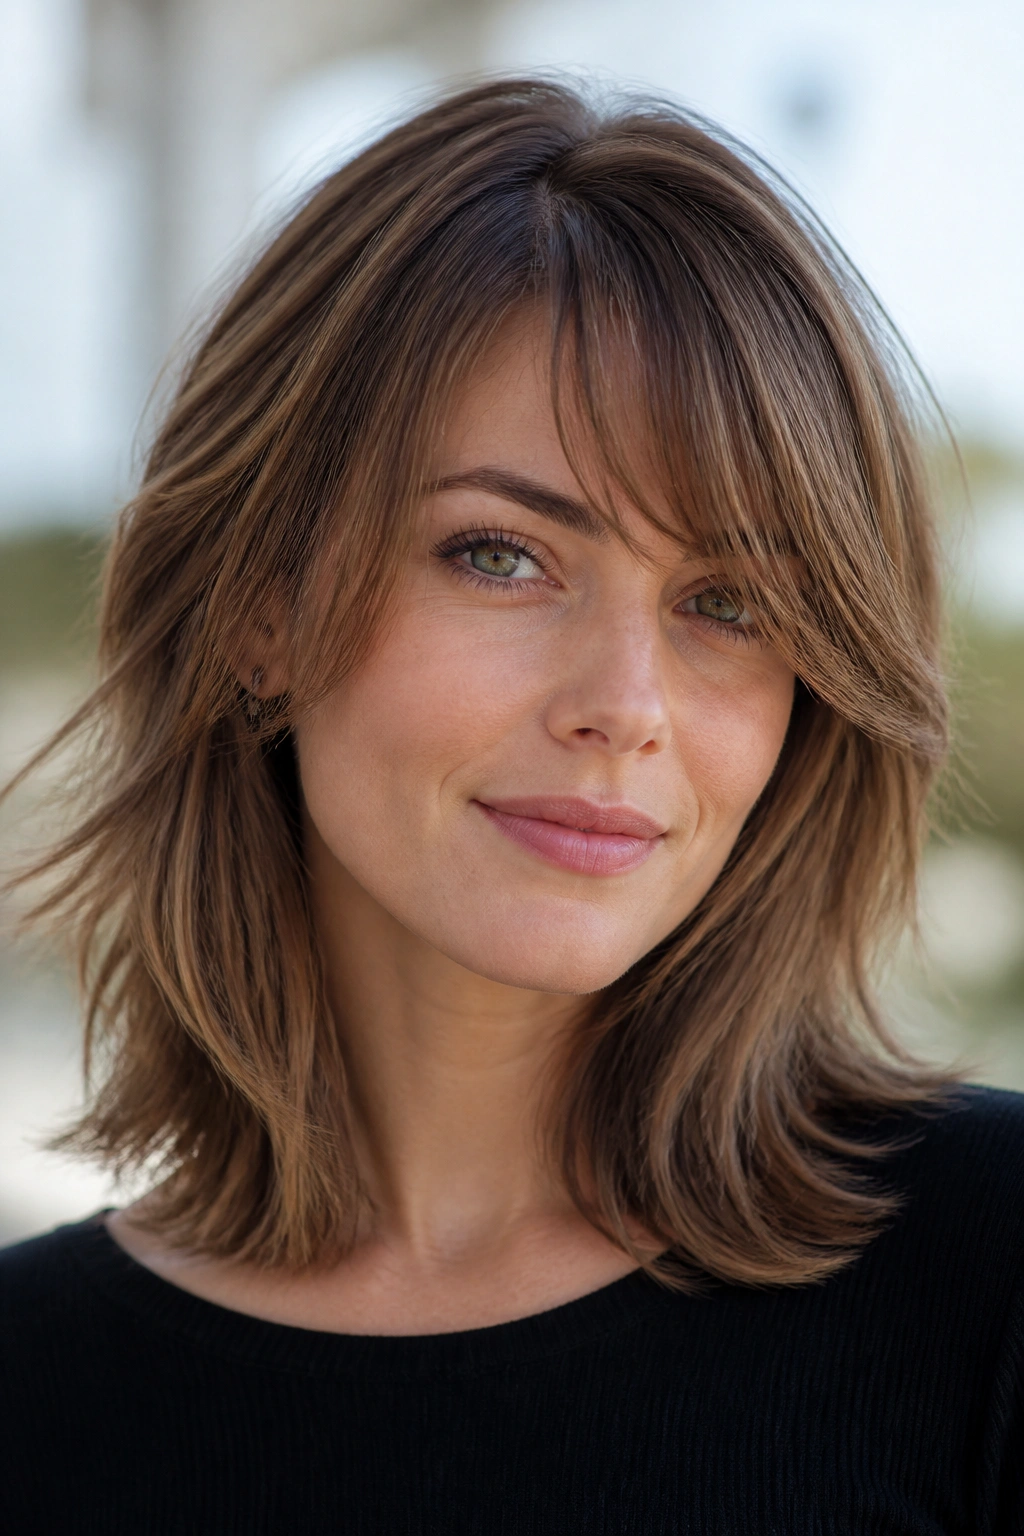
Feathering changes the mood of a cut fast. Unlike blunt ends, feathered layers soften the outline and create a lighter, more airy shape around the face and shoulders. Side bangs help too, because they break up the forehead area and give the top of the style a little movement.
The cut works best when the layers are long enough to move, not short enough to poke out everywhere. Ask for a soft feathering effect through the front and around the jawline, then keep the back a touch fuller. That keeps the hair from going wispy.
This is a good choice if your hair is straight or only slightly wavy. It can look very natural with a quick blow-dry and a round brush. If you want something that feels softer than a blunt lob but not as choppy as a shag, this is a nice middle road.
13. The Wavy Blowout

A wavy blowout gives thin hair that slightly expensive, freshly done feel without needing curls that last all day. The shape comes from a big round brush, a bit of root lift, and loose bends through the lengths. Done well, it looks full but not stiff.
The Salon Feel at Home
You do not need a huge toolkit. A 2-inch round brush, a blow-dryer with a concentrator nozzle, and a light volumizing mousse will do most of the work. Start at the roots, push them up, and then bend the ends under or away from the face depending on the mood you want.
I like to pin the front sections up for a few minutes after drying. Old-school rollers work too. They cool the hair in a lifted shape, which thin strands tend to hold better than one long blast of hot air.
A wavy blowout is one of those styles that looks polished without feeling hard. That balance is hard to beat.
14. The Air-Dried Natural Bend
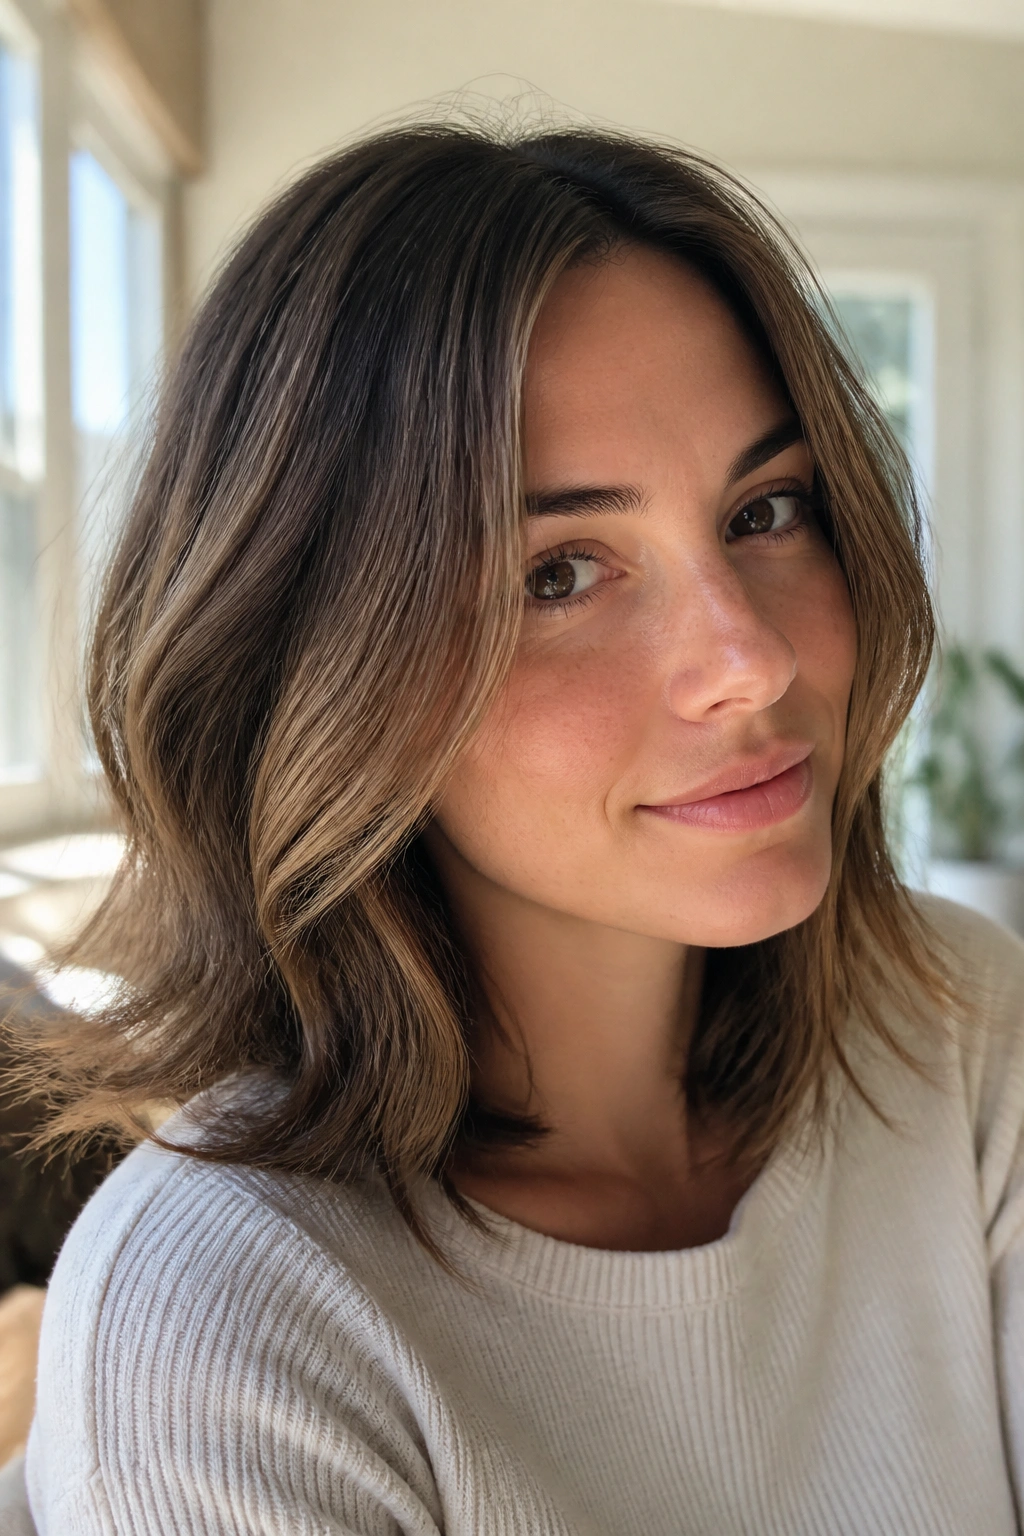
Air-drying can work on thin hair, but only when you stop treating it like a no-effort option. Thin strands need a little help to dry in the right shape. A small amount of mousse, a bit of scrunching, and some careful sectioning can keep the hair from drying flat to the head.
I’d avoid heavy creams here. They tend to make fine hair collapse. A lightweight foam or curl lotion used sparingly is safer. Work it through damp hair, then twist a few sections around your fingers while the hair sets.
This style is best if your hair already has a mild wave. If it’s poker straight, you may get a soft bend rather than a defined wave. That can still look good. It just won’t be dramatic.
15. The Braided Half-Up Crown
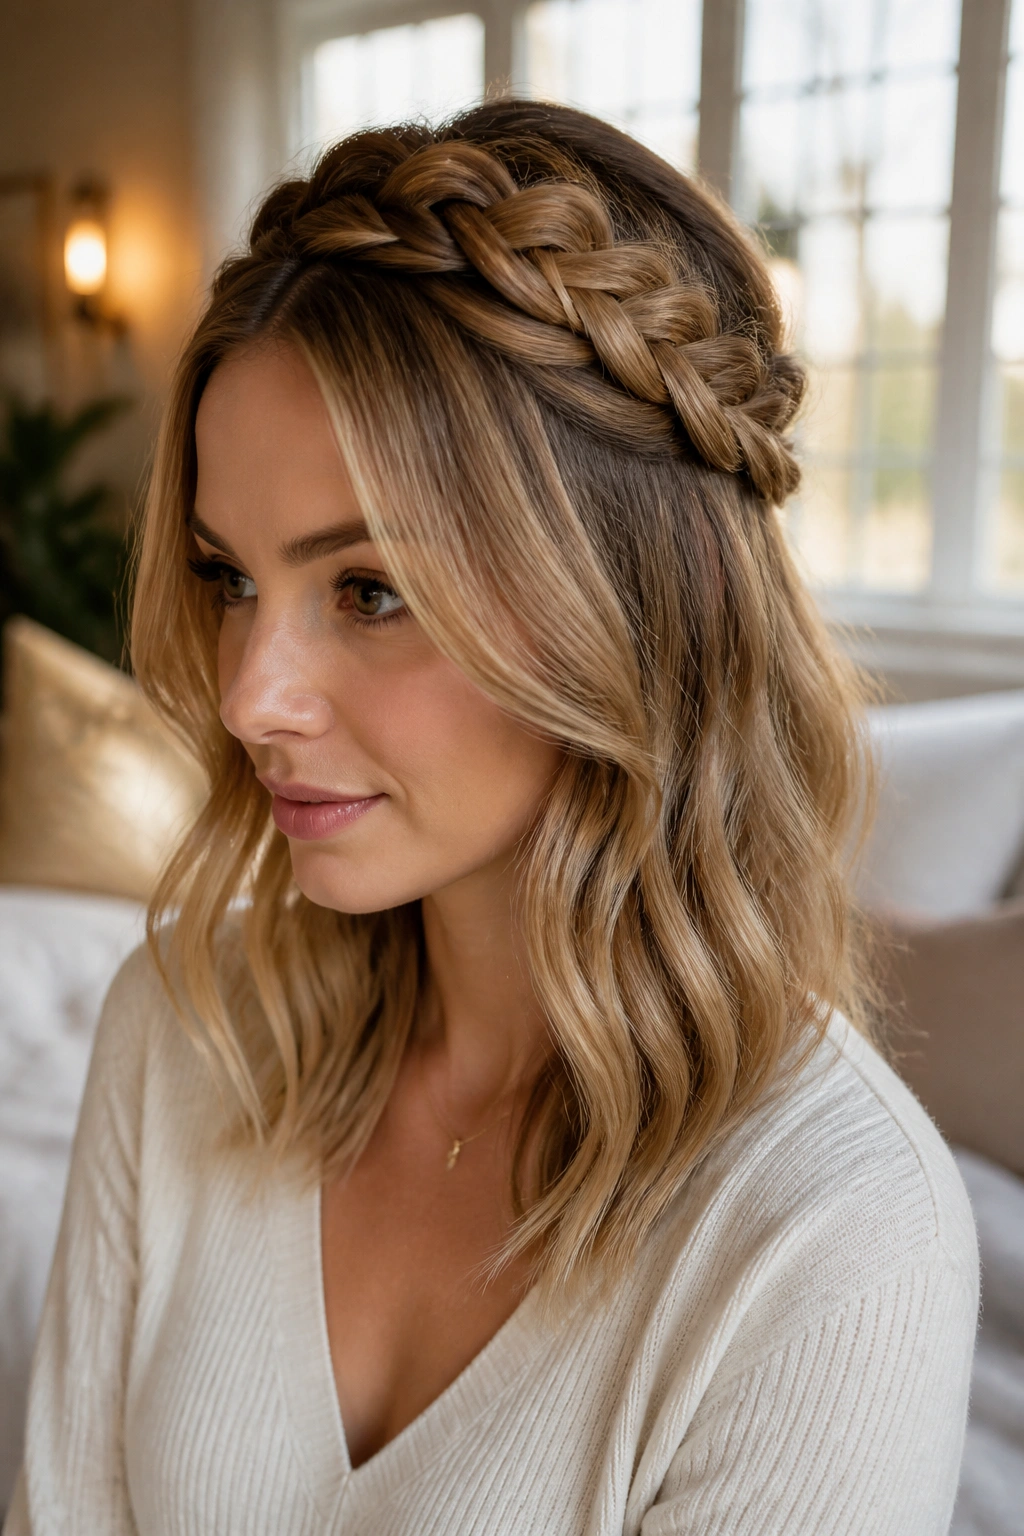
Need volume without heat? A braided half-up crown is one of the smarter ways to get it. The braid adds texture at the top and the pinned section gives the crown a little lift. Thin hair usually appreciates that kind of visual structure.
How to Make It Last
Keep the braid loose. Tight braids pull the hair down and can expose the scalp more than you want. Pancake the braid gently by tugging the edges outward once it’s secured, then pin it flat against the back of the head.
- Braid only the top third of the hair.
- Keep the ends soft or lightly waved.
- Use two bobby pins, crossed, for a steadier hold.
- Mist a little texturizing spray before braiding.
This style has a quiet romantic feel, but it’s also practical. You get a lifted crown, and the rest of the hair stays free.
16. The Mid-Length Wolf Cut

A wolf cut can look amazing on thin hair, or it can look like too much happened too fast. The difference is in the layers. A good version keeps the top textured and the ends light, but not shredded. That balance matters.
This cut works best when hair already has some movement. The shaggy crown gives height, and the longer lengths around the shoulders stop it from looking like a mullet with better PR. If your hair is very sparse, I’d keep the layers softer. A harsh wolf cut can expose too much scalp at the wrong angle.
I like this one for people who enjoy a messier finish. It does not want to be over-smoothed. Air-dry cream, a diffuser, and a bit of finger shaping is usually enough.
17. The Angled Lob
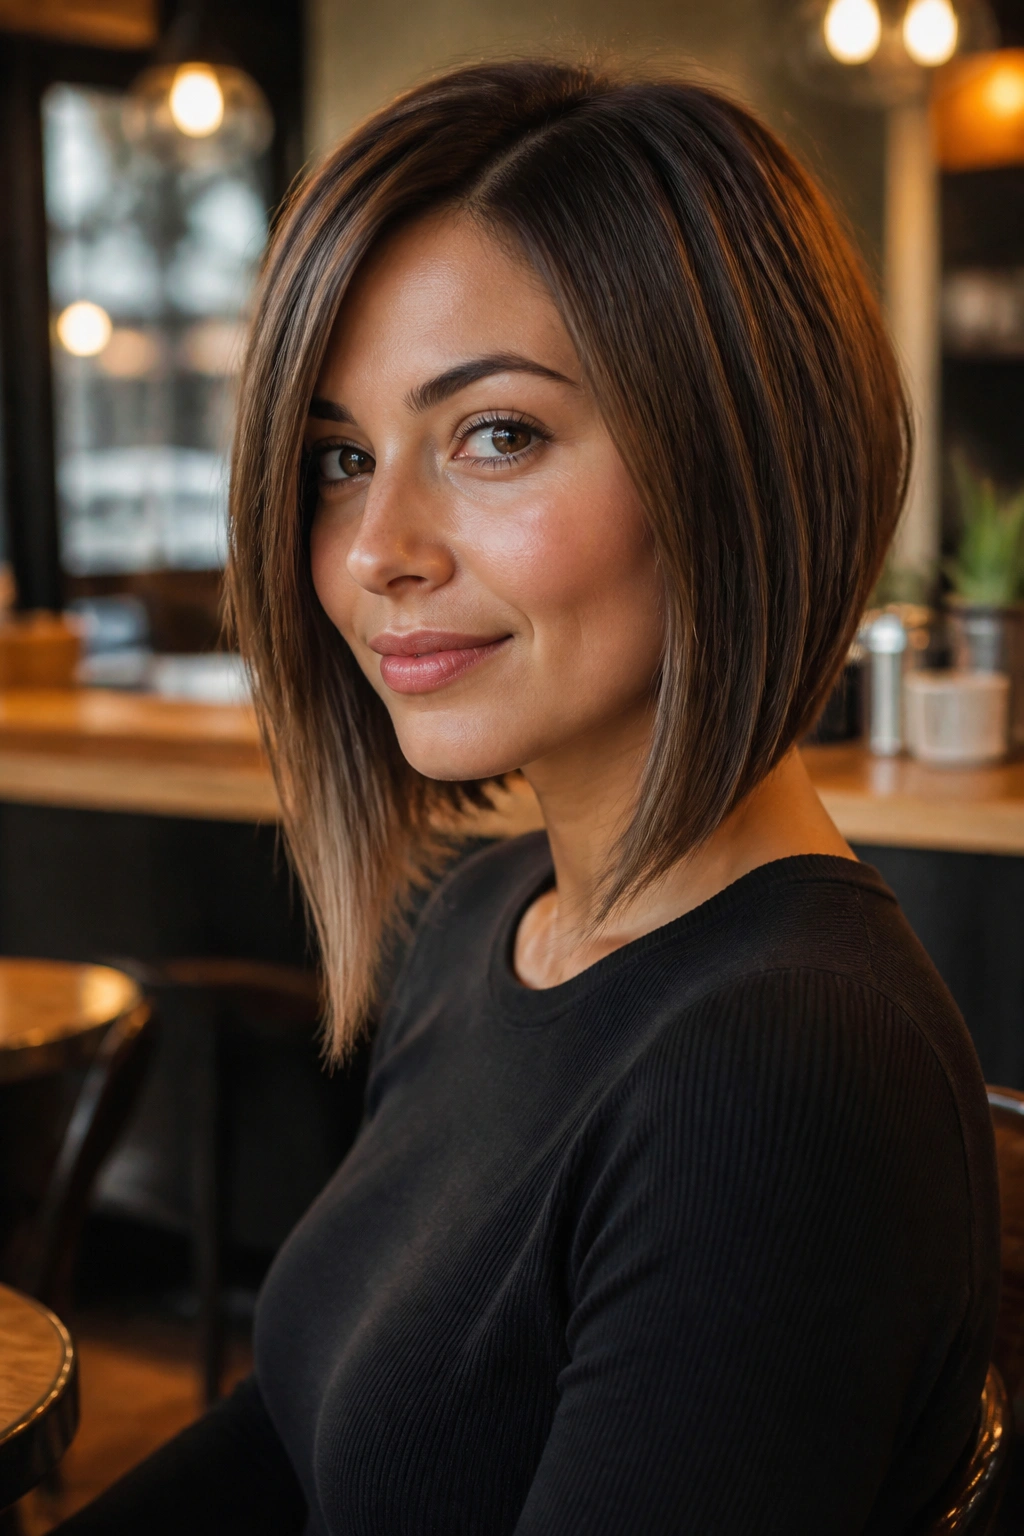
An angled lob gives thin hair shape without asking for a lot of styling. The back sits a little shorter, the front length drops slightly longer, and that forward angle makes the whole cut look intentional. I love that part. It’s tidy, but not boring.
The angle also pulls attention toward the face and neck, which helps the hair look less flat from the side. Keep the difference subtle — maybe 1 to 2 inches from back to front. Too steep and the cut starts looking dated instead of sharp.
This style is especially good if you like to tuck one side behind the ear. The longer front pieces stay visible, and the cut keeps a bit of swing. Clean lines matter here more than heavy texture.
18. Soft Curls With Tapered Ends
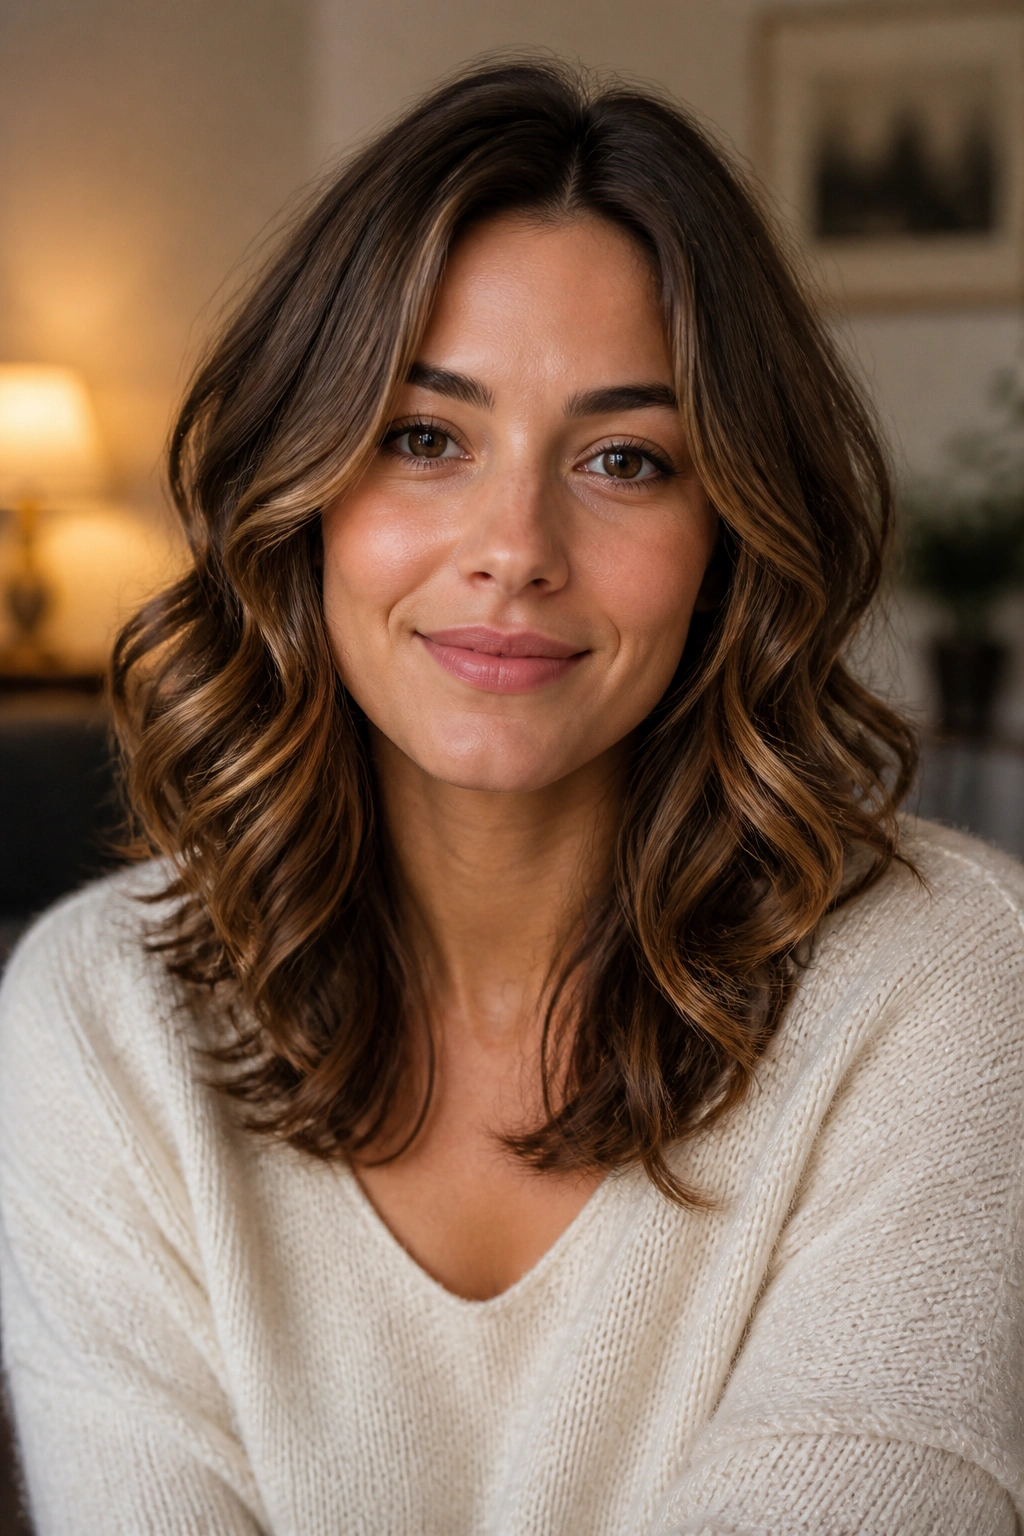
Soft curls give thin hair body without shrinking the length. Tight curls can make medium hair look shorter than it is, and that is not what most people want here. A loose curl pattern keeps the silhouette full and easy to read.
The tapered end matters. Leave the last half-inch or so straighter, or curl only most of the strand. That keeps the style from puffing out too much at the bottom. I’d use a 1.5-inch curling iron, then brush the curls out lightly once they cool.
This is a good option for a dinner, a work event, or any day you want the hair to look done without being stiff. It feels soft. It moves. And it still looks like your hair.
19. The Claw-Clip Twist

The claw clip is not lazy hair. It’s strategic hair. On thin medium-length strands, a loose twist clipped high enough at the back can give you height at the crown and texture through the ends without needing a full updo.
What to Look For
The clip should have a firm grip and enough length to hold the hair without slipping. Smaller, slippery clips tend to slide off fine strands. I prefer a medium-size clip with teeth that don’t feel razor sharp.
- Twist the hair loosely, not tightly.
- Lift the twist a little before clipping.
- Leave some ends out if you want softness.
- Pull a few face pieces free.
The style works because it creates shape in one place and softness everywhere else. That contrast is what keeps it from looking flat.
20. The Low Chignon With Loose Pieces
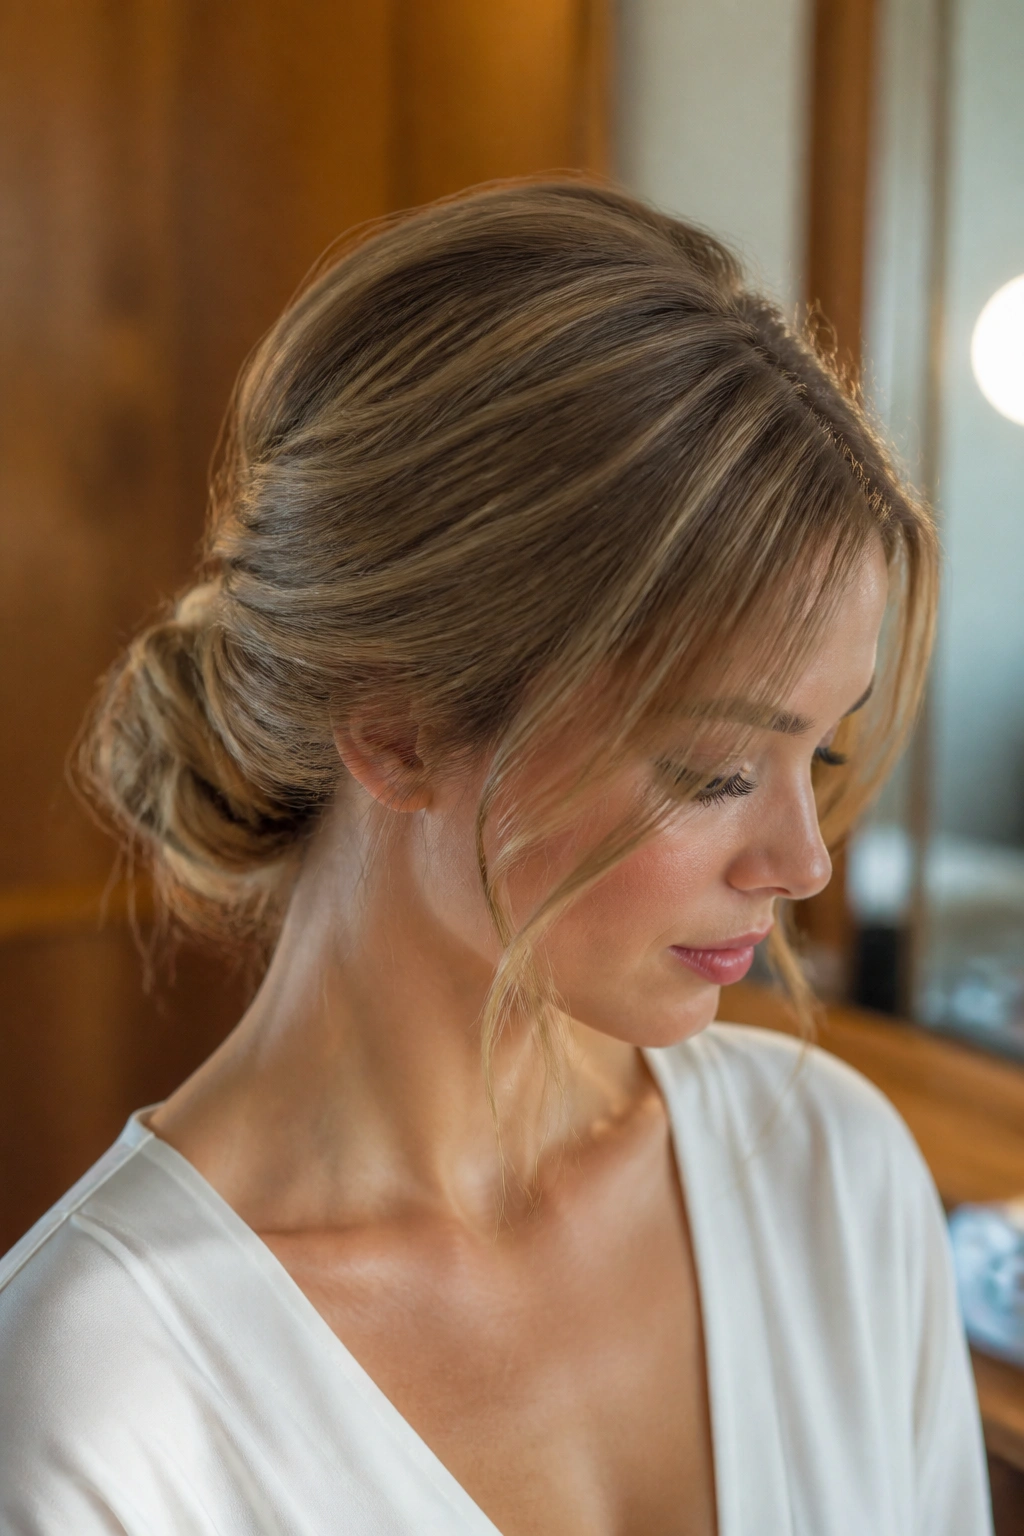
A low chignon can look severe on thin hair if you pull it back too hard. Keep it soft, and the whole thing changes. A little volume at the crown, a loose twist at the nape, and two or three face pieces left out can make the style feel graceful instead of tight.
I like this for medium hair because the length is enough to twist, but not so much that the bun becomes bulky. The trick is to keep the knot small and the surface a little imperfect. A touch of texture spray helps the pins stay hidden.
This is one of those styles that looks especially good with a blazer, a simple dress, or anything with a clean neckline. It gives thin hair a more finished shape without asking for much from the strands themselves.
21. Deeply Side-Swept Waves

Want the easiest way to fake fullness at the front? Sweep the hair deeply to one side and let the waves fall across the forehead and cheekbone area. The shift in weight creates the look of more hair where people notice it most.
Placement Matters
Part the hair farther over than you usually would, then direct the wave pattern away from the face. That one change gives the style a richer front section and a little drama without needing extra length. Pin the heavier side behind the ear if you want the shape to hold.
The rest can stay soft and loose. You do not need a formal curl set here. A bend, a wave, even second-day texture will do. The side sweep is doing the visual heavy lifting.
This is one of my favorite tricks for photos, dinners, or any day you want the hair to look a little fuller in the front.
22. The Pin-Straight Glassy Lob

Sometimes thin hair looks best when you stop trying to make it look messy. A pin-straight lob with a clean shine can be striking because the line is so deliberate. If the cut is blunt and the hair is healthy, the finish looks crisp rather than sparse.
A flat iron helps, but prep matters more. Start with a smoothing spray on damp hair, dry the roots up for lift, then pass the iron through in small sections. Keep the ends straight and polished. If you flip them or over-texturize them, you can lose the very density you were trying to show.
Quick Details
- Keep the perimeter blunt.
- Use a heat protectant every time.
- Straighten in 1-inch sections.
- Finish with a pea-size amount of serum on the ends only.
It’s a clean look. No fuss. No fluff.
23. Piecey Layers With Root Volume

Piecey layers are different from soft feathering. They create separation, which means the hair looks more lived-in and textured. On thin hair, that can work beautifully when the layers are kept long enough to avoid a shredded finish.
The crown lift matters just as much as the cut. A bit of root powder or dry shampoo at the roots helps the style stand away from the scalp, which is where thin hair can lose its shape fastest. Then a texturizing spray through the mids makes the layers show without turning them crunchy.
This cut suits hair that holds texture well. If your strands are very slippery, it can fall a little too fast. But if your hair has grip, the piecey finish can make medium length look much fuller than a smooth blowout would.
24. Bottleneck Bangs With Collarbone Length
Bottleneck bangs are the softer cousin of curtain bangs. They start narrow near the center, then open out around the cheekbones and jaw. On thin hair, that shape adds focus to the front without cutting too much density from the sides.
The collarbone length below the bangs keeps the whole style balanced. I like this pairing because the bangs give the face structure while the longer perimeter keeps the cut from looking over-layered. It’s a smart mix if you want something current-looking without going extreme.
Ask for the shortest part of the fringe to stay modest. Then let the sides feather out gradually. That slow taper is what makes the bangs feel soft instead of chunky.
25. The Bubble Ponytail

A bubble ponytail is one of the easiest ways to make thin medium-length hair look fuller in sections. The hair is tied into a ponytail, then split into little puffed segments with elastics placed every few inches. Each segment bulges slightly, which gives the impression of more volume.
How to Keep It From Looking Childish
The trick is keeping the bubbles loose and the finish clean. Tug each section gently after tying it off. That little puff creates shape without making the ponytail look tight or toy-like.
- Use clear elastics or small bands that match your hair.
- Start with a low or mid-height ponytail.
- Pull the sections outward evenly on both sides.
- Leave the crown soft so the style doesn’t feel hard.
This is a fun one for casual days, but it can be dressed up easily with a ribbon or a clean center part. Surprisingly useful.
26. The Slicked-Back Half-Up
A slicked-back half-up style can be a smart move for thin hair, especially when the roots are a little oily and the crown needs control. The slicked section makes the top look neat, while the loose lower half keeps some softness and movement.
I like this style more than a full slick-back for medium lengths because it does not expose every part of the scalp. The top gets the polish, the bottom keeps the body. Use a light gel or cream, brush the upper section back, and pin it securely before letting the rest fall loose.
The look can feel sharp or relaxed depending on the finish. If you keep the lower half in soft waves, the contrast is especially good. Too much product, though, and the hair starts looking wet in a way that doesn’t flatter fine strands.
27. The Twist-Out Waves
Twist-out waves are a nice answer when heat styling feels like too much. You twist damp sections, let them dry fully, and then release them into soft bends. On thin hair, the pattern gives texture without needing a curling iron every time.
How to Set It Overnight
Use a light mousse or styling foam on damp hair, split it into 4 to 8 sections, and twist each one away from the face. Keep the twists loose. Tight twists can leave the hair too crimped and too small once they’re out.
The next morning, separate the waves with your fingers and stop before they get puffy. A tiny bit of oil on the ends can help if they feel dry, but don’t overdo it. Fine hair goes limp fast when product piles up.
This style has a soft, lived-in feel that works for both casual and polished days. I reach for it when I want shape without heat damage.
28. The Polished Shoulder-Length Blowout
A polished shoulder-length blowout is the style I keep coming back to when thin hair needs to look finished fast. It gives the roots lift, the mids a smooth swing, and the ends a soft bend that makes the whole cut feel fuller. Done right, it looks like you had help, even if you did it yourself in 20 minutes.
The biggest mistake is chasing volume everywhere. That usually backfires. What thin hair needs is lift at the crown, smooth control through the sides, and enough bend at the ends to keep the perimeter from looking stringy. A medium round brush, heat protectant, and a cool shot at the end go a long way.
I also like this style because it works with almost every outfit and nearly every face shape. It can look tidy for work, a little glam for dinner, or plain old pretty on a normal day when your hair needs to behave. If you remember one thing from all 28 styles, remember this: shape matters more than fluff. The right outline does more for thin hair than any amount of random teasing ever will.
