



Flat roots can flatten the whole mood. A pretty twist or bun can lose its shape fast if the crown sits too close to the scalp, which is why voluminous updo hairstyles work so well when you want hair that looks full from the front, the side, and the back.
The trick is rarely about piling on more spray. It’s usually about where the height sits, how much weight you remove from the crown, and whether the style has enough structure to hold its shape after you leave the mirror. A few well-placed pins can do more than a mountain of product. So can a 2-inch section of crown hair that’s lightly teased and then smoothed on top.
That’s the part people miss. Volume does not have to mean messy, and it does not have to mean big everywhere. A lifted French twist looks polished. A bubble ponytail can feel playful. A low chignon with a deep side part can look expensive without looking stiff. The best styles use lift as shape, not decoration.
These 28 looks run the whole range, from soft and romantic to sharp and sculpted. Some lean on teased roots, some use braids or rolls, and some get their body from the placement alone. The point is the same either way: more lift, more presence, less flatness.
1. Soft French Twist With Crown Lift
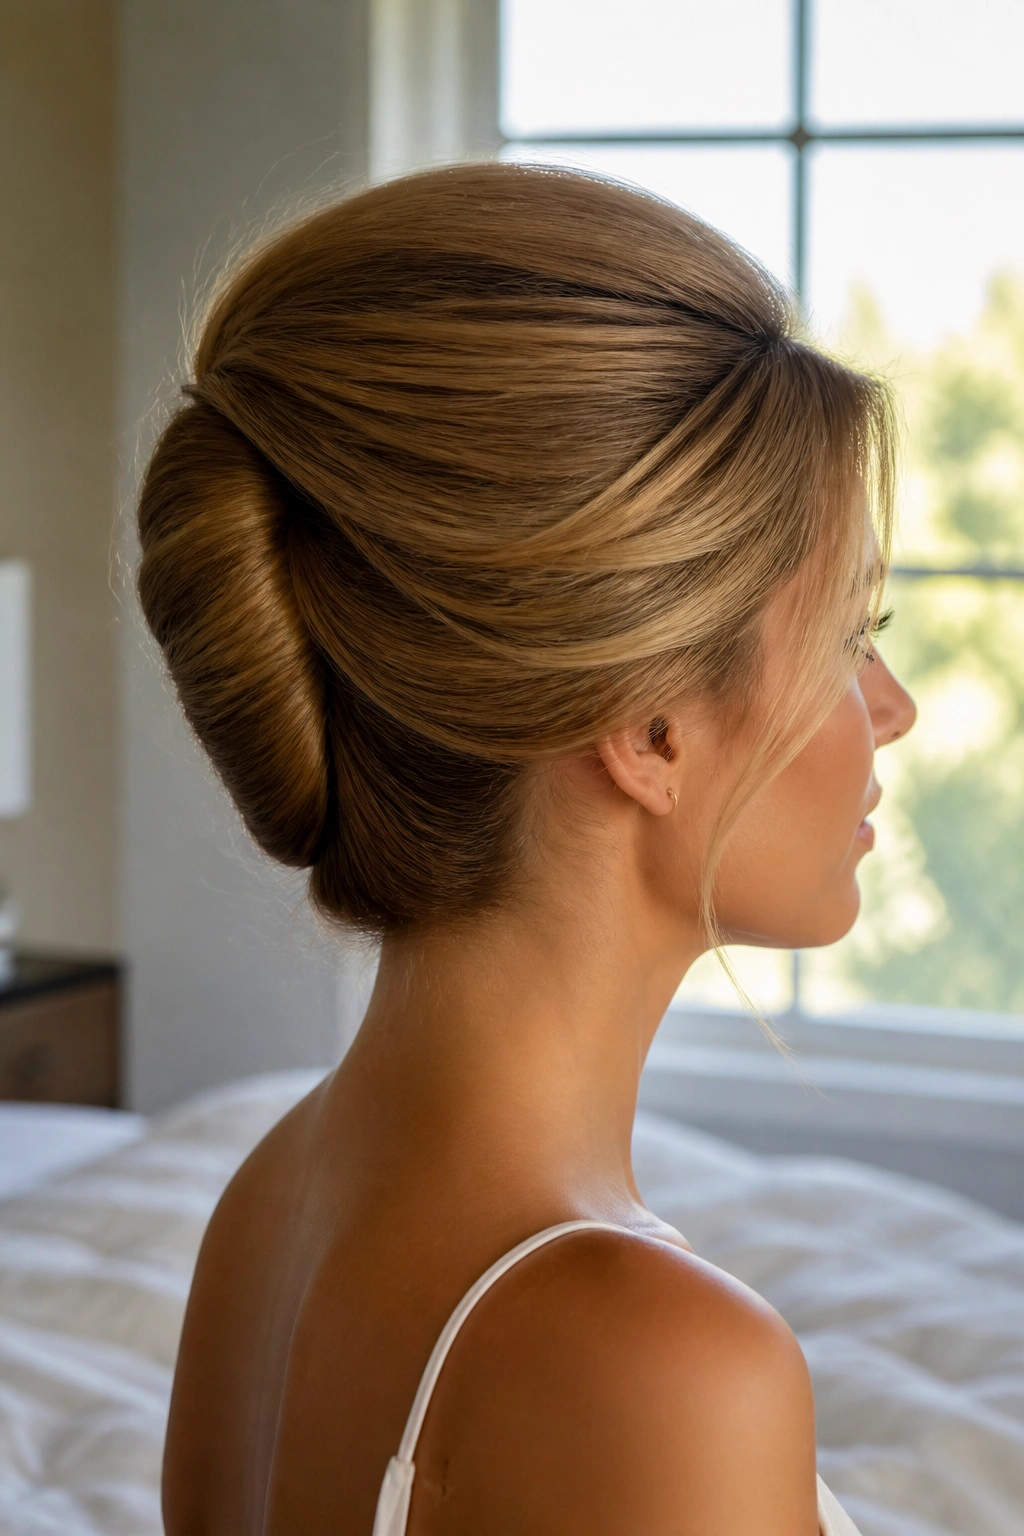
A French twist gets a lot more interesting when the crown is built up first. Instead of scraping the hair tight against the head, leave a little height at the top and let the twist sit just below it. The result feels cleaner than a messy bun and softer than a formal shell.
Why It Works
The twist creates a long vertical line, and that line naturally pulls the eye upward. Add a lifted crown and the whole style looks taller without needing extra length. It’s especially good on medium to long hair that tends to collapse around the temples.
A small amount of backcombing at the crown helps, but don’t overdo it. You want support, not a rough nest. A light mist of texturizing spray before you twist gives the pins something to hold onto.
- Best on hair that reaches the shoulders or longer
- Works well with a deep side part
- Needs 4 to 6 strong bobby pins
- Looks best when the ends are tucked loosely, not flattened
Tip: Keep the top smooth and the lift underneath. That contrast is what makes the style feel intentional.
2. Messy Chignon With Face-Framing Pieces
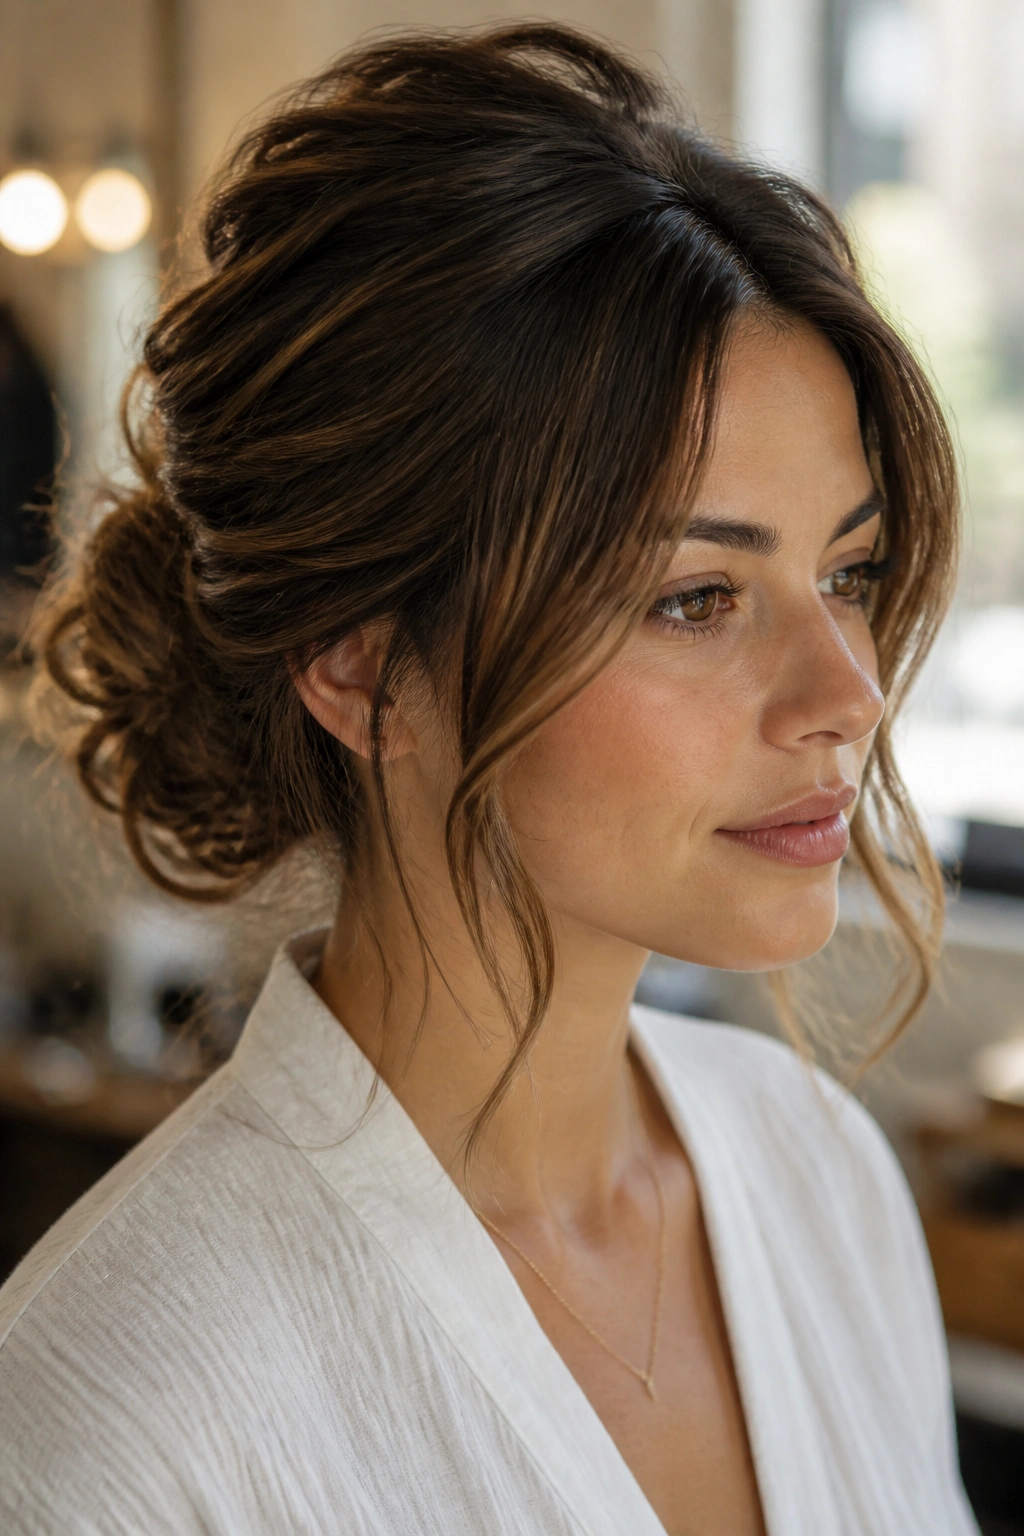
This is the style I reach for when hair needs to look full fast. A messy chignon can hide thin spots at the nape, add softness around the face, and still look put together enough for dinner, a wedding, or a day when you want your hair to behave.
The volume here comes from looseness in the right places. Pull a few strands around the temples. Leave the crown slightly raised. Then twist the bun low and pin it so it doesn’t sit flat against the head. If the bun feels too neat, tug at the outer loops a little. Not a lot. Just enough to break the outline.
The face-framing pieces matter more than people think. Two soft sections, each about 1/2 inch wide, can change the whole balance of the style. They keep the lifted crown from feeling severe and make the bun look fuller from the front.
3. Braided Crown Bun
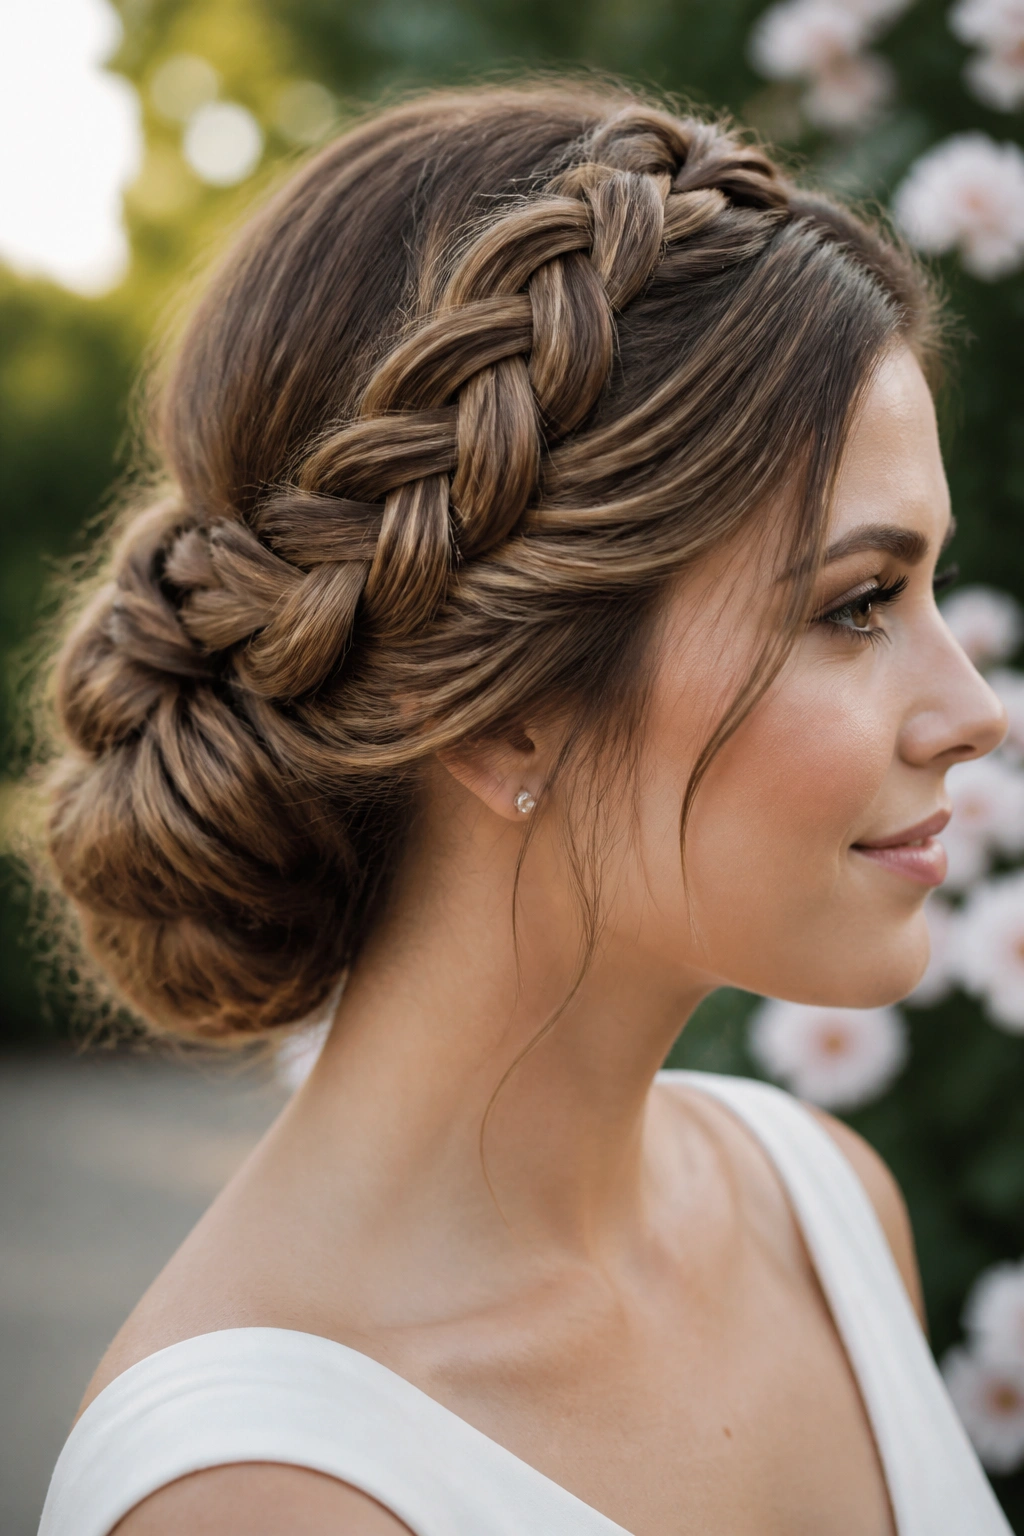
Want height without much teasing? Use a braid to do the work for you. A braided crown bun wraps volume around the upper head, so the style feels broad and lifted before you even get to the bun itself.
How to Style It
Start by parting the hair from ear to ear and braid the top section across the crown. Pancake the braid by gently pulling at the edges so it looks wider. Then gather the remaining hair into a low bun and tuck the braid into it, or wrap it around the base if you want more drama.
This style suits thick hair, but it can work on finer hair too if you prep the roots with dry shampoo or a lightweight mousse. The braid adds visual bulk, which is handy when the hair itself does not want to hold volume for long.
One smart move: keep the braid looser near the hairline and tighter toward the bun. That gives you lift up top and control where you need it.
4. Bubble Ponytail Updo
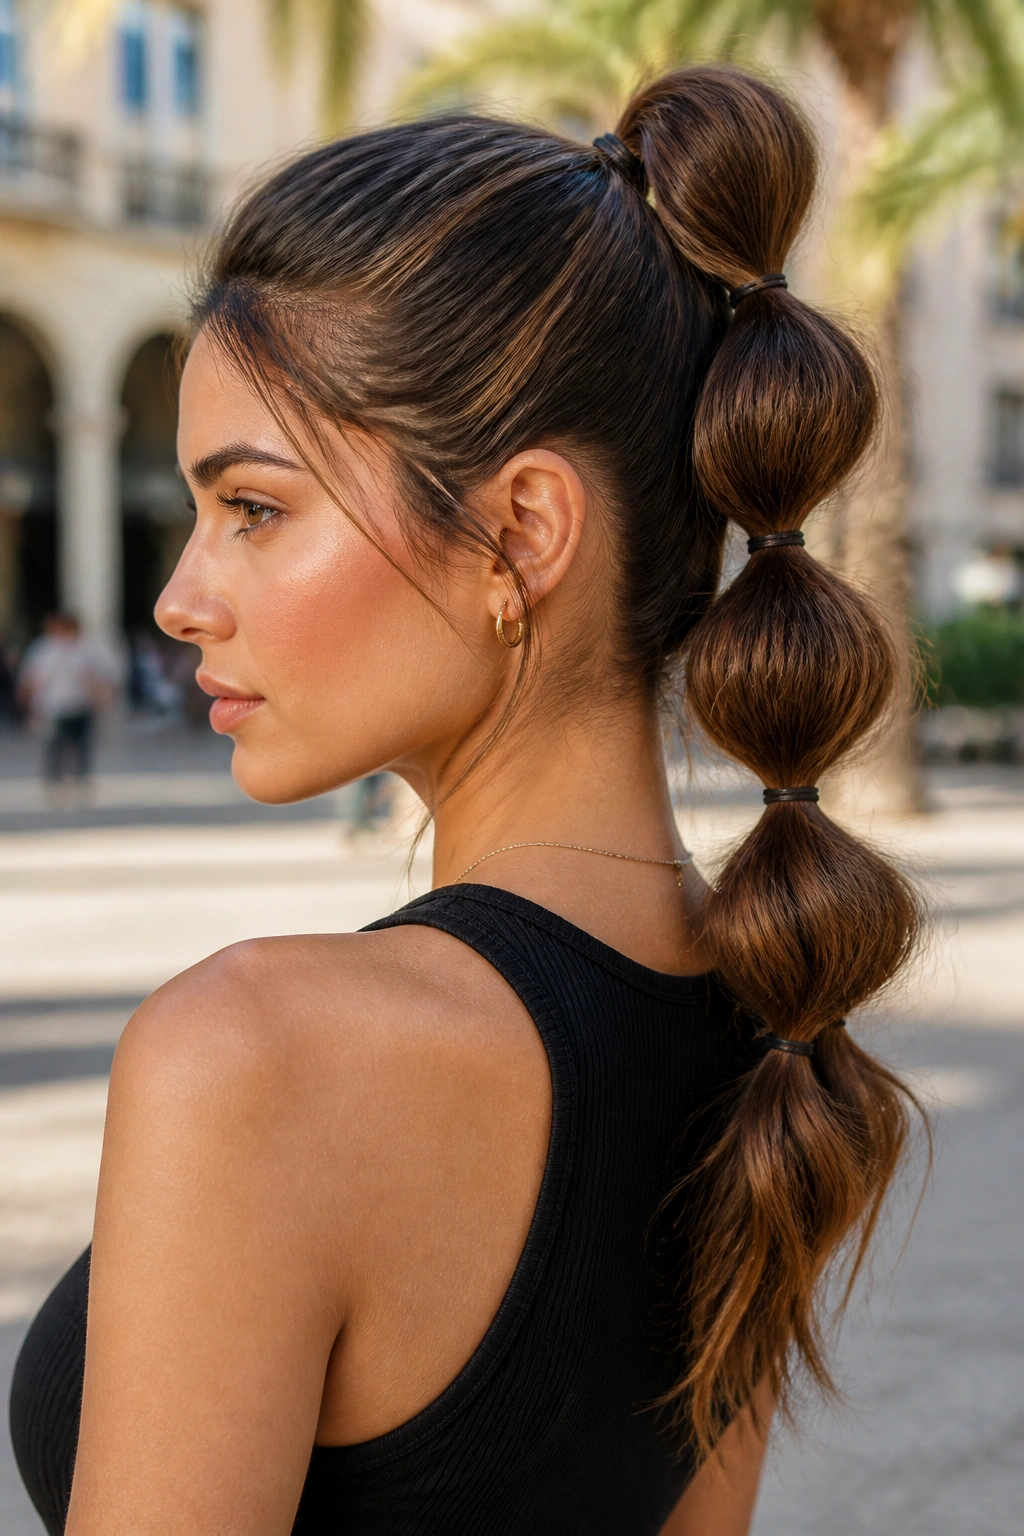
A bubble ponytail looks playful, but it has a sneaky amount of volume built in. Each tied section creates roundness, so the style feels fuller than a plain ponytail before you ever pin anything up.
I’ve seen this work especially well on long hair that goes limp at the crown. You start with a high ponytail, then add elastics every 2 to 3 inches down the tail. Gently pull each segment outward until it puffs into a bubble. If you tuck the tail into a bun at the end, the whole thing turns into a lifted updo with a little movement left in the length.
The key is tension. Too tight, and the bubbles look skinny. Too loose, and the shape sags. Aim for a middle ground where each section holds its roundness but still looks soft.
5. Teased Top Knot
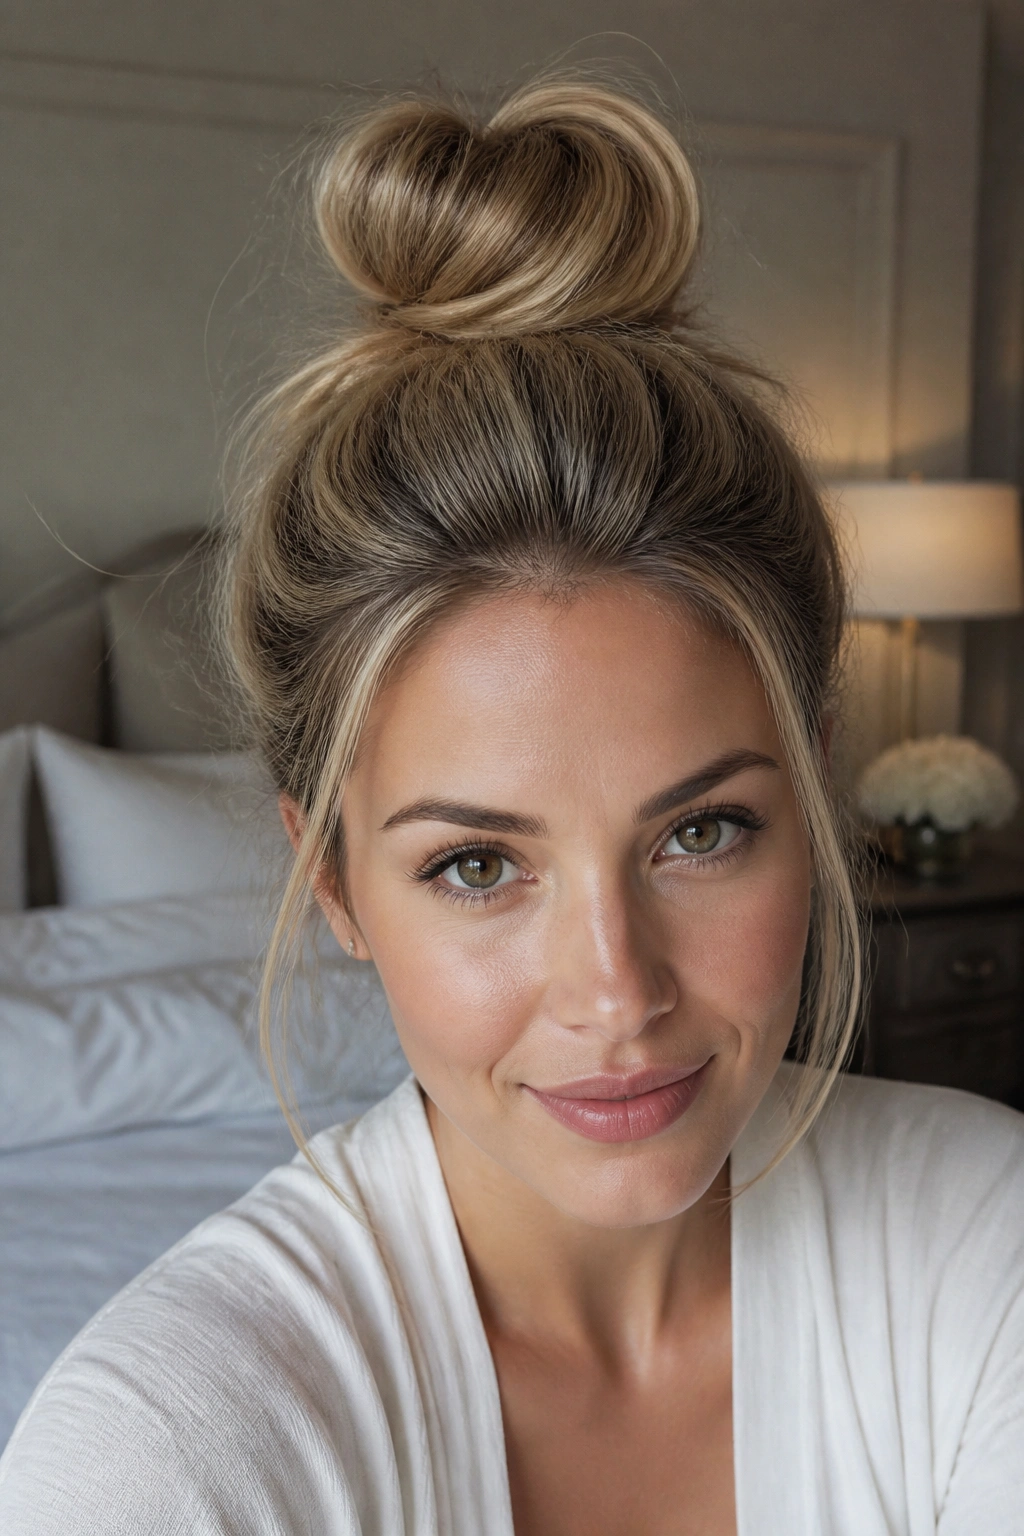
A top knot can look flat and rushed if it sits too low or too tight. Put the knot high, tease the crown first, and suddenly it has attitude. Not the loud kind. The useful kind.
The biggest mistake is making the bun itself carry all the volume. It doesn’t have to. The lift should begin at the roots, then move into the knot. Backcomb a 2-inch strip at the crown, smooth the top layer over it, and pin the knot a little higher than feels natural at first. High placement makes the face look more open and the hair look fuller.
This style is especially kind to fine hair because the knot does not need much hair to look big. A little texture spray and a few crossed pins go a long way. Keep the ends tucked but not shoved in too tightly, or the bun will look crushed.
6. Low Rolled Chignon
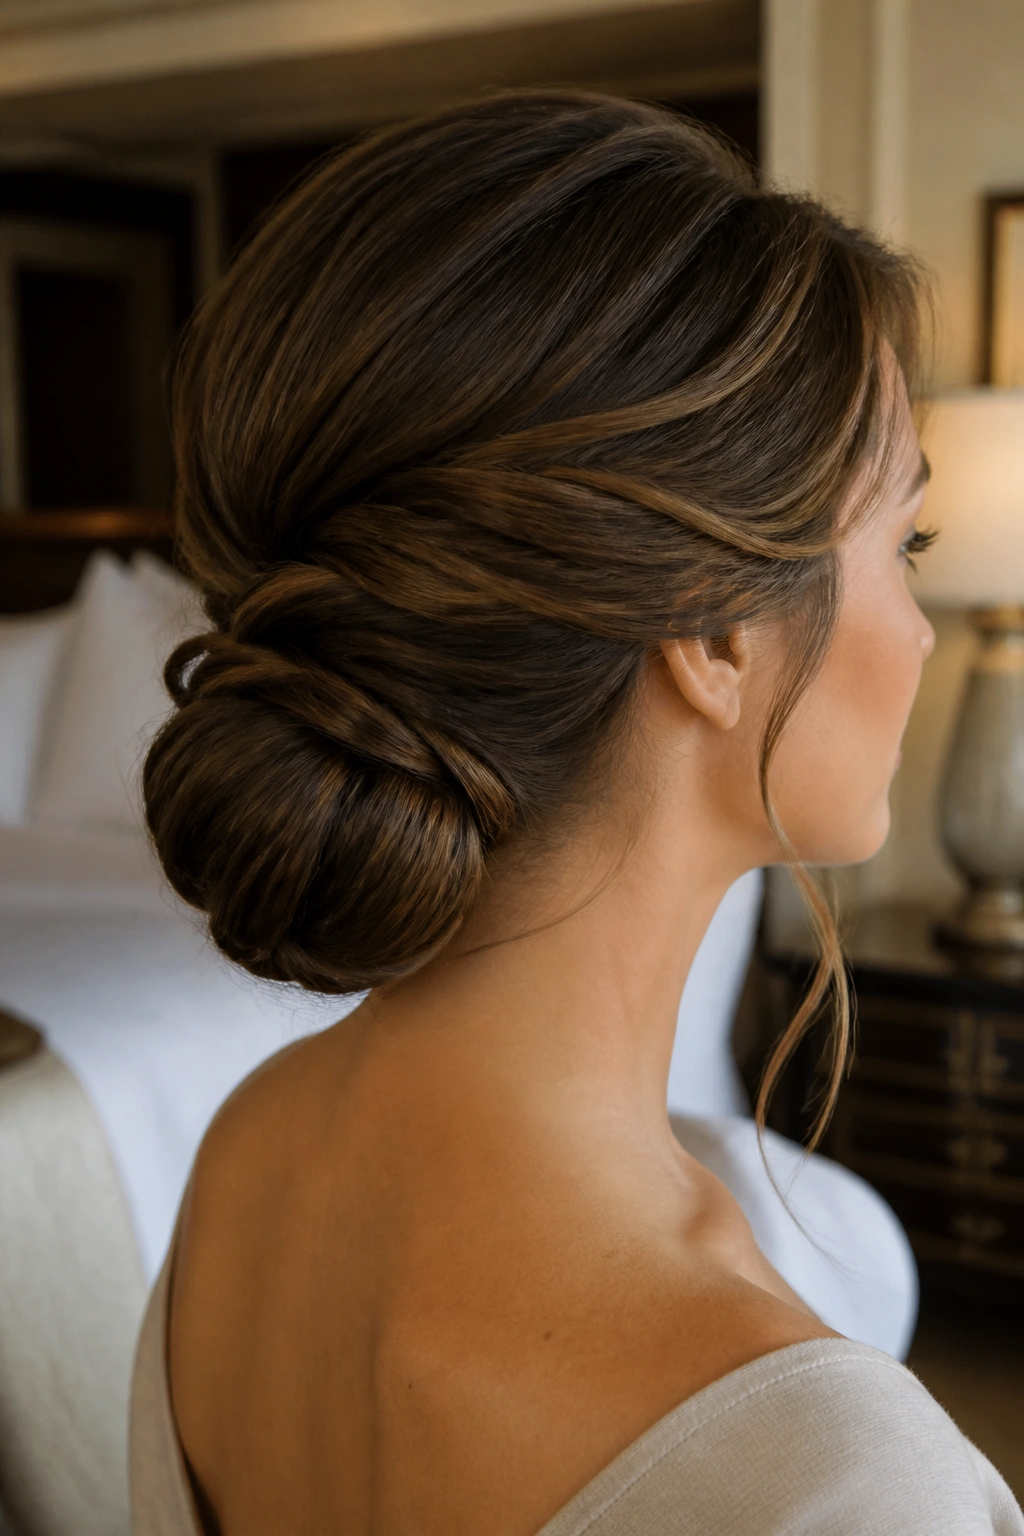
Unlike a tight ballerina bun, a rolled chignon uses shape and shadow to create volume. The hair folds over itself, which makes the bun look thicker even when the actual amount of hair is modest.
What gives it that fuller look is the roll. You twist a section, pin it, then let the next section overlap it slightly. If the hair is fine, a foam bun form under the roll helps. If the hair is thick, you may not need one at all. Either way, the crown should be lifted just enough to keep the style from looking pasted down.
This is one of my favorites for formal events because it feels calm. No drama, no fuss. Just a soft, curved shape and a bit of height at the top.
7. Beehive Ponytail Updo
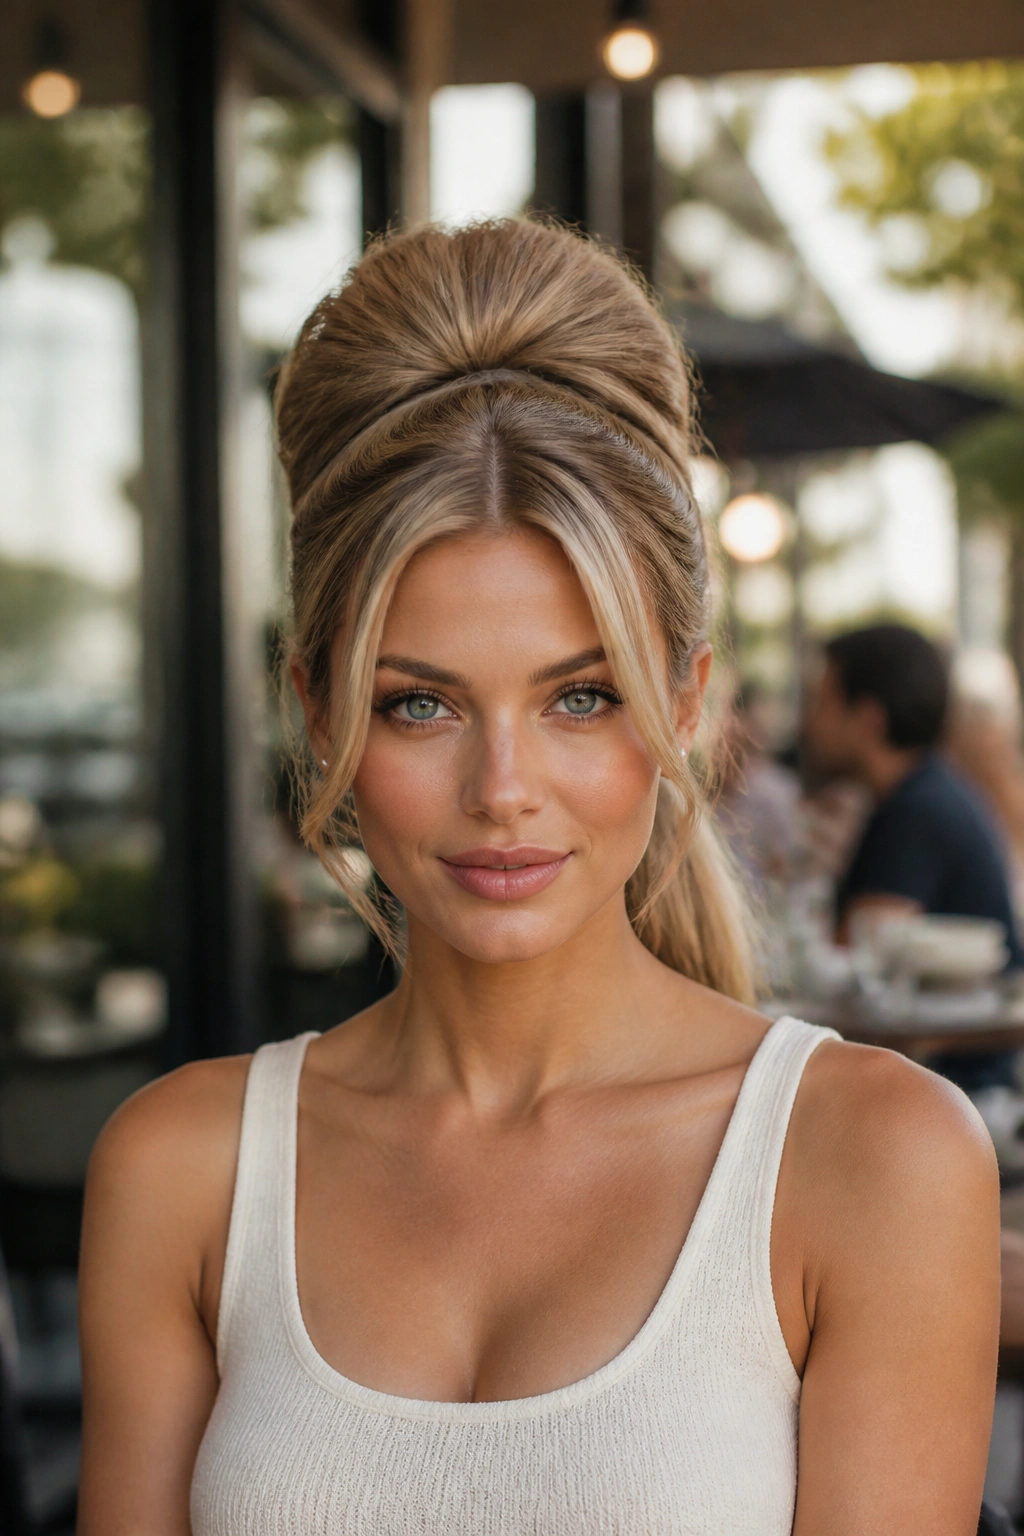
A beehive ponytail is what happens when a ponytail decides to have some fun. The crown gets built up first, then the ponytail sits below that lift instead of dragging it down.
What Makes It Different
A true beehive shape depends on structure at the top. Tease the crown in thin layers, smooth the outer surface, and pin the lifted section so it does not collapse while you gather the ponytail. A high ponytail keeps the energy up, but the crown is where the style earns its volume.
This one loves medium to long hair with a little grit. Second-day hair usually works better than freshly washed hair, and a root-lifting spray helps if your hair is very soft. The style can read retro or modern depending on how polished you keep the ponytail itself.
- Crown height should sit about 1 to 2 inches above the head
- Smooth only the outer layer; don’t flatten the whole section
- Wrap a strand around the ponytail base for a cleaner finish
- Use flexible-hold spray, not a stiff shell
Tip: Keep the ponytail tail sleek if you want the crown to stand out.
8. Gibson Tuck With Lifted Crown
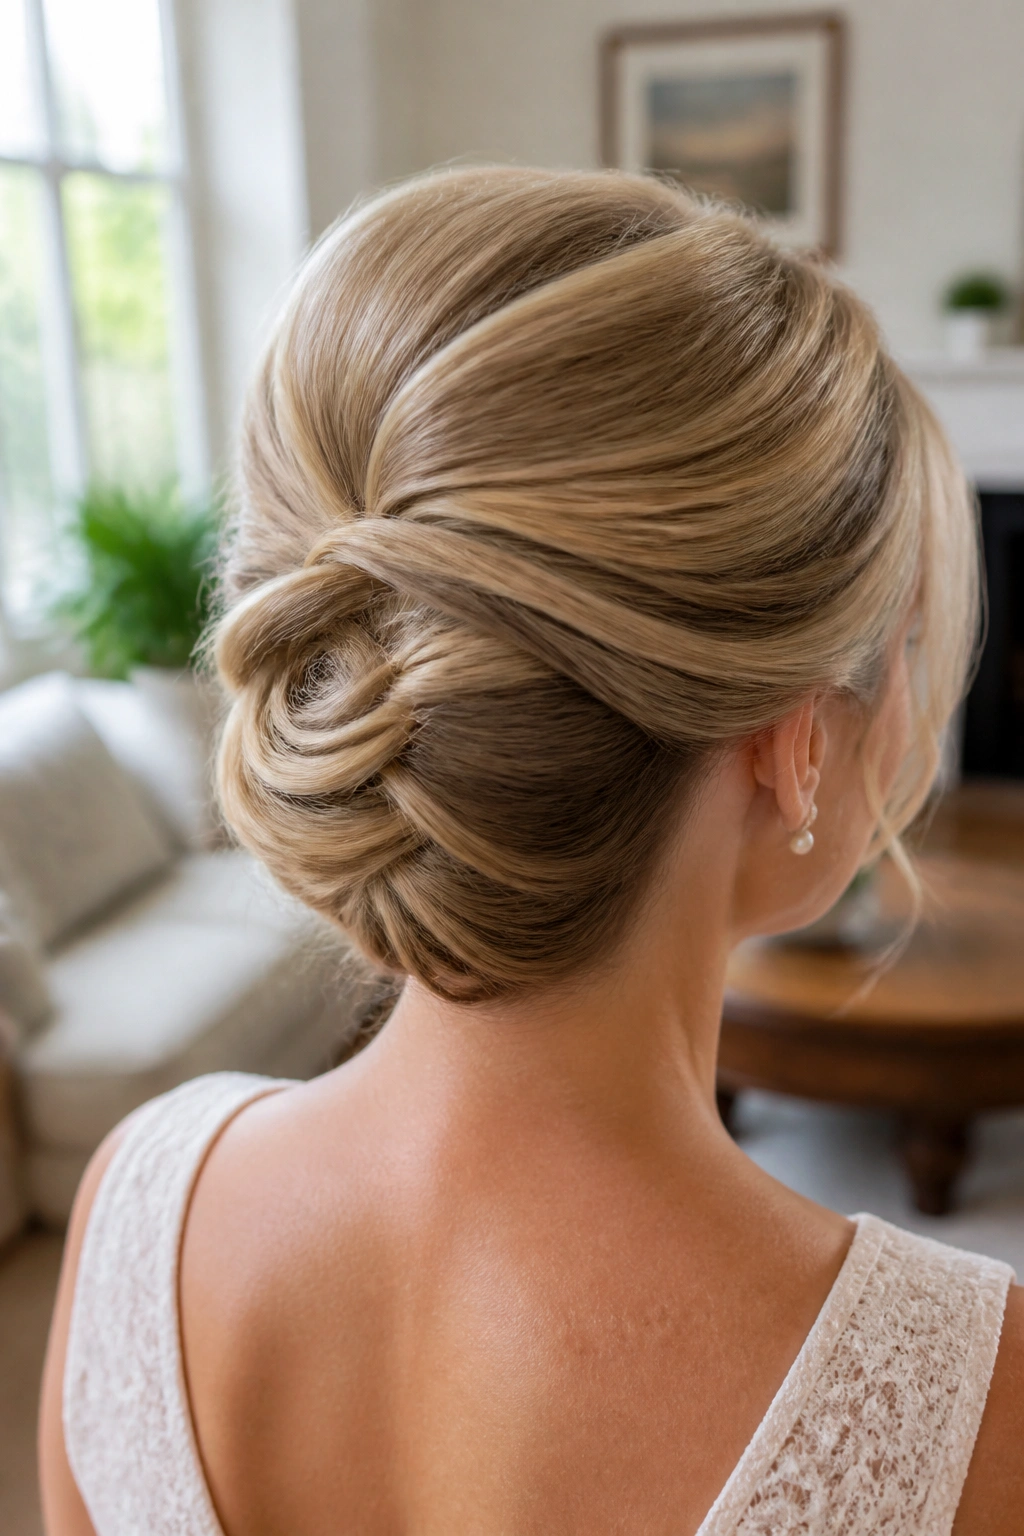
The Gibson tuck is one of those styles that looks more complicated than it is. It also happens to be excellent for adding softness at the back of the head without losing height up top.
You build the crown first, then tuck the length inward along the nape so the hair creates a rolled pocket. The result feels elegant, but not fragile. If the crown is lifted slightly before the tuck, the whole shape looks richer and less severe. That small lift keeps the front from collapsing into the face.
It suits shoulder-length hair especially well, though longer hair can be folded in more than once. The best part? It holds beautifully when pinned close to the scalp in the lower section and left loose near the crown. That little contrast does the heavy lifting.
9. Braided Mohawk Updo
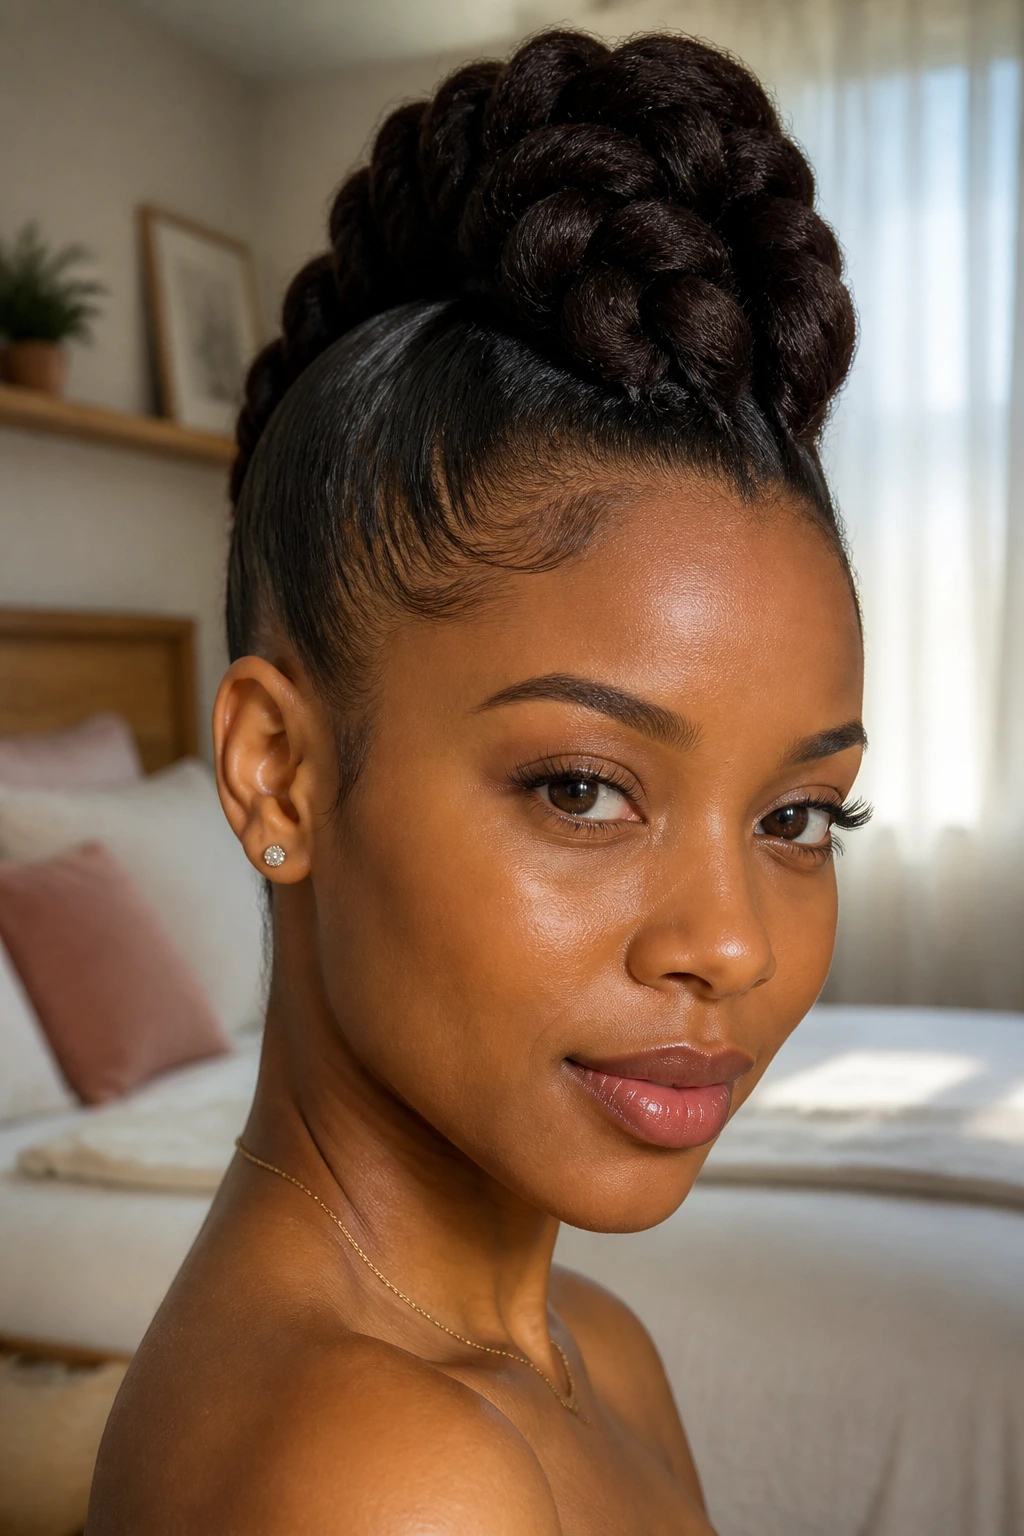
Want a style that looks bold without being fussy? A braided mohawk updo gives you a tall center line and keeps the sides controlled, which is a smart way to fake extra volume.
How to Place the Braid
Start the braid at the hairline or just behind it, then run it straight down the center of the head. Dutch braids work especially well because they sit on top of the hair instead of sinking into it. Pull the braid outward at the edges once it’s secured. That widens the shape and creates the sense of height through the middle.
The sides can be slicked back or left softly brushed, depending on how sharp you want the finish. For curly hair, this style is a gift. For straight hair, texture spray before braiding makes the braid look fuller and less rope-like.
The mohawk line gives you lift without needing to tease the whole head. That is the nice part. Less work, more shape.
10. Donut Bun With Wrapped Ends
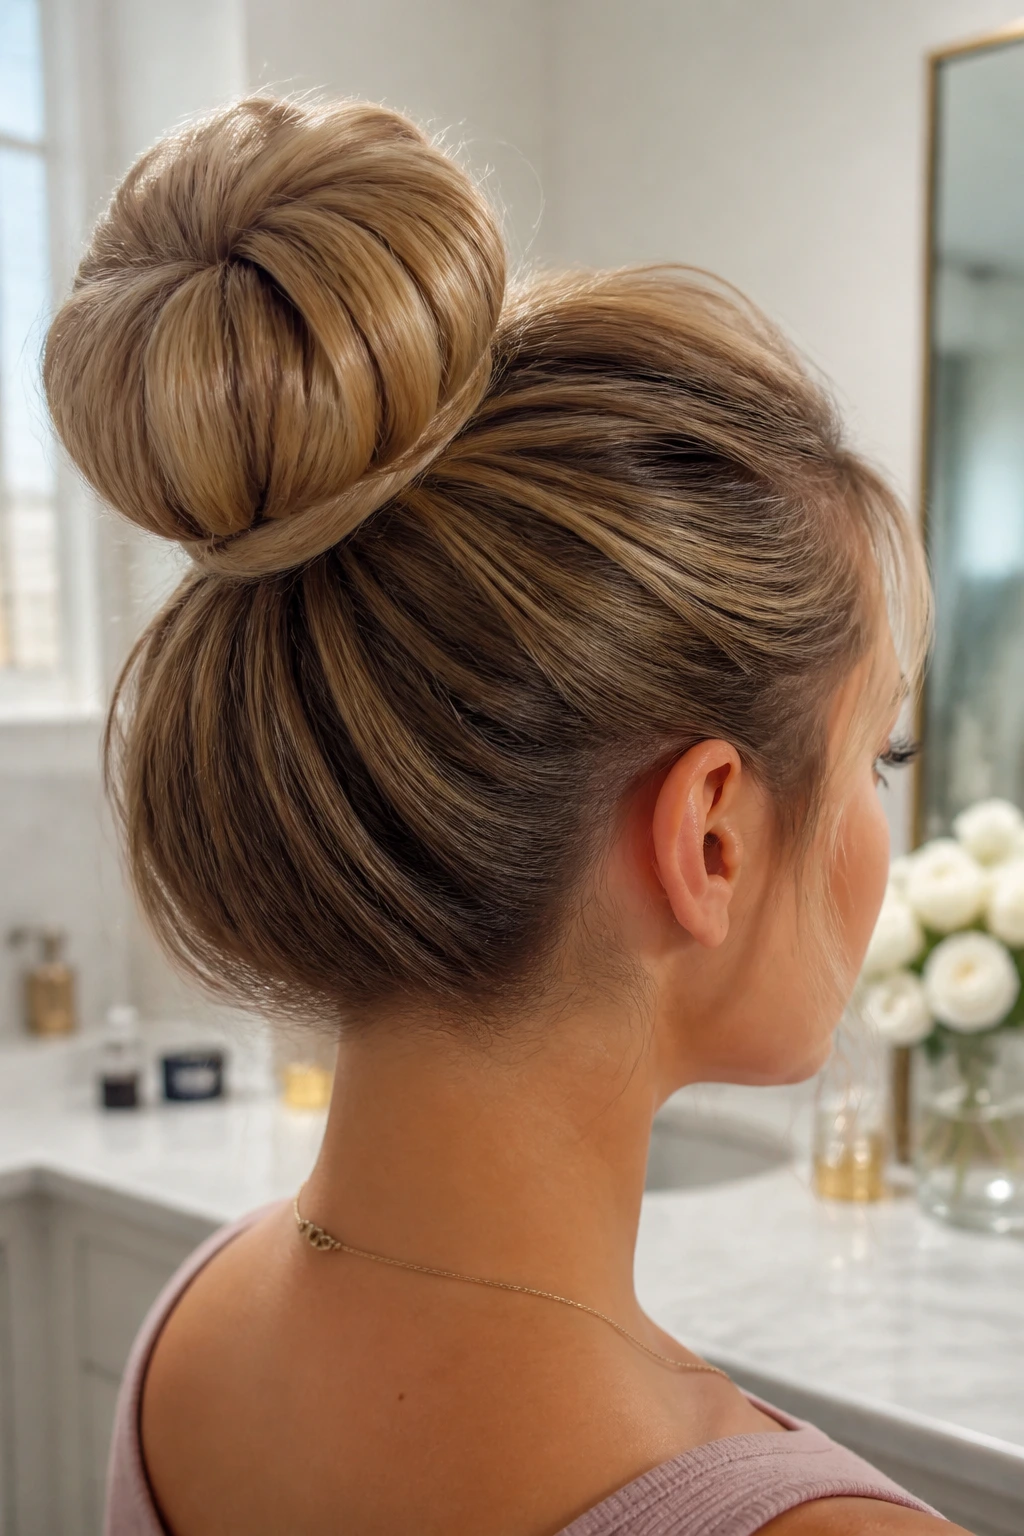
A bun donut sounds basic, but it can look surprisingly full when the hair is wrapped with care. The foam form gives the bun a round base, and the wrapped strands hide the padding so the bun reads as plush instead of fake.
I like this one when the hair needs to look neat but not tiny. Place the ponytail slightly higher than a normal low bun, slide the donut over it, and spread the hair evenly around the form. Then tuck the ends under and pin the outer edge in a few places. If you leave the crown slightly lifted, the bun stops looking stuck to the scalp.
This style is forgiving, which is why so many people keep coming back to it. You get a clean outline, a thicker bun, and a shape that stays steady through a long day. No wrestling required.
11. Twisted Low Bun With Deep Side Part
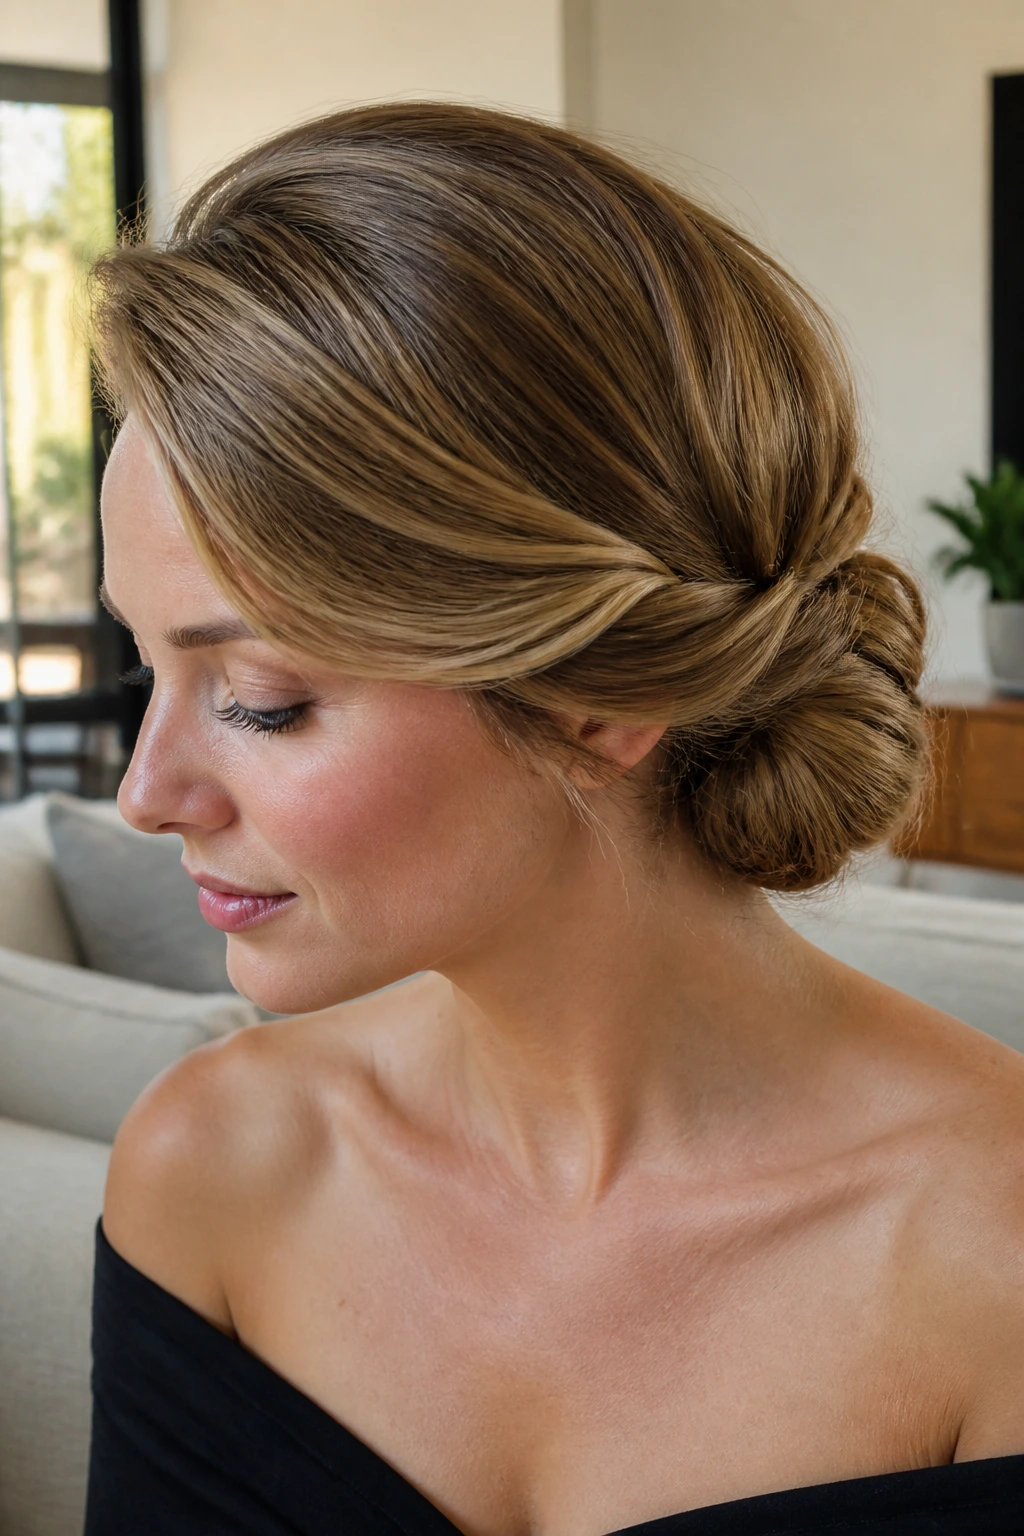
A deep side part can change the whole proportion of an updo. It shifts weight to one side, which makes the style feel fuller even before the bun is pinned.
The twist itself should start at the heavier side of the part and travel toward the nape. From there, wrap the hair into a low bun that sits a little off center. That off-center placement gives the style movement. A bun planted dead in the middle can look stiff. One sitting slightly to the side feels softer and more expensive, if I can put it that way without sounding fussy.
This is one of the easiest ways to flatter rounder faces or anyone who wants a bit of length in the silhouette. The side part opens the face, and the twist keeps the volume from puffing out in the wrong place.
12. Old-Hollywood Rolled Updo
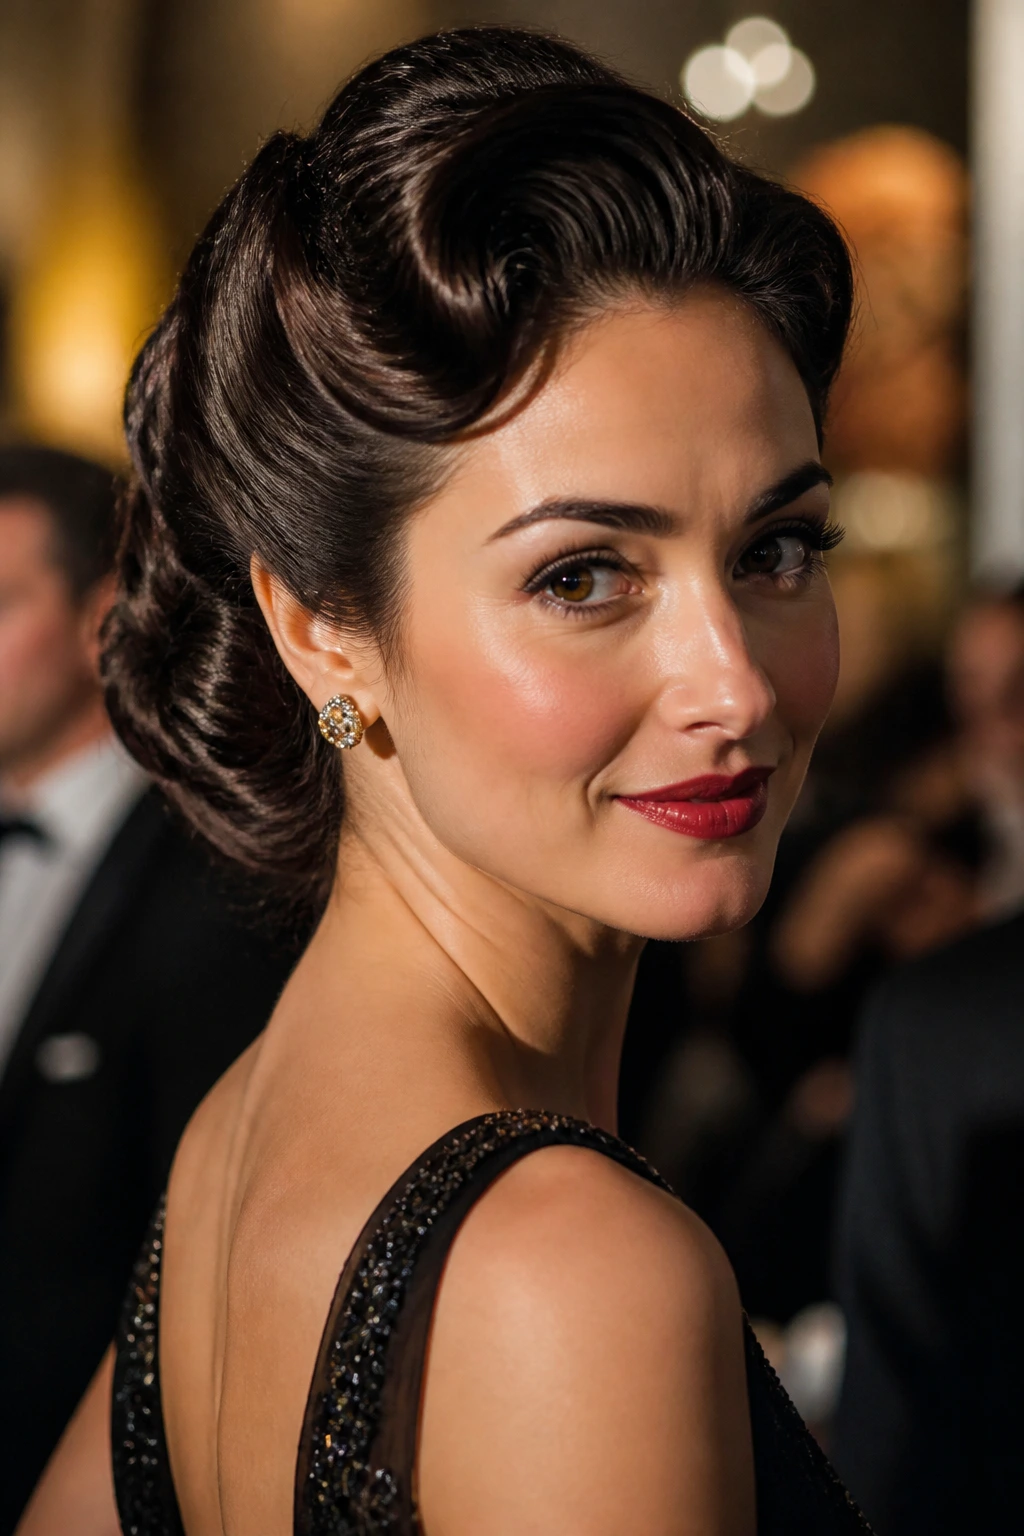
This style is all about curves. The rolls near the temples and the lifted crown work together, so the hair feels full even when the overall shape stays close to the head.
Unlike a messy updo, the old-Hollywood version wants each section to look considered. You create one or two soft rolls, pin them flat, then sweep the remaining length into a low pin curl or tucked roll at the back. The volume comes from the molding, not from rough teasing. That’s why it feels so smooth.
It’s especially good for formal nights and dressier events because the shape stays neat in photographs and in real life. The crown does not need to be huge. It just needs enough lift to keep the rolls from flattening the top of the head.
13. Curly Pineapple Updo
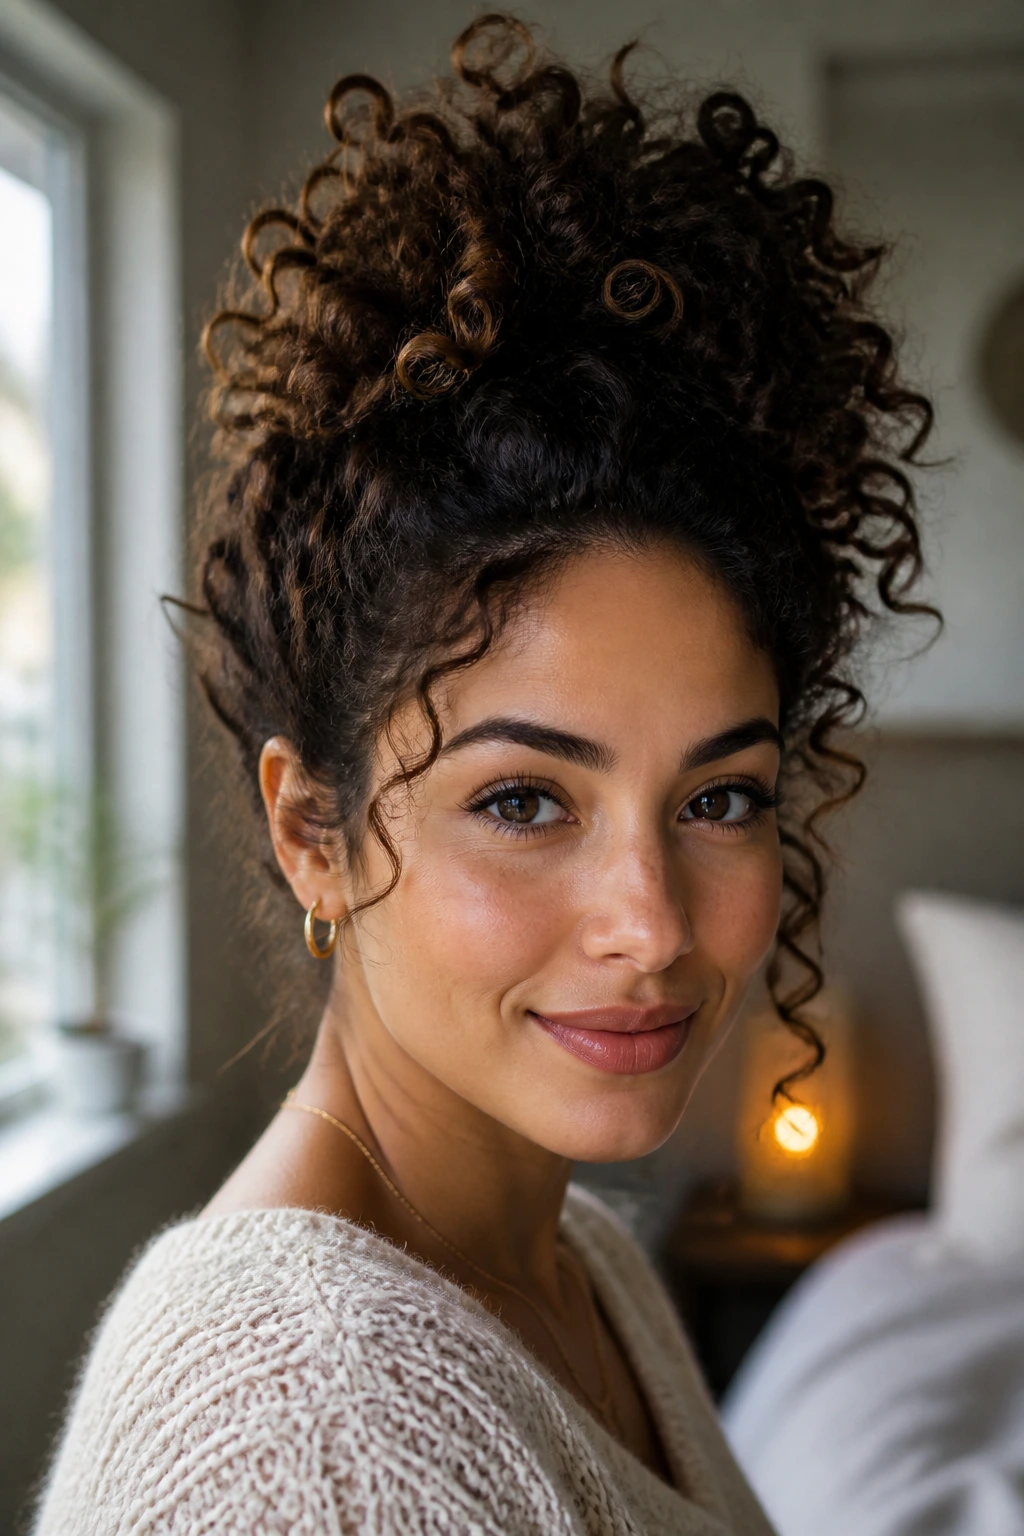
Curly hair already knows how to hold volume. The pineapple updo just moves that energy to the top of the head and keeps the sides soft, which makes the whole style feel light and full at the same time.
Why It’s So Good for Natural Texture
The trick is not to flatten the curls when you gather them. Use a loose band or a silk scrunchie, place it high, and let the curls fan upward instead of compressing them downward. If you want more shape at the crown, pinch in a few bobby pins underneath the gathered section so the lift sits where the eye sees it first.
This style works best when the curls are hydrated but not heavy with product. Too much cream can drag the shape down. A little leave-in and a touch of gel at the edges is enough.
- Best for curly and coily textures
- Works on second- or third-day curls
- Keeps volume without forcing the pattern flat
- Can be dressed up with pins or a comb
Tip: Keep the hairline soft. A sharp edge can fight the airy shape.
14. Rope-Braid Chignon
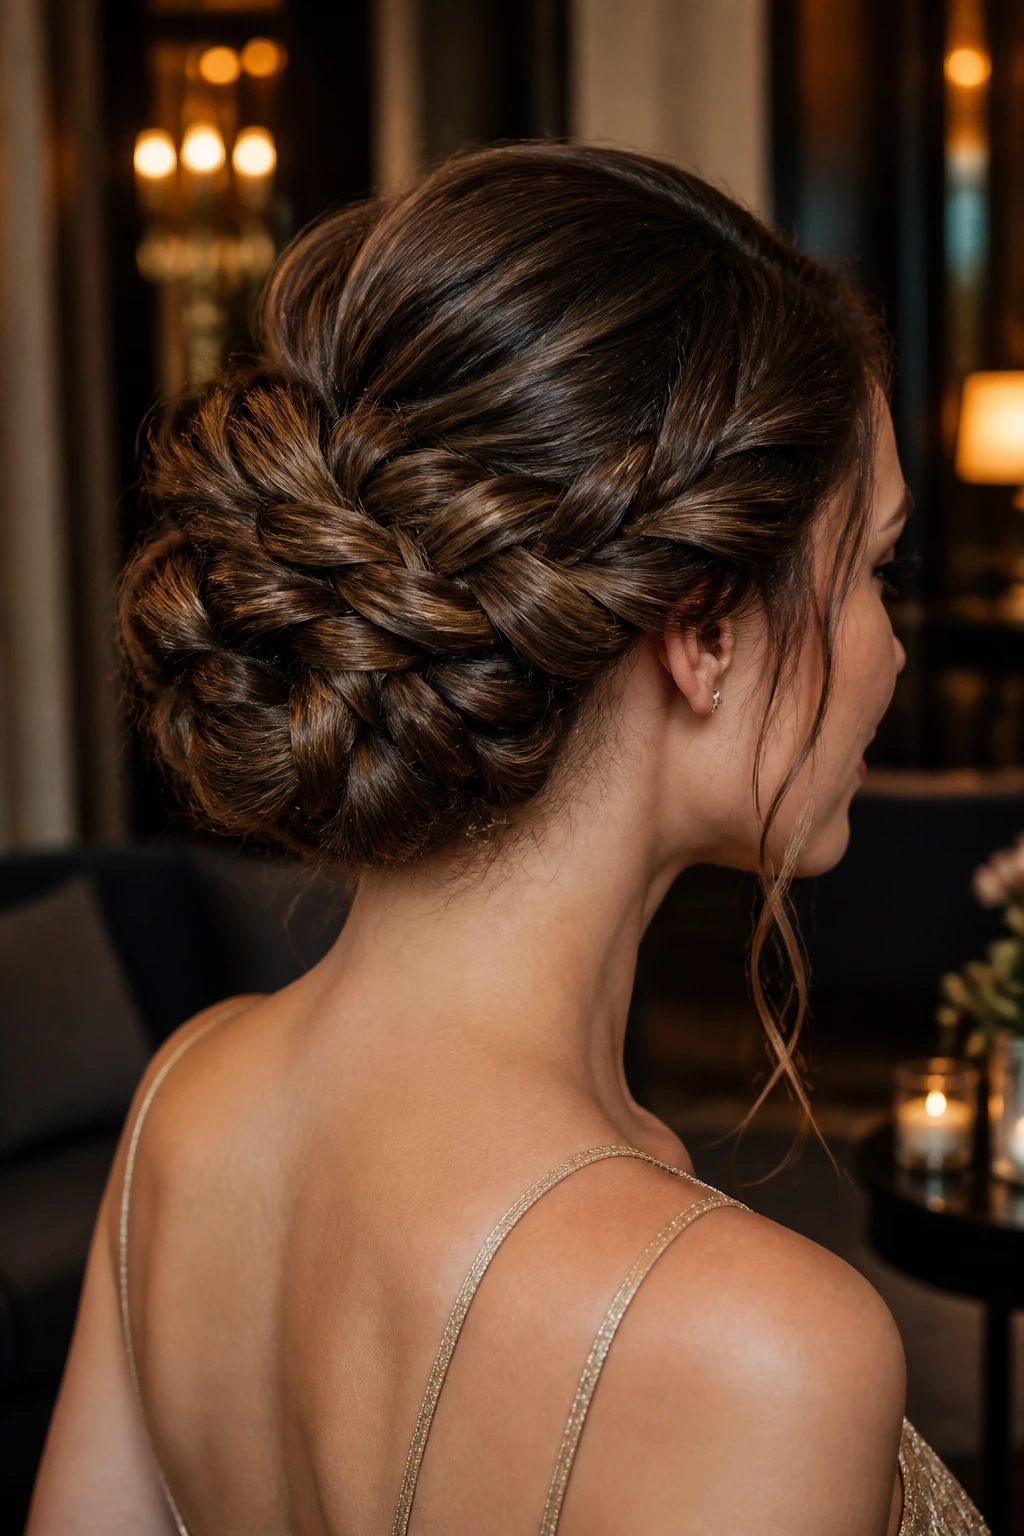
This one is underrated. Rope braids add a thicker look than a plain three-strand braid, and that extra thickness gives the chignon a fuller, more sculpted body.
You twist two sections in the same direction, then wrap them around each other in the opposite direction. The braid ends up looking round and substantial, which helps the bun feel dense without needing a lot of hidden padding. Once the rope braid is coiled into a chignon, tug at a few outer loops so it widens a touch.
The style works well on hair that is smooth but not slippery. If your hair is super fine, a bit of dry texture spray on the lengths keeps the braid from sliding apart. If it’s thick, the braid may look big on its own, which is half the appeal.
15. Wrapped High Ponytail Bun
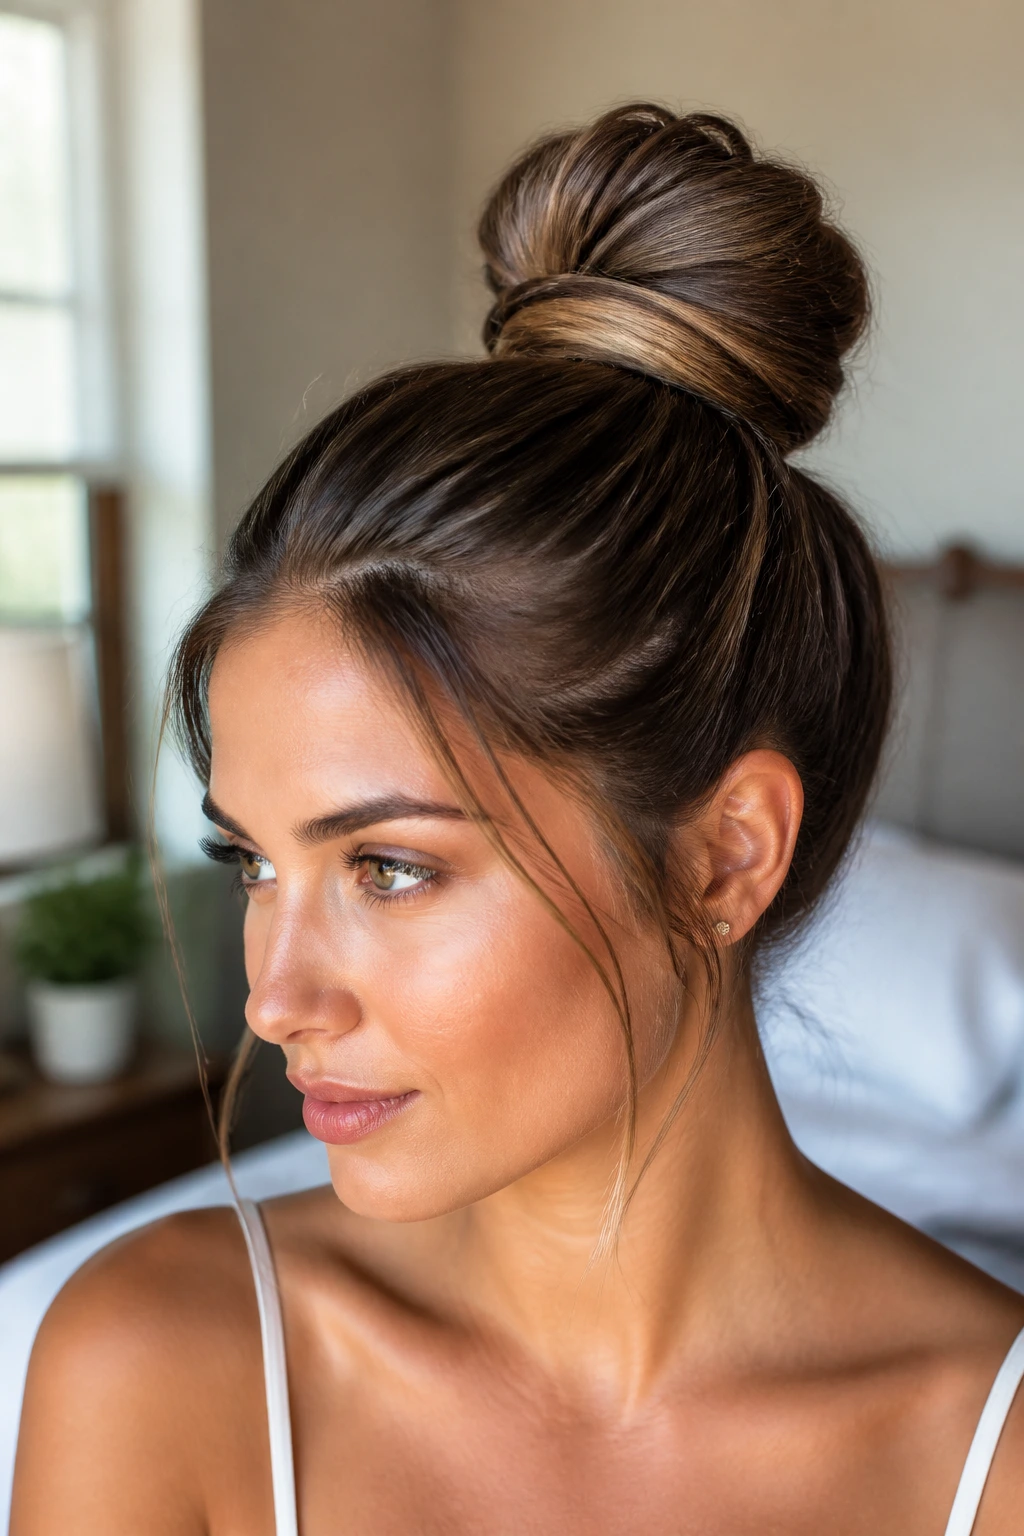
Can a ponytail look like an updo and still feel relaxed? Absolutely. A wrapped high ponytail bun gives you the lift of a high ponytail and the fullness of a bun, all in one move.
How to Keep the Base Clean
Pull the hair into a high ponytail first, then secure it with a strong elastic. Wrap one thick strand around the base to hide the band, then twist the tail into a bun and pin it in a circle. If you want more height, gently loosen the hair above the elastic with the tip of a comb before you wrap the bun.
This style likes long hair best, but medium lengths can work if the bun is compact. A little tease at the crown keeps the ponytail from sitting too tight against the head, which is where a lot of volume gets lost.
The finish can be sleek or soft. Sleek reads sharper. Soft reads more playful. Same structure, different mood.
16. Double-Bun Stack
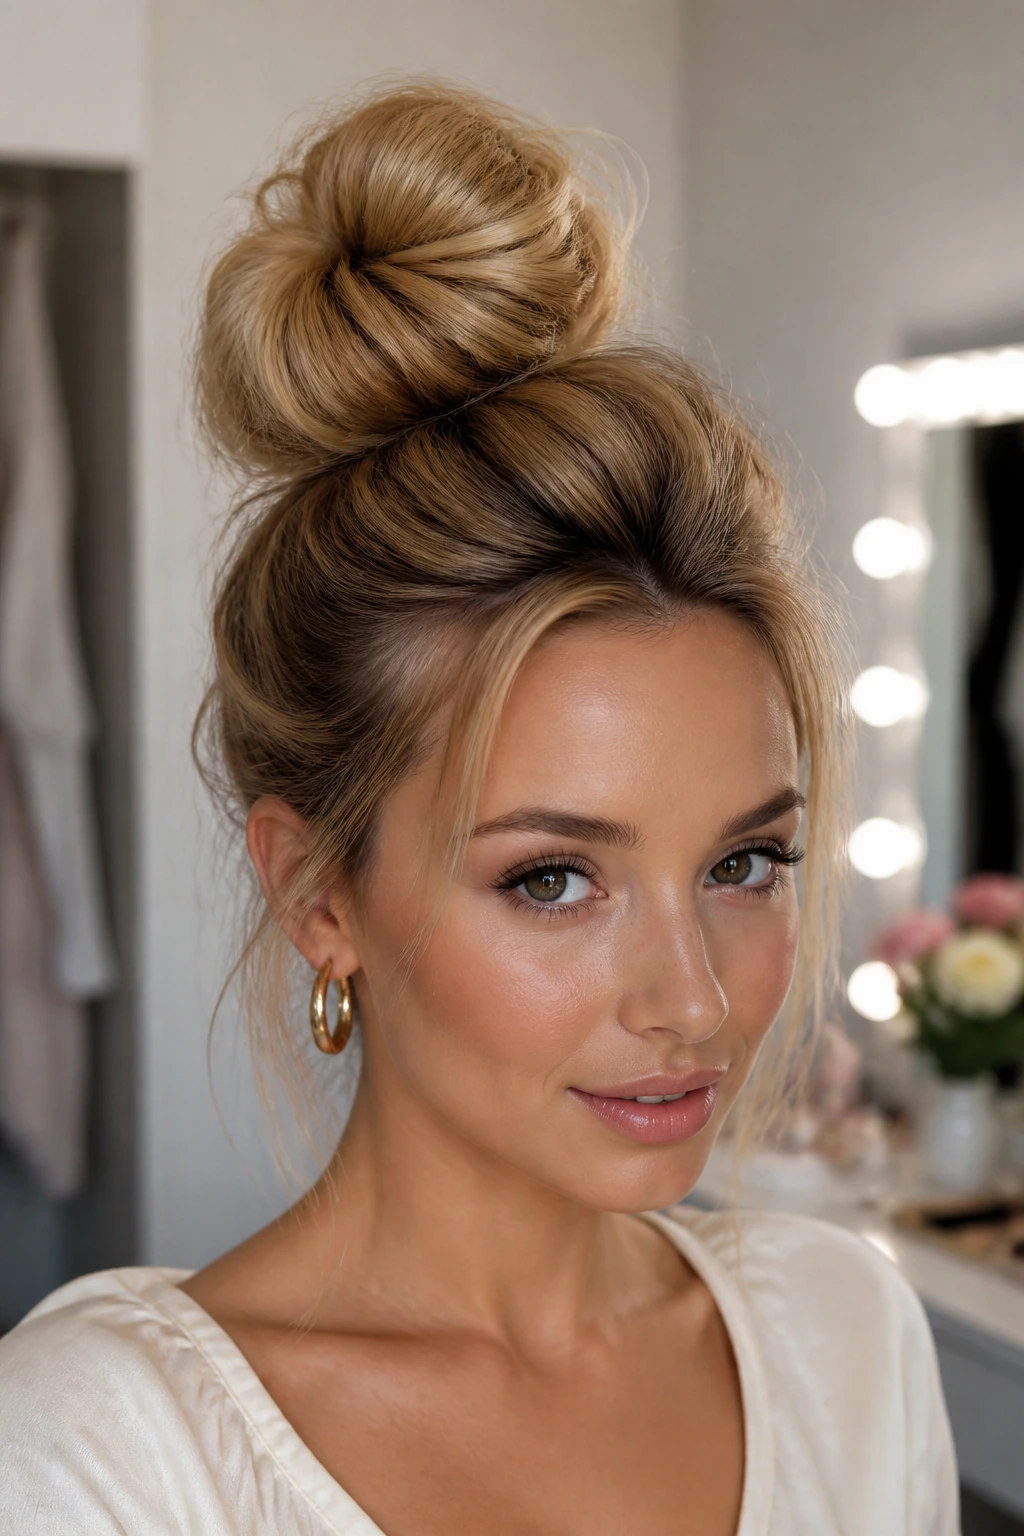
A stacked double-bun updo looks playful from the outside and surprisingly clever underneath. One bun sits above the other, so the style gains height without needing a massive tease at the crown.
I like this on hair that feels too fine for a single big bun. The top bun creates lift, the lower bun adds body, and the two together read as one full shape. It can be polished with clean parting or relaxed with a few loose pieces near the ears. Either way, the silhouette is the point.
This is a style that benefits from careful pin placement. If the buns start drifting apart, the shape gets weird fast. Anchor each bun first, then cross-pin the space between them so the stack stays tidy. It sounds fussy. It is a little fussy. Worth it, though.
17. Side-Swept Volume Bun
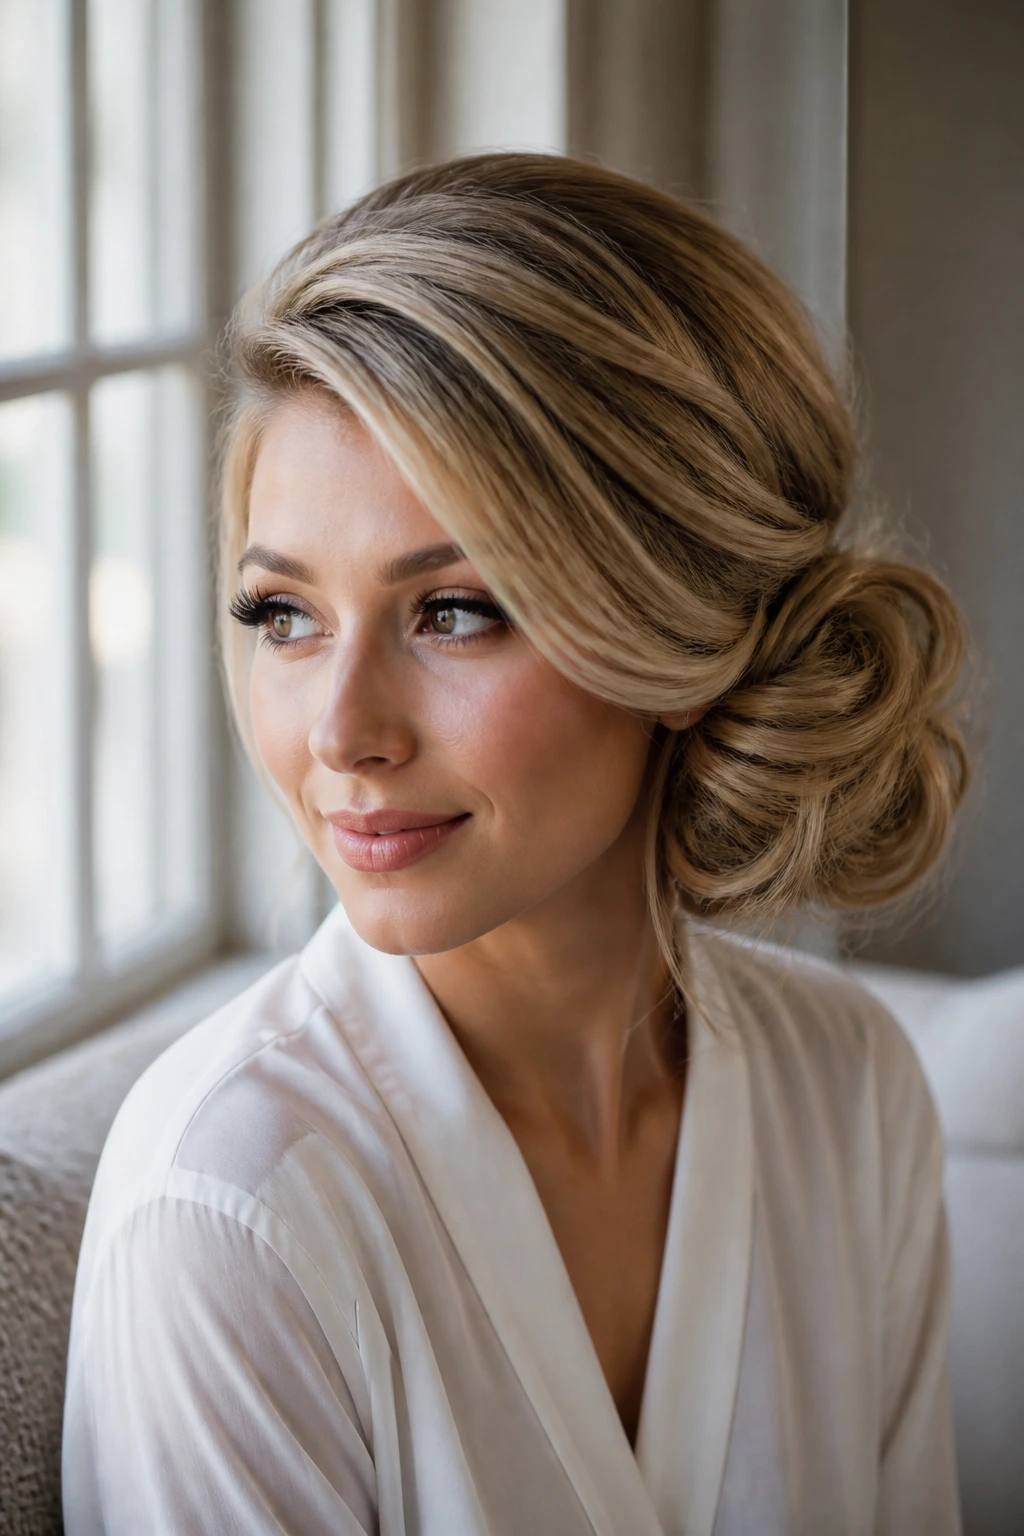
A side-swept bun gives volume a place to live. Instead of centering everything at the back, you build lift over one temple and let the bun sit low and slightly off to the side.
That shift changes the whole reading of the style. The head appears softer, the crown looks higher, and the bun takes on more shape because the eye has to travel across the hair to reach it. It’s a nice move for one-shoulder dresses or anything with a neckline that deserves a little space.
Keep the swept section loose enough to create a curve, not a ridge. A hard line near the part will fight the softness. A gentle arc, pinned discreetly, gives the style a fuller look without making it feel overworked.
18. Corset Braid Bun
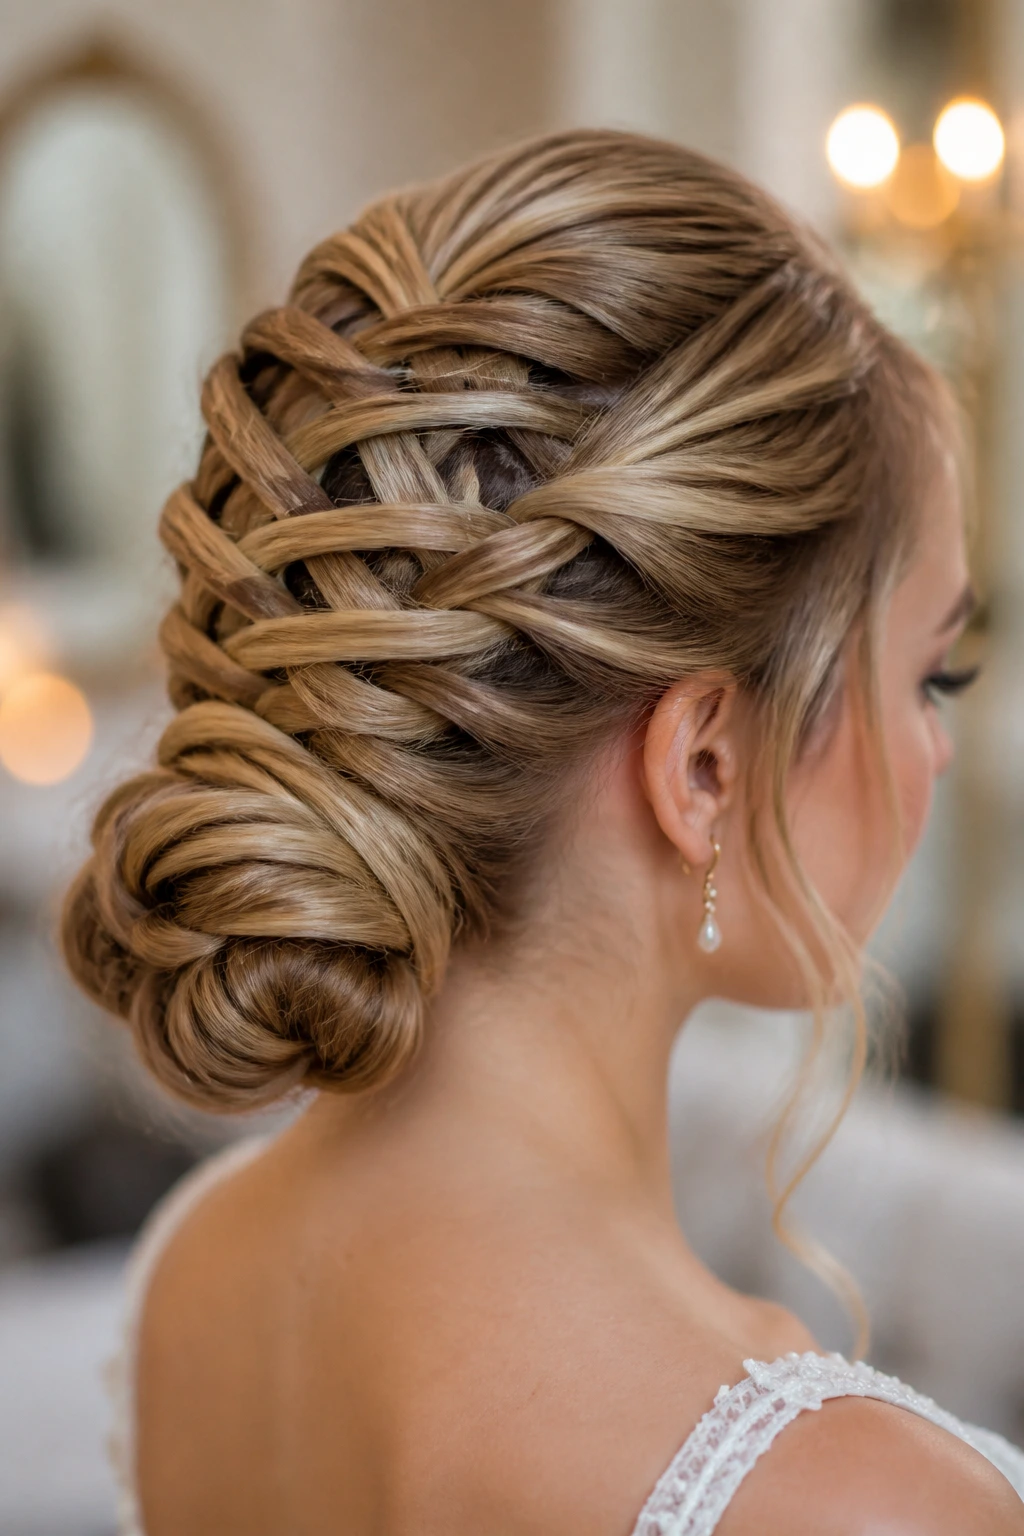
This is the one that looks intricate from across the room. The corset braid creates a laced-up effect that naturally adds width and texture, which means the bun beneath it can stay relatively simple.
Unlike a flat braid, the corset style uses two side sections that weave in and out of a central braid or ribbon, creating gaps that open up the shape. Those gaps are where the volume comes from. Once the braid is complete, twist the tail into a bun and let a few outer sections stay slightly raised.
It’s a strong choice for weddings, performances, or any event where the hair should look detailed up close. The style rewards medium to long hair, especially if the lengths have enough grip to hold the pattern.
19. Dutch Braid Halo Updo
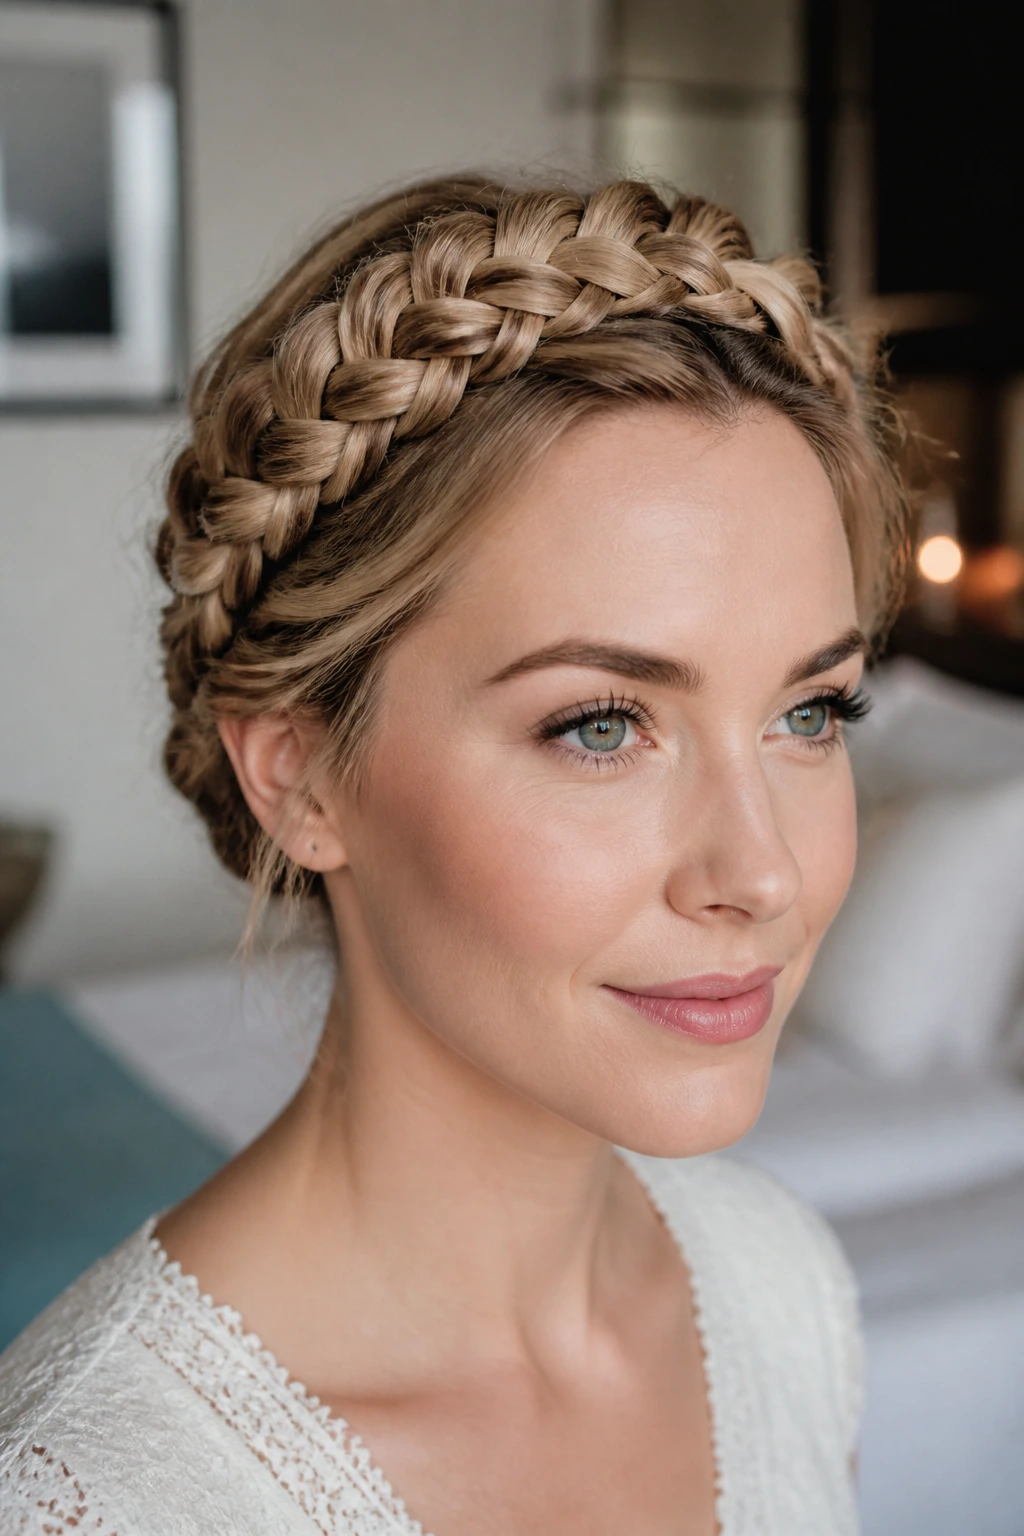
A halo braid wrapped around the head can make the crown look fuller by default. The braid itself acts like a built-in frame, and that frame is what creates the lift.
Why It’s a Volume Trick
Because the braid sits on top of the hair, it adds height around the perimeter of the head instead of flattening it. Dutch braids are useful here because they stand out more than standard braids and give the shape a little more body. When the ends are tucked under at the nape, the whole thing reads as a full updo rather than a simple braid.
A halo works on straight, wavy, or curly hair, though very silky hair may need a light texturizing spray first. Pulling at the braid after it’s secured makes the halo wider and softer.
- Use a middle or slightly off-center part
- Pancake the braid after pinning
- Tuck the tail at the nape, not high on the head
- Keep the front pieces soft if you want the style to feel lighter
Tip: If the braid feels too neat, loosen only the outer edge. Leave the inner line intact.
20. Low Knot With Lifted Crown
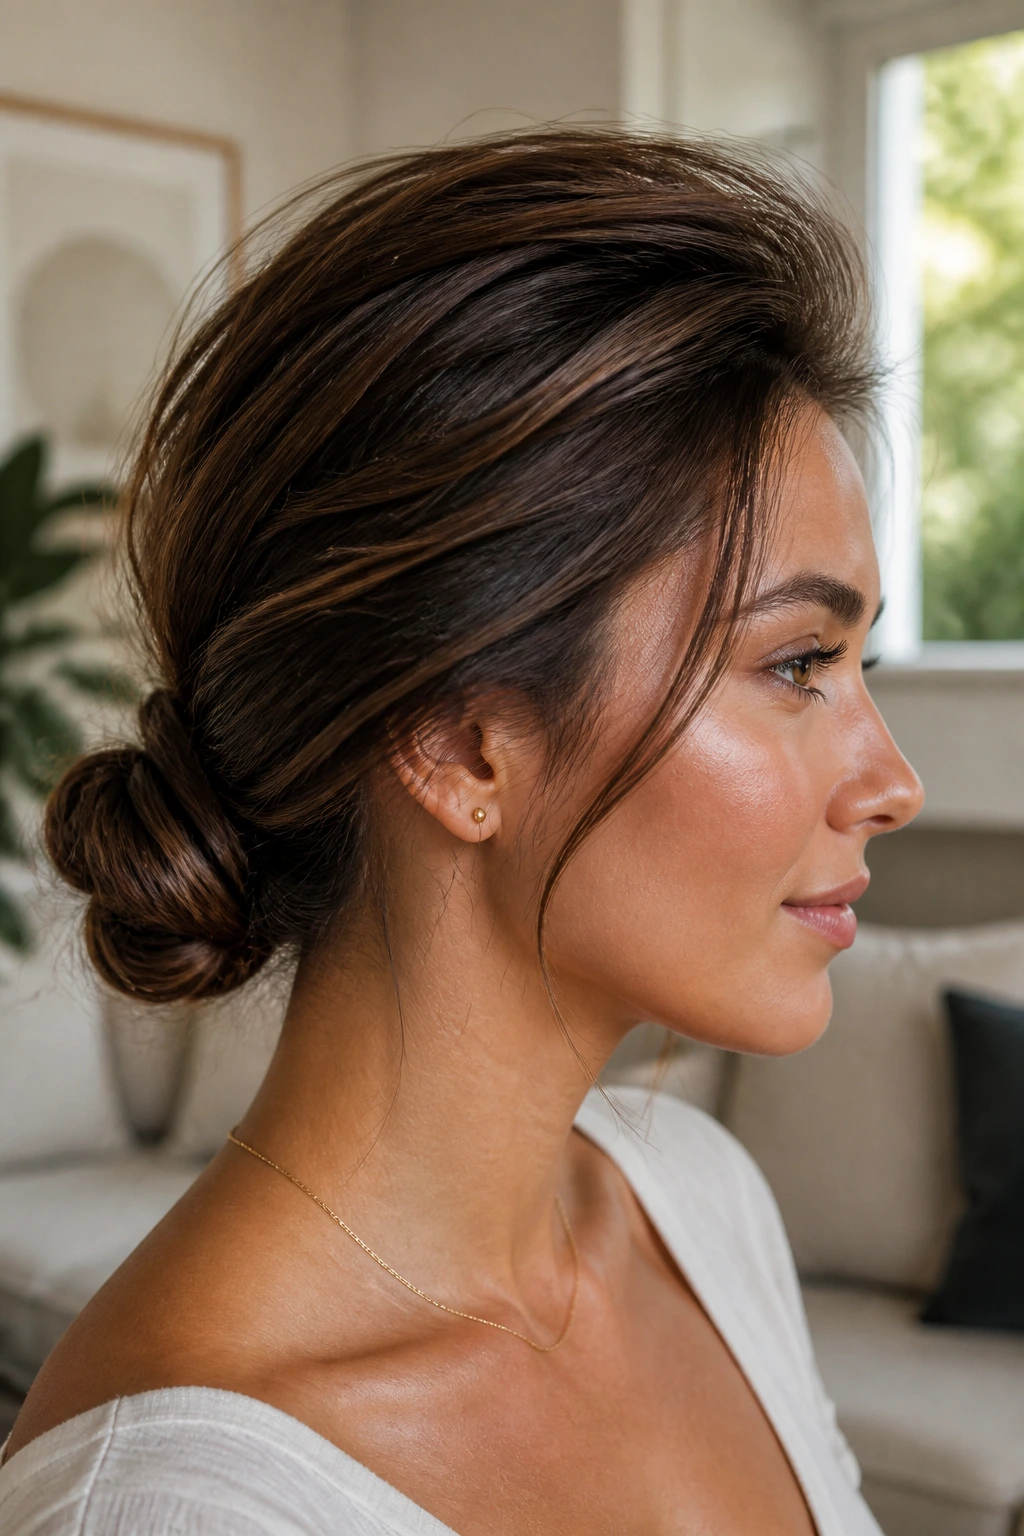
This is the quiet one. A low knot with a lifted crown doesn’t shout for attention, but it gives the hair a fuller profile than a plain nape knot ever will.
The move is simple: build a little height at the crown, smooth it back, then twist the length into a compact knot that sits low and secure. What makes it work is the contrast. The top is soft and rounded, while the knot stays controlled. That balance keeps the style from looking flat or severe.
It’s a strong choice for work, dinners, or any day when you want your hair out of your face without losing shape. I prefer it with a side part, since the side part gives the crown a more natural lift and keeps the knot from feeling too centered.
21. Infinity Twist Bun
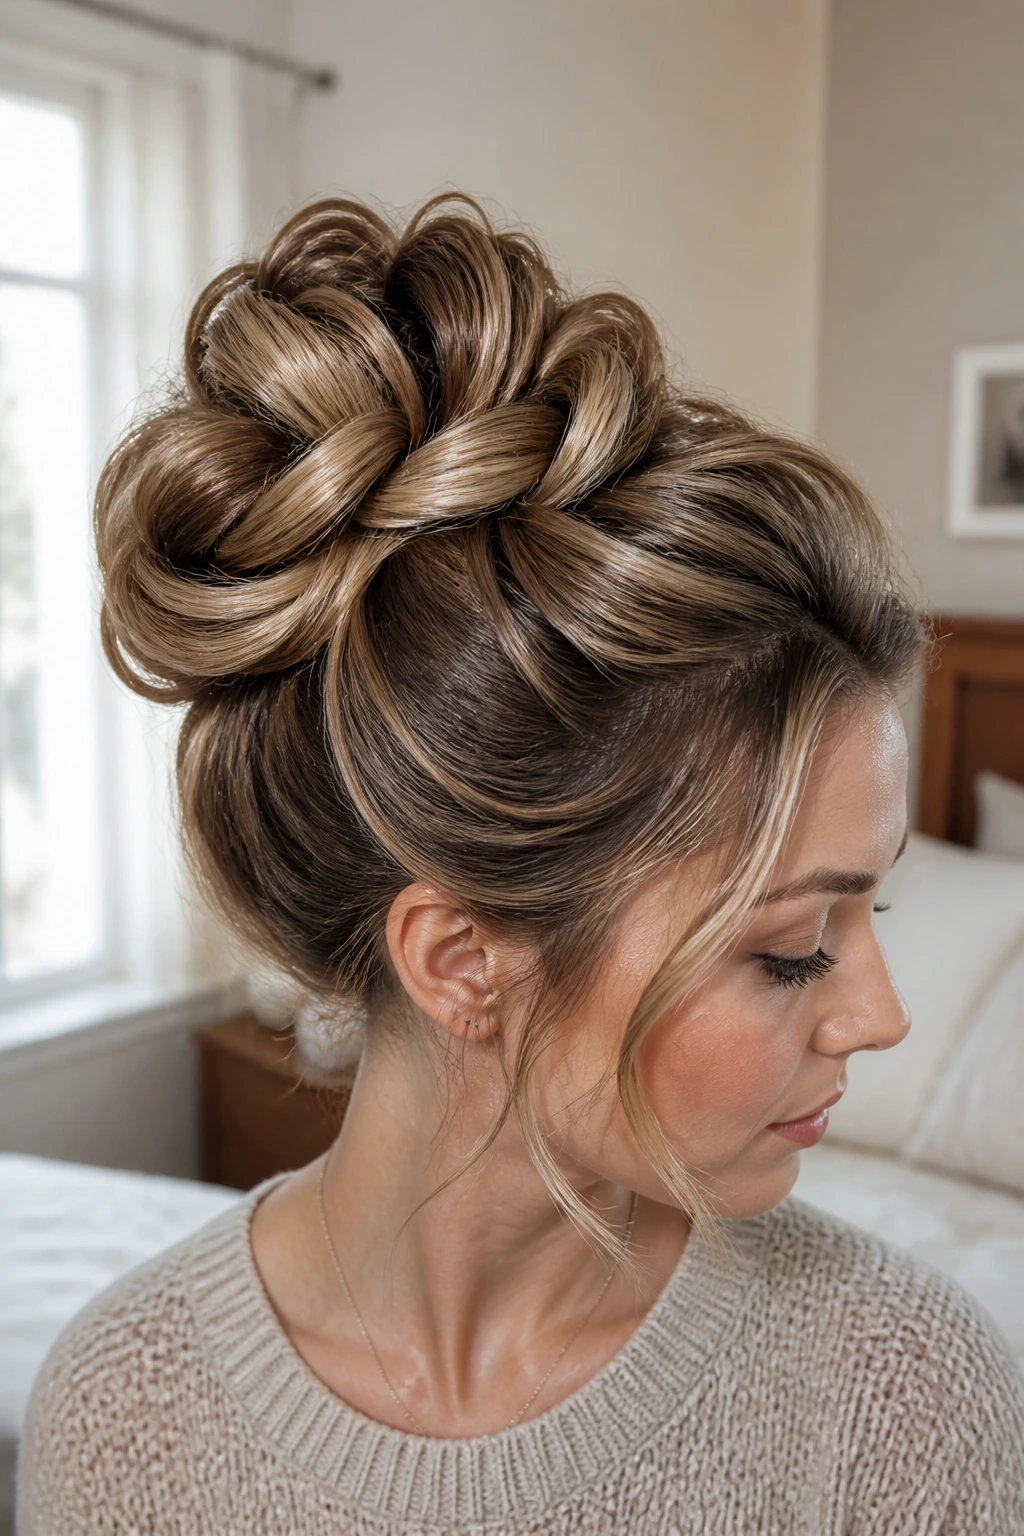
Ever see a bun that looks woven from a single ribbon? That’s the feel of an infinity twist bun. The hair loops over and under itself, which creates thickness without much teasing.
How to Style It
Split the hair into two sections, twist each one, and loop them around each other in a figure-eight motion before tucking the ends underneath. Pin along the paths where the hair crosses so the shape stays lifted. If you want more fullness, lightly backcomb the section at the crown before you start twisting.
This style is best when you want detail without extra bulk. It sits somewhere between sleek and romantic. Fine hair benefits from a little texture spray; thicker hair benefits from careful sectioning so the loops do not fight each other.
The shape is especially nice on medium-length hair, where the twists can stay visible instead of disappearing into a giant knot.
22. Faux Hawk Pompadour Updo
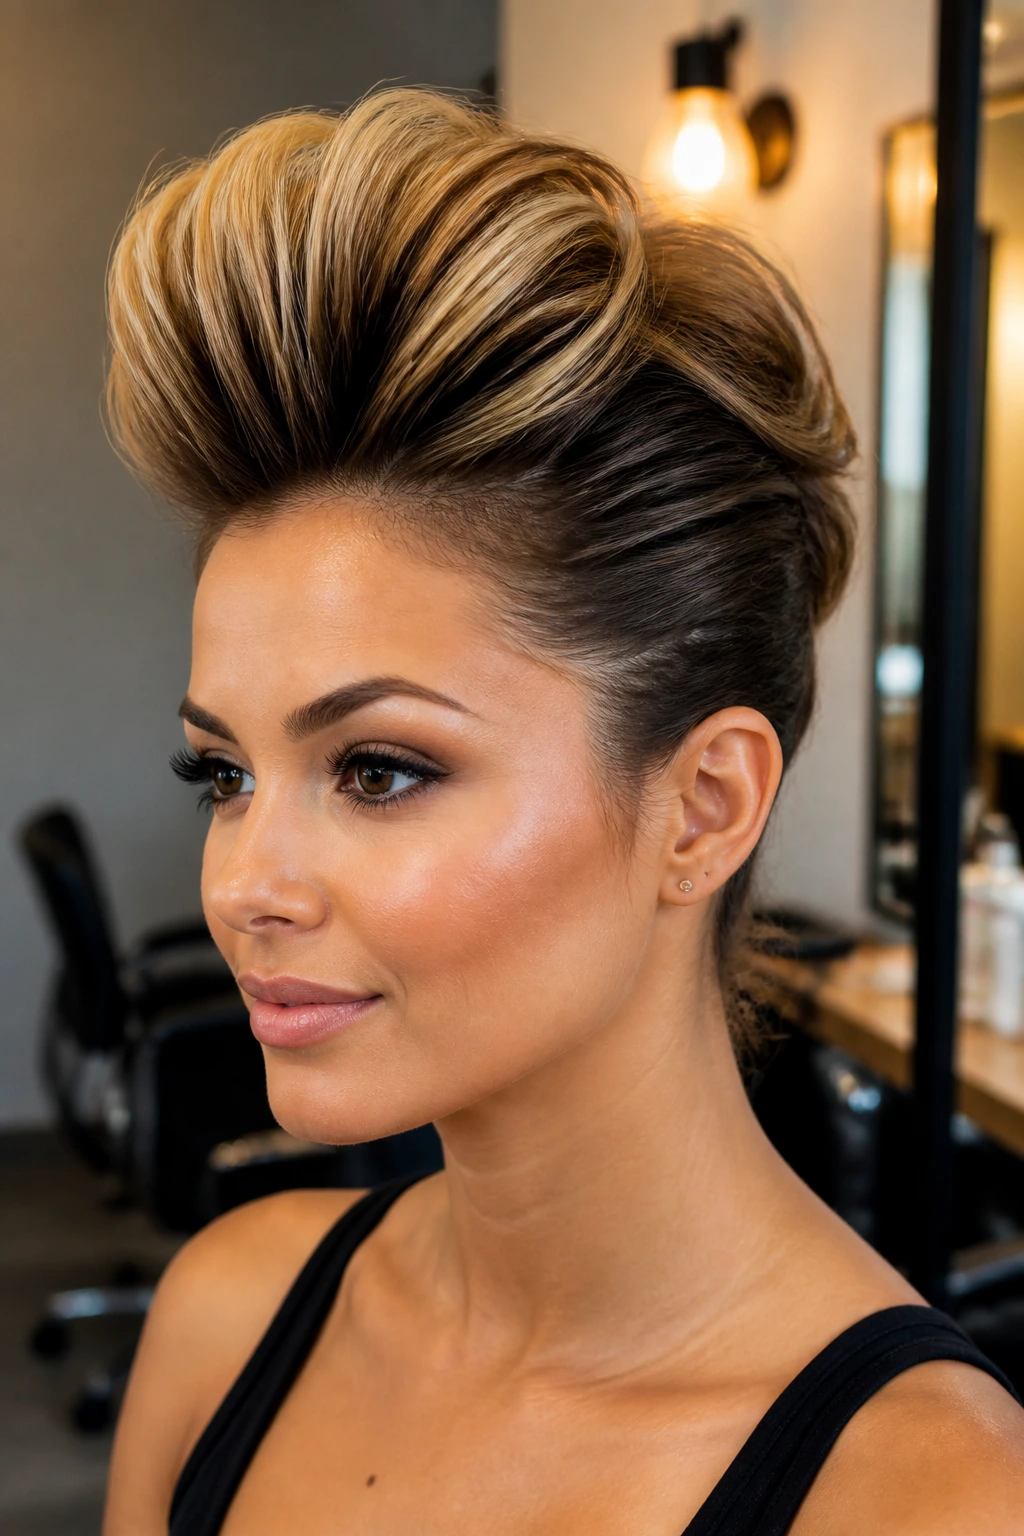
A faux hawk updo gives you the biggest-looking crown of this whole group, and it does it without making the sides bulky. That’s why it works so well when you want height with a sharper edge.
I’ve seen this save limp hair more than once. You build a lifted section at the front, pin the sides tight or smooth them back, then keep the center line raised all the way toward the nape. The effect is bold, but the mechanics are pretty simple. The style wants structure near the roots and control at the sides.
Use it when you want your hair to feel decisive. Shorter faces can wear it well because the height stretches the silhouette. Longer faces can wear it too, but usually with a softer front wave so the top doesn’t look too tall.
23. Scarf-Tied Volume Updo
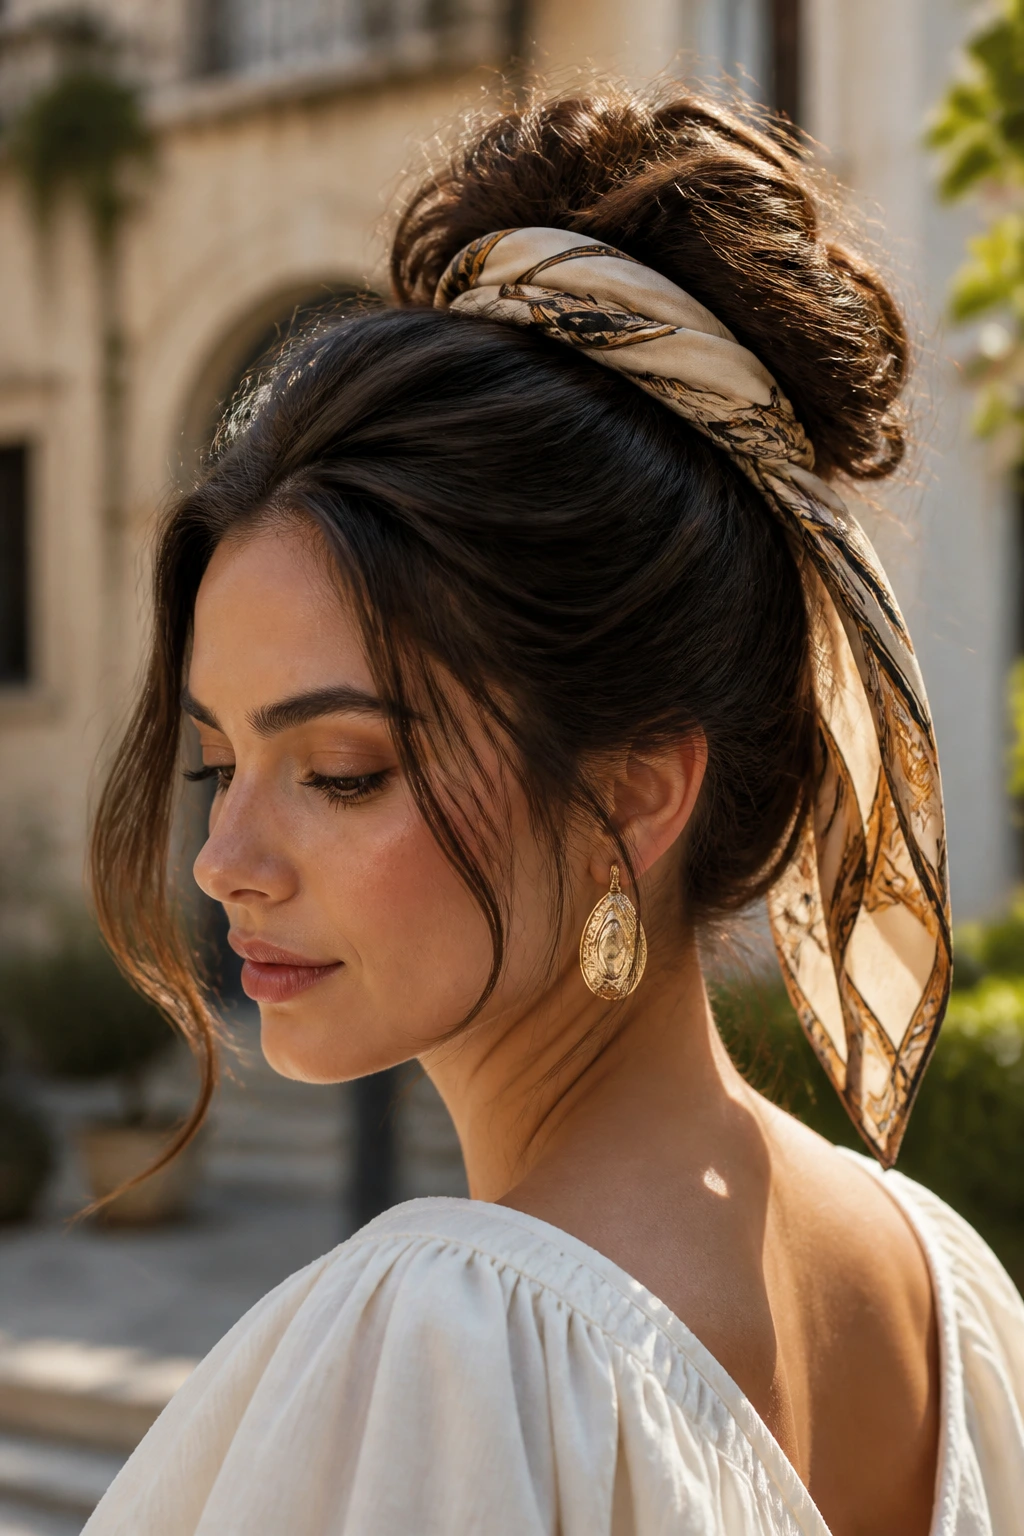
A scarf can do a lot more than decorate. Wrapped into an updo, it adds thickness at the base, gives the style a bit of lift, and helps disguises any spots where the hair feels thin or uneven.
The best version starts with a low twist or bun, then uses a silk scarf to loop around the shape and tie into the hair. Let a corner or two trail if you want movement. If you tuck the scarf under the crown section before you secure the bun, it can act like a soft cushion and give the top a fuller shape.
This works well when you want something that feels a little undone but still deliberate. A printed scarf can turn a simple bun into a proper style. A plain silk one keeps it more polished. Same trick, different finish.
24. Curly Pin-Up Roll
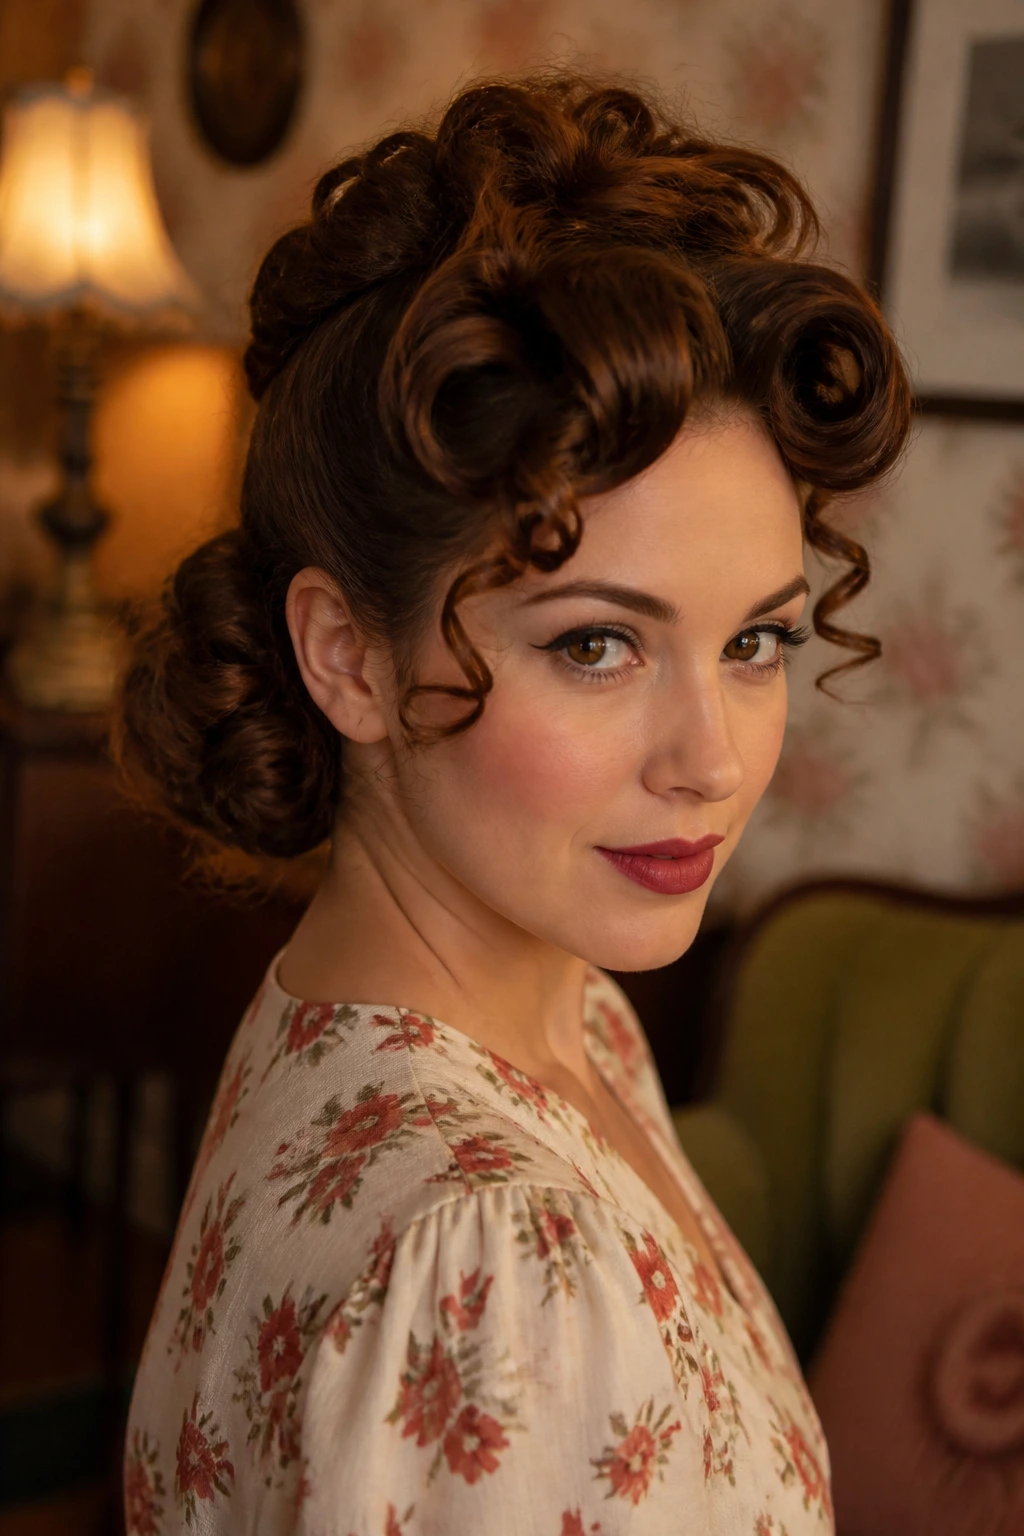
Curly hair and pin-up rolls are a very good match. The natural texture gives the rolls body, and the rolls give the curls a clear shape so the style does not sprawl.
Unlike a flat tucked updo, this one uses curved sections near the front or sides to build height and frame the face. The rest of the hair can be pinned into a low bun, a tucked roll, or a loose cluster of curls at the nape. The lift sits where it can be seen, which is half the point.
This is a good choice if you like a retro feel without going full costume. It flatters curls that need direction more than control. A few strong pins, a light spray, and some finger shaping are usually enough. Leave one or two curls free near the face if you want the roll to feel less rigid.
25. Interlocked Ponytail Bun
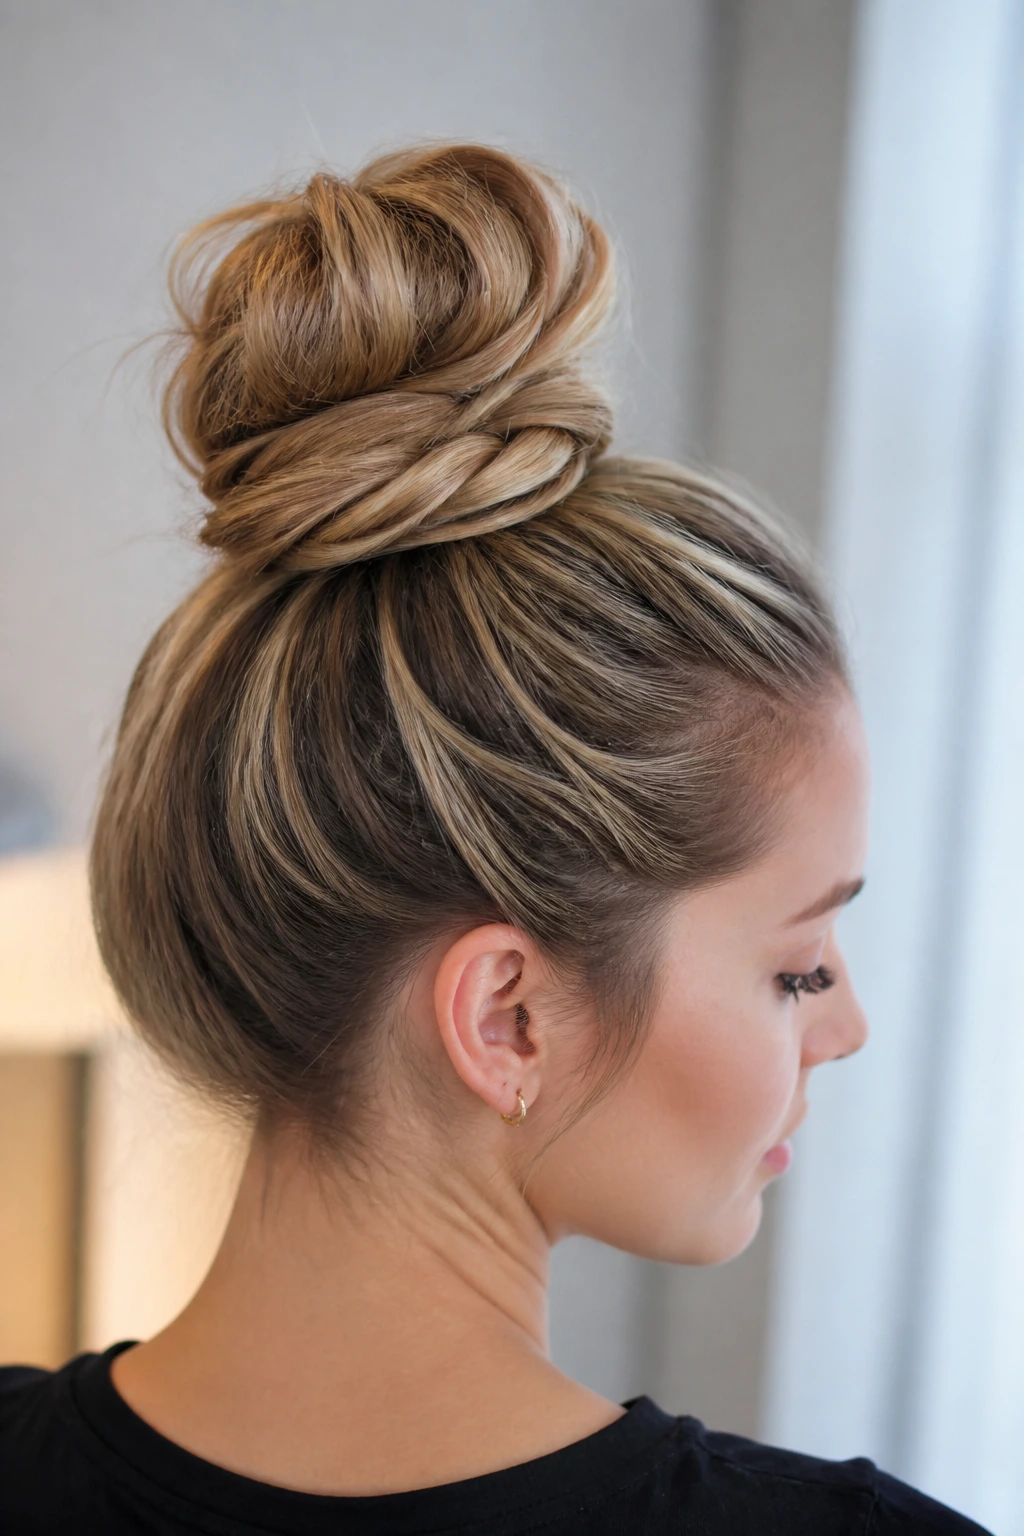
A single ponytail bun can flatten when the hair is heavy. Two interlocked ponytails spread that weight out, which gives the bun more body and helps the crown stay lifted.
What Makes It Different
Start with one ponytail at the crown and another just below it. Bring the top ponytail over the lower one, then wrap the combined length into a bun. Because the base is built from two anchors, the style holds shape better and looks thicker at the center. It’s a smart fix for fine hair that needs more structure.
This also works if you want a bun that feels a little taller without going all the way into a top knot. The overlap creates hidden support, and the final bun can be compact or loose depending on how much hair you have.
- Use small elastics that do not slide
- Keep the upper ponytail slightly looser for lift
- Pin the bun from underneath first
- Gently tug the crown once the bun is set
Tip: Hide the lower elastic with a wrapped strand so the stacked base looks clean.
26. Bridal Shell Updo
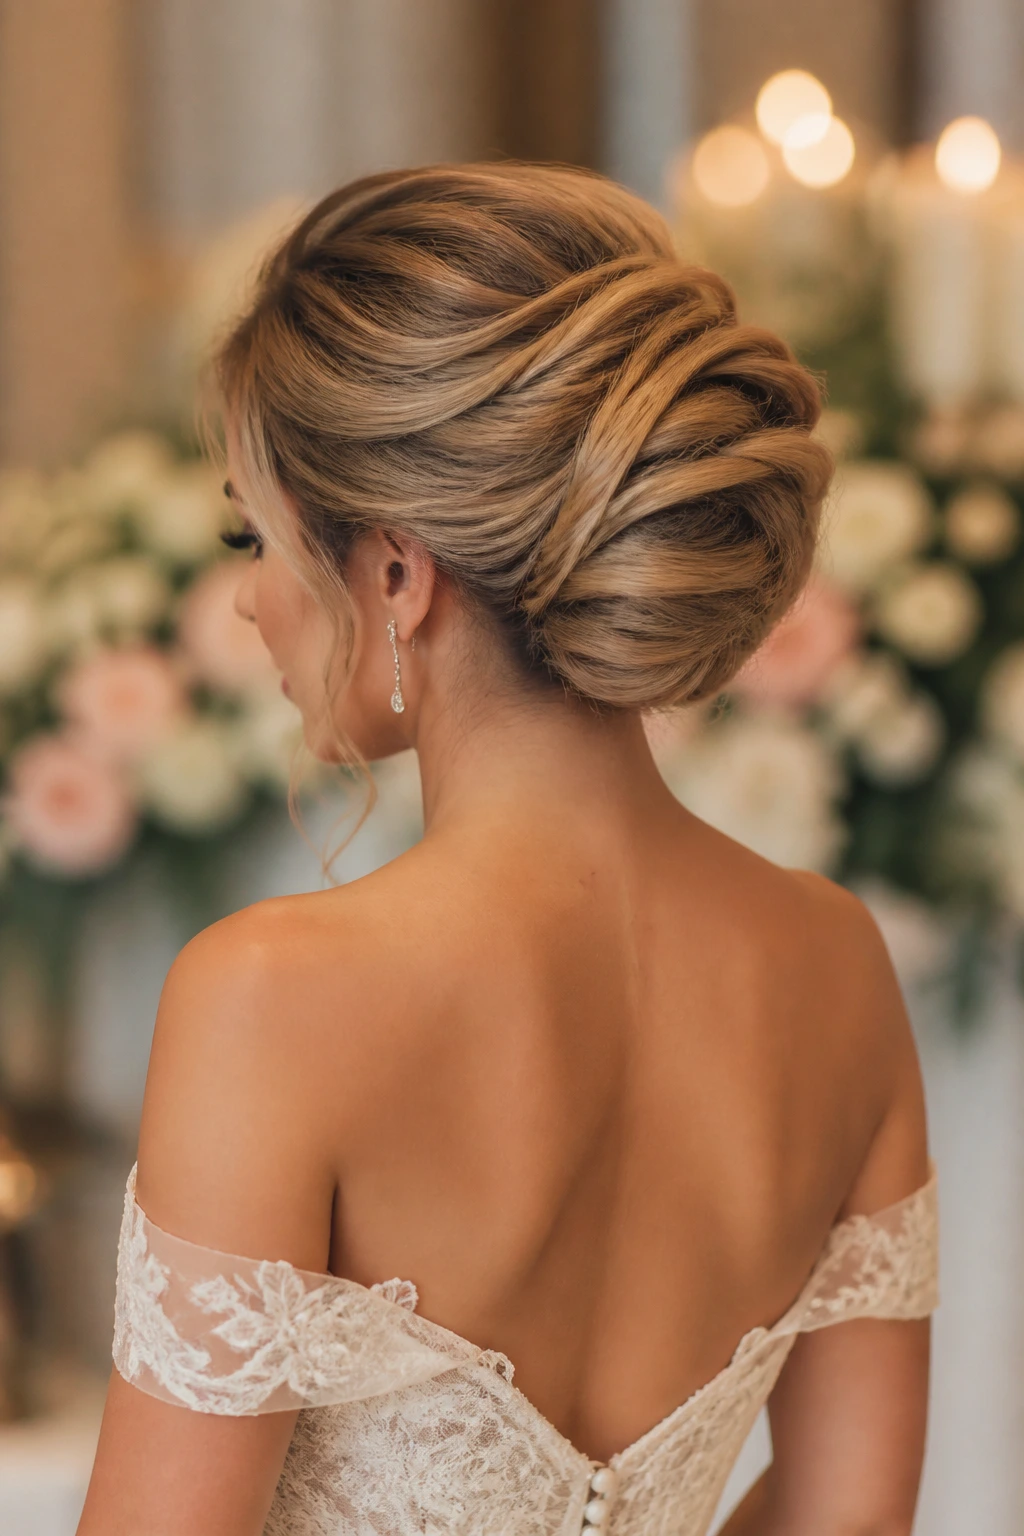
This is a formal style with real presence. The bridal shell updo uses broad, curved sections at the back that resemble a shell or fan, which gives the hair a lifted, fuller look without making it look heavy.
The shape is built by folding large panels of hair inward and pinning them in layers. Because each section overlaps the next, the finished style has depth. It’s especially good for thick hair, which can fill the folds naturally, but it can work on finer hair with a little padding at the nape.
What makes this style stand out is the way it balances polish and volume. The top stays controlled, the back has movement, and the silhouette feels full from several angles. That matters more than people admit, especially when the hair has to hold up through a long event.
27. Claw-Clip Twist With Height
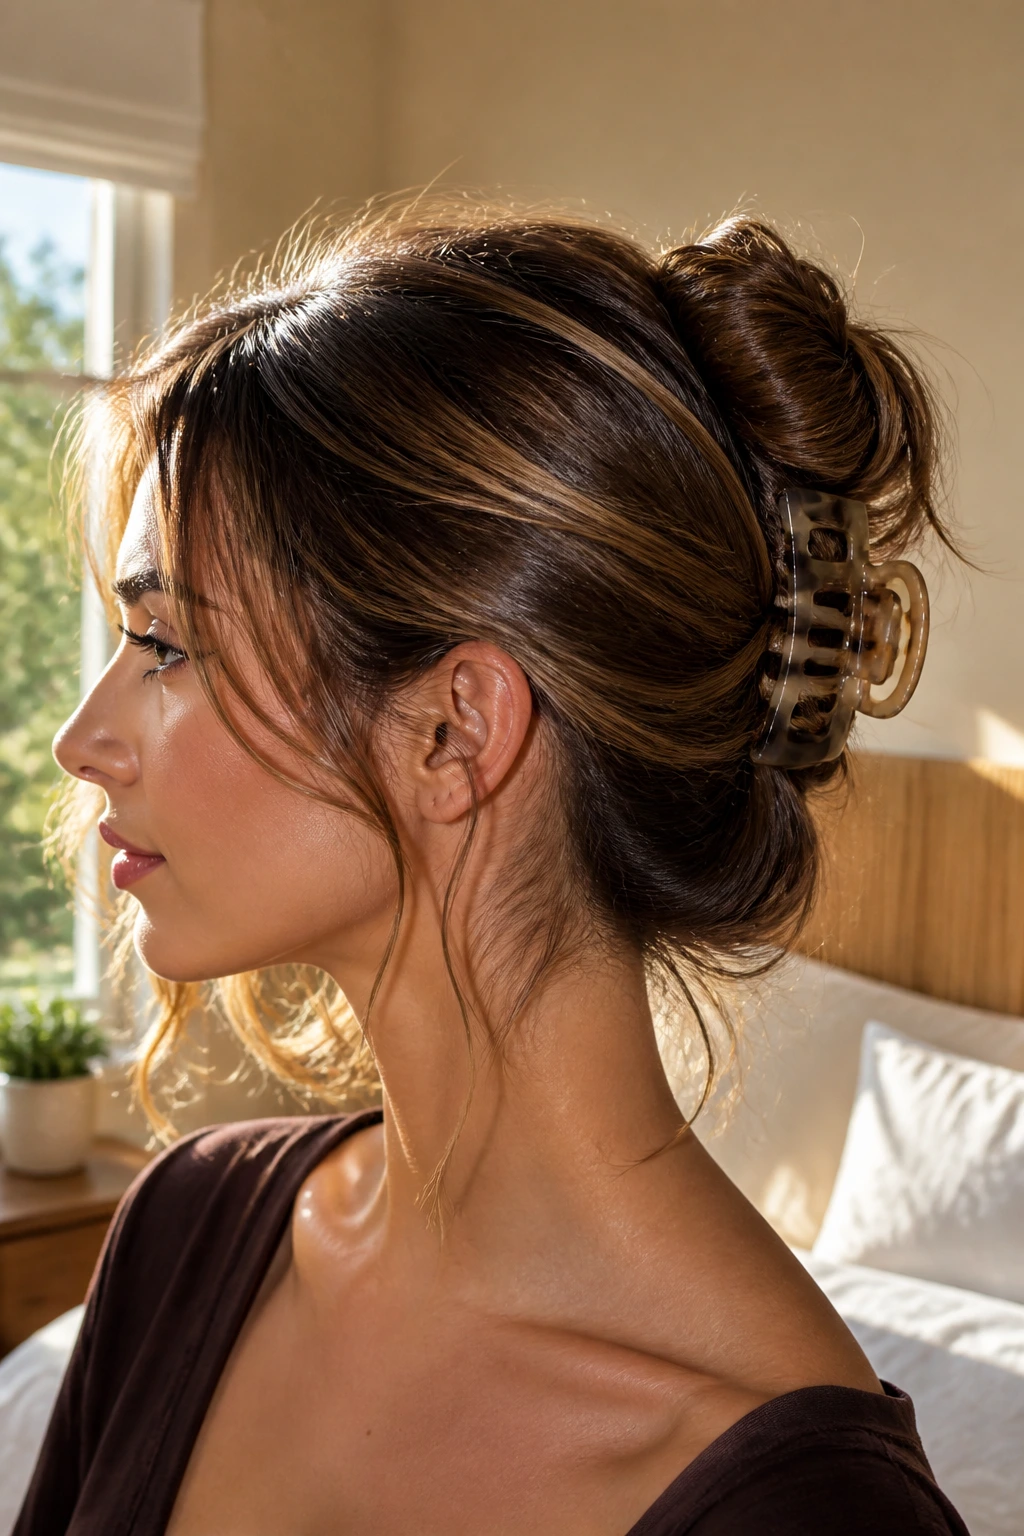
Can a claw clip create volume and still look styled? Yes, if you twist the hair first and leave the crown slightly lifted before the clip goes in.
How to Get the Right Shape
Gather the hair as if you were making a French twist, but stop before you flatten the top. Twist upward, fold the length once, then secure it with a large clip placed a little higher than the nape. The clip should catch enough hair to hold, but not crush the lift you built at the crown. If the top looks too flat, slide the clip lower and loosen the roots a touch with your fingers.
This style is great for days when you want a fast updo that still has shape. It works with wavy hair especially well because the texture keeps the twist from slipping. Straight hair may need a bit of dry shampoo or texture spray so the clip has something to grab.
28. Soft Red-Carpet Knot
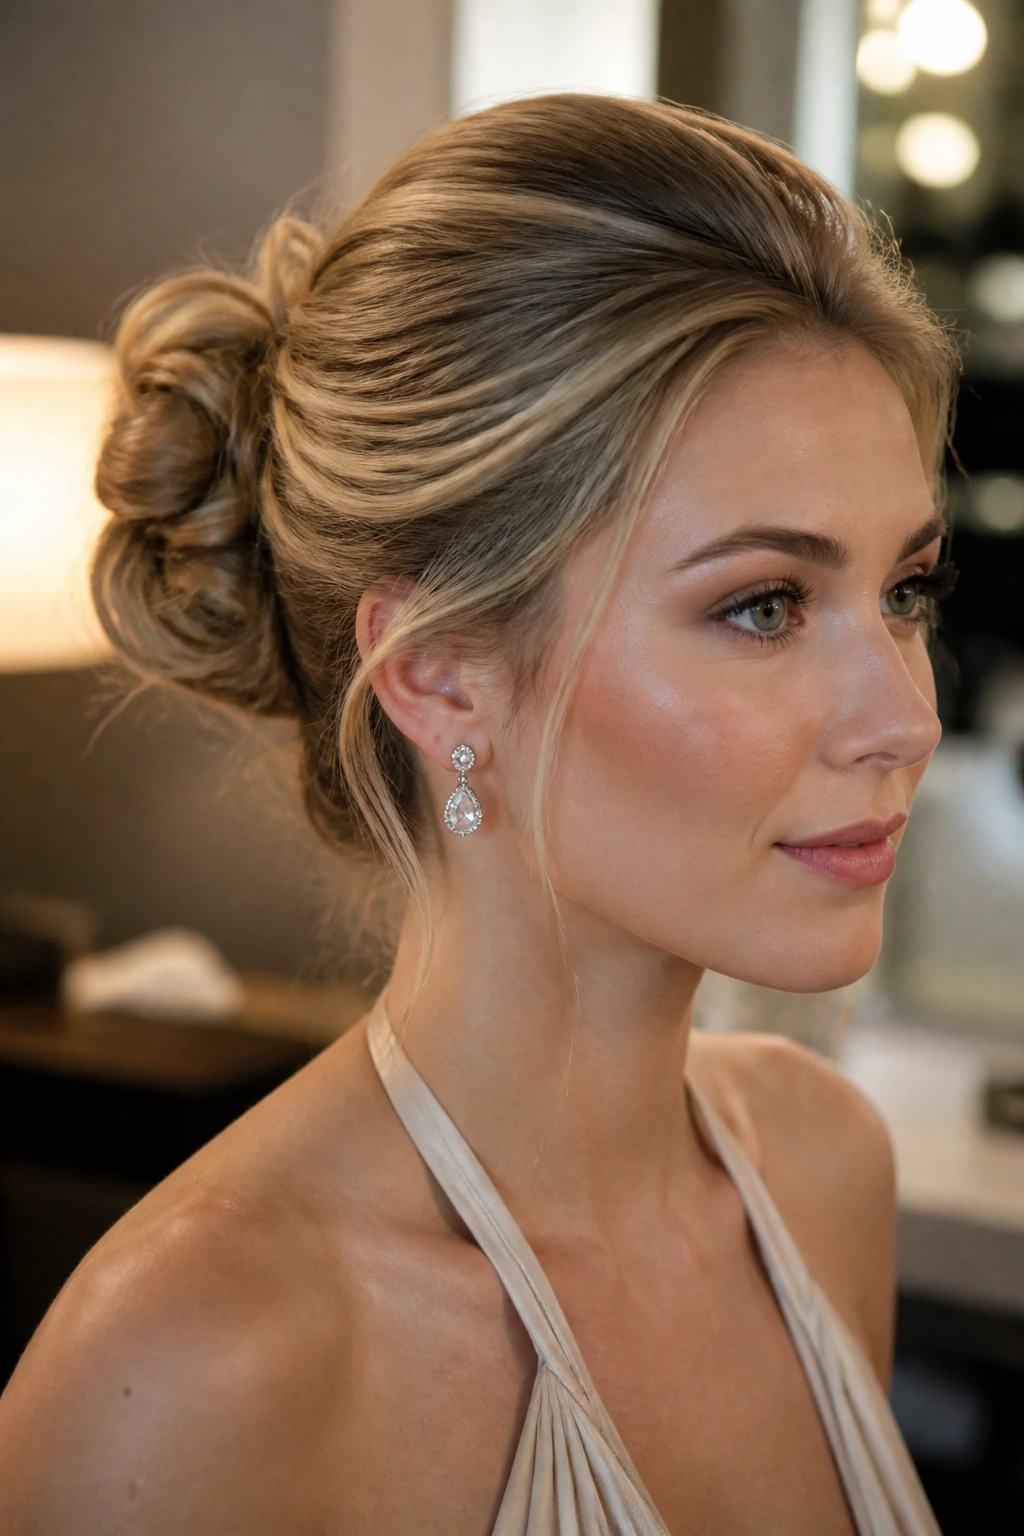
A soft red-carpet knot is really a controlled bun with a little extra lift at the front and a loose, rounded finish at the back. The style feels dressy without becoming stiff, which is why it’s such a dependable choice when you want volume that reads as polished.
I like the way this shape sits slightly above the nape instead of buried low at the neck. That tiny shift changes the whole line of the hair. Add a lifted crown, keep the sides smooth but not tight, and let a few ends disappear into the knot instead of forcing everything into a perfect circle. The bun ends up looking fuller because it has softer edges.
- Keep the crown raised about 1 inch before pinning
- Leave the bun slightly rounded, not compressed
- Use U-pins to hold the shape from underneath
- Finish with a flexible spray so the knot moves a little
The cleanest version is not the tightest one. That’s the part worth remembering.
Final Thoughts
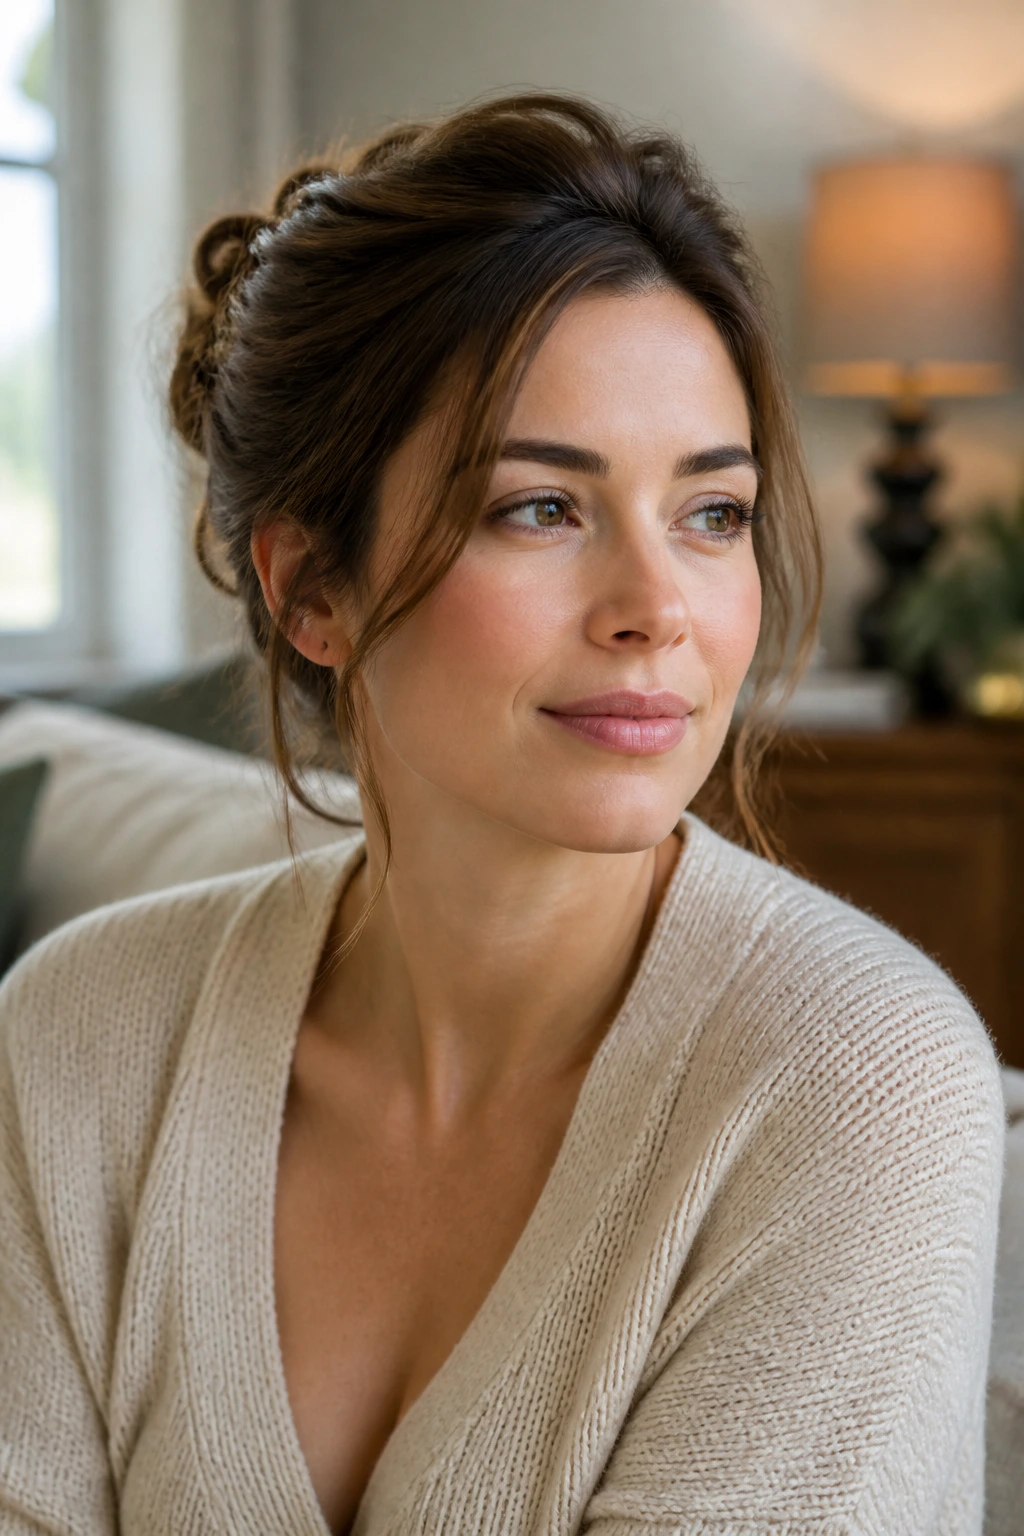
The smartest voluminous updo hairstyles do one thing well: they put lift where the eye expects shape. That might be the crown, the temple, the braid line, or the base of the bun. Once you know where to build, the rest gets easier.
Texture matters too. Fine hair usually needs a little grit, thicker hair often needs weight removed, and curly hair usually needs less coaxing than people think. No single trick solves everything, and frankly, that’s a relief. The styles above work because they use different kinds of volume, not because they all follow the same formula.
If you only change one habit, start building height before you finish the style. Pin under the lift, not over it. That one move keeps the hair looking fuller from the front and stops the whole shape from collapsing halfway through the day.
