



Sleek updo hairstyles for weddings work because they do three jobs at once: they keep hair off the neck, they hold up through hugs and dancing, and they make earrings, veils, and necklines look intentional instead of crowded. The catch is that sleek is easy to say and hard to execute. Too much product, and the style slides. Too little control, and the flyaways show up the second the weather changes or someone gives you a long, enthusiastic embrace.
Freshly washed hair is not always your friend.
A little grip helps. Day-old hair, a light mousse at the roots, and a smoothing cream through the mid-lengths usually hold better than squeaky-clean strands that refuse to stay put. I also think wedding hair looks best when the shine is controlled, not greasy — more polished glass than slicked with oil.
The right updo depends on the neckline, the veil, and how much hair you actually have to work with. A tiny low knot can look richer than a huge puffed bun if the placement is right. A French twist can feel sharp and modern instead of old-fashioned when the seam is clean and the pins disappear.
1. Low Gloss Chignon at the Nape
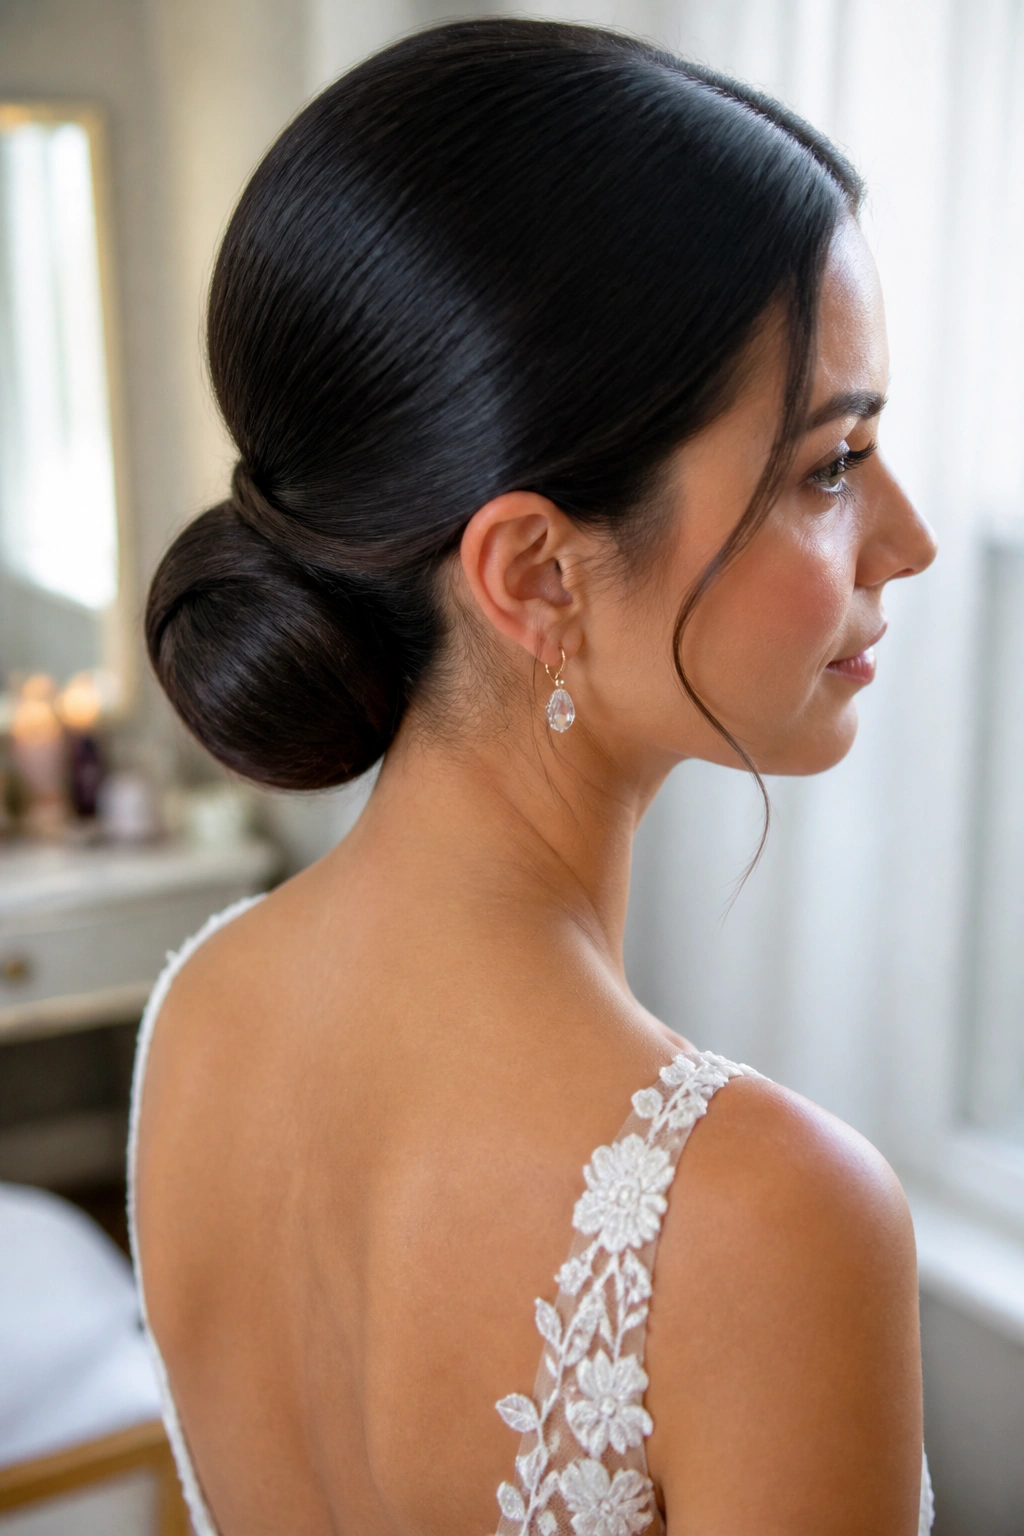
The low gloss chignon is the style I reach for when someone wants calm from the front and luxury from the side. It sits just above the nape, stays tucked close to the head, and gives you that neat, finished line brides keep pinning over and over on inspiration boards.
Why It Works
A low chignon keeps the weight close to the neck, which matters more than people think. It doesn’t fight with a veil comb, and it won’t steal attention from a backless dress or a pair of long earrings.
- Place the bun 1 to 1½ inches above the nape so it clears collars and doesn’t rub.
- Use 6 to 10 bobby pins, crossed in tiny X-shapes for a firmer hold.
- Best on medium to long hair with a little bend or grip.
- A narrow pearl comb can sit just above it without crowding the shape.
The cleanest version uses a tail comb to smooth the crown first, then the ends are wrapped under so the bun looks compact rather than puffed. If your hair is fine, build the base with a small hidden padding circle. If it’s thick, split the tail into two sections before wrapping. That keeps the bun flatter and stops it from bulging like a little helmet.
My favorite detail: leave the hairline smooth, but not shiny in a greasy way. The difference is tiny in person and huge in photos.
2. Center-Part French Twist with a Clean Finish
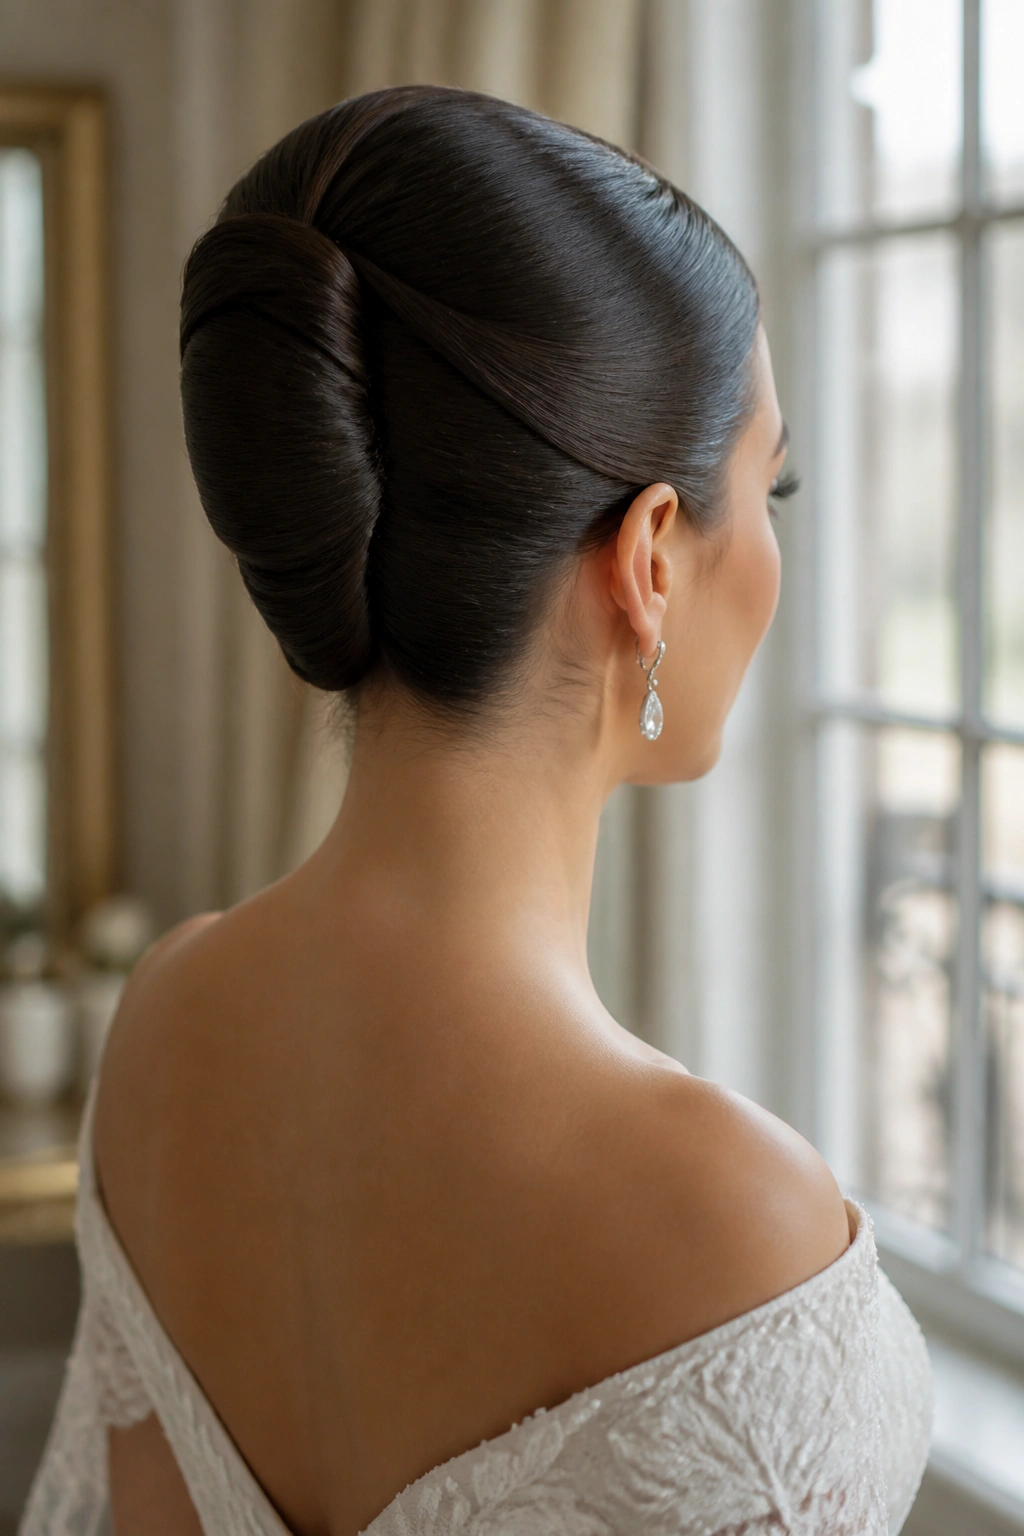
A center-part French twist reads polished without looking stiff. That straight part gives the style a sharp line, and the twist itself climbs up the back like a clean seam. It’s one of those looks that makes a simple dress feel more deliberate.
The trick is restraint. A French twist gets sloppy when it’s overpinned or padded too much, so the sleek version should feel narrow and controlled. I like it with high necklines, column dresses, or anything that already has a strong shape at the shoulders.
The top should be brushed flat first, then gathered low at the nape and rolled upward in one smooth movement. If the hair is layered, a few invisible pins inside the twist keep shorter pieces from poking out. A light mist of flexible hairspray between passes helps more than a heavy blast at the end.
This style works especially well when you want the back of the head to look long and elegant. It does not need a lot of decoration. In fact, too much detail can make it fussy fast.
3. Wrapped Low Bun with Hidden Pins
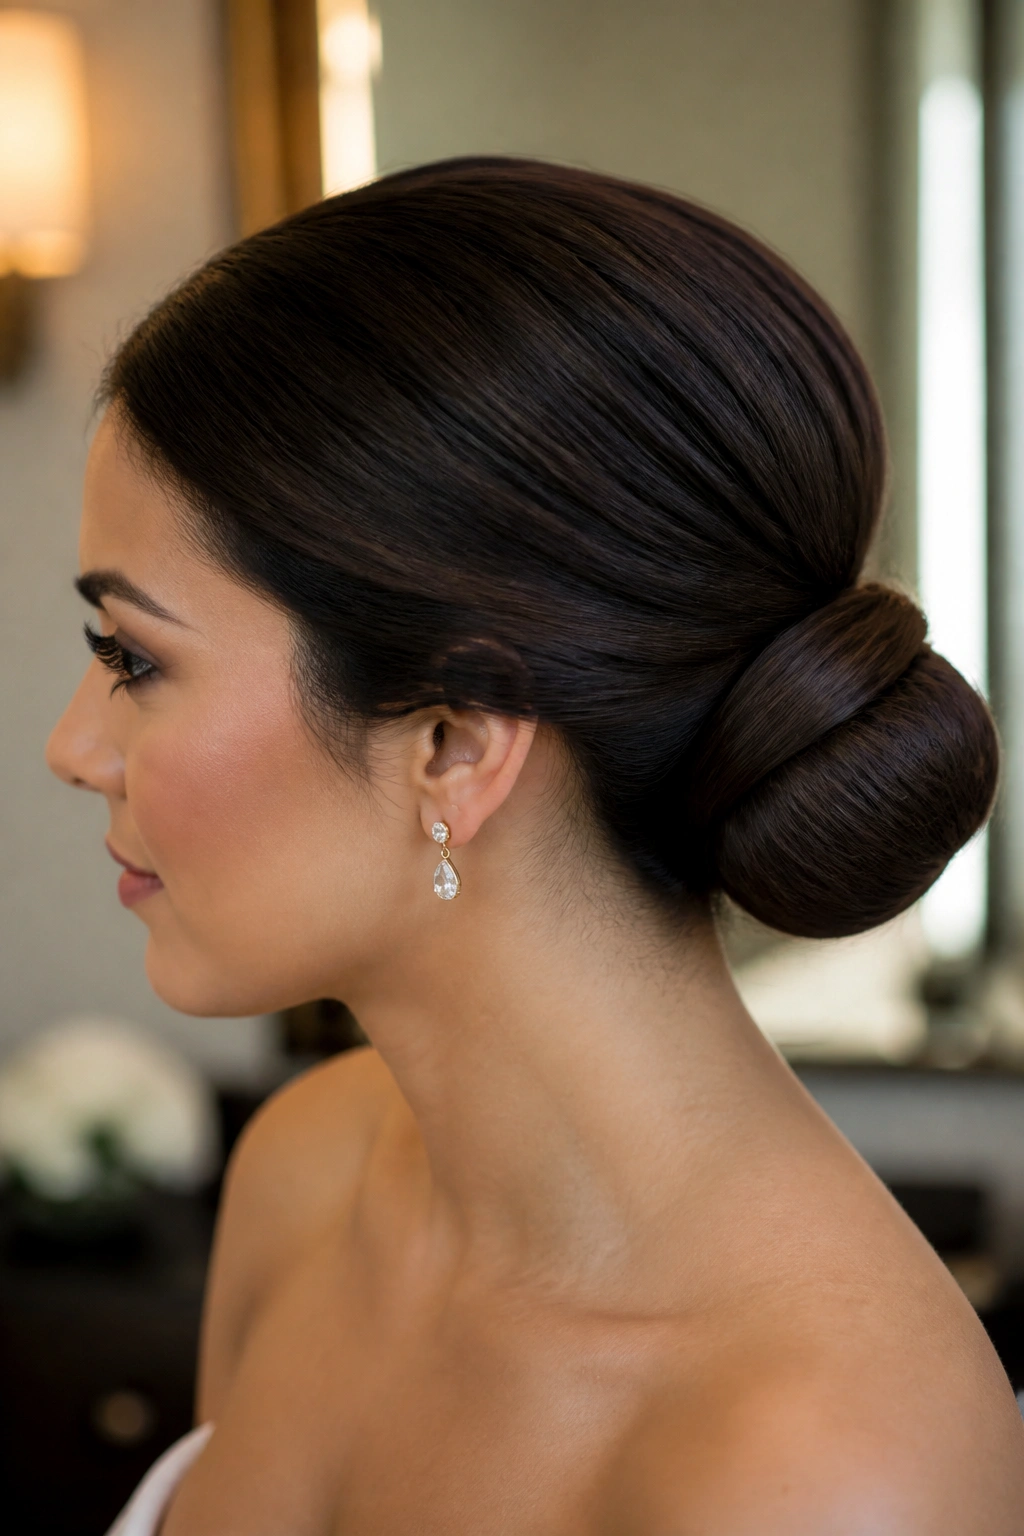
This is the style for a bride who wants the hair to disappear into the dress instead of competing with it. The wrapped low bun looks simple from a distance, but the structure underneath is doing a lot of work. That’s why it stays neat through dinner, dancing, and all the leaning in for photos.
The build starts with a low ponytail, then the ends are wrapped around the base and tucked under themselves. The visible surface should look like one continuous coil, not a stack of separate pieces. Hidden pins go into the underside so the outside stays smooth.
- Works best with second-day hair or hair with a little mousse in it.
- Needs one elastic and 8 to 12 pins.
- Looks best when the bun sits slightly off the collar line, not buried too low.
- Great for heavy earrings because the shape stays quiet.
I like this one with satin gowns and simple veils. It’s not loud. That’s the charm.
4. Sleek Braided Bun at the Nape
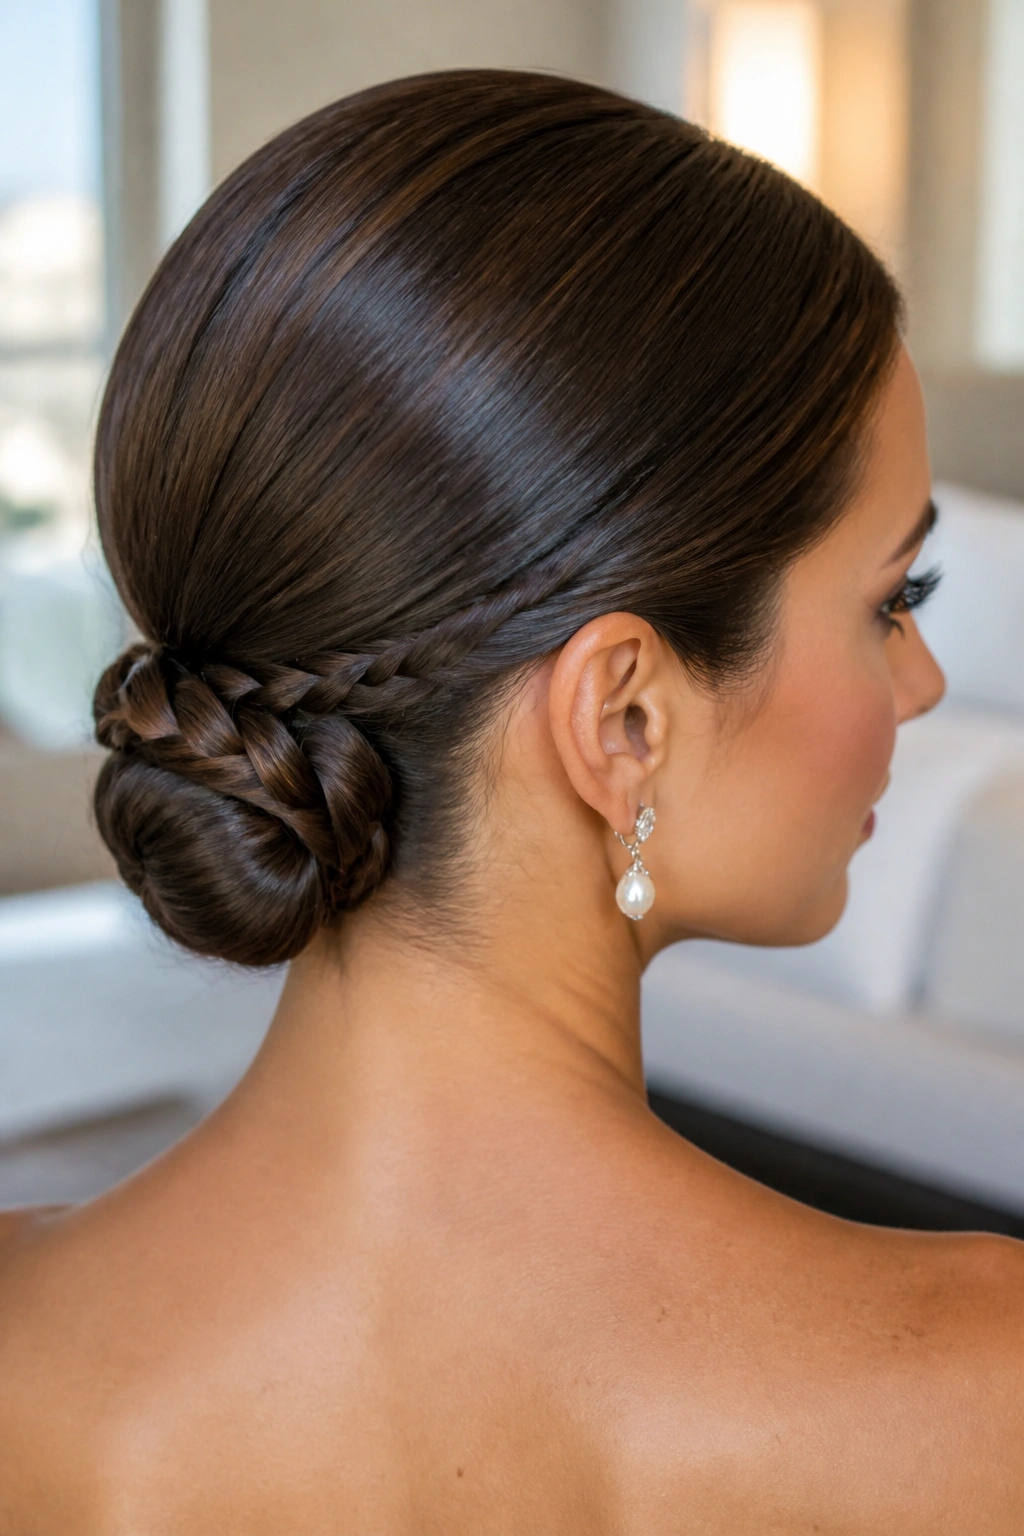
Why add a braid to something already sleek? Because the braid gives the bun a bit of texture without ruining the clean finish. It also keeps the style from going flat at the back, which can happen with very straight hair.
A tight braid running into the bun makes the whole shape feel anchored. The front can stay smooth and polished, while the back has just enough detail to keep people looking twice. It’s a good choice if you want structure but do not want a style that feels hard.
How to Wear It
If the dress has lace, a braid can echo that texture without getting too matchy. If you’re wearing a veil, pin it just above the braid so the comb doesn’t break the pattern.
- Keep the braid firm, not pancaked.
- Use a small amount of shine cream before braiding so the strands lie flat.
- Best for hair that reaches past the shoulders.
- Add a single pearl pin or leave it bare if the gown is already detailed.
The nice part is that this bun still looks like a bun. The braid just gives it better bones.
5. Sculpted Ballerina Bun with a Mirror-Smooth Crown
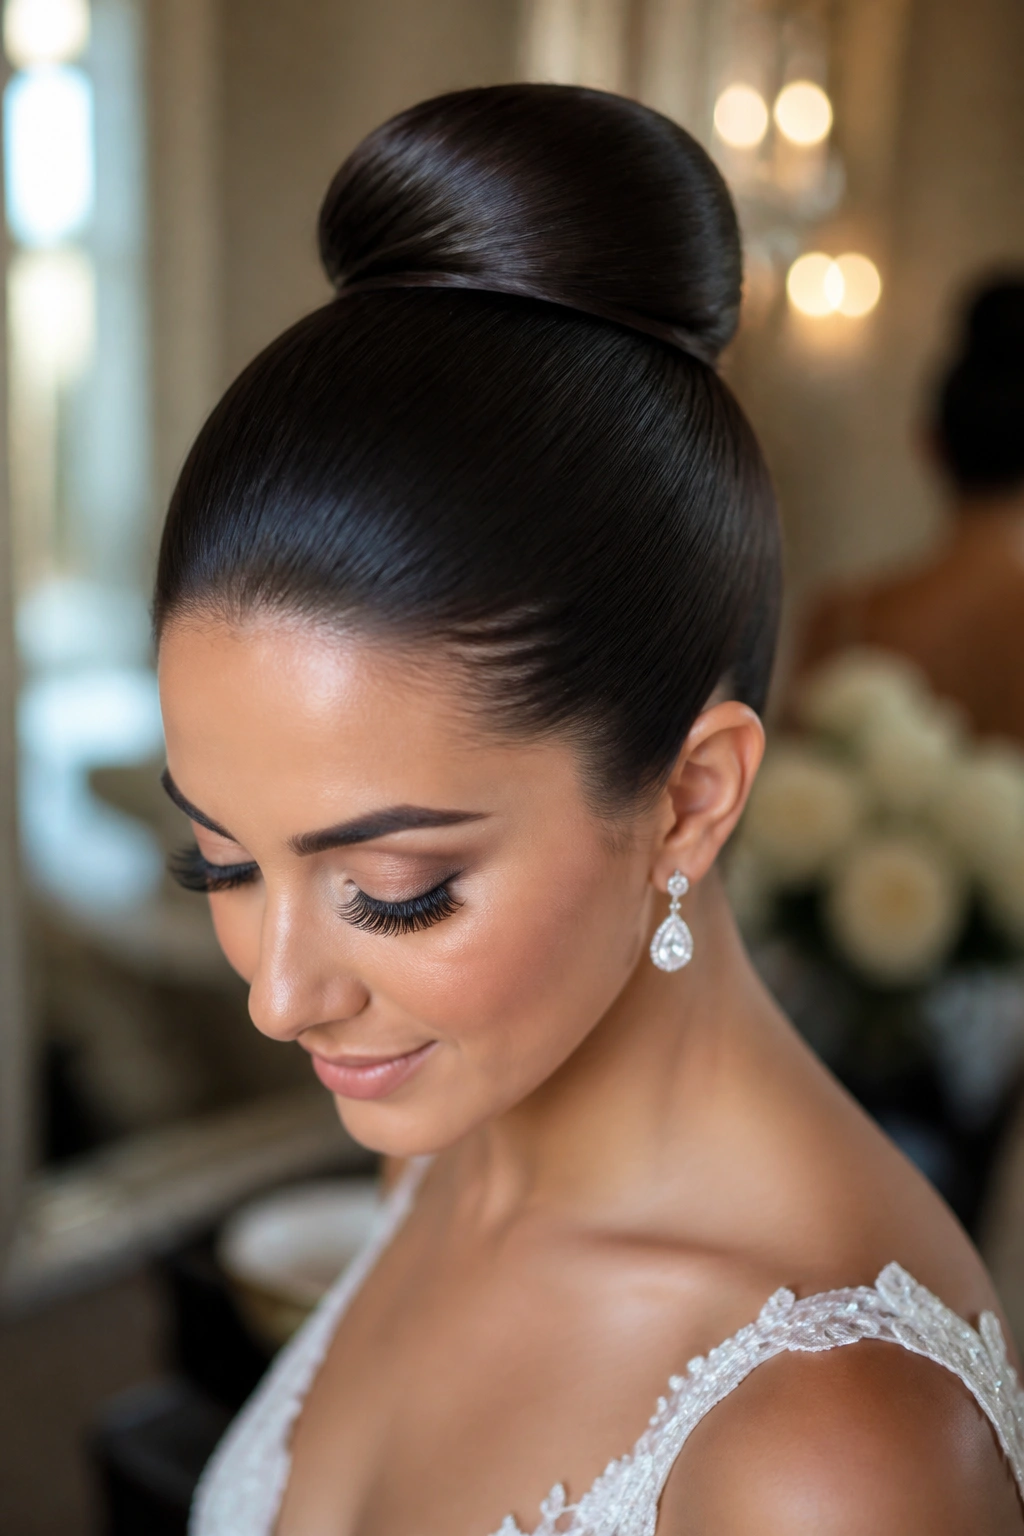
The ballerina bun is the strictest look on this list, and that is exactly why it works so well with dramatic gowns. It places the hair in one clean circle, usually centered low or mid-low, with the crown pressed smooth enough that you can almost see the brush lines vanish.
It does ask for discipline. Any bump or split part will show, so the smoothing has to happen before the bun ever gets pinned. I like to take a tail comb, section the hair into a clean center or soft off-center part, then brush everything back with a small amount of cream on the palms. The bun itself should be compact and round, not wide.
This style is lovely with open backs, structured bodices, and gowns that already have strong lines. It can look too severe if the outfit is soft and floaty, so I usually save it for dresses with a bit of edge.
One small warning: a ballerina bun can tug hard if it’s pulled too tight at the hairline. Leave enough tension that the style feels secure, but not enough to make the forehead shine from strain. That line matters.
6. Side-Part Tucked Roll for a Softer Profile
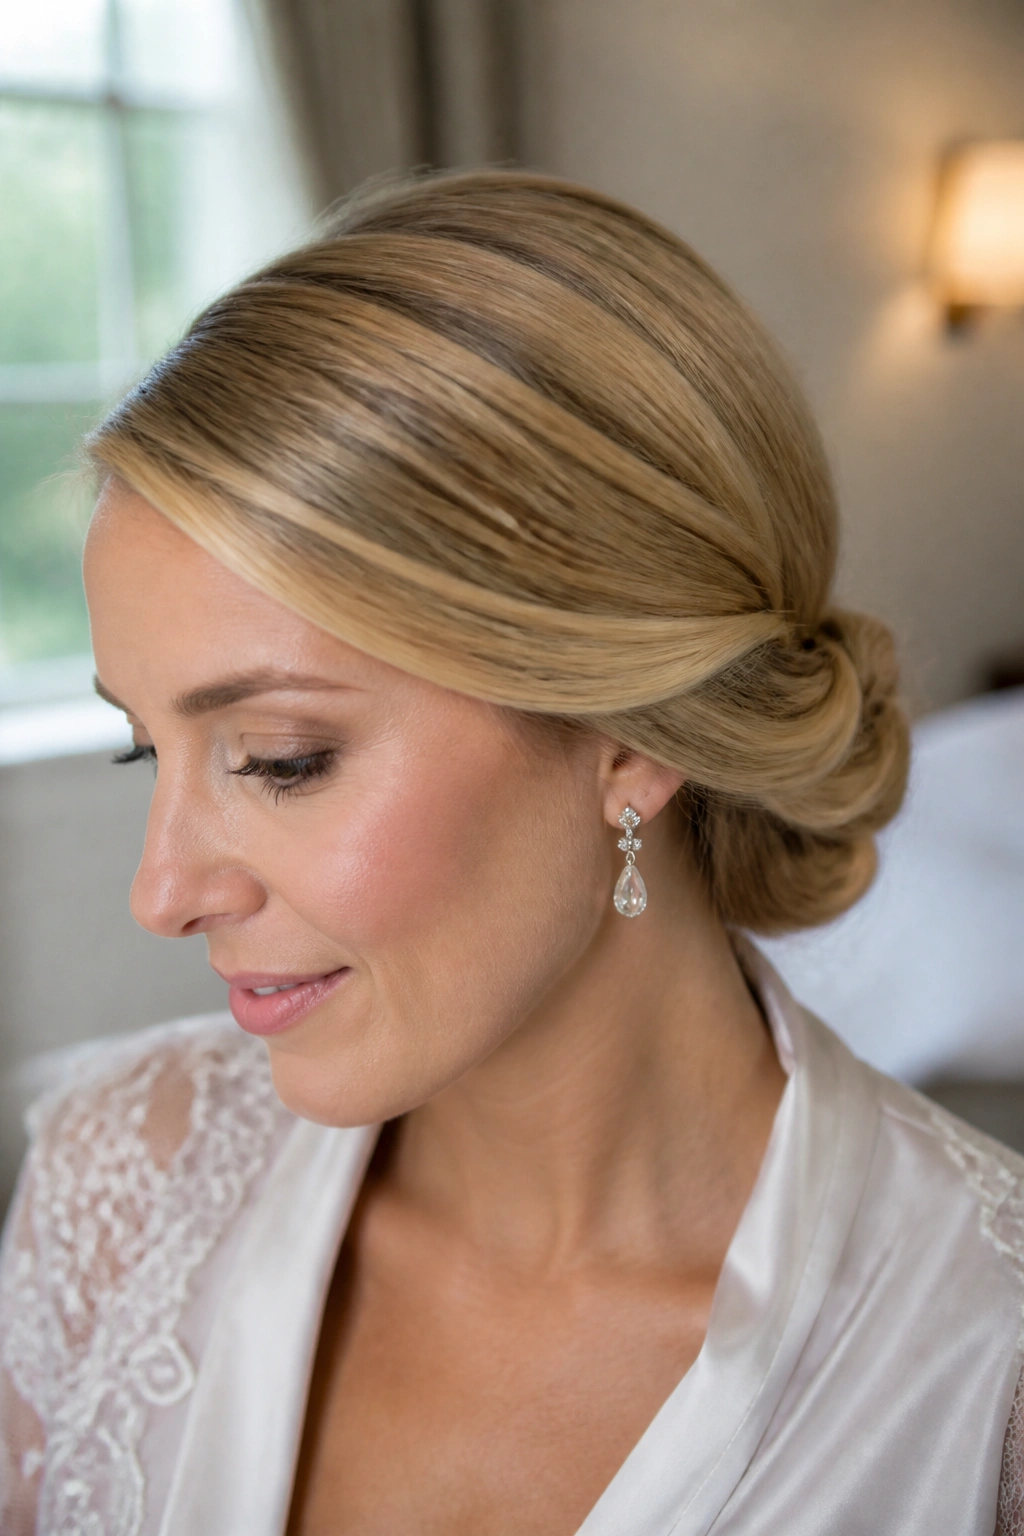
Unlike the center-part styles, a side-part tucked roll gives you a bit of movement without losing the clean finish. It’s a good answer when the dress already has symmetry and the hair needs to break that up a little.
The side part shifts the eye, then the hair is rolled inward and pinned low at the back or just behind one ear. I love this with one-shoulder gowns, asymmetrical necklines, or statement earrings on one side. The shape feels more relaxed, but it still reads polished.
If you want the look to feel expensive rather than casual, keep the side part neat and the roll tight. A loose roll can wander into vintage-party territory fast. A precise roll, on the other hand, looks intentional and almost tailored.
This one is also kind to strong jawlines and sharper cheekbones because the softer sweep offsets them. That’s a detail a lot of people miss. It changes the whole mood.
7. Wet-Look Slicked-Back Bun
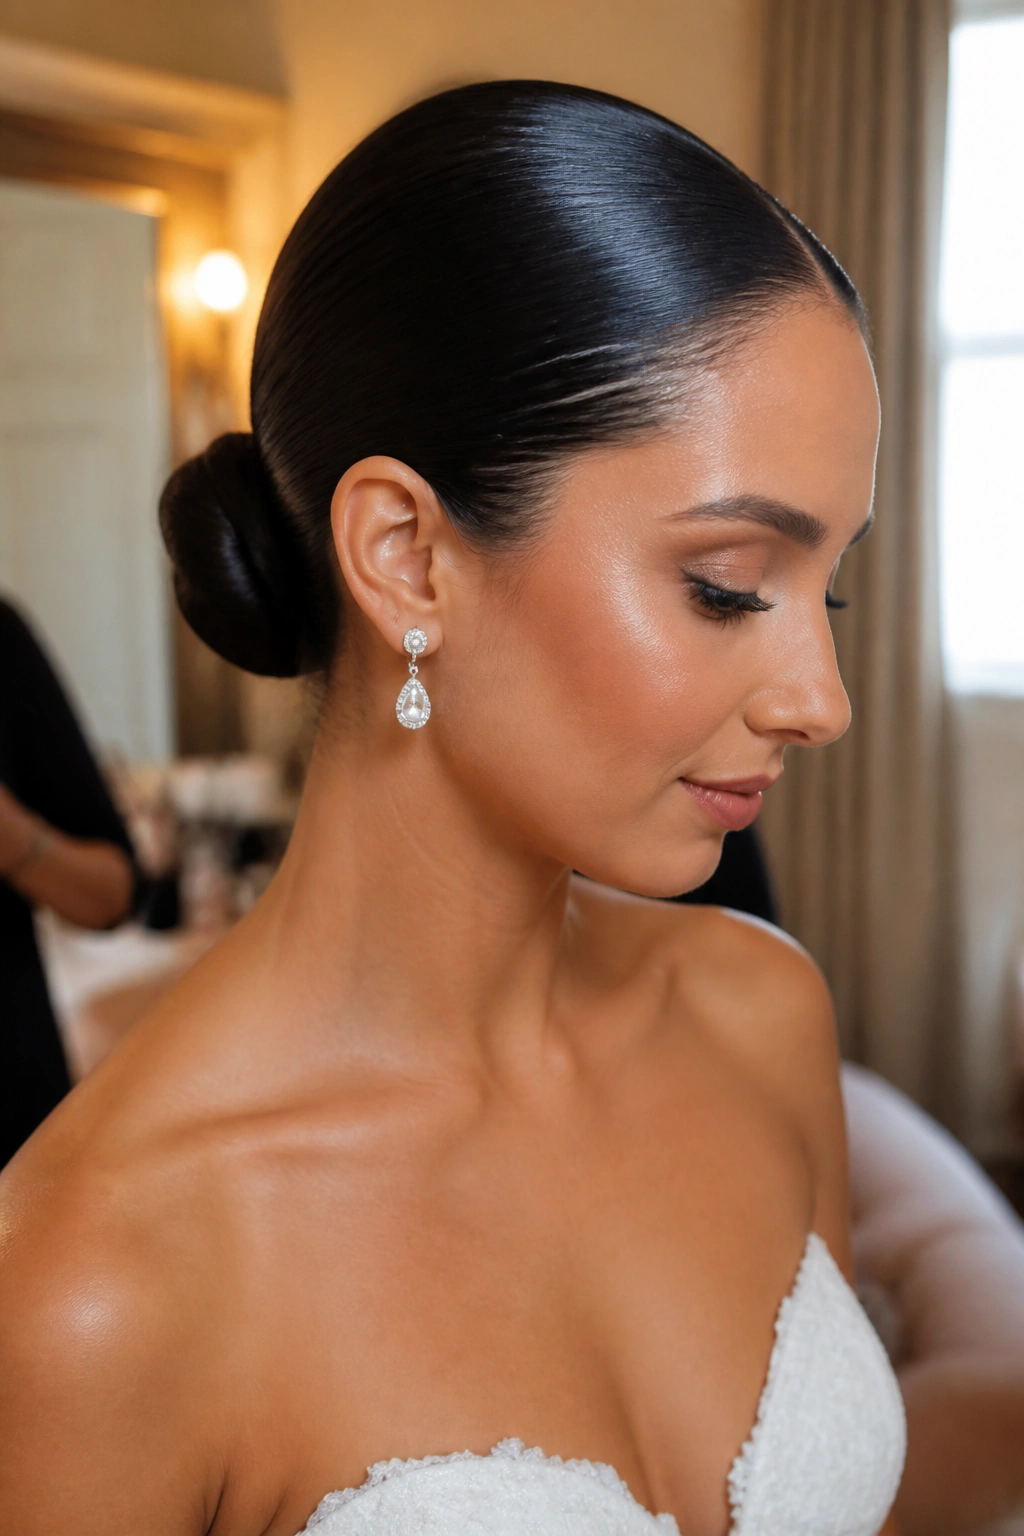
This is the boldest sleek wedding hairstyle on the list, and when it’s done well, it looks deliberate rather than overprocessed. The wet-look bun leans into shine. It says clean lines, modern dress, no stray bits, no fuss.
The key is where the gloss lives. The roots and surface can carry the shine, but the bun itself should still have enough shape to read as hair, not a helmet. I like gel or strong cream at the front and temples, brushed through in thin layers, then a tight bun or coil at the nape.
It works best with satin, crepe, or very minimal gowns. If the dress already has lace, beadwork, and volume, this style can feel a little too hard unless the makeup is equally sharp. A bold lip or graphic liner helps it make sense.
Do not drown the ends in product. That’s the fastest way to make the bun look stringy instead of smooth. Keep the gloss on the surface where it belongs.
8. Knotted Low Bun with a Tailored Shape
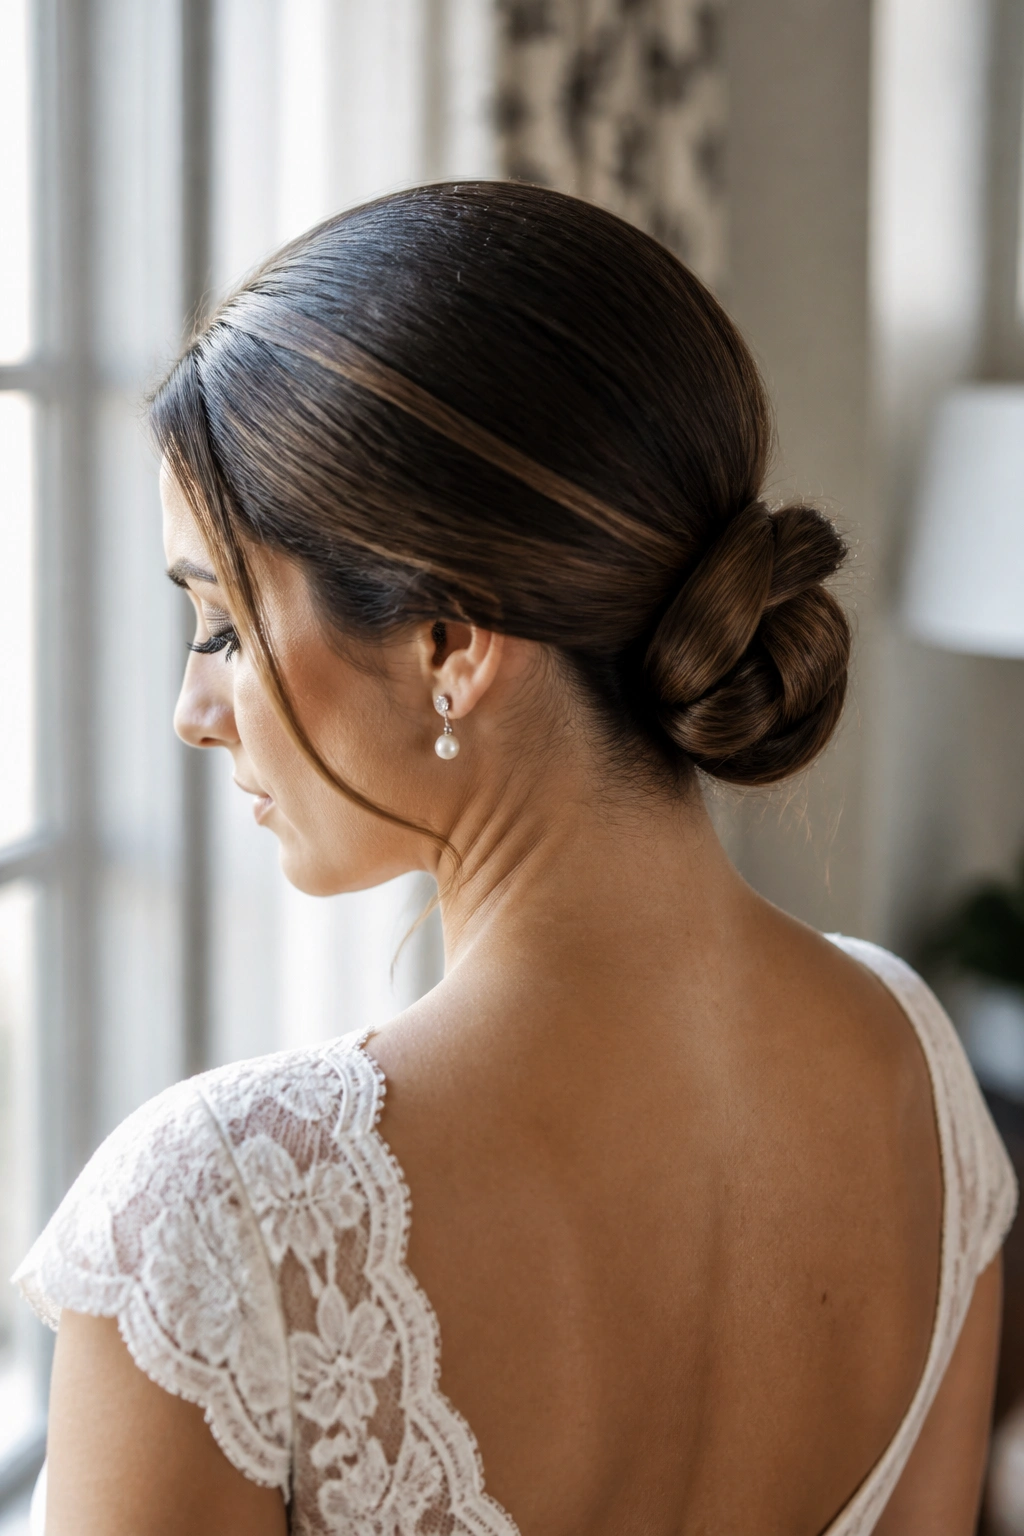
Picture a low knot sitting just under the occipital bone, with the hair folded over itself like a tied ribbon. That’s the appeal here. It feels neat, almost architectural, but not stiff.
The knotted bun is a good middle ground for brides who want something sleek without a lot of visible wrapping. The knot itself does the visual work, and the ends are tucked underneath so the finish stays tidy from every angle. It’s a style that looks like it took much more effort than it actually did.
- Great for shoulder-length to long hair.
- Needs a strong elastic and several pins hidden underneath.
- Works well with minimalist studs or a thin hair vine.
- Best when the knot sits centered, not sagging low.
I like this on brides who are drawn to clean tailoring. It has the same energy as a sharp suit jacket or a well-cut gown. Calm. Controlled. Not boring.
9. Braided Crown Leading into a Sleek Bun
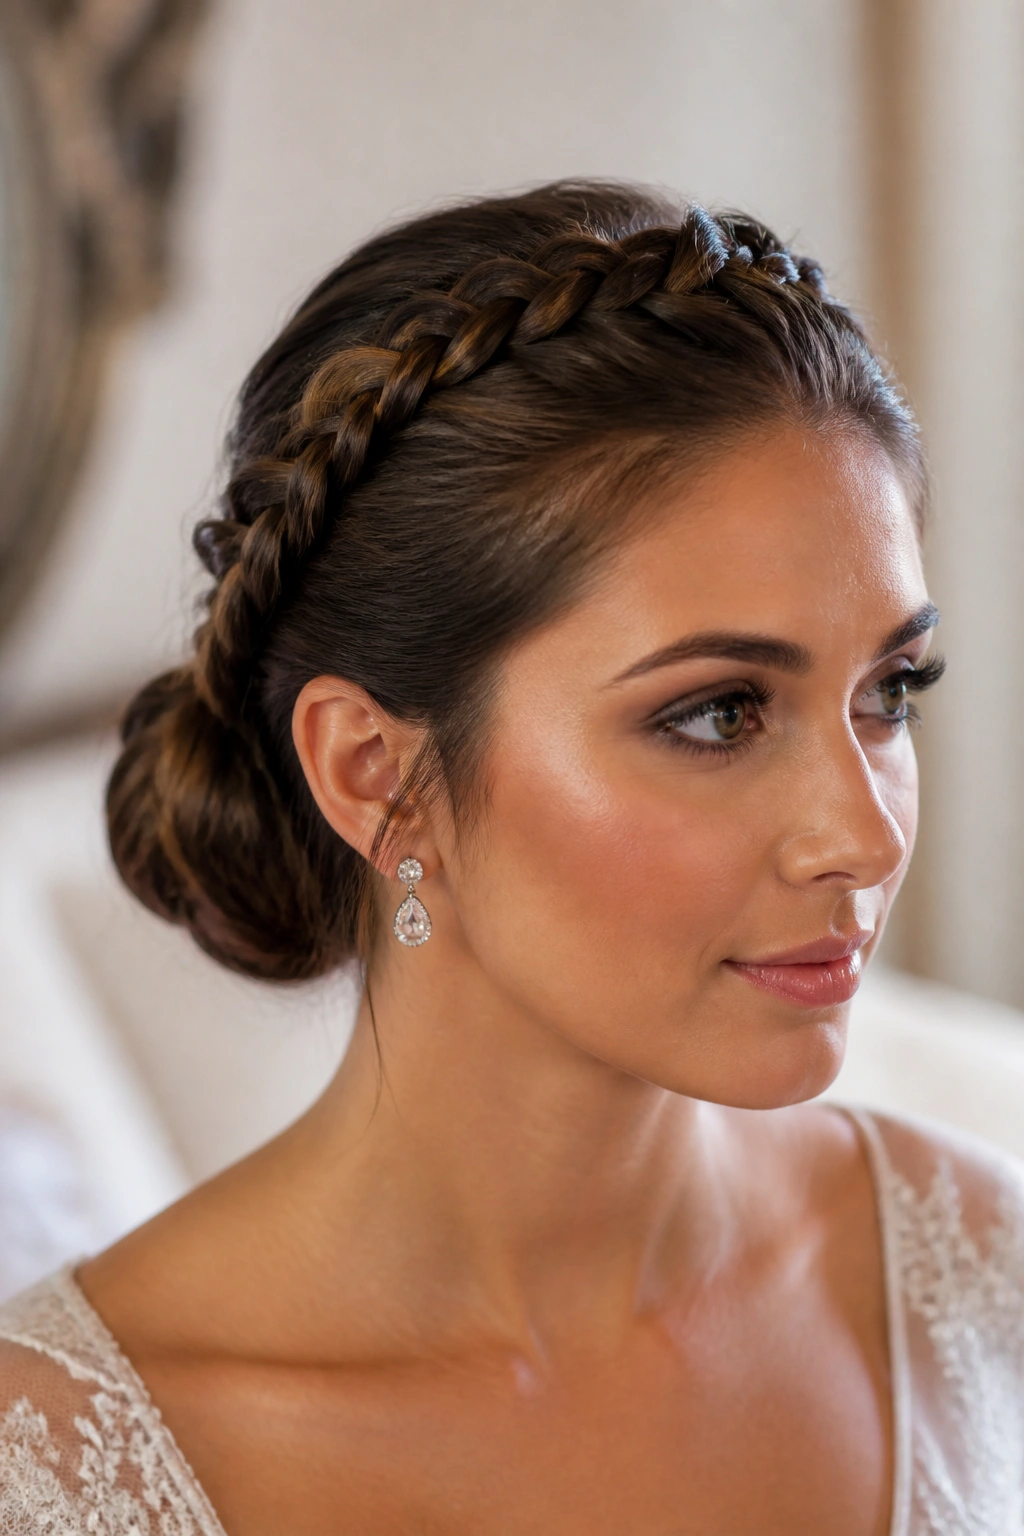
What if you want detail in the front and nothing loose by the end of the aisle? This is the answer. A braided crown feeds into a bun at the back, which means you get texture where people see your face and smoothness where the style needs to hold.
The braid can start at the temple and travel across the crown, or it can sit closer to the hairline for a more dramatic frame. Either way, the rest of the hair stays pinned and tucked into a low bun. The braid becomes a built-in headband, and it does a nice job of holding shorter layers in place.
How to Get the Most From It
If you’re wearing a veil, place the comb just behind the braid so the accessory doesn’t flatten the pattern. If you’re skipping the veil, a slim comb or a few pearl pins can sit just above the bun.
The braid should stay flat and tight. A fluffy braid will fight the sleekness and make the style feel like two ideas in one. That can happen fast.
This is a smart pick for brides who want coverage around the hairline without letting the whole style go soft. It’s tidy, but not plain.
10. Double-Twist Low Updo with a Smooth Back
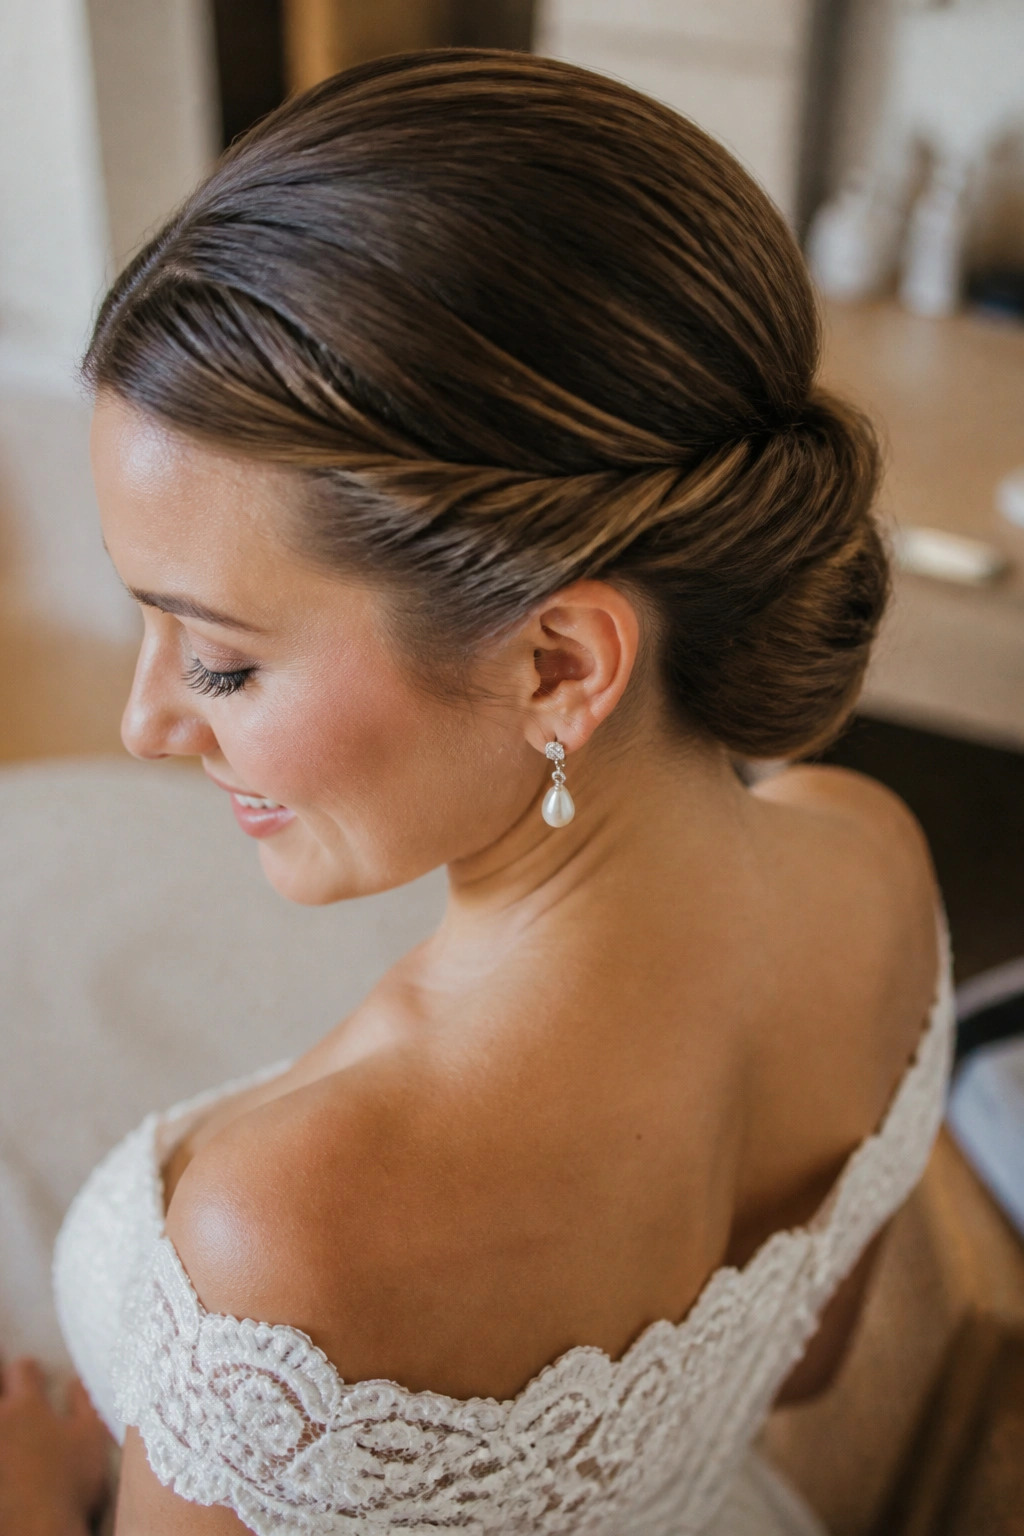
This one looks like a knot of ribbon from behind, which is exactly why I like it. Two sections are twisted inward from the sides, then brought together at the nape and pinned into a low updo. The finish is smooth, but the twists keep the back from looking flat.
It sounds more complicated than it is.
The style works especially well on medium-density hair because the twists create the illusion of fullness without bulk. Fine hair can also benefit, since the twisting adds visual width. Thick hair, meanwhile, needs tighter sectioning so the twists do not puff up.
I would keep the part clean and the twists close to the head. If the sections are too loose, the style starts to wander and loses that crisp wedding feel. The best version looks almost woven, but still controlled.
This is one of those updos that makes people lean closer. Not because it’s loud. Because the lines are neat, and the shape is prettier than it first appears.
11. Sleek Top Knot with Clean Sides
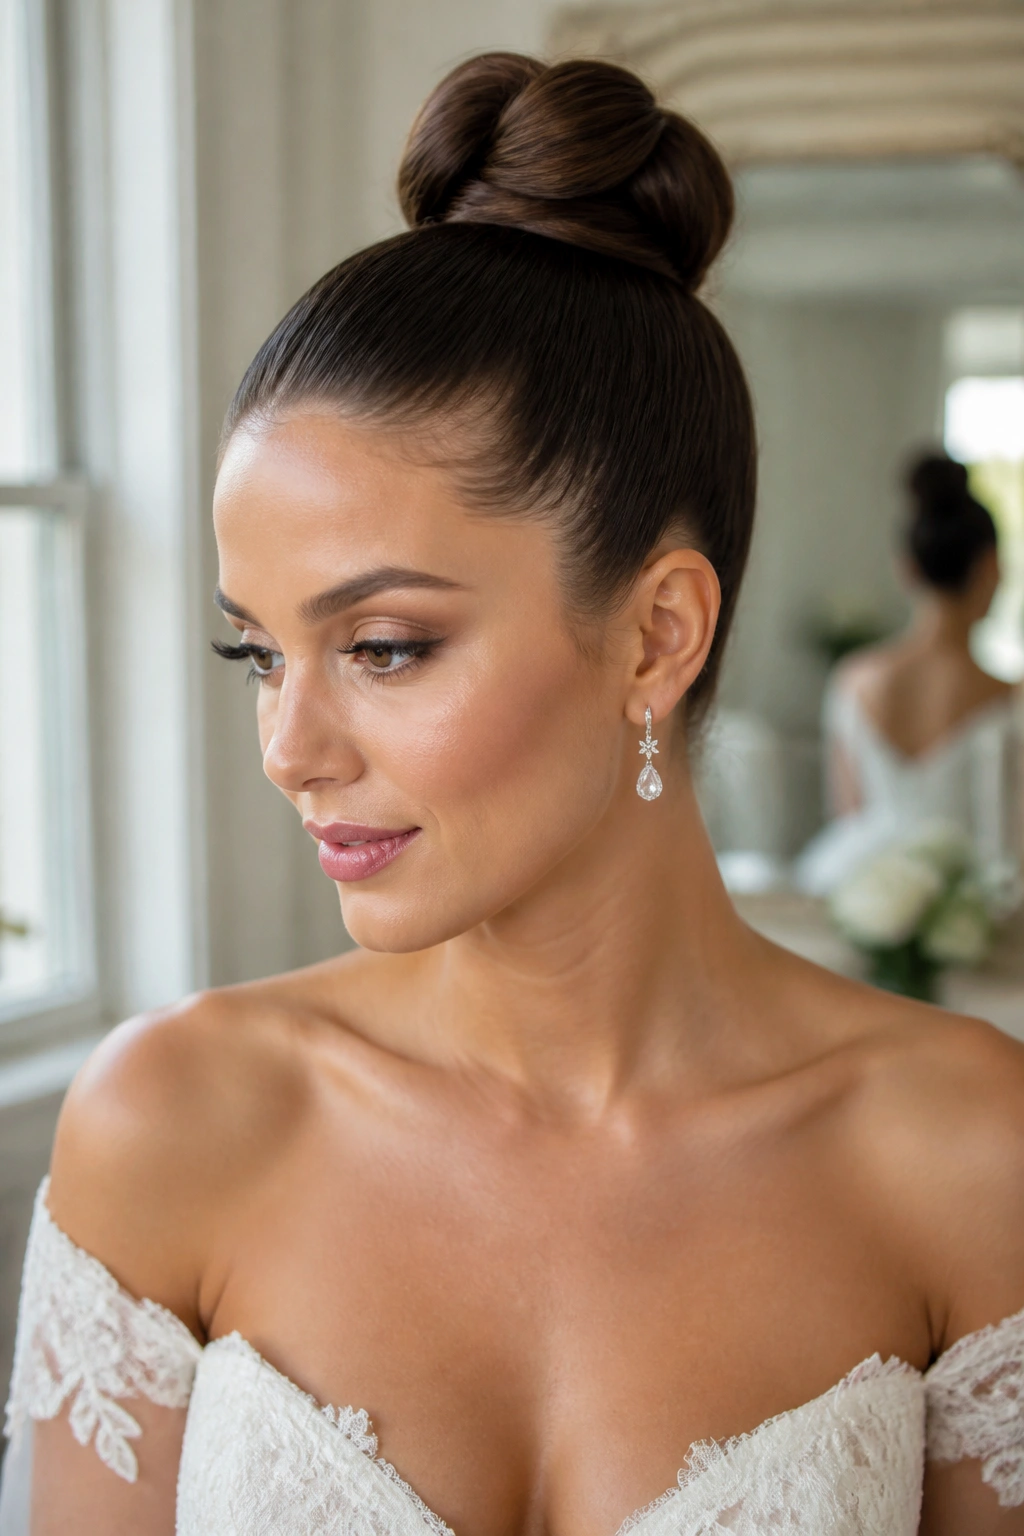
Unlike a low bun, the sleek top knot brings the eye upward. That makes it a strong choice for halter dresses, high necklines, or brides who want to show more of the neck and jaw.
The shape should sit high enough to open the face, but not so high that it turns playful in the wrong way. Keep the sides flat, the crown smooth, and the knot compact. If the base balloons, the whole thing starts to feel too casual.
This style is especially good when you want earrings to do some of the work. A top knot leaves that space open. It also photographs well from the side if the knot is wrapped tightly and the hairline stays neat.
The downside is obvious: it can go severe fast. A tiny bit of lift at the crown keeps it from looking pinched. That little bit of height matters.
12. Gibson Tuck with a Mirror Finish
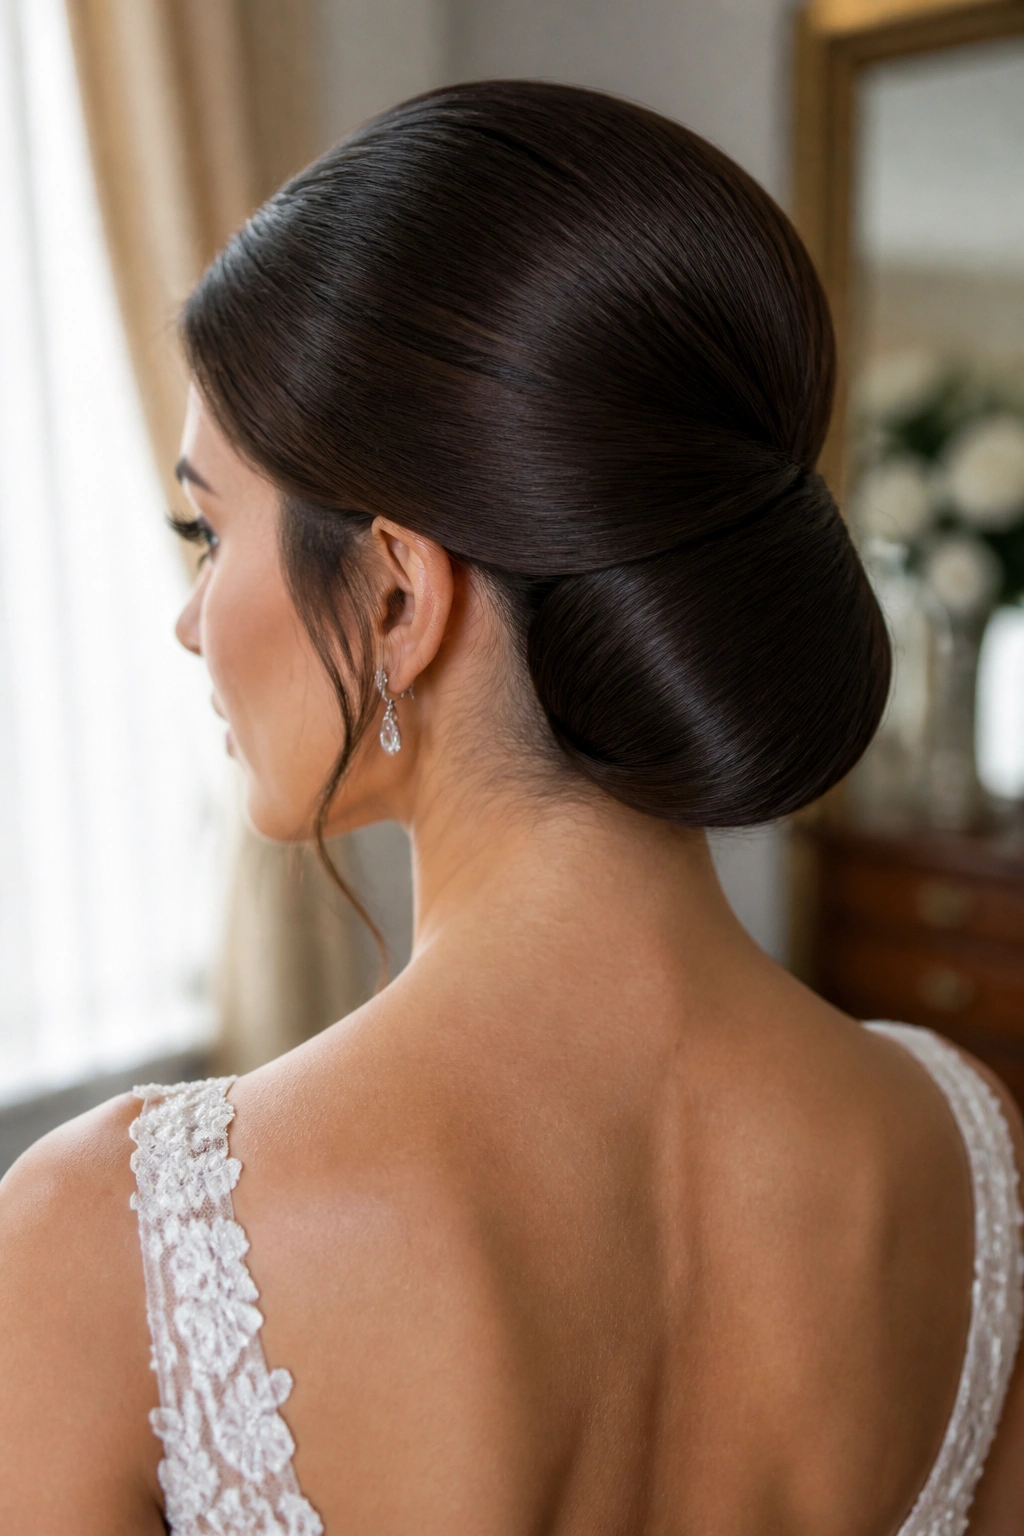
The Gibson tuck is one of those old-school shapes that looks much sharper when the surface is perfectly smoothed. Hair is gathered low, folded inward, and tucked under itself so the back forms a soft roll instead of a hard bun.
Why It Works
It works because the shape is built from one clean movement. There are no dangling ends, no visible elastic, and no need for a lot of decoration to make it feel finished. The tuck does the talking.
- Best on medium to long hair.
- Usually needs 8 to 10 pins hidden along the tuck line.
- Veils can sit above the roll without crushing the shape.
- A thin comb or a short cluster of pins is enough for decoration.
I like this style for brides who want something graceful but not fussy. It has a softer silhouette than a French twist, yet it still feels tailored. If you have layers, tuck them with a little extra care so they do not slip out at the sides.
Tiny tip: keep the tuck loose enough to stay rounded, but tight enough that the fold does not open by the second hour of the reception.
13. Bubble Ponytail Wrapped into a Bun
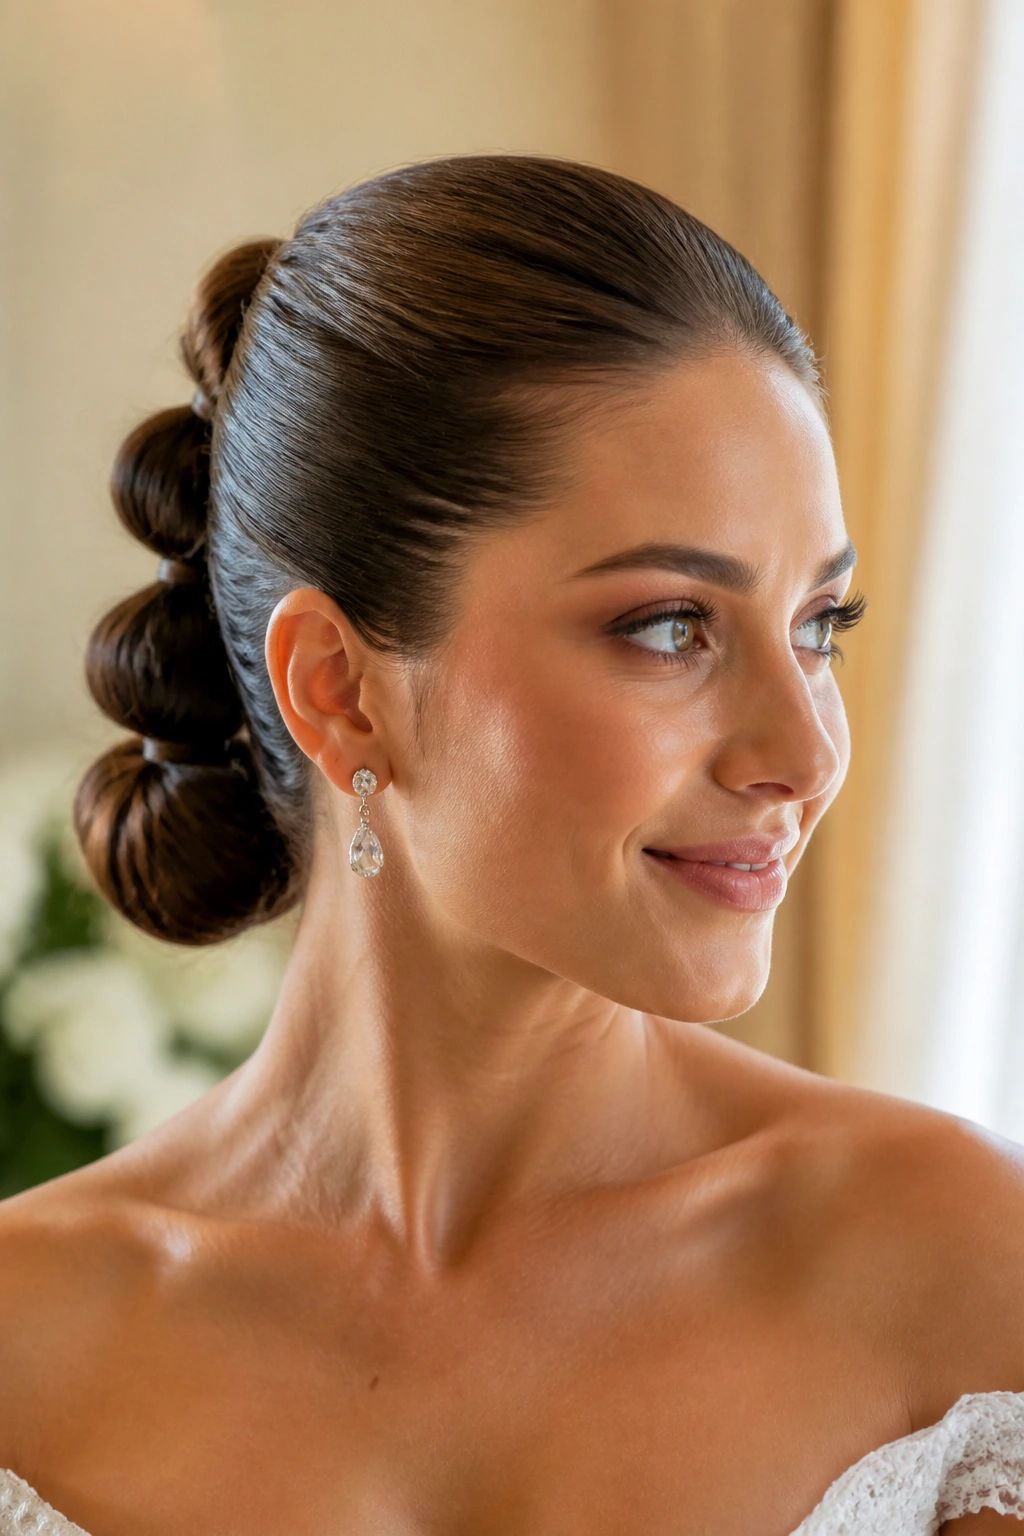
This is the smartest way to get movement into a sleek wedding updo without letting the style get frilly. The bubble ponytail creates clean sections along the length, then those sections are wrapped into a bun or coil at the base.
The result is a polished shape with a little geometry. It looks especially good on longer hair because the bubbles break up the bulk before the bun is made. That means the finished style can sit flatter and cleaner than a traditional all-in-one bun.
A few clear elastics placed every 2 to 3 inches are enough to define the bubbles. The key is keeping each section compact. If the bubbles puff too much, the style stops looking sleek and starts looking playful.
I’d pick this for a bride who wants something modern but not severe. It has more personality than a plain bun, and it still stays wedding-appropriate. That balance is rare.
14. Asymmetrical Chignon with One-Side Weight
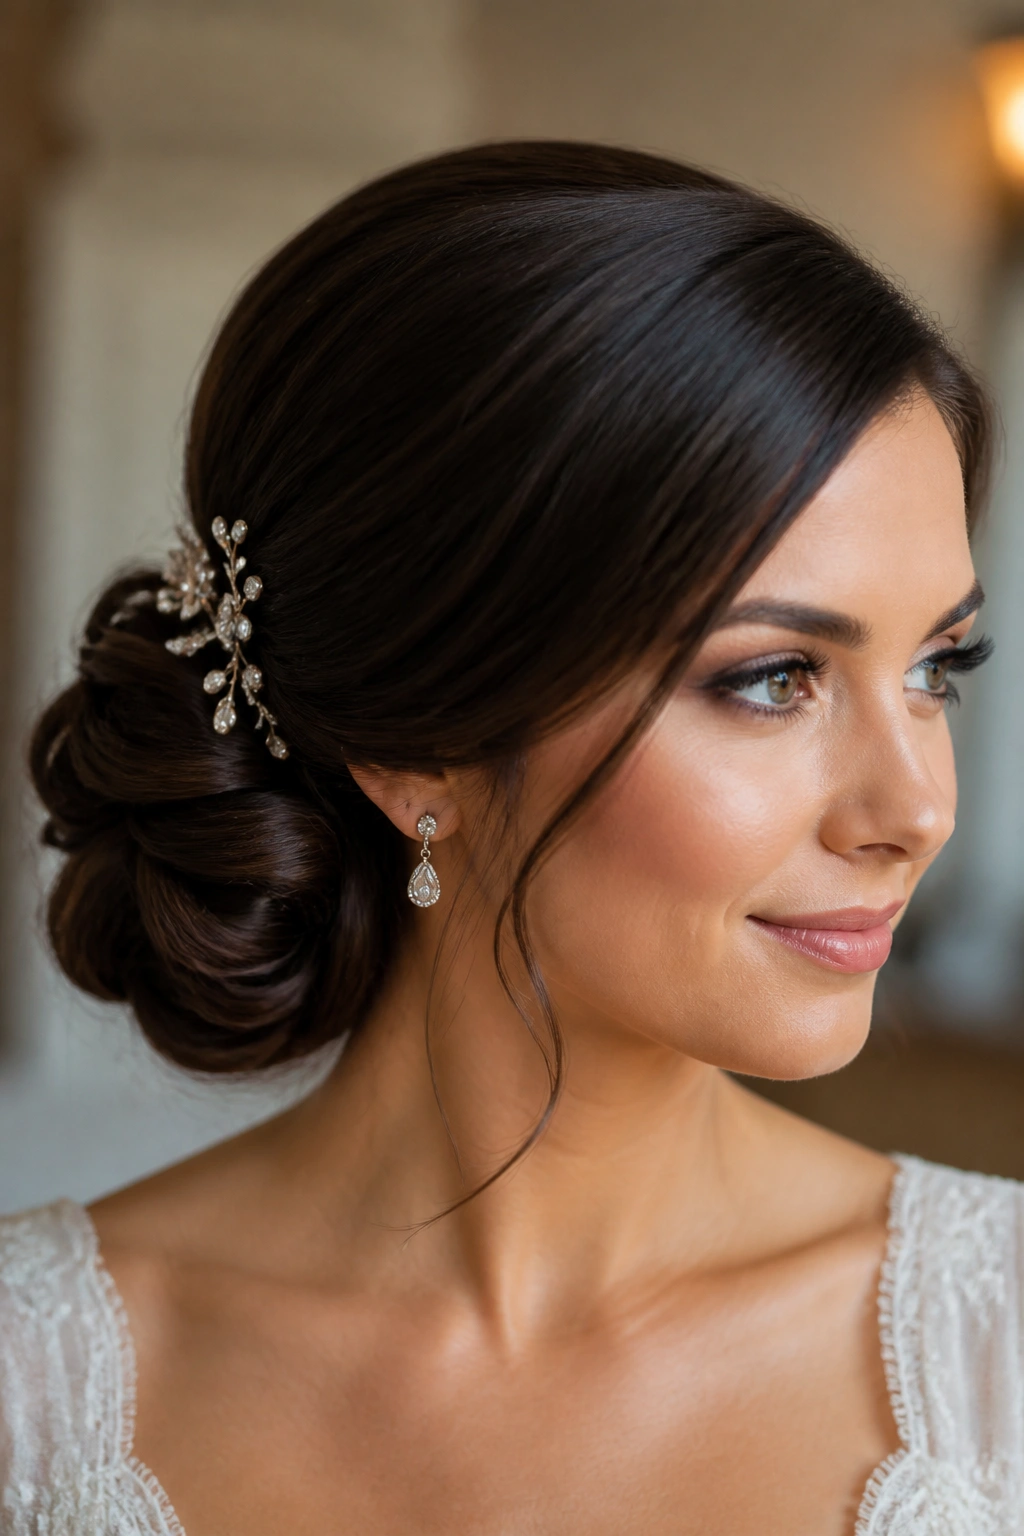
If one shoulder of the dress already does a lot of work, a centered bun can feel too polite. An asymmetrical chignon fixes that. It sits a little to one side, usually low and just behind the ear, with one side flatter and the other side carrying the visual weight.
The shape is subtle, but the effect is strong. It gives the face a little room and keeps the back from feeling too rigid. I think it’s especially nice with side-swept earrings or a gown that has embellishment only on one side.
- Place the bun slightly off-center, not all the way to the ear.
- Keep the flatter side close to the head.
- Add a comb or pin cluster on the fuller side if you want sparkle.
- Works well with a side veil or a gown with one sleeve.
It’s the kind of style that looks composed without trying too hard. That matters.
15. Low Loop Bun with a Soft Edge
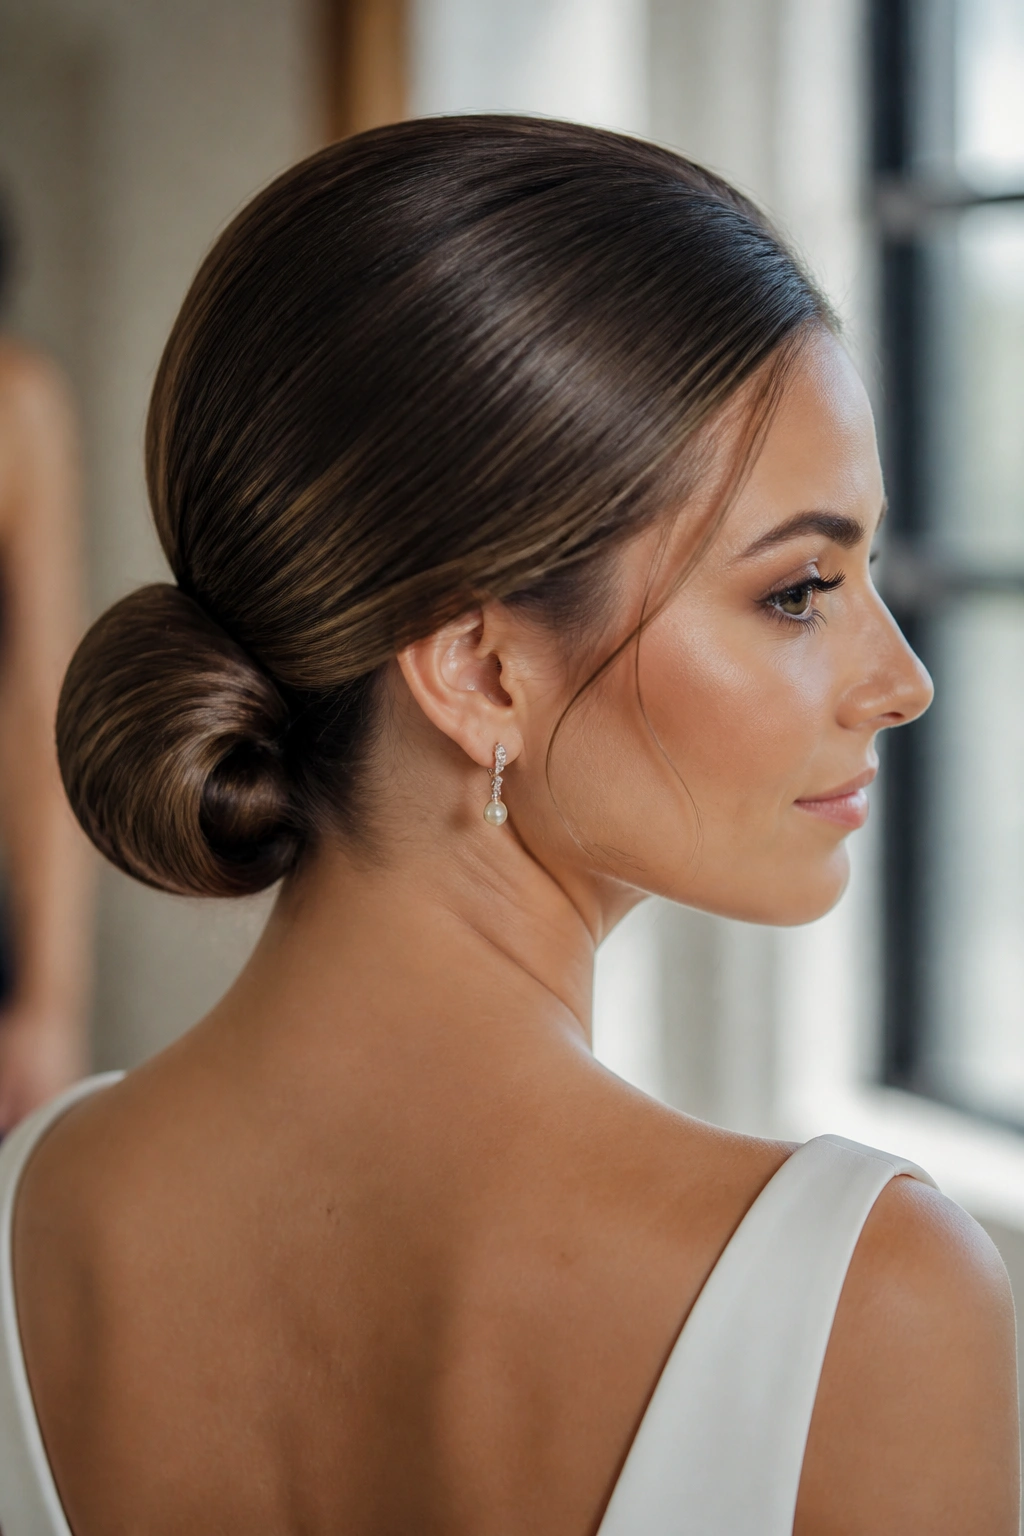
Why does a looped bun look so polished even when it takes ten minutes? Because the curve is clean, the ends are hidden, and the eye reads one continuous line instead of a bunch of separate pieces.
The loop bun is made by folding the ponytail back through itself or shaping the hair into a rounded loop at the base. The edges should stay smooth, and the bun should feel almost like a folded ribbon. That soft arc is what makes it look so nice from the side.
How to Get the Shape
I’d use a tail comb to set a crisp part first, then smooth the hair into a low ponytail. After that, twist or fold the ponytail so the loop sits flat against the head and pin the tail under the curve.
A loop bun is a good pick for shoulder-length hair that can’t build a huge chignon without help. It also works well with a small veil comb or a few scattered pins.
The shape is simple. That’s why it holds up.
16. Twist-and-Pin Wedding Updo for Fine Hair
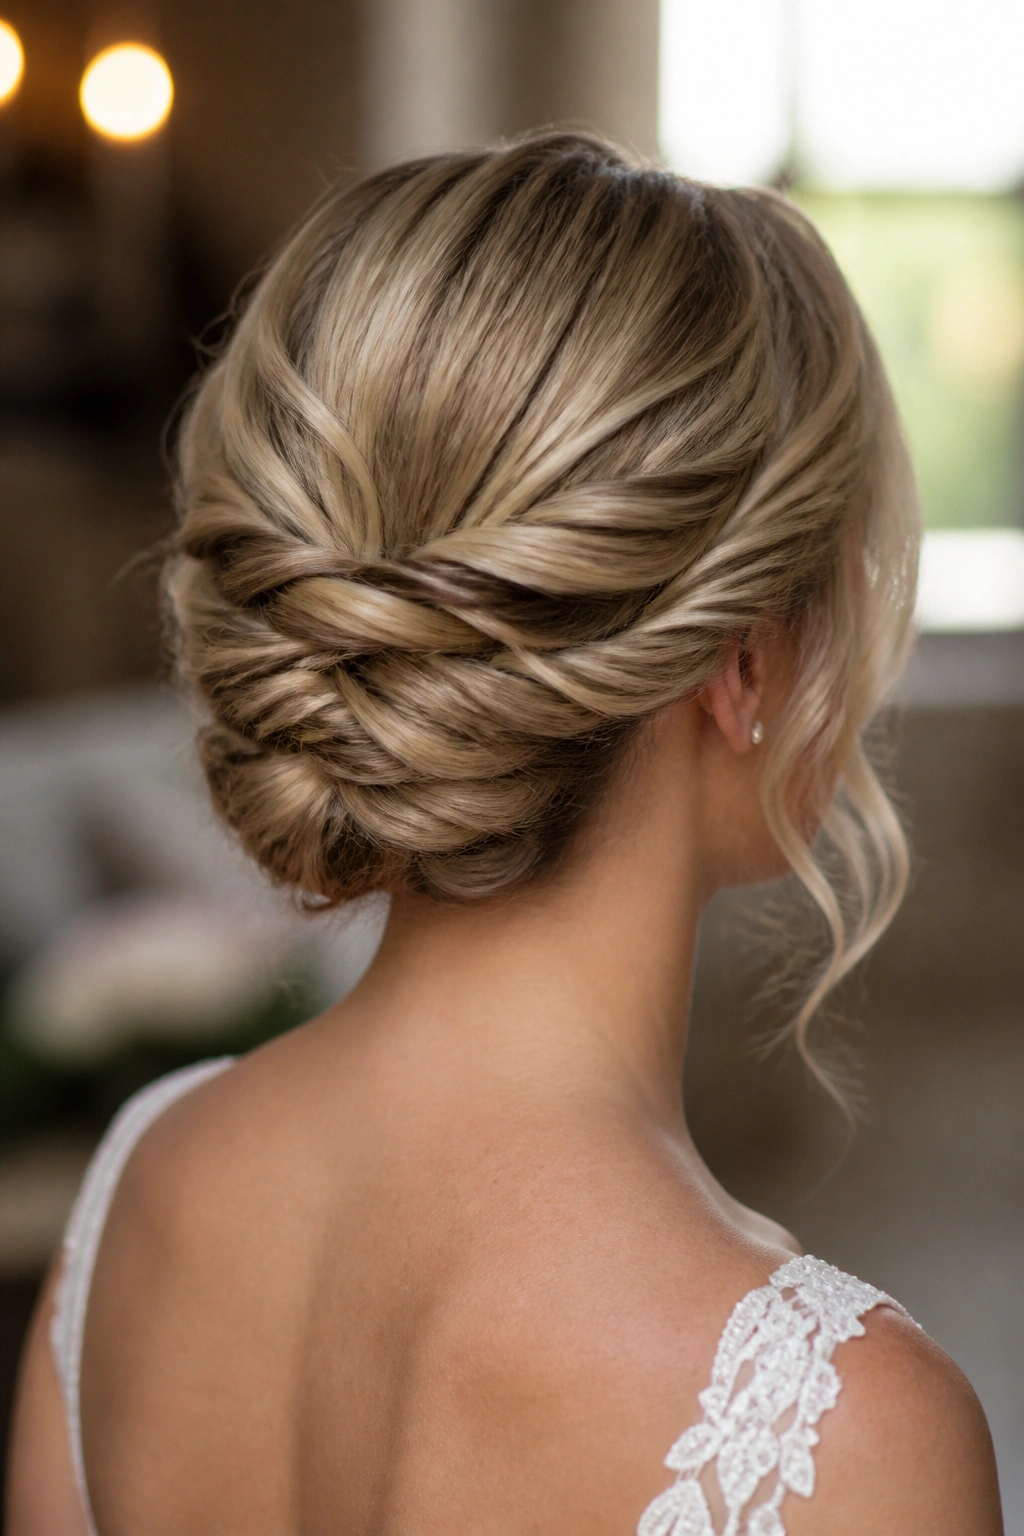
Fine hair loves this trick. Multiple twisted sections create more surface area, which makes the updo look fuller without turning it into a puffed-up bun. The finish is still sleek, just with a little more depth at the back.
I like this style when the gown is detailed and the hair needs to stay out of the way without looking severe. Small sections are twisted back from the temples and sides, then pinned into each other so the seams disappear. If you do it right, the twists look almost woven into the shape.
This is one of those styles where two mirrors help a lot. What looks neat from the front can still have a gap in the back, and you won’t catch that unless you check. A few extra pins can save you from that awkward collapse later.
The best part is that it can look delicate without feeling fragile. That’s a useful thing in wedding hair, where you want grace but you also want the style to survive real life.
17. Sleek Ponytail-to-Bun Hybrid with a Wrapped Base
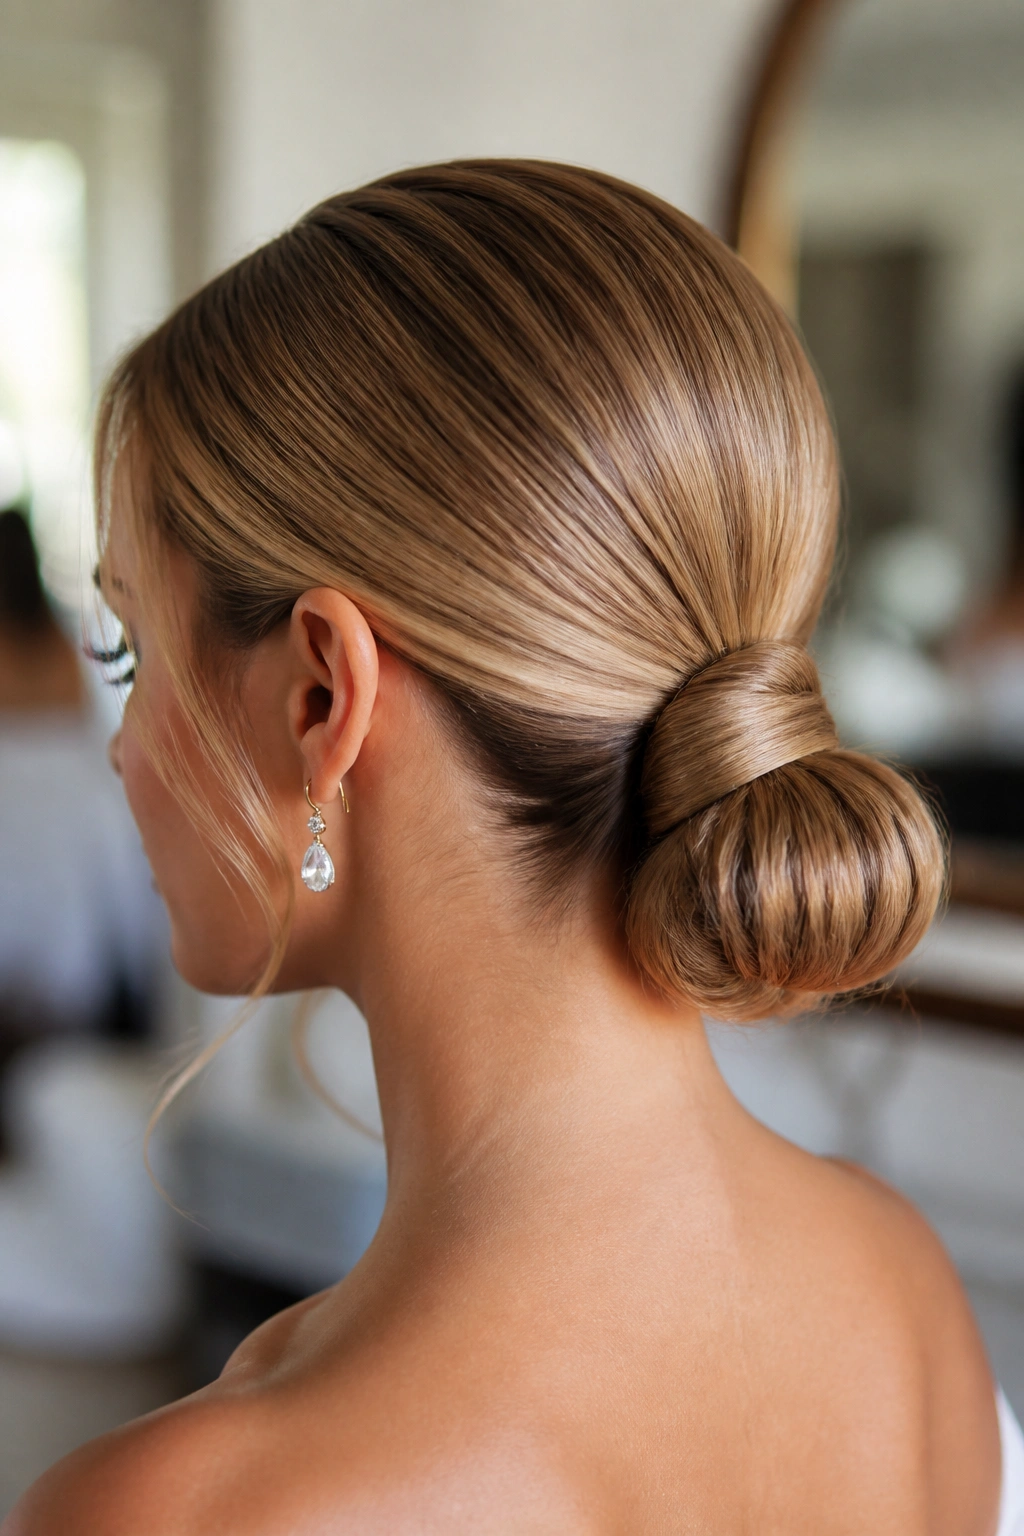
Unlike a pure bun, this version keeps a visible ponytail base or wrapped tail, which softens the silhouette. It gives you a little movement without losing the clean, wedding-ready finish.
The structure usually starts as a low or mid ponytail. Part of the tail is wrapped around the elastic, and the rest is folded into a compact coil or tucked under the base. The ponytail line can still be hinted at, which makes the style feel lighter than a full chignon.
This is a good pick if you like sleek hair but hate the idea of a heavy bun sitting at the nape all night. It’s also useful for very thick hair, since the hybrid shape lets you control the bulk without forcing everything into one tight knot.
I’d keep the surface smooth and let the tail add the shape. If the wrap is too thick, the style starts to look chunky. Thin is better here.
18. Rope-Braid Wrapped Chignon with a Sharp Edge
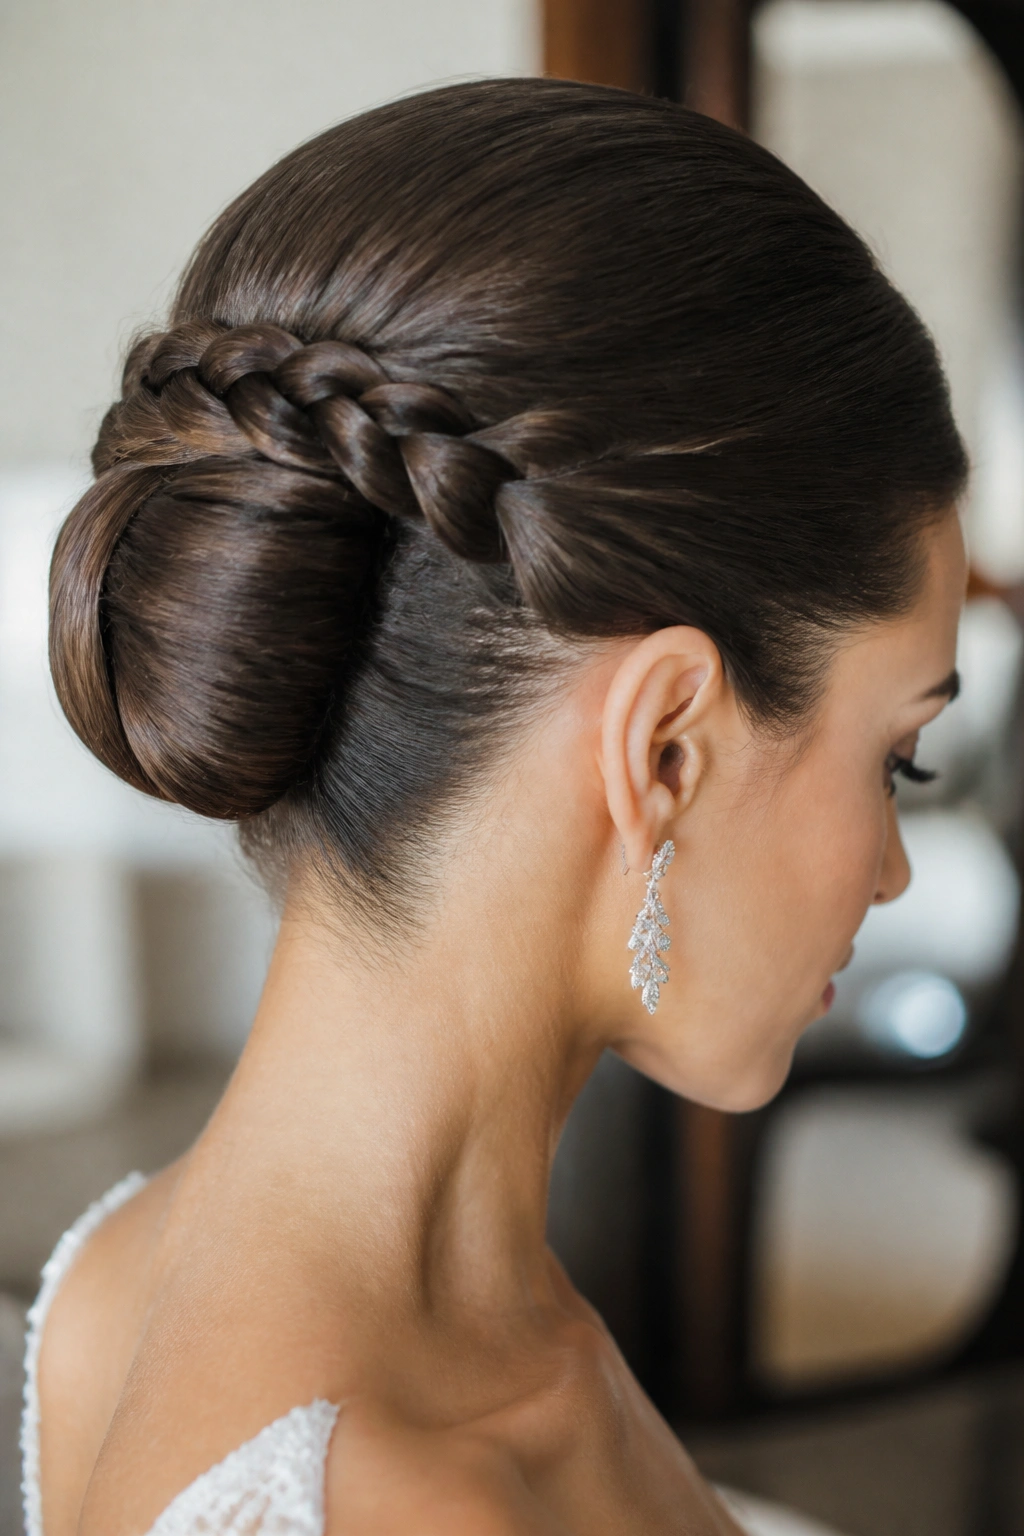
When hair slips, rope braid gives the bun teeth. That is why this style works so well for slippery strands that refuse to stay put. The rope braid adds grip and a crisp line before the hair is wrapped into a chignon.
Why It Works
A rope braid uses two sections twisted in opposite directions, then wound together. The result is tighter than a regular three-strand braid and smoother than a loose twist. It has a neat cord-like finish that suits a wedding updo more than people expect.
- Best on medium to long hair with some natural shine.
- Uses two elastics and several hidden pins.
- Looks good with crystal pins or a slim comb.
- Great if you want the bun to feel structured, not soft.
I like this style when the dress is clean and the accessories are sharp. The rope braid acts like a border around the bun, which gives the whole shape a finished edge. It also keeps the style from collapsing into a plain coil, which can happen with very straight hair.
My tip: keep the braid visible from the side. If you tuck it away too much, you lose the best part.
Final Thoughts
The best sleek updo hairstyles for weddings all have the same backbone: a clean part, thoughtful pinning, and a shape that suits the dress instead of fighting it. That sounds obvious, but it is where most styles go wrong. The hair is either too tight for the face, too loose for the neckline, or too shiny in the wrong places.
A trial run matters. A style that looks lovely in a chair can collapse under a veil, earrings, and a long reception if the pins are placed badly or the hair was too fresh to begin with. Test it with the real accessories if you can, or at least with a comb, a few pins, and the same part you plan to wear.
If you are torn between two looks, choose the one that keeps the silhouette clean from the back. That is the angle people see most after the ceremony starts, and it is the angle that usually tells you whether the style was built well.
