



Second day hairstyles are the sweet spot between clean and cooperative. Freshly washed hair can be too slippery, too soft, and too eager to fall out of pins before lunch; hair that’s had a day to settle usually grips better, bends more easily, and keeps shape with less fuss.
That little bit of natural oil at the roots is not the enemy here. It’s the reason a braid stays put, a twist doesn’t unravel at the nape, and a ponytail can look polished instead of shiny in the wrong way. If your hair is fine, wavy, curly, straight, thick, or somewhere annoyingly in between, day-two texture tends to work with you instead of against you.
You do not need a full wash to look put-together.
A quick brush, a small hit of dry shampoo if the roots need it, and the right shape at the crown can change everything. The trick is picking styles that use what your hair is already doing—extra grip, a little bend, a bit of volume at the ends—rather than fighting for a glassy finish that disappears the second you step outside. Some of these looks are neat, some are soft, some lean playful, and a few are the kind of styles I’d use when I want to look intentional without spending half the morning in front of a mirror.
1. Low Twist Bun for Second-Day Hair
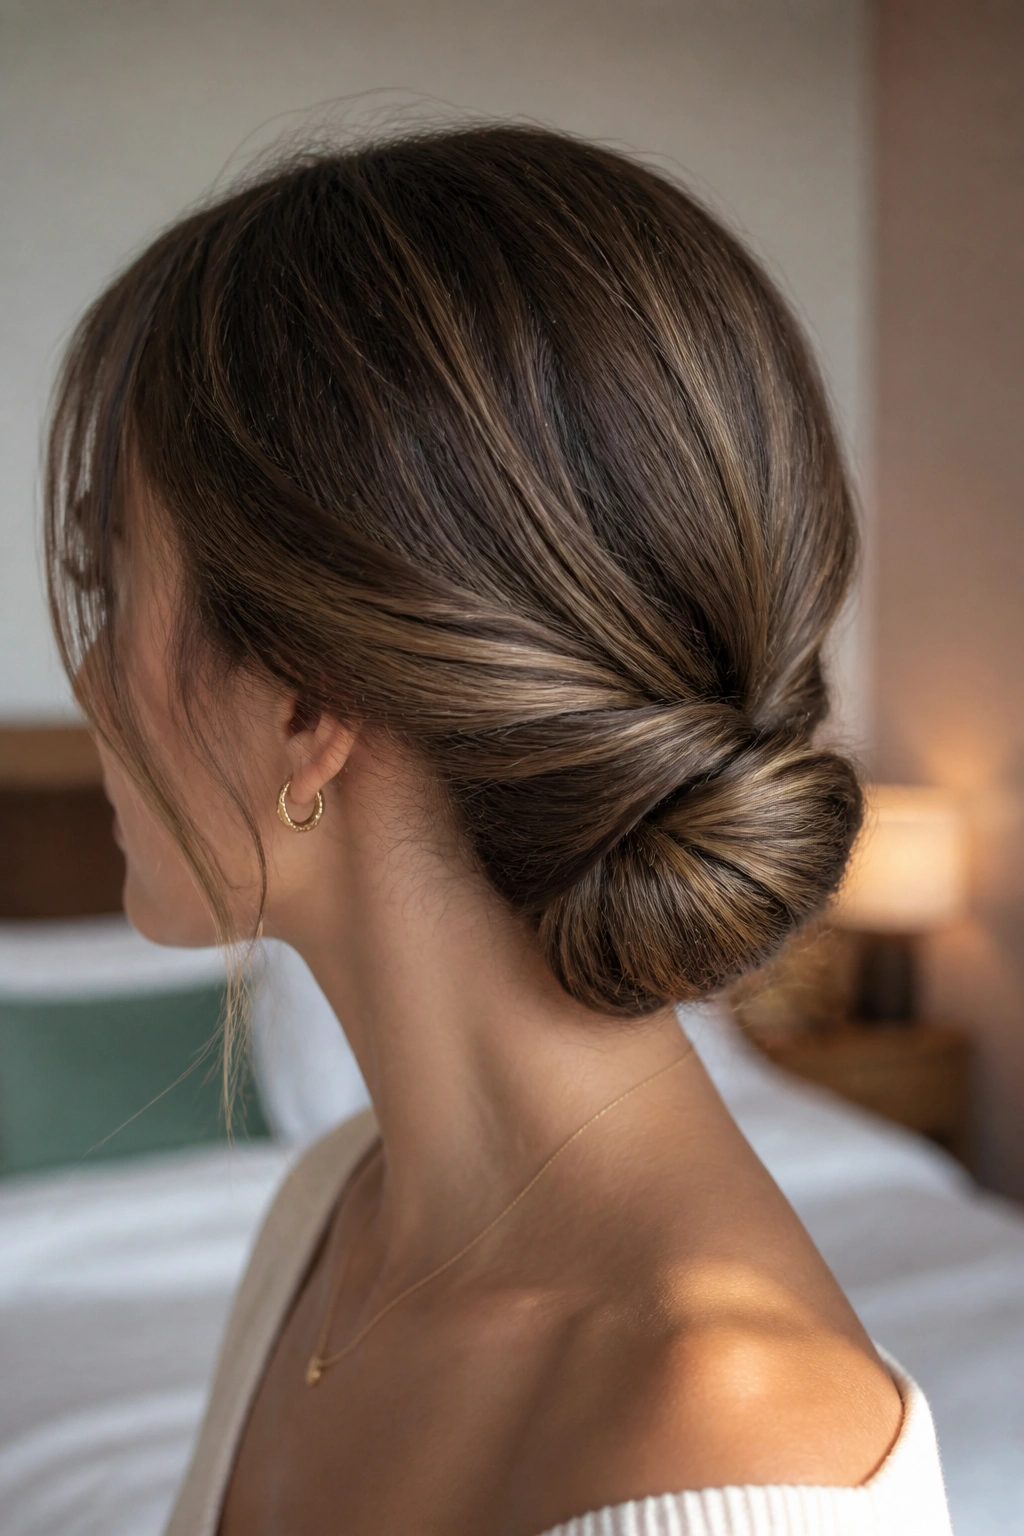
A low twist bun is the kind of style that makes slightly messy hair look planned. The texture from day two gives the bun something to hold onto, so you’re not wrestling with strands that slide apart the second you pin them.
Why it works so well
The shape sits at the nape, where second-day hair usually has enough movement to twist without puffing up too much. If your ends are dry or a little frayed, they tuck into the bun instead of sticking out like they do on freshly washed hair. That’s the whole charm.
For a cleaner finish, gather your hair into a low ponytail first, twist the length once or twice, then coil it around the base. Use 4 to 6 bobby pins pushed in from different angles, not all in a row. That gives the bun real hold.
- Best for medium to long hair
- Works well with straight, wavy, or slightly curly textures
- Needs only a brush, a hair tie, and pins
- Looks better with a little lift at the crown, not a slicked-down scalp
Pro tip: Pull the bun a touch lower than you think you should. A bun that sits too high can look tight and fussy; one that sits at the nape looks calmer and more expensive, even if it took three minutes.
2. Claw Clip French Twist
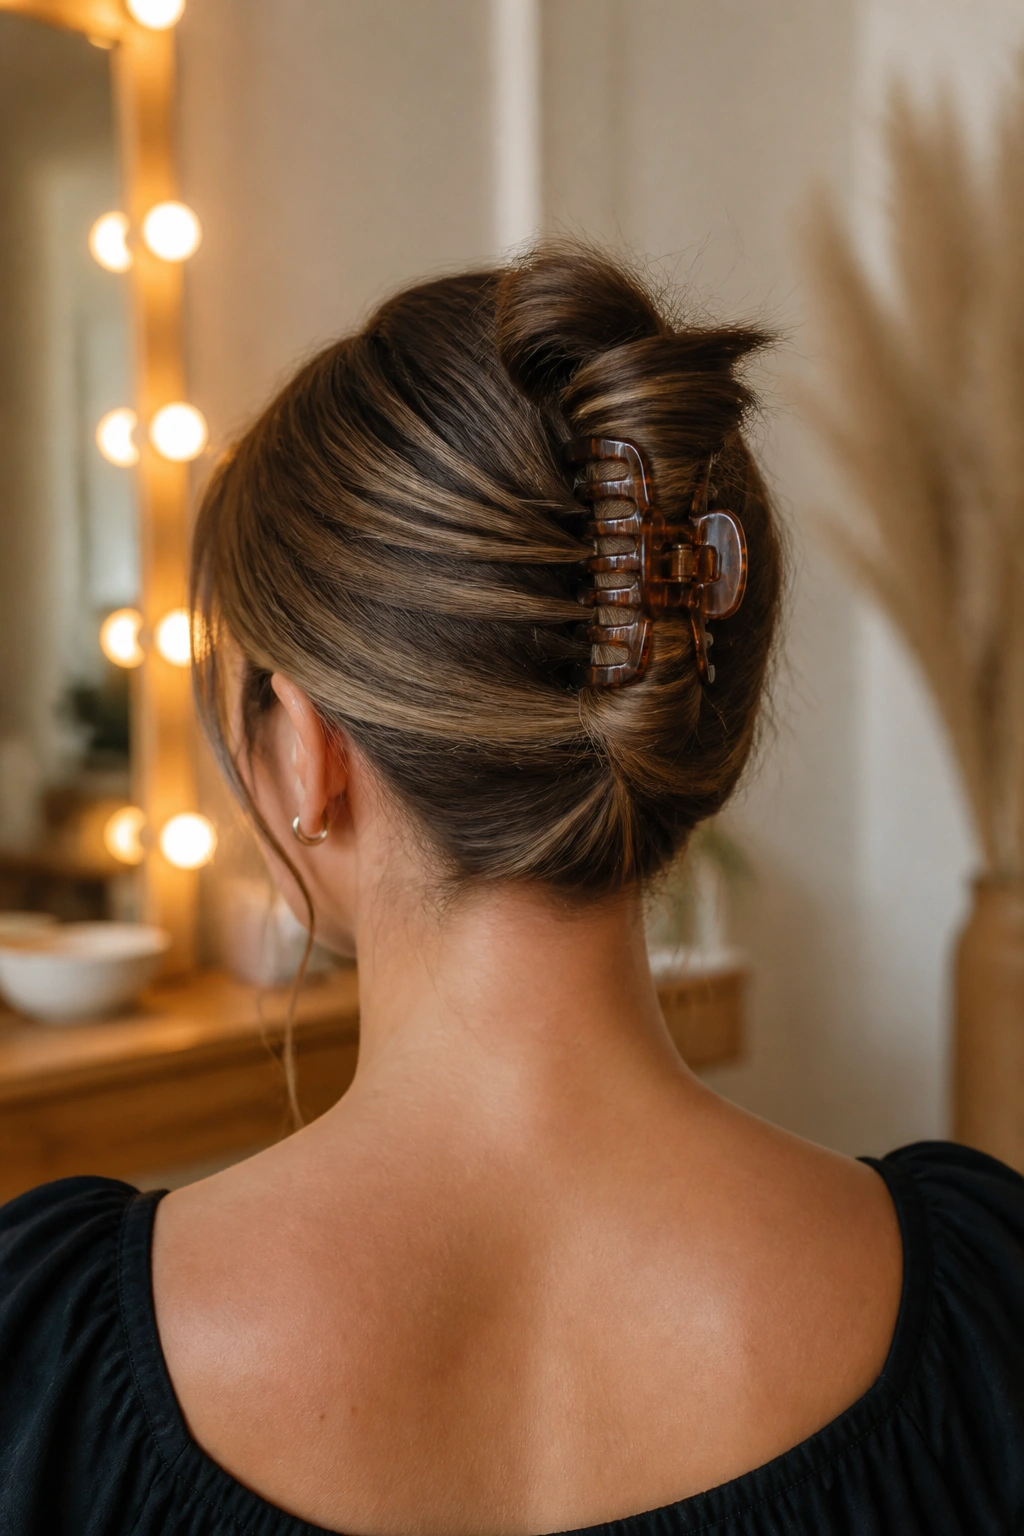
A claw clip French twist is one of those styles that looks like you put thought into your outfit, even if the hair part took less than a minute. The clip does the heavy lifting, but the twist is what keeps it from looking random.
The move is simple: sweep your hair back, twist it upward, fold the length back on itself, and clamp it with a medium or large clip. Leave the ends tucked neatly or let a few pieces peek out if your layers are shorter. Either way, the back should feel secure, not squashed.
This works especially well when second-day hair has a bit of grit. Fresh hair can slip right out of a clip. Day-two texture gives the clip something to grab, which is why this style often holds better than a ponytail on cleaner hair.
I like this one for shoulder-length hair and longer cuts because it keeps the neck open and doesn’t need perfect symmetry. And that matters. A French twist looks best when it’s slightly lived-in, not stiff enough to pass a ruler test.
3. Sleek Low Ponytail with a Wrapped Base
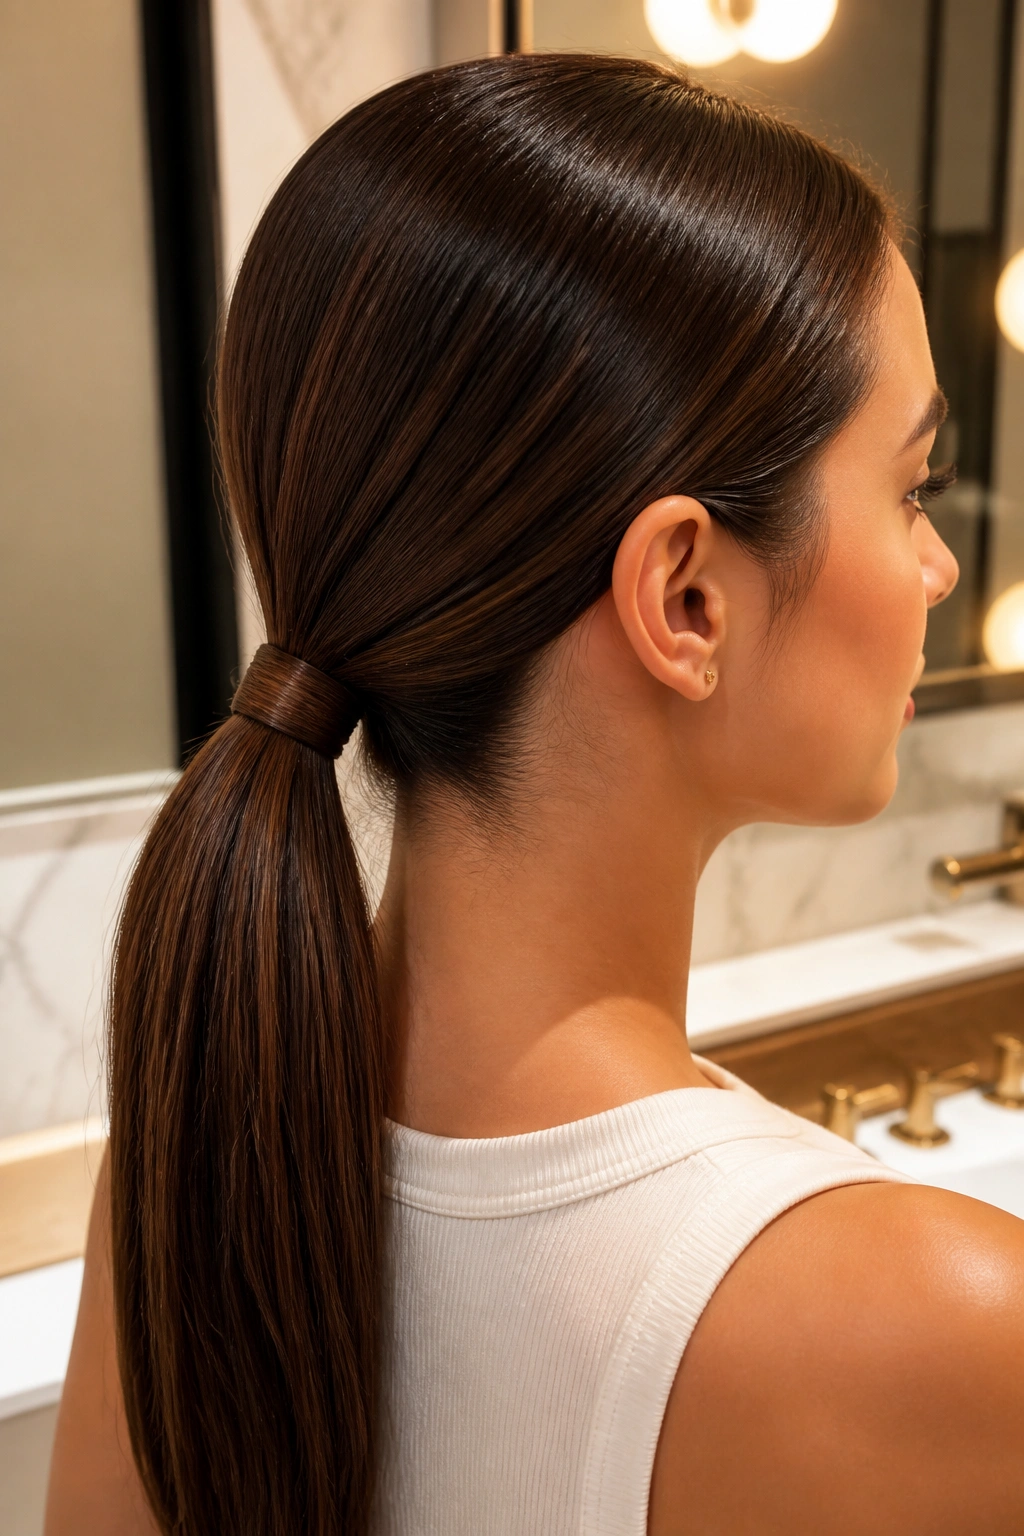
Need something neat in under three minutes? A sleek low ponytail is the obvious answer, but the wrapped base is what keeps it from reading as plain.
Start by brushing the hair back from the temples toward the nape. If the top layer is frizzy, smooth a tiny bit of gel, pomade, or even a drop of cream over the crown before you tie it off. Then take a small strand from the ponytail, wrap it around the elastic, and pin the end underneath. That one detail changes the whole look.
How to keep it smooth
- Use a brush with firm bristles, not a soft detangler
- Tie the ponytail low and centered for a cleaner line
- Spray a little hairspray on the brush, not directly on the hair, if flyaways are stubborn
- Hide the elastic completely if you want a sharper finish
This style is best when your hair is a bit oily at the roots but still has shape through the ends. Too much product can make the ponytail look heavy. Too little, and the crown can puff out in a way that feels accidental.
4. Braided Crown for Second-Day Hair
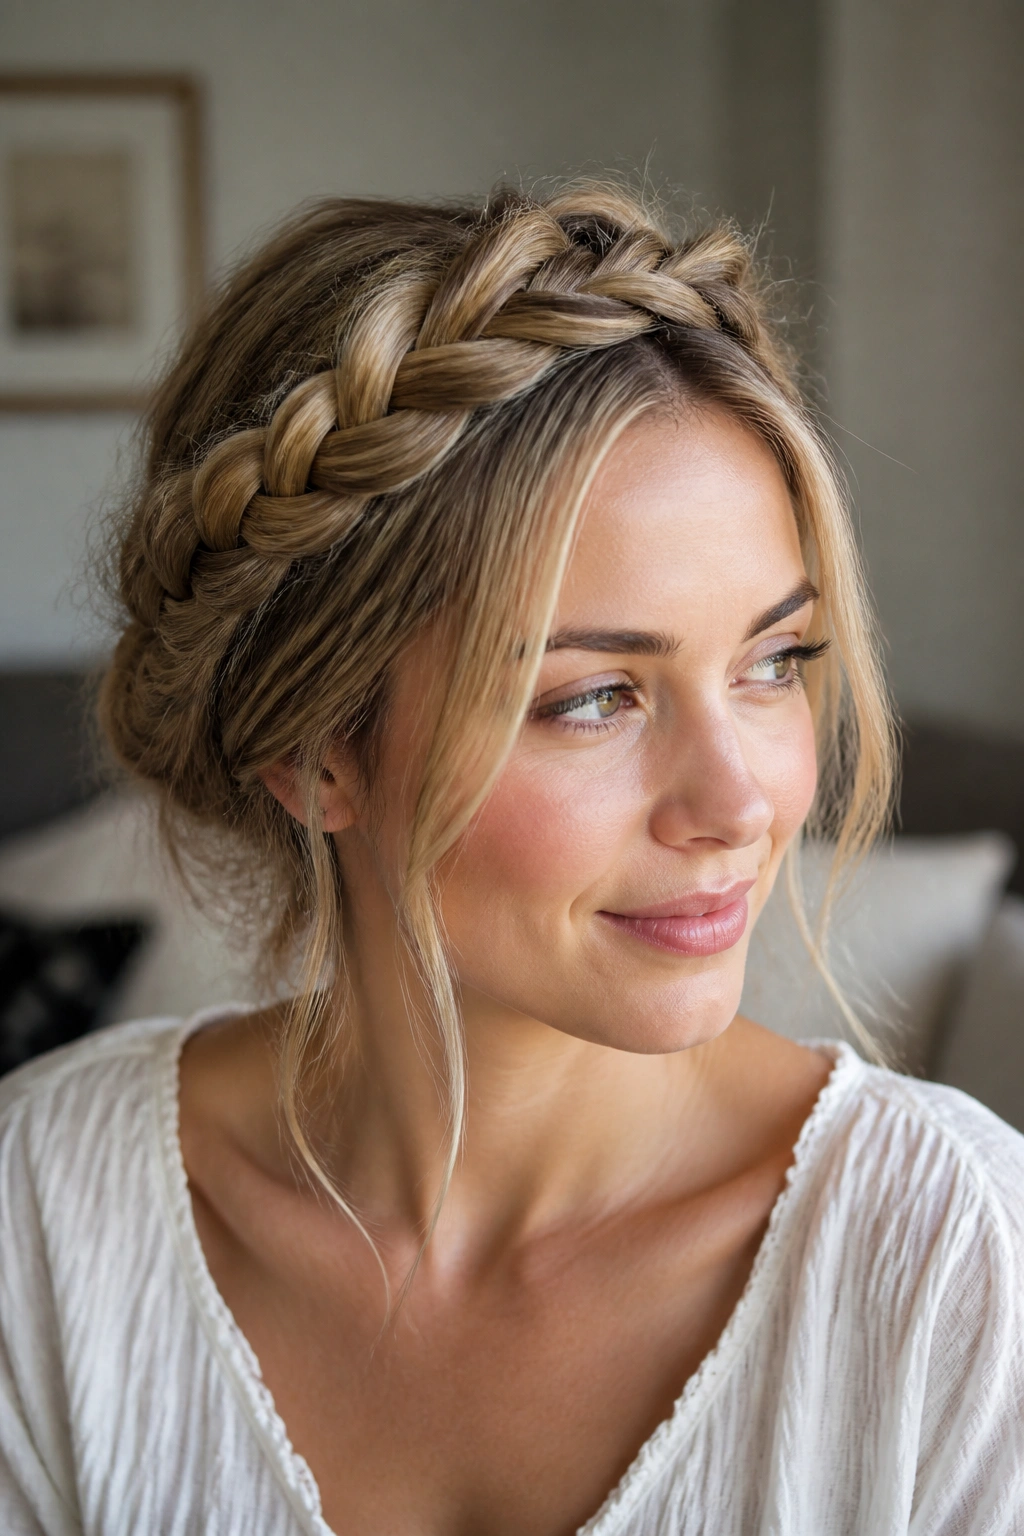
There’s a specific kind of second-day hair that looks untidy around the hairline but still has enough texture to braid cleanly. That’s where the braided crown comes in, and honestly, it’s one of the smartest fixes on the list.
Start just behind one ear, braid along the hairline, and work your way across the top of the head toward the other side. Secure the end with a small elastic, then tuck and pin it out of sight. If the braid feels too neat, tug gently at the outer edges so it looks fuller and a little softer.
The details that matter
- A French or Dutch braid gives more hold than a loose three-strand braid
- Fine hair usually needs a little dry shampoo at the roots first
- Layered cuts look better when the braid sits slightly lower, near the temples
- Two or three hidden pins can hold the whole thing if the braid is short
This is a good one for covering grown-out bangs, greasy roots, or hair that has lost its shine in the front but still looks fine through the lengths. The whole point is to turn the part you dislike into part of the style. No apology needed.
5. Half-Up Top Knot
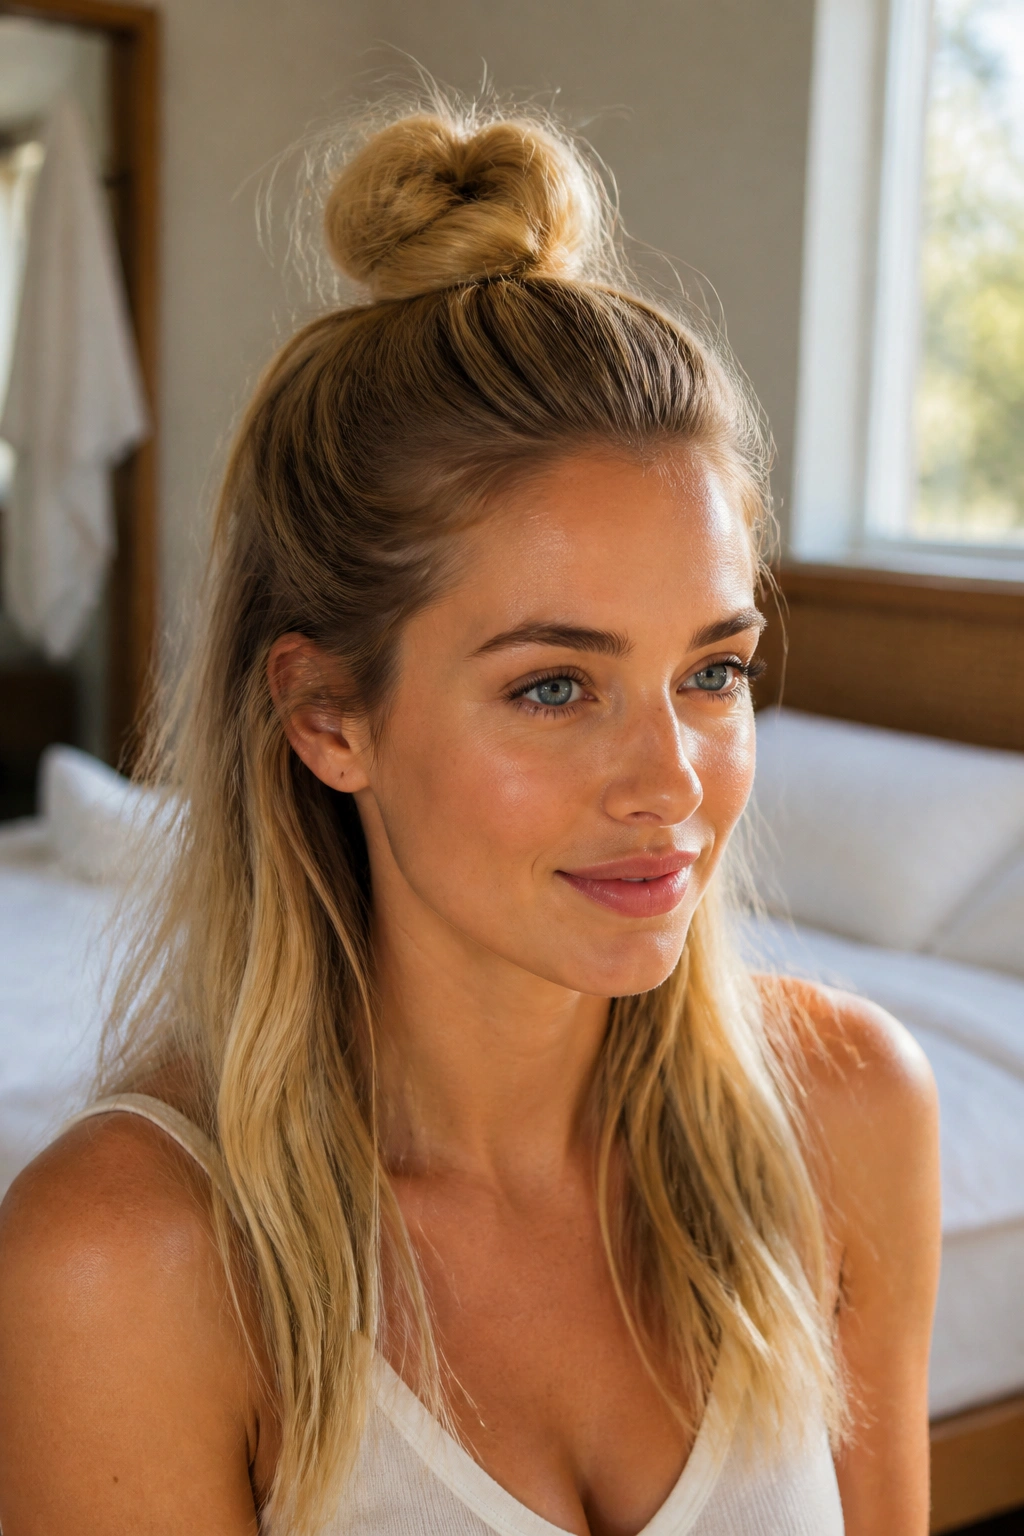
The half-up top knot is the style I reach for when my hair has gone flat at the crown but the rest still has a little movement left. It solves the problem without hiding the whole head under a bun.
Pull the top section from temple to temple, gather it at the crown, and twist it into a small knot. Keep it compact. That’s the difference between chic and messy-in-a-rush. Leave the bottom section loose so the style still has some softness and movement.
I like this look on wavy hair because the lower half keeps its shape better when it’s not fully tied up. Straight hair works too, especially if the ends have a slight bend from yesterday’s blow-dry or air-dry. Curly hair can make this look even better, since the knot gets height while the bottom half stays full.
Tiny knot. Big payoff.
If you want it cleaner, smooth the top section with a light cream before tying it up. If you want it more casual, pinch a few pieces loose around the face and let the knot sit slightly off-center. Both work. The wrong move is making the knot too large, because then the style starts to feel heavy and awkward.
6. Bubble Ponytail
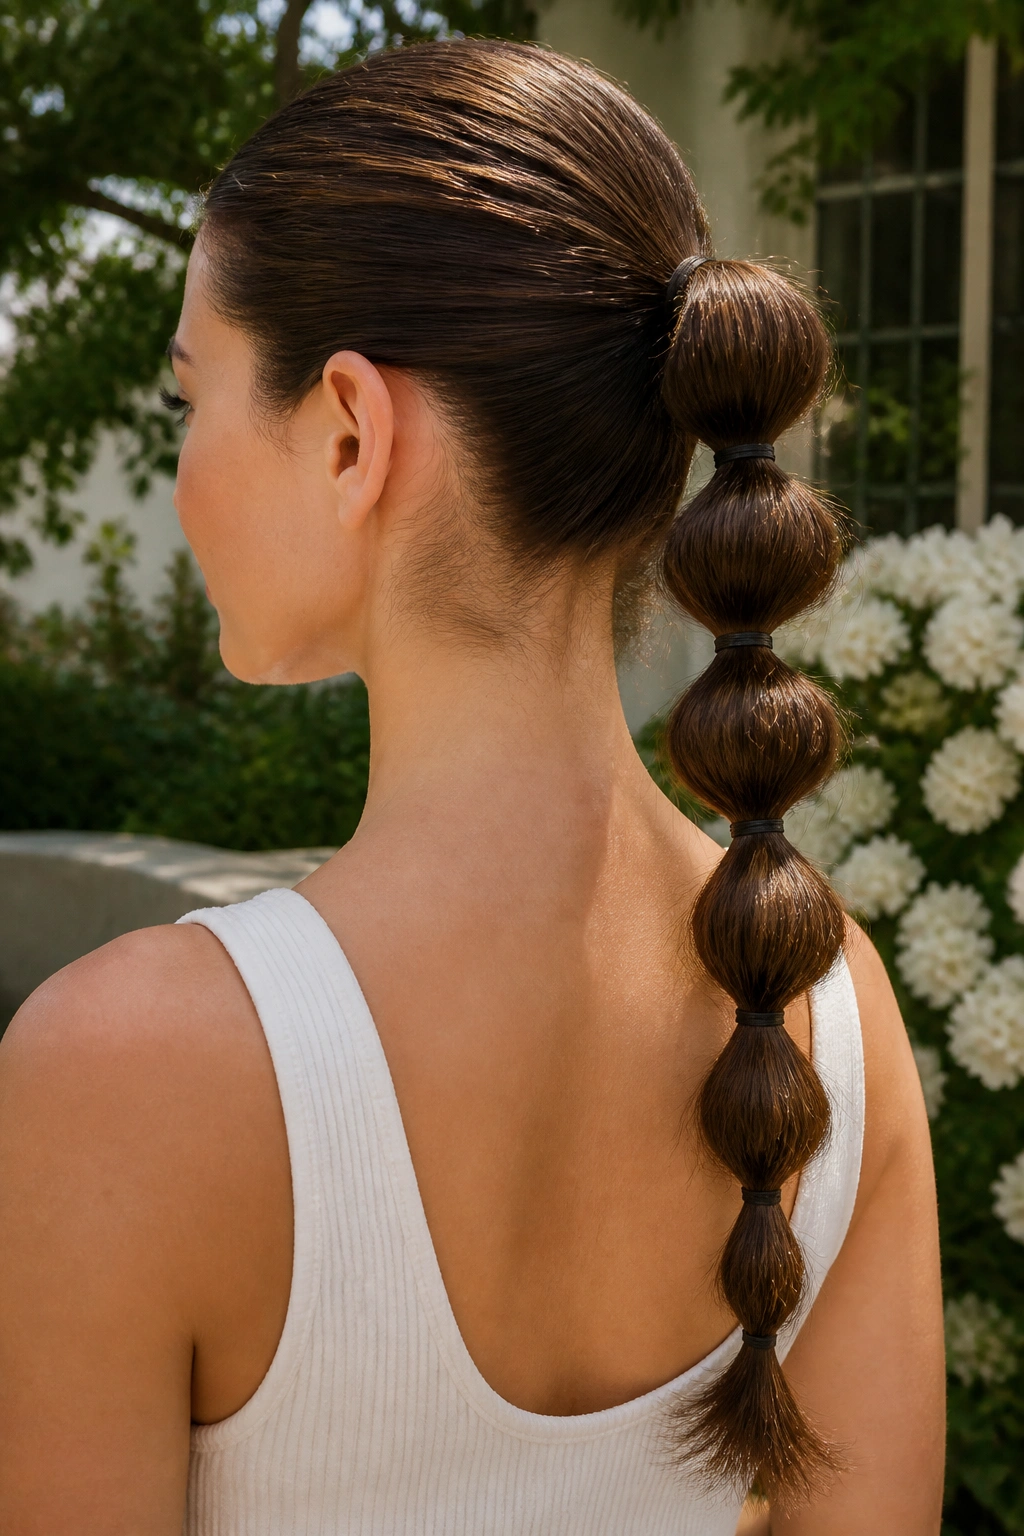
A bubble ponytail is what happens when a regular ponytail needs a little more personality. It also makes second-day hair look fuller, which is useful when the roots are a bit flat and the length is starting to lose shape.
Tie your hair into a low, mid, or high ponytail, then add clear elastics every 2 to 3 inches down the length. After each tie, gently pull the hair between elastics outward to create the “bubble.” Don’t overdo the tugging. You want rounded sections, not a chain of puffy knots.
What makes it different
Unlike a standard ponytail, this one creates shape along the full length of the hair instead of concentrating everything at the base. That makes it useful for long hair that feels a little boring on day two, especially if the ends still have decent thickness.
It also hides uneven texture well. A little frizz? Fine. Slightly dry ends? Also fine. The bubbles distract the eye in a good way.
I’d call this a strong pick for thicker hair, though fine hair can pull it off if you keep the bubbles small and the elastics close together. A matte elastic looks better than a glossy one here. Glossy ties tend to stand out too much and make the style feel childish.
7. Side Braid with Texture
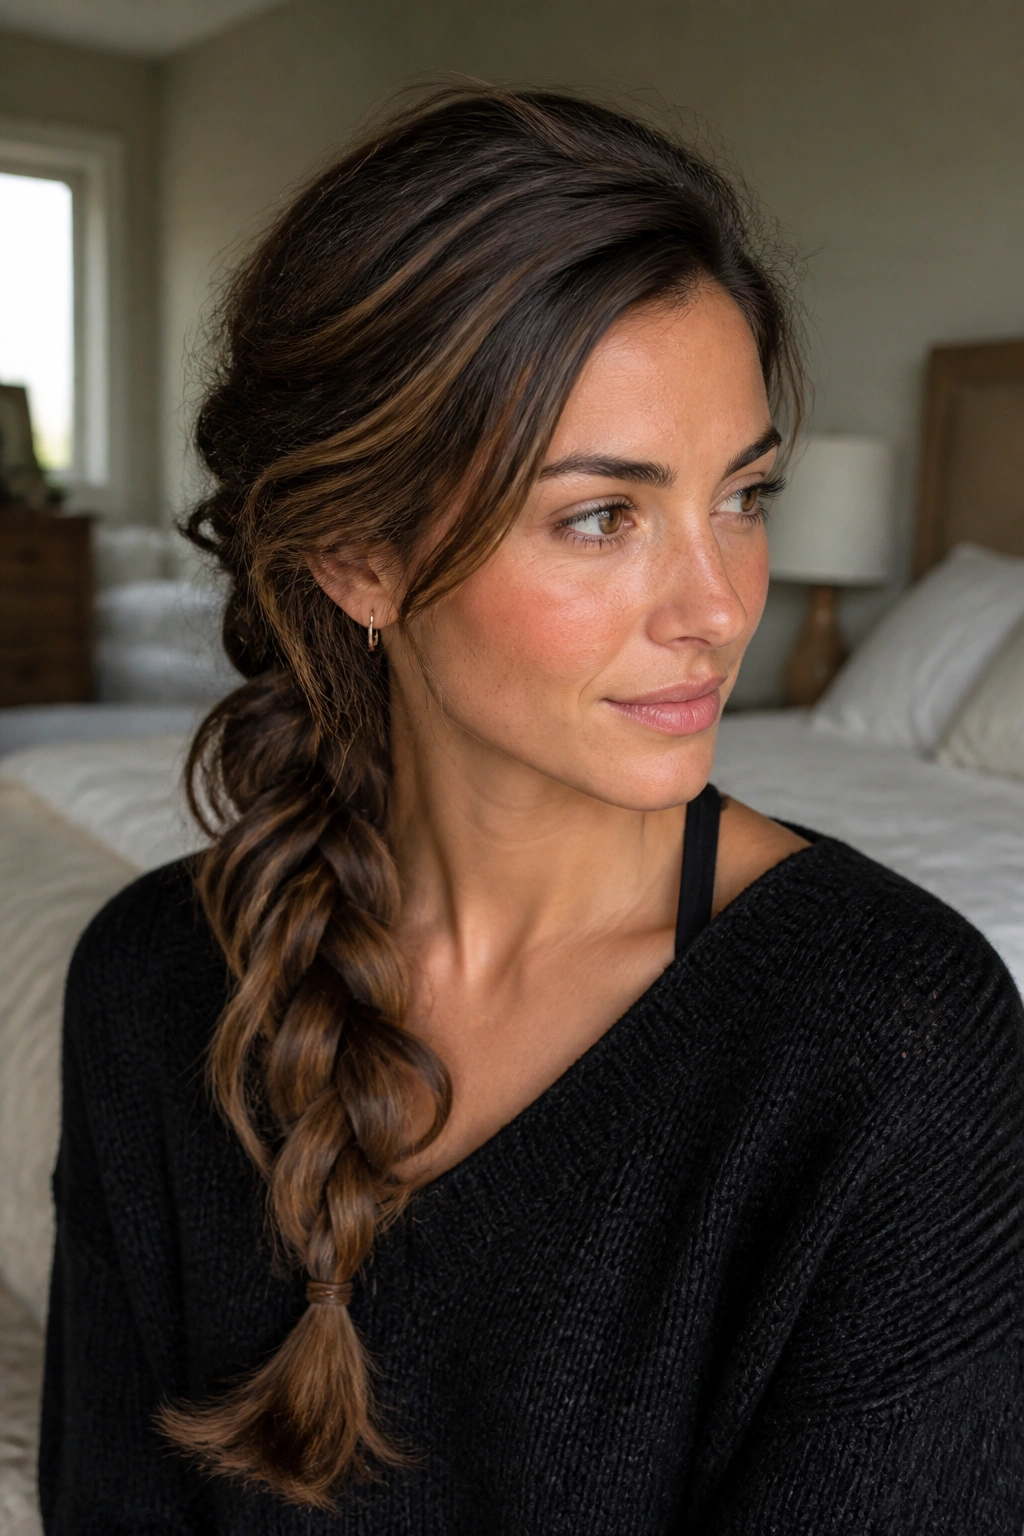
A side braid is one of those styles that gets better when the hair is no longer squeaky clean. There’s enough grip to keep the braid from collapsing, and enough softness at the ends to keep it from looking severe.
Sweep the hair over one shoulder and start the braid low behind the ear or a little below the jawline. You can keep it tight for a tidy look, or braid loosely and gently pancake the outer edges for a softer shape. If your hair has a wave pattern, don’t brush it too hard first. The bend is part of the appeal.
- Works well for medium to long hair
- Good for layered cuts if you start the braid lower
- Easier to hold with a little texturizing spray
- Looks best when the crown isn’t too flat
The side placement matters more than people think. A braid dropped to one side opens up the neck and makes the style feel softer than a centered braid. If you have short face-framing layers, let them fall free. Pinning everything back can make the whole look feel too rigid, and that’s not the point.
8. Messy Chignon with Face-Framing Pieces
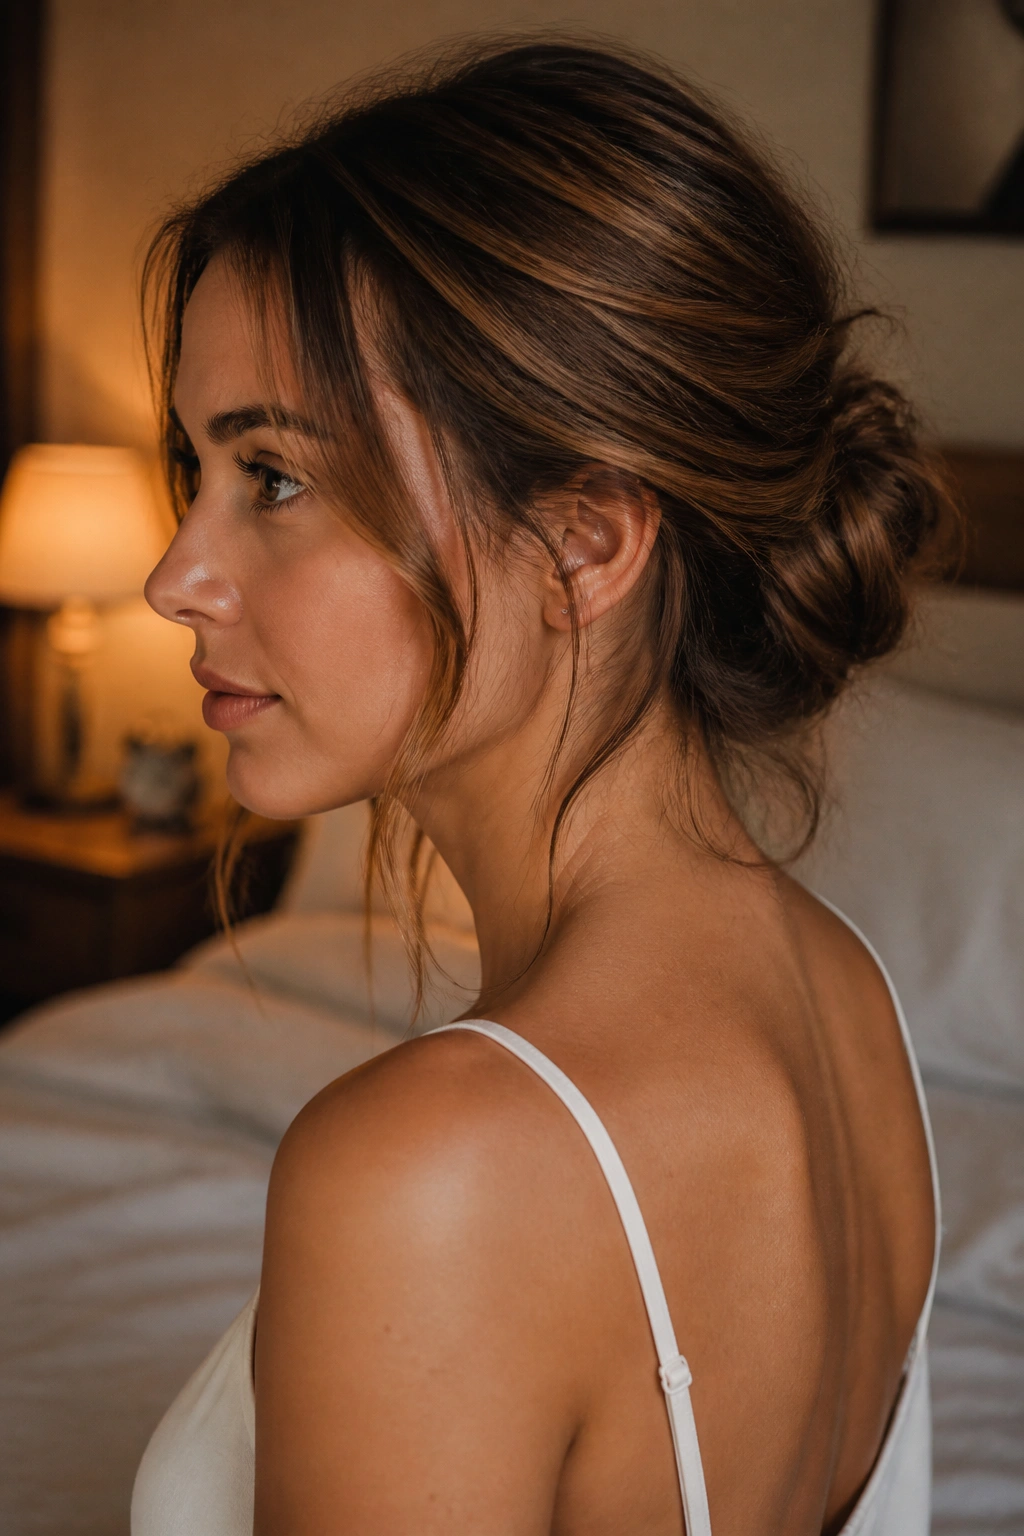
A messy chignon is the style you reach for when the top of your head has gone a little flat and you do not want to pretend otherwise. It is tidy enough for work, soft enough for dinner, and fast enough for a morning when your patience is already on thin ice.
Gather the hair at the nape, twist it into a loose coil, and pin it in place with the ends tucked underneath. Leave a few pieces out around the face—thin ones, not giant strips—and curve them slightly with your fingers or a quick pass of heat if needed. That small softness stops the bun from looking too severe.
The chignon works best when it’s not overbuilt. One thick knot can feel heavy, especially if your hair is long. Two smaller twists pinned together often sit better and last longer. Use crossed bobby pins under the bun if the shape needs extra support.
I like this style because it does not try too hard. A polished bun can look a little stiff on day-two hair. A chignon is more forgiving, and frankly, more flattering when the roots have lost some lift. That tiny bit of looseness around the face is what keeps it wearable.
9. Headband Tuck Roll
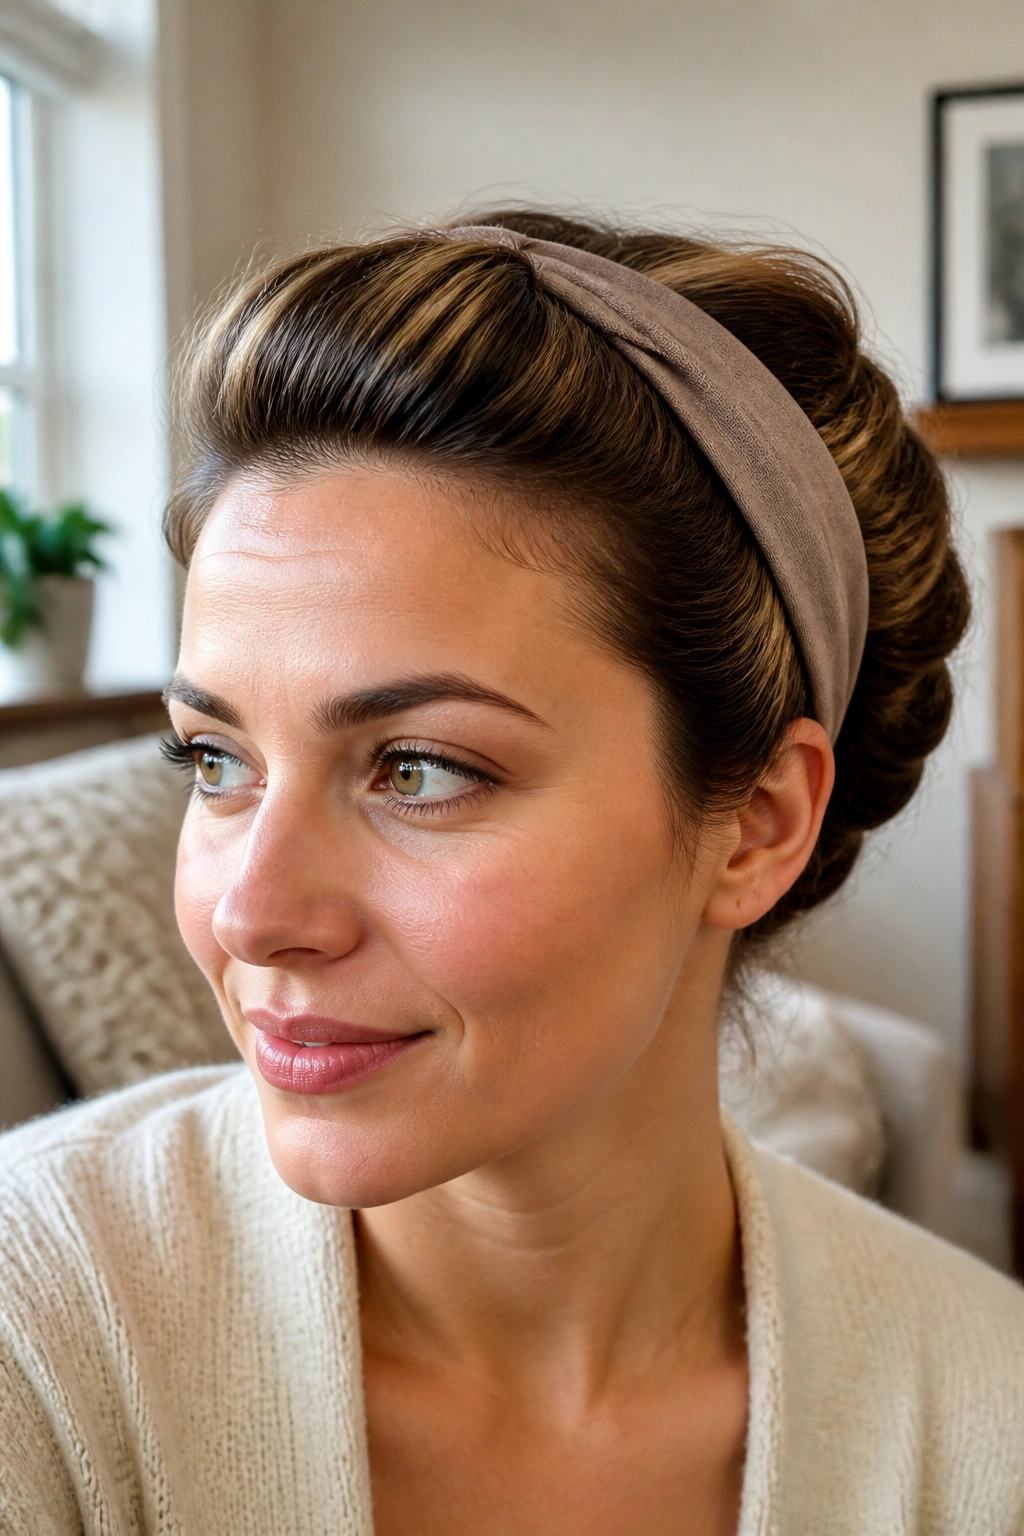
Got a stretchy headband and a little time? The tuck roll turns that into a full hairstyle, which is why it’s such a handy second-day option when the roots need help and the ends are cooperating.
Place the headband around your head, then tuck the hair into it in sections, rolling the length inward until the ends disappear. A soft, stretchy band works better than a stiff one because it holds without digging in. If the hair is long enough, the roll can sit snug and smooth. If it’s shoulder-length, you may get a looser, more casual shape, and that’s fine.
How to keep it from slipping
- Start with a headband that has a little grip on the inside
- Tuck the hair in small sections instead of all at once
- Pin the sides if your hair is fine or very silky
- Leave a little volume at the crown so it does not look flat
This style is especially useful when you want the front off your face without resorting to a ponytail. It also works nicely on hair that has a bit of bend but no real curl pattern left. The result feels neat, almost old-school in a good way, and it takes less time than most people expect.
10. Space Buns
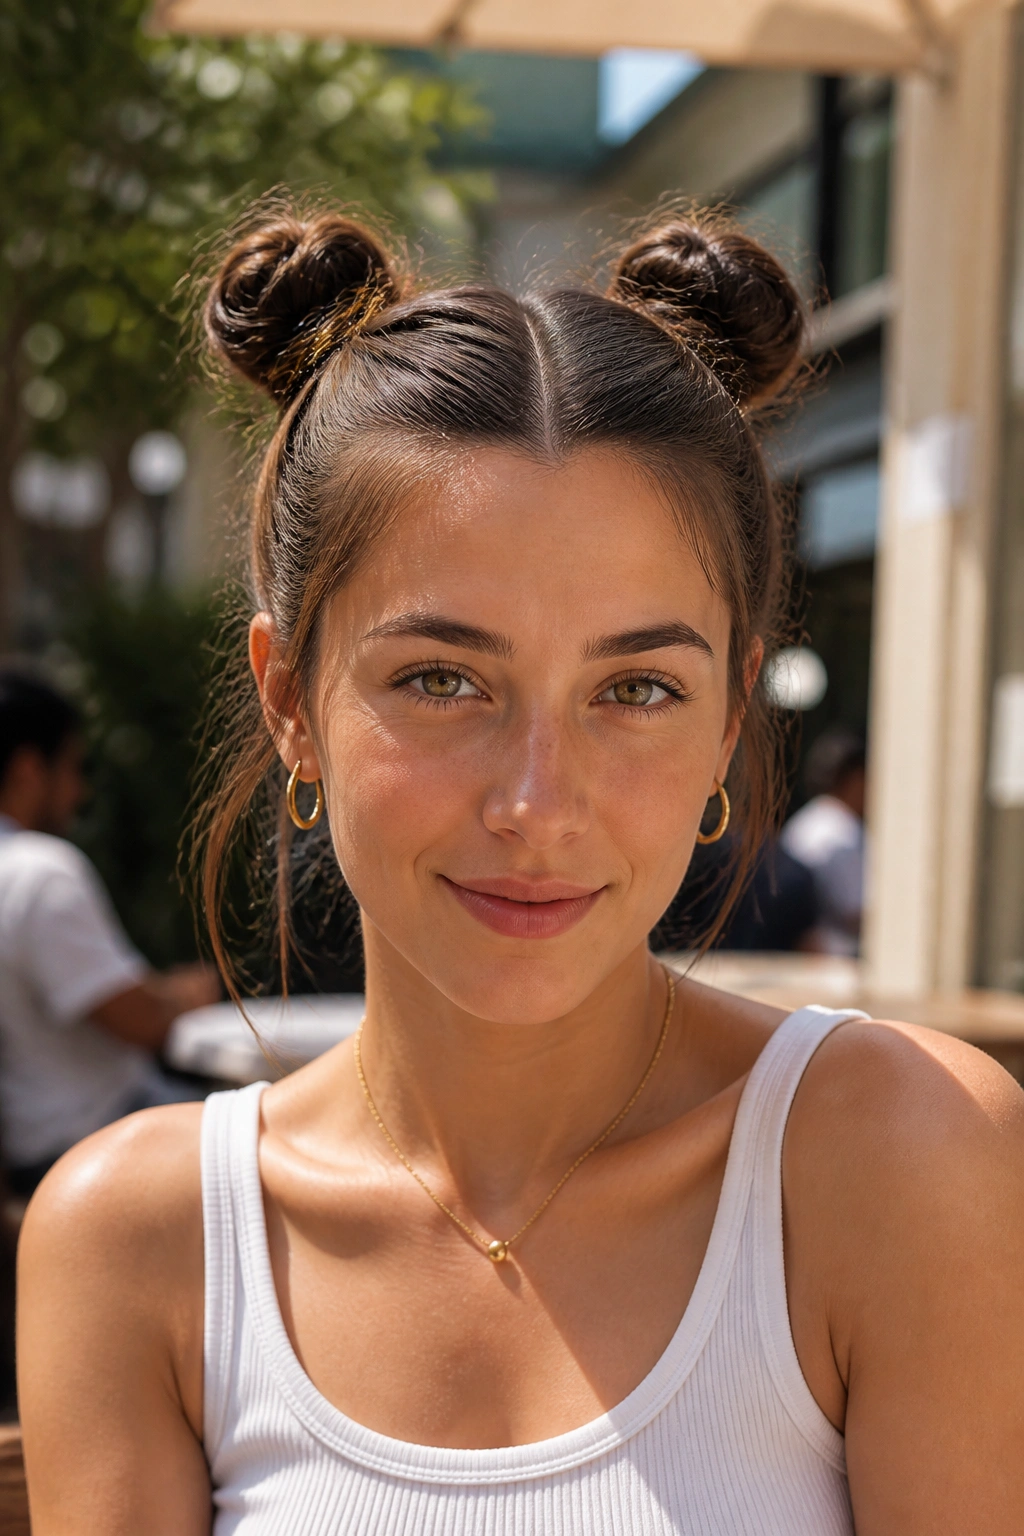
Space buns are not just for playful outfits or festival photos. On second-day hair, they make a lot of sense because the texture that feels uncooperative in a loose style gives the buns extra grip.
Part the hair down the middle, split it into two high ponytails, and twist each one into a small bun. Secure with elastics and a few pins, then pull the buns slightly apart if you want a fuller shape. Keep them a little smaller than your first instinct. Giant space buns can look costume-y fast; compact ones feel more wearable.
This style works especially well when the crown is flat and the ends are still usable. A little dry shampoo at the roots helps, but you do not need a perfect base. In fact, slightly messy roots make the buns look less rigid.
You can wear them high and fun, or lower and more relaxed. High buns give more lift. Lower buns feel less theatrical and a bit easier to wear with everyday clothes. Either way, the style does a good job of turning limp hair into something with attitude. That is a useful trade.
11. Rope-Braid Ponytail
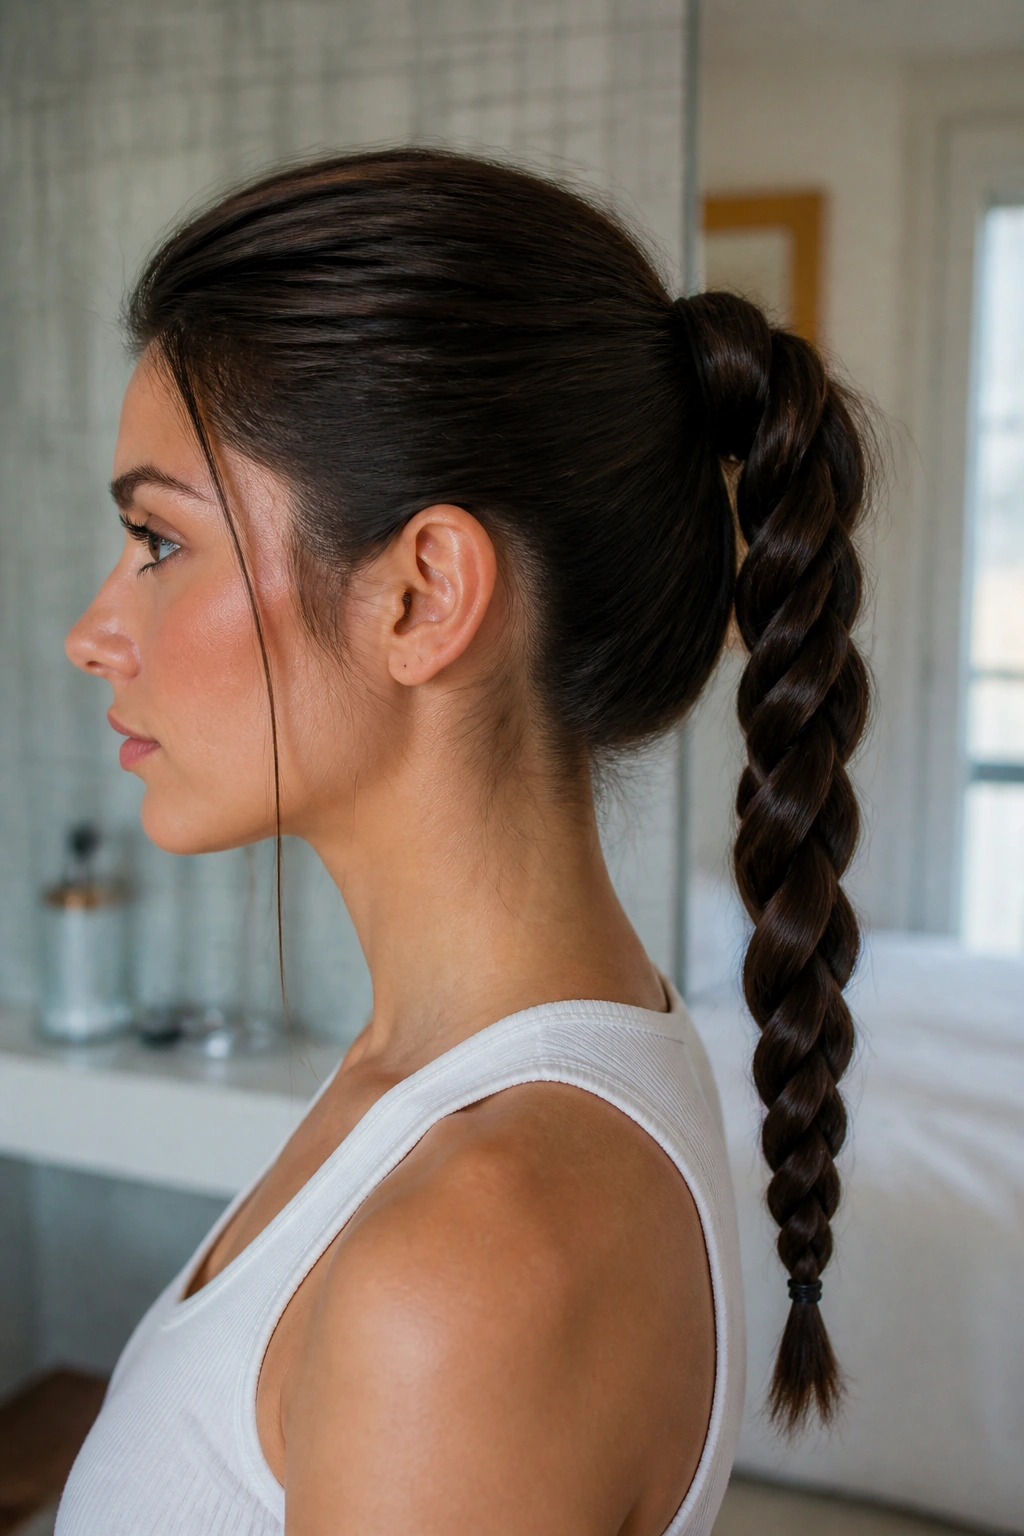
If a three-strand braid feels like too much work, the rope braid is the version I’d point you to first. It looks polished, it’s fast, and the twist pattern works especially well on second-day hair because the strands don’t need to be perfectly smooth.
Pull the hair into a ponytail, split it into two equal sections, twist each section in the same direction, then wrap them around each other in the opposite direction. That opposite-direction part matters. Skip it and the braid loosens fast. Secure the end with a small elastic.
What makes it different
A rope braid creates a tighter, cleaner spiral than a regular braid, which is useful when the hair is thick or when the ends feel a little dry and need to stay contained. It also sits nicely on straight hair because the twist pattern shows up more clearly.
I prefer this one when the ponytail itself still needs to look neat but the hair has enough texture to hold the twist. A light mist of hairspray on the finished braid helps keep the shape from loosening through the day. Not a heavy spray. Just enough to keep the ends in place.
It’s a good style for people who want something more interesting than a plain ponytail without adding ten extra minutes to the morning.
12. Faux Bob with Pins
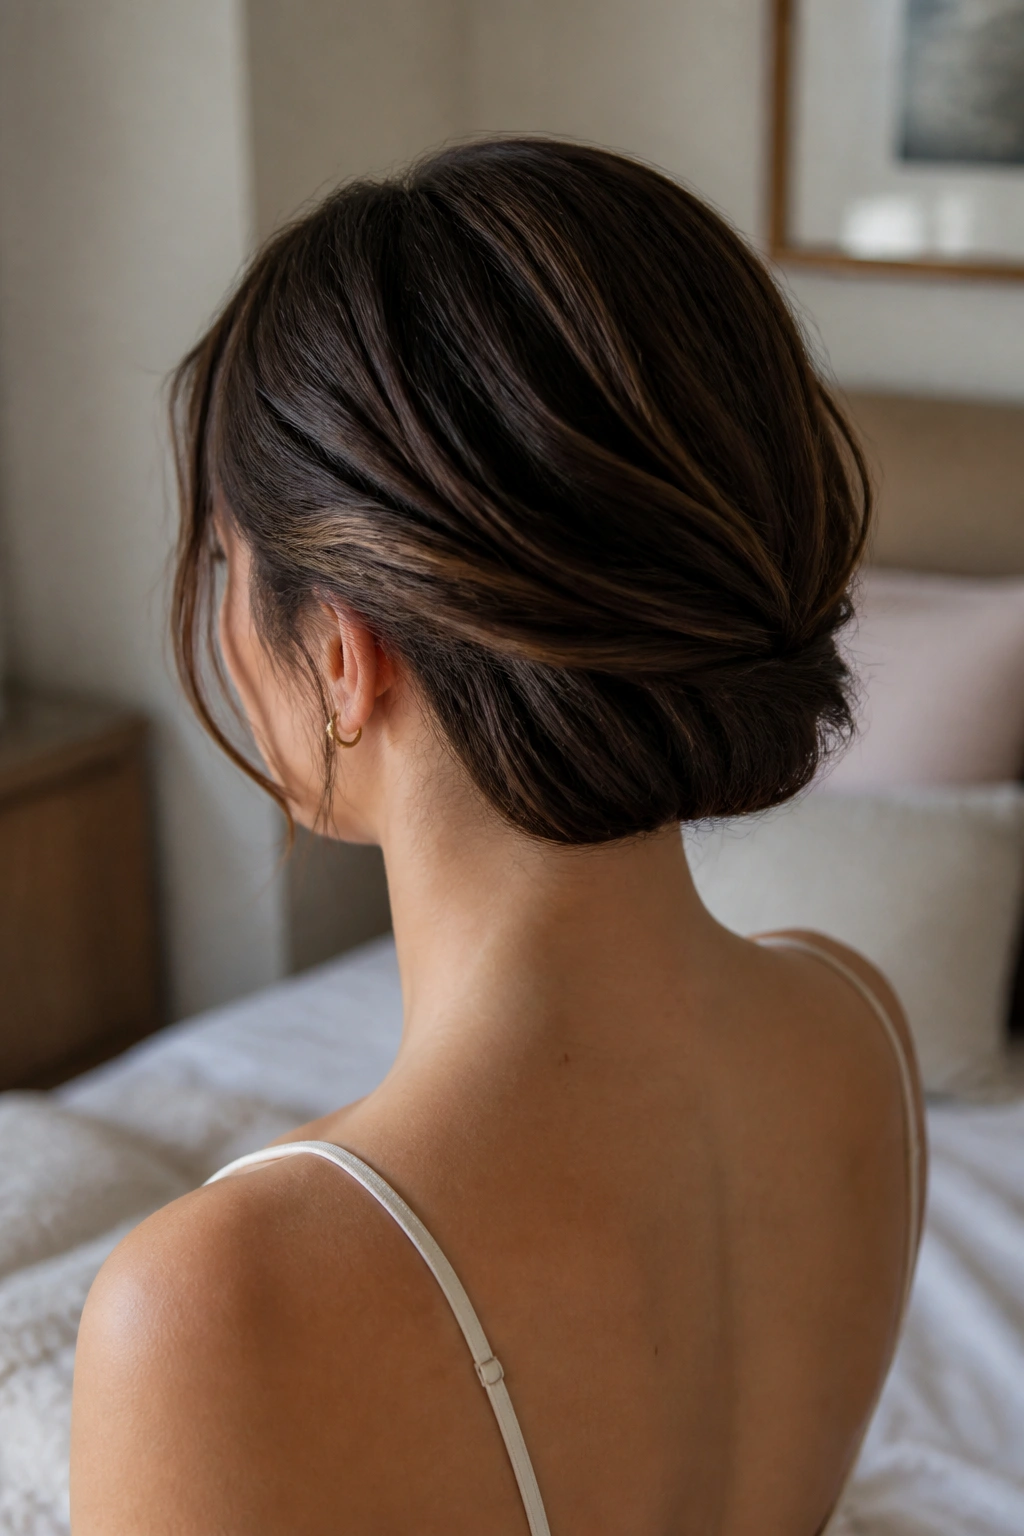
Sometimes you want the look of shorter hair without cutting anything, and that is exactly what a faux bob does. On second-day hair, it can look even better because the lengths have a little memory and the ends are less slippery.
Start by curling or bending the ends inward slightly if they stick out straight. Then tuck the length under itself at the nape and pin it up close to the head. Use hidden bobby pins under the top layer so the outside stays smooth. A few pins can be enough if the hair is not too heavy; thick hair usually needs more, and there’s no shame in that.
Best way to wear it
- Works best on shoulder-length hair and longer
- Needs a few hidden pins, not one giant clip
- Looks cleaner if the ends are tucked in sections
- Can be softened with a side part or face-framing pieces
The important part is checking the back. A faux bob can look great from the front and lumpy from behind if the pins are placed carelessly. Use a hand mirror or your phone camera if that helps. This style is not hard, but it rewards a little patience in the pinning stage.
13. Pinned-Back Waves
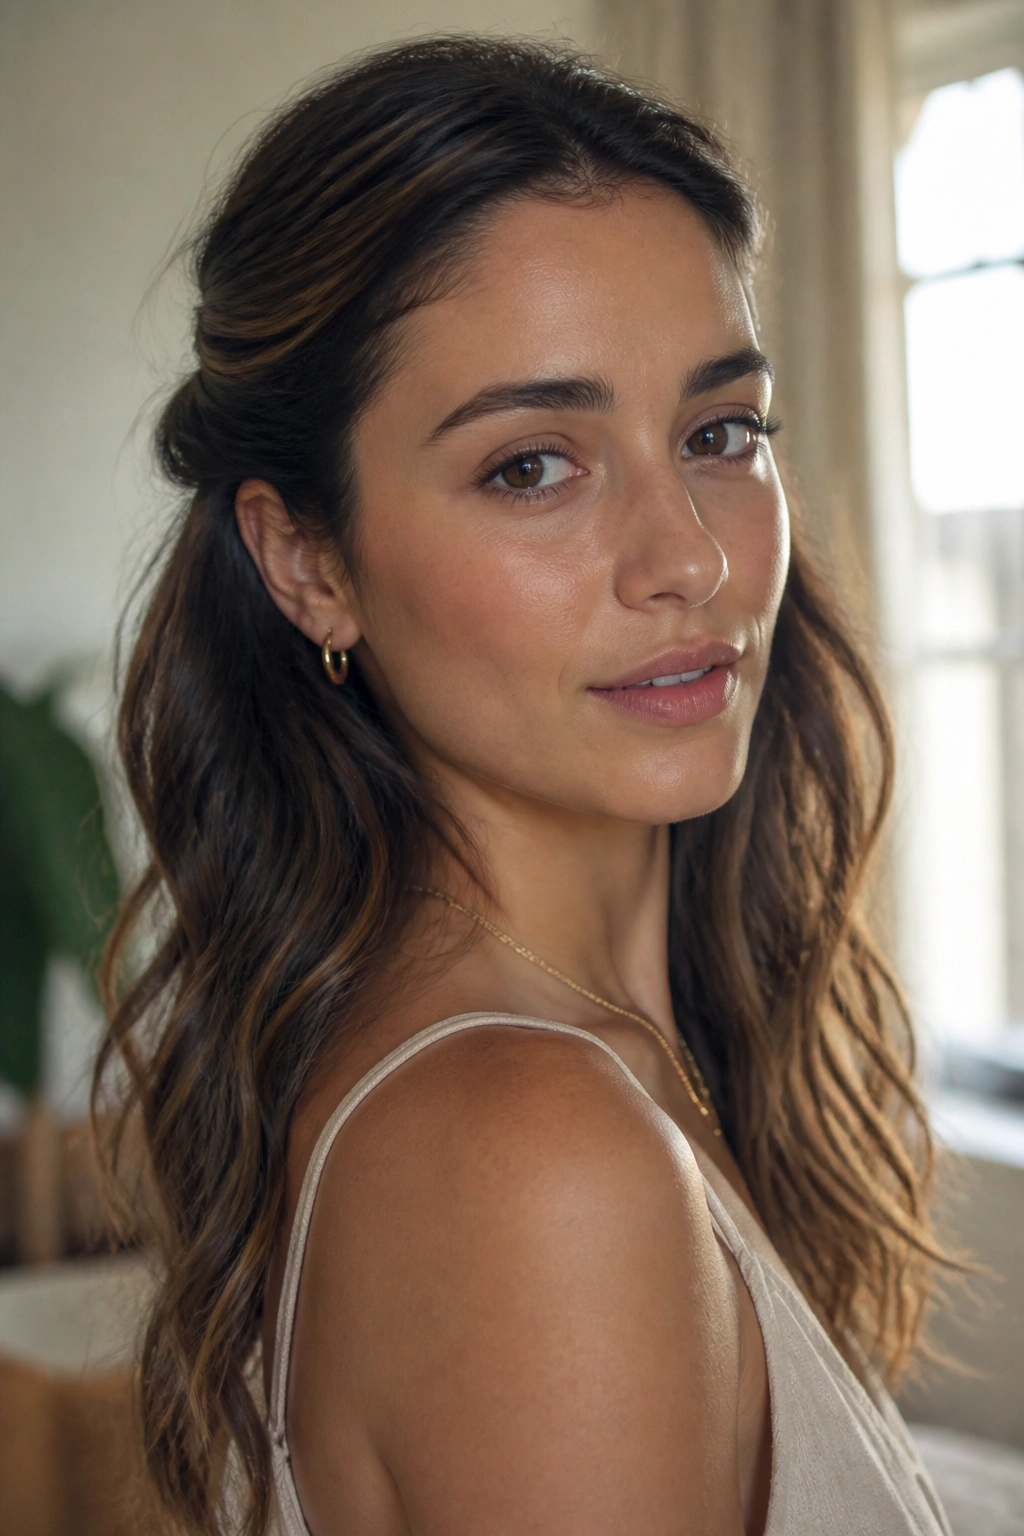
Pinned-back waves are the kind of style that makes natural texture look deliberate instead of half-finished. If your hair has that loose second-day bend through the mids and ends, this is one of the easiest ways to make it feel styled without changing much.
Take the front sections from each side, twist them back loosely, and pin them behind the ears. Leave the rest of the hair down. That’s it, more or less. The trick is not overworking the wave pattern. If you keep brushing and reshaping, the style starts to lose the very texture that makes it work.
Less effort. More polish.
A side part gives this look a softer, slightly dressier feel, while a center part makes it more casual. Either way, the pins should disappear into the hair, not sit on top like an afterthought. Use pins that match your hair color if you can, and slide them in at a slight angle for better hold.
This one is especially good when the front section looks flat but the ends still have movement. It lets the good part of the hair stay visible while fixing the part that needs a little help. Practical. Not boring.
14. Low Braided Bun
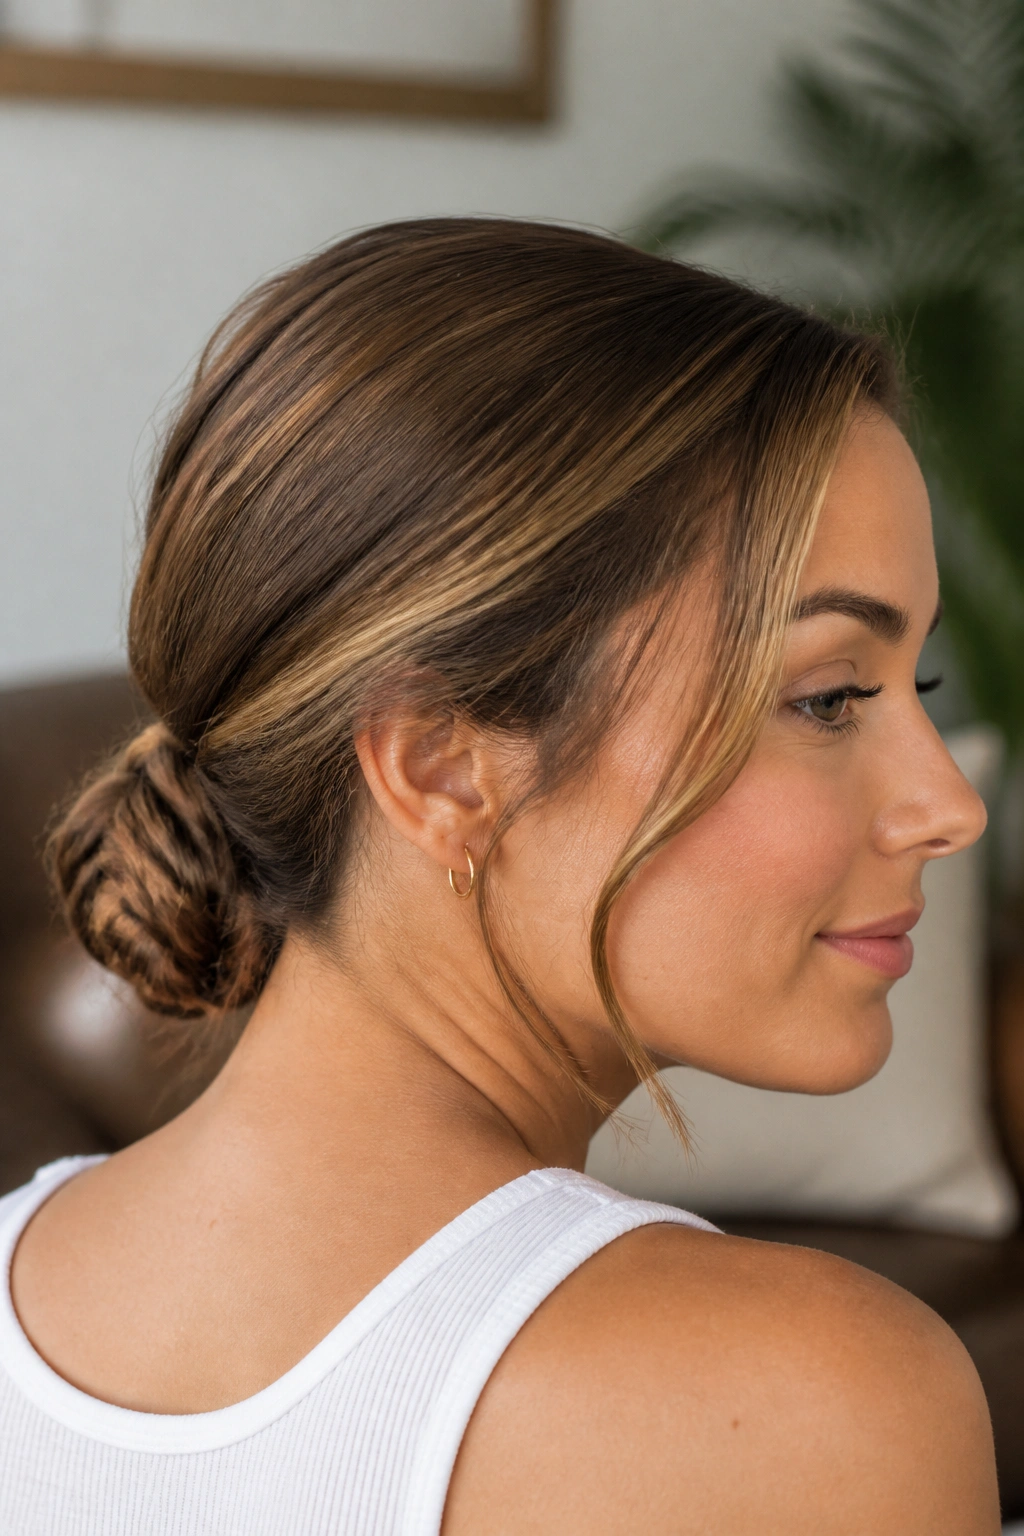
A low braided bun is sturdier than a simple twist bun and neater than a loose chignon. If your second-day hair has grown a little too soft for a high-shine style, this one gives you structure without feeling fussy.
Tie the hair into a low ponytail, braid the tail all the way down, then coil the braid around the base and pin it in place. The braid adds texture inside the bun, which helps the style hold shape longer than a plain coil. Thick hair benefits from this especially, since the braid controls bulk before it gets pinned.
Why this one lasts
Unlike a smooth bun, the braided version gives the pins more places to grip. That’s useful if your hair is slippery or if the ends tend to escape every time you move. It also gives the bun a fuller look, which can be nice when the hair has lost a little density on day two.
If your hair is very fine, tease the ponytail lightly before braiding. Not much. A few backcombed passes at the base are enough. Then pin the bun in a few directions so the weight spreads out instead of hanging from one spot.
This is the style I’d choose when I want the back of the head to look finished from every angle.
15. Scarf-Wrapped Ponytail
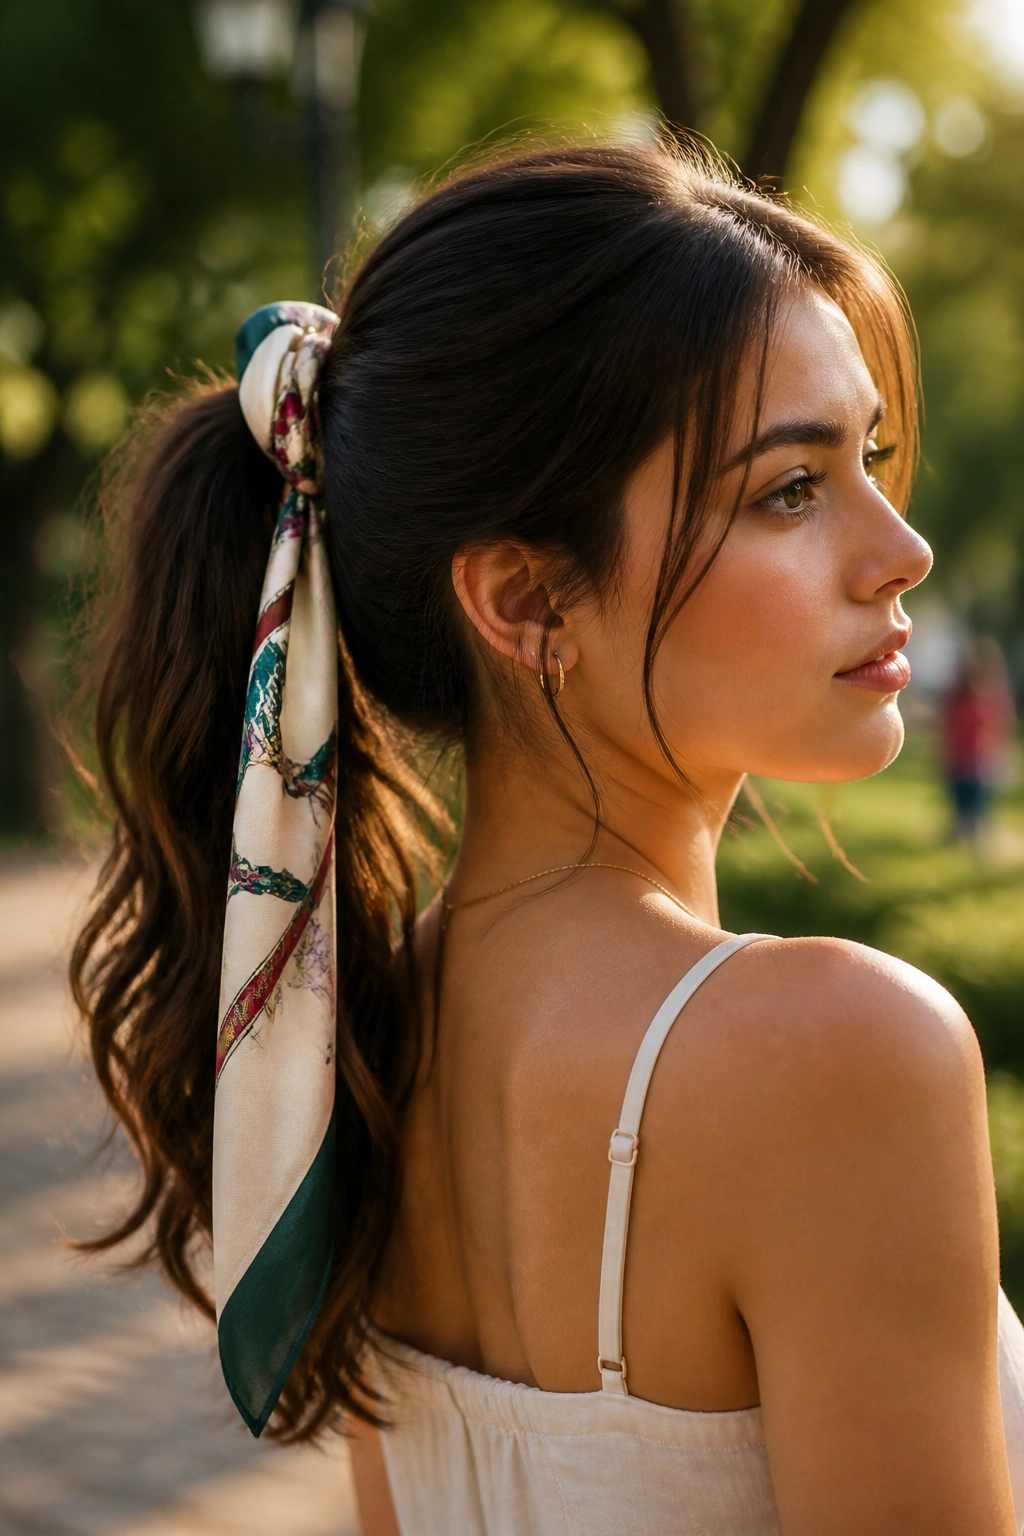
A scarf does more than decorate a ponytail; it changes the whole shape of the style. When your second-day hair needs a lift but you do not want to hide it completely, a scarf-wrapped ponytail is an easy win.
Tie the hair into a low or mid ponytail, then wrap a silk or cotton scarf around the base. You can tie it in a knot, let the ends fall long, or weave the scarf through the ponytail for more color. A narrower scarf feels cleaner. A wider one reads more relaxed and a little more dramatic.
The nice part is that the scarf covers the elastic, distracts from greasy roots, and makes the whole thing look finished without needing perfect smoothing. That is a lot of work for one strip of fabric. If the ponytail itself is a little rough, keep the scarf crisp. If the hair is smoother, a softer scarf can give the style a prettier line.
I like this best with a mid-height ponytail because the scarf sits where people can see it, but the style still stays easy. It is the sort of look that solves a practical problem and gives you a little personality at the same time. Simple. Not plain.
