



A wedding updo that looks polished at the trial and starts sliding out before the cake is cut is a bad deal.
Wedding updos are never one-size-fits-all. Fine hair needs grip, thick hair needs weight control, curls need shape, and short hair needs smart pin work or a little help from padding.
The photo matters, sure. But the person who has to wear the style for six, eight, or ten hours matters more. I have a strong bias here: the prettiest bridal hair is the style that survives hugging, dancing, humidity, and a veil being lifted on and off without turning into a rescue mission.
These 25 wedding updos lean into the way hair actually behaves. Some are sleek and clean. Some hold onto texture. Some are built for long, heavy lengths that refuse to stay pinned. Start with the hair you have, not the one in the inspiration shot, and the rest gets much easier.
1. Sleek Low Chignon for Fine, Straight Hair
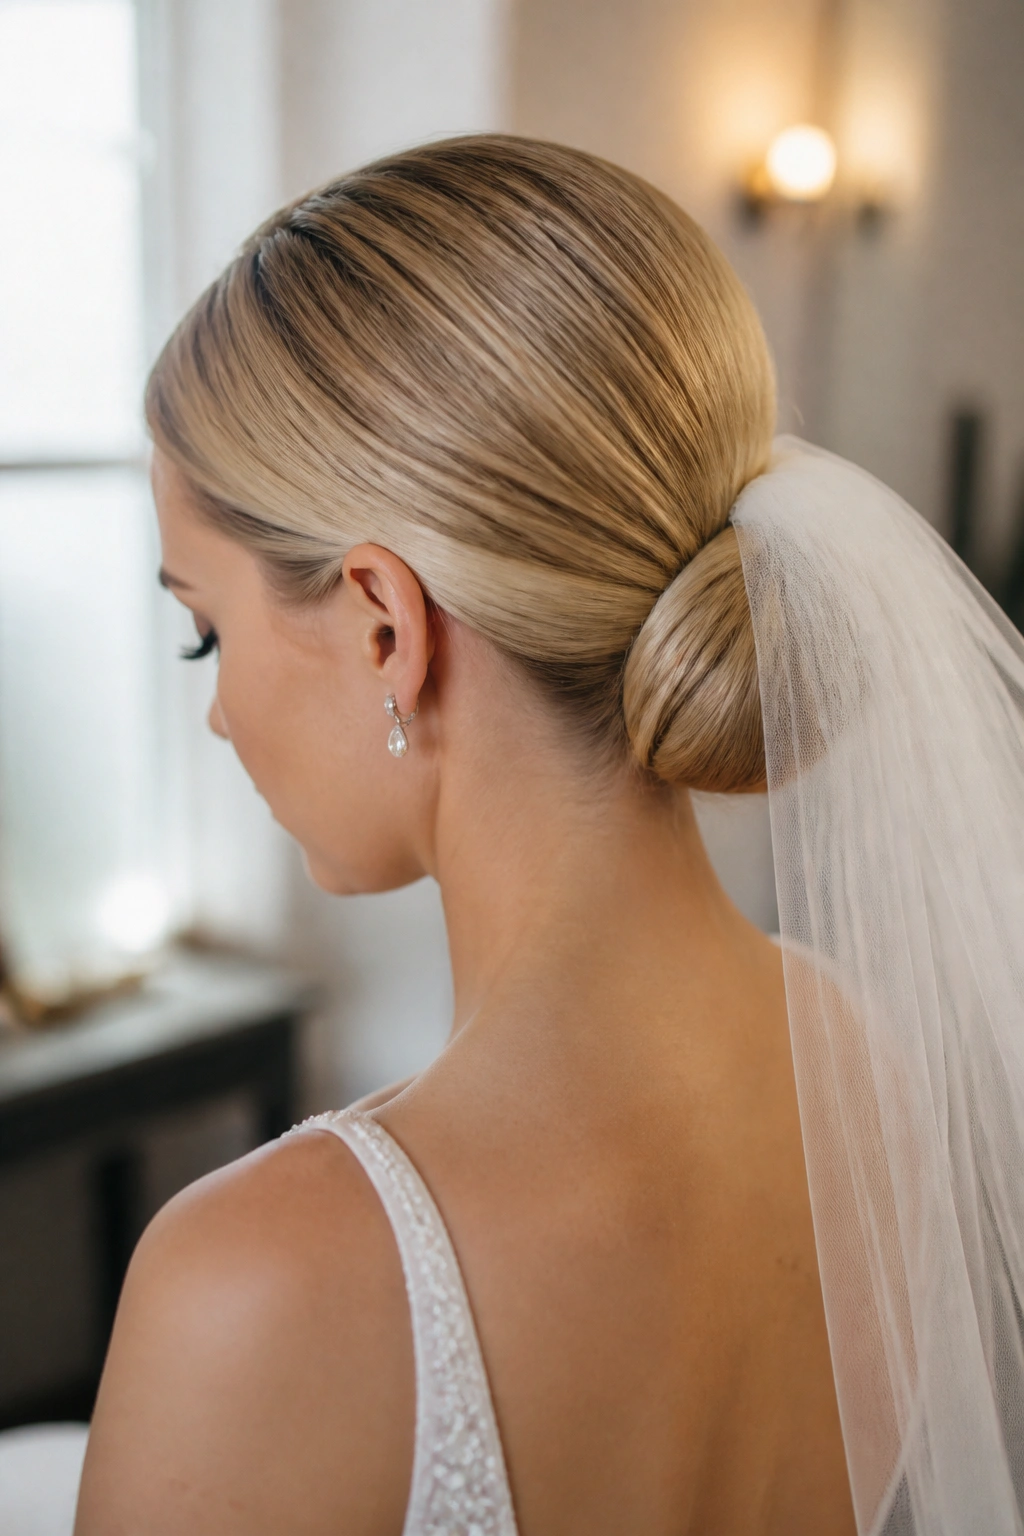
Fine, straight hair tends to slip, so a sleek low chignon is a smart place to start. It sits close to the nape, keeps the shape compact, and does not ask your hair to fake a ton of volume it does not have.
A little prep goes a long way here. Mist the roots with texturizing spray, let it sit for a minute or two, then smooth the hair into a low ponytail before twisting it into a knot. If the hair is extra silky, a small hair pad or a few crossed bobby pins under the chignon keeps it from collapsing halfway through portraits.
Best detail to remember: place the veil above the bun, not through the center of it. That keeps the shape clean and stops the whole style from sagging under the veil comb.
2. French Twist with Hidden Pins for Thick Hair

Can thick hair wear a French twist without looking bulky? Absolutely — if the twist is built in sections instead of one giant roll.
The trick is to divide the hair into two or three horizontal bands, smooth each band upward, and anchor as you go. That keeps the weight from gathering in one heavy spot at the back of the head. The finished shape looks elegant from the side and holds much better than the overstuffed version people sometimes try to force.
Why It Works
Thick hair has a lot of natural body, which sounds helpful until all of it tries to slide at once. Hidden pins, a strong-hold spray, and a few U-pins tucked into the twist give the style a better grip. If you want a softer finish, leave a narrow face-framing section out and curl it once with a 1-inch iron.
3. Braided Crown Bun for Long Hair
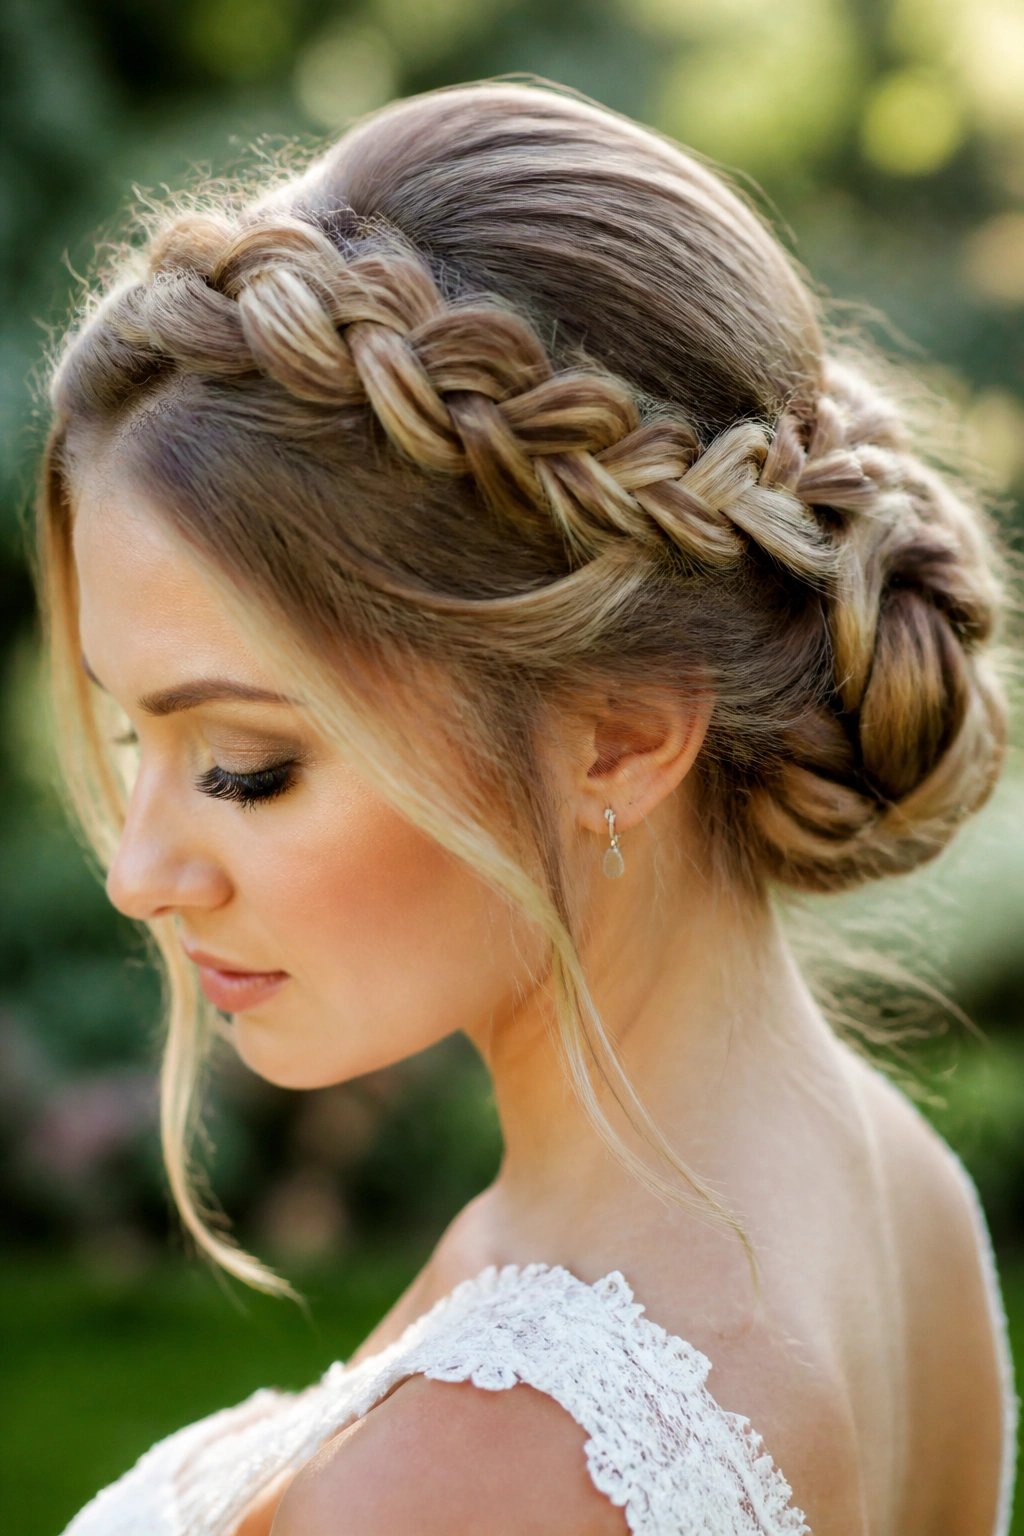
Long hair gives you room to build, and a braided crown bun uses that length instead of fighting it. The braid around the head acts like a frame, while the bun at the back keeps everything anchored and wedding-ready.
This style is one of my favorites for long hair because it solves two common problems at once: flyaways at the hairline and too much weight at the nape. A Dutch braid gives more lift than a flat braid, which is useful if the rest of the hairstyle needs a little height. Wrap the remaining length into a low bun and secure the seam under the braid so the finish looks intentional, not stuffed.
How to Wear It
This one handles a veil well, especially a mid-length veil placed just below the braid line. It also works with hair that is slightly wavy, since the braid gives the surface enough grip to stay neat.
4. Textured Low Knot for Wavy Hair
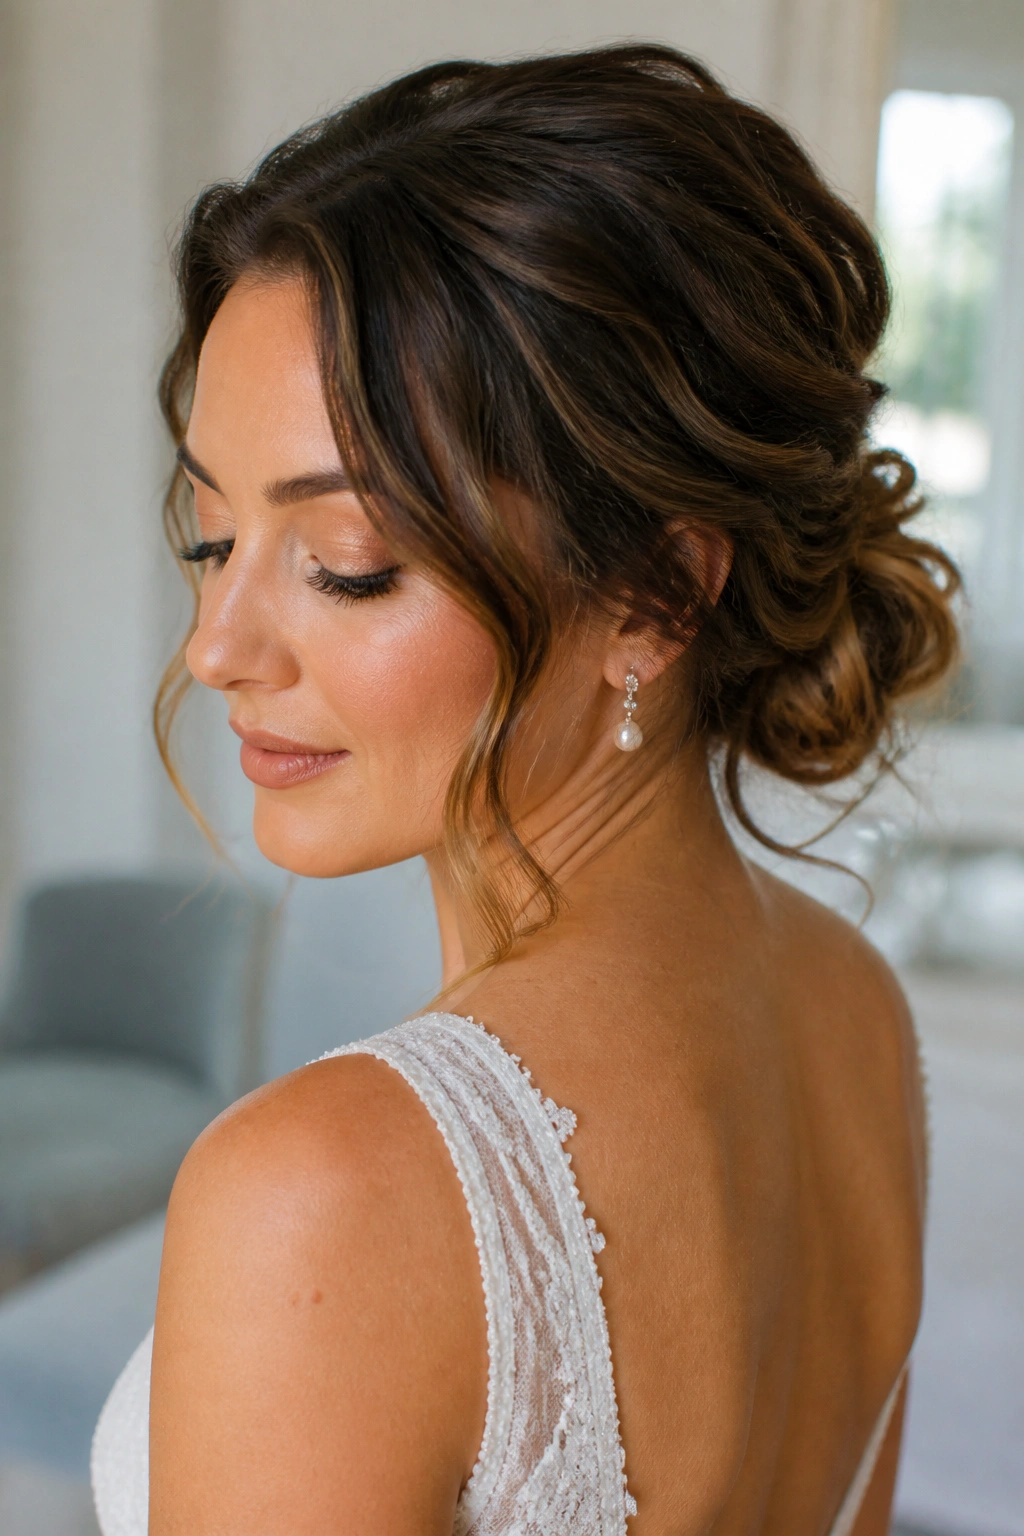
Wavy hair has a built-in advantage: it already wants to bend and hold shape. That makes a textured low knot one of the easiest wedding updos to get right without making it look stiff.
The best version keeps some movement at the sides and uses the wave pattern as part of the design. Blow-dry with a diffuser or air-dry with a touch of mousse, then gather the hair low and twist it into a knot that is not perfectly smooth. The tiny imperfections are what make this style feel soft instead of flattened.
A lot of people overwork wavy hair into submission. Don’t. Let the wave show near the ears and at the nape. It keeps the face open and gives the bun that quietly full shape you usually only get after an expensive trial run.
5. Curly Halo Updo for Curly Hair

Curly hair looks best when the curl pattern is respected, not brushed into a blank sheet of hair. A curly halo updo keeps the curls visible around the crown and sides while pinning the length into a soft halo shape.
The main move is to section the curls by shape, not by tiny little pieces. Pin each curl or twist close to its base so the ends stay springy instead of frayed. If the curls are very tight, let them dry fully before pinning. Damp curls shrink more, and that can make the finished updo sit higher than you planned.
A small but useful note: curl cream and a light oil on the ends help the style stay soft for the whole day. Heavy grease is too much. You want definition, not slickness.
6. Twisted Gibson Tuck for Medium-Length Hair
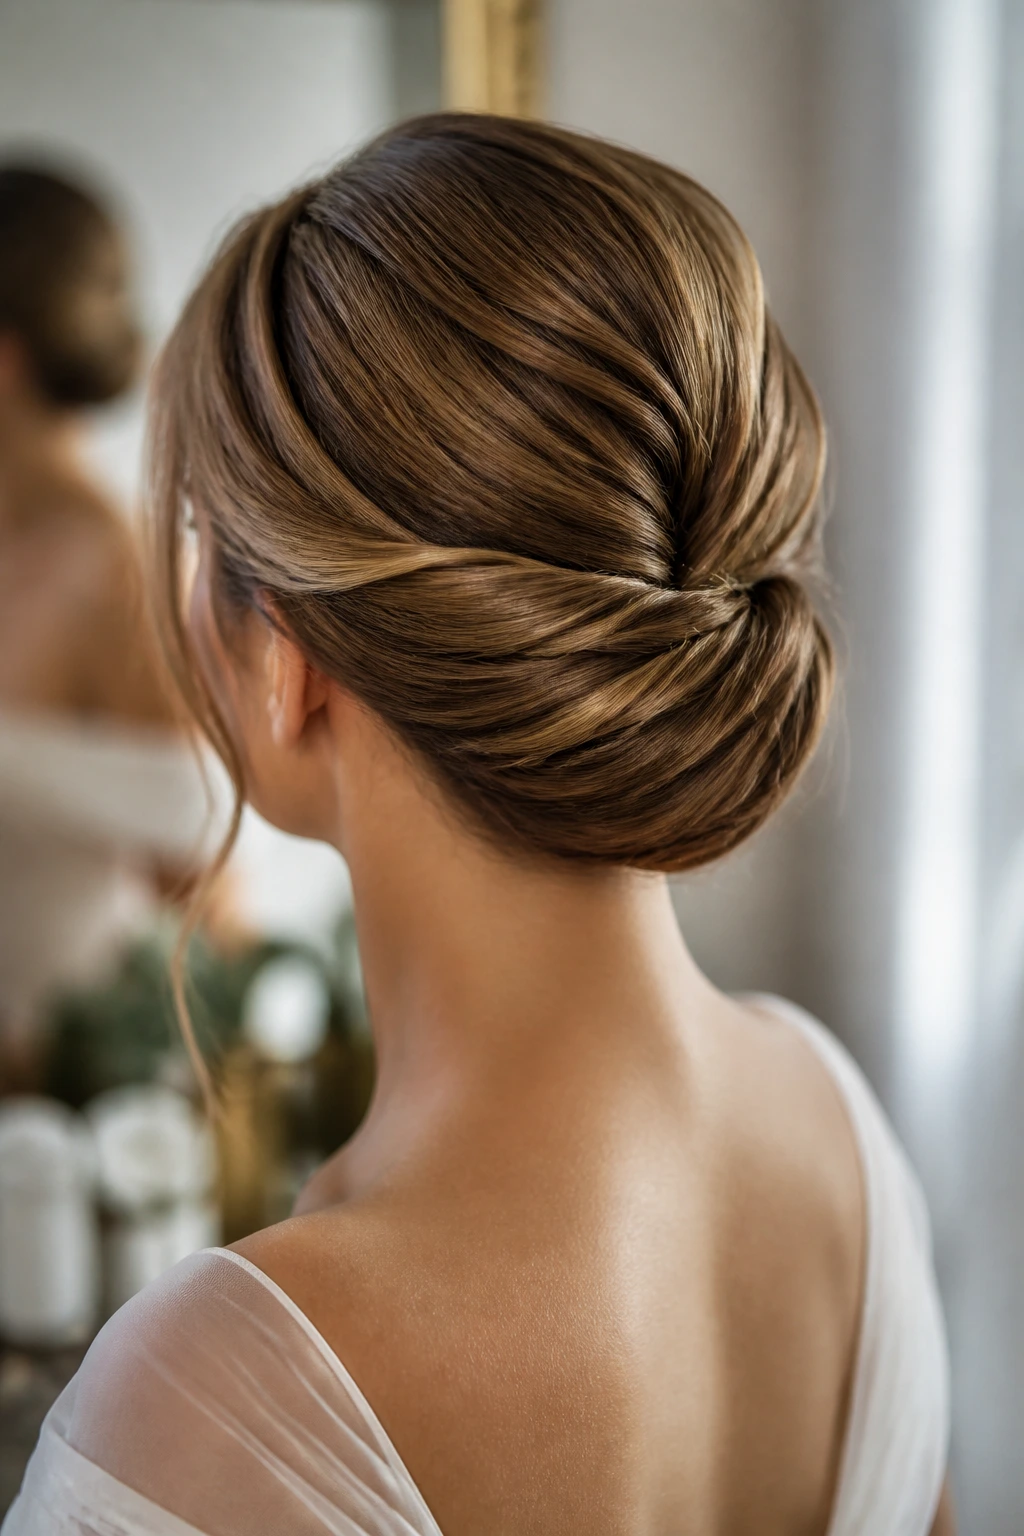
Medium-length hair can be tricky on wedding day because it is often too short for giant buns and too long to leave alone. The twisted Gibson tuck solves that middle ground nicely.
It starts with a low roll or tucked pocket at the back of the head. The lengths are folded upward into the tuck, then pinned along the inside edge so the shape looks smooth from the outside. That gives you a vintage line without needing much extra length. It also keeps the neck open, which is a plus with high collars, lace backs, or a dress that already has a lot going on.
If your hair is shoulder length, add a small clear elastic before tucking. If it is a bit longer, twist each side section first so the tuck has more structure. Simple. Clean. No drama.
7. Polished Ballerina Bun for Straight Hair

A ballerina bun can look severe on the wrong hair, but on straight hair it creates one of the cleanest bridal silhouettes around. The key is tension — smooth at the scalp, tight enough to stay in place, but not so tight that your eyes start watering by dinner.
Brush the hair up with a boar-bristle brush, secure a high ponytail, then wrap the length around the base and flatten the surface with pins. A little gel at the hairline keeps the finish crisp. If the hair is very sleek, a fine hairnet over the bun helps lock down stray ends that would otherwise poke out in photos.
This style suits minimal dresses, statement earrings, and gowns with a strong neckline. It is spare, yes. That is the point.
8. Side-Swept Knot for Fine-to-Medium Hair

A side-swept knot gives fine-to-medium hair a sneaky advantage: the off-center shape makes the bun look fuller than it really is. Hair that might look small in a centered chignon suddenly feels more deliberate.
Start with a deep side part, then sweep the hair low toward one shoulder before twisting it back into a knot near the opposite nape. The side sweep adds visual weight where the hair needs it most. A little backcombing at the crown can help, but keep it light. If you tease too hard, the style gets fuzzy fast.
- Best for gowns with one-shoulder necklines
- Good for hair that falls flat at the crown
- Easy to pin a small comb or veil to the lower side
- Looks softer when one temple is left slightly loose
Tip: this is one of those styles that looks better after ten minutes of settling.
9. Coiled Low Bun for Coily Hair

Coily hair does not need to be forced into a slick shape to look formal. A coiled low bun keeps the texture visible while giving it a clean outline at the nape.
Work in sections, using a light leave-in and a little oil before you start. Twist or coil the hair into individual ropes, then lay them into a compact bun instead of flattening them down. That keeps the texture intact and avoids the puffiness that can happen when coily hair is brushed too hard or pinned while dry and brittle.
The best version is neat at the base and full through the body. It reads elegant from a distance and textured up close, which is usually the sweet spot for wedding hair. If you want extra security, a satin-lined hair net under the bun can help the style hold shape without stripping moisture.
10. Bubble-Braid Bun for Long, Dense Hair
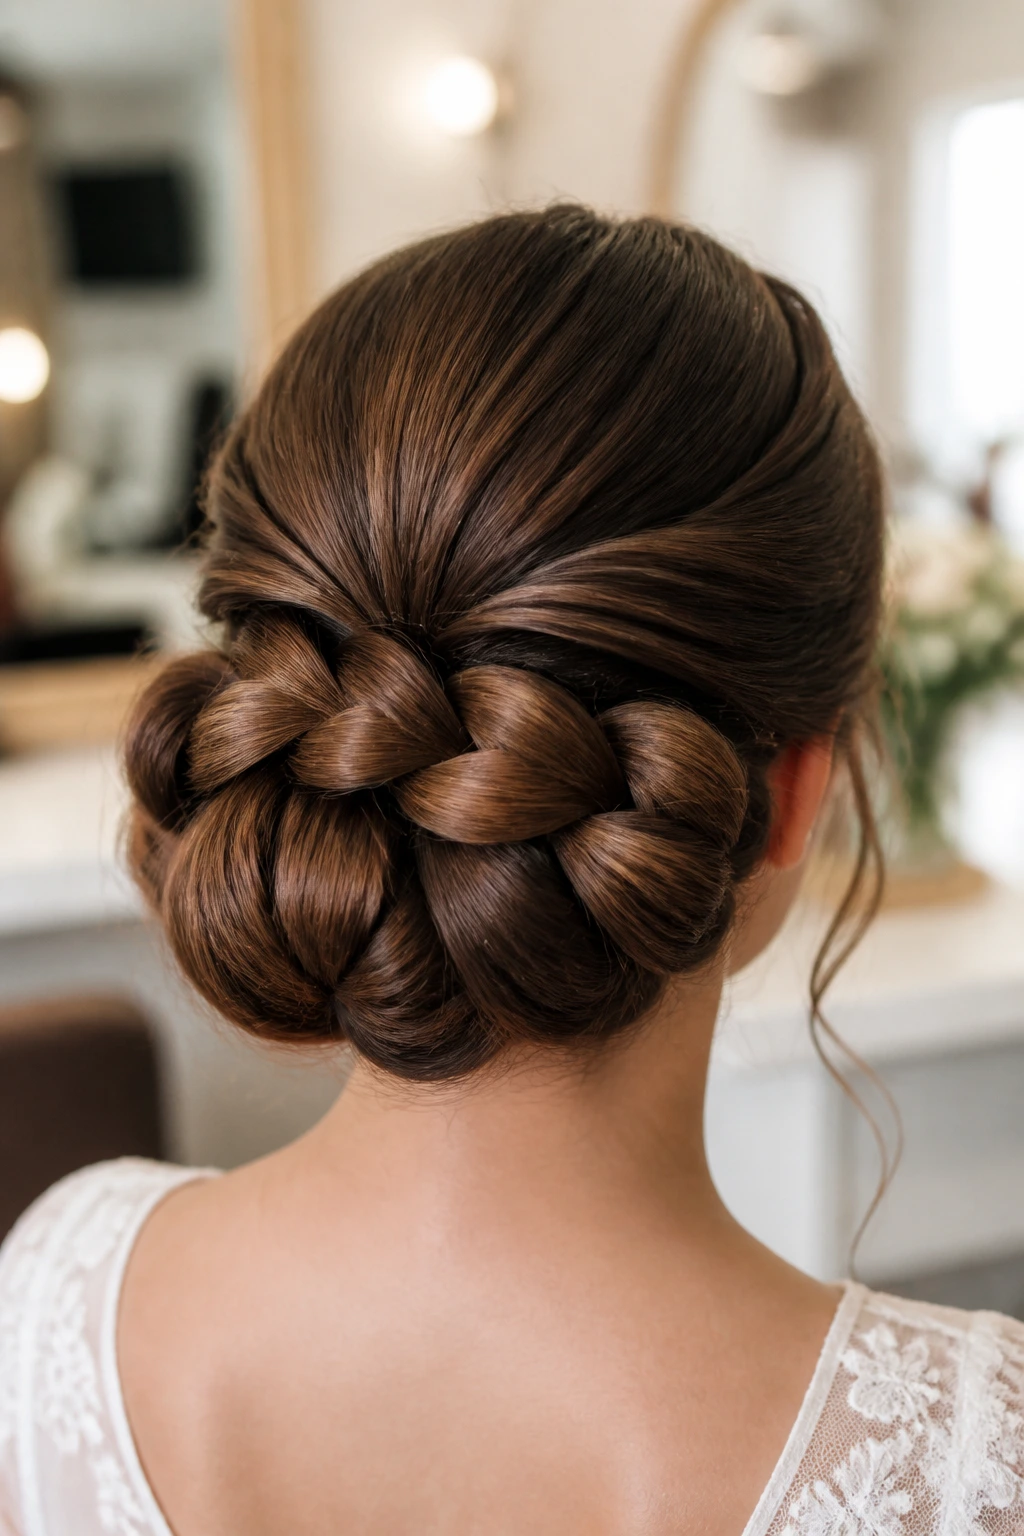
If long, dense hair feels too heavy for a traditional bun, a bubble-braid bun spreads the weight out in a way that holds better. It sounds playful, but on the right bride it looks structured and formal enough for a black-tie venue.
Tie the hair into a low ponytail, then add small clear elastics every couple of inches down the length. Gently tug each section to create the bubble shape. Wrap the bubble braid around the base, pin it low and tight, and let the rounded texture do the rest. The result has more body than a plain knot and less collapse than a single heavy coil.
This is a good choice when the hair is thick enough to fight standard buns. It also works well if you want to show a little texture without going fully braided.
11. Rope-Braid Roll for Sleek or Blow-Dried Hair
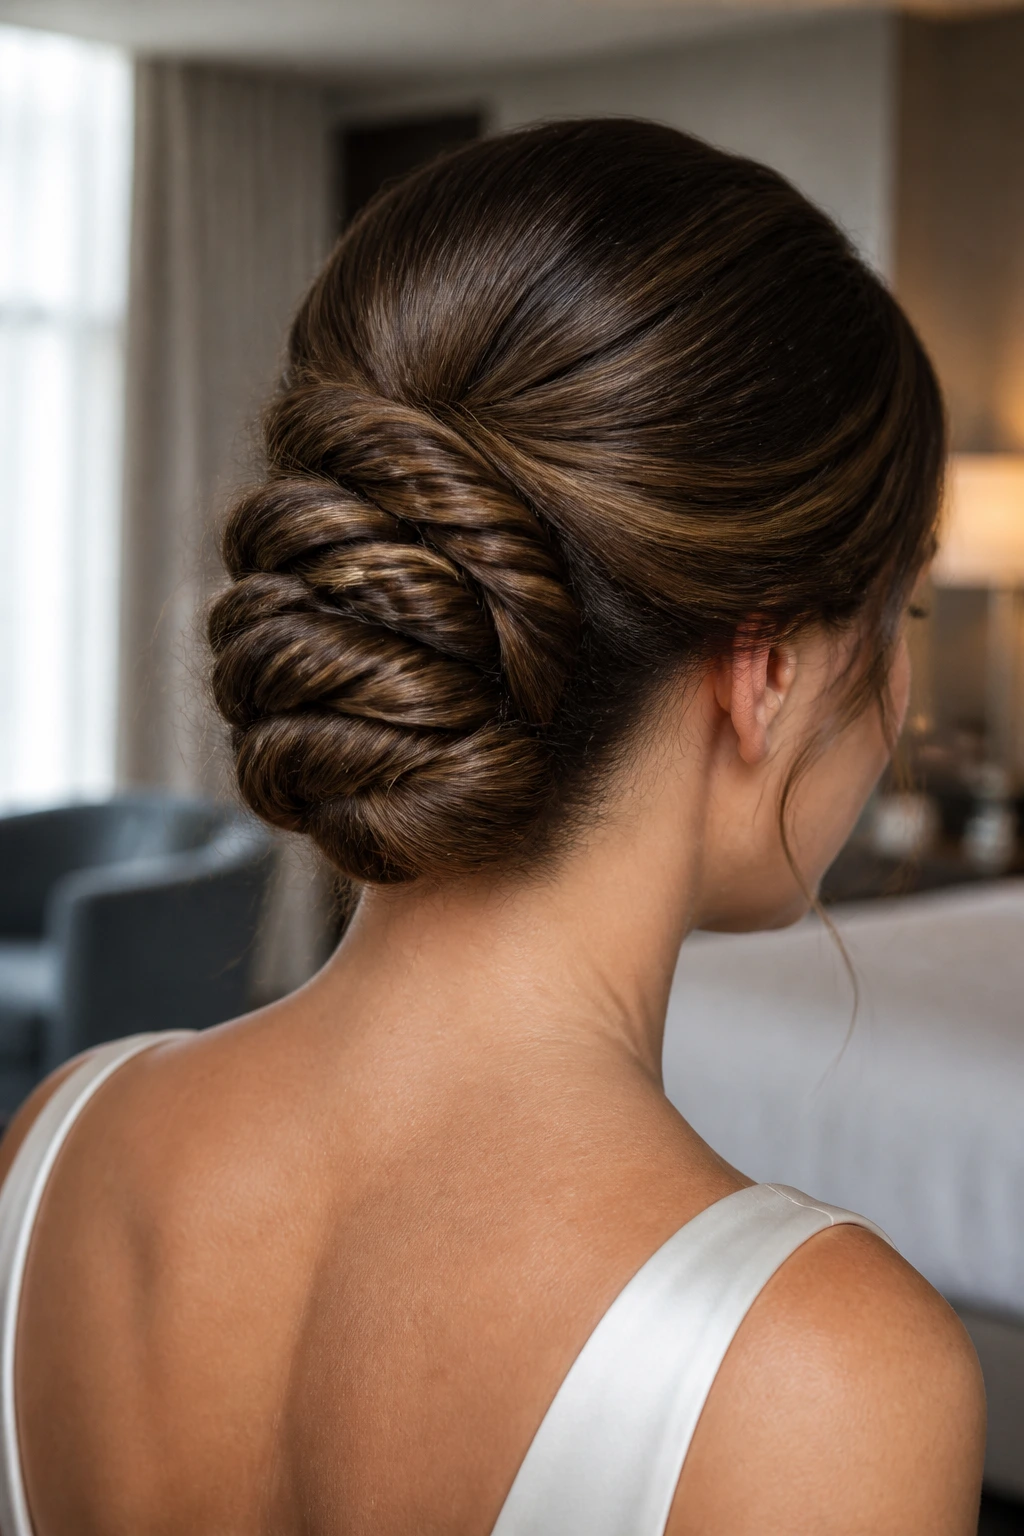
A rope-braid roll is one of those styles that looks more complicated than it is. Two twisted sections get rolled upward into a smooth back shape, which makes it ideal for sleek or freshly blow-dried hair.
What makes it different from a French twist is the visible twist pattern. You get a bit of texture on the surface, so the style does not disappear against a plain dress or a simple veil. Start by splitting the hair into two large sections, twist each one tightly in the same direction, then wrap them around each other before pinning the roll flat at the back.
It is especially nice when the hair is naturally straight and tends to look limp in photos. The rope braid gives the illusion of density without asking the hair to be bigger than it is.
12. Soft Bouffant Bun for Thin Hair

Thin hair often needs a little height, but not the kind that screams “teased on purpose.” A soft bouffant bun gives the crown lift and keeps the bun small enough to stay believable.
The move is simple: add light backcombing only at the roots near the crown, smooth the top layer over it, and gather the hair into a low or mid bun. A small bun pad under the center can help, but the lift should still look like hair, not a sponge. Keep the sides soft. Too much pulling makes thin hair look patchy at the temples.
What to Watch For
- Use a light volumizing mousse before drying
- Don’t over-tease the ends; they fray fast
- Choose matte pins if the hair is very fine
- Spray the crown in layers, not all at once
That last point matters. A heavy spray pass can flatten thin hair after twenty minutes, and nobody wants that.
13. Braided Low Bun with Wrapped Base for Thick Hair
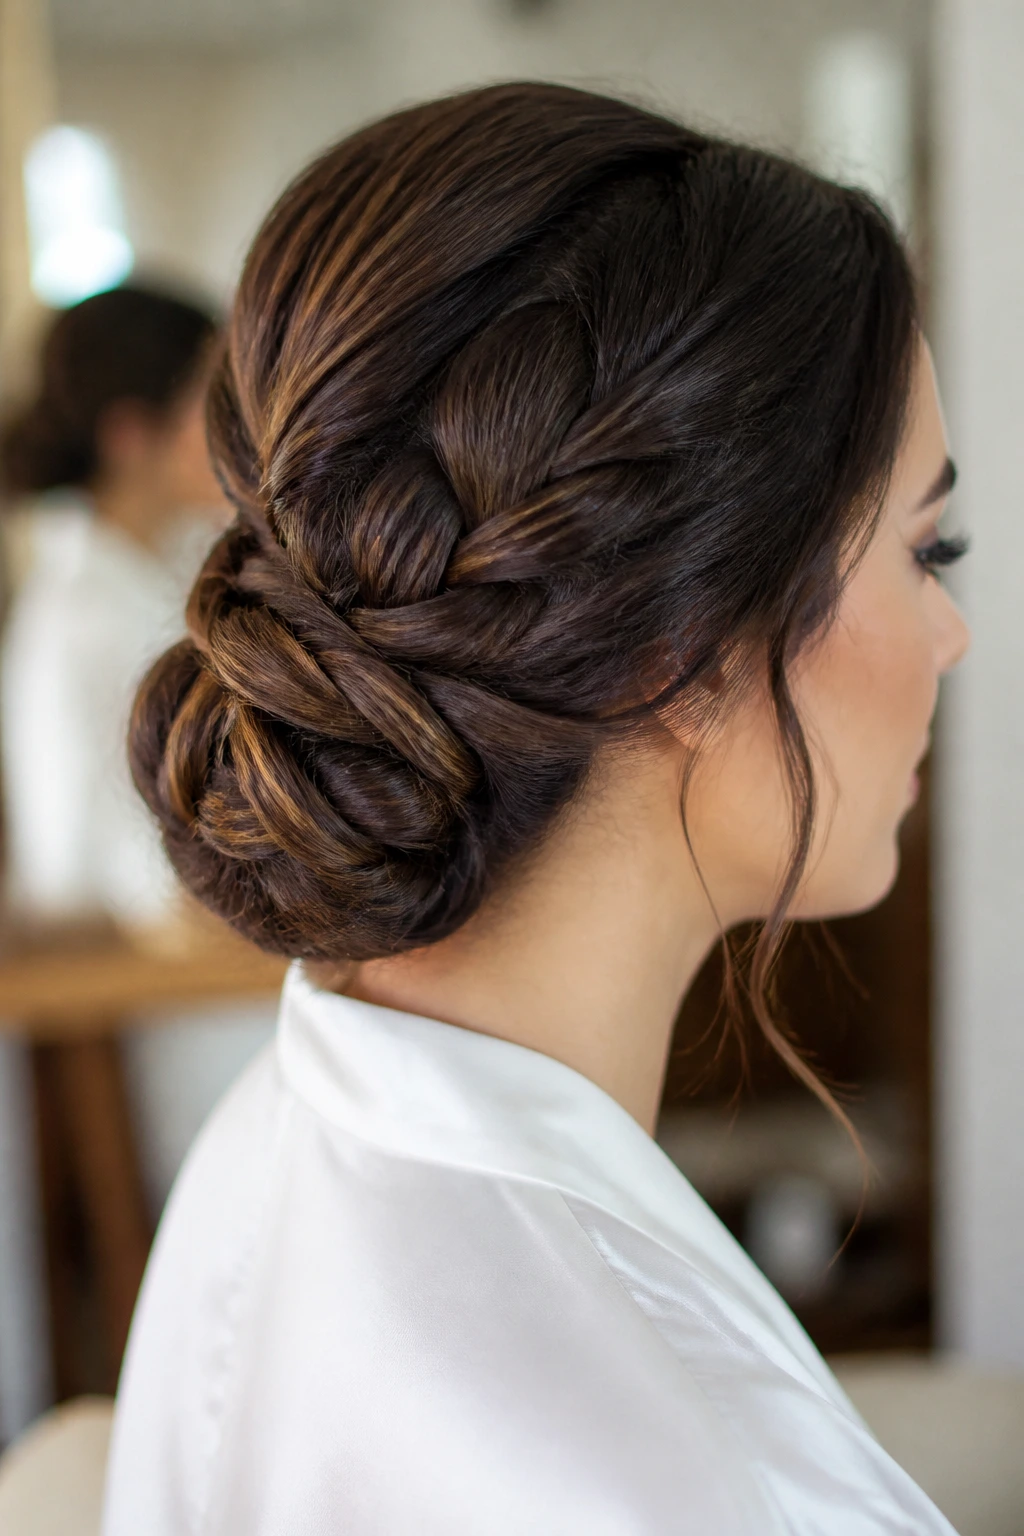
Thick hair often needs a bun that hides its own structure. A braided low bun with a wrapped base does exactly that.
Braid the lengths first, then coil the braid around the nape and wrap a small section around the outside so the elastic disappears. The braid creates a compact shape, while the wrap gives the finish a polished edge. It is especially good for hair that is full enough to look bulky if twisted loosely.
This style holds well because the braid gives the pins something to bite into. If the hair is coarse, smooth a tiny amount of cream through the ends before braiding so the texture lies flat. Keep the bun low and centered if you want a classic bridal look, or sit it slightly off-center for a softer profile.
14. Pin-Curl Vintage Roll for Short to Medium Hair

Shorter lengths do not have to be excluded from wedding updos. A pin-curl vintage roll turns a bob or collarbone cut into a structured style with proper shape and a little old-school glamour.
Set the hair in loose pin curls or barrel curls first, then brush them into soft rolls and pin each roll close to the scalp. The finish should feel sculpted, not stiff. If the cut is layered, use the shortest pieces at the front to form the face-framing roll and tuck the rest into the back. A strong setting spray matters here because short hair tends to spring loose faster than long hair.
This is the style I’d pick for someone who wants a formal look without pretending they have waist-length hair. It feels honest, which is underrated.
15. High Sculpted Topknot for Long, Straight Hair

A high topknot can look lazy if it is thrown together. A high sculpted topknot is the opposite: controlled, lifted, and sharp enough to hold its own with a dramatic dress.
Long, straight hair is ideal because it can be wrapped into a smooth knot without a lot of hidden bulk. Pull the hair up high, smooth the surface, then wrap the length around a firm base in a neat spiral. Keep the knot snug, and pin from underneath so the pins do not show. If the hair is too silky, a dusting of dry shampoo at the roots gives it some bite.
This style is a good call when you want the neckline open and the face lifted. It also photographs cleanly from the side, which matters more than people think.
16. Crown Braid Into Tucked Bun for Wavy Hair
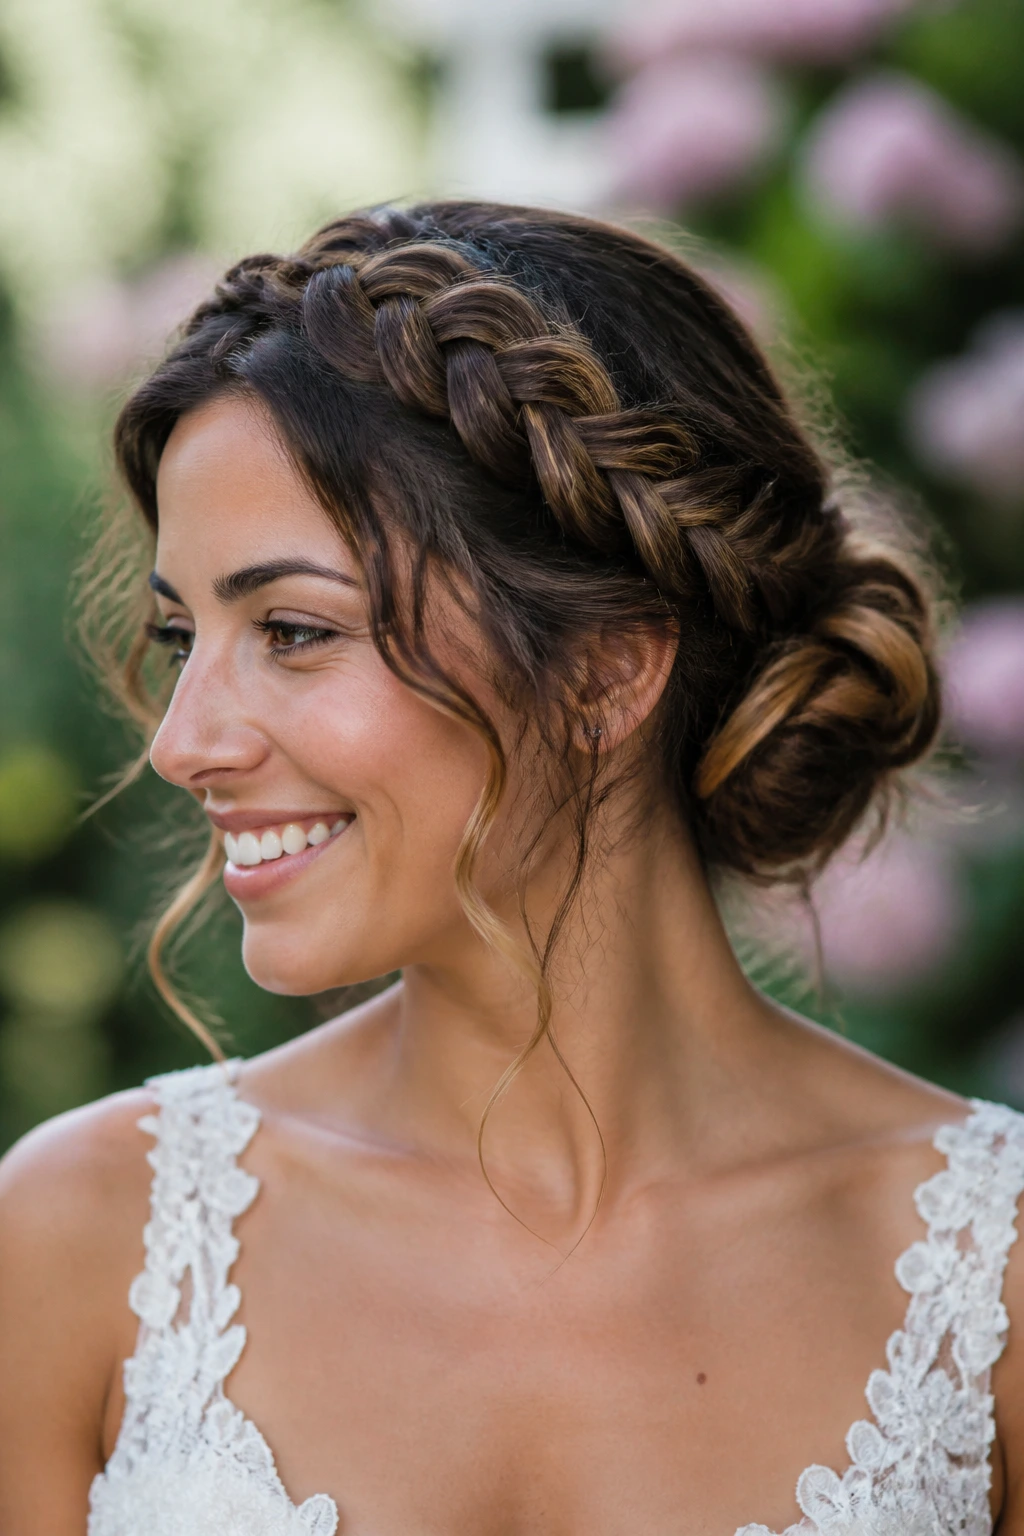
Wavy hair handles this style beautifully because the braid grips, and the loose texture keeps the crown from looking too harsh. A crown braid into a tucked bun is one of the safest choices for an outdoor ceremony, because it resists wind better than a lot of softer updos.
Braid along the hairline, stopping behind one ear or circling all the way around, then tuck the remaining length into a bun at the back. The braid acts like a frame, while the bun keeps the ends under control. Leave a few soft pieces around the ears if you want a less severe look.
This one also works well with floral pins. Use two or three small pieces instead of covering the braid with decoration. Too many extras make the shape disappear.
17. Curly Pinned-Up Cascade for Long Curly Hair

Long curly hair looks lovely when some movement stays visible. A curly pinned-up cascade gathers the length upward while letting a few curls fall in a controlled way at the back and sides.
The main mistake to avoid is brushing the curls out first. Don’t. Separate them with your fingers, then pin curl by curl so the shape keeps its definition. The goal is a lifted silhouette with enough loose curl to soften the outline. If the curls are very loose, pin them in larger sections. If they are tight, use fewer pins and let the texture do the work.
This style feels romantic without going frilly. It can handle a longer veil if the pins are placed just above the nape, and it leaves room for earrings to show.
18. Wavy French Roll for Fine Hair

A French roll sounds formal, but on fine hair it can be too flat unless a little wave is built in first. The wavy French roll solves that by giving the roll some bend and softness before it is pinned.
Set the hair with a loose bend using a curling iron or overnight rollers, then brush it lightly before rolling. That small amount of texture keeps the style from looking pasted to the head. Fine hair benefits from this because the wave gives the roll a bit more surface area to hold onto. Use short, crisscrossed pins rather than one or two large pins; they grip better in slippery strands.
This is a good option if you want the French roll shape but hate the severe, shell-like version. It feels more forgiving. Less rigid. More wearable.
19. Double-Twist Low Bun for Thick, Heavy Hair

Thick hair can be a blessing and a burden. A double-twist low bun splits the weight into two manageable sections, which makes the whole thing easier to pin and a lot more comfortable.
Section the hair down the middle at the back, twist each side inward, then meet them at the nape and coil them together into a bun. Because the twists are separate, the style does not balloon into a huge lump. It stays flatter against the head, which is useful if the dress already has texture, lace, or a high collar.
A Small Practical Note
Use long pins, not tiny ones. Thick hair eats short pins for breakfast.
If the hair is very dense, spray the roots lightly before twisting so the sections stay put. This style is one of the more forgiving choices for long ceremonies because it spreads the tension out instead of pulling one spot hard.
20. Braided Mohawk Updo for Coily Hair
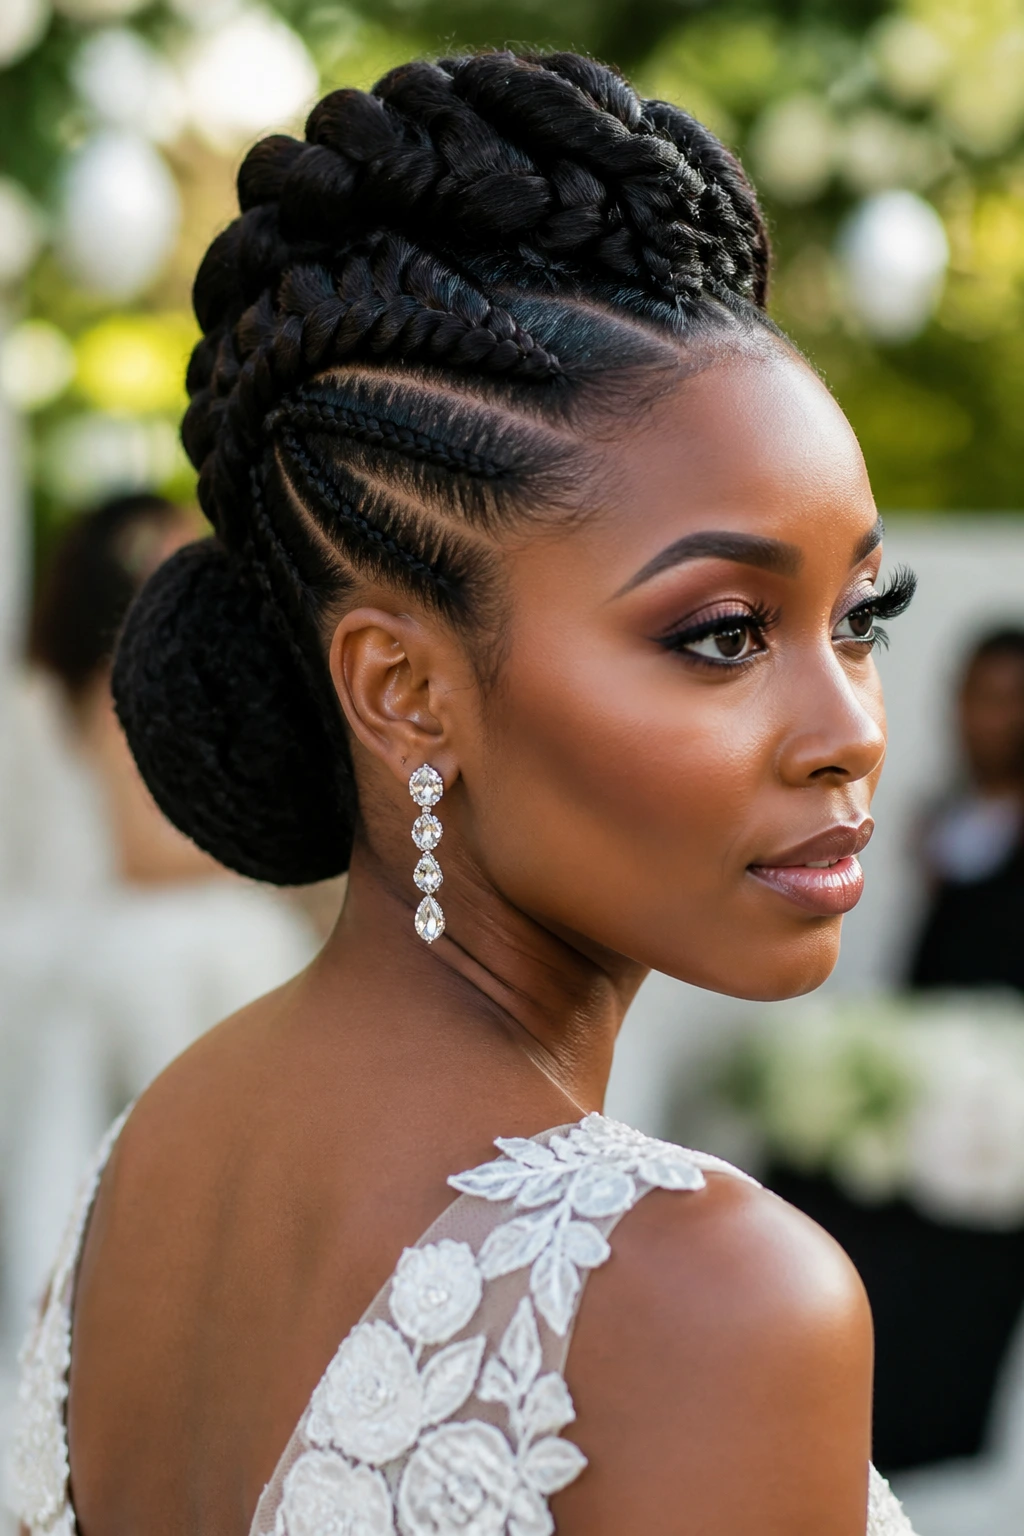
A braided mohawk updo is not shy, and I mean that in the best way. It gives coily hair height, shape, and a clear line through the center of the head while keeping the sides neat and controlled.
Flat braids along the sides create a smooth frame, then the center section is built into a ridge or lifted roll that runs from forehead to crown. The back can be tucked into a bun or folded under, depending on how much length you have. This is a strong choice when the dress needs a little attitude. It also keeps the profile clean from every angle, which matters in photos with a lot of side views.
Pearl pins, if you use them, should be sparse. Two or three is enough. More than that and the style starts fighting itself.
21. Minimalist Tucked Knot for Short Hair
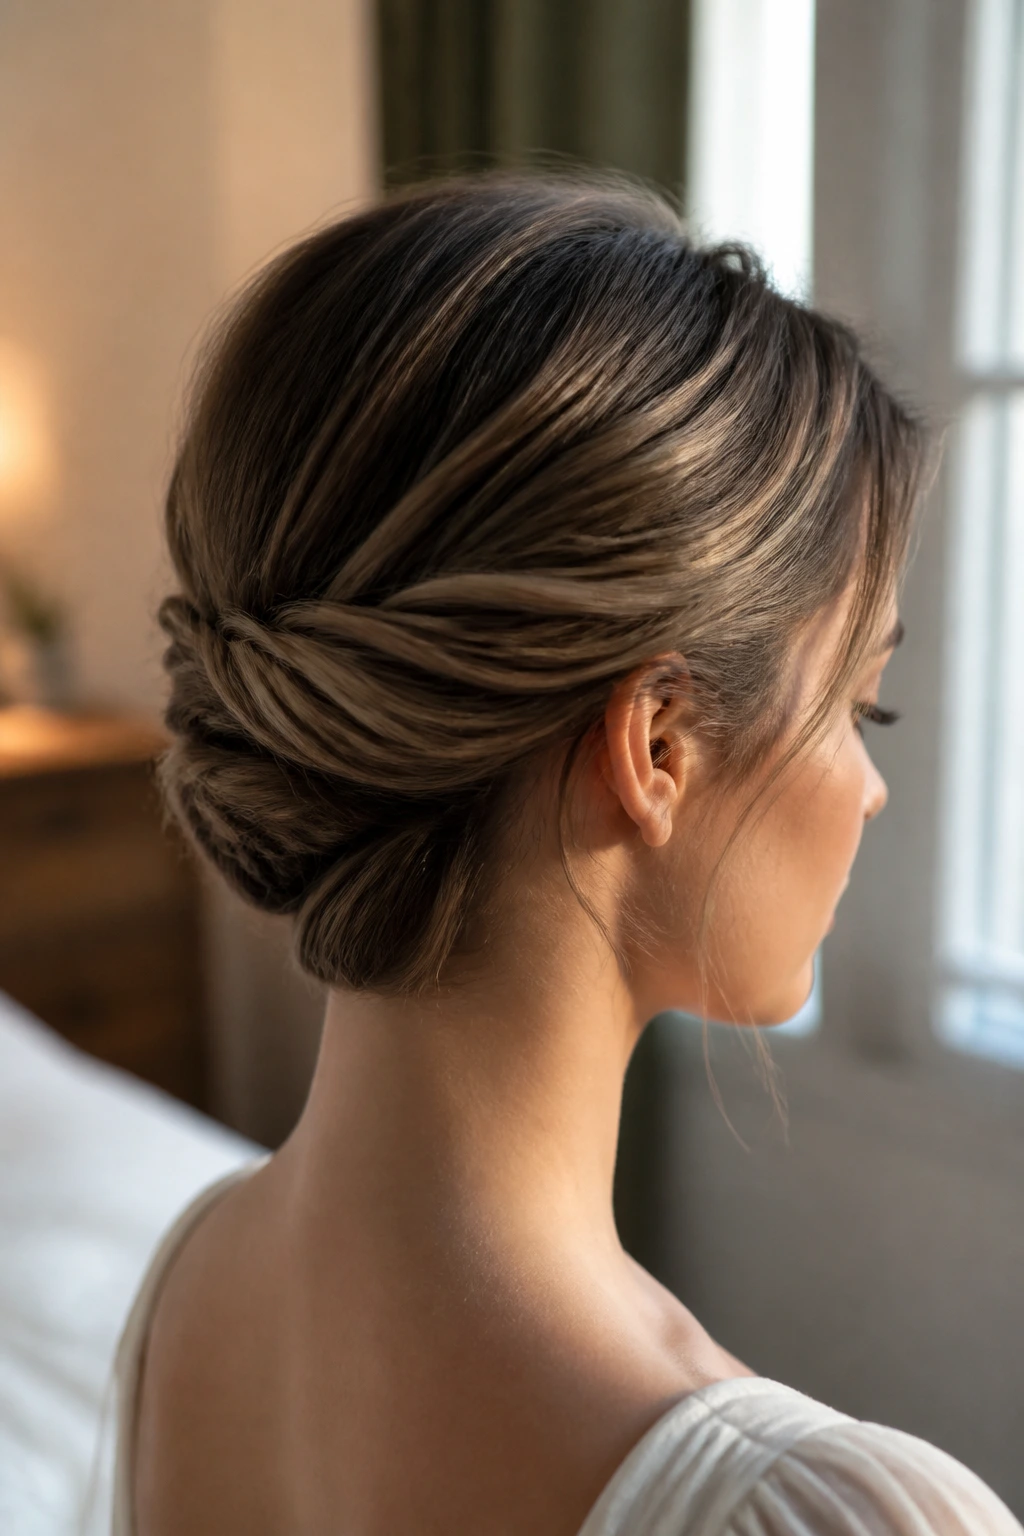
Short hair can still make a wedding updo. It just needs a smarter shape. A minimalist tucked knot works best on bobs, lobs, and layered cuts that barely graze the shoulders.
The style relies on tucking the ends inward and pinning them into a compact knot or faux chignon at the back. A small bun pad can help if the cut is too short to roll on its own. Use hidden pins, and don’t try to make every strand disappear. A few escaped pieces around the ears make the style feel intentional instead of forced.
This one is especially good for brides who want to keep the look airy and modern. It is not a giant updo, and that is the point. Sometimes the most flattering answer is the one that respects the length you actually have.
22. Voluminous Puff with Pinned Ends for Natural Hair

A voluminous puff with pinned ends lets natural hair stay full while still creating a formal silhouette. The puff gives lift at the crown, and the pinned length sits low enough to keep the shape elegant.
This style works best when the hair is moisturized and stretched a bit before styling. You want the coils or curls to stay soft, not dry and brittle. Gather the hair high or mid-high, shape the puff with your hands, and pin the ends where they naturally want to fall. If the hairline is sensitive, avoid pulling it too tight. There’s no prize for tension headaches.
It looks especially nice with dresses that have clean lines, because the hair adds presence without becoming fussy. Add a satin ribbon or a small comb if you want one detail, not a pile of them.
23. Loose Knot with Pearl Pins for Soft, Lived-In Texture

Some brides want a style that looks touched, not shellacked. A loose knot with pearl pins gives you that soft, lived-in finish while still reading as formal.
The knot sits low and is pinned loosely enough that the texture stays visible. Wavy or lightly curled hair works best, because the movement prevents the style from feeling flat. The pearl pins should go in purposefully — one near the twist, one at the side, maybe one hidden under the knot. Scatter them like confetti and the whole thing gets messy fast.
This is the kind of style that makes sense for late-afternoon ceremonies and dresses with soft fabric. It has a quiet, easy look, but it still holds. That balance is harder to get than people think.
24. Tucked-Up Braided Shell for Very Long Hair

Very long hair needs a plan. A tucked-up braided shell keeps all that length under control by folding braid after braid into a shell-like shape at the back of the head.
Start with two or three braids, depending on how much hair you have, then curve them inward and pin each one so the finished shape looks layered rather than bulky. The shell shape works because it keeps the hair close to the head while still showing off length and texture. It is a good solution for hair that tangles easily or feels too heavy in a loose bun.
If the hair is silky, prep with texture spray first. If it is thick, split the braids smaller so they fold more cleanly. Either way, this style stays elegant without making the nape feel overloaded.
25. Asymmetrical Bun with Veil Anchor for Veil Wearers
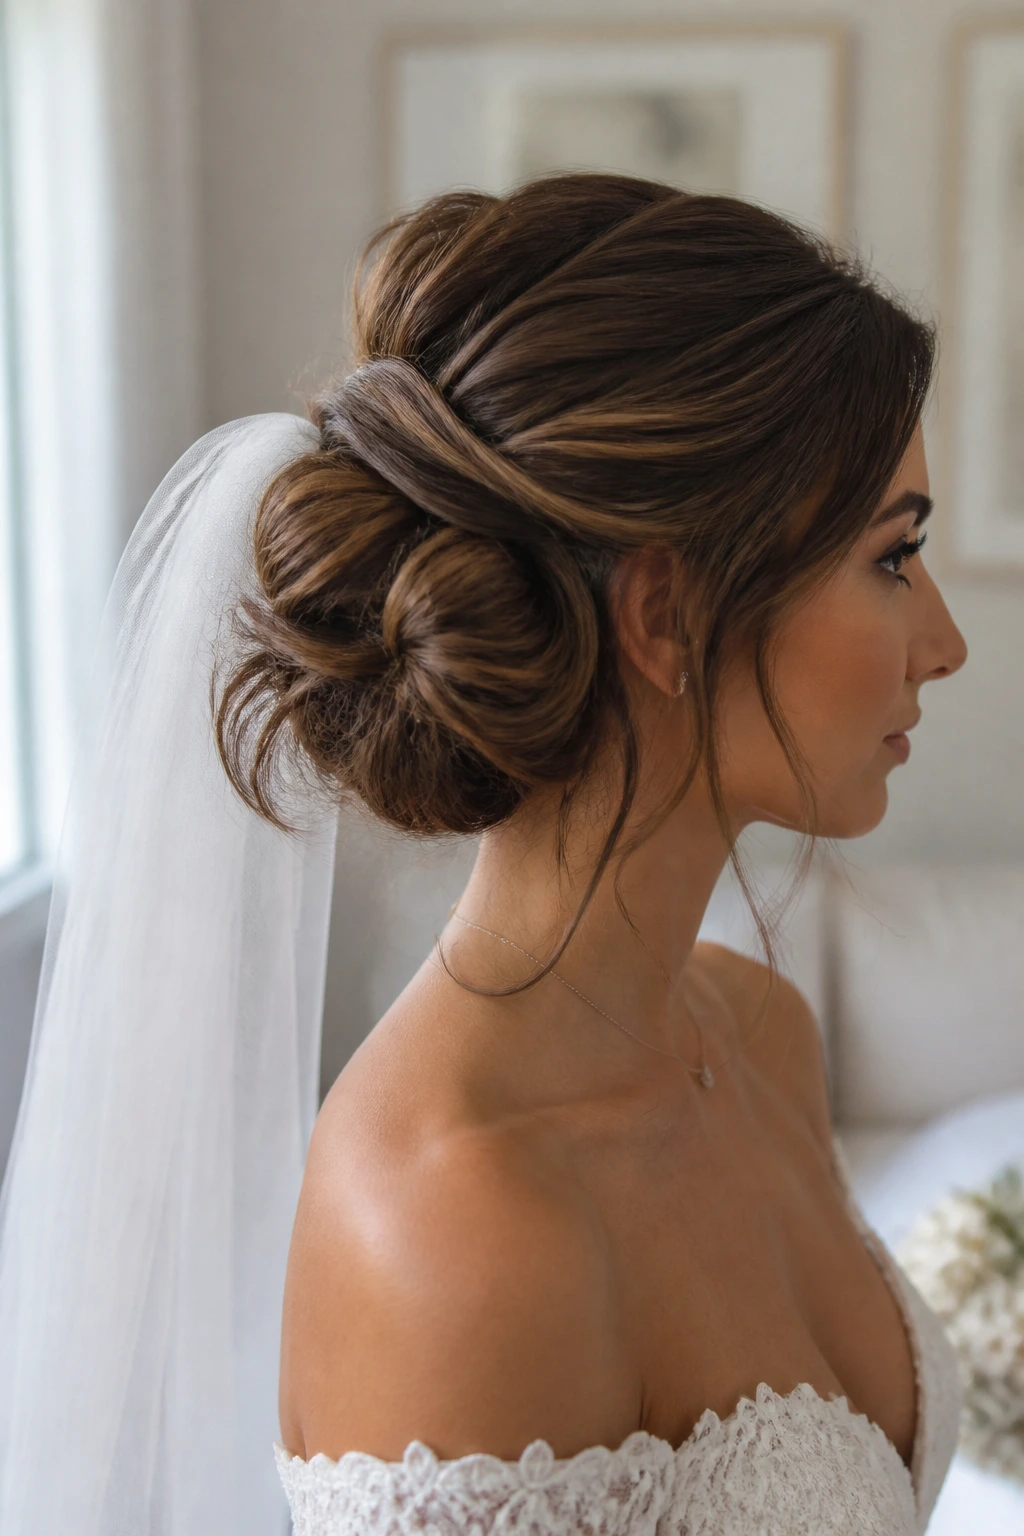
An asymmetrical bun with a veil anchor is one of the most practical wedding updos on the list, because it solves a very real problem: where the veil sits once the style is finished.
Instead of centering the bun dead in the middle, place it slightly off to one side or low at the back with a hidden anchor point for the comb. That gives the veil more stability and leaves room for a little softness on the opposite side. It works on straight, wavy, curly, and coily hair because the shape depends more on placement than on one exact texture.
If you want the style to last through hugs and dancing, ask for the veil comb to be secured under a crossed set of pins, not just slid into the top. Small detail. Big difference.
The best wedding updo is the one your hair can actually hold for the whole day. That usually means choosing a shape that respects texture instead of fighting it.
And if you’re stuck between two styles, pick the one that feels good from the side and from the back. Those are the angles that matter when the dress is on, the veil is in place, and nobody’s looking at the same photo-friendly front view you saw in the mirror.
