



A wedding guest hairstyle has one brutal test: it has to look polished at the ceremony, then survive hugs, wind, photos, dessert, and a dance floor that somehow turns into a workout. Formal hairstyles for wedding guests do not need to feel stiff, though. The best ones usually have one soft detail — a wave, a tucked piece, a bit of shine — so the style reads finished instead of frozen.
Necklines matter. So do earrings, hair texture, and how much time you want to spend with hot tools before you walk out the door. A high neck usually looks better with hair up or swept off the shoulders. A strapless dress can handle more movement at the sides. Short hair can look just as dressed up as long hair when the shape is clean and the finish is deliberate.
I like wedding guest hair that behaves. That means enough hold to keep its shape, but not so much spray that it feels like you could crack it if you blink too hard. A style should still look good after a champagne toast and a long conversation near the buffet.
1. The Sleek Low Chignon
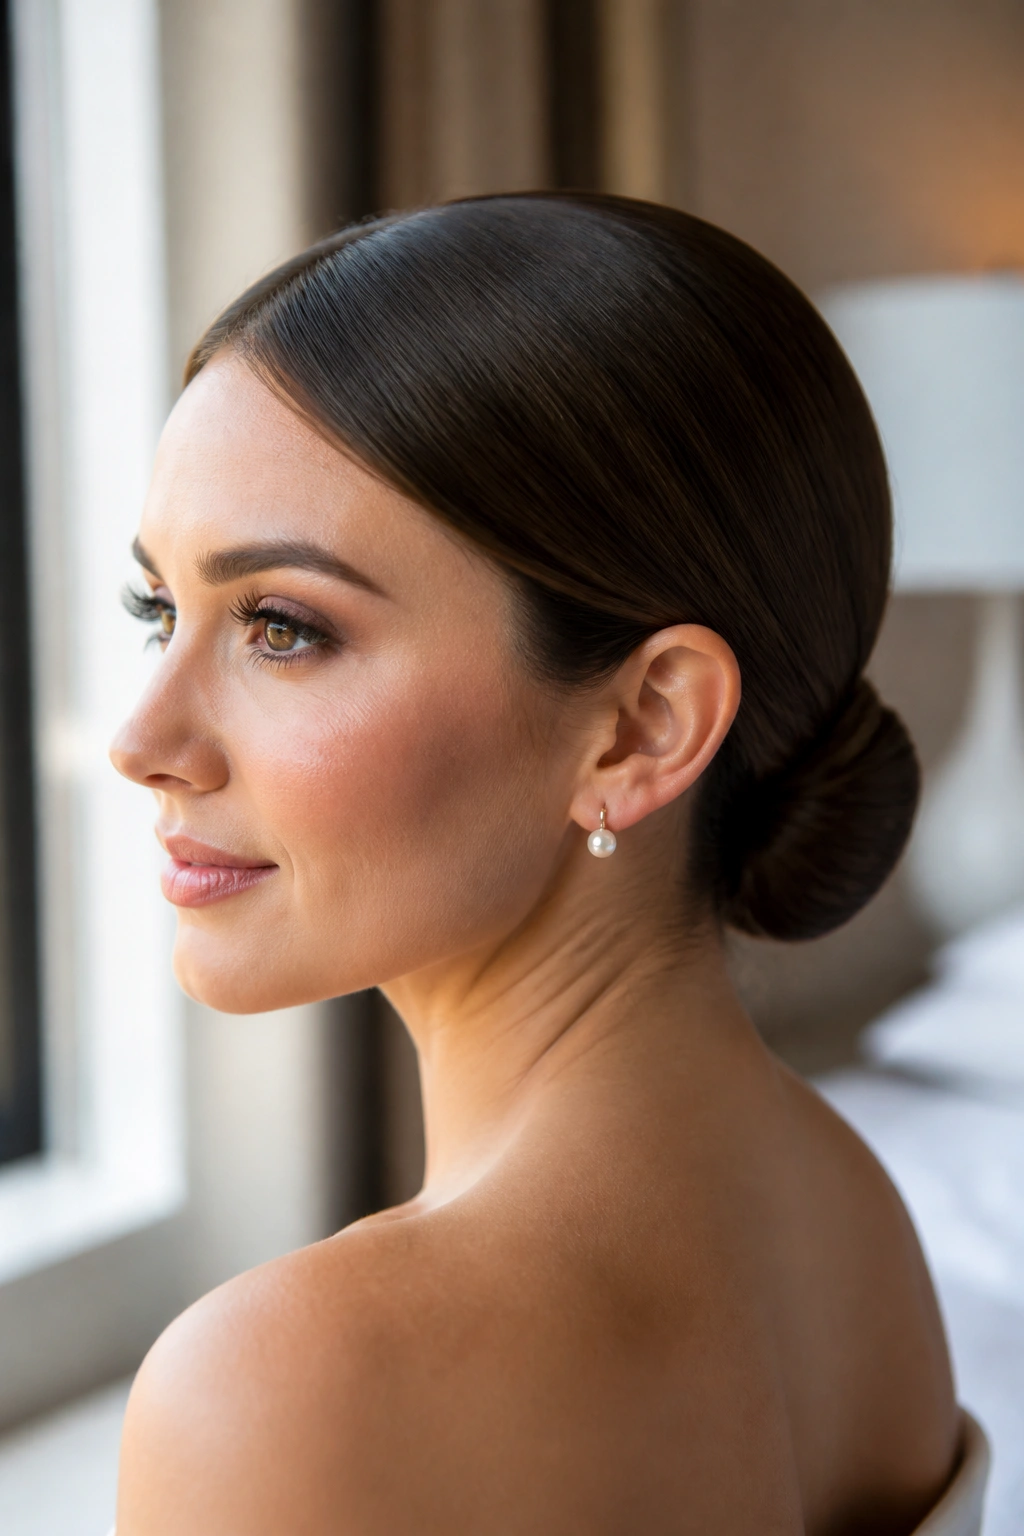
A low chignon is the hairstyle I trust when the invitation says formal and the rest of the outfit already has personality. It sits close to the nape, keeps the neckline clear, and gives you that quiet, tidy finish that photographs well from every angle.
Why it works so well
The shape is compact, which is the whole point. You can keep it center-parted for a modern feel or slide the part a little off-center if your face looks better that way. Either version stays neat, and neat hair usually looks more expensive than hair that is trying too hard.
A small amount of shine serum on the outer layer helps a lot here. Use it sparingly. Too much and the hair starts to look greasy instead of polished. I like a chignon that still shows a few natural bends near the twist — not a helmet, not a pageant shell.
- Best on medium to long hair
- Use 2 to 4 bobby pins crossed at the base so the knot does not wobble
- Finish with a light-hold hairspray and a soft brush over the surface
- Works especially well with high necklines and dramatic earrings
Tip: place the bun at the point where your neckline ends. Any higher and it can feel severe.
2. French Twist with Soft Height
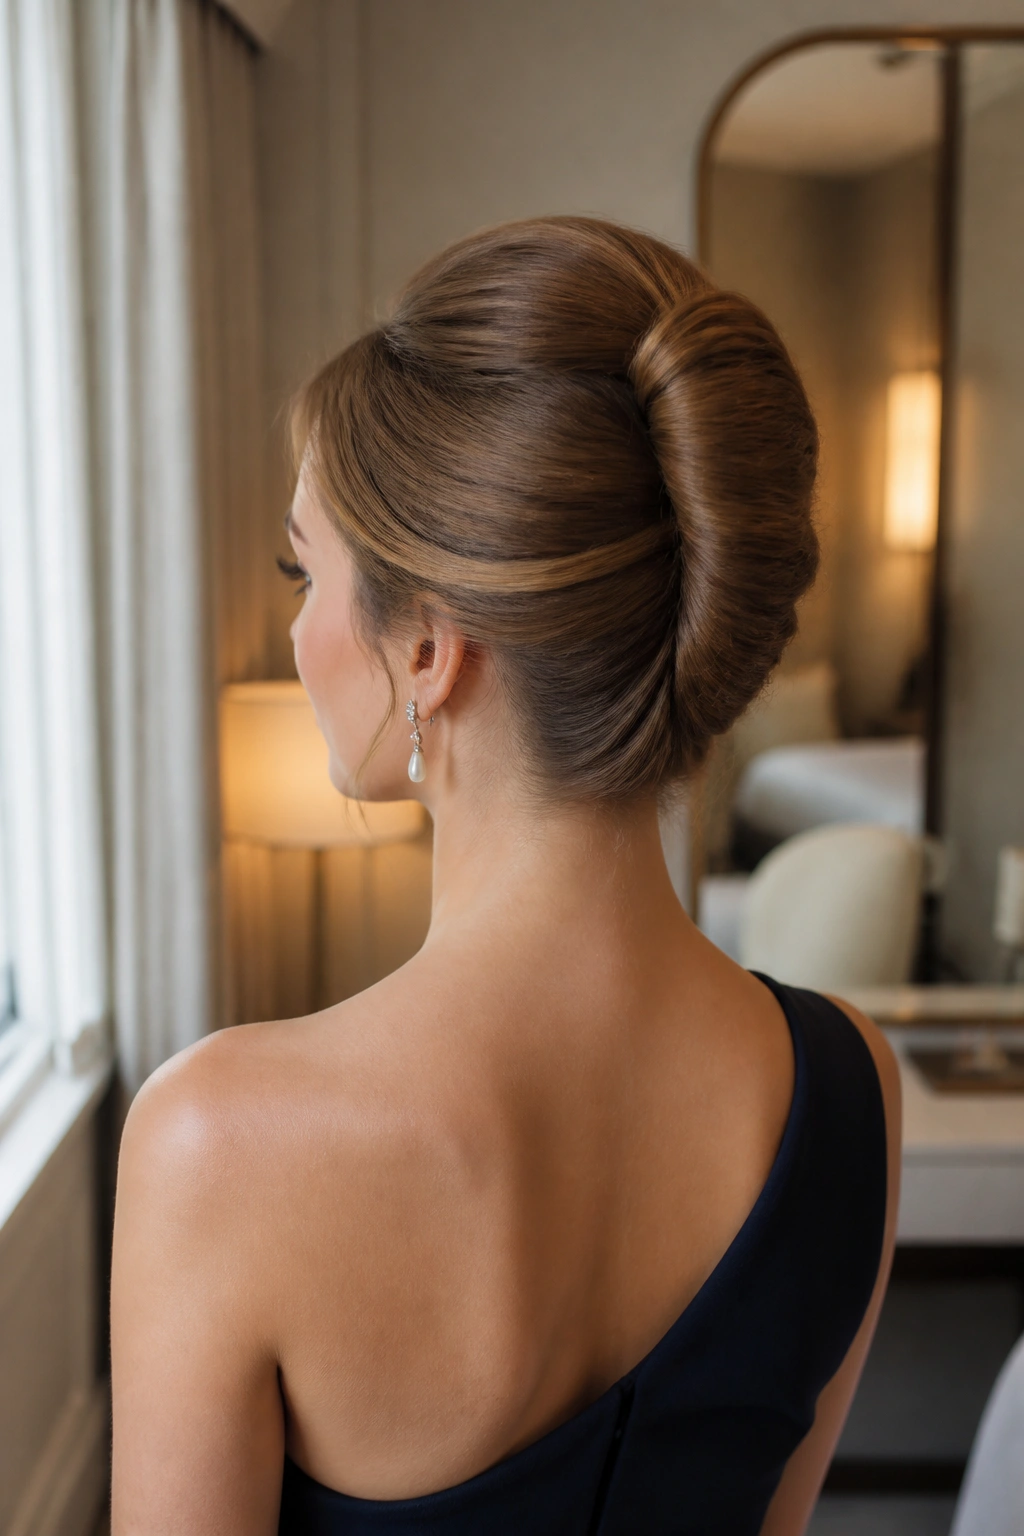
If you want one hairstyle that looks formal from the back and still feels elegant from the front, this is it. The French twist has a little old-world energy, but it does not have to look dated. A touch of lift at the crown keeps it from sitting flat against the head like a school recital style.
The trick is to leave the twist smooth, then let the top have a little body before you fold it in. A rat-tail comb helps, as does a few minutes of pinning with the hair slightly looser than you think you need. Tight twists age badly. Soft ones hold up better.
I like this on wedding guests who are wearing a structured dress, a satin slip, or anything with sharp shoulders. It balances the outfit without competing with it. It also gives you room for a single statement earring, which I think is often enough.
One more thing: the French twist is best when the seam is hidden. If you can see every pin, it starts looking like an updo in progress rather than a finished style.
3. Glossy Hollywood Waves
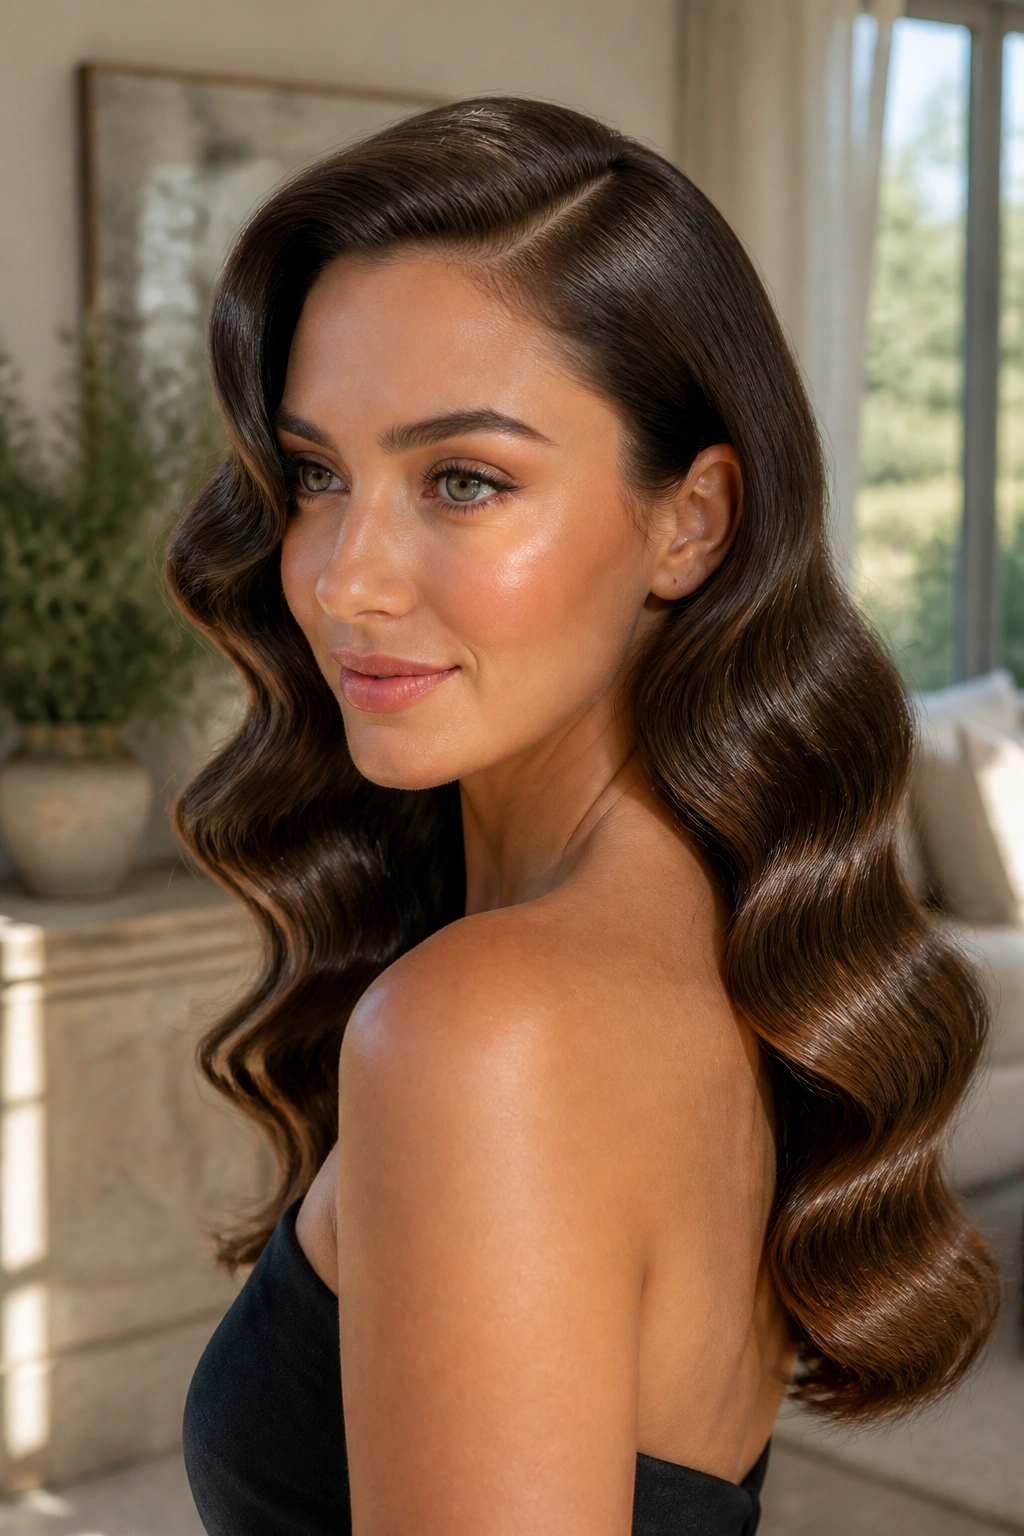
Why do Hollywood waves still work so well? Because they manage to be romantic and disciplined at the same time. The curve is soft, but the pattern is controlled, and that combination makes the style look dressed up without becoming fussy.
The easiest version starts with a deep side part and a 1¼-inch curling iron. Curl each section in the same direction, clip the waves while they cool, then brush them out once they have set. That brushing step matters more than people think. It turns ringlets into those long, smooth bends that feel formal instead of playful.
How to keep the bend soft
Use a flexible spray, not a stiff one. A crunchy wave looks tired fast, and wedding photos are unforgiving about that. A little polish at the roots helps too, especially if your hair is fine and tends to collapse by the time dinner starts.
Hollywood waves are a strong pick for one-shoulder dresses, simple necklines, or any outfit that needs a bit of drama near the face. They also work beautifully when you want your hair down but don’t want it to look casual. Not casual. Not even close.
4. The Wrapped Low Ponytail
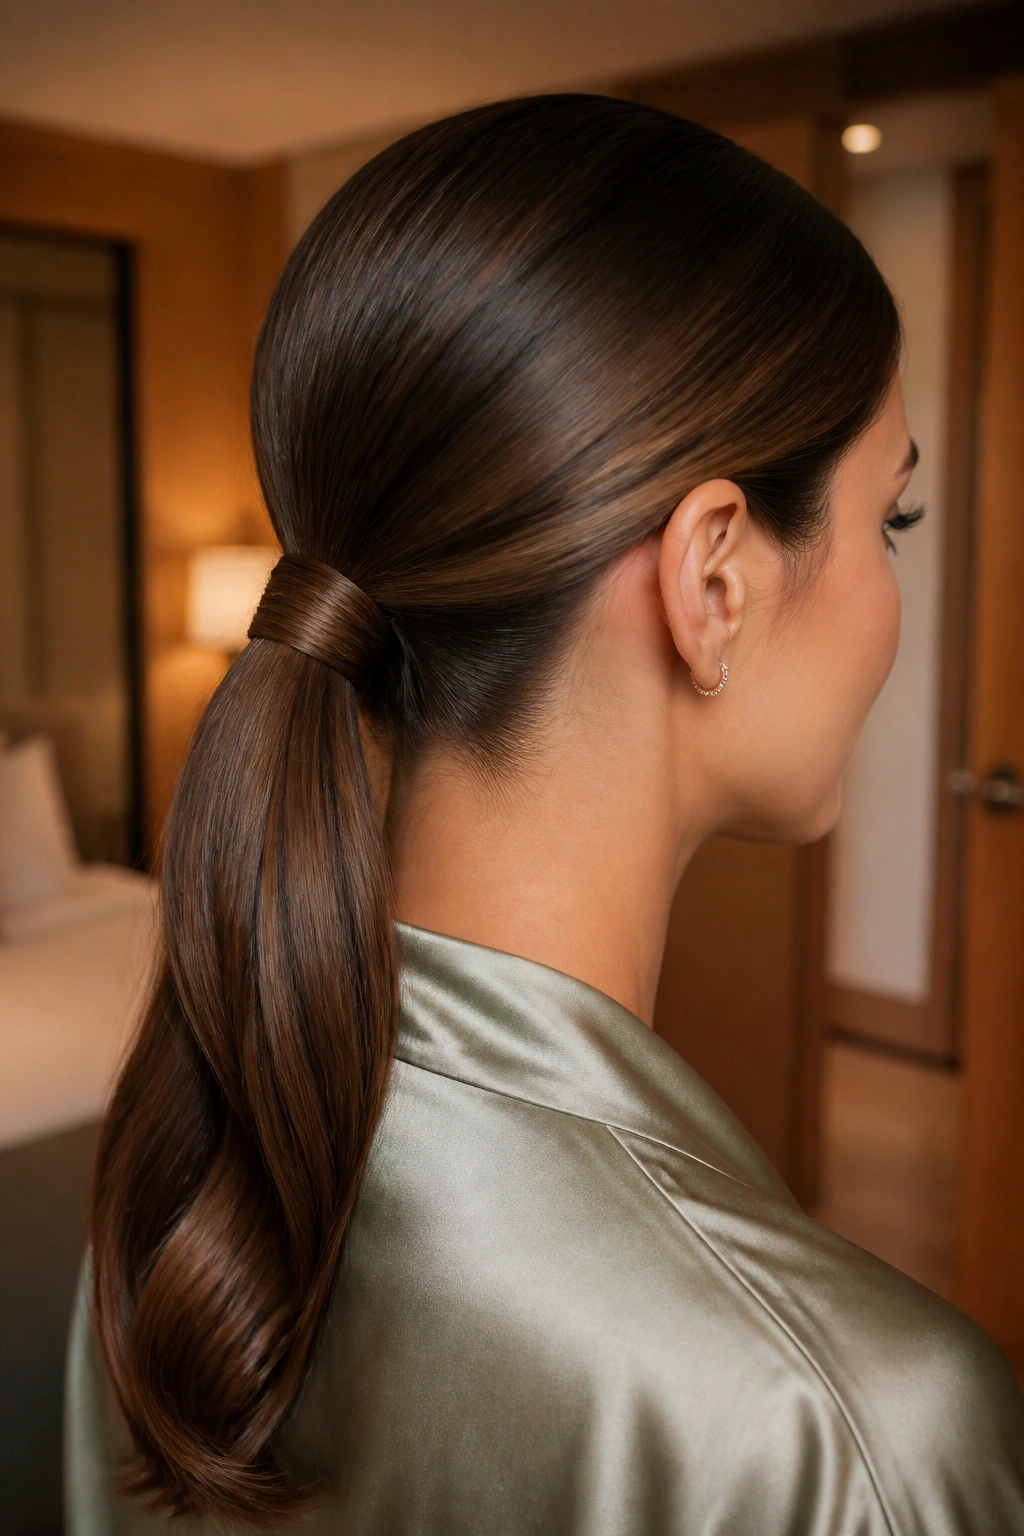
A wrapped low ponytail is one of those styles that looks simple until you notice how many details are working together. The roots are smooth, the ponytail sits low and tidy, and a strand of hair hides the elastic so the whole thing feels intentional.
This is a smart choice if your hair is long enough to swing but you do not want it all over your shoulders. It also handles thick hair better than many buns, which can become bulky fast. Keep the crown flat, then wrap a clean section of hair around the base and pin the end underneath.
- Best when the dress has a strong neckline or detailed back
- Use a fine-tooth comb to smooth the roots before tying
- Secure with a small clear elastic, then cover it with a hair wrap
- Add a slight bend through the tail with a curling iron if the ends look too blunt
A ponytail can still be formal. This one proves it. The difference is in the finish — sleek at the top, soft at the tail, no loose pieces pretending to be part of the plan.
5. Braided Bun at the Nape
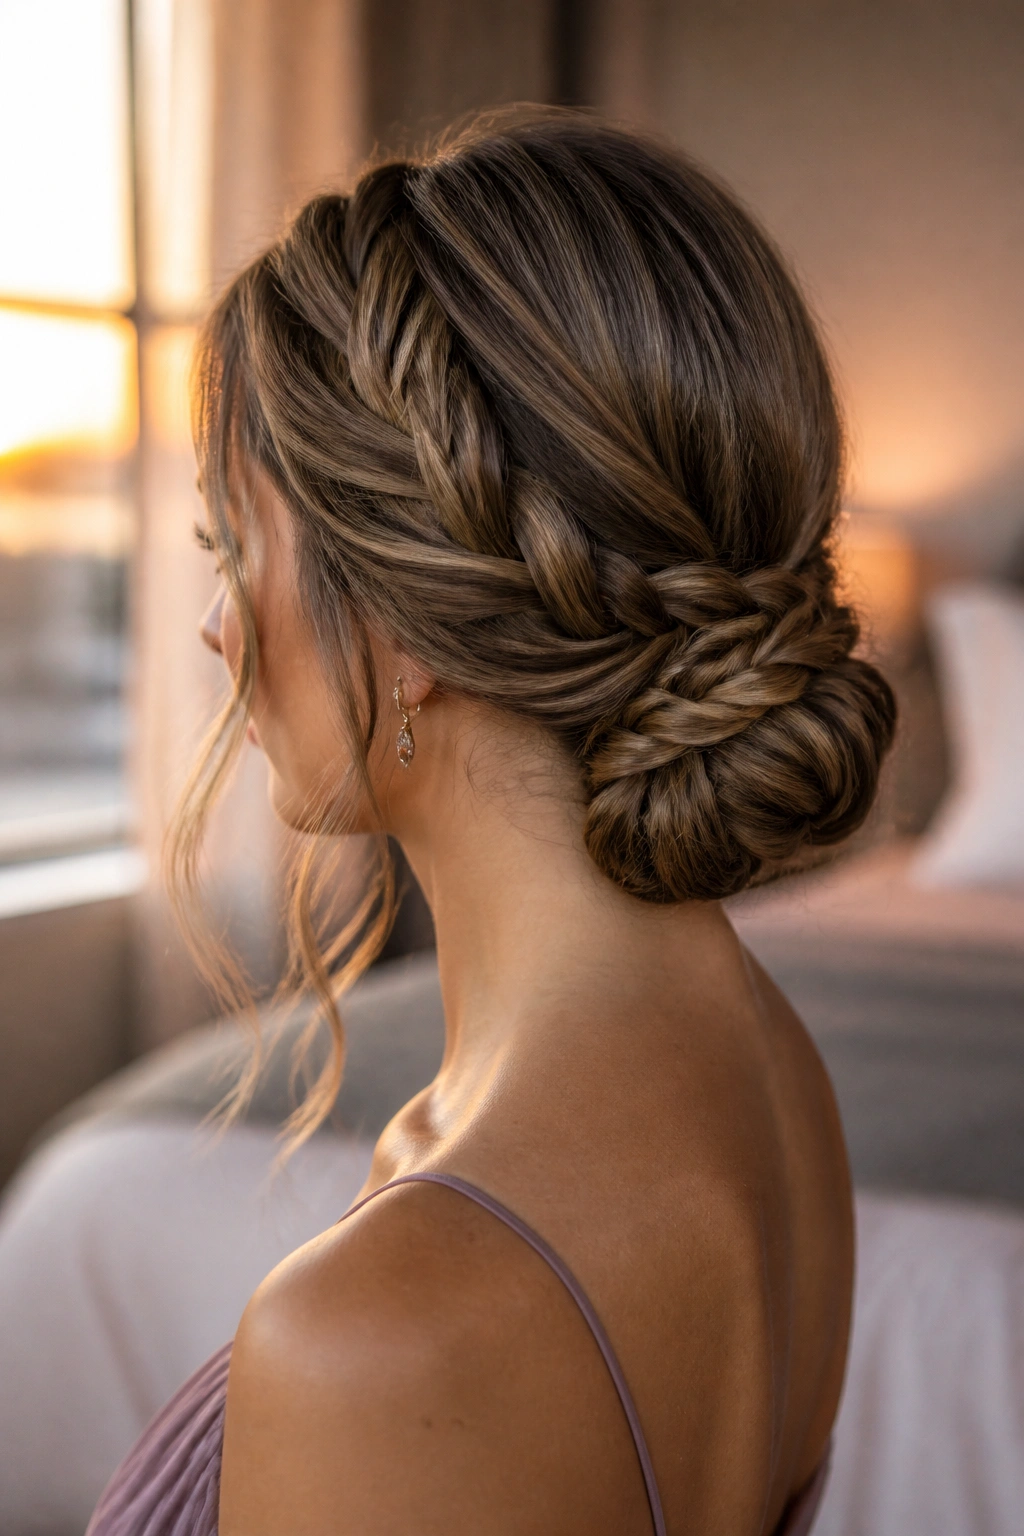
Warm light, bare shoulders, a braid tucked into a bun at the nape — that combination has a nice, calm energy to it. It looks especially good when the wedding feels a little more elegant than casual but not so buttoned-up that you need a sculptural updo.
The braid gives the bun texture. That matters. Without it, a low bun can look a little too plain on hair that naturally falls very smooth. You can braid one side, both sides, or the full tail before coiling it into place. I usually prefer a braid that starts a few inches back from the hairline, because it keeps the front soft.
The best version has a few tiny imperfections. One or two loops can sit a little wider. A braid that is too neat starts to feel rigid. A braid that is too loose falls apart the minute you put on a coat.
A pin-heavy bun is not the enemy here. It is your insurance. Cross the bobby pins in an X pattern near the base, then hide the ends under the braid so the whole thing looks seamless from the side.
6. Side-Swept Curls with a Deep Part
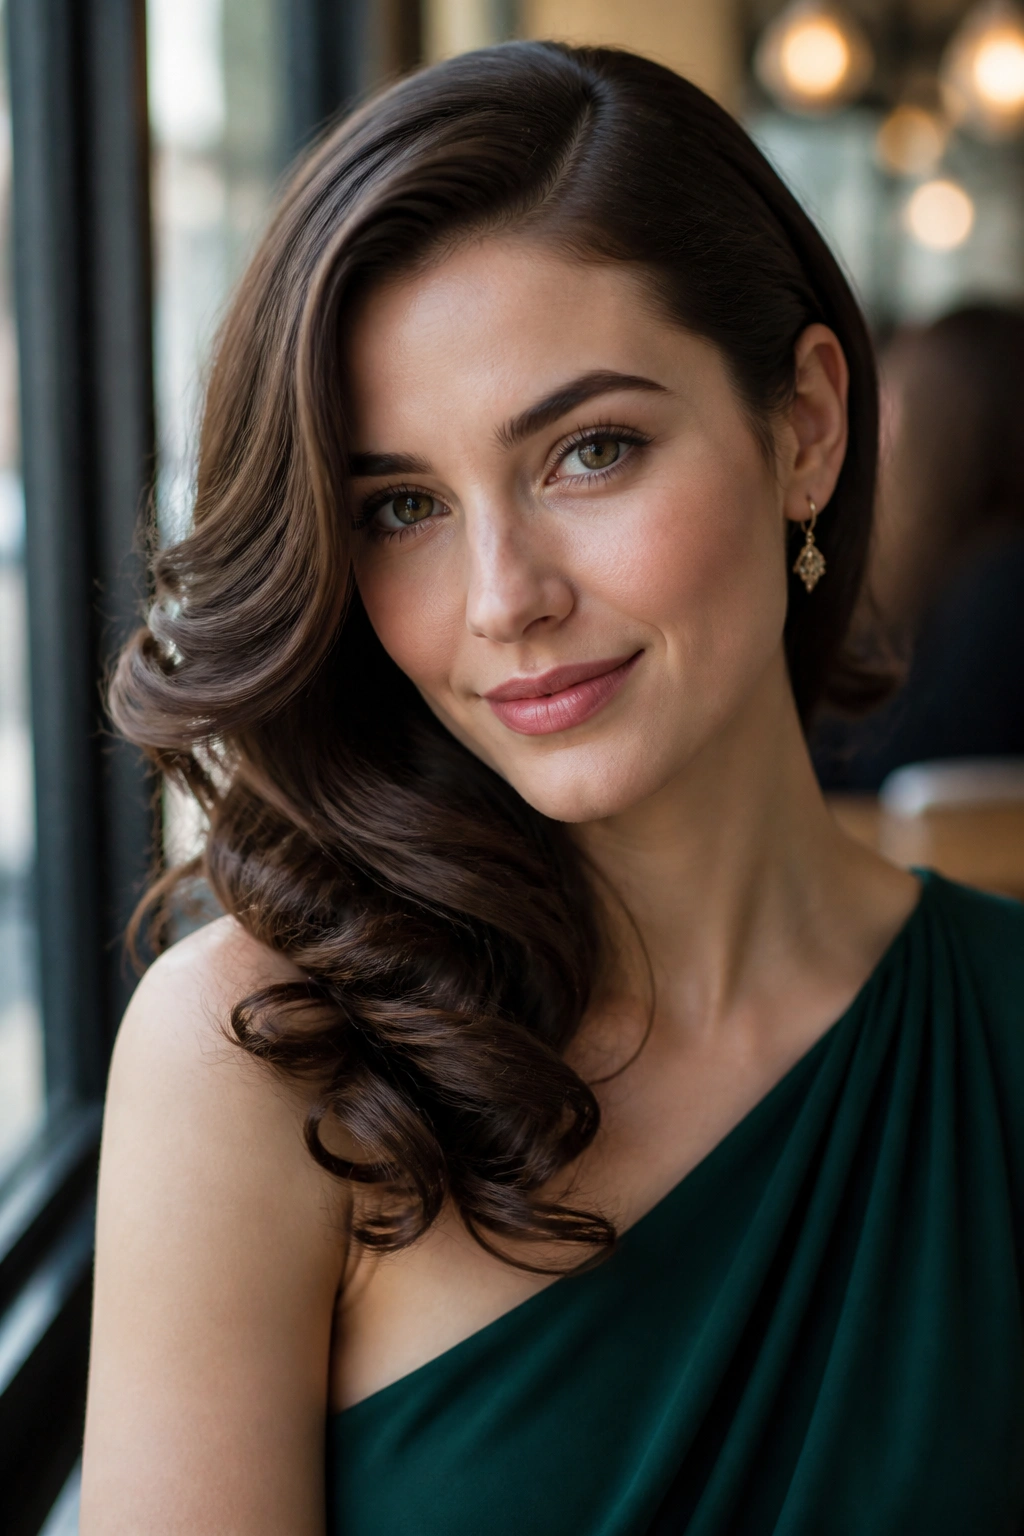
A deep side part changes the whole mood of curls. It makes the style look more formal immediately, because the hair falls with intention instead of evenly around the face. That asymmetry is flattering, and it gives the outfit a little old-school polish without requiring a full updo.
This is a good pick if your dress already has movement — draping, ruffles, lace, or a softer neckline. The curls can be loose or a little tighter, but the key is that one side stays fuller while the other gets tucked back just enough to show the cheekbone. A single pin behind the ear can do a lot of heavy lifting.
Compared with center-parted curls, this version feels more dressed. The side sweep also gives earrings more room to show, which I always appreciate at weddings because jewelry can disappear fast under layered hair.
If your hair is heavy, pin the smaller side back first, then shape the rest. Do not fight the natural fall. Work with it, and the style looks better for longer.
7. Half-Up Twists with Loose Ends

Half-up twists are one of the easiest formal styles to get wrong. Too tight, and they look severe. Too loose, and they slide down before the first toast. The sweet spot is somewhere in the middle: lifted at the crown, pinned securely, with the rest of the hair left soft and movable.
Best when you want hair down but tidy
The top section should be smooth enough to feel finished, but not pulled so hard that it leaves a harsh line across the head. Twist from the temples back toward the crown, secure with two U-pins on each side, then let the ends fall naturally. If the lower half is long, add a bend through the mid-lengths so the style does not look flat.
A half-up twist works especially well on shoulder-length and medium-long hair. It gives shape without hiding the length, which is useful if you want your hair to show up in photos. It also behaves nicely with a dress that has an open back, because the top half stays controlled while the rest still moves.
- Good for second-day hair with a little grip
- Use a 1-inch curling iron on the loose ends only
- Keep the crown smooth with a soft bristle brush
- Finish with a mist, not a heavy spray
Tip: pin the twists slightly higher than you think. They settle as you wear them.
8. Smooth Center-Part Bun

A center-part bun can look more formal than a bigger updo if the finish is clean enough. That symmetry does something useful. It makes the face look framed and deliberate, and it gives the whole style a sharp, modern edge.
This is the one I reach for when the dress is minimalist. A satin column, a square neckline, a clean sheath — those pieces like a hairstyle that doesn’t wander. Keep the part straight, brush the sides back tightly, and place the bun low or mid-low depending on the neckline.
The bun itself should be compact, not fluffy. If there is too much looseness in the coil, the whole style loses that precise feeling. A little shine spray on the outer layer helps, especially if the hair tends to frizz at the crown.
A center-part bun can read severe if the makeup and earrings are also minimal, so I like it best when something else softens the look. A warm lip, a small hoop, a gown with movement. One detail usually does the job.
9. The Polished Bob with Finger Waves

Can short hair look formal enough for a wedding? Absolutely. A bob with finger waves has more presence than people expect, and it works because the shape is sculpted instead of left to chance. It also keeps the length visible, which is nice if you spent all that time growing it out on purpose.
Finger waves need a little patience, but not much equipment. A small curling iron or even a flat iron bend at the ends helps set the pattern, and a strong but flexible gel or setting lotion keeps the wave from collapsing before the ceremony ends. On jaw-length hair, a single wave near the front can be enough.
Tools that matter here
- Fine-tooth comb for clean lines
- Duckbill clips or wave clips while the hair sets
- A mini flat iron for the ends
- Light shine spray, used from a distance
This style is especially good when the dress has structure or when you want the hair to look deliberate from the front without covering the neckline. It says you thought about the whole outfit, not only one part of it.
10. Bubble Ponytail

A bubble ponytail sounds playful, and it can be. But on long hair, with clean sections and a sleek base, it reads more polished than silly. The shape gives you movement, keeps the length visible, and stops the ends from turning into one heavy, flat mass.
I like this for guests who have long hair and do not want it pinned to the head all night. The trick is to place small elastics every 2 to 3 inches down the ponytail, then gently tug each section to form even bubbles. Not too much. Just enough to round the shape.
The root area should be smooth, almost glossy. That contrast is what makes the style feel finished. If the top is puffy and the bubbles are uneven, it slides straight into casual territory.
- Wrap the first elastic with a strand of hair for a cleaner base
- Keep the bubbles the same size from top to bottom
- Use clear elastics if the hair is fine
- Add a soft curl at the ends for a dressier finish
A bubble ponytail is one of those styles that gets better when the rest of the outfit is simple. Let the hair do the talking.
11. Textured Top Knot with Face-Framing Pieces
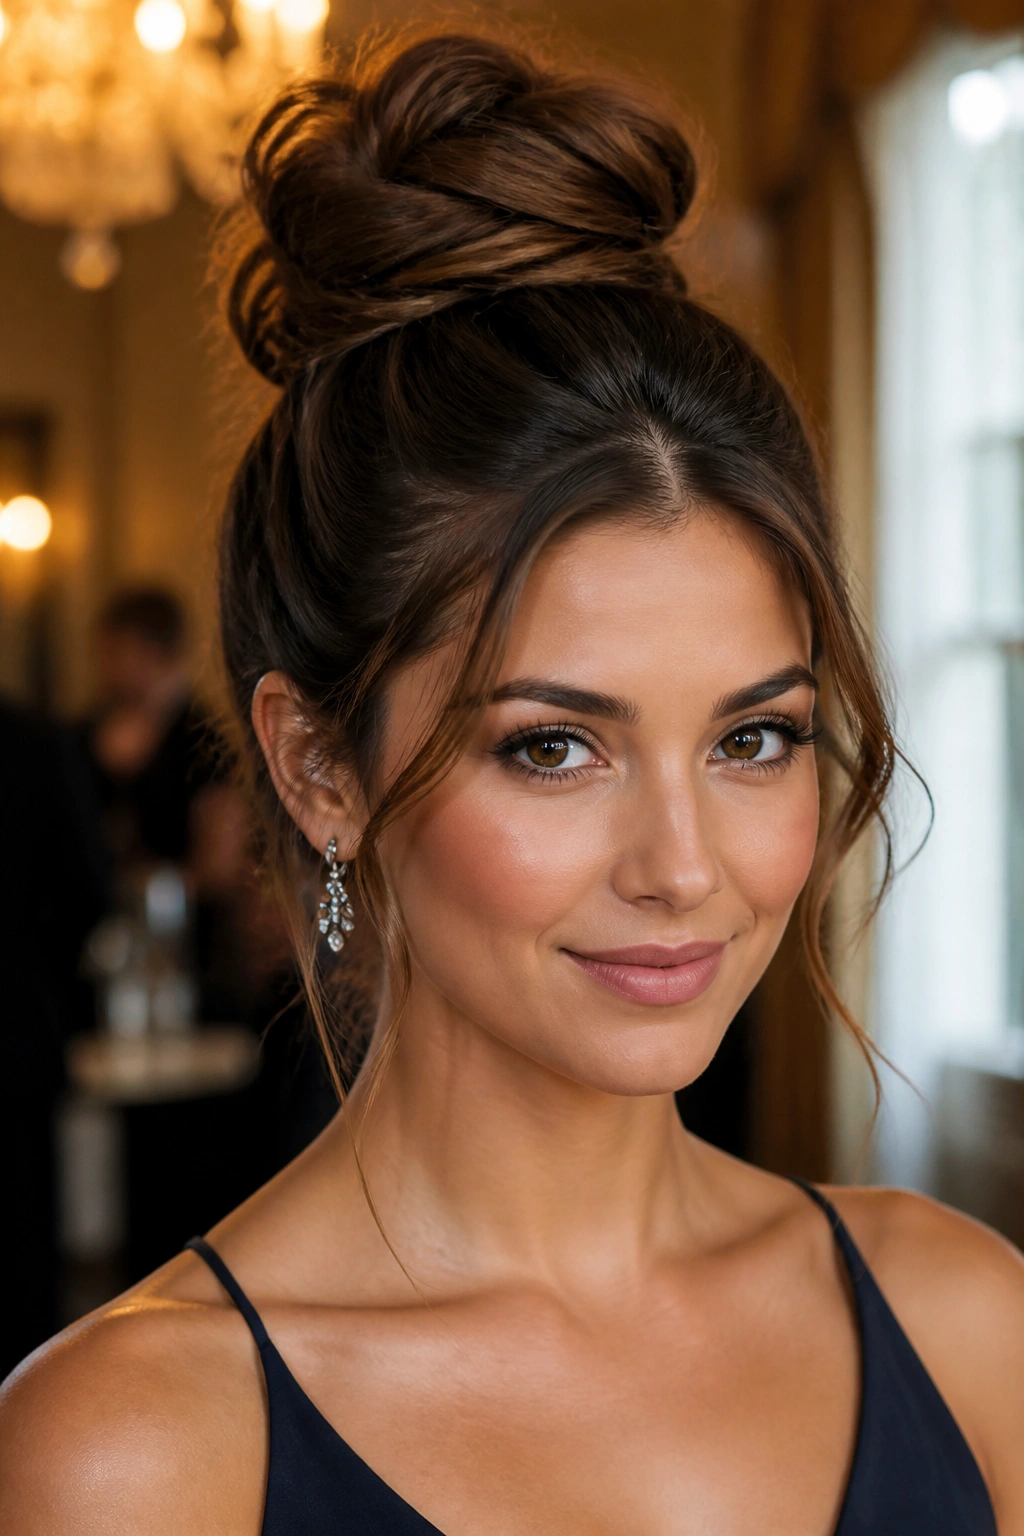
A top knot does not have to look like you ran out the door from the gym. In formal hair, the difference is all in the shaping. The knot sits higher, the crown has controlled texture, and the face-framing pieces are placed on purpose rather than left to chance.
The best version leaves the top a little airy. Not messy. Airy. You want movement at the crown, but you still want the base to stay secure. Pull a few pieces loose near the temples, then smooth the ends of those pieces so they don’t look neglected. That little contrast keeps the style from feeling too severe.
This is a strong pick for dresses with bold sleeves or heavy detail at the neckline, because it keeps the hair off the shoulders and gives the outfit some space. It also works when you know you will be warm for part of the evening. A knot can be practical and still look dressed up.
One warning: if the knot gets too large, it starts stealing attention from the dress. Keep it compact. That is where the elegance lives.
12. Waterfall Braid Half-Up Style

A waterfall braid is a nicer answer than a full crown braid when you want detail without turning the whole head into a braided costume. The braid threads across the back of the head, then releases pieces as it moves, which leaves the lower hair flowing underneath. That bit of movement is the reason people keep coming back to it.
Where it shines
It works best on medium to long hair with some natural texture. Very straight hair can still do it, but you will need a little grip in the strands first. A light curl through the loose ends helps the braid stand out, especially in softer light.
I like this style for outdoor weddings, garden receptions, and dresses that lean romantic rather than sharp. The braid adds detail near the crown while the length keeps the overall look soft. It is also nice when you want a style that is more interesting than a basic half-up but not as locked-in as a full updo.
A loose braid is the better braid here. If it is pulled too tight, the waterfall effect disappears. If you can still see the individual drops of hair moving through the braid, you’ve done it right.
13. Side Chignon with a Soft Sweep
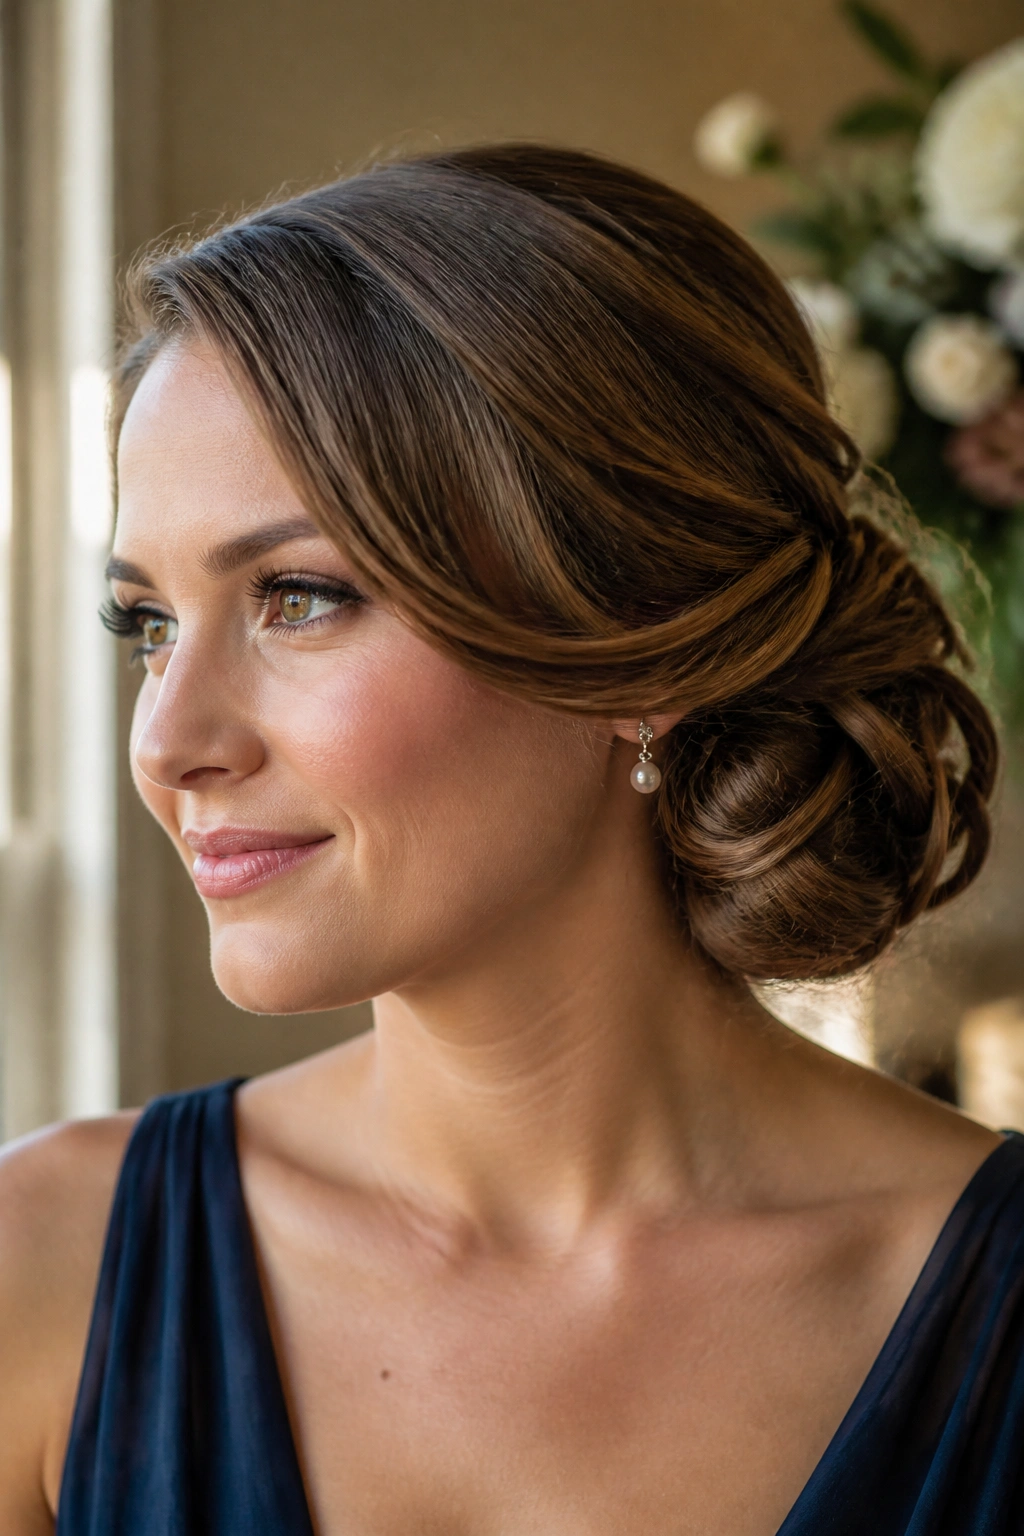
A side chignon does something a center bun can’t: it gives the face a gentle diagonal line. That is especially flattering with one-shoulder dresses, asymmetrical necklines, or earrings that deserve their own moment. The sweep is the detail that makes it feel formal.
Keep the part soft and guide the hair toward one side before gathering it. The chignon itself can sit just behind the ear or lower at the nape, depending on how much drama you want. I prefer the lower placement for a long evening, since it feels steadier and less likely to fight with the neckline.
The style needs balance. If the sweep is too heavy, it can drag the face down. If the bun is too tiny, it looks accidental. The middle ground is better: enough fullness to notice, enough restraint to keep it elegant.
A side chignon also has the useful habit of making earrings look better. That sounds small. It isn’t. At a wedding, small details tend to do more than the loud ones.
14. Rope-Braid Bun

A rope braid bun looks more complicated than it is. Twist two sections in the same direction, wrap them around each other, then coil the rope into a bun at the back. The result is tidy, textured, and a little more interesting than a plain twist.
How to keep it from unraveling
Start with hair that has some grip. Freshly washed hair can be slippery, and a rope braid needs a bit of traction. A touch of mousse or dry texture spray at the mid-lengths usually helps. Then secure the ends before you begin wrapping the bun, because loose ends are the part most likely to escape.
This style is especially good if your hair is medium to thick and you want a formal look that still feels a little modern. It works with soft gowns and structured dresses alike. The texture keeps it from looking too severe.
- Twist both sections tightly before crossing them
- Pin the bun at two opposite points, not one
- Leave the surface smooth if the dress is detailed
- Use a medium-hold spray so the braid keeps its shape
I like this style because it has texture without being fussy. That’s a rare thing.
15. Sleek Straight Hair with a Statement Barrette
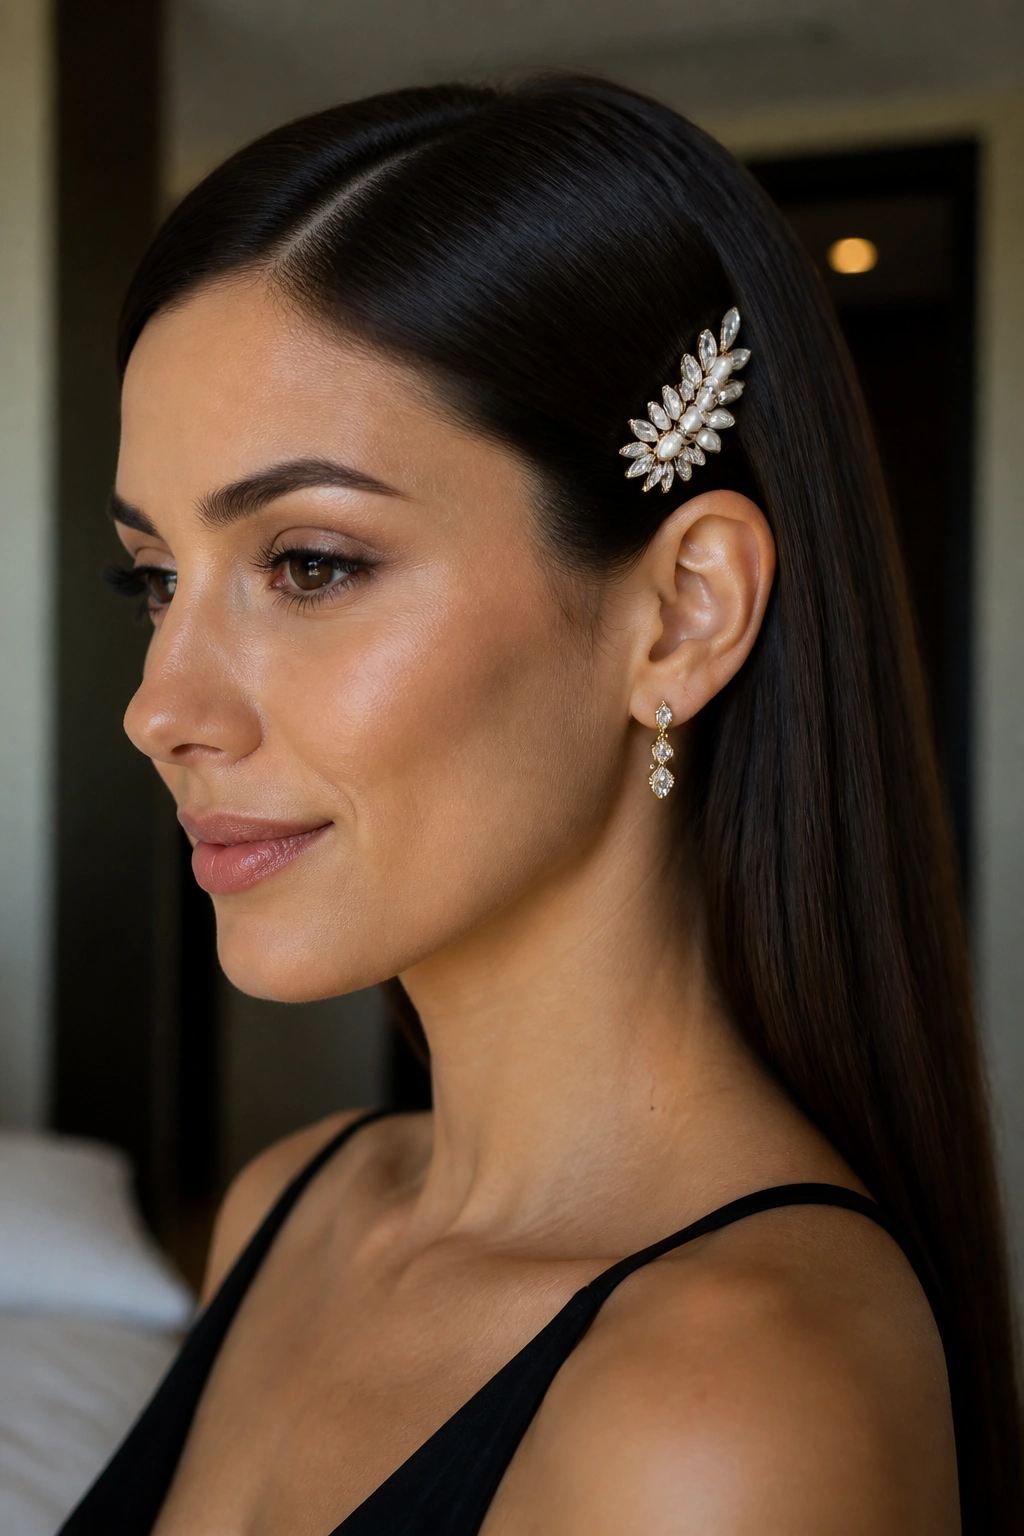
Sometimes the most formal thing you can do is keep the hair straight and immaculate. A smooth finish, a clear part, and a statement barrette on one side can look sharper than a soft curl, especially with a strong dress line.
This works best when the barrette earns its place. A pearl clip, a crystal bar, or a polished metal piece can hold the hair back while also acting like jewelry. Put it just above the ear, not too close to the temple, so the placement feels intentional rather than decorative for decoration’s sake.
Straight hair needs clean ends. If the lengths are rough, the whole look falls apart fast. Run a flat iron through the mid-lengths, bend the ends slightly under, and smooth the top with a brush before adding the clip.
- Best with medium to long hair
- Works beautifully with bold lipstick or a neckline that already has shape
- Keep the accessory to one side only
- Use a heat protectant that leaves no sticky residue
One polished barrette can carry the whole look. More than one, and the hair starts to feel crowded.
16. Swept-Back Curls
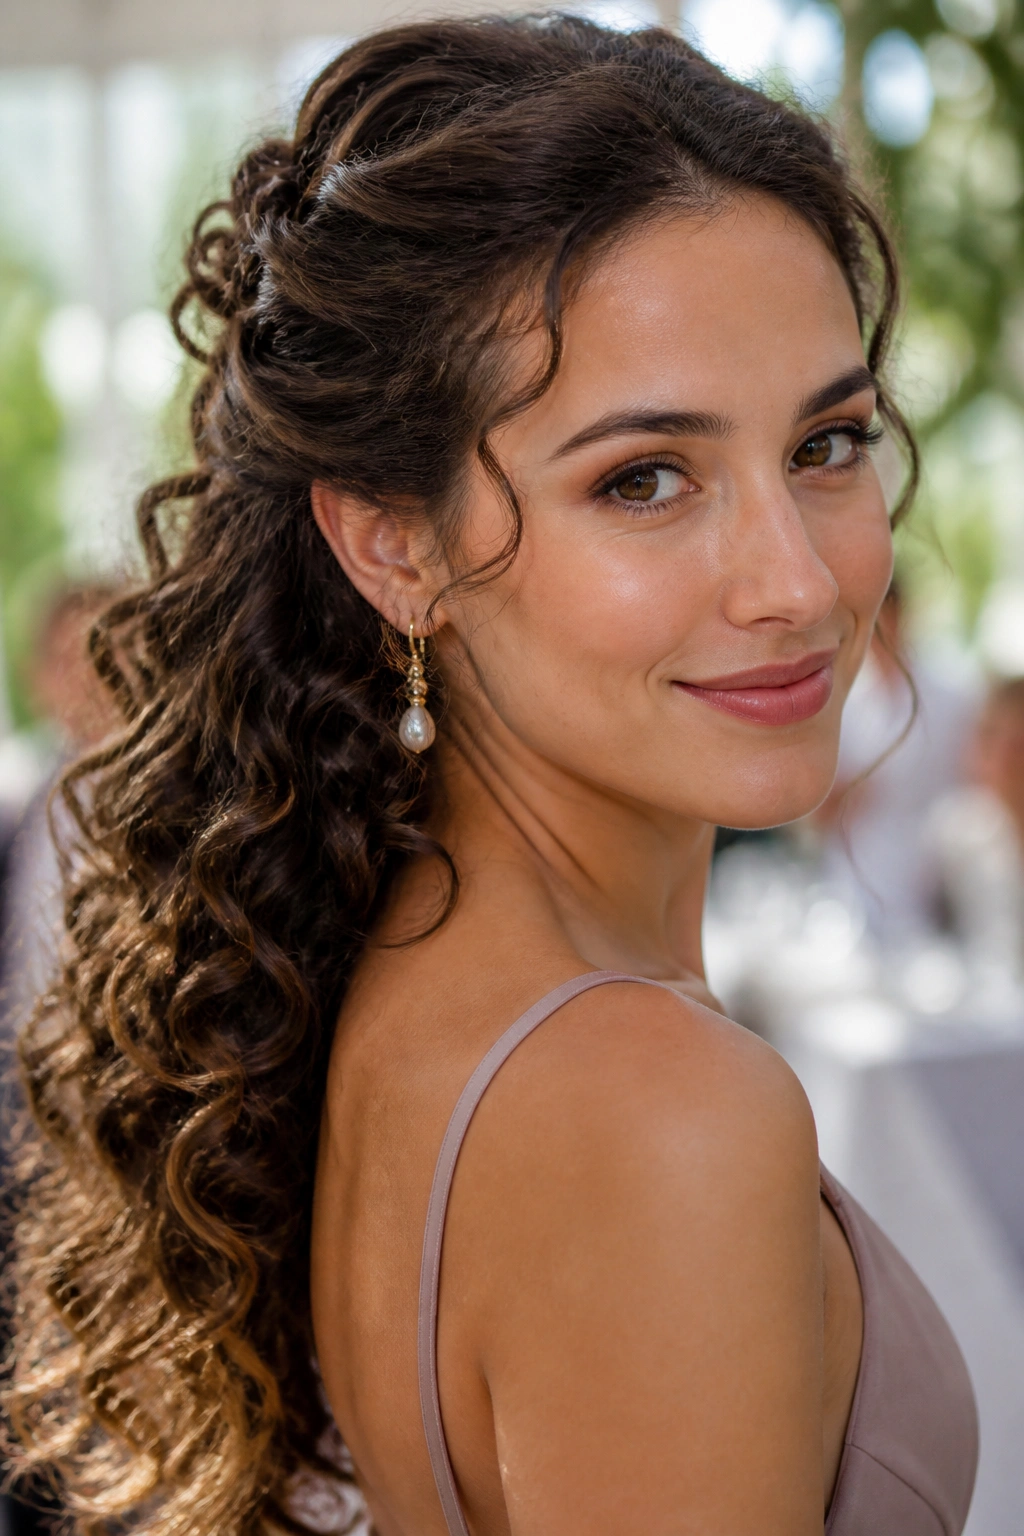
You do not need to pin every curl up to look dressed for a wedding. Swept-back curls prove that. The hair stays mostly down, but the sides move away from the face, which keeps the style open and slightly formal without losing softness.
This is one of my favorite choices for guests with naturally curly or wavy hair who want to work with the texture instead of flattening it. The trick is to sweep the front sections back loosely, pin them behind the ears or at the temples, and let the rest fall in defined curls. The face stays visible, the length stays visible, and the outfit still gets room to breathe.
A style like this feels especially good with earrings, because the curls frame them instead of hiding them. It also handles humidity better than a fully smoothed style, which is no small thing if the room gets warm.
The point is not perfection. The point is control. Curls should look shaped, not squeezed.
17. Gibson Tuck

The Gibson tuck has old-fashioned charm in the best way. It rolls the length under itself at the nape, which creates a soft horizontal shape that feels formal without requiring a stiff shell of an updo. I prefer it on guests who want the elegance of pinned hair but do not want a bun sitting high on the head.
Why it beats a plain tuck
A standard tucked style can look flat. The Gibson version has a little volume before the roll, and that volume gives the whole shape more life. It also works nicely with medium-length hair, which is often the hardest length to style for formal events because it’s neither short nor long enough to behave perfectly on its own.
The surface should stay smooth, but the roll underneath can be a little relaxed. You don’t need to see every fold. You only need the shape to hold and the front to stay neat.
This style is lovely with lace, pearl details, or a dress that has a vintage feel. It also gives a soft frame to the neck, which can be useful if the neckline is simple and you want the hairstyle to carry more of the look. Quietly stylish. That is the whole appeal.
18. Braided Halo Crown
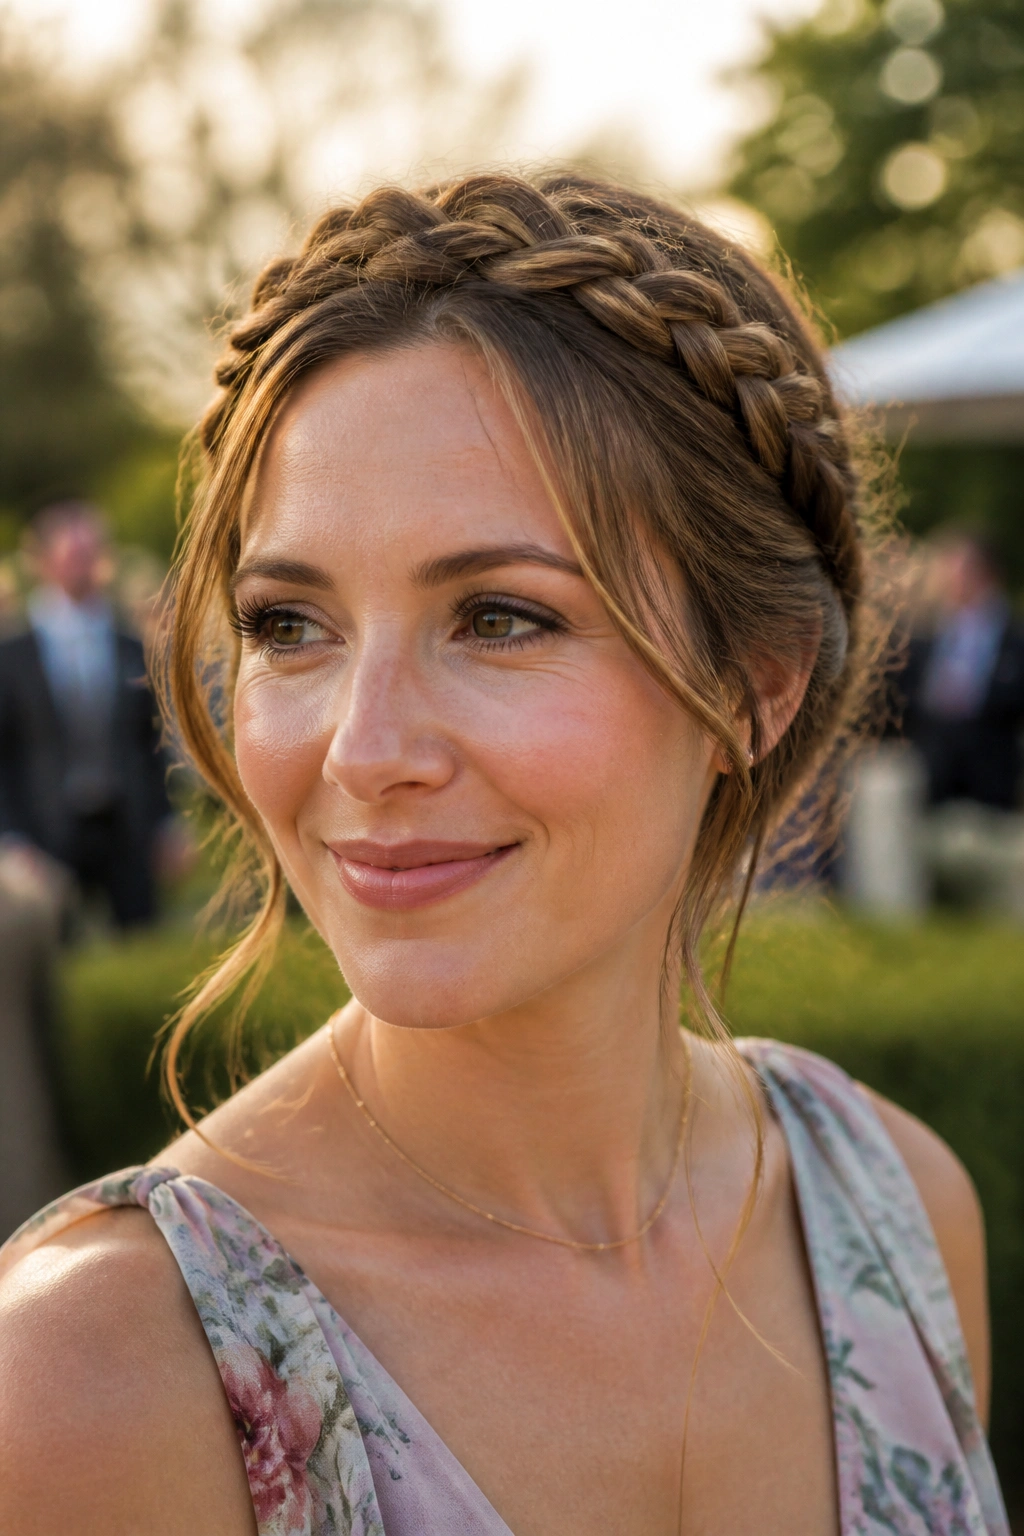
What if you want hair off your face all night, but a standard bun feels too plain? A braided halo crown is the answer. The braid wraps around the head like a soft band, and because it sits at the hairline, it gives the style a full, finished edge.
The key is not to braid too tightly. A crown braid that hugs the head too hard can look severe and can be uncomfortable by the time dinner starts. Pull a few pieces loose around the ears and nape so the shape stays soft. That little looseness keeps it from feeling costume-like.
This style is especially useful for outdoor ceremonies, church weddings, or any event where you know you will be moving between rooms and dealing with heat. It stays put, which is the point. And because the braid itself is the ornament, you don’t need much else.
- Keep the braid slightly behind the hairline
- Use matte pins that disappear into the braid
- Add a few curled ends if your hair is long enough
- Finish with spray only where the braid meets the rest of the hair
A halo braid is more practical than people give it credit for. It just happens to look nice too.
19. Deep Side Part with a Voluminous Blowout
A big blowout can look as formal as an updo when the part is deep and the roots are lifted well. The shape matters more than the curl pattern here. You want body, smoothness, and movement that holds without turning into a fluffy triangle by the end of the night.
Compared with Hollywood waves, this style feels less sculpted and a little more airy. That makes it a good fit for dresses that already have strong structure or heavy embellishment. The hair doesn’t need to compete. It only needs to be present.
Why volume beats curl sometimes
A round brush and a blow dryer can create a polished lift at the roots, which keeps the face open and the hair from lying too flat against the head. If your hair is fine, this is often the better option than trying to force a wave pattern that will collapse by dessert.
The ends can stay smooth, or you can add a soft bend through the bottom two inches. That depends on how dressed up you want the final look to feel. Either way, the side part does a lot of the work.
A blowout looks best when the shine is controlled, not oily. Keep that in mind. The difference is small in the mirror and obvious in photos.
20. Sculpted Knot at the Nape
A sculpted knot at the nape looks like the polished cousin of a low bun. The shape is cleaner, the lines are sharper, and the whole thing has a little architectural feel that suits formal wedding guest hair very well. It works especially nicely with black-tie dresses or anything with a strong, clean silhouette.
The secret is to smooth the crown first, then build the knot in sections so the shape stays visible. If you just gather and twist, the style can slump. If you fold the hair into defined loops before pinning, it holds its outline. That is the difference between a knot and a lump.
- Smooth the roots with a paddle brush before pinning
- Anchor the knot with pins placed inside the fold
- Keep the bun low and centered unless the neckline suggests otherwise
- Use a light mist of spray at the very end, not during shaping
This is not the hairstyle for a rushed morning. It rewards a few extra minutes of patience. The payoff is a knot that looks calm and deliberate from every angle, which is exactly what formal hair should do.
21. Twisted Half-Up with Polished Ends
A twisted half-up style gives you the best part of both worlds: the softness of hair down, and the control of hair pulled back at the crown. The polished ends matter here. If the lower half is left rough, the whole style looks unfinished, no matter how neat the top is.
Start by twisting small sections from the temple area back toward the middle. Secure them with pins or a hidden clip, then smooth the remaining length with a flat iron or a curling iron, depending on the look you want. Straight ends feel modern. Soft curls feel more romantic. Either can work.
This style is useful when you want your hair to show, but you also want the top of the head to feel tidy in photos. It’s especially flattering on dresses with delicate straps or a little shimmer, because the style leaves space around the neckline instead of crowding it.
I like this one because it is not trying to be a full updo. It knows what it is. That confidence shows.
22. Curly Updo with Soft Tendrils
Can curls look formal without being pressed into a perfect shell? Yes, and this style is the proof. A curly updo keeps the texture alive, but the curls are pinned in a way that creates a rounded shape at the back and leaves a few soft tendrils around the face.
The trick with tendrils
Leave out enough curl to frame the cheekbones, not so much that the style turns into a loose mess. Two to four tendrils is usually enough. They should look intentional, not forgotten. A little gel on the edges can help keep them defined without making them stiff.
This is a strong choice for natural curls, coils, and wave patterns that already have body. Trying to flatten that texture into something sleek often creates more work than it saves. A curly updo respects what the hair already does well.
The pinned section should feel secure at the back, but not crushed. Let the texture breathe. That little bit of volume gives the style energy and keeps it from looking flat in side profile.
A curly updo also photographs well from behind, which matters more than people think. Wedding guests get seen from every angle.
23. Modern French Roll
A modern French roll is cleaner than a French twist and softer than a shell. That middle ground is what makes it so good for wedding guests. The vertical line at the back looks polished, but the overall silhouette feels a little less formal and a little more wearable.
Unlike the classic version, this one can sit slightly off-center or have a looser seam at the back. That keeps it from looking too rigid. It also makes the style easier to pair with modern dresses, especially sleek columns, wrap gowns, or a neckline with a high collar.
A few details that matter
- Use a tail comb to create a neat seam
- Smooth the hair upward before folding it in
- Pin the roll along the spine of the twist so it stays flat
- Leave the front soft if your dress is severe
I think this style works best when you want elegance without the stiffness that sometimes comes with more traditional updos. It has structure, but it still feels like a real head of hair.
24. Pearl-Pinned Low Bun
One small accessory can do more than a whole box of extra hairpins. A pearl-pinned low bun proves that. The bun itself stays low and simple, then a few pearl pins are placed where the twist changes direction so they catch the eye without taking over the style.
This is a good choice when the dress is plain and you want the hair to do a bit more work. It is also smart when the rest of the outfit already has texture. Pearls play nicely with satin, crepe, lace, and anything with a soft sheen.
The bun should not be overbuilt. If it gets too large, the pearls start looking decorative in a very deliberate, almost bridal way. A smaller bun with one or three well-placed pins feels cleaner. Better, even.
I like this style because it lets you add interest without going loud. The pins can sit in a line, curve around the knot, or cluster on one side. Small adjustments. Big difference.
25. Sleek Wrapped Ponytail
The sleek wrapped ponytail is the style I keep coming back to when everything else feels too precious. It’s clean, formal, and fast to wear, which makes it a good answer for long ceremonies, heavy dresses, or guests who would rather spend twenty minutes on hair than forty.
The base should be smooth enough to reflect light, but not so flat that it looks pressed down. Wrap a section of hair around the elastic, tuck the end underneath, then either keep the tail straight or add a soft curl through the last third. Straight ends feel sharper. Curled ends feel softer. Both work.
This one is especially useful when the outfit has a strong back or a lot happening at the front. The ponytail stays out of the way and still looks finished in profile. That profile matters. People see it more than they expect.
If nothing else feels right, this is the safe bet. Not boring. Just disciplined. And at a wedding, that usually earns its place.
