



Long hair can look polished in five minutes, or it can spend the whole day trying to slip out of every clip you own. That’s why braided hairstyles for long hair stay in heavy rotation: they hold shape, keep length under control, and still look like you made an effort even when the morning was a mess.
The best braid is not the one that looks the most complicated. It’s the one that suits your texture, your schedule, and the amount of patience you actually have before coffee. Some braids need a little grip from day-old hair or a mist of dry shampoo. Others are happier on clean, smooth lengths, where every strand behaves for about ten minutes and then starts freelancing.
Long hair gives you options that shorter lengths simply can’t fake. You can go low and sleek, high and sporty, loose and romantic, or build a braid into a bun and still have enough tail left over to make the shape feel full. That extra length is a gift, but it’s also a little needy. Too much weight, and the braid droops. Too much smoothness, and it slips apart. The sweet spot matters.
Some of these styles are quick. Some ask for a few pins and a mirror you trust. None of them need salon-level perfection. A slightly uneven braid on long hair usually looks better than a stiff one anyway.
1. Classic Three-Strand Braid for Long Hair
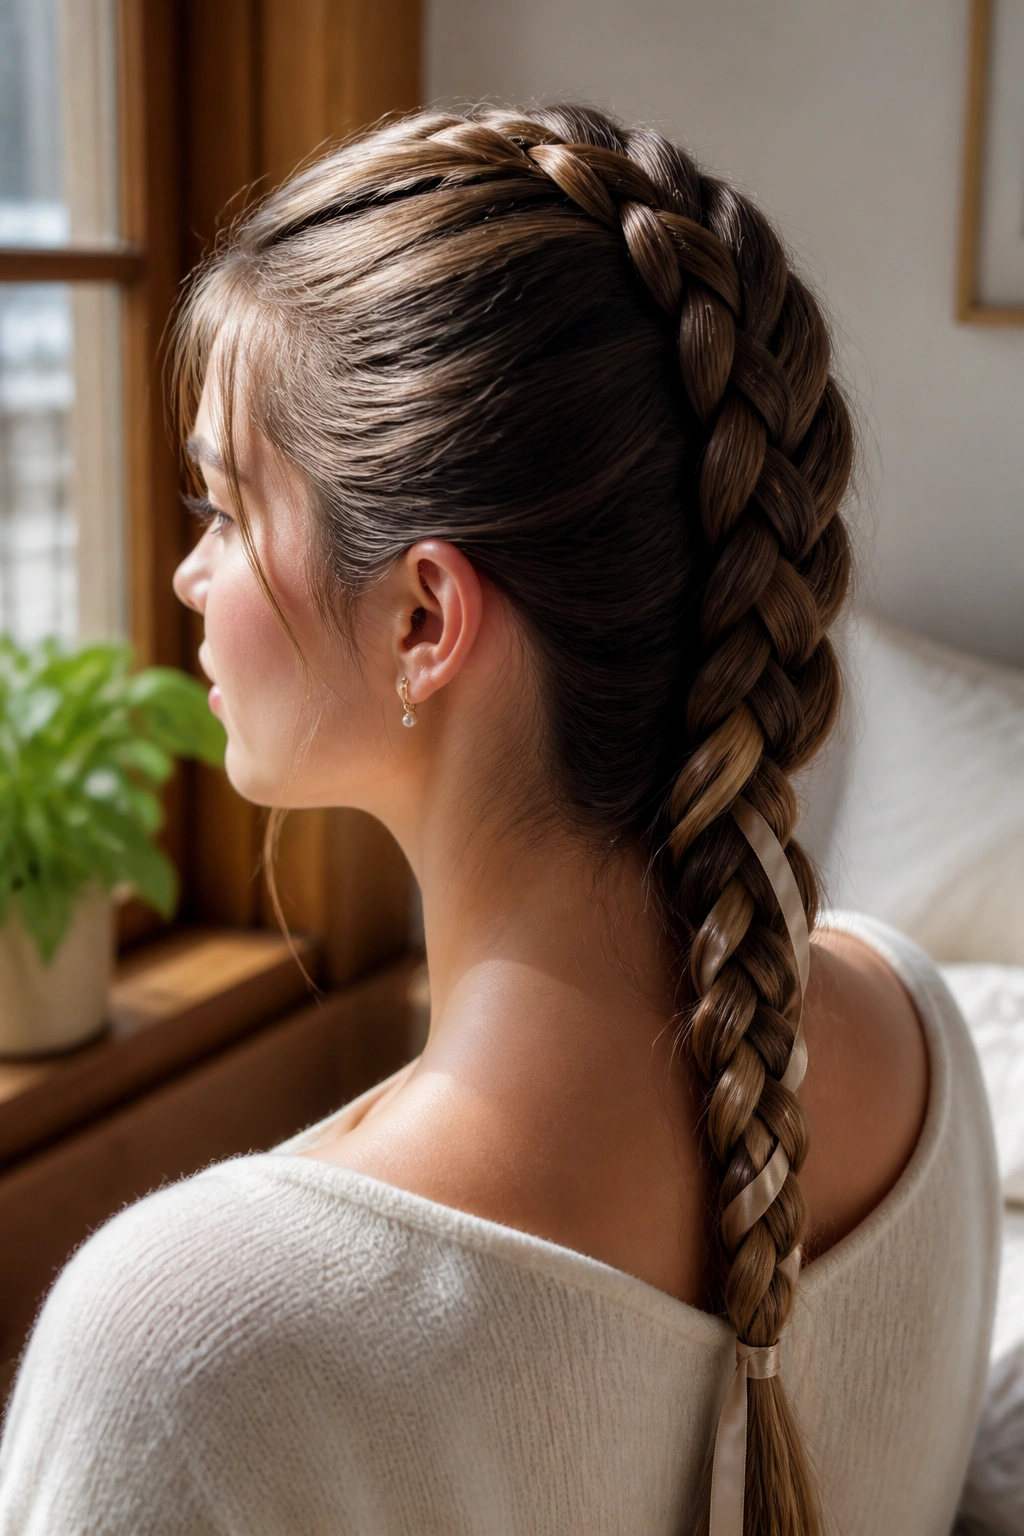
The plain three-strand braid gets underestimated because it’s familiar. On long hair, though, familiar can be the whole point. When the braid starts high and is kept snug through the crown, the length falls in a clean line that looks tidy without feeling severe.
A ribbon makes this style feel softer fast. Thread a narrow silk or grosgrain ribbon into one of the outer sections at the nape, then keep braiding as usual. The color peeking through the plait gives the braid a finished look, and it hides tiny gaps if your hair is fine at the ends.
Best for: straight, wavy, or slightly textured hair.
Tiny detail that helps: if your hair is very slippery, mist the mids and ends with dry shampoo before you start. Not the roots. The ends. That little bit of grip keeps the braid from unraveling halfway down your back.
One small pull at the edges after you tie it off makes the braid look fuller. Go slow. A rushed tug turns neat into messy in about two seconds.
2. Loose French Braid Pulled Soft at the Sides

A French braid does not have to look строг. That word would be wrong here anyway. The softer version is the one I reach for when long hair needs to stay controlled but still look easy, not school-uniform neat.
Start at the front hairline and gather sections with a little looseness from the beginning. Keep the braid close to the scalp through the top half, then stop adding hair once you reach the nape and finish with a standard braid. After that, gently pull the outer loops outward with your fingertips so the braid widens into a fuller shape.
Why it flatters long hair
Long lengths give the tail some weight, which keeps this braid from puffing out too much. That’s useful. A shoulder-length braid can get fluffy fast; a long braid falls in a more graceful line.
A few face-framing pieces help, too. Leave two thinner strands out near the temples if you want a softer edge. They should sit lightly against the cheekbones, not cling to the face.
Watch for this: if you pull the sides too much, the braid loses its structure and starts looking fuzzy. A little widening is enough. You want relaxed, not unraveling.
3. Dutch Braid Pigtails

Why do Dutch braid pigtails look so full? Because the braid sits on top of the hair instead of sinking into it. That raised shape gives long hair extra presence, and honestly, it makes even simple parts look deliberate.
Part the hair down the center, then braid each side by crossing the outer strands under the middle strand rather than over it. That underhand motion is what creates the lifted ridge. Keep the tension even from the front hairline to the ends, or one side will sit flat while the other side sticks out like it missed the memo.
How to wear them without looking too sporty
- Leave the ends loose and wavy if you want a softer finish.
- Tie each braid with a small clear elastic, then wrap a tiny strand of hair around the base if you want a cleaner look.
- Pull the braid wider only after both sides are finished, so the shape stays balanced.
- Wear them tight when you want them to last through a busy day; wear them slightly looser for a softer, more casual feel.
These are especially good when hair is a little oily at the roots. That extra slip helps the braid slide into place, and the style usually holds better than you’d expect.
4. Fishtail Side Braid Over One Shoulder

If your long hair feels plain in a regular braid, a fishtail braid fixes that without asking for a fancy tool or a complicated setup. It looks intricate because the sections are tiny and layered, which gives the braid that woven, rope-like finish people always notice.
Sweep all the hair to one side and split it into two sections. Then keep taking small pieces from the outside of each section and crossing them over to the other side. The thinner the pieces, the sharper the pattern. The thicker the pieces, the more relaxed the braid looks. Both work.
A side placement changes the whole vibe. Over one shoulder, the braid shows off the length and the texture at the same time. It also keeps the front softer than a center-back braid, which matters if you like a little movement around the face.
Best pairing: loose waves, a little texture spray, and a collar or neckline that shows the braid off. A high-neck top can swallow the detail.
5. Crown Braid Around the Hairline
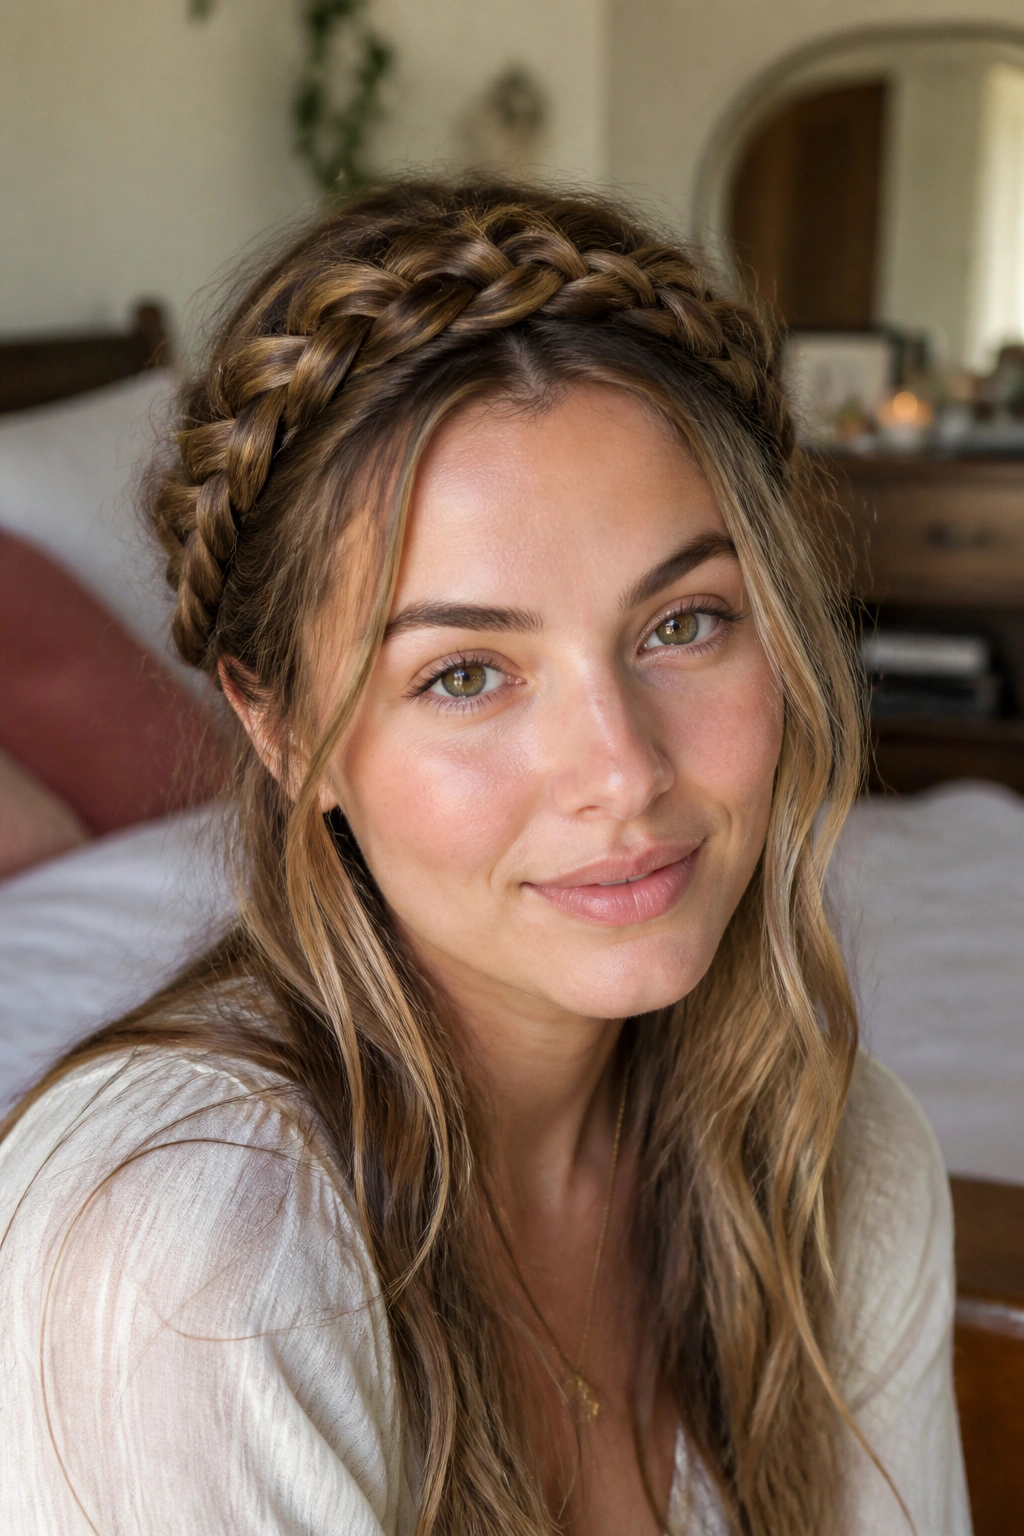
A crown braid does not have to feel formal. That’s the mistake people make. On long hair, a crown braid can look almost casual if you keep it loose enough and let a few fine pieces escape around the temples.
Braid along the hairline from one side of the head to the other, following the curve of the skull. If your hair is extra long, you can make the braid wrap fully around the crown and pin the end underneath the opposite side. The length does the heavy lifting here. Without it, the style can feel too small for the head shape. With it, the braid becomes a frame.
I like this one when the ends of long hair are getting dry or a little rough. Tucking the length into the braid gets the ends out of sight without making the style look like a severe updo.
A few loose tendrils around the ears soften the whole thing. Keep them thin. Thick face-framing pieces can fight the braid and make the style look heavy.
6. Waterfall Braid with Loose Waves
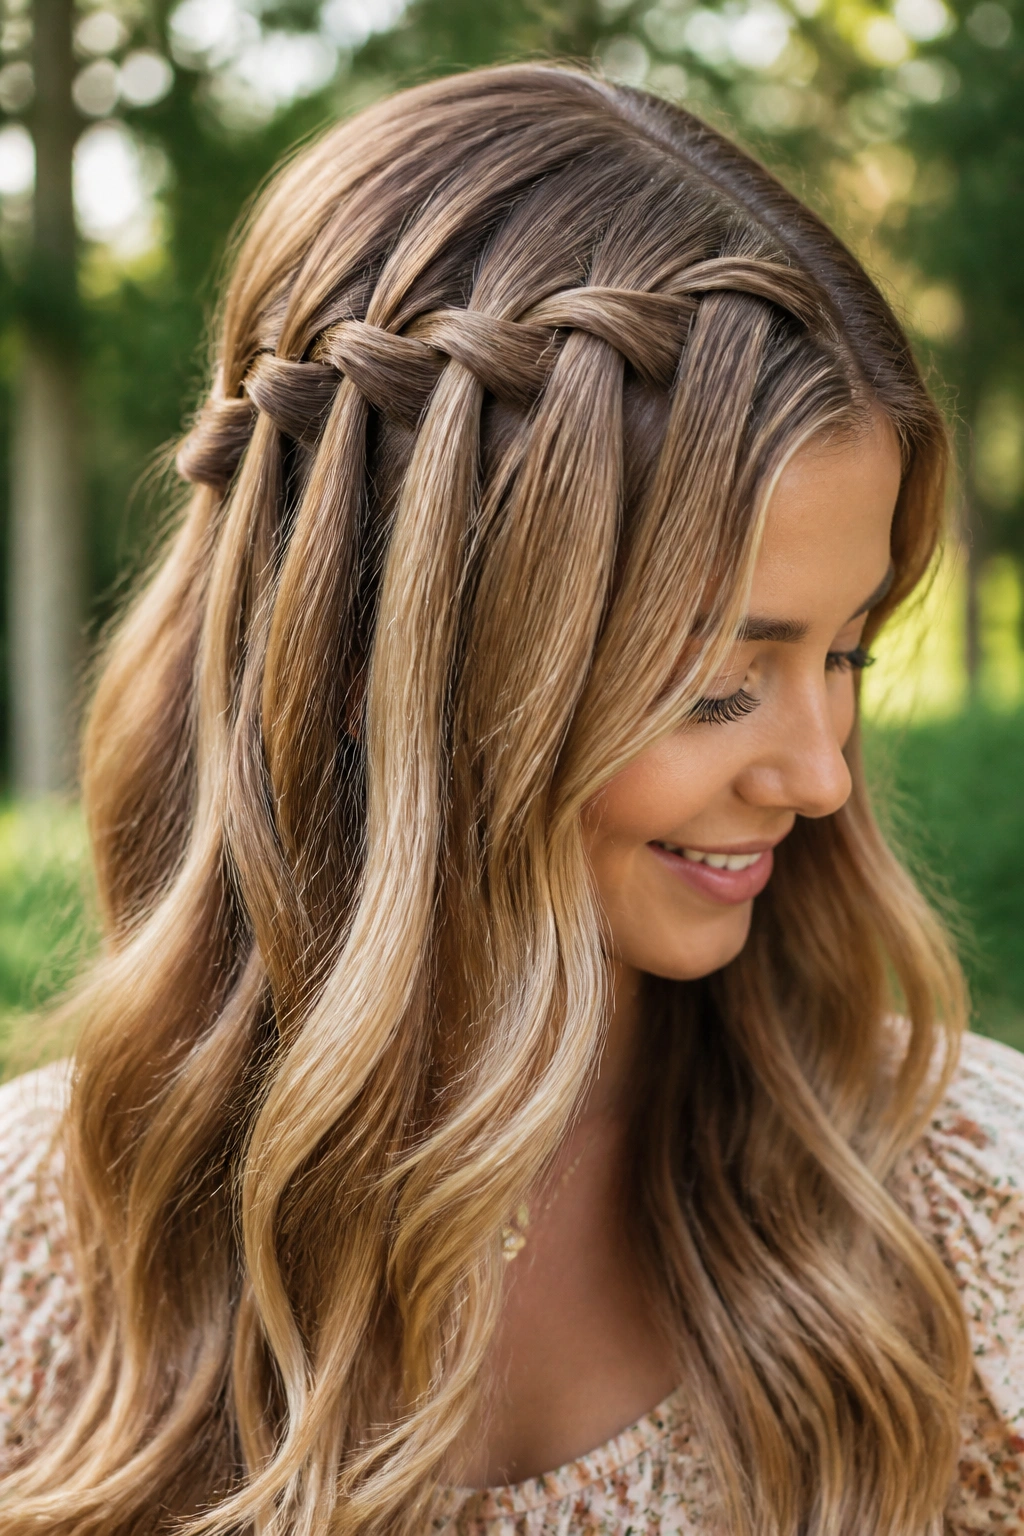
A waterfall braid gives you that pretty, laced look across the top while letting the rest of the hair keep moving. It’s one of the better choices when you want braid detail without giving up the feel of long hair.
The braid works by dropping one strand each time you make a pass, then picking up a fresh section to keep the pattern going. That leaves little openings where the loose hair shows through, almost like the braid is floating on top of the length. On wavy hair, the effect is especially nice because the loose sections echo the braid’s shape instead of sitting flat.
What makes it hold
- Start with hair that has a little grip, not hair that was just blow-dried into a glassy finish.
- Use a fine-tooth comb for the first section so the braid has a clean line.
- Pin the end firmly under a top layer if your hair is heavy.
- Mist the finished braid lightly with flexible-hold spray, then let it set for a minute before touching it.
The style is delicate, but not fragile if you anchor it well. That part matters. Otherwise the braid slides sideways and loses the whole waterfall effect.
7. Pull-Through Braid for Very Long Hair

A pull-through braid is the style I recommend when someone says their hair is “too long” for a braid. It’s not too long. It’s just heavy. This braid handles that weight better than most because it builds volume with elastic ties instead of tight crossing.
Make a small ponytail at the top, then another directly underneath it. Split the top ponytail into two halves, pull the second ponytail up through the center, and clip the halves out of the way before adding the next section down. Keep repeating until you run out of hair, then tug each segment wider so the braid looks full and rounded.
This style is forgiving. That’s the selling point. The sections can be a little uneven and still look good once they’re fluffed. If your hair is fine, it can fake a lot of thickness. If your hair is thick, it makes the braid feel almost architectural.
Use clear elastics and match them carefully. Visible neon bands ruin the look fast. And yes, they show more than you think in long hair.
8. Rope Braid Ponytail
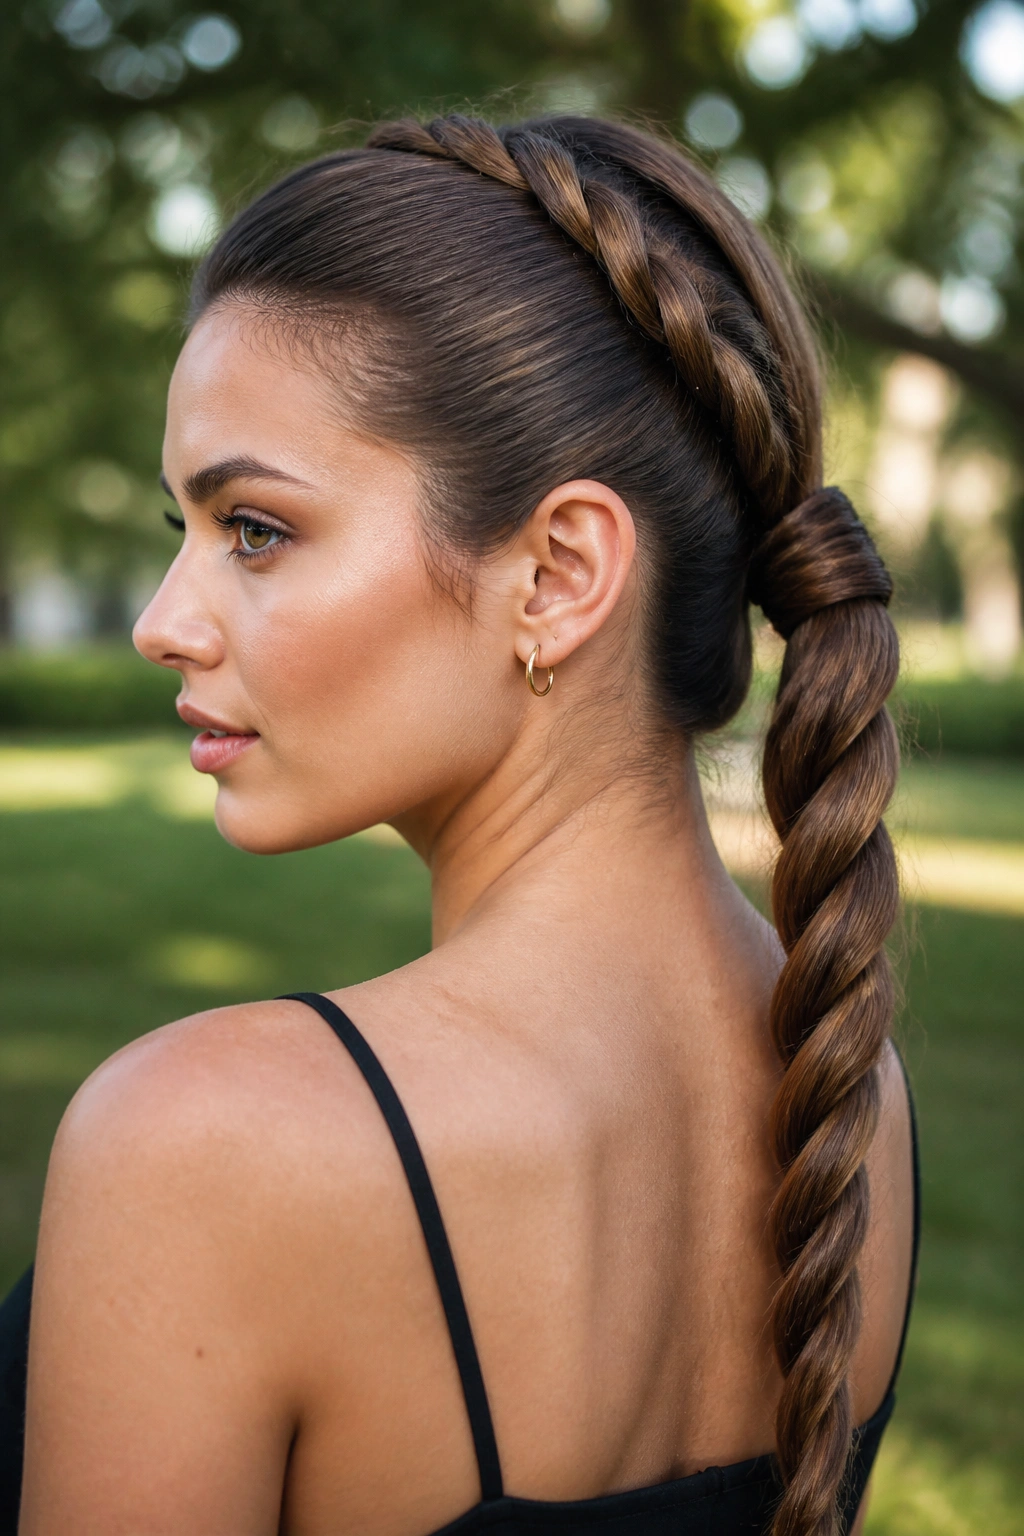
Why does a rope braid look so polished even though it only uses two sections? Because the twist creates a tight spiral that stays smooth and neat, especially on long hair that tends to frizz at the ends.
Gather the hair into a low, mid, or high ponytail, split it in two, twist both sections in the same direction, then wrap them around each other in the opposite direction. That opposite twist is what keeps the rope shape intact. If you twist both steps the same way, the whole thing loosens and starts to look tired within an hour.
A rope braid works well when you want something sleek but not severe. It has a little edge to it. Less polished than a classic braid, more interesting than a plain ponytail.
If your hair is layered, smooth the top with a light cream before you start. The ends can stay a little airy. The base should be clean, though, or the twist starts to separate near the crown.
9. Boxer Braids for Long Hair

Boxer braids can look very sharp or very casual depending on how tight you braid and how much shine you leave in the hair. On long lengths, they’re practical first and cute second, which is probably why they stick around.
Part the hair straight down the middle. Then Dutch braid each side from the front hairline back to the nape, keeping the section size even so the two braids look balanced. A tiny dab of gel or styling cream at the part helps keep flyaways from breaking up the clean line. That little detail matters more than people think.
Best product pairings
- A lightweight gel at the roots for a crisp part.
- A smoothing cream on the mid-lengths if your hair puffs up in humidity.
- Small elastics that blend into your hair color.
- A tail comb for the part, because finger parts get crooked in a hurry.
These braids are one of the most useful styles for long hair when you need everything out of your face and still want the style to read as intentional. They’re not soft and romantic. Good. Sometimes that’s exactly the point.
10. Half-Up Braided Halo

Half-up styles can get boring when the braid is too thin to matter. A braided halo fixes that by giving the top half of the hair real shape while the rest stays loose and visible.
Take a section from each temple, braid them separately, then bring them back and pin them together at the back of the head like a soft crown. The loose lengths underneath balance the structure on top. If your hair is very long, the bottom half adds enough weight that the style won’t feel too puffy.
This one works especially well when you want to show off waves or curls. The braids keep the sides controlled, but the rest of the hair still moves. That mix is the reason it feels cute rather than stiff.
A small trick: curl the loose lengths first, then braid. The contrast between the soft waves and the tighter braid detail makes the style look fuller without adding much effort. The braid itself can stay fairly narrow; the shape comes from the placement.
11. Milkmaid Braids
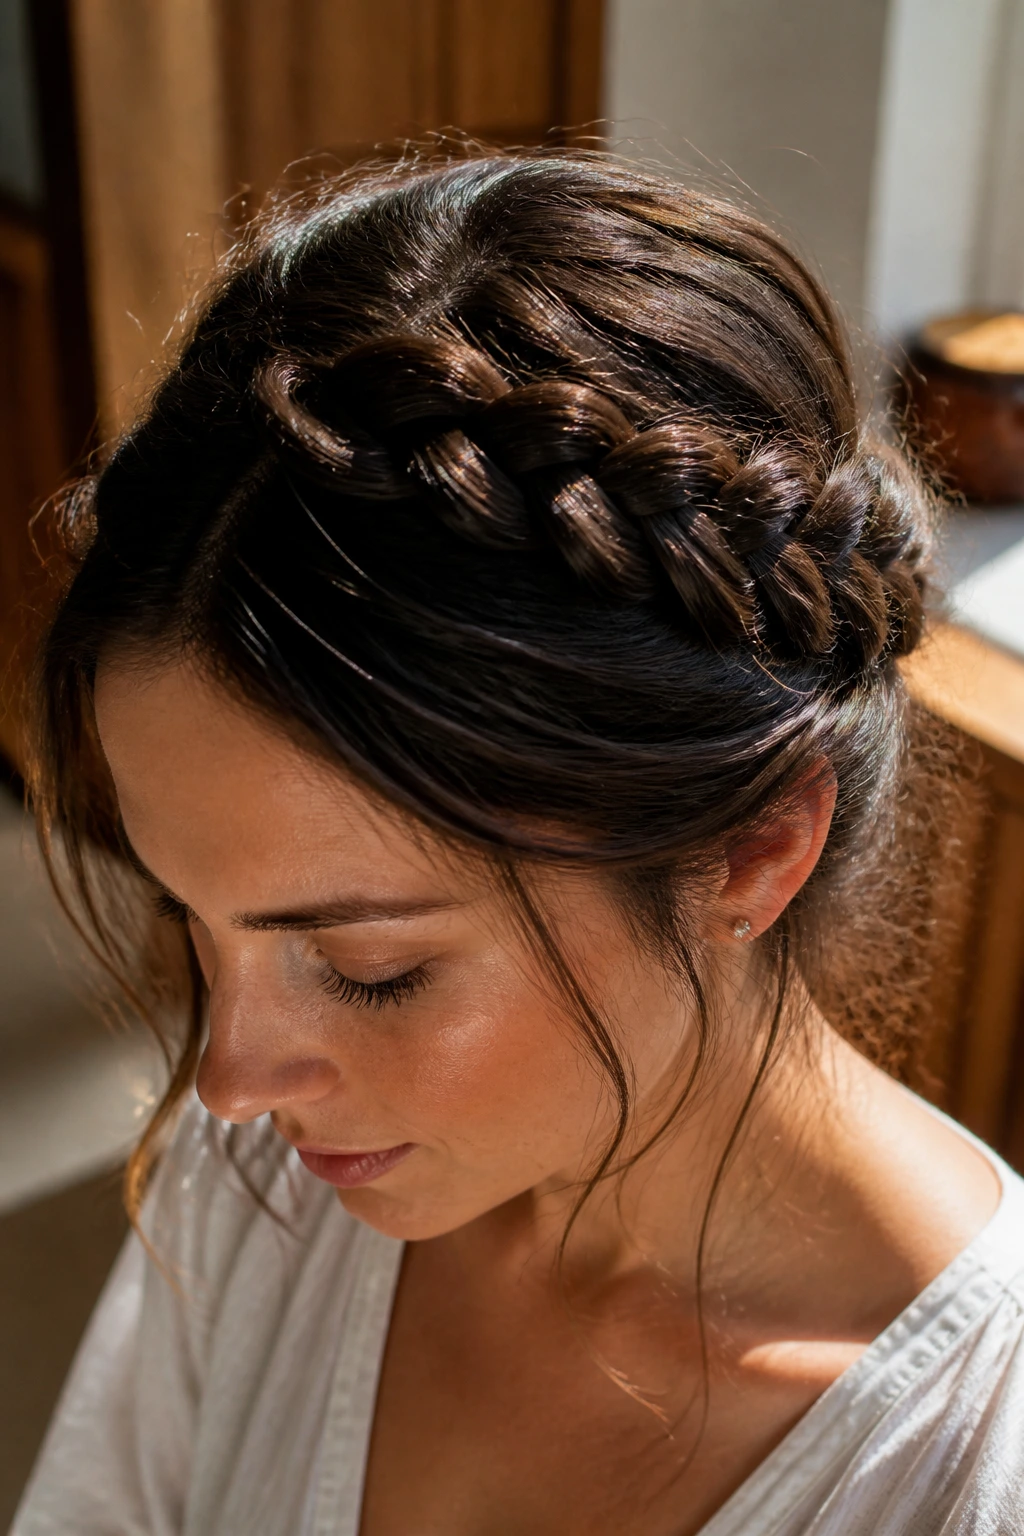
Milkmaid braids are one of the fastest ways to make long hair look finished without pulling every strand tight against the scalp. The trick is simple: braid two pigtails, lift them up and over the head, then pin them across the crown.
The style works because long hair gives you enough length to wrap the braids neatly without forcing them flat. Shorter hair can struggle here. Long hair gives you the extra inch or two that keeps the braid soft instead of cramped.
Leave the braids a little loose before you pin them. If they’re over-tight, the final shape sits too high and can feel old-fashioned in the wrong way. A few wisps near the ears keep the look relaxed. Not messy. Relaxed.
I also like this style when the ends of the hair are dry or ragged. The tucked sections hide what you don’t want to show, and the crown becomes the main event. That’s a useful trade when your ends are not cooperating.
12. Braided Low Bun

Want your hair off your neck without looking like you ran out of time? A braided low bun is the answer I keep coming back to. It starts as a braid, then folds into a bun at the nape, which gives the style structure before you pin it down.
Braid the hair from mid-lengths or from the base of a low ponytail, then coil the braid around itself and secure it with bobby pins. If you want a softer finish, stop the braid a few inches before the ends and let the tail tuck into the bun. That keeps the shape round rather than rope-like.
Where it works best
- Long workdays when you need the style to survive a chair, a coat, and a headset.
- Warm rooms, because the nape stays clear.
- Events where you want polished hair without a tight chignon.
- Second-day hair, especially if the roots have a little grit.
The biggest mistake is pinning only the outer edge. Pin through the bun in two or three directions so it stays put. Heavy long hair will drag a weak bun down in minutes.
13. Lace Braid into a Soft Ponytail

A lace braid is just a French braid that adds hair from one side only, which creates a clean sweep across the head. On long hair, that sweep can become the prettiest part of the style because it leads the eye straight into the ponytail.
Start at one temple and braid along the hairline, adding hair only from the top side as you move back. When you reach behind the ear or the crown, stop adding sections and gather everything into a ponytail. The result is neat at the front and loose at the back, which is a nice balance if you want the length to stay visible.
This is one of my favorite “meetings in ten minutes” styles. It looks composed, but it does not take the whole head hostage. A sleek elastic and a wrapped strand around the base finish it off cleanly.
If your hair has layers, the lace braid keeps the shorter pieces in place better than a bare ponytail does. That alone makes it worth trying.
14. Five-Strand Braid

A five-strand braid sounds more complicated than it feels once you get the rhythm. And that’s the surprise: it looks woven and detailed, but the structure is still just organized handwork, not magic.
Because there are more sections, the braid comes out flatter and more ribbon-like than a three-strand braid. On long hair, that wider shape is a gift. The extra length lets the pattern stretch out instead of bunching up near the top. You get detail all the way down.
What makes it different
The braid has a little more visual texture than a standard plait, so it’s a smart choice when your hair is very smooth and a regular braid would look too simple. It also works well if you want a style that reads as special without needing pins or accessories.
Take your time on the first few passes. Once the pattern clicks, it moves faster than people expect. The only real problem is tension. Pull too hard and the braid gets stiff; keep it too loose and the pattern blurs. Somewhere in the middle is the sweet spot.
15. Infinity Braid Accent

An infinity braid is small enough to feel like a detail and interesting enough to make the whole style look considered. I like it as an accent rather than the entire hairstyle, especially on long hair where one neat braid can anchor loose lengths beautifully.
The braid forms an elongated figure-eight pattern, which gives it that looped look. It works best near the side of the head or across the back as a half-up feature. Because it’s compact, it pairs well with soft waves, straight lengths, or even a low ponytail.
The nice thing here is restraint. You do not need to cover the whole head with braiding to make the style feel special. One well-placed infinity braid can do the job, and it keeps the rest of the hair free, which matters if you like motion.
If your hair is very layered, use a light cream or spray wax on the top sections first. The braid needs a little control to keep the loops crisp. Without it, the pattern gets fuzzy fast.
16. Bubble Braid with Tiny Braid Details
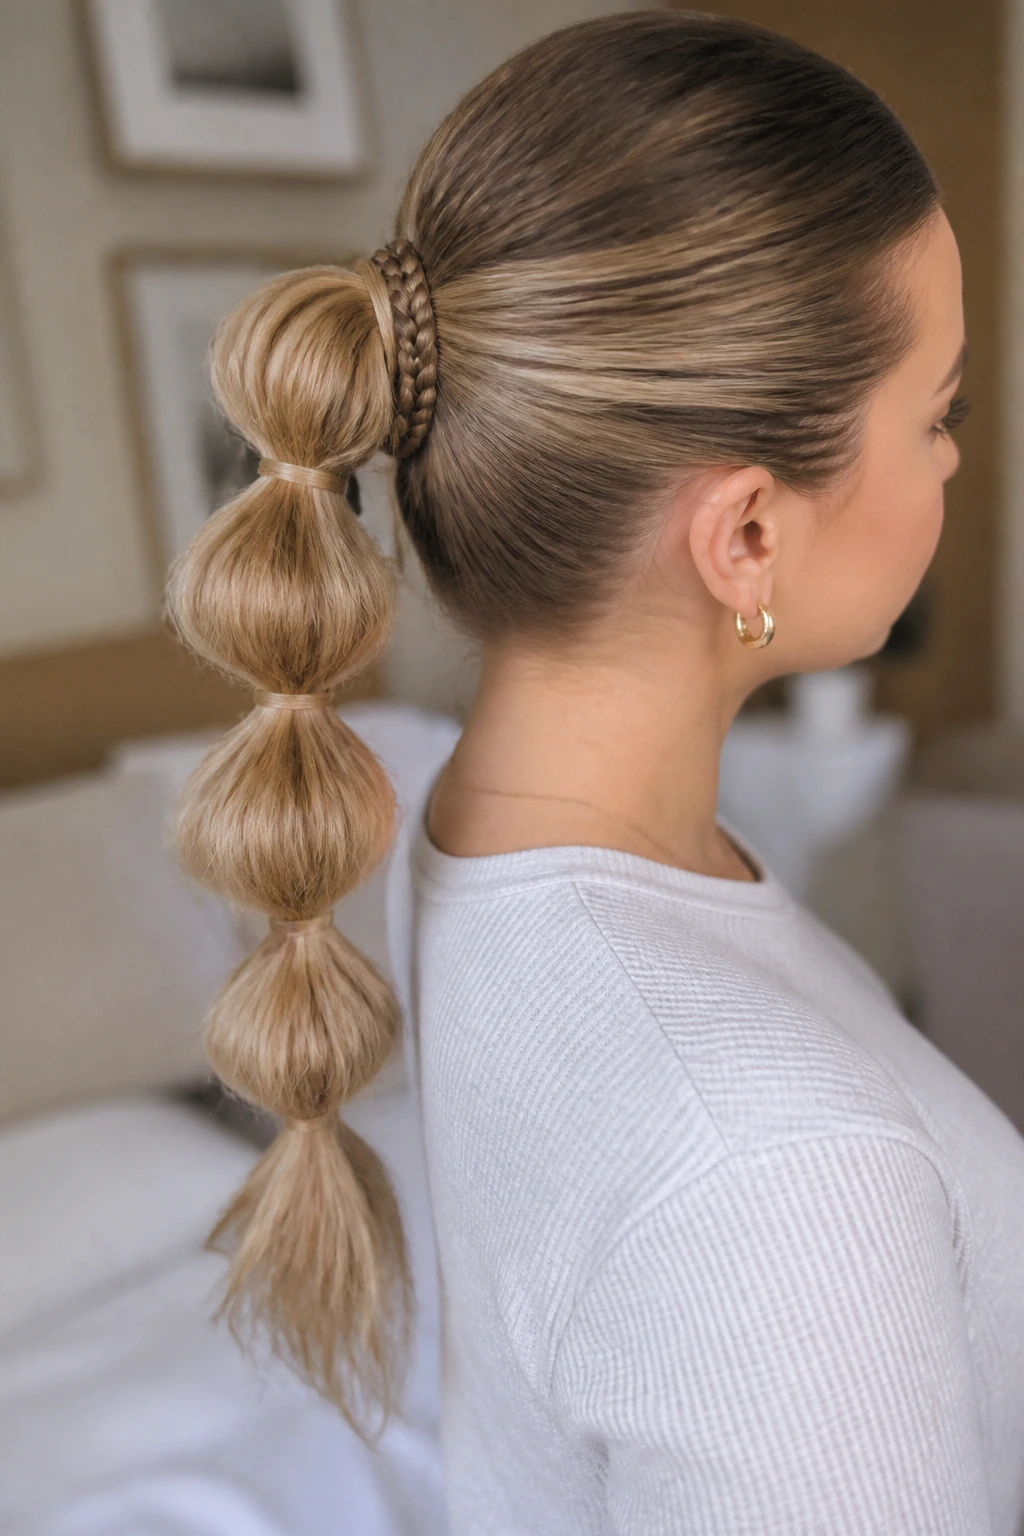
A bubble braid can look playful without looking childish, which is a hard balance to find on very long hair. Add a tiny braid near the part or along one side, and the whole style gets more texture without turning fussy.
Build a ponytail first, then tie clear elastics down the length every few inches. Gently tug each section between the elastics so the hair rounds out into bubbles. The tiny braid can sit beside the ponytail base or run down one side before joining the main section. Either way, it gives the style a little extra line work.
Best trick: keep the bubbles even, but not identical. A slightly larger bubble near the crown and smaller ones lower down look more natural than a perfectly matched set.
This style is especially good for thick long hair because it shows off the density instead of flattening it. If your hair is fine, it still works—just rough up the sections a bit more so the bubbles have shape.
17. Side French Braid into a Messy Bun

There’s something good about a braid that refuses to stay precious. A side French braid feeding into a messy bun gives you that slightly undone feel while still controlling the front and sides.
Start the braid at one temple and work it back along the hairline toward the ear. Once you reach the nape, gather the rest of the hair into a low bun and pin it loosely. A few ends can stick out. That’s fine. Actually, that helps. The bun looks less staged when the braid transitions into something softer at the back.
This is a strong option for long hair because the braid gives the bun extra grip. A plain messy bun on long hair can droop under its own weight. The braid acts like a spine, which keeps the bun from collapsing by midday.
Leave one or two thinner pieces around the face if you want the style to feel less severe. Not chunky pieces. Thin ones. The difference matters.
18. Braided Ponytail Wrap

A braided ponytail wrap is one of those styles that makes people think you spent more time than you did. It’s simple, and that’s exactly why it works.
Pull the hair into a ponytail first. Then braid a narrow section from the ponytail itself, or use a small side section before tying everything together. Wrap that braid around the elastic until the base is hidden, then pin the end underneath. The ponytail looks cleaner immediately, and the braid gives the style a finished edge.
Why I like it: it solves the ugly-elastic problem. Plain elastics can make long hair look abruptly cut off. A braid wrapped around the base smooths that transition.
Use this with straight hair, waves, or curls. It does not fight texture. If anything, it gives the ponytail a more intentional shape. And if the lengths are very long, the ponytail swings with more presence, which is half the fun.
19. Micro Accent Braids in Loose Lengths

Not every braid has to take over the whole head. Micro accent braids are tiny, tucked-in details that sit inside loose long hair and create a little surprise when the hair moves.
Take one or two skinny sections near the temples or behind the ears, braid them tightly, and leave them woven into the rest of the hair. You can keep them plain or add a bead at the end if that suits your style. The point is contrast: a little structure inside all that loose length.
What to watch for
- Keep the tension gentle at the root.
- Do not add too many braids or the style loses its charm.
- Space them out so they show when the hair shifts, not all at once.
- Match the braid size to your texture; ultra-fine braids disappear in thick curls.
This style is one of the easiest ways to make long hair feel styled without changing the whole shape. It works especially well on waves because the braids sit against the texture instead of fighting it.
20. Reverse French Braid Updo
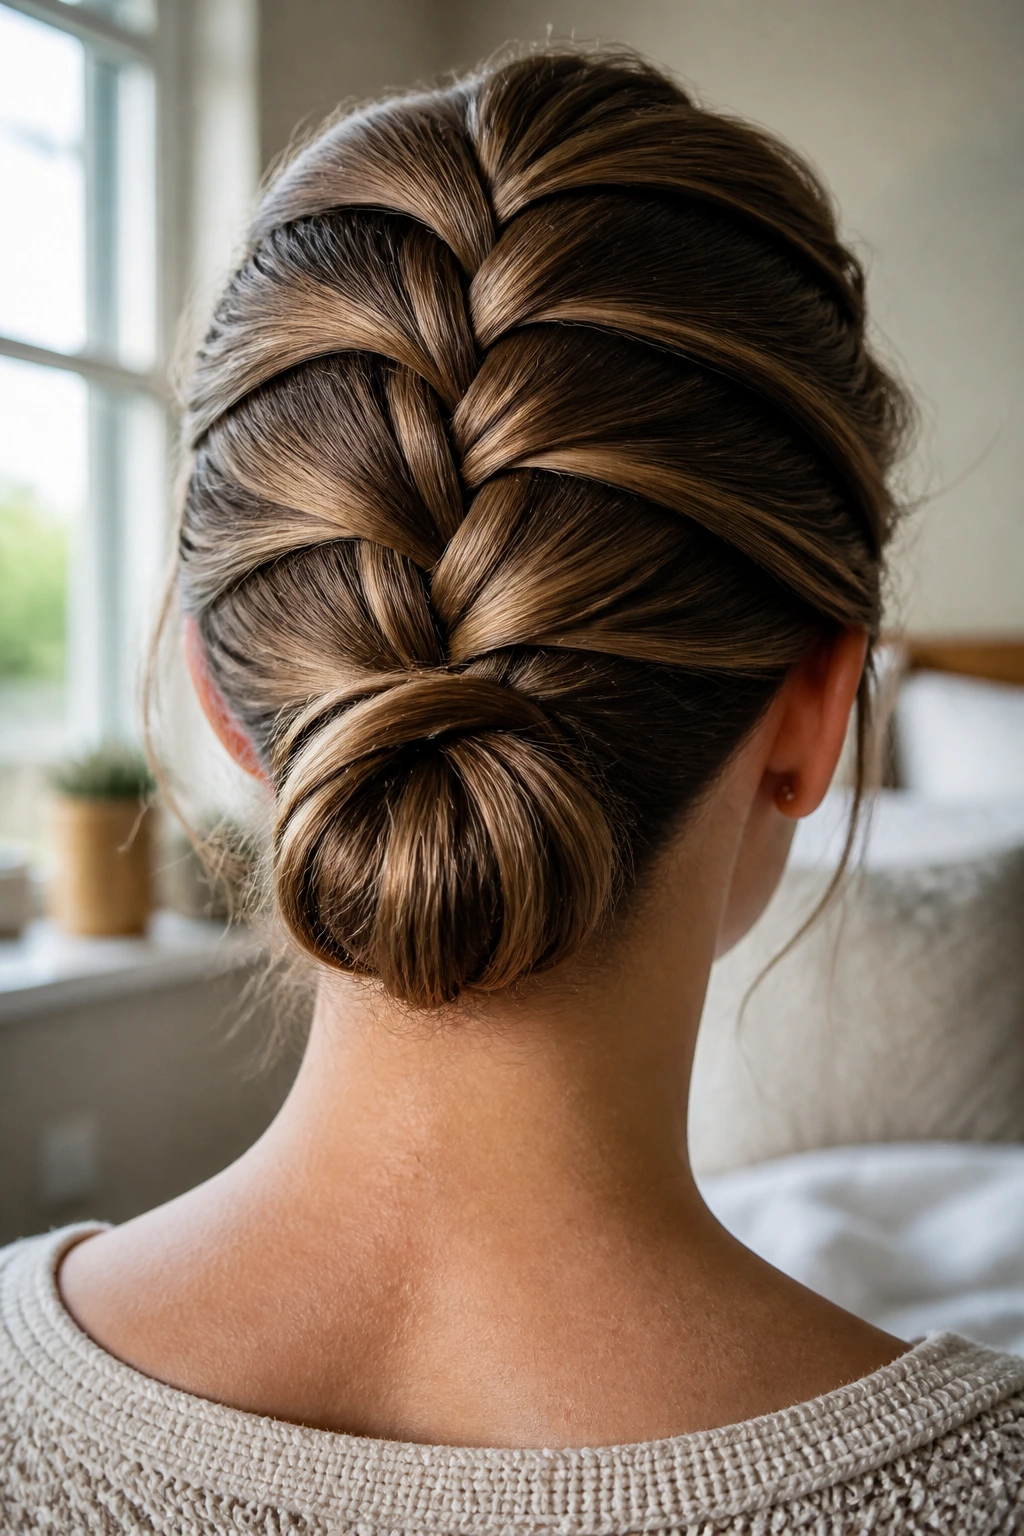
If your hair slips out of buns the second you move, a reverse French braid updo gives the style some grip before the pins go in. Start at the nape and braid upward toward the crown, which sounds awkward until you do it once or twice. Then it starts to make sense.
The reverse direction helps gather heavy long hair into the center of the head instead of letting it drag everything down. Once the braid reaches the crown, twist the remaining length into a bun or tuck it under itself and pin it flat. The braid becomes the anchor point.
This is a smart style for thick hair, especially if the ends are a little bulky. The braid compresses the volume, and the updo keeps the shape from spreading out too wide.
Use a hand mirror if you need to check the braid line at the back. The first few times, the angle can feel clumsy. After that, it becomes one of those styles you can do without thinking too hard, which is exactly how the best hair routines behave.
21. Heart Braid Half-Up
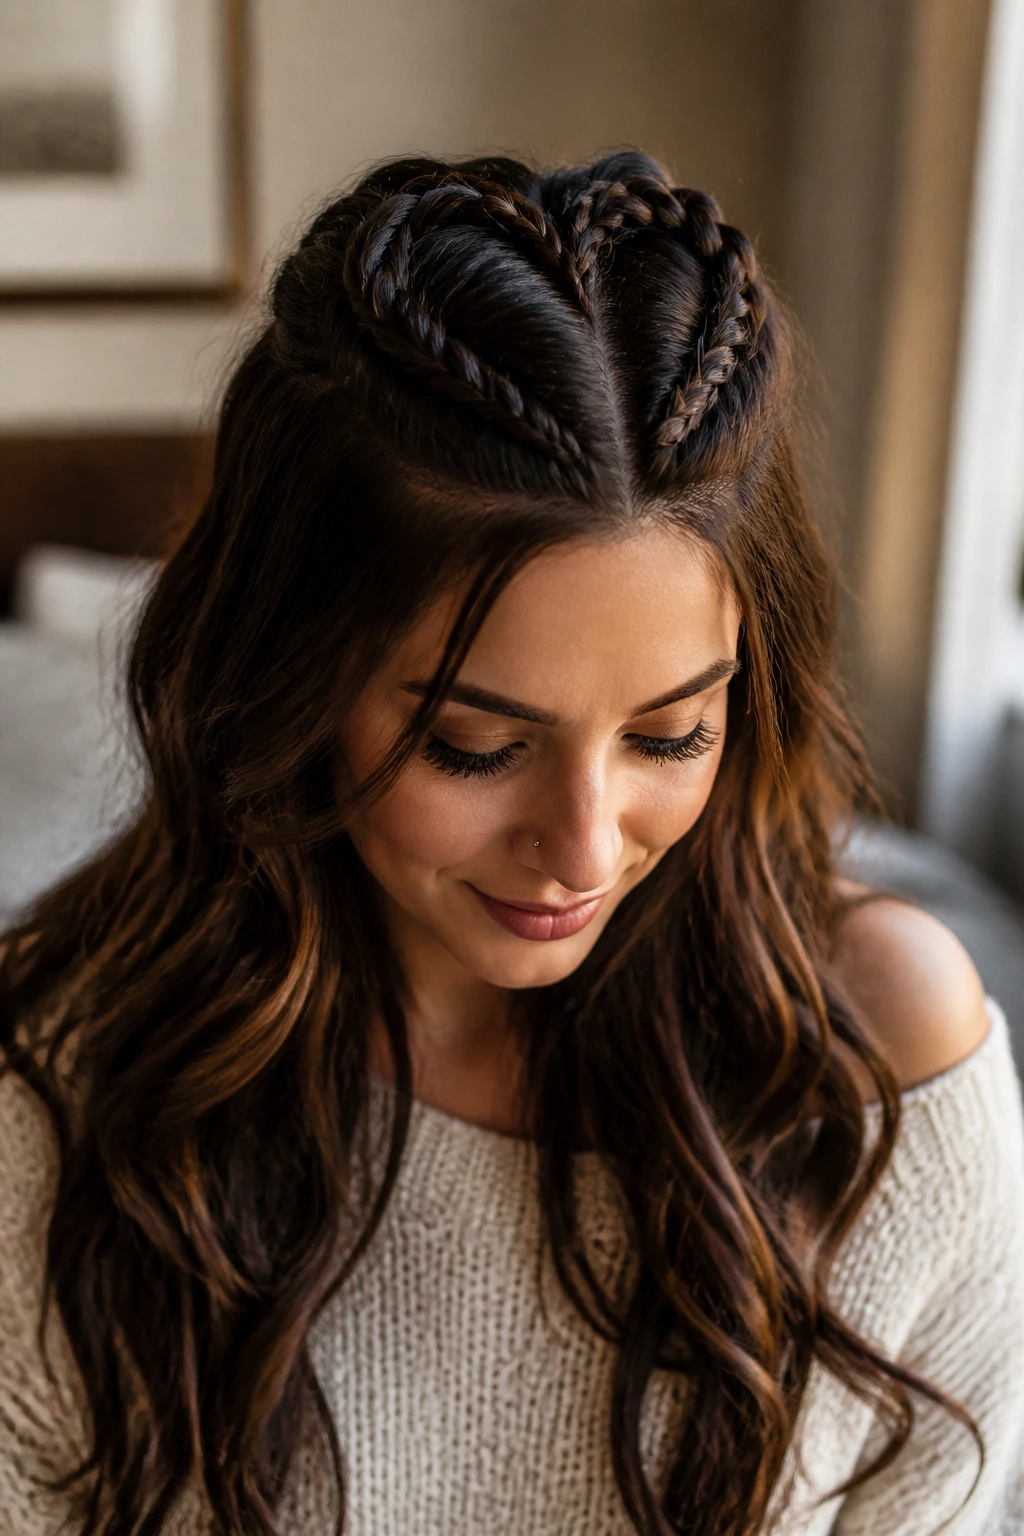
A heart braid half-up looks playful in a way that still feels grown-up if you keep the rest of the hair soft. Long hair gives you enough material to shape the loops clearly, which is what makes this style work better here than on shorter lengths.
Split the top section into two curved braid paths that meet at the center back of the crown, then pin them so they form the top lobes of the heart. The lower point comes from the way the sections converge. It sounds fiddly, and yes, it takes a few pins. But once the shape is secure, the style has a clear outline without needing a ton of extra decoration.
Good places to wear it
- Date nights.
- Parties.
- Photos with friends.
- Any day you want your hair to look like you actually had a plan.
Keep the bottom lengths loose and lightly waved if you want the heart shape to stand out. Straight, flat hair can make the top look too hard.
22. Snake Braid Along the Crown
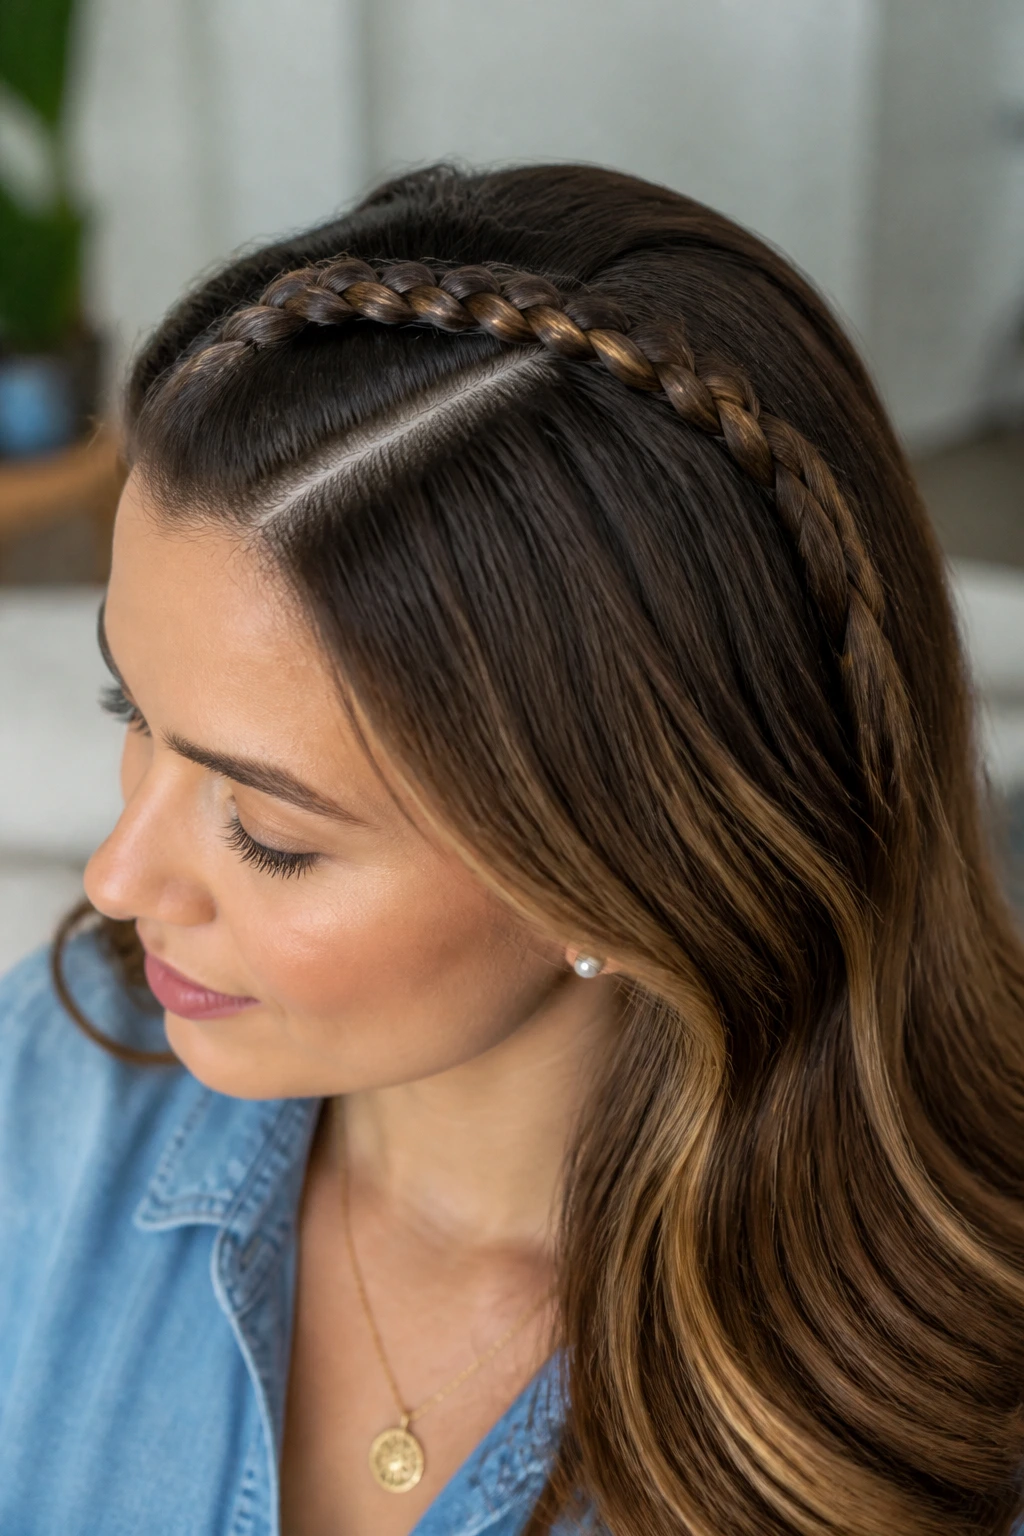
A snake braid has a strange little drama to it. The braid starts as a thin plait, then gets pushed and pulled so it bends across the hair like a ribbon with a pulse. On long hair, the effect is better because the length gives the braid room to curve.
This is best as an accent braid across the crown or near one side of the part. The braid stays visible, but it does not take over the whole head. That keeps the look from feeling costume-like, which is where snake braids can go wrong if they’re too big or too centered.
The key is tension. The braid should sit flat against the surface before you start shaping it. Once it’s in place, the bends feel intentional instead of random. Too much fluff, and the pattern disappears.
If you like styles that look a little different but still wearable, this is a good one. It is not subtle in the boring sense. It just knows where to stop.
23. Braided Space Buns
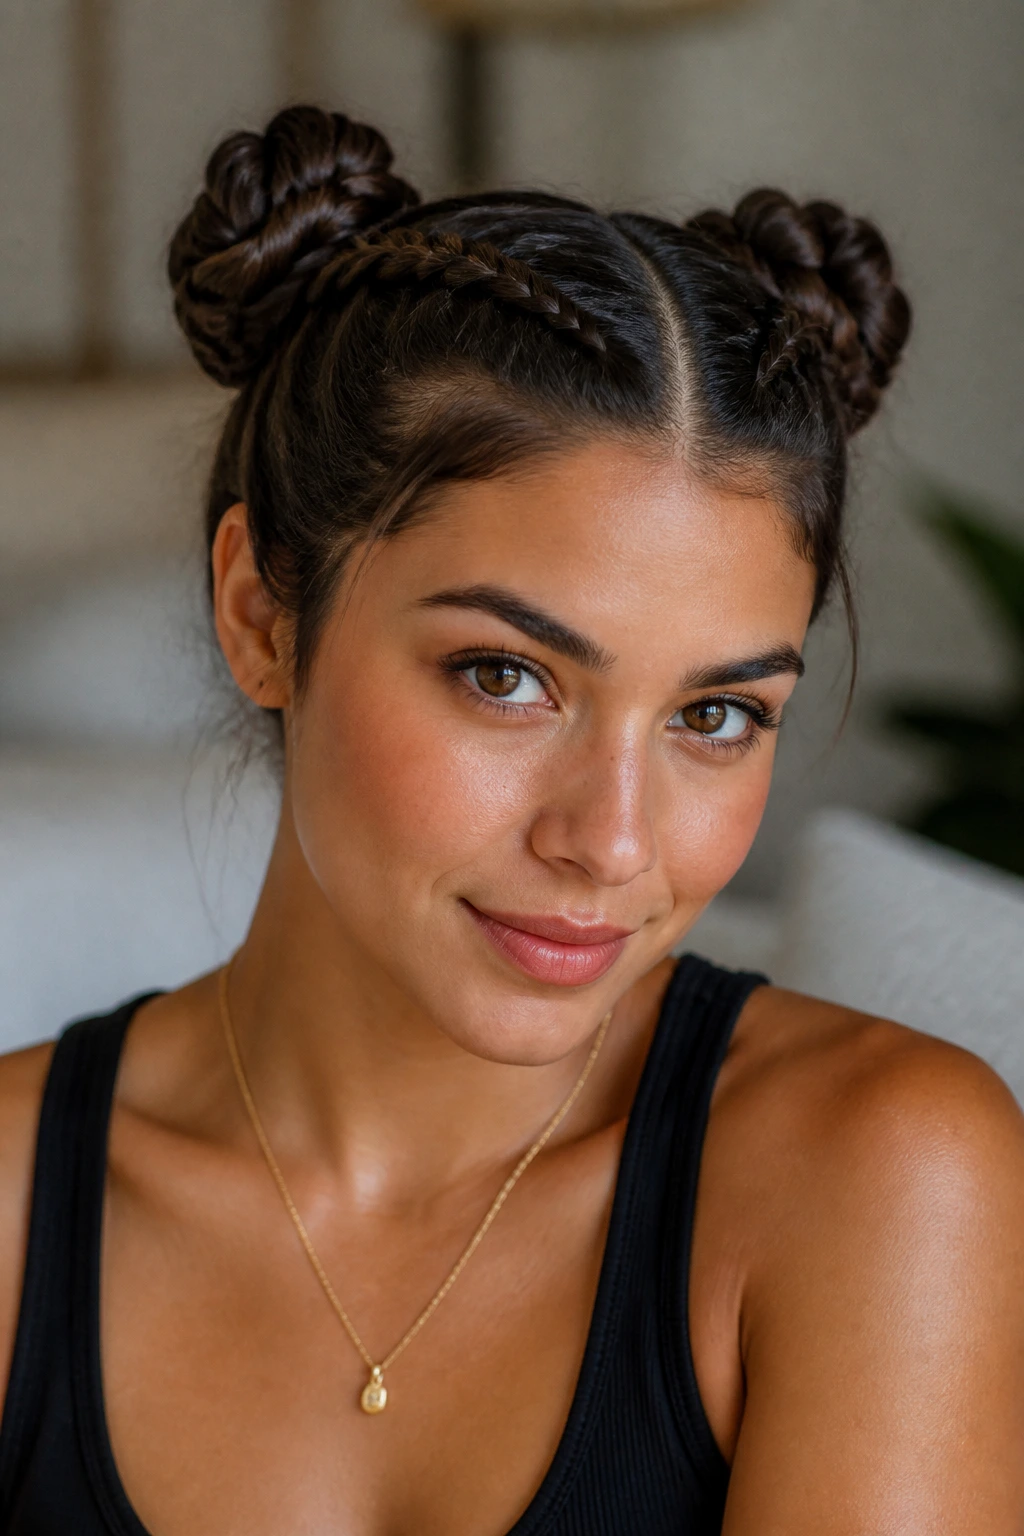
Two small buns can feel childish fast. Add braids, and they get a cleaner shape and a little more edge. That’s why braided space buns work so well on long hair: the braids control the sections before they coil up, which keeps the buns from looking puffy or shapeless.
Part the hair down the middle, braid each side into pigtails, then coil each braid into a bun above the ears or higher on the head. Pin the buns tightly underneath, and smooth the part if you want the style to look sharper. If you want it softer, leave a few short pieces around the face and loosen the buns slightly.
Small warning: heavy long hair can pull space buns downward if you under-pin them. Use more pins than you think you need. Two pins is wishful thinking. Four or five per bun is safer.
This style has a fun, slightly playful feel without needing bright accessories. That makes it a lot easier to wear than people assume.
24. Double Fishtail Half-Up

You do not need a full updo to make fishtail braids interesting. A double fishtail half-up takes the best part of the texture and leaves the rest of the length free, which is a nice balance on long hair.
Take one fishtail braid from each side of the head, start around the temples, and bring them to the back. Tie or pin them together, then let the loose hair fall underneath. The braids frame the top half of the head and keep the sides neat, while the lower length stays loose and soft.
This style works well when the ends of the hair look better than the roots. It gives you a chance to show off the nice parts and control the parts that need help. That’s practical styling, which I always prefer to styling that asks the hair to be perfect from root to tip.
If your hair is textured or wavy, the contrast between the fishtails and the loose length is especially good. The braid detail reads clearly, even from a distance.
25. Soft Boho Halo for Long Hair
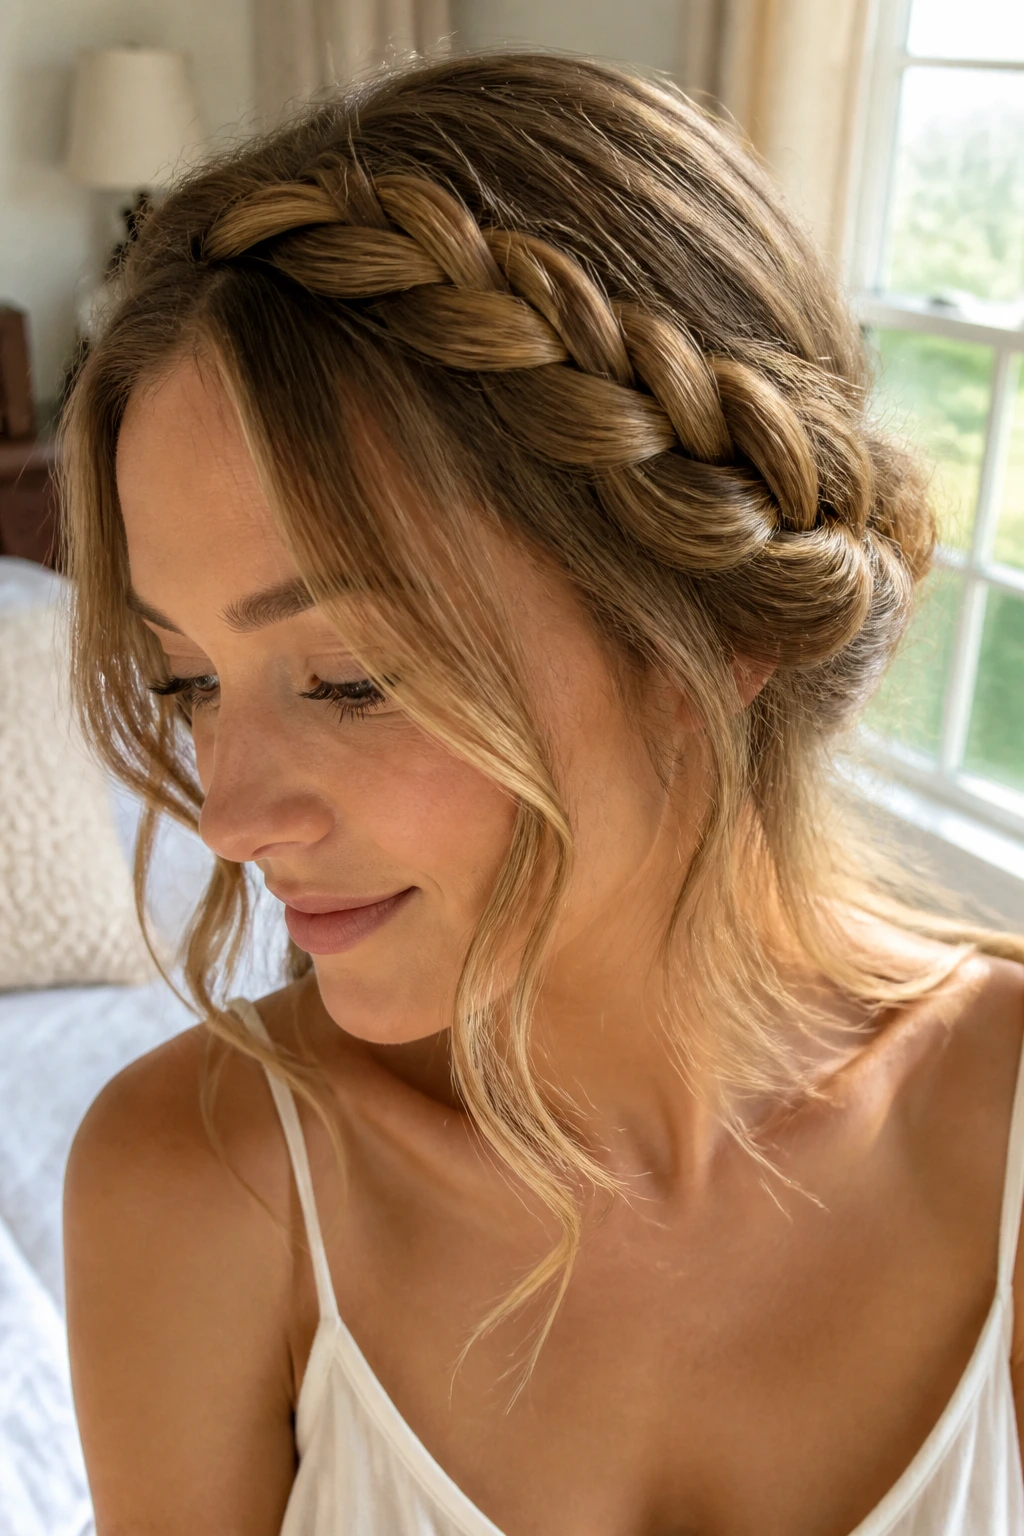
A soft boho halo is what I reach for when I want a braid to feel relaxed instead of polished. It wraps around the head like a loose crown, but it leaves face-framing pieces out and keeps the edges a little airy so the style never feels trapped.
Braid across the top or along one side, then pin the braid loosely around the crown. Let the ends tuck under the hair instead of showing. The best version of this style does not sit too high. It should follow the shape of the head and blend into the length below it.
This is the braid I’d choose for hair that has a little wave, a little texture, and maybe a few pieces that refuse to behave. That is fine. Those pieces are part of the look. Pin the braid, soften the temples, and leave the rest alone.
Long hair makes this style especially pretty because the braid has enough length to travel. Short hair can look like it stops halfway. Long hair gives the halo a full path, which is why it lands so nicely.
Some hairstyles want to be noticed from across the room. This one doesn’t. It just sits there, calm and a little undone, and that’s often the better move.
