



A hard center part can make a round face feel wider than it is. Side swept hairstyles for round faces do the opposite: they cut across the face on a diagonal, pull the eye upward, and make room for a little lift at the crown. That diagonal line matters more than people think. It changes the whole read of the style.
The trick is not to hide your face. That’s the mistake I see most often. A heavy curtain of hair pinned flat across the forehead usually makes the cheeks look fuller, not slimmer, and a part that sits too low can drag everything downward. What works better is a shape with movement: a deep side part, a sweep that starts near the eyebrow, a bit of height at the roots, and ends that fall below the jawline.
Hair texture changes the details, but the idea stays the same. Straight hair likes clean angles. Wavy hair likes softness with structure. Curly hair needs enough length and layering so the sweep doesn’t puff out at the sides. Tiny adjustments make a big difference.
1. Deep Side Part with Long Face-Framing Layers
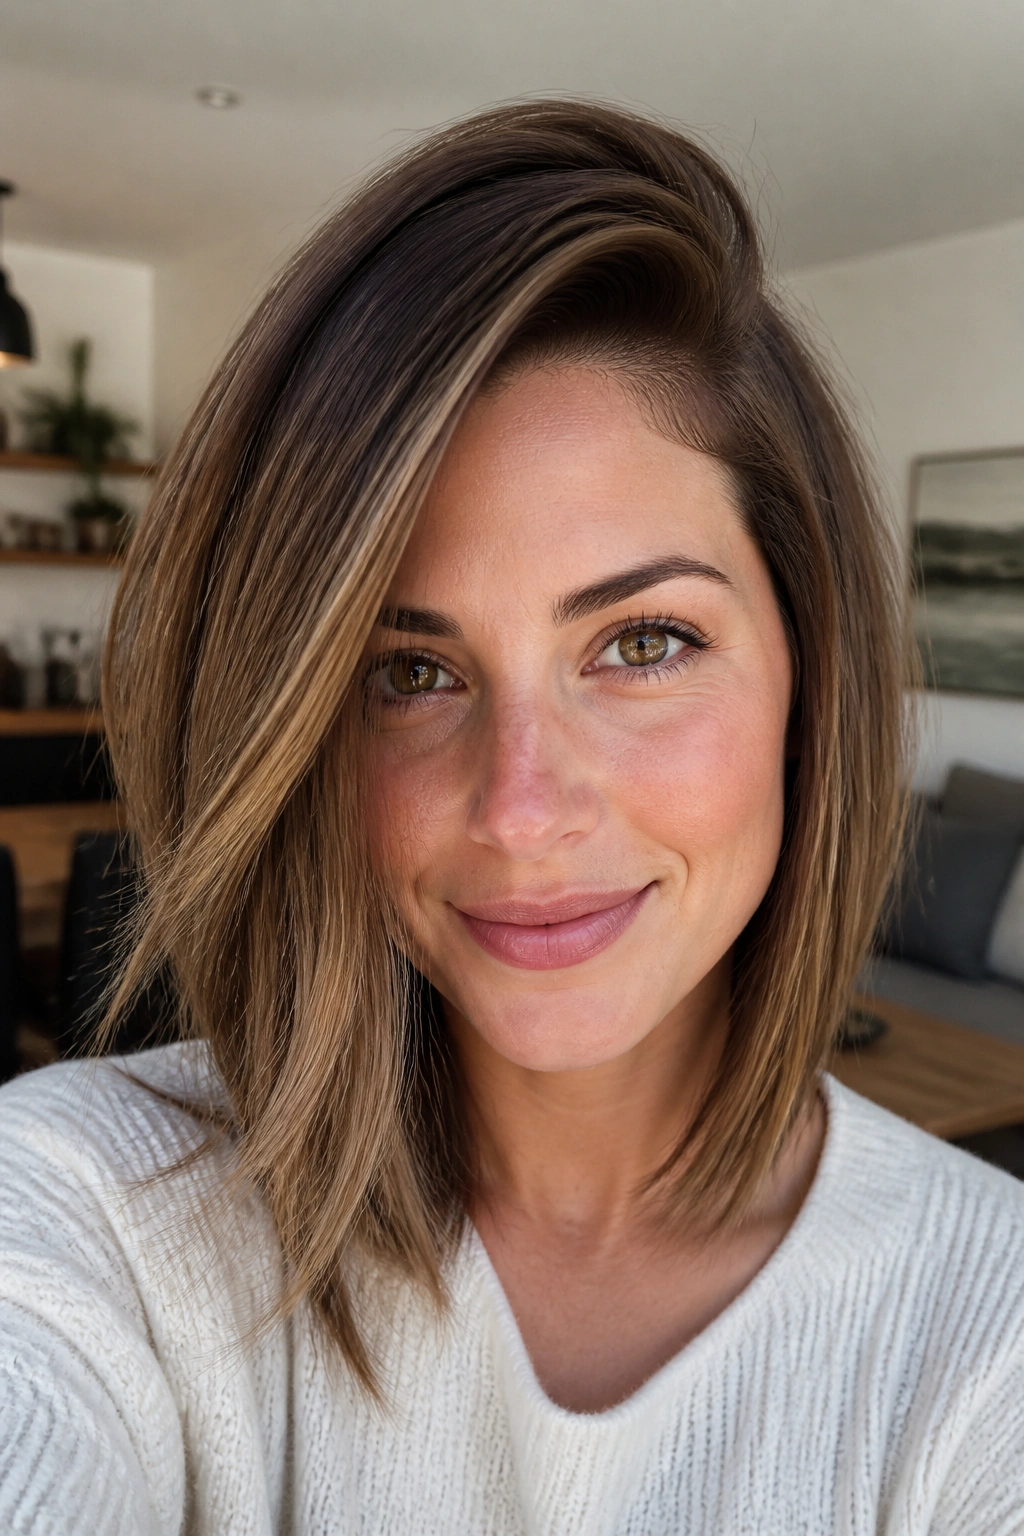
A deep side part is one of the easiest ways to break up the fullness of a round face. It creates a long diagonal line from the crown down toward the cheekbone, which is exactly the kind of shape that gives the face more length.
Why the angle matters
The part should sit a little above the outer edge of one eyebrow, not way back on the crown. That placement gives you lift at the top without making the style look severe. Long layers that start below the chin keep the sides from flaring out where you do not want extra width.
A lot of people stop at the part and forget the ends. Don’t. The layers need to fall past the jaw so the eye keeps traveling downward.
- Ask for face-framing pieces that begin around the mouth or chin.
- Blow-dry the top away from the part first, then direct it back.
- Use a 1½-inch round brush if your hair is straight or barely wavy.
Bold tip: keep the crown airy. Flat roots undo the whole effect fast.
2. Side-Swept Curtain Bangs on a Collarbone Lob for Round Faces
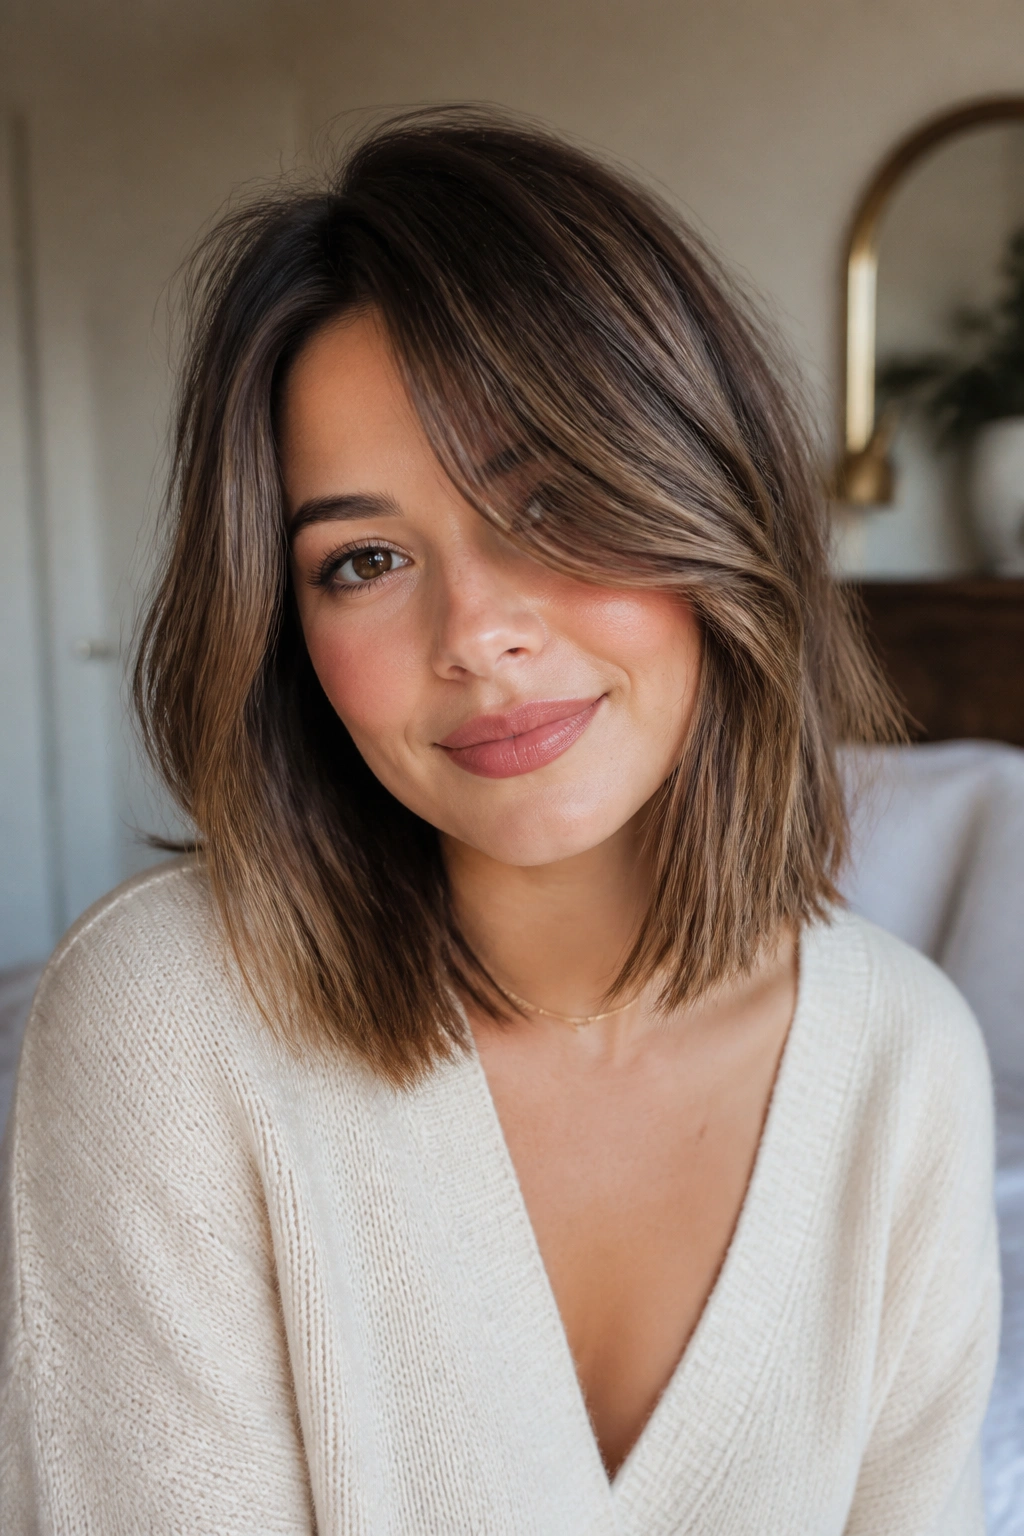
Can bangs work on a round face? Yes, if they bend instead of cut straight across. Side-swept curtain bangs on a collarbone-length lob give you that soft angle without chopping the face in half.
The length is the part people get wrong. Bangs that end right at the widest part of the cheeks can make the face look shorter. Bangs that skim the cheekbone and then open toward the jaw do a much nicer job. A collarbone lob helps too, because it gives the front pieces enough length to move.
Best face-framing length
- Keep the shortest point around eyebrow level.
- Let the longest bang piece touch the cheekbone or lip.
- Tuck one side behind the ear when you want more openness.
This one has a pretty easy styling rule: dry the bangs from side to side with a small round brush, then sweep them back over the forehead with your fingers. That tiny side motion is the whole point.
3. Low Side Bun with Loose Pieces Around the Face
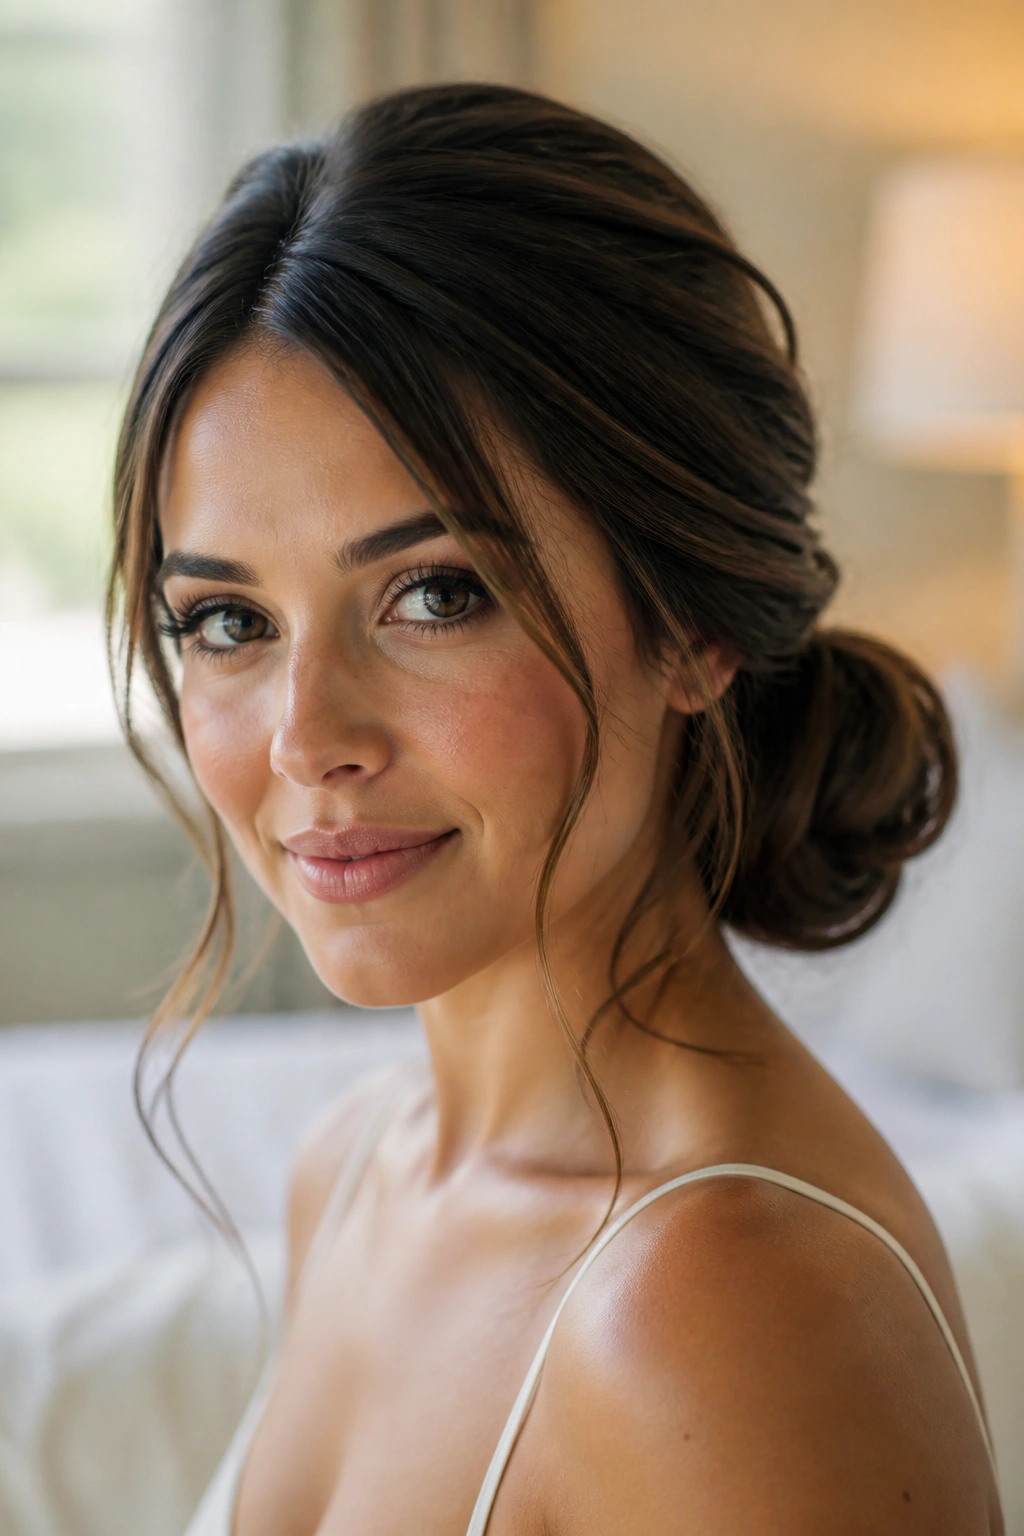
A low side bun can look soft and a little romantic, which is a nice change from the tight buns that tend to sit like helmets. Place it just behind one ear or slightly lower at the nape, and the shape starts working for you instead of against you.
The secret is looseness in the right places. Leave a few slim pieces at the temples and near the ears, then pin the bun so it sits off-center. That keeps the style from adding extra width exactly where a round face already has it.
If your hair is medium or long, twist it into a bun instead of wrapping it too neatly. That little bit of texture keeps the style from going stiff.
- Pin the bun under the heavier side of your part.
- Pull two face-framing pieces free, each about ½ inch wide.
- Mist the top lightly with flexible hairspray before you pin.
One sentence matters here: do not hide the face completely. That usually backfires.
4. Long Pixie with a Swept Fringe for Round Faces
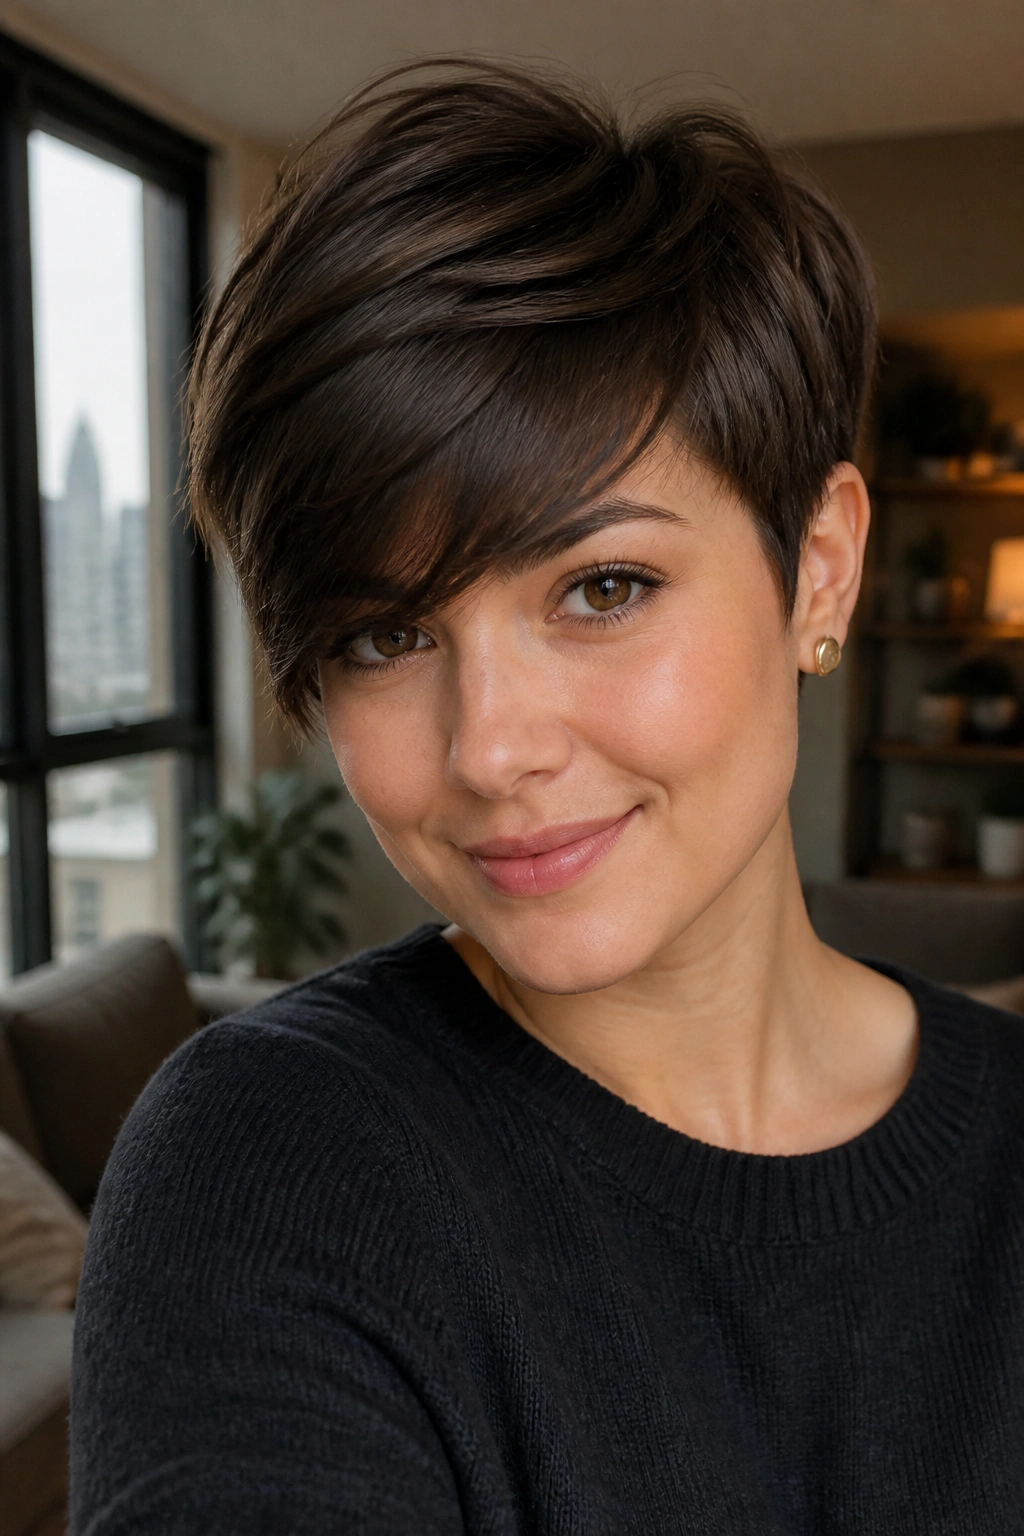
Short hair can flatter a round face. It just needs shape. A long pixie with a swept fringe adds that shape in a way a blunt crop never will.
What I like about this cut is the contrast. The sides stay close, which keeps the silhouette neat, while the top and fringe stretch upward and across the forehead. That diagonal fringe gives the face a longer read, especially when the top has a bit of lift.
What to ask for at the salon
Ask for short, tapered sides and a longer top with enough length to sweep across the forehead. The fringe should be long enough to move, not so short that it stands up. Five to six inches on top is often enough, though thick hair may need a little more.
A tiny dab of matte paste or cream is all you need. Work it through the ends, then push the fringe to one side with your fingers. Keep the root close, but not slicked down. That balance matters.
5. Old-Hollywood Waves Draped Over One Shoulder
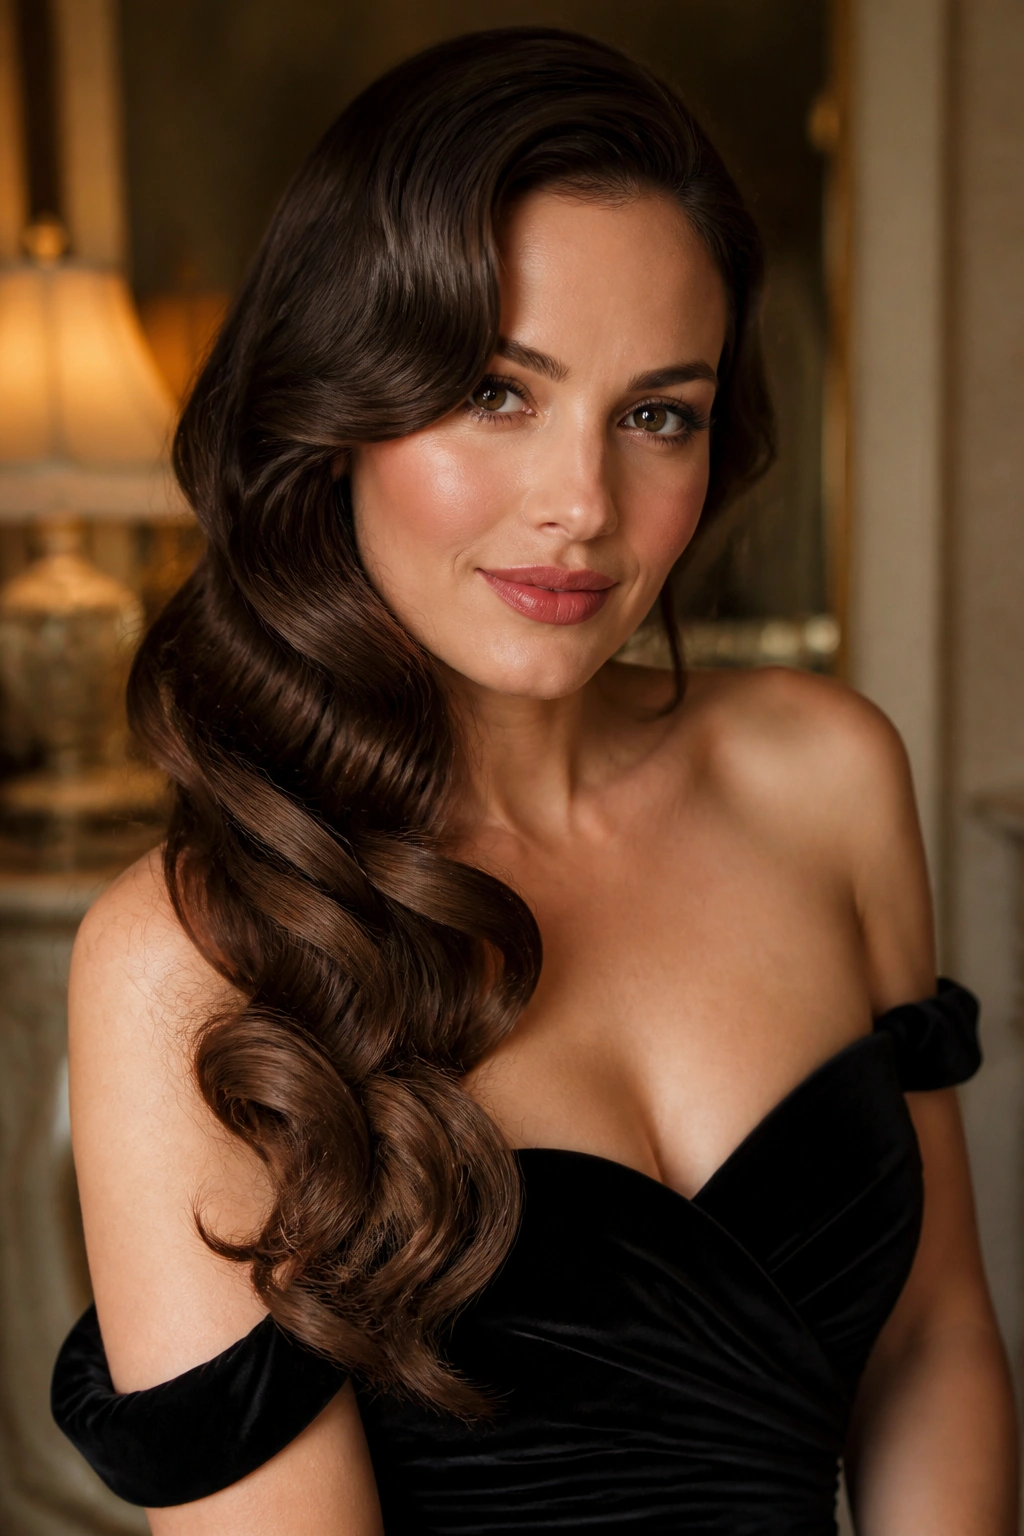
Glossy waves falling over one shoulder have a way of softening a round face without smothering it. The sweep looks elegant because the hair moves in one direction, not equally on both sides.
This style works especially well when the wave pattern starts below the cheekbone. If the bend begins too high, the width lands right where you least want it. A 1¼-inch curling iron usually gives a good, soft curve, and the brush-out after cooling is what makes it feel polished instead of crunchy.
Styling notes
- Curl all the sections away from the face.
- Let the curls cool fully before brushing.
- Pin one side behind the ear with 2 or 3 bobby pins.
- Finish with a light mist of shine spray, not a heavy lacquer.
The best part? It moves. It does not sit there like a sculpture.
6. High Ponytail with a Side Sweep Across the Forehead
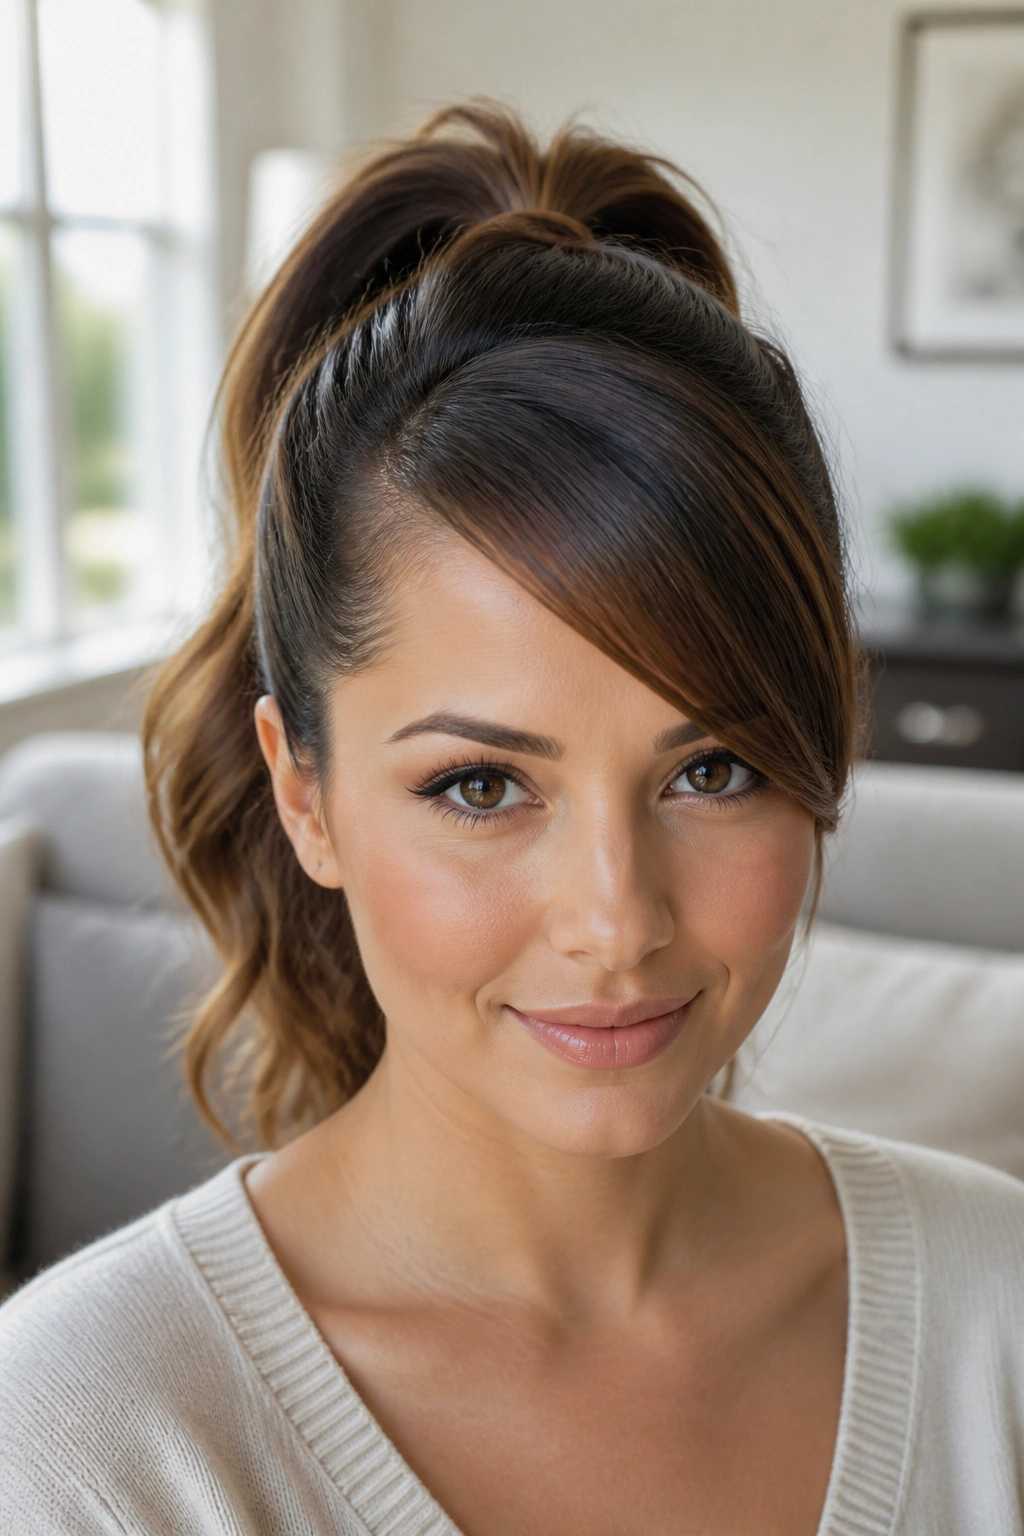
High ponytail. Not the gym version.
A high ponytail with a side-swept front section gives you height at the crown and a clean line down the face, which is a nice combination for round faces. The ponytail itself can sit high or slightly off-center, but the front sweep is what changes the shape.
Backcomb the crown a little before you tie it. Then take the front section from the heavier side of your part and direct it across the forehead. That one motion adds a diagonal line without needing much length.
If your hair is fine, this style holds better with a little mousse at the roots and a spritz of texture spray through the tail. If it’s thick, smooth the top with a brush first so the ponytail does not puff out too much.
A small detail: wrap a thin strand of hair around the elastic. It makes the whole thing look more finished.
7. Fishtail Braid Slung to One Side
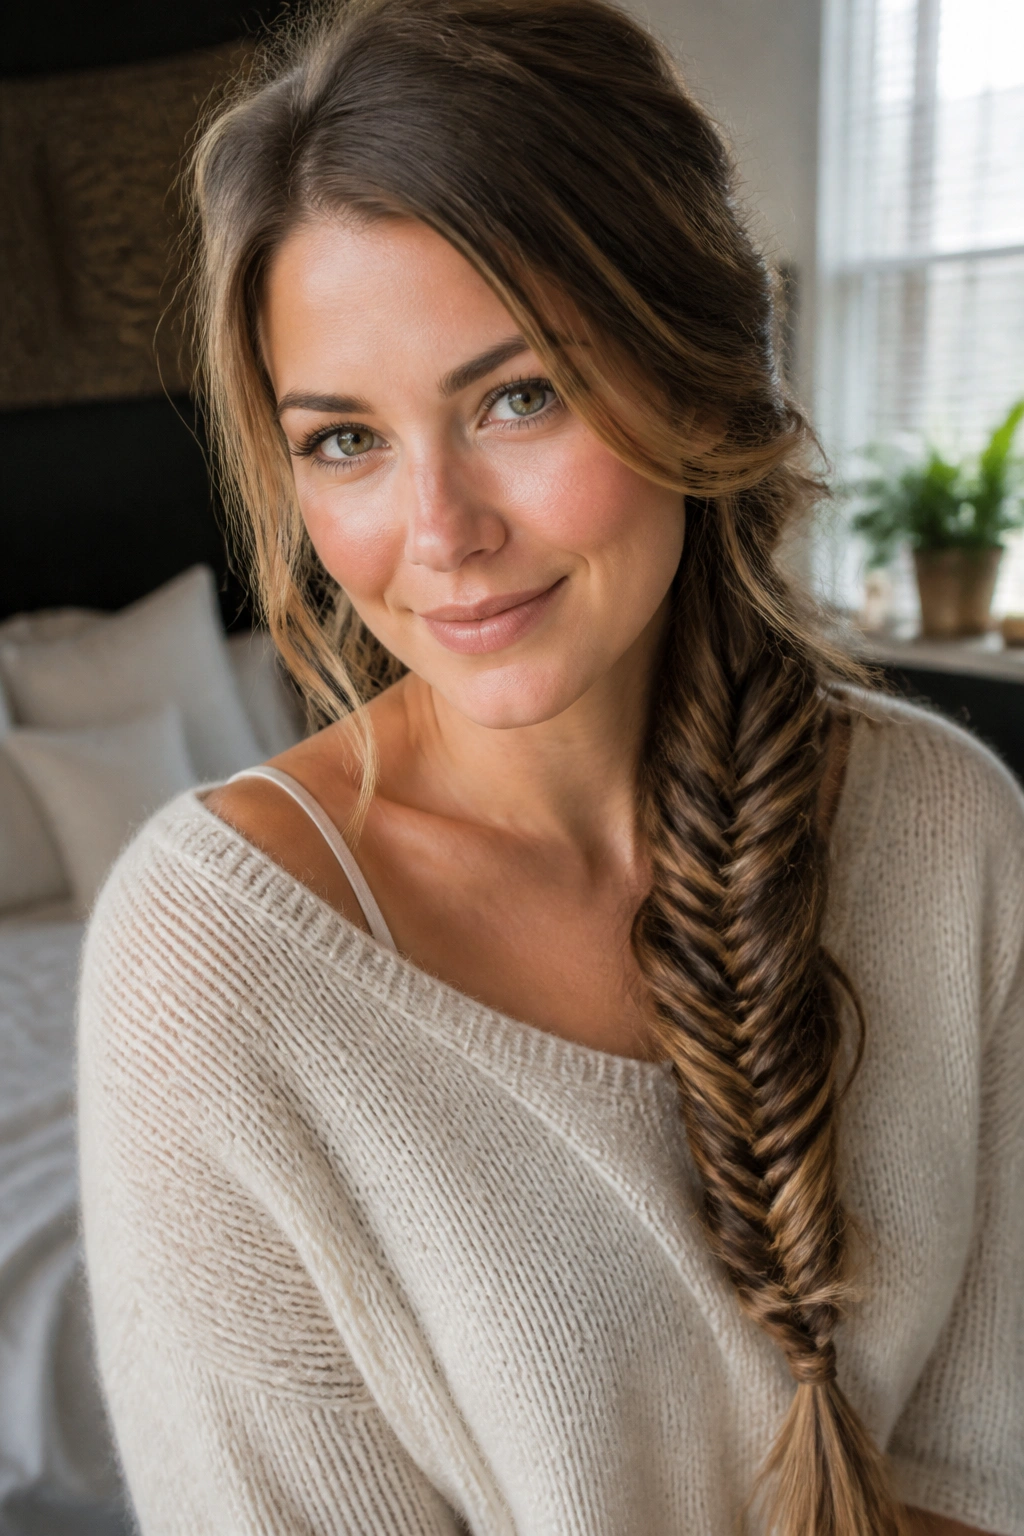
Three sections and a loose finish are all it takes to make a fishtail braid flattering on a round face. The braid itself gives you a long vertical line, and when you wear it over one shoulder, that line starts to work diagonally across the body.
Where to start the braid
Start the braid just behind the fuller side of the face, not dead center at the back. That placement keeps the braid from looking too symmetrical. Then keep the braid soft while you work. A tight fishtail can look fussy fast, and it can make the head shape seem rounder.
After you tie it off, pull the outer edges of the braid gently. People call this “pancaking,” and the word sounds silly, but the effect is good. The braid looks wider and more relaxed, which helps keep the face from feeling boxed in.
- Use a clear elastic or a small elastic that matches your hair.
- Leave the top loose for about 1 inch around the part.
- Pull a few tiny pieces free near the temple for softness.
8. Half-Up Twist with a Soft Side Part
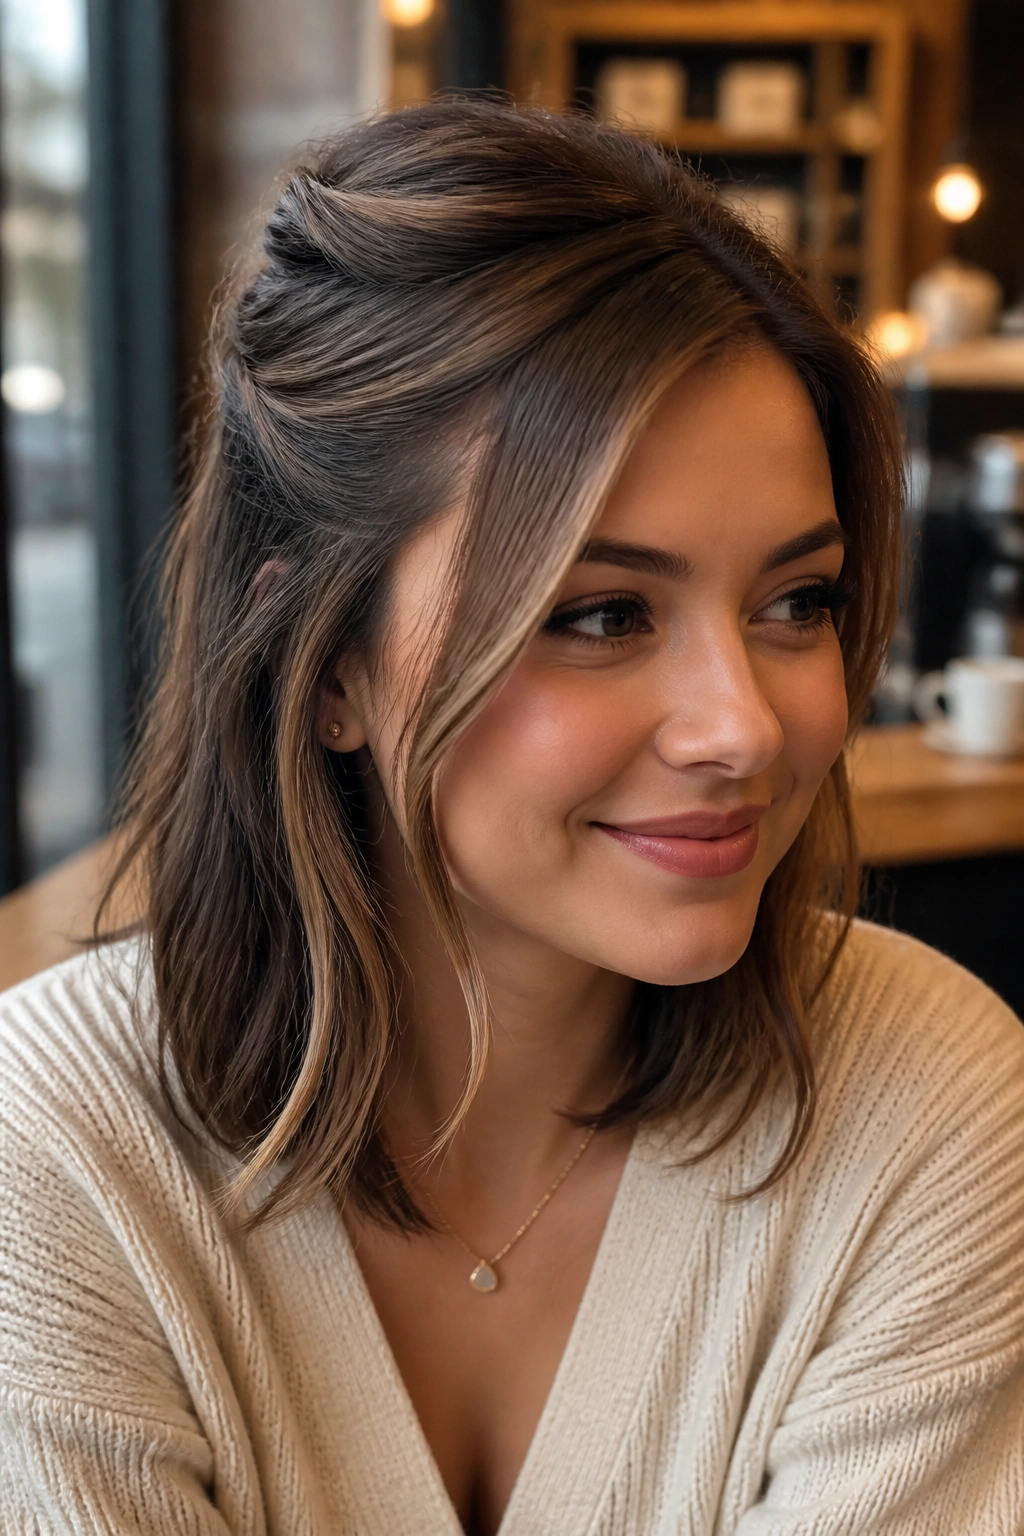
Half-up styles can work on round faces if they leave the temples alone. That is the whole game. A half-up twist with a side part gives you a bit of lift on top while keeping the lower half of the hair loose and lengthening.
Twist the front sections from each side back toward the crown, but pin them slightly off-center instead of directly in the middle. That off-center placement pulls the eye diagonally. The lower hair should stay loose and smooth, with the front pieces grazing the cheeks rather than bunching at the sides.
I like this style on medium and long hair because it gives shape without committing to a full updo. It also lets you keep some movement around the jaw, which is helpful if the lower half of your face already feels wide.
Use a couple of hidden pins and a flexible spray. Nothing too stiff. If the top is hard as a rock, the style loses the softness that makes it work.
9. Sleek Lob Tucked Behind One Ear
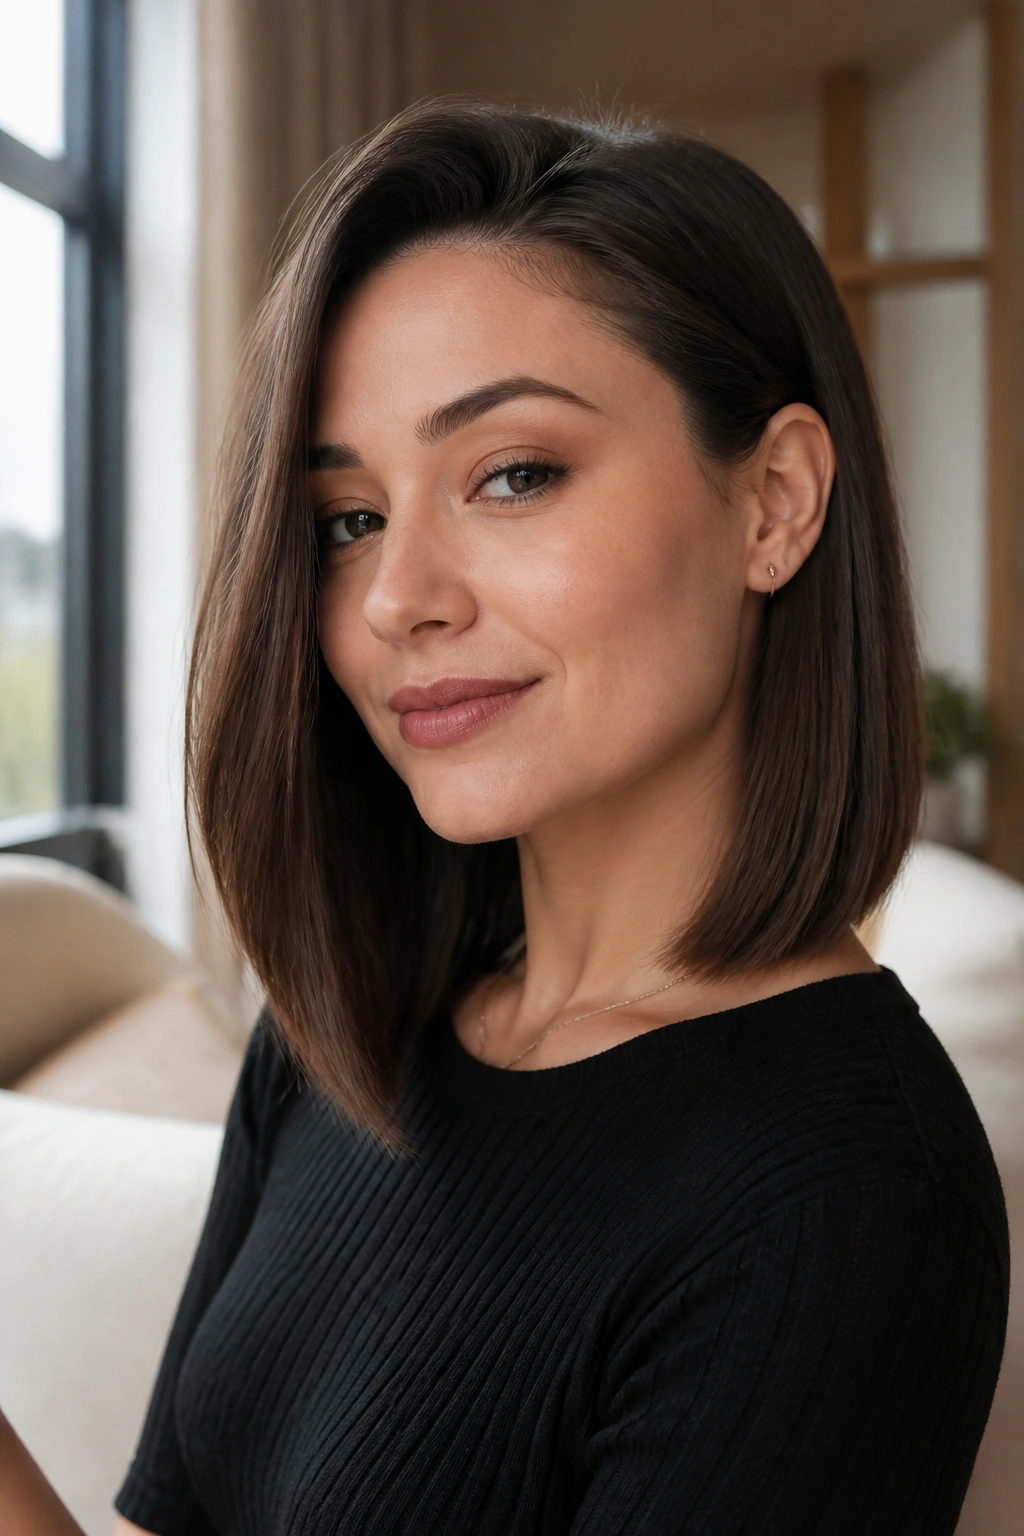
A sleek lob tucked behind one ear is one of the easiest ways to add shape without extra fuss. The asymmetry does the work. One side falls forward, the other side opens up, and the face stops reading as a perfect circle.
The length should sit around the collarbone or just below the chin. Too short, and the tuck can make the face look wider. Too long, and you lose the clean line that makes the style sharp. A slight bend at the ends helps too, even if the rest of the hair is straight.
- Part slightly off center.
- Tuck the heavier side behind one ear.
- Leave the front piece on the other side slightly curved toward the cheek.
- Use a flat iron only on the last inch of the ends if they need a soft turn.
This is a good one for work, dinners, or any day when you want to look put together without going full glam.
10. Curly Shag with a Side-Swept Fringe

On curly hair, a side sweep can be a lifesaver. It keeps the shape from spreading evenly around the head, which is often what makes a round face feel even rounder.
A curly shag works because the layers remove bulk and the fringe travels across the forehead instead of sitting in one blunt block. That fringe should be long enough to blend into the curls on the side, not short enough to spring up and sit above the brow.
What keeps it from puffing out
A leave-in cream plus a light gel gives the curls some hold, but you need to direct the hair while it dries. Diffuse it with your head tipped a little to the side, then let the fringe fall across the forehead before it sets. If the curls dry in the wrong direction, the whole face shape changes.
This cut has a little edge to it, and I mean that in a good way. It does not apologize for volume. It just puts the volume where it helps.
11. Angled Bob with a Strong Side Sweep
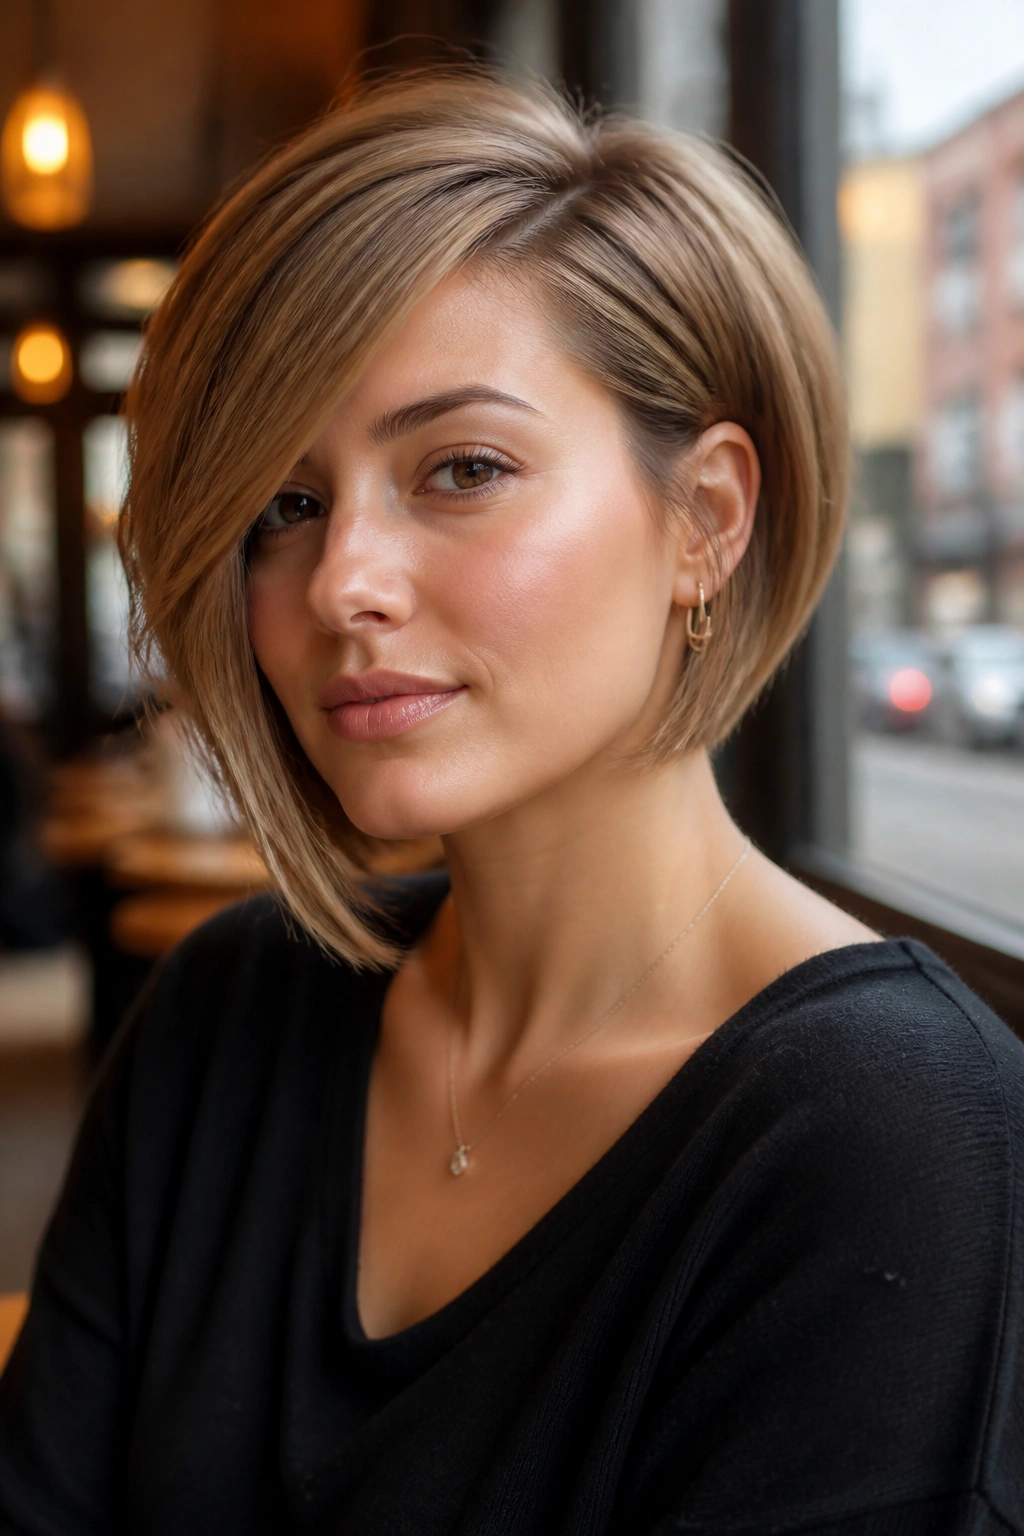
An angled bob does not need dramatic styling to flatter a round face. The cut itself does most of the work. Shorter in back, longer in front, it creates a clean line that draws the eye down and forward.
That forward angle is the useful part. It pulls attention toward the jawline instead of letting all the visual weight sit at the cheeks. A side sweep makes the shape even clearer, especially if the front section on one side lands just below the cheekbone.
Keep the back close to the head and the front a little longer, then tuck one side behind the ear if you want more space around the face. If your bob is thick, ask for light texturizing at the ends so it doesn’t balloon out. If it’s fine, a touch of volumizing spray at the roots gives the cut more shape.
This is a blunt haircut, but not a harsh one. There’s a difference.
12. Low Chignon with Lift at the Crown
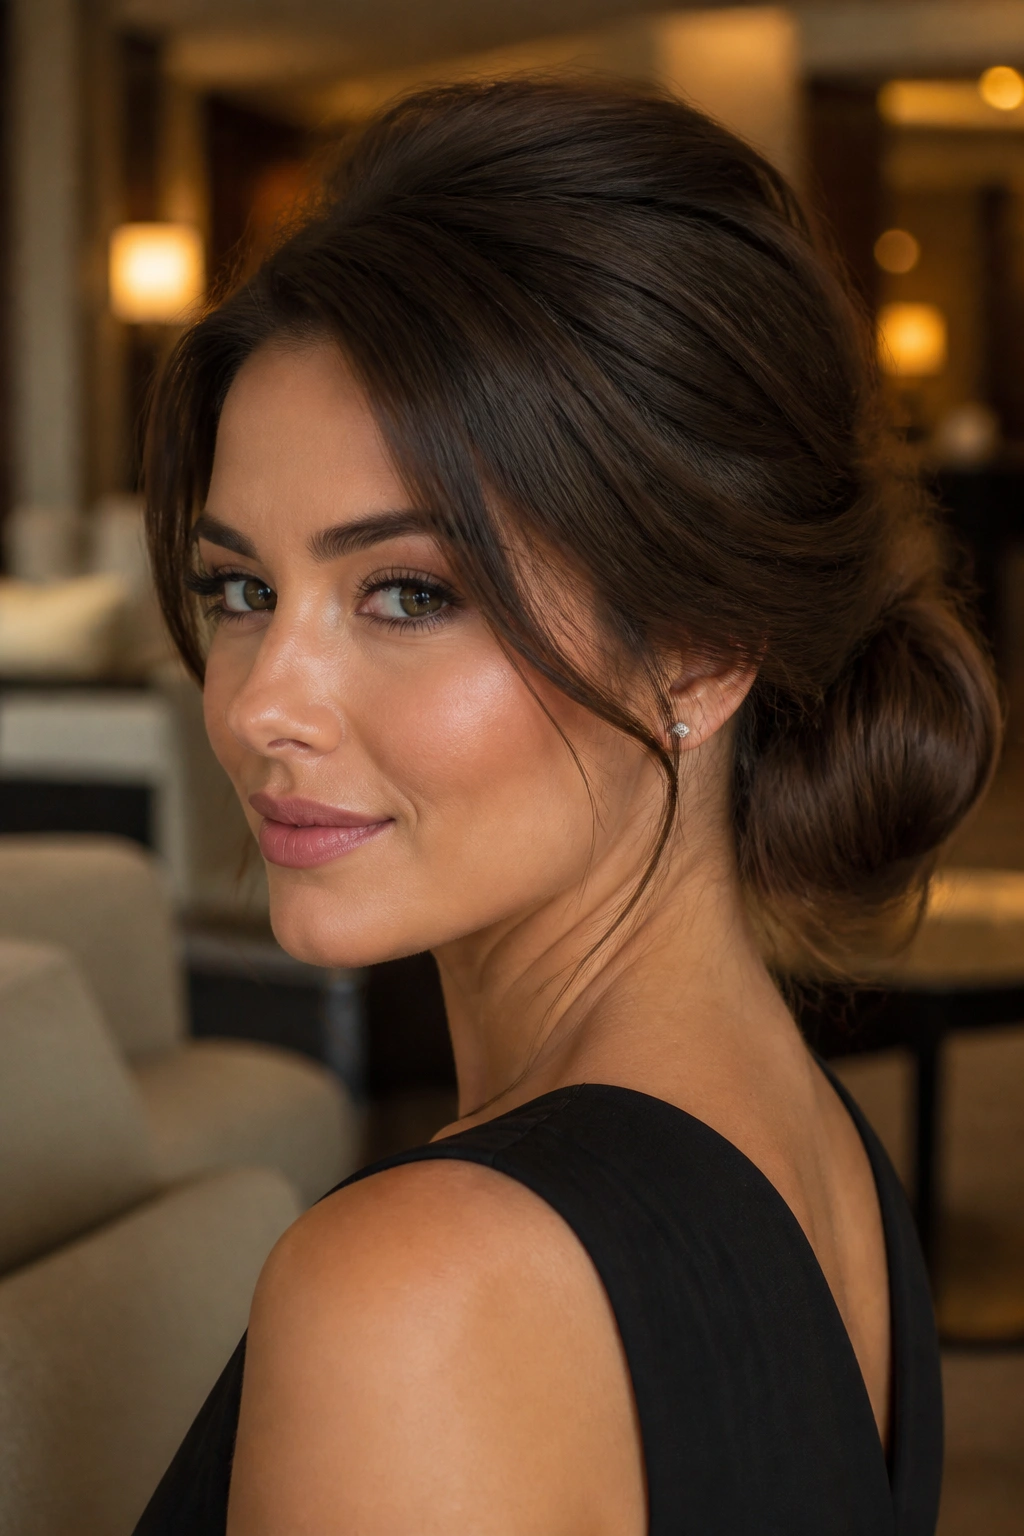
Can a low chignon feel soft instead of formal? Absolutely. The trick is to build a little height at the crown and keep the bun slightly off-center.
The bun should sit at the nape, but not dead center. Move it a little toward one side, then smooth the top so the crown has lift and the part travels diagonally. That shift keeps the style from making the face look wider. A few loose strands at the temples help, too, but they need to be intentional, not just flyaways you forgot to pin.
Where the bun should sit
- Place the twist just behind the heavier side of the part.
- Tease the crown lightly before pinning.
- Leave one slim piece free near each temple if the style feels too strict.
- Use U-pins for hold; they’re less bulky than big claw clips.
This is one of those styles that can look fancy with very little fuss. It just needs the right placement.
13. Waterfall Braid Falling to One Side
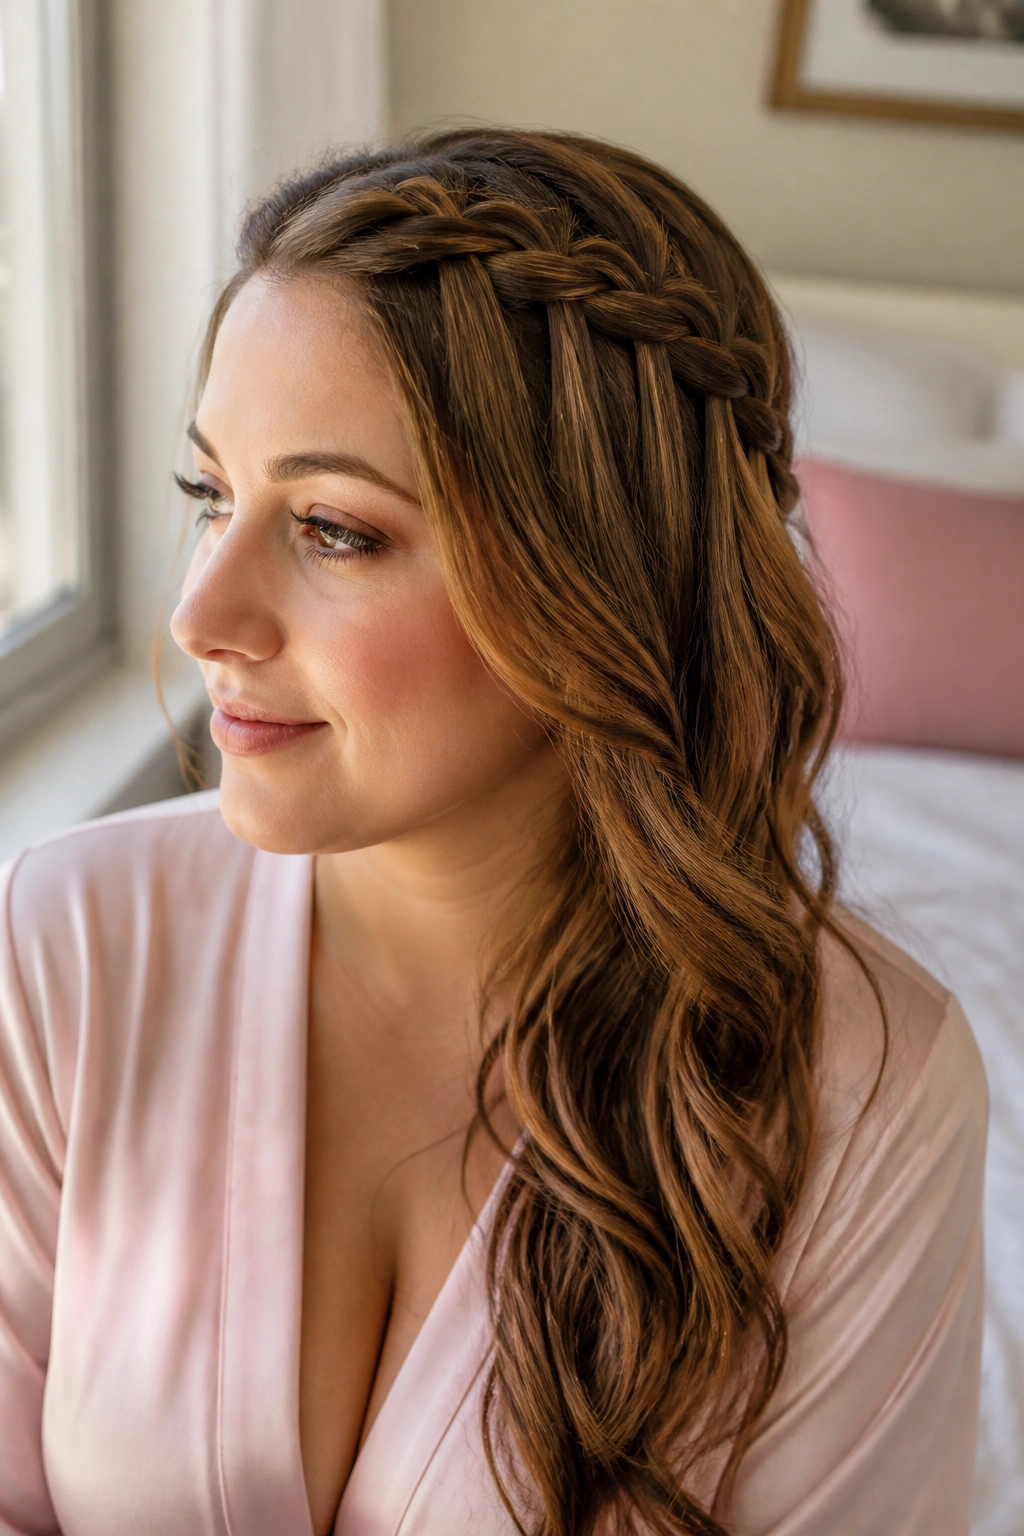
A waterfall braid has a different feel than a plain side braid. It looks like strands are slipping through the braid and landing over the shoulder, which gives the whole style a soft, moving line.
That line matters on a round face. Instead of creating a block of hair around the cheeks, the braid travels across the head and then releases into length. The released pieces keep the face from feeling boxed in, and the braid itself adds structure where you want it.
Use the braid along the hairline, starting a little above the temple on the fuller side. Keep it loose enough that the braid does not tug the scalp. Tight braiding can create a harsh line across the face, and that is not the goal here.
- Curl the loose lengths first if you want a softer finish.
- Secure the braid with a small clear elastic or a pin behind the ear.
- Pull the braid edge slightly to widen it after you finish.
It’s delicate, but not fussy. That’s why I keep coming back to it.
14. Textured Ponytail with Wrapped Base
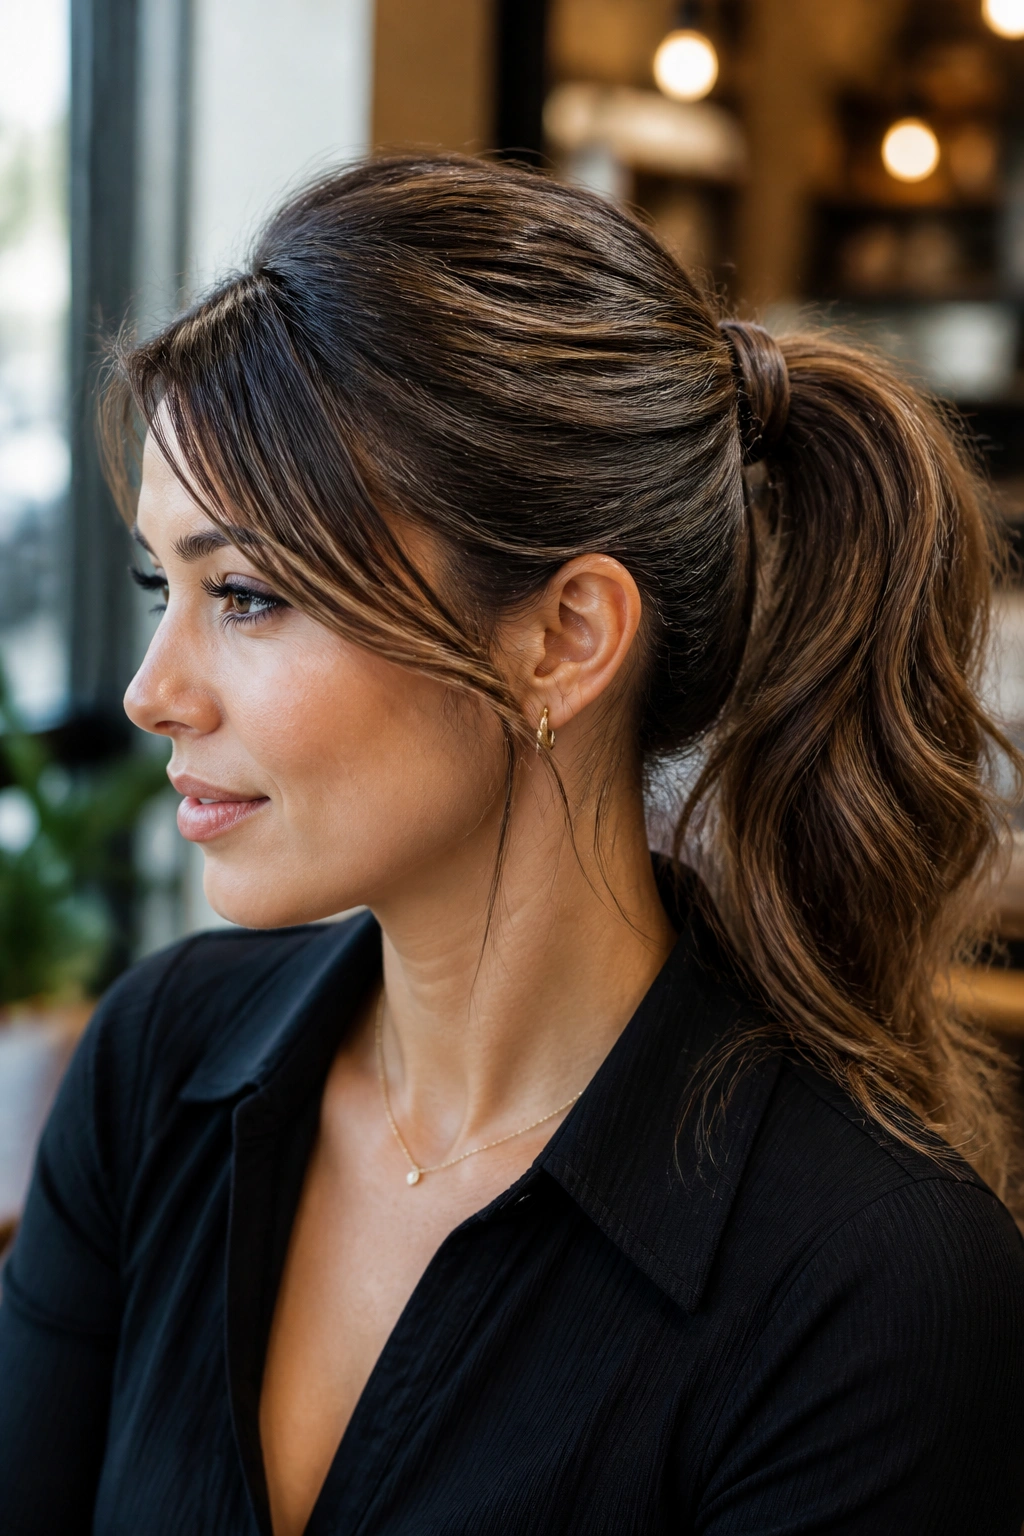
A ponytail does not have to be casual. With texture, lift, and a side sweep, it can do a lot for a round face.
The first move is adding grit. Work a texturizing spray through the roots and mid-lengths, then rake the hair back with your fingers instead of brushing it flat. A side part and a sweep across the forehead give the style a directional feel, while the wrapped base hides the elastic and makes the ponytail look more deliberate.
If the ponytail sits at mid-height, it usually gives the nicest balance. Too low and it can drag the face down. Too high and the crown sometimes gets too tall in a way that feels cartoonish. Mid-height keeps the line clean.
My favorite detail: pull a small piece from the front and let it fall across one cheek. Tiny piece. Big payoff.
15. Braided Crown Leading into Loose Lengths
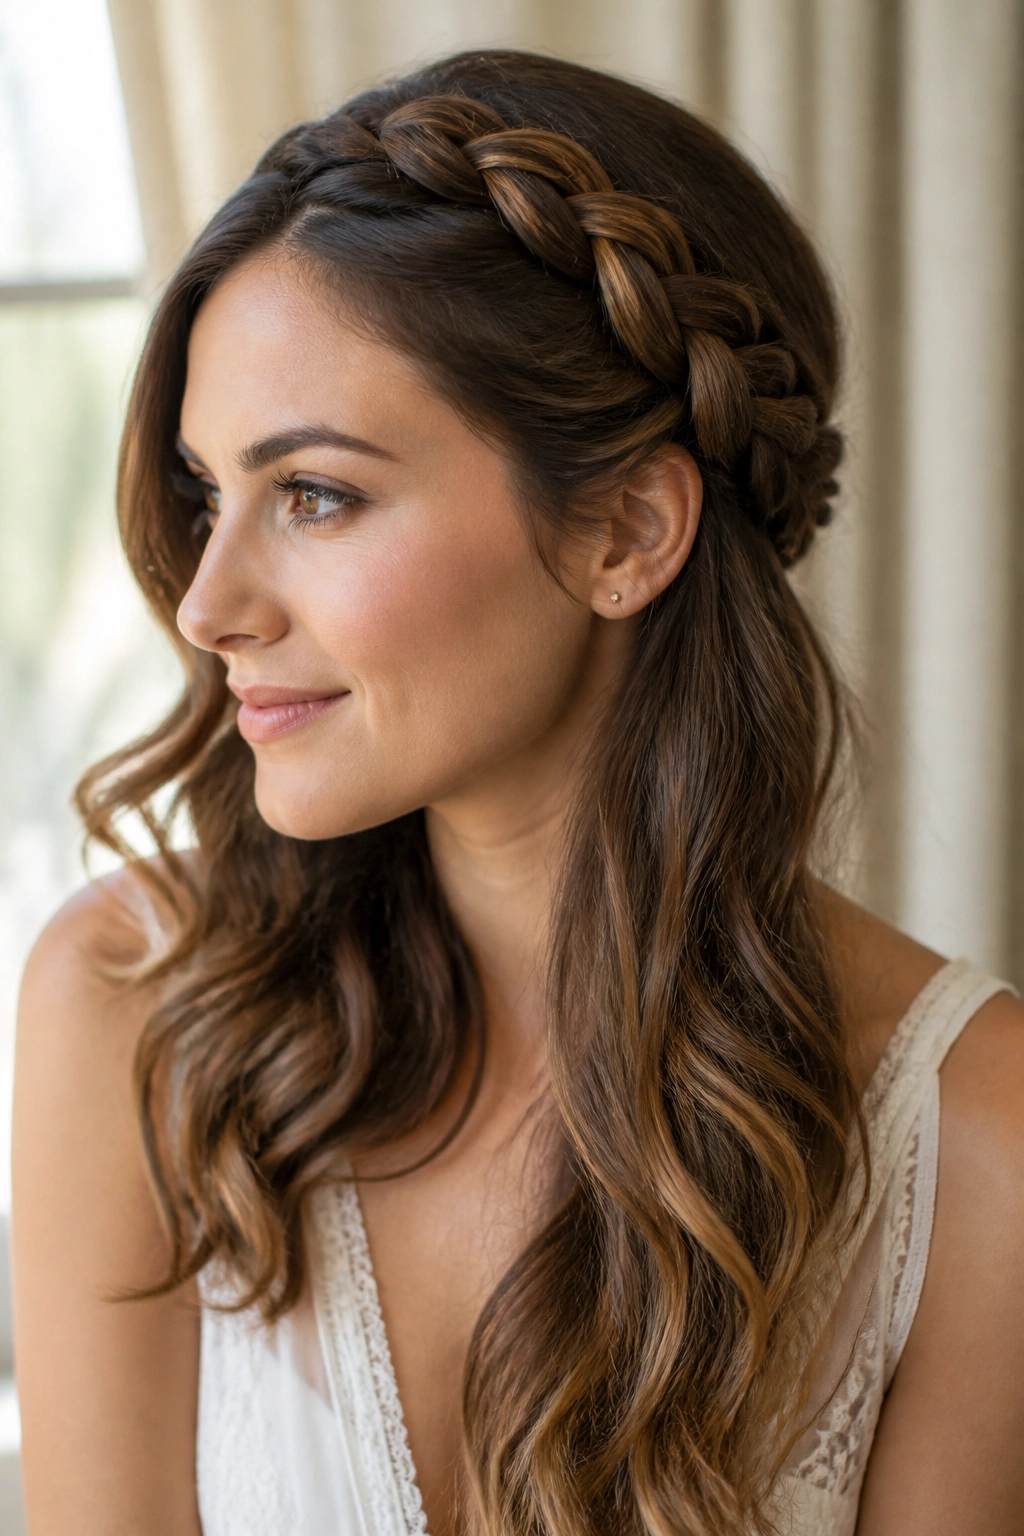
Braids can do the face-shaping work for you. A braided crown that starts at one temple and curves back toward the ear creates an arc rather than a full circle, and that arc is kinder to a round face.
The braid does not need to wrap all the way around the head. In fact, stopping it near the ear often looks better. Let the rest of the hair fall loose over one shoulder so the style keeps that side-swept feeling from top to bottom.
The shape that matters
The braid should sit a little above the hairline, not buried in the hair. That keeps it visible enough to matter. If you braid too low, the face-framing effect gets lost. If you braid too tight, the scalp shows too much and the style starts to look severe.
A soft wave in the loose lengths makes this even better. Straight hair can work, but a little bend adds life.
16. Messy Top Knot with Face-Framing Tendrils
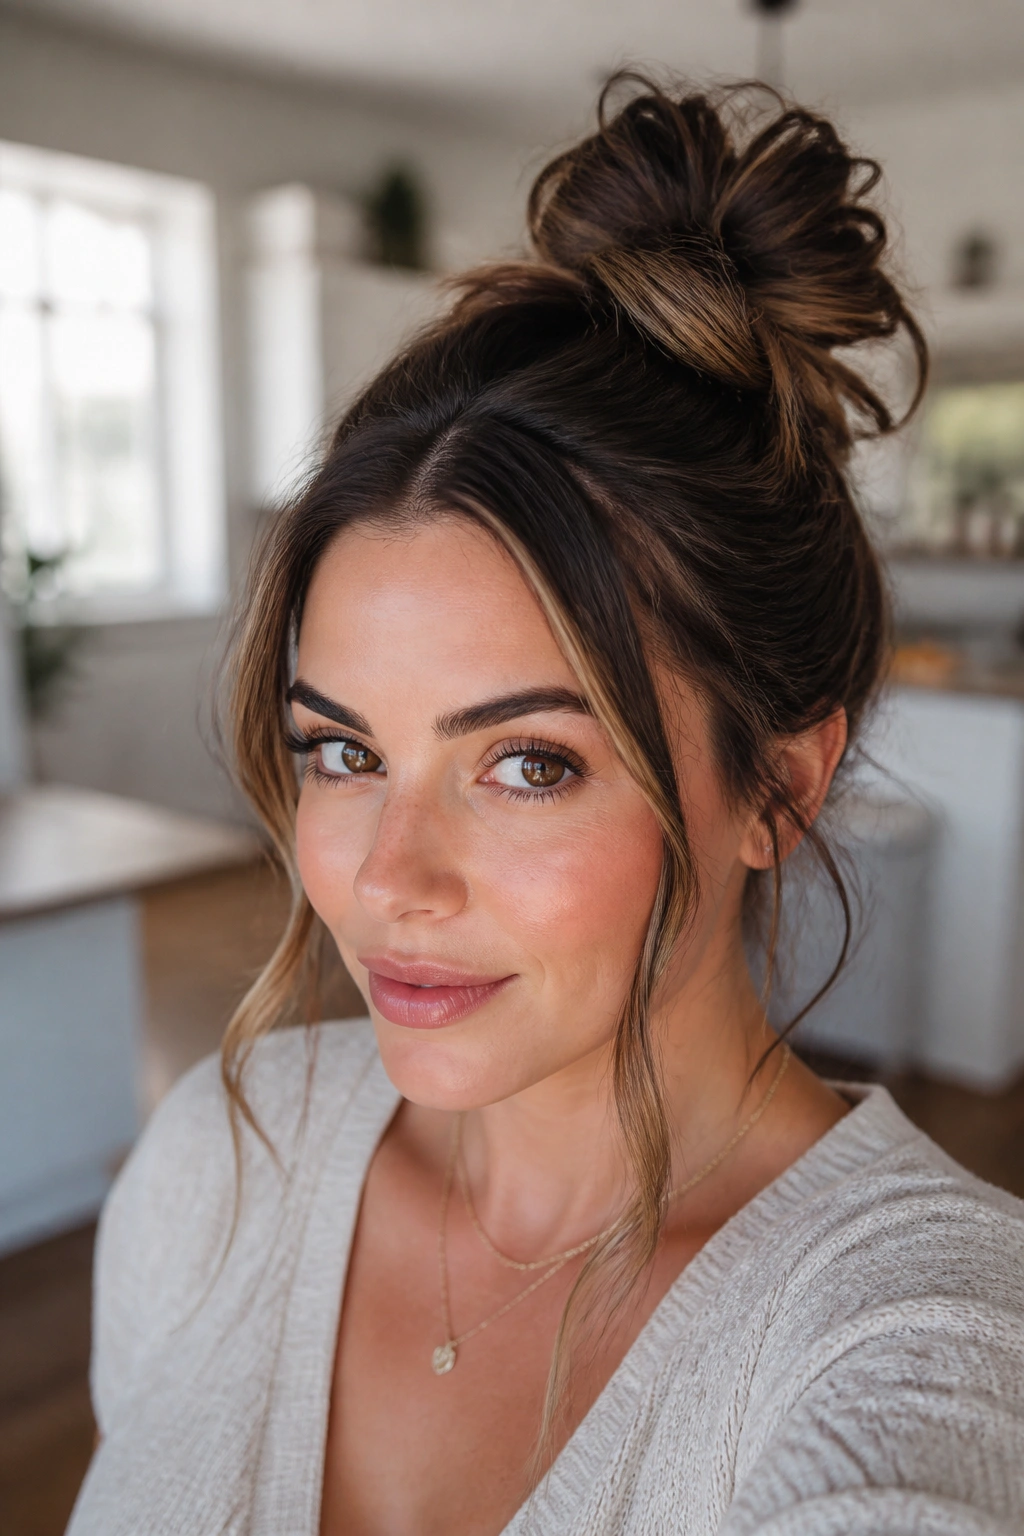
Need something messy that still looks deliberate? A top knot with a side part and face-framing tendrils handles that nicely.
Place the knot slightly off-center instead of dead on top of the head. That tiny shift changes the balance of the whole style. Then pull out two tendrils near the temples and maybe one softer piece near the cheek. The face gets a frame, but not a tight one.
A lot of people pull the knot too tight and end up with every bit of width concentrated near the crown. Loosen the roots first. Lift the hair up with your fingers, not a brush, so the top has a little texture. If you have layers, let some escape. That’s fine. Better than fine, actually.
- Keep the knot high enough to open the neckline.
- Leave the front pieces about 1 to 2 inches long.
- Pin the knot after you shape it, not before.
- Finish with dry texture spray at the roots.
This is the style I’d pick on a rushed morning.
17. Sleek Low Ponytail with a Deep Side Part for Round Faces
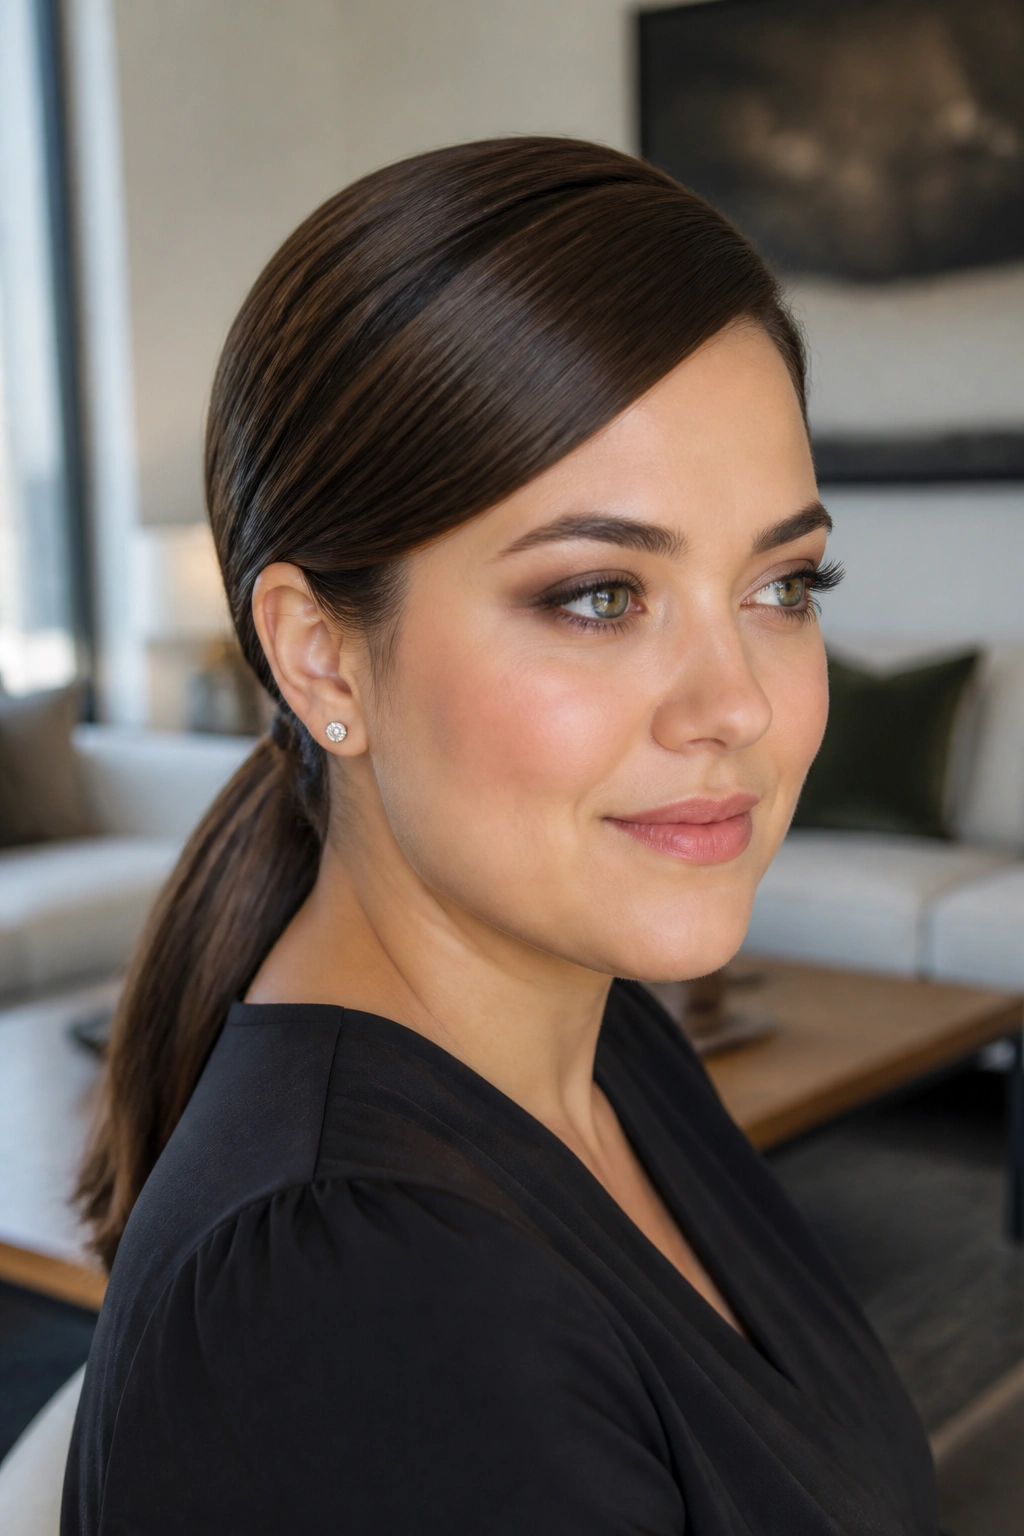
A sleek low ponytail works on round faces because it keeps the eye moving down instead of out. The side part adds that diagonal line, and the low placement keeps the shape calm and clean.
Brush the hair smooth with a paddle brush, then use a little styling cream on the surface only. You do not need to coat the whole head. That usually makes the ponytail limp. Tie it at the nape or just below it, and sweep the front section across the forehead before tucking it behind the ear on the heavier side.
This style looks sharper if the ends are straight, but a small bend at the bottom is fine. What matters more is the top. If the crown stays flat and smooth, the face gets a longer read. If the crown puffs up in the wrong spot, the whole thing loses its line.
A silk scrunchie under the hair tie helps keep the ponytail from creasing.
18. Beach Waves with Curtain Pieces Swept Aside
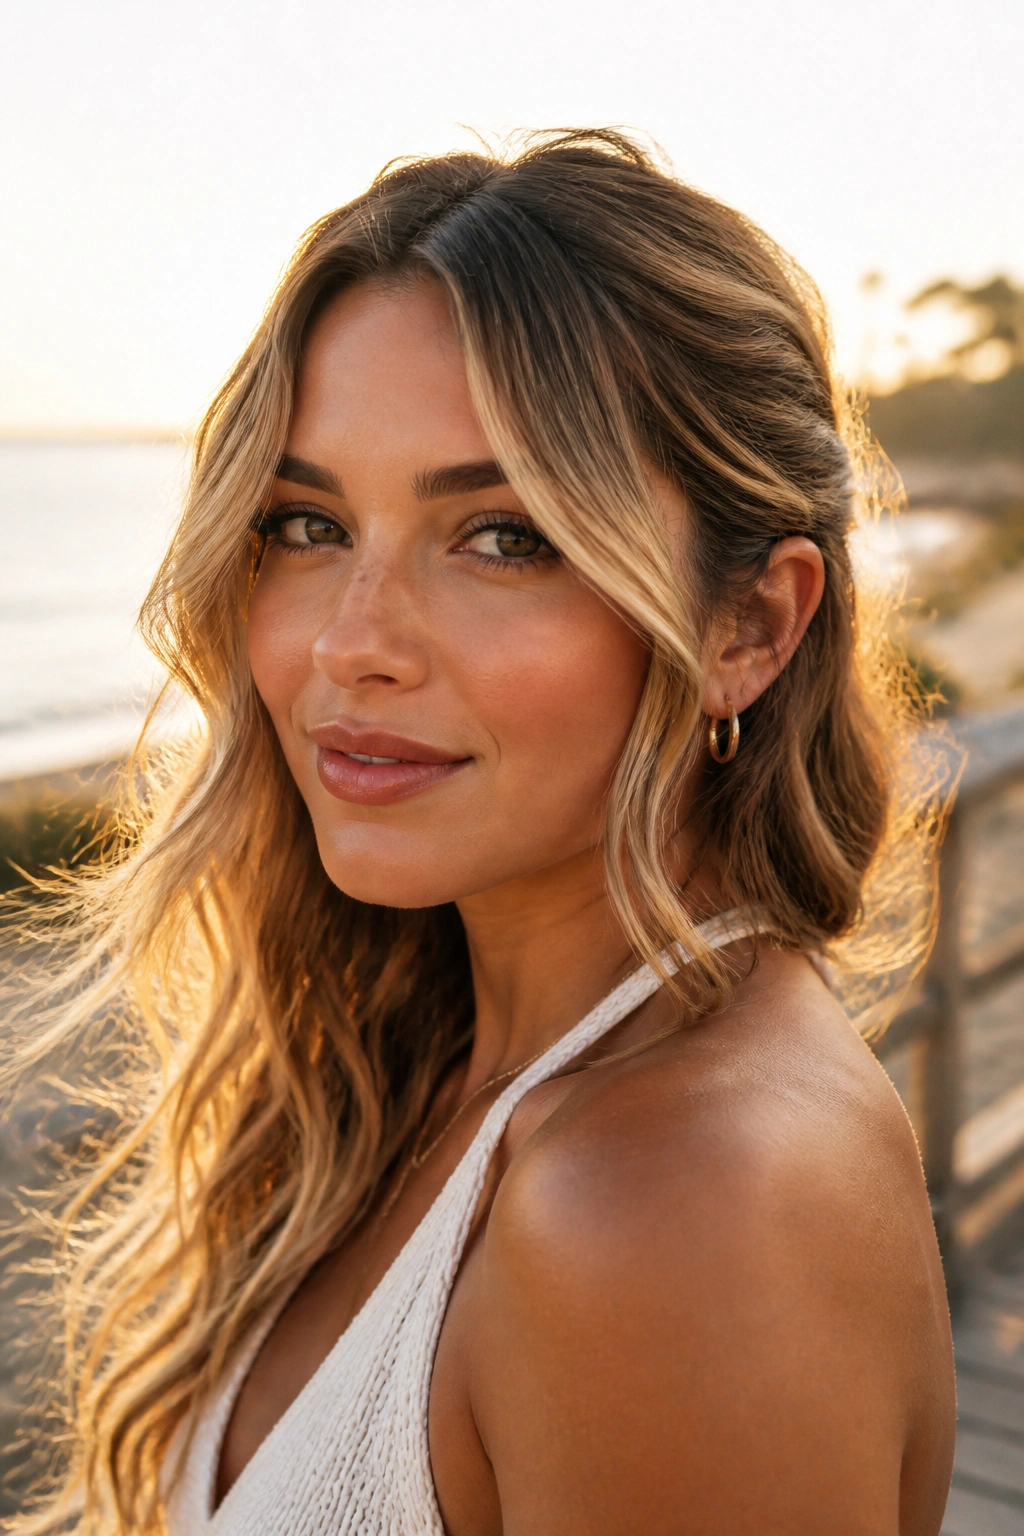
If you want the softest, most forgiving version of a side sweep, beach waves are hard to beat. The texture blurs the edges, and the curtain pieces keep the forehead from feeling crowded.
Use a 1½-inch iron or a flat iron bend to create loose waves, then part the hair slightly off center. The front pieces should sweep away from the face on one side and tuck behind the other ear if needed. That little asymmetry keeps the style from turning boxy.
Small changes that help
- Start the wave below the cheekbone.
- Leave the front two sections a touch longer than the rest.
- Break up the waves with your fingers, not a brush.
- Use sea salt spray only at the roots and mids; too much at the ends makes hair feel rough.
This style is easy to wear because it never looks too polished or too bare. It lands in the middle, where most people actually live.
19. Asymmetrical Bob with One Longer Side
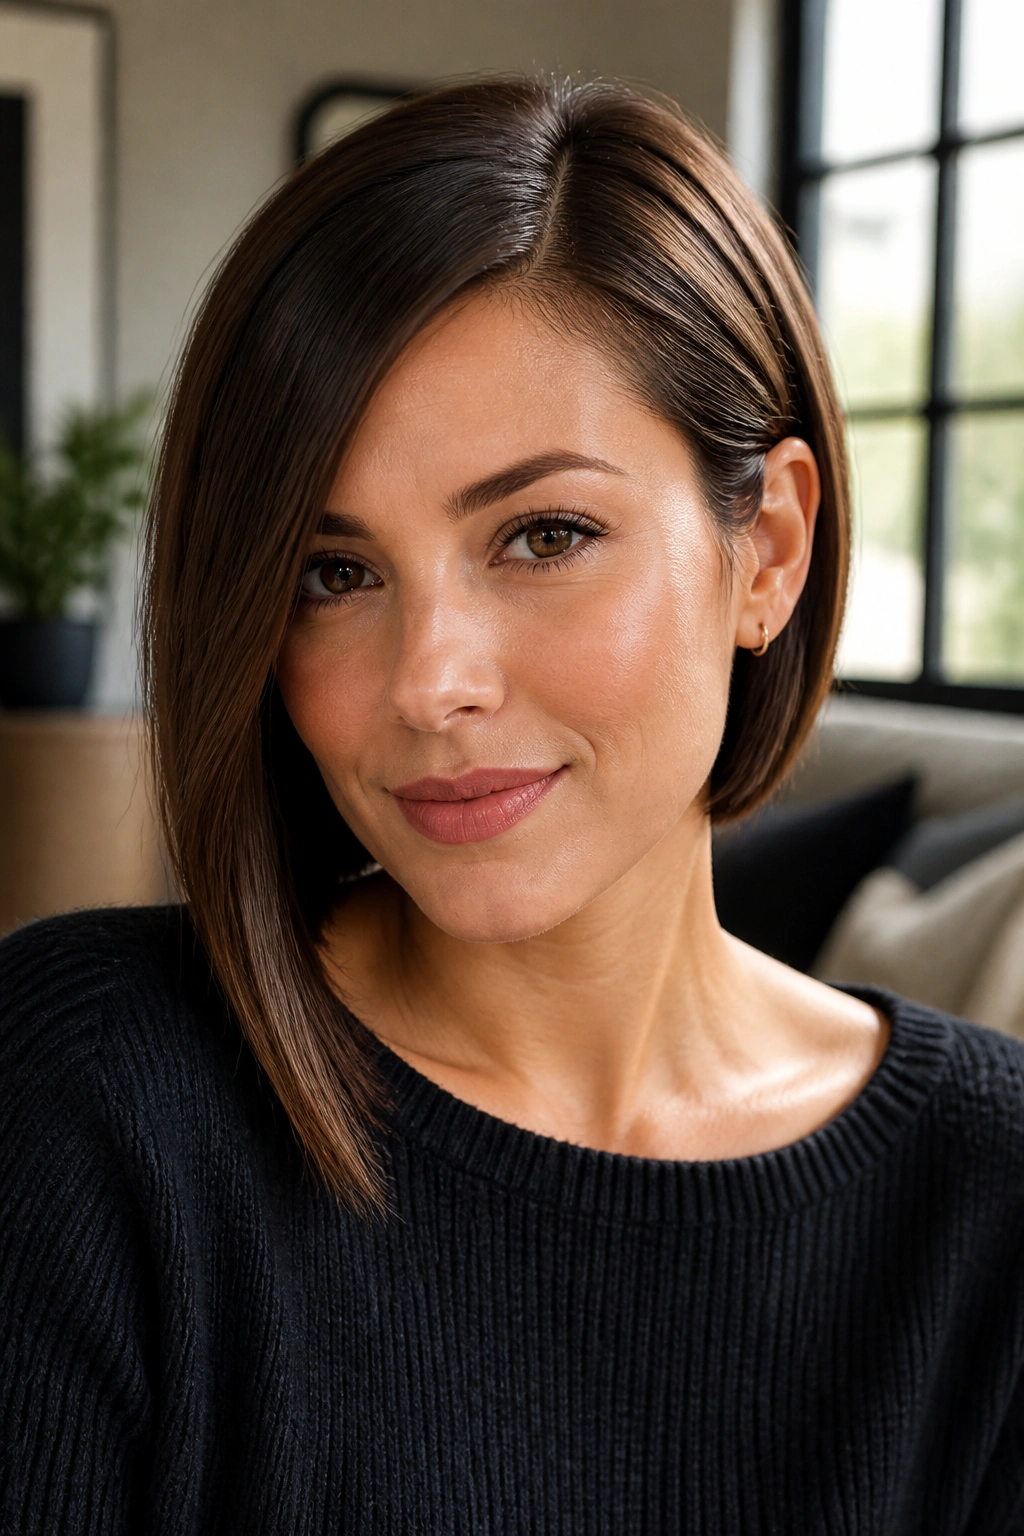
An asymmetrical bob can be a blunt little problem-solver. One side is longer, the other sits a touch shorter, and that uneven line takes the focus off the width of the cheeks.
The longer side should skim the jaw or the top of the collarbone, not hang awkwardly in the middle of the cheek. The shorter side can still feel soft if it stays slightly tucked behind the ear. That contrast is what gives the face more shape. It sounds sharp, and it is, but sharp doesn’t have to mean harsh.
This cut is good for fine hair because the geometry does a lot of the work. It’s also good for thicker hair if the ends are cleaned up properly. A blunt perimeter on one side and a gentle angle on the other keep it from feeling bulky.
If you want more movement, a side part and a slight wave through the front pieces help the asymmetry read even more clearly.
20. Side-Swept French Twist with Soft Ends
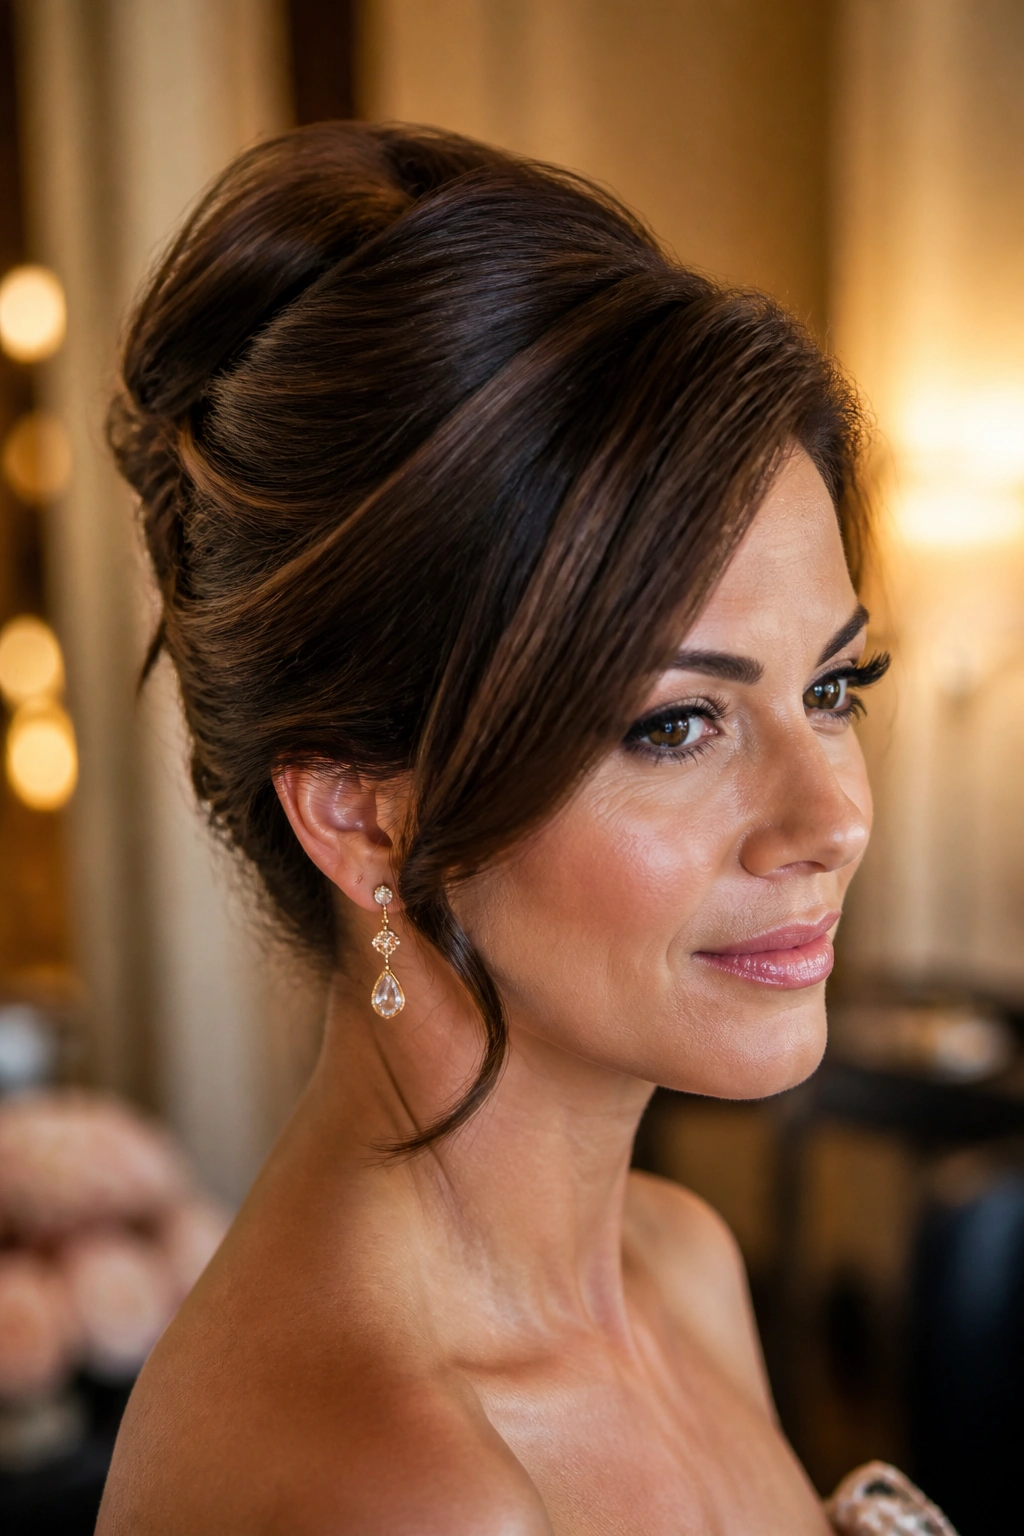
When you want polish, a side-swept French twist has the clean lines that round faces tend to like. It lifts the hair upward, tucks volume into a narrow shape, and leaves enough softness around the front so the style does not feel severe.
I prefer a twist that starts a little off-center and rises diagonally instead of straight up the back of the head. That shape feels friendlier. Let a few ends stay soft at the top or near the nape if your hair is layered. Those loose bits keep the twist from looking stiff and help the face stay open.
If you’re choosing between this and a tighter updo, choose this. A tight style can make the cheeks look broader by comparison. A twist with lift and a side sweep gives you structure without that hard outline.
For special events, this is the one I keep coming back to. It has a little gravity to it, but it does not flatten the face. That’s the whole point, really. The best side-swept styles for round faces do one thing well: they build angles where the face needs them, then leave enough softness for the hair to move. That’s the balance worth chasing.
