



Twist bun hairstyles have a way of making a rushed morning look intentional. A few twists, a handful of pins, and a low or high bun can carry you through work, errands, dinner, or a formal event without needing a full blowout or a complicated braid.
That’s why this style shows up so often in real life, not just on mood boards. It works on straight hair that needs grip, wavy hair that wants shape, and curly hair that needs a little direction more than a full reset. If your strands are freshly washed and slippery, a mist of dry shampoo or texture spray at the roots helps more than people expect.
A good twist bun also forgives small mistakes. A twist that isn’t perfectly even? Fine. A pin that peeks out? Easy to hide. The hair is doing most of the work for you, which is honestly the charm.
These 15 twist bun hairstyles cover polished, soft, messy, and practical looks, so you can pick the one that fits your hair length, texture, and how much patience you’ve got that day.
1. Classic Low Twist Bun
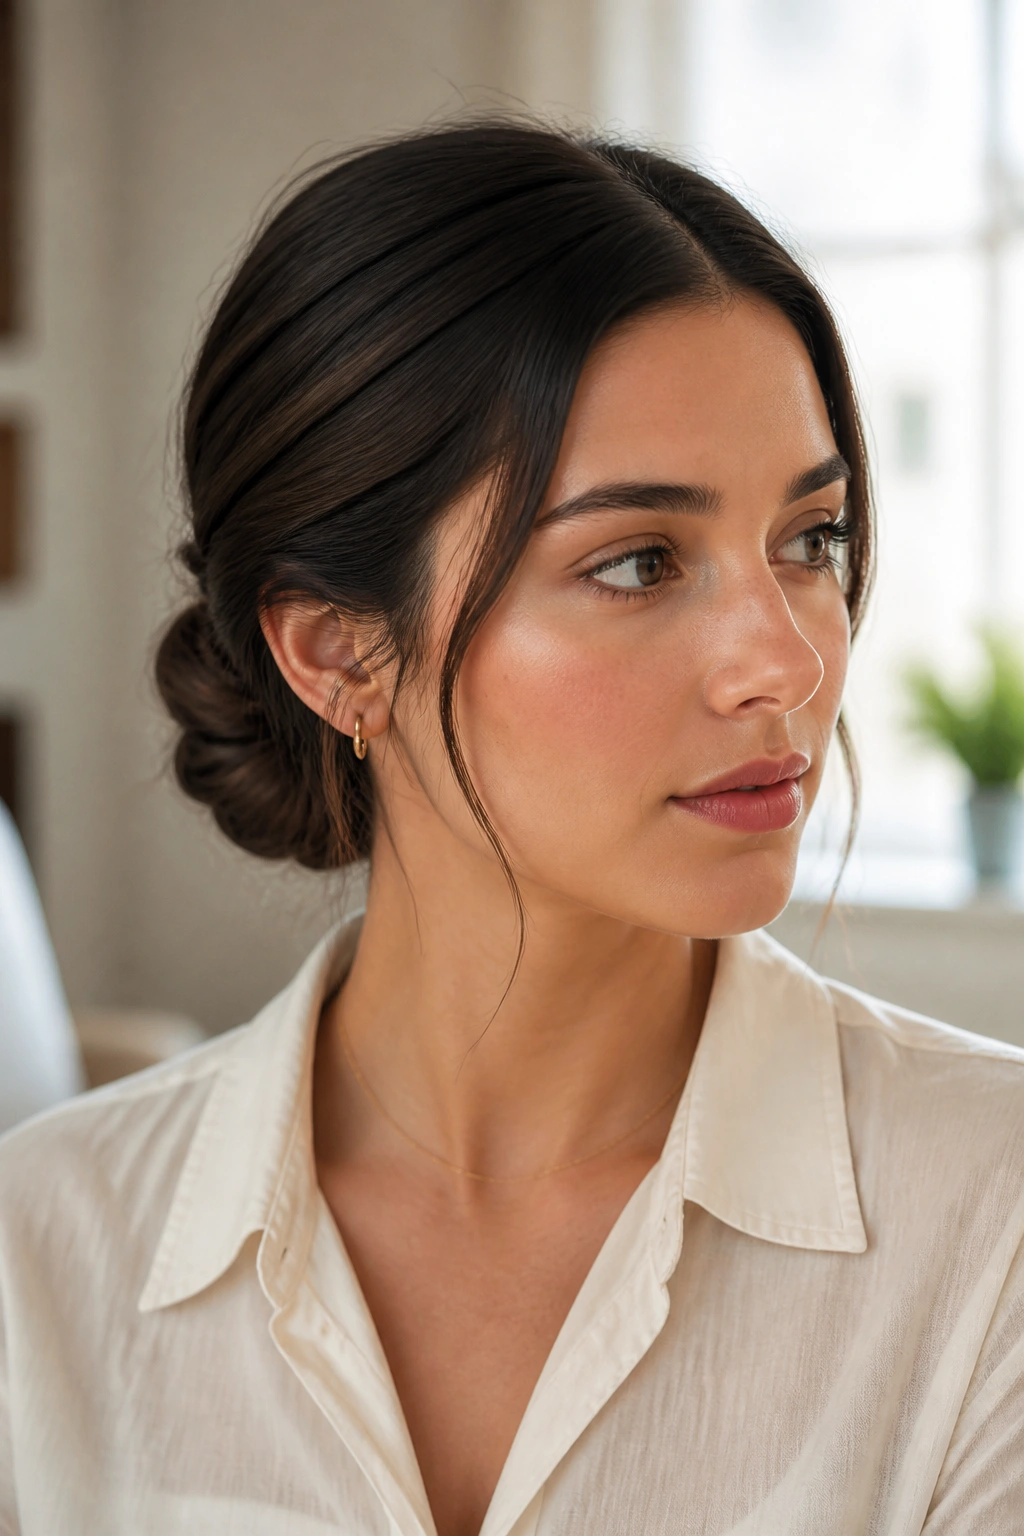
The classic low twist bun is the style I reach for when I want hair off my neck and still want it to look thought through. It sits at the nape, where it feels tidy without looking stiff, and it’s one of the easiest ways to make a simple twist bun look finished.
Why It Works So Well
Split the hair into two sections, twist each side backward, then wrap both twists into a low bun and pin them in place. That’s the whole trick. The shape stays soft around the head, and the bun doesn’t have to be huge to read as polished.
A center part keeps it clean, but a slightly off-center part gives it a less formal feel. If your hair is layered, leave the ends a little loose and tuck them under the bun instead of trying to force every strand flat. That little mess at the edge usually looks better than a too-perfect shell.
- Best for medium to long hair
- Usually needs 4 to 6 bobby pins
- Holds better with day-two hair or light texture spray
- Looks neat with a blazer, dress, or simple tee
Best tip: anchor the pins through the twist itself, not only the outside of the bun. That keeps the style from sliding down by lunch.
2. Sleek Side-Part Twist Bun
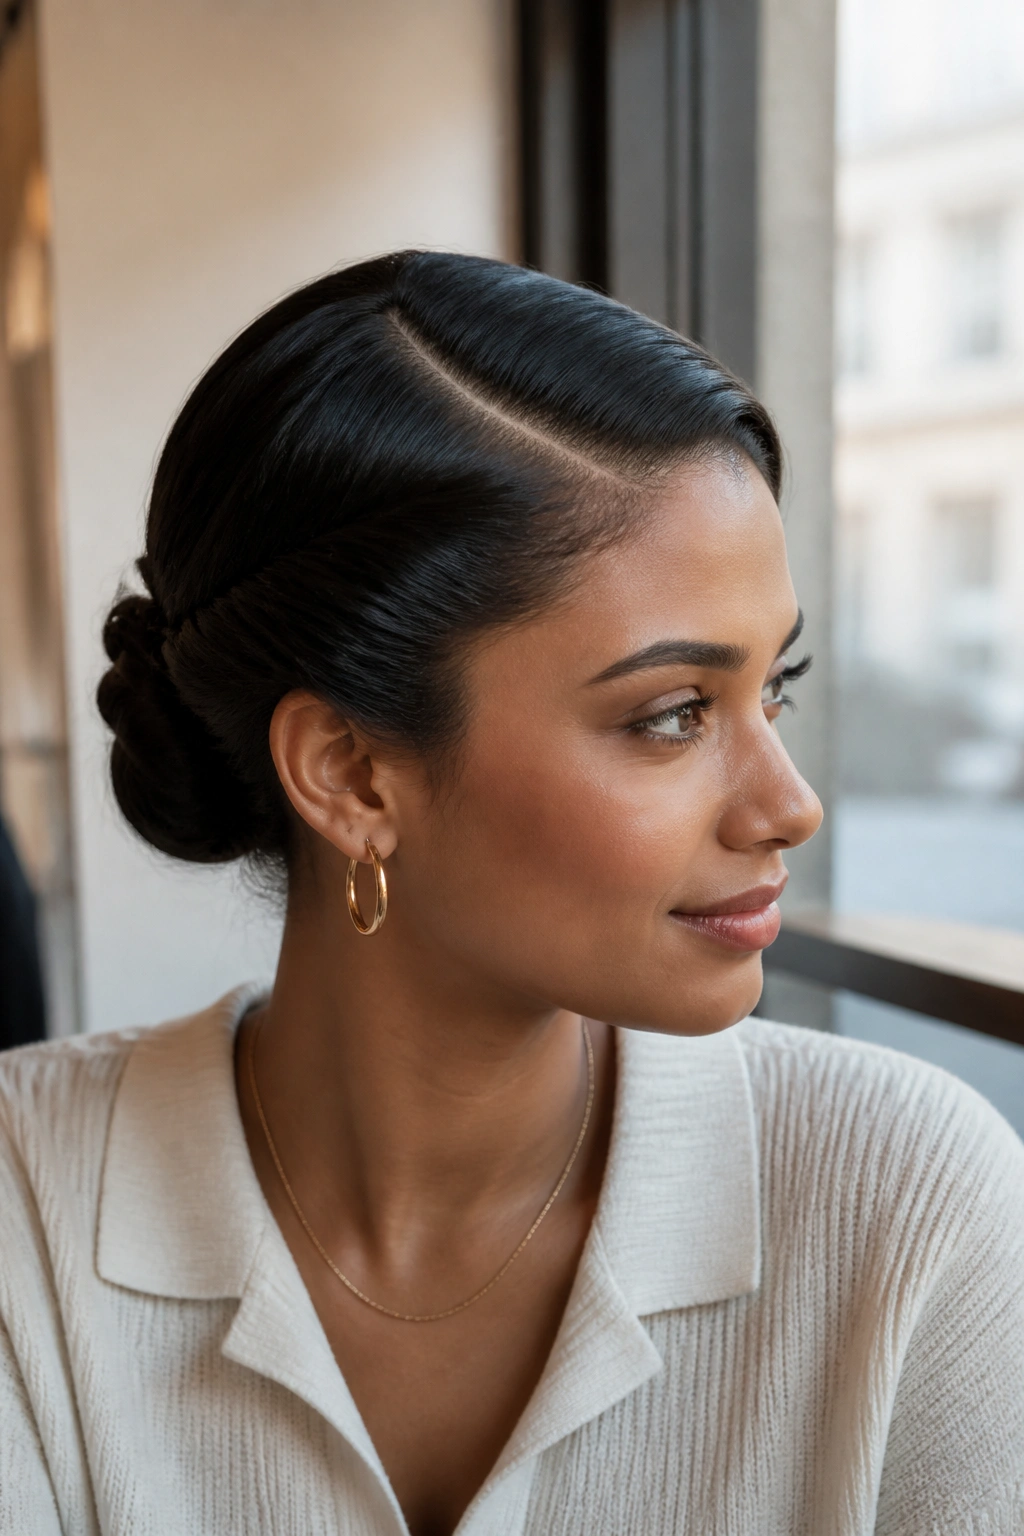
A side part changes the whole mood of a twist bun. It gives the front a bit of sweep and makes the style feel sharper, even if the bun itself is tiny and quiet at the back.
Start by drawing a deep side part with a tail comb, then smooth the top with a light cream or gel. Pull the hair low, twist each side toward the bun, and keep the surface flat before you pin. The result is neat, but not severe.
This version works especially well when the hairline needs a little help. A side sweep can soften a broad forehead, and it can also make fine hair look fuller at the crown because the part creates a clean line that your eye follows.
Don’t overdo the product. A pea-sized amount of gel or styling cream is enough for most hair types. Too much and the bun turns greasy fast, which is never the goal. The shine should look controlled, not wet.
If you wear earrings, this is a strong pick. The side part leaves room for the face, and the bun sits low enough that the whole look feels balanced instead of crowded.
3. French Twist Bun With a Soft Tuck
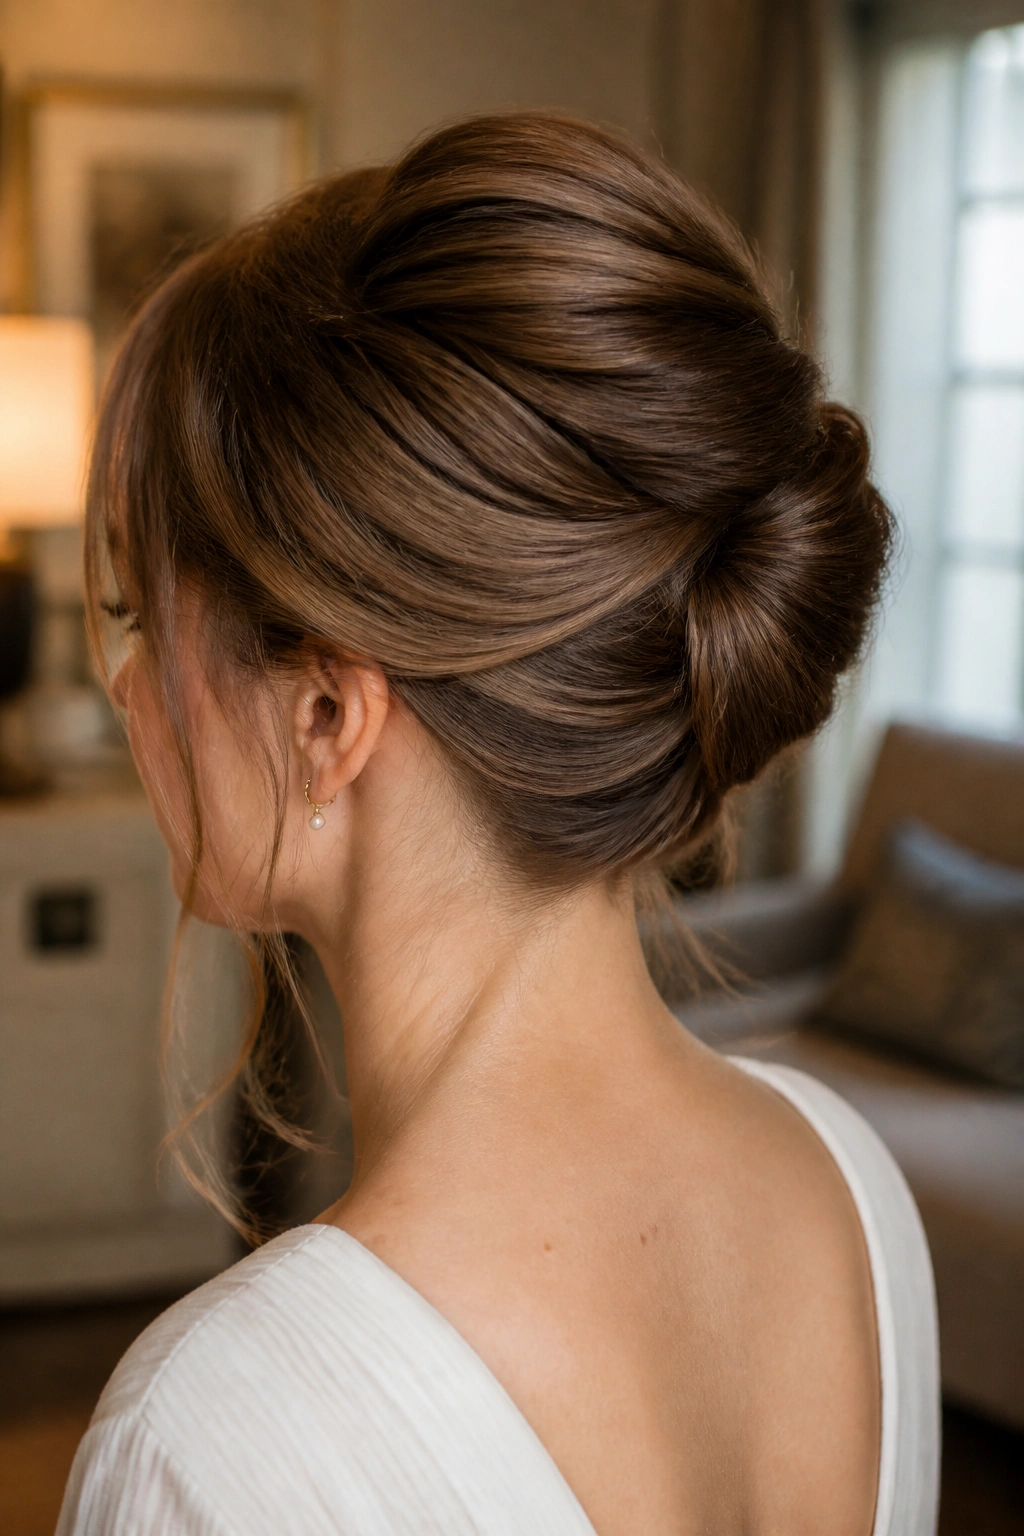
Why does a French twist bun keep coming back? Because it makes the back of the head look neat in a way that feels more refined than a regular coil, but it still doesn’t take much time once you learn the hand motion.
Brush the hair back, gather it at the center, and twist upward along the back of the head until the ends tuck inward. Then fold the length over itself and pin vertically down the seam. The bun ends up looking like a smooth roll with a hidden tuck, which is exactly what gives it that classic shape.
How to Wear It Without Making It Too Formal
The neat trick here is to leave a few tiny pieces loose around the temples if you want it softer. A French twist can look severe if every strand is lacquered down. A couple of face-framing bits keep it from feeling like a costume.
This style also helps shorter layers behave. The tuck hides awkward ends better than a round bun does, and that makes it a smart option for shoulder-length hair that’s just long enough to pin up.
It pairs well with simple studs, a boatneck top, or a collared shirt. Not flashy. Just tidy. And sometimes that’s exactly what the day wants.
4. Double Rope Twist Bun
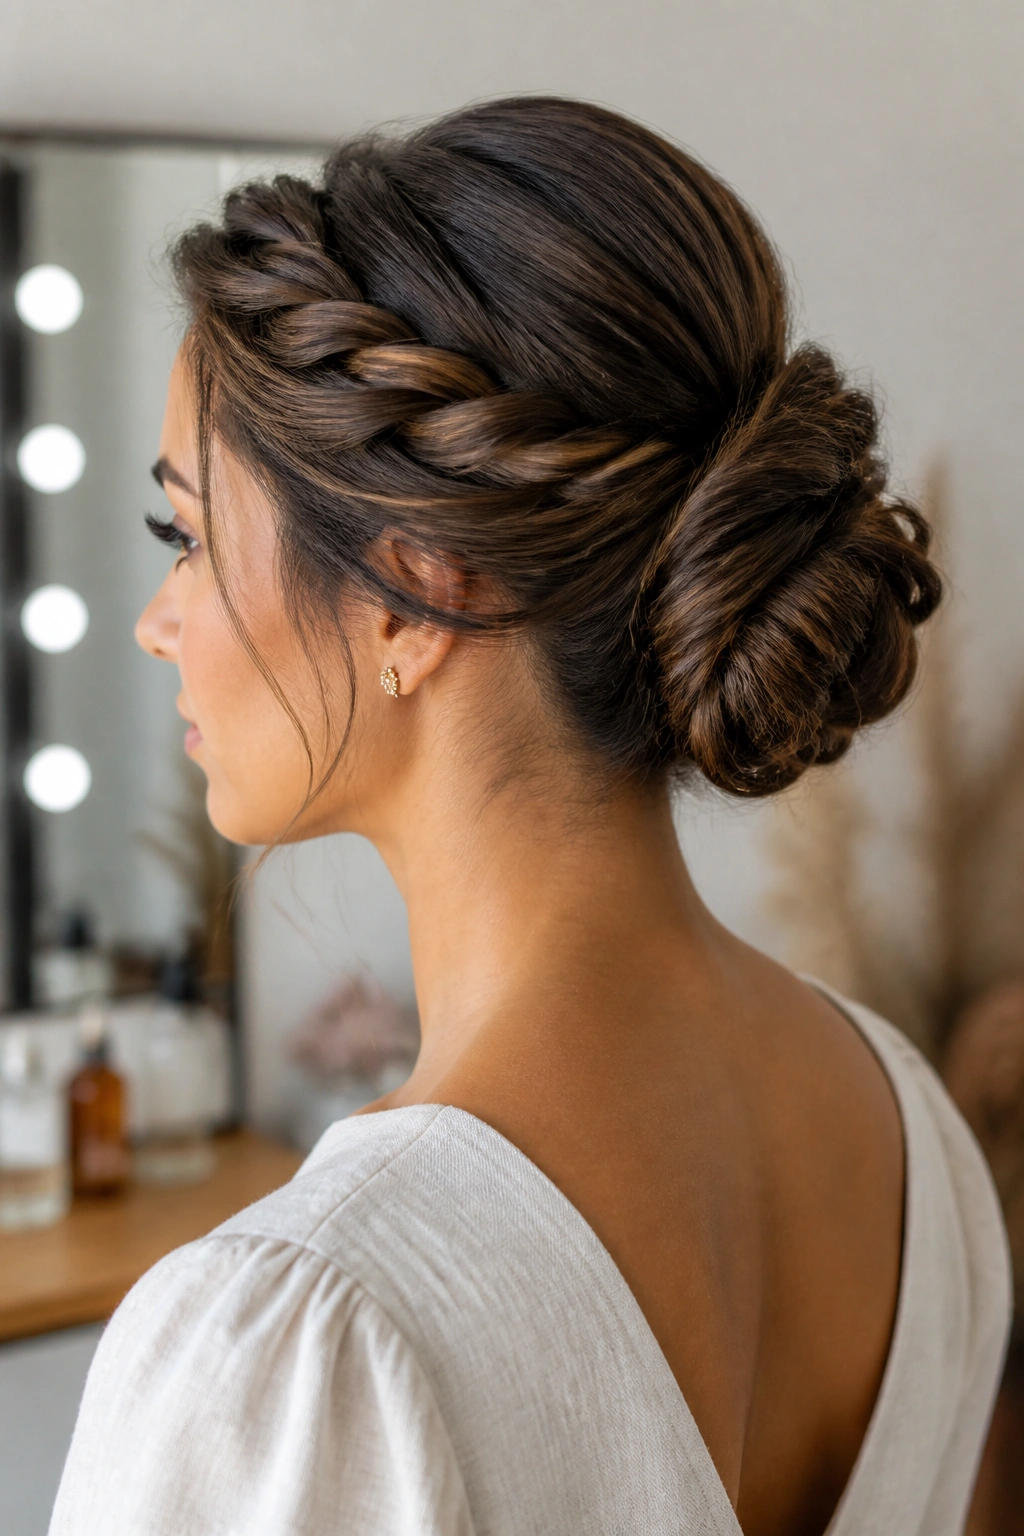
If your hair slips out of pins by noon, a double rope twist bun usually does better than a single soft twist. The two rope sections give the bun more grip and a little more structure, which helps thick or layered hair stay where you put it.
Take one section from each side of the head, split each section in two, then twist the two strands around each other until they tighten into rope twists. Bring both ropes to the back, wrap them into a bun, and pin through the center and outer edge. It feels a little like building a basket by hand.
Key Details That Matter
- Use two small elastics if the hair is very long
- A matte texture spray helps rope twists hold better than silkier products
- Thick hair usually needs 6 to 8 pins
- Fine hair can still do it, but the twists should stay tight from the start
This one has a bit more texture than the classic low bun, which is why it photographs well in person and in motion. The ridges from the rope twist show up even when the bun is compact. That gives the whole look more body without asking for much volume at the roots.
5. Messy Mid-Bun Twist
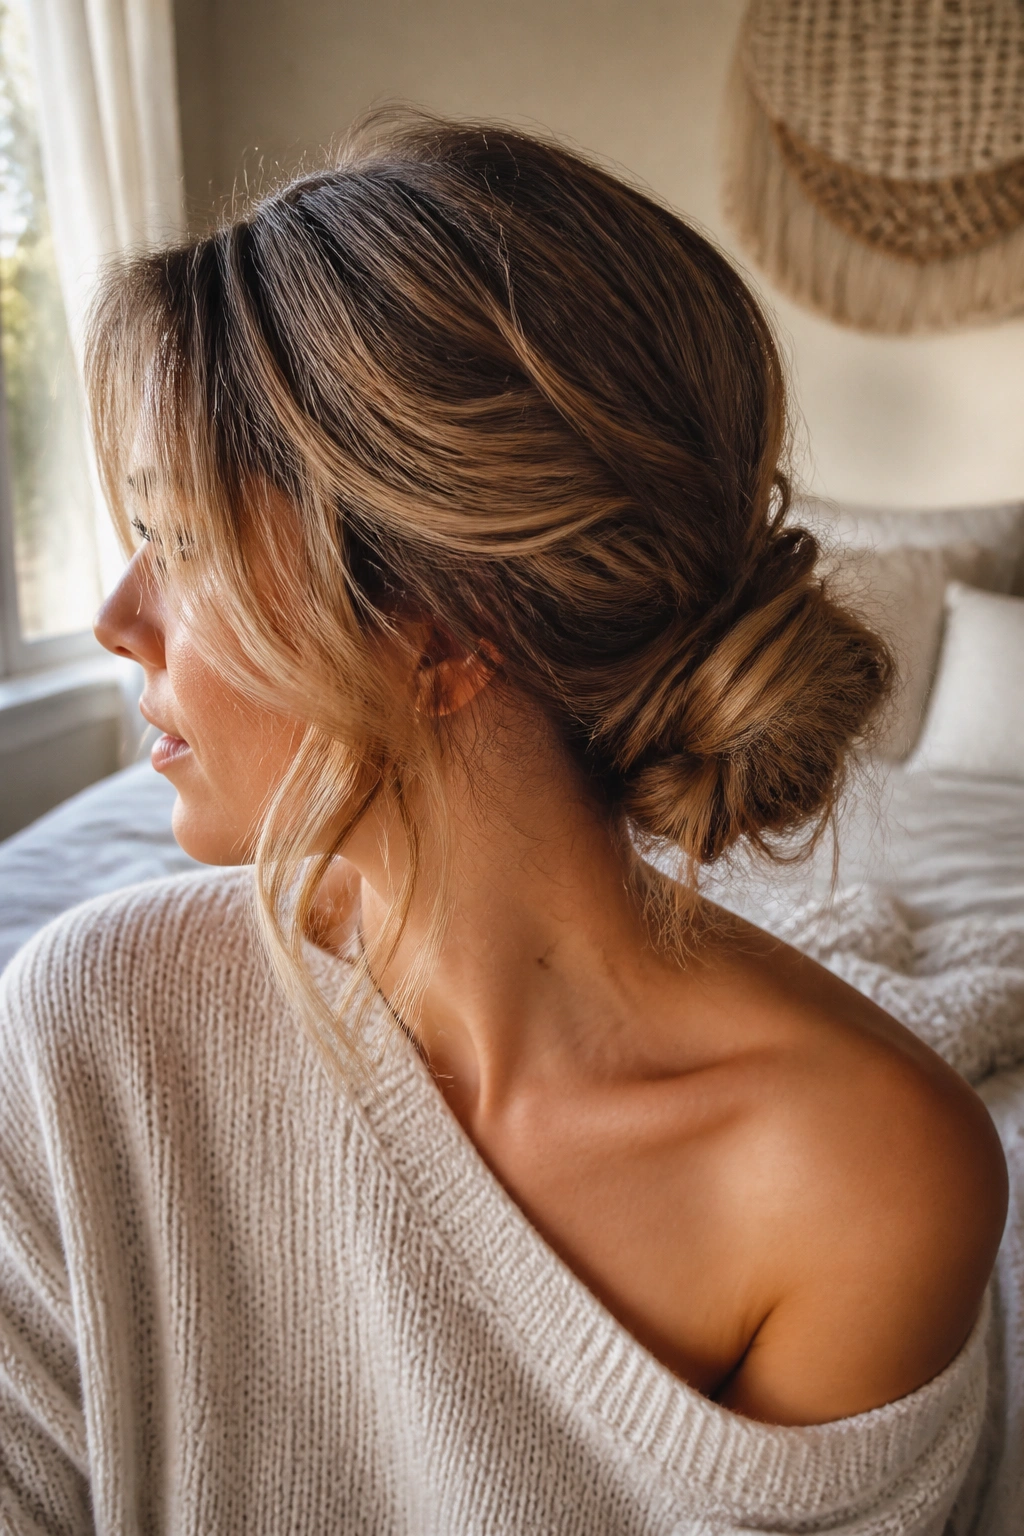
Messy doesn’t mean careless. A mid-bun twist works because the center placement gives it shape, while the looser finish keeps it from looking too severe.
Pull the hair to the middle of the back of the head, not high and not low. Twist each side loosely, then wrap them around a mid-level bun and leave a few ends poking out on purpose. Once the bun is pinned, tug lightly at the twists with your fingertips until the shape feels a little softer around the edges.
The best part is how forgiving it is. If one side looks fuller than the other, that usually just makes the style look more lived in. If the bun sits slightly off center, it can still look good, which is more than I can say for some sleeker updos that demand perfect symmetry.
Use this version when your hair has some texture already. Day-two waves, natural bend, or even a little leftover curl from yesterday will all help. Freshly washed hair can work too, but it needs more pins and more spray. Otherwise the bun may sag before you leave the house.
A mist of light-hold hairspray at the end is enough. No need to shellac it.
6. Low Knot Twist Bun
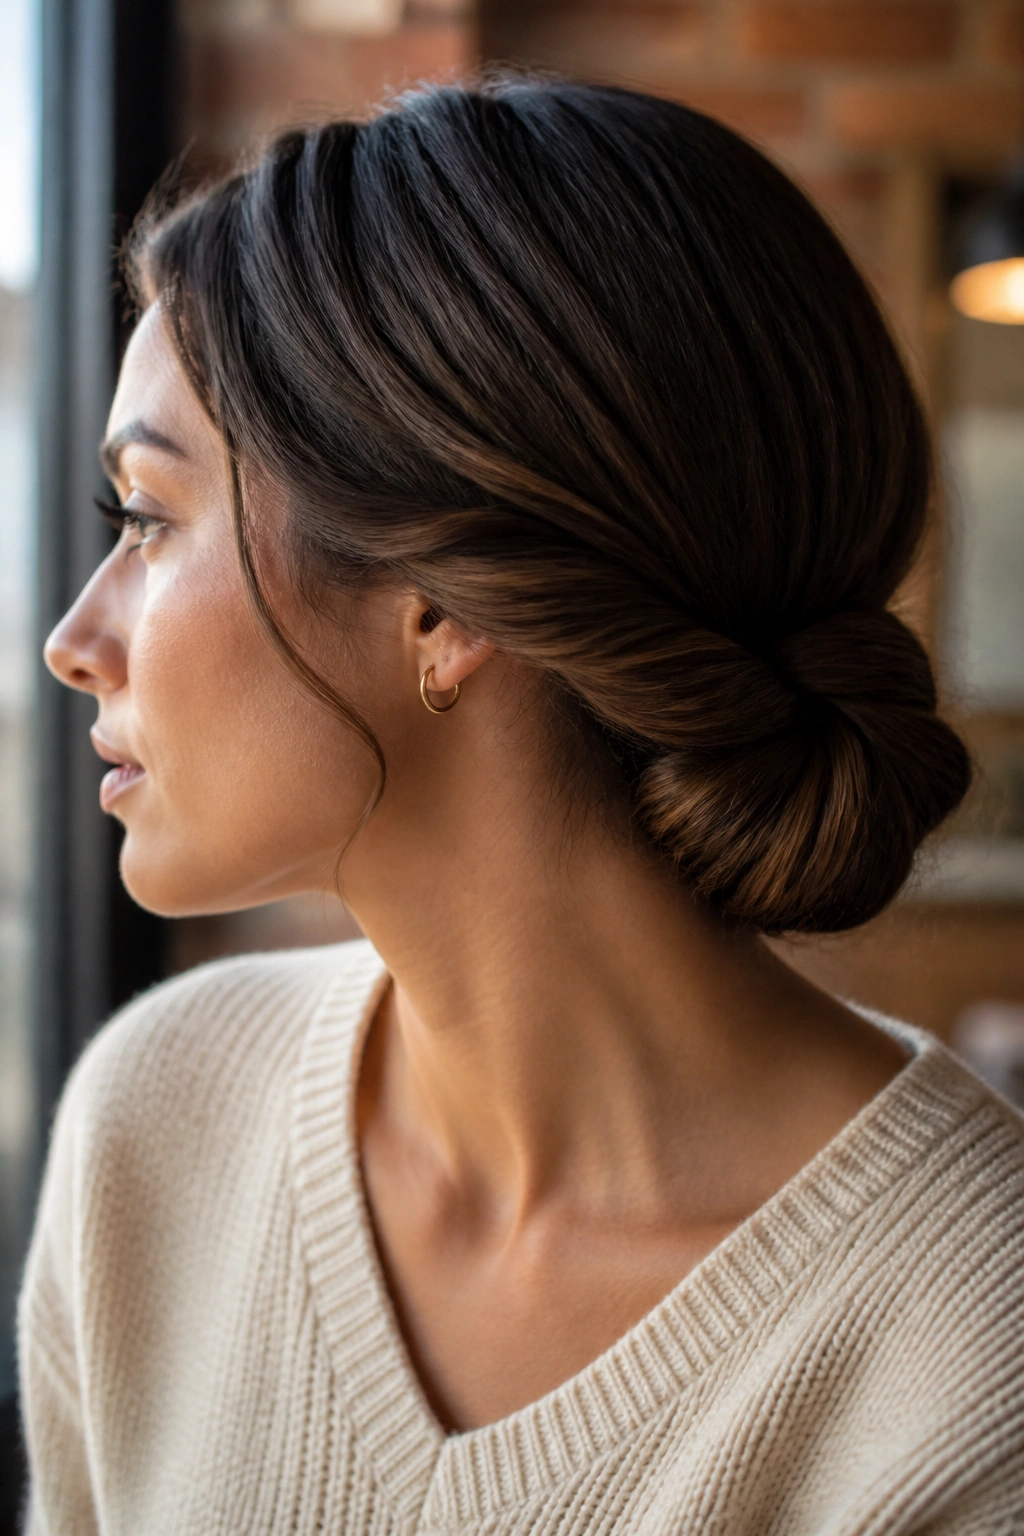
Unlike a round bun that spreads out in a circle, a low knot twist bun sits flatter and tighter at the nape. That makes it a good choice when you want your hair to stay out of the way under a scarf, high collar, or jacket with a stiff neckline.
The style starts with two twisted sections, but instead of wrapping them in a full coil, you tie them into a simple knot and tuck the ends underneath. The result is compact, with a shape that feels a little more modern than a standard chignon.
This is the one I’d pick for a busy day. It holds well, it does not demand much volume, and it doesn’t collapse the way some oversized buns do after a few hours. If your hair is thick, the knot keeps the weight anchored close to the neck. If your hair is fine, the flatter profile keeps it from looking like a tiny ball floating on your head.
It’s also a nice option for people who hate fussing with the back of their hair while they’re working. Once the knot is in place, there isn’t much to adjust.
7. Half-Up Twist Bun
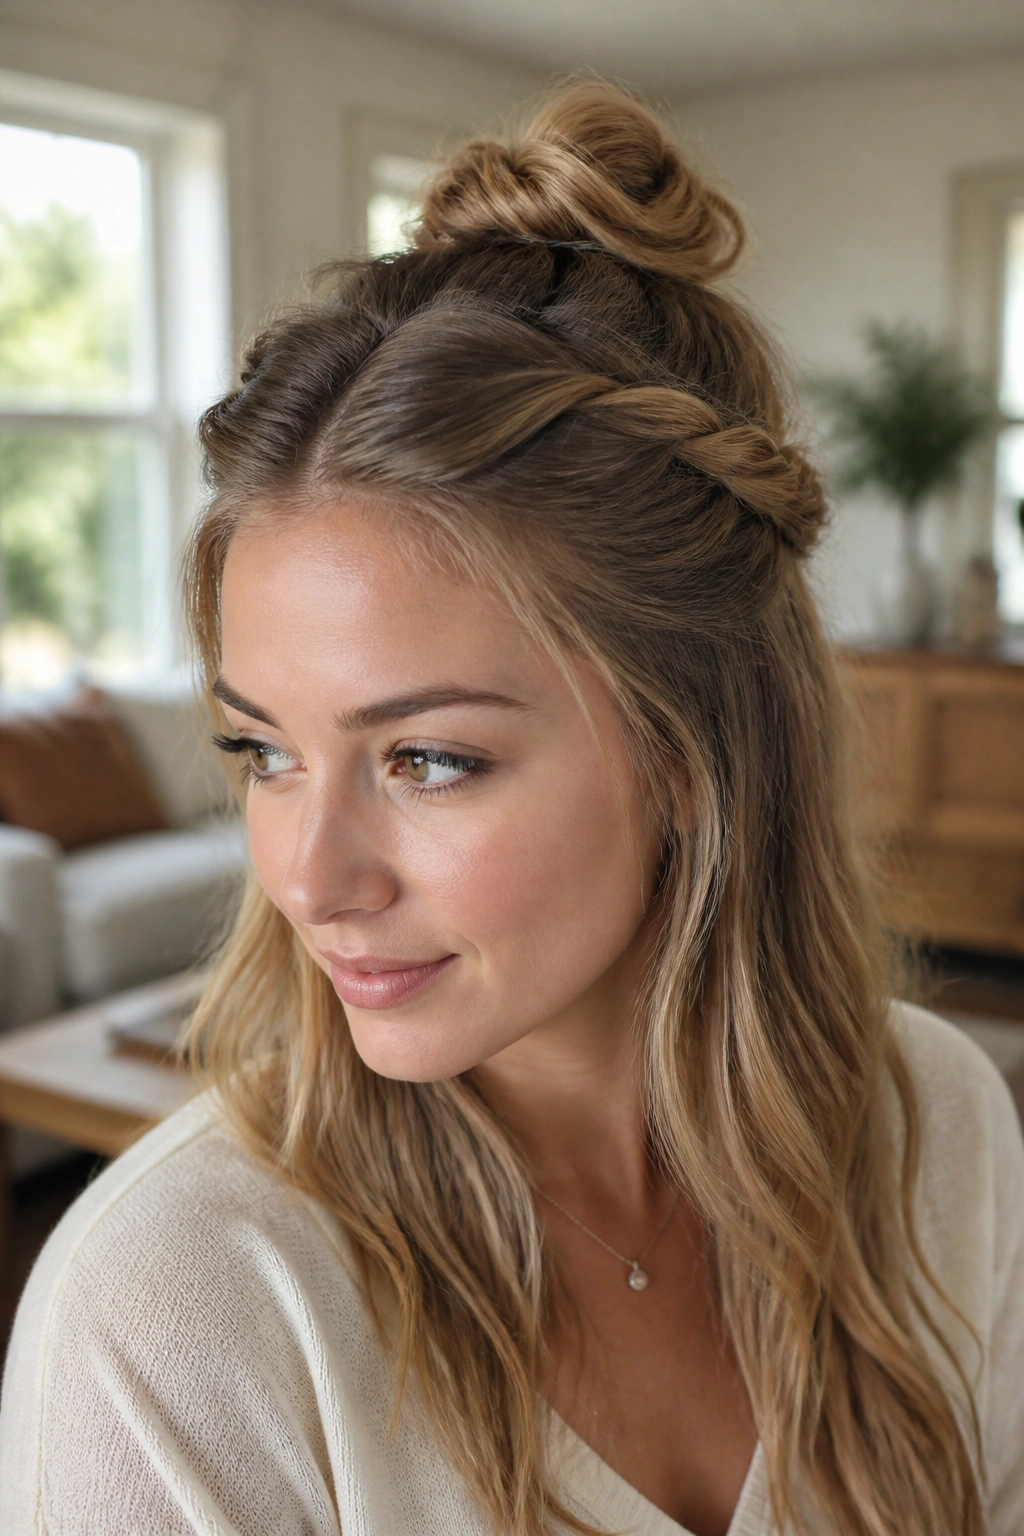
Half-up twist buns are sneaky. Done badly, they can look young or a little unfinished. Done well, they give you lift at the crown and keep the front pieces under control without hiding the rest of the hair.
Start by taking two sections from the temples and twisting them back toward the crown. Tie or pin them into a small bun on top, then leave the rest of the hair down. The bun should look like a detail, not the entire hairstyle.
How to Keep It From Looking Too Small
The placement matters most. If the bun sits too low, it can look accidental. If it sits too high, it starts to feel like a top knot with leftover hair. Right around the upper third of the head usually works best.
Leave the bottom half loose and add a little bend to the ends if the hair is pin-straight. A half-up twist bun needs some contrast. Smooth top, softer length. That mix keeps it from reading as flat.
This is one of the easiest easy updo looks for longer hair that you still want to wear down. It keeps hair out of your face, but you still get movement through the ends, which matters more than people admit.
8. Crown Twist Into Bun
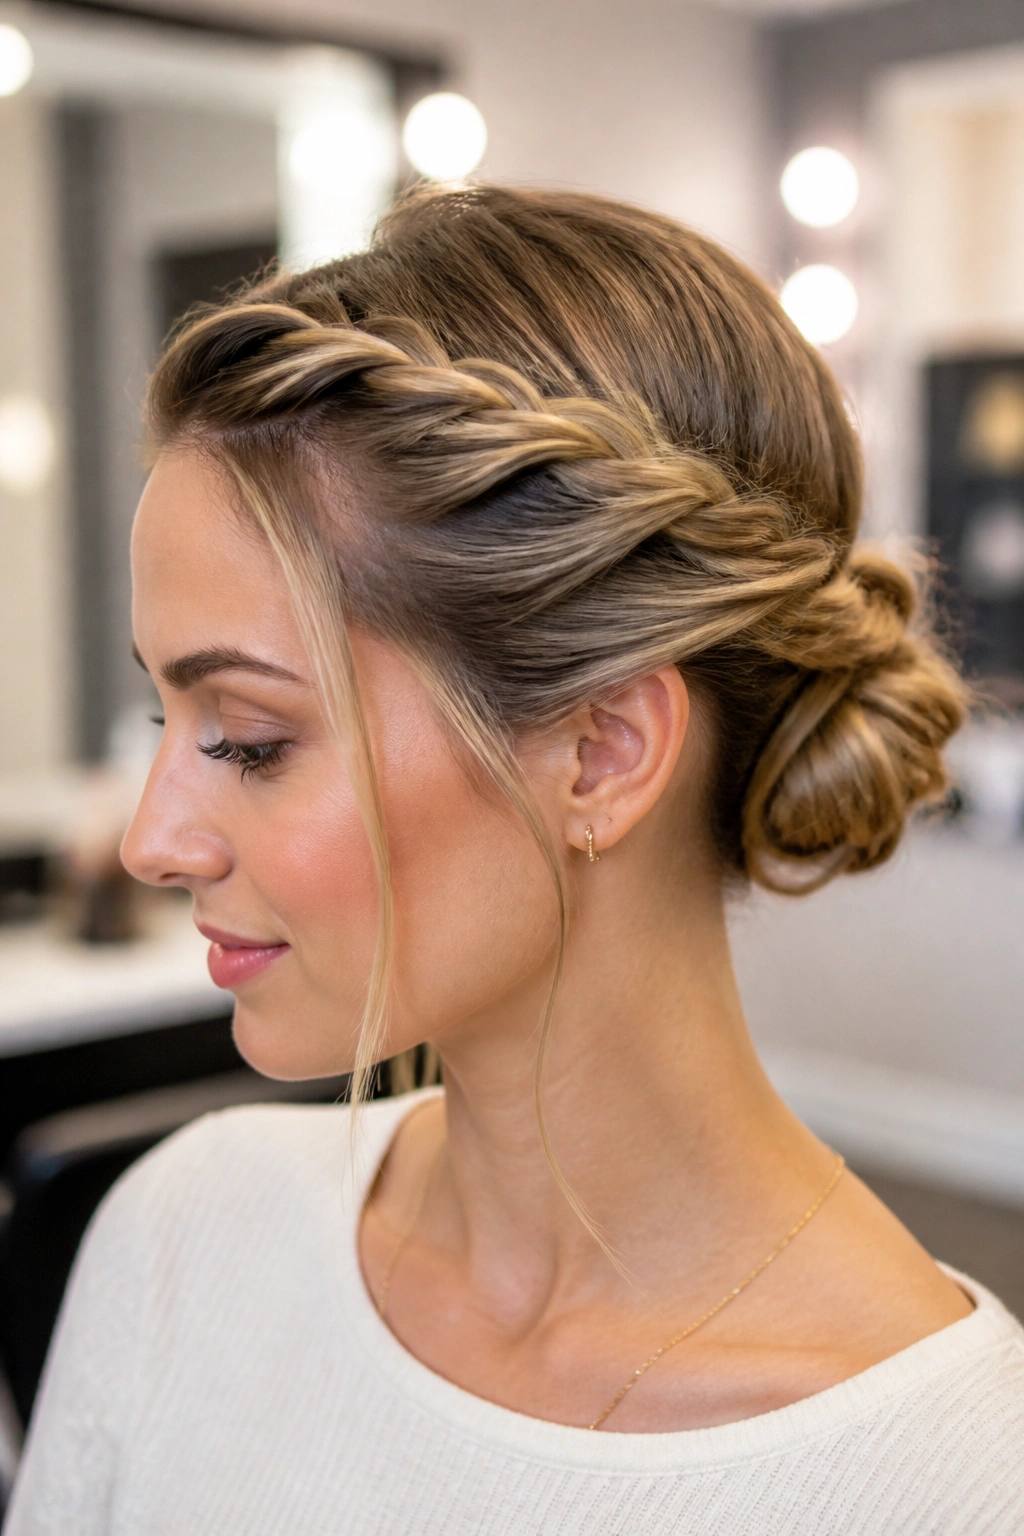
A crown twist into bun pulls the eye upward before it even gets to the bun itself. That’s the whole appeal. The twisted sections around the sides create shape near the face, then everything meets in a bun at the back.
Take a section from each temple, twist them along the hairline, and guide them toward the center back. Once they meet, gather the rest of the hair and form a bun beneath or just behind the twists. The top ends up with a soft curved line, almost like a half halo.
This style is useful when roots are a little flat or when you want the hair to look fuller without teasing it into a puff. The twists create built-in lift, and the bun gives the style a stopping point. Nothing feels too loose or too tight.
It works especially well with shoulder-length to long hair. Very short layers can slip out around the temples, and very long hair may need a second set of pins near the crown. Still, the shape is worth the extra minute. It has a graceful look that doesn’t depend on perfect curls or a blowout.
9. Curly Twist Bun
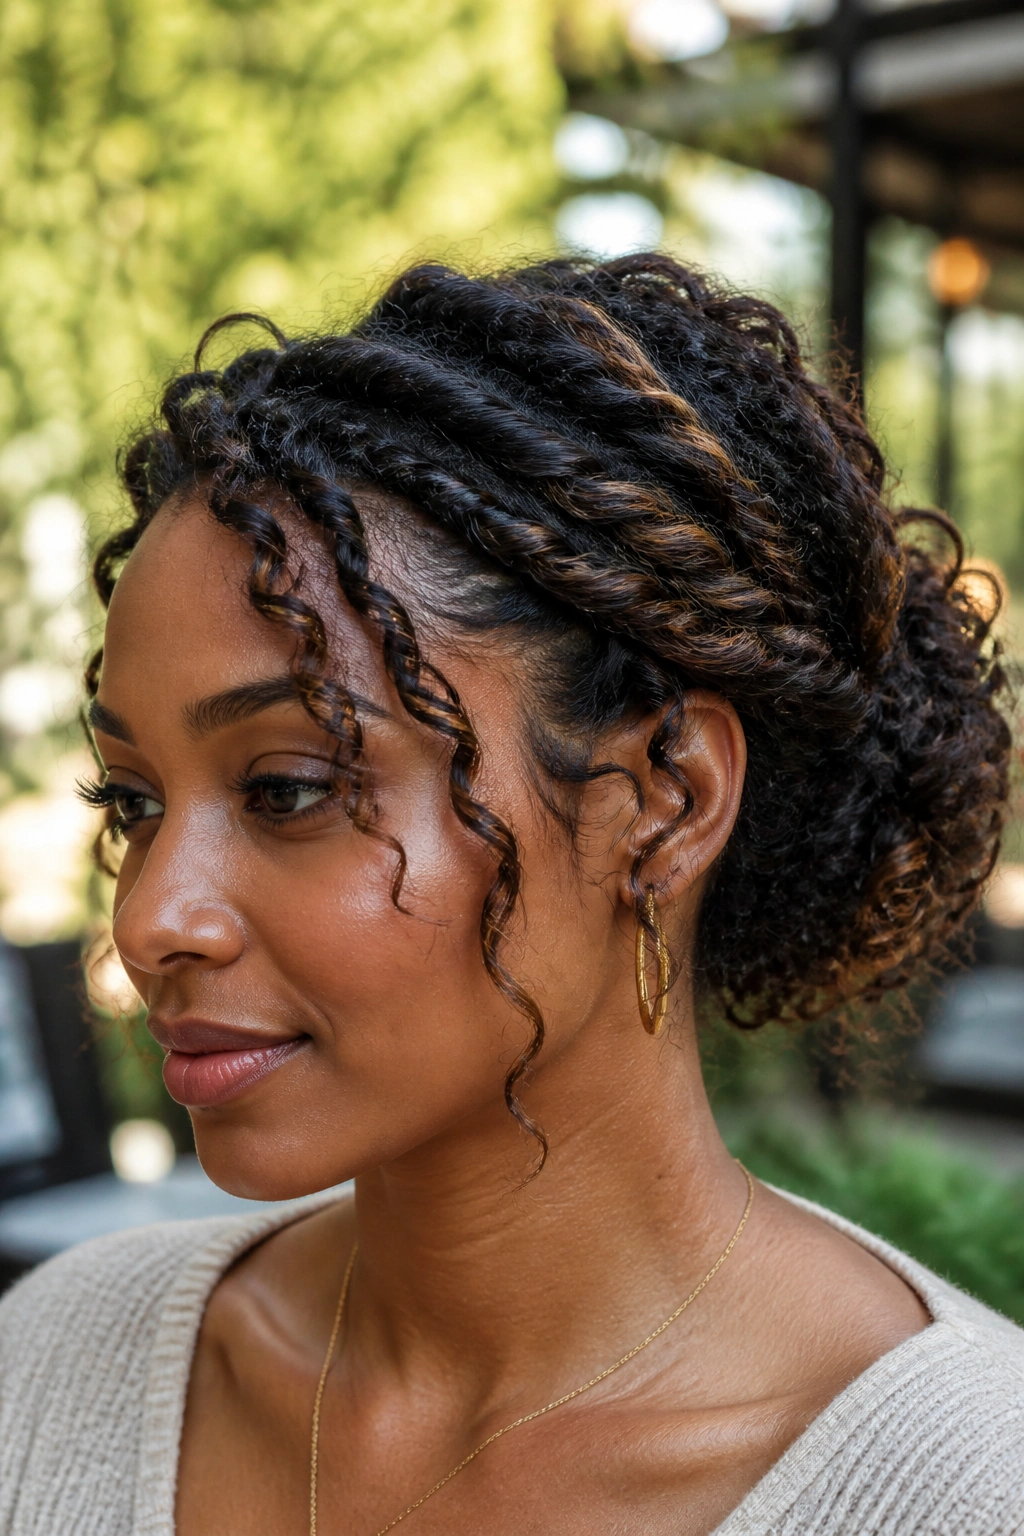
Can you do a twist bun on curly hair without flattening the curl pattern? Yes, if you stop trying to force every curl into the same shape. That is where a lot of people go wrong.
Start on damp or dry curls that have already been detangled. Use a little leave-in conditioner or cream, then twist only the front or side sections and let the rest stay textured. Gather the length into a loose bun at the back or slightly off center, and pin it in a way that supports the curls instead of squeezing them flat.
How to Keep the Curl Shape
Work with the curls you already have. If the hair wants to coil, let it. If a section is more wavy than curly, don’t fight it into a sleek finish just because the rest of the head has tighter bends. That mix can look good.
Use pins that slide in easily, not ones that snag. Curly hair hates rough handling, and the shape falls apart fast if you keep poking at it. Once the bun is secure, stop touching it. Seriously.
This version is one of the nicest ways to make an easy updo feel natural on textured hair. It keeps volume at the crown, shows off the curl, and still gets the hair off the shoulders.
10. Braided Twist Bun Hybrid
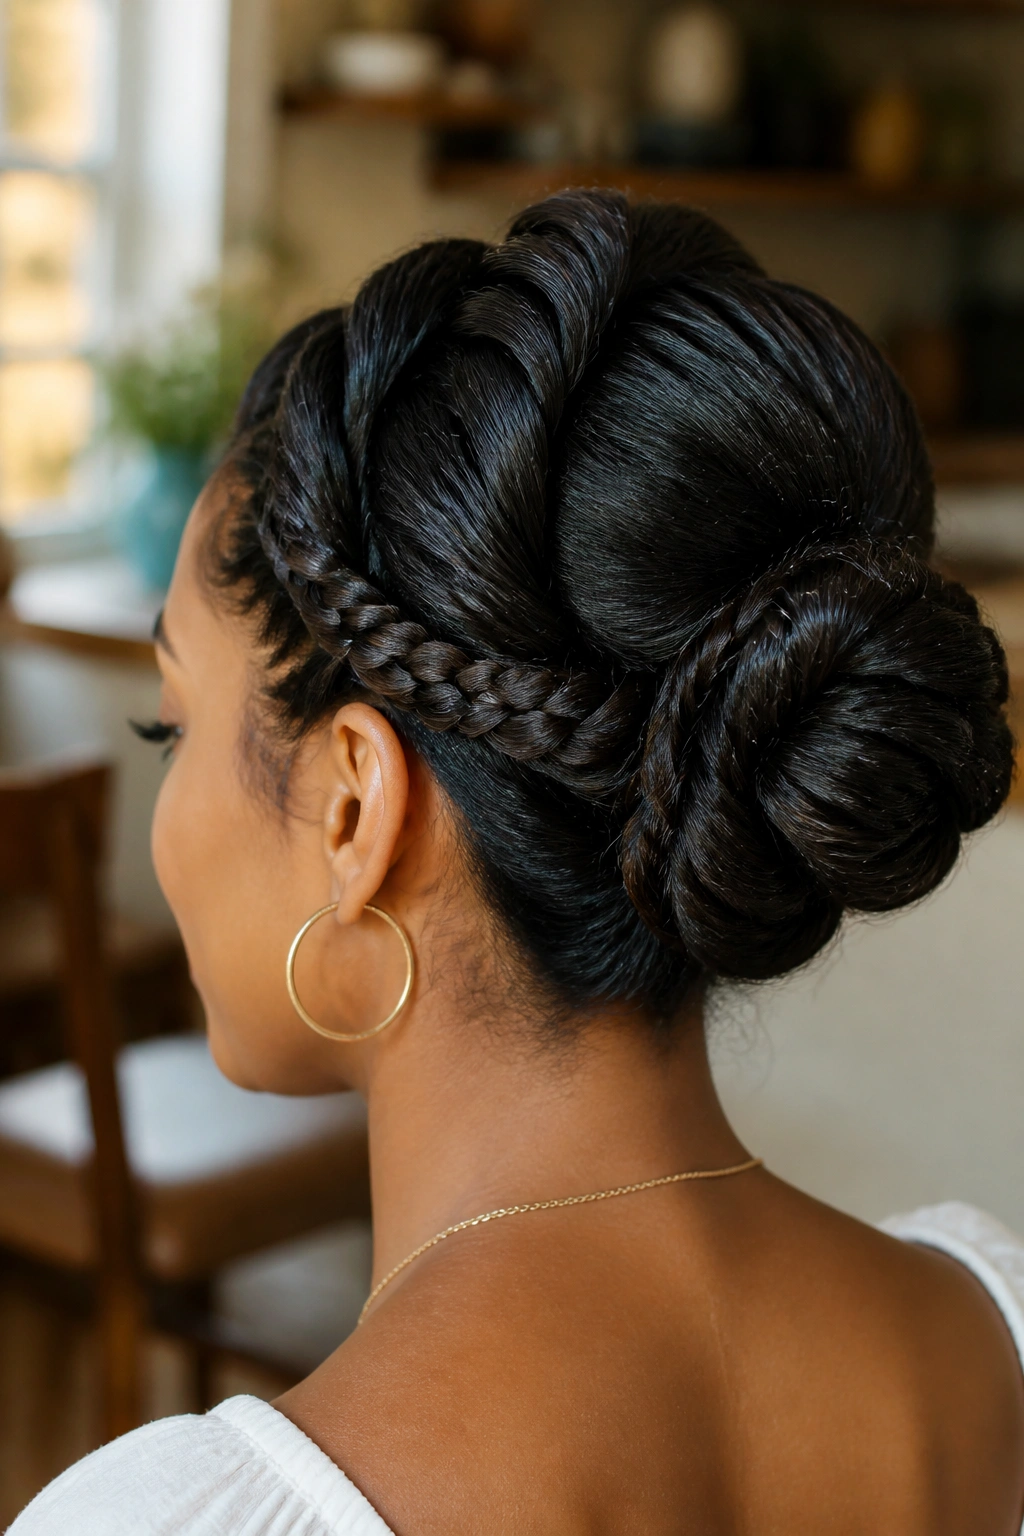
If you want a twist bun with a little extra detail, adding a small braid to each side changes the whole feel without turning the style into a full braid hairstyle. It’s a useful middle ground.
Take one section from each side of the head and make a simple three-strand braid or a rope braid, depending on how much texture you want. Bring the braids back, twist the remaining hair into a bun, then tuck the braids around the base so they look like part of the bun instead of decoration added at the last second.
That extra woven detail helps a plain bun feel more finished. It also gives the style more hold, because braids grip better than loose sections do. Thick hair can handle this easily. Fine hair gets a little more visual body from the texture.
- Good for medium to long hair
- Works well with second-day texture
- Needs 5 to 8 bobby pins, depending on thickness
- Looks good with a matte finish or a soft shine spray
This is the one I’d wear for a dinner, a family event, or any day when I want the bun to look like I spent more effort than I actually did. Which, frankly, is a useful skill.
11. High Twist Top Knot
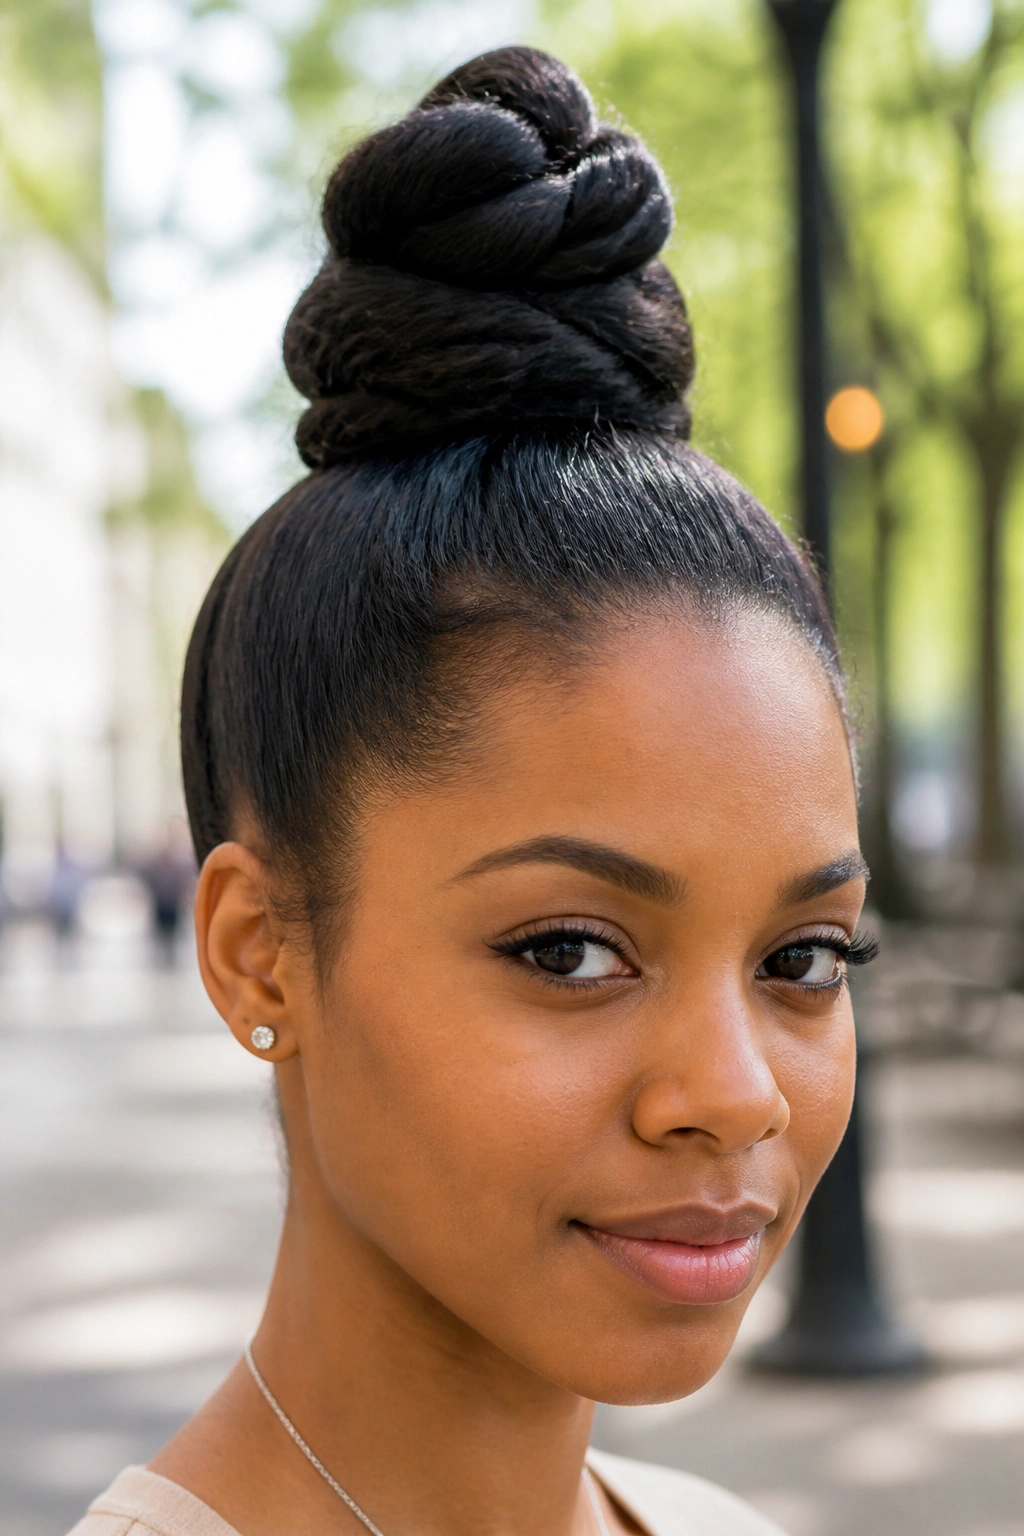
A high twist top knot changes the whole mood of the bun. It lifts everything up, clears the neck, and gives the face a bit more room, which can be useful when you want the hair to feel light and out of the way.
Pull the hair into a high ponytail first, then split the tail into two sections and twist each one tightly. Wrap the twists around the base of the ponytail, keeping the coil close to the head, and pin the ends under the knot. The bun should sit above the crown, not halfway down the head.
The shape works best when the top is smooth and the bun itself has some texture. If the ponytail is too soft, the knot can droop. If it’s too tight, the style starts to look severe. A little lift at the base and a little looseness in the wraps usually gets the sweet spot.
This is a strong pick for thick hair because the weight is centered high and the hair has room to fill out the knot. It also pairs well with athletic wear, sharp jackets, or anything with a higher neckline.
One warning: if your hair is very long, the knot can get heavy. In that case, spread the coils a bit wider and pin underneath as you go.
12. Gibson-Tuck Twist Bun
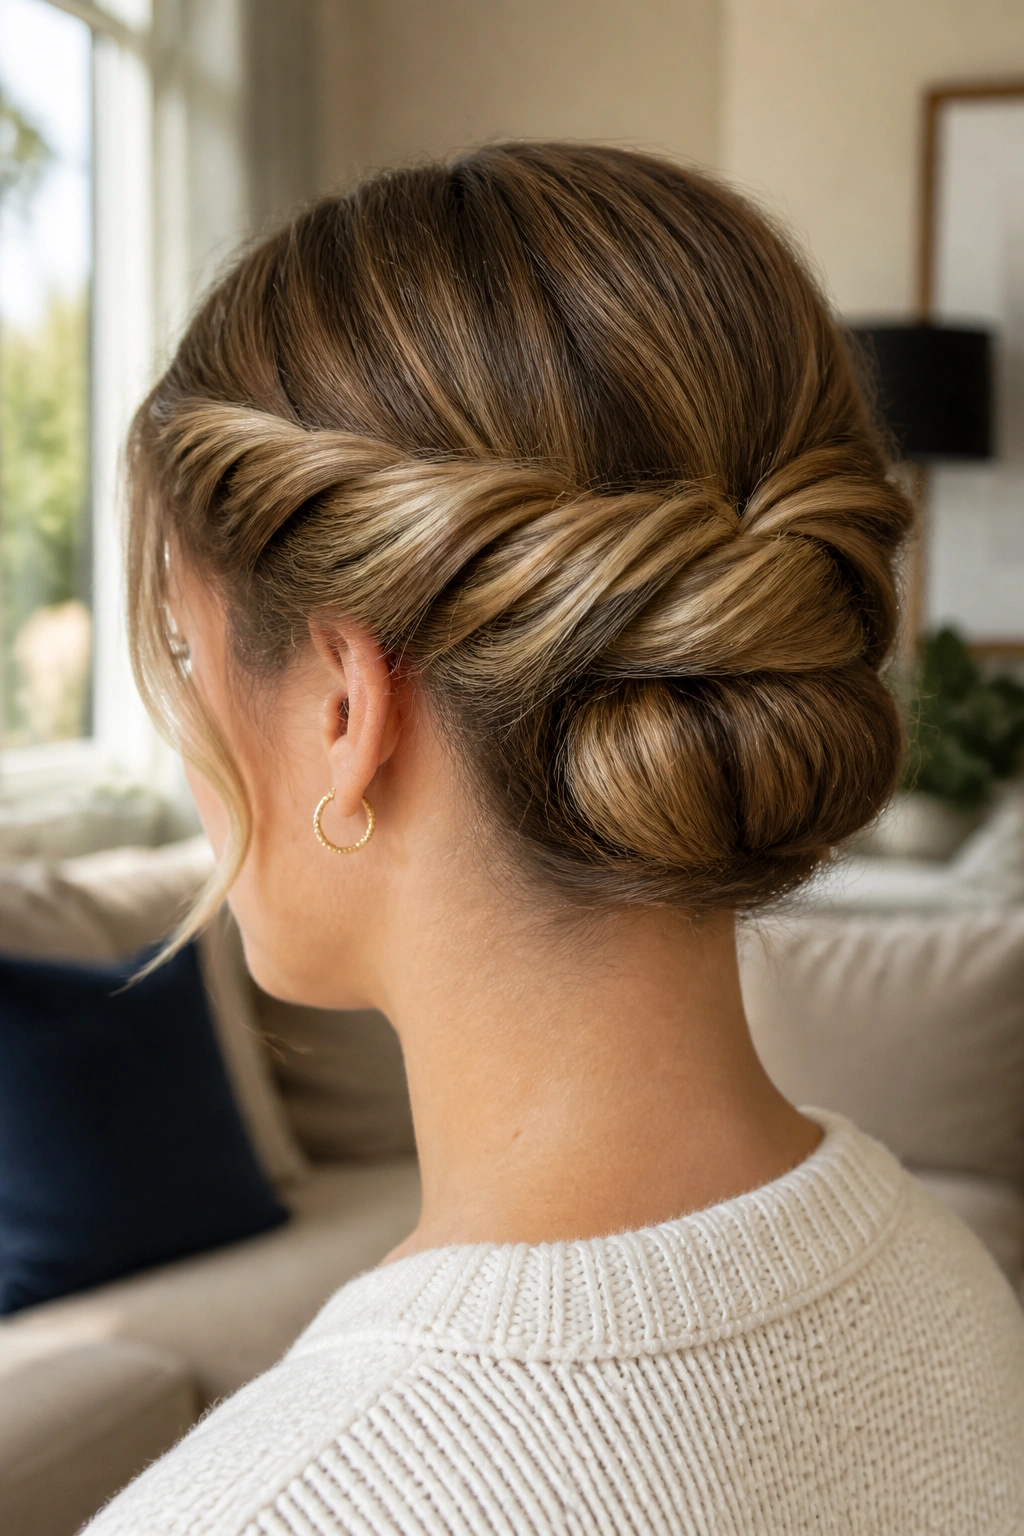
The Gibson-tuck twist bun is quieter than a lot of other styles, and that is exactly why I like it. The hair rolls inward instead of sitting in a round pile, so the whole look feels contained and tidy.
Create two small twists from the front sections, then gather the rest of the hair into a low ponytail or loose hold near the nape. Fold the length upward and tuck the ends into the roll, almost like making a pocket. The twists from the front can sit over the tuck or feed into it, depending on how much detail you want.
What Makes It Different
Unlike a standard bun, this style hides the ends. That matters if your hair has blunt layers or if the bottom section tends to fray when pinned. The tuck keeps the finish smooth without asking for a perfect circular bun.
It’s also handy for medium-length hair that feels too short for a big bun but too long to leave hanging. The Gibson shape gathers the length neatly, and the front twists add enough interest that it doesn’t look plain from the front.
This one works well with a soft blouse, a knit dress, or any outfit that already has a lot going on. The hair stays calm. The clothes can do the talking.
13. Accessorized Twist Bun
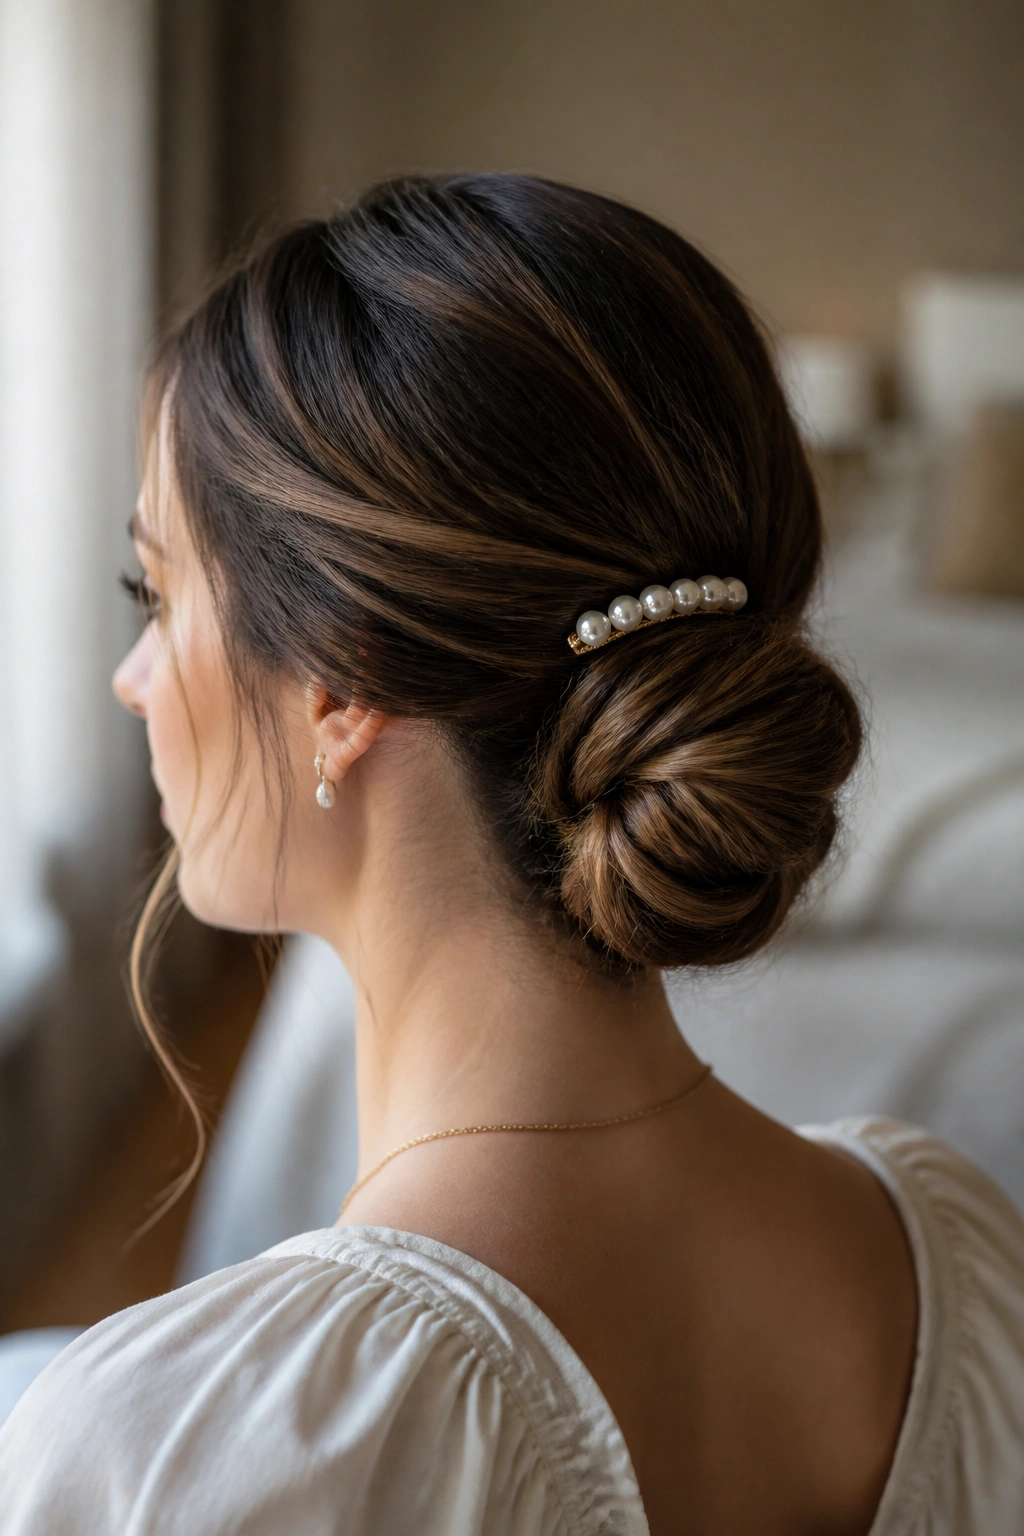
A twist bun can change a lot with one accessory, and you do not need a pile of decorations to make that happen. One comb, one ribbon, or one set of pearl pins is usually enough.
Build a simple low or mid twist bun first, then choose one accent and place it where the eye lands naturally. A comb can sit above the bun, a ribbon can wrap around the base, and small decorative pins can trace one side of the twist. If you add all three at once, the style starts to feel crowded fast.
How to Keep the Accessory From Taking Over
Pick one thing that matches the shape of the bun. A narrow bun looks better with a slim comb or a short ribbon. A fuller bun can handle a larger clip or a cluster of pins.
Keep the rest of the hair simple. When the bun is doing the talking, the part, the twist, and the finish should stay clean enough that the accessory has room to matter. Too much texture everywhere makes the detail disappear.
This version is handy for events, date nights, or any day when plain hair feels a little too plain. The bun itself stays easy. The accessory gives it personality.
14. Side-Swept Low Twist Bun
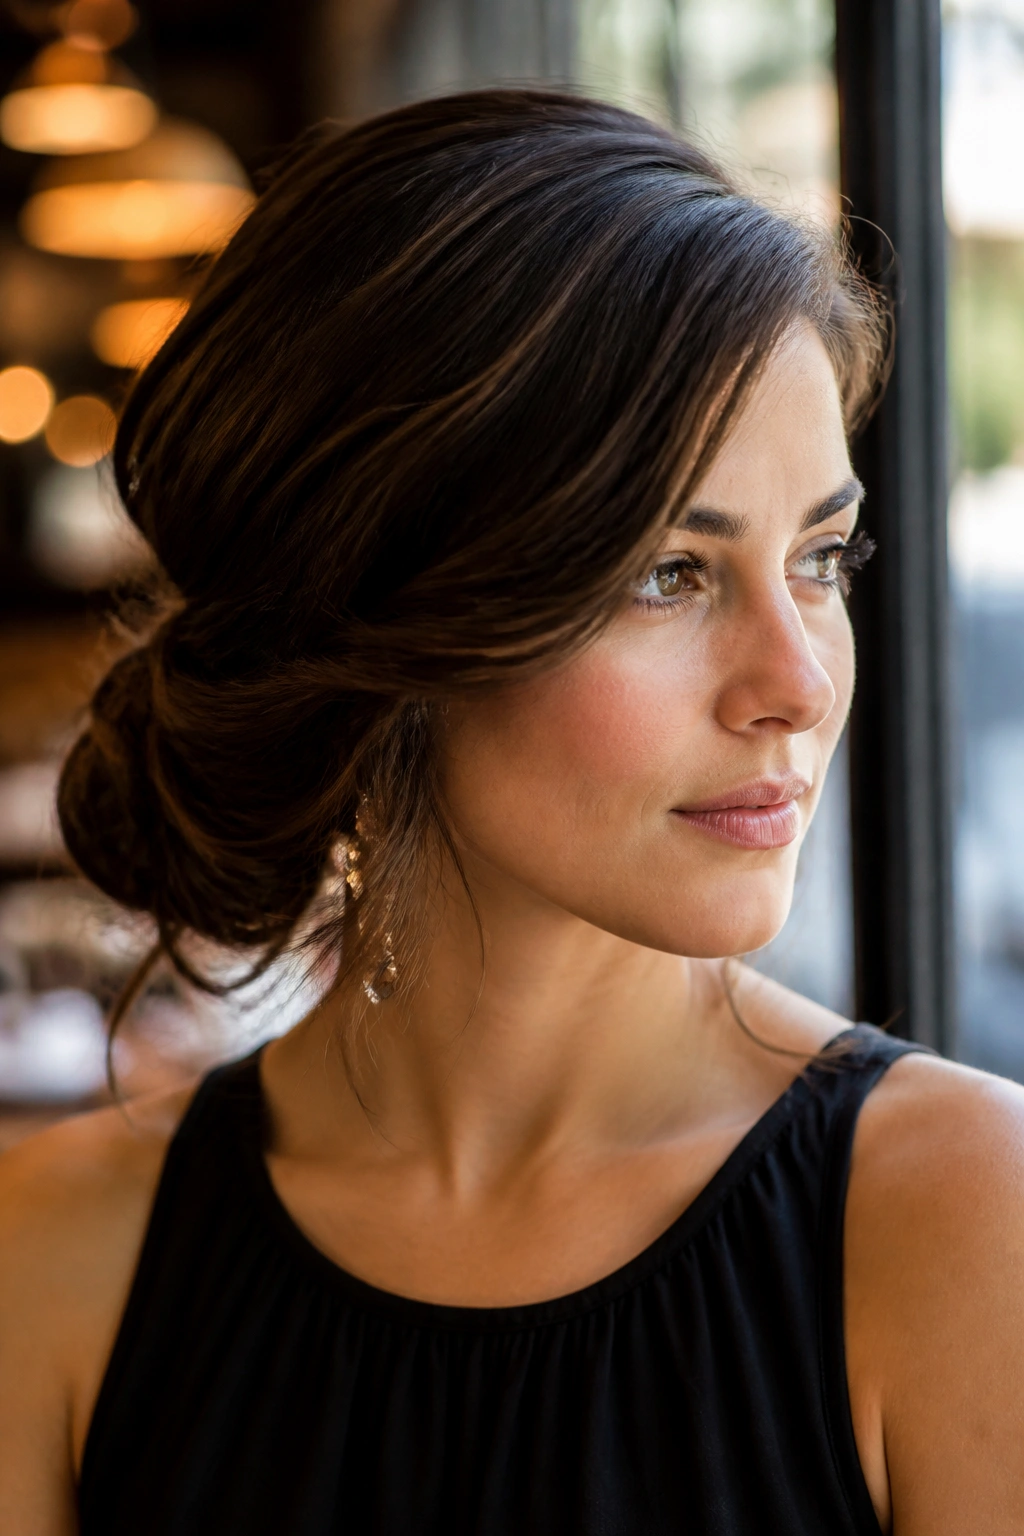
A side-swept low twist bun changes the shape of the face in a softer way than a center-part bun. That slight shift matters. It pulls the eye diagonally instead of straight down the middle, which can make the whole style feel more relaxed.
Sweep the hair to one side, twist the heavier side first, then gather everything into a bun low and slightly off center at the nape. Keep one front piece a touch looser if you want movement near the cheek. That little curve can make a plain bun feel less strict.
This style works well when you want the bun to sit politely but not formally. It also gives earrings more room, especially long ones, because the hair is not sitting symmetrically on both sides. If your hair is thick, the side sweep can help distribute the weight. If your hair is fine, the asymmetry can make the bun look fuller than it is.
The finish should be soft, not messy. A side-swept bun can drift into “I forgot to fix my hair” territory if the twists are too loose. Keep the base secure and let the looseness live only around the front.
15. Quick Twist Bun for Second-Day Hair
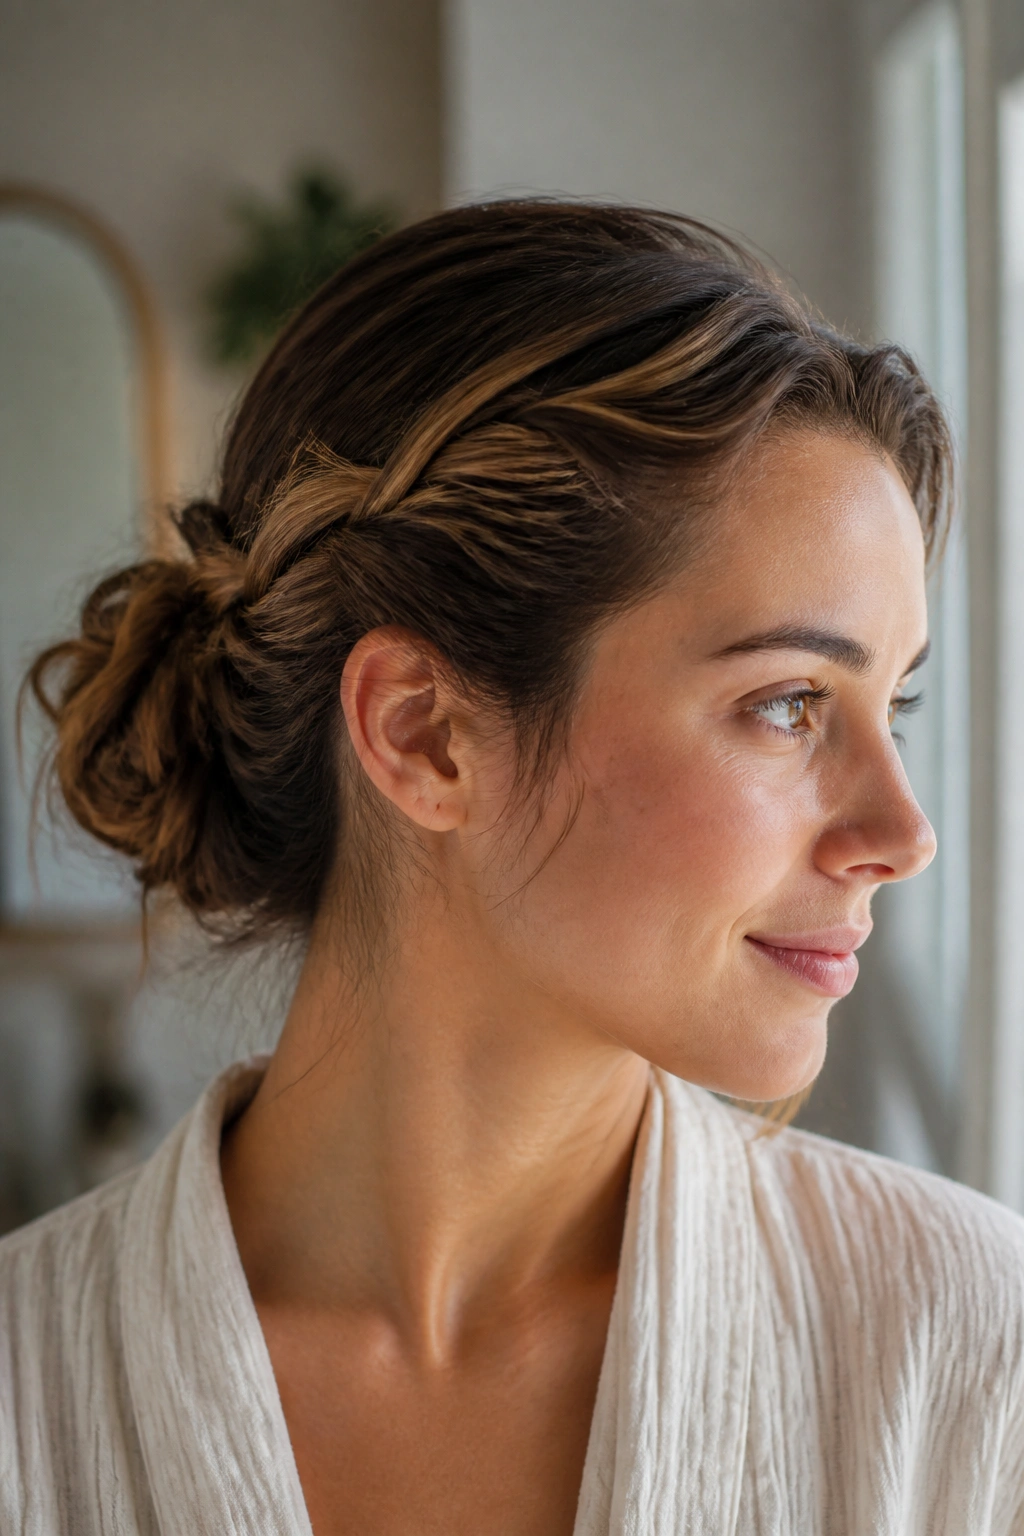
Second-day hair is where twist buns shine. The hair has a little grit, a little bend, and enough memory from yesterday that it usually cooperates better than fresh-washed hair that wants to slide everywhere.
Pull the hair into a mid or low ponytail, split it into two sections, twist each one loosely, and wrap them into a bun with only a few pins. Don’t chase perfection here. The charm is in the speed. A couple of escaped pieces near the ears can make the style look softer and more lived in.
The Fast Version
- Mist the roots with dry shampoo if they feel flat
- Twist each side only two or three turns before wrapping
- Use 4 pins max if you want it to stay relaxed
- Leave the ends tucked loosely instead of forcing a hard tuck
This is the style that saves you when the day starts early and your patience runs thin. It gets the hair up, keeps the shape readable, and doesn’t ask for a mirror session that lasts forever.
It’s also the one I’d point to if someone says they “can’t do updos.” You can. You just need a style that forgives speed.
Twist buns work because they give you structure without turning the hair into a helmet. That’s the real appeal. You get shape, movement, and enough control to feel put together, which is a rare combination on a busy morning.
If you keep one thing in mind, make it this: start with enough grip at the roots, then stop fussing once the bun is secure. The best twist bun hairstyles for an easy updo usually look better after one careful adjustment than after ten small ones.
