



Long hair makes a crown braid look expensive fast. It also makes the style harder to pin if you skip the boring prep, which is where most people get annoyed and give up.
Most crown braid hairstyles for long hair live or die on tension. Too loose, and the braid slips into a sad little rope by noon. Too tight, and you get that stiff, pulled-back look that makes your scalp feel like it signed a contract it never wanted.
The sweet spot is somewhere in the middle. Use hair with a bit of grit, section it cleanly, and keep a box of bobby pins nearby because long hair always finds a way to hide the one pin you desperately need. That part never changes.
The styles below move from neat and classic to softer, fuller, and more decorative, so you can pick the one that fits your hair, your hands, and how much time you actually have.
1. Classic Halo Crown Braid

The classic halo braid is the version most people picture when they hear “crown braid.” One braid starts near a temple, travels around the head, and disappears under the opposite side. On long hair, the whole point is to make the braid feel secure without making it look stiff.
Why It Works on Long Hair
Long hair gives you enough length to wrap the braid cleanly around the head without tiny ends poking out everywhere. It also gives the braid weight, which helps the style sit flush instead of floating off the scalp.
A little texture helps a lot. Second-day hair, a light mist of dry shampoo, or a touch of texturizing spray gives the strands enough grip to stay where you put them.
- Start the braid just behind one ear or slightly above it.
- Keep the first section tight so the braid doesn’t loosen halfway around.
- Pin every 2 to 3 inches as you wrap.
- Tuck the tail under the braid base and hide the end with a crossed pin.
Pro tip: angle the pins inward, not sideways. That tiny change makes the style last longer than people expect.
2. Double Dutch Crown Braid
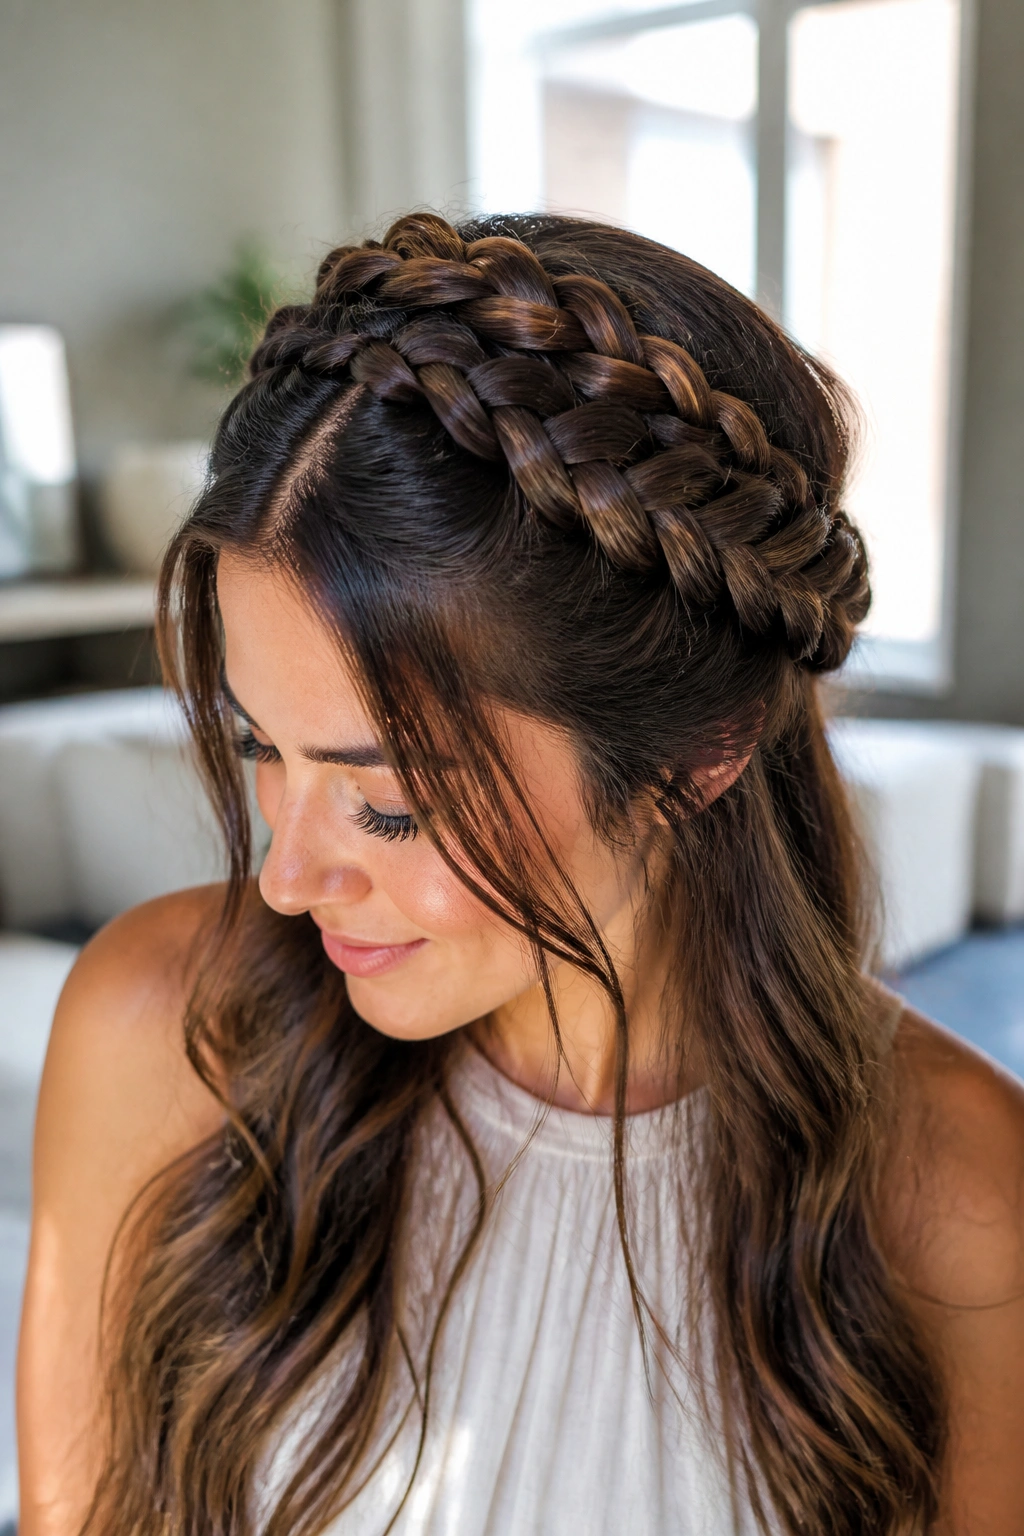
A double Dutch crown braid is the sharper, more defined cousin of the classic halo. If the standard version feels soft and airy, this one has a raised ridge that reads clean from across the room. It’s one of those styles that looks more complicated than it is, which is always nice.
The Dutch braid technique means you cross sections under instead of over, so the braid sits on top of the hair instead of sinking into it. On long hair, that raised shape gives the style more presence and helps it survive a long day without flattening out too fast.
It also suits thick hair better than people think. Thick lengths can feel heavy in a flat braid, but the Dutch structure keeps the shape visible and neat. If your hair is straight and slippery, start with a rough blow-dry and a little dry texture at the roots.
I like this version for days when a regular halo feels too soft. It has more edge. More structure. Less fuss.
3. Fishtail Crown Braid
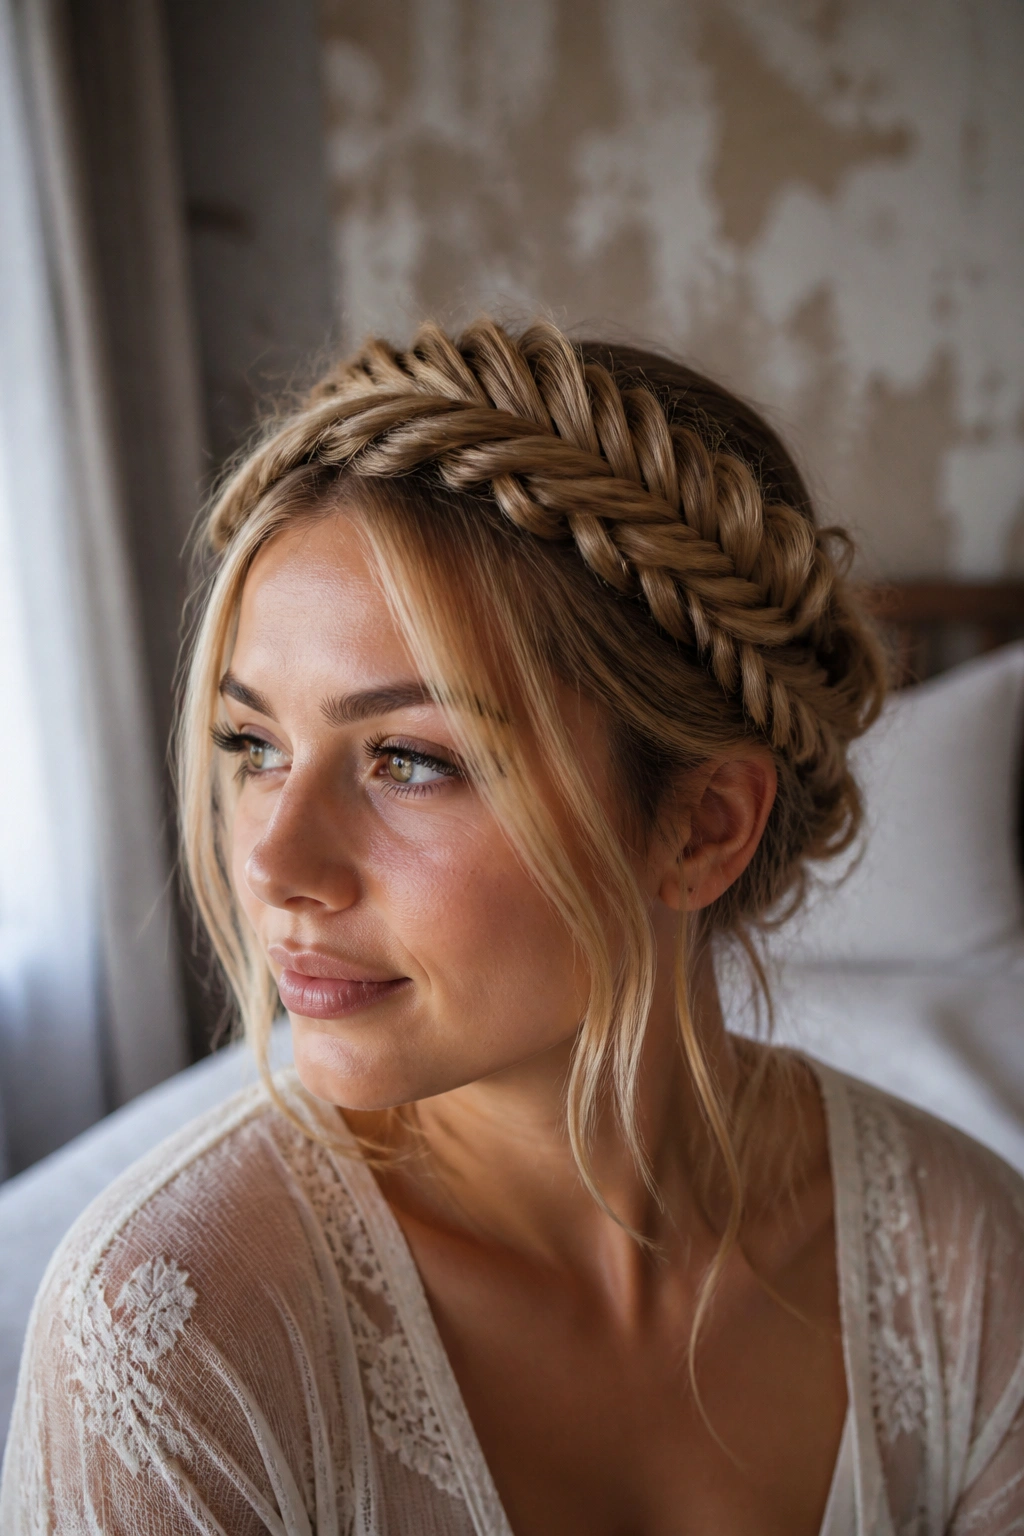
Why does a fishtail crown braid look so detailed even when the shape is simple? Because the tiny sections make the braid read like woven fabric instead of a standard plait. That fine pattern stands out beautifully on long hair, especially when the braid can travel all the way around the head without running out of material.
The tradeoff is time. A fishtail braid takes longer than a three-strand braid, and you’ll feel that in your hands if your hair is very long or thick. Still, the finish is worth it when you want something that feels polished but not too formal.
How to Wear It
Keep the sections narrow and even. That’s the whole game. Uneven pieces make the braid look loose in the wrong way, and the pattern gets messy fast.
A side part works well here because it gives the braid a little movement across the forehead. If your hair is layered, smooth the top with a light cream first so the shorter pieces don’t fray out before you finish the wrap.
A fishtail crown looks especially good with long, straight lengths that have been lightly waved through the ends. The braid stays neat, and the loose ends stop the style from feeling too severe.
4. Rope-Twist Crown Braid
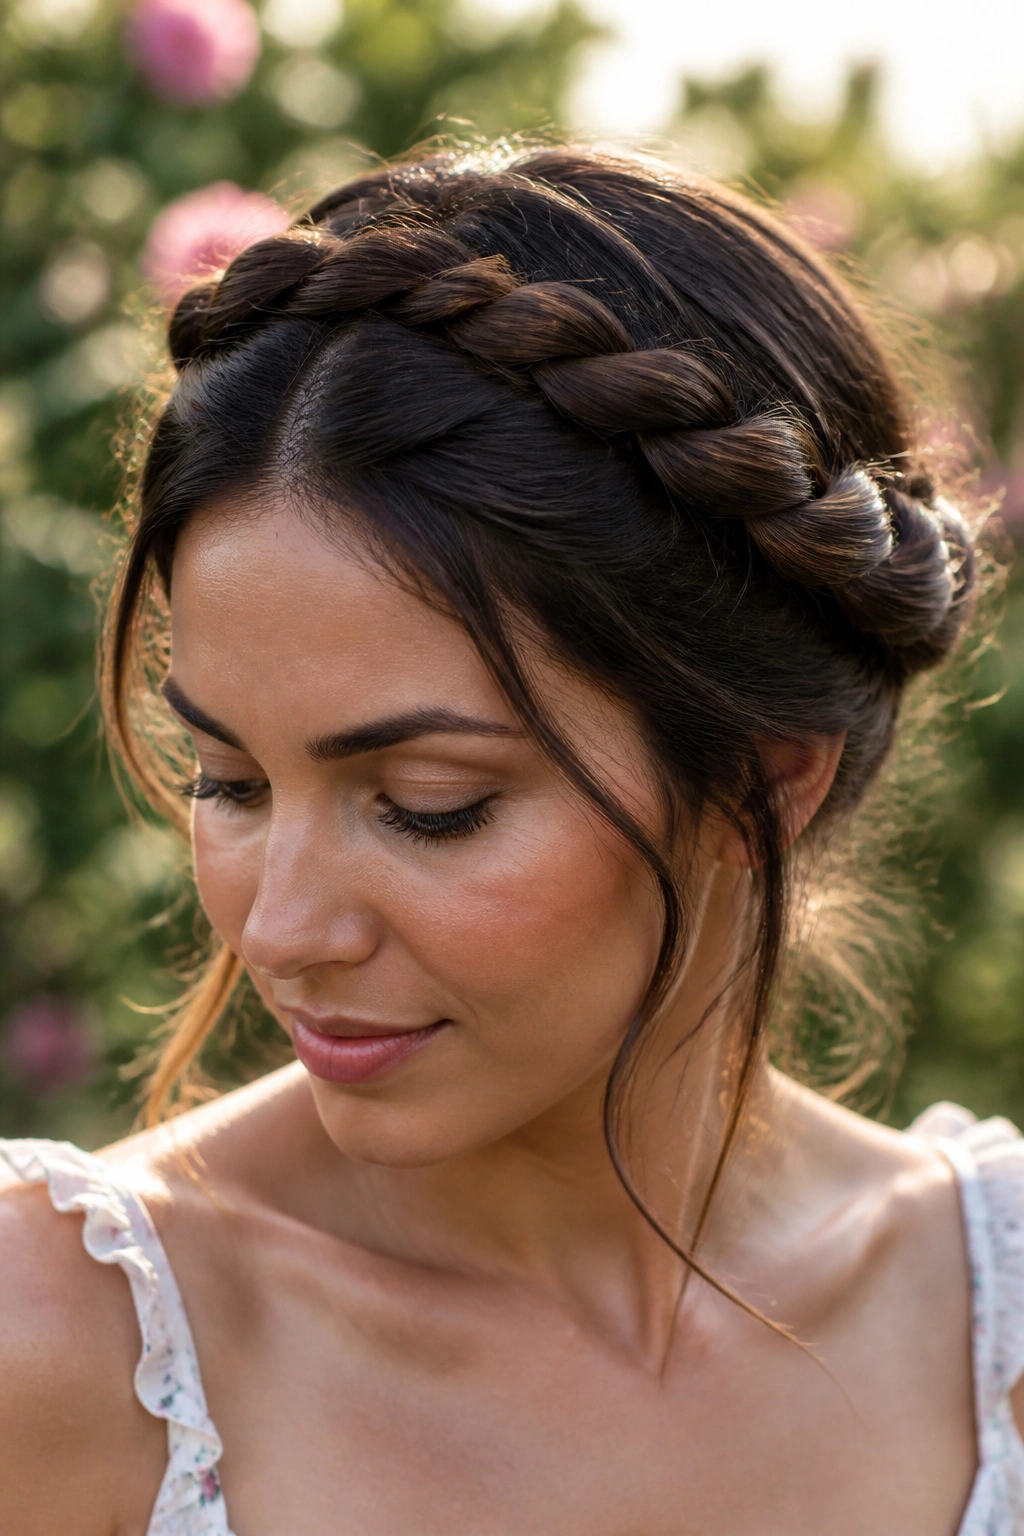
Rope twists are what I reach for when my hands are tired and I still want something that looks deliberate. You only work with two sections instead of three, so the motion is easier to remember, and the finished braid has a clean spiral that wraps nicely around long hair.
The key is direction. Twist both sections the same way, then wrap them around each other in the opposite direction. If you reverse that, the braid loosens and starts looking mushy. No one wants that.
This style is also kinder to hair that doesn’t hold a regular braid well. Fine strands, freshly washed hair, and silky ends tend to slip out of three-strand braids. Rope twists grip a little better because the twists lock into each other.
- Twist both sections clockwise, then cross counterclockwise.
- Keep the tension even from root to end.
- Smooth flyaways with a pea-size amount of cream.
- Use 4 to 6 strong pins at the back, not one giant heroic pin.
Best part: rope-twist crowns look neat from every angle, which is rare and useful.
5. Loose Boho Crown Braid
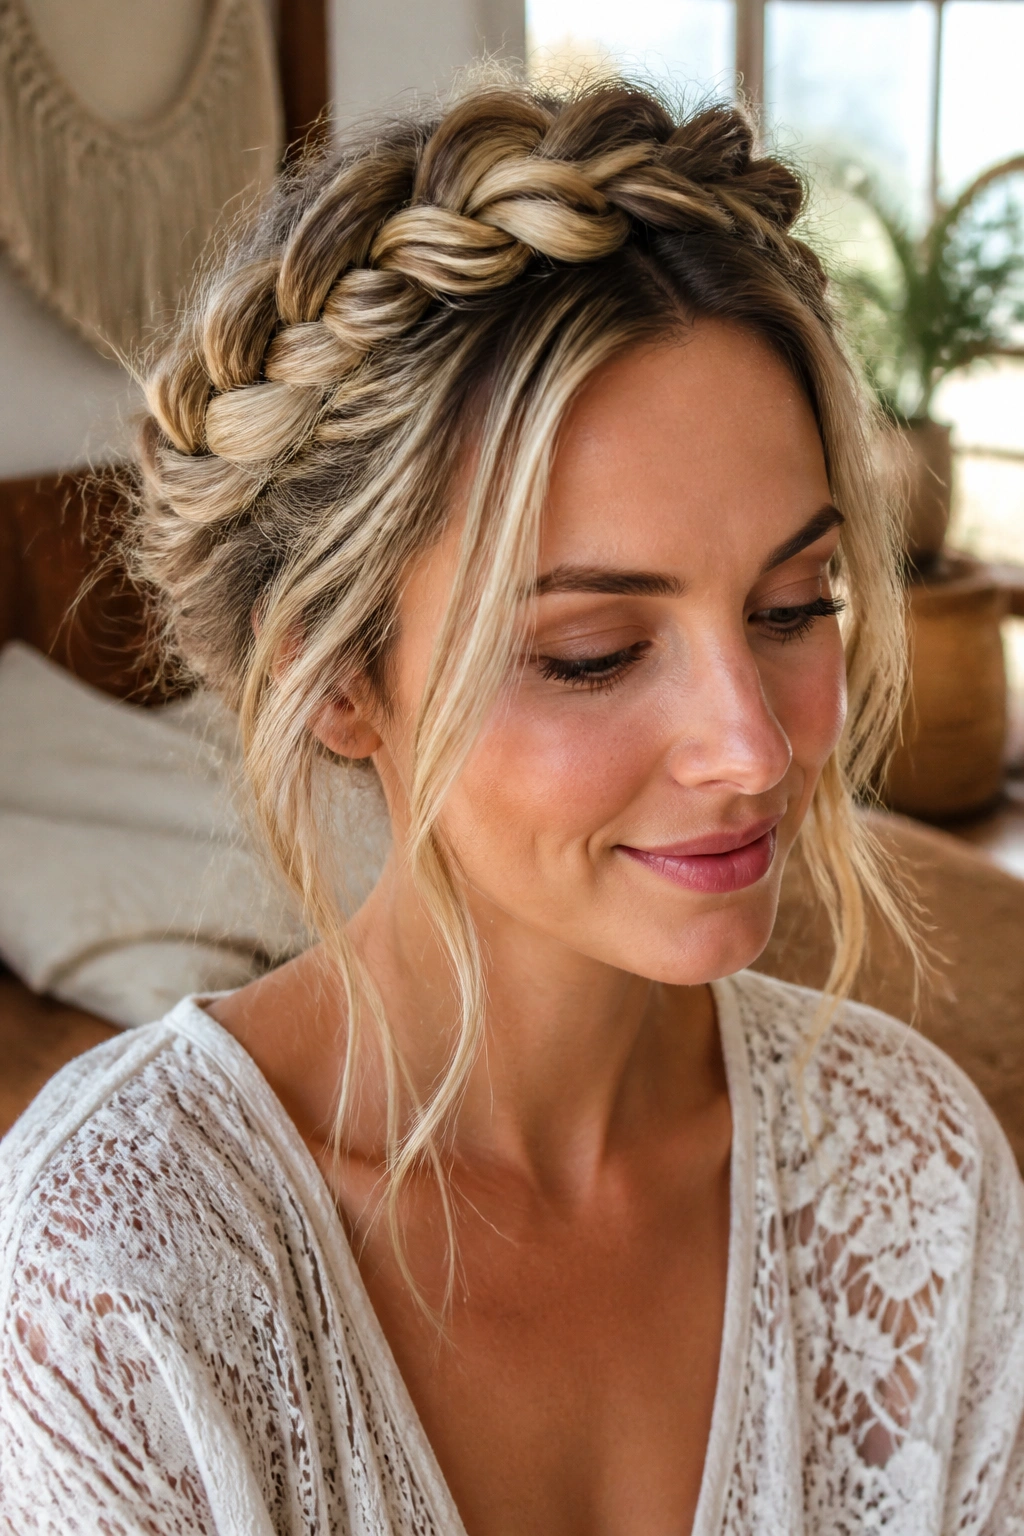
A loose boho crown braid is what happens when you stop trying to make every strand behave. It still needs structure, but the charm comes from softness: a few pieces around the face, a little volume at the crown, and a braid that sits with a gentle curve instead of a hard line.
This is the version I’d pick for long hair that has layers, waves, or natural texture. The braid does not have to be perfectly smooth to look good. In fact, too much smoothing can make it feel flat and overworked.
The trick is to braid a little tighter at the start and then relax the outer edges once the shape is pinned. That gives you the airy look people want without making the braid fall apart. A couple of discreet pins at the back do more work than a pile of fancy products.
It also helps to leave one or two thin face-framing pieces free. Not giant chunks. Just enough to soften the line near the cheekbones. Too much, and the braid loses its point.
6. Milkmaid Crown Braid
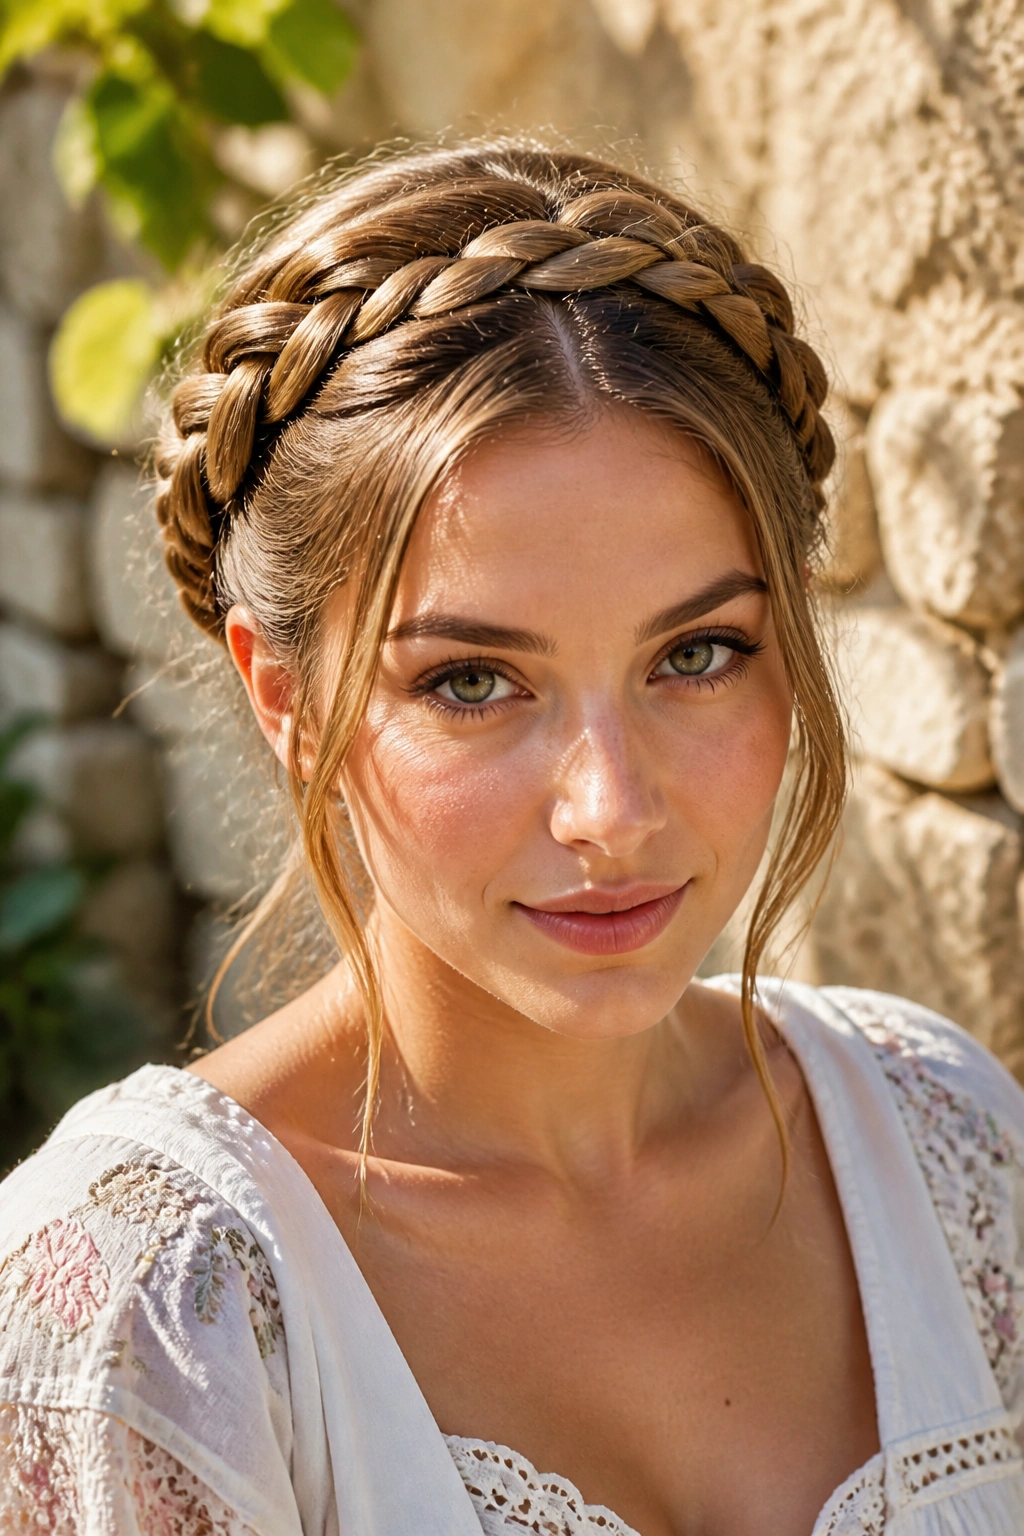
Unlike a single halo braid, a milkmaid braid uses two braids that cross over the top of the head. The shape is a little more old-fashioned, but that’s part of the appeal. It feels sturdy, and on long hair it spreads the weight out more evenly than one large braid circling the whole head.
I think this version gets overlooked because people assume it only works on thick hair. It actually works well on long hair of almost any density, as long as the braids are pinned close to the scalp and not left floating. The crossing point can sit high on the crown or lower near the temples, depending on how neat you want the final look.
It’s especially useful when you want the hair off your neck but do not want the sleek severity of a bun. The braids give the style texture. The crossed shape gives it balance. And the ends can disappear under the braids so neatly that the whole thing looks almost architectural.
If you want one crown style that survives a busy day, this is a strong pick.
7. Half-Up Crown Braid
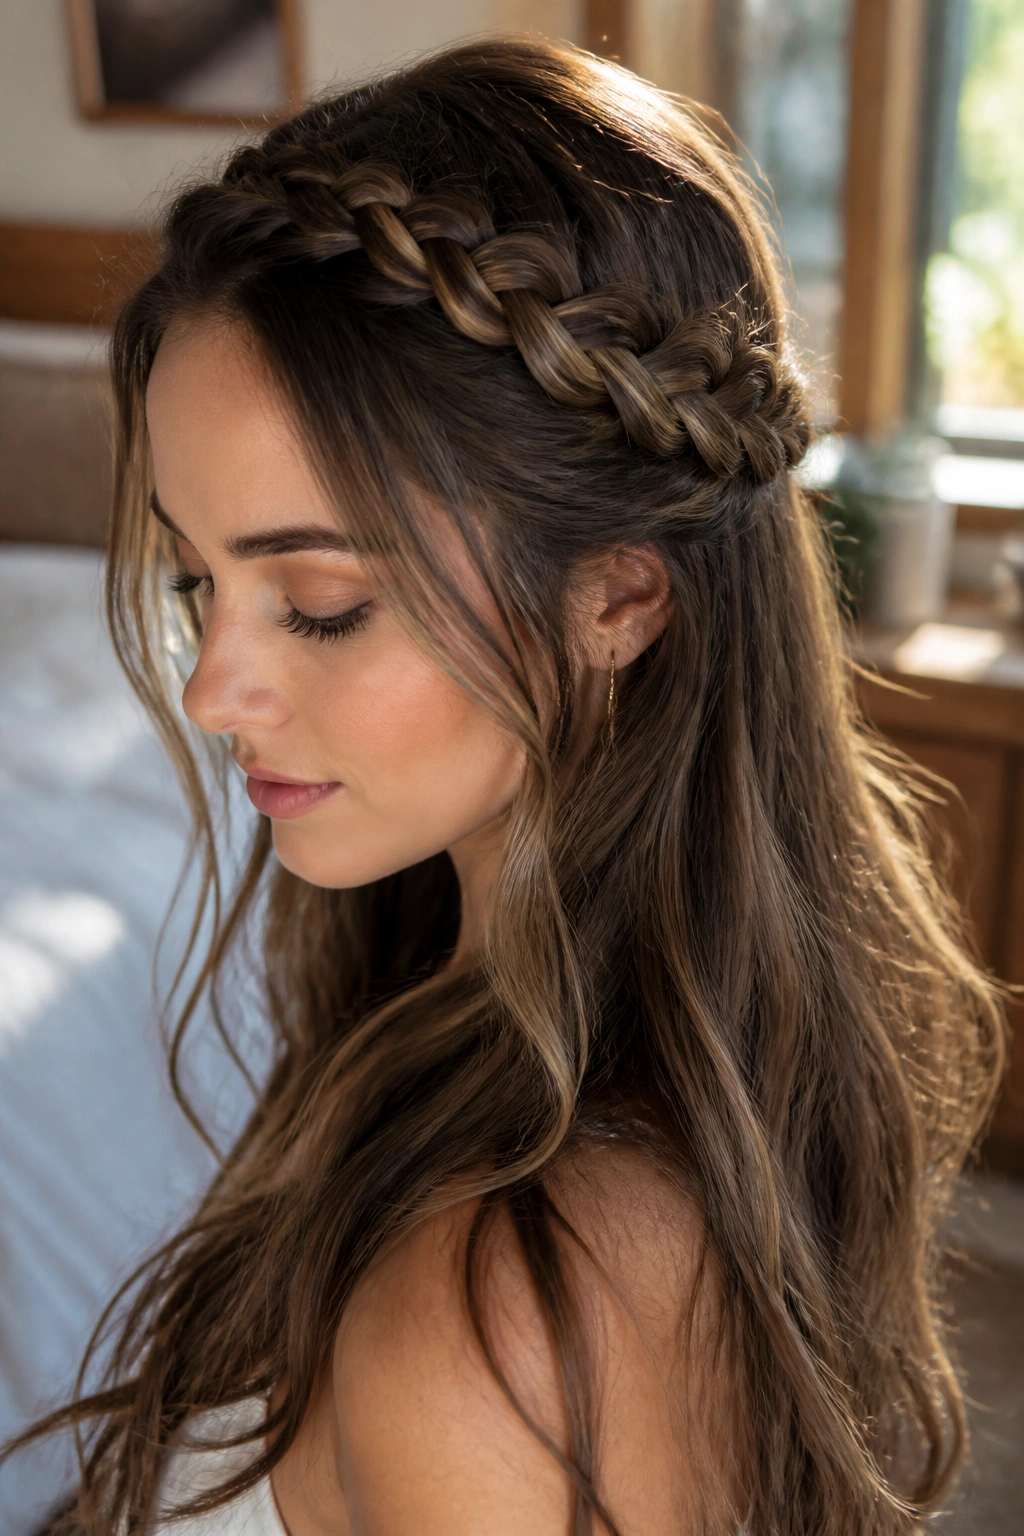
A half-up crown braid is the answer when you want the braid’s shape without giving up the length. The braid circles part of the head, usually from one temple to the other, while the rest of the hair stays down. That mix of structure and movement is what makes it such an easy wear.
What Makes It Work
The braid acts like a built-in headband. It keeps hair off the face, controls shorter layers near the front, and still lets the ends move naturally. On long hair, that matters, because a full updo can sometimes swallow all the length and leave the style feeling heavy.
- Start with a clean side or center part.
- Braid along the hairline, not too far back.
- Leave the rest of the length loose and softly waved.
- Pin the braid behind the ear on the hidden side.
This one is good when you want your hair to look done without looking pinned up. It’s also one of the easiest crown braid styles to dress up or down. Add a ribbon for something softer, or keep it plain if you want the braid to do all the work.
8. Side-Swept Crown Braid
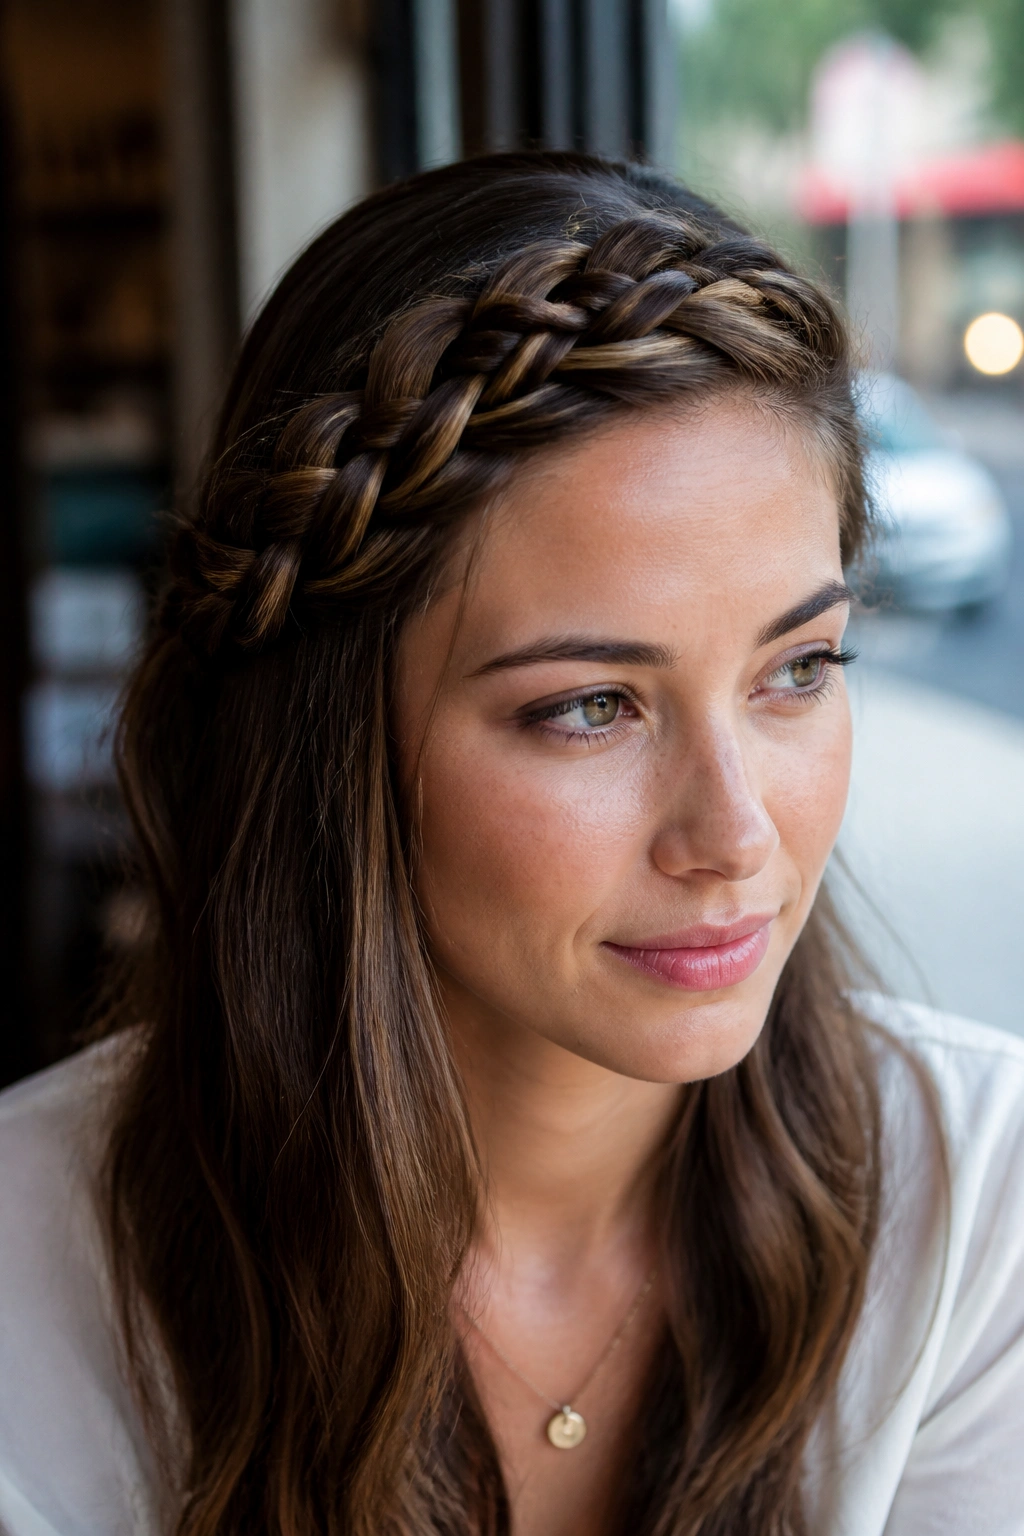
If your part never sits perfectly centered, a side-swept crown braid can save the whole look. The braid begins low on one side, travels across the front hairline, and settles near the opposite temple or behind the ear. That diagonal line softens the forehead and gives long hair a little movement without needing curls everywhere.
This style has a nicer shape than people expect. It feels less formal than a full halo, but it still reads as intentional. The asymmetry is the point. It also gives you a good excuse to use the braid as a frame for one eye or for a set of long bangs.
A side-swept version works especially well if your hair has layers that don’t want to stay in a tight circle. The angle of the braid lets the layers blend instead of fight the shape. Smooth the front with a small brush and a touch of cream, then let the braid drift naturally as it crosses the head.
It’s a good one for dinner, parties, or any day when you want a braid that feels a little softer than the usual polished crown.
9. Pancaked Wide Crown Braid
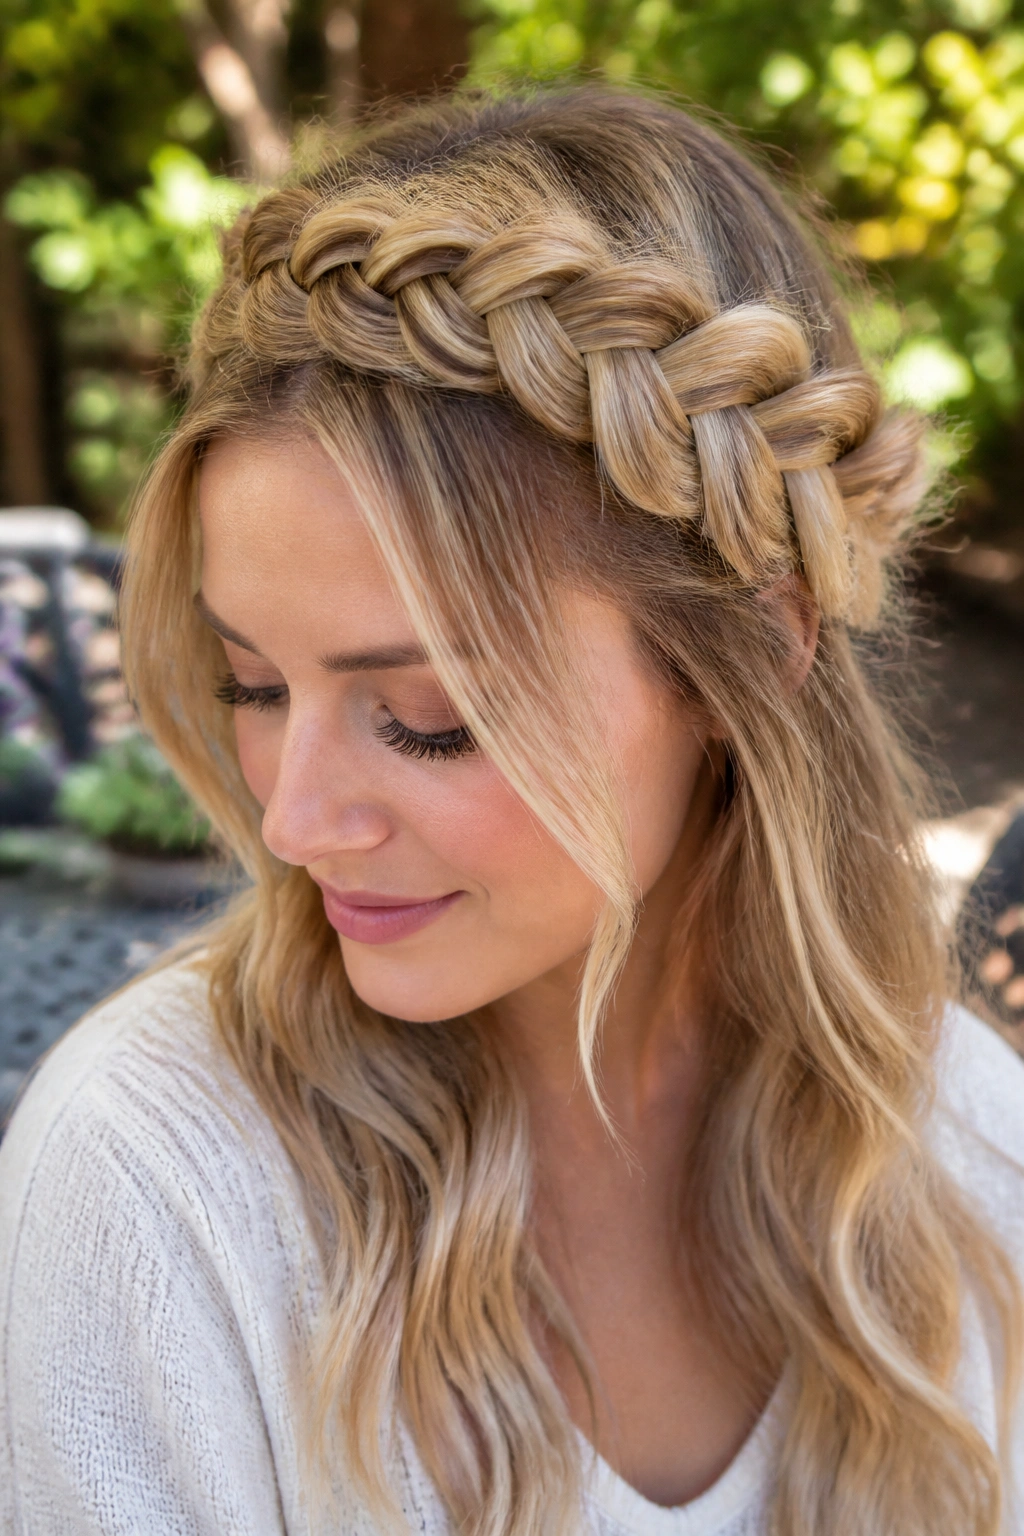
Why does a pancaked crown braid look fuller than the original braid? Because you gently pull the outer edges of each braid section wider after it’s secured, which makes the braid spread out like ribbon. On long hair, that widening trick can turn a plain braid into something that looks thick and lush.
How to Get the Width
Start with a normal crown braid, pin it in place, and then tug the outer loops only. Don’t yank the center spine. That’s where the style loses its shape and starts looking frayed instead of full.
This version is a smart move if your hair is fine or medium-density and you want more visual weight. It also helps when the braid needs to fill space around the head because there’s not enough thickness for a chunky wrap on its own.
Use a bit of dry texture before you braid. Then pancake slowly, working around the full circle so the width feels even instead of lopsided.
A small warning: if you go too far, the braid can look lacy in a way that stops reading as braid at all. Restraint matters here.
10. Crown Braid with Curtain Bangs
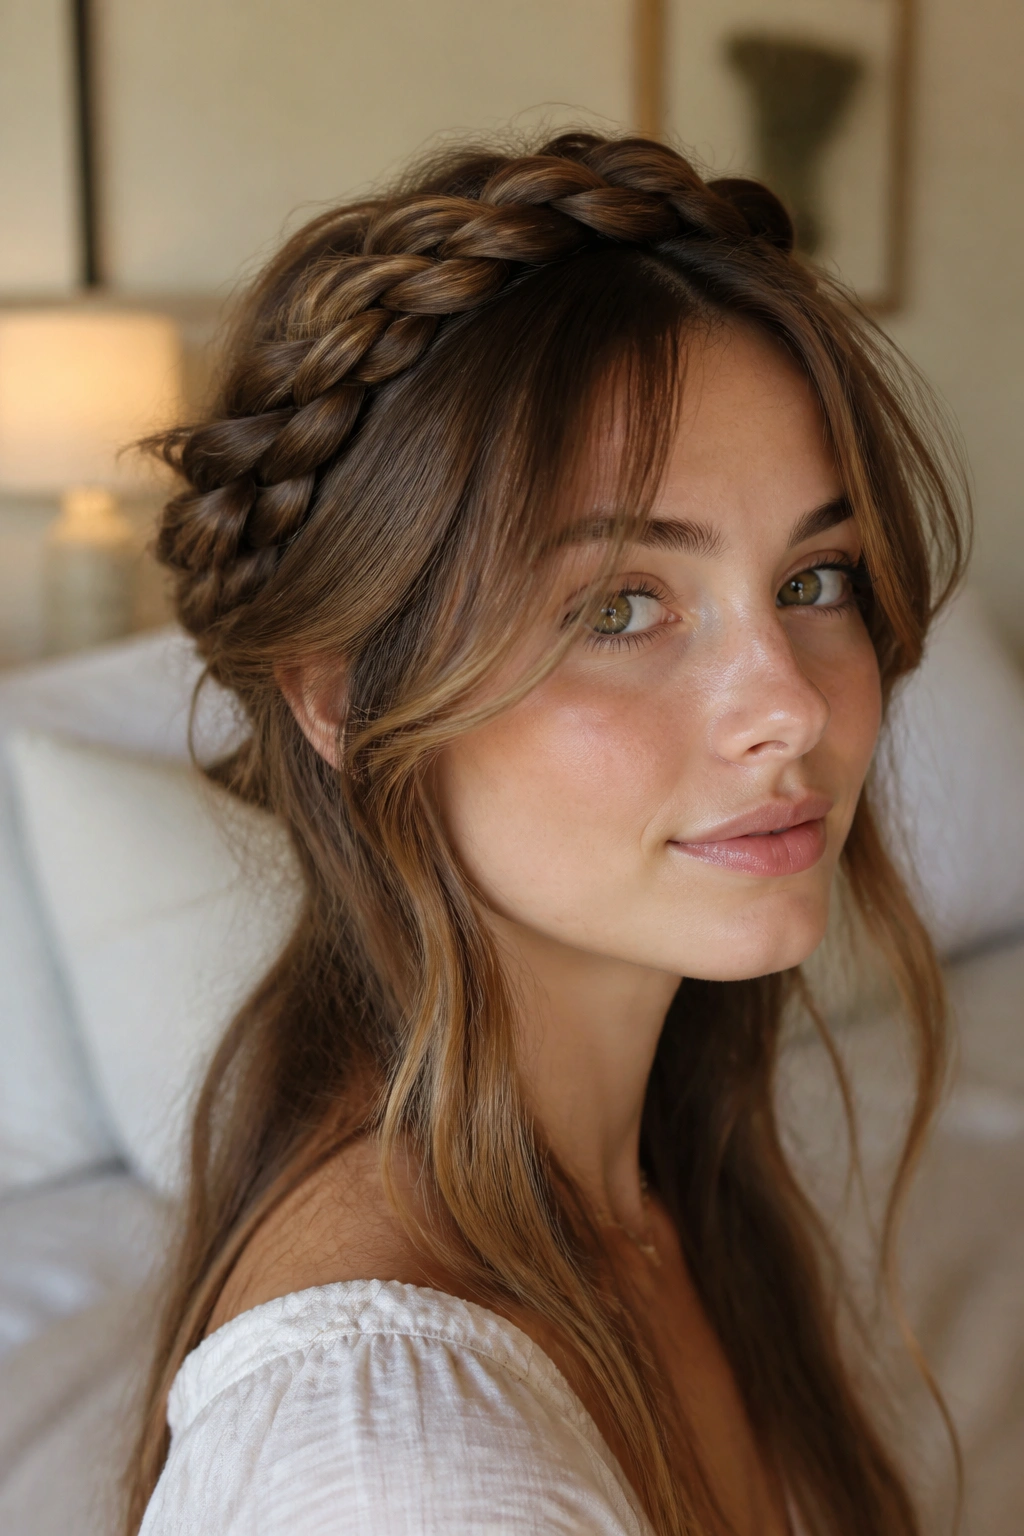
A crown braid with curtain bangs gives you the softness of a braided halo without pulling every front piece back. That matters if you like movement around the face or if you’re growing out fringe and need a style that does not fight the awkward middle stage.
The braid can start a little farther back than usual so the bangs have room to fall naturally. Long hair helps here because the braid has enough length to travel behind the front pieces instead of squeezing them into the braid line. The result feels looser and more flattering around the cheeks.
This style also makes sense when your hair has layers that refuse to stay tucked. Rather than chasing every shorter piece with pins, let the bangs and front strands do their own thing. A quick bend with a round brush or flat iron can keep them from separating too much.
- Keep the bangs soft, not curled into ringlets.
- Pin the braid behind the high point of the temple.
- Leave two slim pieces near the jaw if you want a gentler frame.
That tiny bit of face framing changes the whole mood.
11. Braided Crown into Low Chignon
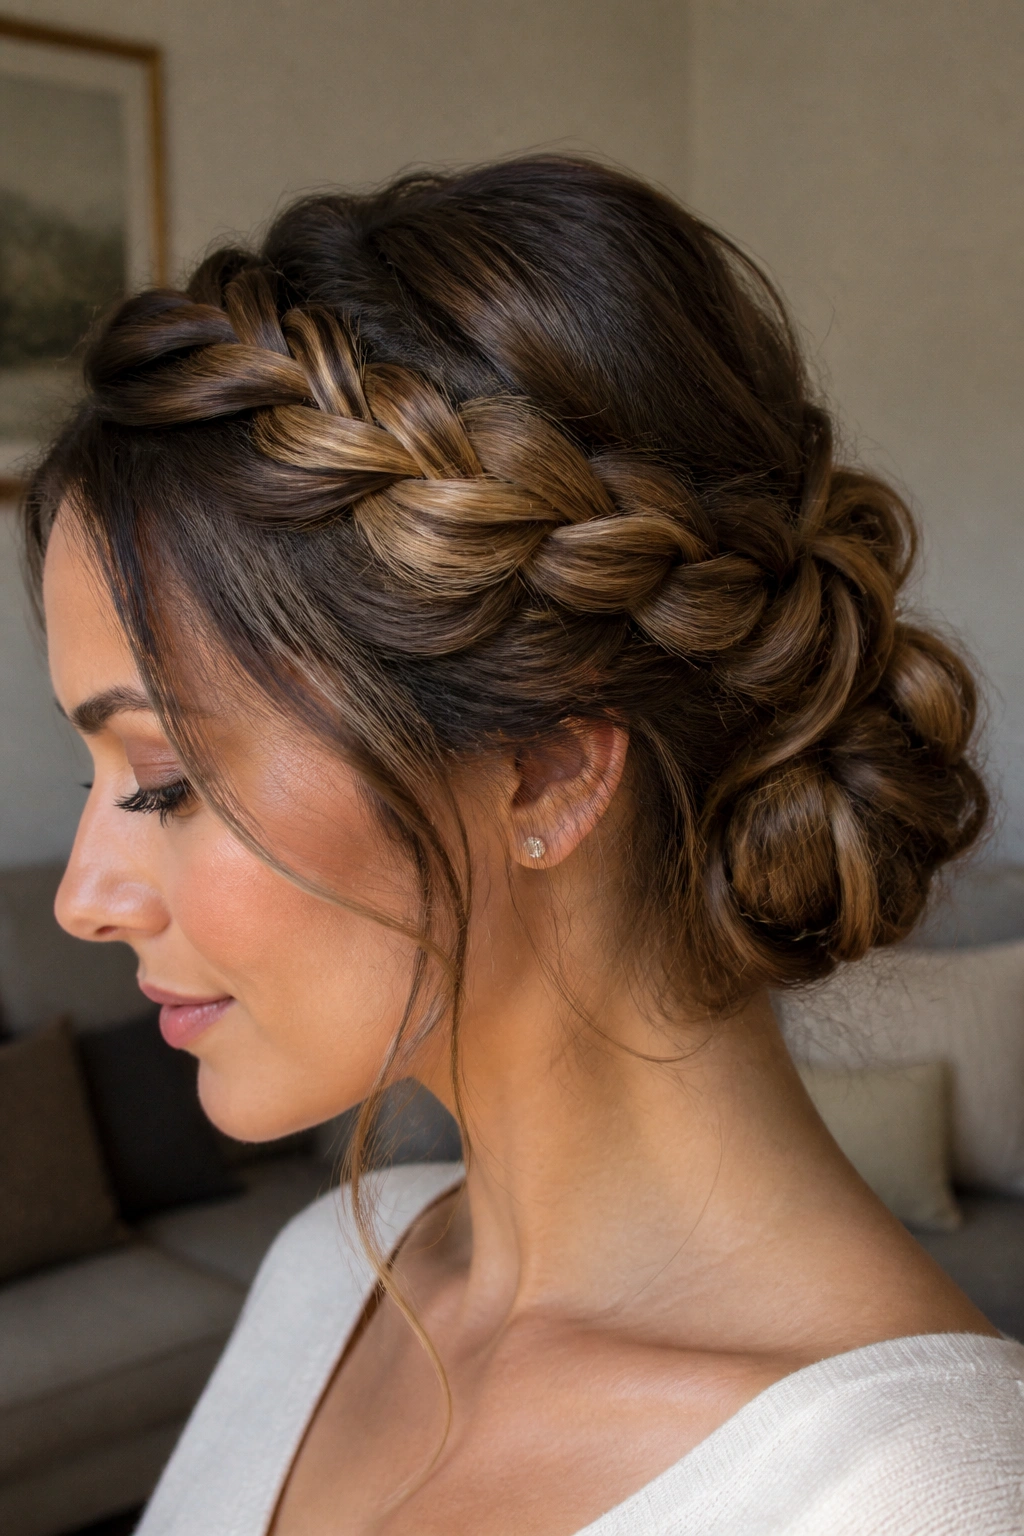
A braided crown into a low chignon is the style I trust when the goal is neatness. The braid wraps the head first, then the remaining length gets tucked into a bun at the nape. It keeps the back clean, which is handy if you’re dealing with humidity, long layers, or a dress collar that would swallow a loose style.
There’s a nice logic to it. The braid gives the front of the hair some interest, and the bun takes care of the long tail without leaving a heavy knot sitting high on the head. That balance makes the style feel calmer than a full updo.
It also photographs well from the side, since the braid line leads the eye into the bun instead of ending abruptly. Use crossed bobby pins under the bun, not just around it. That small detail keeps the weight from dragging the braid down later.
One more thing: leave the chignon slightly textured unless you need a strict polished finish. A bun that is too slick can make the braid look disconnected.
12. Four-Strand Crown Braid
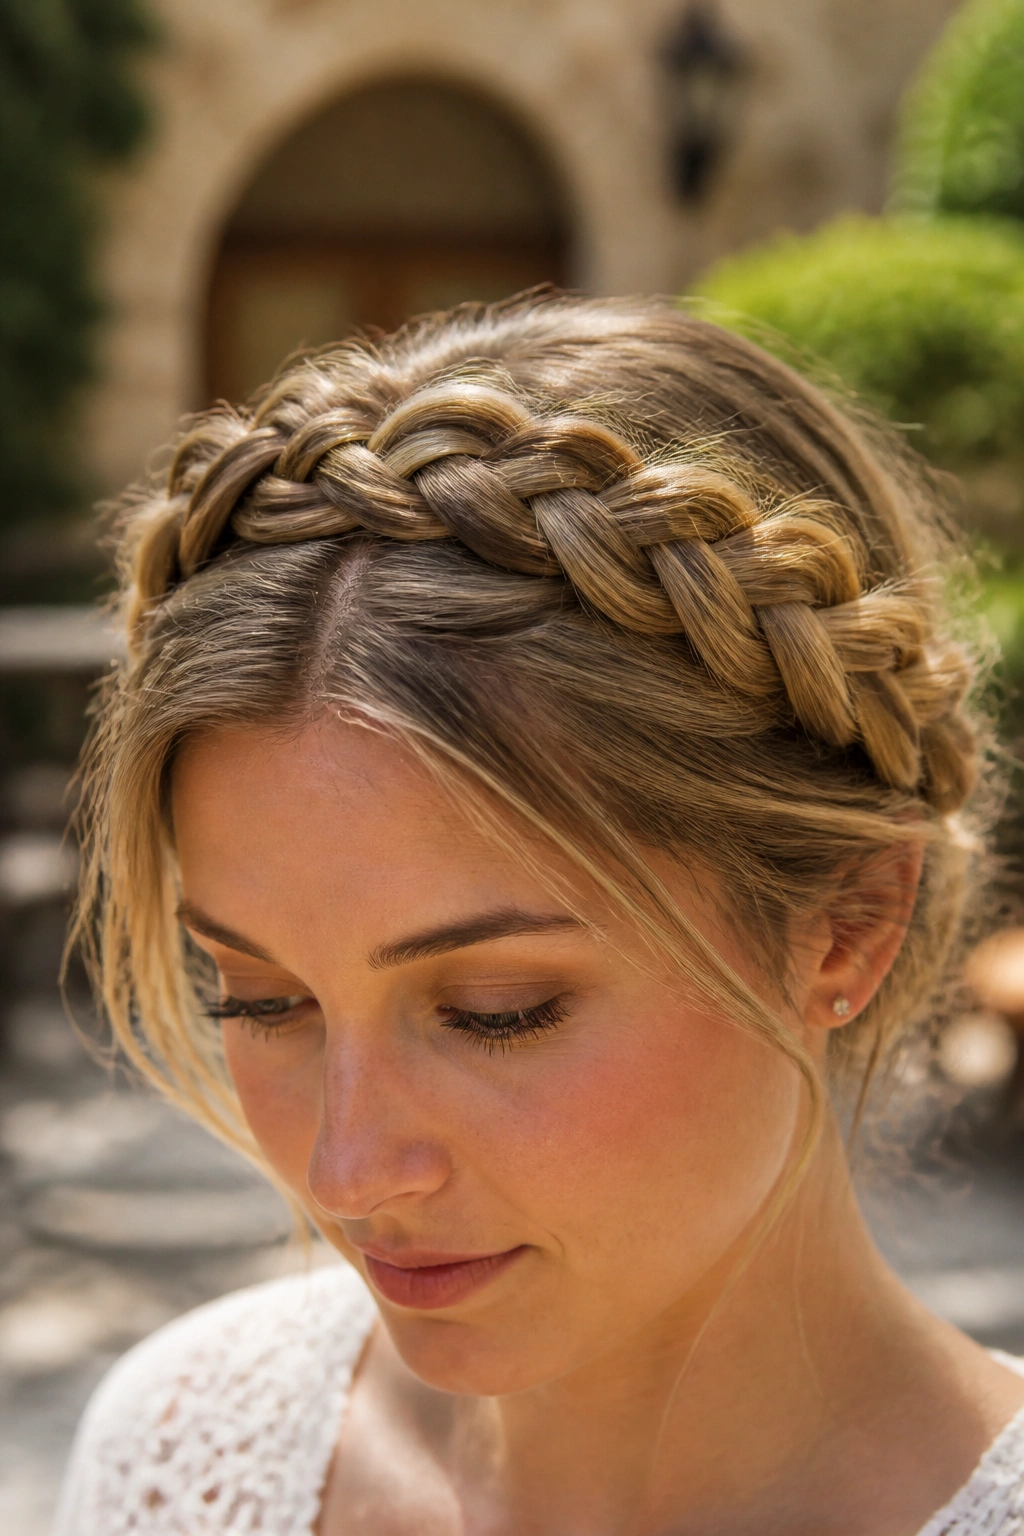
A four-strand crown braid looks more woven than a regular three-strand braid, and that extra depth gives long hair a richer, almost cable-like finish. The sections take more focus, though, so this is the one I’d suggest when you’ve got a few quiet minutes and decent lighting.
The difference is obvious once it’s done. A standard braid has a familiar rhythm; a four-strand braid has a tighter, flatter pattern that reads more refined. If your hair is very long, that added detail is useful because the braid can stay interesting all the way around the head instead of turning into a plain rope by the end.
This one suits people who already braid a lot. The hand movement takes practice, and the first try can feel clumsy. Still, if you can keep the sections separated, the result is worth it. The braid lies close to the scalp and can be pinned into a crown shape with a clean finish.
I’d choose it for formal events or when you want a braid that feels a little more technical without looking fussy.
13. Basket-Weave Crown Braid
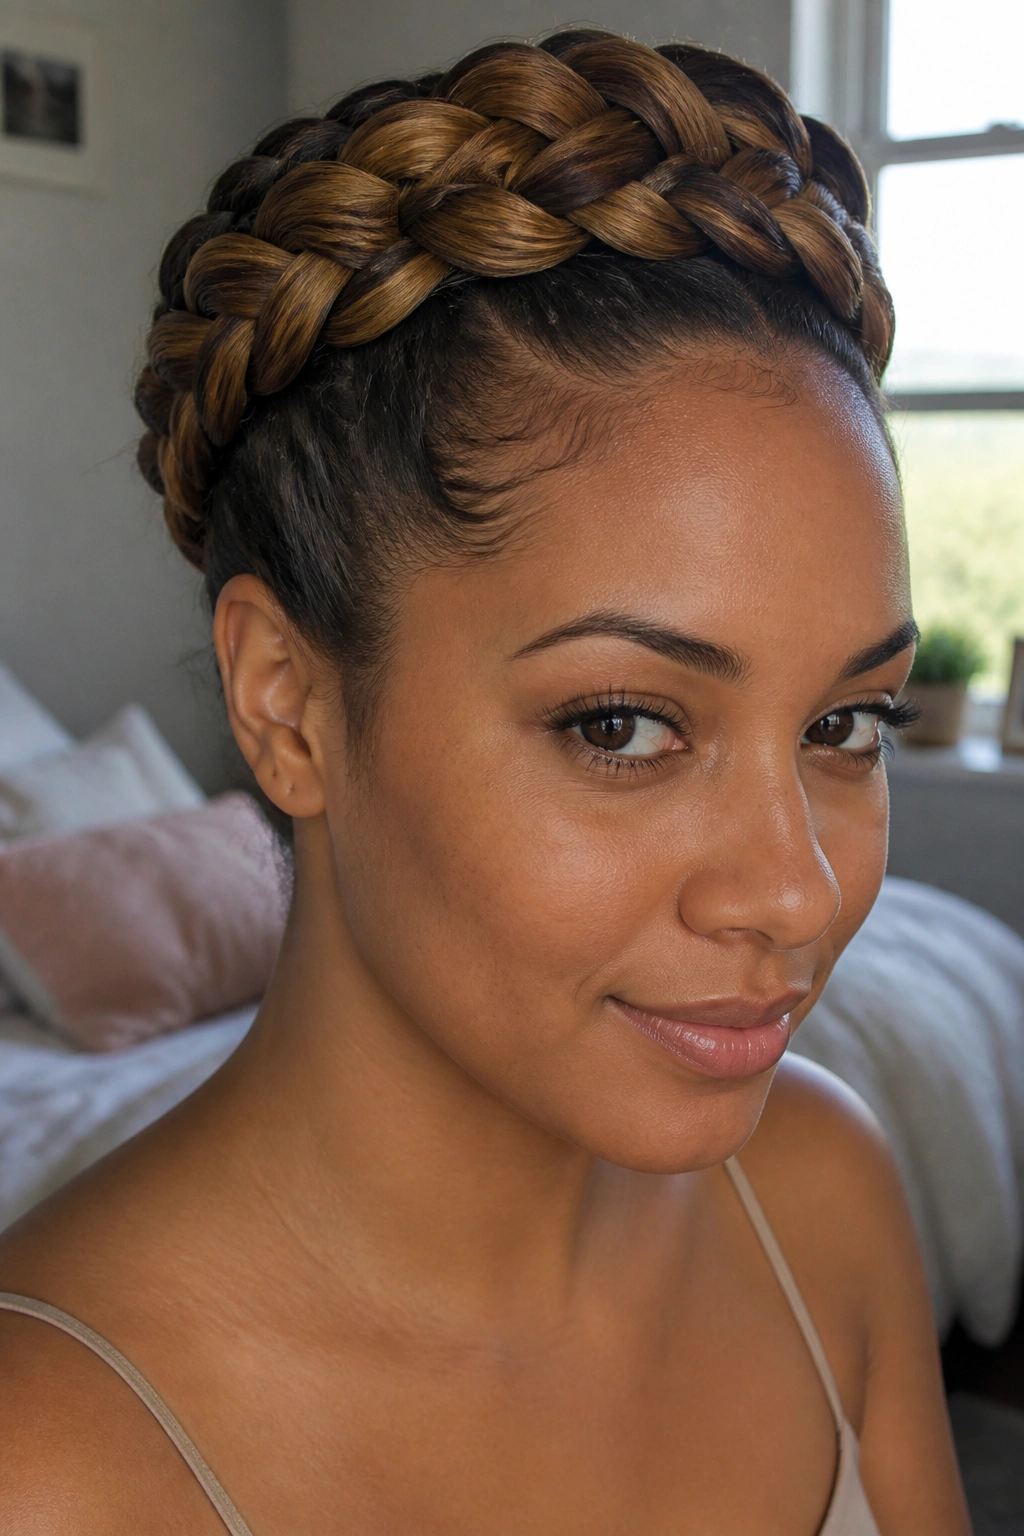
A basket-weave crown braid has more structure than a normal halo, and that is exactly why it stands out. The sections weave over and under in a way that makes the braid look almost like fabric strips laid across the head. On long hair, the pattern has room to show itself, which is a big part of the appeal.
Why It Looks So Different
The braid is built from broader pieces, so the pattern reads heavier and more textured. It is less about softness and more about shape. That makes it a smart option when you want the braid to feel like the main event instead of just a neat way to pin hair back.
- Use clean, even sections at the start.
- Keep the weave close to the scalp so it does not puff out.
- Mist the hair lightly before you begin; dry hair can get noisy fast.
- Pin each curve as soon as it’s formed, not after the whole braid is finished.
This style takes patience, but it gives long hair a dramatic frame. It suits straight hair, wavy hair, and even thicker textures that can hold a stronger pattern without collapsing.
14. Scarf-Woven Crown Braid

A silk scarf can fix a crown braid that feels plain. It can also rescue ends that are too short to hide neatly, which is useful if your long hair is layered and the braid tail keeps popping out in annoying little bits.
The easiest way to do it is to fold the scarf into a narrow strip and work it into one side of the braid as if it were a strand. You can also wrap it around the finished braid and tie the ends at the back. Both methods work, but the first one feels more integrated.
This style has a nice practical side too. The scarf adds grip, so the braid tends to stay put better on smoother hair. It also gives you a chance to bring in color or pattern without changing the braid shape itself. That matters more than people think.
Pick a scarf that is light enough to fold neatly. Heavy fabric can make the braid bulky and make pinning harder. A narrow silk or satin strip usually behaves best.
15. Curly Hair Crown Braid
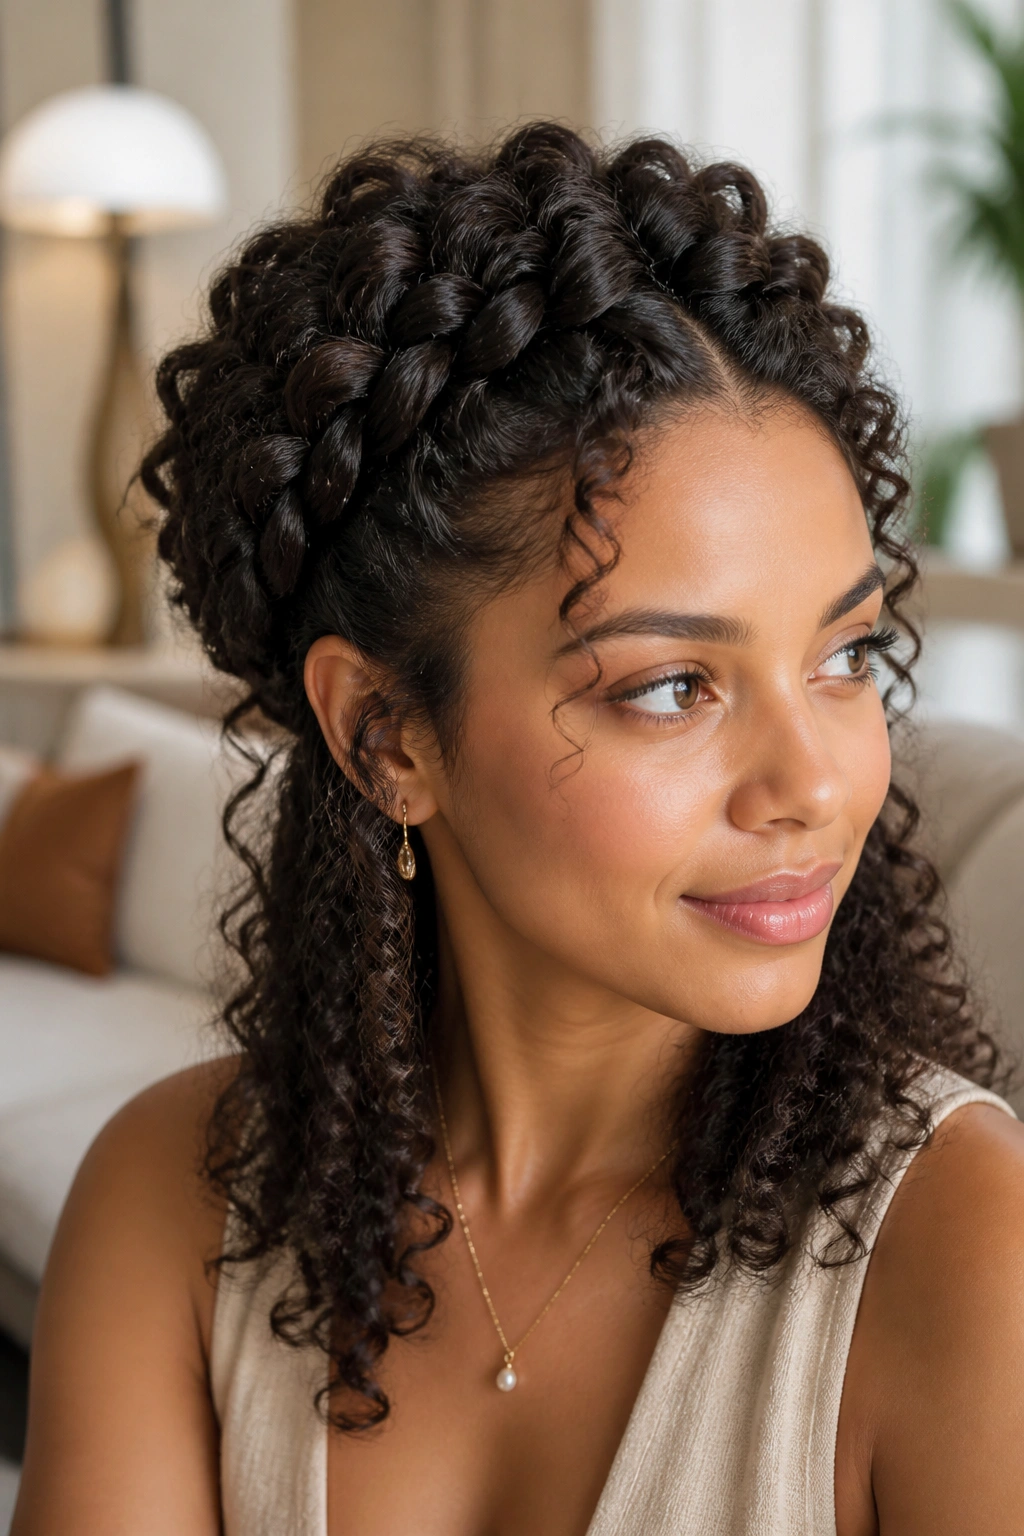
Can curly hair do a crown braid without losing its shape? Yes, but the braid has to work with the curl pattern, not against it. Trying to brush curls into a flat, perfectly smooth crown usually ends in puffiness, frizz, and a lot of pointless frustration.
The better move is to braid on stretched curls, refreshed curls, or softly detangled hair that still has some bend left in it. Long curly hair has a lot of visual strength on its own, so the crown braid can stay a little looser and still look finished.
How to Keep the Curl Pattern Intact
Leave the ends curly if you can. That keeps the style from looking overly controlled, and it stops the braid from turning into a hard shell. A light gel at the hairline helps smooth the front without wiping out the rest of the texture.
This is one of those styles where small mistakes show fast. If you brush too aggressively, the curl clumps separate. If you pin too tight, the crown loses its softness. So be a little patient. Work in sections, use your fingers when possible, and let the texture carry some of the look.
Honestly, curly hair gives crown braids more personality than straight hair does. You get shape and movement for free.
16. Pull-Through Crown Braid

A pull-through crown braid is a lifesaver if you like the look of a full braid but your fingers hate doing actual braids for that long. Instead of weaving three strands the usual way, you create the shape with small ponytail sections and loops secured by elastics.
It sounds more technical than it is. In practice, it is a chain of little steps that builds into a very full, thick-looking crown. That makes it excellent for long hair, especially if your hair is dense and heavy enough that a regular braid tends to collapse before you finish wrapping it around the head.
The biggest benefit is fullness. Pull-through styles give you those chunky, rounded sections that stay visible even when the hair is long. They also hide imperfect hands better than a classic braid because the structure is forgiving.
- Secure each section with small clear elastics.
- Keep the loops even so the crown looks balanced.
- Gently pull the sides of each loop wider once it’s in place.
- Hide the ends under the last section and pin them flat.
It is a cheat, sure. But it is a smart one.
17. Crown Braid into Braided Ponytail

A crown braid that ends in a braided ponytail is the kind of style I like on days when I want long hair controlled but not hidden. The braid wraps the head first, then the remaining length gets gathered into a ponytail or a loose braided tail at the back. You keep the drama of the crown and still get movement down the back.
That ending changes the whole feel. Instead of stopping at the nape, the braid keeps going, which makes the style look more athletic and less formal. It also helps if your long hair gets tangled easily because the ponytail keeps the ends together.
This works well with straight hair, wavy hair, and thick hair that needs more structure than a simple twist can give. Add a few loose pieces around the front if you want softness, or keep it tight if you need the hair out of your way completely.
It moves well. That matters. A lot of pretty braided styles fall apart the second you walk fast or turn your head too much, and this one holds its shape better than it should.
18. Sleek Bridal Crown Braid Bun
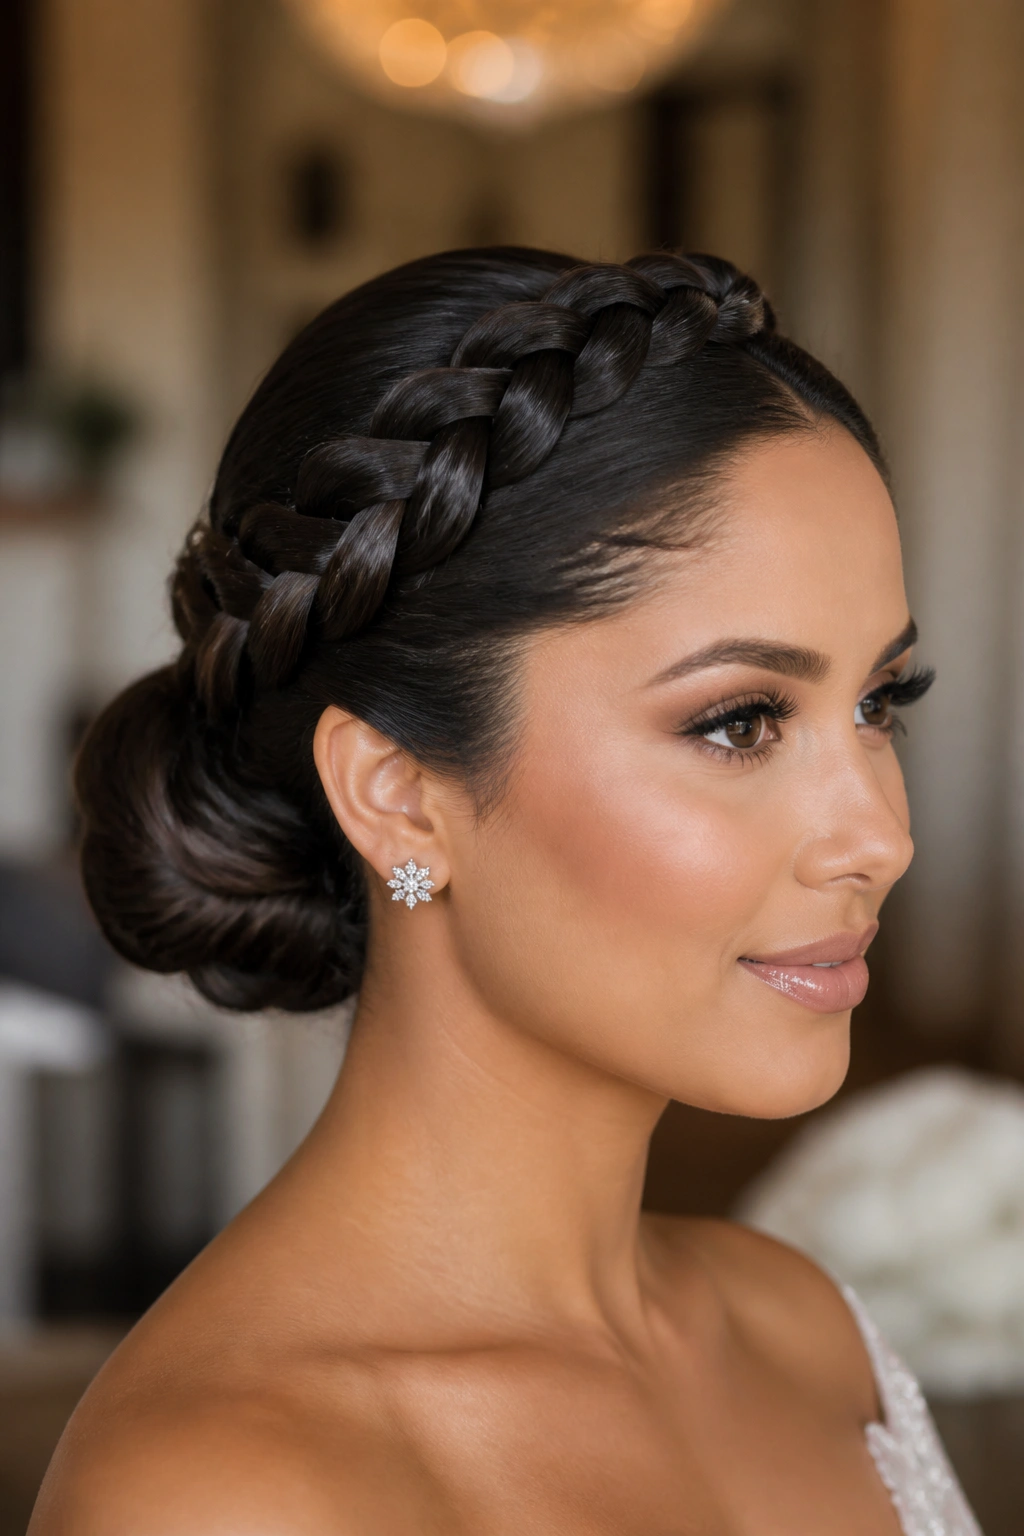
A sleek bridal crown braid bun is the one I trust when the brief is formal and the hair needs to last for hours without looking tired. The braid wraps close to the head, the surface stays smooth, and the remaining length disappears into a low bun or tucked knot that sits cleanly at the back.
What makes it work is control. The front needs to be brushed flat, the braid needs to stay tight near the scalp, and the bun needs enough pin support that it doesn’t sag. Fine-tooth comb, smoothing serum, and a few strong pins go a long way here. Too much product turns the hair greasy. Too little, and the flyaways start winning.
This style is strong on long straight hair, but it also works on slightly waved hair if you prep it first. Blow-drying the root area smooth gives the braid a cleaner line, and that line matters more than people think.
A final note: tuck the bun lower than you think you need to. High buns fight the crown shape. Low ones let the braid do the talking, and that is the whole point.
