



Vintage braided hairstyles for long hair have a useful little trick up their sleeve: they make length look deliberate instead of heavy. A braid can tame thick hair, keep it off your neck, and still feel soft enough for a wedding, a dinner out, or a day when you want to look put together without pinning every strand into submission.
The part that gets overlooked is shape. A braid placed high near the hairline reads different from one that starts low behind the ear. A clean center part can feel Edwardian and neat; a side sweep feels more pin-up; a wrapped knot at the nape leans midcentury. Same head of hair. Totally different mood.
I also think long hair gives braids more personality than shorter lengths ever can. There’s more room for loops, wraps, tucked ends, ribbon, and those small uneven pieces that make a style look lived-in rather than helmet-like. Silky hair needs a bit of grip, though. A mist of texture spray, a dusting of powder at the roots, or even hair that’s been worn for a day usually braids better than freshly washed, slippery hair.
Some of these styles are the sort you can learn once and repeat for years. Others need a few bobby pins and a little patience. The first one is the cleanest place to start.
1. Milkmaid Braids, a Staple in Vintage Braided Hairstyles for Long Hair
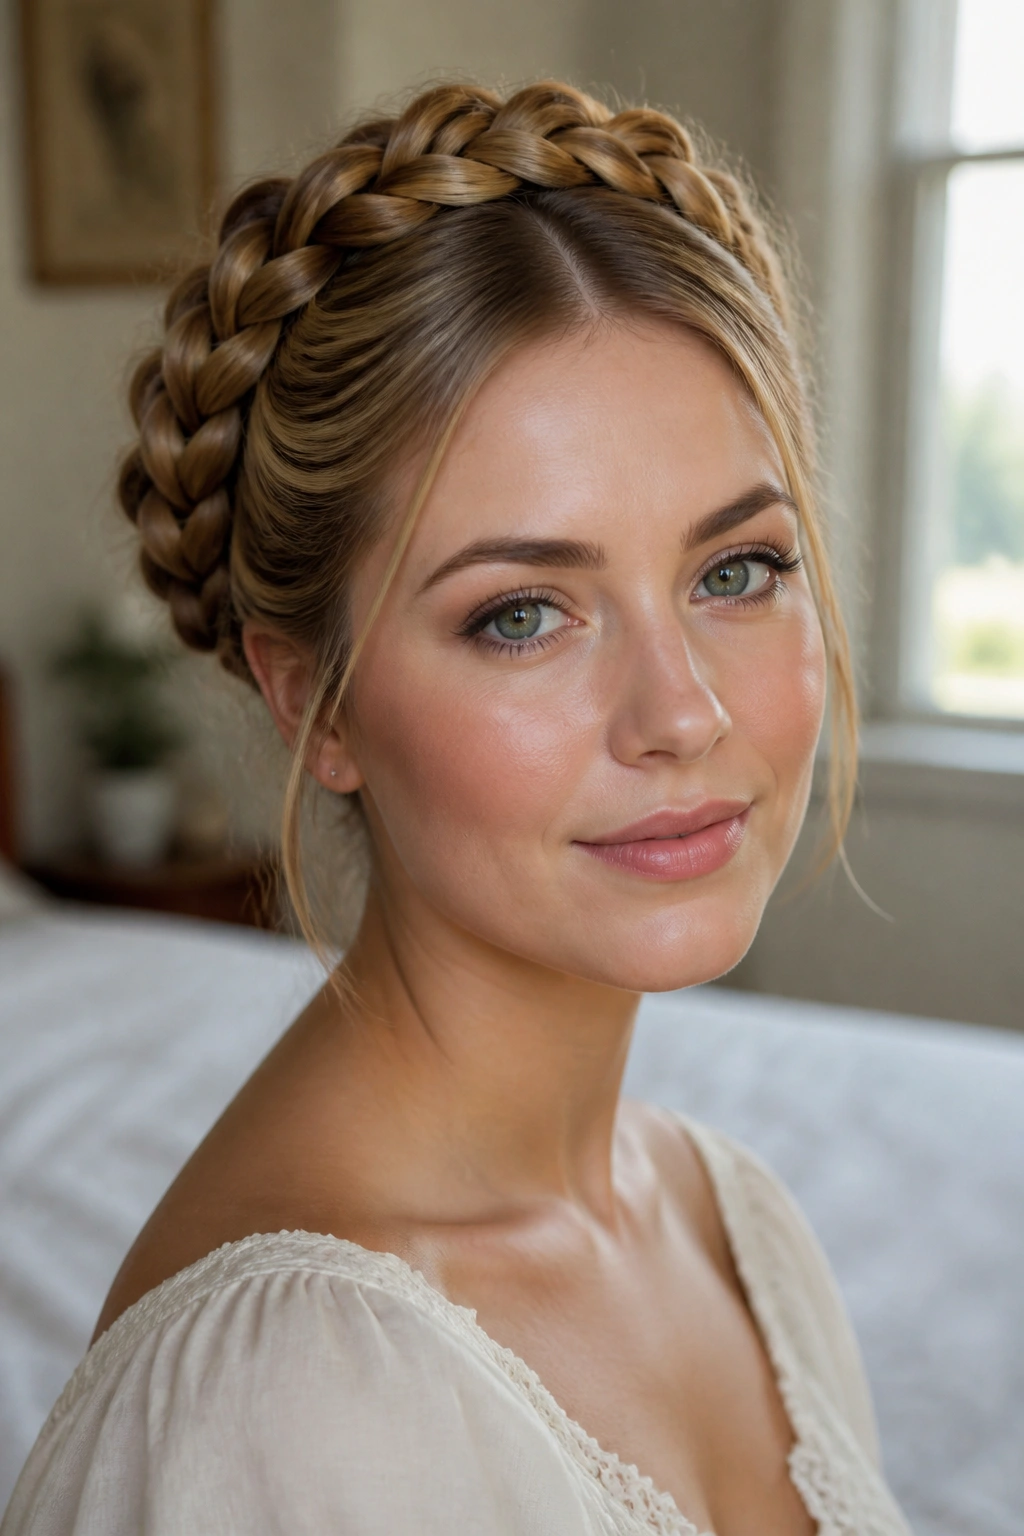
Milkmaid braids are the braid style people picture when they want “vintage” without looking like they raided a costume trunk. The shape sits high, frames the face, and gives long hair a tidy crown that still feels gentle.
What makes this style work is tension. Keep the braids firm enough that they hold their curve, but not so tight that the edges look pulled. A middle part helps a lot here. So does braiding on hair that has a little texture already.
Why the shape feels old-fashioned
The wrapped placement matters more than the braid itself. When the plaits cross over the top of the head, they create that tidy, almost pastoral outline that shows up in old portraits and summer picnic photos.
- Part the hair cleanly down the center.
- Braid each side into a regular three-strand braid.
- Pancake the braids lightly by tugging the outer edges.
- Pin them across the crown with crossed bobby pins every 1 to 2 inches.
Skip heavy oil at the roots. It makes the braid slide before lunch.
2. Crown Braid with Soft Tucked Ends
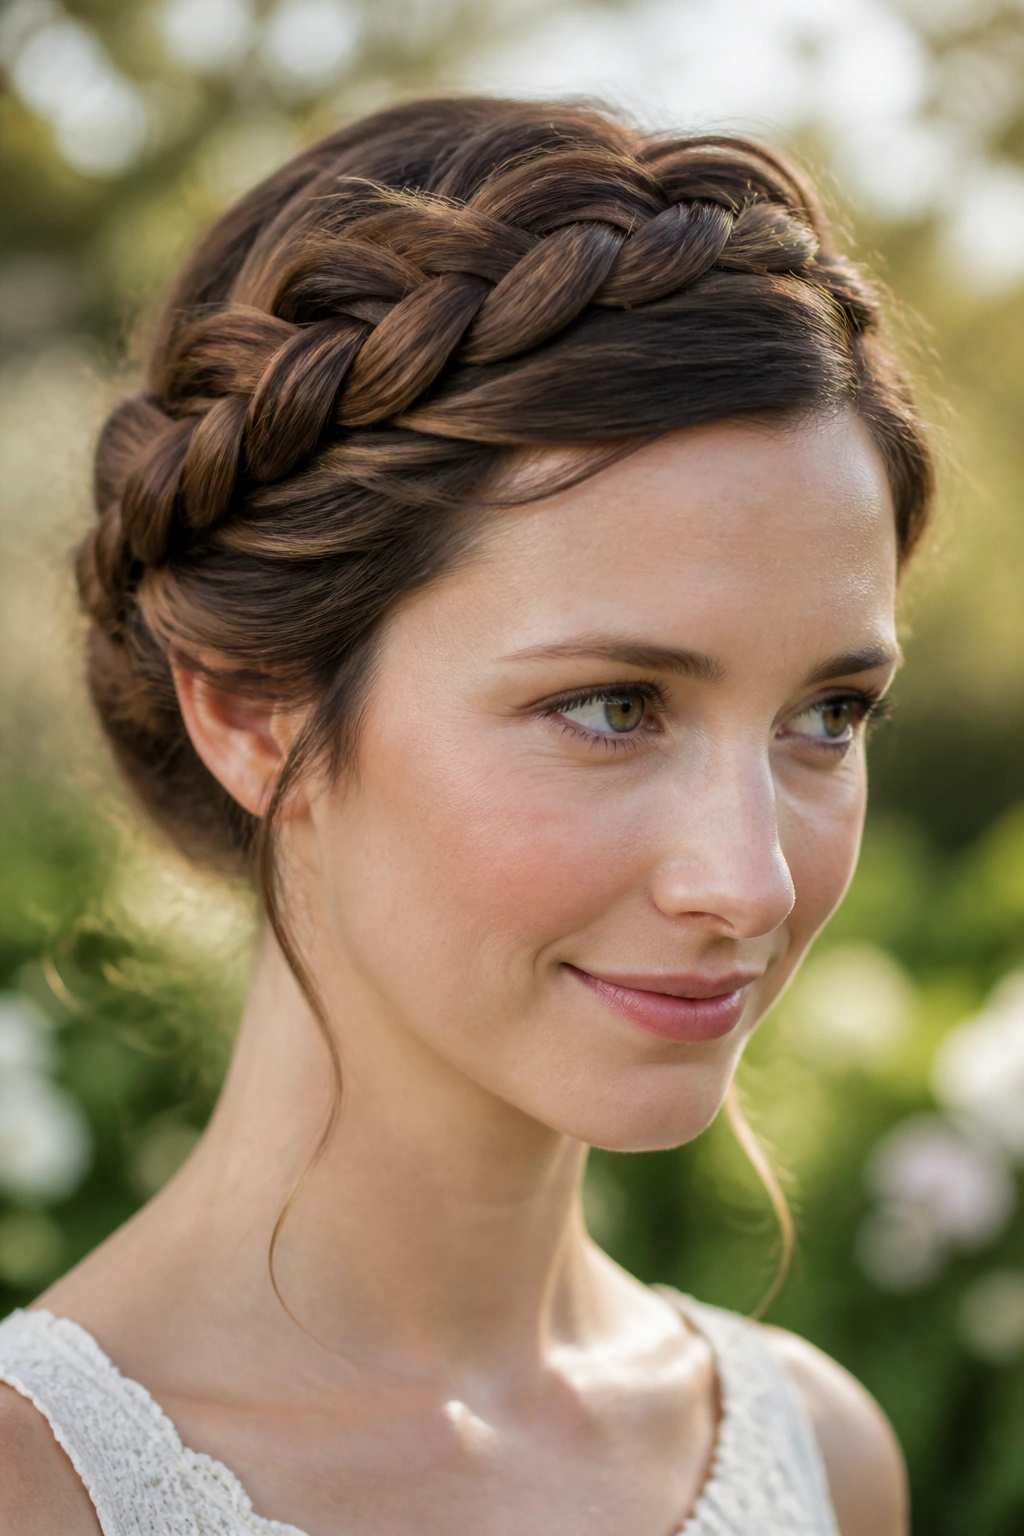
A crown braid is the polished cousin of milkmaid braids. The difference is subtle at first, then obvious once you see the finish. Instead of crossing the braids like a headband, you wrap one braid around the head and tuck the ends so the hairline stays smooth.
I like this one for long hair with a bit of natural wave. The wave keeps the braid from looking too sharp, and the tucked ends make the whole thing feel considered. If your layers are short around the face, leave a few slim pieces loose. That keeps the style from reading severe.
A tiny bit of teasing at the crown helps too. Nothing wild. Just enough to stop the braid from flattening the top of the head. The final look should sit like a soft frame, not a tight hoop.
3. Braided Gibson Tuck with a Low Roll
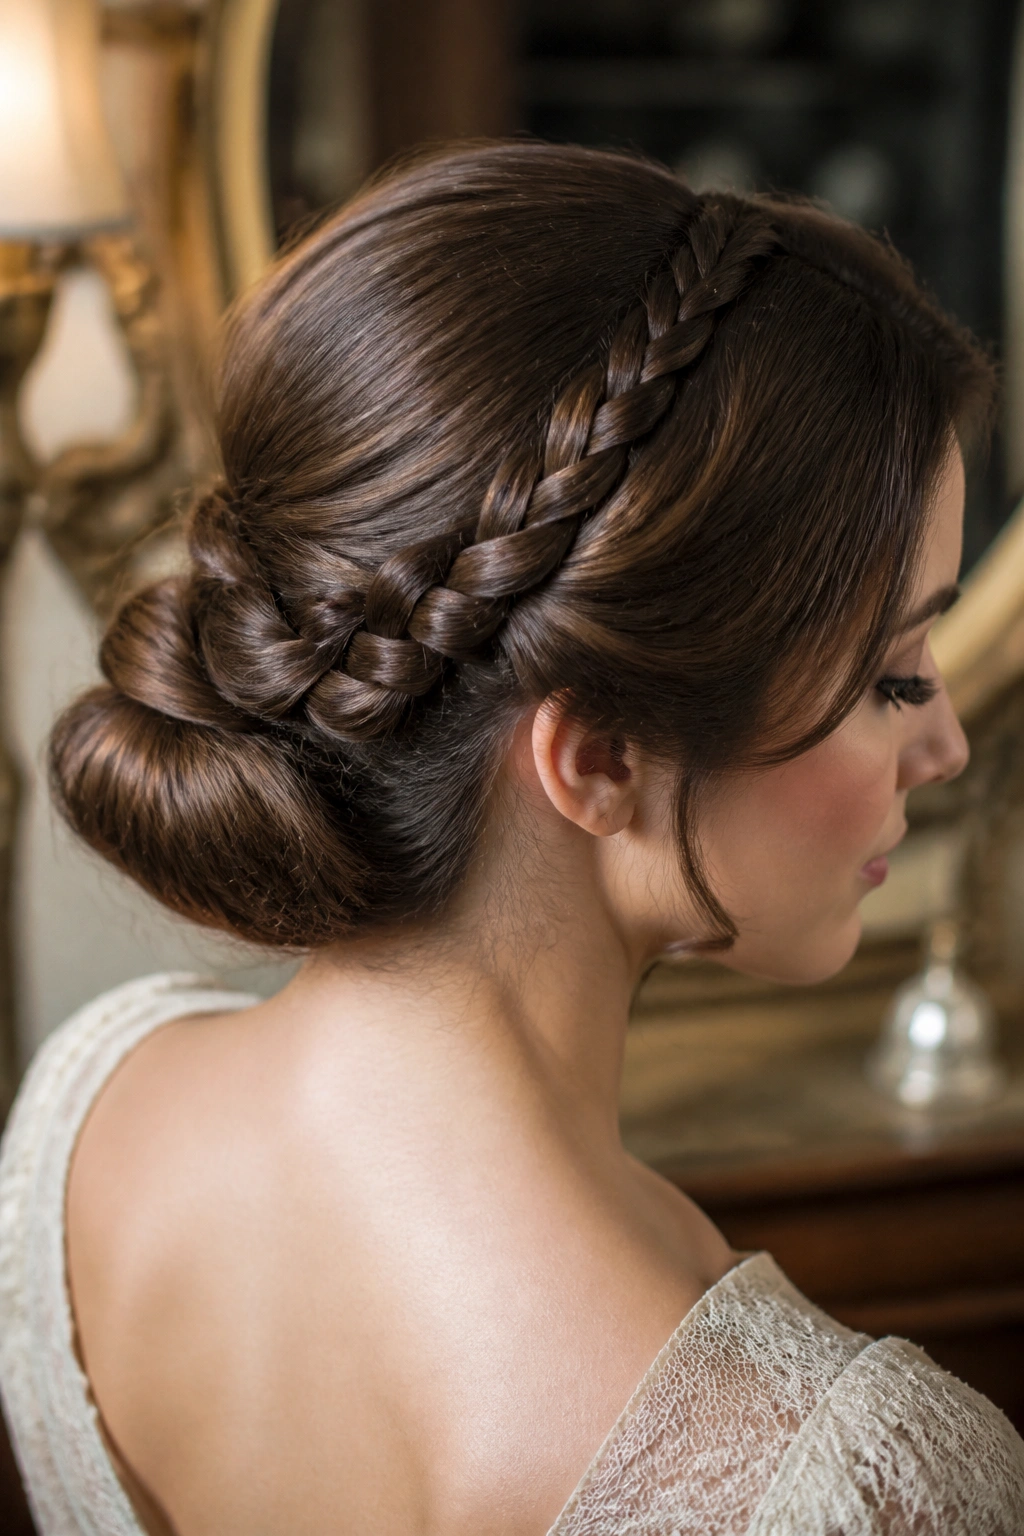
If you only learn one formal vintage braid, make it this one. The Gibson tuck already has that turn-of-the-century shape, and adding a braid gives it more grip and a cleaner line.
Why it feels so period-correct
The style has the neatness of an updo and the texture of a braid, which is a very useful combination. The front can stay smooth, almost glossy, while the braid disappears into the fold at the nape.
A small clear elastic is handy here. So are 8 to 12 bobby pins, depending on how much hair you have and how stubborn your ends are. I also like a fine-tooth comb for the front and a little setting cream on the palms before smoothing.
How to wear it
- Braid the back section first, leaving the front hair loose.
- Tuck the braid upward into a low roll just above the nape.
- Pin the roll from the inside out so the pins do not show.
- Leave the front soft or sweep it into a side part for a gentler look.
This one lasts. It stays neat through a long evening and still looks good when a few wisps come loose.
4. Side-Swept Fishtail Braid with Finger Waves at the Front
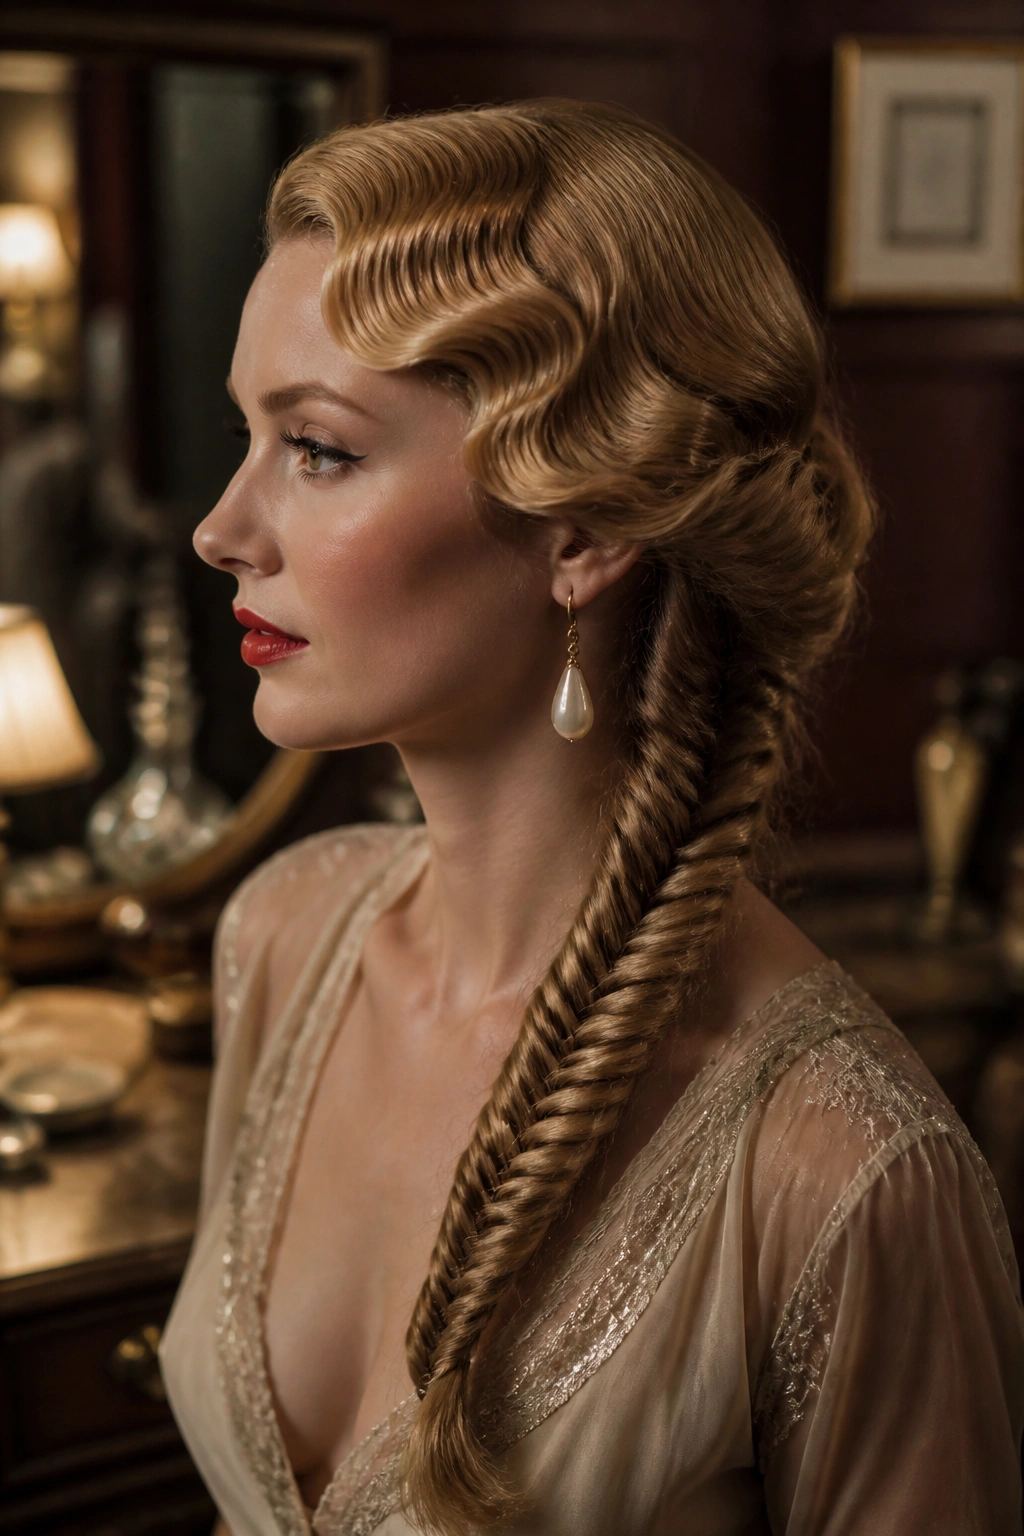
A fishtail braid brings a finer texture than a standard three-strand braid, and that matters when you want the style to feel dressed up. Sweep it over one shoulder, keep the front in soft waves, and the whole look starts leaning old-Hollywood without becoming stiff.
Why does this work so well on long hair? Because the fishtail needs length to show off its pattern. On shorter hair it can look crowded. On long hair, every crossover is visible, and the braid gets that neat, almost scaled look that photographs nicely from the side.
The front section is where the vintage mood lives. Set the hairline with a curling iron or old-fashioned finger waves if you like a stronger period note. If not, a brushed wave and a deep side part are enough. The braid itself does the heavy lifting.
5. Rope-Braid Chignon at the Nape
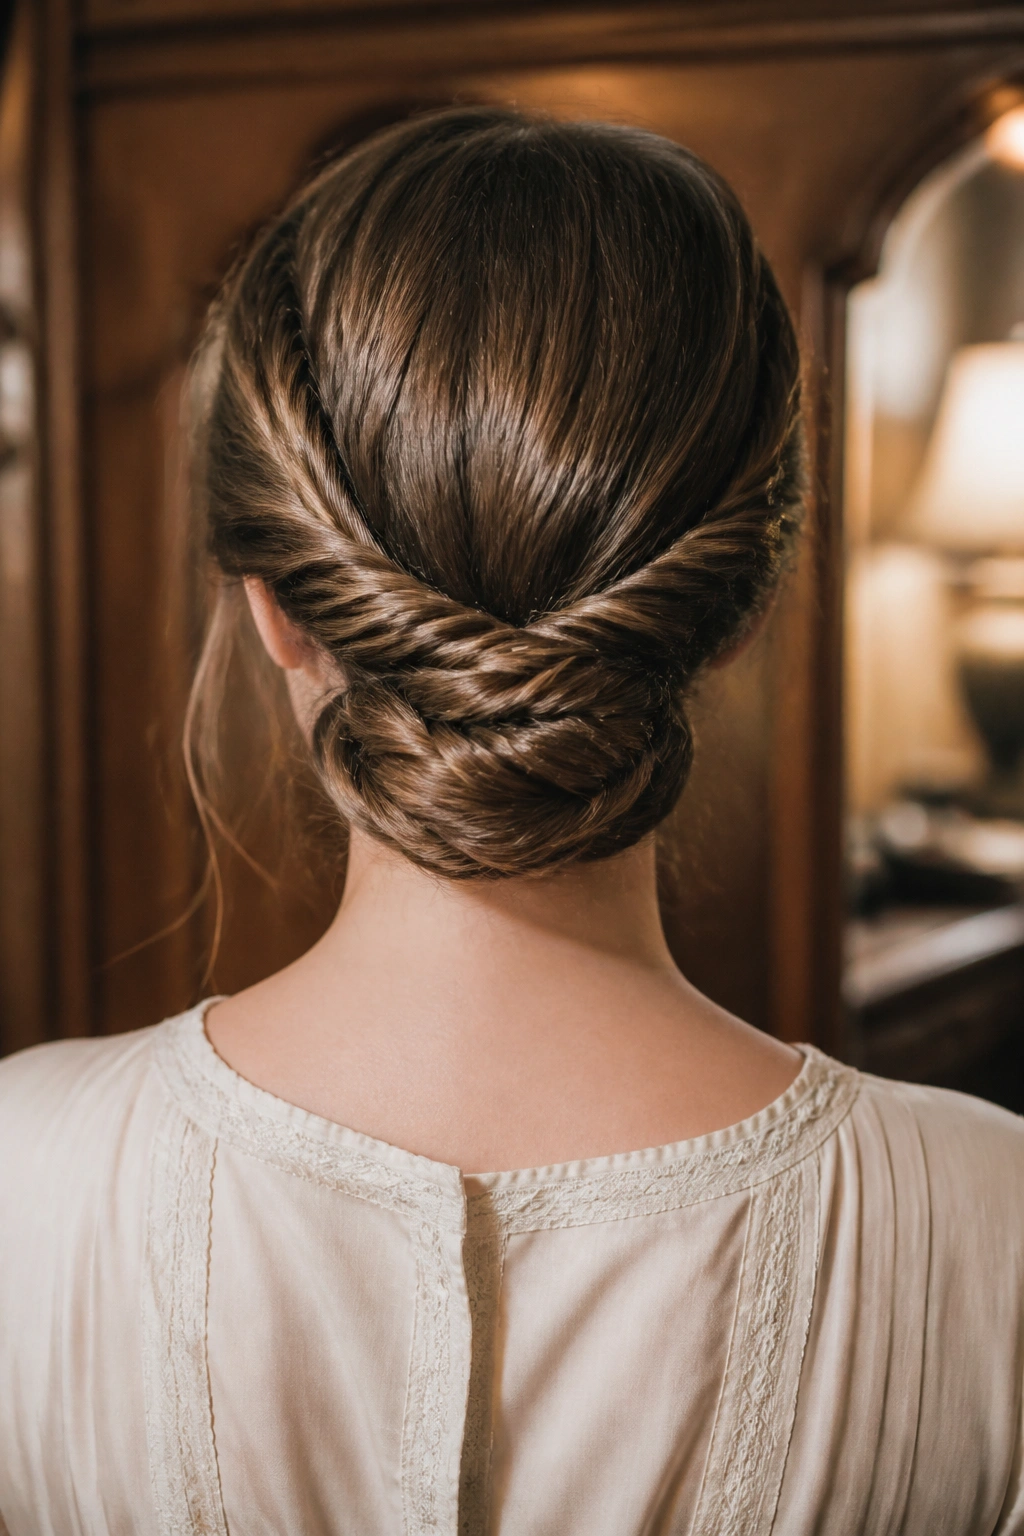
Why does a rope braid feel so midcentury? Because it has that clean, glossy twist that looks tidy from every angle. It’s not as fussy as a woven braid, and that’s exactly why it works for a low chignon.
The trick is simple: split the hair into two sections, twist each section in the same direction, then wrap them around each other in the opposite direction. If you twist both sides too loosely, the braid puffs apart. Too tight, and it can look wiry. You want a firm spiral with a little give.
How to get the shape right
A rope braid looks best when the bun sits low and slightly off-center. That tiny shift keeps it from feeling too strict.
- Start with hair brushed smooth and lightly misted with setting spray.
- Twist each section from root to end before crossing them.
- Coil the finished rope into a compact bun at the nape.
- Pin the bun through the middle, not just the edges.
A little shine cream on the outer surface gives it that polished, old-photo finish.
6. Ribbon-Woven Three-Strand Braid
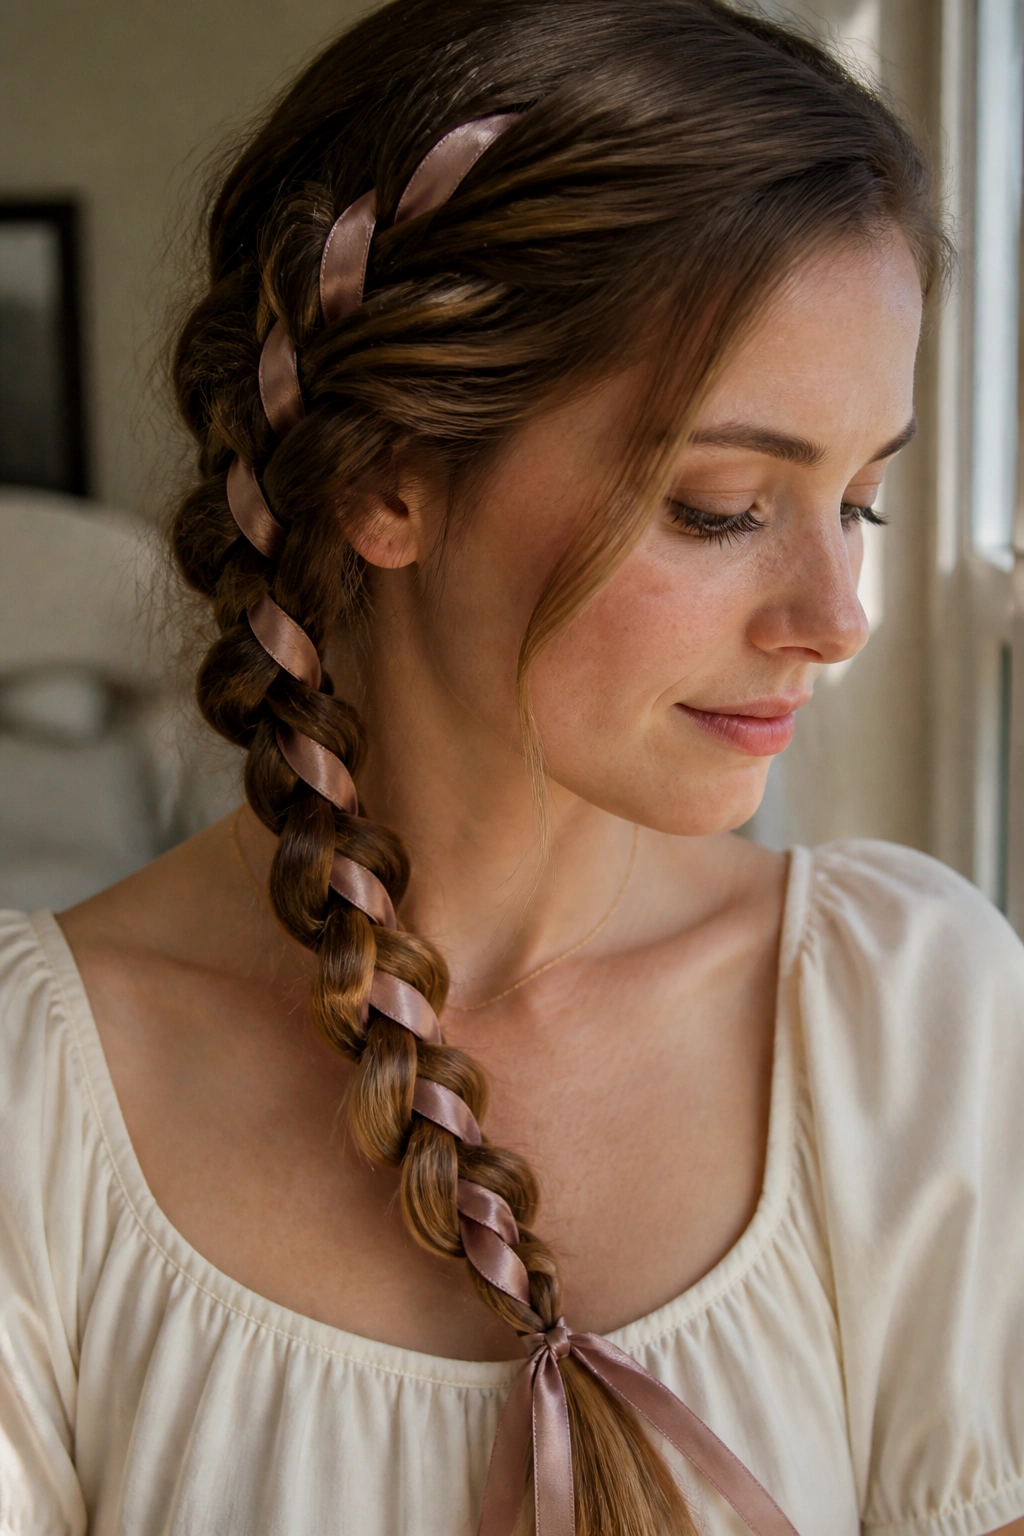
This is one of those styles that looks far more difficult than it is. You braid a ribbon right into the hair, and the whole thing changes tone instantly. Satin feels dressy. Grosgrain feels sturdier. Velvet is the most dramatic, though it can make the braid bulkier than you expect.
I prefer ribbon widths between 1/4 and 1/2 inch for long hair. Anything wider can start to fight the braid instead of sitting inside it. Match the ribbon to the outfit when you want a neat, composed look, or choose a color that sharply contrasts with your hair if you want the weave to show off.
The practical bit: tie the ribbon to the top section first and keep it flat while you braid. If it twists, the braid starts to look cluttered. That little detail matters more than people think.
7. Braided Headband with Loose Length
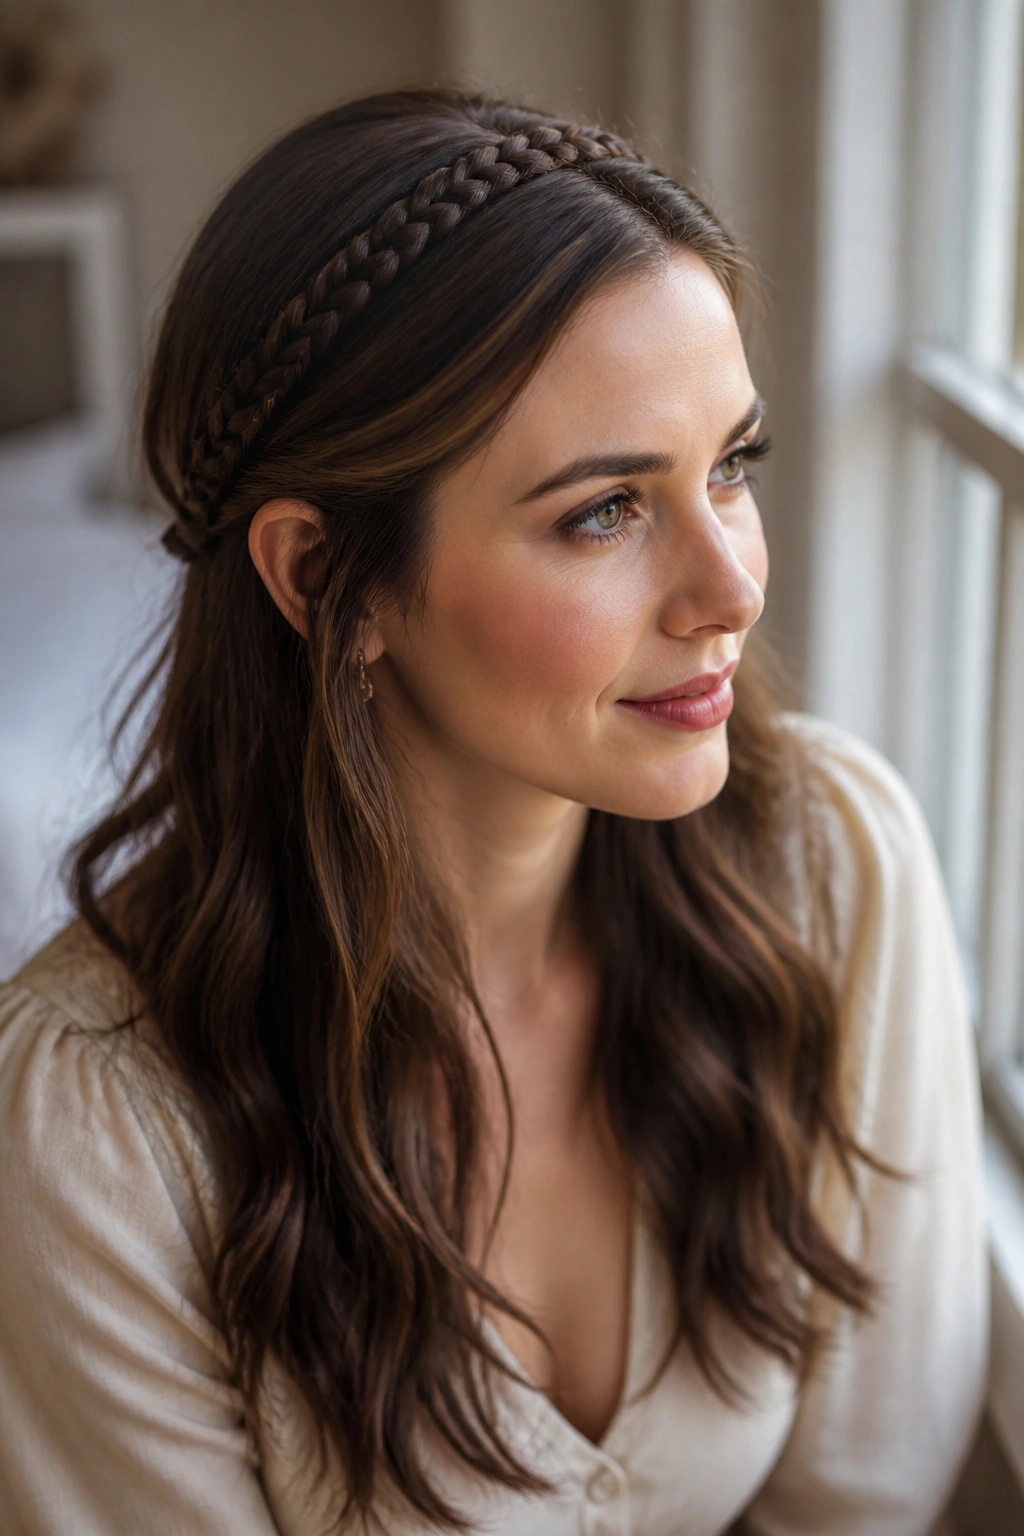
This is the style for days when you want your hair down but not in your face. It borrows the visual idea of a headband, then builds it from your own hair, which is what gives it that vintage ease.
A braided headband works best when the rest of the hair has body. Loose curls, brushed-out waves, or a soft blowout make the braid look intentional rather than like an afterthought. I also like this on long hair because the length below the braid can stay loose and pretty; you get structure up top without sacrificing movement.
What to watch for
A braid headband should sit just behind the hairline, not halfway back on the crown. Too far back and you lose the frame.
- Keep the braid narrow, about 1 to 1.5 inches wide.
- Pin it behind each ear with hidden bobby pins.
- Curl the lengths underneath in large sections if you want a softer finish.
- Let a few front pieces fall naturally for a less formal mood.
One neat braid. That’s enough.
8. Double Dutch Braids Folded into Low Rolls, Vintage Braided Hairstyles for Long Hair Edition
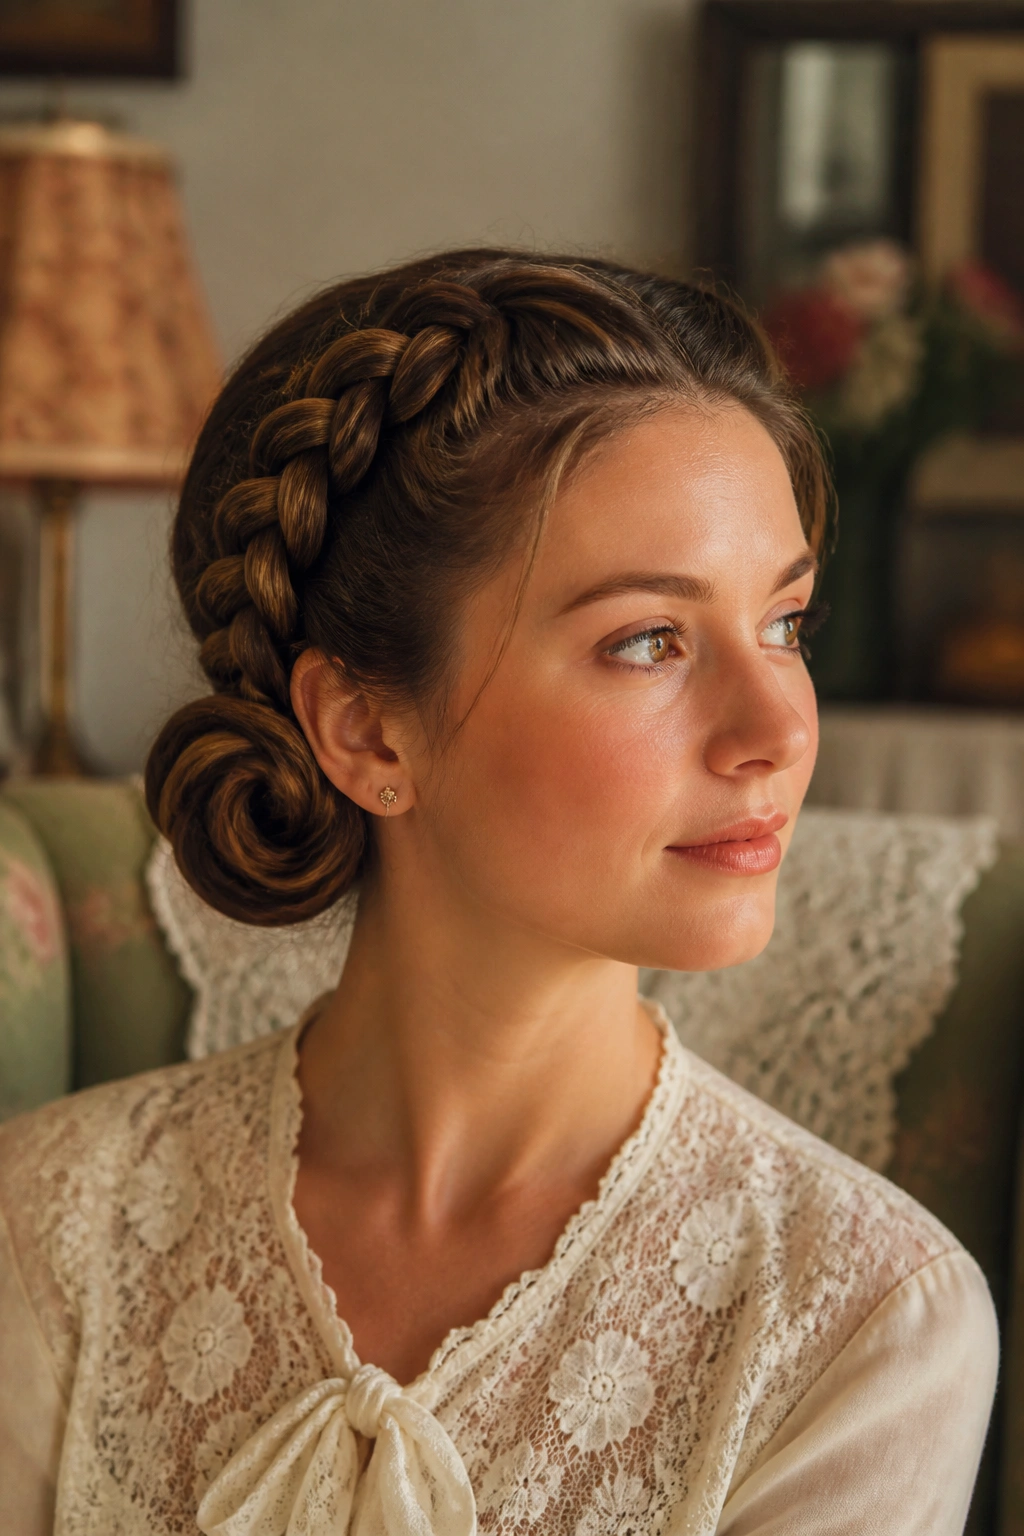
Unlike school-day pigtails, Dutch braids sit on top of the hair and give the style some structure right away. Fold those braids into low rolls behind the ears, and the result feels playful, tidy, and a little retro without getting sugary.
This is a good choice when your hair is long enough to make the braids substantial. The texture matters here. Dutch braids need the sections to stand up slightly from the scalp, and long hair gives them more shape to work with. When you fold the ends under, the whole style gets that neat, tucked-away finish that reads more vintage than sporty.
I’d use this on second-day hair with a light dry shampoo at the roots. Freshly washed strands can be too soft, and the braid won’t hold its edges as cleanly. The rolls should sit low and even, almost like two mirrored knots hidden from the back.
9. Half-Up Waterfall Braid with Waves
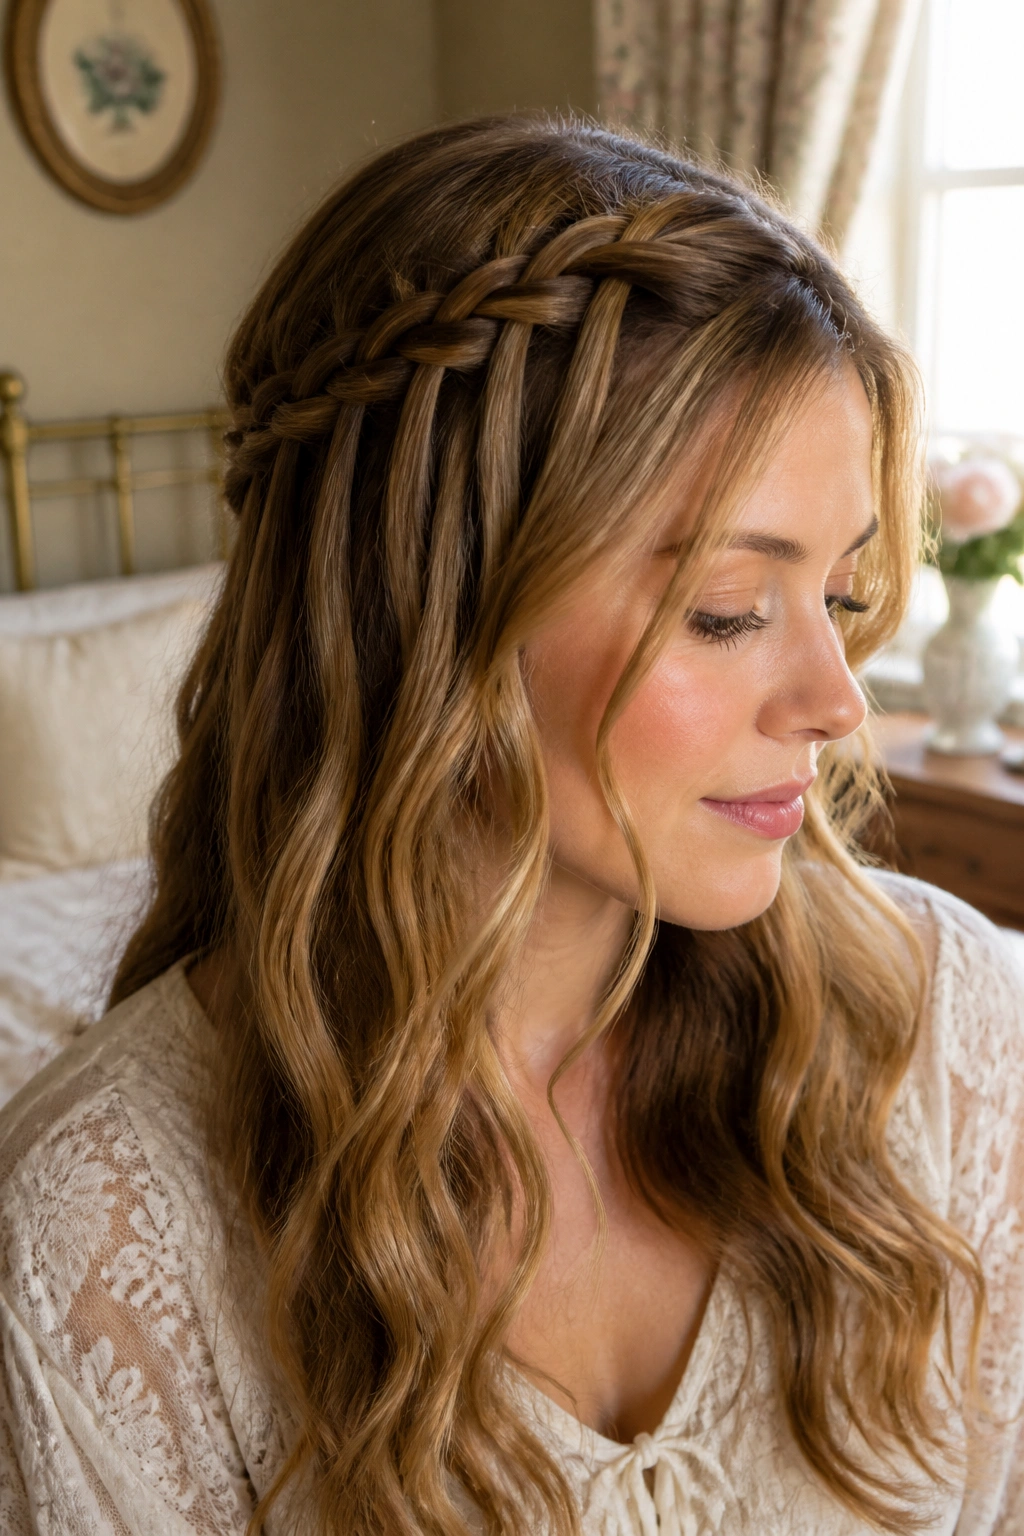
A waterfall braid has a delicate look that suits long hair in a way shorter lengths can’t really fake. The braid releases one section as it moves, so the loose hair keeps flowing underneath like a soft curtain.
That movement is what makes it feel romantic instead of rigid. A tight braid would fight the style. A waterfall braid should look almost airy, with each dropped piece sitting neatly on top of the waves below. I like this best with brushed curls rather than tight ringlets. The curves are softer, and the braid shows up more clearly.
If your hair is layered, work slowly around the crown so the shortest pieces don’t pop out. A few discreet pins under the braid will keep the pattern from sagging. The front can stay side-parted or center-parted, but I think a gentle side part gives the whole thing more old-fashioned charm.
10. Four-Strand Braid Down the Back
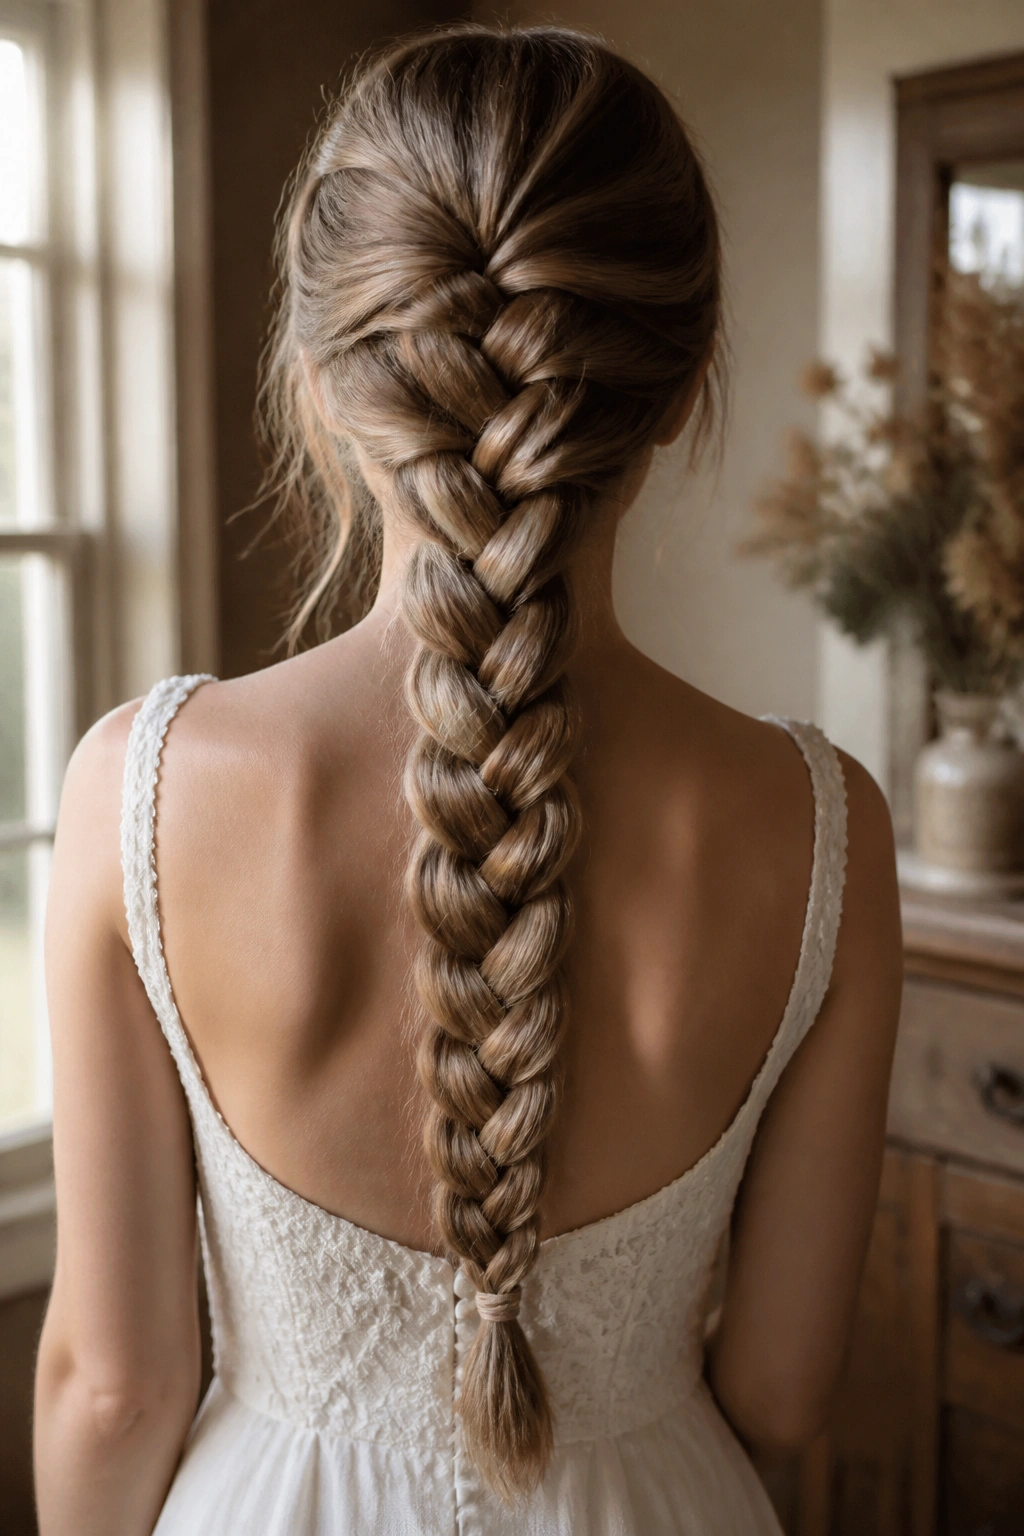
This is the most polished braid in the bunch, full stop. A four-strand braid has a richer weave than the ordinary version, and on long hair it becomes a thick, almost woven ribbon down the back.
It does take practice. The first few times, the sections will feel awkward in your hands, and the braid might look uneven near the top. That’s normal. Once the motion settles in, the pattern becomes more predictable, and the finish is worth the effort because it holds its shape better than a loose three-strand braid.
I’d wear this with a center part and minimal front styling. Let the braid be the point. If you want extra vintage mood, add a narrow velvet tie at the end, about 2 inches from the tip. That tiny detail looks old-fashioned in the best way.
11. Braided Victory Roll Hybrid
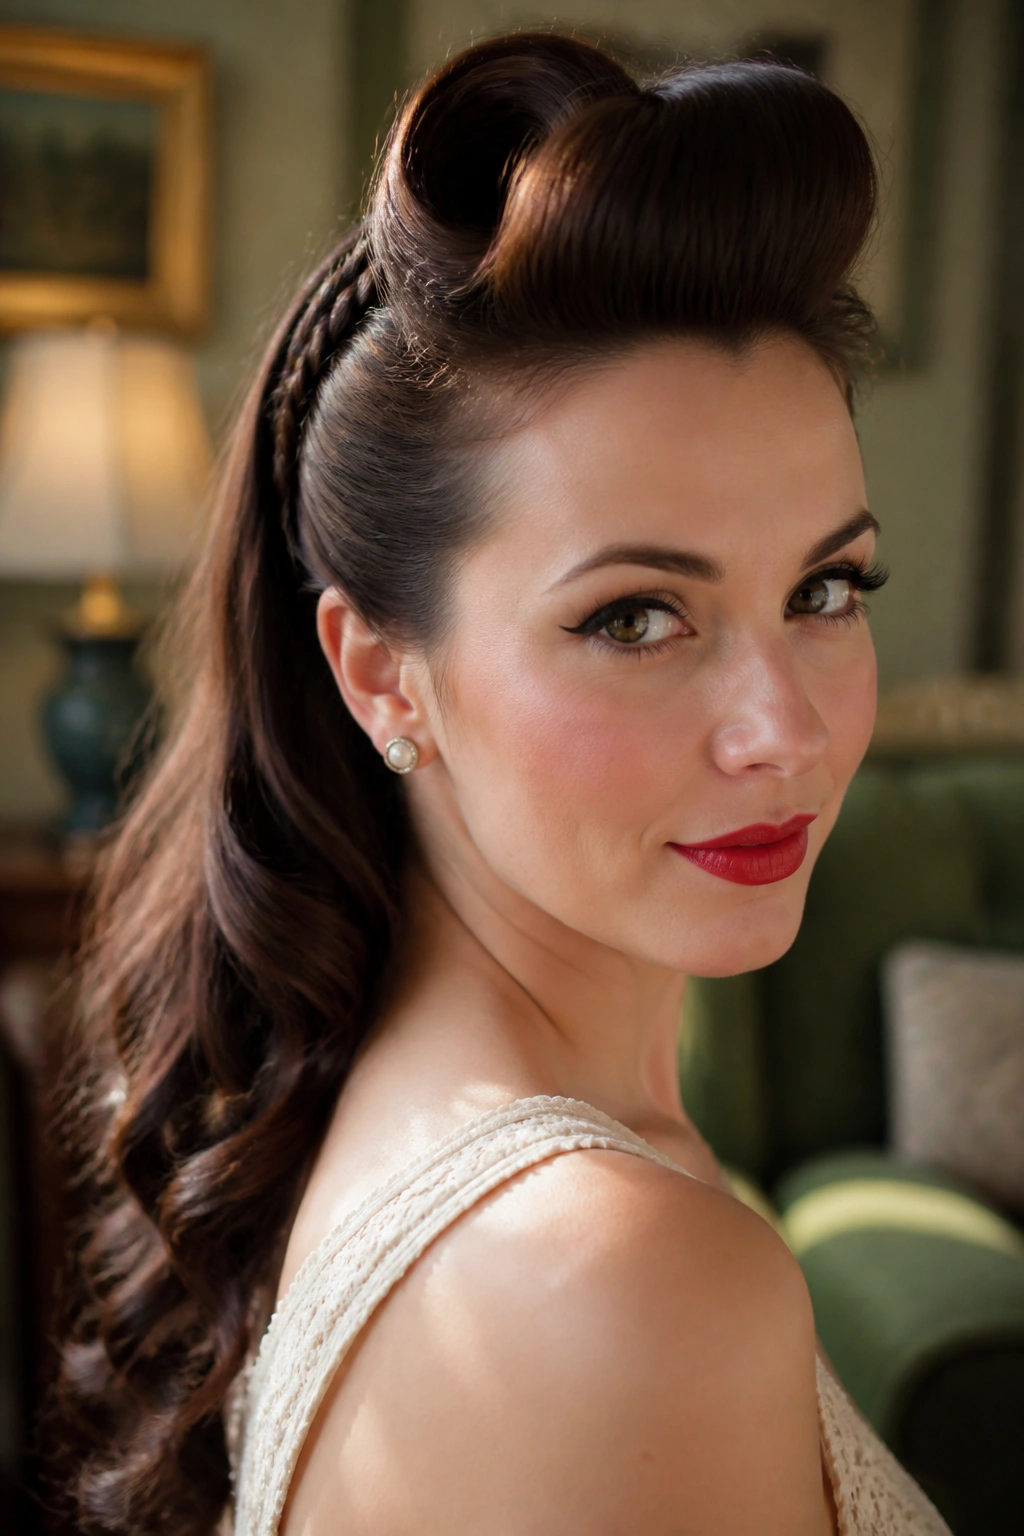
A victory roll hybrid gives you the drama of a rolled front and the texture of a braid in one style. It sounds busy. It isn’t, if you keep the braid narrow and the roll smooth.
The front matters most
Most of the character sits at the hairline. That’s where the lift happens, and that lift is what pulls the style into pin-up territory. The braid can begin at one temple, skim back over the top, then disappear into the roll or a low base at the back.
A teasing comb helps, but use it lightly. You want the front to have height, not a nest of broken strands. A little pomade on the outer surface of the roll will tame flyaways without flattening the shape.
The nice thing about this style is that it gives long hair a clear outline. You see the curve first, then the braid. That order matters. It keeps the look from feeling overworked.
12. Basket-Weave Half-Up with Tucked Ends
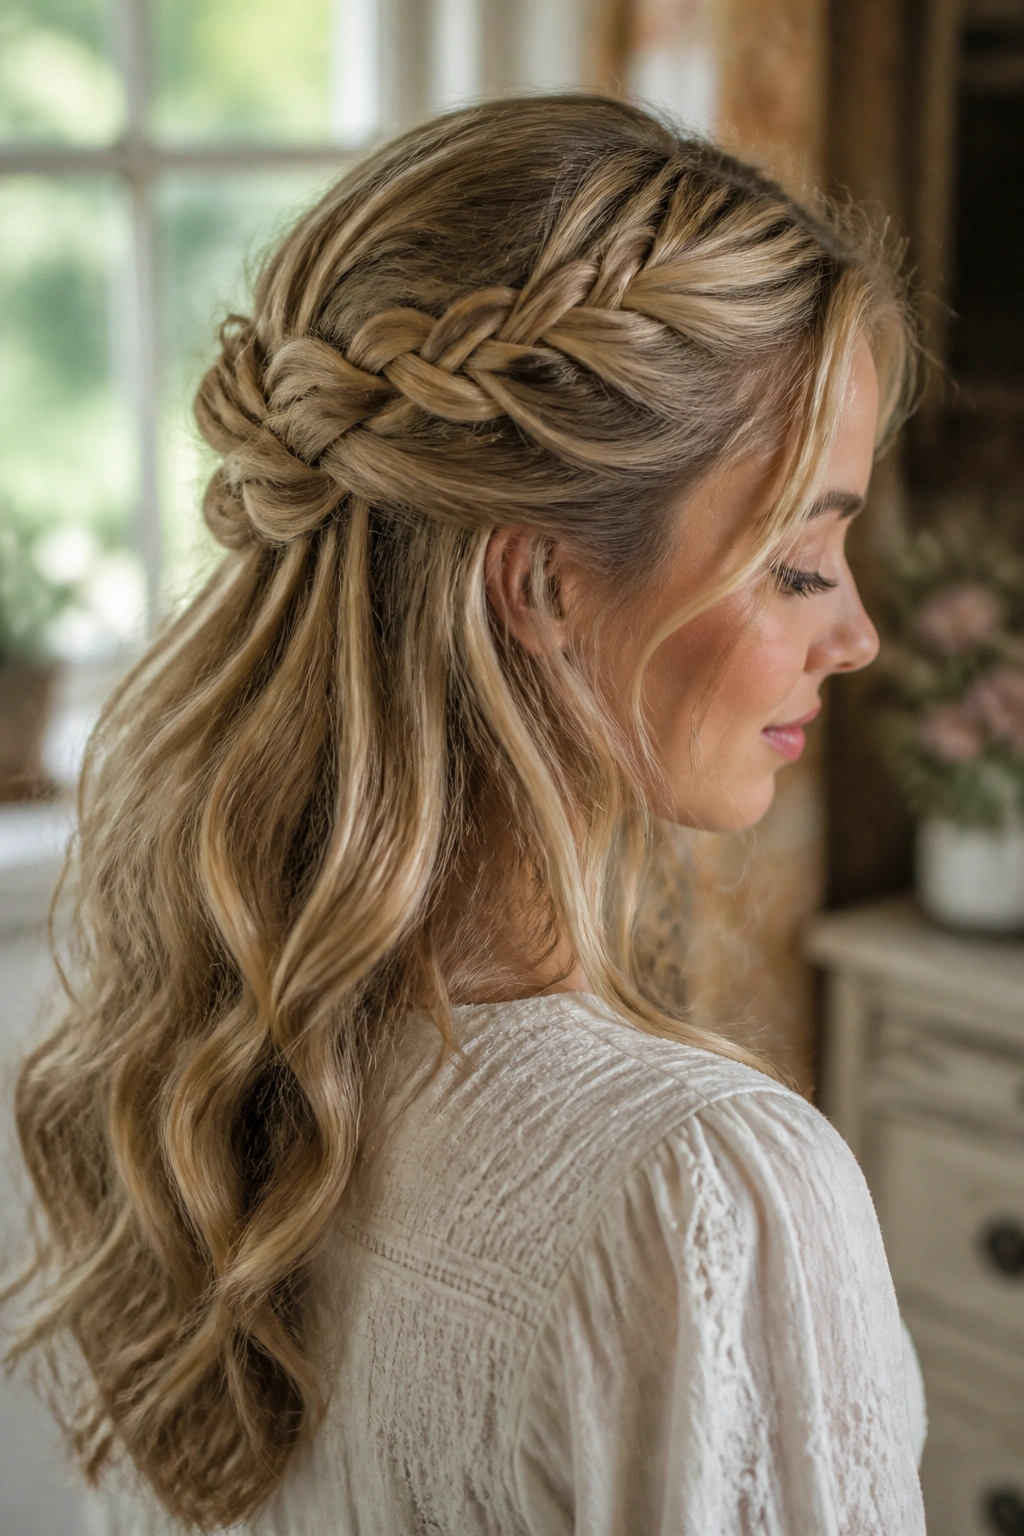
If crown braids feel soft and rounded, basket-weave styling feels more graphic. It uses crossing sections to create a woven panel at the back of the head, which looks intricate even when the technique is not that wild.
This is a good option for long hair because the longer lengths let the weave lie flat and neat. Short hair can make basket work look crowded. On long hair, the panels stretch out enough to show the pattern. I like pairing it with loose waves below so the top half feels structured and the bottom half stays relaxed.
You do need a steady hand. Secure each crossover before moving to the next one, or the whole thing starts to slip. A few invisible pins under the overlaps are worth the effort. They disappear, and the shape stays cleaner.
13. Low Braided Bun with a Deep Side Part
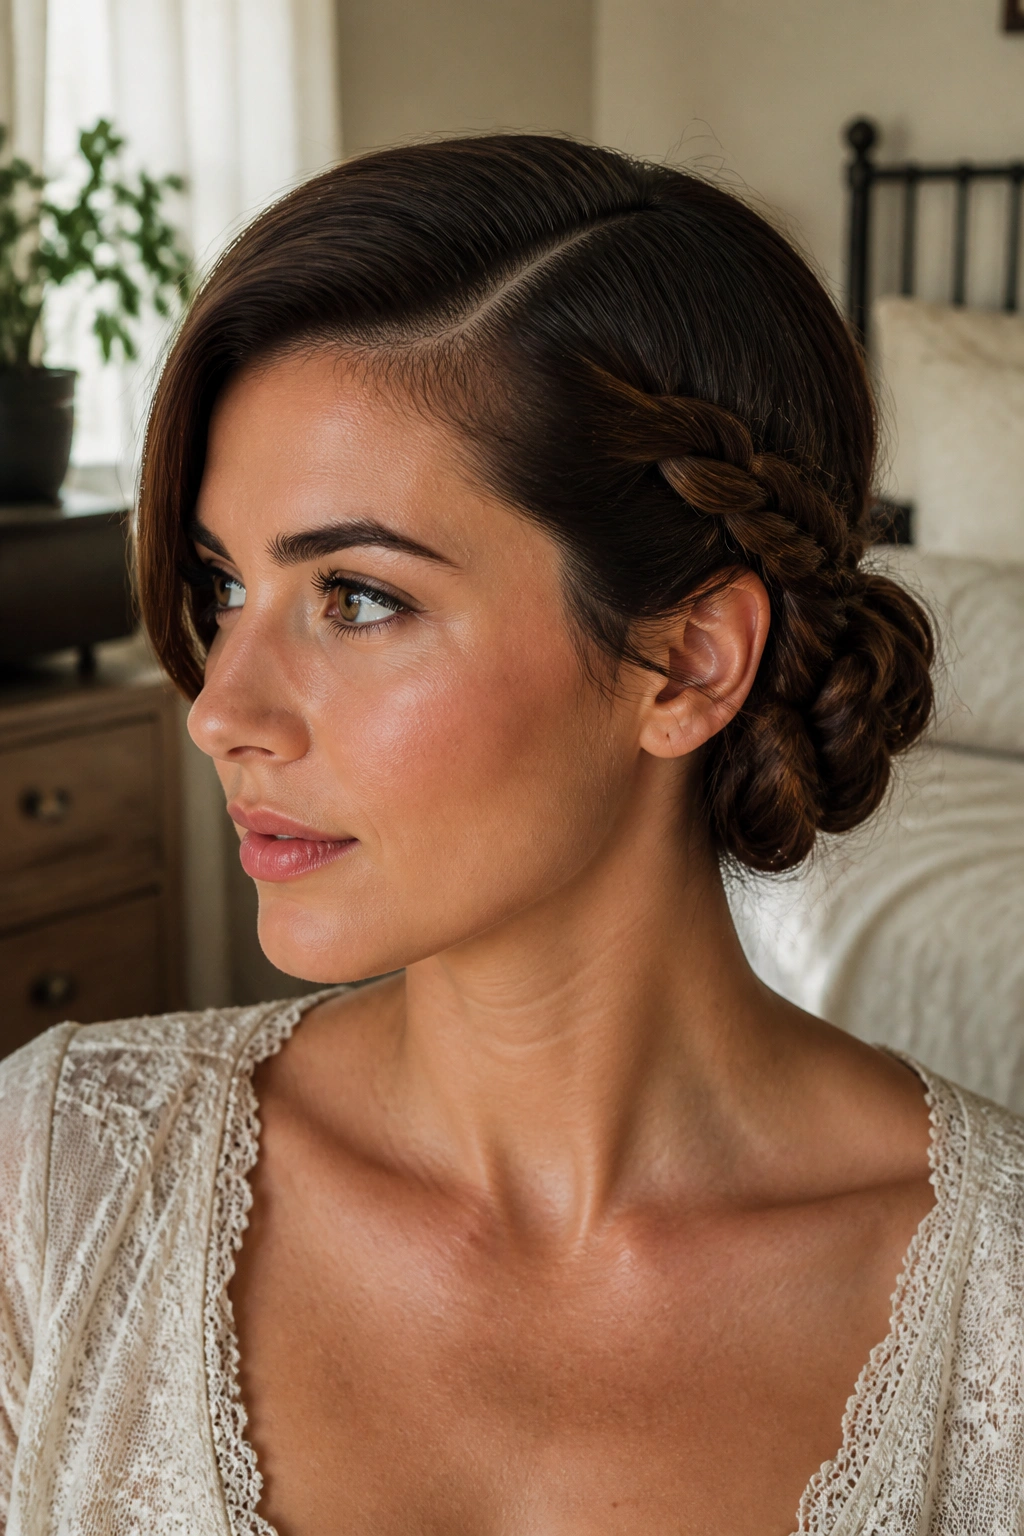
A deep side part changes everything here. It gives the style that old-screen polish, and once the braid is tucked into a low bun, the shape looks deliberate instead of plain.
The braid itself can be loose or tight, depending on how formal you want it to feel. Loose braids give you a softer bun with texture showing through. Tight braids read cleaner and more composed. I tend to prefer the first one because a little irregularity in the braid makes the bun feel hand-done, not factory-perfect.
Smoothing cream along the part helps the top stay flat without shine overload. Then pin the bun low and slightly behind the ear on the heavier side of the part. That offset is small, but it gives the style a face-framing curve that a centered bun usually misses.
14. Halo Braid with a Satin Scarf
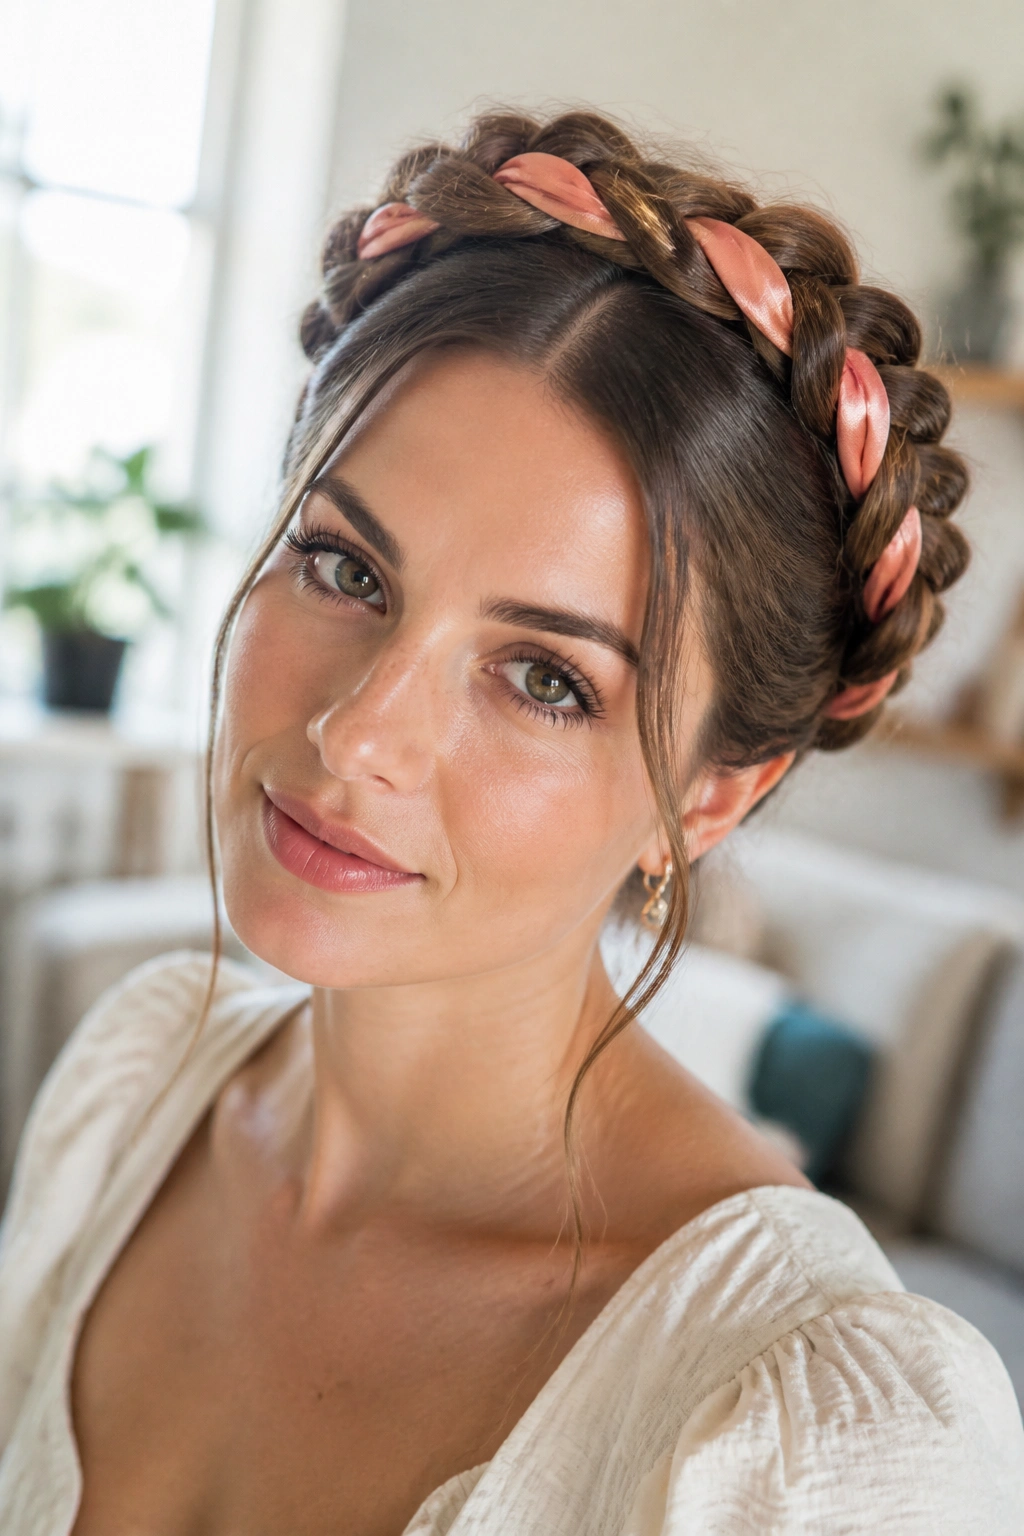
A halo braid by itself already has that vintage-girl energy. Add a satin scarf, and the style becomes more personal, less like a fixed costume look. The scarf can sit under the braid, peek through it, or tie at the nape like a soft accent.
The scarf width matters. Too wide and the braid starts to lose shape. A folded strip around 3/4 inch wide usually sits well in long hair. Thin scarves feel delicate, which is nice if you want a lighter touch. A richer fabric, like satin or silk, makes the braid look smoother and more dressed up.
What the scarf changes
It shifts the eye away from perfection. That’s a good thing.
- A plain braid looks cleaner.
- A scarf breaks up the line and adds color.
- A printed scarf can pull in the shade of a dress or blouse.
- A solid scarf in cream, navy, or deep red stays easier to wear with more outfits.
This one has a little personality. I think that’s the point.
15. French Braid into Curl-Set Ends, Another Take on Vintage Braided Hairstyles for Long Hair
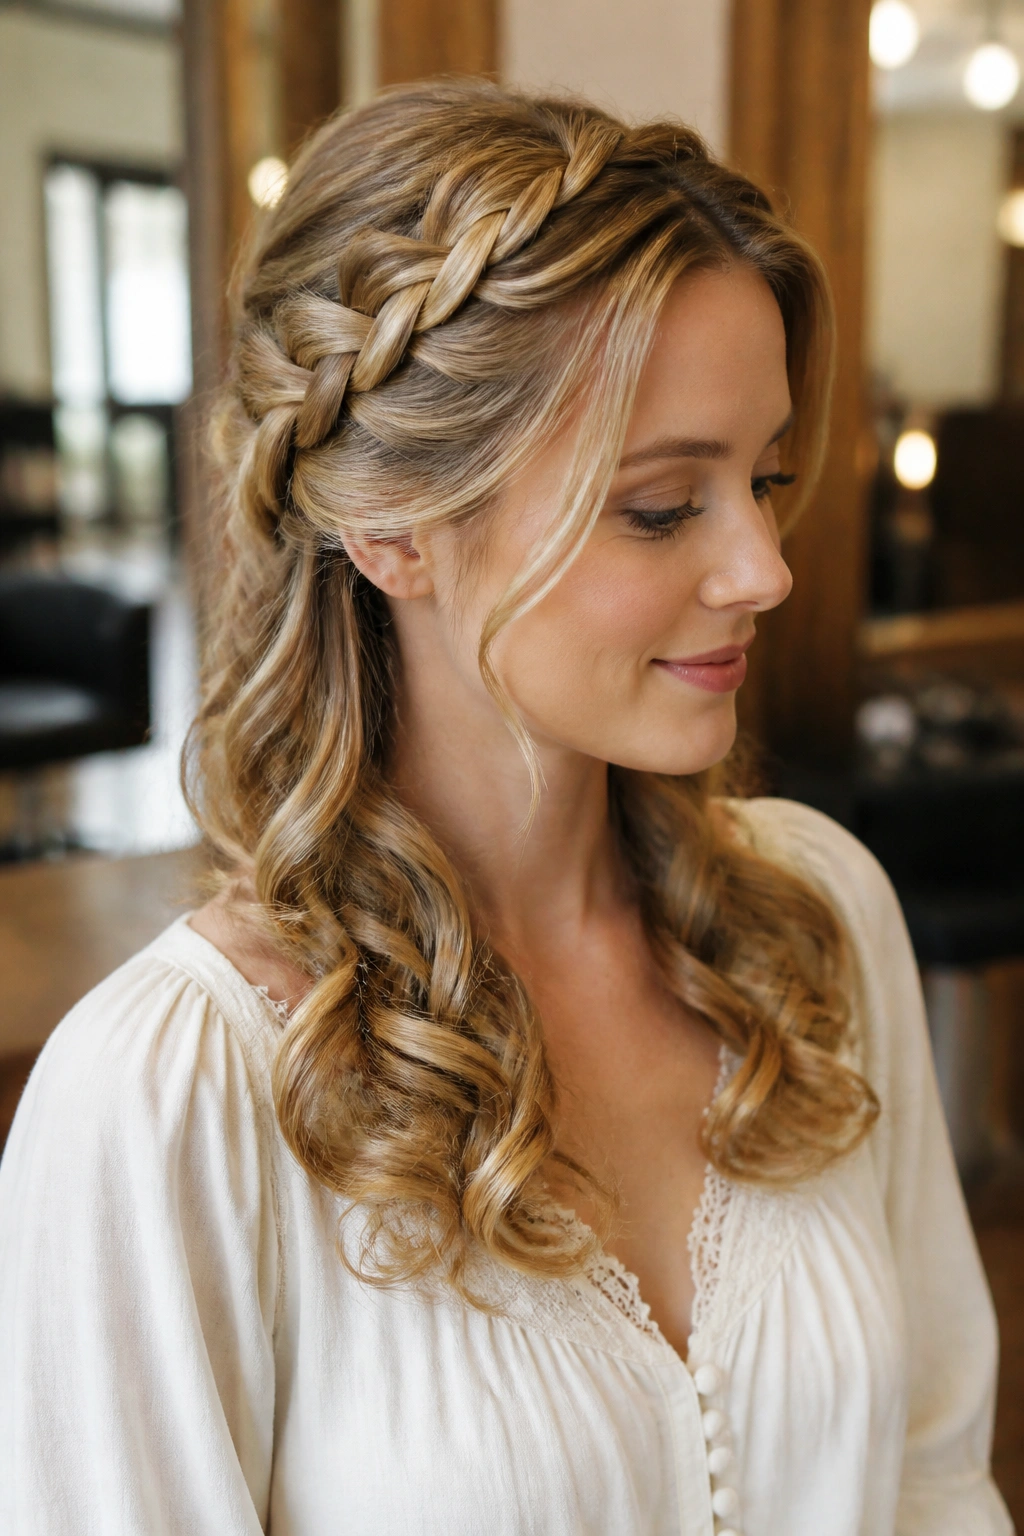
This is one of my favorite combinations because it gives you two textures in one style. The French braid keeps the top controlled, then the ends open into curl-set softness that feels unmistakably vintage.
The transition matters. Stop the braid before the very ends, secure it with a small elastic, and set the loose tail with a curling iron or pin curls. A 3/4-inch iron gives you tighter curls; a 1 to 1.25-inch iron makes the finish softer and more brushed-out. I lean toward the softer end unless the hair is very fine and needs more shape.
It’s a good style when you want to show length without letting the hair fall everywhere. The braid keeps the crown neat. The curls keep the finish pretty. That balance keeps the style from feeling too plain or too fussy.
16. Braided Pompadour with Sleek Sides
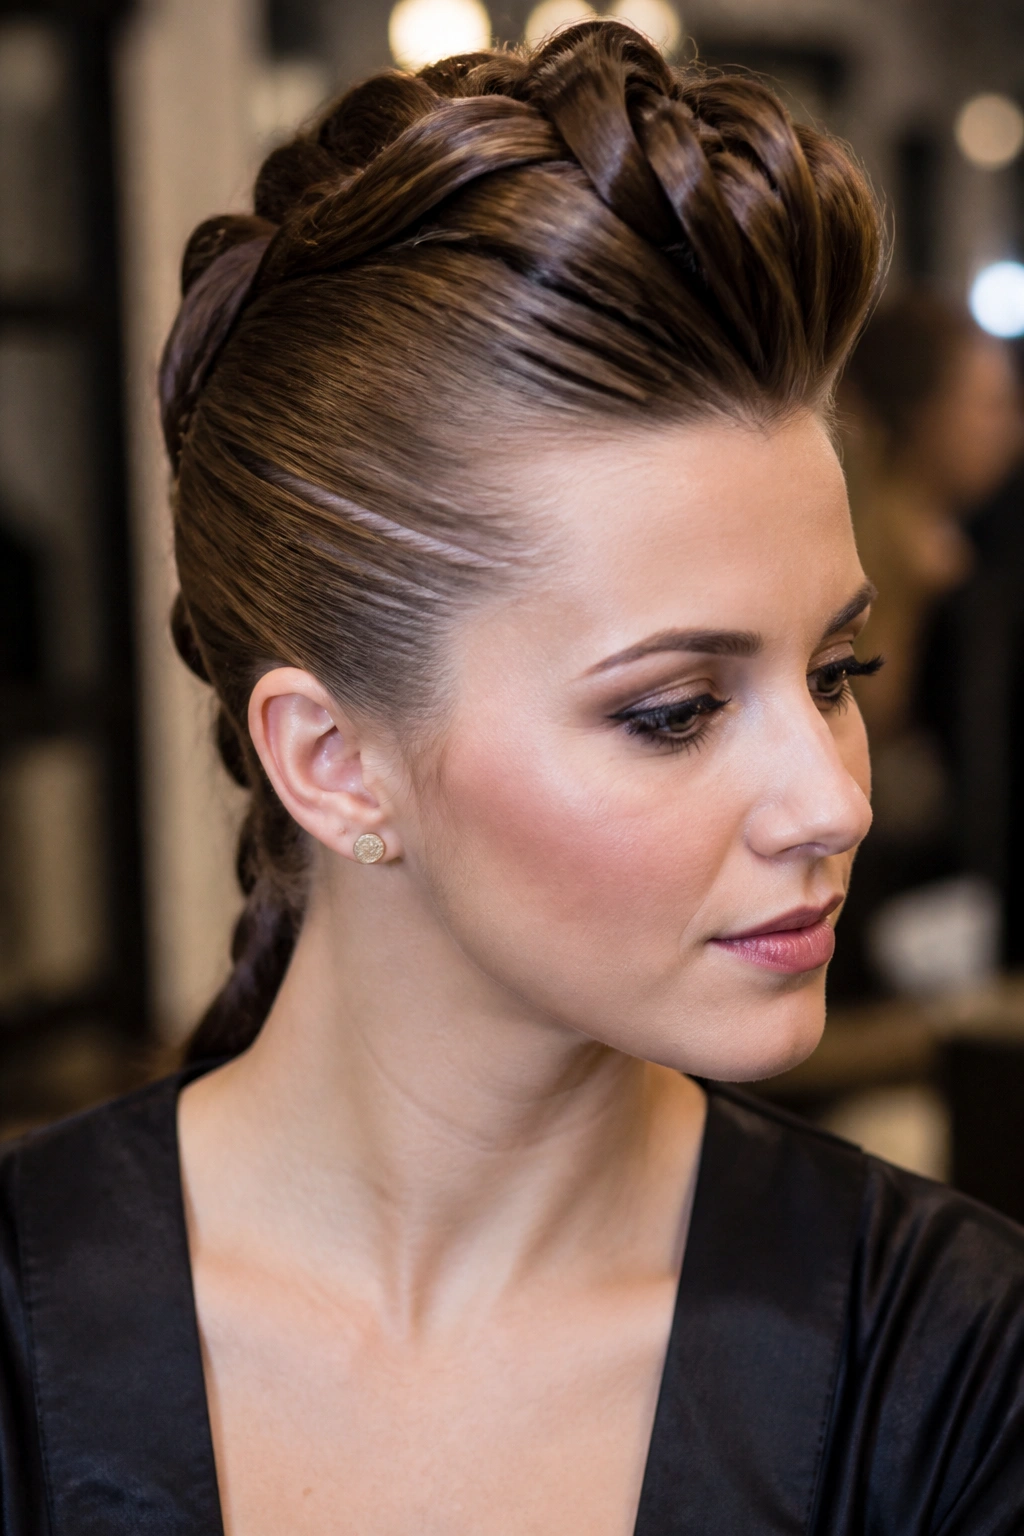
A braided pompadour is not shy. It uses height at the front, smooth sides, and a braid that feeds into the back so the whole silhouette looks lifted.
The front section should be teased in small layers, then brushed over gently so it stays smooth on top. That’s the hard part. If you rush, the pompadour collapses. If you over-tease, it starts to look stiff. A little structure goes further than a lot of drama.
I like this style when the outfit has a strong neckline or clean shoulders. The braid can be a low tail, a wrapped bun, or a single plait that drops down the back. What matters is that the front stays tall and glossy. That shape does more than people expect.
17. Rolled Side Braid with a Decorative Comb
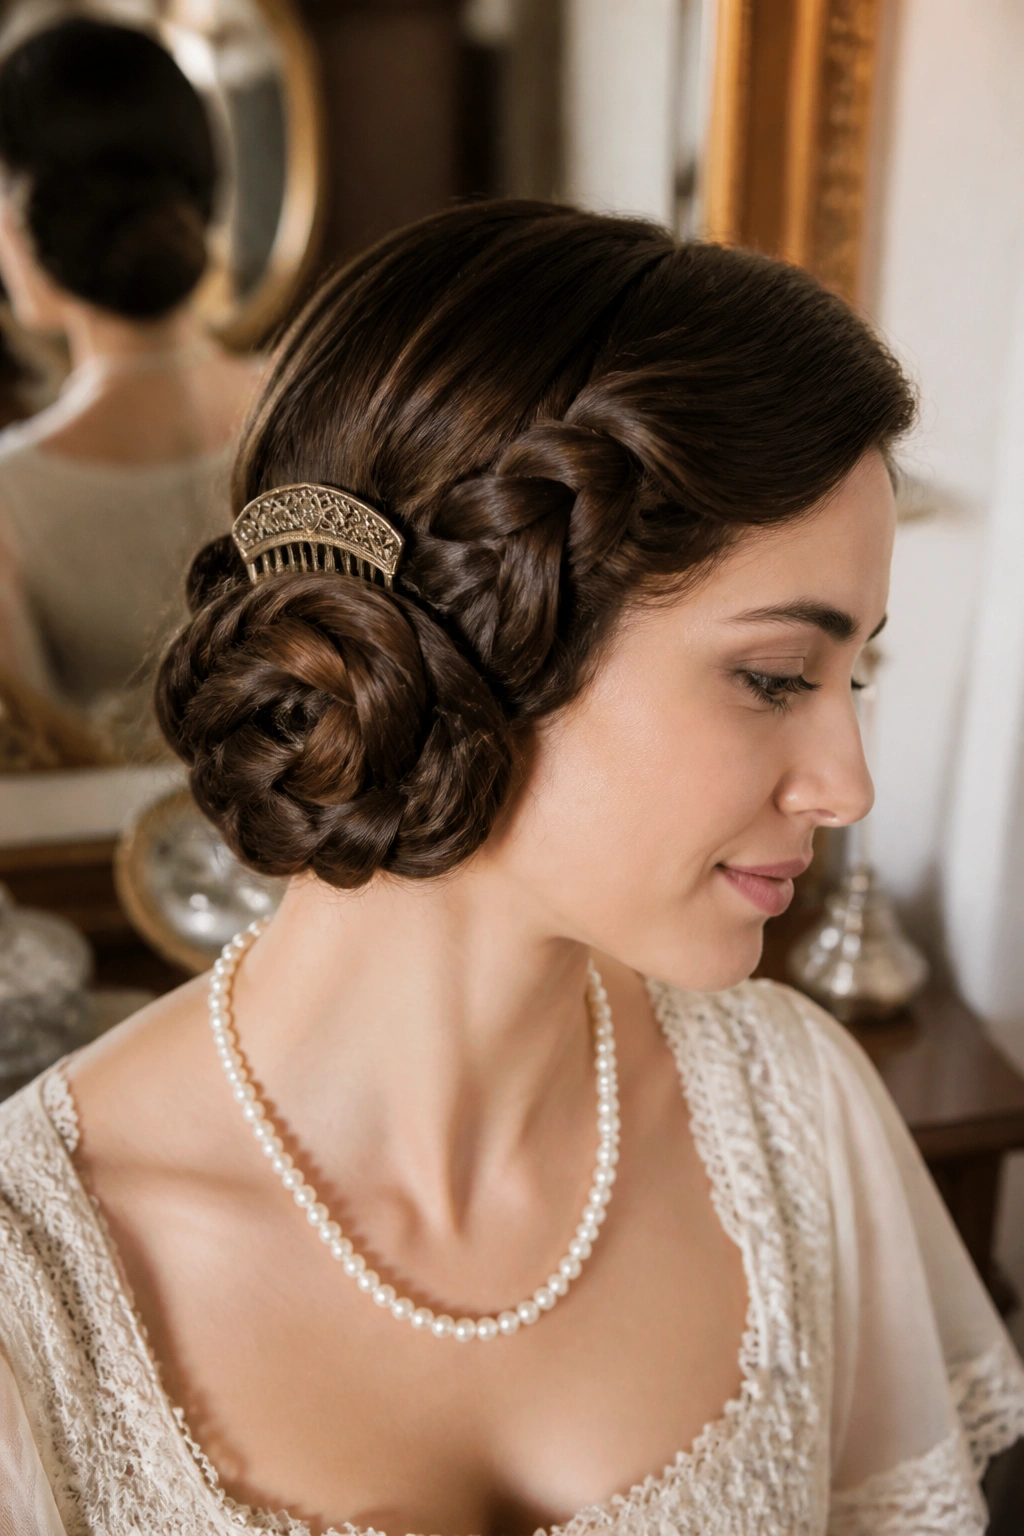
A side braid rolled into a low shape is one of those styles that looks like it came straight out of a dressing room mirror. It sits to one side, gathers the hair into a neat coil, and gives you a spot to tuck in a comb or clip.
The comb is not an afterthought. It finishes the style. A small decorative comb with pearls, tortoiseshell, or rhinestones can sit above the roll and make the whole thing feel deliberate. Keep the braid simple if the comb is ornate. If the comb is plain, the braid can carry a little more texture.
One useful detail: anchor the braid with one pin before rolling it, then pin the finished coil from underneath. That keeps the shape from drifting down during wear. The result is tidy, side-swept, and a little glamorous without trying too hard.
18. Lace Braid Wrapped into a Rose Bun
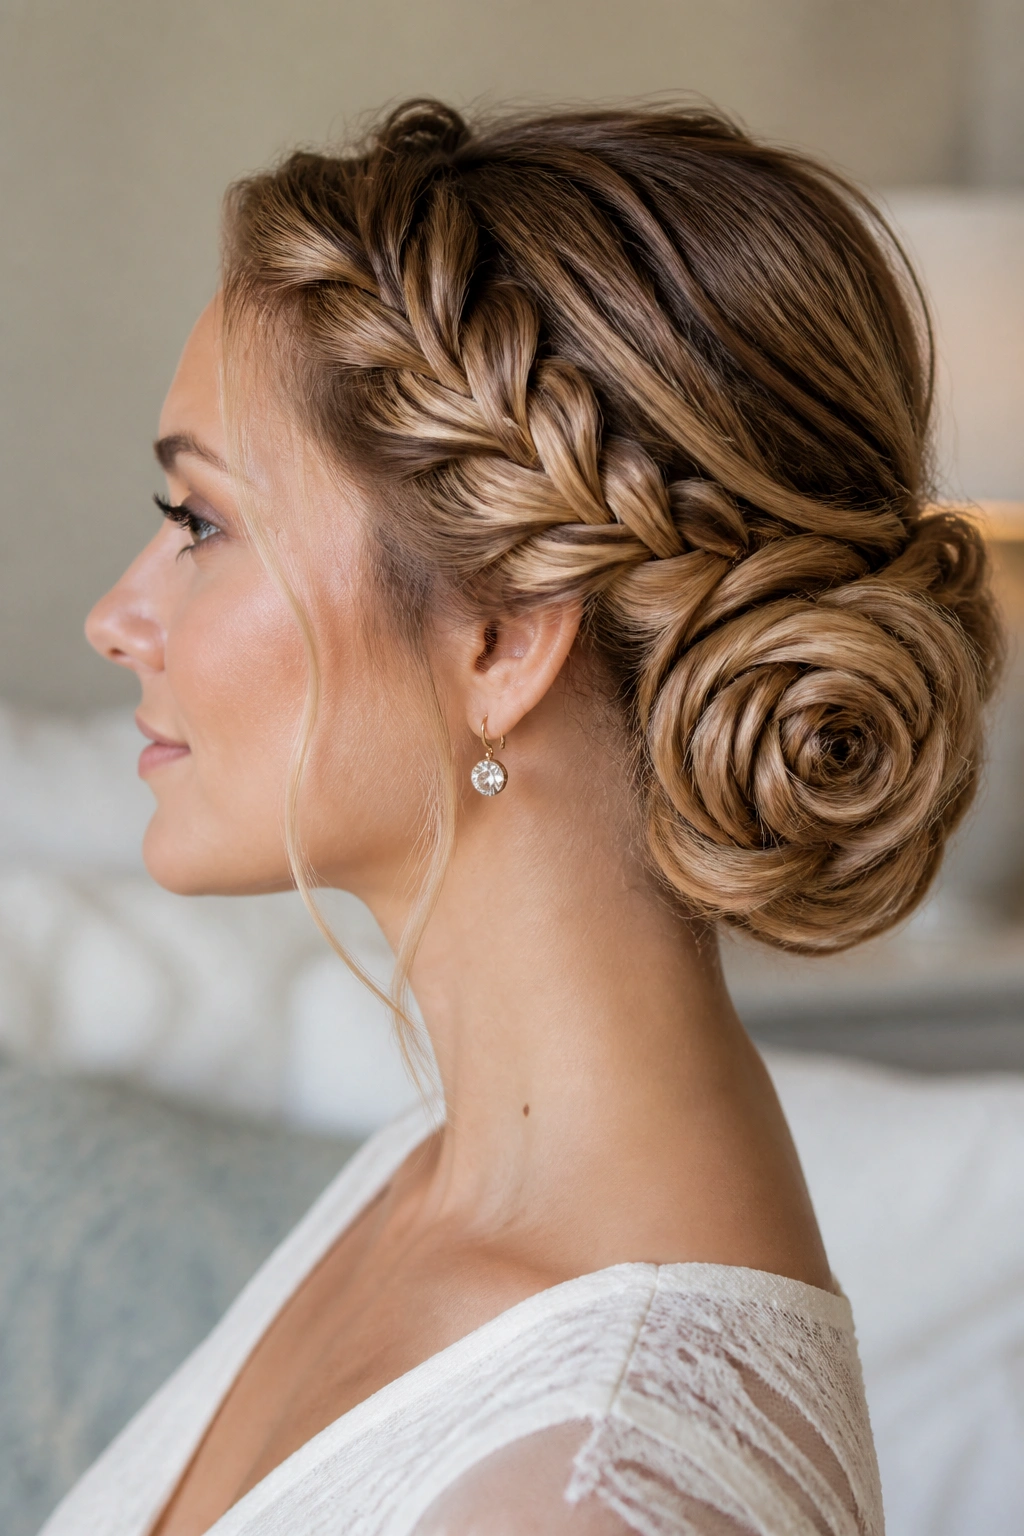
Why does a lace braid look so graceful in long hair? Because it leaves one edge soft and one edge structured, which gives the finished bun a petal-like effect once you coil it.
A lace braid is like a French braid’s quieter cousin. You add hair only on one side as you move down the head, and that asymmetry creates a gentle curve. Wrapped into a rose bun, the braid’s edges start to look layered instead of flat. It’s a pretty effect, and it takes less volume than a full braided bun.
The soft edge is the point
Do not pull the braid too tight while you’re making it. The looser surface gives the “rose” shape when you wind it around itself.
You’ll want a handful of long pins, not just two or three. Hidden support makes the bun stay round. A satin finish spray can help smooth the top without making the braid sticky. That matters. Sticky braids are hard to reshape once they’re in the bun.
19. Twin Braids Crowned and Joined at the Back
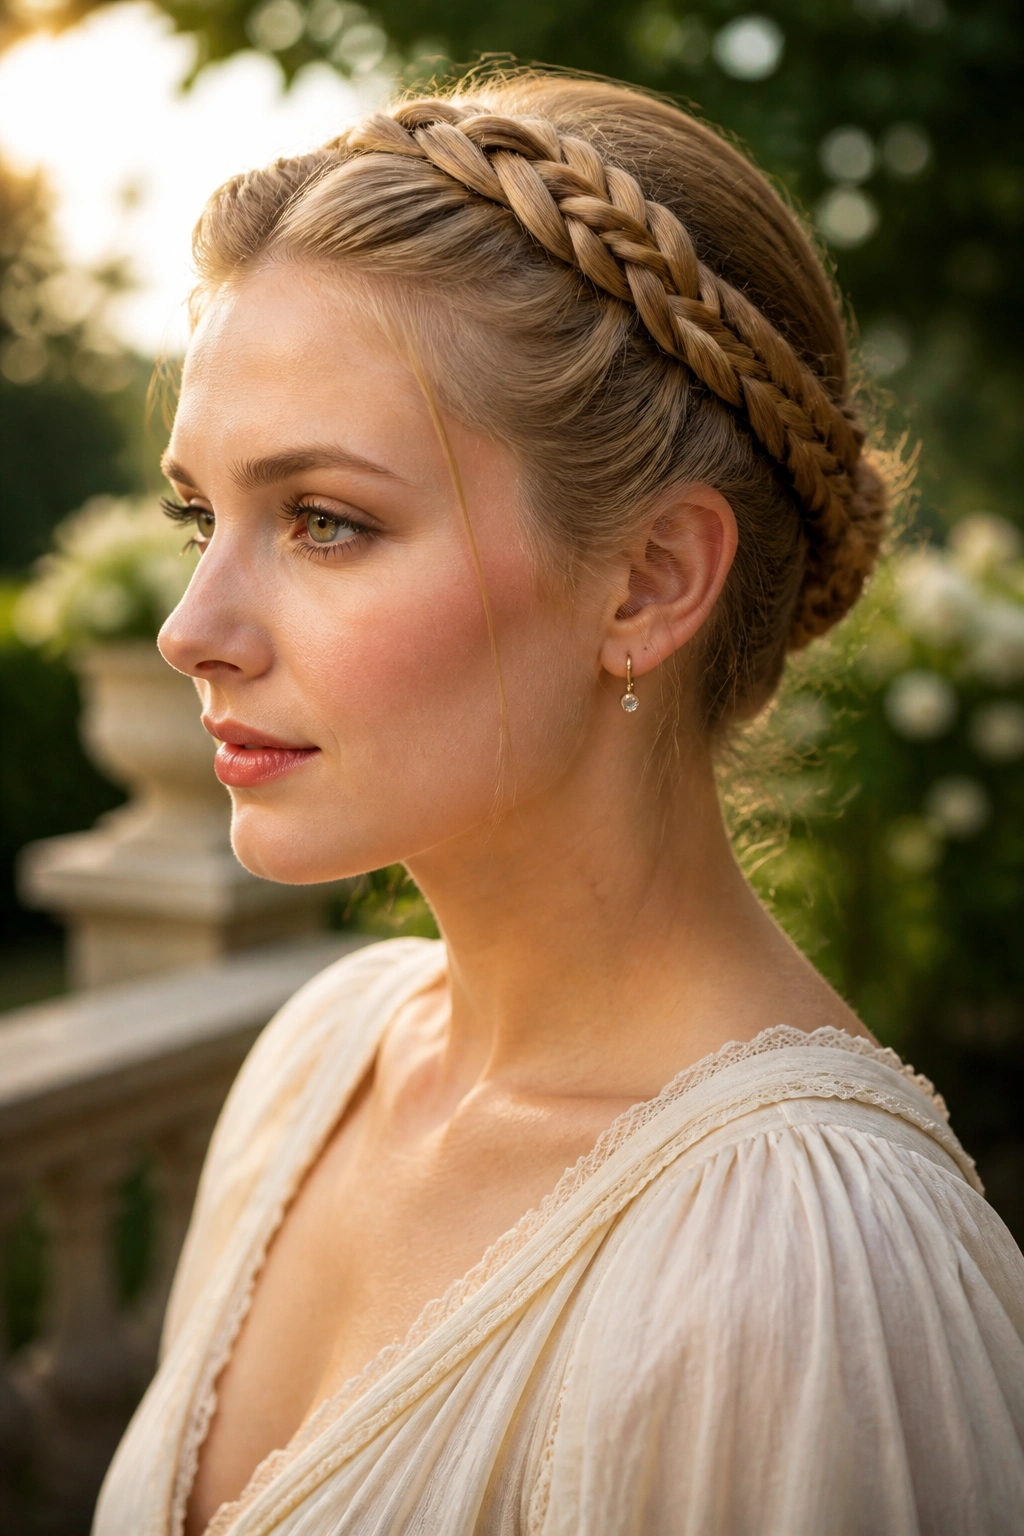
This style takes the milkmaid idea and lowers the tension a little. Instead of wrapping the braids high across the crown, you bring them around the sides and join them at the back, which softens the face and keeps the silhouette longer.
It works especially well on long hair because the braids have enough length to drape and connect without feeling stubby. You can keep them tight for a neat, school-inspired look or loosen them until a few edges puff slightly. I prefer the second version. It has more life.
What to watch for
- Keep both braids the same thickness before you start wrapping them.
- Pin the join point under the back section, not directly on top.
- Use crossed pins so the braids do not sag after an hour.
- Leave the ends hidden, unless you want the tucked join to show on purpose.
The style feels balanced and practical. That’s not a bad thing.
20. Braided Chignon with a Velvet Bow
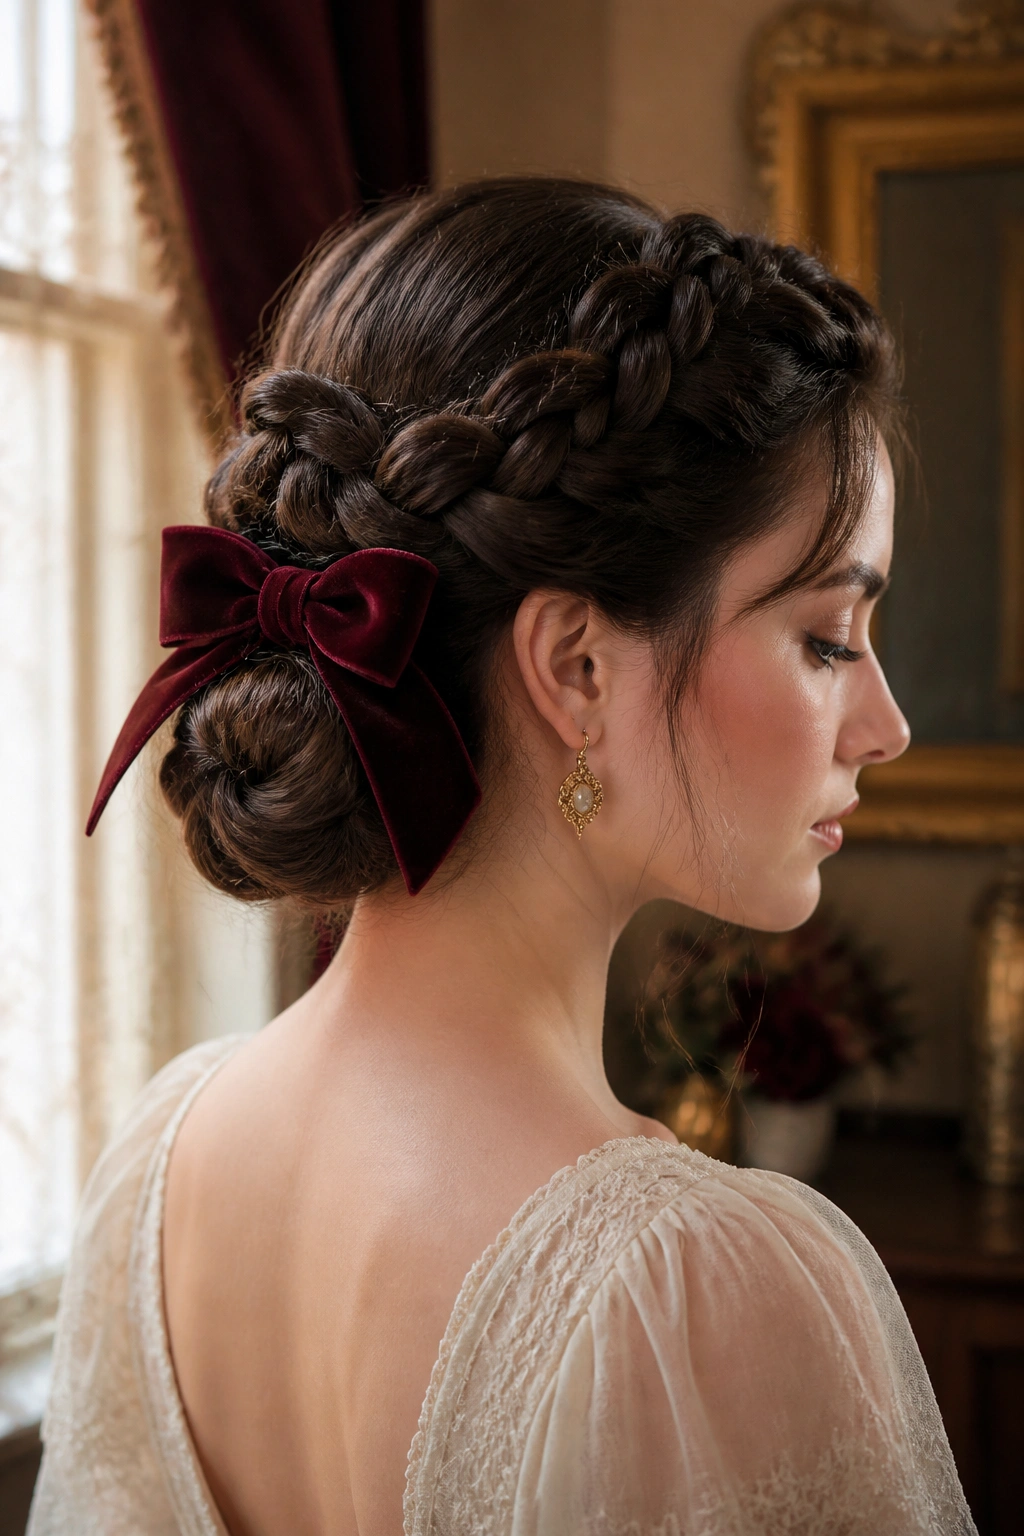
A braided chignon is one of the easiest ways to make long hair look formal without making it look strict. The braid gets wound low into a bun, the bun gets smoothed just enough to stay clean, and a velvet bow finishes the whole thing with a soft, old-fashioned edge.
The bow should not swallow the bun. Keep it moderate — about 1 to 1.5 inches wide if you want the knot to stay visible. Dark velvet feels rich and grounded. A dusty jewel tone can be lovely too, especially if the hair is dark or the outfit needs a little contrast.
I like this style because it has restraint. There’s no need for extra glitter, no need for a dozen pins showing, no need to overthink the front. A neat braid, a low coil, and one good bow do the job. That’s enough.
