



Long hair is where vintage boho styling finally gets room to breathe.
Vintage boho hairstyles for long hair work because they can borrow from old-school set waves, braided crowns, scarf ties, and pin-up rolls without looking stiff. The length gives you options. You can leave the ends loose, tuck them under, twist them into a knot, or let them spill over one shoulder, and the style still feels deliberate.
The trap is overdoing the polish. If the hair is too sleek, the look turns formal fast. If it is too messy, it reads as unfinished. The sweet spot lives in that middle zone: soft texture at the crown, a few loose pieces around the face, and enough structure at the back that the whole thing holds past dinner. A little grit helps. So does a good pin.
Most of these styles look best on hair that has some bend already, even if that bend comes from a blow-dry brush, a 1-inch curling iron, or a loose overnight braid. Long hair can carry more detail, which is great, but it can also drag styles down if the roots are flat. That is why texture spray, light teasing, and a handful of bobby pins show up again and again. They are not glamorous tools. They work.
1. Loose Gibson Tuck with Face-Framing Pieces
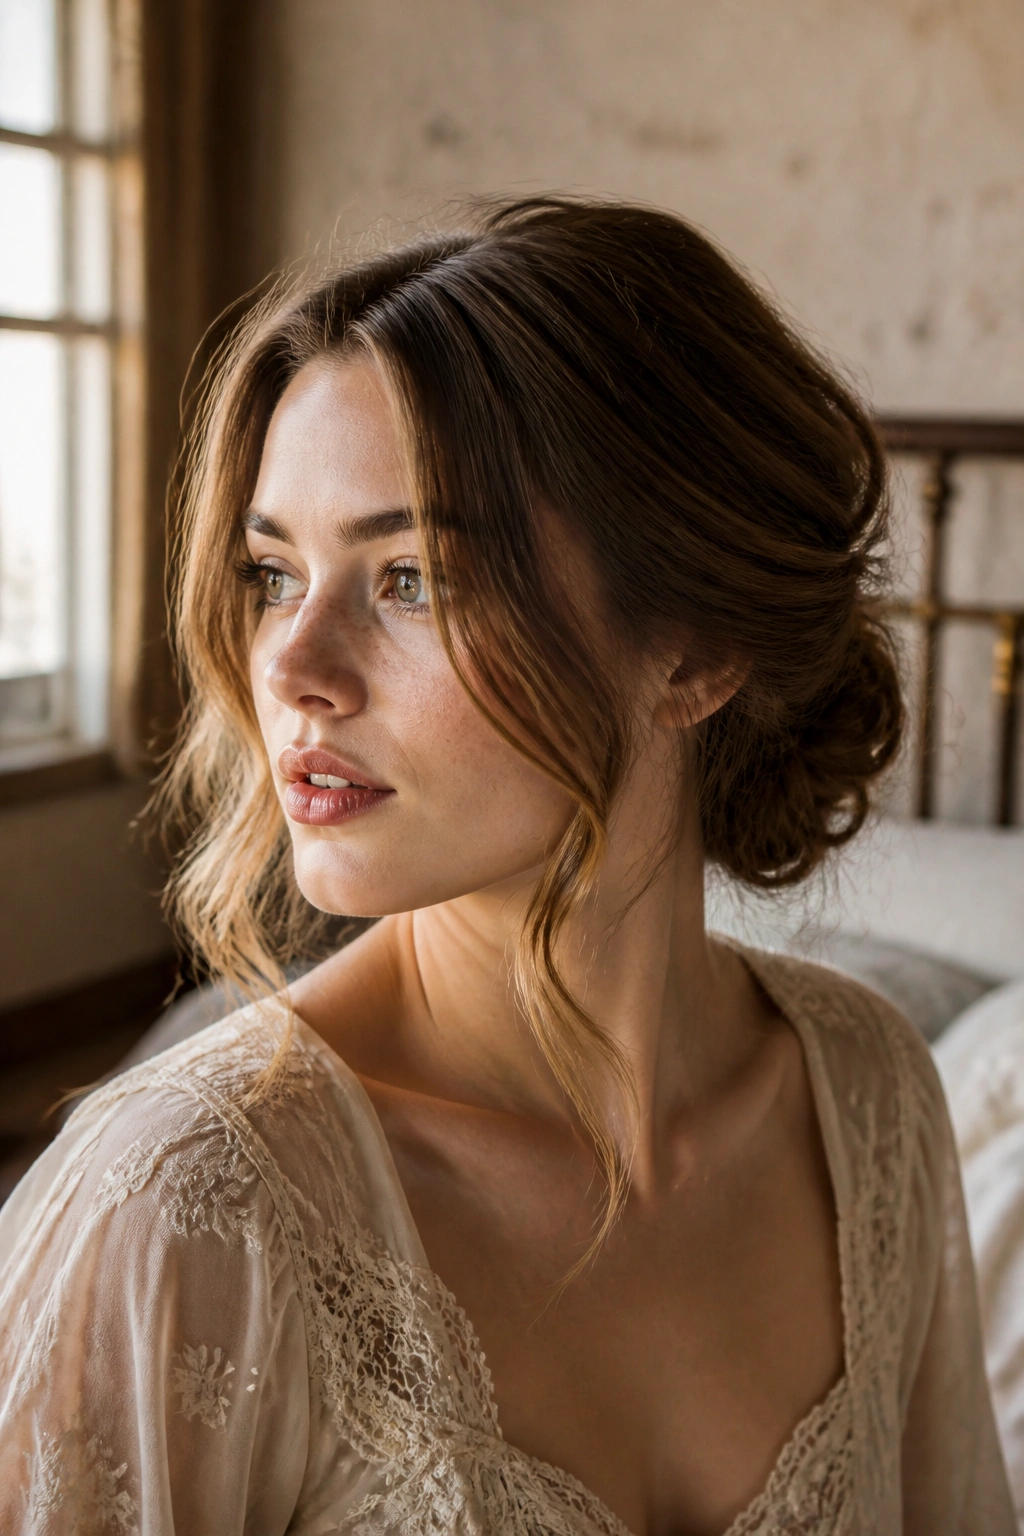
A loose Gibson tuck hits that sweet spot between old-fashioned and easygoing. It has the neat back shape of a vintage updo, but the soft pieces around the cheeks keep it from looking too formal. On long hair, the tucked section gives you a little drama, while the loose front layers keep the whole thing from feeling heavy.
Why the Gibson Tuck Still Flatters Long Hair
The shape matters more than the polish here. A low tuck at the nape keeps the hair anchored, and the long lengths give the roll enough weight to sit nicely instead of popping out.
The best version is never packed tight. Leave the crown slightly airy, bend the ends with a curling iron, and pull two thin strands free near the jaw. Those small details make the style feel lived in instead of pressed into place.
- Use a 1.25-inch curling iron on the ends only.
- Keep the tuck low at the nape, not halfway up the head.
- Secure with 4 to 6 bobby pins, crossed in an X if the hair is slippery.
- Pull out two face-framing pieces no thicker than a pencil.
Bold tip: If the tuck looks too neat, loosen the top with your fingertips before you add hairspray. That tiny step changes the whole mood.
2. Half-Up Crown Braid with Soft Waves
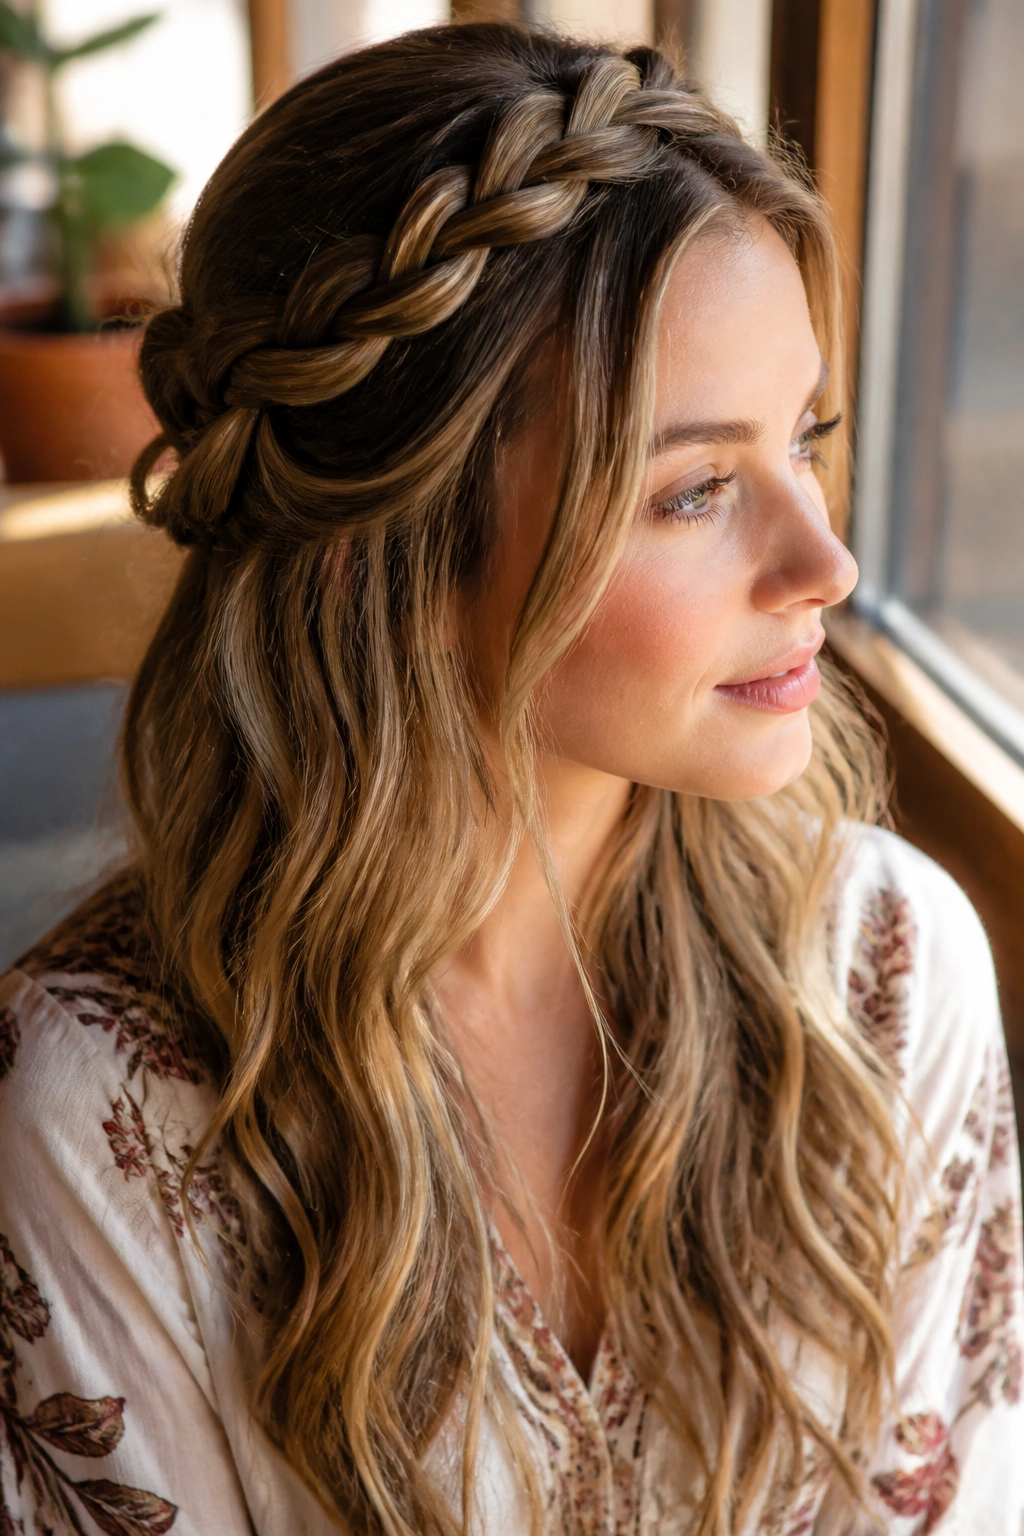
If you want the fastest route to that old-photo, festival-weekend feel, start here. The half-up crown braid gives structure right where long hair usually needs it most, and the waves underneath keep the style soft instead of rigid. It is one of those looks that seems more complicated than it really is, which is always nice when you are working with a mirror and a deadline.
What makes it work is contrast. The braid creates shape across the top of the head, but the rest of the hair stays loose and bends naturally over the shoulders. You get the romance of a halo without committing to a full updo, which is useful if you want your length to stay visible.
I like this one best with a slightly imperfect braid. Start at one temple, braid toward the back, then repeat on the other side and join the sections at the back of the crown. Pancake the braid a little so it looks wider and softer. A mist of flexible-hold hairspray and a few bent ends finish the job without making it crunchy.
3. Pin Curl Waves with a Deep Side Part
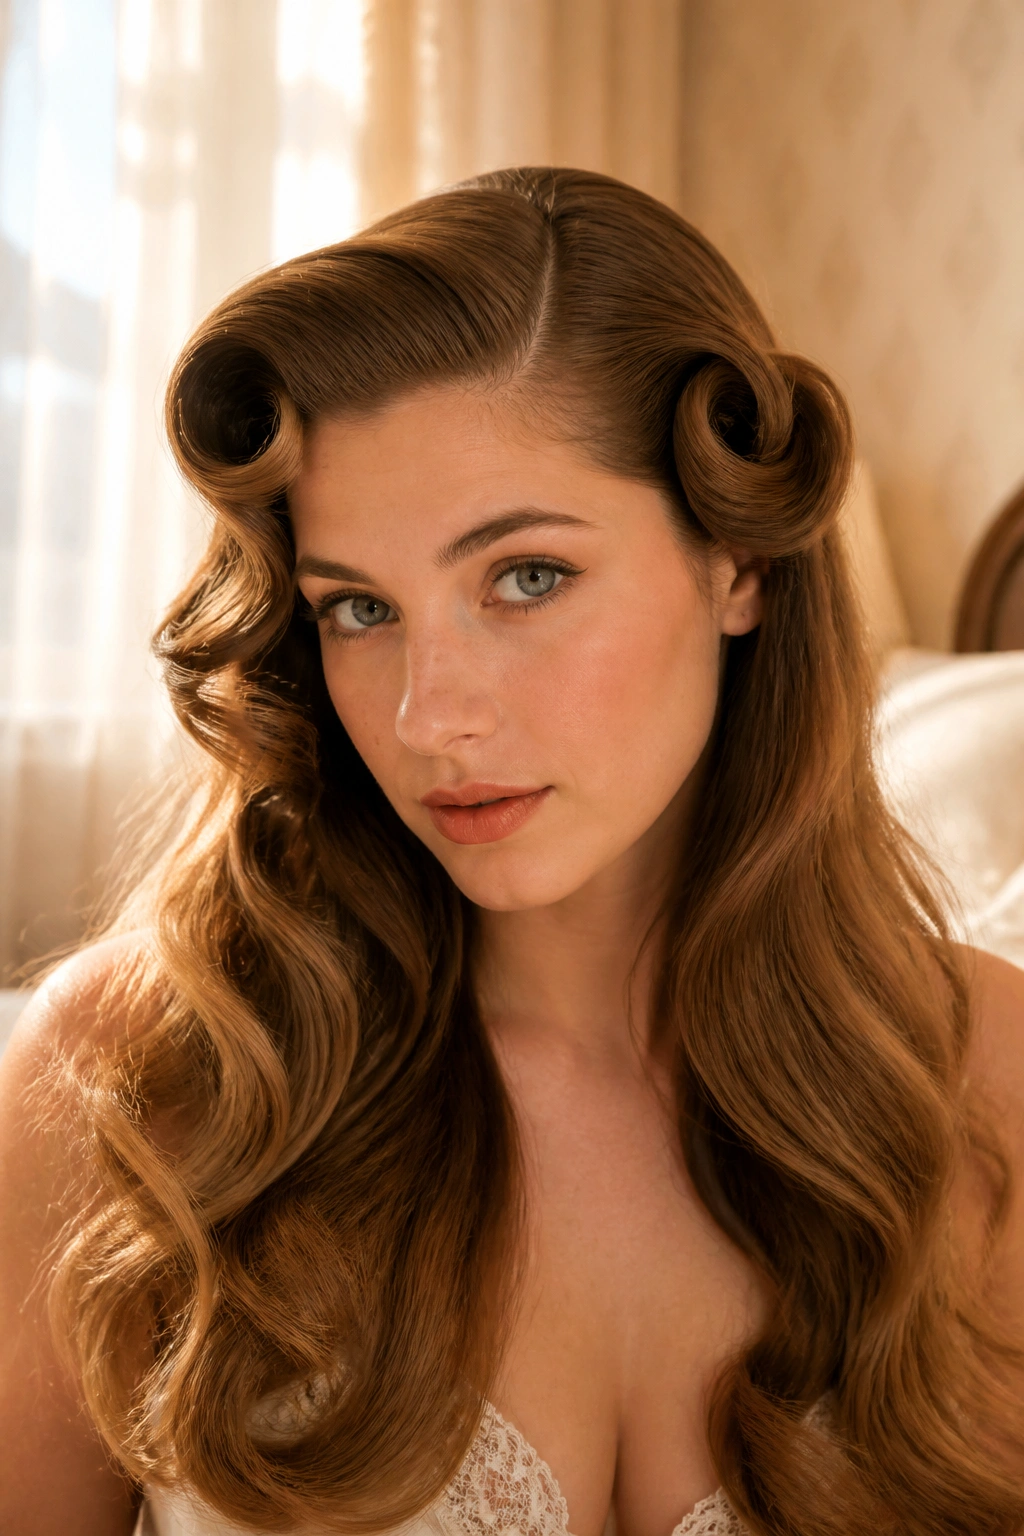
Why do pin curls still look so good on long hair? Because the shape is clean at the front and loose everywhere else, which gives you that old-glam frame without locking the whole head into one hard finish. A deep side part adds the vintage note, and the long lengths let the wave pattern fall in a way that feels relaxed rather than stagey.
The trick is to keep the curls consistent near the face and less perfect through the ends. Use a 1-inch curling iron or hot rollers on the front sections, then pin each curl flat while it cools. Once they set, brush them out with a soft paddle brush so the wave pattern opens up.
How to Wear It
Pin one side behind the ear with 2 hidden pins and leave the other side fuller. That small asymmetry is what keeps the style boho.
A tiny side sweep at the front helps too. It softens the forehead line and gives the curl pattern somewhere to start. If your hair is fine, a puff of root powder at the part will stop the style from collapsing by lunch.
4. Fishtail Braid into a Low Knot
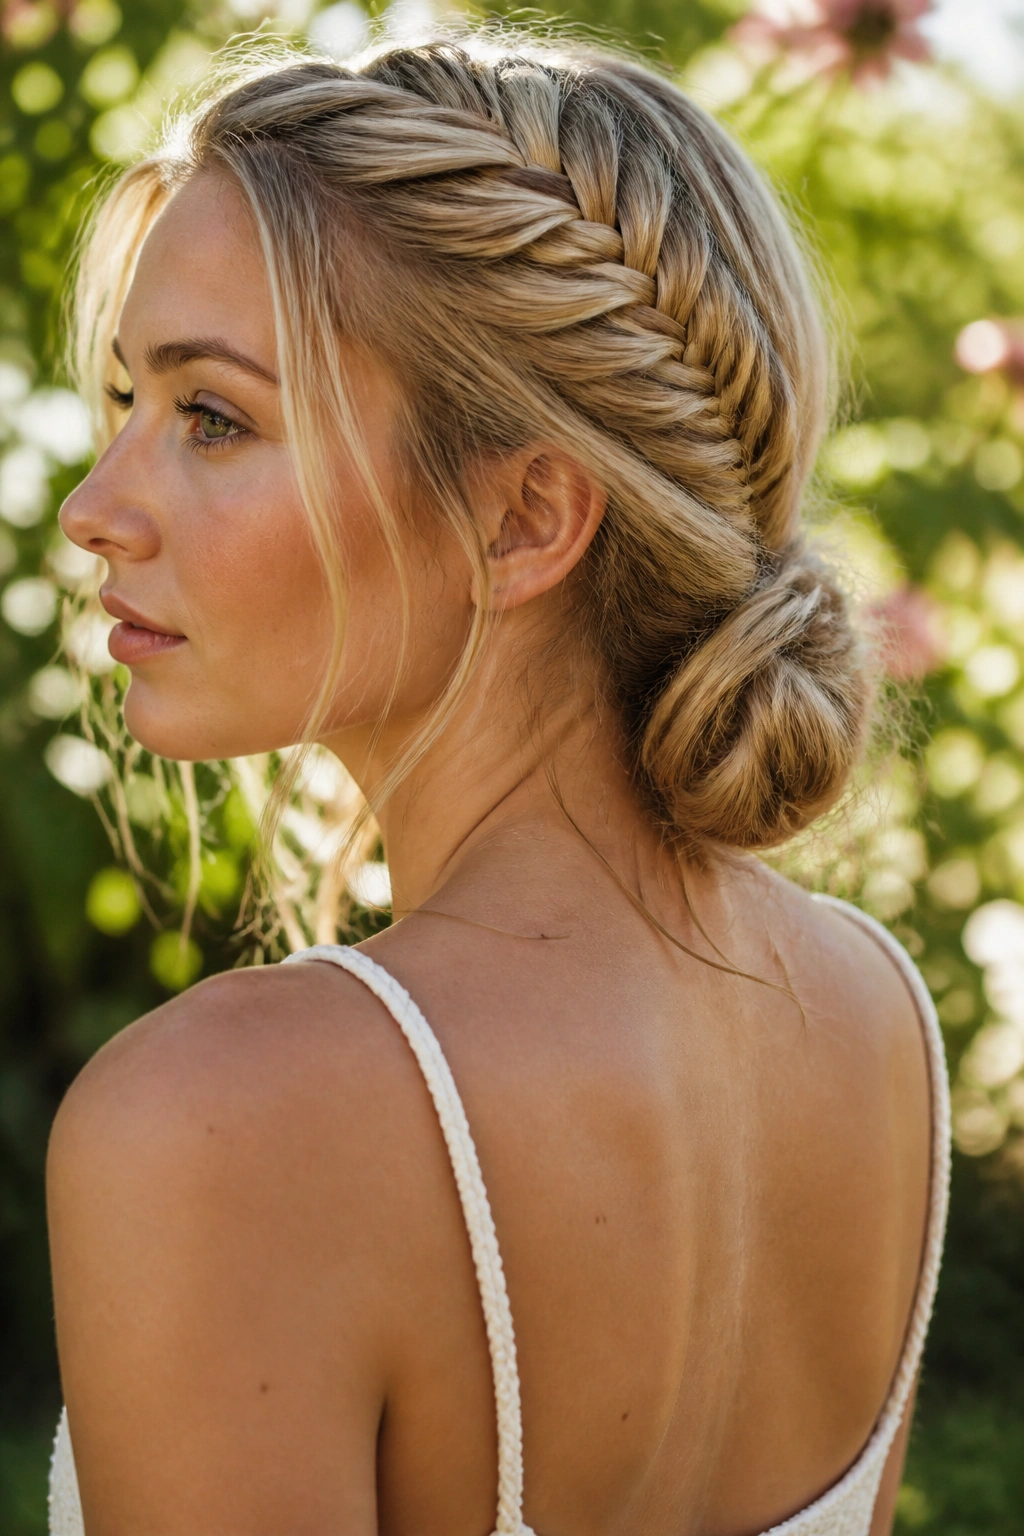
Picture a braid that starts neat and ends loose, then folds itself into a knot at the nape. That is the appeal here. A fishtail braid has enough detail to feel special, while the low knot keeps the finish grounded and calm.
This style works because the braid feeds into the bun instead of sitting on top of it. On long hair, that means the length becomes part of the shape rather than something you have to hide. I also like that the fishtail texture looks even better once you tug it apart a little; the little gaps make it look softer and less precious.
- Begin the fishtail at the mid-back of the head.
- Braid only to the last 4 to 6 inches of hair.
- Twist the tail into a compact knot at the nape.
- Secure with 3 to 5 U-pins from different angles.
- Pull out one thin wave near the temples if you want movement.
The closing result should feel controlled, not stiff. If the knot is too tight, it loses the boho part and starts looking like a recital hairstyle.
5. Flower-Trimmed Braided Halo
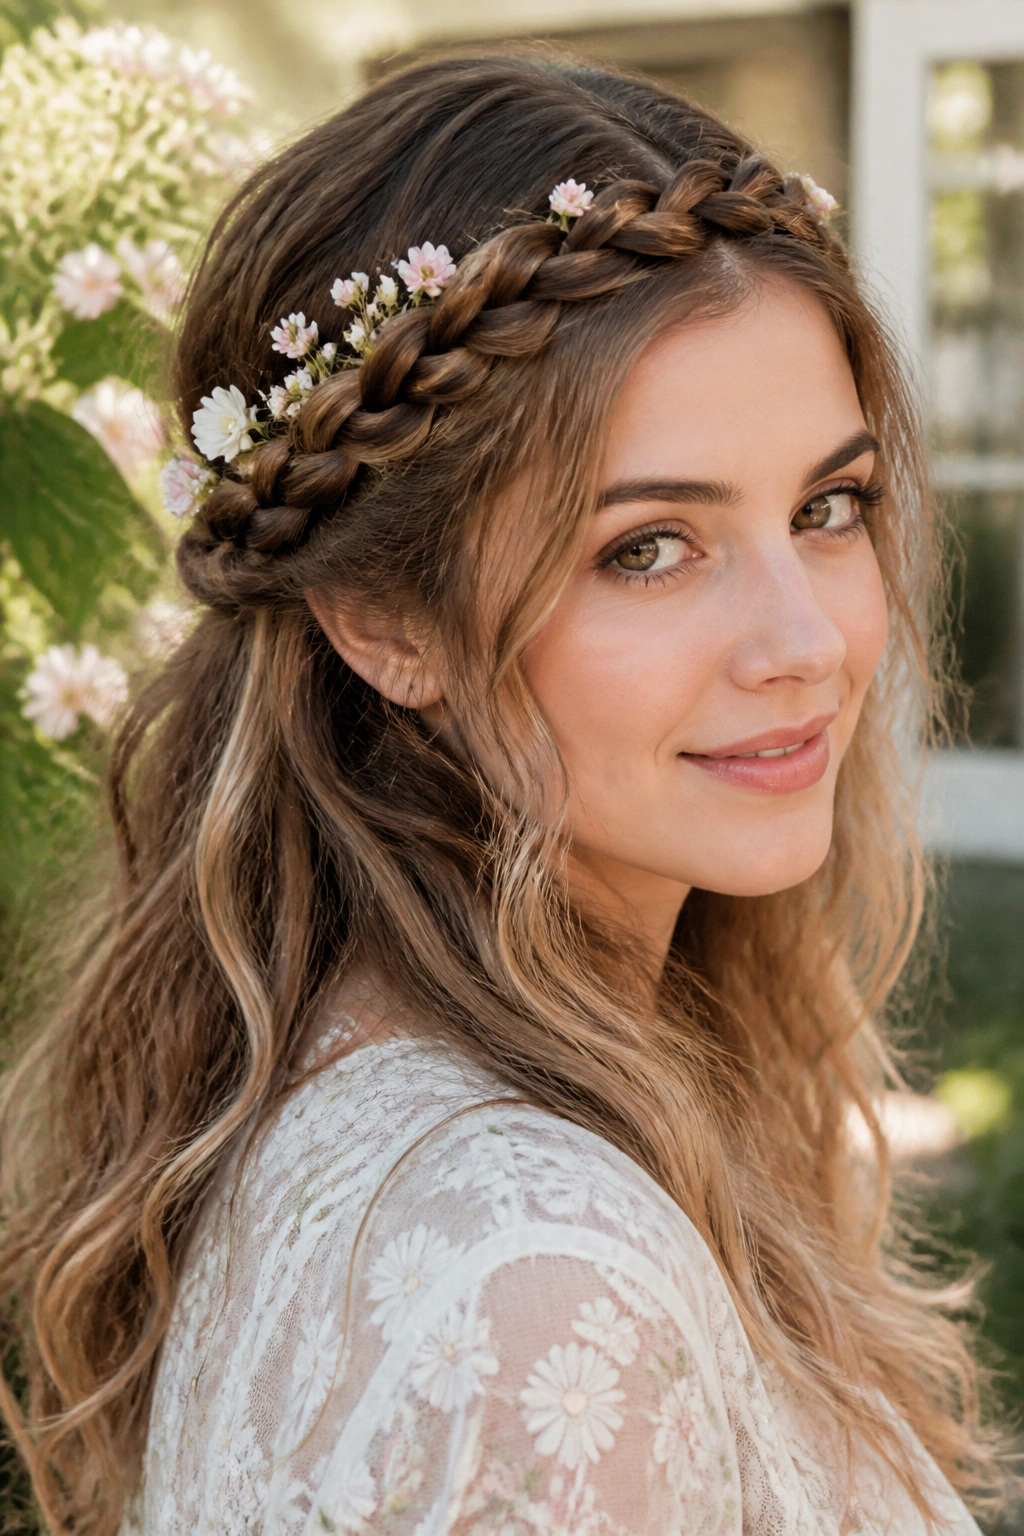
A braided halo with flowers has a soft, almost hand-made feeling that suits long hair better than most people expect. The braid wraps the head like a band, then the flowers break up the line so it does not read as too tidy. Tiny blooms, dried sprigs, or a small floral comb can all work. I prefer the smaller stuff. Big flowers can take over.
The best version starts with a loose braid that sits just above the ears, not pressed flat against the scalp. That little lift gives the halo shape room to breathe. Leave the rest of the hair down in soft bends, and the contrast between the wrapped crown and the free length feels very boho, very vintage, and not a bit fussy.
The flowers should look tucked in, not jammed on top. One sprig above the ear, one near the back pin, maybe a third if the hair is especially full. That is enough. More than that and the hairstyle starts wearing you.
Fresh flowers need extra care, and they do not always last through a long day. Faux blooms or dried stems are easier, and on long hair they usually sit better anyway because the braid gives them a stable base.
6. Rolled Victory-Style Half-Up
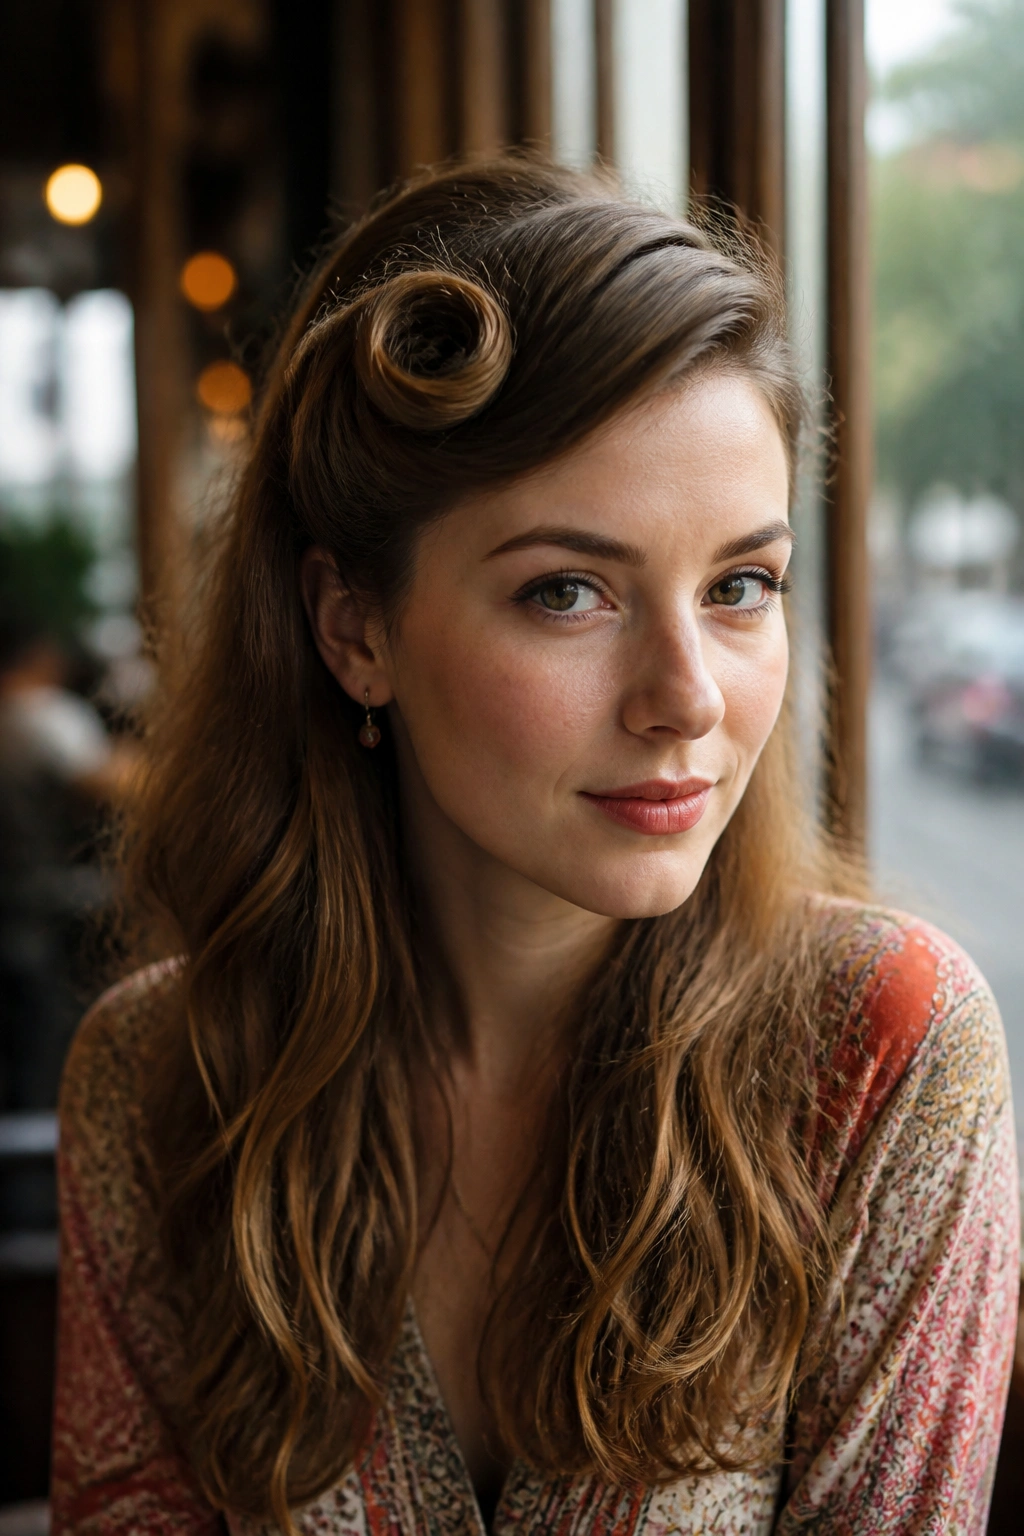
This is not a full victory roll, and that is the point. A true pin-up roll can feel costume-y if you carry it too far, but the half-up version keeps the shape while letting the rest of the hair stay loose and boho. It gives you a strong front detail, then lets the length soften everything underneath.
The comparison is simple: a full roll leans formal, while this version still moves. Long hair helps because the loose back section balances out the sculpted front. If your hair is thick, the roll will have more body; if it is fine, a little backcombing at the roots gives you enough lift to make it hold.
This style suits people who want a clear vintage note without giving up softness. A blouse with a rounded collar, a slip dress, or even a plain tee suddenly looks more intentional with a roll pinned over one temple. Keep the roll small, keep the back loose, and skip the urge to over-spray the front.
7. Braided Pigtails with Ribbon Ties
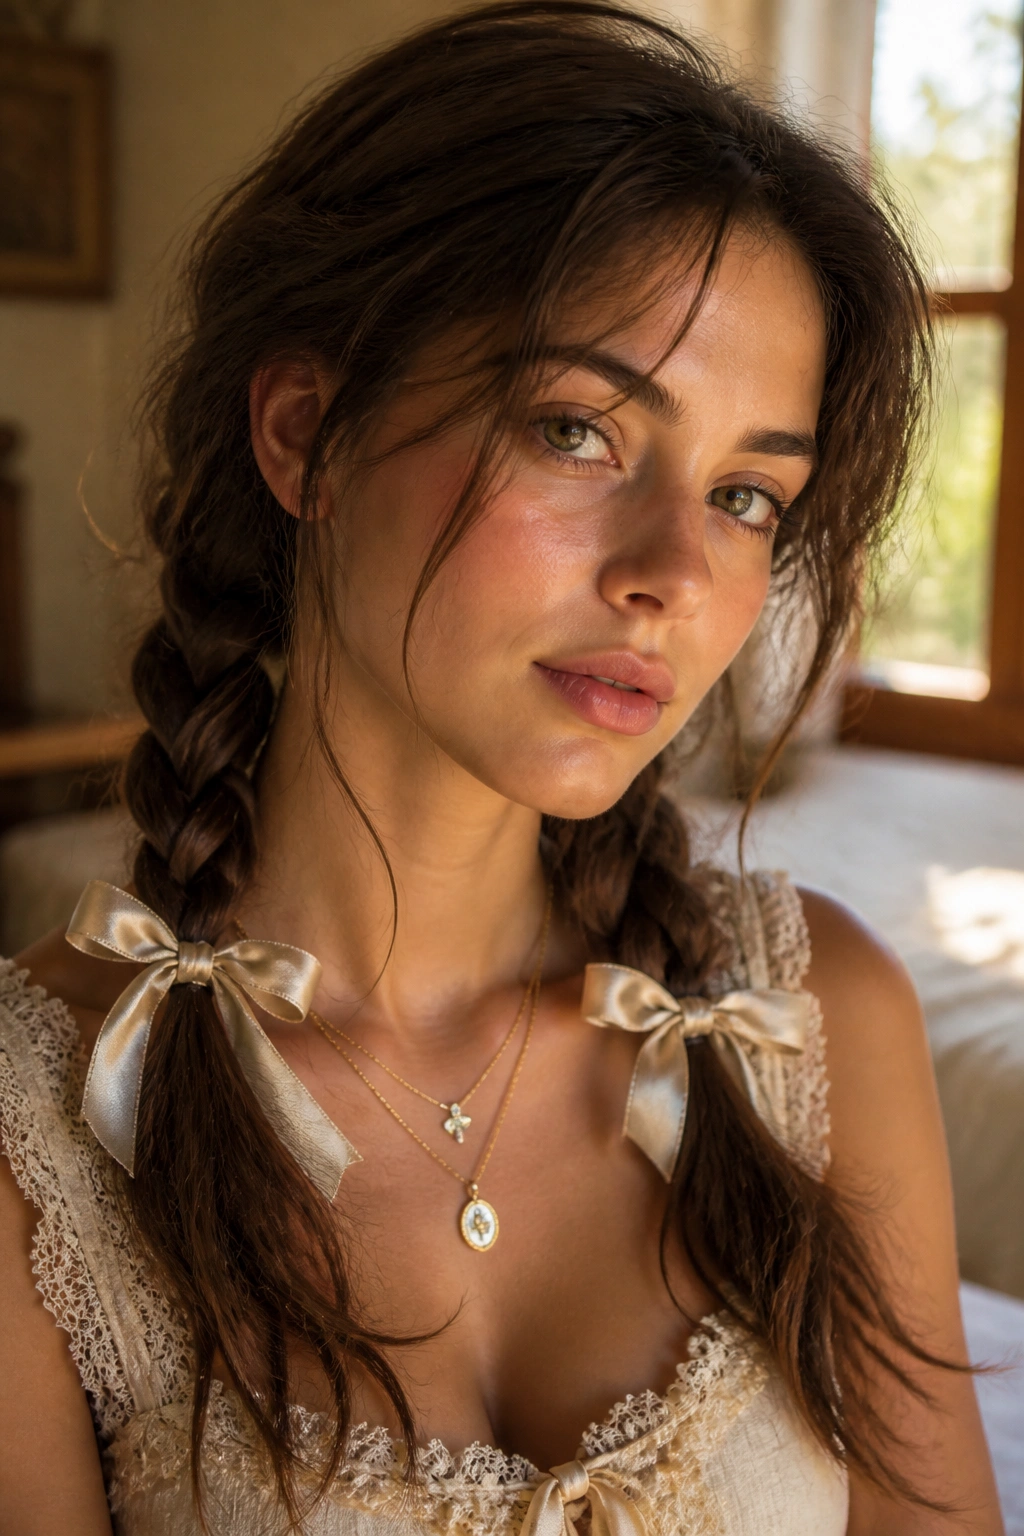
Braided pigtails can look childish in the wrong setup, and grown-up in the right one. The difference is where you place them and how loose you leave them. On long hair, low braids with ribbon ties feel playful in a way that still nods to old countryside photos and music-festival hair.
What Makes Them Feel Vintage Instead of Cute
The ribbons do a lot of the heavy lifting. Use satin, velvet, or grosgrain in a width of about 1/2 to 1 inch, then tie them once around each braid instead of making giant bows. That keeps the look cleaner and less doll-like.
A center part helps. So does starting the braids below the ear, not at the crown. Pull a few strands free around the face, then flatten the top with your hands so the whole thing has a soft, slightly slept-in shape.
- Part the hair straight down the middle.
- Braid each side below the ears.
- Leave the ends slightly bent, not pin-straight.
- Tie with two matching ribbons or mix textures if you want contrast.
Quick tip: If your hair is layered, mist the lengths with water before braiding. The shorter pieces grip the braid better and stay tucked in.
8. Messy Chignon with Soft Tendrils
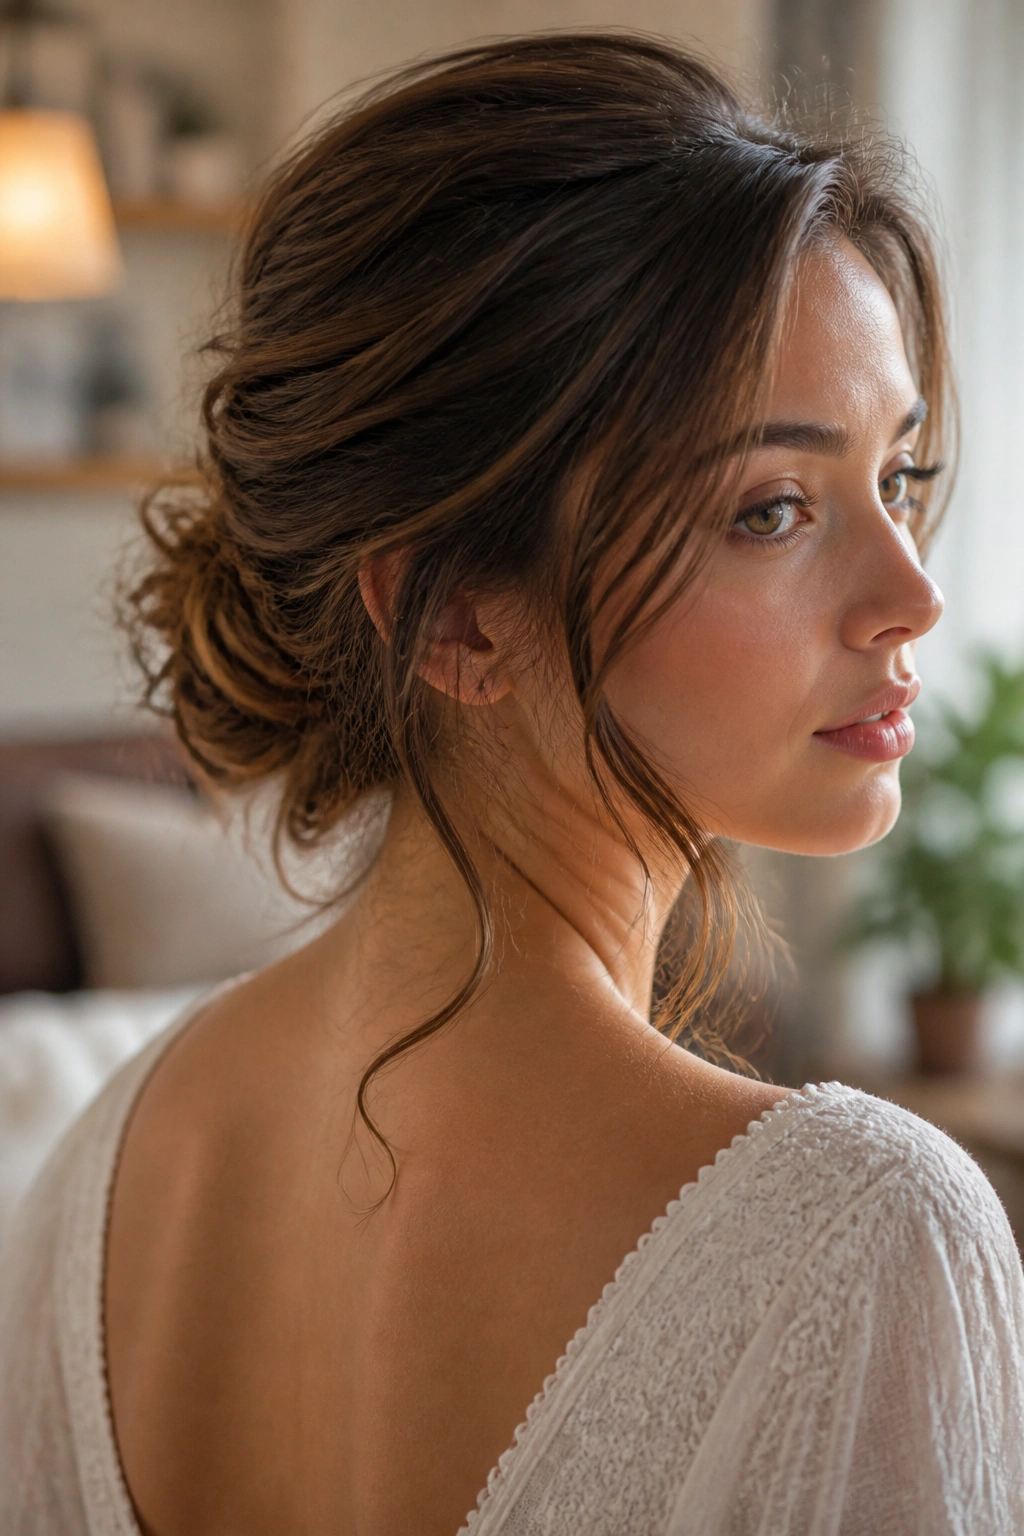
The messy chignon only works when the mess is controlled. That sounds fussy, but it matters. A good one has a low anchor point, a little height at the crown, and a few tendrils left out on purpose. A bad one looks like you stopped halfway through pinning.
Long hair makes this style easier because there is enough length to wrap and re-wrap the knot until it sits where you want it. I like a nape-level chignon with the bun shifted a touch off-center. That small move keeps it from feeling too formal and gives the style a softer side view.
The tendrils matter more than most people think. Leave two wisps near the temples and one thinner piece near the jaw, then bend them with a curling iron so they fall in a soft curve. If they are left straight, they look accidental. Curled ends make them look planned.
This is one of those styles that works for almost anything, but it especially suits slightly textured hair. Freshly washed hair can be slippery, so a bit of dry shampoo or texturizing spray helps the bun hold shape.
9. Waterfall Braid Over Beach Waves
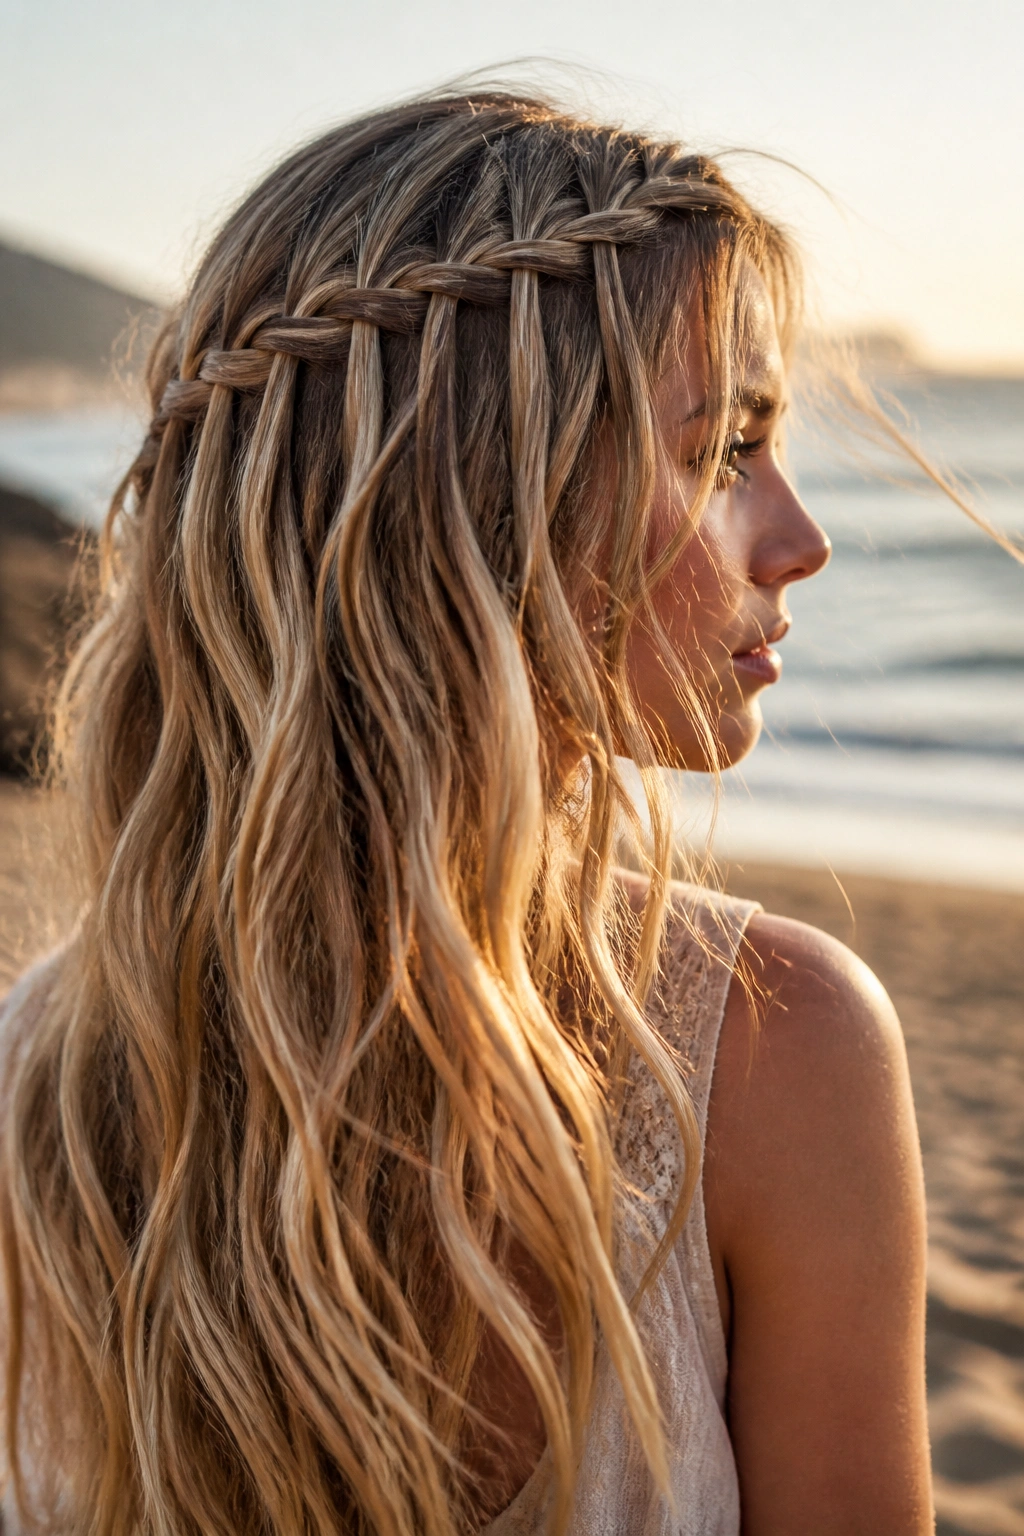
Why does a waterfall braid still hold up? Because it gives you detail without taking away length. The braid moves across the head in a soft line, then the dropped sections blend into loose waves below. On long hair, that mix looks airy rather than busy.
The braid itself should stay thin. If the sections are too fat, the pattern gets clunky and the whole style loses its lightness. Use a comb to keep the part clean at the front, then let the back stay a little looser. That contrast is what makes the style feel boho instead of over-styled.
How to Keep the Braid from Getting Lost
Texture is your friend here. A little grit on the hair before you start gives the braid something to hold, especially if the ends are silky.
Keep the wave pattern soft through the bottom half of the hair. A curling wand held vertically gives a looser bend than a tight barrel twist, and that bend makes the waterfall sections look more natural when they fall through. Secure the braid with a hidden pin behind the ear, not a visible elastic, if you want the finish to stay clean.
10. Scarf-Wrapped Low Ponytail
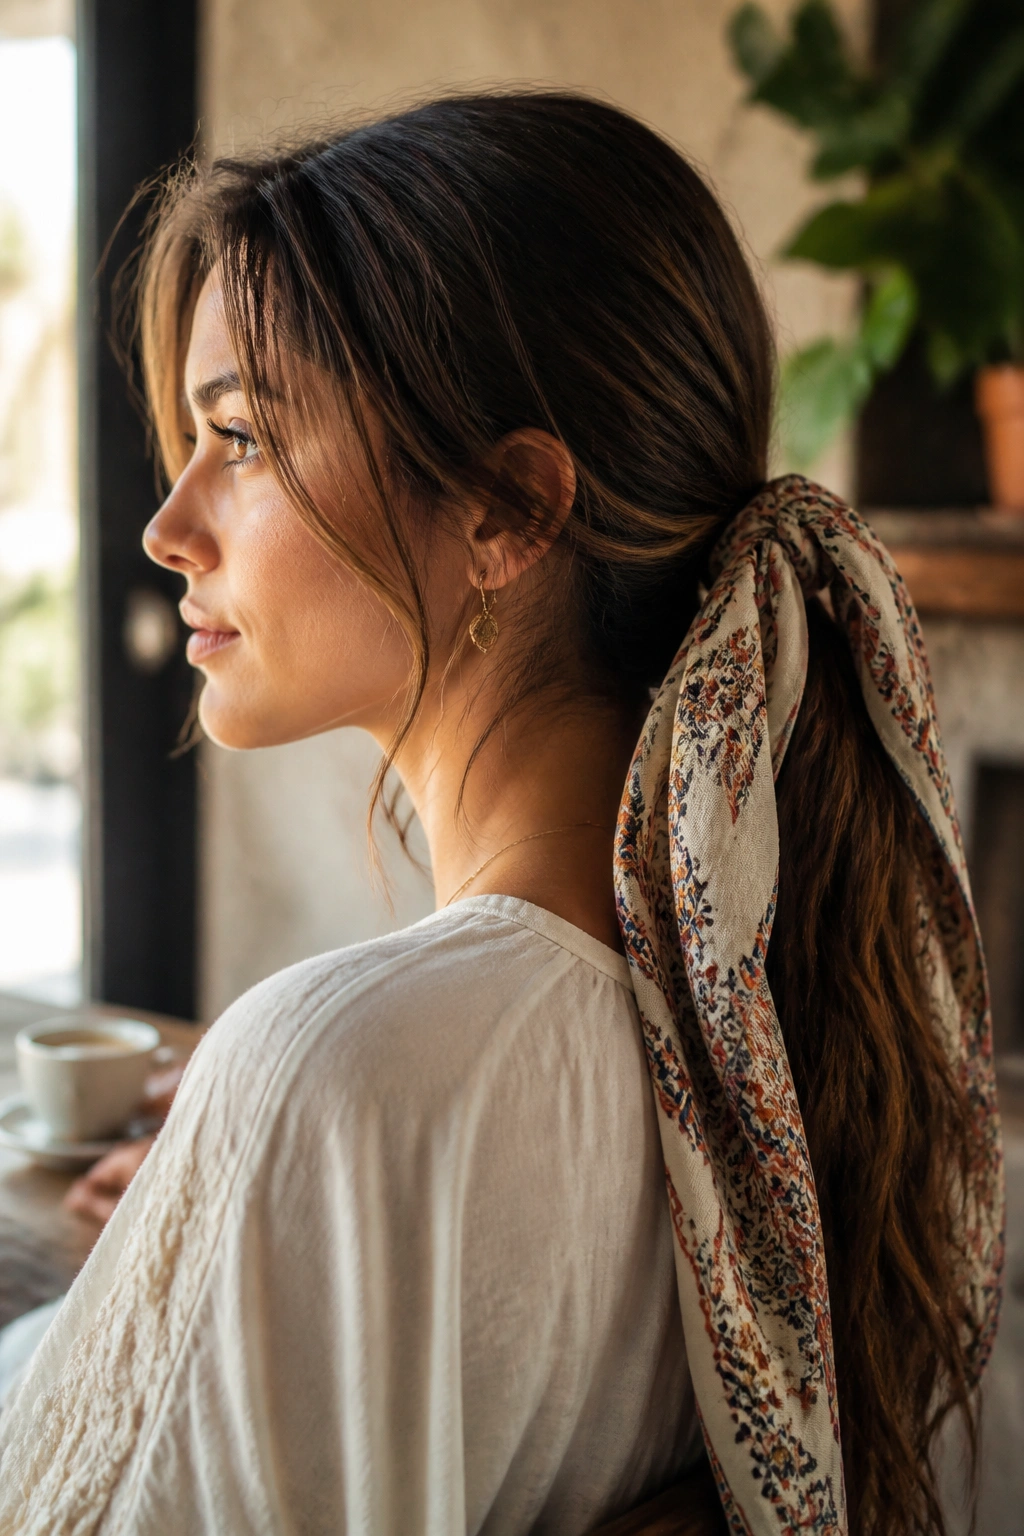
A low ponytail starts plain. Add a scarf, and suddenly it has a whole different mood.
That is why this style works so well for long hair. The length gives the scarf something to trail over, and the scarf gives the ponytail a clear vintage note without much effort. A silk or cotton scarf, folded into a long strip, sits best when tied just above the ponytail elastic. Keep the knot off to one side if you want a softer feel.
- Choose a scarf around 30 to 36 inches long.
- Tie the ponytail low, at the nape or just below it.
- Wrap the scarf once around the elastic.
- Let the ends hang long, or tuck them into the tie.
- Curl the ponytail ends in two or three loose bends if the hair needs shape.
A neat pony with a scarf can look polished. A slightly messy one looks more boho. I prefer the second version. It has more movement, and movement is where this look gets its charm.
11. Braided Bun with Vintage Clips
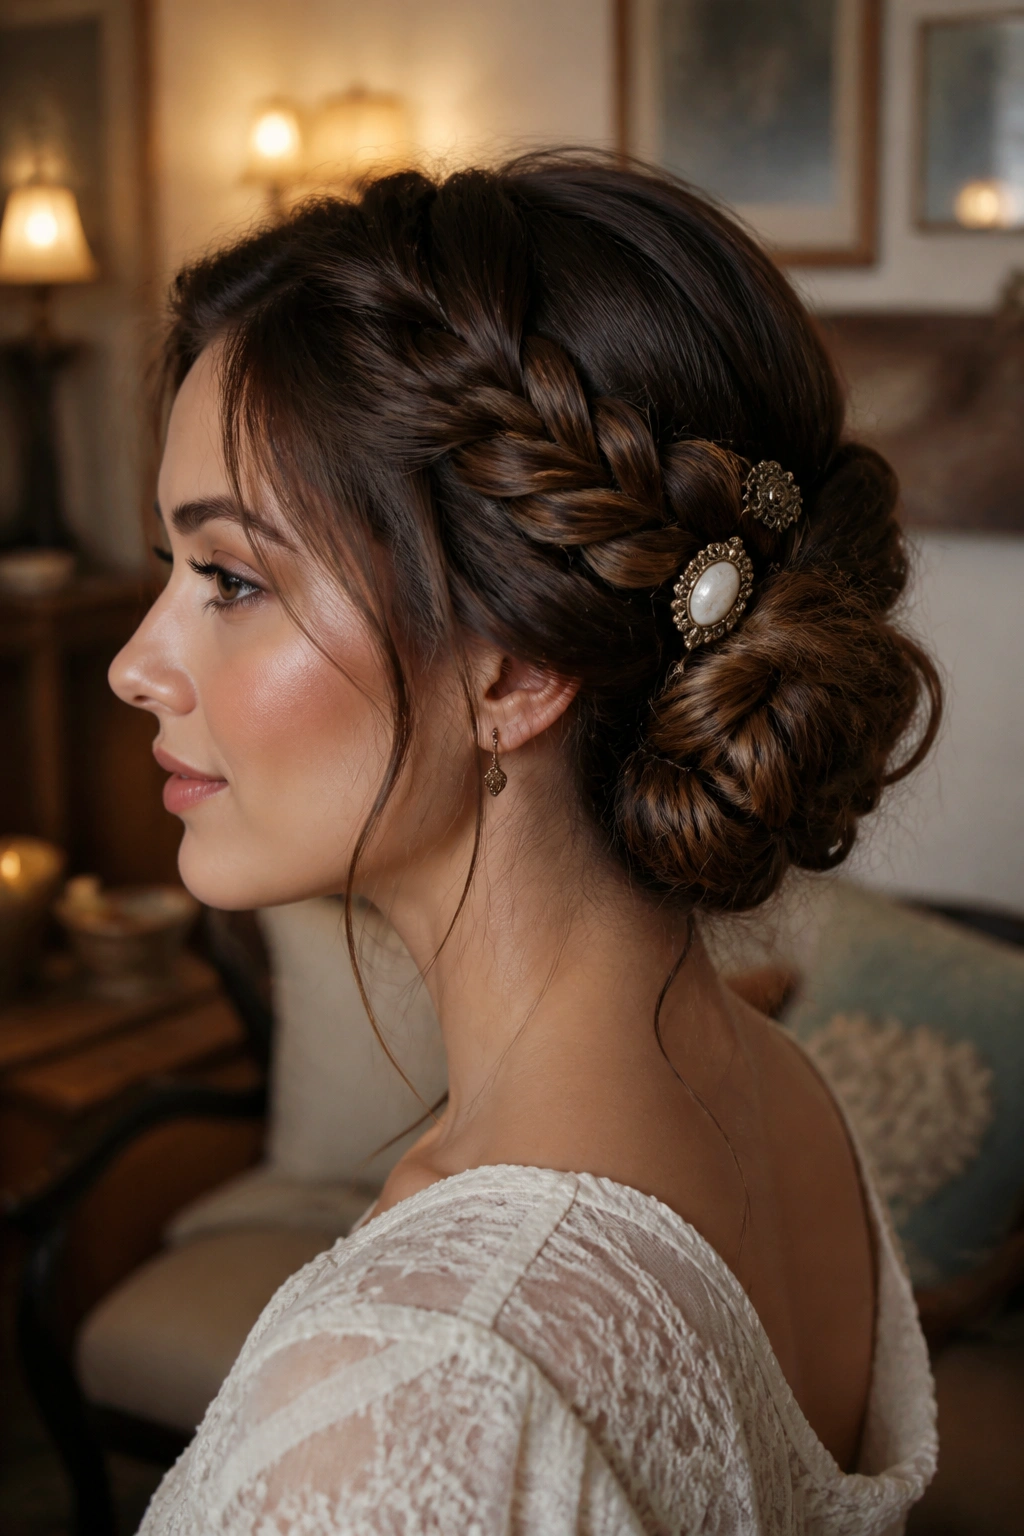
The braided bun is one of those styles that gets better the longer your hair is. You can braid the length first, coil it into a bun, then pin the braid’s texture around itself so the bun has detail instead of just bulk. Add a couple of vintage-style clips, and the whole thing shifts from plain to finished.
I like this style low and slightly loose. Tight buns can look severe, especially if the dress or makeup is already doing a lot. A braided bun softens that by giving the back some pattern, and the decorative clips pick up the light near the nape or one side. Pearl pins, carved metal clips, or old-school rhinestone barrettes all work.
If your hair is very thick, divide the braid into two sections before wrapping it. That prevents the bun from turning into a heavy knot that sits too far from the head. A little spray at the roots keeps the crown from puffing up later.
The nicest part is that it survives a long day without needing constant fixes. Once the braid is pinned down properly, the shape stays put.
12. Side-Swept Rope Braid with Volume
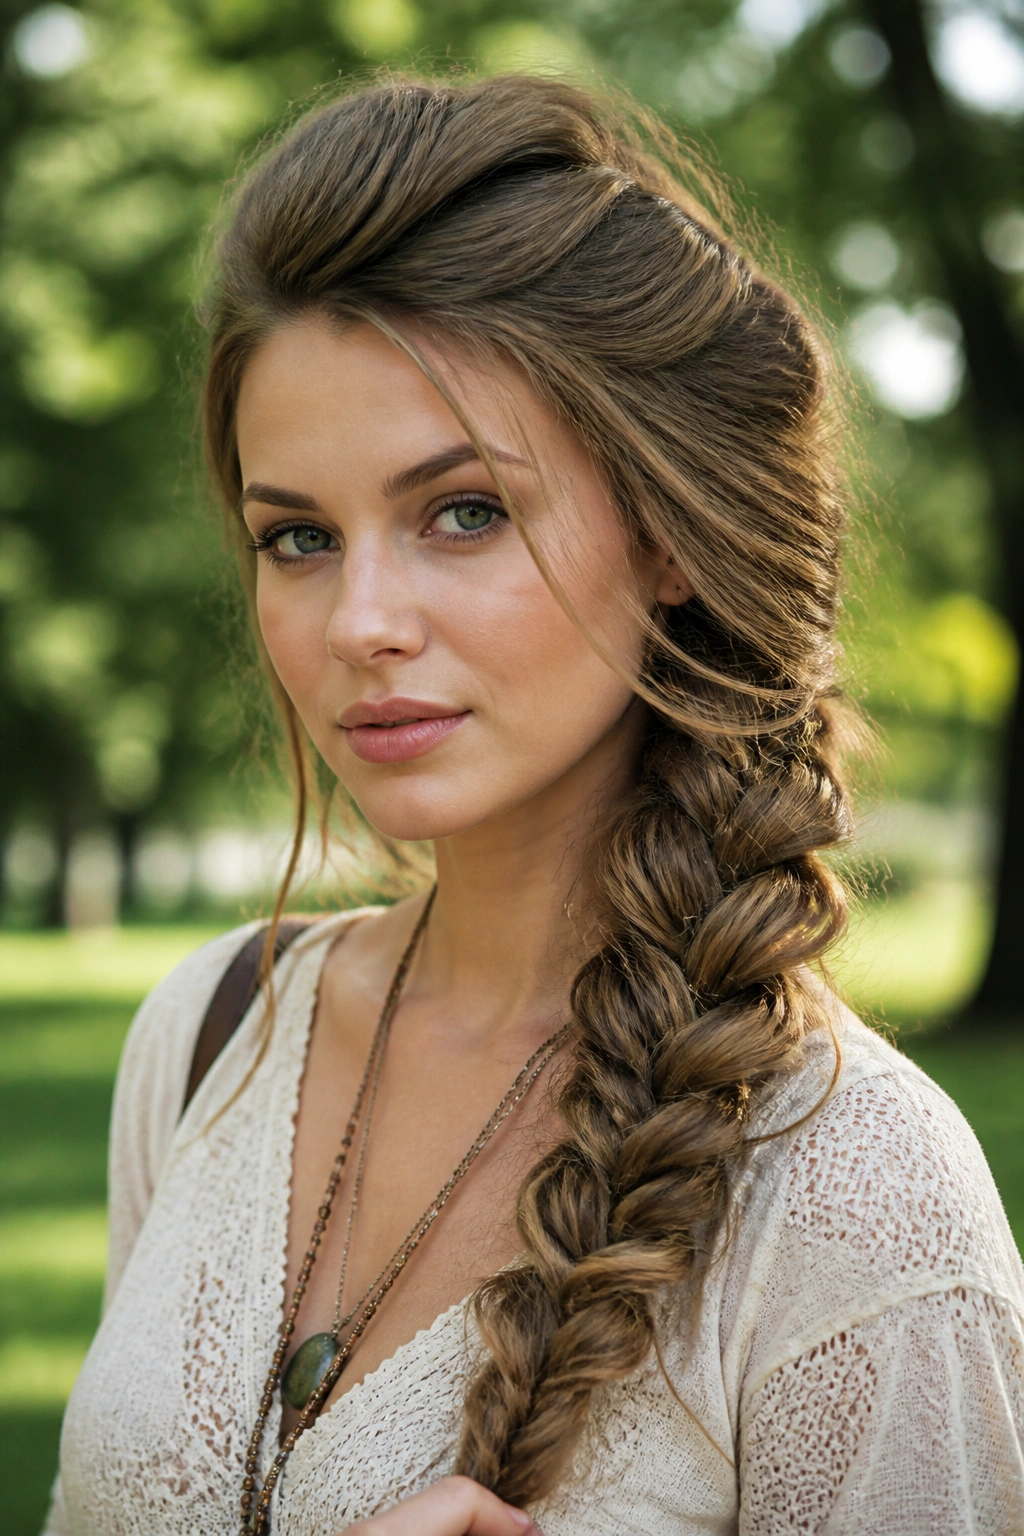
Unlike a three-strand braid, a rope braid has that twisted look that feels a little more sculptural. On long hair, it falls over one shoulder with enough weight to stay visible, which is useful if you want the hair to be part of the outfit instead of sitting quietly in the background.
This one is especially good for thick hair. The twist catches the texture, and the side-swept shape keeps all that length from feeling heavy. I like a deep side part, then a small lift at the crown from a teasing comb before the braid starts. That lift keeps the braid from dragging the face down.
The rope braid should be pulled apart after it is secured. Not too much. Just enough to soften the twist and let a few strands break loose near the ears. A satin ribbon threaded through the last inch of the braid can make it feel more vintage if you want a dressier finish.
For long, layered hair, this is one of the easiest ways to make the cut look intentional. The uneven lengths add texture instead of getting in the way.
13. Vintage Boho Milkmaid Braids with Loose Length
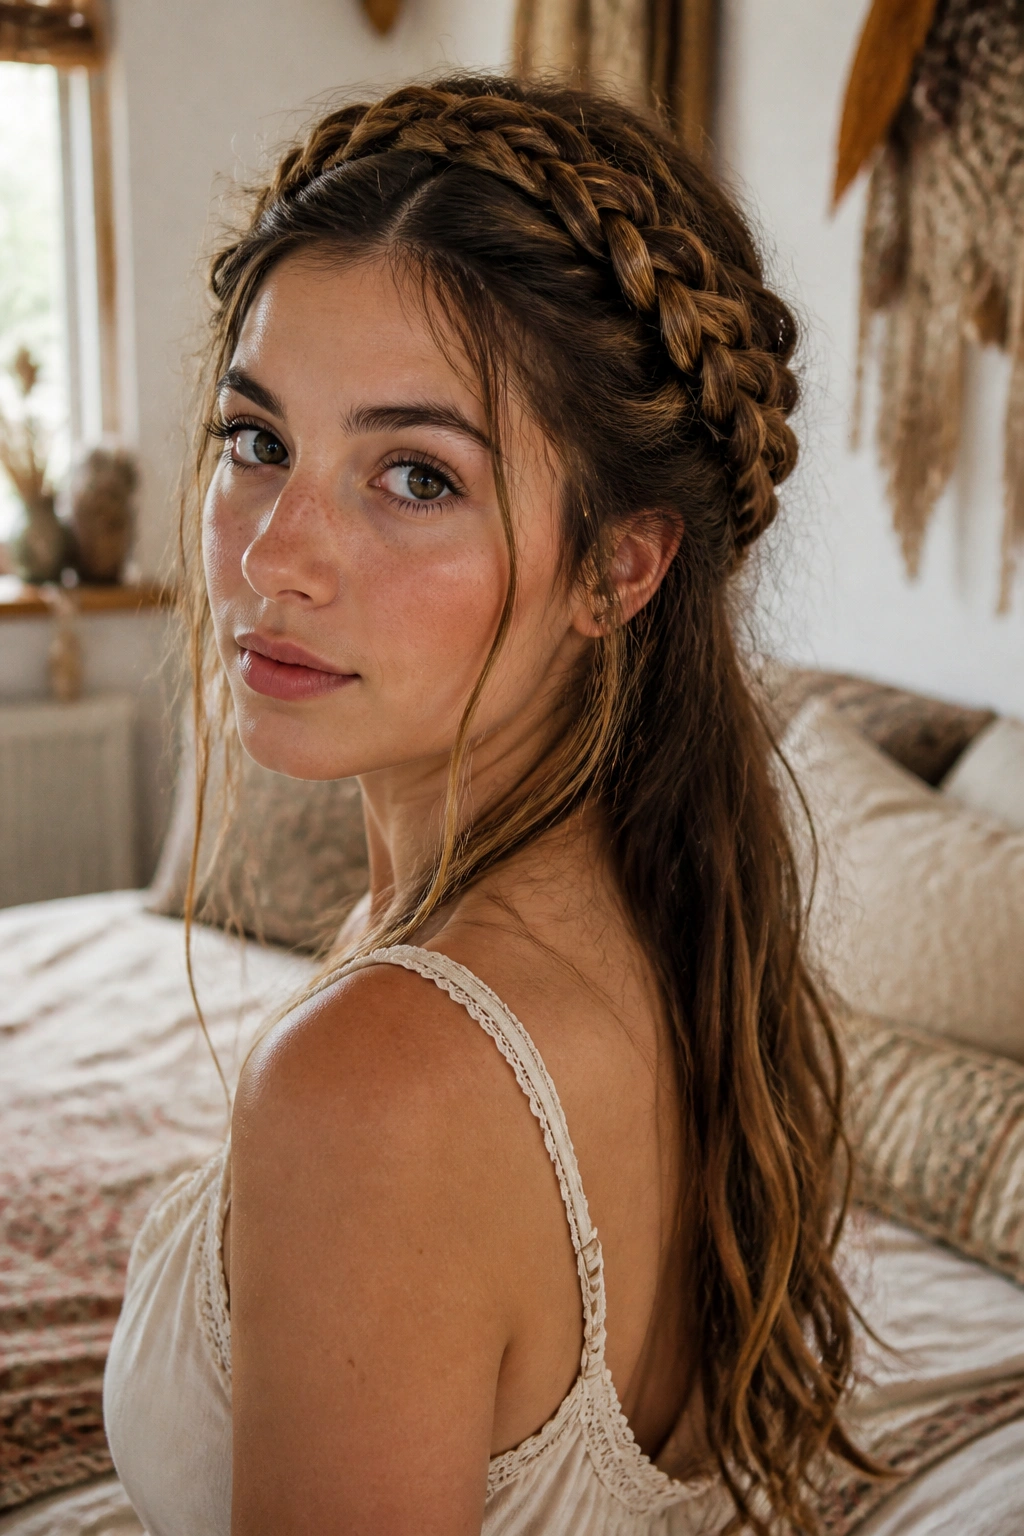
Milkmaid braids can go very sweet very fast, so the trick is to keep them relaxed and leave the ends hanging. That shift matters. Instead of wrapping every last inch around the head, you let part of the length drop down the back, which keeps the look in boho territory.
Why This Version Feels Softer
The braids sit like a frame rather than a helmet. That is the difference. You braid from each side, cross them over the crown, and pin them loosely while leaving the tails out or half-tucked. On long hair, the result is more interesting because the loose pieces add movement below the braid line.
- Start each braid behind the ear.
- Keep the braid tension light to medium.
- Cross the braids high on the crown.
- Leave the tails loose if the hair is long enough.
- Pull a few thin pieces around the temples.
One small detail: pancake the outer edges of the braids after pinning. It widens the shape and stops the braids from looking flat in photos or in person.
This is a nice option when you want hair off the neck but still want the length visible. It also plays well with peasant blouses, lace necklines, and anything that likes a softer frame.
14. Teased Half-Beehive with Waves
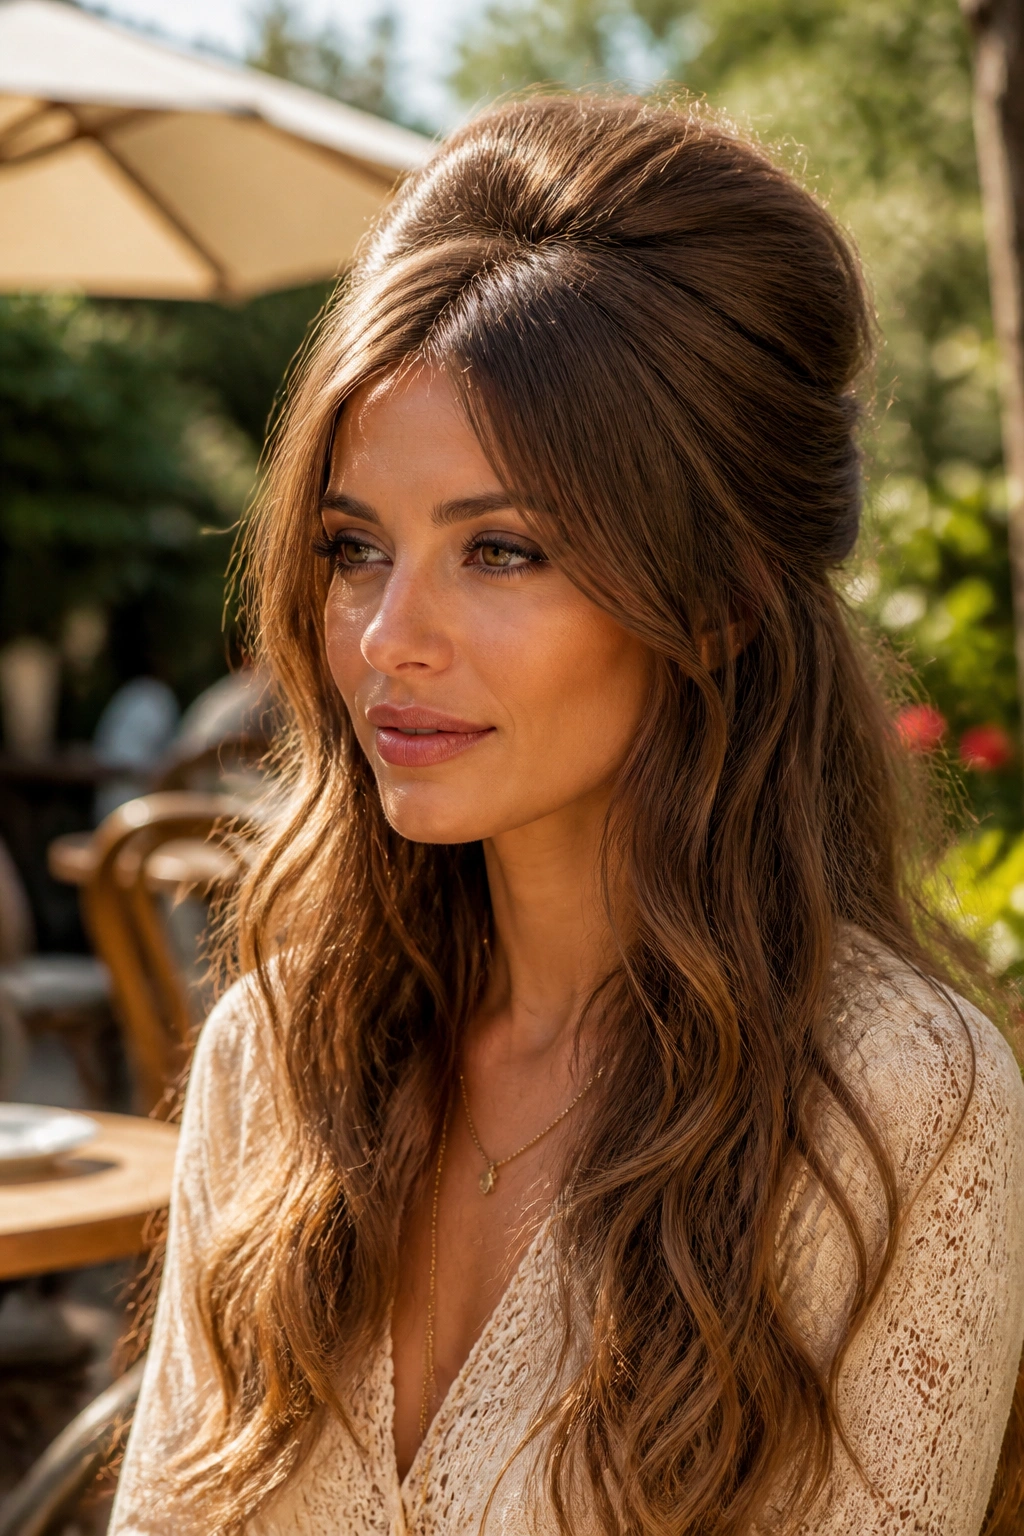
A half-beehive is not the same as a full beehive, and that matters a lot. The smaller version gives you crown lift without the hard edge of a full retro set. On long hair, that lift becomes the anchor point for soft waves, so the style ends up feeling boho instead of costume-like.
The teasing should happen in thin sections, not giant chunks. Backcomb the crown at the roots, then smooth the top layer lightly so it still looks touchable. If the hair is fine, a dusting of volumizing powder at the roots gives the style more grip than hairspray alone.
I like the back left loose and the front gently curved away from the face. That shape gives the head a little height and the length a little softness, which is the whole point. Too much height and it starts to look sharp. Too little and the crown disappears.
This one suits people who like a stronger silhouette. It looks good with square necklines, little collars, and earrings that deserve room to show off. Keep the wave pattern soft through the ends, and the style stays wearable.
15. Twisted Low Knot with Lace Ribbon
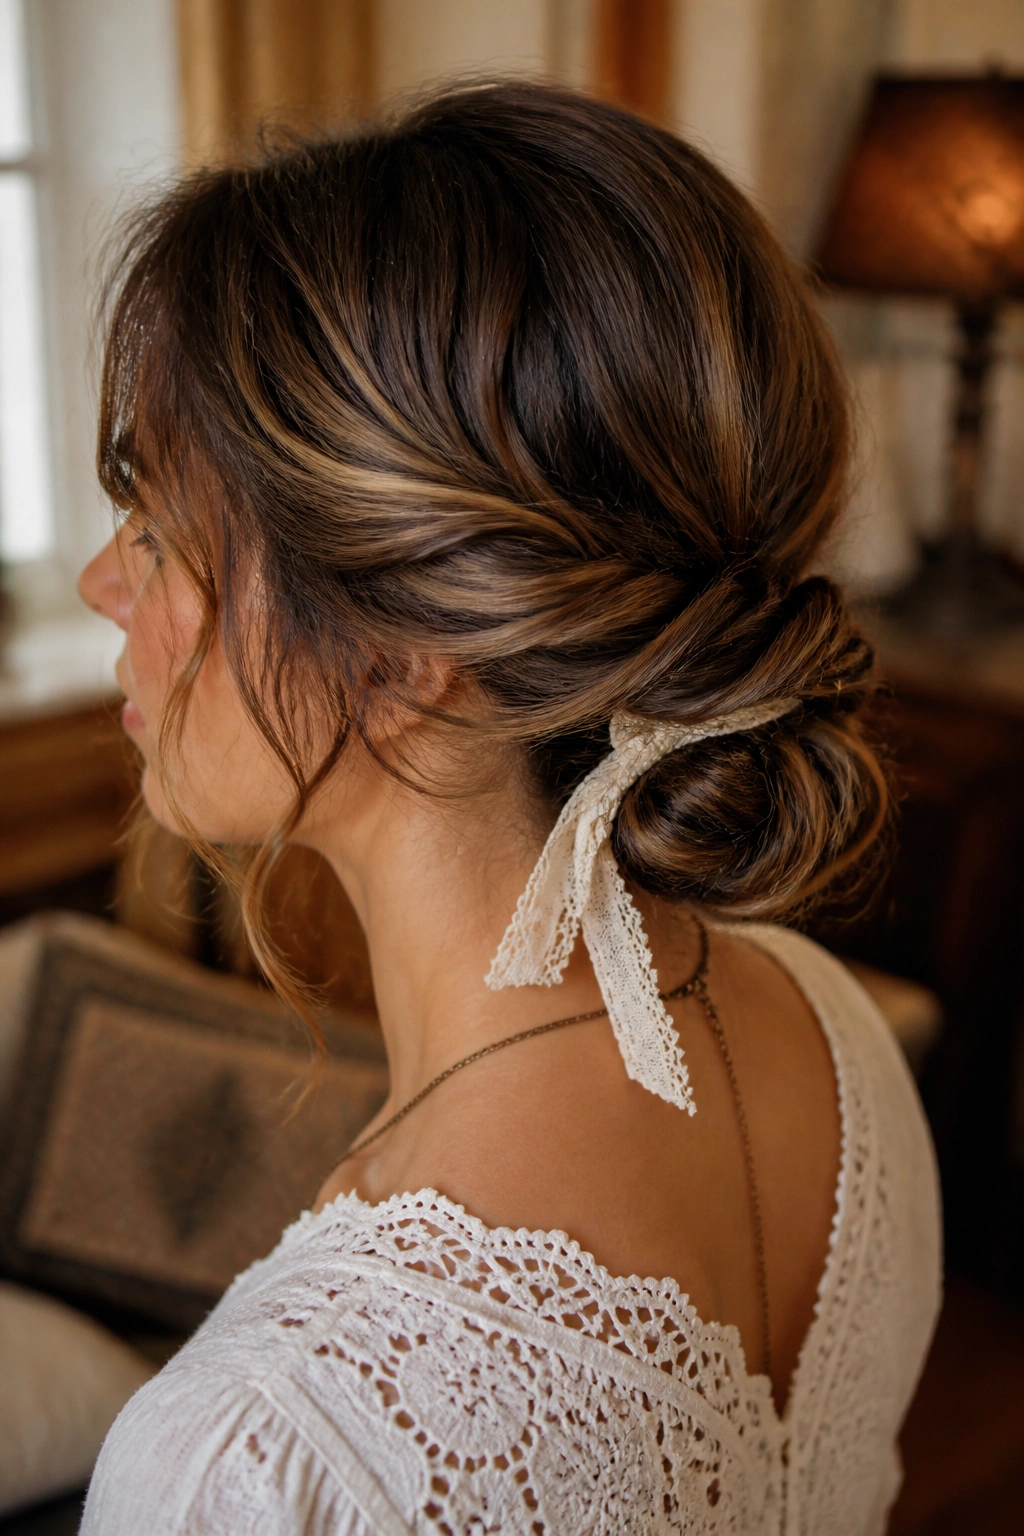
Can a low knot feel romantic without getting fussy? Yes, if the twist is loose and the ribbon does some of the decorative work. A lace ribbon gives this style a vintage note right away, and the low placement keeps it grounded.
The knot itself should sit at the nape with a slight fold rather than a hard coil. Twist the hair first, wrap it once, then tuck the tail back through the loop or under the knot. That creates a shape with a little texture, which is better than a flat bun when you want a softer finish.
How to Style It
Use a 1/2-inch lace ribbon or a narrow satin strip. Tie it under the knot so the bow or tail sits just below the bun, not on top of it. That placement keeps the detail visible without making the crown busy.
A few loose strands around the ears help too. Bend them slightly with a curling iron so they do not hang straight. Straight pieces can make a delicate style feel unfinished in a hurry.
This is a smart choice for dresses with open backs or high necklines. It sits quietly, but not boringly.
16. Boho Bubble Ponytail with Soft Ends
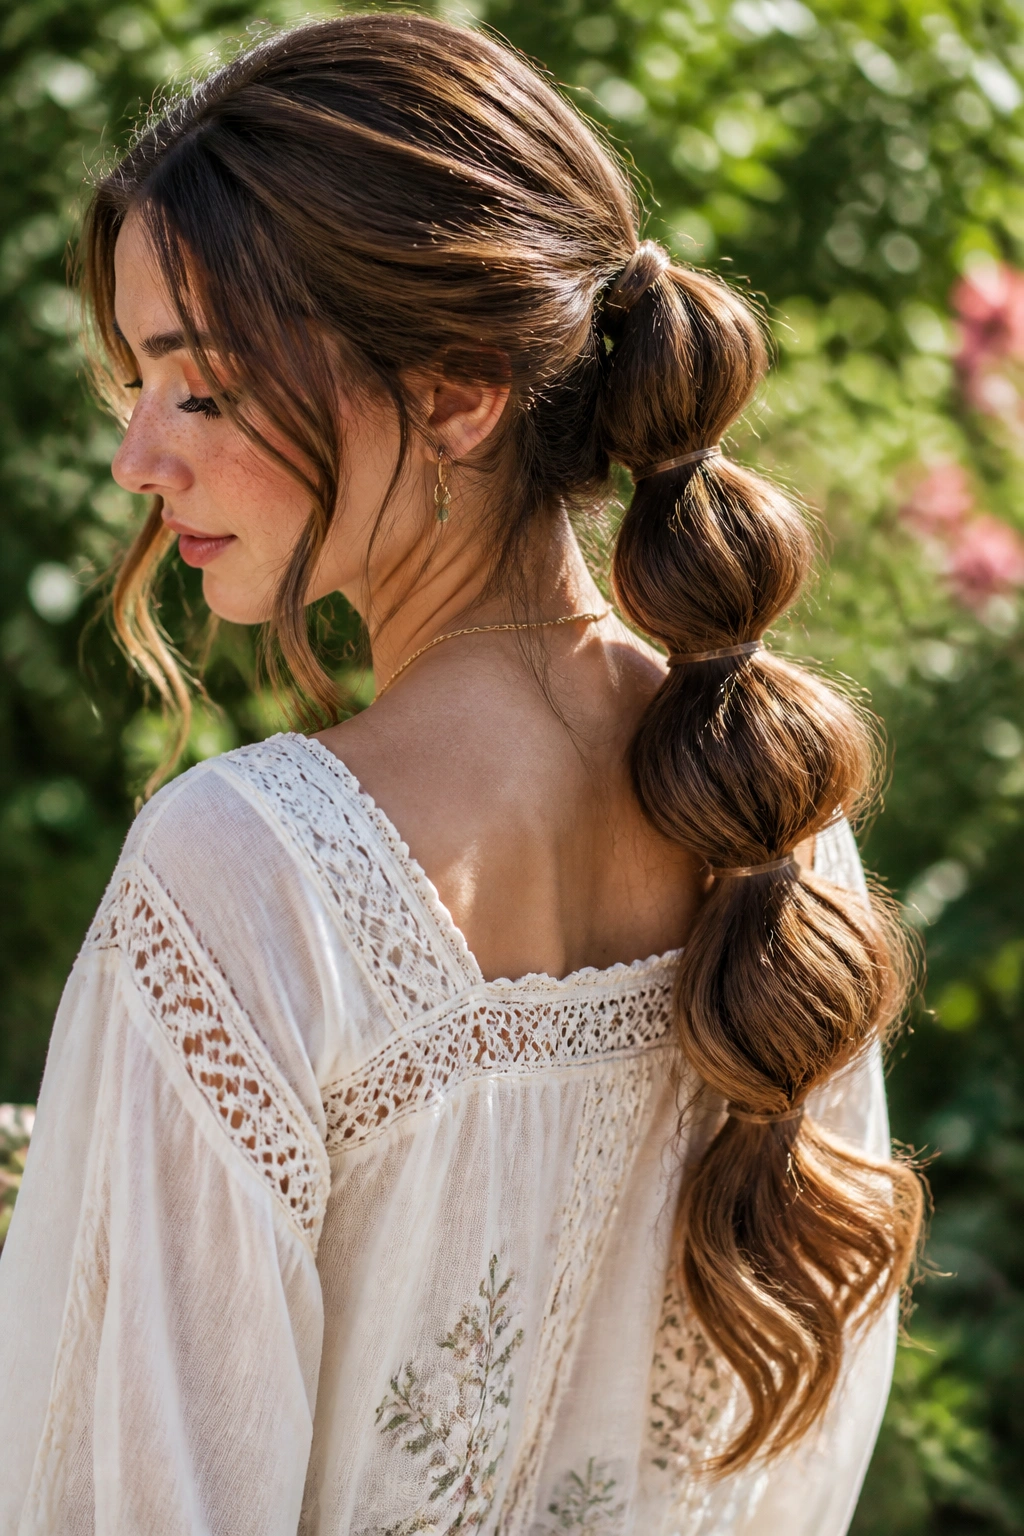
A bubble ponytail sounds playful, and it is, but long hair gives it enough length to look styled rather than silly. The bubbles create rhythm down the ponytail, and the soft ends keep it from feeling too rigid.
The setup is simple. Secure a low or mid ponytail, then add clear elastics every 2 to 3 inches down the length. Tug each section gently to puff it out. That repeated shape is what gives the ponytail its vintage-meets-boho feel. If you want a more relaxed finish, leave the crown a bit loose and wrap a thin strand of hair around the first elastic.
The ends should stay soft. Curl the last few inches with a wand or leave them bent from the ponytail tie. Either works, as long as the bottom does not go pin-straight. A straight tail can make the bubbles look too sporty.
- Use 4 to 6 clear elastics on long hair.
- Keep the bubbles even, but not identical.
- Tug each bubble from both sides, not just one.
- Finish with a light mist of spray from 10 to 12 inches away.
This style holds up well and has a little bounce to it, which I always appreciate.
17. Dutch Crown Braid with Free Ends
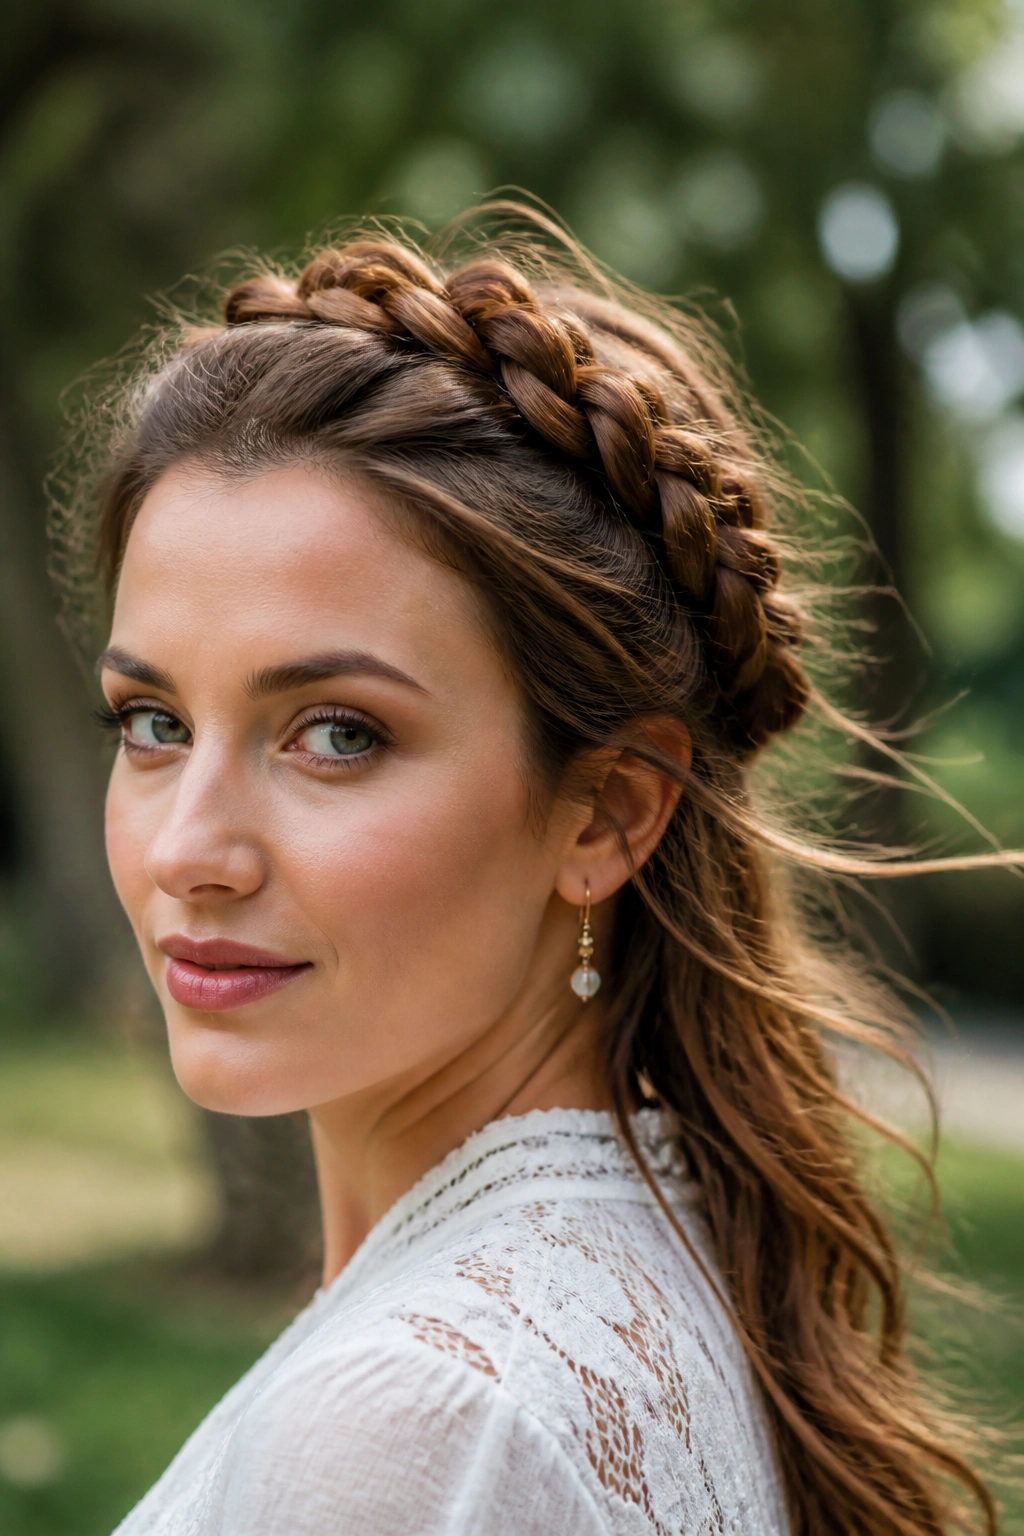
A Dutch crown braid is sturdier than a regular crown braid because the braid sits raised on the head instead of sinking into it. That makes the pattern easier to see on long hair, especially if the hair is layered or naturally thick. Leaving the ends free softens the effect and keeps it out of school-uniform territory.
The braid should start behind one ear, travel around the crown, and finish on the opposite side with the tail left loose. That loose tail can be waved, curled, or even tucked into the back of the hair if you want less length showing. I prefer it loose. The contrast between the structured braid and the open ends is what gives the style its charm.
This one works well when you want the front of the hair controlled but still want motion through the back. It is also a good choice for windy days, since the crown stays secure while the ends can move a little. Use small, hidden pins under the braid rather than overloading the top with clips. Too many visible pins kill the line.
If your hair is slippery, rough it up first with dry shampoo or texture spray. Otherwise the braid can slide flat before the day is over.
18. Soft Pin-Up Roll with Long Loose Curls
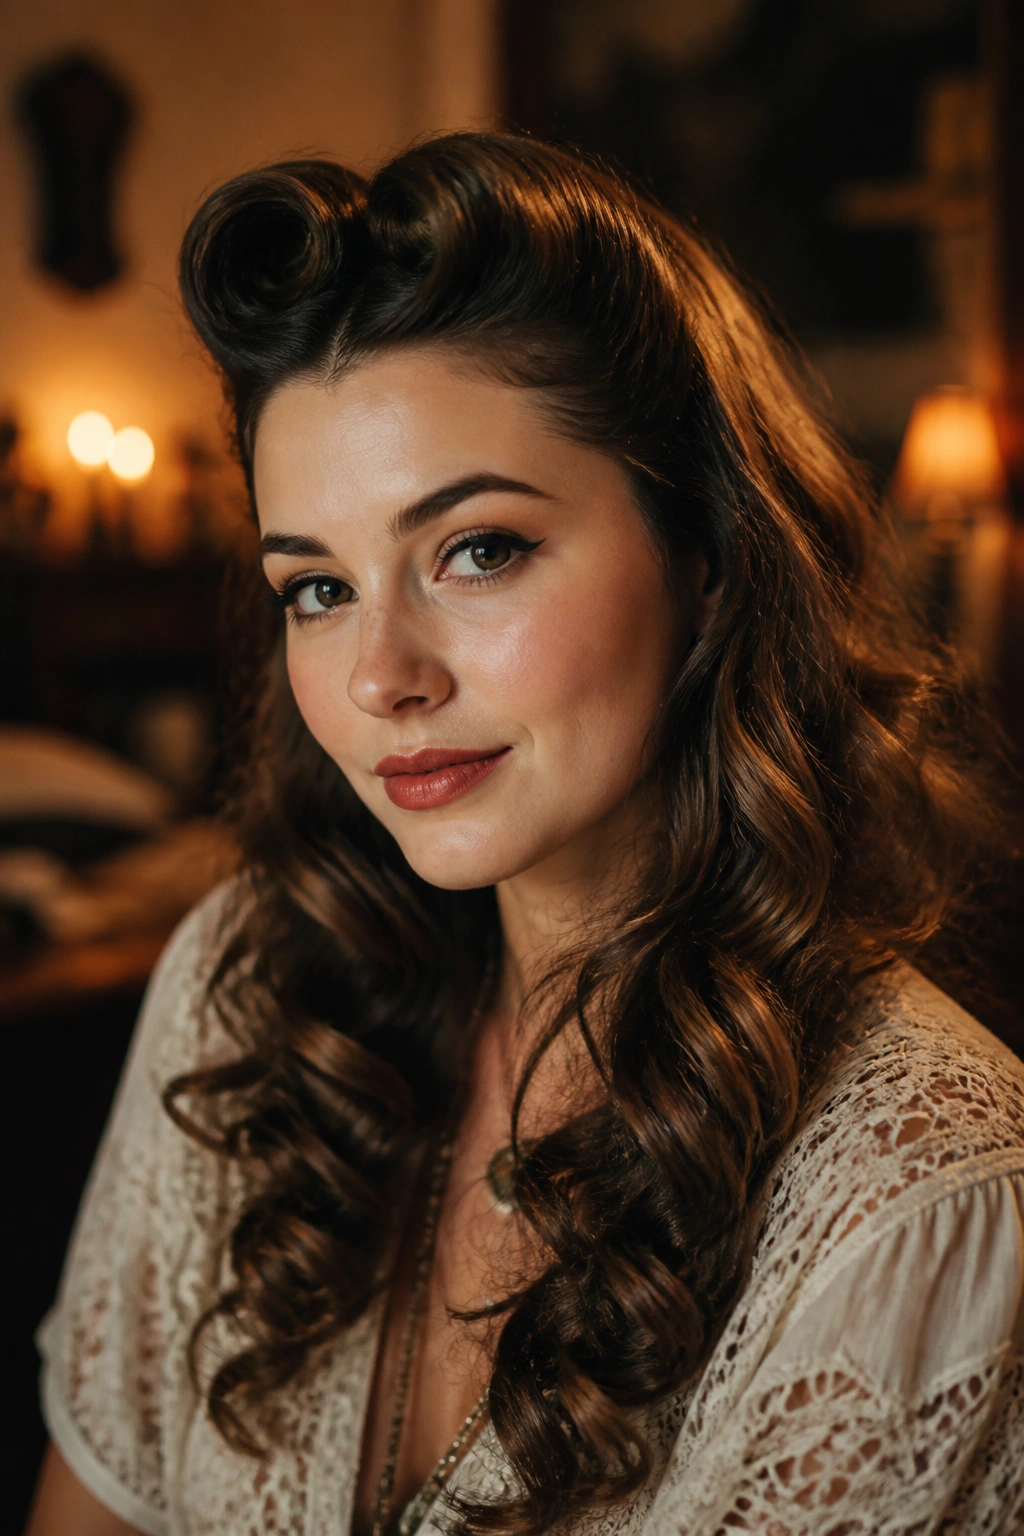
A soft pin-up roll is the neatest option in this whole group, but it does not have to feel stiff. Keep the roll small, keep the curls loose, and let the long ends do some of the work. That balance makes it feel vintage without losing the boho ease that long hair handles so well.
The front section should be shaped, not armored. Roll a two- to three-inch section back from the hairline, pin it flat, then let the rest fall in loose curls over the shoulders. If the hair is very long, one roll at the front is enough. More than that and the style starts to tip into costume.
I like this one for evenings when the outfit is doing most of the talking. A roll, a side part, and soft curls create a cleaner silhouette than a full braid, and sometimes that is exactly what you want. The look still feels feminine and old-fashioned, but it has enough looseness around the ends to stay comfortable.
A final detail makes a difference: brush the curls out just once, gently, after they cool. Do not overwork them. You want soft bends, not a cloud. That last pass gives the style its calm finish, and it is usually the part that keeps it from looking over-styled.
