



Wavy hair and vintage hairstyles get along better than most people think. The bend is already there, which means half the shaping job is done before you even pick up a comb.
The catch is control. Vintage hair usually wants a clean part, a defined curve, and enough hold to survive brushing without collapsing into frizz. If you’ve ever tried finger waves on hair that refuses to stay flat at the crown, you know the feeling: one side looks polished, the other side looks like it changed its mind.
That does not mean you need poker-straight hair or a drawer full of rollers. Wavy texture can be a gift, especially for brushed-out waves, faux bobs, side-swept Hollywood styles, and pin-up shapes that look dressed up even when the tools are simple. The trick is choosing a style that works with your wave pattern instead of fighting it.
Some looks want structure. Others only need a deep part, a few bobby pins, and a brush that behaves. The styles below lean into both kinds of vintage charm, because wavy hair looks best when the shape feels intentional, not forced.
1. Soft Finger Waves at the Hairline
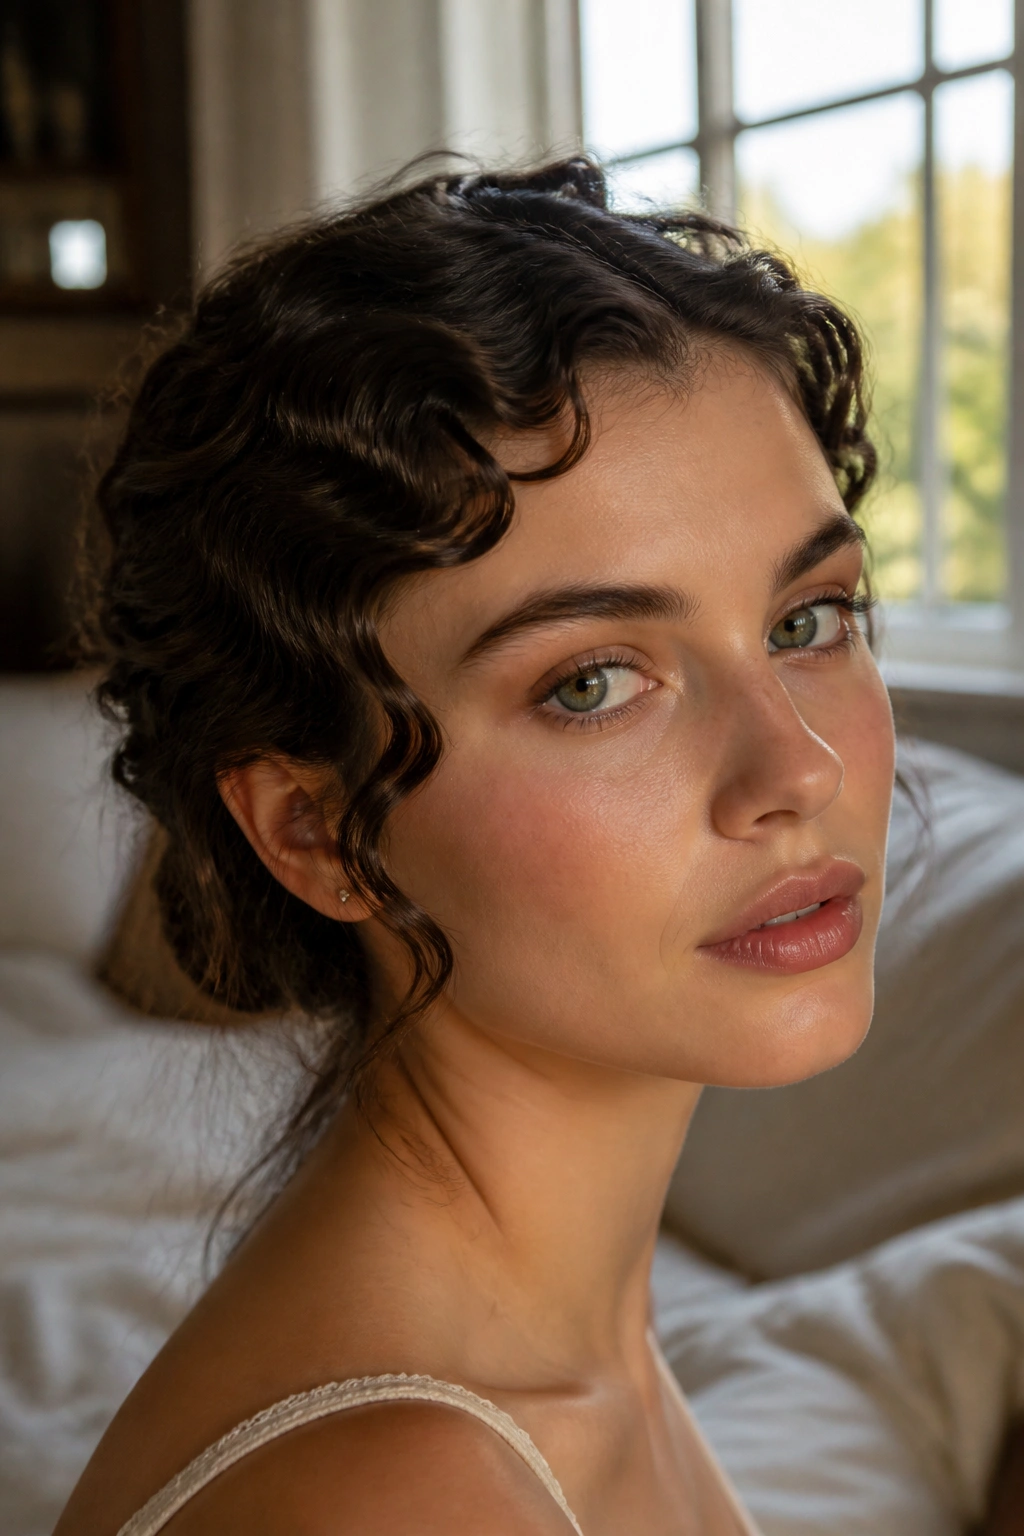
Finger waves are the sharpest old-school look on this list, and wavy hair gives them a head start. You do not need to force every strand into place; you only need to guide the bend.
Why It Flatters Wavy Hair
The front of the hair usually needs the most control, and that is where finger waves do their best work. If your natural wave already bends around the cheekbones, the style settles faster and looks less stiff. That matters. A lot.
Keep the rest of the hair simple. A low bun, tucked ends, or a smooth shoulder-length shape lets the wave pattern do the talking without turning the whole head into a costume piece.
Quick Setup
- Apply a strong-hold gel or setting cream to damp hair.
- Use a rat-tail comb to carve a deep side part.
- Shape the waves with your fingers and hold them with duckbill clips while they dry.
- Let the hair dry fully before removing the clips, or the pattern will slump.
Best tip: keep the waves narrow near the temple and wider toward the ear. That small shift makes the style look hand-set instead of stamped on.
2. Marcel Waves with a Soft Shine
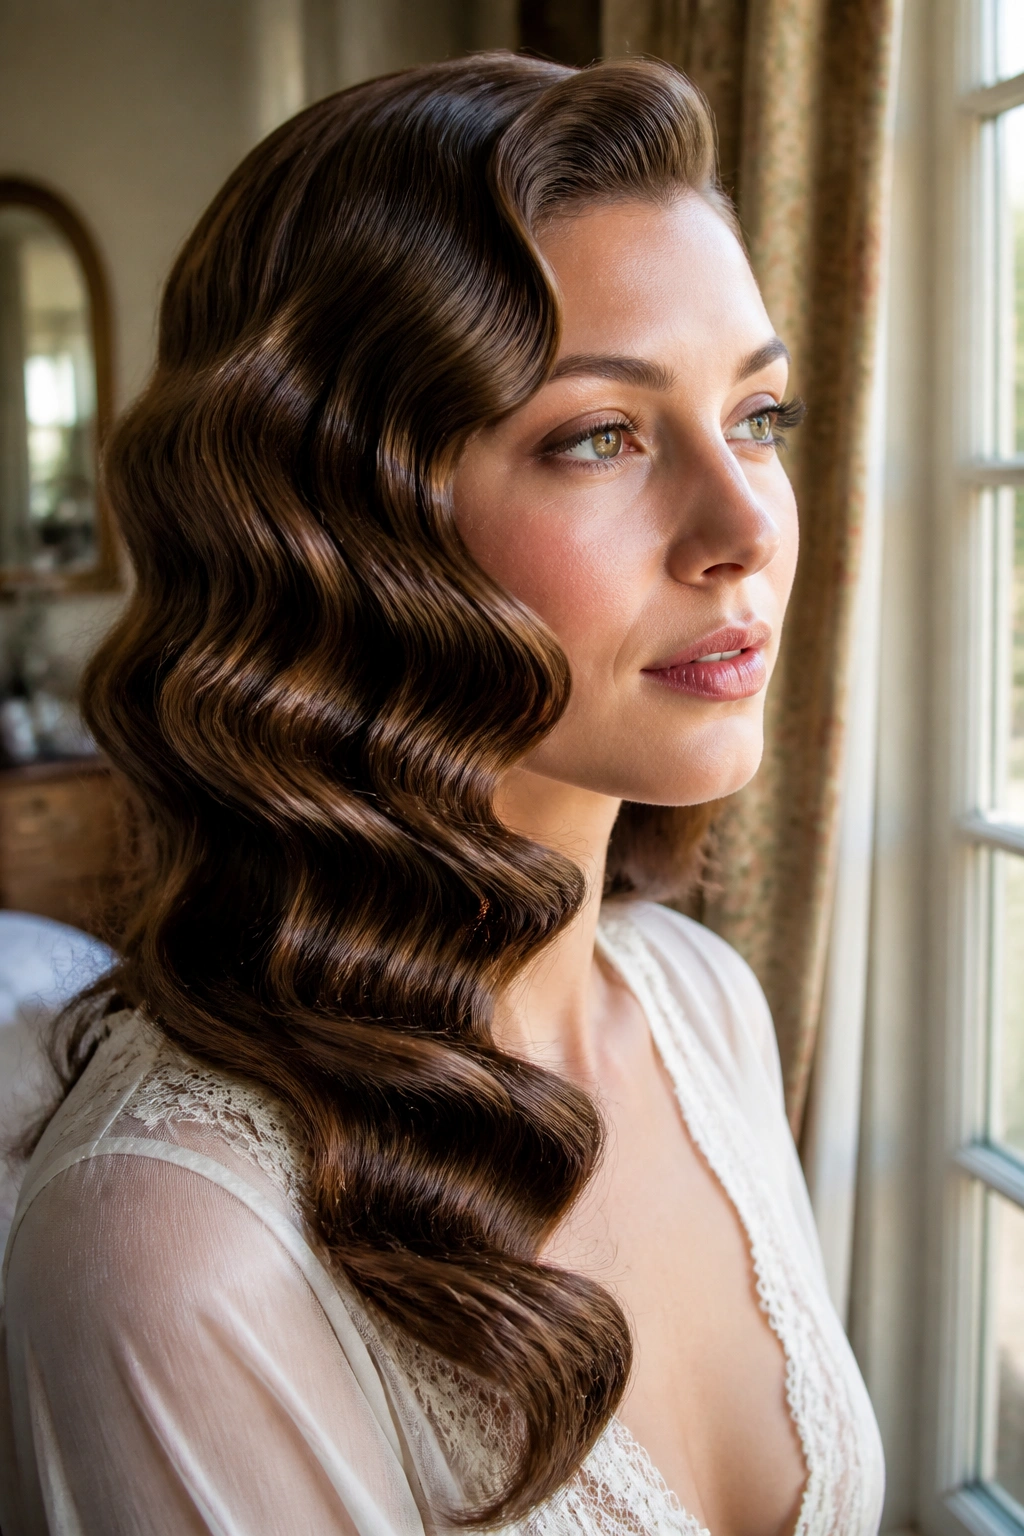
Marcel waves look more elegant than finger waves when you want movement instead of a tight sculpted finish. They have that glossy, ribbon-like shape that sits beautifully on wavy hair, especially if your strands already fall into loose S-curves.
The look comes from creating deep, even bends through the length, then brushing them just enough to soften the edges. That’s the part people miss. Marcel waves are not about making the hair flat. They are about making the wave line look deliberate and expensive, with a little air between the bends.
A 1-inch curling iron or Marcel iron works well here, but the finish matters more than the tool. Set each section, let it cool in your hand for a few seconds, then pin it in place until the whole head is cool. If you rush the cooling stage, the wave pattern weakens fast.
For wavy hair, this style is a sweet spot. The texture helps the bend hold, and you do not need to fight for every inch of shape. Add a light shine spray at the end, not a heavy oil. Heavy oil turns a glossy wave into a limp one, and that is a waste of good styling.
3. Deep Side-Part Hollywood Waves
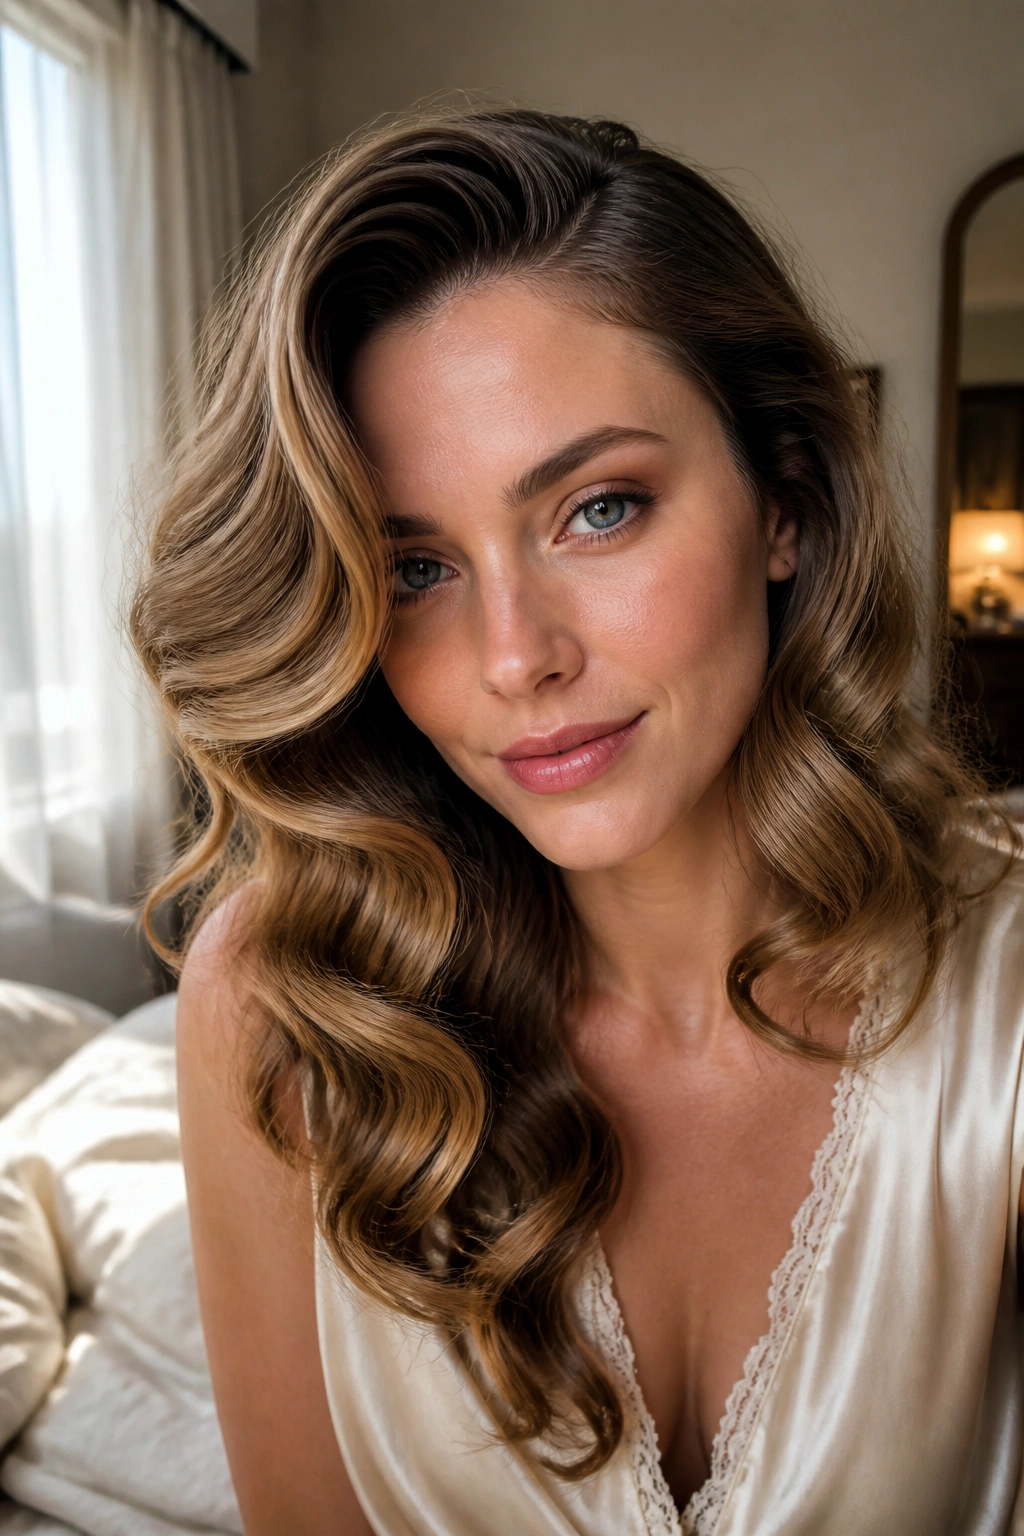
Why do deep side-part Hollywood waves still look right on almost every face shape? Because the line of the hair does half the styling for you.
The deep part creates drama, but the real magic is the sweep. One side can tuck behind the ear while the other falls in a soft sheet over the cheek and shoulder. On wavy hair, that shape feels natural because your texture already knows how to curve. You are not building the wave from scratch. You are teaching it where to sit.
How to Style It
- Blow-dry with a large round brush or use 2-inch rollers for a softer set.
- Curl all sections away from the face.
- Brush the hair only after it cools completely.
- Pin the heavier side behind one ear with a plain bobby pin or a jeweled clip.
A little shine serum at the ends helps, but keep it away from the roots. Roots that are too slick tend to separate and expose the part in a way that looks unfinished. The best version of this style feels rich and smooth, not greasy.
This is one of the easiest vintage hairstyles for wavy hair if you want something formal without a lot of pin work. It shows off the wave pattern, and it does not ask you to erase it.
4. Victory Rolls with Loose Ends
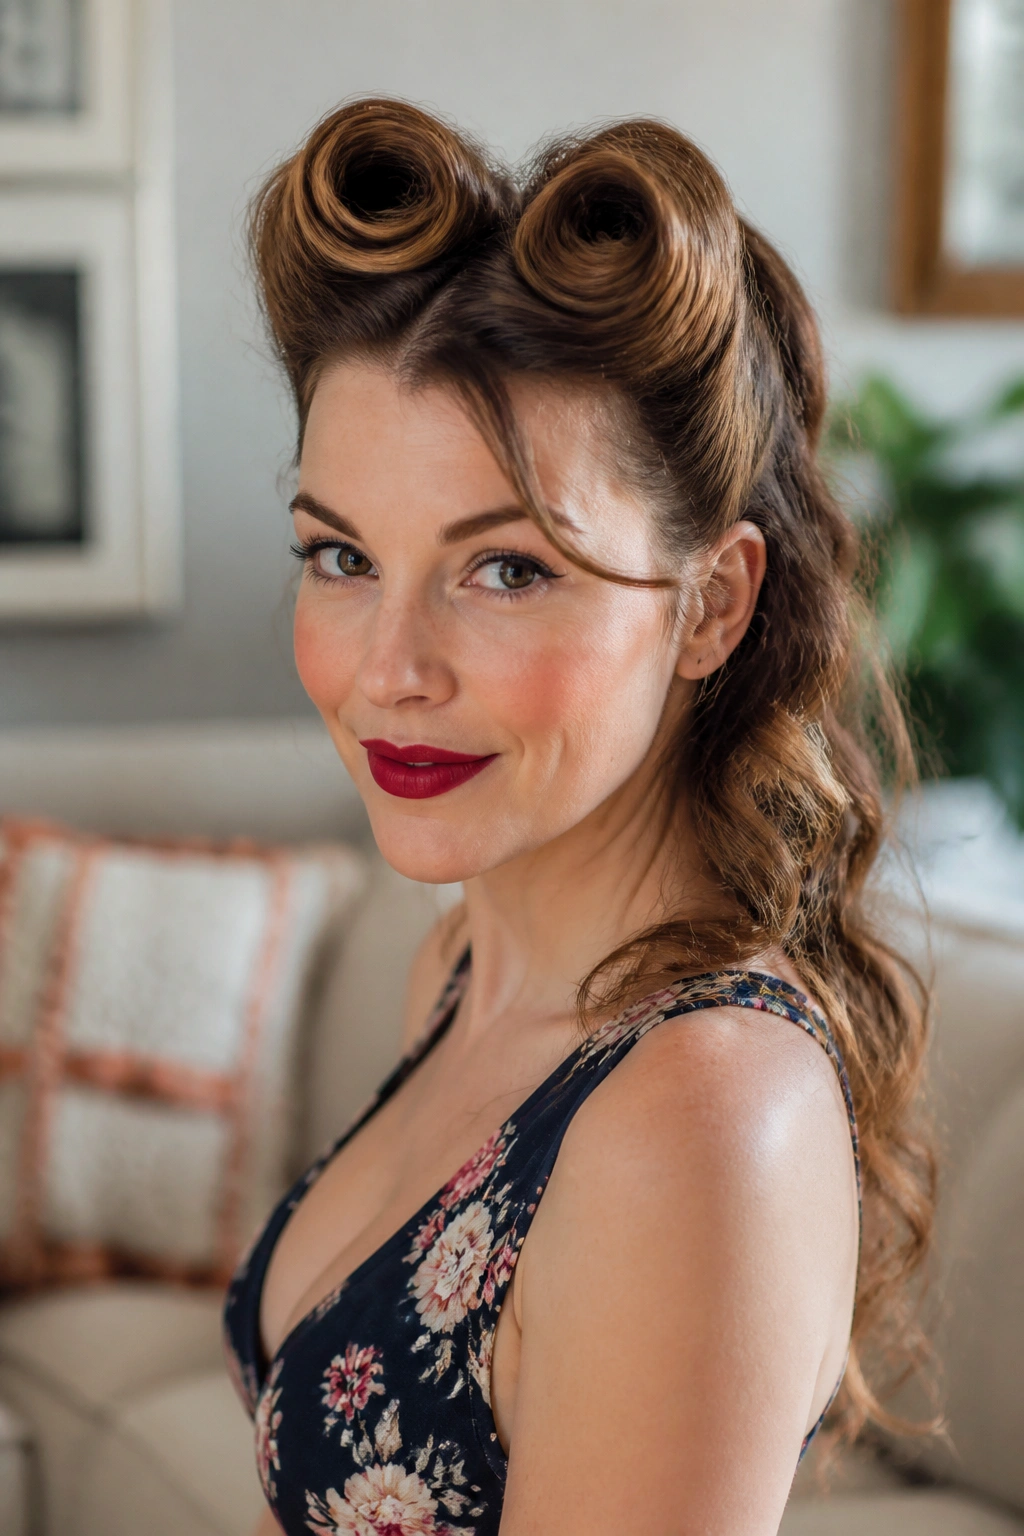
If you want one hairstyle that says pin-up without tipping into costume territory, victory rolls are the move. On wavy hair, they hold shape with less teasing than you might expect, because the natural bend gives the roll something to grip.
Picture it: two sculpted rolls near the forehead, a neat center or side split, and the rest of the hair left loose in soft waves or gathered into a low curve. That contrast is what makes the style work. Tight at the top, easy through the length.
What Makes It Hold
- Roll the front sections over small sections of padding only if your hair is very fine.
- Secure each roll with crossed bobby pins so they do not twist open.
- Keep the back soft and wavy, not stiff.
- Use a medium-hold hairspray after the rolls are pinned, then let it set for 5 to 10 minutes.
The style looks best when the rolls feel airy. Too much teasing at the crown makes the whole thing look heavy, and heavy victory rolls age badly. Light teasing at the roots is enough.
I like this style for events where you want shape in the front and movement everywhere else. It photographs well, but more importantly, it still looks good from the side. That matters more than people admit.
5. Pin-Curl Waves Set Overnight
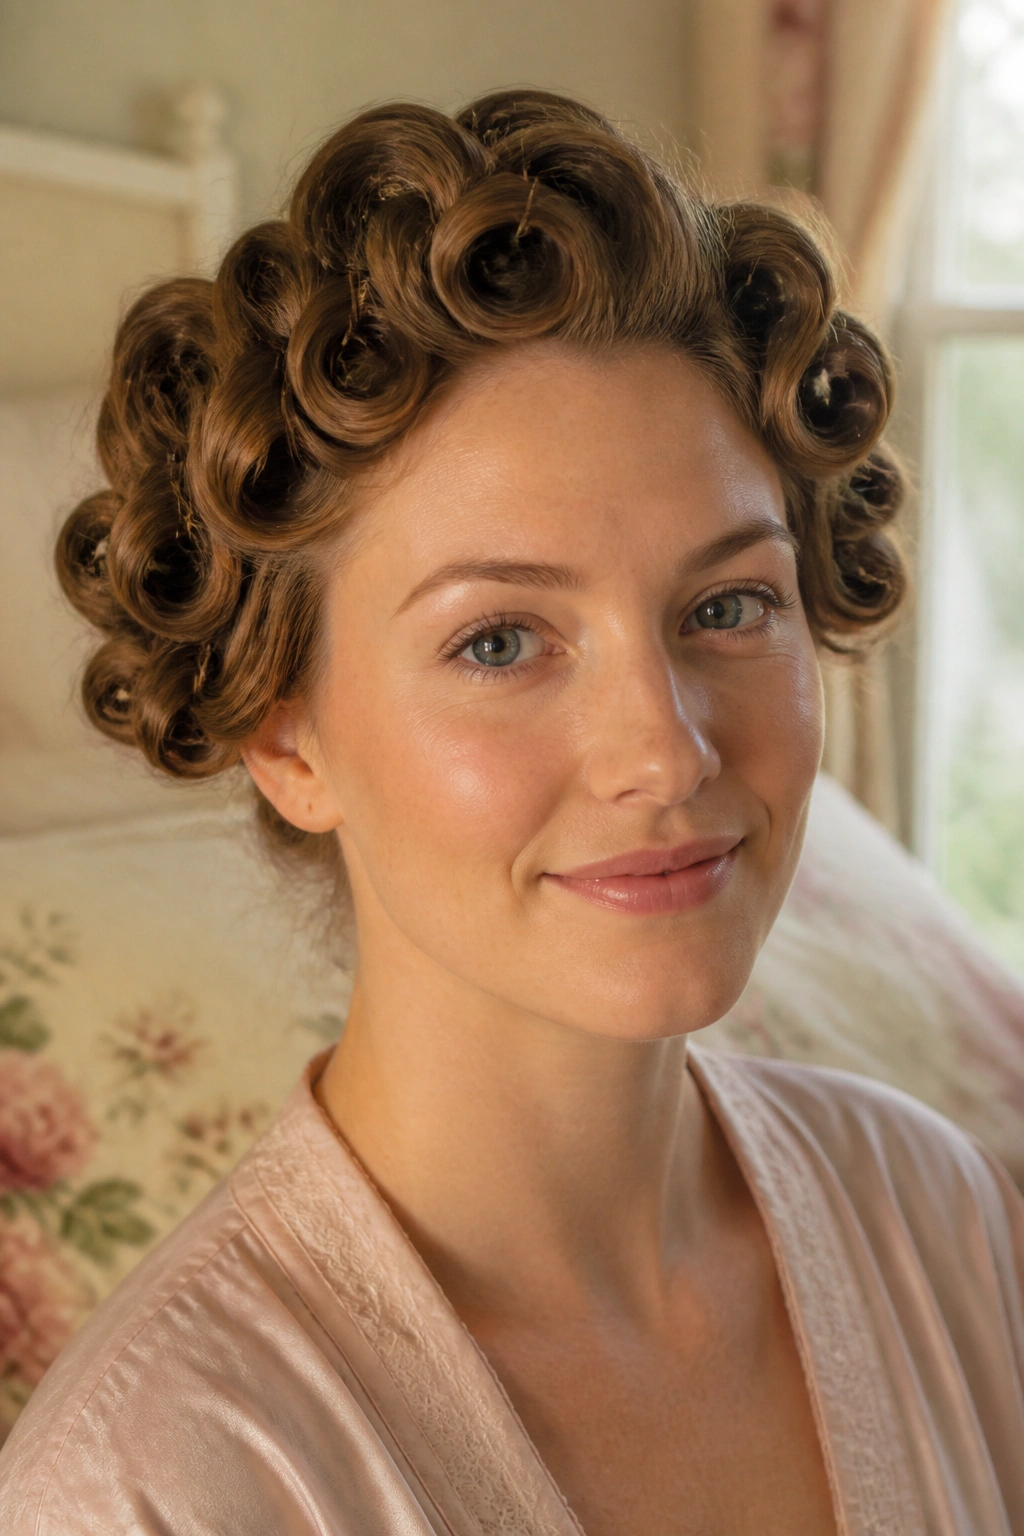
Pin-curl waves reward patience. They also punish impatience.
This is the style that feels the most old-school, because you are shaping the hair while it is damp and letting time do most of the work. Wavy hair often takes to pin curls quickly, especially if the pattern is already loose. Each curl cools into a defined wave, and the brush-out later gives you that soft, brushed vintage finish that never looks too hard.
The real trick is direction. Alternate the way you roll each section so the waves fall into one another instead of making obvious lumps. Small sections set tighter; larger sections give you a looser ripple. For shoulder-length hair, sections about 1 to 1½ inches wide are a practical place to start.
Sleep in a silk scarf or a mesh cap. Cotton sucks moisture out of the set and leaves the surface rough, which is the opposite of what you want. In the morning, wait until the hair is fully dry before brushing. Fully dry. Not almost dry.
Use a boar-bristle brush if you want the wave to soften fast, or your fingers if you want to keep more shape. The style is a little fussy, but once you get it right, it has that pretty, cloudlike finish that modern curling irons never quite copy.
6. Faux Bob Tucked at the Nape
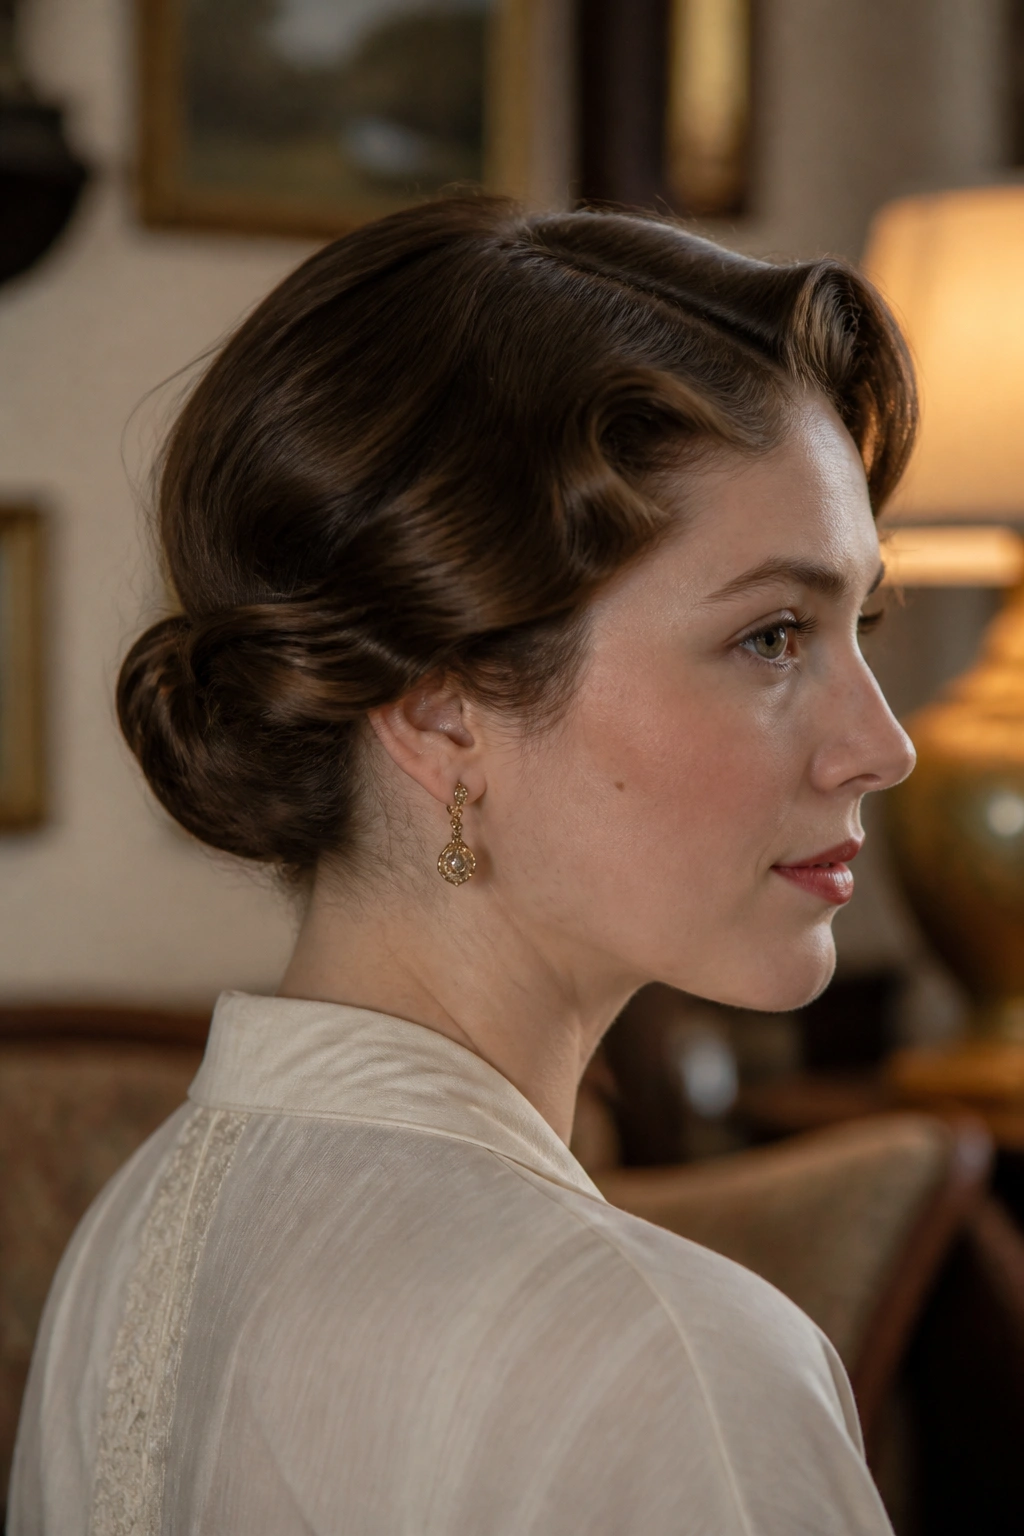
Unlike a real bob, a faux bob gives you the cropped silhouette without losing your length. That makes it one of the smartest vintage hairstyles for wavy hair, especially if you like the look of a chin-grazing cut but do not want scissors involved.
The wave pattern helps hide the pins. That’s the lovely part. On straight hair, the tuck can look a bit too obvious if the surface is too smooth. Wavy hair breaks up the line naturally, which makes the illusion easier to sell.
This style works best with medium to long hair. Curl the lengths first, then tuck the ends upward and secure them along the nape with hidden pins. Leave a soft wave or side roll near the face so the front does not go flat. A tucked style with no facial movement tends to look stiff and a little theatrical.
If your hair is layered, you may need more pins than you expect. That is normal. Use a small hairnet if the ends keep escaping. Nobody sees it, and the style holds far better.
7. Half-Up Bouffant for Wavy Hair
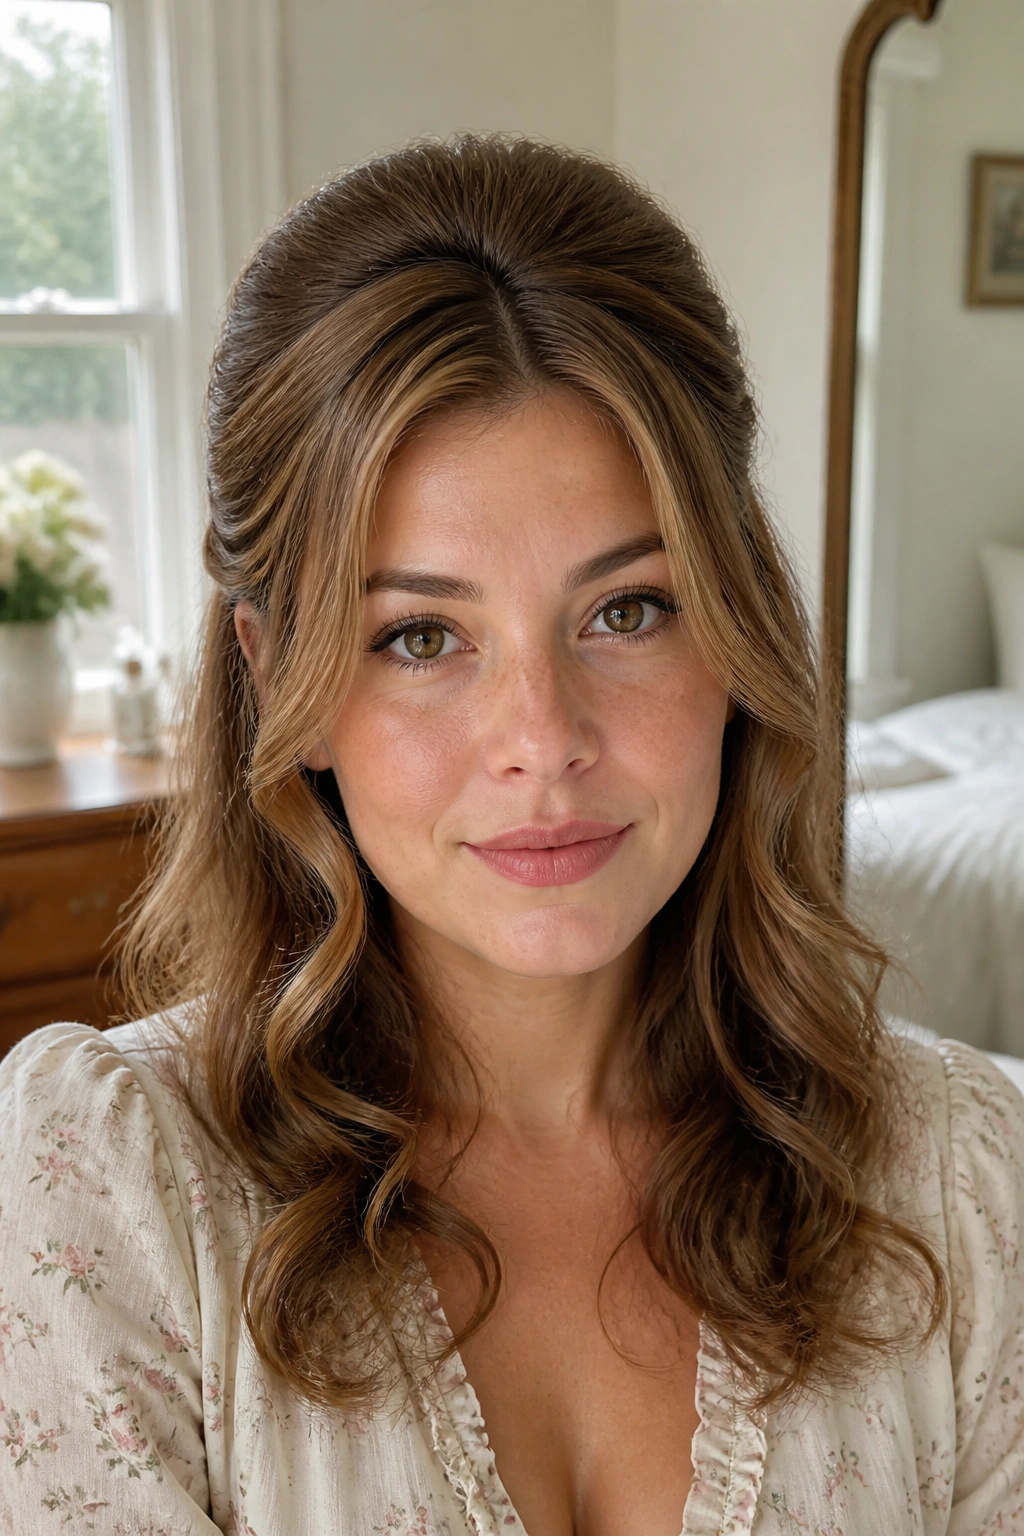
A half-up bouffant is the easiest way to make wavy hair feel very mid-century without locking everything into place. You get lift at the crown, volume through the back, and enough looseness to keep the style from turning stiff.
Why It Works on Wavy Hair
Waves already create body, which means you do not need aggressive teasing. Lift the crown with a light backcomb at the roots, smooth the top layer over it, and pin the half-up section at the back of the head. The lower half can fall in loose waves or be curled under for a neater finish.
- Tease only the top 2 inches of hair.
- Keep the part soft or slightly off-center.
- Use two to four pins to anchor the half-up section.
- Finish with a light mist of hairspray and a quick touch at the ends.
The bouffant should look lifted, not puffy. There is a difference, and it shows fast. If the crown rises too high, the style starts looking costume-like. Keep the volume rounded and controlled.
This one is excellent when you want a vintage shape that still feels easy to wear. It’s dressy enough for dinner, and relaxed enough for a daytime outfit with a cardigan and lipstick.
8. Curved Pageboy with Flipped Ends
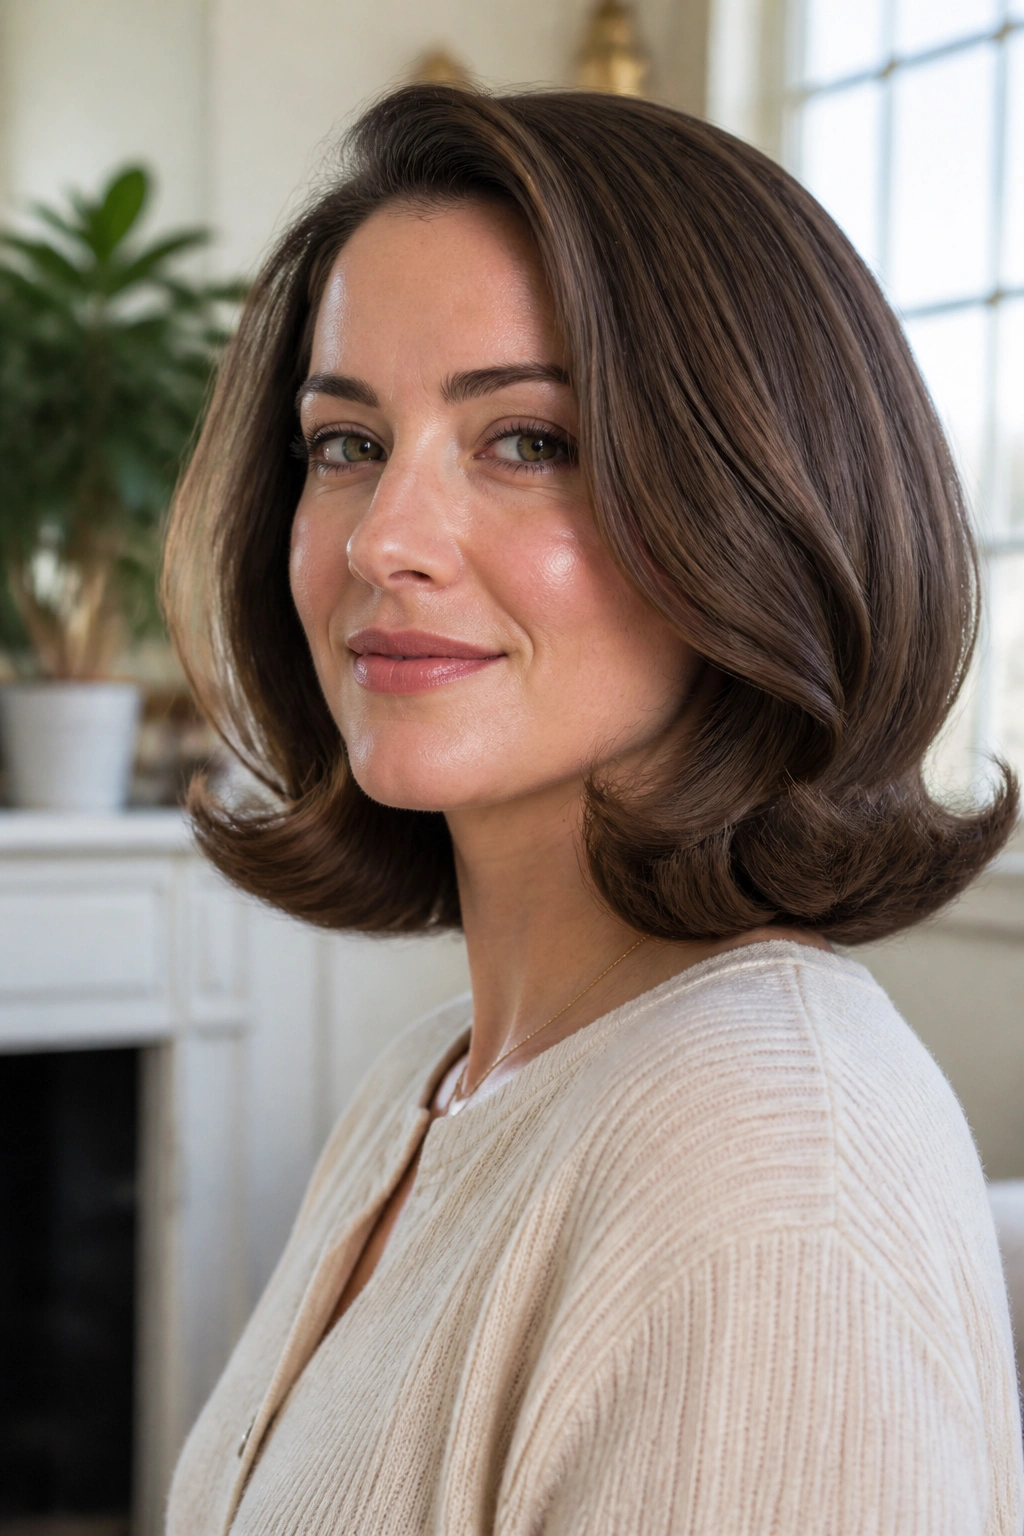
Pageboys look crisp, but on wavy hair they need less work than people think. The hair already wants to curve, which makes the inward sweep at the jawline easier to build.
The classic pageboy shape sits close to the head and turns under at the ends. That flip is the whole point. On wavy hair, you can coax it into shape with a round brush or large rollers, then smooth the top with a paddle brush so the surface stays clean. The result is neat without looking frozen.
This style is good for shoulder-length hair and just-below-shoulder lengths. Anything much longer starts fighting the shape. If you have layers, keep the top layers polished and the ends tucked under evenly. Uneven ends make the pageboy look accidental, and accidental is not the goal here.
A small amount of styling cream through the mid-lengths helps the bend stay tidy. Skip heavy mousse unless your hair is fine and collapses quickly. The pageboy is about line, not fluff.
9. Veronica Lake Waves Over One Eye
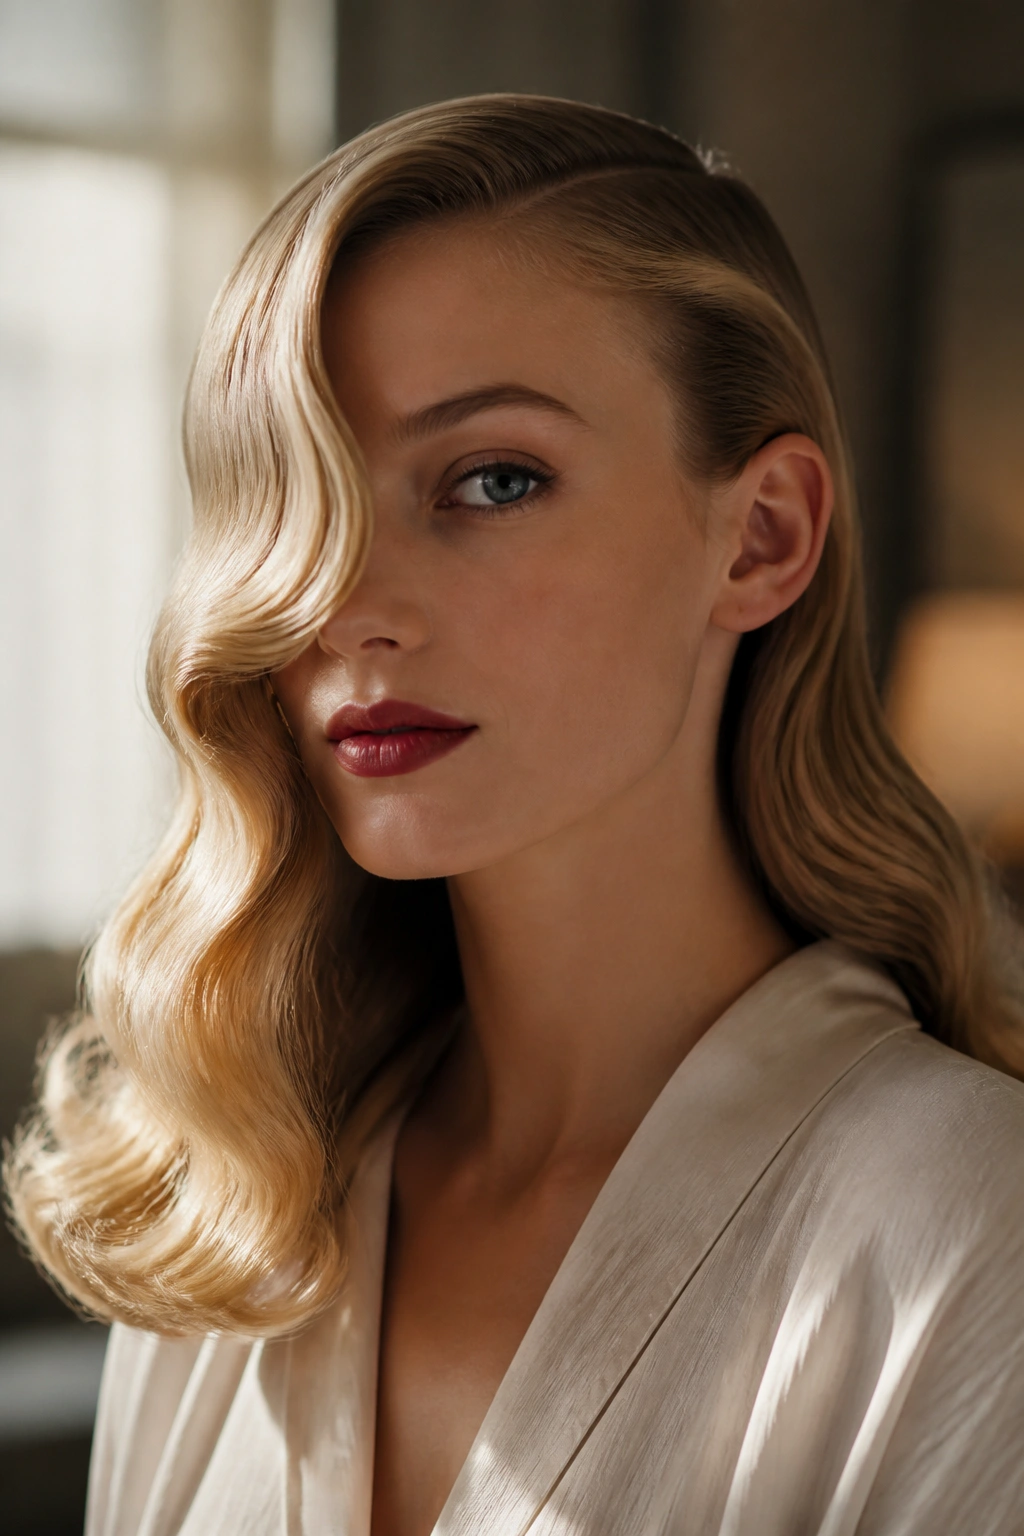
What makes Veronica Lake waves so memorable? One side disappears behind the face, and the other side falls in a single glossy sheet.
That asymmetry is what gives the style its drama. It also makes the look easier to wear than people assume, because you are styling one strong direction instead of trying to balance both sides equally. On wavy hair, the curve usually holds with less effort, especially if you set the front section with a big roller or a large barrel iron first.
How to Style It
- Create a deep side part several inches off center.
- Curl all sections in the same direction away from the face.
- Brush the curls out into one smooth wave.
- Pin the smaller side behind the ear and let the larger side fall forward.
The front wave needs to skim the cheek, not cling to it. If it presses too hard against the face, it can look heavy. If it sits too far out, the whole style loses that old-screen glamour.
This is one of my favorite vintage hairstyles for wavy hair when the outfit is simple and the hair needs to carry the look. It does the job fast. Very fast, once you get the part right.
10. Scarf-Tied Roll-Up for Day-Two Hair
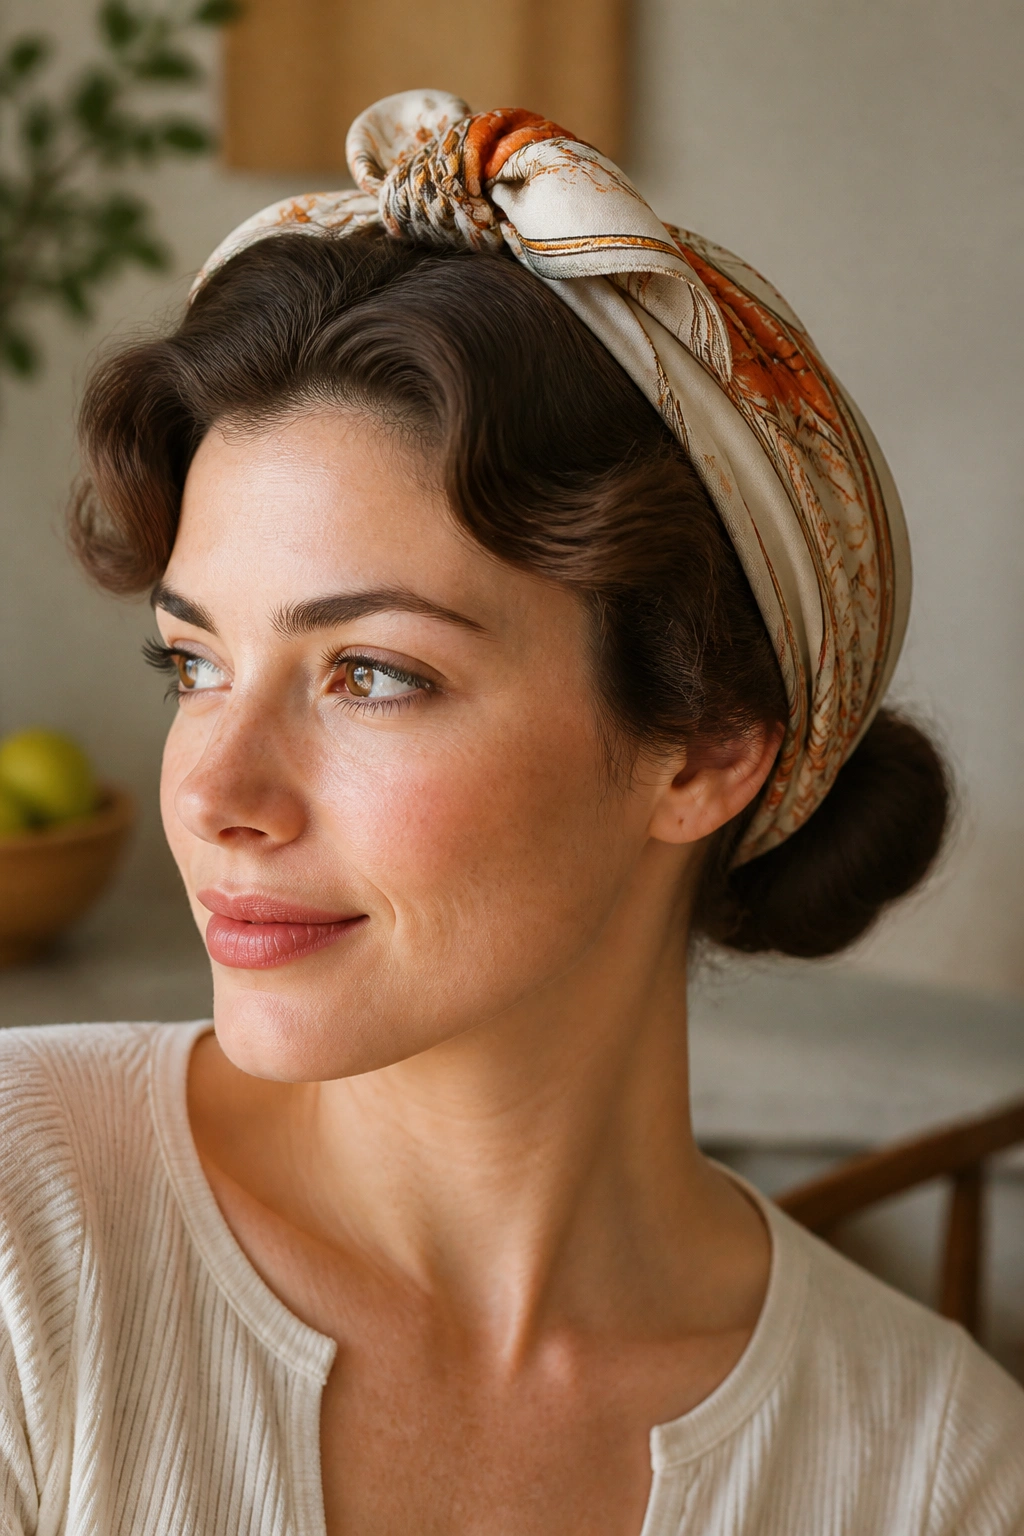
If day-two hair is behaving like a small rebellion, a scarf-tied roll-up keeps the whole thing looking deliberate.
The scarf does two jobs at once. It hides pin work, and it gives the style a real vintage feel without asking for a perfect set. That matters on wavy hair, because slightly imperfect texture can look charming when it is framed by a printed scarf or a plain silk wrap.
A Few Details That Matter
- Roll the sides toward the nape before tying the scarf.
- Leave a soft wave or fringe at the front so the style does not disappear under fabric.
- Choose a scarf that is at least 24 inches square if you want enough length to knot securely.
- Use pins under the scarf, not on top of it.
The roll should sit low and close to the head. If it rises too high, the scarf loses the clean line that makes the style work. Keep the knot neat. A sloppy knot tends to make the whole look feel improvised in the wrong way.
This style is especially good for shoulder-length waves that need a break from heat. It also buys you a little time between wash days, which is always welcome. I’d wear it to brunch, to a market, or on any day when the hair needs a soft reset.
11. Gibson Tuck with a Soft Front Wave
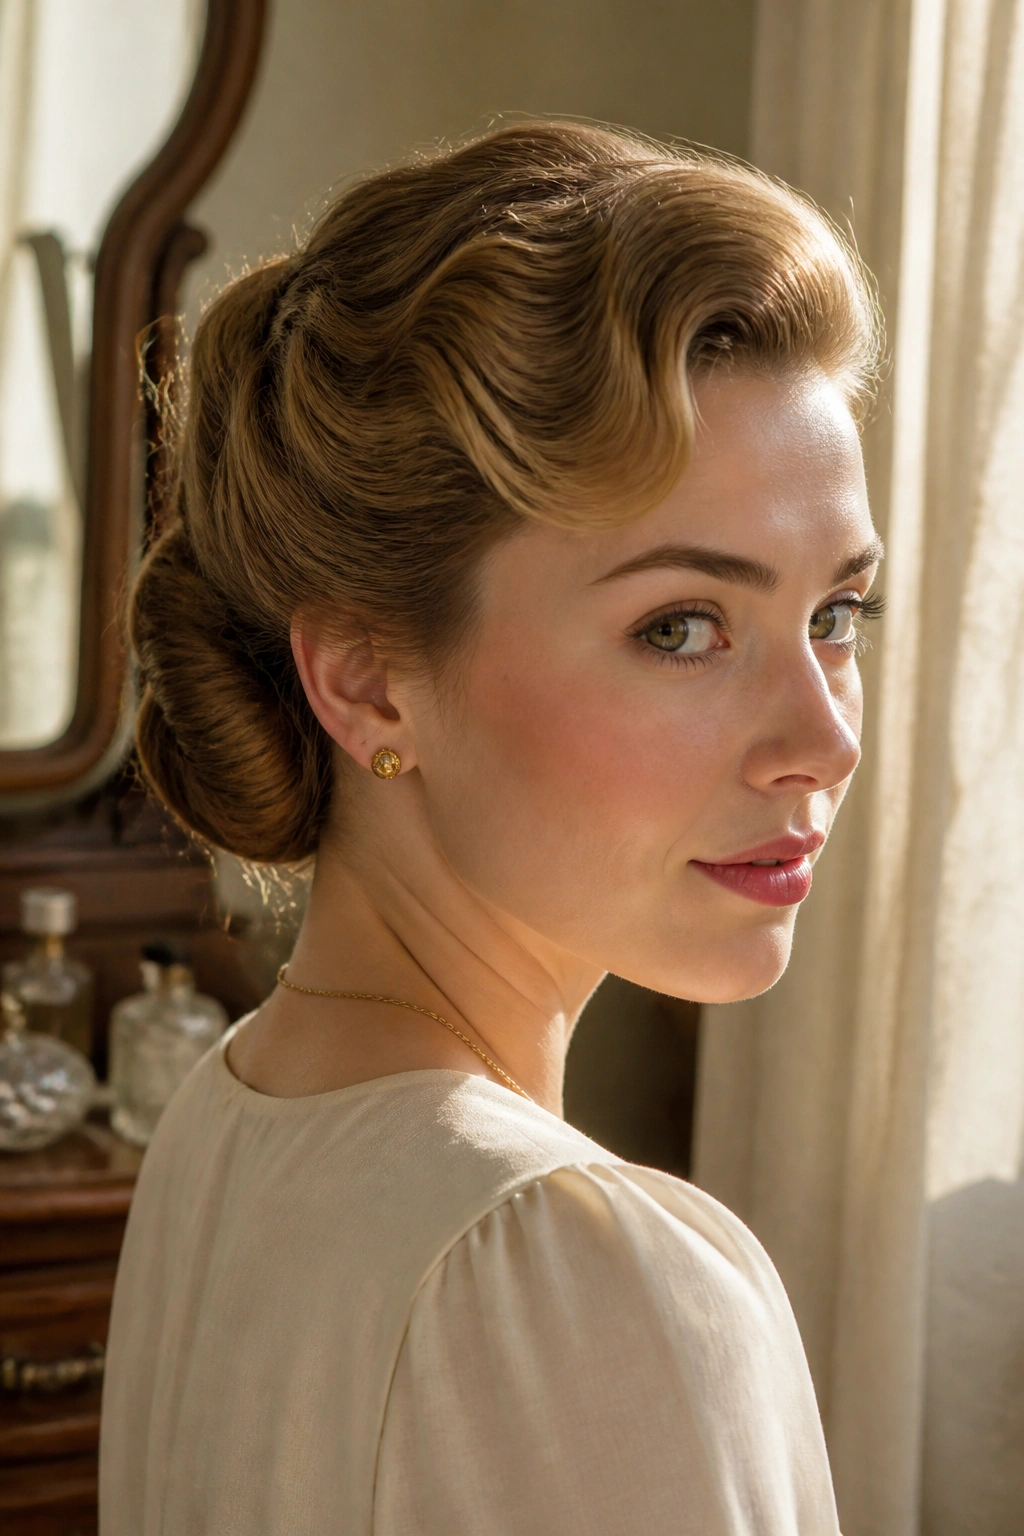
A Gibson tuck is one of those styles that looks complicated until you actually do it. Then it makes sense fast. The hair rolls upward and inward at the nape, leaving the top smooth and the length hidden in a soft fold.
Wavy hair helps more than people expect. The texture gives the tuck a little grip, so the roll does not slide around as much as it does on very silky hair. That means fewer pins and less frustration. Good news. You still need enough control at the front, though, because a loose top can undo the whole polished effect.
Start with a gentle side wave or a brushed-back front section. Gather the length low, fold the ends upward into the tuck, and pin across the roll with U-pins or long bobby pins. A light mist of hairspray before the final pinning step can help the tuck hold, especially if your hair has a slippery finish.
The Gibson tuck suits formal settings, windy weather, and any day you want the neck to look clean and long. It has a quiet kind of elegance. Not flashy. Just well put together.
12. Retro Ponytail with a Rolled Crown
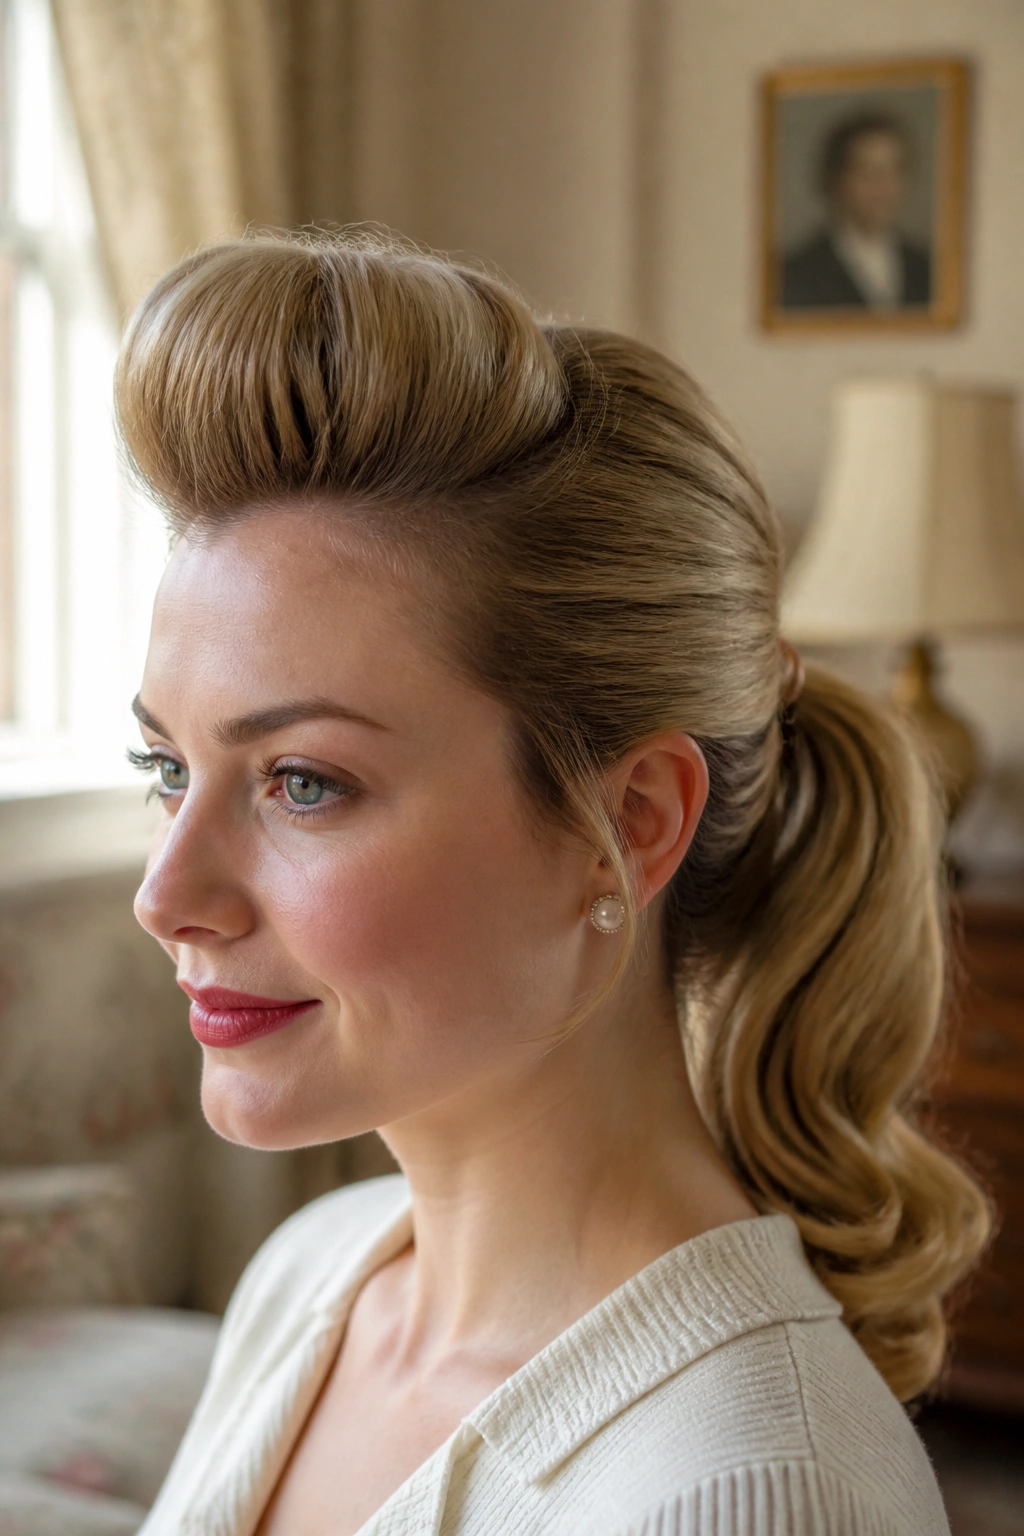
Unlike a sleek ponytail, this version wants lift at the crown and a curled tail. That small change makes it feel retro instead of athletic, which is the whole point.
The crown should have a soft bump, not a hard tease. Wavy hair gives you natural fullness there, so you usually only need a little backcombing and a smooth top layer. Tie the ponytail low or mid-height, depending on how much drama you want, then wrap a section of hair around the elastic for a cleaner finish.
The tail can stay loose and wavy or be curled under in a smooth arc. A ribbon works well here if you want the style to lean more playful than polished. So does a simple barrette. Keep the accessory small enough that it does not fight the shape.
This is one of the easiest looks on the list for busy mornings. It still has that vintage curve, but it does not require a full set or a deep brush-out. If your hair starts to frizz at the ends, smooth just the last few inches with a curling iron and leave the rest alone.
13. Bettie Page Bangs and Loose Waves
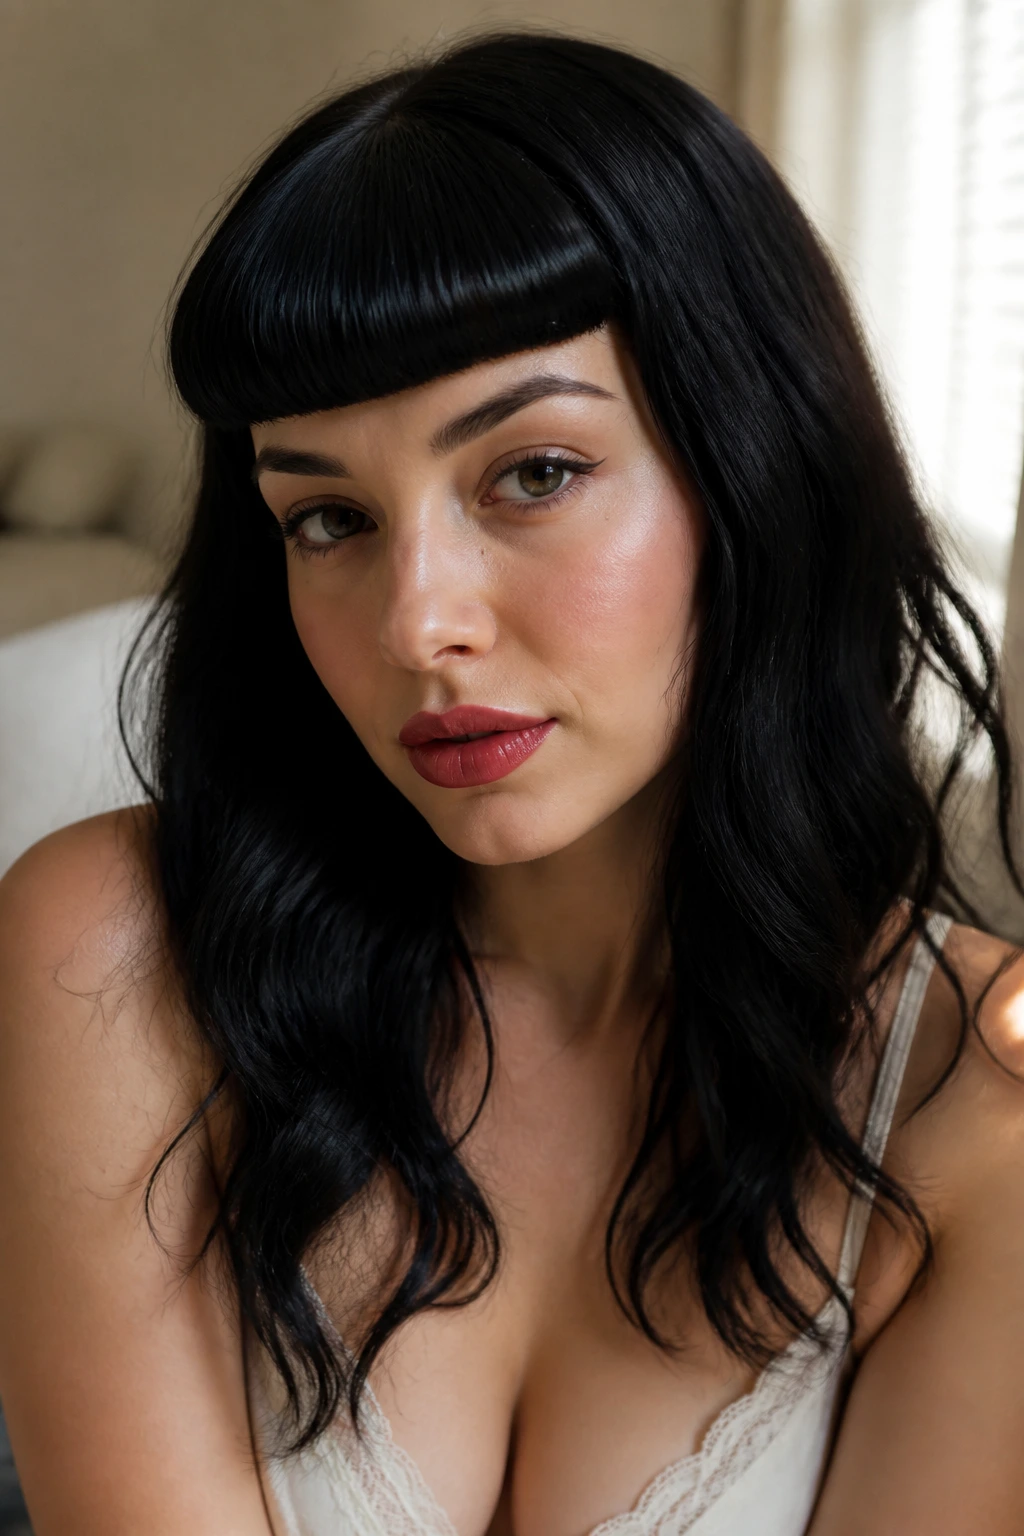
The Balance to Aim For
Bettie Page bangs are bold, and they need a softer shape underneath so the whole style doesn’t turn cartoonish. That contrast is what makes it work. The fringe sits blunt and clean, while the lengths below can fall into loose, airy waves.
If you already have bangs, this is a straightforward vintage look. If you do not, you can still borrow the idea by pinning the front into a short faux fringe shape and letting the rest of the hair stay wavy. It is a neat trick, and it keeps the style from feeling too exact.
- Blow-dry the bangs first with a small round brush.
- Keep the fringe smooth and slightly curved under.
- Use a 1-inch iron on the lengths, curling away from the face.
- Finish with a touch of setting spray at the fringe only, not the whole head.
Bangs need attention, period. They flatten faster than the rest of the style, and if they separate, the whole look changes. I would not call this the easiest option, but it is one of the most recognizable. The payoff is strong if you like a little edge with your vintage hair.
14. Low Chignon with Wave-Swept Front
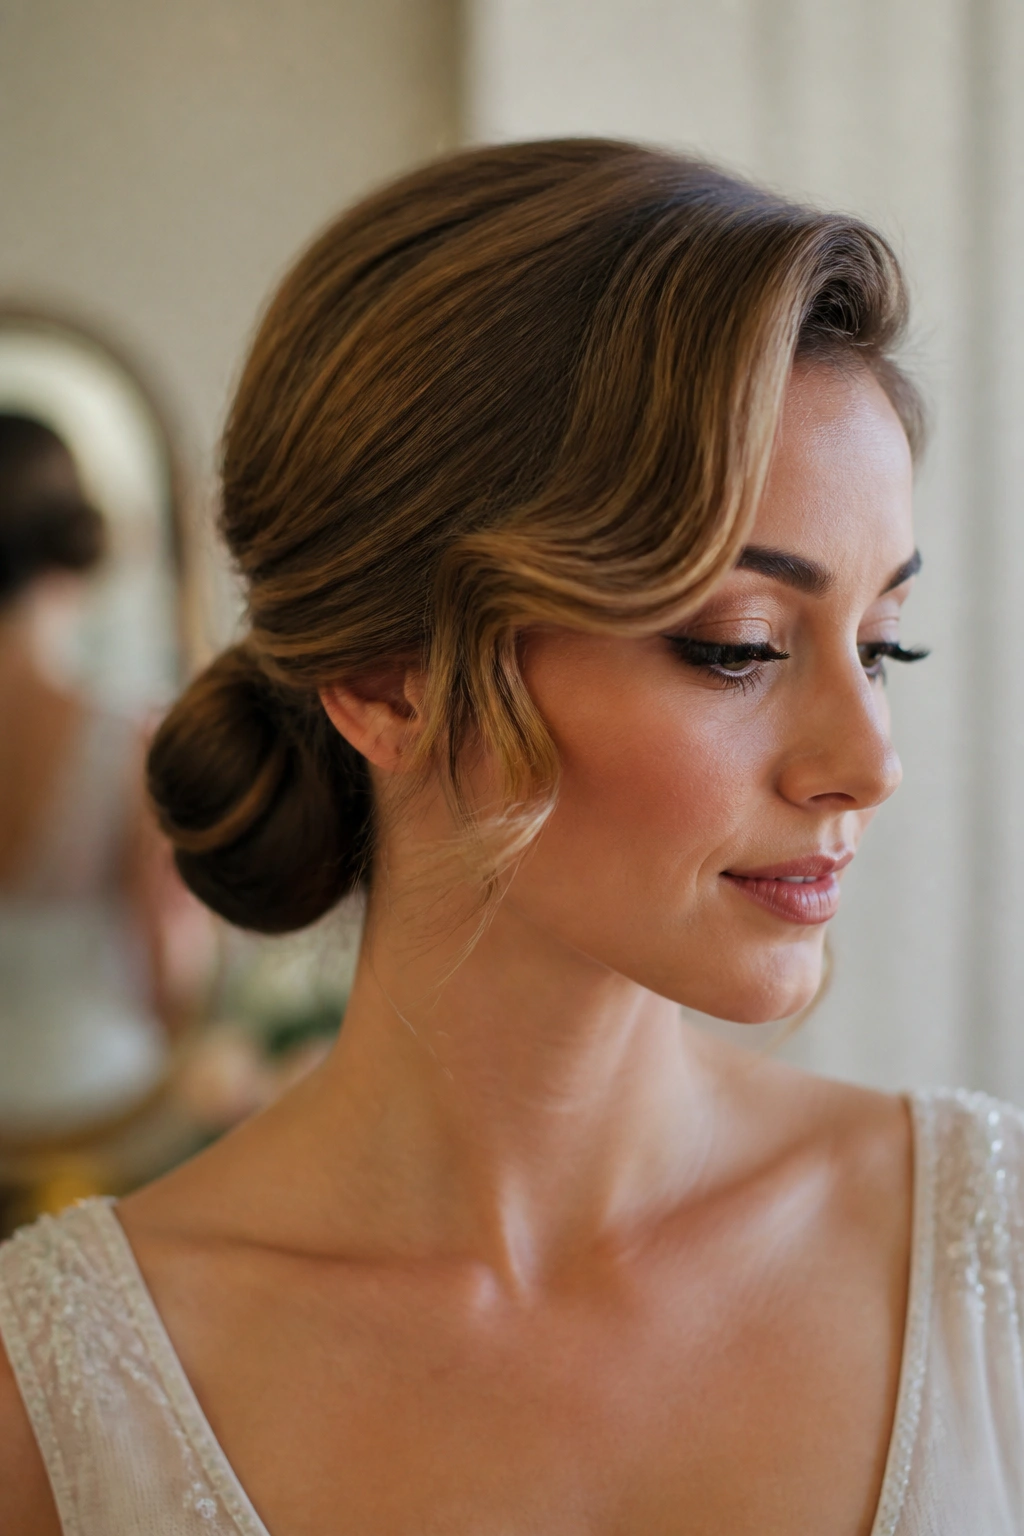
A low chignon is the quietest look here, but it may be the one that survives the longest. It sits low at the nape, which means it stays neat when you move, and the wave-swept front keeps it from feeling too severe.
The front wave matters more than the bun itself. A side sweep, a soft roll, or a curved piece that crosses the forehead gives the style its vintage character. Without that detail, the chignon can drift into plain formal territory, and plain formal is not the same thing at all.
For wavy hair, the texture helps the bun grip and gives the front pieces a little lift. Twist the length into a compact knot, pin from multiple directions, and hide the ends under the roll. If the bun feels loose, tuck a small hairnet over it before adding the final pins. That old trick still works.
This style is excellent for weddings, dinners, and any event where you want your neck and shoulders to stay visible. It also plays nicely with earrings. Big earrings, even. The bun stays quiet while the rest of the outfit gets to speak.
15. Brushed-Out Barrel Waves with a Side Clip
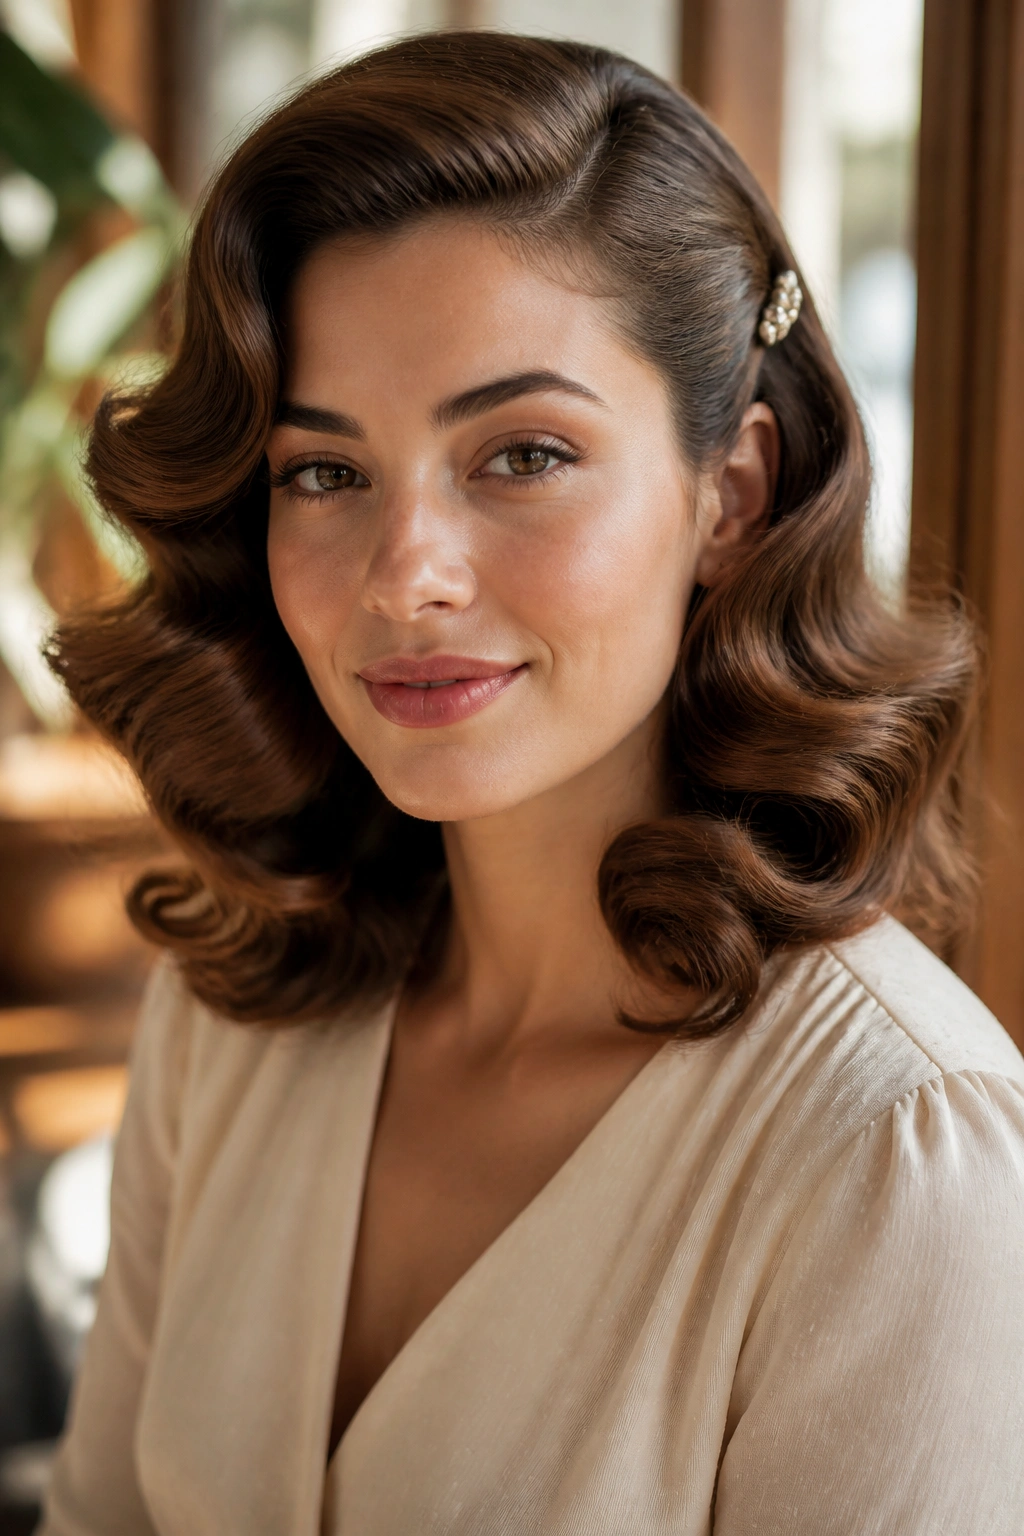
What if you want one vintage style that works for errands, dinner, and a camera flash? Brushed-out barrel waves are hard to beat.
The shape is softer than Hollywood waves and less structured than finger waves, which makes it a good fit for wavy hair that likes a little freedom. Set the hair in large sections, let everything cool completely, then brush through with a boar-bristle brush until the waves merge into one smooth pattern. A side clip at the temple keeps the front controlled without flattening the whole look.
This is the style I reach for when the goal is polish, not perfection. It forgives a slightly uneven curl set. It forgives a little frizz at the ends. It even forgives a part that is not quite straight, which is more common than people admit.
Use medium sections if your hair is thick, and larger sections if your wave pattern is already strong. The brush-out should feel soft under your hand, not puffy. If the ends start to separate, stop brushing and smooth them with your fingers instead. That tiny restraint keeps the shape from breaking apart.
Leave a little movement in the waves. That softness is what keeps the whole style from looking stiff, and it is exactly why vintage hairstyles for wavy hair can feel so wearable when they are done well.
