



Finger wave hairstyles for Black women have a specific kind of pull: they can read as sharp, romantic, formal, or a little bit defiant, sometimes all in the same look. A clean wave pattern hugs the head in a way loose curls never will, and that’s exactly why the style keeps coming back whenever someone wants polish with personality.
The shape matters more than the length. A good finger wave is about a clean part, a controlled ridge, and enough shine to show the curve without turning the hair into a greasy sheet. On Black hair, that usually means the mold has to be set while the hair is still pliable, because once it dries in the wrong direction, the comb starts fighting you.
That’s the part a lot of people miss. Finger waves are not magic; they’re structure. The wave has to be placed, pinned, dried, wrapped, and then protected, or the whole thing softens into fluff before you even leave the house. A soft wave can look gorgeous, but a weak one looks unfinished fast.
The 20 styles below range from cropped and crisp to bridal, themed, and slightly dramatic, with enough variety that you can find one for a photoshoot, a formal night out, or a cut that just needs a better shape.
1. Deep Side-Part Finger Waves
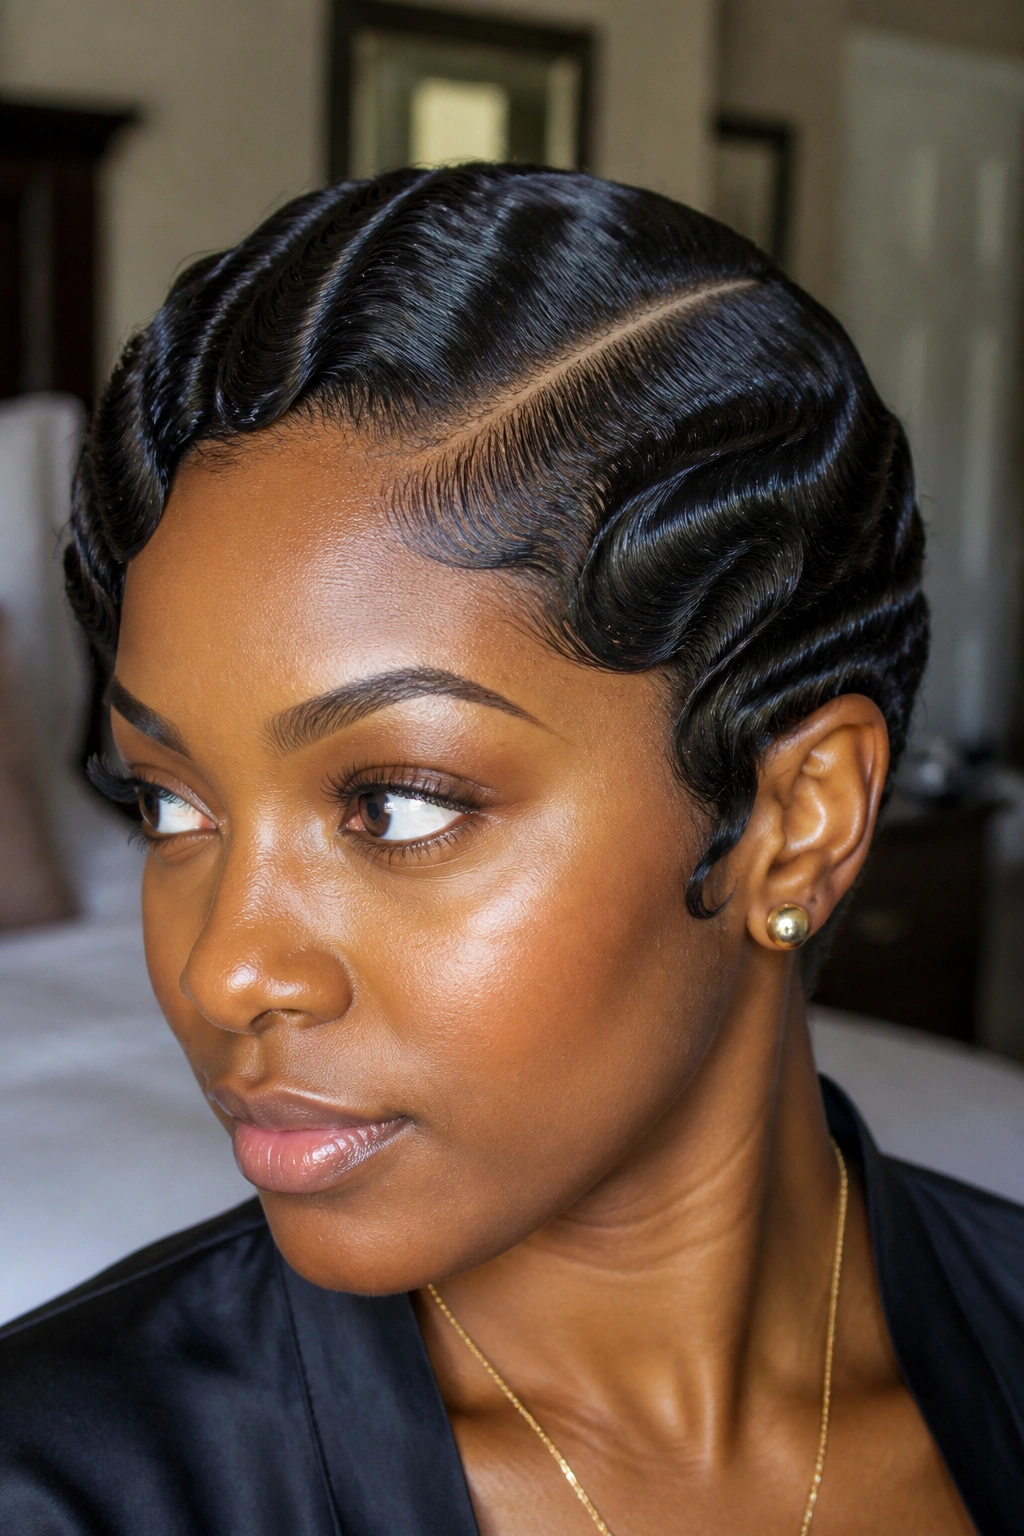
A deep side part is the cleanest place to start if you want finger waves that feel classic without looking stiff. It gives the face a clear line right away, and that line does a lot of work before the first wave even shows.
Why the Side Part Carries the Look
The part opens one side of the face and lets the wave pattern sweep across the head in a way that feels deliberate. I like this version on Black women with strong brows, sharp cheekbones, or a cut that needs a little drama without extra height.
A deep side part also makes the shine look better because the light has a clear path to follow across each ridge. If the part is crooked or fuzzy, the whole style loses its edge. That sounds picky, and it is. This style rewards fussiness.
- Works best with short to medium-length hair that can lay close to the scalp
- Looks clean with bold earrings, a red lip, or a structured dress
- Holds shape better when the part is combed in before the wave pattern starts
- Needs a fine-tooth comb, firm-hold mousse, and a scarf for setting
Best move: press the part first, then form the waves. If you build the waves and try to fix the part later, the pattern usually gets sloppy.
2. Short Cropped Finger Waves
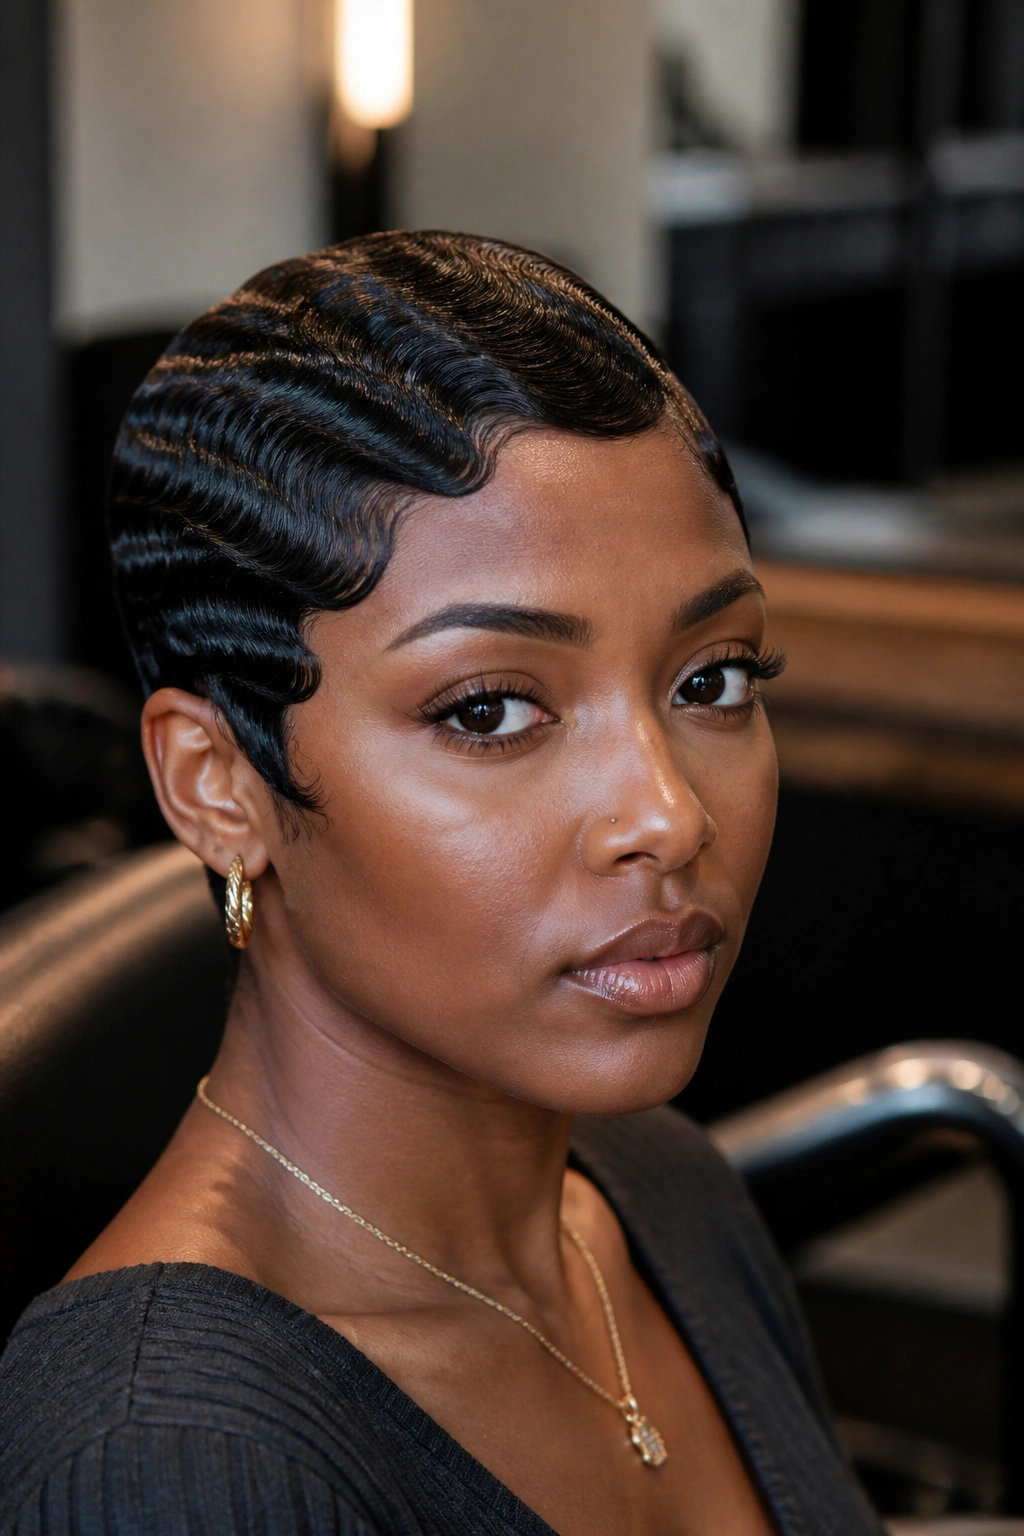
Short hair is where finger waves look sharpest. There’s no extra length to hide behind, so every curve shows up in a clean, compact way that feels almost architectural.
A cropped cut also lets the wave pattern sit closer to the scalp, which gives you that crisp 1920s-to-1940s feel without needing a lot of hair. If the sides are tightly tapered, the top can still carry the wave, but the shape has to be intentional. No loose ends. No wandering pieces.
I like this style most when the cut is already neat around the ears and neckline. If the barber or stylist leaves the back too boxy, the wave line can look unfinished. A soft taper helps the eye move from the wave into the nape without stopping hard.
Short crops are also easier to refresh. A light mist of water, a little foam, and a good wrap usually bring the pattern back to life. Don’t flood the hair. That’s where people get into trouble. Too much product turns the waves gummy instead of glossy.
3. Finger Waves with a Tapered Nape
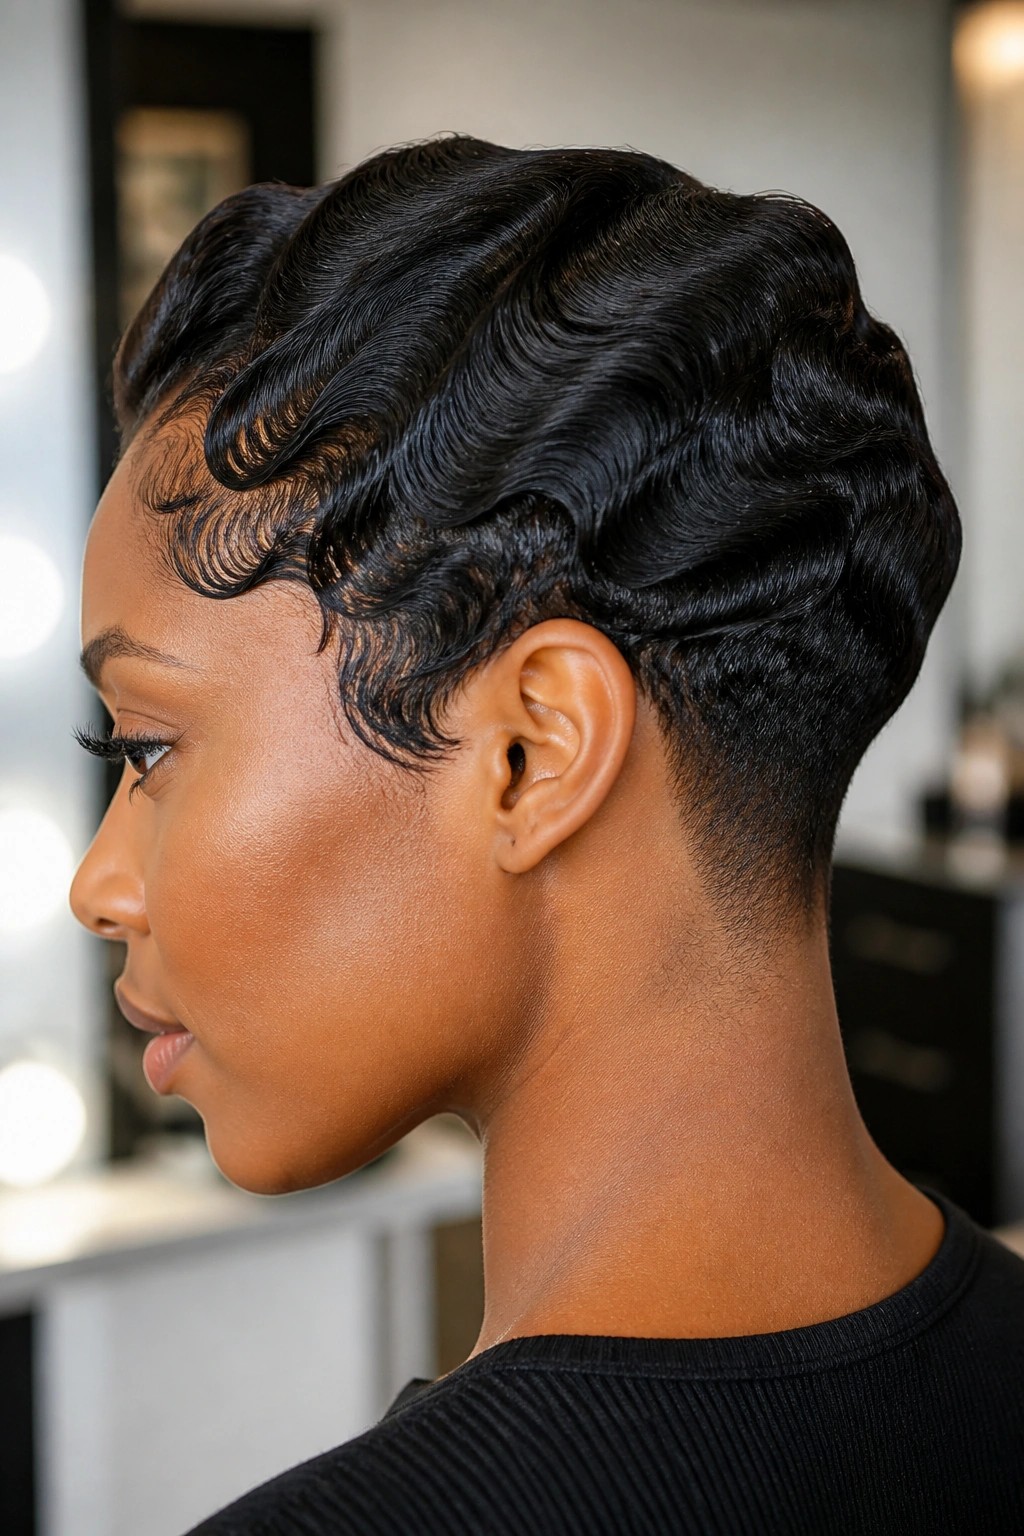
Picture polished waves at the temples and a tapered nape that stays tight and clean at the back. That contrast is the whole point here.
This style works because it gives you two different textures in one silhouette: smooth ridges up front and a neat fade or taper behind the ear. The result feels modern even though the wave pattern itself is vintage. It’s a smart choice if you want earrings to show and don’t want the back of your head fighting the front.
What Makes the Shape Work
The nape should be trimmed short enough to stay tidy but not so tight that it looks disconnected from the rest of the cut. A soft taper is easier to live with than a hard, blunt line. The transition matters.
A little shine spray goes a long way here. Too much and the nape looks oily; too little and the wave pattern reads flat. The sweet spot is a light gloss, not a wet finish.
- Best on pixie cuts and short bobs with a clean neckline
- Keeps the look neat for several days if you wrap it nightly
- Needs regular edge cleanup if the taper is very short
- Looks especially good with hoop earrings or a high neckline
4. Old-Hollywood S-Curve Waves
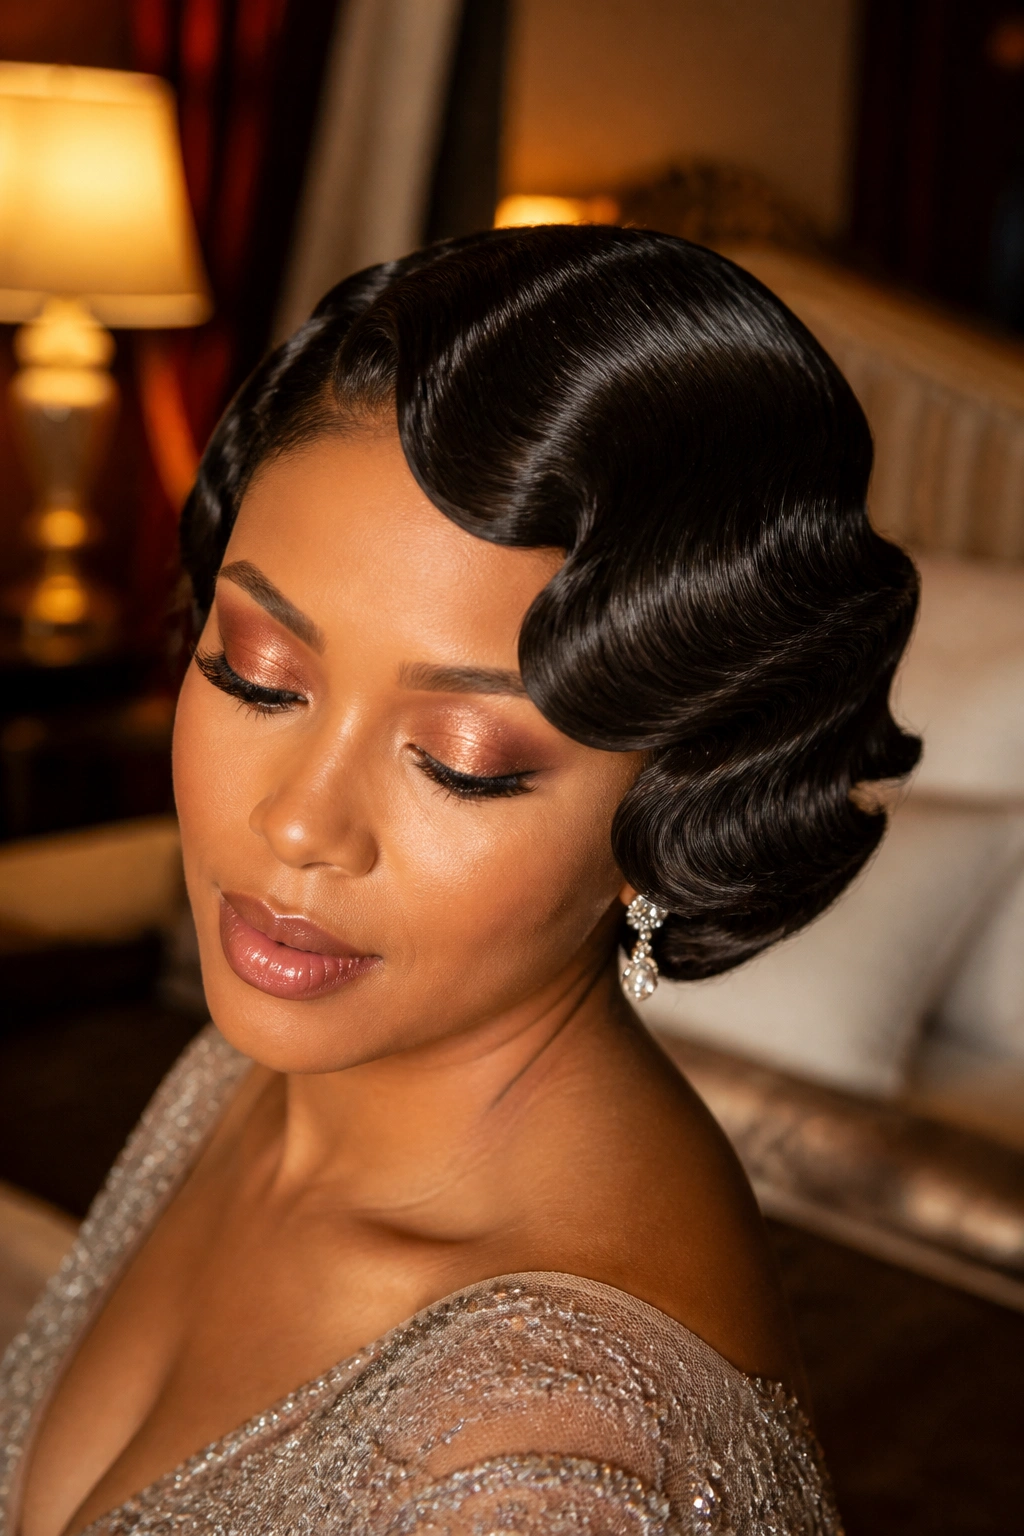
Why do some finger waves feel softer than others? Usually because the curve is wider and less compressed. The ridges still sit close to the scalp, but the S-shape has a gentler flow.
This version leans into the glamour side of finger waves. It works well when the outfit already has shape and you want the hair to feel smoother, almost like satin pulled across the head. On Black women, the result can be gorgeous on relaxed, pressed, or well-stretched natural hair, as long as the set is controlled.
What Makes the Curve Softer
The wave is drawn with a slightly larger arc, and the combing is done with a light hand. If you press too hard, the wave turns flat and stiff. If you press too softly, it falls apart before it dries. That middle space is where the look lives.
A medium-hold foam wrap lotion or setting mousse helps here because it gives slip without making the hair crunchy. I like this style for formal events, opera nights, or any outfit that already has a lot of detail at the neckline.
The whole look is smoother than it is sharp. That’s the appeal.
5. Finger Waves into a Low Bun
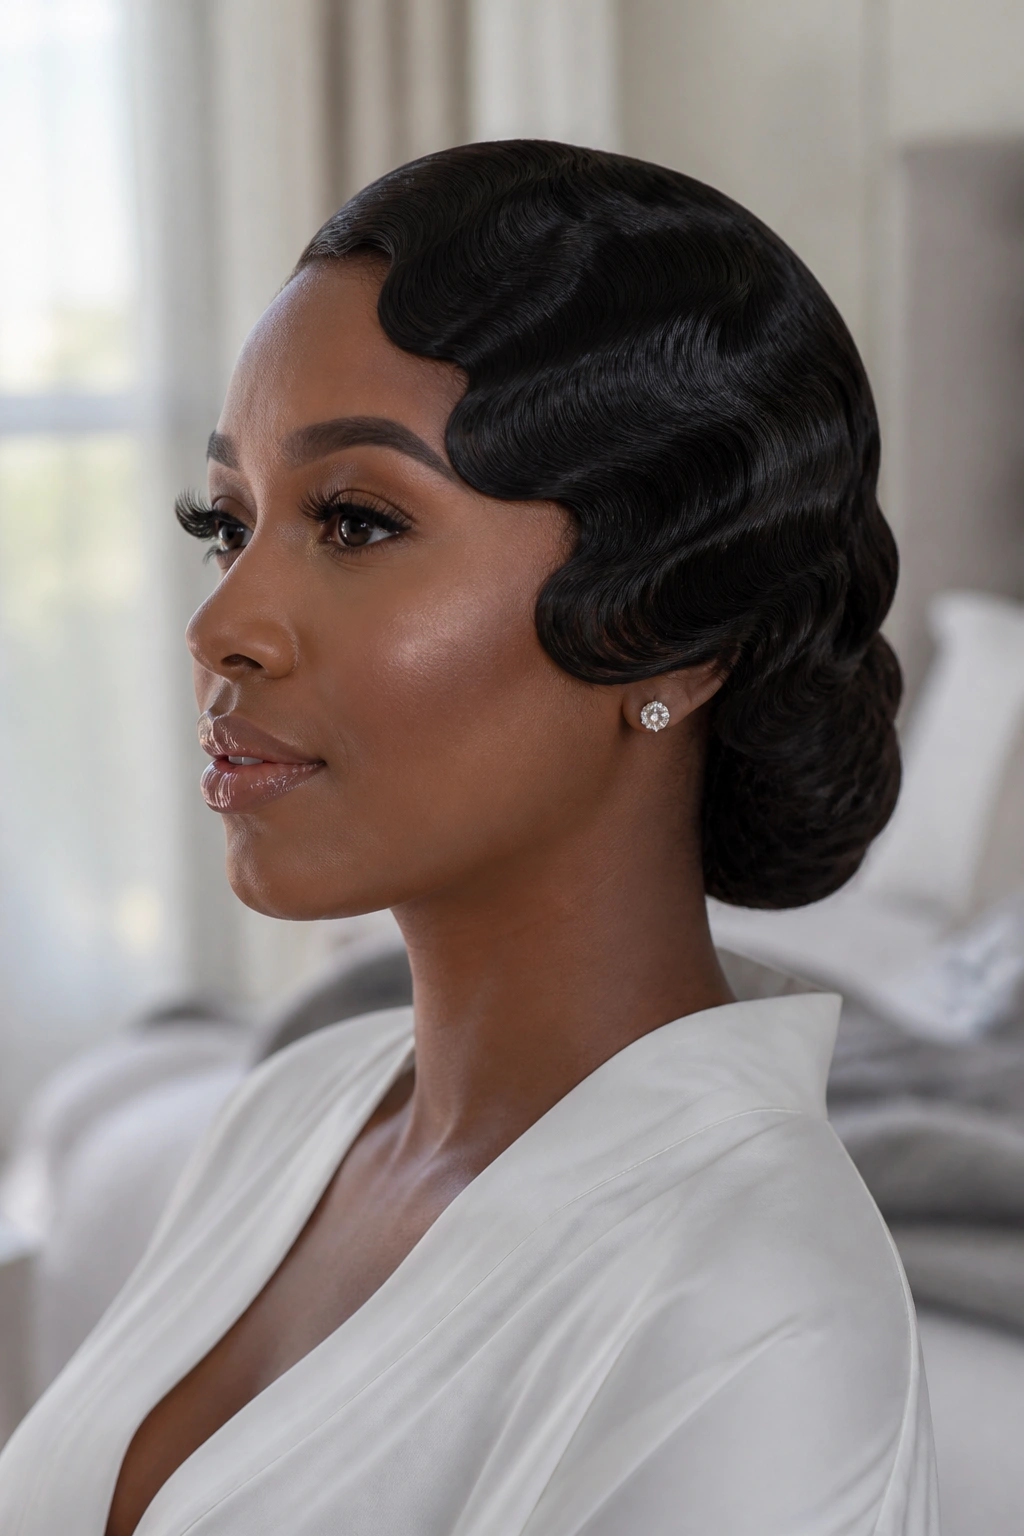
Finger waves do not have to stop at the hairline. They can feed right into a low bun and look even better for it.
This is one of my favorite formal versions because it solves a common problem: how to keep the front polished without letting the back feel plain. The waves sculpt the top and sides, then the length gets tucked into a low bun, chignon, or wrapped knot at the nape. It feels finished from every angle.
The trick is to keep the front wave pattern tight enough that it doesn’t puff up once the bun is pinned. You want the front to stay smooth while the back sits softly tucked. A few long bobby pins, a few hidden U-pins, and a net if the hair is thick — that’s usually enough.
This style is especially strong for weddings, galas, and black-tie events because it survives movement better than loose waves. You can dance in it. You can hug people in it. That matters more than people admit.
6. Wet-Look Finger Waves on Natural Hair
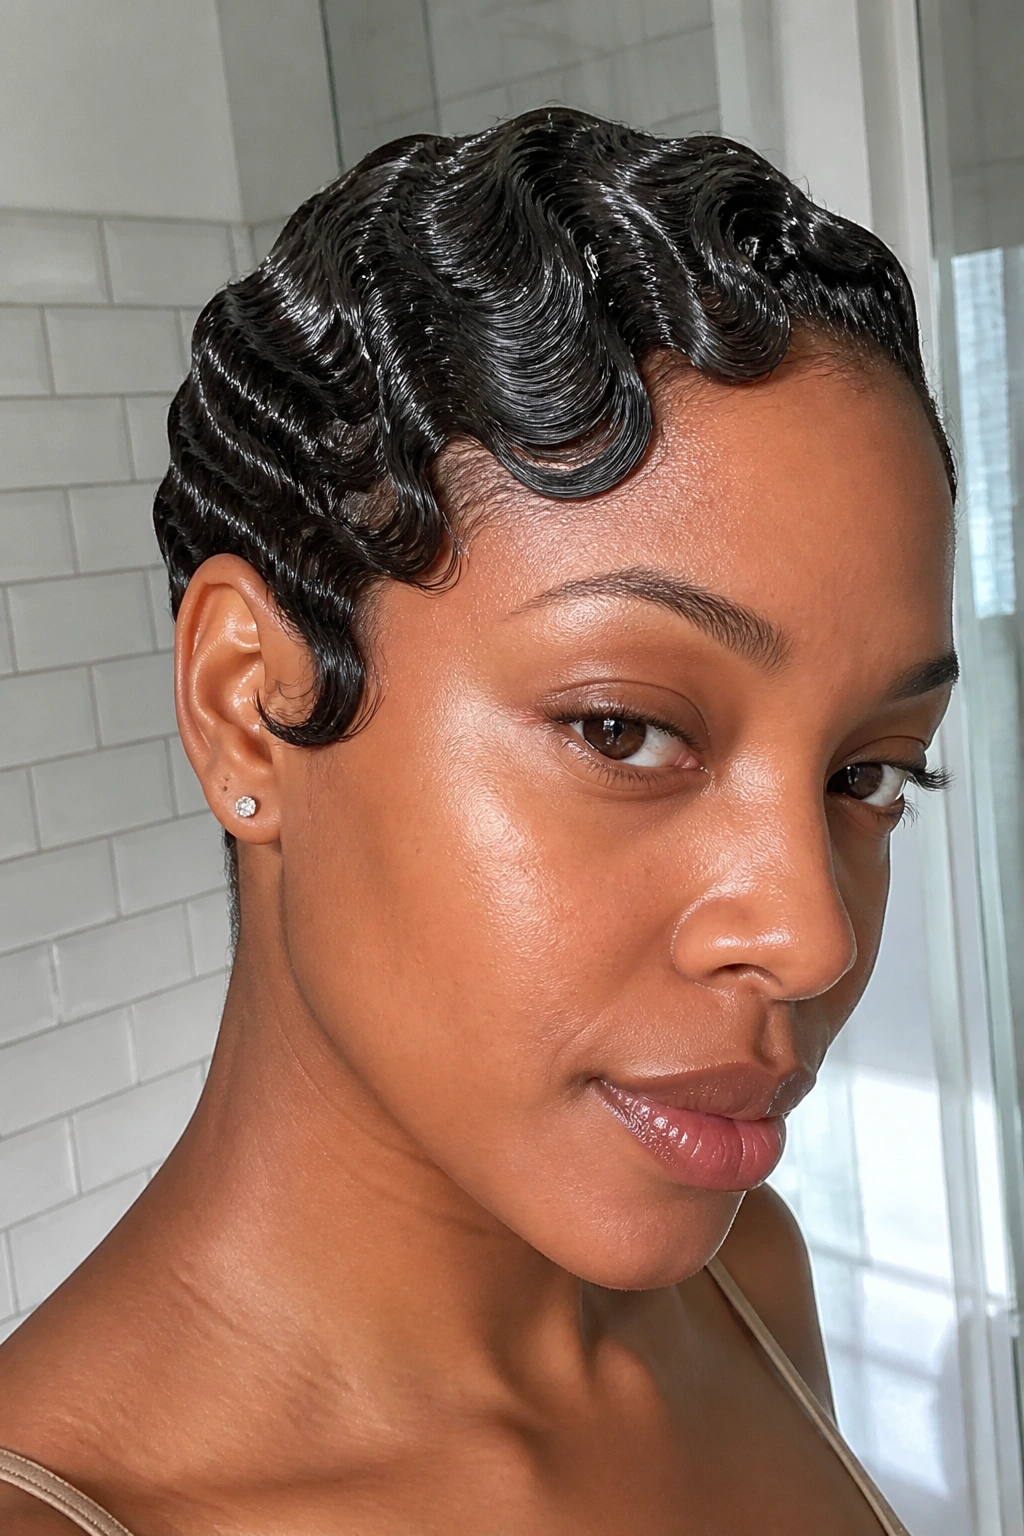
The best wet-look set should feel cool, tacky, and a little stubborn under your fingertips. Not greasy. Not dry. Stubborn in the good way.
On natural hair, this style can be stunning because the gloss makes the ridges stand out, but it needs discipline. The hair usually has to be stretched first, even if only a little, or the curl pattern underneath starts pushing back against the wave. If your hair is dense or tightly coiled, don’t rush the mold.
Use a firm-hold gel or styling custard on a damp base, then follow with a mousse that keeps the pattern flexible while it sets. If the product is too heavy, the hair can flake once it dries. If it’s too light, the waves collapse. Annoying, yes. Real, too.
- Start with damp, not dripping, hair
- Use a wave brush or fine comb to press the ridges
- Set under a hooded dryer if the hair is thick
- Wrap with a satin or silk scarf once the shape is in place
Watch for this: if the roots still feel soft after drying, the style was not set long enough. Give it more time before you unwrap.
7. Pixie Finger Waves with Tucked Sides
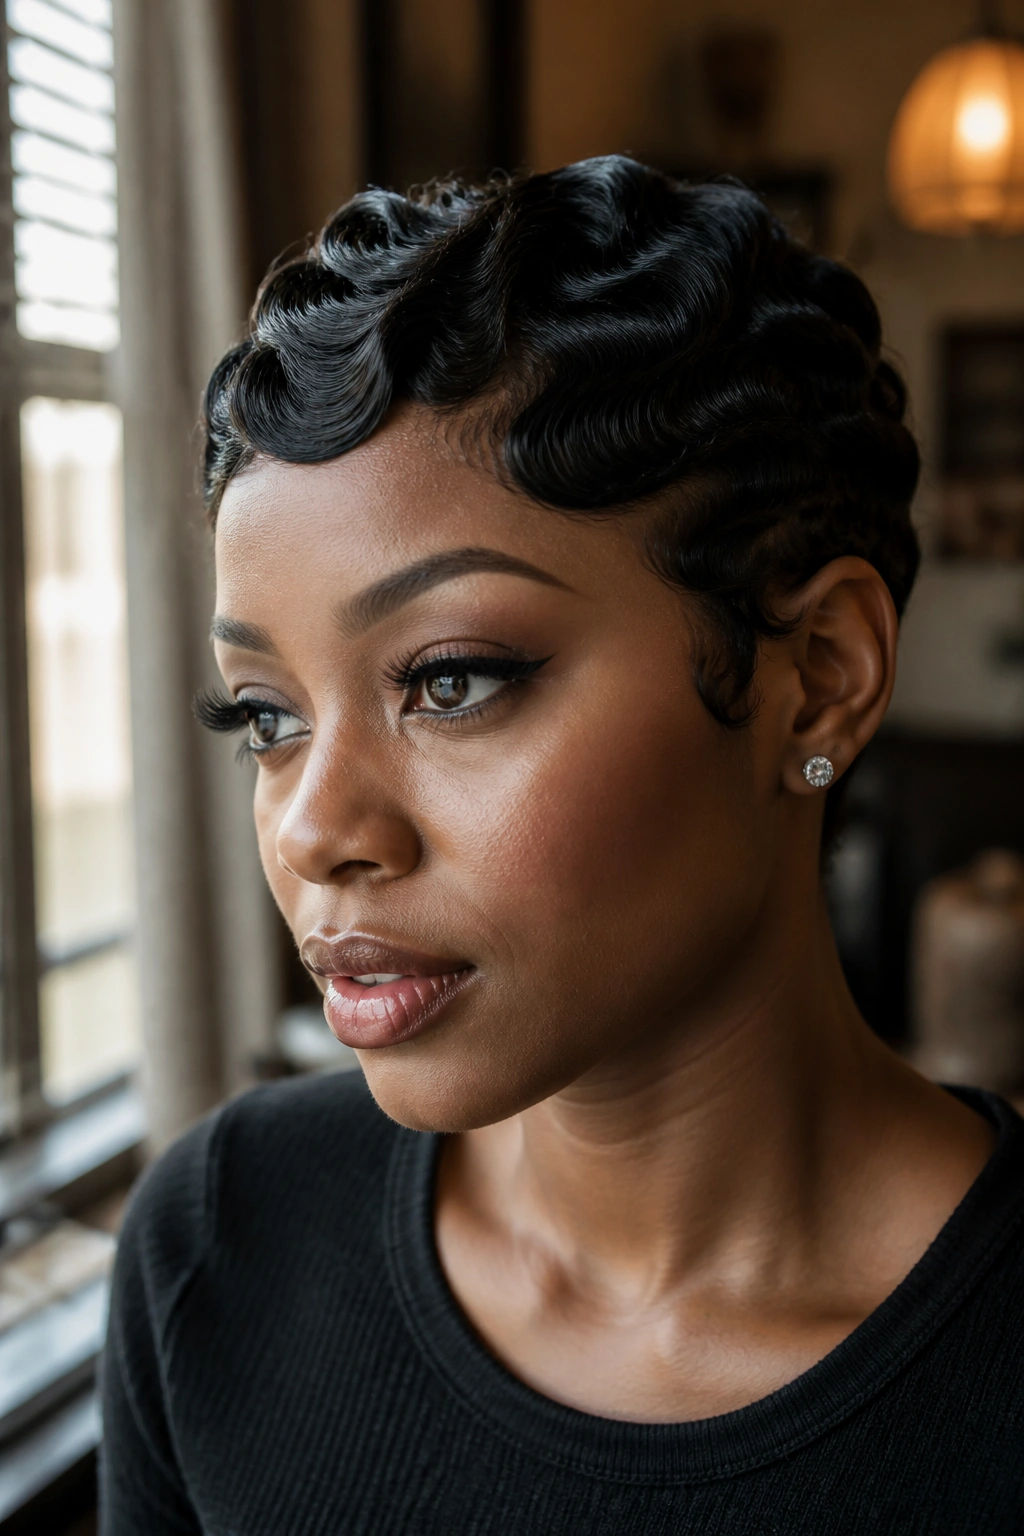
A pixie cut gives finger waves nowhere to hide. That sounds harsh, but it’s exactly why the style looks so clean.
With a pixie, the hair at the crown and temples is short enough to be molded into crisp little ridges, while the sides stay tucked close to the head. The result feels precise, almost like the haircut and the wave pattern were designed as one thing instead of two separate ideas.
What Makes the Shape Read Cleanly
The top has to have enough length to bend, even if it’s only an inch or two. If the hair is too short all over, the wave can turn into a soft ripple instead of a real finger wave. A little length at the crown helps the pattern show up.
I’d ask for a pixie that leaves room in the front and trims the sides neatly so the wave line doesn’t get crowded. The style gets better when the shape is already strong before product goes on.
This one is good for people who like sharp lines and low-maintenance cuts. Low-maintenance, though, does not mean lazy. You still need a wrap, and you still need to protect the shape at night.
8. Center-Part Finger Waves
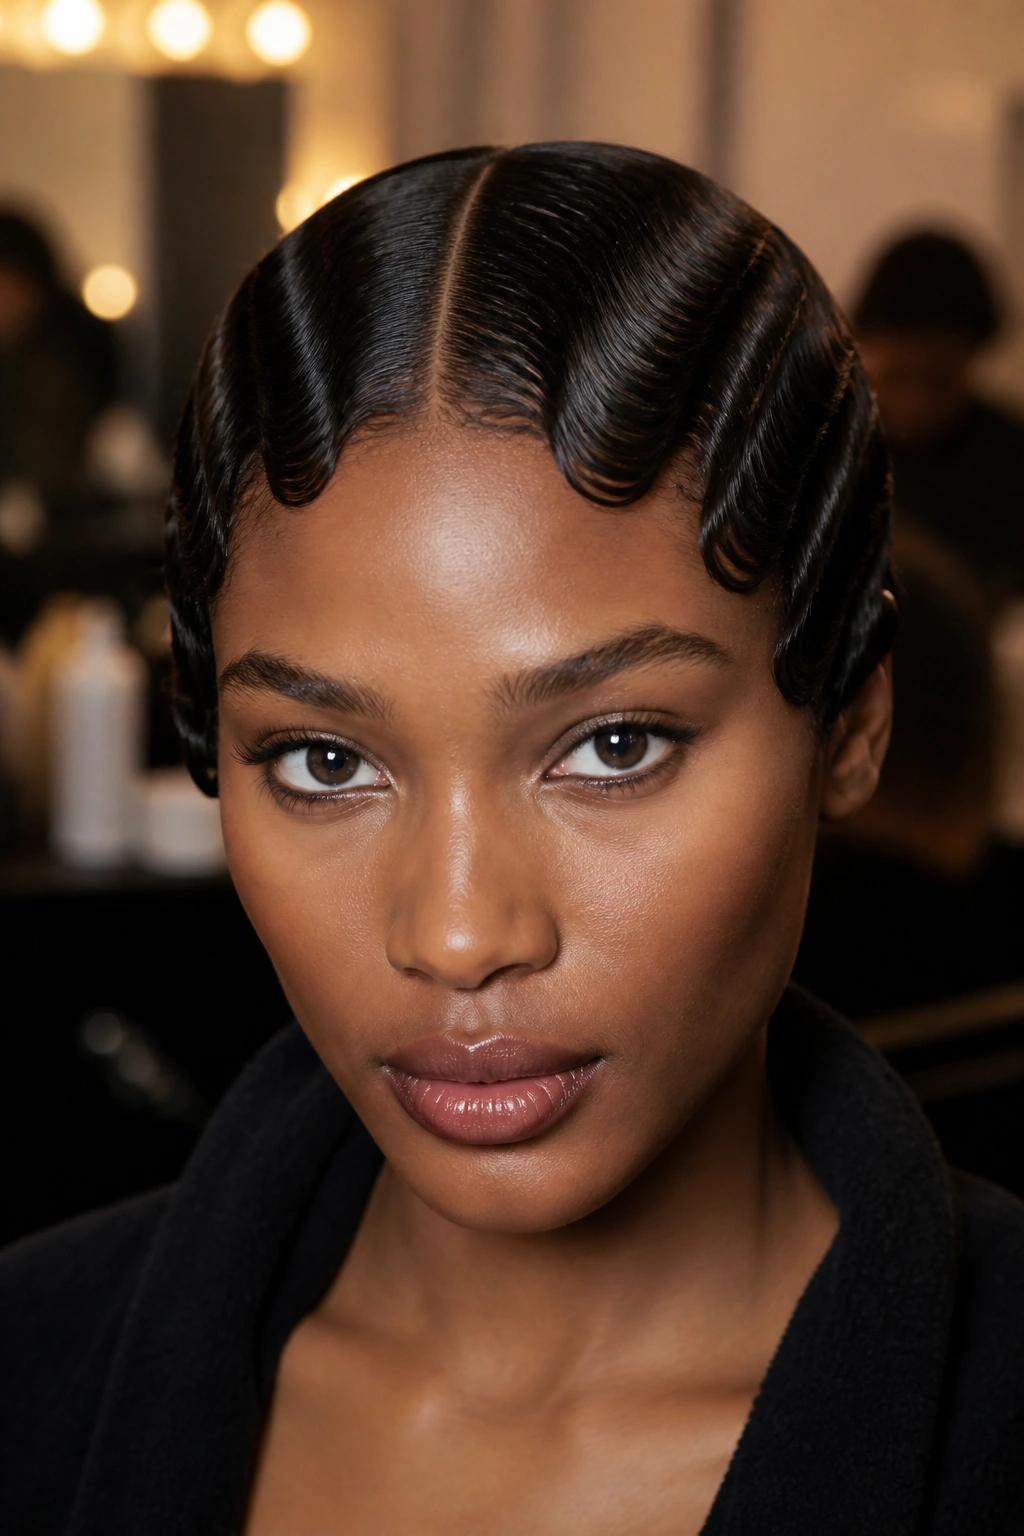
A center part changes the mood fast. The style stops feeling playful and starts feeling deliberate.
That symmetry works beautifully on some faces and less so on others. Oval faces can wear it without much fuss. Longer faces sometimes need a little more width through the temples so the style does not stretch the face even more. A rounded wave at the side helps balance that out.
A center-part finger wave can also make a look feel more formal without adding extra volume. That’s useful if you want the hair to stay close to the head and let the makeup or outfit do the louder talking. I reach for this version when the clothes have strong shoulders or a high neckline, because the center part keeps everything balanced.
The key is to keep the line crisp from forehead to crown. If the part wanders, the style loses its symmetry and starts looking accidental. Nobody wants accidental finger waves.
9. Finger Waves Under a Veil or Fascinator
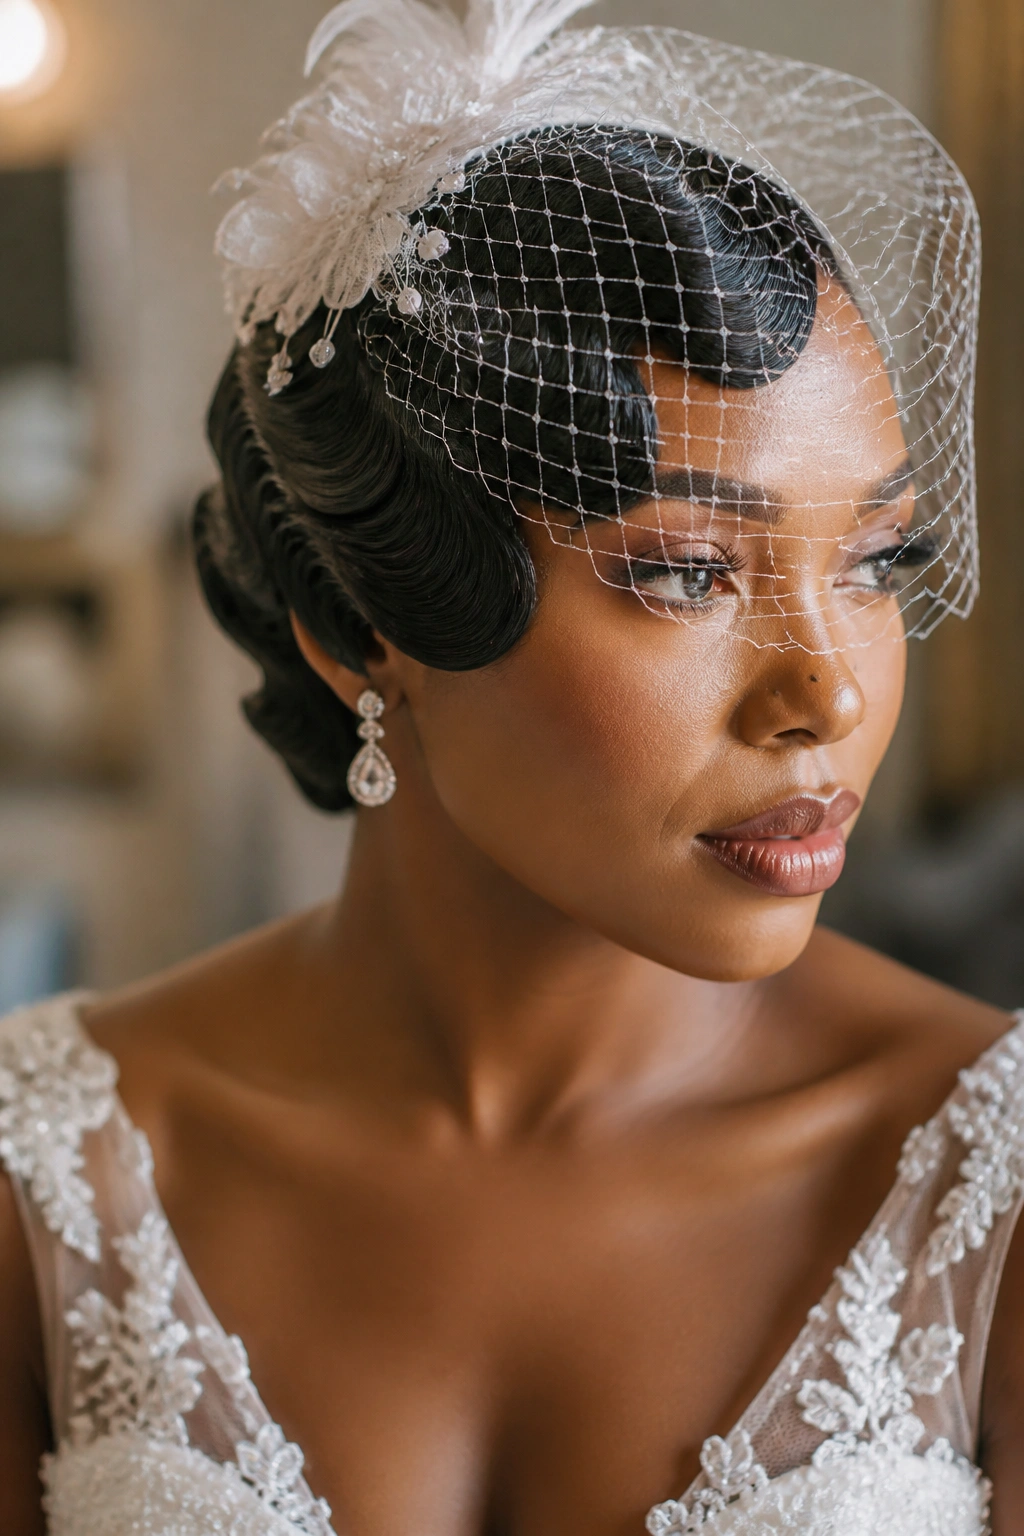
What happens when finger waves have to share the spotlight? They hold their own, as long as the accessory sits in the right place.
A veil or fascinator works best when it does not cover the whole wave pattern. You want enough of the ridges visible so the styling still reads as finger waves, not just a pinned-up base for a hat. The accessory should sit slightly off-center or a little higher on the head, depending on the shape.
Accessories That Play Nicely With Waves
- A birdcage veil pinned just behind the part
- A small fascinator placed above one temple
- A jeweled comb set into the side wave
- A net veil that skips over the crown instead of flattening it
The biggest mistake is placing the accessory after the hair has already been wrapped into the wrong shape. Pin the waves first, then test the accessory from the front and side. If the veil pulls the wave line down, move it.
This style is a strong choice for bridal looks, vintage parties, and themed shoots where you want the hair to look intentional under an extra layer.
10. Crown Roll Finger Waves
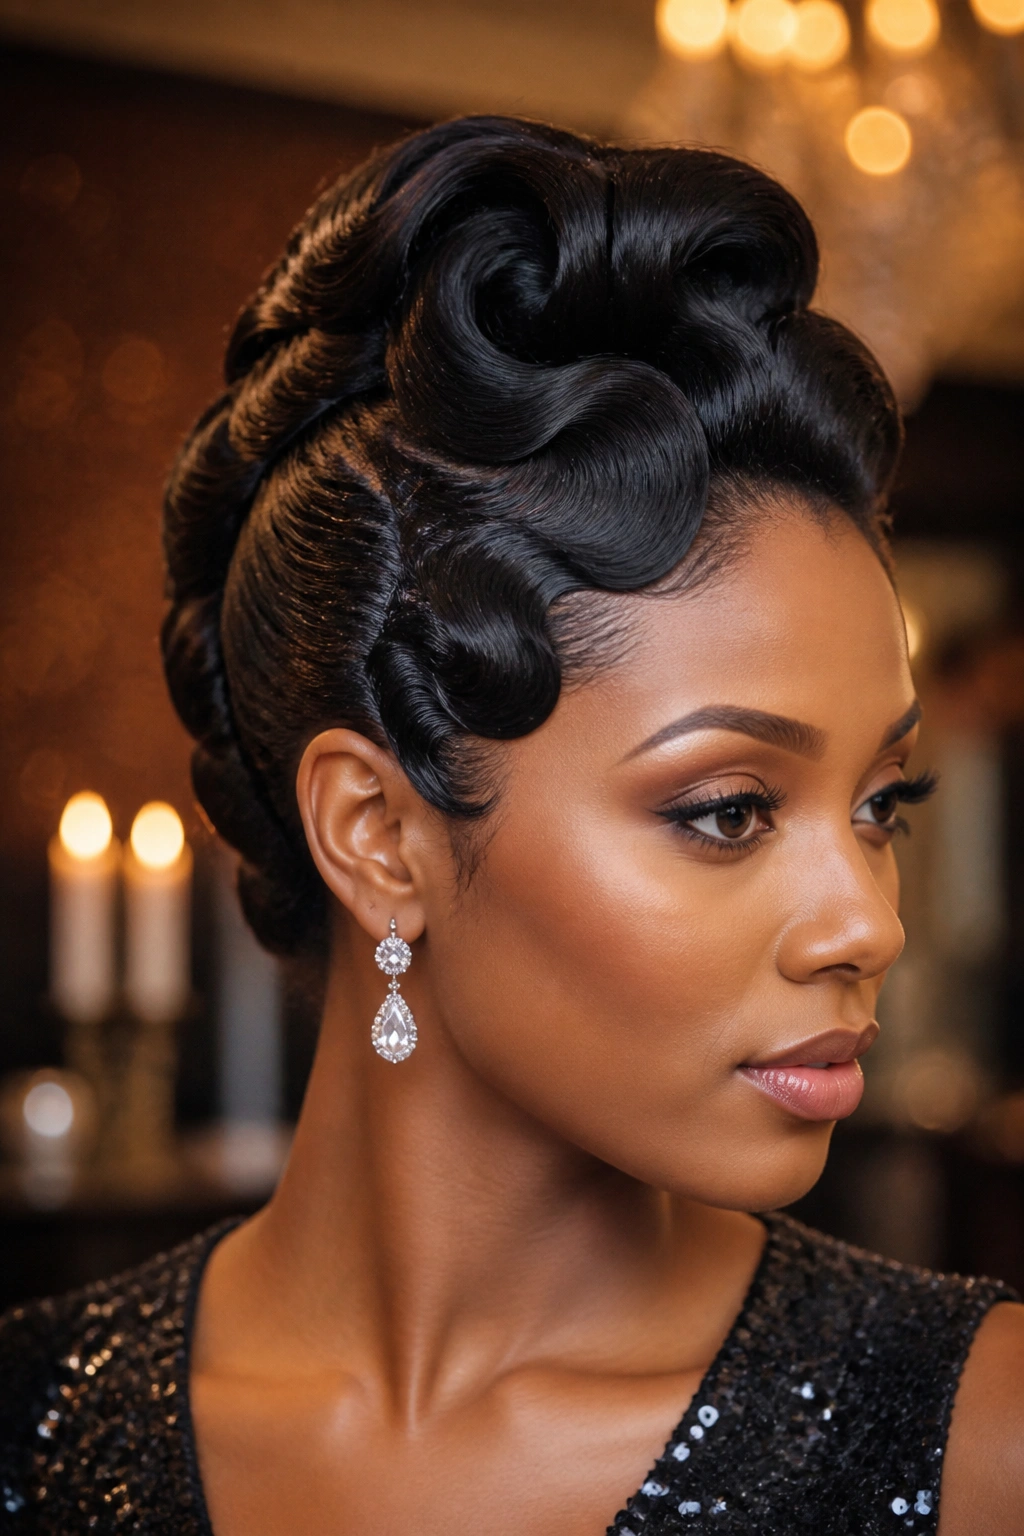
Unlike flat finger waves, a crown roll adds height right where the eye lands first. That tiny bit of lift changes everything.
The crown roll was built for drama, but not the messy kind. The front stays sleek, then the hair at the crown is shaped into a rolled ridge that gives the head a little more presence. On Black women with shorter cuts, this is a smart way to add shape without needing a lot of length.
When I Reach for This Version
I like crown rolls when the face needs a little vertical lift or when the outfit has a strong collar that could swallow a flat style. The roll creates a clear silhouette from the side, which is where a lot of hairstyles fall apart.
This style does take a steadier hand than a basic side wave. The roll has to sit even, and the transition into the rest of the wave pattern needs to look smooth instead of stacked. If the roll is too tight, it can look stiff. Too loose, and it sags by the end of the night.
It’s a good option for evening wear, especially if you want the hair to feel old-school without copying a costume version of the era.
11. Undercut Finger Waves
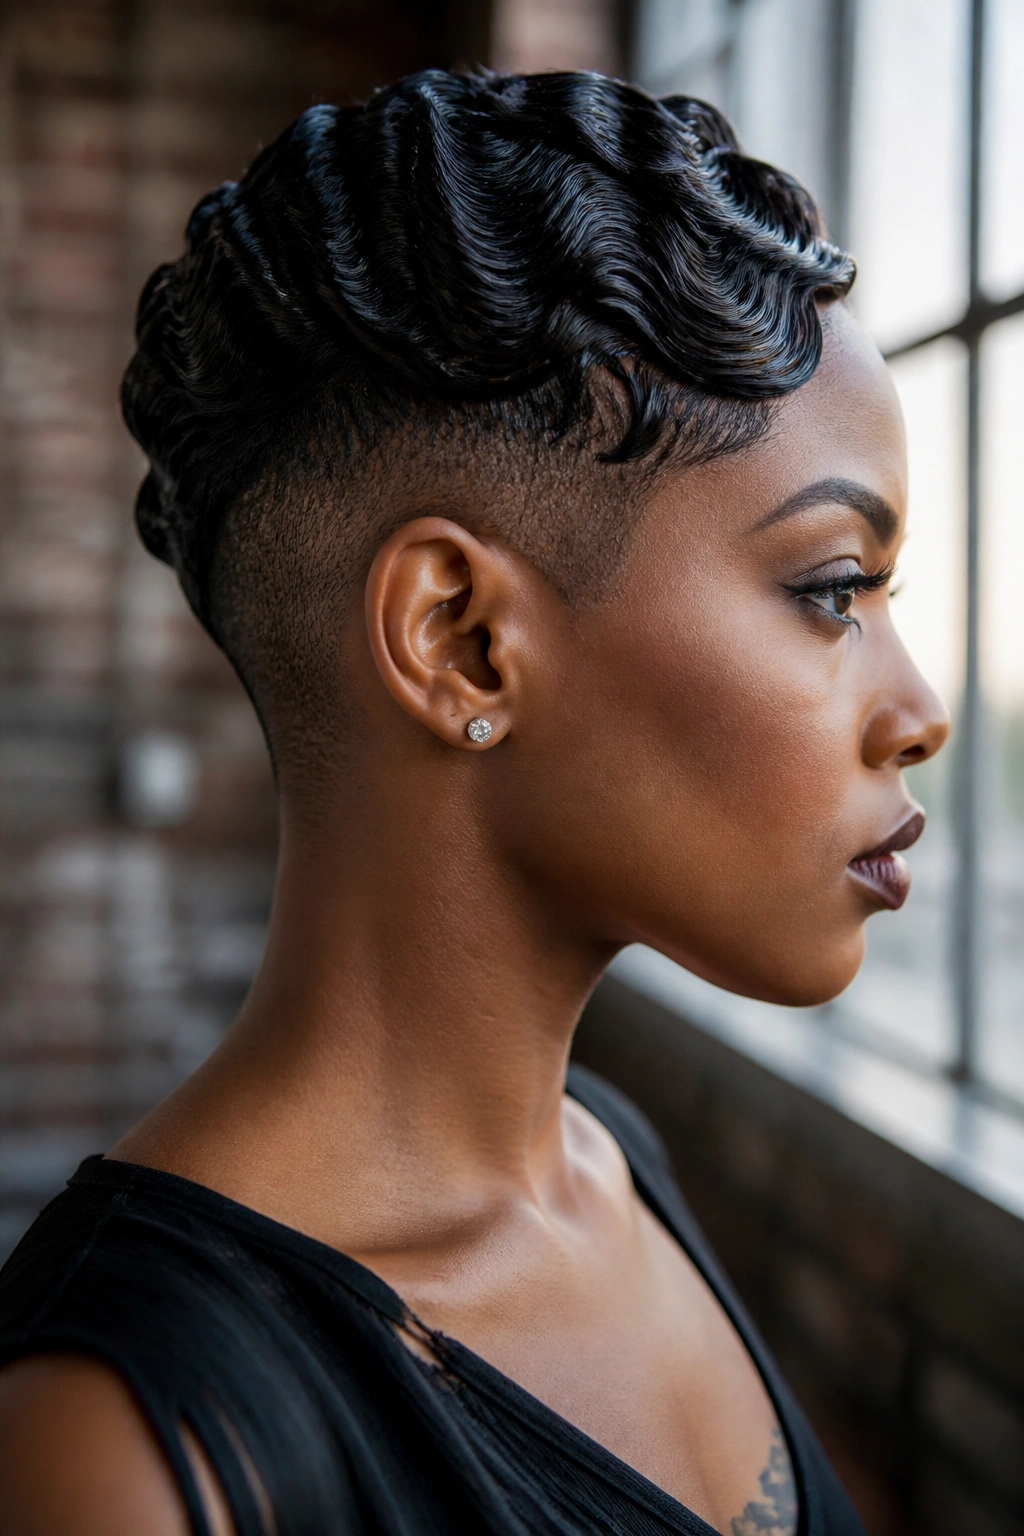
An undercut changes the whole conversation. Suddenly the wave is not just pretty; it has contrast.
That shaved or closely clipped section underneath gives the top waves a harder edge. The style becomes cleaner, sharper, and a little more unexpected. It’s one of the best choices if you want finger waves but do not want them to read as delicate or overly romantic.
The top section can stay glossy while the undercut remains neat and matte, or both can be polished depending on the finish you want. Either way, the contrast is the point. A soft wave line against a close clip makes the pattern stand out more than it would on a uniform cut.
- Best on clients who like strong shape around the sides
- Works well with side parts, swept-over fronts, or a compact crown ridge
- Needs regular clipper cleanup to keep the undercut sharp
- Looks best when the top has enough length to form a real wave, not a tiny bend
This style is not the quiet choice. That is part of the appeal.
12. Finger Waves into a Low Chignon
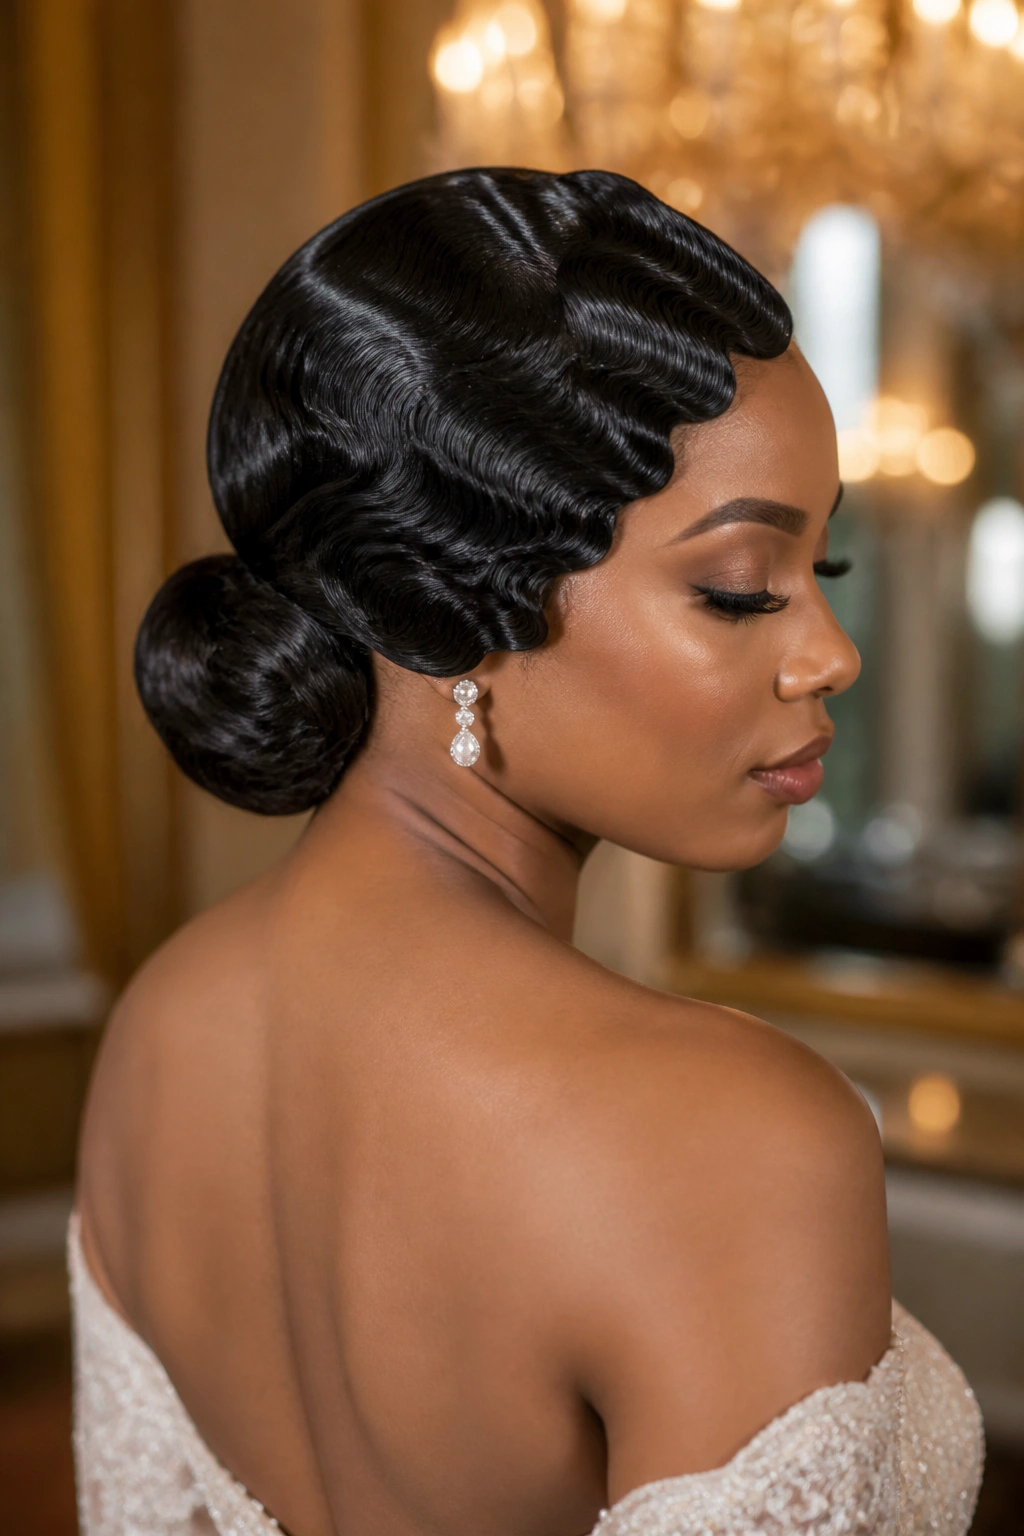
Some styles are built for the back of the room and the close-up at the same time. Finger waves into a low chignon do that well.
The front and sides stay sculpted, usually with a side or center part, while the hair at the nape is gathered into a compact chignon. The chignon can be twisted tight, folded softly, or wrapped in a smooth knot depending on how formal you want it to feel. A sleek finish works best when the bun sits low and close to the neck.
Why the Back Matters
A low chignon stops the style from feeling front-heavy. The wave pattern frames the face, then the bun gives the look a clean ending point. That balance is what makes this version work for weddings and formal dinners.
Pins matter here. A weak bun can sag, and once the bun drops, the front waves start looking disconnected. Use enough pins to lock the base, but not so many that the shape gets bumpy under the hair.
This is one of those styles that photographs nicely from every angle because nothing feels stranded. The front, sides, and back all belong to the same idea.
13. Sculpted Baby Hairs Finger Waves
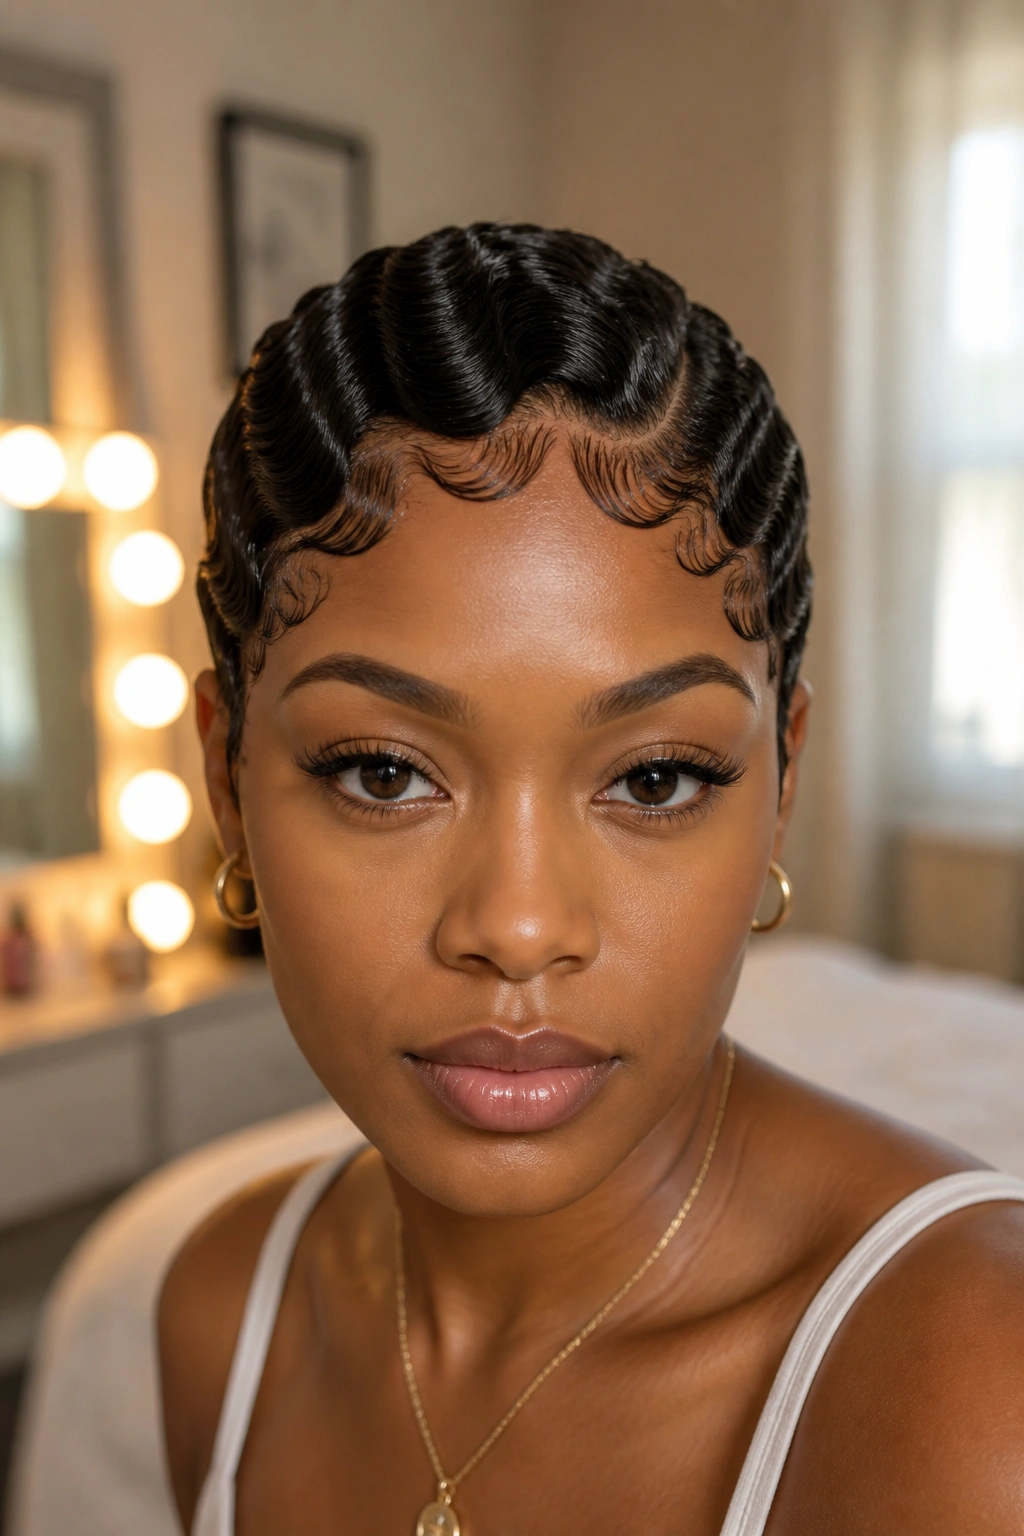
Baby hairs should support the wave, not steal the scene. That’s the line I draw.
A good finger wave already has enough shape at the hairline, so the edges only need a small amount of control. Tiny swoops, brushed into one direction, can soften the look around the temples and help the style blend into the forehead. Thick, overdone edges fight the wave and make the front look crowded.
What works best is a light touch. Use a small edge brush, a dab of control, and a quick pass with the fingertip if needed. The goal is to echo the curve of the wave, not build a second hairstyle on top of it.
This version looks especially good on short cuts and formal styles where the hairline is fully visible. It also helps if your wave pattern is very tight and you want a softer frame around the face. Keep it neat. Keep it small. That’s enough.
14. Finger Waves on a Tapered TWA
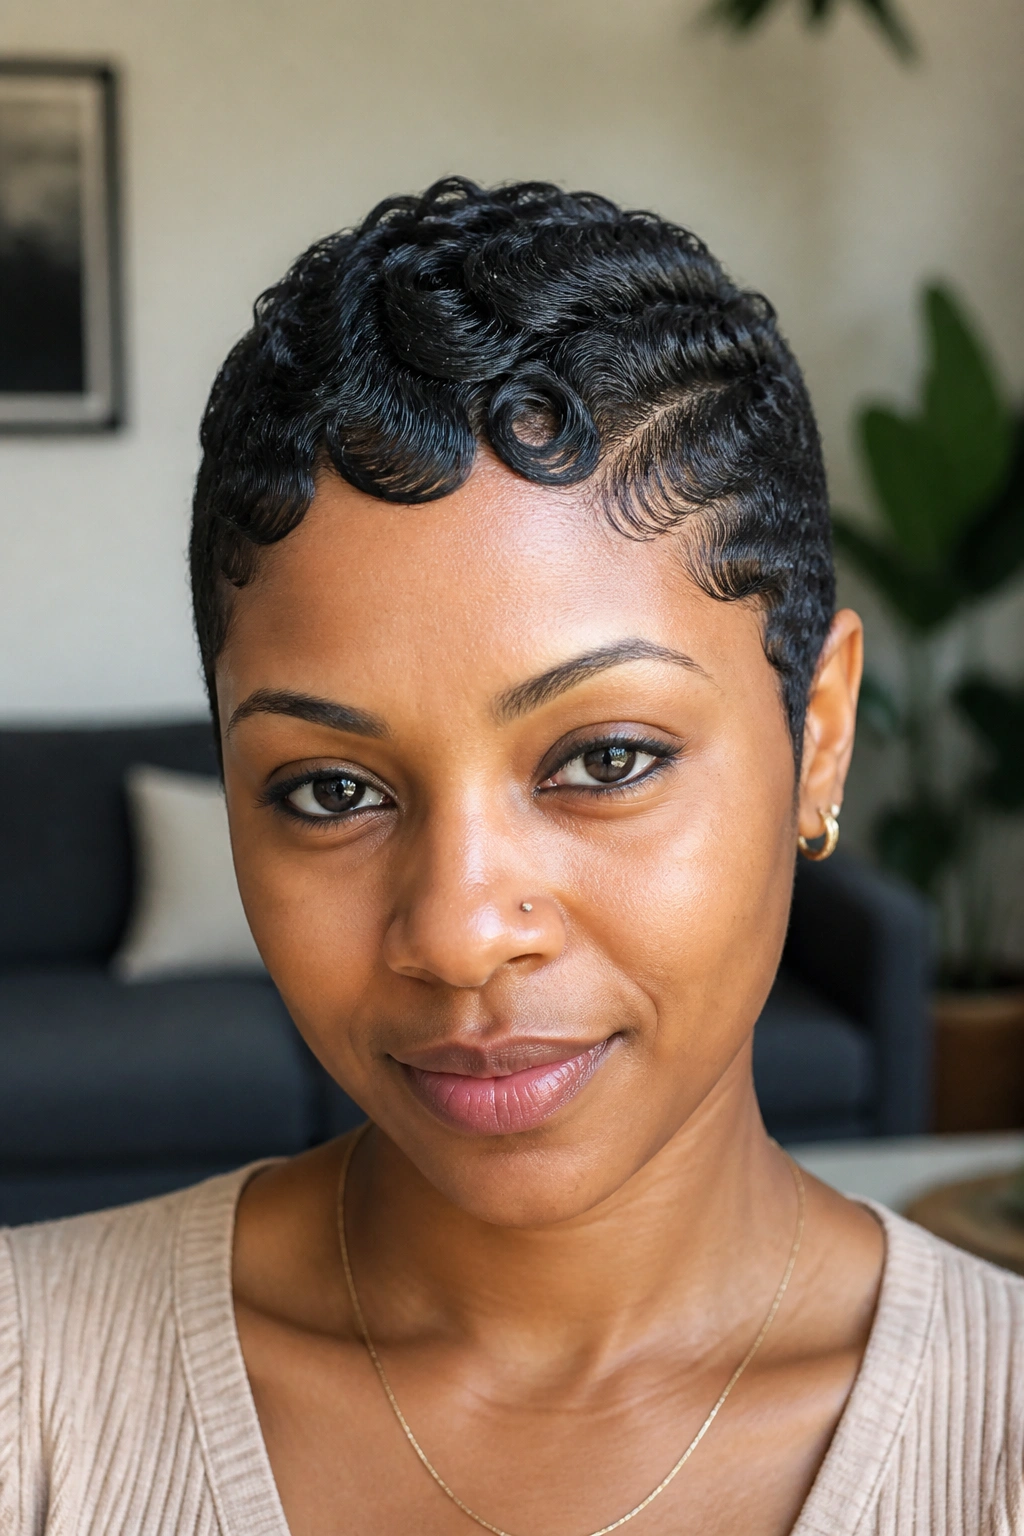
Can a tiny afro still wear finger waves? Yes, and when it’s done right, the look has real character.
A tapered TWA gives you enough surface area at the front and sides to sculpt a small wave pattern while keeping the back neat and compact. The key is to stretch the hair just enough so the comb can shape it. If the curl pattern is too springy, the wave will fight back and loosen before it sets.
How to Get the Shape
Start with damp hair and a strong setting product that gives hold without making the hair feel like cardboard. Then shape the front in small sections, using your fingers and a fine comb to press the ridges into place. The shorter the hair, the more precise the movement has to be.
This style is great when you want a vintage look but don’t want to hide your natural texture completely. A tapered TWA already has a clean outline, and the waves can sharpen the front without taking away the cut’s personality.
I’d keep the finish low and controlled. Too much height at the crown can make a TWA finger wave look accidental. The charm is in the neatness.
- Best with a fresh taper around the sides and nape
- Works well for short formal looks
- Needs strong hold at the roots
- Looks best when the top is stretched first, not brushed dry
15. Finger Waves with a Beaded Cornrow Accent
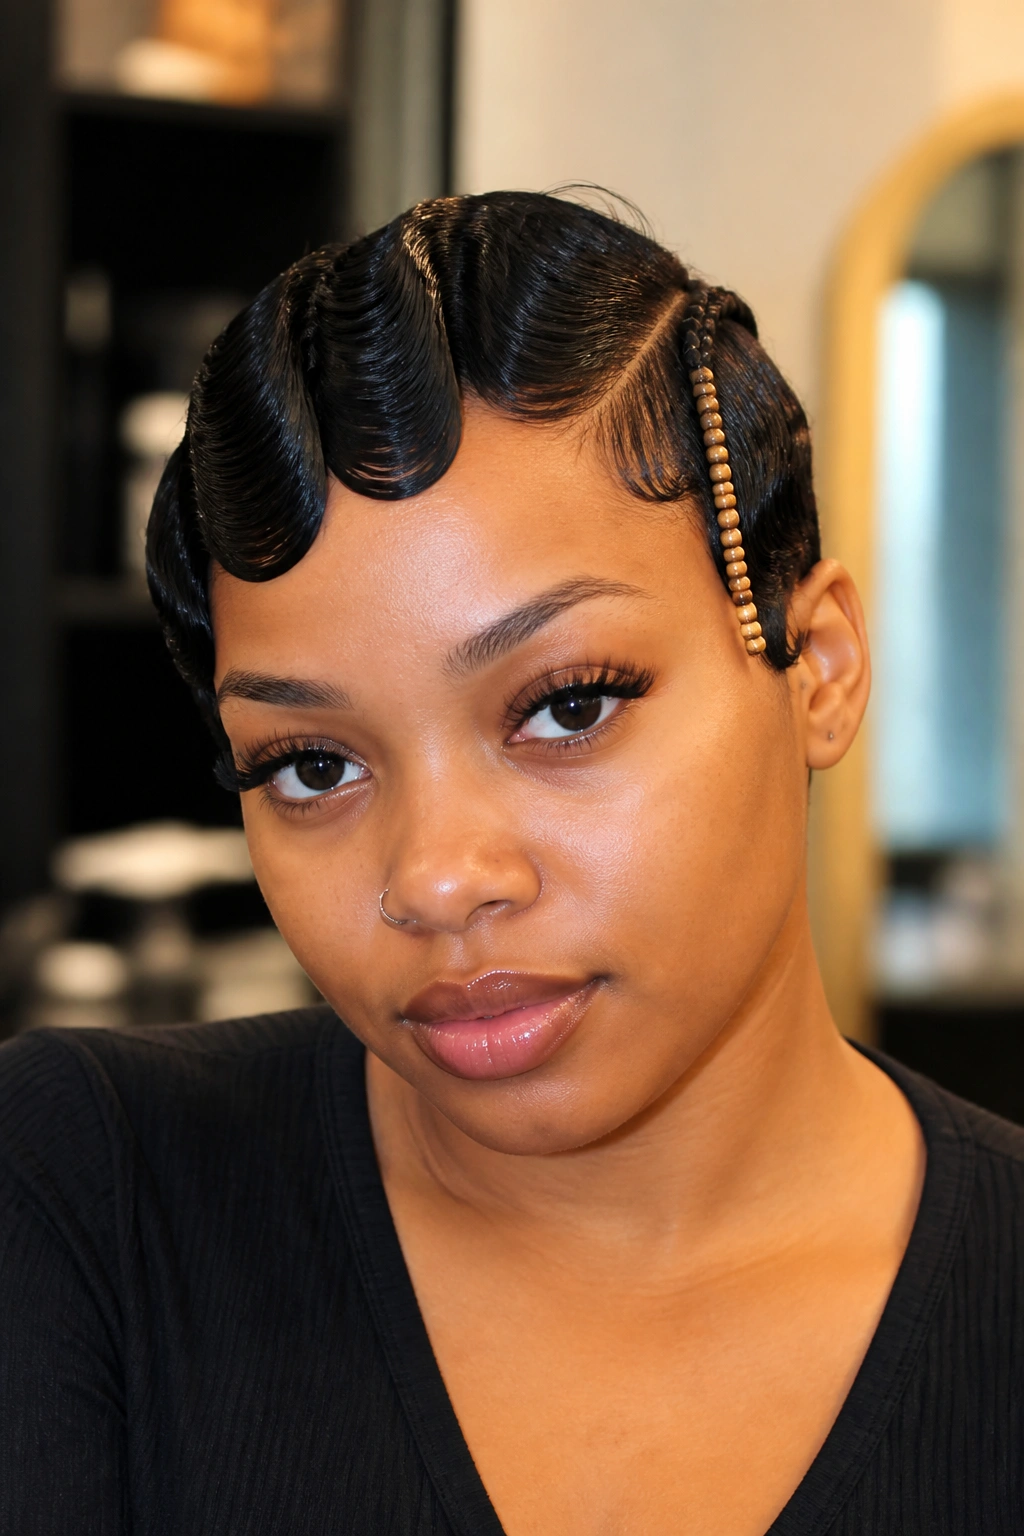
A single beaded braid can change a plain wave into a story. That is why this version works so well for themed styling.
The idea is simple: one section stays in finger waves, while a thin cornrow or braid runs alongside the wave pattern and ends in small beads. The braid adds texture and movement, and the beads give the style a finish that feels personal instead of generic. Keep the braid slim. If it gets too thick, it starts competing with the wave.
This look makes sense when you want a nod to heritage, pageantry, or cultural dress without losing the sculpted feel of finger waves. The beads can be wood, gold, pearl, or glass, depending on the outfit. Small beads usually work better because they do not drag the braid down.
The wave side should stay clean and glossy so the braid has a clear partner. If both sides are equally busy, the style starts to look crowded. One side should lead; the other should support. That balance matters.
16. Pin-Curled Finger Waves
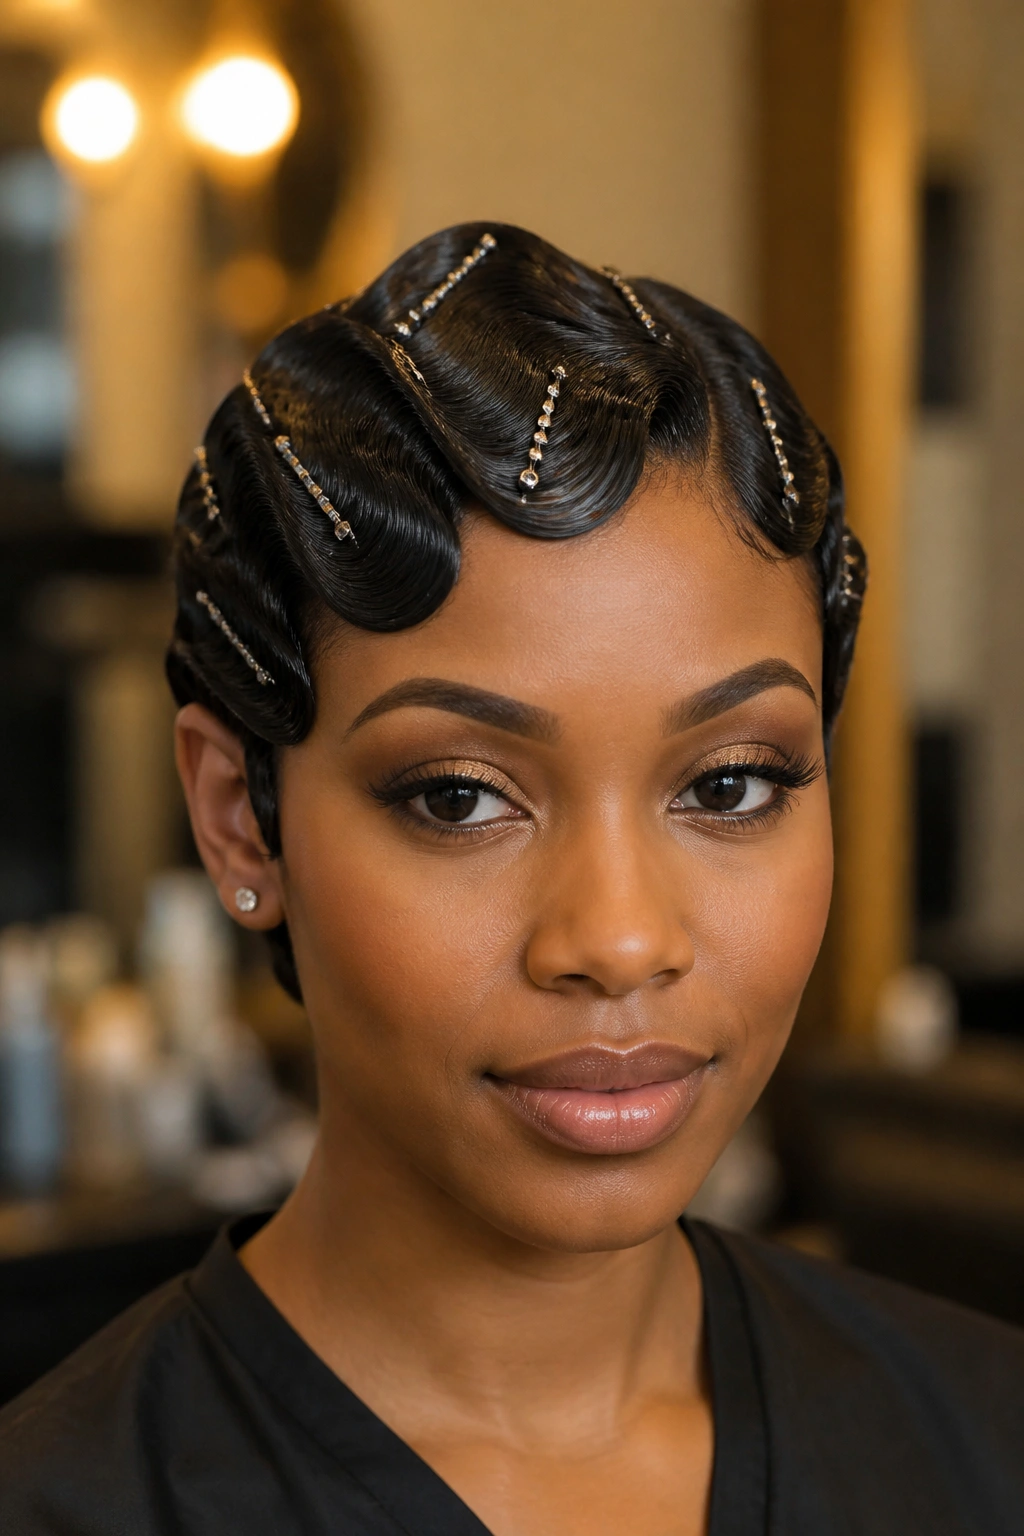
If your hair refuses to keep a wave overnight, pin curls are the backstage help.
This style uses finger waves as the visible shape, then pin curls or flat pins as insurance while the hair sets. The waves get pressed into place, each curve is pinned where needed, and the whole thing is left to cool before the pins come out. It’s slower than a quick molded style, but it holds better on hair that slips easily.
The pins should go in where the wave changes direction, not just anywhere. That keeps the curve from flattening while the hair dries. And do not yank the pins out too soon. If the hair still feels warm or soft, the shape is not ready.
- Best for layered short cuts and fine hair that loses shape quickly
- Helpful when you need the style to last through a long event
- Works well with a hooded dryer or overnight wrapping
- Needs a gentle takedown so the ridges do not collapse
I like this version when I want a wave that looks smooth but behaves like it was set with real care. Because it was.
17. Soft Faux Hawk Finger Waves
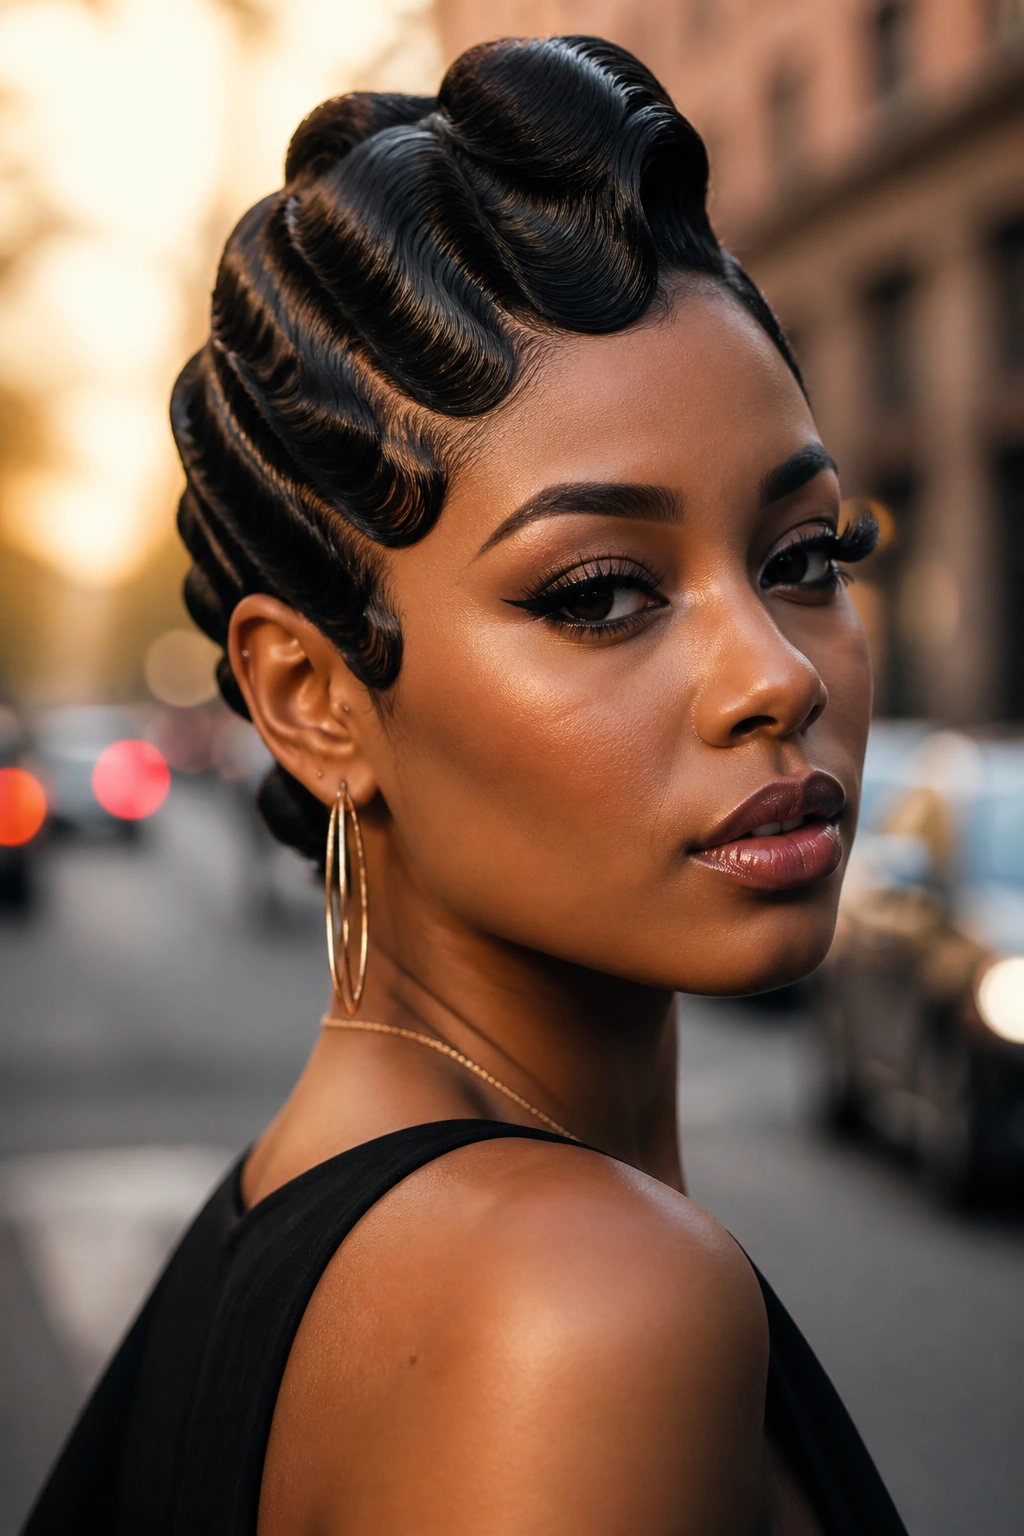
Unlike a straight side-sweep, a faux hawk lifts the center and keeps the sides tight. That single change turns the mood from classic to edgy.
The sides are molded down close to the head, while the center ridge rises just enough to suggest height without becoming a full mohawk. The finger wave pattern can still run through the front and crown, but the silhouette has a stronger spine. It feels modern, even a little rebellious.
Who This Flatters
This is a strong choice for Black women who like a sharper profile or want a style that works with statement makeup. Strong cheekbones, angular jawlines, and short tapered cuts tend to hold the shape well. A soft faux hawk can also give a little lift to hair that lies flat too easily.
The key is control. If the sides puff up, the faux hawk loses its edge. If the center gets too tall, it stops reading as finger waves and starts looking like a different style entirely. Keep the height measured and the lines clean.
This one likes bold earrings and clean necklines. It does not need much else.
18. Finger Waves with Loose Spiral Ends
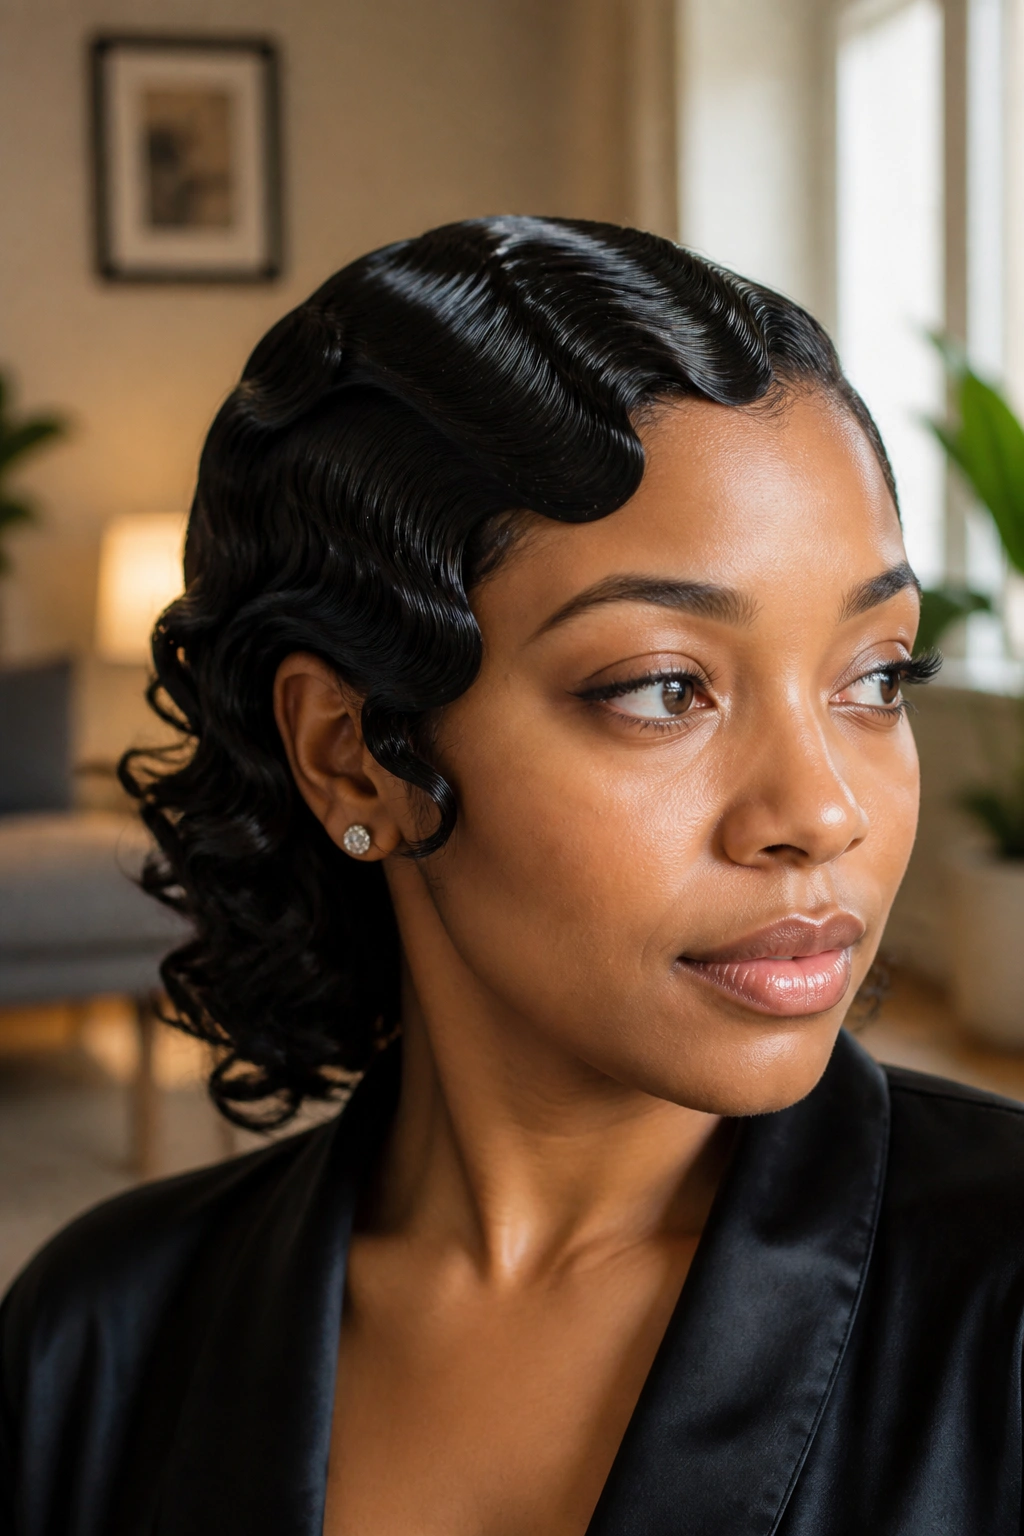
The front stays lacquered; the back gets movement. That contrast is what makes this version feel fresh.
Instead of tucking every strand away, the top and front are shaped into finger waves while the ends or back lengths are left in soft spiral curls. It works especially well on bob-length or shoulder-length hair, where the front can stay close and the back still has enough length to curl.
I like this style because it keeps the vintage shape without making the whole head feel sealed down. The loose ends soften the look and stop it from becoming too rigid. If the outfit already has a lot of structure, this little bit of movement keeps things from looking too formal.
Use a curling iron or rods on the ends after the wave set is secure. Let them cool fully before touching them. If you brush the curls out too soon, they lose that separate, buoyant finish and the whole style blends together.
19. Side-Swept Finger Waves with a Sculpted Puff
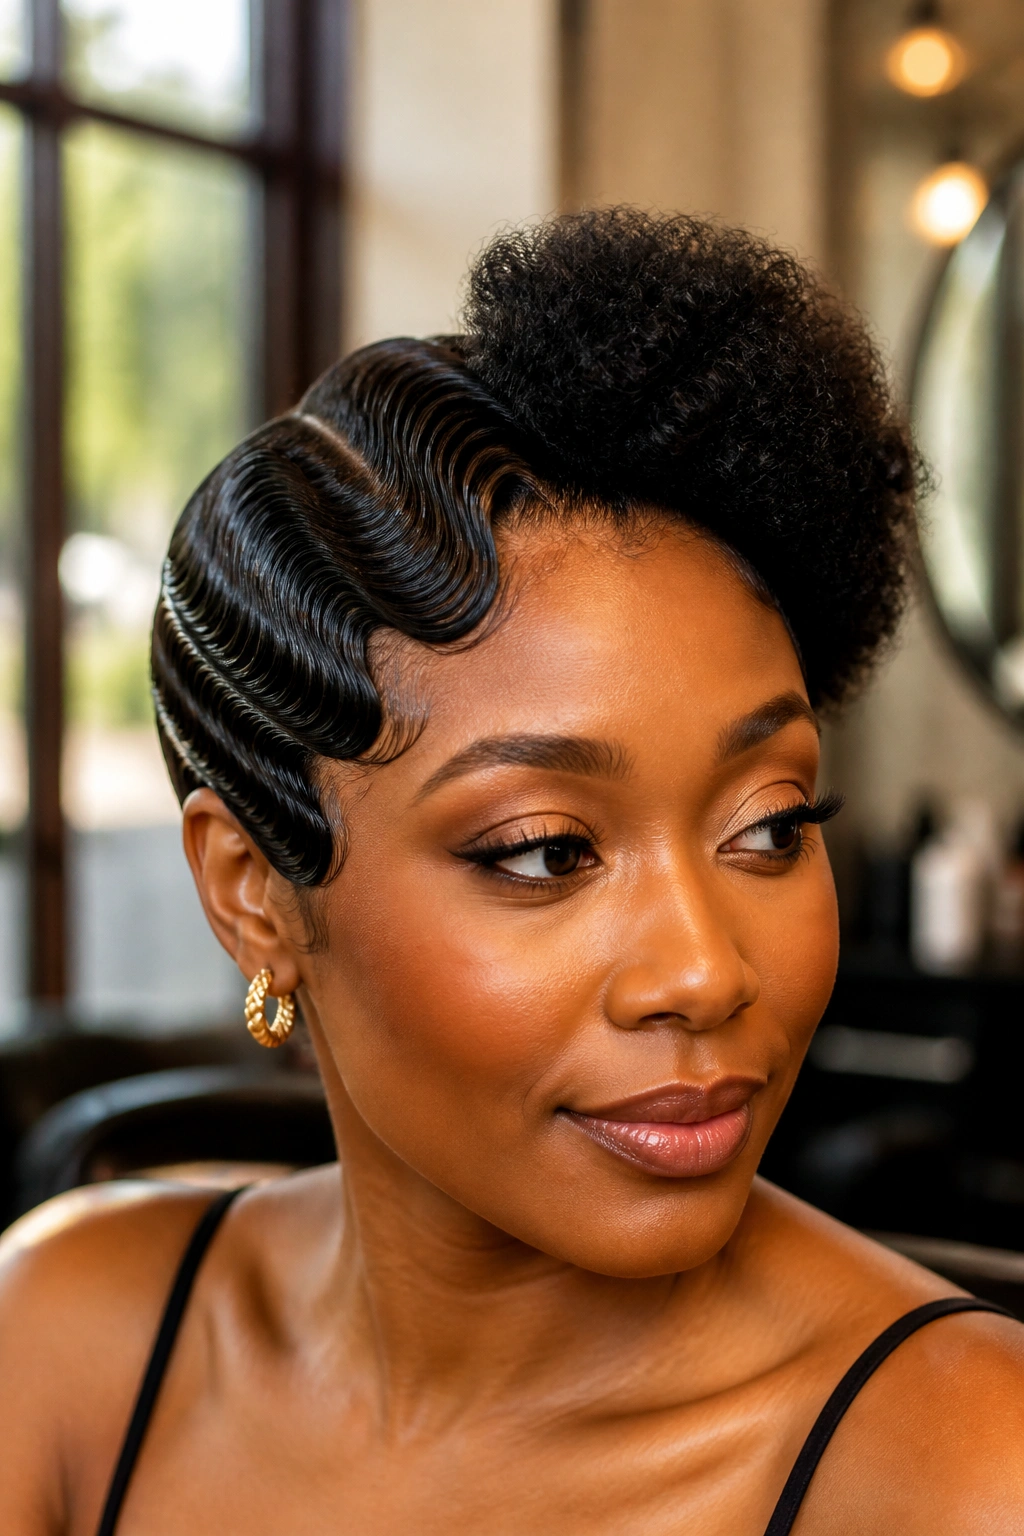
Can waves and natural texture live in the same style? Absolutely, if the puff is controlled and the wave side stays neat.
This look usually keeps one side sculpted into finger waves while the other side or back is gathered into a soft puff, mini afro, or rounded natural shape. The contrast between smooth and textured feels rich, not messy, when the transition is clean. It also gives Black women with natural hair a way to wear waves without flattening every curl on the head.
How to Keep the Balance
The puff should look shaped, not random. A little pick-through at the roots is fine, but the outline needs to stay tidy so it doesn’t swallow the wave detail. Think rounded, not giant.
This works beautifully when you want something softer than a fully molded set. It has a little more breathing room. It also makes the style easier to wear if your hair resists being pressed flat all over.
- Great for natural hair that needs one section left with texture
- Works with a deep side part or side wave panel
- Needs a clean pinning point between the wave and the puff
- Looks best when the puff is moisturized but not overly soft
20. Modern Finger Waves with a Textured Back
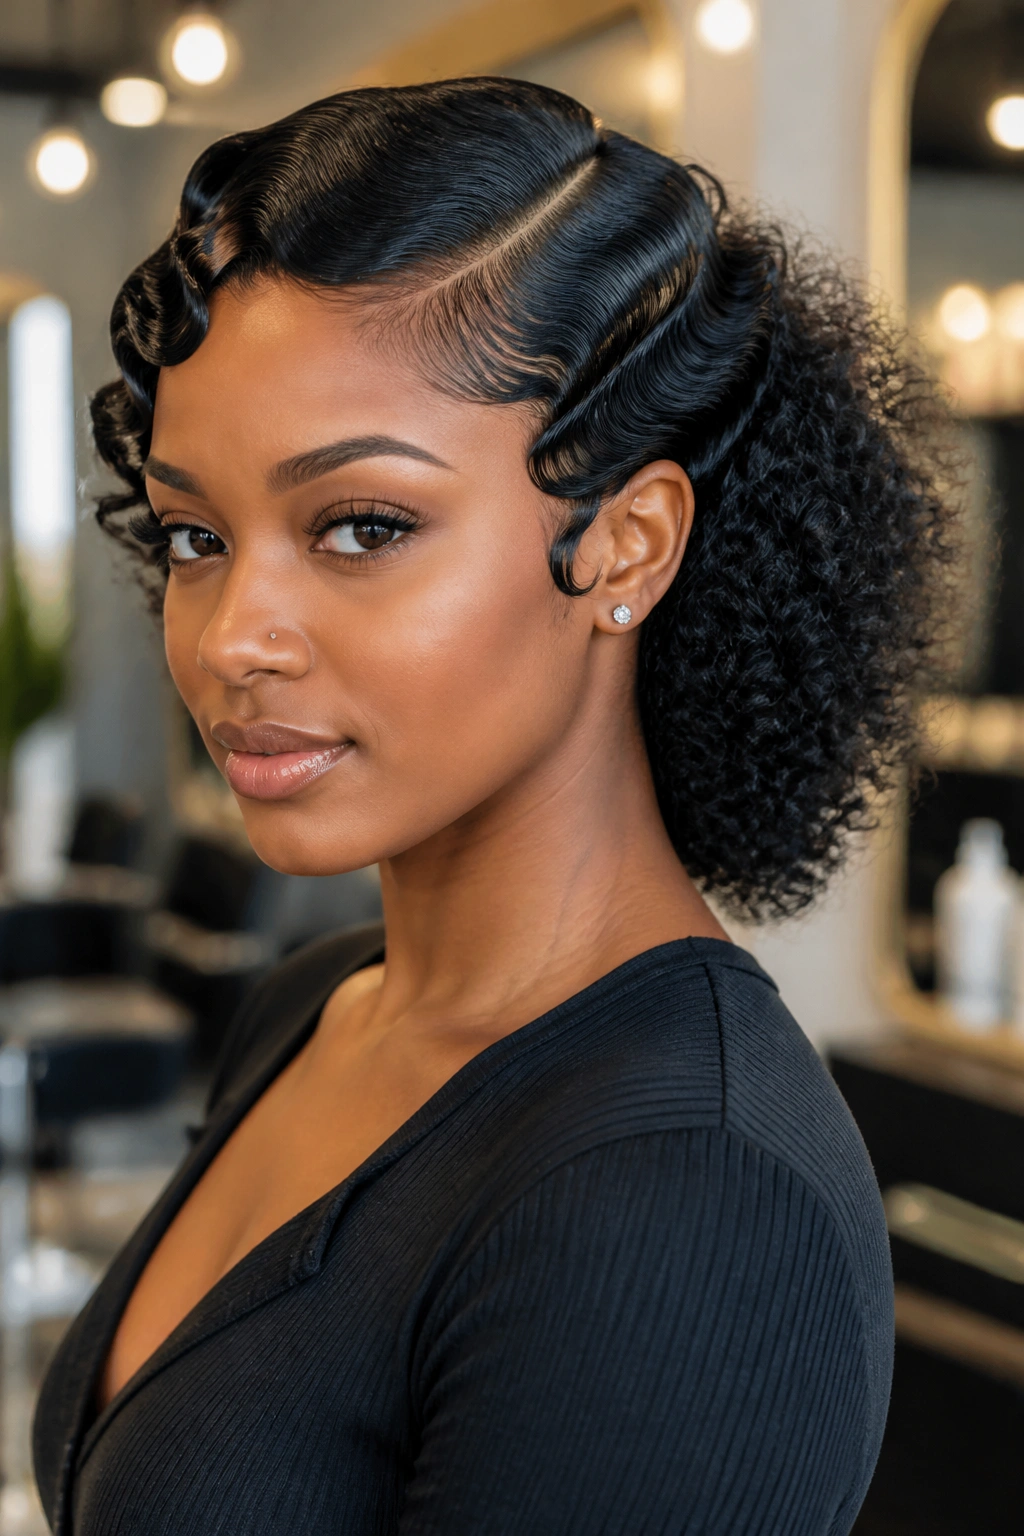
This is the version I like when old-school polish needs a little air.
The front stays shaped into clean finger waves, usually around the part and temples, while the back keeps a more natural texture — brushed-out curls, a soft coil pattern, or a shaped fluff that feels deliberate instead of forced. That combination keeps the style from feeling costume-like. You still get the vintage line, but the rest of the hair can breathe.
What makes this look work is restraint at the front. If the wave pattern gets too wide, it starts fighting the texture behind it. Keep the front crisp and let the back do its own thing. The contrast should feel intentional from the side, especially if the hair is cut in a bob or tapered shape.
This is a smart option for Black women who want finger waves but do not want to flatten every bit of texture on the head. It feels easy to wear, and that matters. Not every wave look has to be severe to be good. Sometimes the most interesting one is the one that leaves a little softness at the end.
