



Brown hair can go flat fast when the light is bad. A few silver highlights on brown hair fix that without pushing you into full platinum territory. The trick is that silver is not one look; it can read icy, smoky, pearly, or steel-gray, and the placement changes everything.
If the brown base is dark, silver needs a stronger lift to look clean. Leave too much orange behind and the toner turns muddy; leave too little depth and the whole head can look pale and washed out. That is why the same silver formula can look sharp on a chestnut bob and harsh on a nearly black wave.
Placement matters more than people think. A thin veil near the face says one thing. A hidden underlayer says something else. A chunky panel down the side says, very clearly, that you meant it.
The smartest silver looks on brown hair usually keep some brown visible on purpose. That contrast is the whole point. Start with the first idea that matches how bold you actually want to be, and the rest gets easier from there.
1. Silver Babylights Threaded Through Dark Chocolate Brown
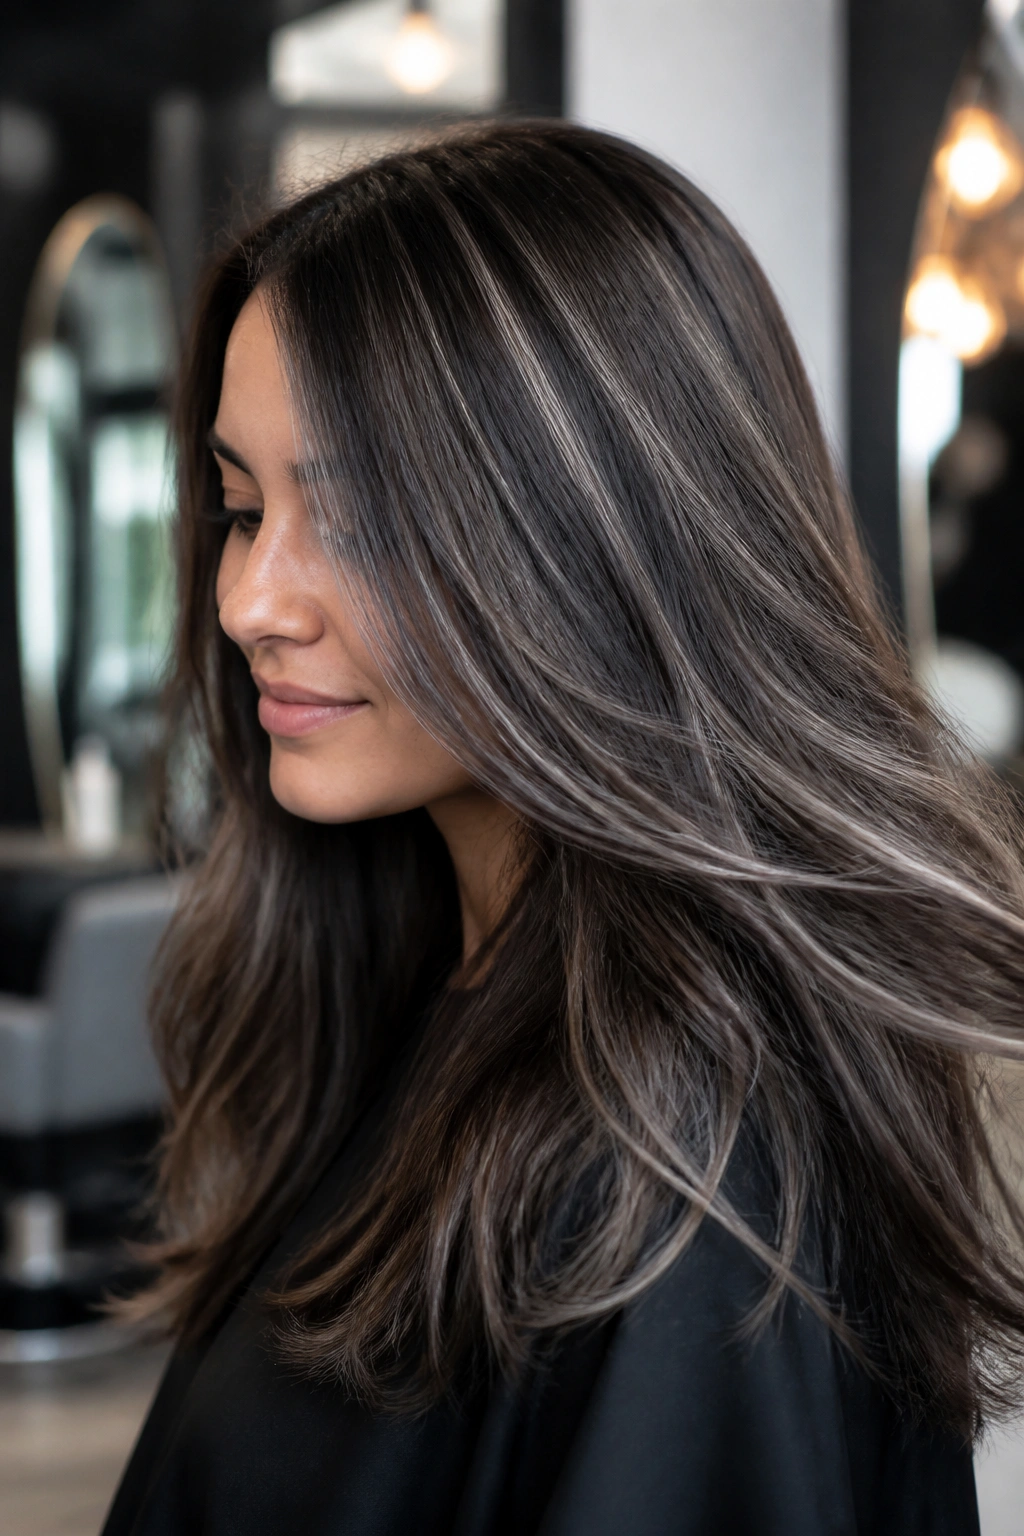
Silver babylights are the quietest way to test the look, and I trust them most when someone wants silver highlights for brown hair without a hard stripe. The strands are woven so fine that the silver reads like a cool shimmer instead of a block of color.
Why Babylights Work
The magic is in the size. Tiny sections keep the brown base dominant, so the silver moves when you turn your head but does not take over the whole haircut. That is a much nicer result on dark chocolate or cocoa brown, where heavy highlights can look blunt fast.
Babylights also age better than big panels. As the roots come in, the line stays soft because the highlights were never loud to begin with. On straight hair, they look delicate and polished. On waves, they pick up just enough contrast to keep the hair from looking one-note.
- Ask for micro-fine weaving through the top and outer sides.
- Keep the silver a shade cooler than your natural brown, not stark white.
- Let the stylist leave a little depth at the root for a softer grow-out.
- Use a violet or blue-toned shampoo only once or twice a week, not every wash.
Pro tip: If your brown hair lifts warm, babylights should be toned with care. A clean silver needs a pale yellow base, not orange.
2. Bright Silver Money Pieces at the Face
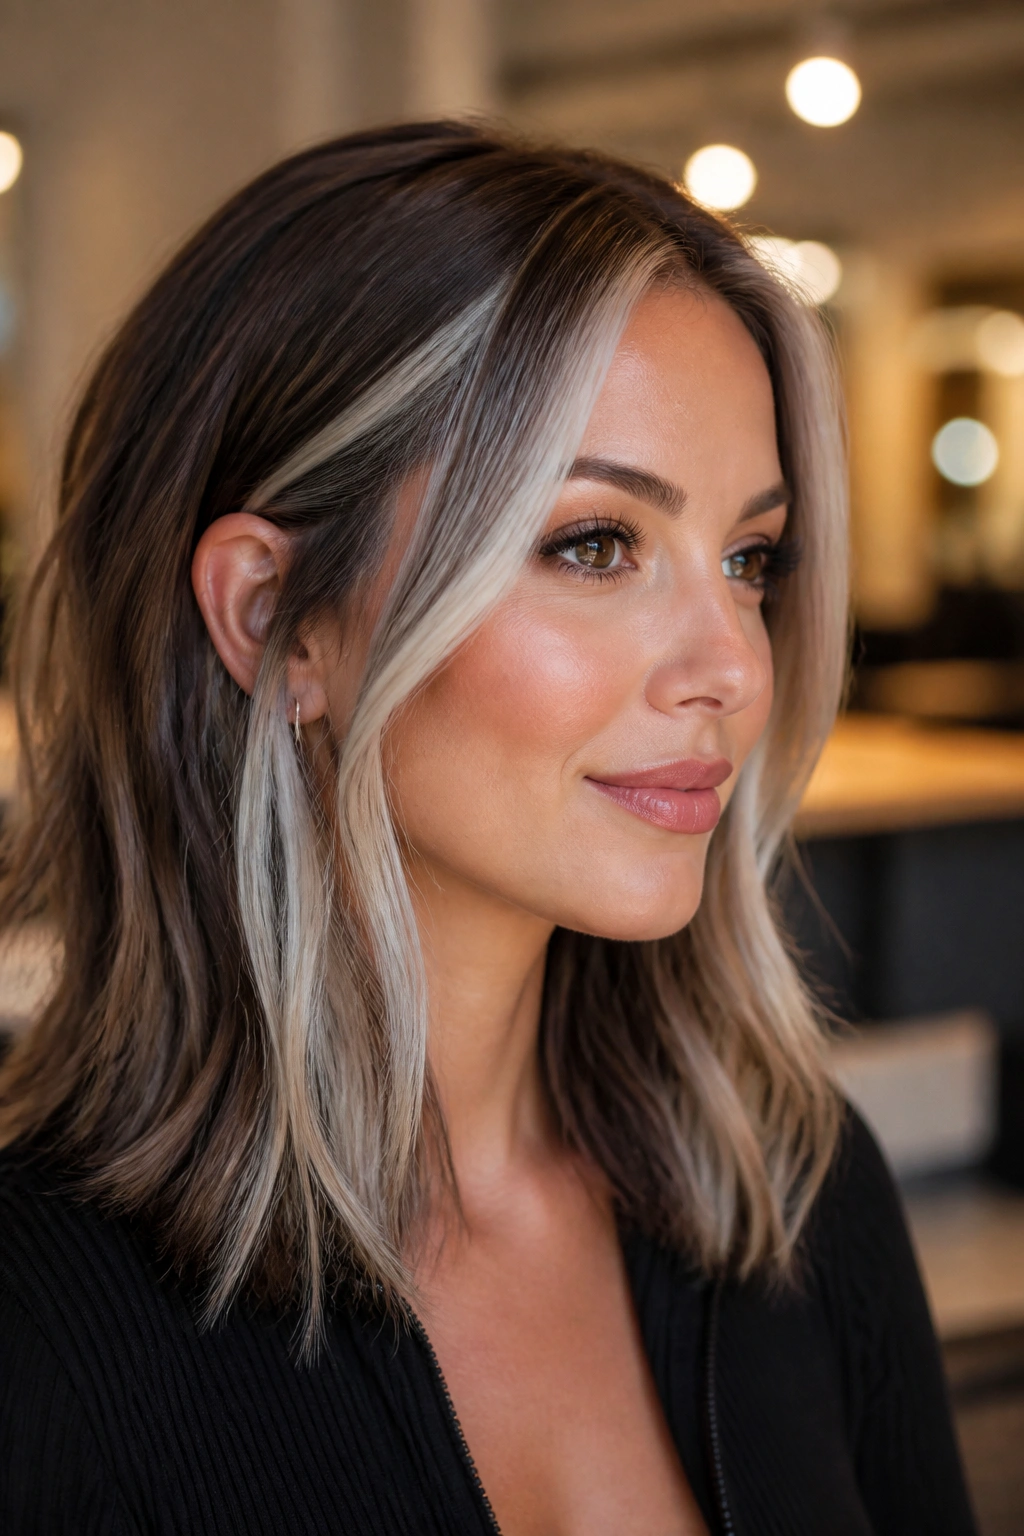
Want the fastest way to wake up brown hair? Put the silver at the face. A bright money piece gives you that sharp, reflective edge right where people look first, which is why it can change the whole haircut in one appointment.
The best versions start just behind the hairline and sweep down through the front sections, usually around the cheekbone or jaw. That keeps the silver from looking like a random stripe. On a middle part, the pieces can sit symmetrically. On a side part, I like one slightly wider panel and one narrower one so the face still feels balanced.
This idea works especially well if you wear curtain bangs, a lob, or any cut that moves away from the face. The silver catches when hair swings and still shows when the rest of the hair is tucked behind the ears. If you wear glasses, keep the front pieces a touch wider so they do not disappear under the frame.
It’s bold, but not reckless. That matters.
3. Smoky Silver Balayage on Chestnut Brown
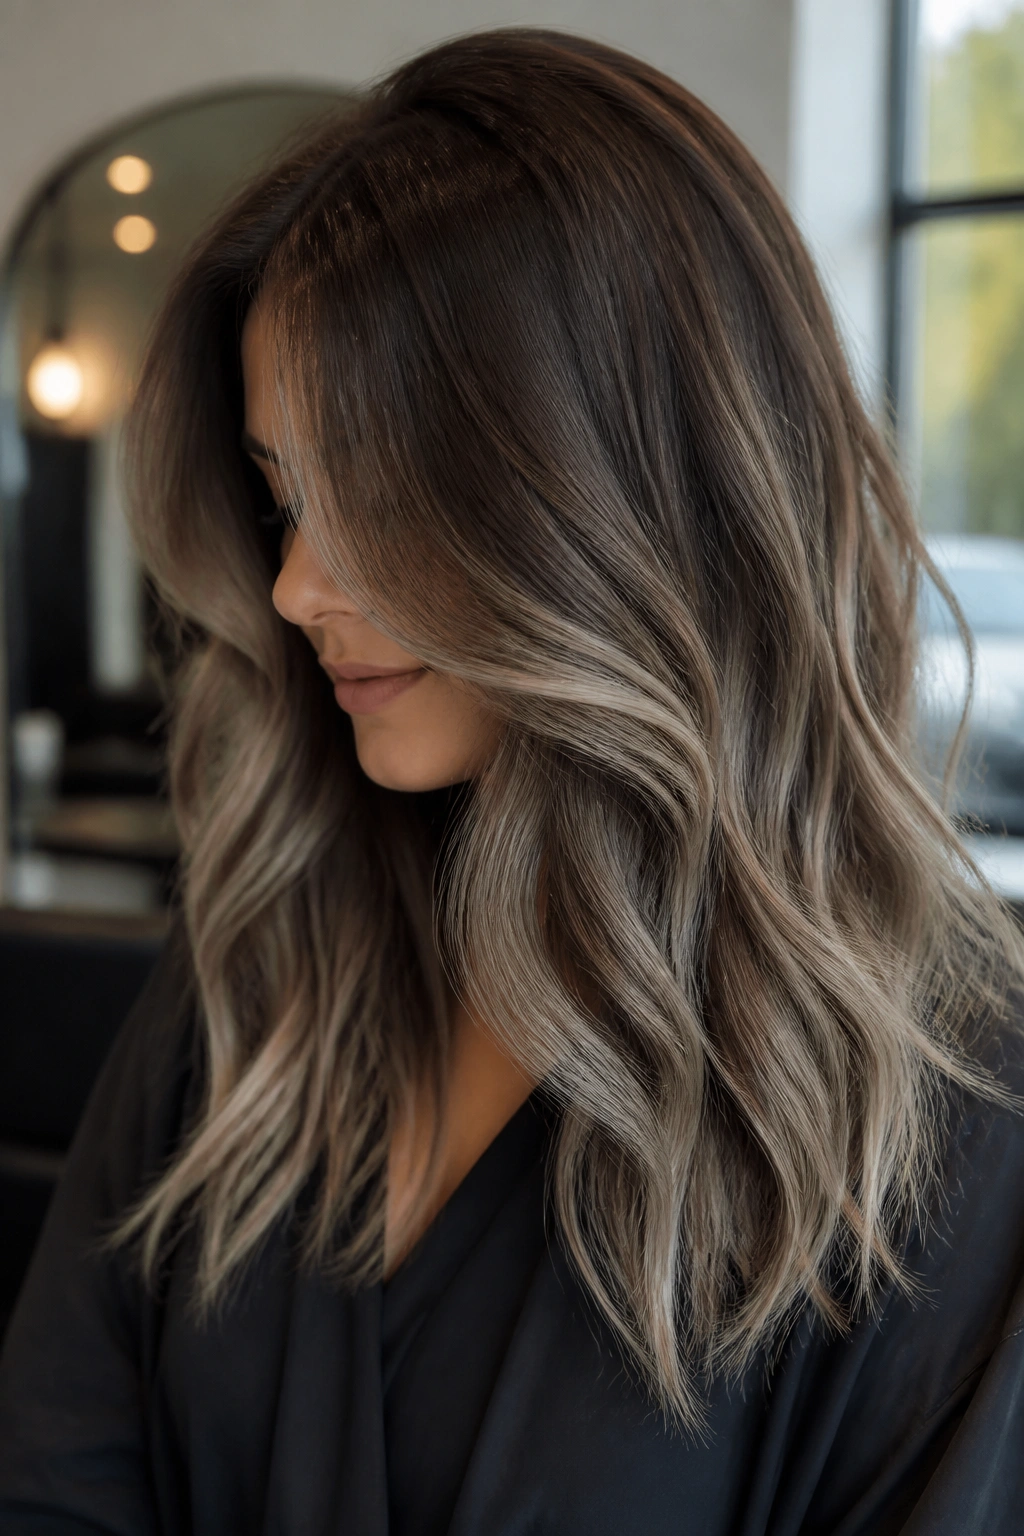
Smoky silver balayage is for the person who wants movement, not stripes. The colorist paints the silver in a sweeping pattern through the mid-lengths and ends, leaving the chestnut base visible near the scalp and through the interior of the hair.
What Makes It Look Soft
Balayage works because it mimics the way hair naturally lightens in sunlight, only cooler. On chestnut brown, that smoked-out silver can look almost like brushed metal instead of a high-contrast dye job. It feels expensive in a very quiet way, which I know is a boring phrase, but the result really is that controlled.
The placement matters more than the number of foils. Concentrate the lighter silver pieces around the face, the top layer, and the ends that move the most. Leave the underside deeper so the hair still has shape when it is pinned up or pulled into a ponytail.
- Best on shoulder-length hair and longer.
- Works well when the silver starts lower, around the cheekbone or chin.
- Looks cleaner if the toner leans ash rather than violet.
- Needs less upkeep than a full-head silver job.
If you like your brown hair to still look brown, this is one of the easiest ways to get there.
4. Chunky Silver Panels for a Retro Stripe Look
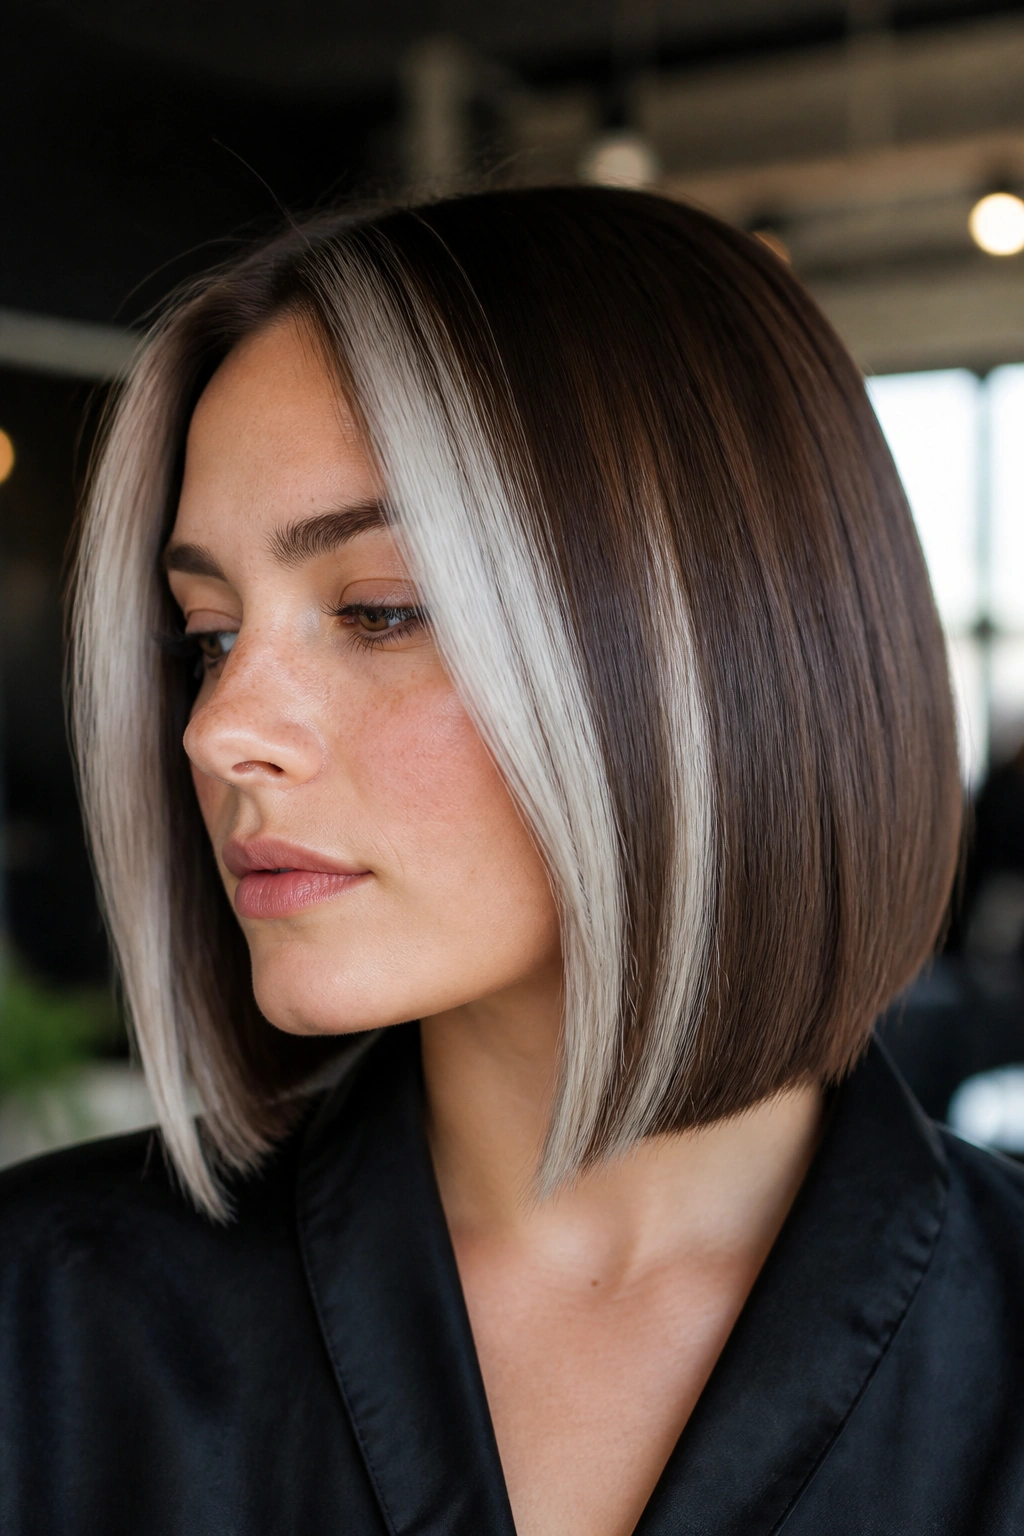
Chunky does not have to mean dated. When the panels are spaced well and the silver tone is right, a bold stripe can look sharp, graphic, and weirdly modern on brown hair.
The trick is restraint in the layout. Keep the silver panels wide enough to show—about half an inch to one inch—but separate them with solid brown sections so the look reads intentional, not zebra-like. On a blunt bob or sleek long hair, that contrast can be excellent. On layered curls, it gets messier fast, so this one likes smooth styling.
I prefer this idea on deeper brunettes because the contrast has a stronger frame. Espresso, dark mocha, and nearly-black brown all handle a clear silver band better than lighter chestnut does. The light-dark pattern gives the cut structure, especially if the haircut itself is simple.
If you want a style that looks strongest in a straight blowout, this is a good one. If you live in a messy bun, maybe skip it.
5. Hidden Silver Peekaboo Layers
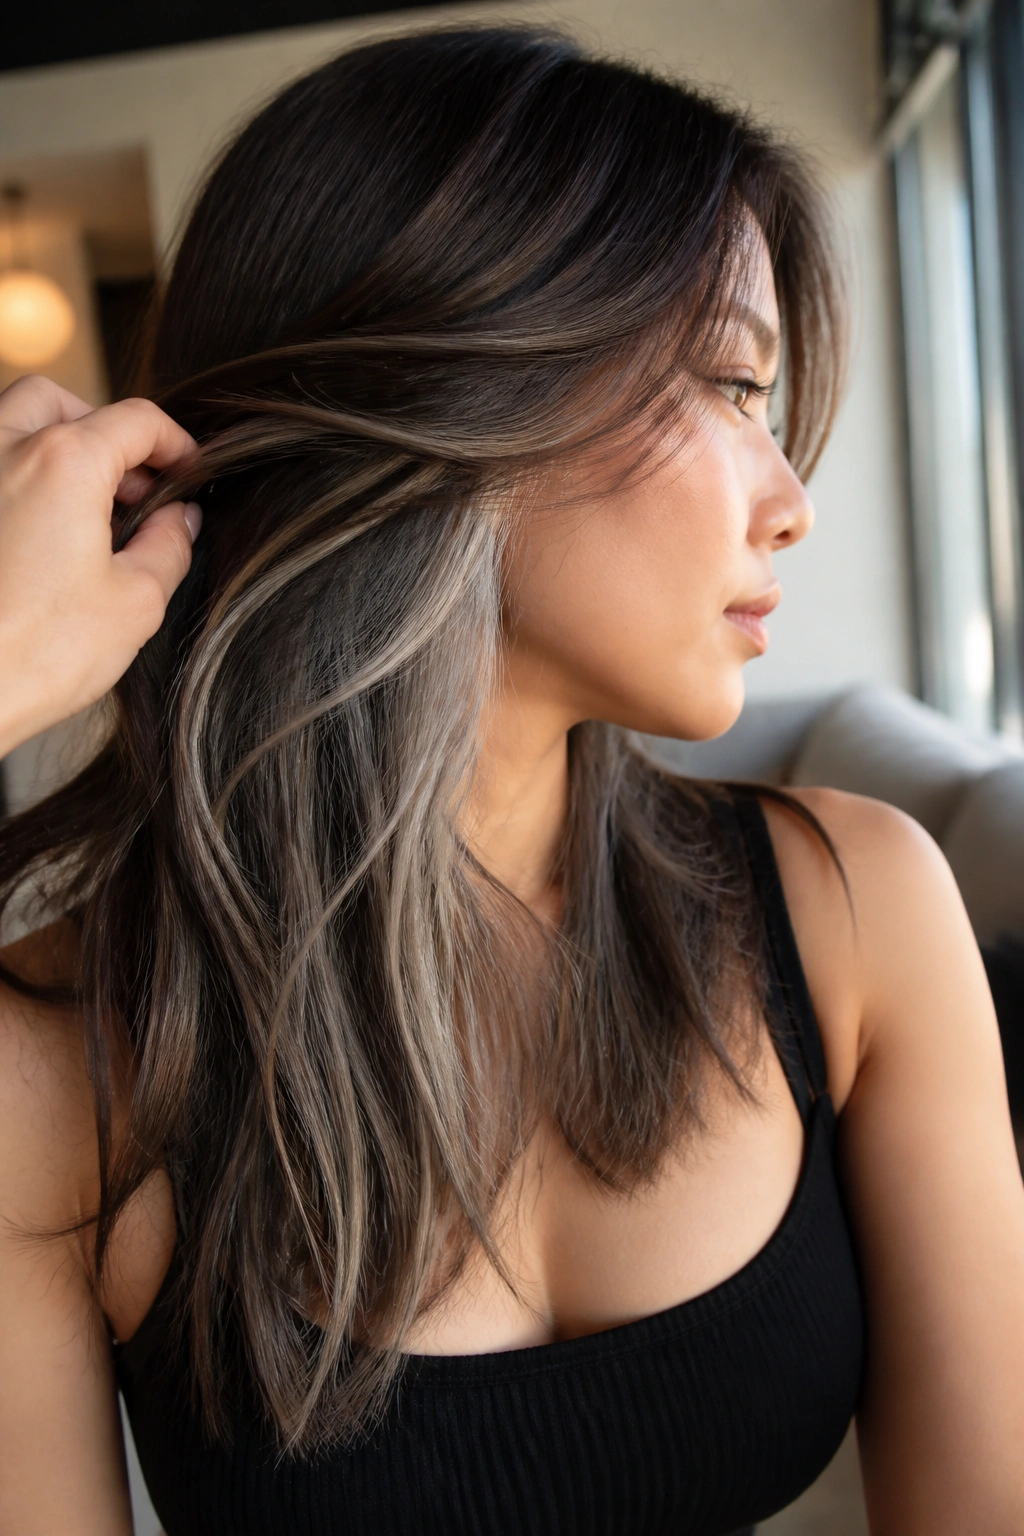
From the front, the hair stays brown. Then you turn your head, and silver flashes underneath. That little surprise is why peekaboo highlights keep hanging around in salons: they give you color without making your whole head feel bright.
Peekaboo silver sits in the lower layers, usually around the nape and the inner sides. It works well if you wear your hair up a lot, because the silver shows through braids, twists, half-up styles, and loose buns. It also lets you keep a conservative top layer at work while still having some personality underneath.
Where Peekaboo Wins
The color stays protected from some sun exposure, which helps the silver hold a little longer than pieces on the surface. It also means the grow-out is less obvious. That part is practical, not glamorous, but people notice when they can go a bit longer between appointments.
This is a good choice if you want to try silver without a big commitment. You can keep most of the hair natural and still get a real visual hit. And if you ever get bored, the hidden pieces can be cut away slowly as the style changes.
6. Rooted Silver Melt from Brown to Frosted Ends
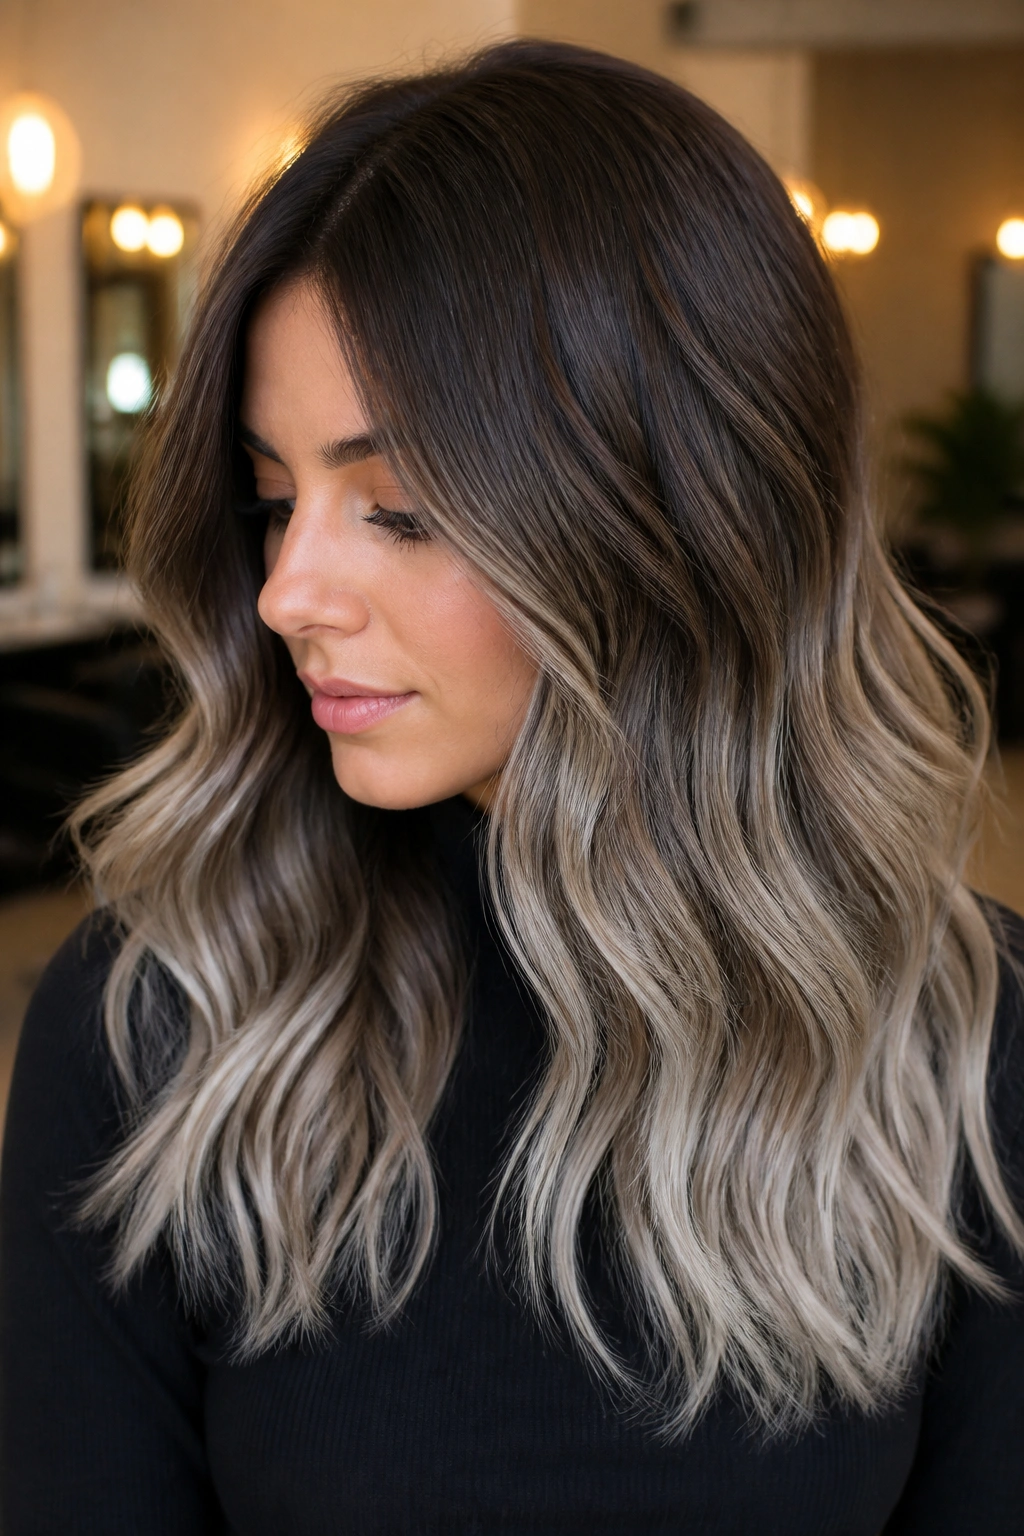
If you hate obvious regrowth, a rooted melt is the smartest silver choice. The color starts deep at the scalp, then fades through cooler brown and soft gray before it lands in frosted ends.
Ask for This
- Keep the root about 1 to 1.5 levels deeper than the mid-lengths.
- Blend the silver through the ends with a slow fade, not a hard line.
- Ask for a root shadow that matches your natural brown, or sits one step cooler.
- Save the lightest silver for the last 3 to 4 inches.
The result is easy to wear because the base gives the eye somewhere to rest. That matters more than people admit. A full silver head can look flat if every strand is equally light, while a rooted melt still has dimension from a distance.
It also grows out in a friendlier way. You get a little more time before the roots start shouting for attention, which is nice if your schedule is not built around color appointments. On long hair, the fade can look almost like smoke drifting toward the ends.
7. Silver Ribbons Painted Along Wavy Lengths
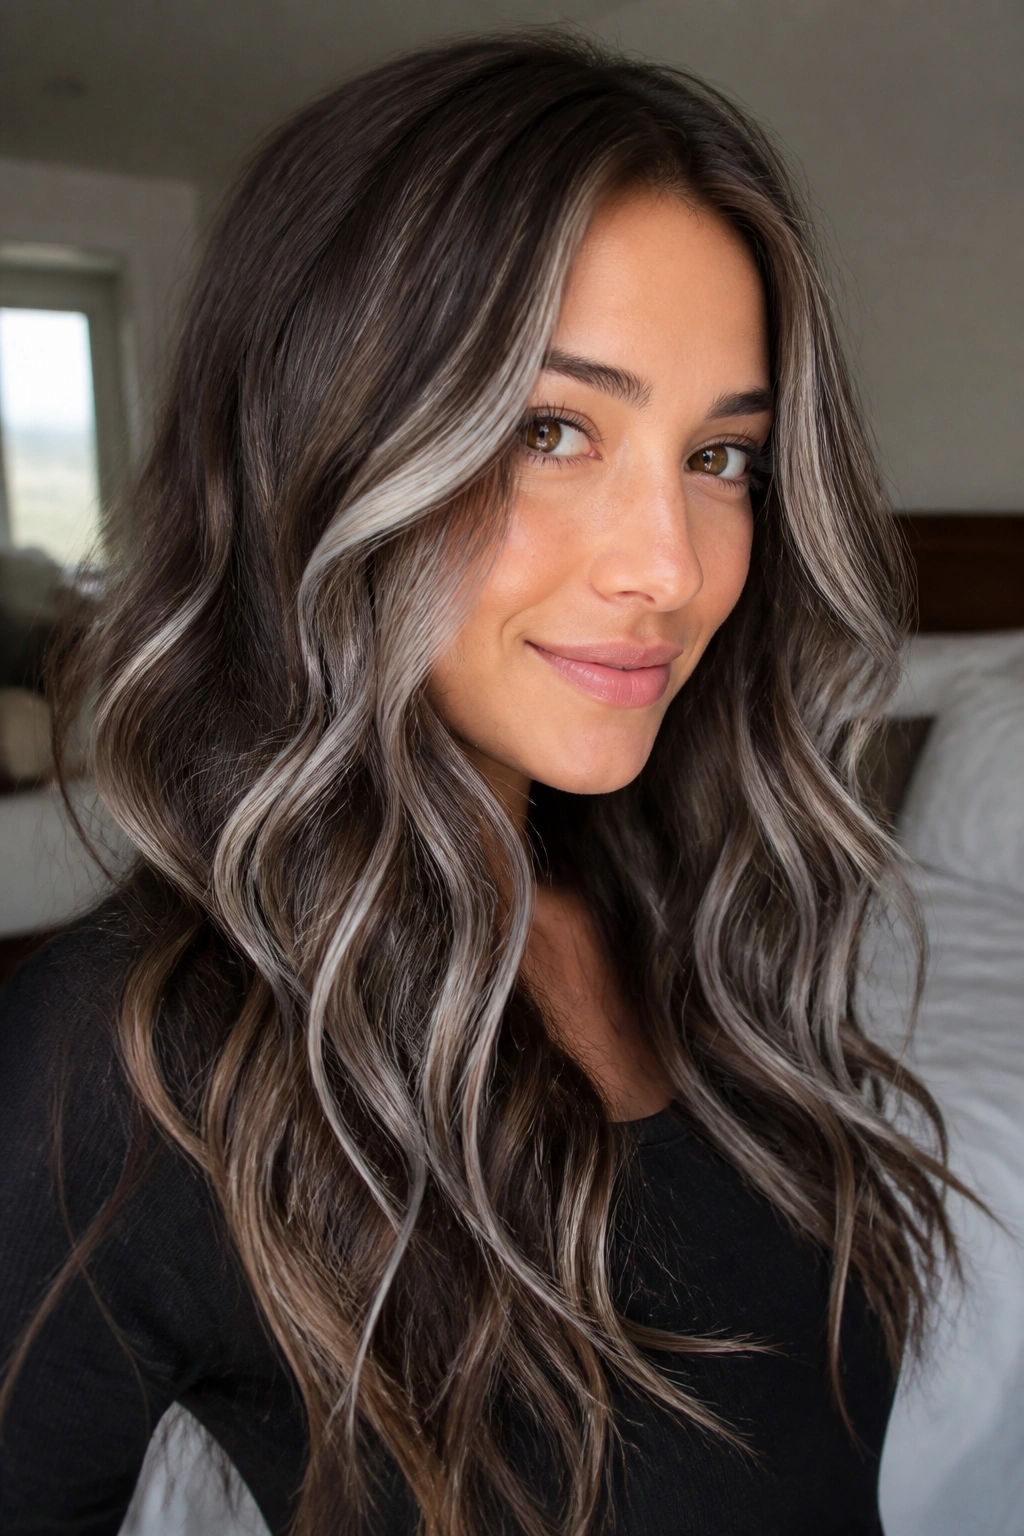
Why do some silver highlights look airy while others look painted on? On wavy hair, the answer is placement. Silver ribbons should follow the bends of the hair, not fight them.
A ribbon highlight is wider than babylights but softer than chunky panels. It runs through the wave pattern so each bend catches a different sliver of silver. That means the color changes as the hair moves, which is the whole point. If the pieces are dropped in too straight, the style loses that floating look and starts to feel heavy.
I like this on medium brown hair with a natural wave or a loose heat-set bend. The silver can sit through the surface layer and a few interior sections, while the underside stays darker. That contrast gives the waves shape without making them look frizzy or dry.
What to Watch For
- Ask for ribbons that follow the curve of the wave.
- Keep the lightest pieces near the face and top layer.
- Avoid over-lightening every bend; the hair needs some brown between the silver.
- Use a wide-tooth comb after washing so the ribbons stay visible in the pattern.
On wavy hair, the motion does half the work for you. Use it.
8. Mushroom Brown Blended with Soft Silver Veils
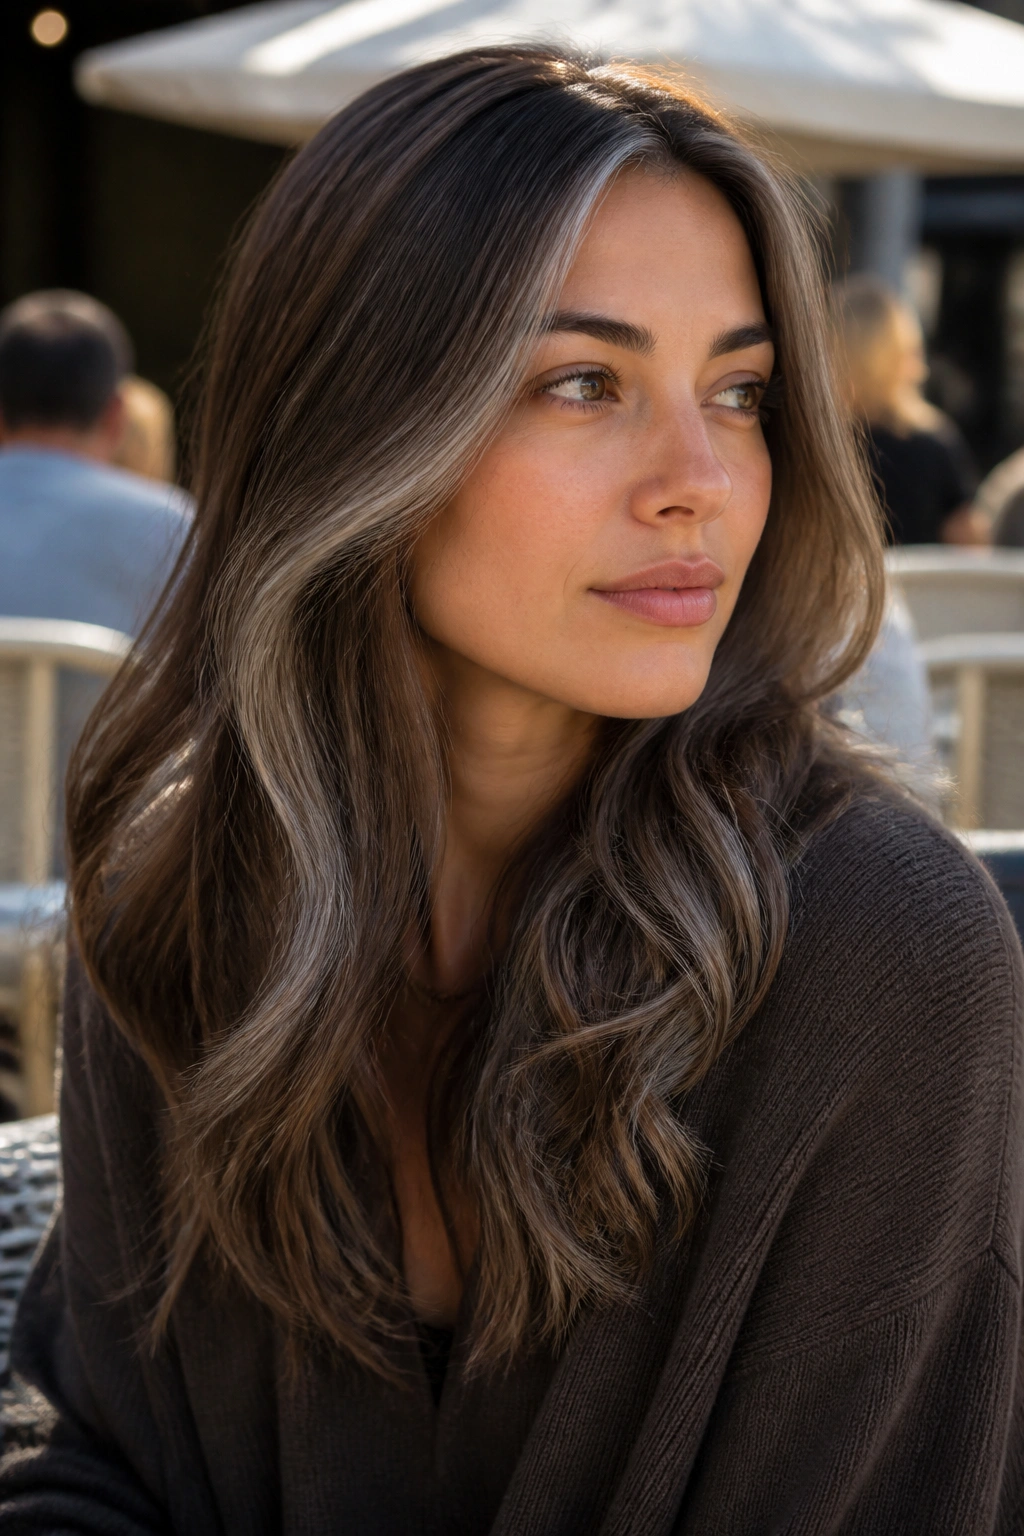
Mushroom brown sits in that cool middle ground between beige, taupe, and gray, which makes it a good home for silver. Instead of looking like silver was dropped on top of the hair, the whole color family feels connected.
This is the one I like when someone wants cool tones but does not want the hair to go icy or sterile. The brown stays earthy. The silver comes through in thin veils over the top, around the face, and in the outer layers. From a distance, the effect can read almost like stone or weathered metal.
The best part is how forgiving it looks on a haircut with texture. Lob cuts, shaggy layers, and soft waves all take to mushroom-silver blending well because the color shifts with the movement instead of sitting in one flat band. The style has more depth than a pure silver overlay, which matters if your natural brown is warm.
It’s a calmer choice, but not a dull one. There’s a difference.
9. Frosted Silver Ends on Long Layers

When the ends are the only part that go silver, long hair keeps its depth near the scalp and all the drama at the bottom. That split can look especially good if your hair has long layers, because the lighter tips will move at different lengths instead of hanging in one flat sheet.
The word frosted fits here. The ends should look dusted with cold light, not dipped in paint. That means the silver is concentrated on the last few inches and softened upward with a blur, so the transition feels light instead of obvious. On chestnut or medium brown hair, the contrast can be lovely when the hair swings.
- Best on hair below the shoulders.
- Needs even lightening at the tips before toner goes on.
- Works well with loose waves, blowouts, and soft curls.
- Keep the ends trimmed every 8 to 10 weeks so the lightest pieces do not look see-through.
This is also a good answer if you want a lighter look without touching the roots too much. Long hair can carry a lot of color story at the bottom. Let it.
10. Silver Face Frame with Curtain Bangs
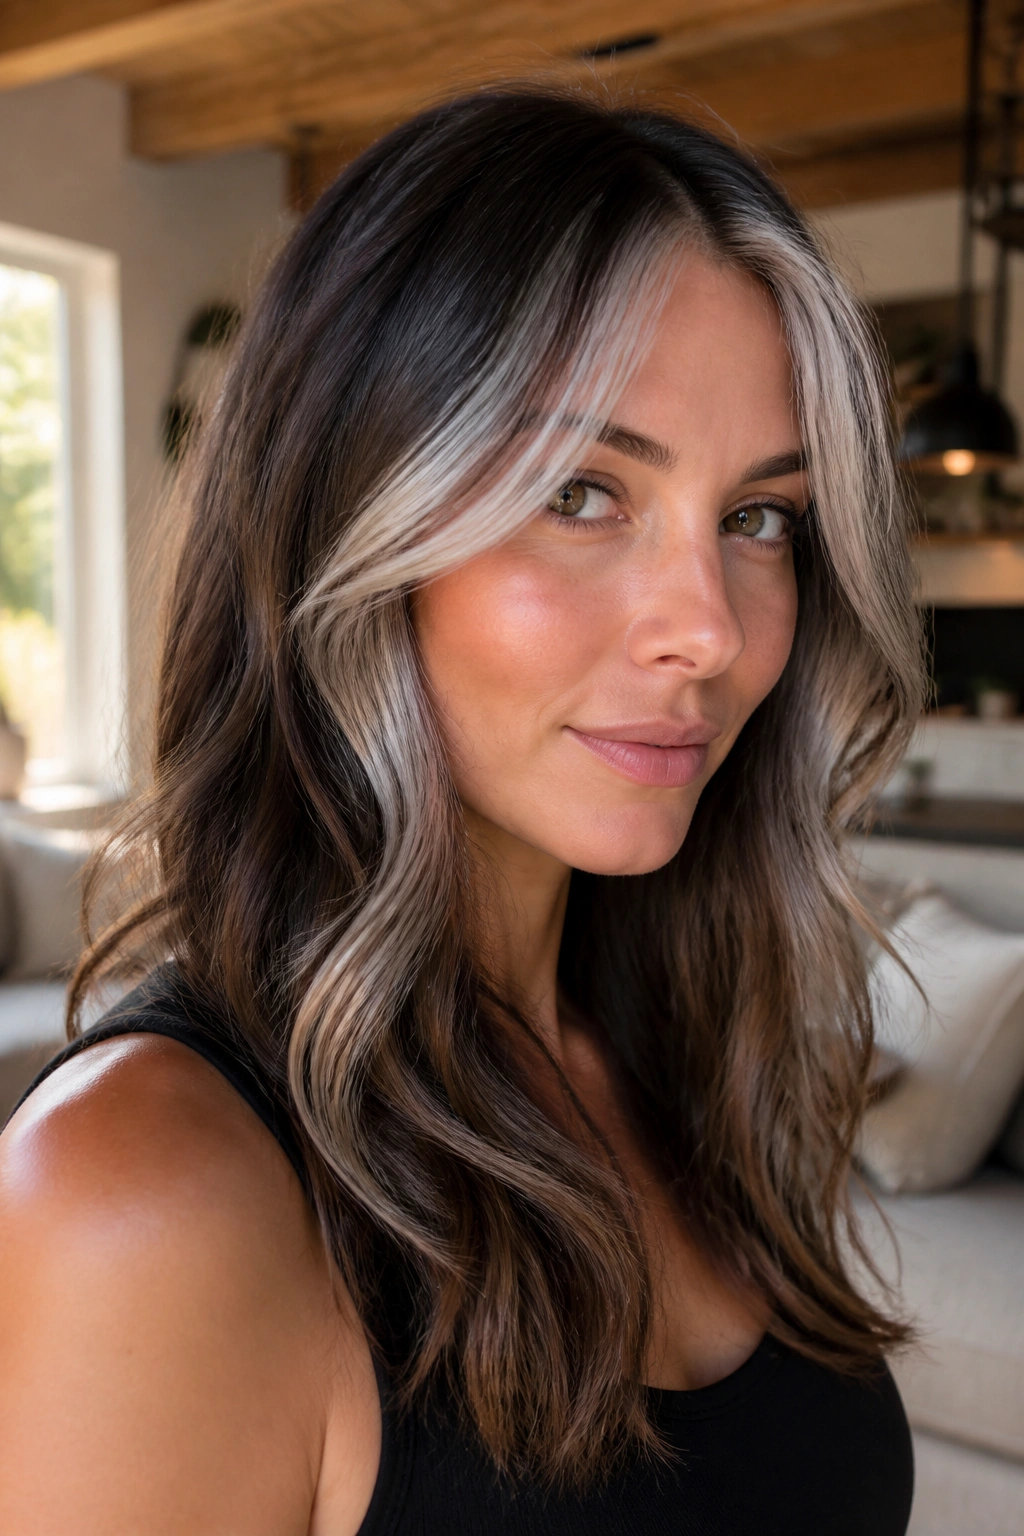
A silver face frame is not quite the same as a money piece. The difference is the way it lives with the bangs. Curtain bangs give the silver a little movement to hide inside, so the front feels blended instead of blunt.
If you part your hair in the center and sweep the bangs away from the face, the silver can peek through at the temples and cheekbones. That makes the color feel woven into the haircut, not pasted on. It also keeps the front from looking too severe, which can happen when the silver is too wide and too bright.
This idea works especially well on medium brown hair with a soft layered cut. The bangs break up the front line, and the silver brightens the eyes without taking over the rest of the style. If you like to tuck your hair behind your ears, the front pieces stay visible in a way a hidden highlight never could.
You get brightness, but not a hard frame. That balance is the charm.
11. Metallic Silver Foilayage on Espresso Brown
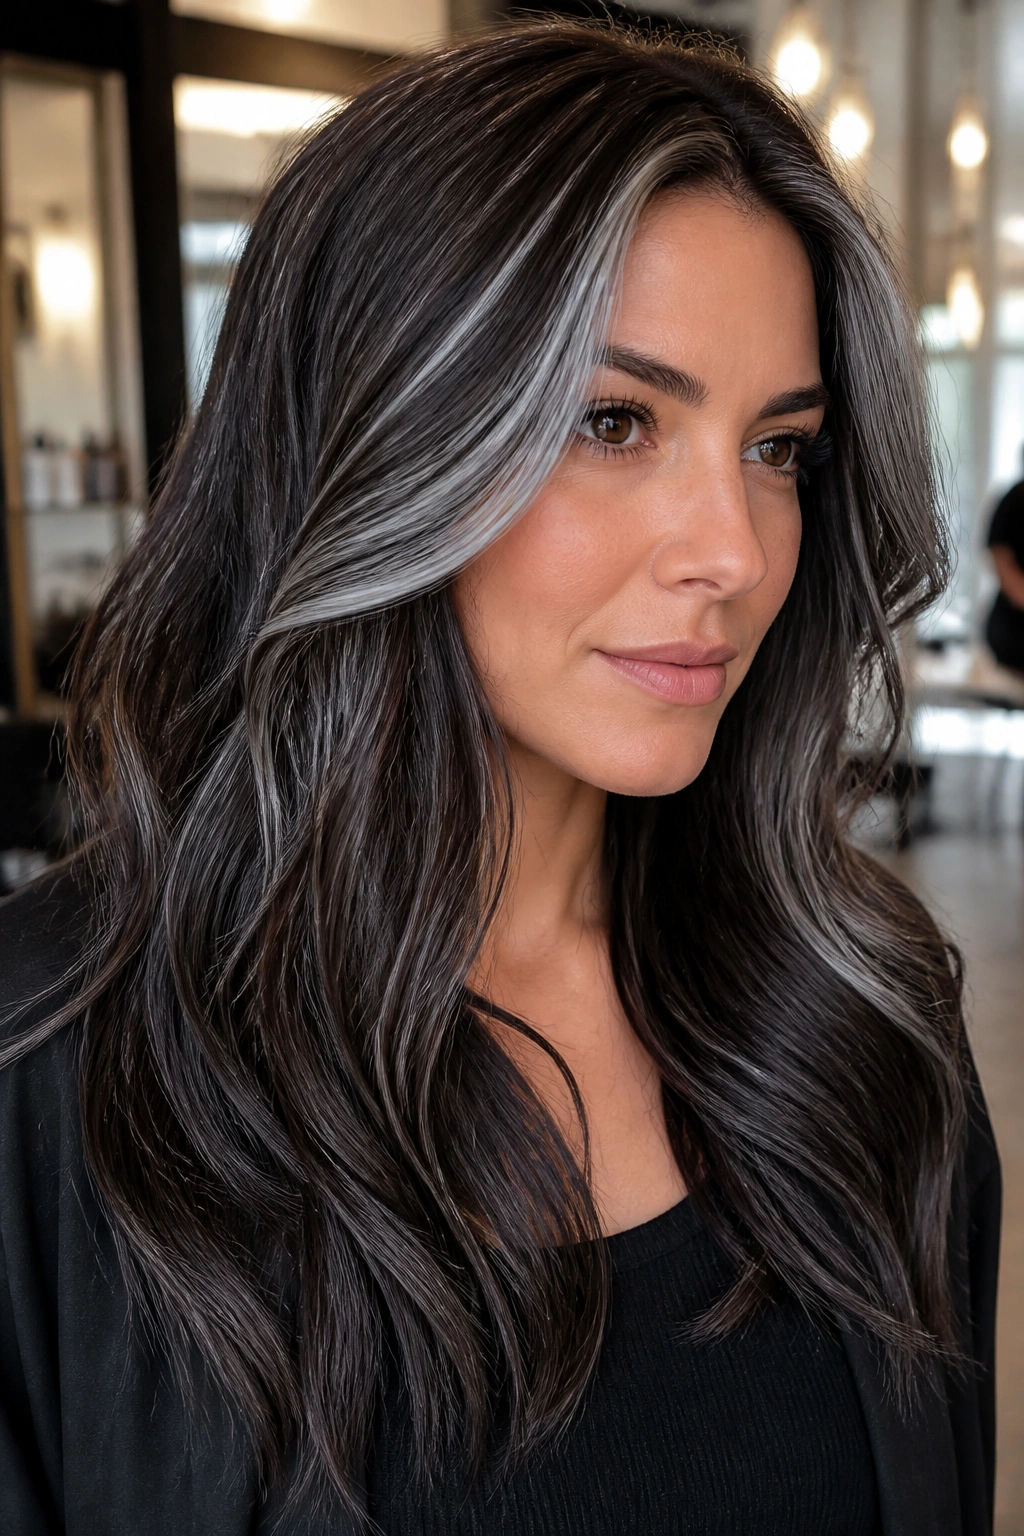
Foilayage gives you a stronger lift than freehand painting, and espresso brown often needs that extra push if you want a true metallic silver rather than a smoky gray. The foils hold heat, which helps the lightener work more evenly through dark hair.
Why Foils Matter
Balayage is softer, sure. Foilayage is sharper. If your hair starts very dark, the foil method can lift it a level or two more cleanly, which gives the toner a pale base to sit on. That base is what makes the silver read crisp instead of dull.
The look usually has a brighter surface and a deeper interior. That matters. Without the deeper brown underneath, espresso hair can lose its richness and start to feel thin. With foilayage, the silver pieces pop through the top, while the rest of the hair keeps its weight.
- Good for dark brunettes who want a higher contrast finish.
- Better on healthy hair that can handle a stronger lift.
- Works with sleek styles and defined waves.
- Ask for a toner that stays in the steel or pearl lane, not beige.
This is not the softest option on the list, but it is one of the cleanest when you want brightness.
12. Ash-Silver Ombré on Mid-Brown Hair
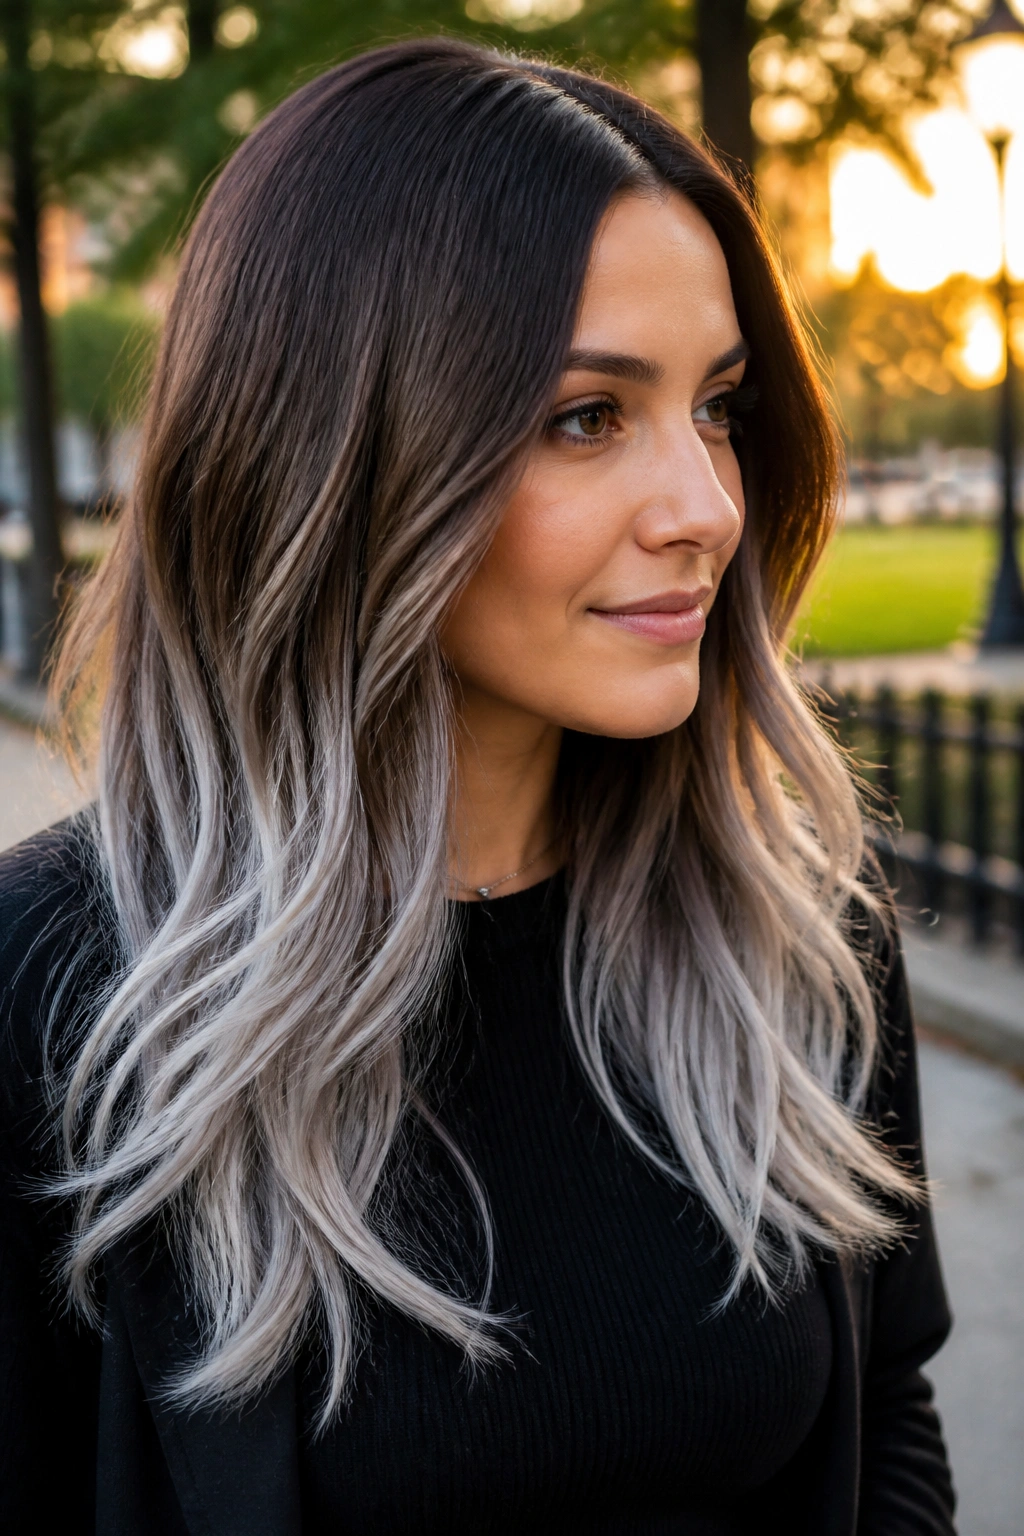
An ombré makes sense when you want the silver to feel like a slow fade, not a patchwork. On mid-brown hair, the transition can start around the ear or chin and drift into ash-silver at the ends.
How the Gradient Should Fall
The top third of the hair should stay noticeably brown. The middle can pick up cooler ribbons, and the ends should carry the fullest silver. That keeps the eye moving down the length instead of stopping at a hard line. If the fade starts too high, the hair can look washed out. Too low, and the silver barely shows.
This style suits people who like long layers and a bit of swing at the bottom. The silver ends catch on curls, bends, and loose braids, which gives the haircut more motion than a uniform color ever would. It is also a good choice if you want one part of the hair to feel lighter without changing the entire head.
There’s a calm kind of drama to it. Not loud. Just enough.
13. Silver Streaks Woven Through Curly Brown Hair
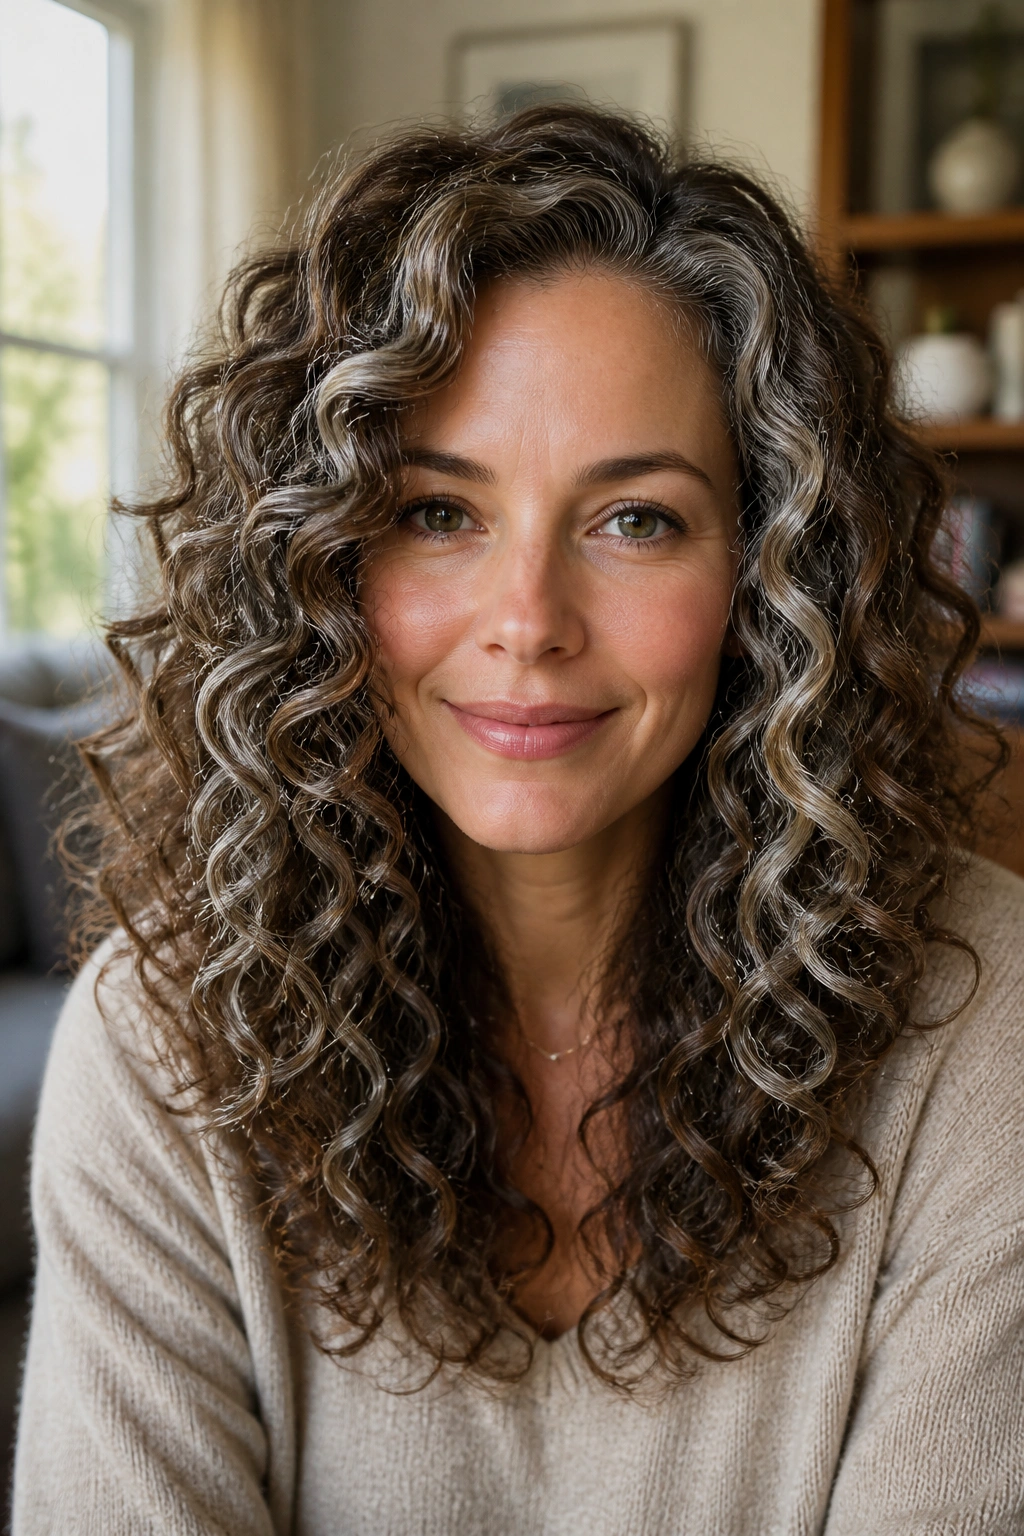
Curly hair needs a different map. A streak that looks balanced on straight hair can vanish once a curl springs back, so the silver has to be placed where the spiral shows the most surface.
Why Curly Placement Is Different
Color should ride the outer curve of the curl, not get buried inside it. When silver sits on the visible edge of each coil, it flashes as the hair moves and the shape stays readable. If the stylist paints the inner fold too heavily, the curl can look dark again once it dries.
That is why I like streaks rather than all-over silver on curls. A few well-placed ribbons can trace the pattern of the curl and make the texture pop. You do not need every ringlet lightened. You need the right ones.
This is especially good on dense curly brown hair, where the contrast can get muddy if too many sections are lifted. Keep the silver on the outer tiers, the crown, and the front pieces around the face. Leave some deeper brown underneath so the curls keep their shape.
Curly hair does not need more color noise. It needs clarity.
14. Micro Silver Highlights for Fine Brown Hair
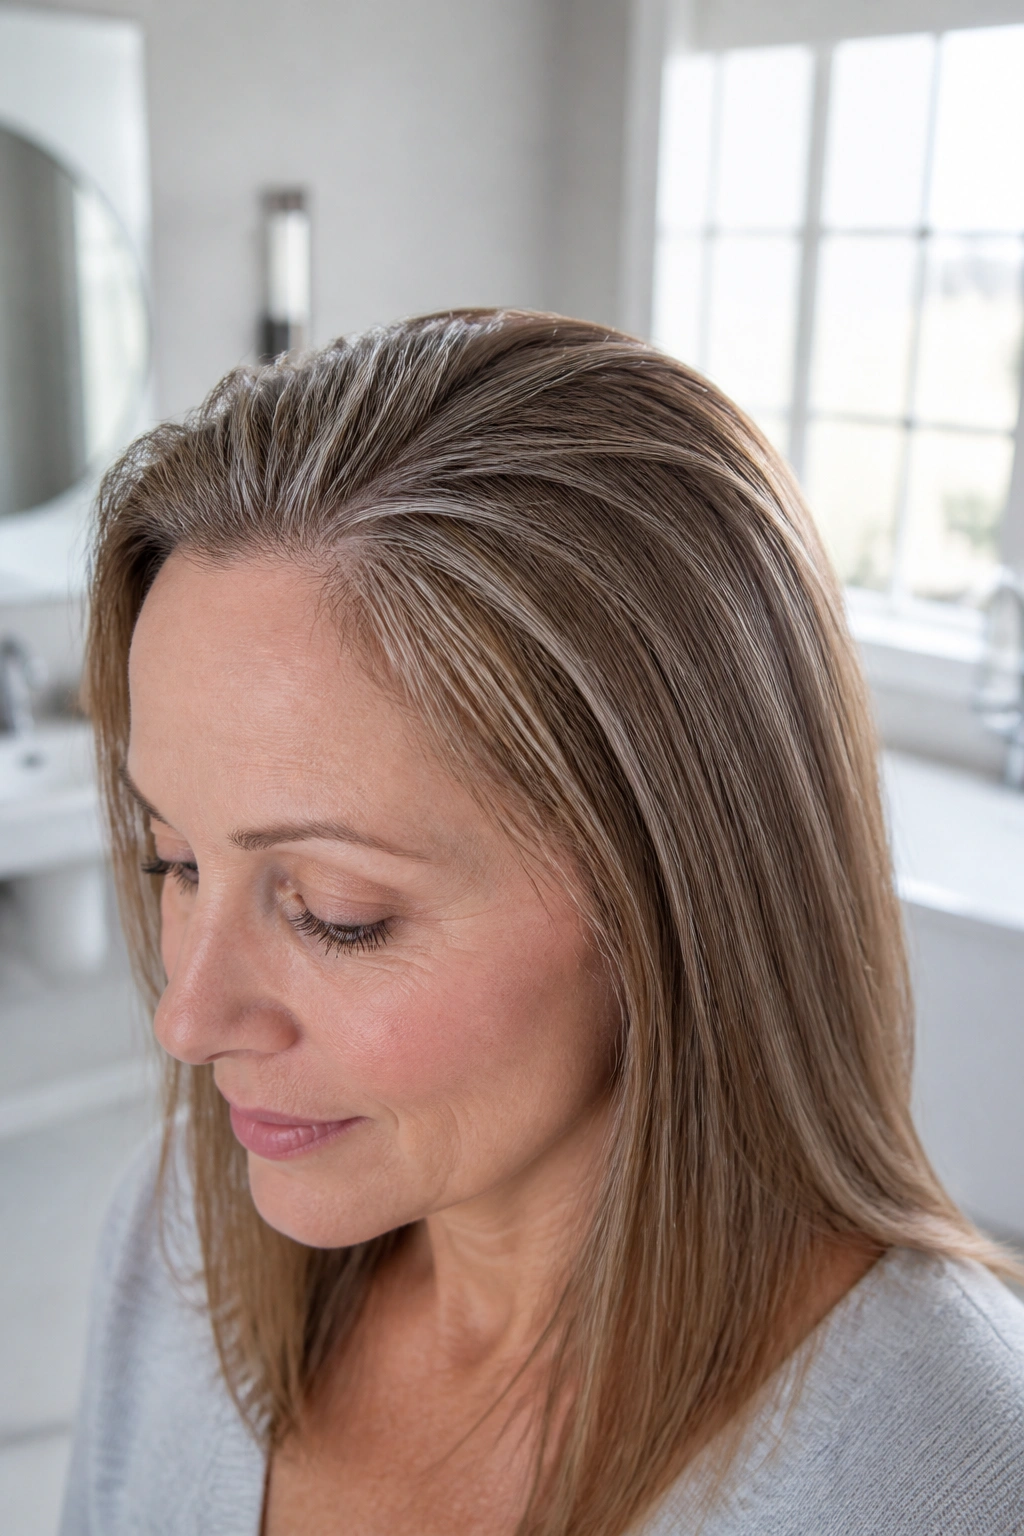
Thick highlights can make fine hair look skinnier, which sounds backward until you see it in a mirror. Tiny silver micro-highlights do the opposite. They break up the brown just enough to make the hair look fuller without drawing hard lines through the density.
The sections should be narrow and fairly close together at the crown and hairline, then soften as they move back. That gives fine hair a bright surface without leaving obvious gaps between the pieces. On a bob or shoulder-length cut, this can look cleaner than larger foils because the hair itself is not fighting the color.
What Helps Most
- Keep the silver pieces very thin.
- Concentrate brightness near the top and face.
- Leave some brown between highlights so the hair reads thicker.
- Style with a root lift or soft bend to show the detail.
Fine hair can handle silver, but it needs a lighter touch. Too much lightness in one place makes the ends look weak. A careful weave gives you the shine without the sparse look. That is the whole game here.
15. Charcoal-Laced Silver on Deep Brunette Hair
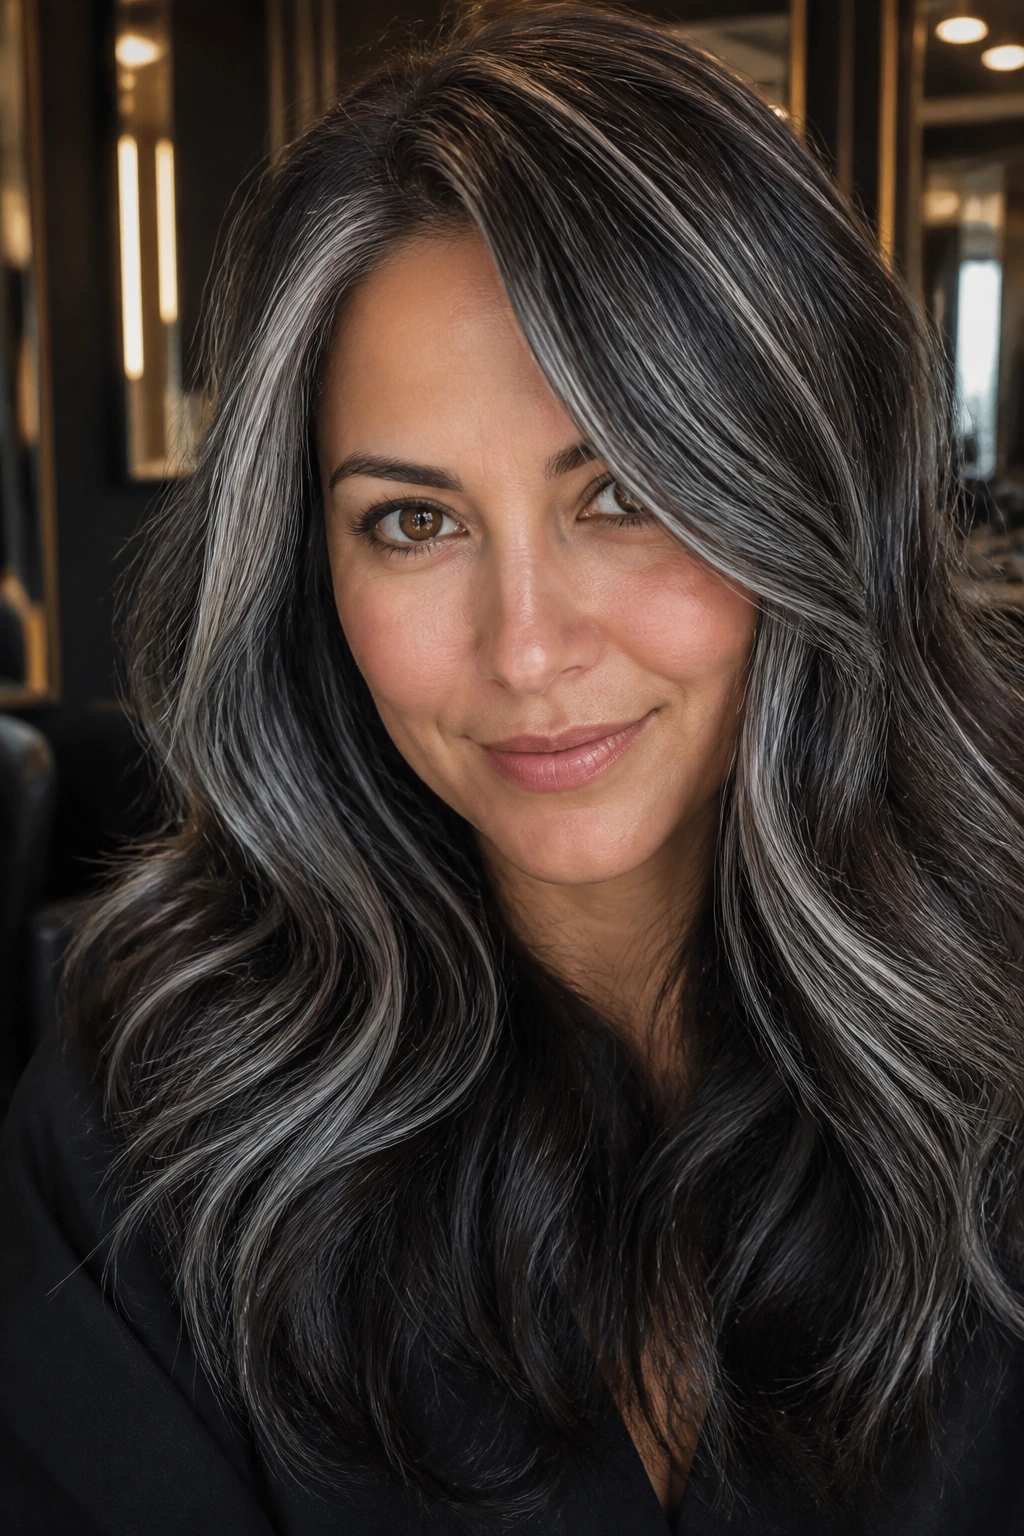
Charcoal and silver together are underrated on deep brunette hair. The dark charcoal pieces hold the base together, while the silver slices through them and gives the whole head more shape.
This is a better move than going straight to pale silver if your natural brown is nearly black. A full lift can be rough on the hair and hard on the color. Charcoal-laced silver keeps part of the darkness, so the look feels richer and less dry. It also works beautifully on sleek styles because the dark-light contrast shows every line of the cut.
The pieces should not be too evenly spaced. Put the silver where the eye naturally lands—around the face, along the top layer, and through the ends that move the most. Keep the charcoal in the gaps so the silver has something to sit against.
If you like strong contrast but hate flat blonding, this is a smart lane. It has teeth.
16. Silver Halo Highlights Around the Crown
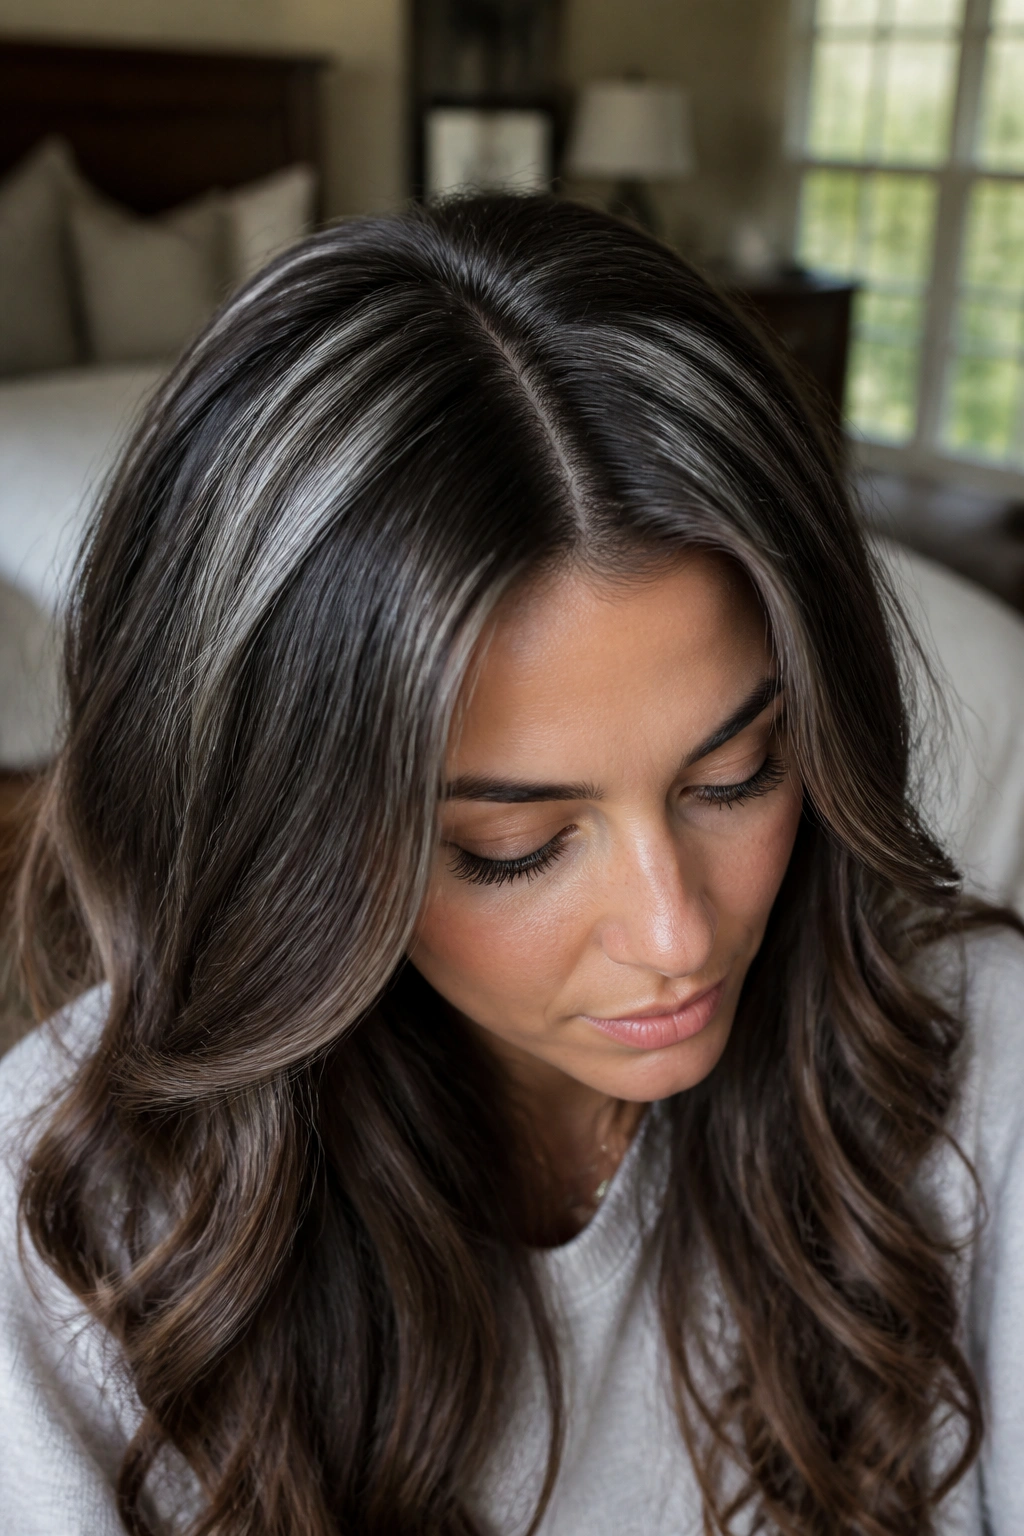
If the top looks heavy, brighten the crown. A silver halo sits around the upper head, just under the top layer, so the light catches where hair usually looks darkest and flattest.
The Trick
The halo should not be a full ring. That would look odd. It needs to be broken into soft sections that follow the curve of the head, starting near the part and tapering back toward the crown. That way, when you move, the silver peeks through the darker top layer instead of sitting on top like a helmet.
This idea is excellent for ponytails, messy buns, and half-up styles. The silver shows through the lift at the crown and gives the whole style a brighter finish. On down hair, it adds a little lift near the roots without needing a loud front frame.
I like this more on medium to long brown hair than on short cuts. The longer length gives the halo room to hide and reveal itself. Short hair shows everything at once, and this placement needs a little mystery to work.
17. Silver Underlights for Braids, Buns, and Updos
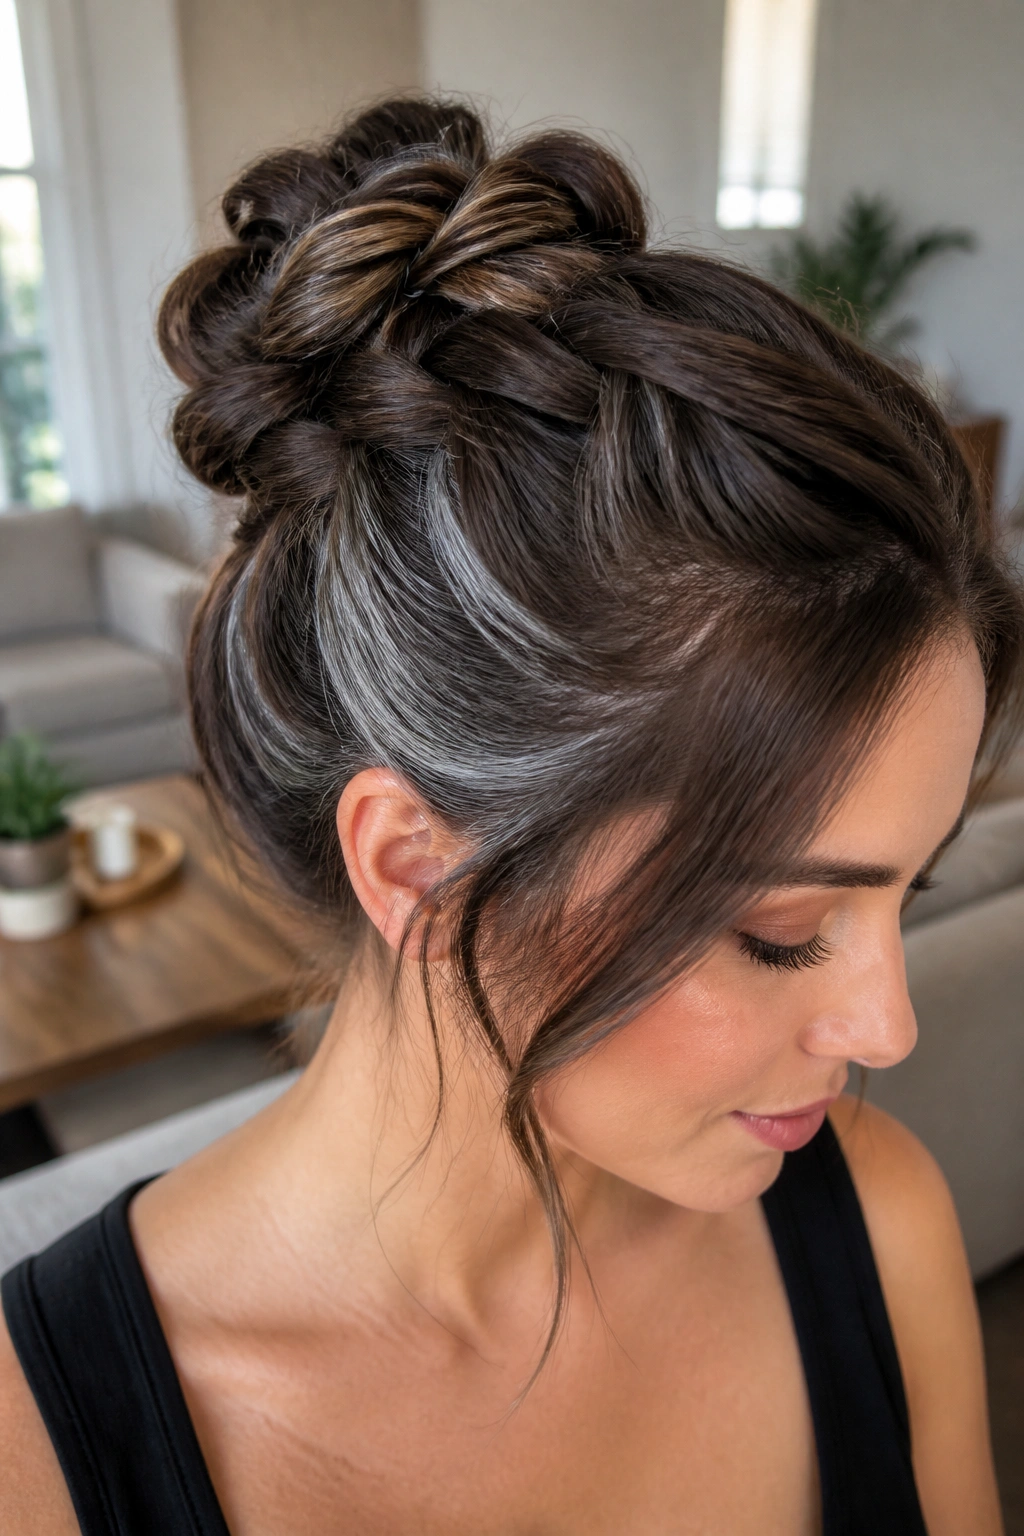
Some highlights are made to be seen in motion, not all the time. Silver underlights live in the lower layers and the nape, so they stay tucked away until you braid, twist, or pin the hair up.
That makes them a good fit for people who wear their hair in buns or braided styles several days a week. The brown on top keeps the look grounded, while the silver flashes through the woven sections underneath. In a fishtail braid, the contrast can look almost woven into the pattern itself.
The placement is practical too. Underlights are a little gentler on the hair because they are not exposed all day to sun and heat tools. They also grow out in a quieter way. You can go from office-friendly to event-ready with the same cut, which is more useful than people think.
If your hair life involves pins, clips, and ties, this may be the most useful silver option on the list. It works hard without making a fuss.
18. A Silver Glaze Over Warm Brown Balayage
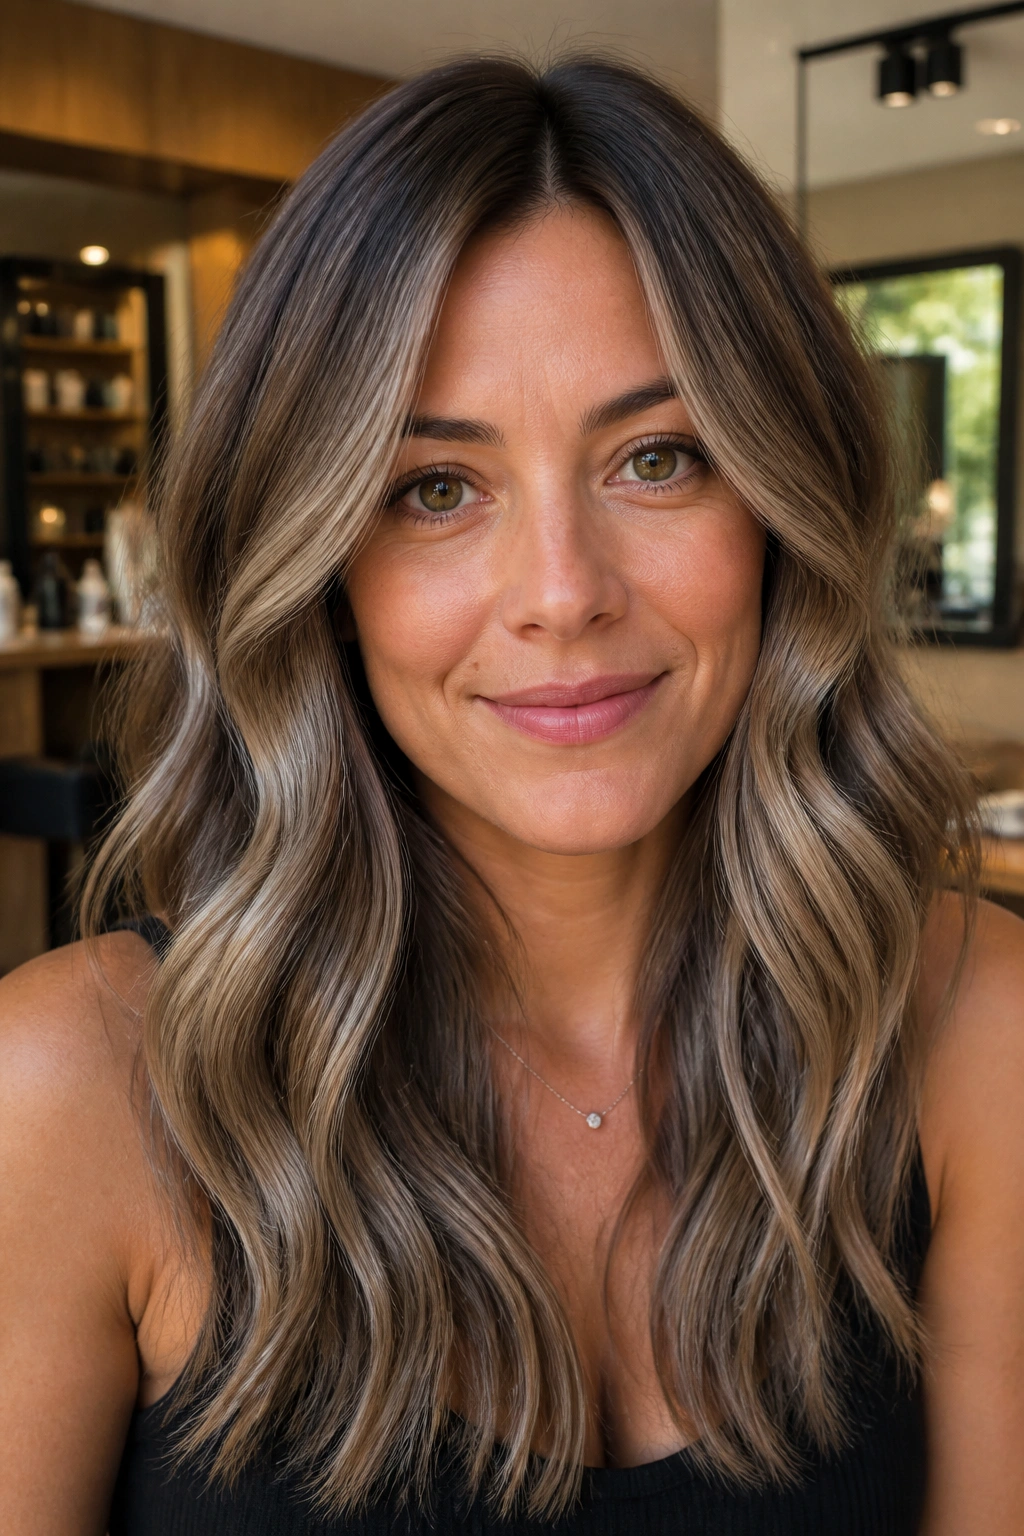
Sometimes the fix is not more lightening. It is a glaze. A silver glaze can cool down warm brown balayage that has drifted beige, gold, or orange and pull it back toward that soft metallic edge.
When a Glaze Is Enough
A glaze is deposit-only, which means it adds tone without lifting the hair again. That is a big deal. If your highlights are already light enough but they look too warm, a silver or ash glaze can clean up the finish in one sitting. If the hair is still orange, though, a glaze will not save it. The base has to be light enough first.
This works well when you like the shape of your color but hate the warmth that creeps in after a few washes. It is also a nice maintenance move between bigger appointments. The hair looks more even, and the silver pieces regain that smoky cast.
I would use this on balayage that already has a pale blonde or soft brown base. It is not the right tool for dark, stubborn hair that still needs lift. That would be asking a toner to do a job it cannot do.
19. Silver Teasylights with Soft Root Blur
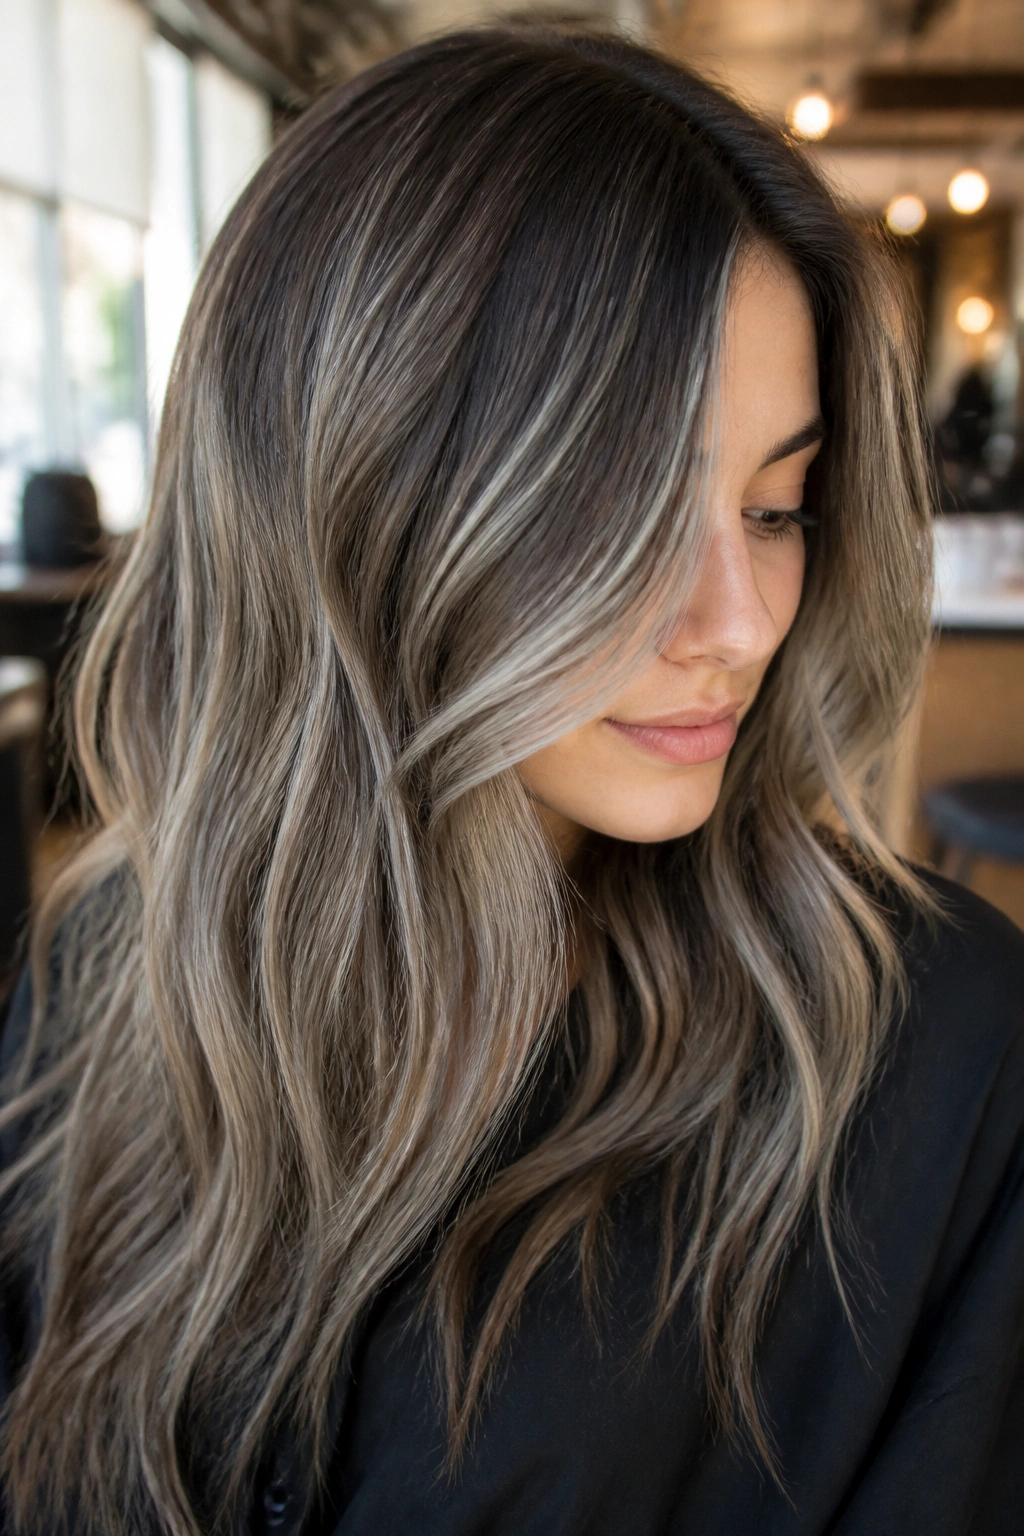
Teasylights are softer than regular foils because the sections are lightly backcombed before the lightener goes on. That little tease blurs the line at the root, which is exactly why silver teasylights work so well on brown hair.
The highlights come out airy, not striped. You still get brightness, but the root area stays diffused, so the grow-out is easier to live with. That makes teasylights a smart choice for medium-length and long hair where harsh regrowth would show fast. The silver can sit through the top and mids while the root blur keeps the finish calm.
Why They Look Softer
The backcombing prevents the lightener from starting in a solid block. That gives you a feathered effect when the hair is worn down, and a lived-in one when it is tied up. It also makes the silver blend better with the brown base because the transition is already softened before toner even enters the picture.
If you like color that feels polished without looking freshly done every single week, this is one to keep in mind. It is one of the most wearable silver ideas on brown hair.
20. Platinum-Silver Accent Pieces on Dark Brown
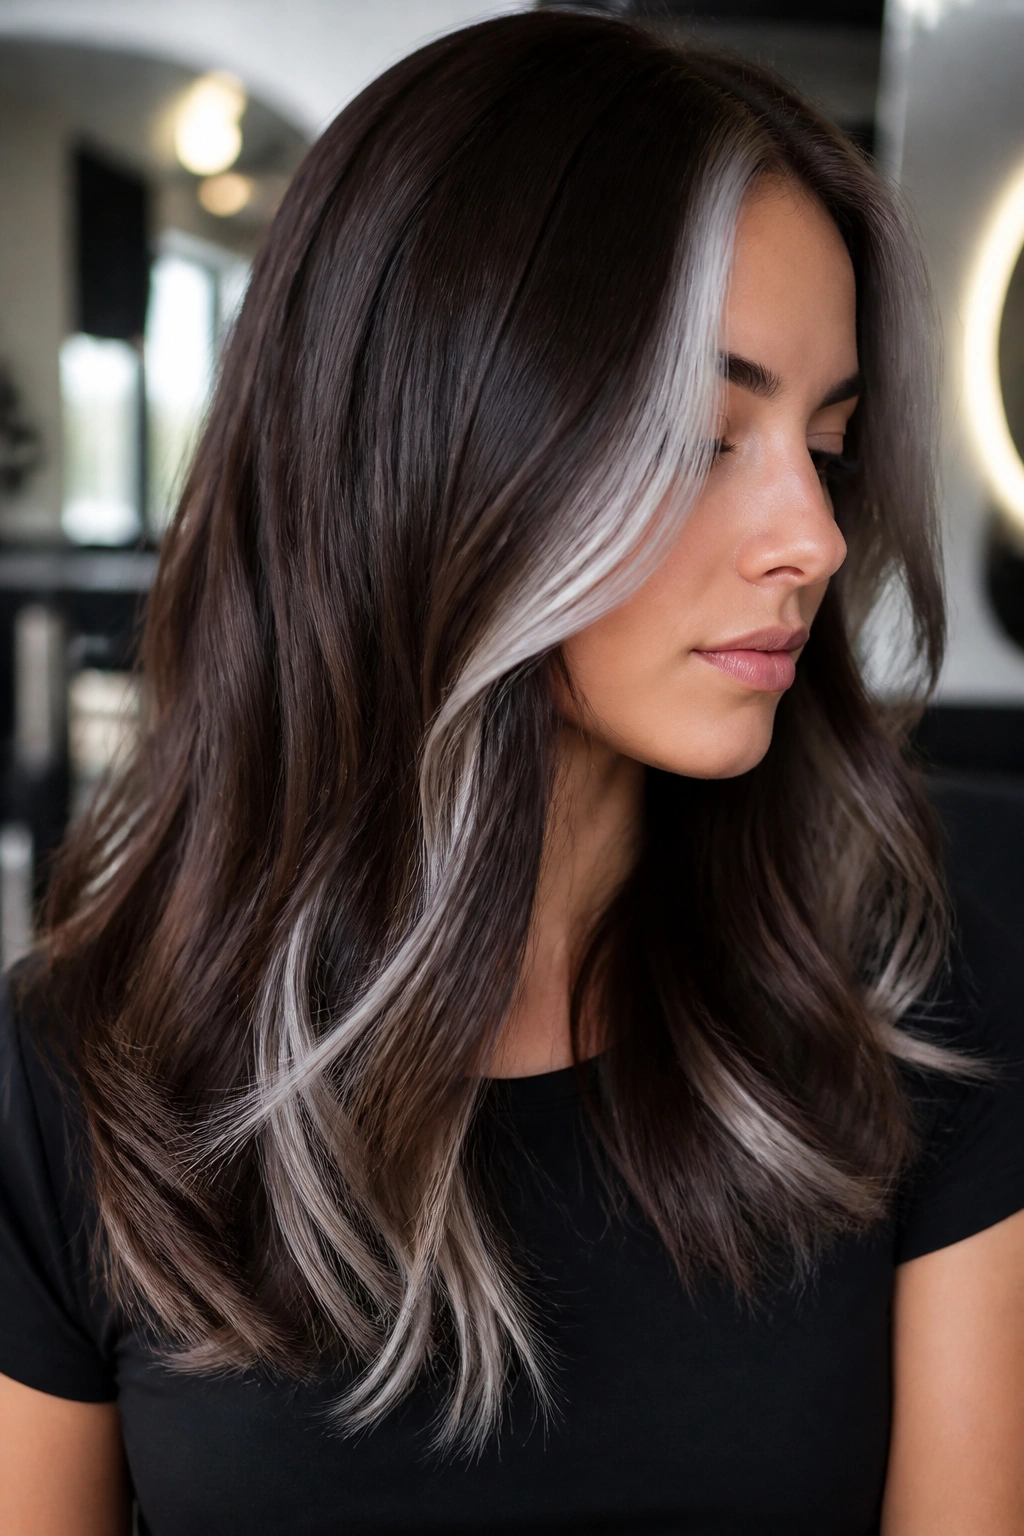
A few platinum-silver pieces can carry the whole look if the rest stays deep. That is the move here: not a full silver wash, but a handful of sharp accents that hit hard against a dark brown base.
The best placements are usually near the face, along one side part, or tucked into the outer ends of layered hair. You do not want too many of them. Three or four strong pieces can say more than a whole head of half-committed highlights. The contrast is cleaner when the dark brown still dominates.
This style suits people who like bold hair but do not want a full blonding process. It also looks strong on sleek cuts, sharp waves, and blunt lobs where the lines are easy to read. On very textured hair, the accents can disappear if they are too thin, so they need enough width to survive movement.
If you want a little drama and a lot of contrast, this is the punchiest option in the group. It is direct. No apology needed.
Final Thoughts
The best silver highlights on brown hair do one thing well: they respect the brown. Too much lightness, and the hair loses depth. Too little planning, and the silver turns fuzzy, flat, or oddly beige.
Placement is the real secret. Babylights, money pieces, teasylights, underlights, and rooted melts all tell a different story, even when the toner lives in the same cool family. That is why a good consultation photo matters more than a trendy name.
Bring two or three pictures if you can. One for the placement, one for the tone, and one for the density of the highlights. That small bit of prep saves a lot of guesswork, and it usually gets you much closer to the silver look you had in mind in the first place.
