



Long hair can look polished or fussy in ten seconds flat. The difference usually comes down to the ponytail. Sleek ponytail styles for long hair solve that problem without asking you to chop off inches or hide the length you actually love.
The funny part is that long hair is both a gift and a headache here. It gives you weight, swing, and that satisfying heavy line down your back, but it also means every bump at the crown shows up, every flyaway sticks out like it has a grudge, and every elastic has to work harder than it does on shoulder-length hair.
That’s why the best ponytail styles for long hair are not just “pulled back.” They’re shaped. They use the weight of the hair on purpose, keep the hairline clean, and decide very carefully where the ponytail sits, because an inch higher or lower can change the whole face.
Some of these styles are sharp and glossy. Some are softer but still controlled. A few are the kind I’d wear when I want my hair to look expensive without actually doing much to it. And that is a very specific kind of beauty, which is probably why it never gets old.
1. Glass-Smooth High Ponytail
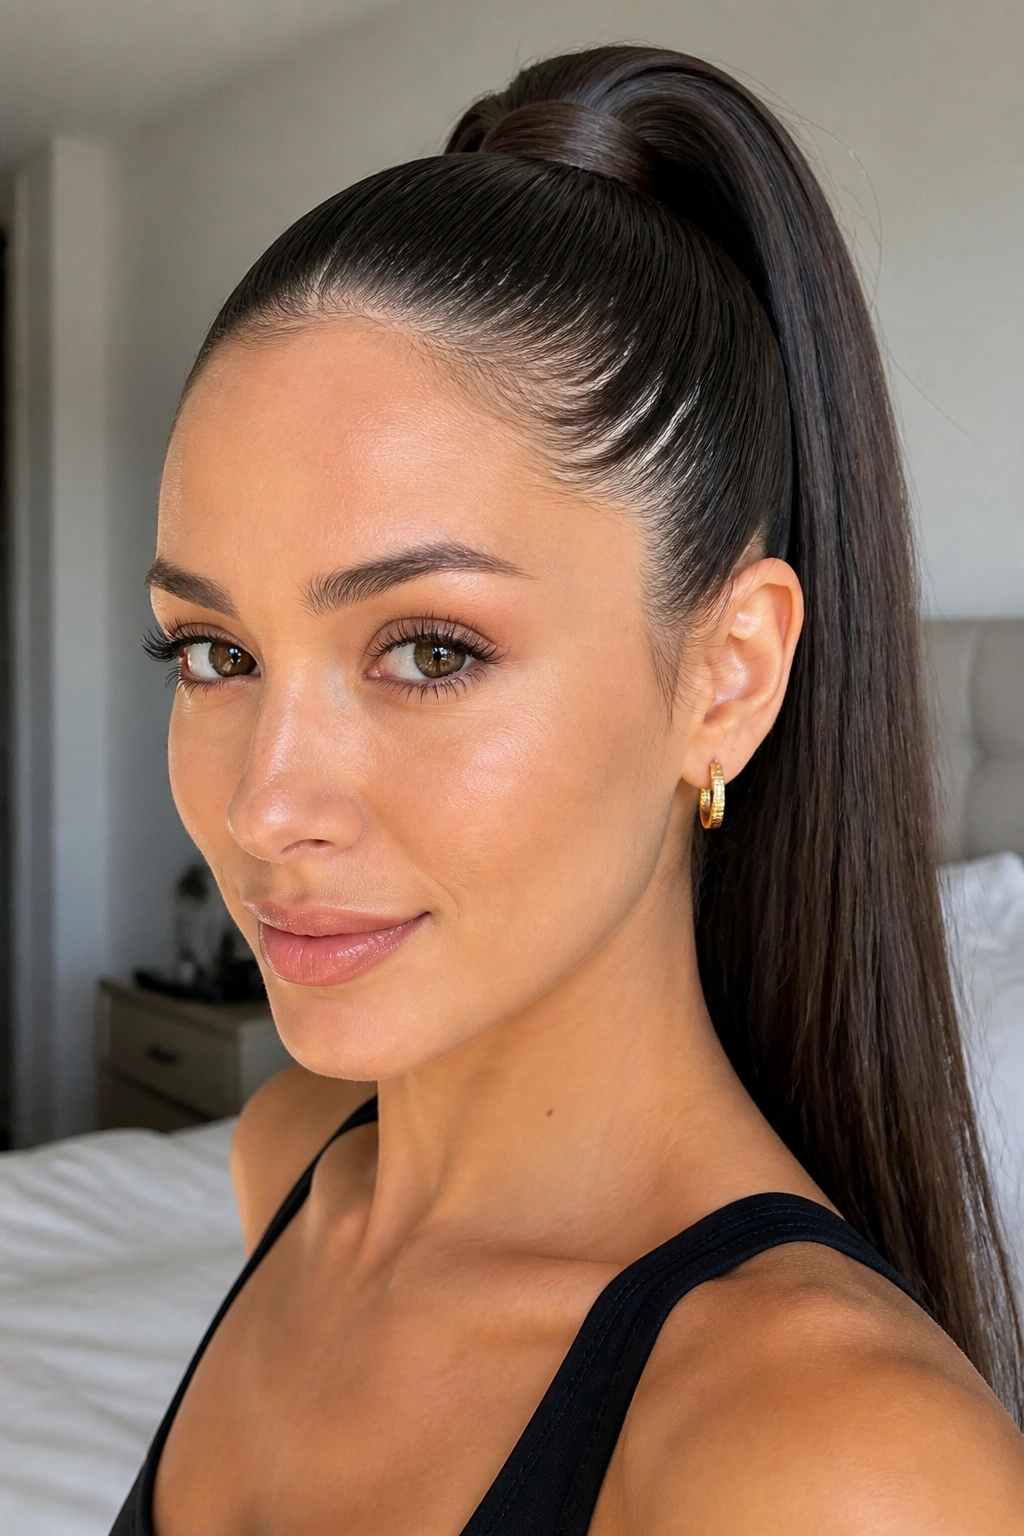
A high ponytail can look sporty in five minutes and sharp enough for evening in the next five, depending on how clean you make the crown. The trick is tension without puffiness. You want the hair lifted, not teased into a little helmet.
Start by brushing the hair straight up from the temples and nape with a boar-bristle brush or a dense paddle brush. Add a thin layer of styling gel or smoothing cream along the hairline first, then secure the ponytail at the top of the head with a strong elastic. If your hair is heavy, use two elastics stacked close together. Long hair can pull a single tie down faster than you’d expect.
A wrapped base finishes the look neatly. Take a small strand from underneath the ponytail, wrap it around the elastic, and pin the end underneath with a bobby pin. That one detail makes the style look deliberate instead of rushed.
What it does best
- Lifts the face and makes the cheekbones look sharper.
- Keeps long lengths off the neck without losing drama.
- Works well with straightened hair, blown-out hair, or naturally smooth textures.
- Holds up better if you set the crown with a light mist of hairspray before the elastic goes in.
My favorite part: it looks clean from the front and full from the side. That balance is hard to beat.
2. Low Center-Part Ponytail
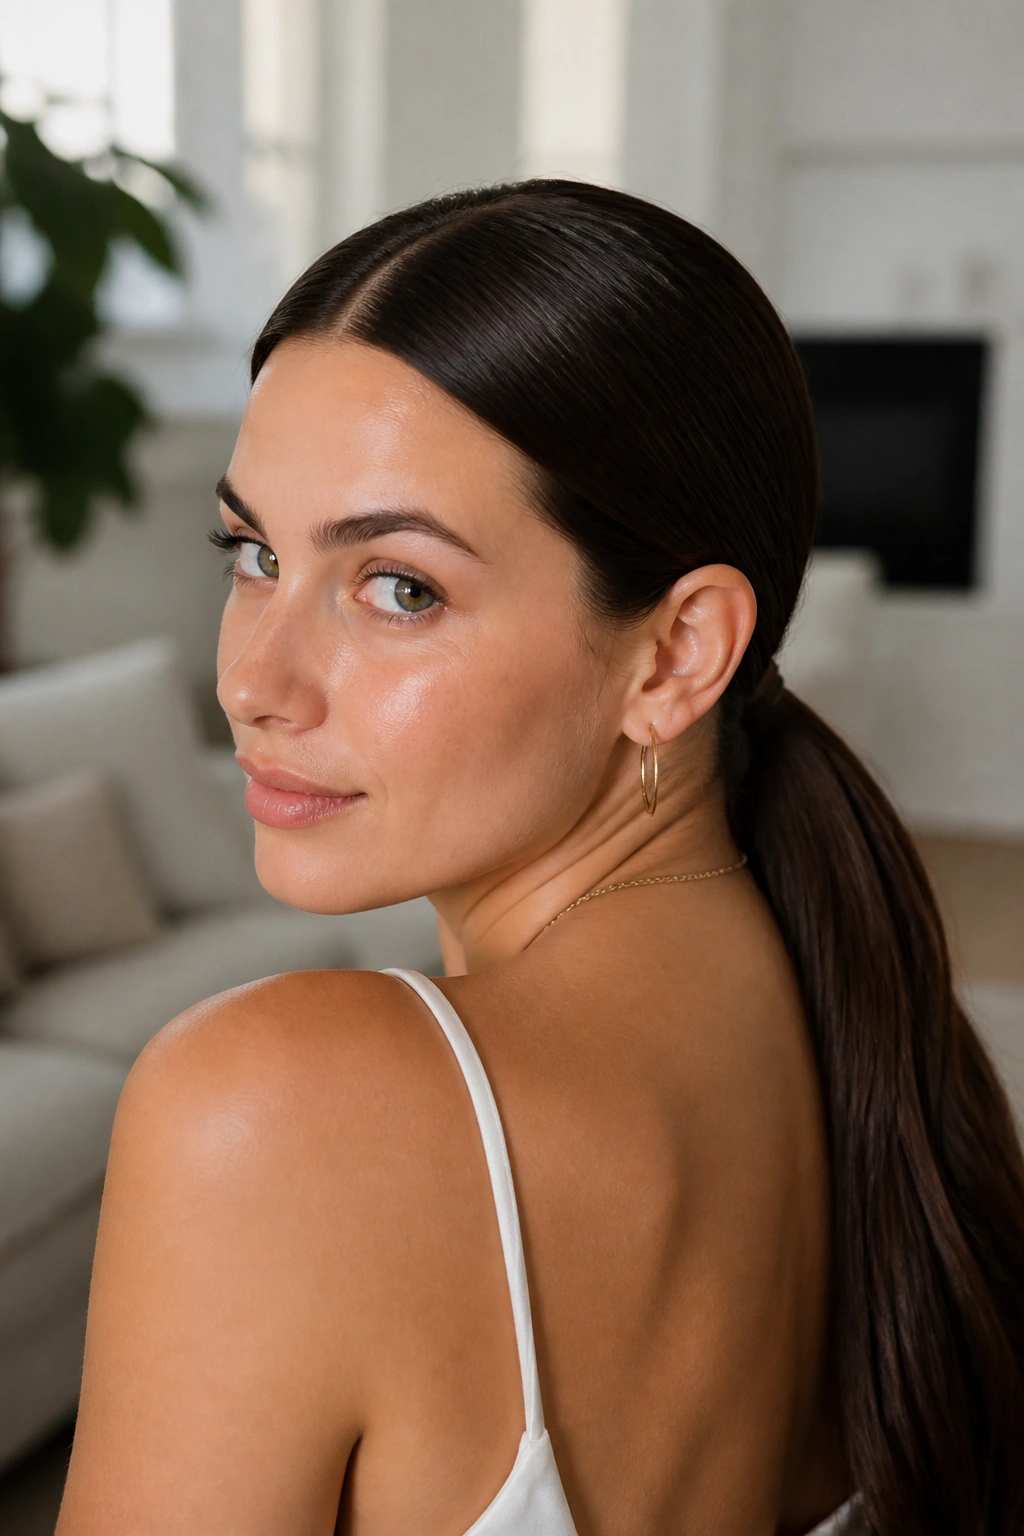
Why does a center part change everything? Because it gives the face a straight, balanced frame before the ponytail even starts. A low center-part ponytail feels calm and tailored, and on long hair it has a nice heavy line that hangs beautifully at the nape.
Part the hair cleanly down the middle with the tail of a comb. Smooth both sides back using a light serum or cream, but don’t drown the roots. Too much product around the hairline can make the style look greasy instead of glossy. Bring the ponytail to the center of the nape and secure it snugly.
Why it stays elegant
The center part keeps the style from looking random. That sounds basic, but it matters. On long hair, the weight of the lengths already creates drama, so the part needs to stay quiet and precise.
A low ponytail like this is a good match for sharp collars, tailored jackets, and makeup that leans clean rather than heavy. If your hair is layered, a few shorter pieces may escape around the temples. Leave them if they’re fine and smooth. Fight them if they stick out at odd angles.
A tiny bit of shine spray on the final length helps too. Not a cloud. A pass or two.
3. Wrapped-Base Ponytail
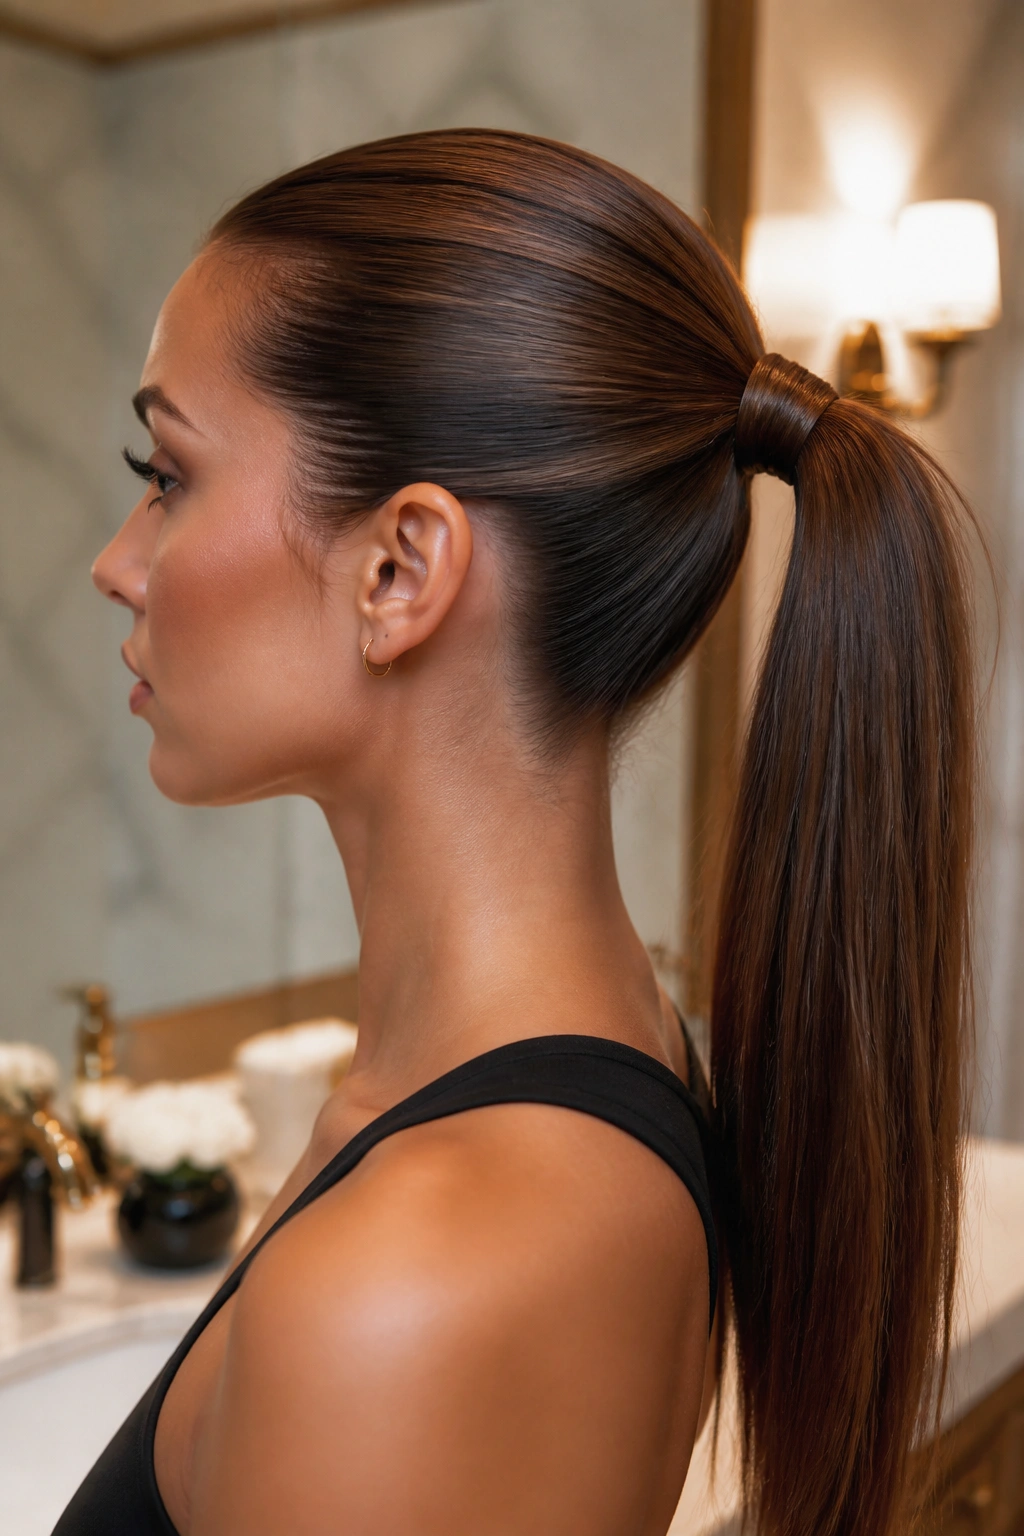
A wrapped base is the fastest way to make a basic ponytail look expensive. There’s no magic here. Just less visible elastic, which is often the whole problem with long hair pulled back too casually.
Make any ponytail you like — high, mid, or low. Then pull out a one-inch section from underneath the ponytail and smooth it flat with your fingers or a touch of cream. Wrap it tightly around the elastic, overlapping each loop so the band disappears. Pin the end under the ponytail, not off to the side. Side pins have a habit of sliding out at the worst time.
Small details that matter
- Use a strand from underneath the ponytail so the wrap blends in.
- Keep the wrap snug, not loose.
- Choose a bobby pin that matches your hair color if you can. It matters more than people think.
- If your hair is very silky, mist the strand lightly before wrapping so it has a little grip.
This style works on almost every long-hair texture. Straight hair gives you the cleanest result, but wavy hair can look good too if the surface is smoothed first. The wrapped base doesn’t call attention to itself. That is exactly why it works.
4. Bubble Ponytail With a Sleek Crown
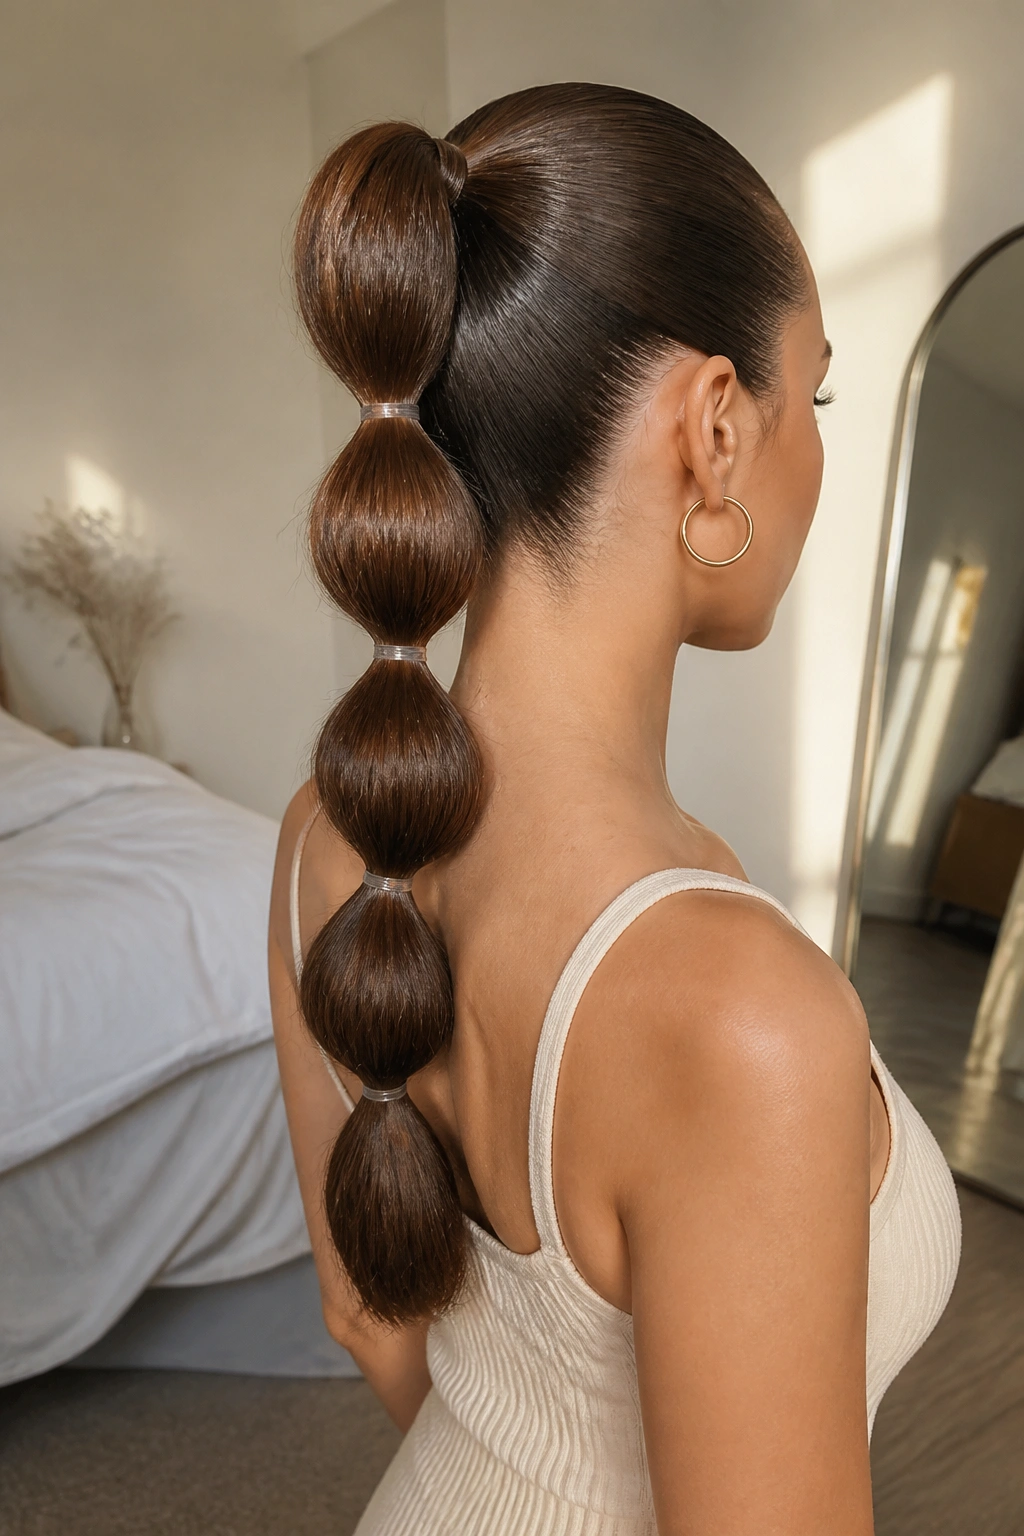
A bubble ponytail can look playful fast, which is why the crown has to stay sleek. Smooth roots, round sections, clean gaps. That’s the whole game.
Pull the hair into a high or mid ponytail and secure it firmly. Then add clear elastics down the length of the ponytail every 2 to 3 inches, depending on how long your hair is and how full you want each “bubble” to be. Gently tug the sections between elastics so they puff out evenly. Don’t pull from the very top or you’ll wreck the shape.
The slick crown keeps the style from drifting into weekend-casual territory. If the top is clean and the bubbles are evenly spaced, the whole thing reads as styled, not random. Long hair is useful here because the extra length makes each bubble look fuller and more defined.
A lot of people stop too early and leave the bottom section limp. I wouldn’t. Finish with one last elastic close to the ends so the tail doesn’t spread out in a messy fan. That tiny fix keeps the silhouette neat.
5. Side-Swept Low Ponytail
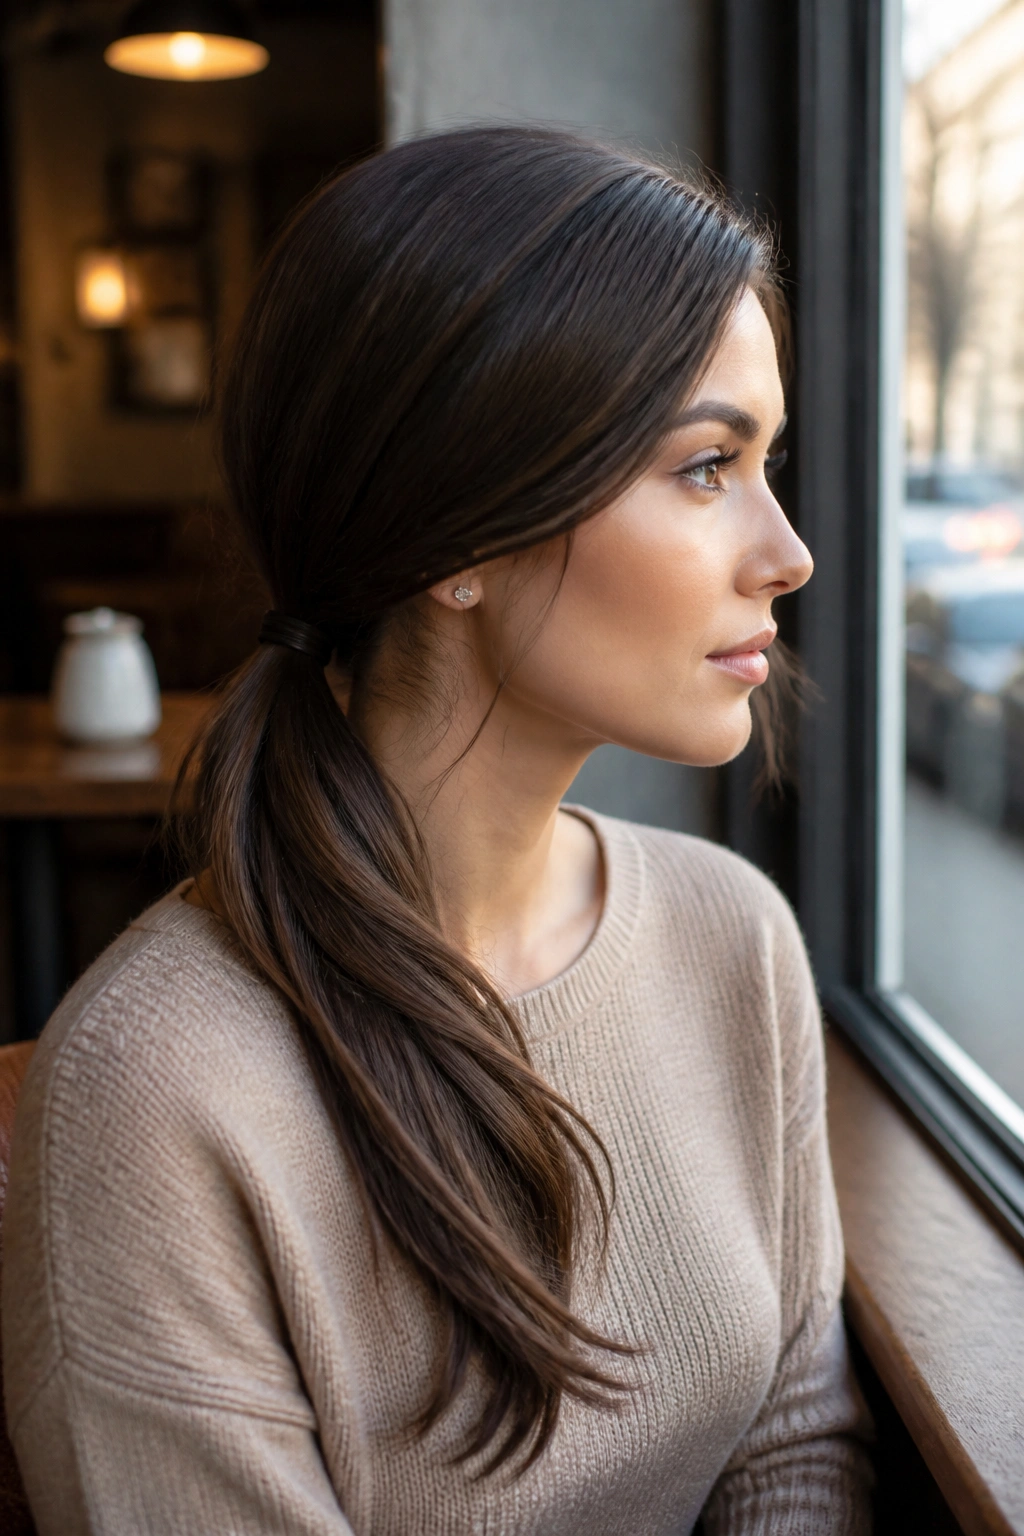
A side-swept low ponytail has a softer face than a straight-back style, and I think that is why people keep coming back to it. It feels a little more relaxed, but not sloppy. Not even close.
Sweep the hair into a low position slightly behind one ear rather than dead center at the nape. Use a brush to guide the roots over smoothly, then secure the ponytail with a strong elastic. If your hair is very thick, support the base with a second tie underneath the first one. Heavy lengths can drag a side pony down faster than you’d expect.
One thing I like about this style is the shape it gives the profile. The ponytail sits along the shoulder line, so the hair feels anchored instead of floating away from the head. That makes it especially good with long layers, because the ends can spill over one shoulder without looking rough.
A side-swept ponytail also gives you room to play with the part. A deep side part creates a little more drama. A shallow side part keeps it clean. Either one works, and that flexibility is part of the appeal.
6. Braided-Base Ponytail
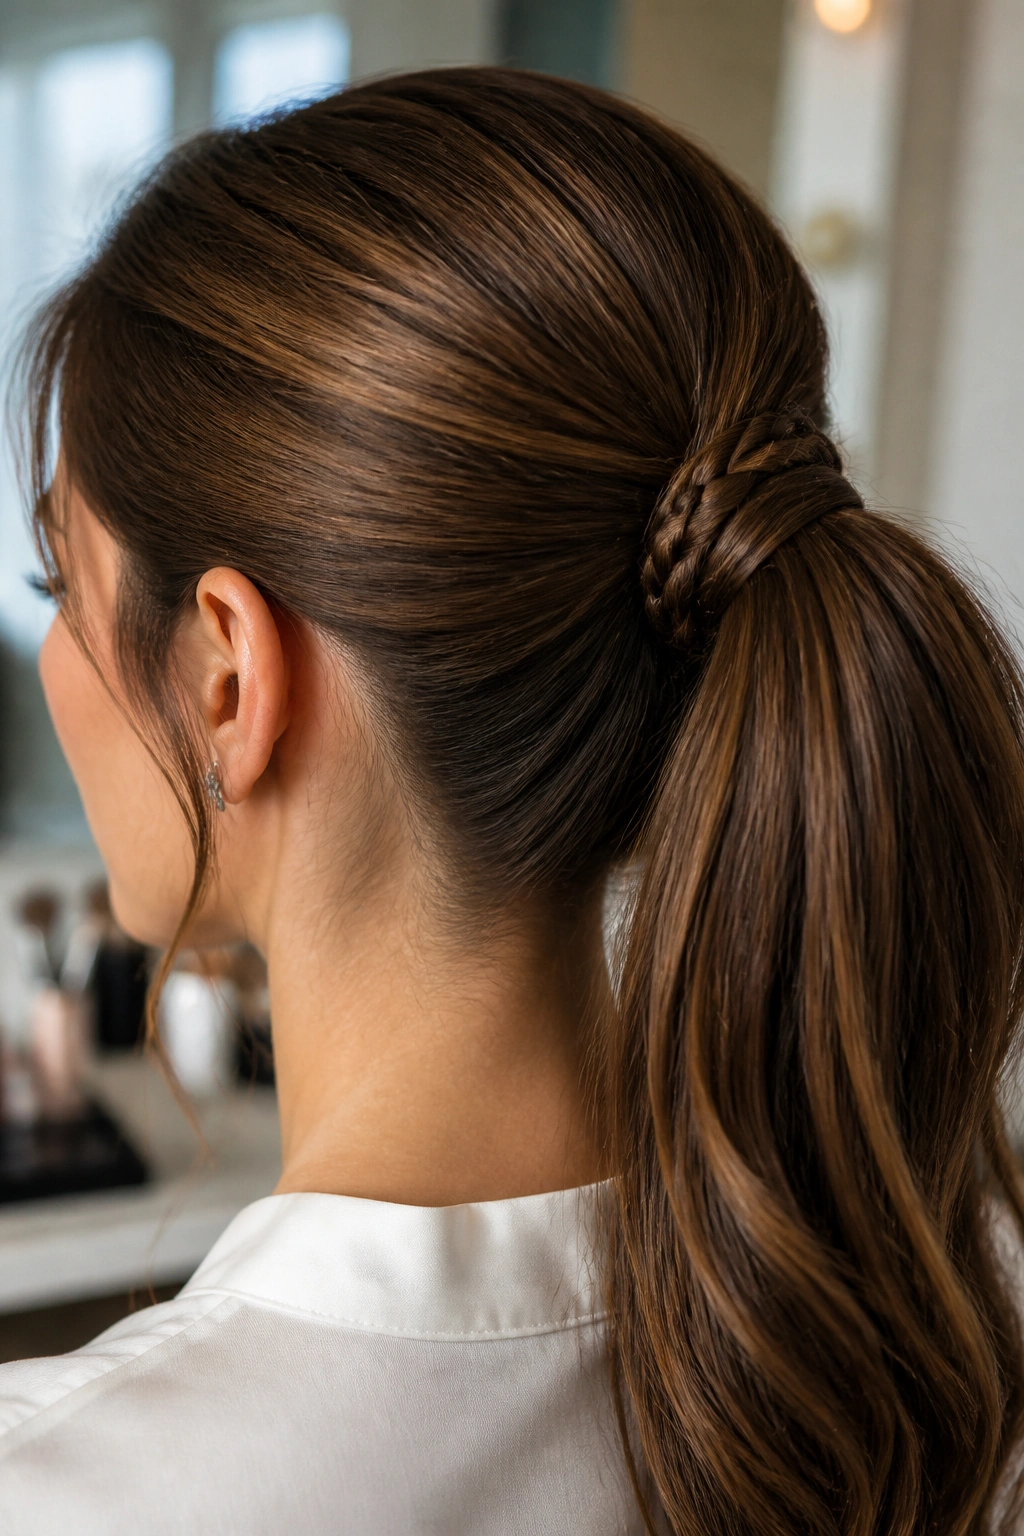
The first two inches matter here. If you braid the base of the ponytail before the length drops free, the whole style feels more controlled and a lot less ordinary. That braided section sits flat against the scalp and gives the ponytail a built-in finish.
Start with a low or mid ponytail. Before securing the full tail, take a small section from the front or side and braid it tightly for a few inches, then fold that braid into the ponytail base or wrap it around the elastic. It sounds fussy. It isn’t. Once you’ve done it once or twice, it goes quickly.
What the braid does
- Keeps the top from puffing up during the day.
- Adds grip so the ponytail stays anchored.
- Makes long, straight lengths look more deliberate.
- Gives you a nice detail without needing accessories.
If your hair is layered, a braid at the base helps hide those shorter pieces that often slip loose around the nape. That is one of those small real-life fixes people don’t talk about enough. The style looks better because the base behaves better.
7. Wet-Look Ponytail
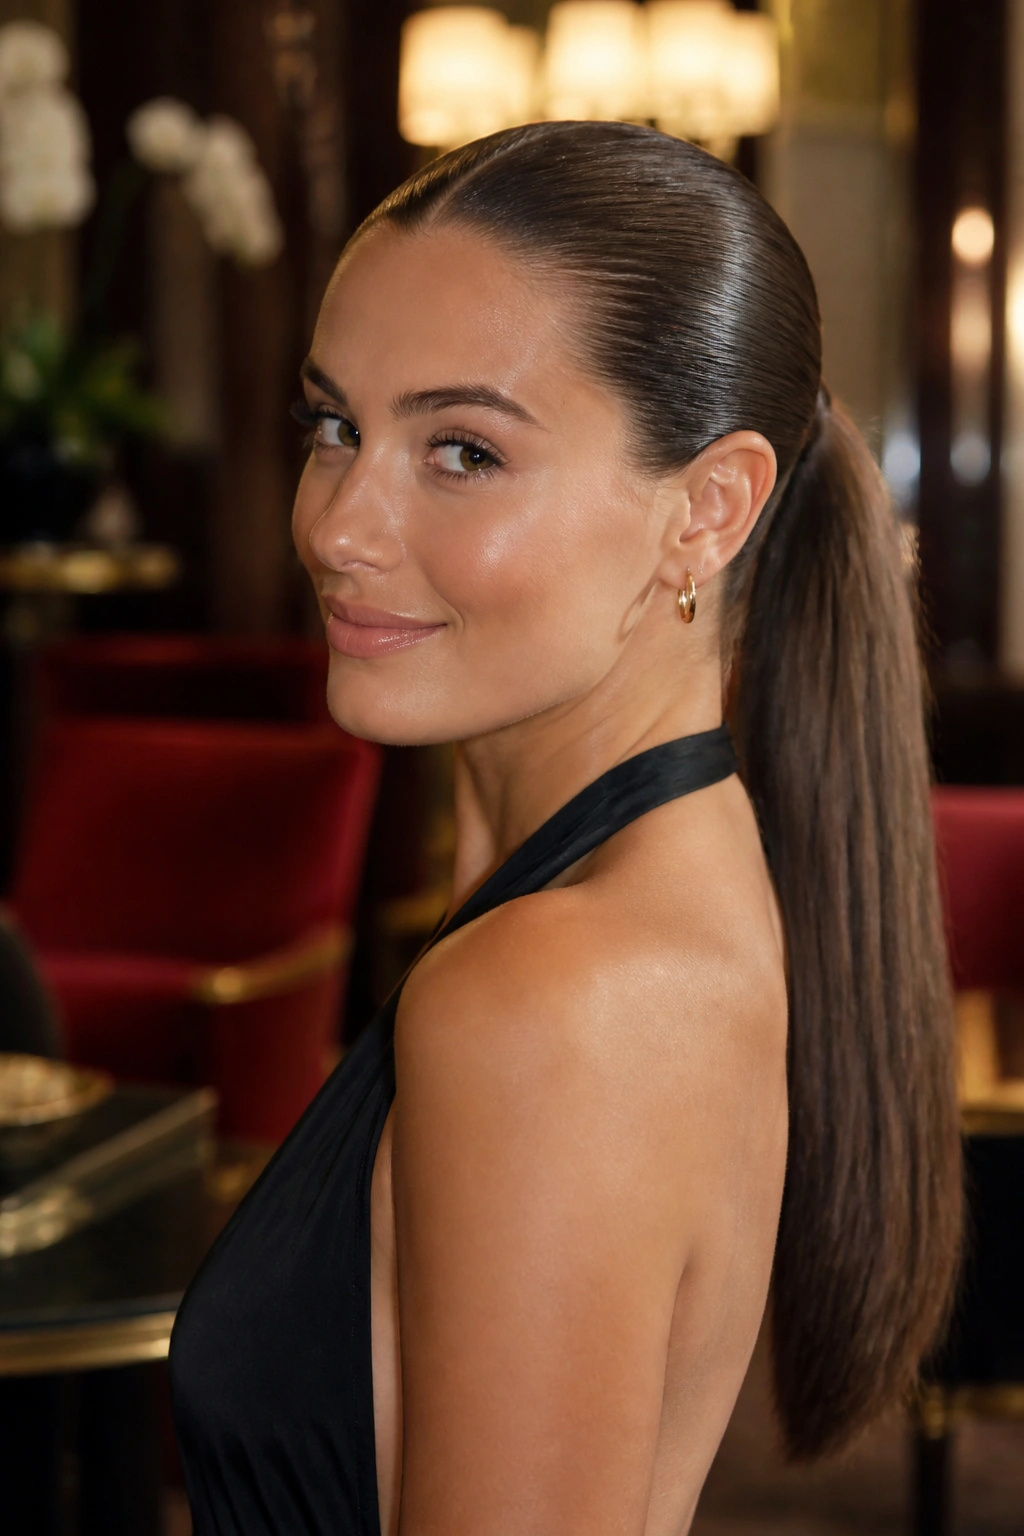
Is it actually wet? No. And it should not be dripping or crunchy. But it should look slick, shiny, and a little glossy at the roots, like you stepped out of a clean, controlled styling moment and not a windy parking lot.
Use damp or fully dry hair. I prefer dry hair with a strong-hold gel worked through the top section from the hairline back toward the crown. Keep the product close to the roots and use less than you think you need. Too much gel will turn the style heavy and sticky in a way that shows under bright light. Smooth the hair with a fine-tooth comb, then secure the ponytail low or mid-height.
How to keep it polished
- Use gel first, then a tiny mist of shine spray only on the surface.
- Press down flyaways with the flat side of a brush.
- Pick a simple elastic; ornate bands fight the whole look.
- Don’t touch the top once it’s set.
This style works best for evenings, sharper outfits, and long hair that already lies fairly flat. Very coarse hair can do it too, but it usually needs a little extra smoothing cream before the gel goes on. Keep the lengths sleek, not wet-looking all the way down unless you want a dramatic finish.
8. Twisted Crown Ponytail
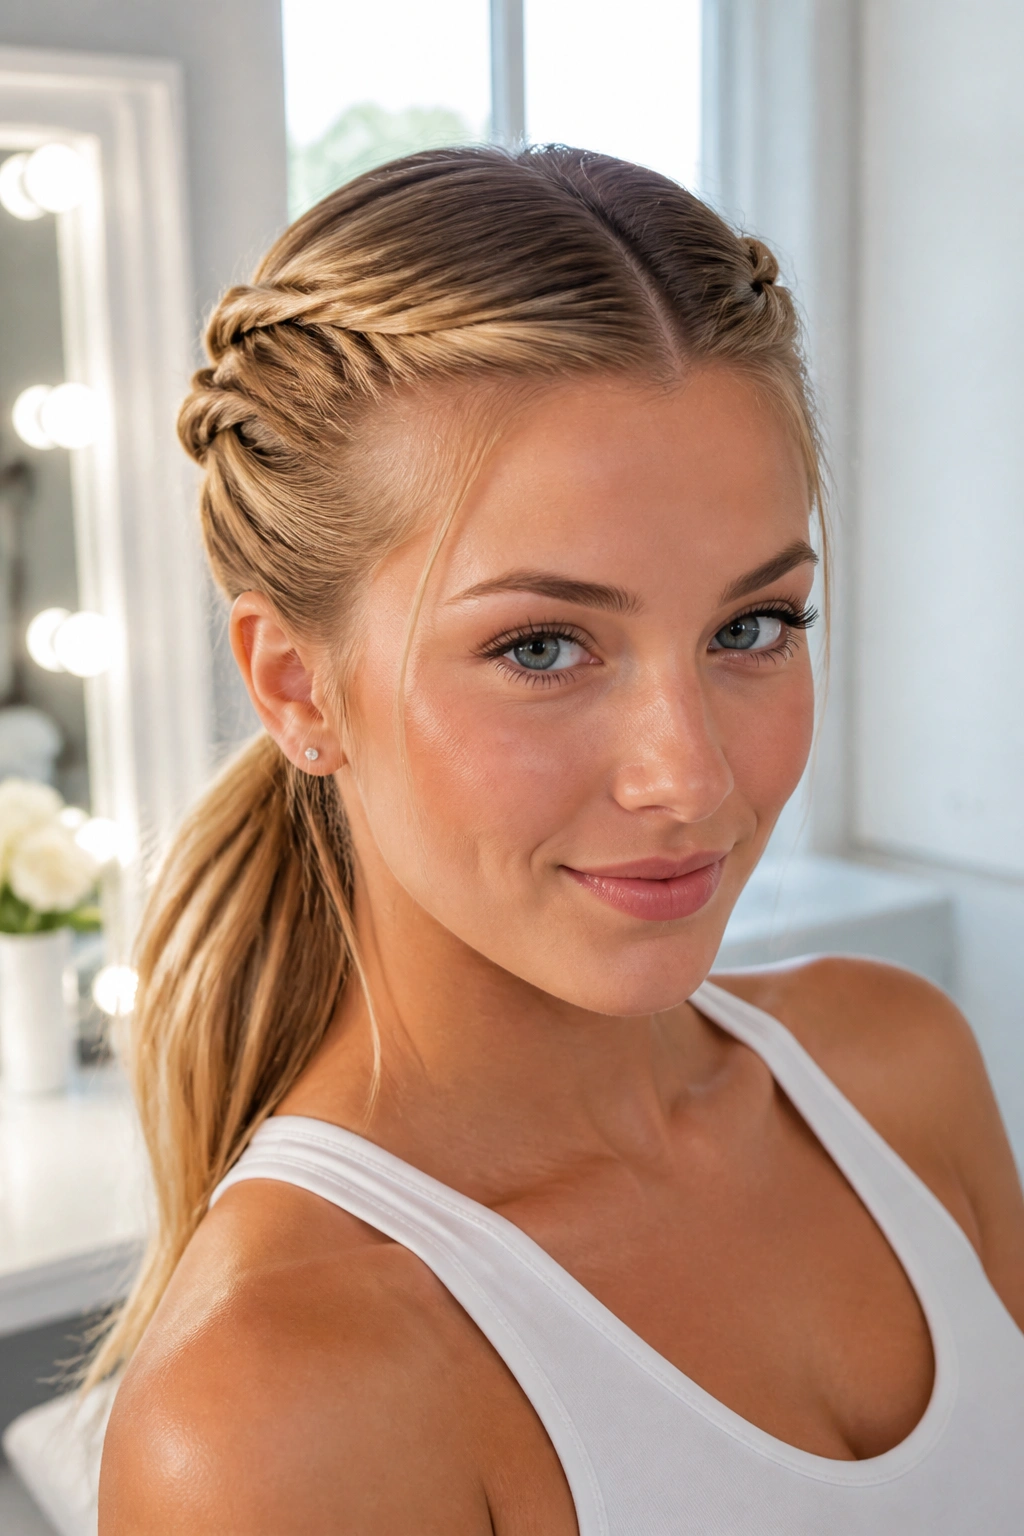
A twisted crown gives you the effect of a more complicated updo without actually building one. I reach for it when I want the front of the hair to look styled but I do not want a braid taking over the whole head.
Part the hair where you want it, then take a section from each side near the temples. Twist each section back toward the nape and secure both into a low or mid ponytail. You can pin the twists in place first if your hair is slippery. That extra step helps a lot on very long hair, because the weight can tug the twists loose before the ponytail is set.
The result is clean around the face and a little more detailed across the crown. It also works well if your hairline tends to frizz. The twists cover that area without needing a full wall of product.
Good places to wear it
- Weddings where you want polished but not stiff.
- Workdays when a basic ponytail feels too plain.
- Dinner plans where you want something that looks thought through.
- Days when your hair has some bend and you don’t want to fight it.
A small satin or matte finish spray at the end keeps the twists looking neat instead of fuzzy.
9. Rope-Wrap Ponytail
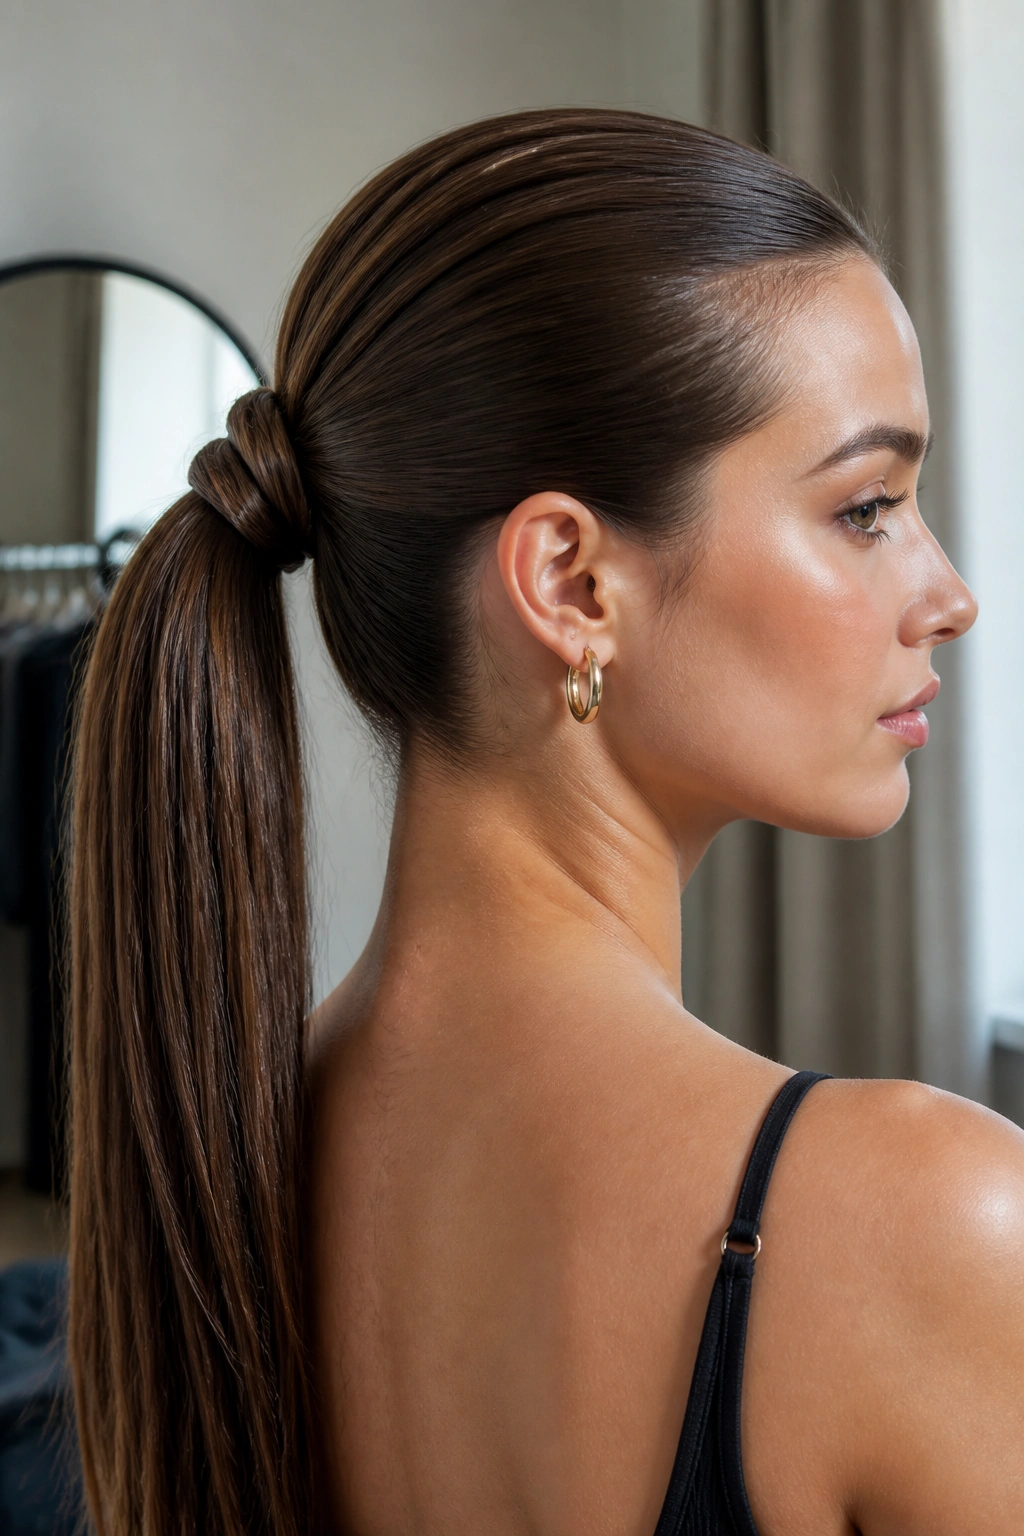
Unlike a braid, a rope-wrap ponytail feels cleaner and faster. It uses the same idea — control the base, then build texture down the length — but the finish is sleeker and less busy. On long hair, that matters because too much pattern can start to fight the length.
Split a section of hair into two strands, twist them individually in the same direction, then wrap them around each other in the opposite direction. That is the rope twist. Wrap it around the base of the ponytail or work it into the first few inches of the tail itself. The twist should sit snugly, not puffy. Loose rope twists fall apart in seconds.
How to get it even
- Keep both strands the same thickness.
- Twist each section the same number of turns.
- Hold tension at the top while you wrap.
- Pin the end underneath where it will not show.
This style is a good choice when your hair is extra long and you want the length to look intentional, not just left alone. The rope detail gives the eye something to follow, then the rest of the ponytail can stay smooth. That balance is what makes it work.
10. Double-Elastic Power Ponytail
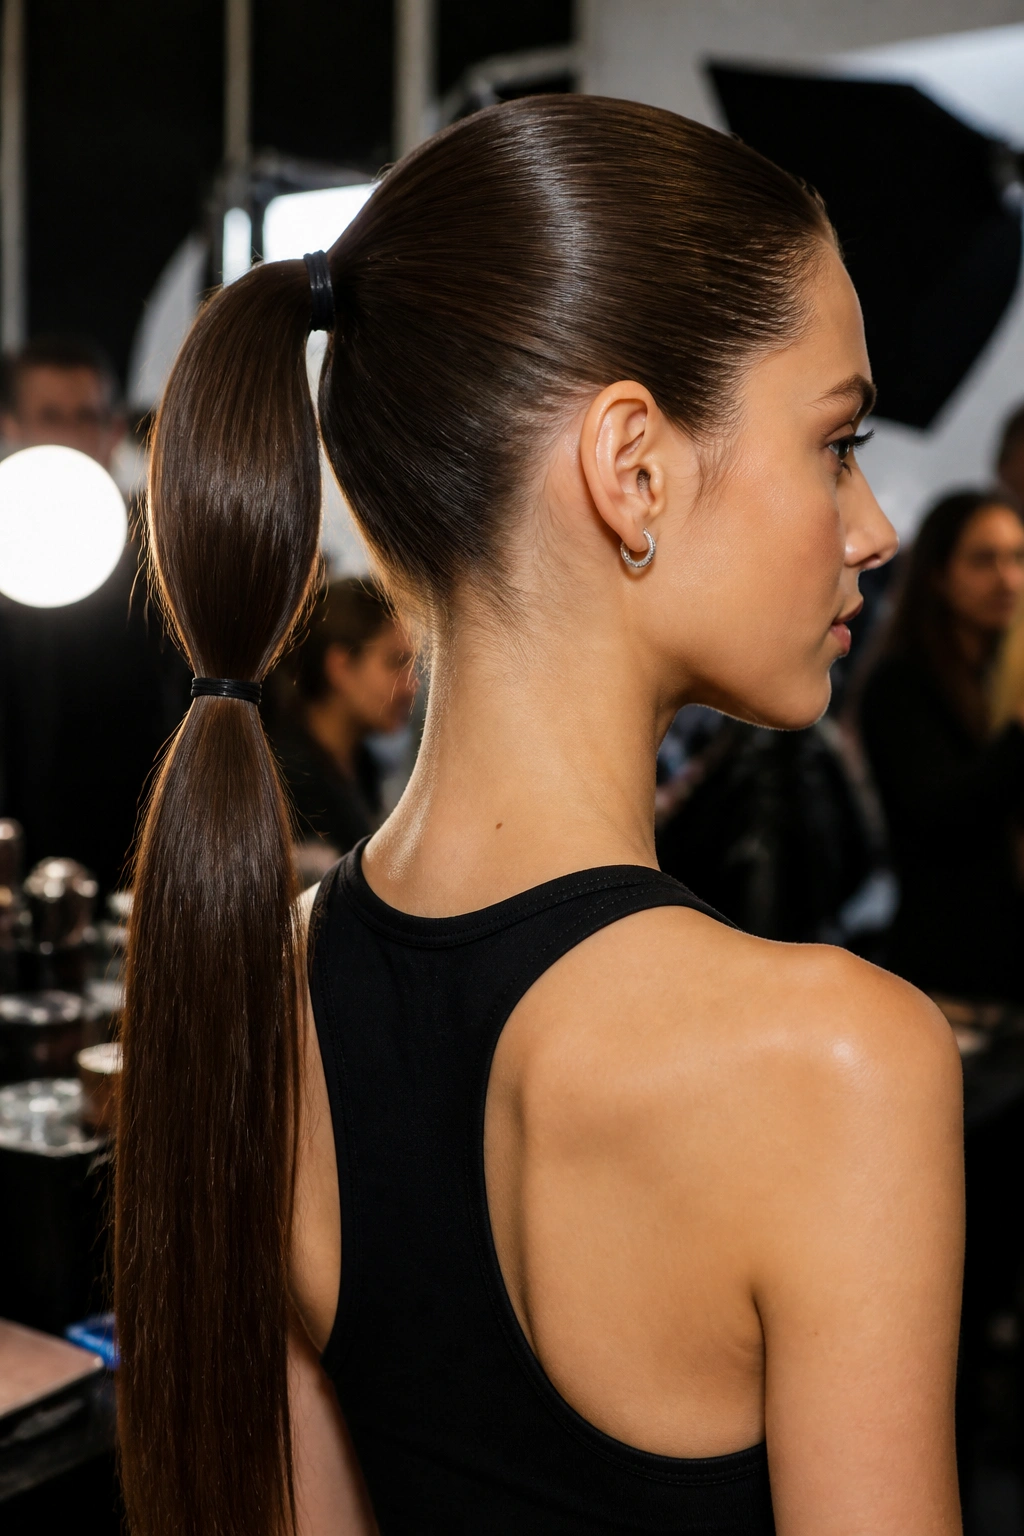
A single elastic has one job. On long hair, it sometimes fails at the worst moment. That is why the double-elastic ponytail is so useful. Two ties, one clean shape, less sag.
Put the first elastic where you want the ponytail to sit. Then add a second elastic 2 to 3 inches below it, hidden by the upper section. This gives the ponytail a sturdier spine, which is especially helpful if your hair is thick, heavy, or layered in a way that pulls the style downward.
I like this technique for long hair that tends to slip. The first tie gives shape at the base. The second one keeps the weight distributed so the ponytail doesn’t flatten halfway through the day. It sounds small. It is not small once you’ve worn it for eight hours and the ponytail still sits where you put it.
The ends can stay straight, curled under slightly, or brushed into a soft bend. The style doesn’t demand a certain finish. It just needs support.
11. Polished Ends Ponytail
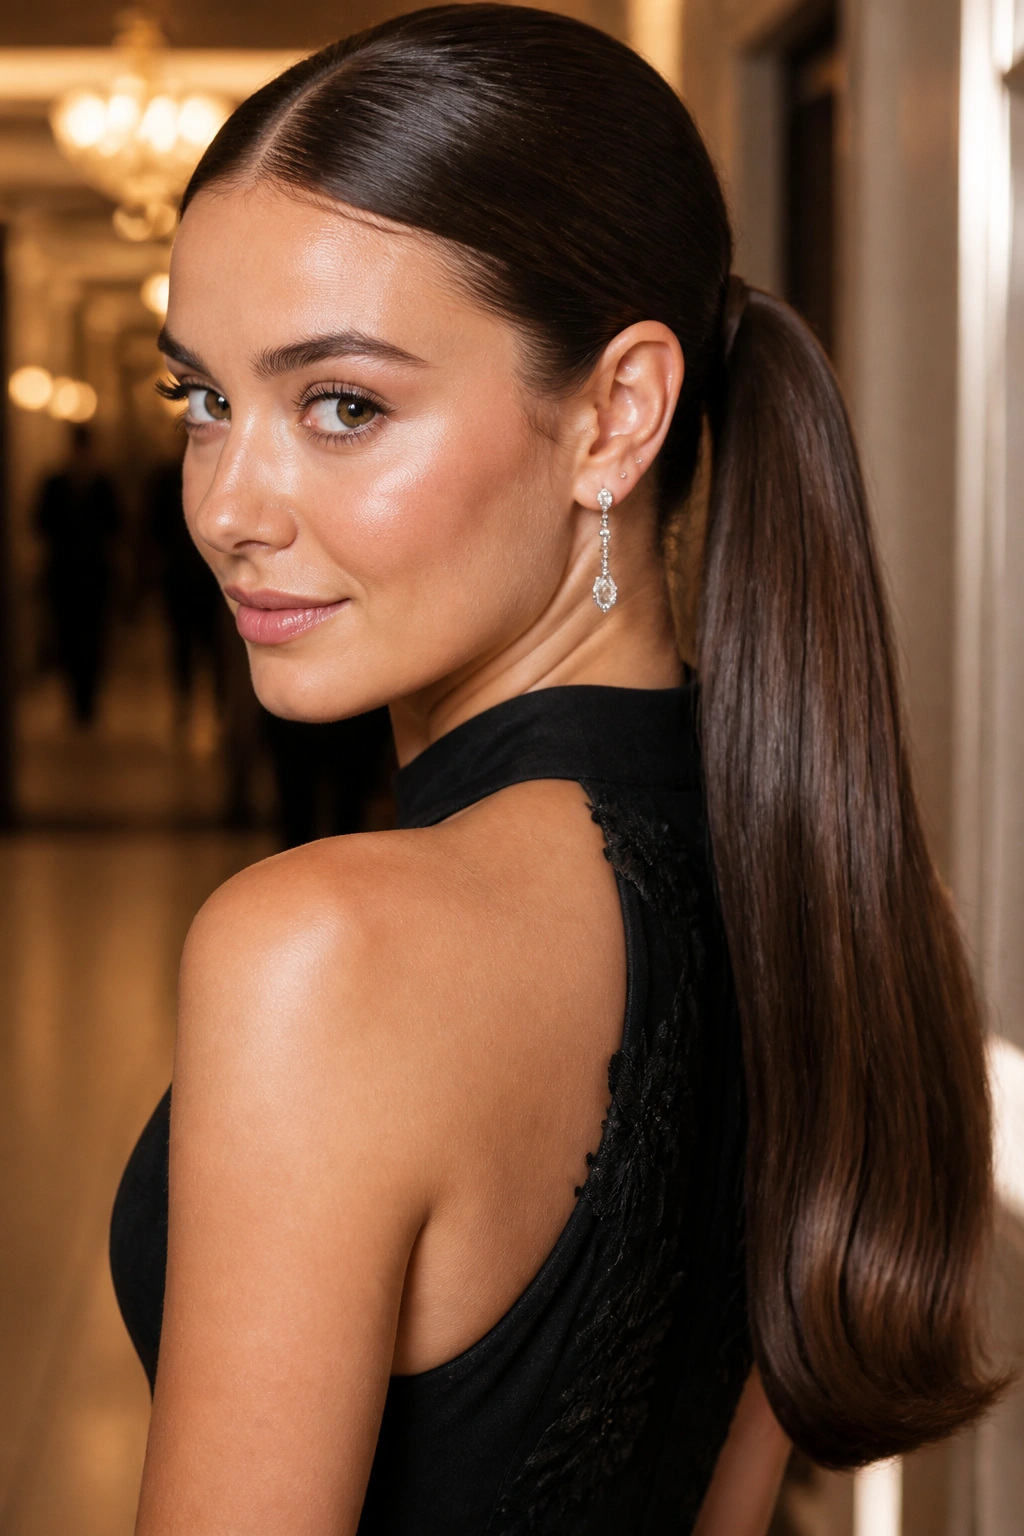
A lot of sleek ponytails focus so hard on the crown that the ends get ignored. That is a mistake, especially with long hair. If the roots are flat but the bottom looks dry, frayed, or split into a broom, the whole style loses its edge.
After securing the ponytail, run a pea-sized amount of smoothing cream or a few drops of hair oil through the bottom 4 to 6 inches only. If your hair is straight, you can follow with a quick pass of a flat iron on low heat just at the ends. Keep the iron moving. You want a smooth line, not a pin-straight, brittle finish.
Why the ends matter
The eye always drops to the longest part of the hair. Always. If that section looks soft and neat, the style feels finished. If it looks ragged, the whole ponytail looks older than it should.
For layered long hair, this trick is gold. The layers can still move, but the ends sit together instead of puffing outward in different directions. I’d choose this finish for interviews, formal events, or any day when the ponytail needs to read as deliberate from every angle.
12. Ribbon-Tied Sleek Ponytail
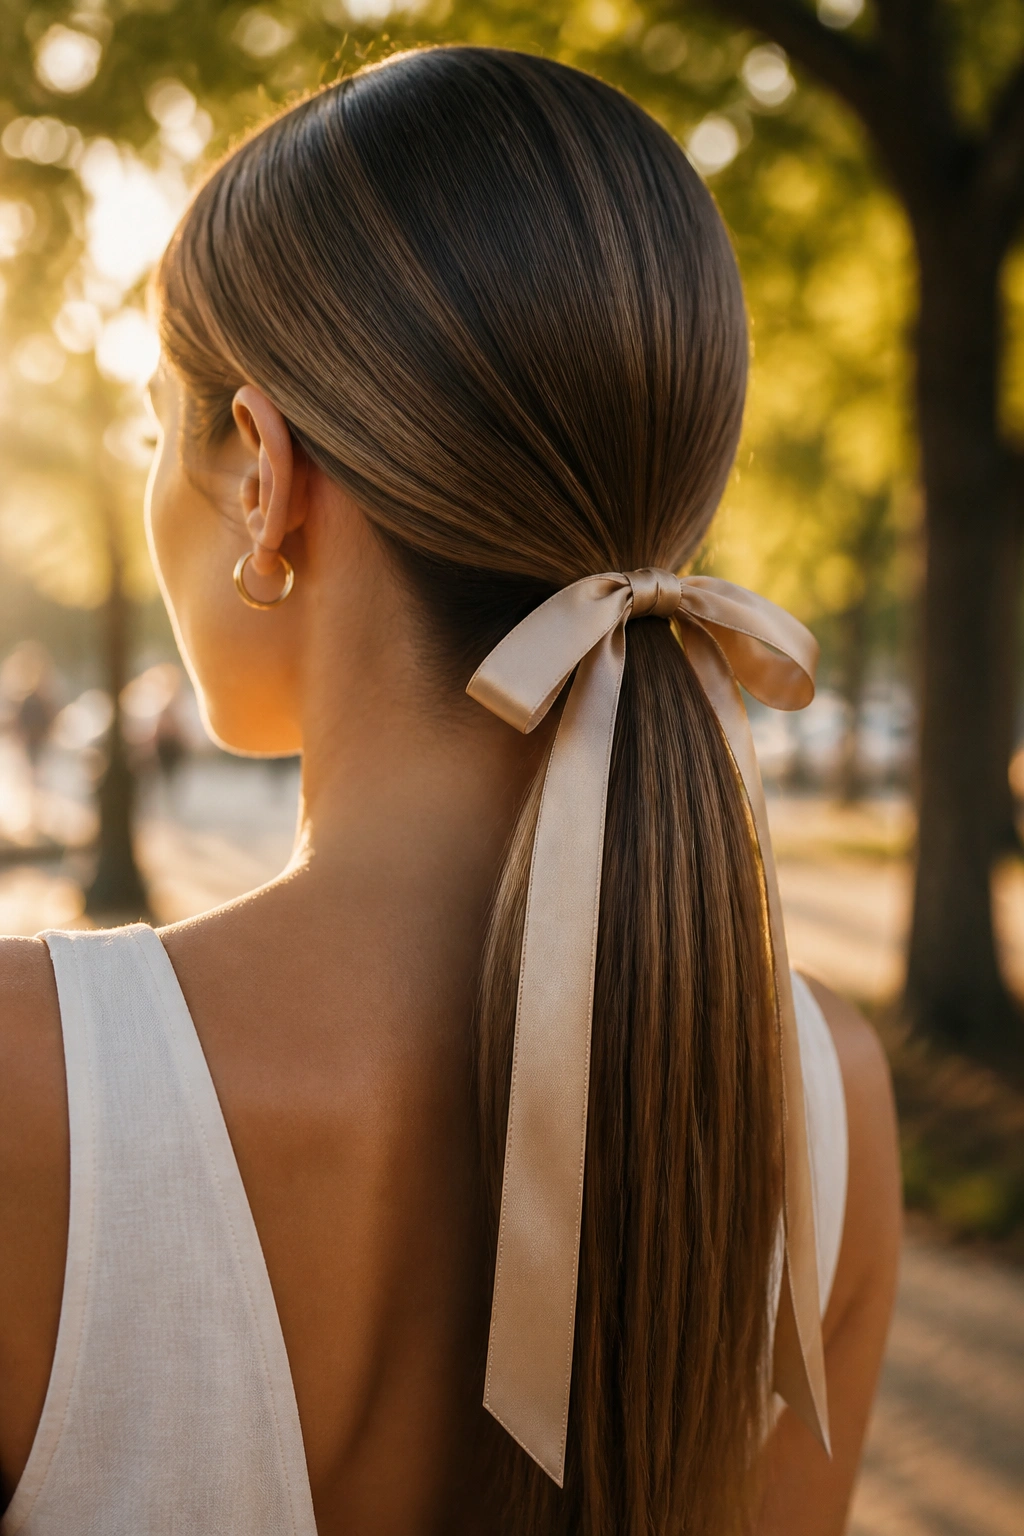
A ribbon changes the mood without changing the structure. That is why I like it. The ponytail stays clean and simple, but the ribbon gives it a softer finish that feels more dressed up than a plain elastic.
Use a low or mid ponytail for this one. A satin ribbon about 1 inch wide works well because it sits flat and doesn’t twist into a knotty mess. Tie it over the elastic, then let the tails fall evenly on both sides or slightly to one side if you want a more relaxed look. If the ribbon is too thick, the base gets bulky. Too thin, and it disappears into the hair.
This style works especially well on long hair because the ribbon has room to hang. Shorter hair can make the bow feel crowded. Long lengths let the ribbon breathe.
I also like it because it solves the “I want something different, but not much different” problem. That is a real styling problem. Sometimes you just want one visible detail and no more. The ribbon does that cleanly.
13. Knotted Ponytail
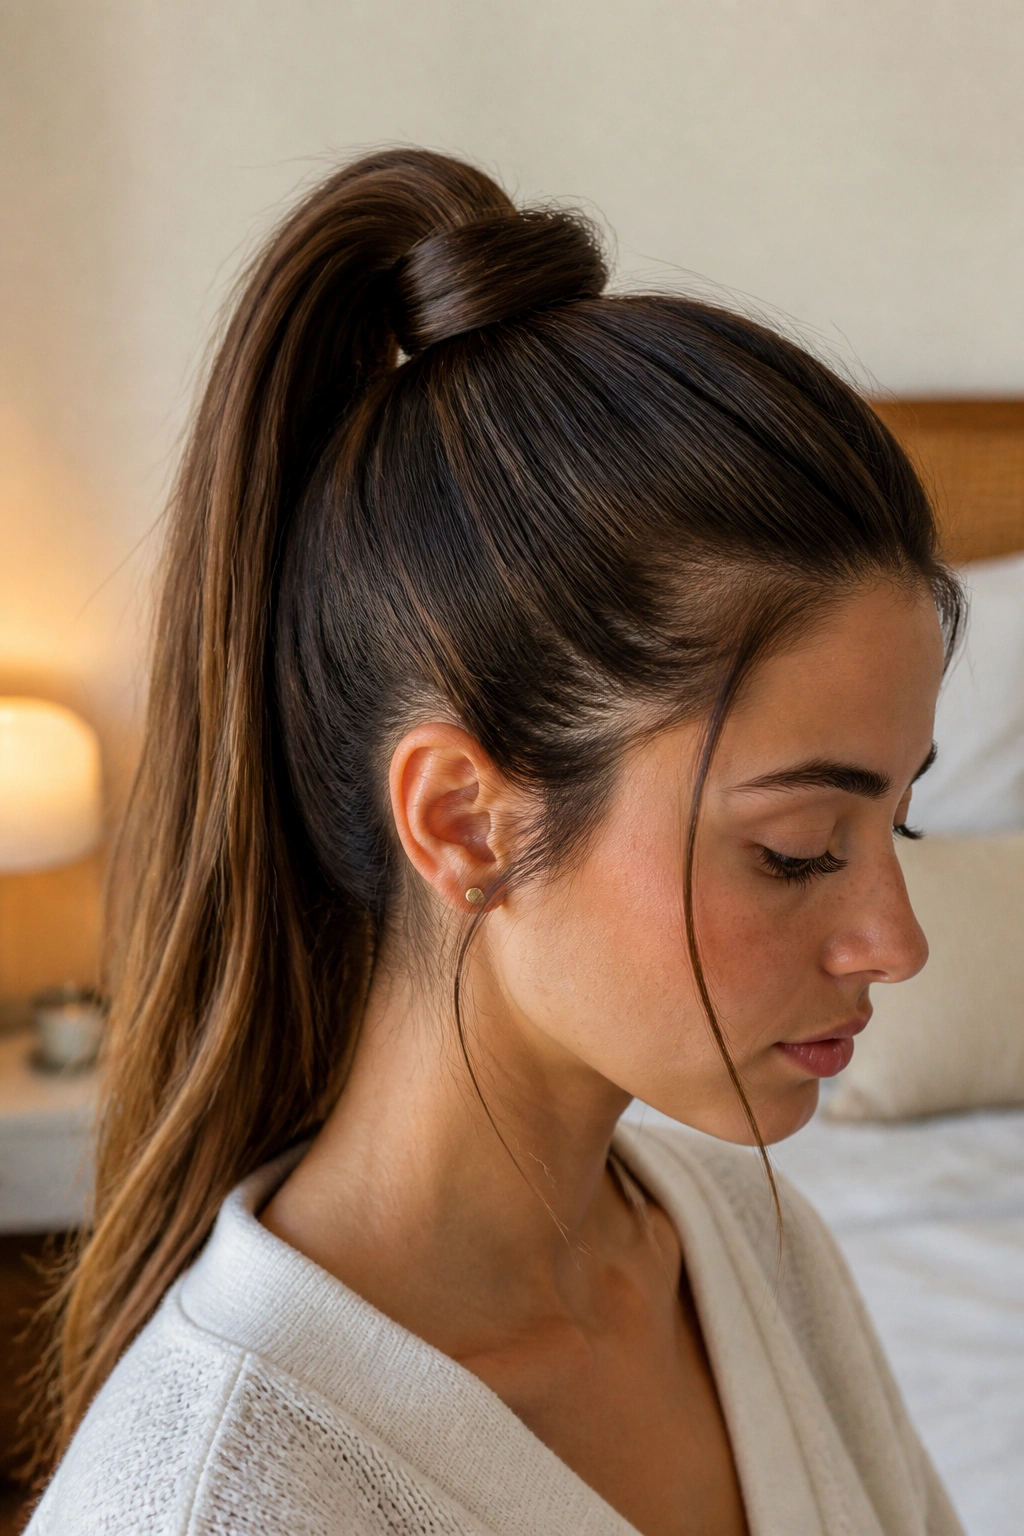
What if you want the ponytail to look built, not just tied? Use a knot. A knotted ponytail gives the base a structured feel without needing braids or extra decoration.
Split the top section into two parts, bring them together behind the head, and knot them once before securing the remaining hair into a ponytail underneath. If your hair is slippery, prep the strands with a tiny amount of texturizing cream or dry shampoo first. You do not need grit everywhere. Just enough grip to keep the knot from sliding apart.
How to keep the knot flat
- Pull the strands evenly so neither side bulges.
- Keep the knot close to the scalp.
- Pin the tails underneath if they poke out.
- Use a narrow elastic to anchor the ponytail after the knot is set.
This style has a neat, almost tailored feel. It’s a good fit for long hair because the knot gives the crown some purpose before the length falls away. Without that, long ponytails can look a little too simple. Not always. But often enough.
14. Side-Part Low Ponytail With Face-Framing Pieces
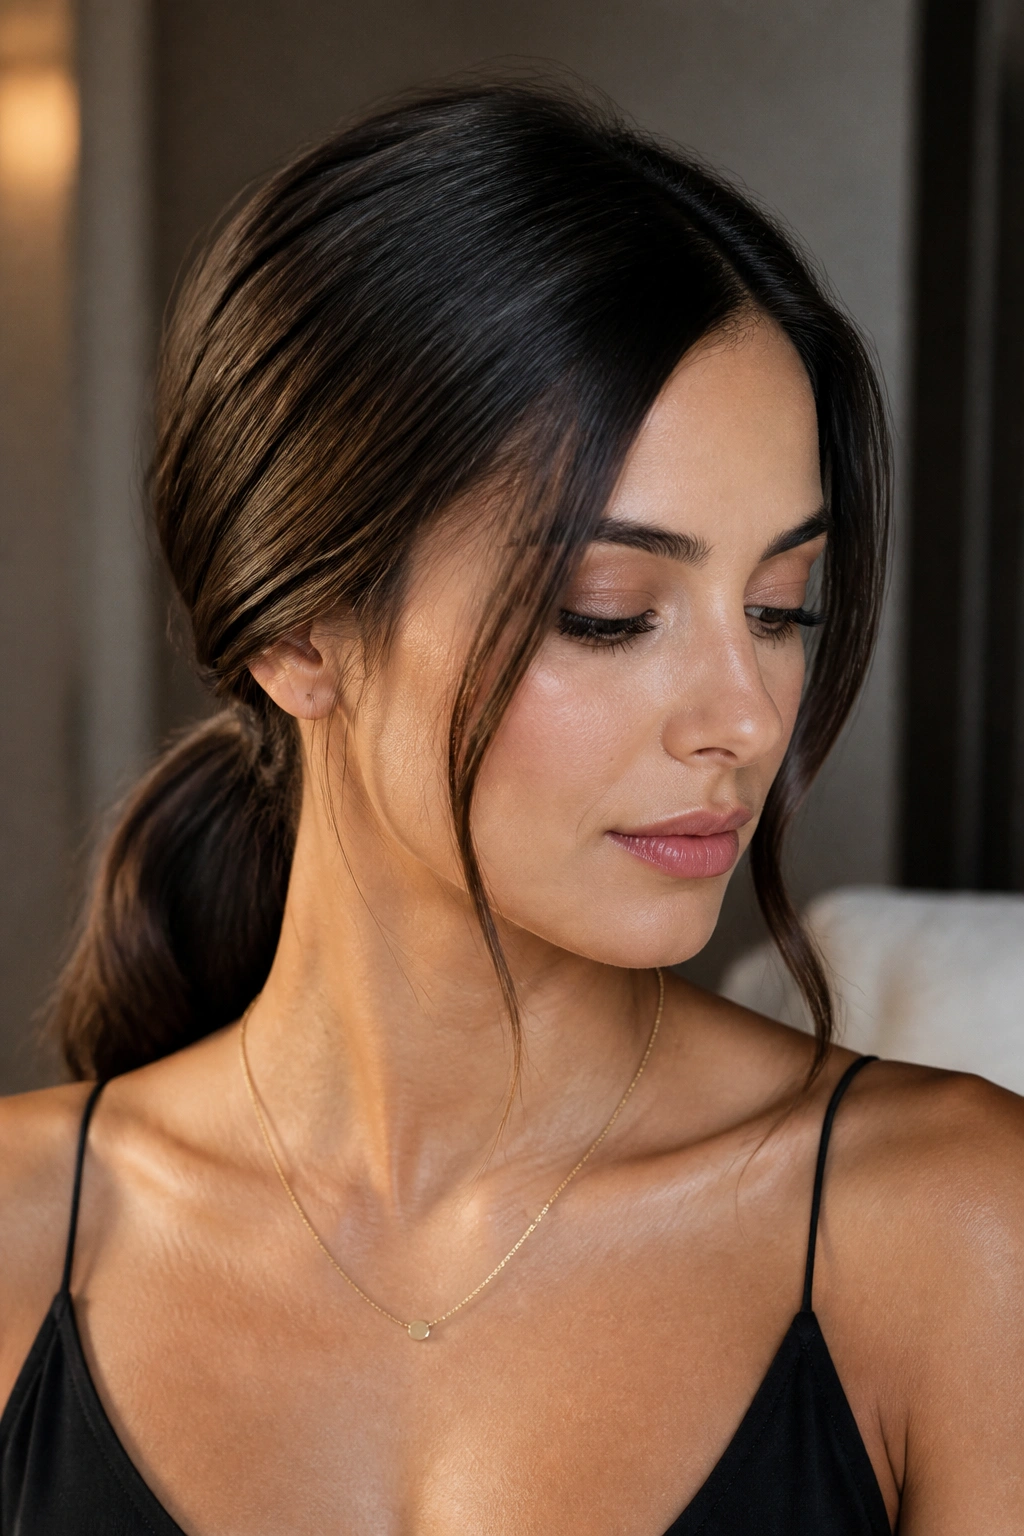
A side part changes the whole mood of a low ponytail. It makes the style feel less severe and gives you a little asymmetry near the face, which can be a nice break if you wear center parts all the time.
Make the part clean, then smooth the hair back toward one side and secure the ponytail low at the nape or just below it. Leave two thin face-framing pieces out if you want softness. Keep them narrow. Thick front sections can make the style look undone instead of polished. If the ends are too fluffy, run a flat iron through them once or use a light cream and twist them with your fingers while they cool.
This is one of those styles that behaves differently depending on hair thickness. On fine long hair, the side part adds shape and keeps the ponytail from looking flat. On thick hair, it helps break up the weight so the style doesn’t feel too blocky.
The face-framing pieces should look intentional, not forgotten. That distinction matters. Pull them forward, smooth them once, and stop touching them.
15. Fishtail-Bound Sleek Ponytail
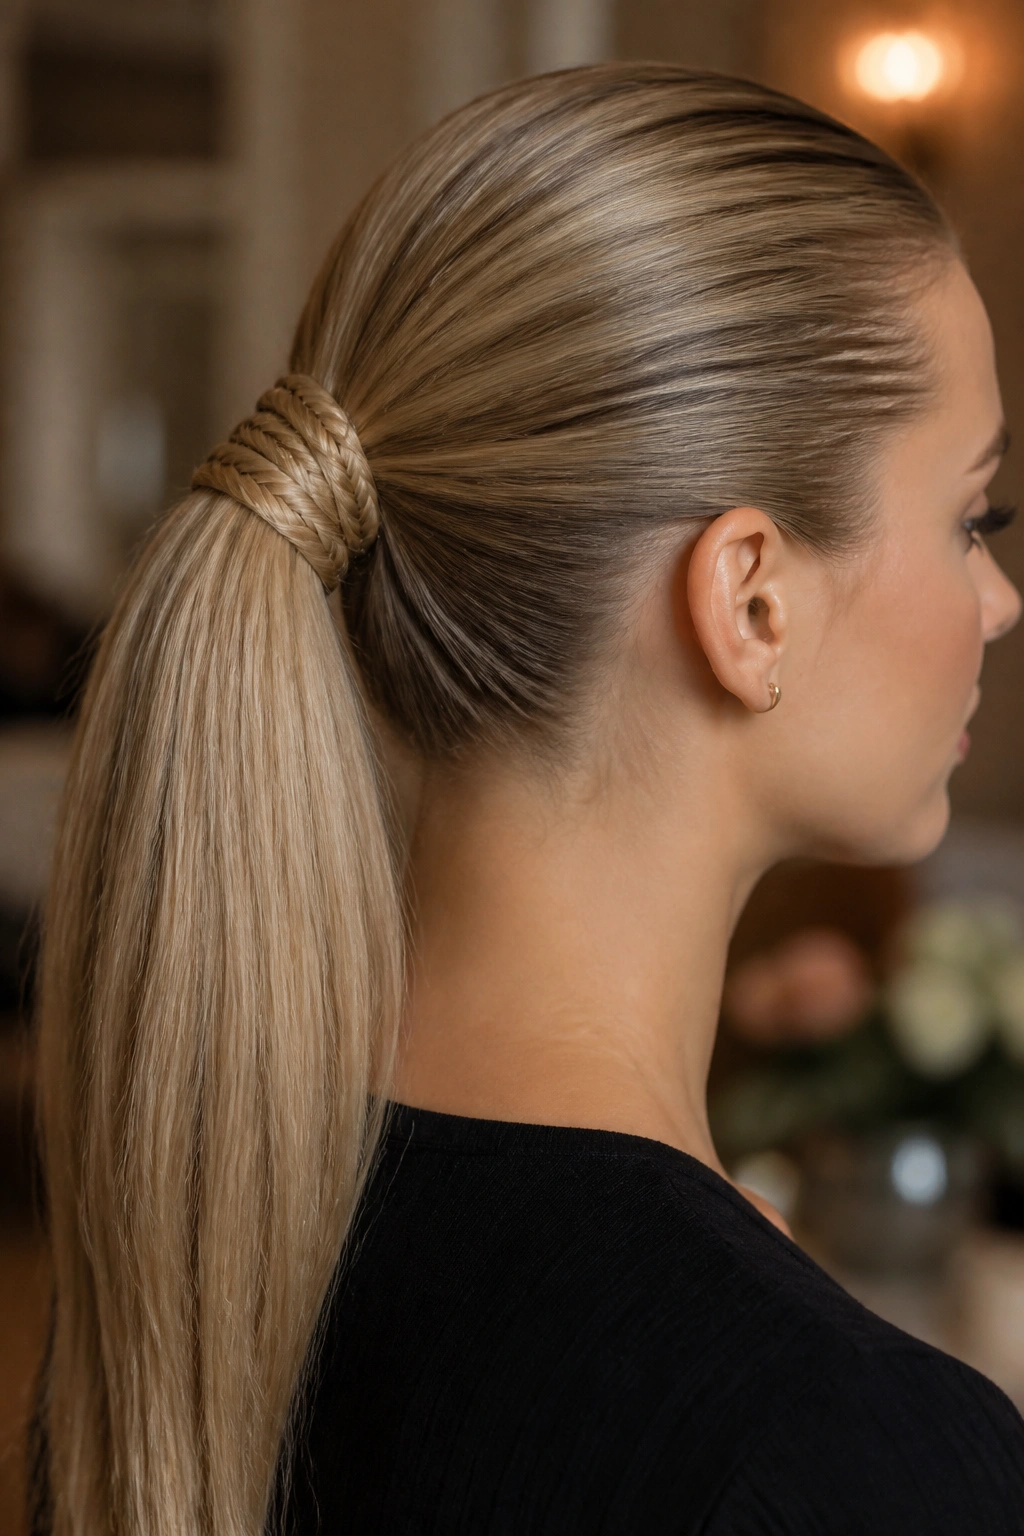
A fishtail-bound ponytail has more detail than a braid-wrapped base, and that extra texture looks especially good on long hair because the length gives the fishtail room to show itself. The surface stays sleek, but the binding adds a little pattern right where the eye lands first.
Secure the ponytail first, then take a small section from the tail and fishtail braid it tightly for a few inches. Wrap that braid around the base or let it run down one side of the ponytail like a decorative spine. Keep the rest of the hair brushed smooth so the braid is the only textured part. If everything has pattern, nothing stands out.
What makes it different
A fishtail looks finer and more intricate than a classic three-strand braid, even though the basic idea is simple. That makes it a good choice when you want the ponytail to feel dressier without adding an accessory. It’s also a smart option for very long hair because the braid can stay visible longer before the tail disappears into the rest of the length.
Best of all, it holds shape well. Once it’s pinned and tucked, it tends to stay put.
Final Thoughts
The best sleek ponytail styles for long hair all do the same quiet job: they control the crown, protect the shape of the base, and make the length look on purpose. That sounds simple, but the details matter. A cleaner part, a stronger elastic, a wrapped base, or a smoother set of ends can change a ponytail from “pulled back” to genuinely polished.
I’d start with two or three styles and get them in your hands before trying to learn all fifteen at once. High ponytails, low center parts, and wrapped bases are the easiest places to begin because the structure is obvious and the payoff is immediate. After that, the more detailed looks — rope twists, fishtail wraps, ribbon ties — stop feeling fussy and start feeling easy.
Carry a small brush, a few bobby pins, and a travel-size hairspray if you wear ponytails a lot. Small kit. Big difference.
