



Holding a pair of professional hair shears for the first time is a specific kind of adrenaline rush. There is a palpable tension in that small, metallic click as the blades meet, a sound that signals there is no going back once you start. People often treat cutting hair as a dark, mystical art reserved for licensed professionals with fancy chairs and expensive products. While there is certainly value in a salon experience, the actual mechanics of a haircut are rooted in geometry, physics, and—above all—knowing exactly where to stop.
Most disastrous home haircuts happen because of haste and a lack of proper sectioning. When you rush, you lose sight of the symmetry and the tension you are holding. You do not need to be a cosmetologist to achieve a respectable, trendy cut, but you do need to be methodical. You need to treat your hair like fabric, not like a bush you are hacking away at in the backyard. Before you even think about lifting the scissors, ensure you have the right tools. Drugstore craft scissors will chew through your hair and cause split ends within days. Invest in a dedicated pair of hair-cutting shears, a fine-tooth rattail comb, and at least four alligator clips.
If you are nervous, start by cutting less than you think you need. You can always take more off, but you cannot glue hair back on. This approach requires patience, a clear line of sight, and a willingness to stop every few minutes to check your work. Let’s look at the cuts that are manageable for a DIY enthusiast, provided you have the right mindset and a steady hand.
Essential Preparation and Tool Maintenance
Before touching a strand of hair, you must understand your tools. Using dull shears is the fastest way to get jagged, uneven ends that will split and fray. Your shears should be sharp enough to slice through a single layer of facial tissue without bending or tearing it. If they struggle with tissue, they will shred your hair.
Always work with clean, detangled hair. Whether you choose to cut wet or dry depends on your texture, but for most precision cuts, slightly damp hair provides the best control. Never pull your hair too tight. If you hold your hair with extreme tension while cutting, the moment you release it, the hair will bounce up, often resulting in a cut that is significantly shorter than you intended. Use a mirror setup that allows you to see the back of your head—either a tri-fold mirror or a handheld mirror positioned so you can see the reflection of the back of your hair in your primary mirror.
1. The Classic Precision Bob
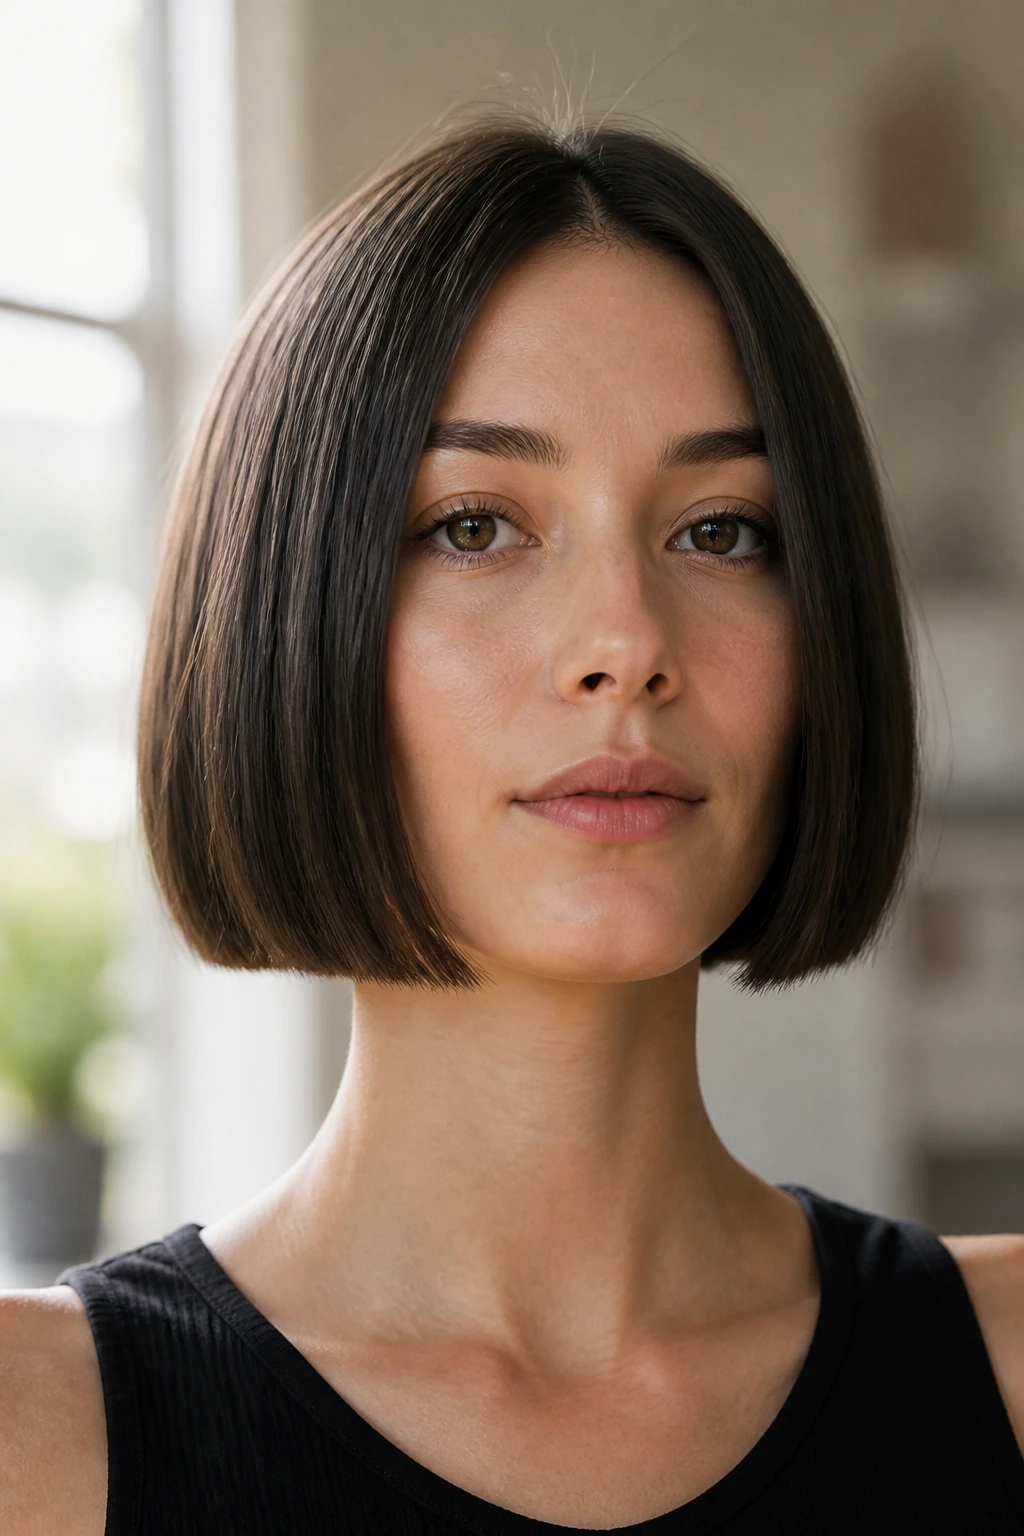
The precision bob is the gold standard of short hair. It is unforgiving, which is exactly why it is so rewarding when done correctly. You are essentially creating a sharp, horizontal line that hits just at or above the jawline. The secret here is consistent tension.
How to Execute the Sharp Line
You must divide your hair into sections, starting with the back. Create a small horizontal subsection at the nape of the neck, about half an inch thick. Use your fingers or a comb to hold it flat against your neck and cut straight across. This acts as your guide. Use this guide to cut the next section above it, and so on. Keep your head perfectly upright. If you tilt your head forward, the bob will be too short in the back when you stand up straight.
What to Watch For
If you tilt your head down while cutting the nape, you are creating a graduation that you might not want. Always check your work by standing perfectly straight and looking forward. If you notice a tiny bit of unevenness, do not try to fix it by cutting more. Instead, comb the hair back down and use the point-cutting technique—snipping vertically into the ends—to soften the line rather than shortening it.
2. The Shaggy Textured Pixie
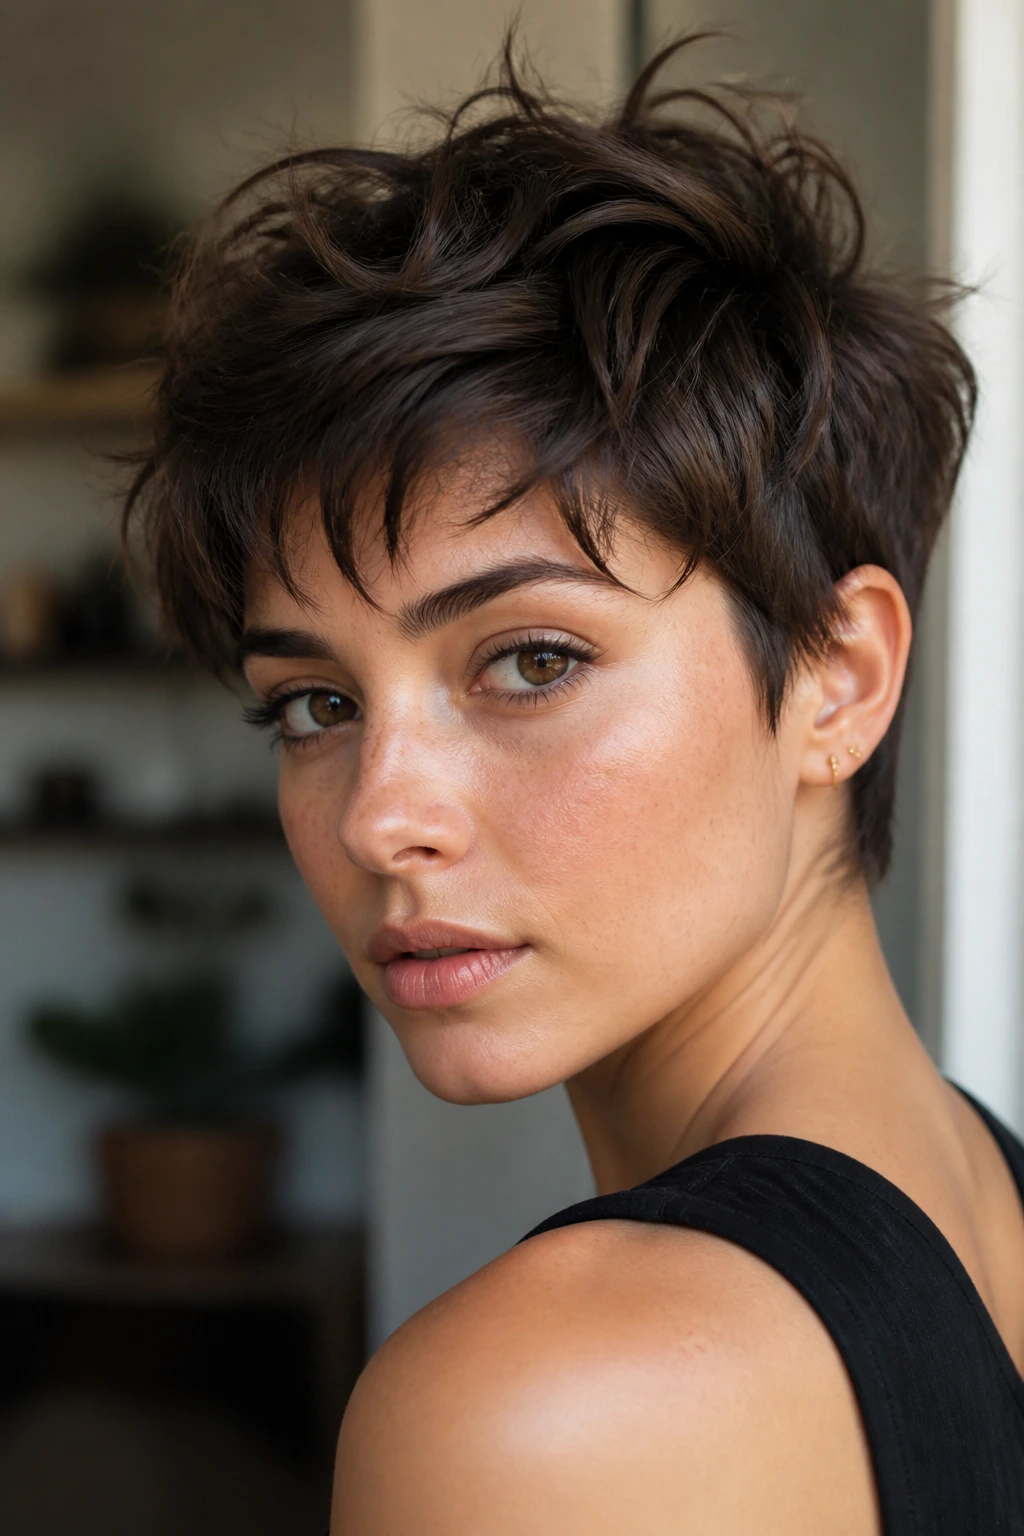
A shaggy pixie is far more forgiving than a precision bob because it relies on texture rather than clean, geometric lines. This style thrives on movement and a slightly messy, “I just woke up like this” aesthetic. It is perfect for those who want a drastic change but worry about the precision requirements of shorter styles.
The Point-Cutting Secret
This cut is all about the shears. Instead of cutting horizontally, you hold your shears vertically and snip into the ends of the hair. This removes weight and creates soft, jagged edges. You are essentially “texturizing” as you cut. Start at the top of the head and work your way down the sides, pulling small sections straight up and cutting into them at an angle.
Why This Style Wins
- It requires very little styling product.
- It grows out gracefully, avoiding the awkward “mullet” phase.
- It adds volume to fine, limp hair.
- You can mess it up slightly, and it still looks intentional.
3. The Face-Framing Curtain Bangs
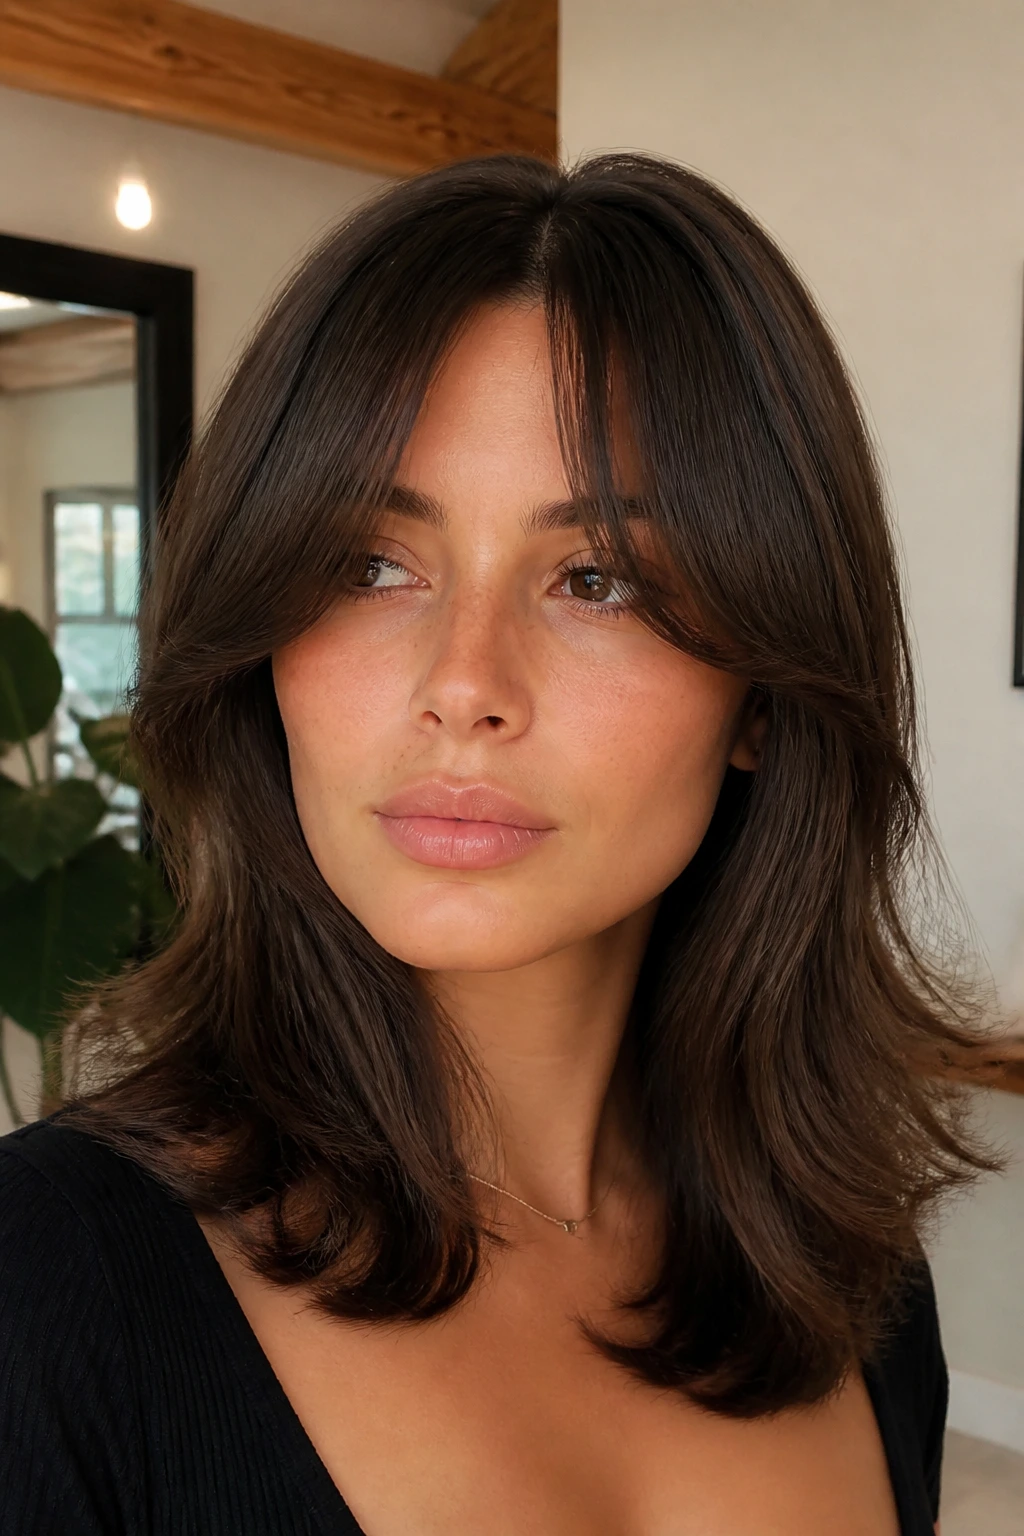
Curtain bangs are perhaps the most popular way to update a haircut without losing overall length. They serve as a transition piece that draws attention to the eyes and cheekbones. The key is in the sectioning—specifically, the triangle.
Sectioning the Triangle
You want to pull a triangle of hair from the top center of your head, with the point of the triangle ending at the recession area of your hairline (where the hair starts to curve back). Pull this hair forward and twist it once in the middle. Cut across at the length you desire, keeping in mind that the hair will jump up once it dries. Start longer than you think. You can always go shorter, but starting at the tip of your nose is a safe bet for a first try.
The Finishing Touch
After the initial cut, release the twist. You will have a slight arch. Use your point-cutting technique again to soften the ends so they blend into the sides of your face. Do not just leave them blunt; you want them to flow seamlessly into the rest of your hair.
4. The Blunt Shoulder-Length Cut
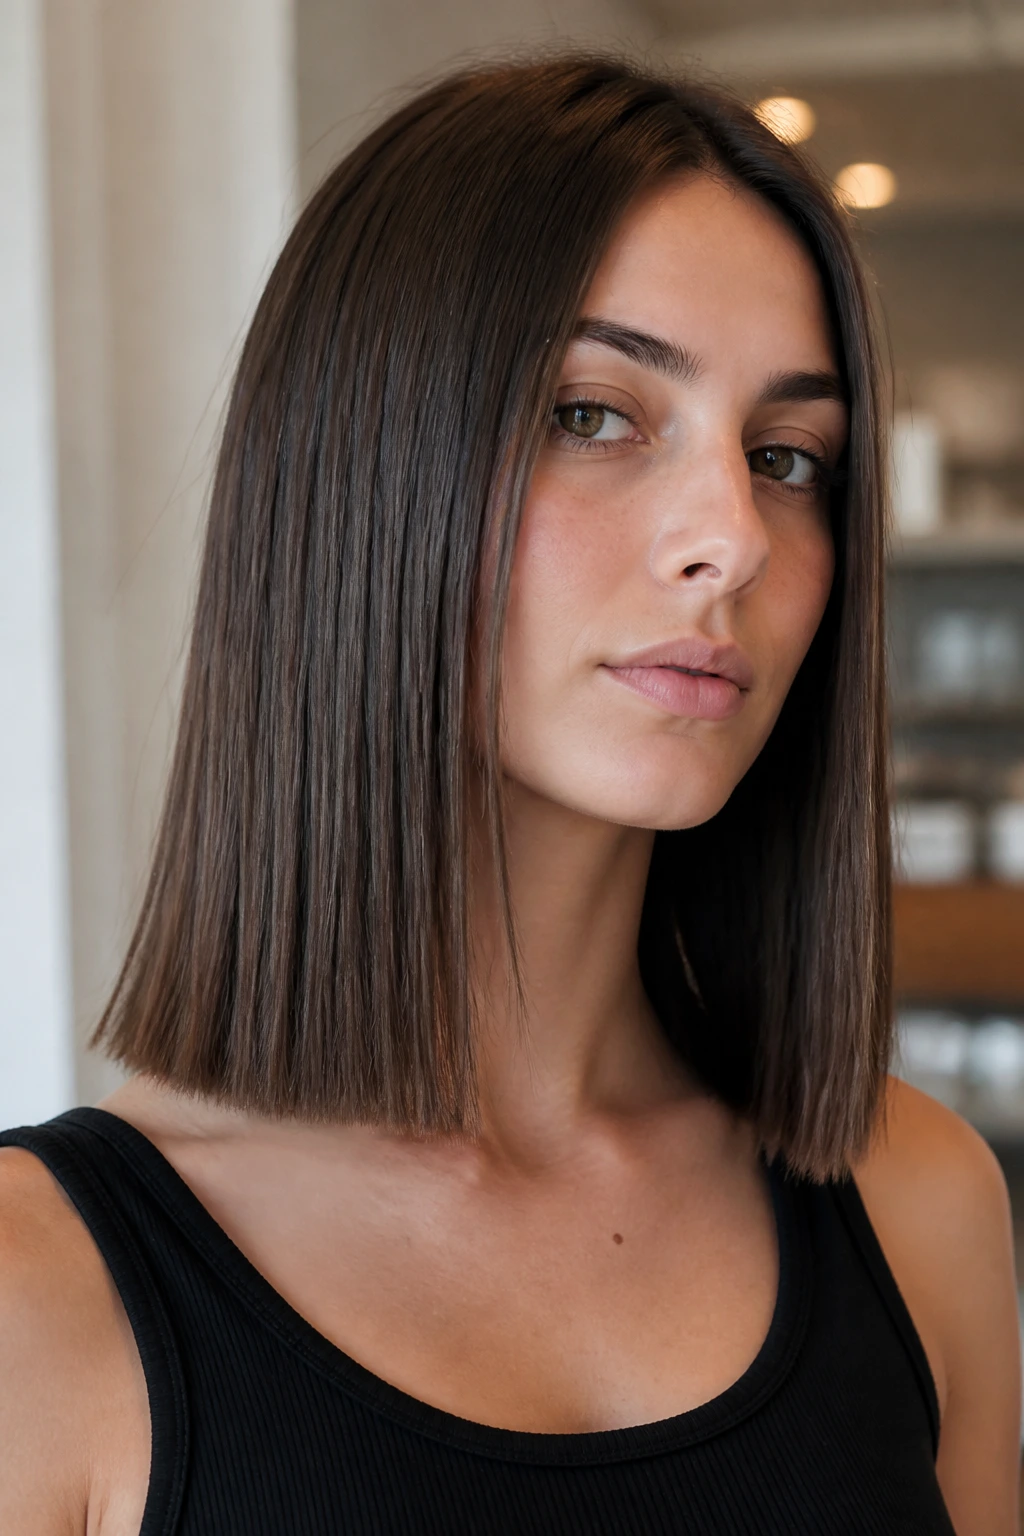
This is the “safe” short cut. It is long enough to pull back into a ponytail if you have a bad hair day, yet short enough to look intentional and styled. A blunt cut creates the illusion of thickness, making it ideal for those with thinner strands.
The Technique
The challenge here is ensuring the two sides are even. Part your hair exactly where you normally wear it. Bring all your hair to the front, over your shoulders. Use a fine-tooth comb to ensure there are no tangles. Hold the hair between your fingers and cut horizontally. The “front-to-front” method is the best way to ensure the perimeter is even, as gravity pulls the hair into its natural resting position.
Avoiding the “Triangle” Look
If you have thick hair, a blunt cut can sometimes puff out at the ends, creating a triangle shape. If this happens, use thinning shears—sparingly—on the inside of the ends only. Do not thin the top layer. You want to remove bulk from underneath to help the hair lay flatter against your shoulders.
5. The Layered Lob (Long Bob)
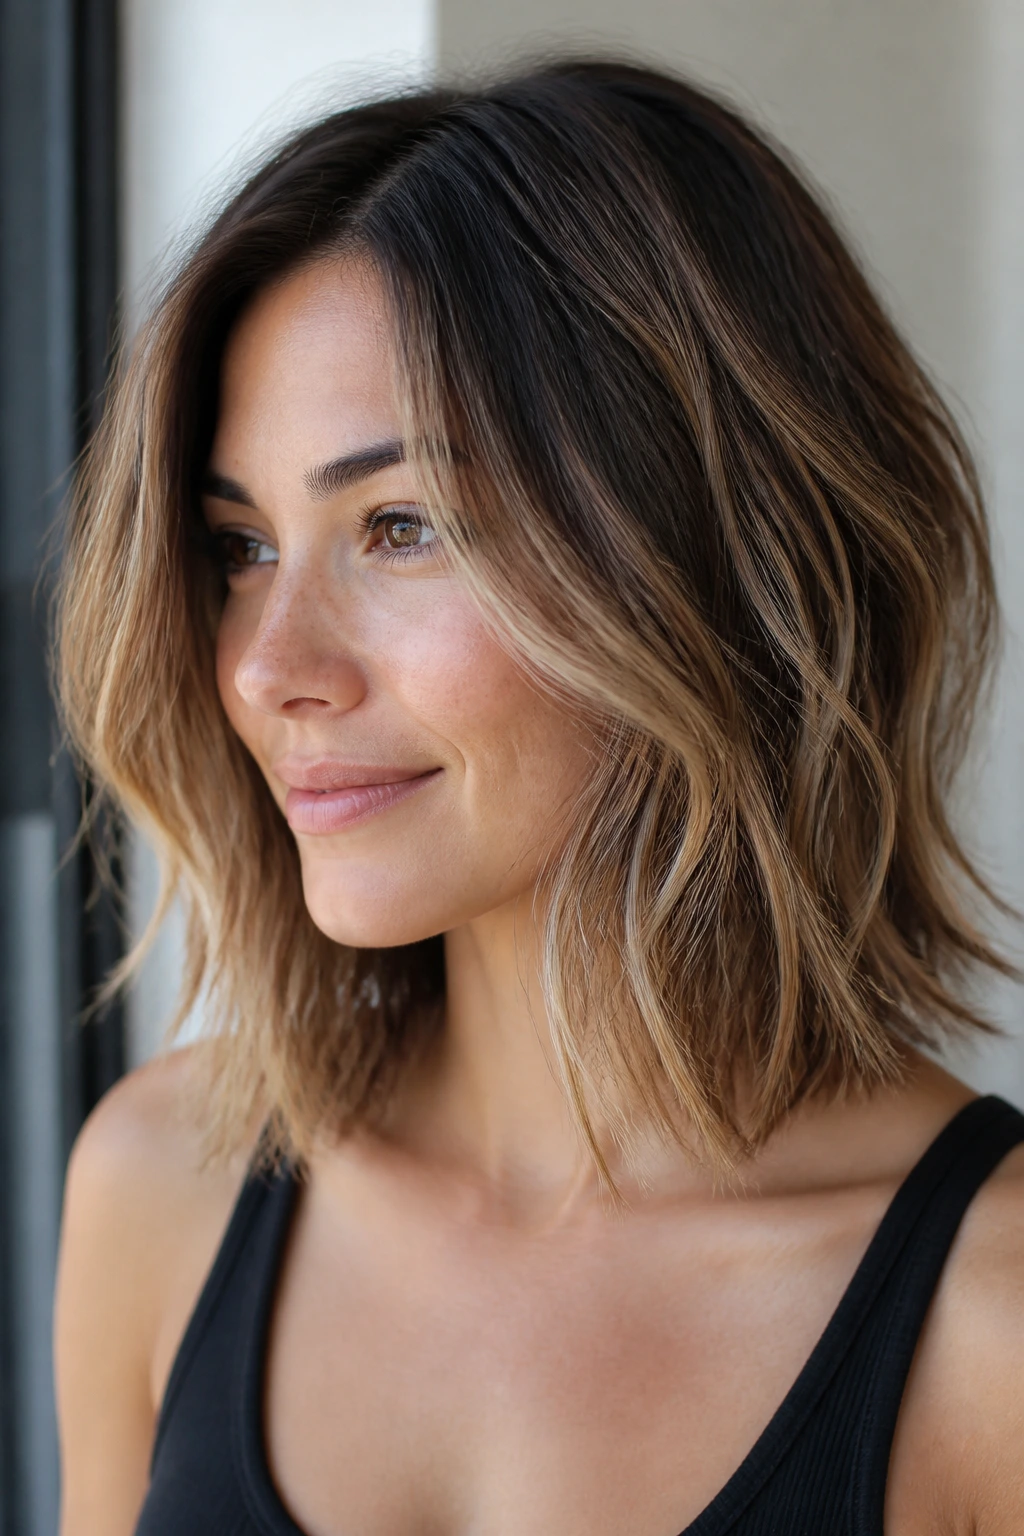
A layered lob is the sophisticated older sister of the blunt bob. It has movement and body, which prevents the hair from looking like a heavy curtain. The layering process might sound intimidating, but it is actually quite straightforward if you break it down into small sections.
Creating Vertical Layers
Pull your hair up into a high ponytail on top of your head. This is the “unicorn” method, and it is a classic DIY shortcut. Secure it with an elastic. Slide a second elastic down to the point where you want to cut. Snip the hair straight across above the second elastic. When you let your hair down, you will have instant, even layers throughout the length.
Refining the Layers
While the unicorn method is fast, the layers can sometimes be too heavy. Once you have the basic length, take small vertical sections around the crown and point-cut the ends again. This breaks up the bluntness of the layers you just created, giving the hair that airy, lived-in feel.
6. The Undercut Buzz Cut
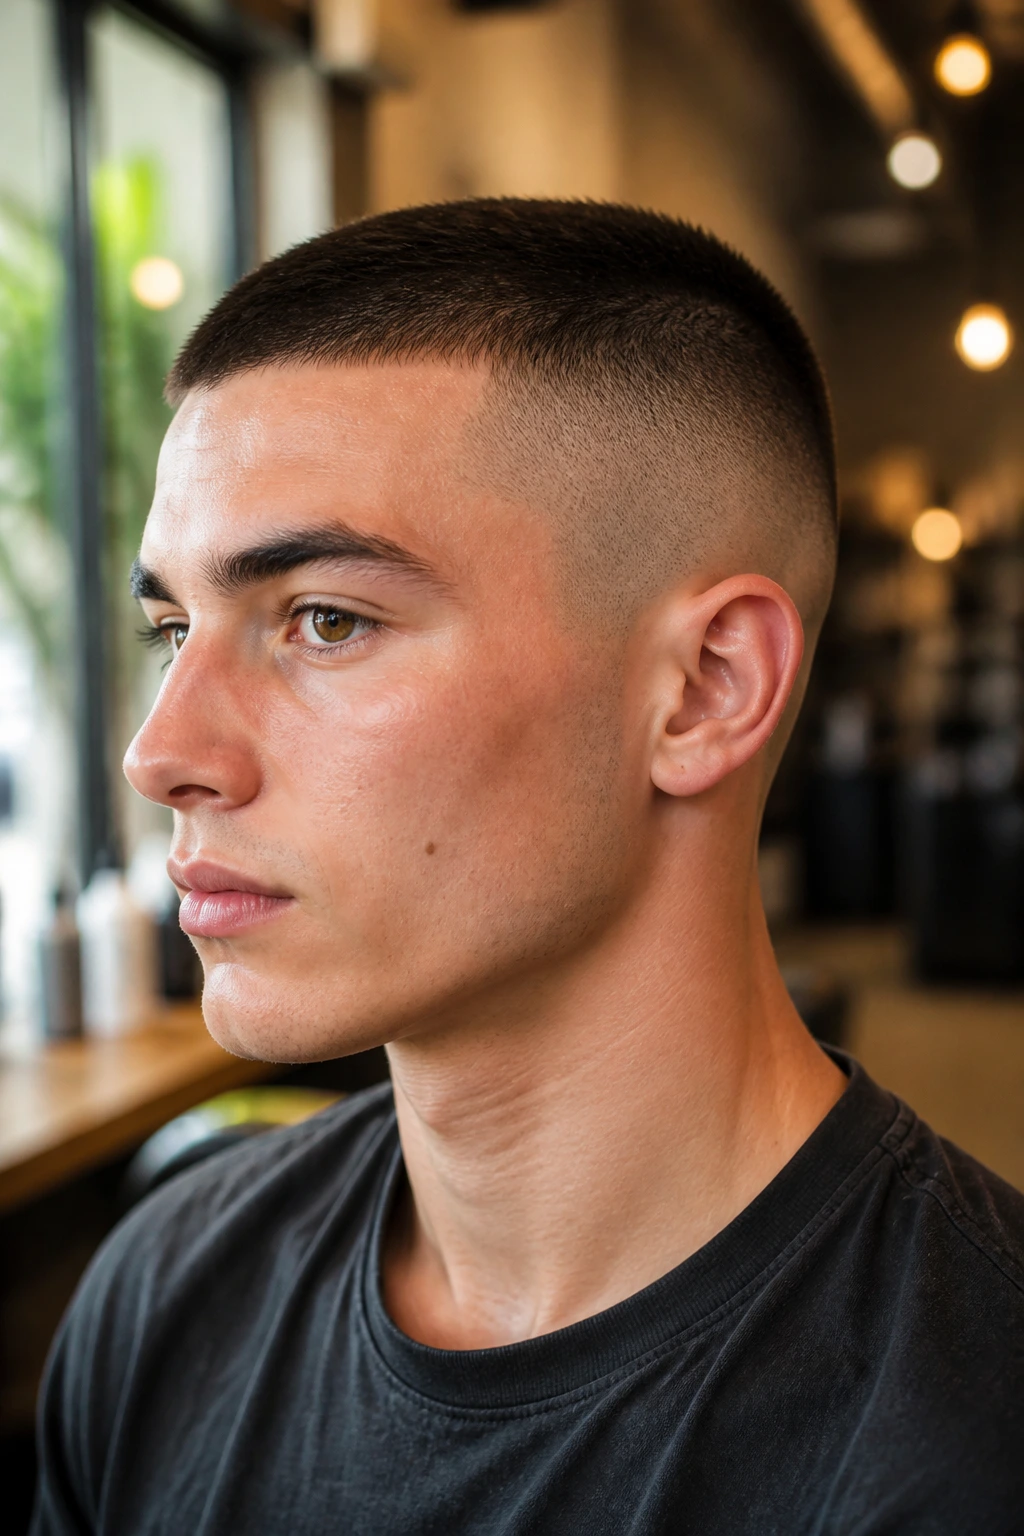
If you want to feel a sense of absolute freedom, an undercut is the way to go. It is essentially shaving the hair at the nape of the neck or on one side, which immediately makes the rest of your hair feel lighter and more manageable.
Selecting Your Guard
Do not reach for the razor without knowing your guard size. A #3 guard is a safe starting point—it is short but provides enough coverage that you won’t look like you just joined the military. If you want a closer fade, drop down to a #2, but avoid going lower unless you are very confident. Work in upward strokes. Start at the bottom and push the clippers upward, pulling away from the head as you reach your stopping point to create a natural fade.
Where to Stop
For a classic nape undercut, draw a line from the top of one ear to the other. Clip everything above that line up and out of the way. Shave everything below that line. This gives you a hidden surprise that looks incredibly edgy when you wear your hair up.
7. The Rounded Bowl Cut (Modern Version)
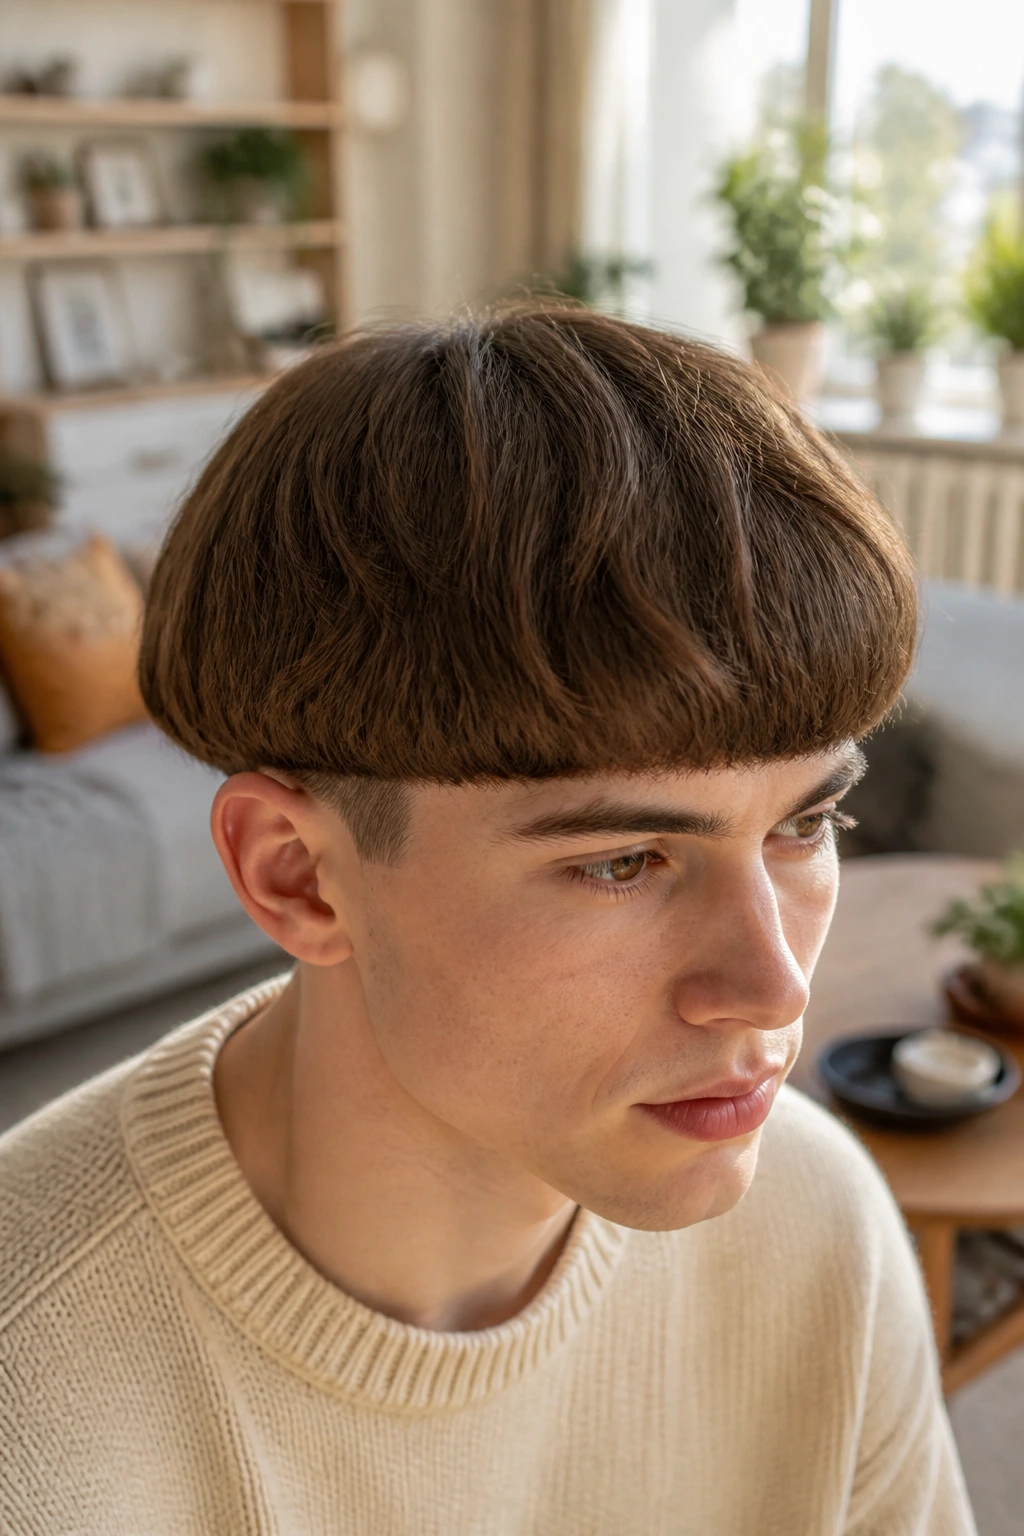
Forget the elementary school nightmare. The modern bowl cut is actually quite chic, characterized by a rounded fringe that connects to the rest of the hair in a smooth, continuous line. It is a bold move, but it highlights facial features brilliantly.
Defining the Perimeter
You need to create a section that wraps around the head, following the roundness of the skull. A good way to visualize this is to find the top of your ears and draw a horizontal line around the head. Everything below this line will be cut to the same length.
The Connection
The key to a good bowl cut is the transition between the top section and the bottom section. You don’t want a harsh disconnection. Instead, use your point-cutting shears to blend the edge of the top section into the bottom section. It should look like one continuous piece of fabric. This is definitely a cut for someone with a confident style and a bit of patience.
8. The Choppy Asymmetrical Bob
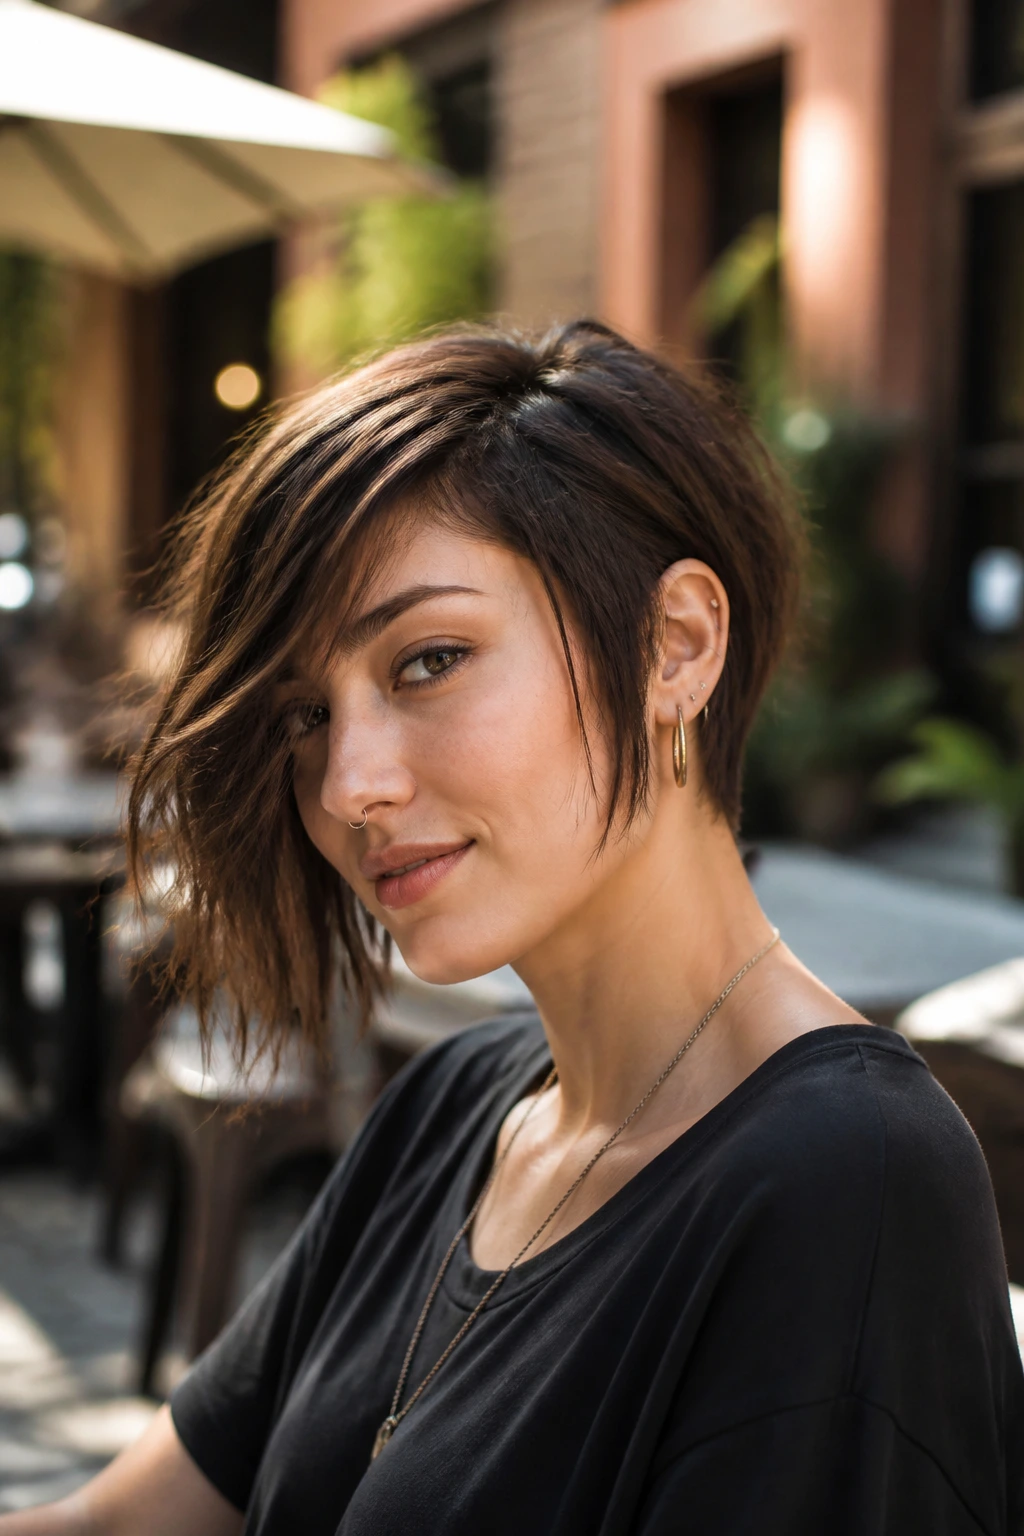
Asymmetry is the best way to hide minor unevenness in a haircut. Since the hair is meant to be longer on one side, a slight slip of the hand on the shorter side won’t ruin the entire look. It is a deliberate, stylish choice.
Managing the Slope
Decide which side will be the longer side. Part your hair accordingly. Use a comb to create a diagonal line starting from the back of your neck up toward your jaw on the shorter side. Cut along this diagonal line. Take it slow. You are essentially creating a slope. Once you have the shorter side established, use it as a reference for the back, and then let the other side remain naturally longer.
Why This Style Works
- It is visually interesting and draws the eye.
- It is easier to maintain than a perfectly symmetrical bob.
- It works exceptionally well with wavy or textured hair.
9. The Curly Hair Dry-Cut
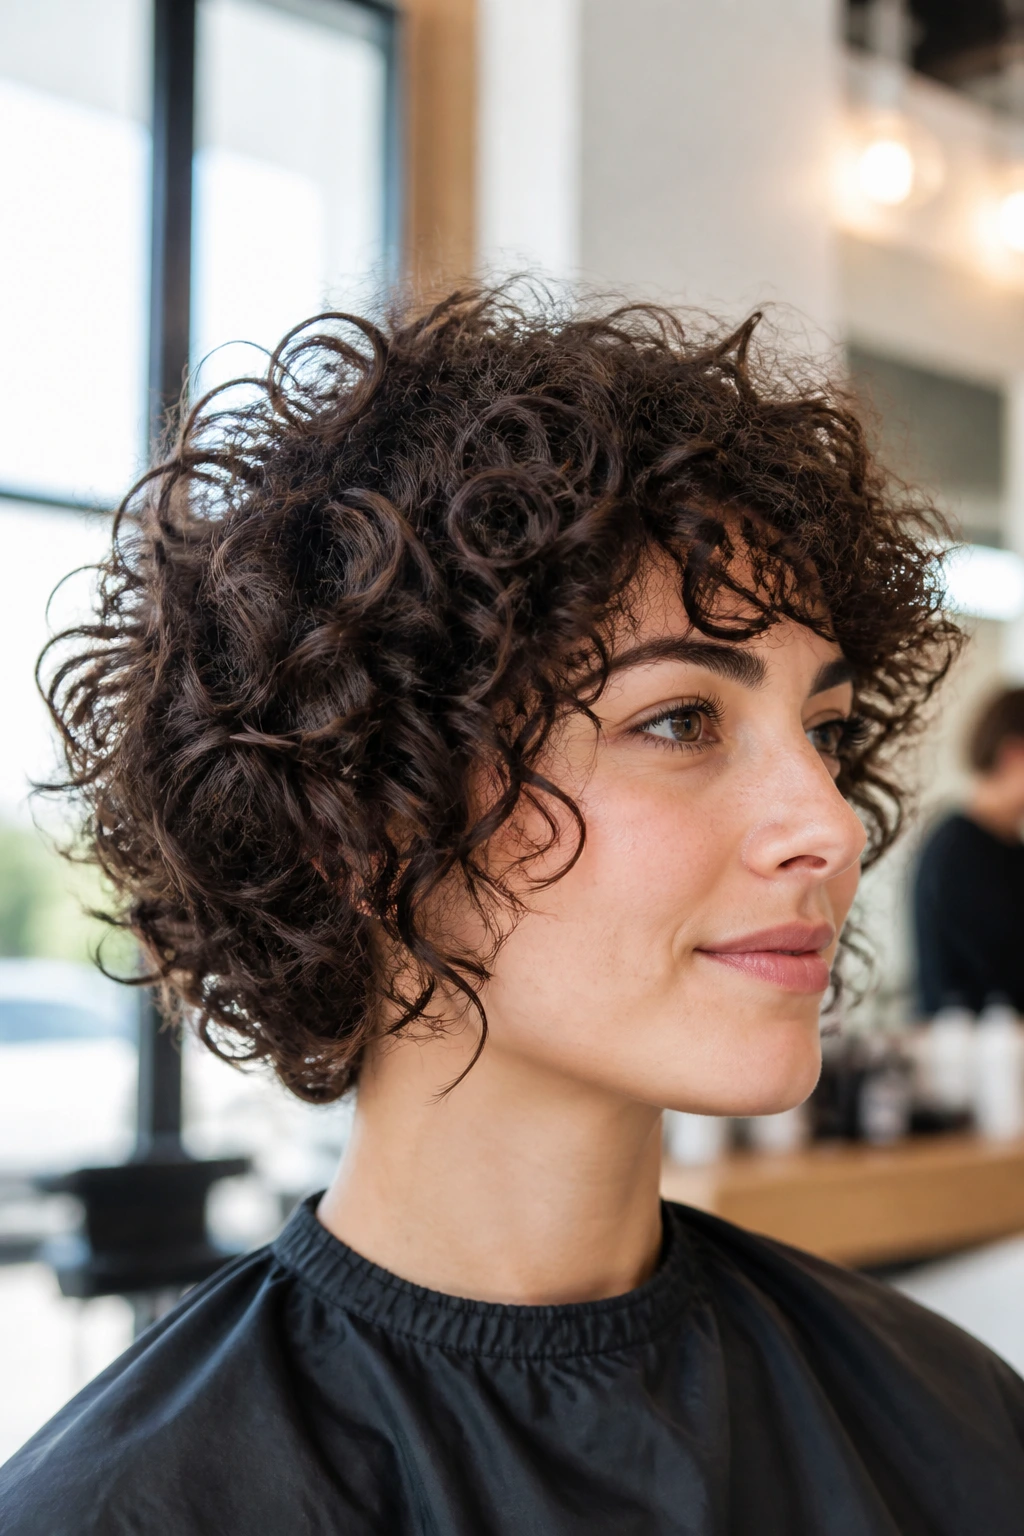
Curly hair has a mind of its own. If you cut it wet, you will be shocked when it dries and shrinks three inches. You must cut curly hair dry, in its natural state, so you can see exactly how each curl behaves.
The “Individual Curl” Method
Do not use a comb to pull the hair tight. Instead, let your curls sit naturally. Pick up individual curls and cut them one by one. This is time-consuming, yes, but it is the only way to ensure the shape stays consistent. If you pull a curl straight, you are changing its shape, and the cut will look uneven the moment you let go.
Tips for Success
- Always use sharp shears; dull blades cause frizz.
- Cut at an angle that follows the natural direction of the curl.
- Focus on cutting “weightless” layers to prevent the dreaded triangle shape.
- If you have varying curl patterns, cut based on the tightest curl as your guide.
10. The Soft Feathered Layers

Feathering is a technique that involves creating very fine, wispy layers that frame the face. It gives hair a light, airy quality and is perfect for hair that tends to fall flat.
The Twist-and-Cut Technique
Take small sections of hair around the face. Twist the section tightly. While the hair is twisted, use your shears to snip into the twist at various points. When you release the hair, it will have little “feathers” of varying lengths that create a beautiful, soft frame.
Achieving the Feather
The goal here is not to create chunky layers but to create a cascade of shorter to longer pieces. If you feel like you’ve made a mistake, you can always go back and trim a few more pieces to blend it in, but always be conservative with how much you remove during each twist.
11. The French Girl Bangs

These are thinner, wispier, and slightly longer than traditional bangs. They are supposed to look like you cut them yourself in a Parisian bathroom, which is essentially the vibe we are going for.
The Sparse Sectioning
The biggest mistake people make with bangs is taking too much hair. For French girl bangs, you want a very shallow triangle of hair. It should be barely an inch deep from your hairline. This ensures the bangs don’t look thick or heavy.
The “Irregular” Cut
Do not cut a straight, blunt line. Instead, cut into the hair in a jagged, irregular pattern. Hold the scissors vertically and take tiny, uneven bites out of the ends. This creates that effortless, undone look that characterizes the style. They should just barely graze your eyebrows.
12. The Tapered Nape Cut
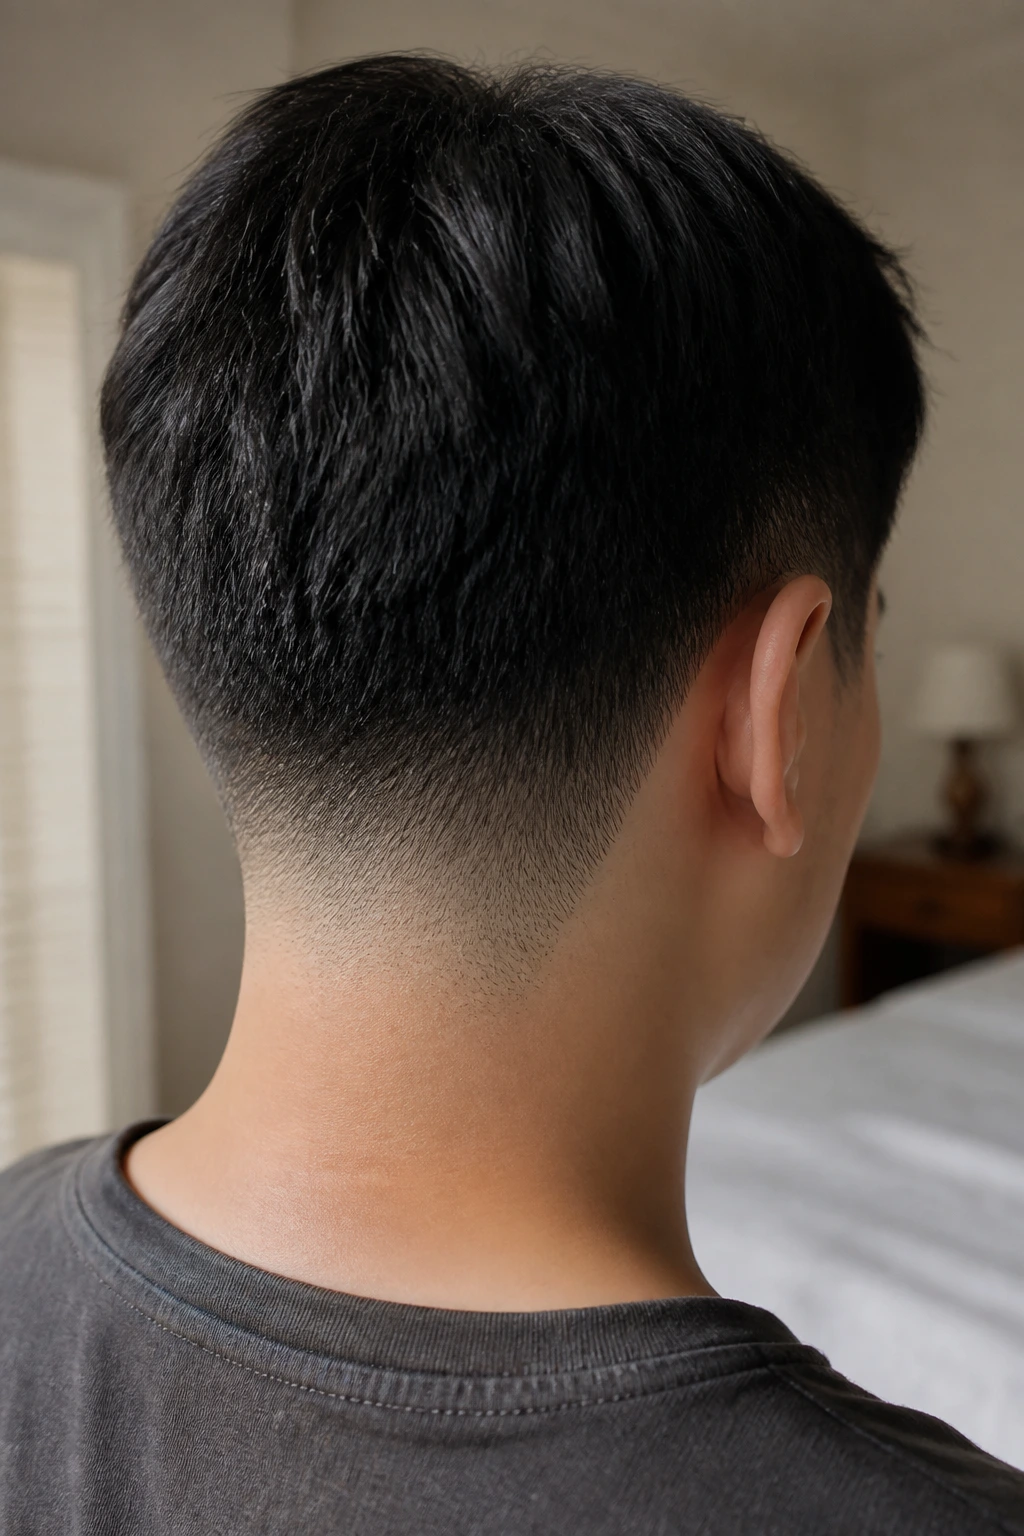
If you have a short haircut and the back is starting to look bushy, you need a tapered nape. This creates a clean, professional finish that makes the hair look like it was done at a high-end salon.
Vertical Sectioning
You will need your clippers again, or very sharp scissors and a comb. Use a comb to lift the hair at the nape of the neck away from the skin. Use the scissors to cut the hair that protrudes through the comb. Start at the bottom (the hairline) and work your way up, moving the comb further away from the skin as you go higher.
The Gradient
This creates a natural gradient from very short at the skin to longer as it meets the rest of your hair. It is a subtle detail that makes a massive difference in how clean the overall haircut appears. It takes practice to get the comb angle right, so take your time.
13. The V-Shape Back Cut
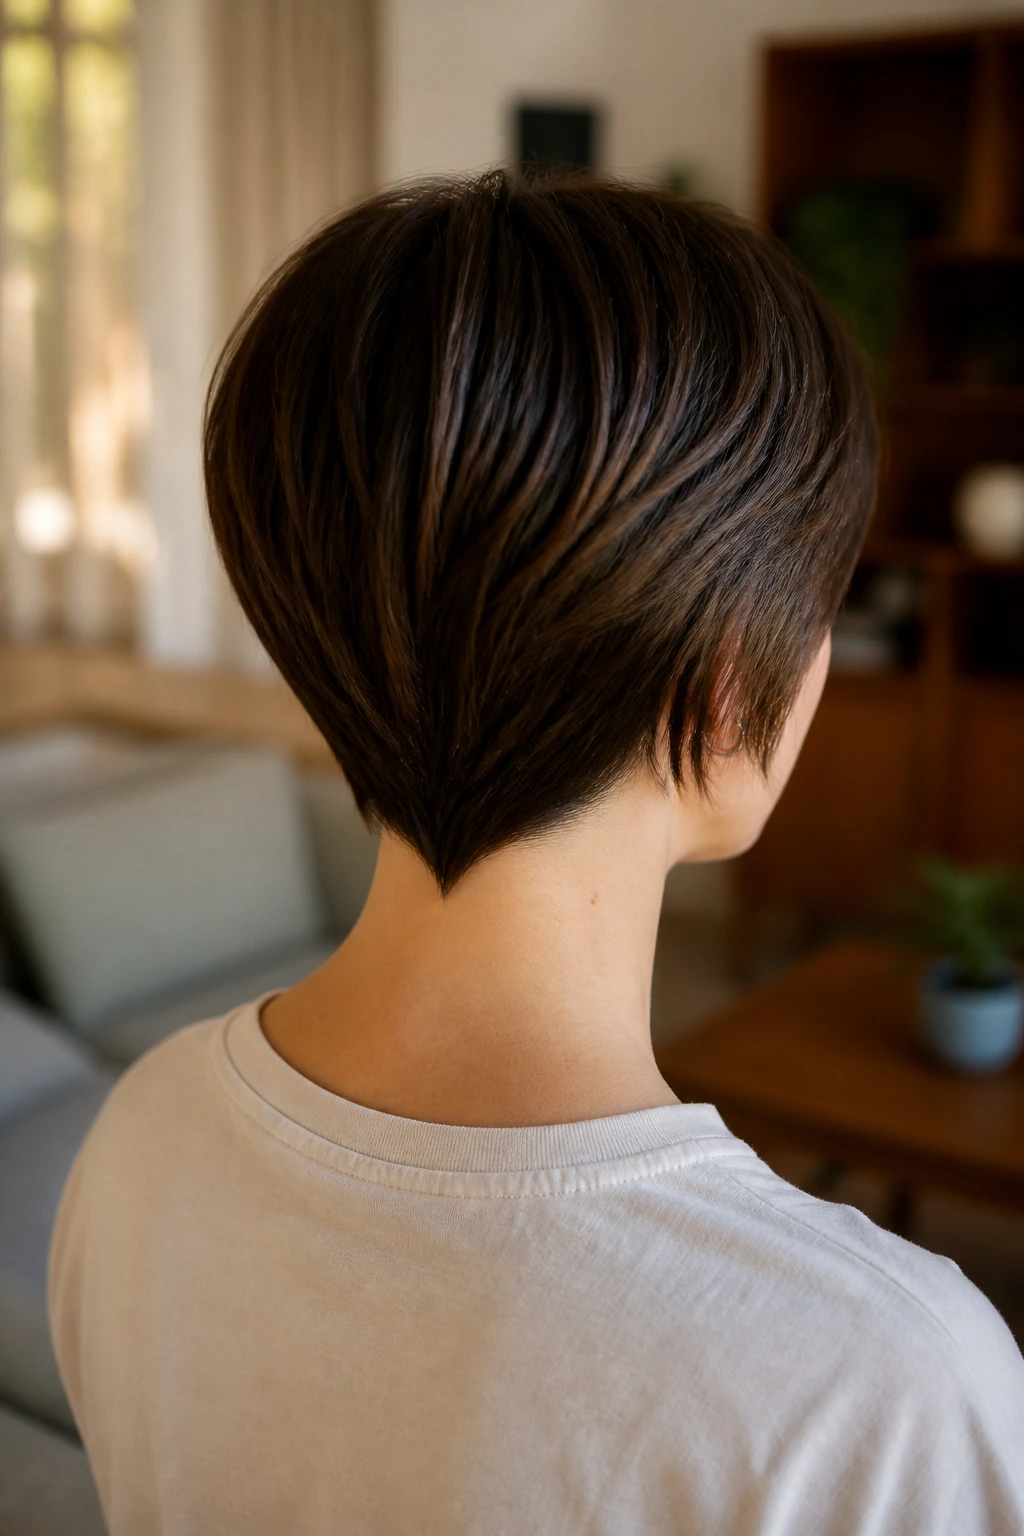
A V-shape cut adds a dramatic flair to any length. It draws the eye downward and creates a beautiful point at the center of the back. It is especially effective on straight hair, which shows off the clean lines.
Creating the Point
Pull all your hair to the back and secure it in a low ponytail. Slide the elastic down to the point where you want the “V” to end. If you want a deep V, put the elastic lower; for a subtle V, keep it higher. Cut the hair straight across at the elastic.
Refining the Shape
When you take the elastic out, you will have a blunt V. It will likely need some softening. Use your point-cutting technique to blur the harsh line of the V so it blends naturally into the sides of your hair. This makes it look less like a stark arrow and more like a soft, layered point.
14. The Wispy Face-Framing Layers

Sometimes you don’t want to cut your main length, but you want a change. Wispy face-framing layers are the answer. They add movement and softness around the face without sacrificing the security of your longer hair.
The “Slide” Method
Take a section of hair from the front, about an inch wide. Hold it out away from your face. Instead of cutting straight across, place your shears open against the hair and gently slide them down the length of the strand, opening and closing the blades slightly as you go.
Controlling the Shape
The higher you start the slide, the higher the layer will begin. If you want a dramatic frame, start around your cheekbone. For a subtle look, start near your chin. This method is incredibly forgiving because you aren’t creating a blunt line, so even if you aren’t perfectly symmetrical, it’s rarely noticeable.
15. The Mid-Length Blunt Cut

If you are hovering between short and medium, the mid-length blunt cut is a fantastic option. It hits right at the collarbone, often called the “lob.” It is the most versatile length for styling.
The Collarbone Marker
Use your collarbone as your guide. When you are looking in the mirror, stand up straight and see where your collarbone hits. That is your baseline. Cut the back first, then bring the sides forward and match them to that length.
Finishing the Ends
A mid-length blunt cut can look a bit “stiff” if it’s perfectly straight across. Once you have the length right, use your shears to point-cut the very ends just a little bit. It will keep the bluntness of the shape but add a soft, textured finish that prevents the hair from looking like a wig.
Maintaining and Correcting Your Cut
The reality of DIY haircuts is that you will eventually make a mistake. It happens to everyone, even professionals. If you realize you have cut one side shorter than the other, do not panic and do not try to “fix” it by cutting the other side shorter immediately.
Step back. Take a deep breath. Often, the unevenness looks worse to you than it does to anyone else because you are staring at it from six inches away. Use a mirror to see if it is truly noticeable. If it is, trim the longer side in very small increments—millimeter by millimeter. If you have over-thinned your hair or made a layer too short, there is no quick fix other than time. Use texturizing sprays or a bit of pomade to blend the layers while you wait for your hair to grow out.
Remember, hair is remarkably resilient. It grows on average half an inch a month. If you truly hate a cut, it will look different in three weeks and significantly better in two months. Treat your hair with kindness during the grow-out phase—use deep conditioning masks and avoid excessive heat styling, which can break fragile, newly-cut ends.
The Bottom Line
DIY hair cutting is a skill that improves with every single attempt. Your first cut might not be runway-ready, but it will be a learning experience that teaches you how your hair moves, where it cowers, and how it holds volume. Embrace the process, keep your tools clean and sharp, and always—always—err on the side of cutting less. There is a deep satisfaction in looking in the mirror and knowing you are responsible for the shape of your own hair, a small act of creative control in a busy life. Take your time, focus on the sectioning, and remember that, at the end of the day, it is just hair—and it will grow back.
