



Air dry hairstyles for wavy long hair can look effortless right up until the front pieces dry into a curtain, the crown goes flat, and the ends puff out with their own opinion. The fix is not more heat, and it is not a bucket of product either. It’s choosing shapes that let your wave pattern settle instead of getting bossed around.
Long wavy hair has a particular kind of stubbornness. It carries enough weight to pull at the roots, but not enough weight to keep every bend in place, so a style can look polished for the first ten minutes and then start sagging, frizzing, or splitting into odd little sections. I have always thought the smartest air-dry styles work with that tension rather than pretending it does not exist.
That means loose structure near the scalp, freedom through the mids, and enough control at the ends that the whole thing reads on purpose. A middle part, a side part, a twist, a braid, a clip, a scarf — all of those can do the job if they are placed with a little care. Heavy hands tend to ruin wavy hair; light hands, on the other hand, usually make it look richer and fuller.
Start with the style that fits your morning. Some of these take two minutes. Some are better when the hair is damp but not dripping. A few are the kind of things you throw together when the weather has already made your hair decisions for you.
1. Center-Parted Air-Dried Waves
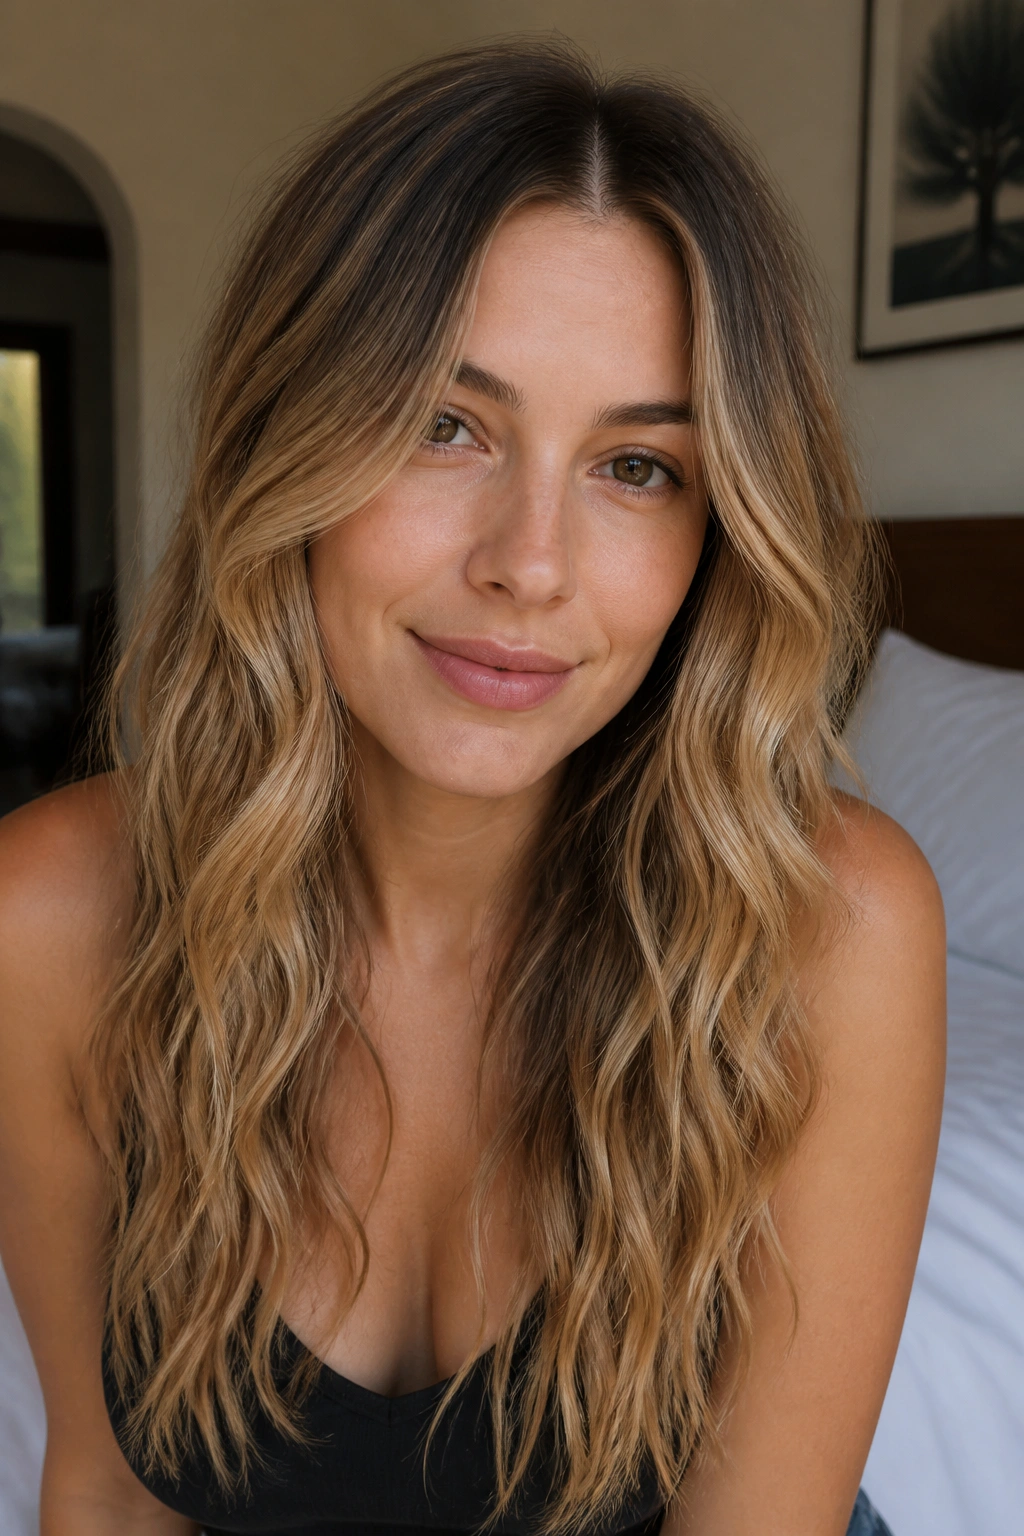
A clean center part is the least fussy way to wear long waves, and it still looks deliberate. If your texture already bends in an S-shape, this style lets the pattern show without asking it to do extra work.
Why It Works
The middle part splits the weight evenly, which helps long hair fall on both sides instead of collapsing into one heavy curtain. That matters more than people think. If the crown tends to go flat, lift two narrow sections at the part and clip them for 10 to 15 minutes while the hair is still damp.
A light leave-in on the mids and ends is usually enough. Skip the roots unless they are bone dry. The cleaner the root area stays, the less likely the style is to swell up into frizz as it dries.
- Best for medium-loose waves that already have bend.
- Works well on hair that air dries with a soft cast from mousse.
- Looks neat with a middle part that starts at the nose bridge.
- Pairs well with a tucked-behind-the-ear finish on one or both sides.
Tiny tip: don’t keep touching the front pieces while they dry. That’s the fastest way to blur the wave line and create fuzz around the face.
2. Deep Side Part with a Tucked Front Section
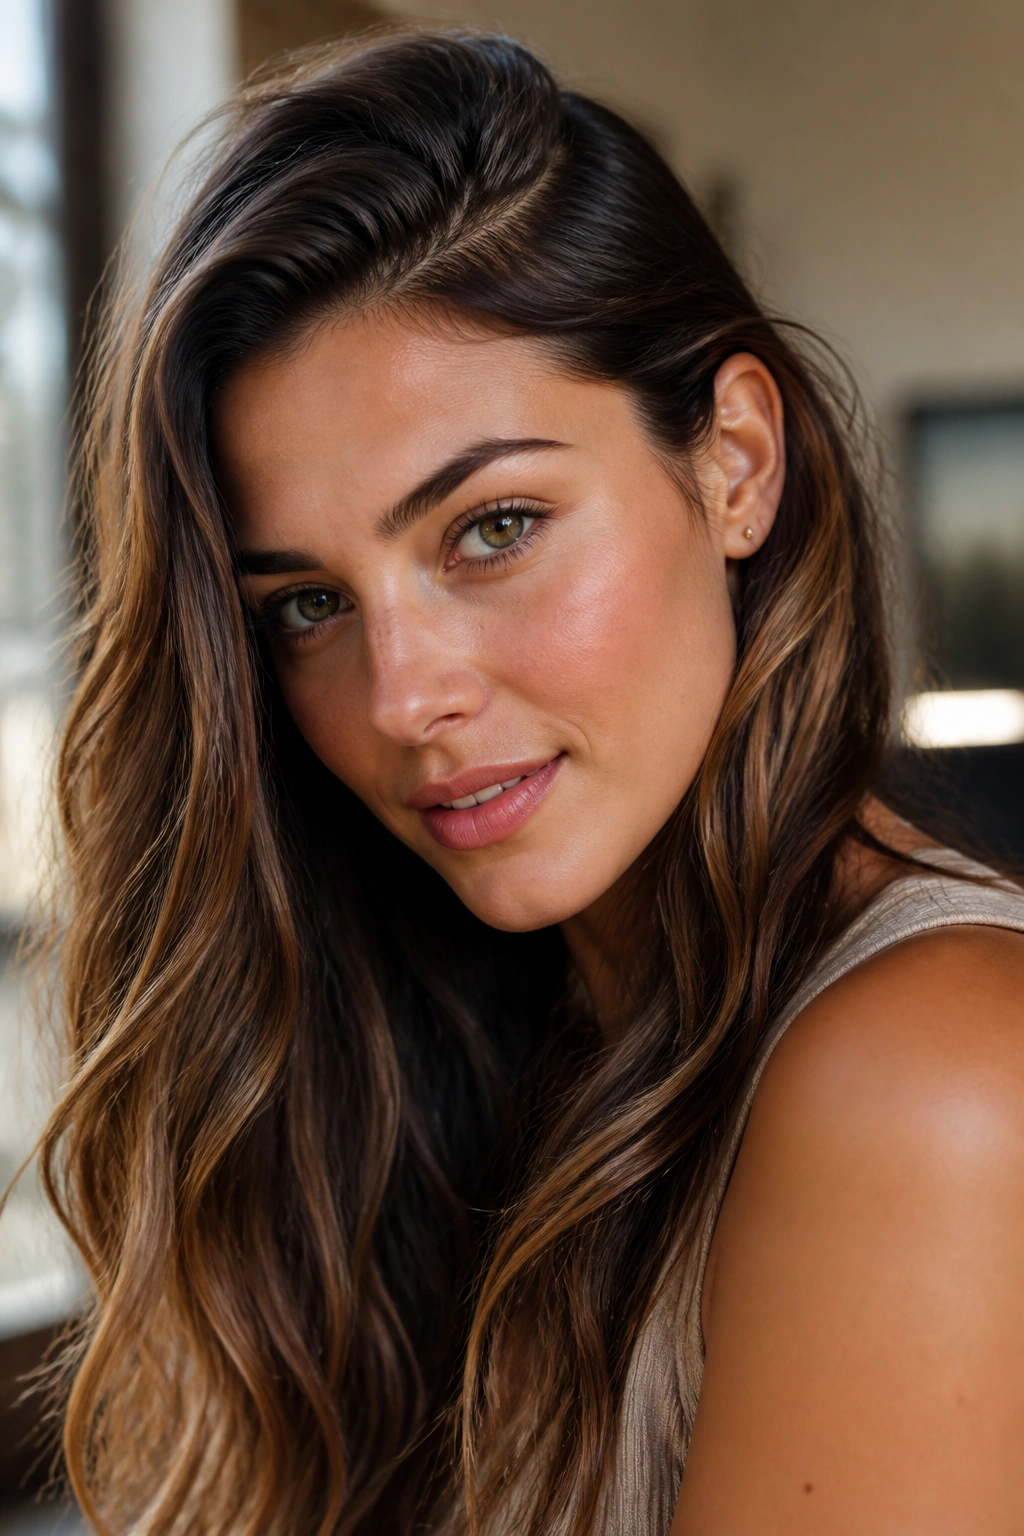
A deep side part gives long wavy hair instant lift at the crown. It is one of the quickest ways to make the whole head look fuller without changing the texture itself.
The trick is to place the part where the hair naturally wants to fall, then push the heavier side across the forehead and tuck a small front section behind the ear. That single move changes the balance of the whole style. It also keeps the face side from turning into one flat sheet, which happens all the time with long lengths.
Use a tail comb or even the pointed end of a rat-tail brush to draw the part. A messy finger part tends to drift and create a weird zigzag. If your hair is very dense, pin the tucked section with a small clip so it stays put.
A deep part looks especially good with earrings, glasses, or a strong brow shape. It frames the face instead of hiding it.
3. Half-Up Twist Crown for Wavy Long Hair
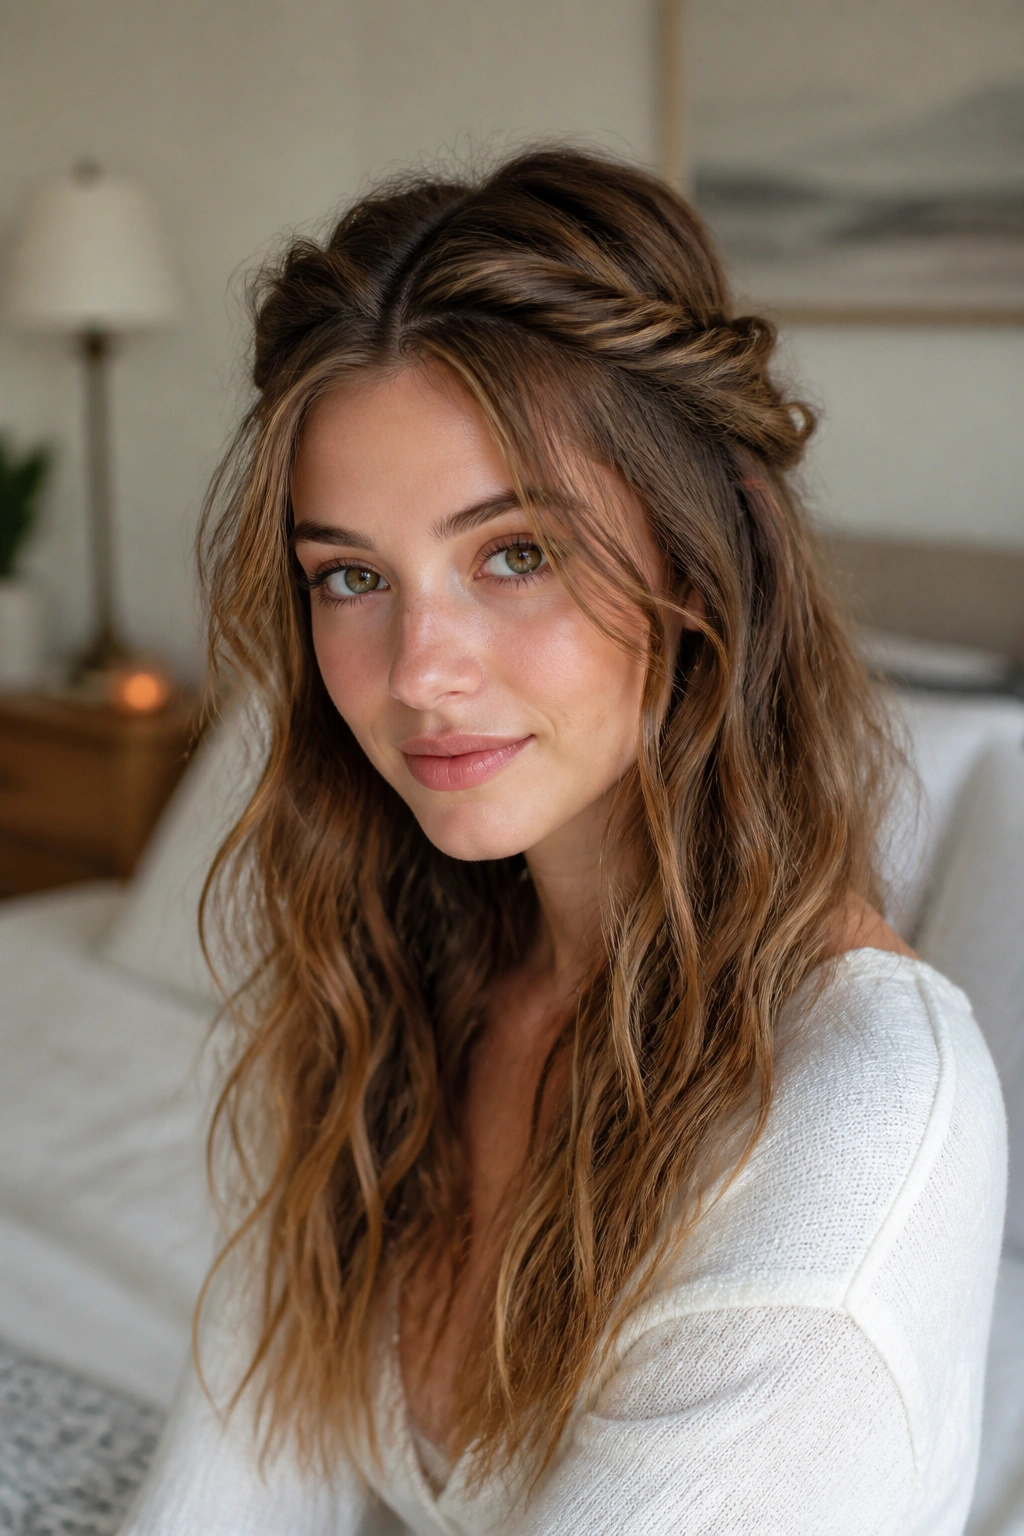
Need your hair off your face without losing the length? The half-up twist crown is one of the easiest answers.
Take a small section from each temple, twist them backward, and join them at the back of the head with a clear elastic, slim barrette, or tiny claw clip. Keep the twists loose. Tight twists flatten the wave pattern near the front, and that is a bad trade when your hair already has movement.
How to Wear It
Let the front pieces fall around the cheekbones. That softens the look and keeps the style from turning severe. If the crown needs a little height, pinch the top section gently after the elastic is in place.
This one works best when the hair is mostly dry but still has a bit of bend left in it. The twist holds better once the surface texture has started to set. It is also a solid move for second-day waves that need a small reset without a full wash.
A little shine cream on the very ends can help, but keep it away from the roots. Too much and the whole thing slips.
4. Claw-Clip French Twist
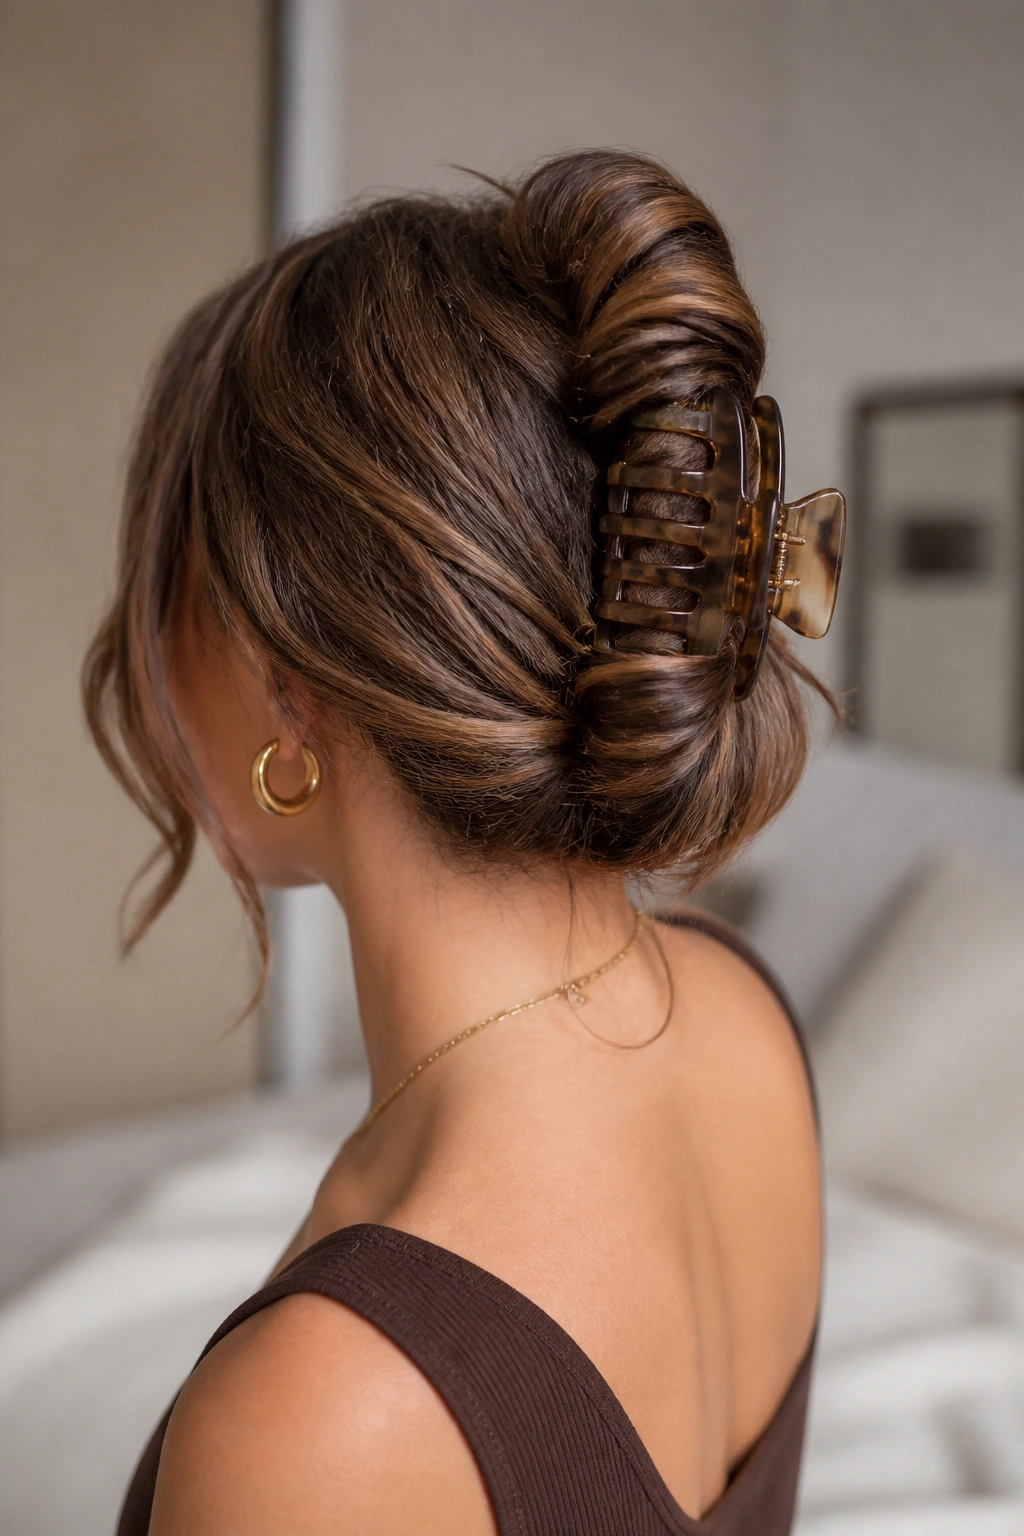
If your hair keeps sliding off your shoulders, a claw-clip French twist solves the problem fast. It also feels less precious than a neat bun.
Gather the hair low at the back, twist it upward, fold the ends in at the top, and clamp the twist with a medium or large claw clip. Wavy hair gives this style a useful amount of grip, so it usually stays better than on very silky hair. If the layers are slippery, add two bobby pins crisscrossed under the clip.
The shape does not need to be perfect. In fact, a little looseness around the sides makes it look better. Leave one or two short face pieces out if you want the style to feel softer around the jaw.
- Use a clip that is at least 3 inches long for thick hair.
- Twist upward, not sideways, so the weight sits close to the head.
- Keep the fold low if your layers are short.
- Do not over-tighten the twist; it will pull at the scalp and flatten the crown.
That last bit matters. A twist that hurts will not last long.
5. Loose Rope Braid Over One Shoulder
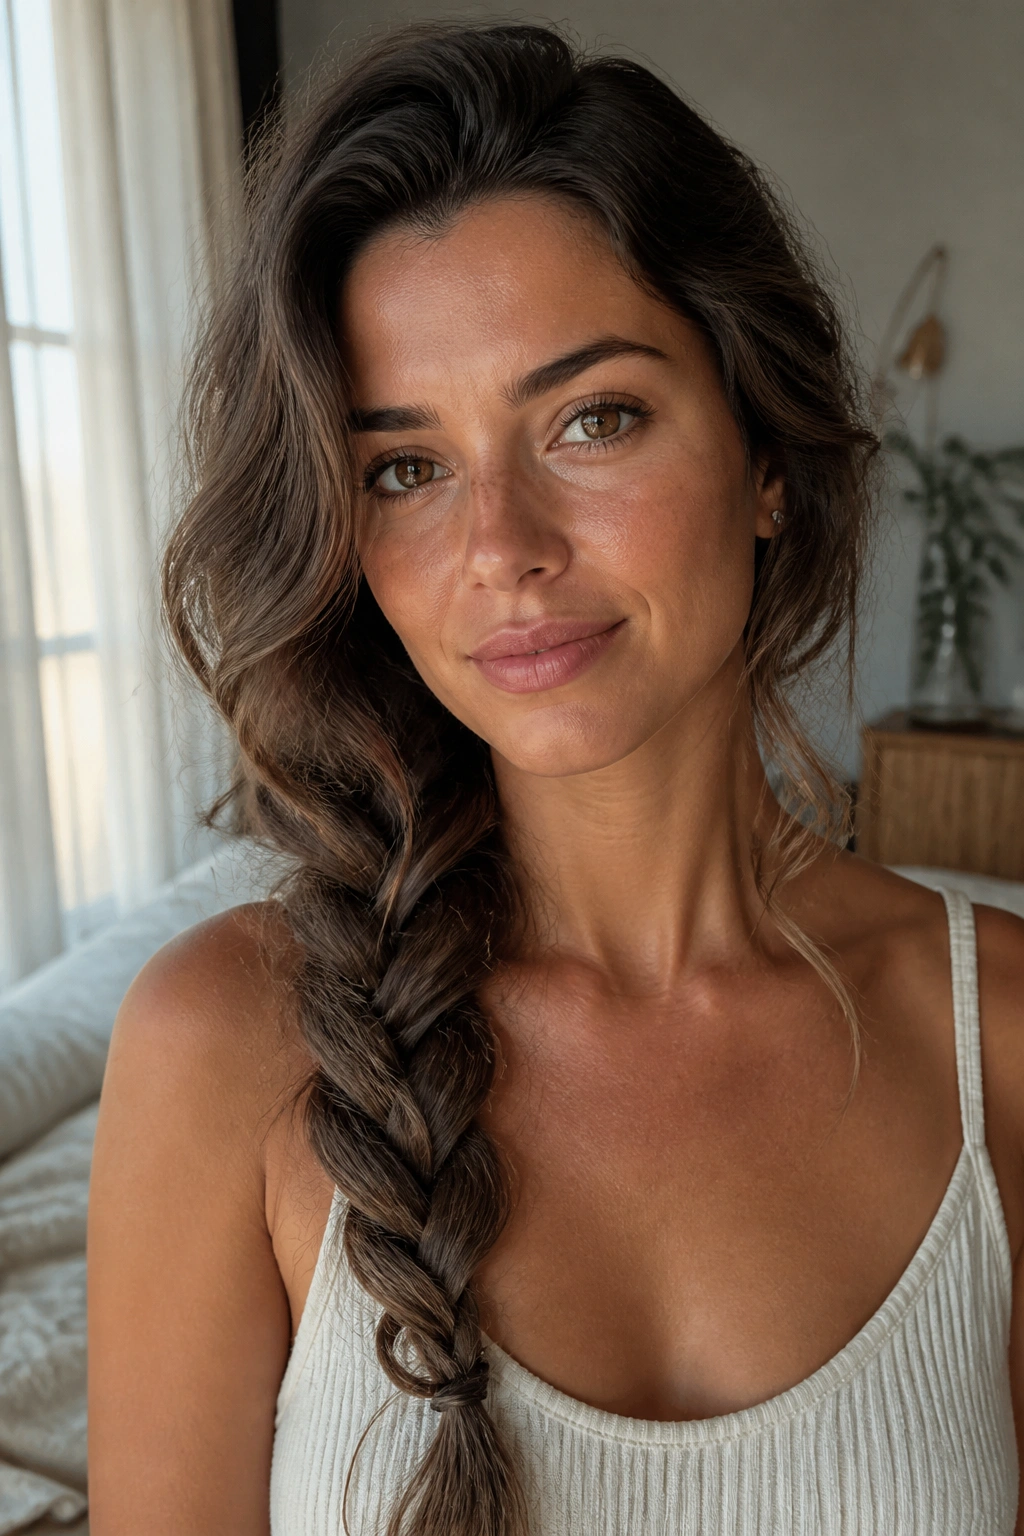
A rope braid is the most underrated air-dry style for long waves. It looks more polished than a simple ponytail, but it takes less skill than a classic three-strand braid.
Split the hair into two sections, twist each section in the same direction, then wrap them around each other in the opposite direction. That opposite motion is the whole trick. It keeps the braid from unraveling and makes the surface texture look tidy without crushing the wave pattern.
If your hair tends to slip, mist the lengths with a little texturizing spray before you start. A rope braid works best when the hair has a tiny bit of grip. Smooth, freshly washed hair can be too slick and will let the braid loosen before the day is over.
This style is one of my favorites for windy weather. It keeps the ends contained, but it still shows off the bend in the lengths.
6. Braided Crown with Open Ends
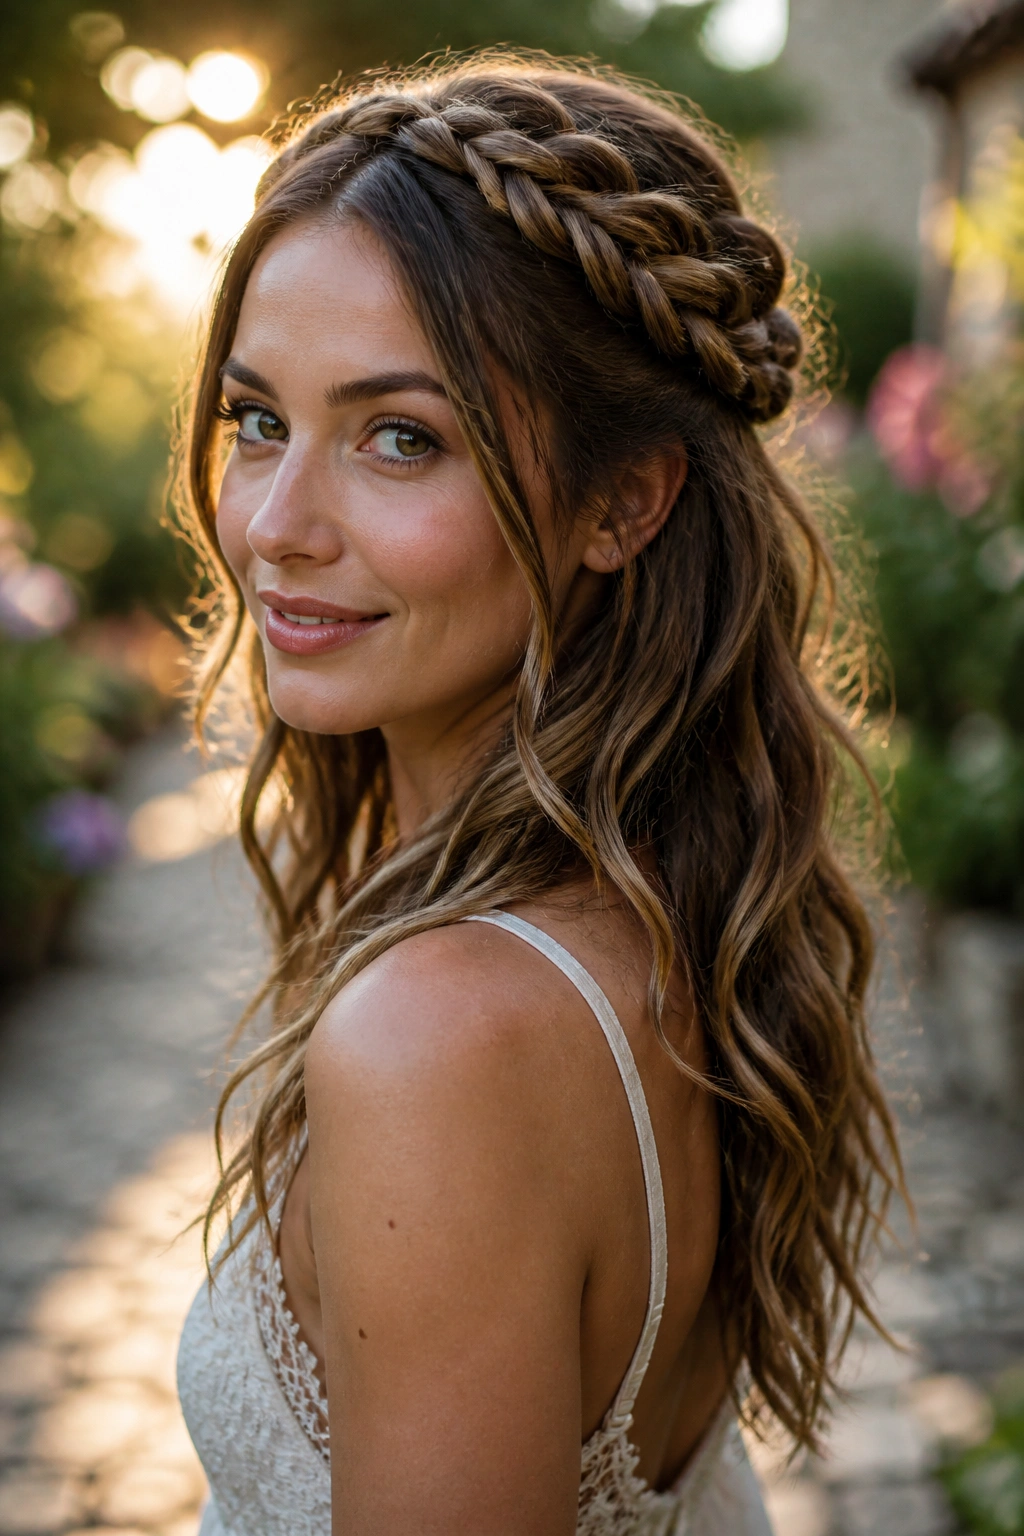
A braided crown gives you structure without hiding the whole head of hair. That balance is the reason it works so well on long waves.
Braid each side from the temple area, pull the braids back, and pin them together near the back of the head. Leave the remaining lengths loose. The style feels more relaxed than a full crown braid, and it avoids the helmet effect that can happen when every strand gets pulled tight.
What Makes It Different
Unlike a full braid that wraps the whole head, this version lets the lower half stay free and textured. That keeps the movement in the style, which is the part most wavy-haired people actually want. It also distributes weight a little better across the sides, so the front does not collapse so fast.
It suits a soft blouse, a simple dress, or even a plain tee when you want your hair to do some of the talking. If the braids look too crisp, pull the outer edges very gently with your fingertips.
A few loose face pieces make the whole thing feel less formal.
7. Bubble Ponytail with Soft Ends
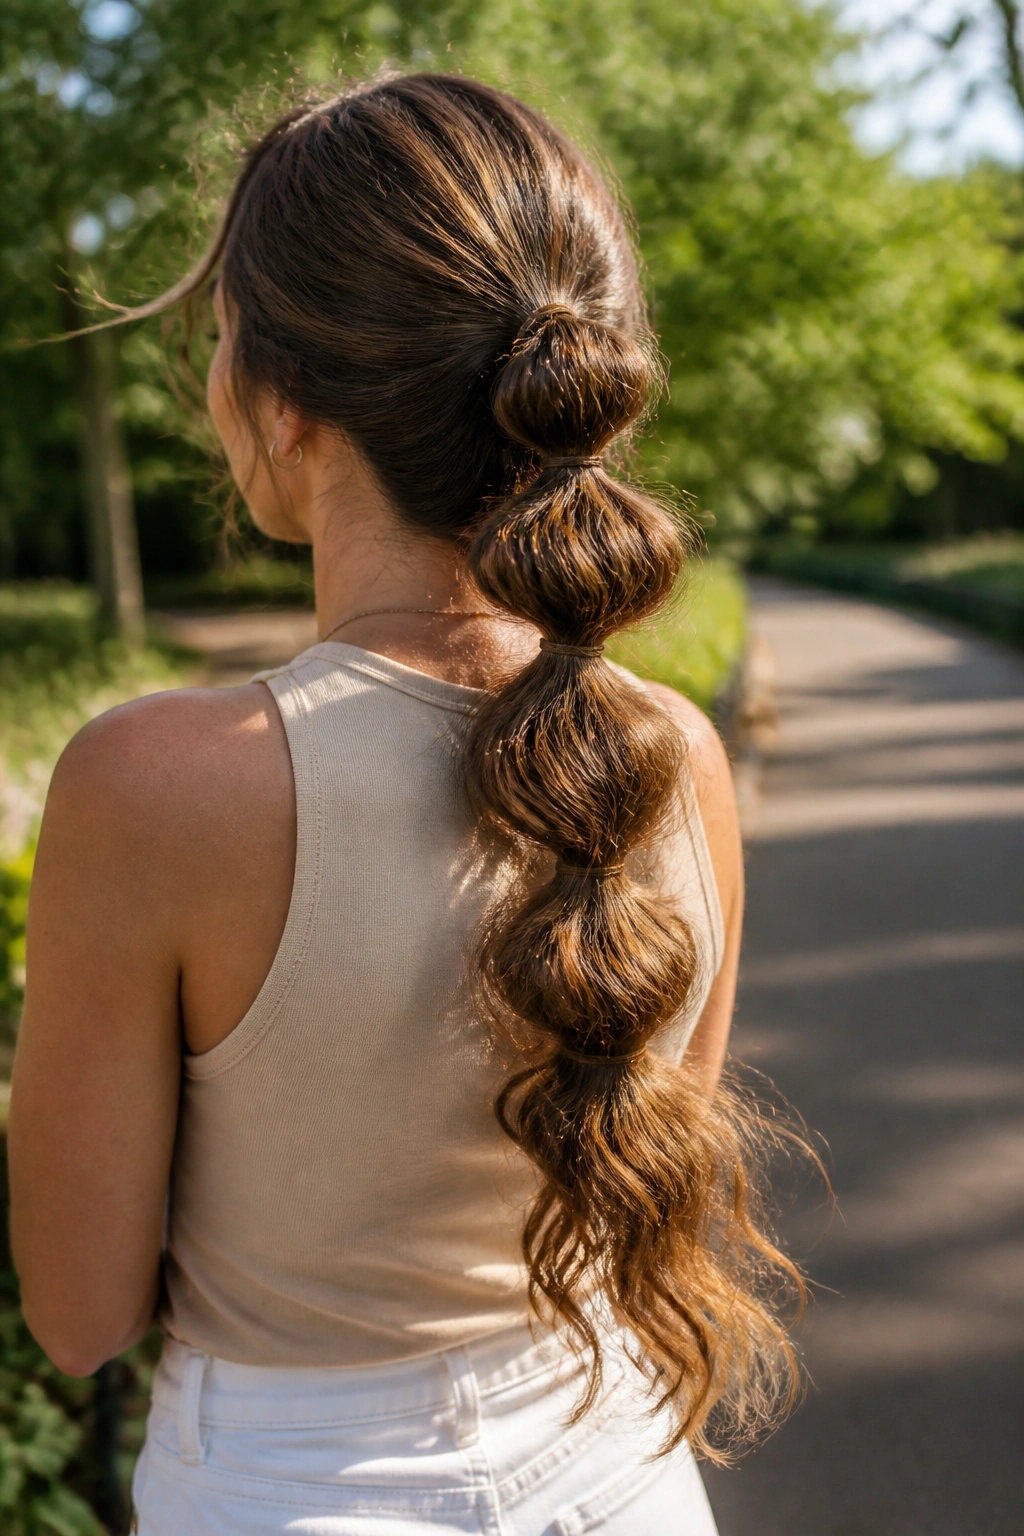
A bubble ponytail is a fast fix when you want something playful that still works with long wave texture. It looks polished from a distance and a little more relaxed up close, which is a nice combination.
Start with a low or mid-height ponytail, then add clear elastics every 2 to 3 inches down the length. After each elastic is in place, tug the section between elastics outward so it forms a round bubble. Leave the last few inches loose so the wave pattern can show at the ends.
This style is especially useful when the hair has too much volume to sit neatly in a plain ponytail. The bubbles break up the weight and stop the tail from looking like one long block. If you want it cleaner, wrap a small strand of hair around the top elastic.
It is not fussy. That is the point.
8. Low Twisted Bun with Face-Framing Pieces
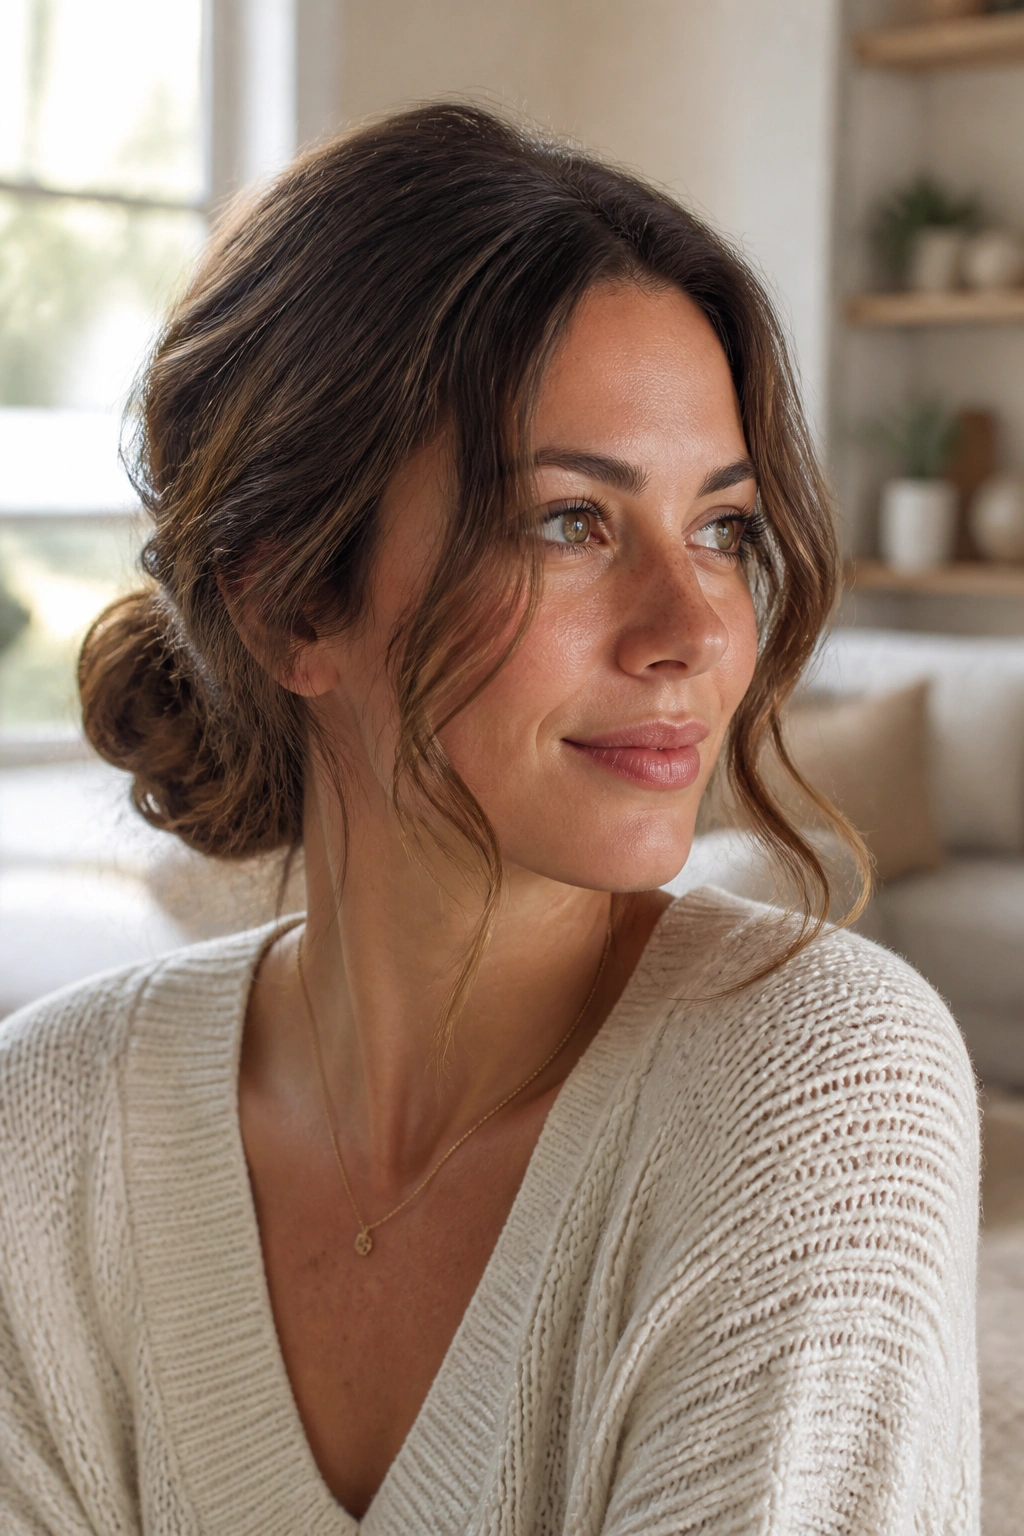
A low twisted bun can look dressed up without turning stiff, which is harder to pull off than people think. The face-framing pieces do a lot of the work here.
Split the hair into two sections, twist each side toward the nape, and coil them into a loose bun. Pin the bun where the twists meet so the shape stays close to the head. Then leave two soft pieces around the face, about half an inch to an inch wide, depending on how much structure you want.
That little bit of looseness keeps the style from feeling severe. Long wavy hair can go formal fast, and not always in a flattering way. A soft bun with movement around the cheeks avoids that problem.
If your layers are short in the front, use a small bobby pin hidden under the bun rather than trying to force the whole thing into one elastic. It sits better and looks cleaner.
9. High Pineapple Lift with a Satin Scrunchie
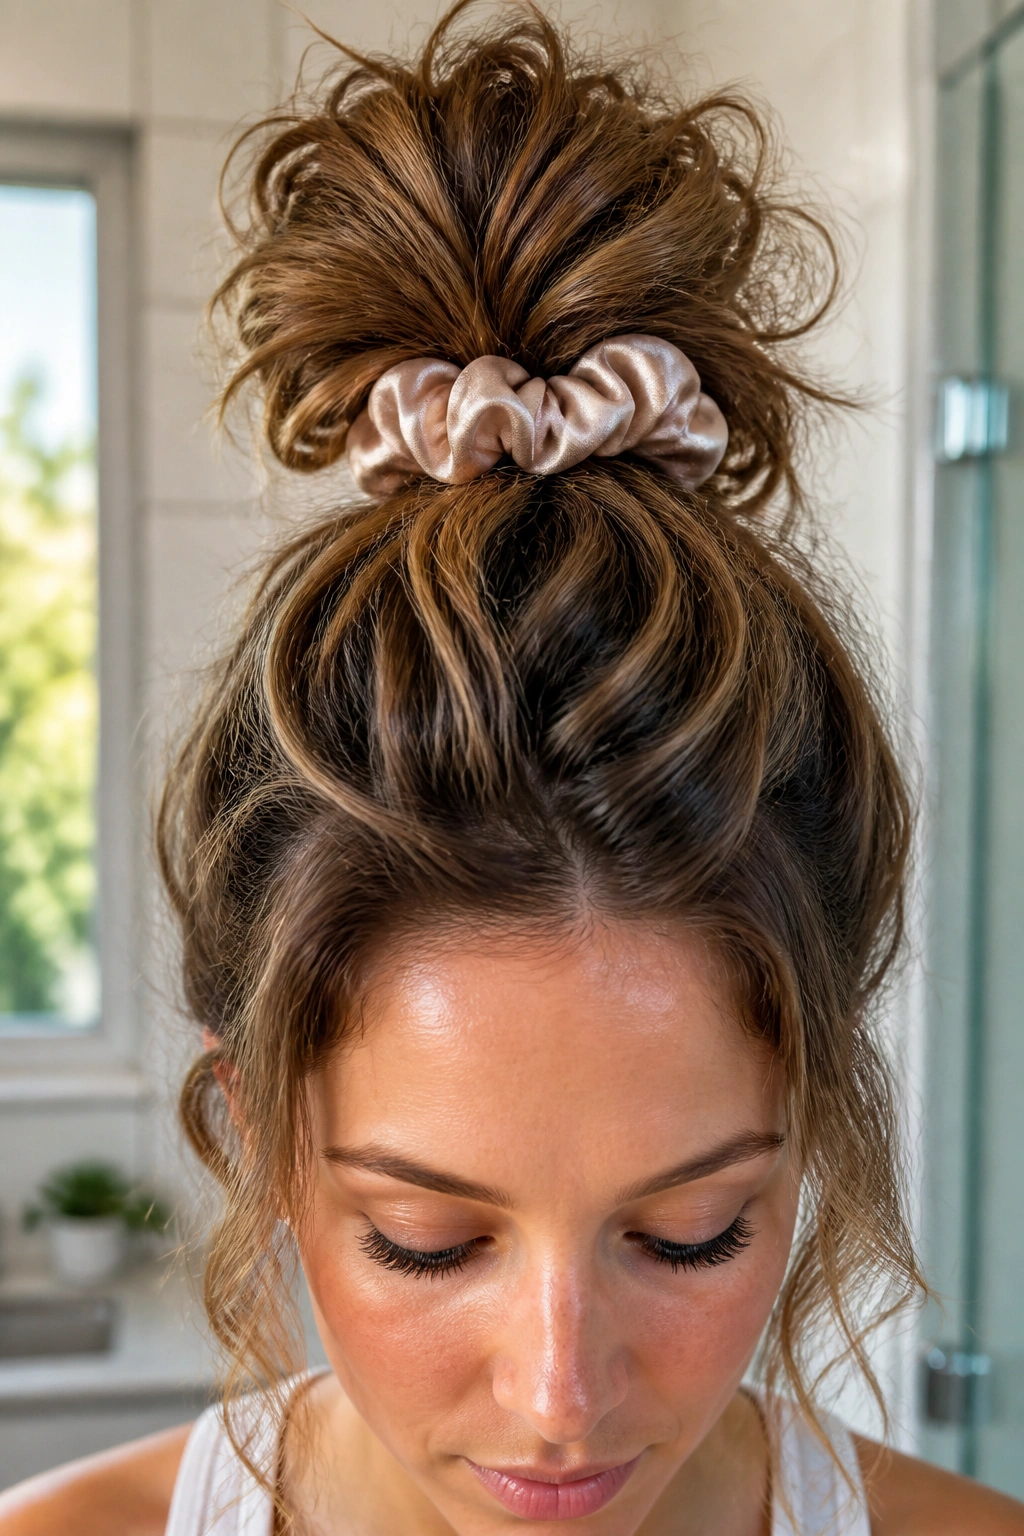
When your roots are flat and the ends still have life, put the volume on top. That is basically what the high pineapple does.
Gather the hair very high, near the crown, with a satin scrunchie. Do not pull it tight enough to smooth every bump out of the scalp. The point is to lift the hair away from the face and let the lengths fall in a loose cascade, not to flatten everything into a tiny knot.
Why It Helps Long Waves
Long wavy hair often looks limp when it sits low and heavy. Moving the ponytail higher changes the angle of the weight and makes the waves read more clearly. The satin scrunchie also gives a softer hold than a basic elastic, so you get fewer dents in the hair.
- Best on second-day waves or hair that has mostly dried.
- Works well if the crown needs height.
- Keep the scrunchie a little forward of the exact top of the head.
- Let the ends spill out instead of tucking them under.
That forward placement matters. If the pony sits too far back, it slides and the whole shape loses its lift.
10. Mini Braids at the Hairline
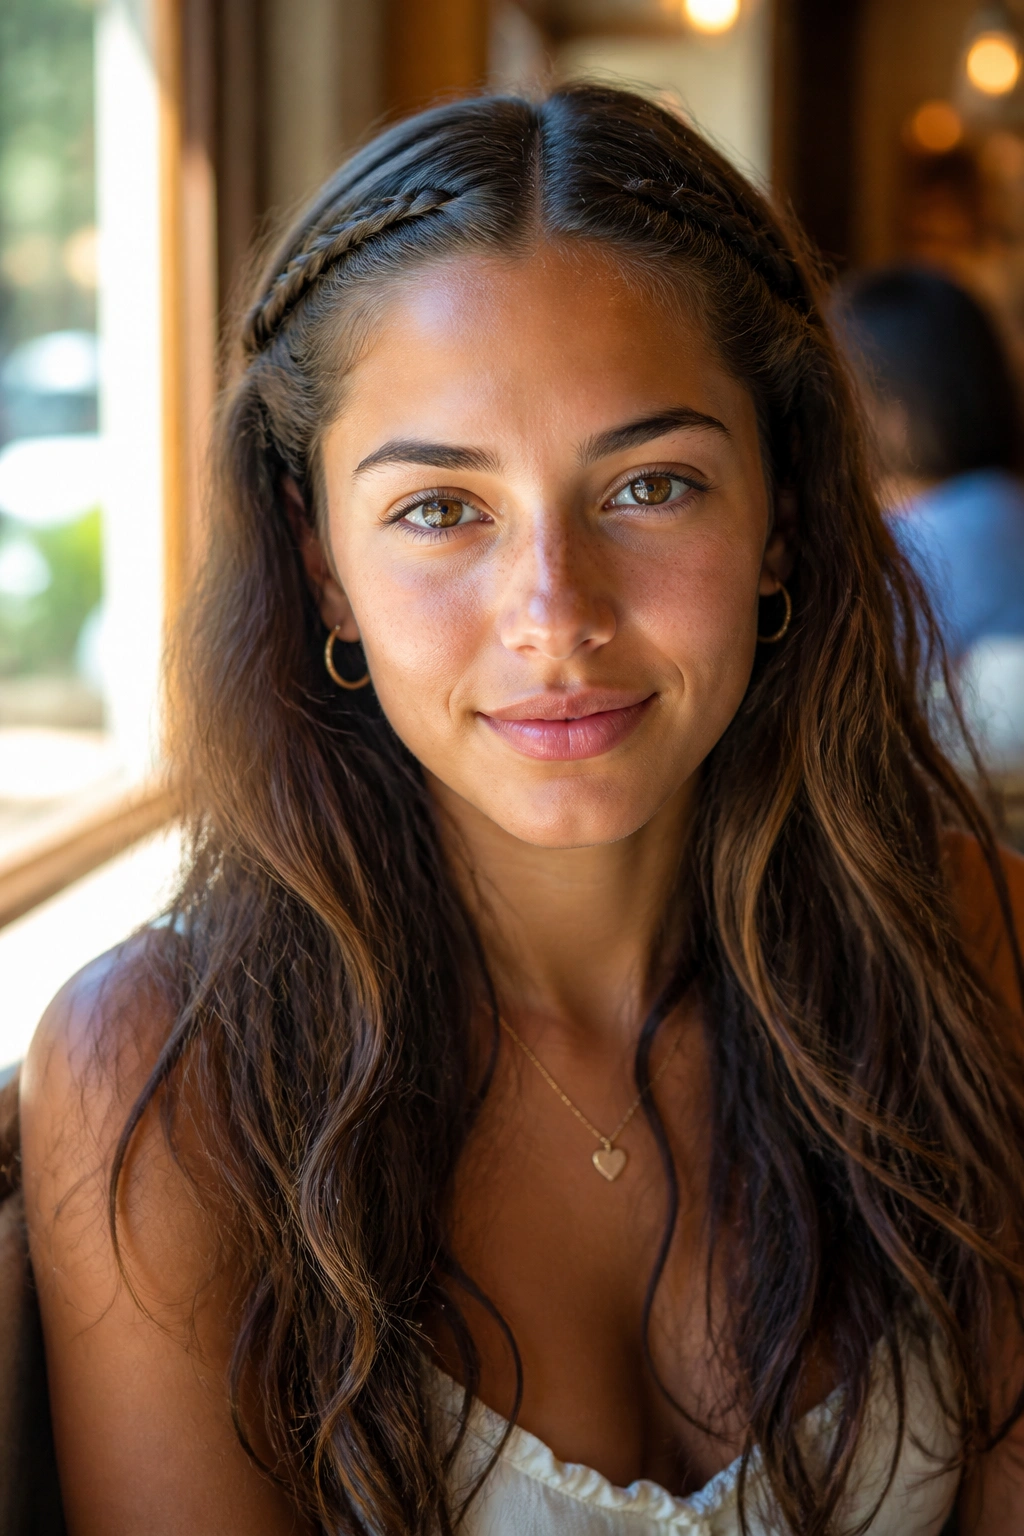
Tiny braids can do more for long wavy hair than a full styling session. They tame the front without taking over the look.
Take one small section from each side of the hairline, braid it loosely, and pin or tie it behind the ear. You can do two braids, four braids, or just one on the heavier side if that is all the style needs. The rest of the hair stays loose and air-dried.
This works especially well when the front layers have a mind of their own. Those short pieces are often the first to frizz, curl awkwardly, or stick to your forehead. Mini braids keep them in line while the lengths keep their movement.
A narrow braid is better than a tight one. Tight braids leave dents once you take them out, and they can make the root area look striped in a way that does not flatter waves.
One small braid is often enough.
11. Waterfall Braid That Leaves the Lengths Loose
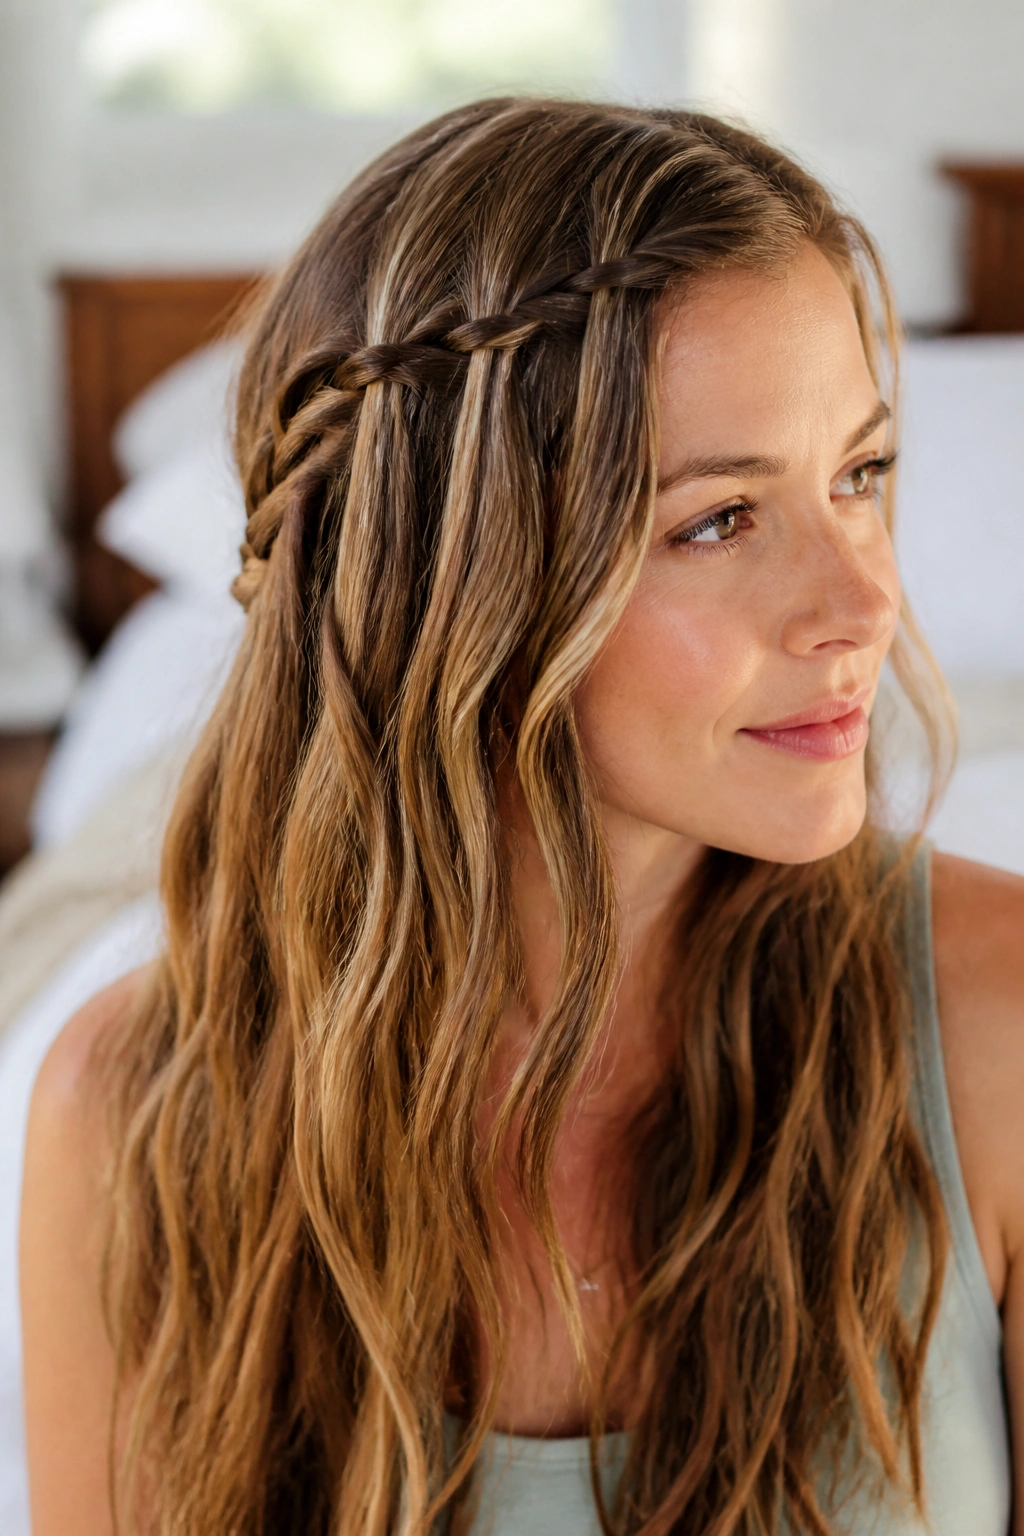
Want a style that looks involved without swallowing your waves? The waterfall braid does that job nicely.
Start with a small section near the temple, braid across the side of the head, and let the outer strand drop out as you weave. Each time you release a strand, pick up a fresh one from above. That creates the waterfall effect and leaves most of the length visible.
How to Keep It from Slipping
The braid sits best on hair that has already started to dry. Wet hair stretches too much and can pull the braid flat. Once the braid is in place, pin it behind the ear with two bobby pins crossed in an X. That tiny trick holds better than one pin alone.
This style is good when you want the hair to look soft around the face but still controlled enough for dinner, errands, or a long day out. It is also one of the nicer ways to show off highlighted or sun-lightened waves, because the braid breaks up the texture in a pleasing way.
Keep the braid loose. Tight waterfall braids look fussy, and long waves do not need that kind of help.
12. Fishtail Side Braid for Thick Wavy Hair
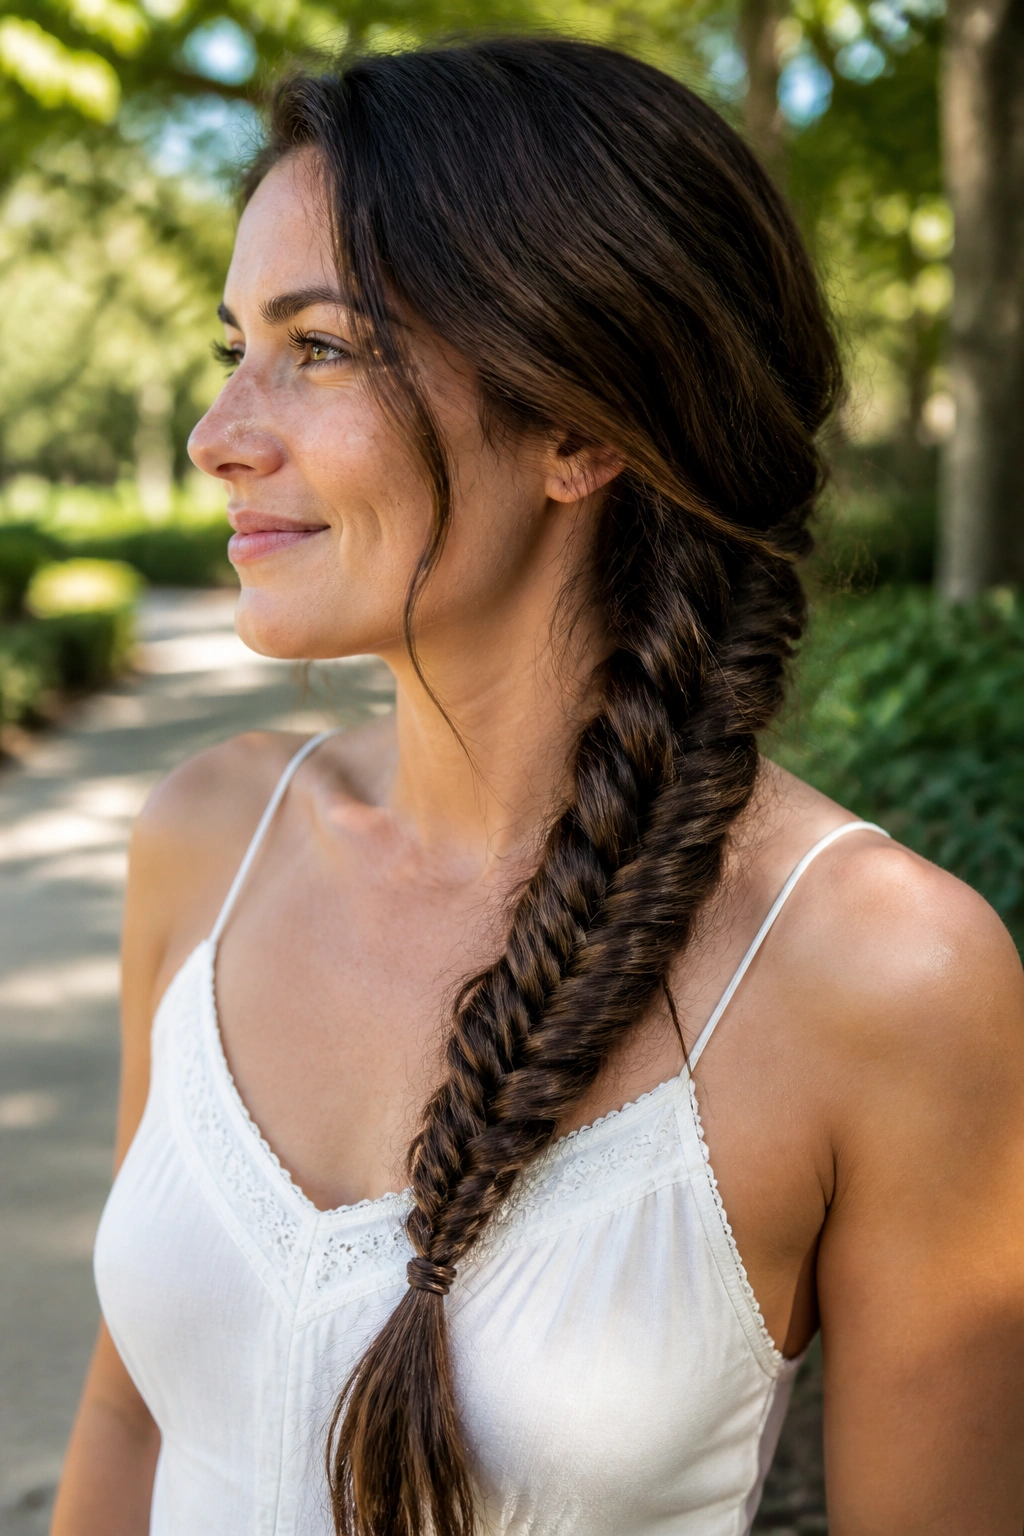
A fishtail braid is sharper than a regular braid, and thick wavy hair usually wears it well. The smaller weaving pattern shows off texture instead of hiding it.
Bring all the hair over one shoulder, divide it into two sections, then take a thin piece from the outside of one section and cross it into the other. Repeat until you reach the end. The tighter and more even the picks, the cleaner the braid looks. The looser the picks, the more boho it feels.
This style is especially handy when your hair has a lot of bulk. A simple side braid can look chunky in a good way, but a fishtail gives that bulk a little refinement. It still feels relaxed, though. Not precious. Not stiff.
Use a snag-free elastic at the end and tug the braid apart gently if you want it fuller. I prefer to stop before it gets too wide; if you pancake it too much, it starts looking like a decoration instead of a hairstyle.
13. Double Dutch Braids into Loose Ends
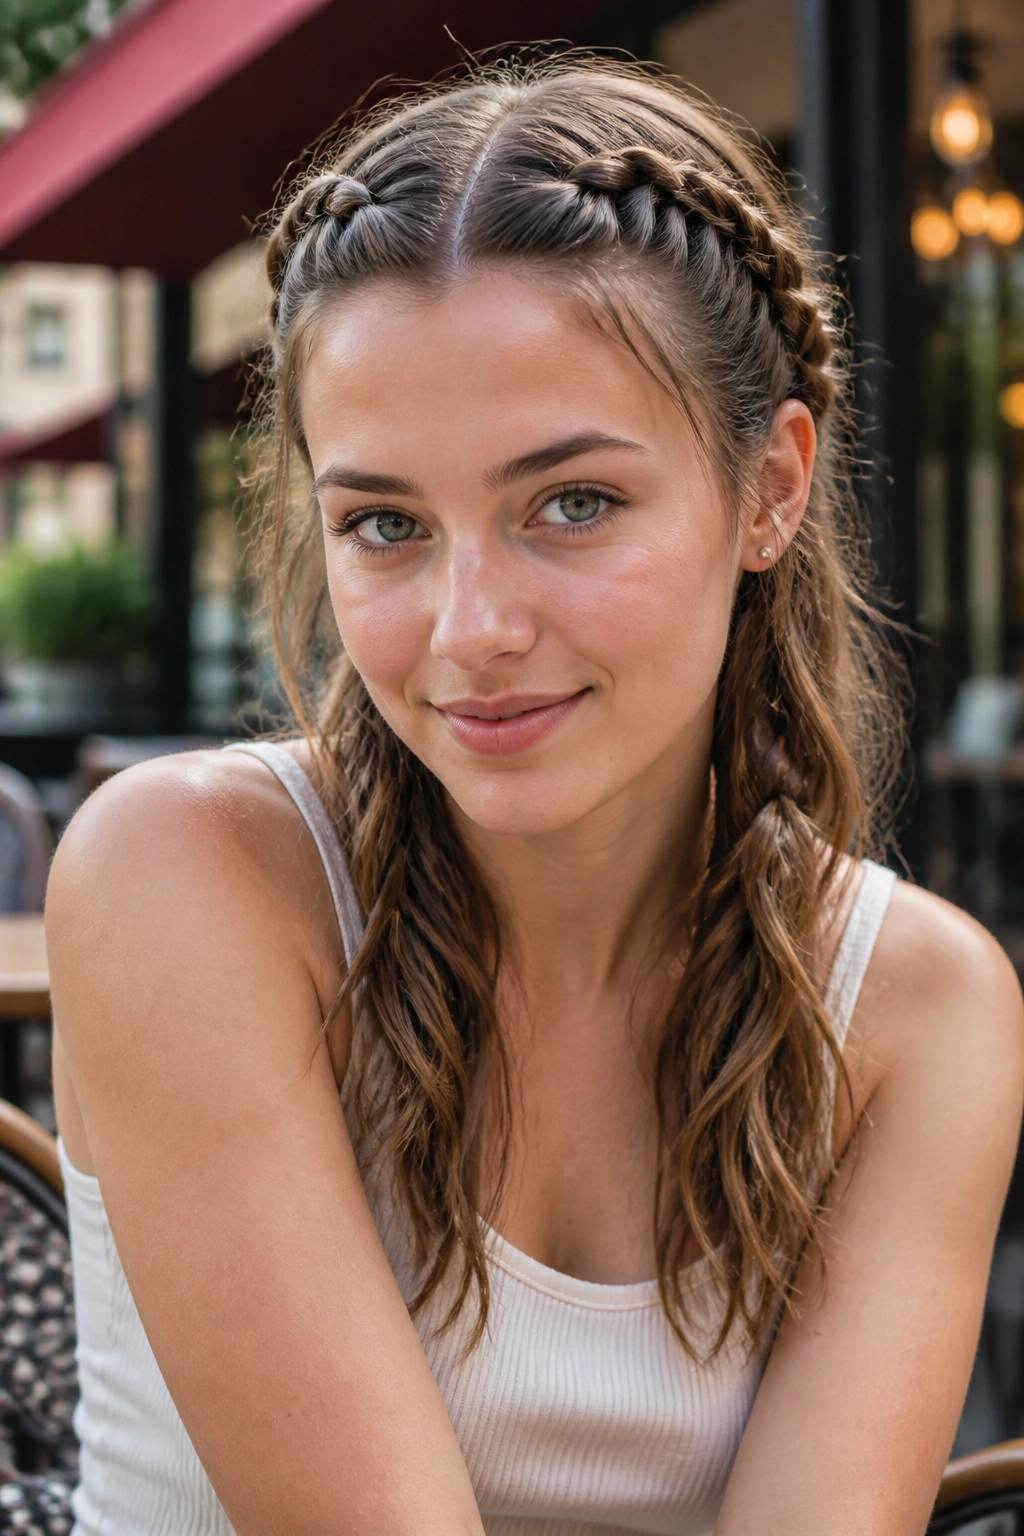
This is the style I reach for when I need hair to behave for a long stretch. It keeps the crown secure, and the loose ends still show off the wave pattern.
Part the hair down the middle, braid each side Dutch-style from the front hairline toward the nape, and stop once you reach the point where the hair starts to feel too heavy. Tie each braid low, then let the remaining lengths fall loose. If your hair is long enough, the loose ends become part of the look instead of an afterthought.
- Keep the braid tension even on both sides.
- Use a light detangling spray before you start.
- Start braiding close to the scalp so the part stays neat.
- Leave the bottom section loose enough that the waves can bend naturally.
This one works for errands, travel, workouts, and those days when wind seems determined to mess with your plans. It is practical hair, and I mean that in the best way.
14. Half-Up Space Buns
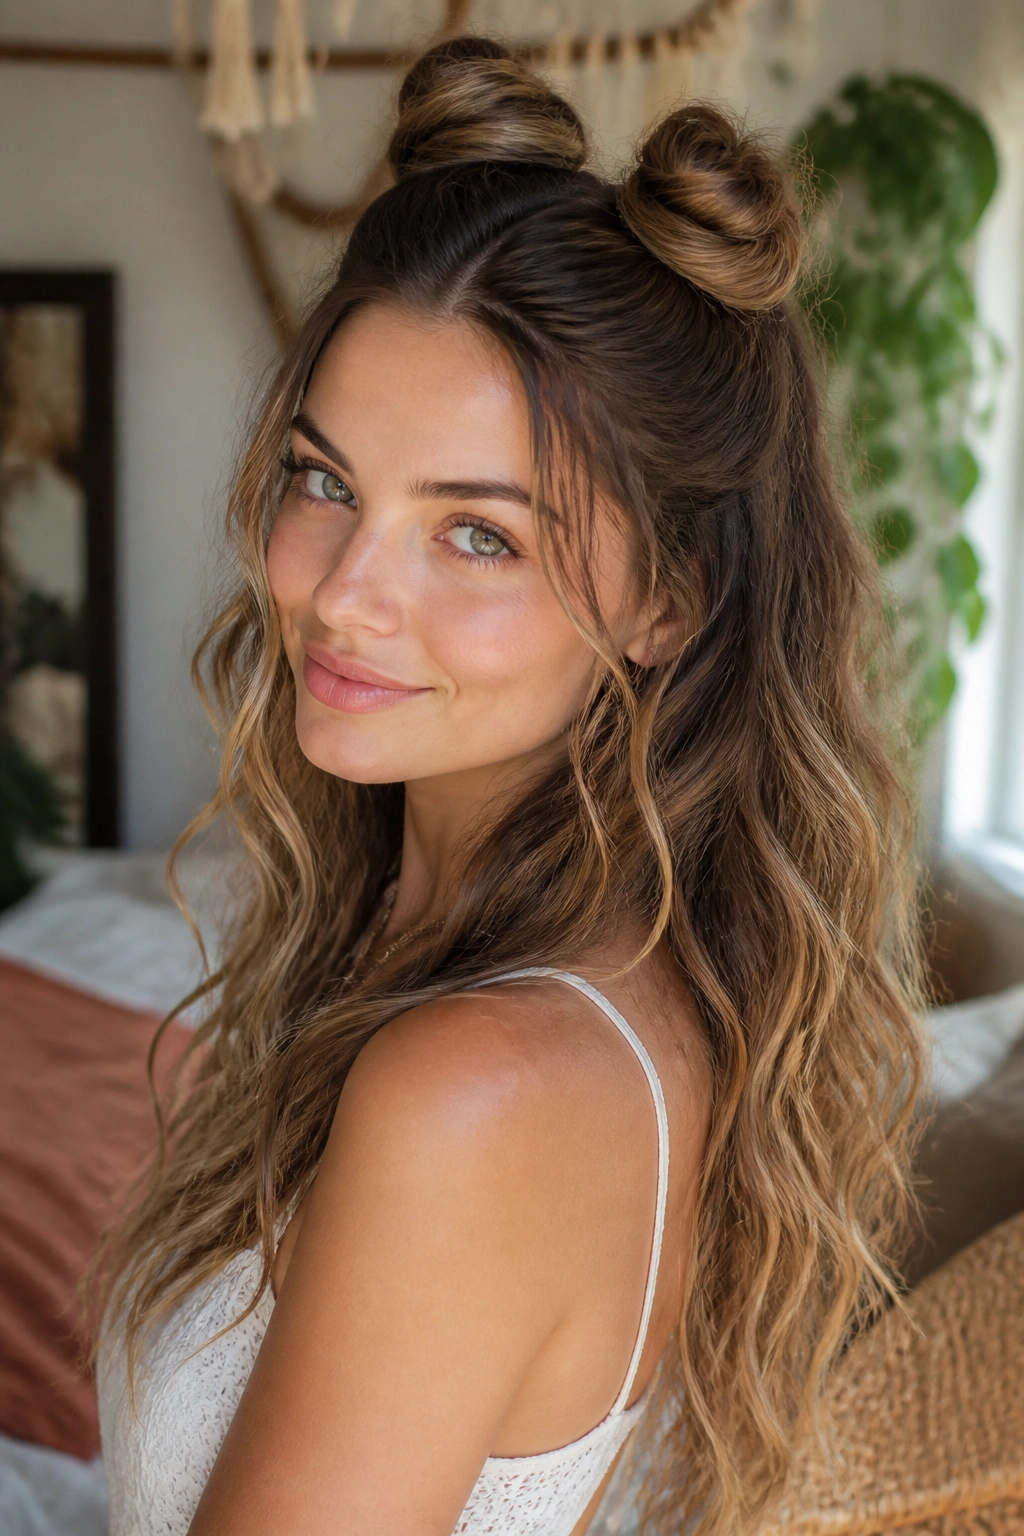
Half-up space buns are not just for festivals or costume parties. On long waves, they can be surprisingly useful.
Pull the top half of the hair into two small buns, one on each side of the crown, and leave the bottom half loose. The buns should be small enough to look intentional, not like two oversized knots trying to compete with your face. If the hair is very long, twist each bun once and pin it instead of wrapping it into a bulky loop.
The lower half keeps the wave movement, which is what saves this from looking childish. The top half gets the weight off the crown, which helps the roots breathe a little. That matters on heavy hair.
If you want the look softer, pull two small pieces forward near the temples. If you want it cleaner, smooth only the top section and leave the rest alone. Both versions work.
15. Low Bubble Ponytail
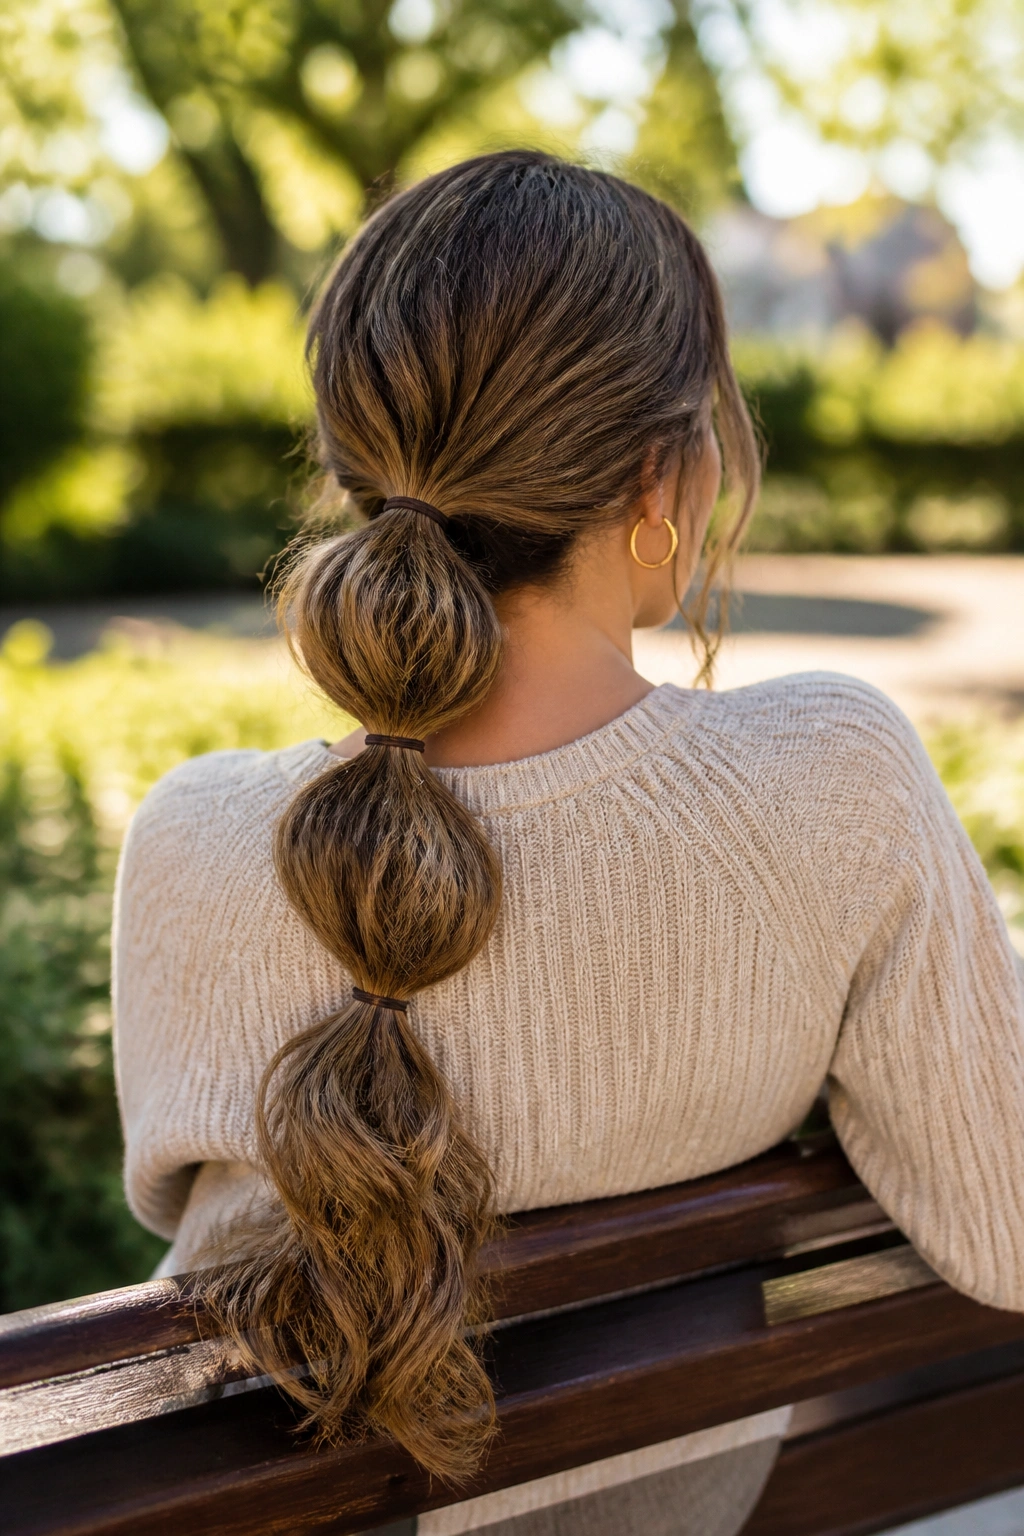
The low bubble ponytail sits somewhere between polished and easy, and that makes it useful. It is cleaner than a messy ponytail, but softer than a tightly brushed style.
Secure the hair at the nape with a covered elastic, then add more elastics every 2 to 2½ inches down the tail. Gently pull each section apart until you get a round bubble. The wave pattern stays visible between the ties, which is the whole point on long textured hair.
The style looks best when the crown is smooth but not glued down. A little lift at the top keeps it from looking flat. If the lengths are very thick, use clear elastics that grip well and space them evenly so the bubbles do not bunch up unevenly.
A low bubble ponytail is one of those styles that looks like you tried harder than you did. That is a fine thing to be good at.
16. Headband Tuck with Crown Volume
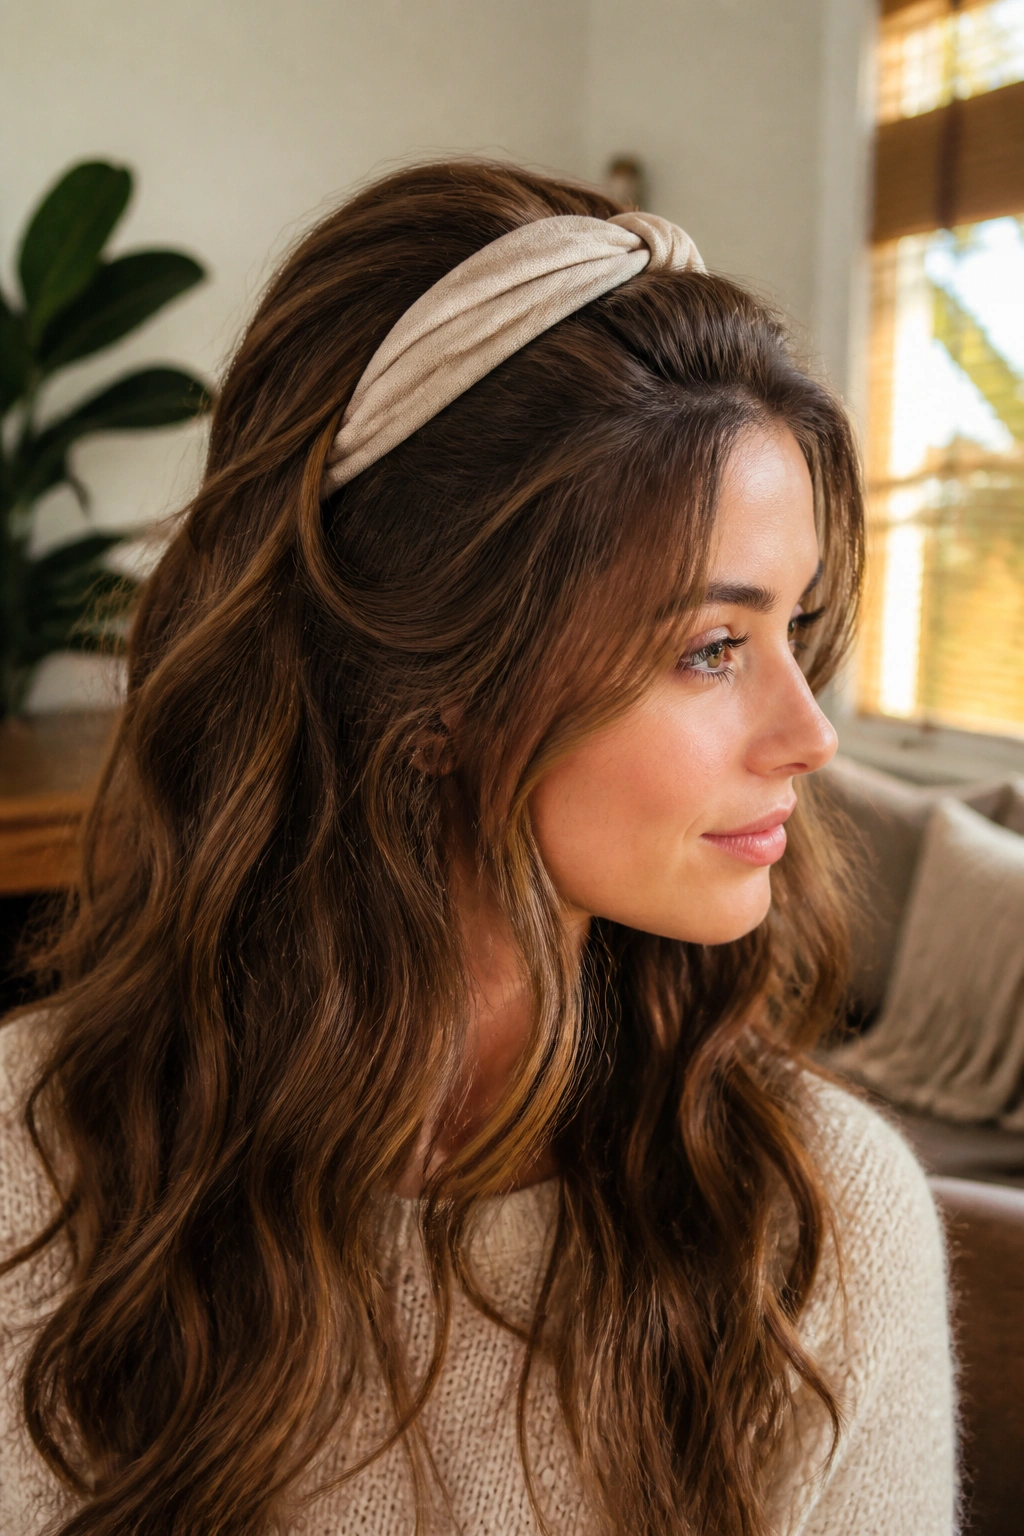
Bad hair day, but not really. A headband tuck solves a lot of problems in one move.
Slip a soft headband on about one to two inches behind the hairline, then tuck the front sections back lightly so they sit over the band instead of puffing forward. Leave the lengths loose if you want a relaxed look, or gather them into a soft fold at the nape if you want more control.
A rigid plastic band is the wrong tool here. It digs in, makes a line across the hair, and can turn the front into a weird flat strip. A padded or fabric-covered band holds better and feels less sharp against the scalp.
This style is especially good when the crown is frizzy but the lengths still look decent. It lets you hide the problem area without flattening the rest of the wave pattern. Small fix. Big difference.
17. Scarf-Wrapped Ponytail
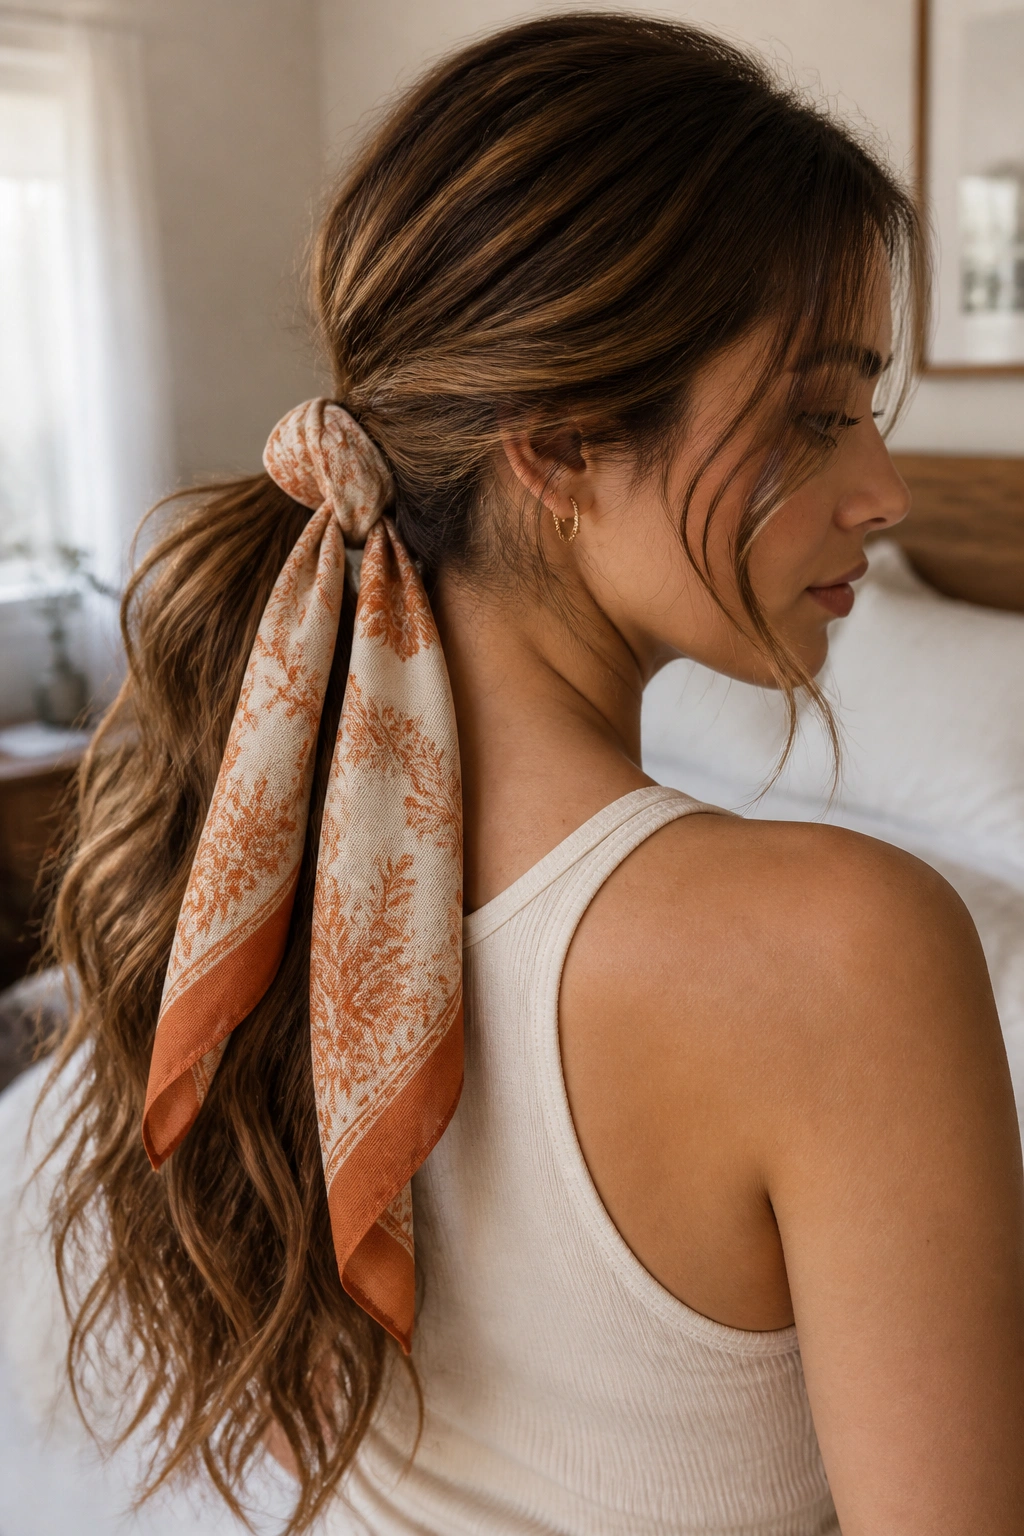
A scarf wrapped around a ponytail does more than decorate the elastic. It changes the whole mood of the style.
Fold a silk or cotton scarf into a strip, tie it around a low ponytail or braid, and let the tails hang with the hair. You can also wrap the scarf around the base before tying it into a knot. Either way, it softens the line where the hair is gathered and gives the style a little movement near the neck.
What Makes It Different
Unlike a bare elastic, the scarf adds color and breaks up the hard edge of the ponytail holder. That matters on long wavy hair because the tail already has enough visual weight. The scarf keeps the base from looking heavy or plain.
Choose a scarf that is thin enough to knot neatly, around 2 inches wide when folded. Thick scarves can bulk up the tie in a bad way. If the hair is layered, leave the shortest face pieces out so the whole thing does not feel too contained.
It is a small detail, but it changes the finish a lot.
18. Side-Swept Clip Sweep
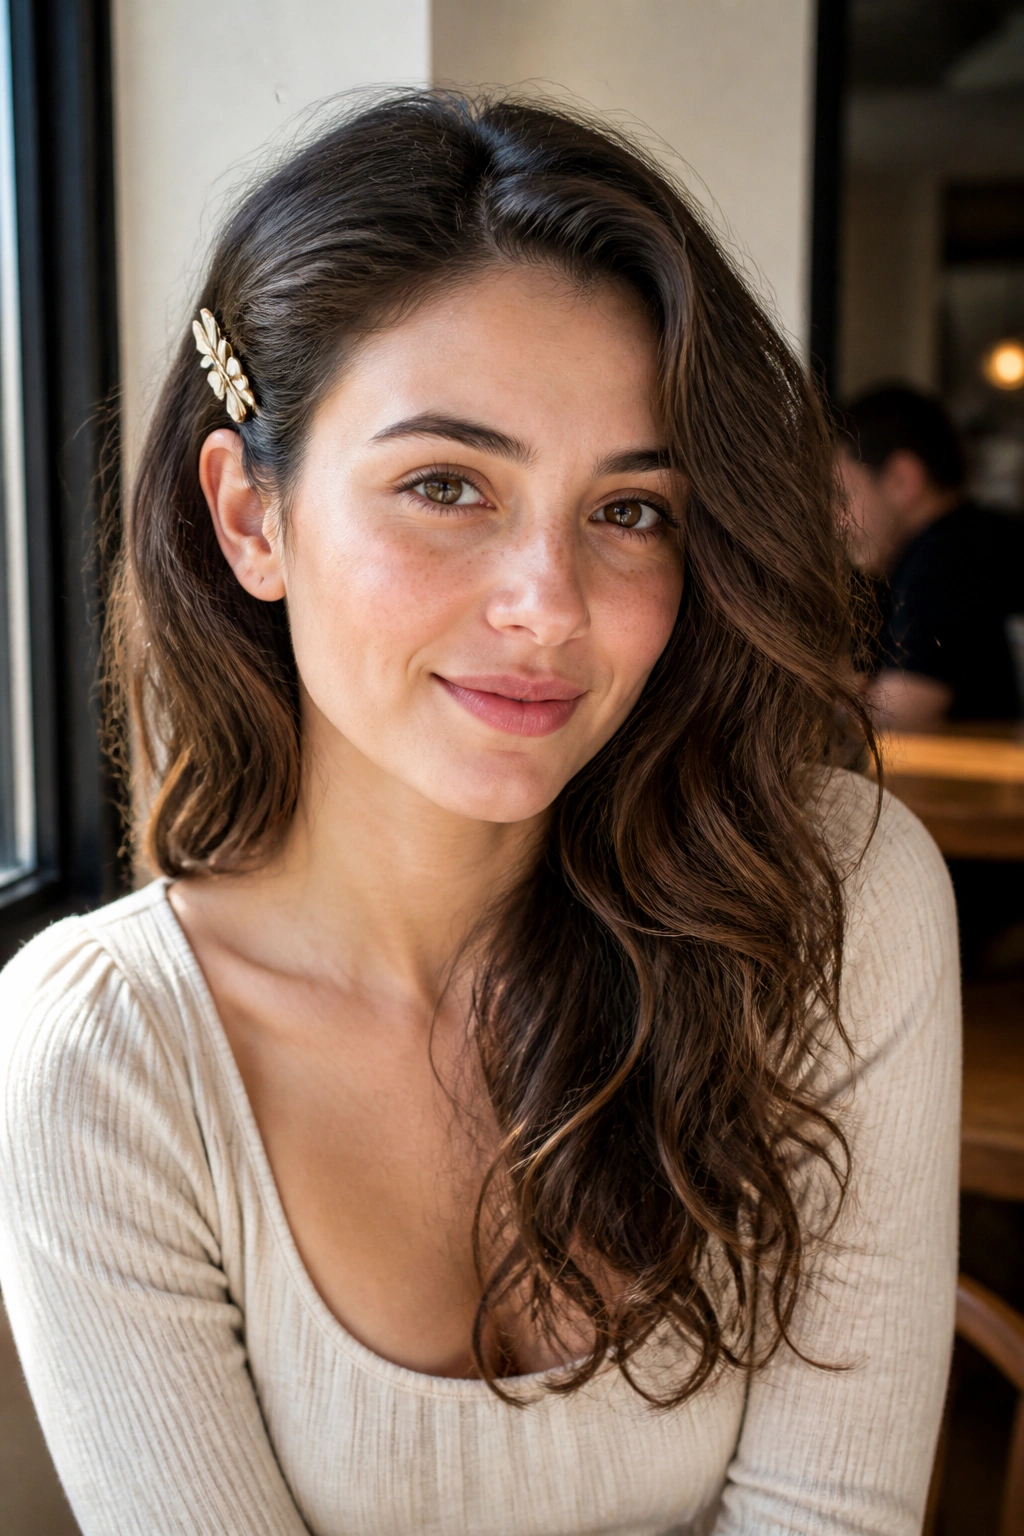
Some days you do not need a hairstyle so much as a solution. This is that solution.
Sweep all the hair to one side and pin it just above the ear with a decorative clip or two crossed bobby pins. Let the rest fall naturally. The wave texture does the rest of the work, so the style can stay incredibly simple and still read as finished.
If your hair is layered, secure the shortest front layer first so it does not spring free and annoy you later. That is the part that usually escapes. A small amount of smoothing cream on the very top section can help, but use a light hand. Too much and the hair starts looking greasy at the root.
This style is fast, which is its biggest strength. It keeps the face open, highlights the wave pattern, and takes almost no setup. No fuss. No drama.
19. Top Knot with Curved Ends
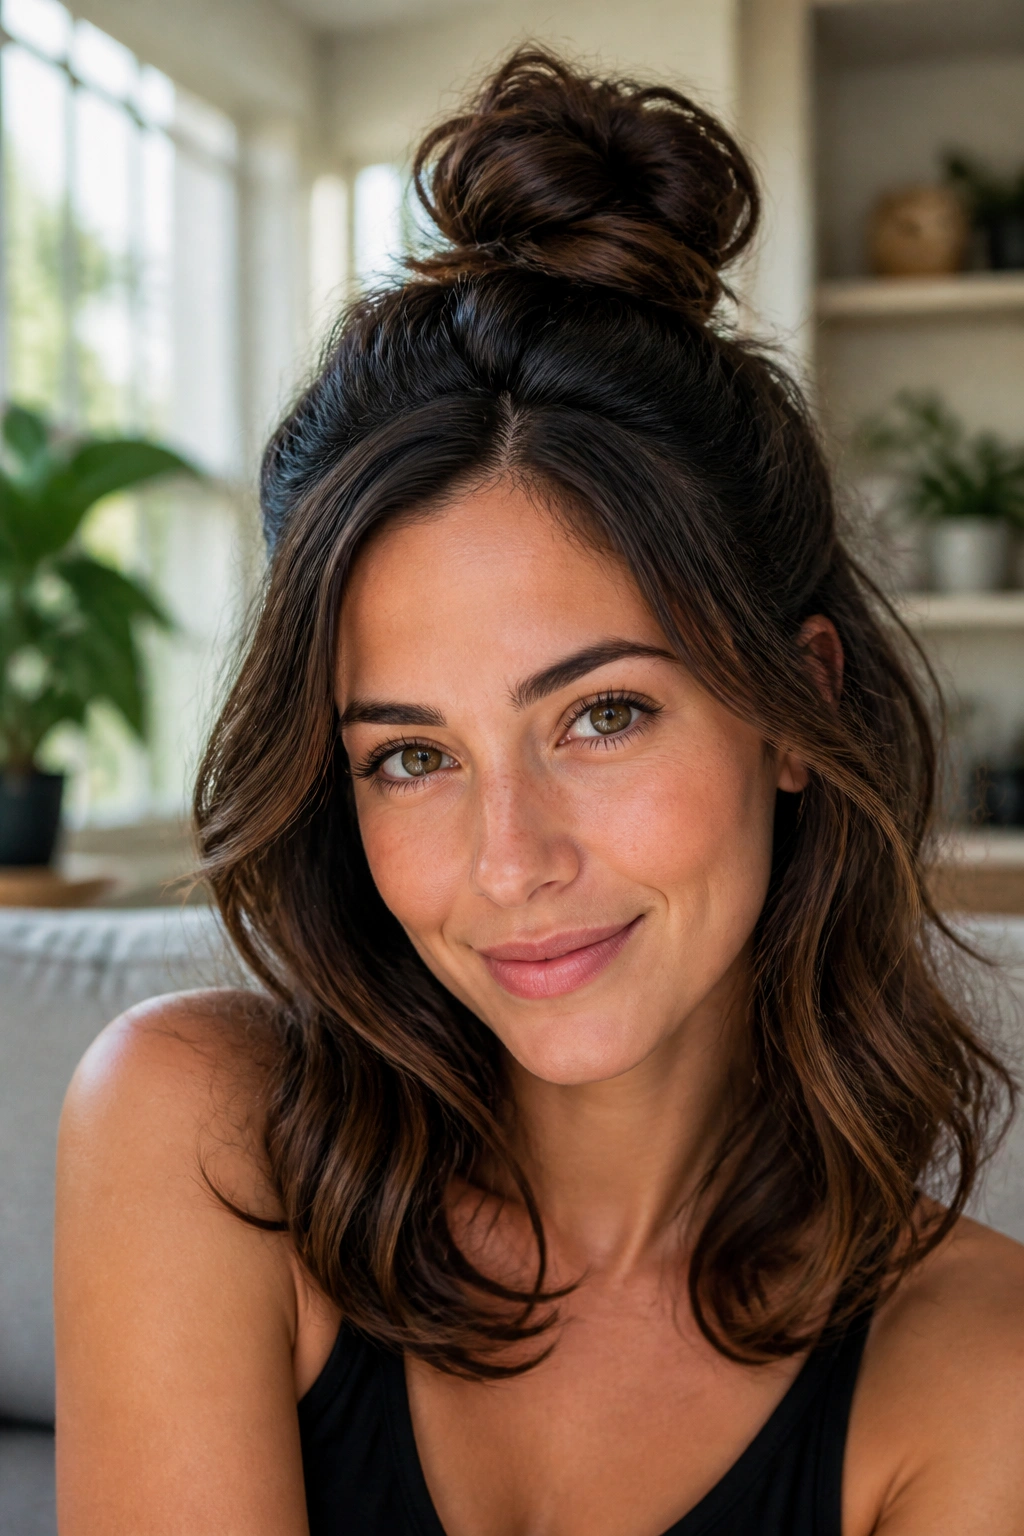
A top knot can still count as an air-dry style if the lower half keeps its wave and the ends stay soft. The trick is not pulling every strand into the knot.
Gather only the top third or half of the hair, twist it into a knot high on the head, and leave the bottom lengths out. If the hair is long, let the knot stay a little loose so some curved ends spill around it. That soft edge is what keeps the style from feeling too severe.
This works especially well when second-day waves have a little memory but the roots need a reset. The knot lifts the front, and the loose lower section keeps the overall shape grounded. It is the kind of style I like when I want my hair out of the way but still want to see the length moving.
A pair of hidden pins can hold the knot better than a single elastic. Worth doing.
20. Side Bun with Soft Tendrils
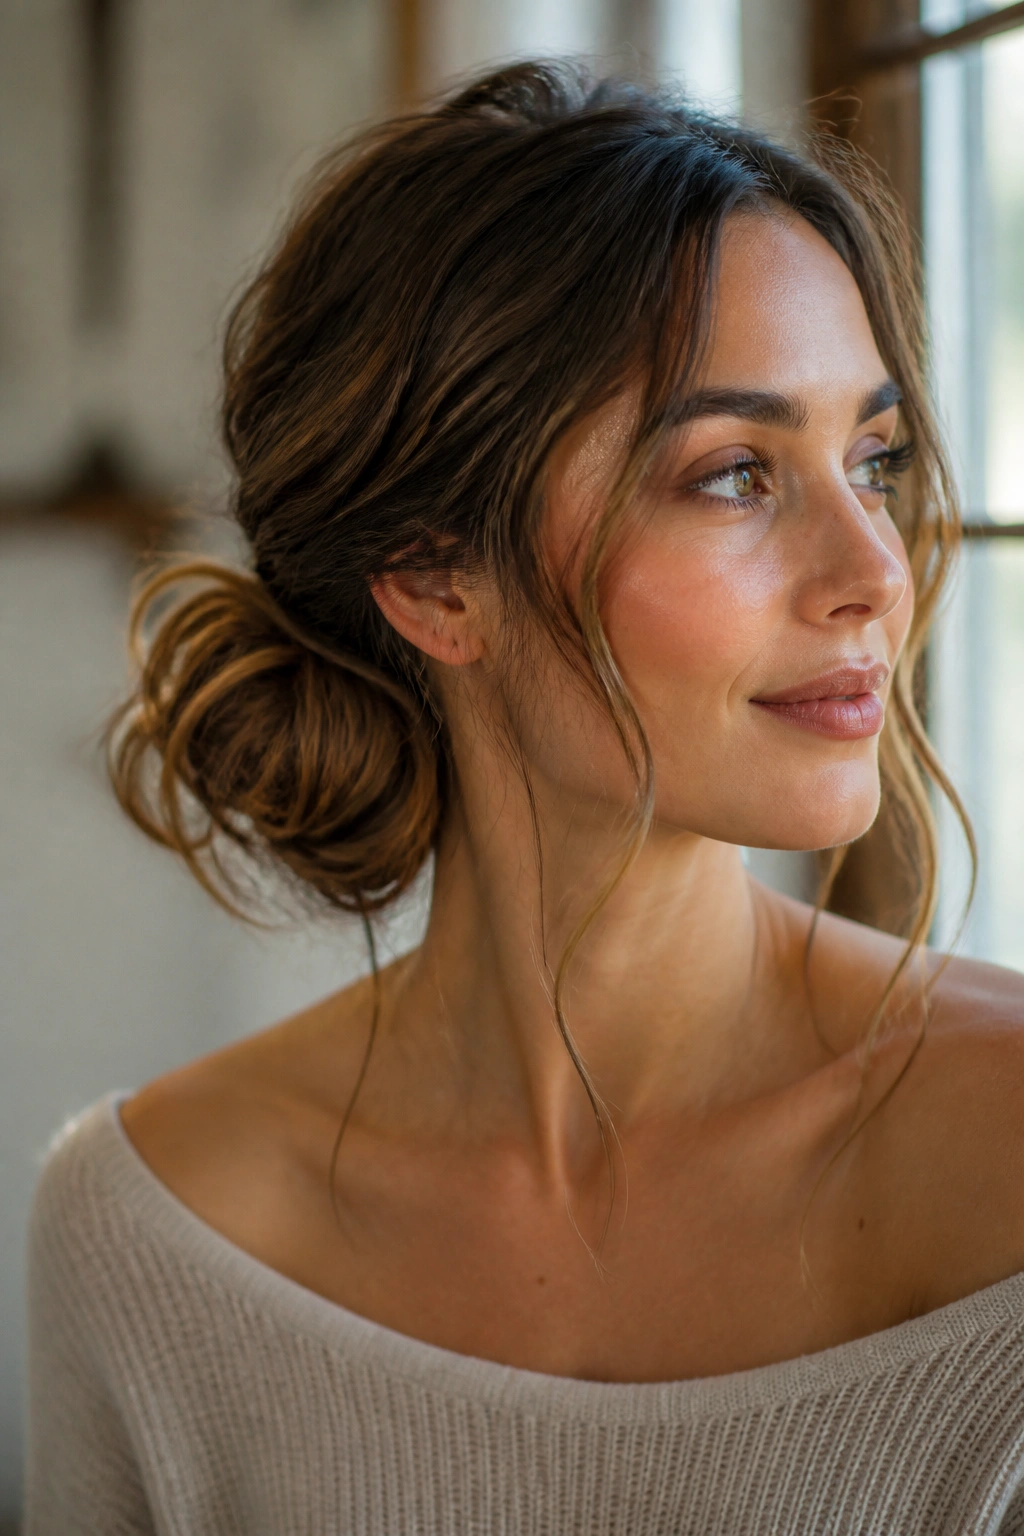
A side bun looks dressy without asking for heat or a lot of precision. On long wavy hair, that matters.
Sweep the hair low to one side, coil it into a loose bun near the jawline, and pin it so the shape sits softly against the head. Leave a few tendrils at the temples and behind the ear. Those loose pieces keep the style from feeling too locked down.
- Best for dinners, events, and dressed-up days.
- Works well when the wave pattern is still visible through the mids.
- Use two or three pins in an X shape for hold.
- Let the bun stay a little imperfect; that helps it blend with the natural texture.
If your hair is fine, a small amount of texturizing spray at the roots gives the bun more grip. If it is thick, skip the spray and rely on the pins. Overloading the hair with product can make the bun slide.
21. Rope-Twist Half Crown
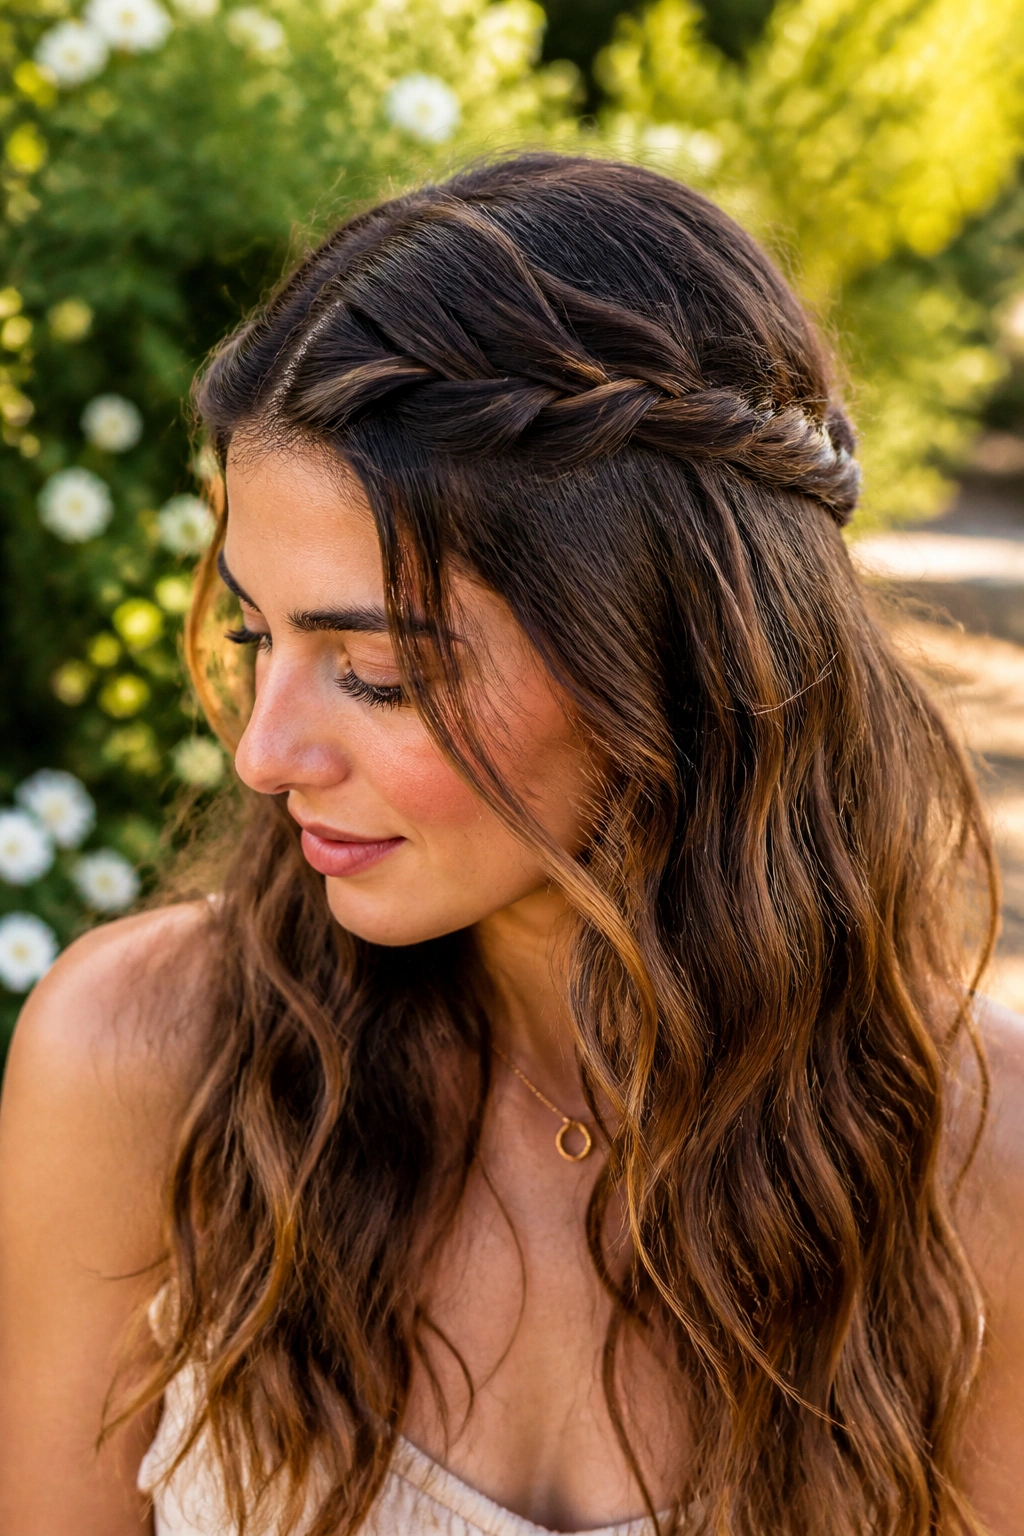
This is the quieter cousin of the braided crown, and I think it deserves more attention. It is lighter, faster, and a little less obvious.
Take a small section from each side of the head, twist them backward, and pin them together near the back, like a tiny crown made out of rope twists instead of braids. Leave the rest of the hair loose. The result looks soft and controlled at the same time, which is not easy to pull off with long waves.
Why It Stands Out
A rope-twist crown puts less bulk around the head than a full braid, so it suits finer wavy hair especially well. It also dries flatter, which helps if the twists are being done while the hair is still a little damp. The loose lengths keep their body, and the crown gets just enough structure to shape the face.
If the twists are slipping, cross two bobby pins over the pin point. That small fix usually solves the problem. You do not need a lot of hardware here.
It is one of those styles that looks calm rather than styled. I like that.
22. Loose Braided Tail for Everyday Wear
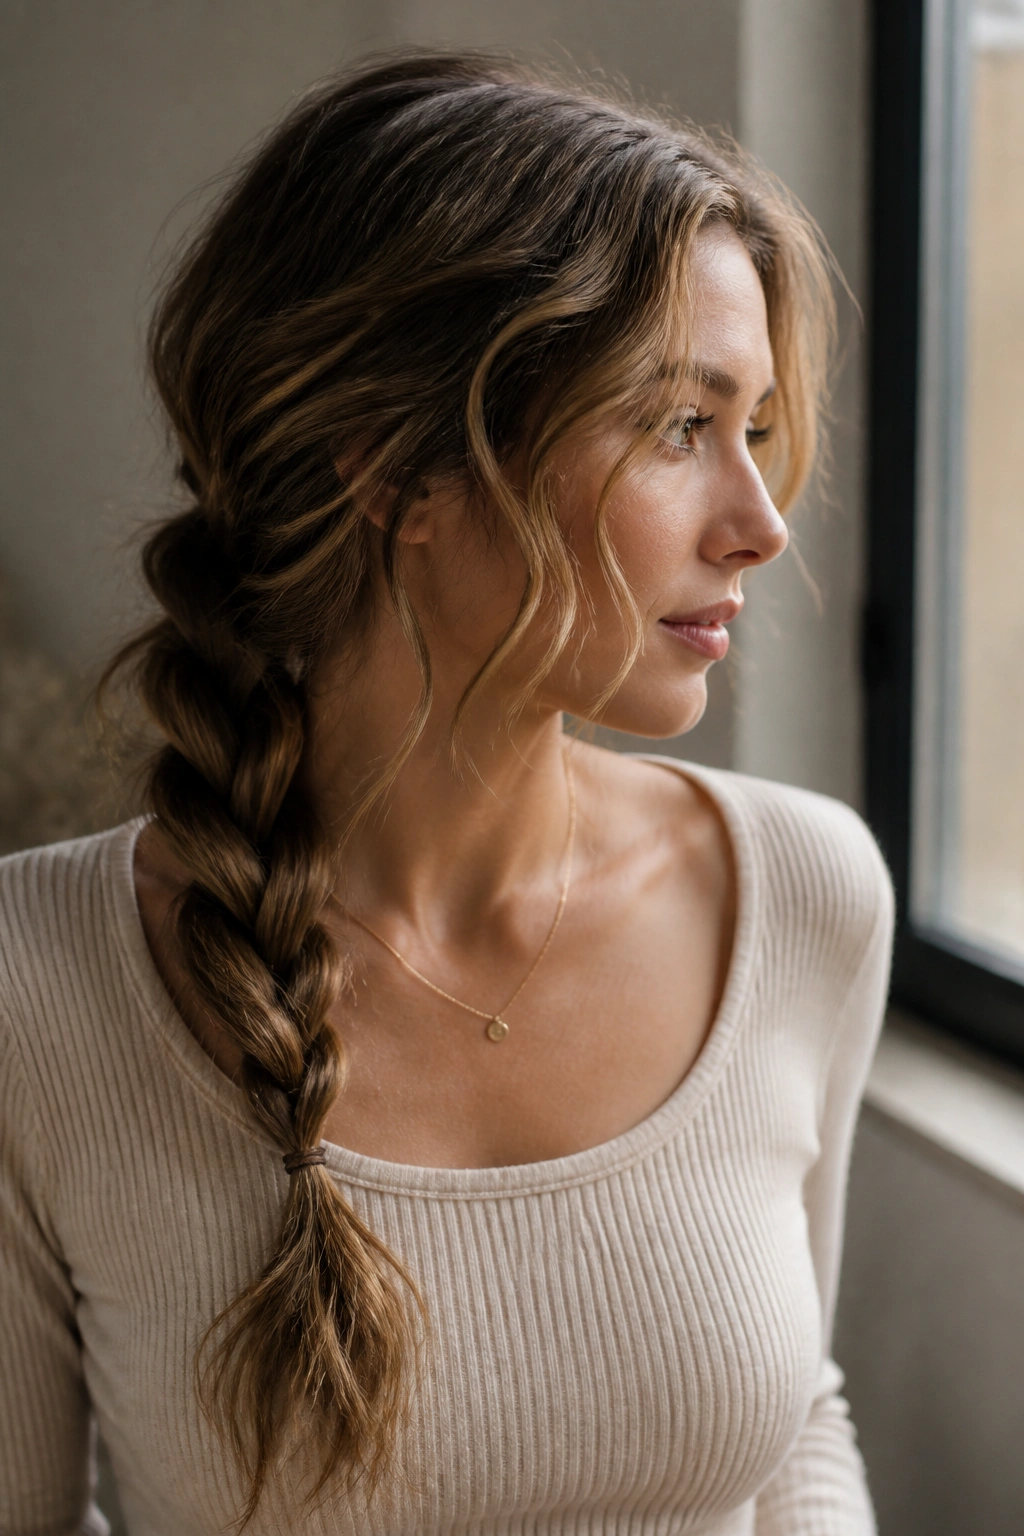
If you only learn one air-dry style for long waves, make it this one. The loose braided tail is easy, dependable, and forgiving when your hair has decided to behave in slightly different ways on each side.
Pull the hair into a low ponytail, braid it loosely, and stop before the end starts to look too tight or too neat. Gently tug the braid apart in a few spots so it looks fuller, then leave the last inch or two soft if your wave pattern is worth showing off. The braid keeps the length contained without flattening the texture into nothing.
This is the style I use when the day is already moving and I do not want to spend ten minutes negotiating with my hair. It holds up to a coat collar, a wind gust, or a long drive. It also makes long wavy hair look intentional with very little effort, which is a nice thing to have in reserve.
A loose braid is not flashy. It is better than that. It works.
