



Type 3 curly hair has a personality all its own. The bend is already built in, the volume sits higher than people expect, and a style can look polished one minute and soft the next, which is half the fun and half the headache.
With naturally curly hair type 3, the trick is not forcing the curl pattern into submission. It’s choosing shapes that work with spring, shrinkage, and texture instead of fighting them. A style that looks a little loose when you’re standing in front of the mirror often settles into something better once the curls dry and bounce back into place. Funny how that works.
The wrong cut or style can make type 3 curls feel heavy, triangle-shaped, or puffy in places you did not ask for. The right one gives the hair room to move. Room matters. So does placement — a ponytail an inch too low or a part that sits too flat can change the whole mood.
Some of the styles below are quick fixes for busy mornings. Others are the kind you reach for when you want your curls to look deliberate, not accidental. Either way, they all lean into the best part of type 3 hair: shape, lift, and that built-in spiral that does half the work for you.
1. The Classic Wash-and-Go Ringlet Set
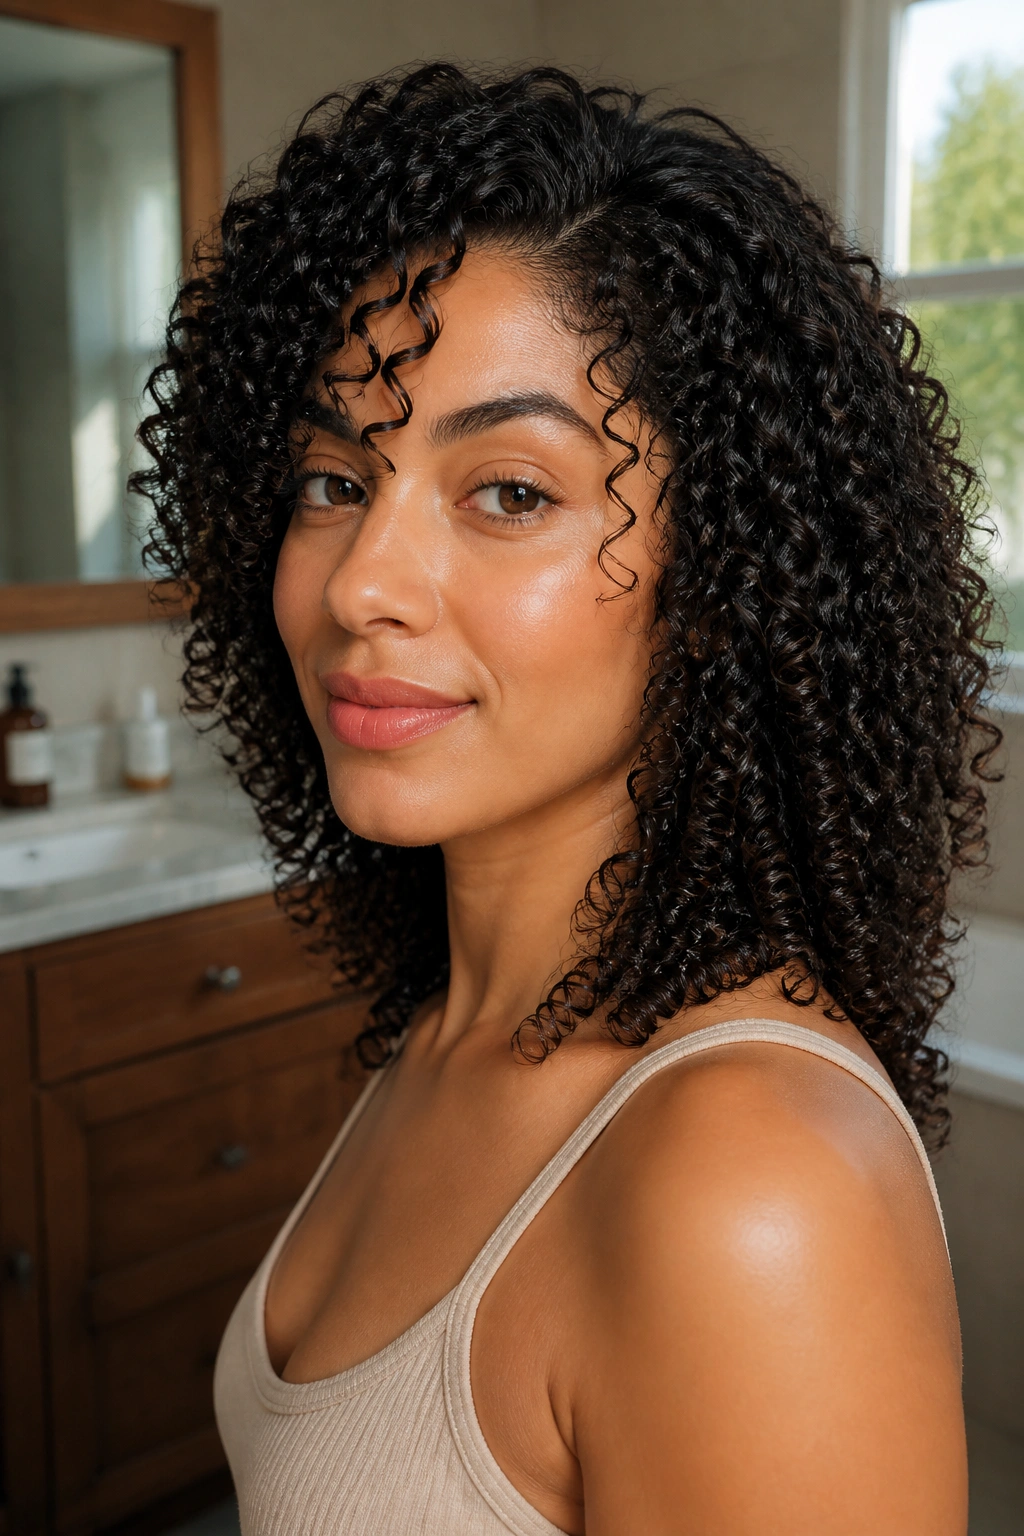
A good wash-and-go is still the cleanest, most honest way to wear naturally curly hair type 3. It lets the curl pattern do what it wants, which sounds simple until you’ve seen a bad one. Then it’s obvious why product order, water content, and drying method matter so much.
Why It Flatters Type 3 Curls
Type 3 curls usually like definition near the roots and softness at the ends. That means a wash-and-go can look full without turning into a helmet if you apply your styler on very wet hair and leave the curls alone while they set. Scrunching helps. Raking too much often does not.
A small amount of leave-in conditioner, followed by curl cream or gel, tends to give the best balance. The hair should feel slippery when you finish styling and slightly firm once it dries. That cast can be broken later with a drop of oil or a dry hands-only scrunch.
- Work in small sections, about 4 to 6 total across the head.
- Apply stylers from mid-length to ends first, then smooth what’s left at the roots.
- Use a microfiber towel or cotton T-shirt if you need to blot water.
- Diffuse on low heat and low speed if air-drying takes forever.
Tip: Don’t touch the curls until they’re dry. That one habit saves more definition than any expensive product ever will.
2. The Pineapple Puff
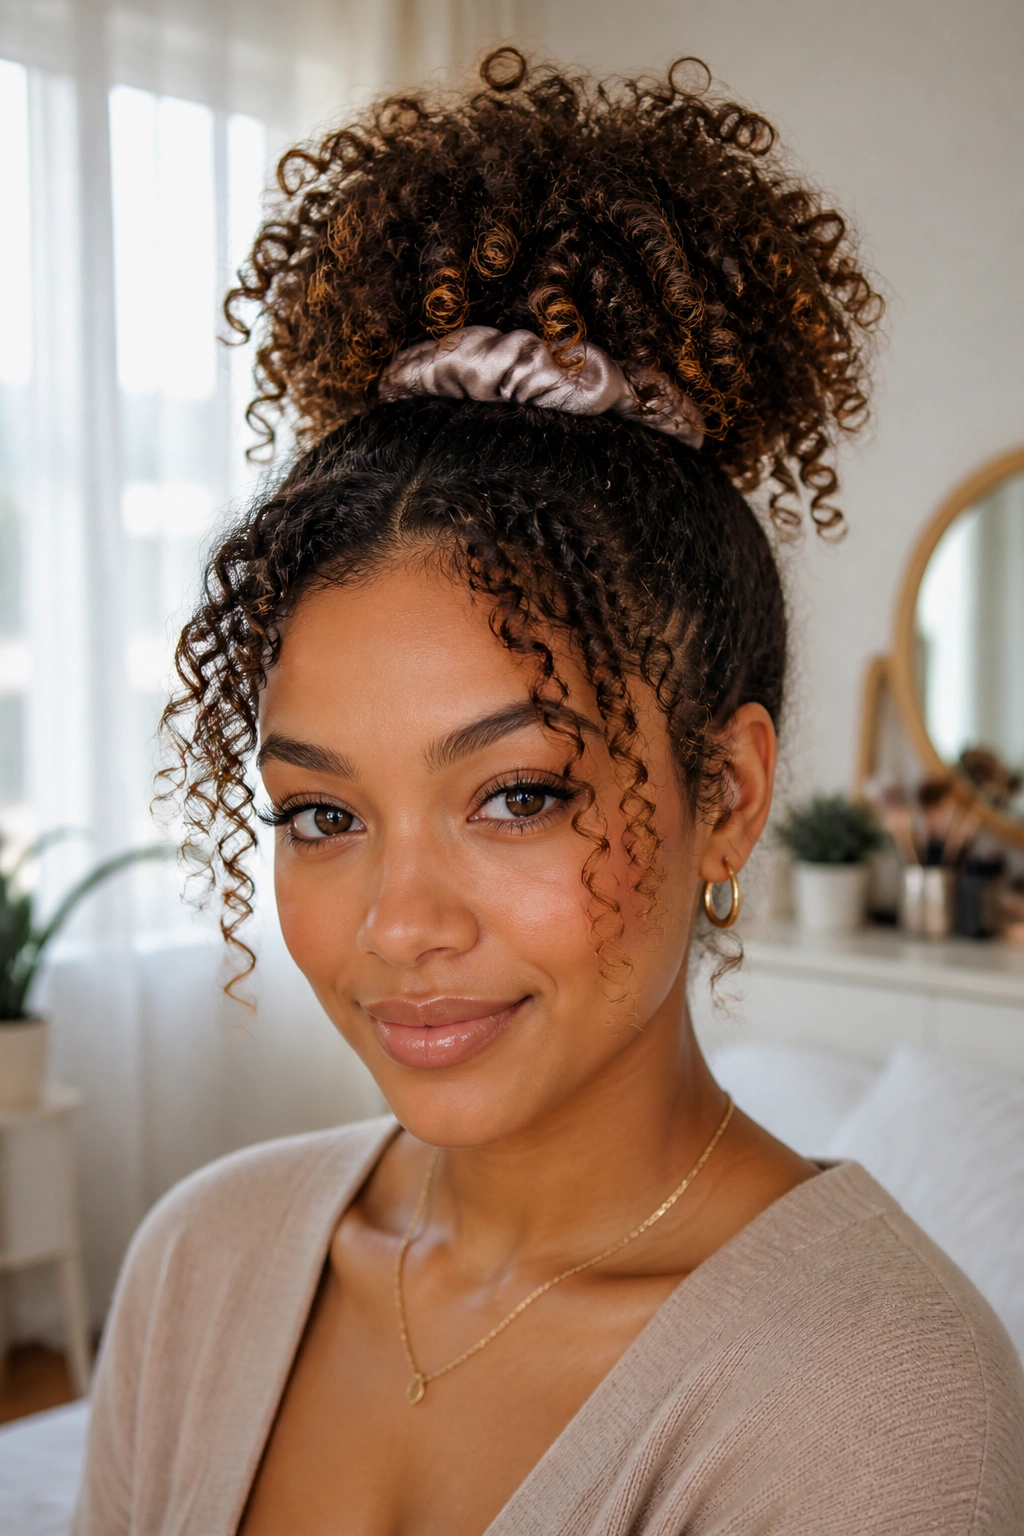
The pineapple puff is what I reach for when curls need to survive the day with minimal drama. It sits high on the head, keeps the bulk out of your face, and lets the ends spill into a soft halo instead of getting crushed at the nape.
It works especially well on second-day type 3 hair because the curls already have shape, which means you are not rebuilding them from scratch. Gather the hair loosely at the crown with a satin scrunchie, not a tight elastic, and stop before the base starts to flatten. That part matters more than people think. Tightness is the enemy here.
A few curls can hang around the hairline or fall along the temples if you want the style to look less pulled-back. I like that detail because it keeps the face soft. Without it, the pineapple can feel a little gym-bag practical. With it, the whole thing reads as intentional, even when you threw it together in under two minutes.
3. Half-Up, Half-Down With a Curly Crown

Why does this style keep showing up? Because it solves a common type 3 problem: the top layer wants control, while the bottom layer wants to show off. The half-up, half-down look gives both sides a job.
How to Keep the Top Section Lively
Pull only the top third to half of the hair back, and leave enough volume above the ears so the crown does not go flat. A small claw clip, a barrette, or a skinny elastic all work, but the section should stay loose enough to keep lift. If you pull the top too tight, the style loses the airy shape that makes it worth wearing.
This one is especially good for curls that get puffy at the roots by midday. The top section stays controlled, while the bottom keeps its bounce and length. You can also twist the sides back before securing them if you want a little more polish.
- Best for shoulder-length to mid-back hair
- Works nicely with 3a and 3b curls
- Easy to dress up with two bobby pins or one decorative clip
- Looks clean with a center part or a soft off-center part
4. The High Curly Ponytail

A high curly ponytail is one of those styles that makes type 3 hair look taller, fuller, and a little more confident. The placement changes everything. Put it too low and it feels ordinary. Put it just above the crown and the whole face opens up.
The best version is not slicked flat to the scalp unless that is the look you want. Leave a little lift at the roots, smooth the surface just enough to remove bumps, and wrap a small curl around the elastic so it looks finished. That tiny detail matters. A wrapped base makes the ponytail feel like a hairstyle instead of a backup plan.
It also keeps the curl pattern visible, which is the whole point. The ends should still look like curls, not stretched strands. If your hair is thick, split the ponytail once with your hands after securing it to give it more width. If it’s fine, pinch the base a little higher for extra lift.
5. The Low Curly Ponytail With a Wrapped Base
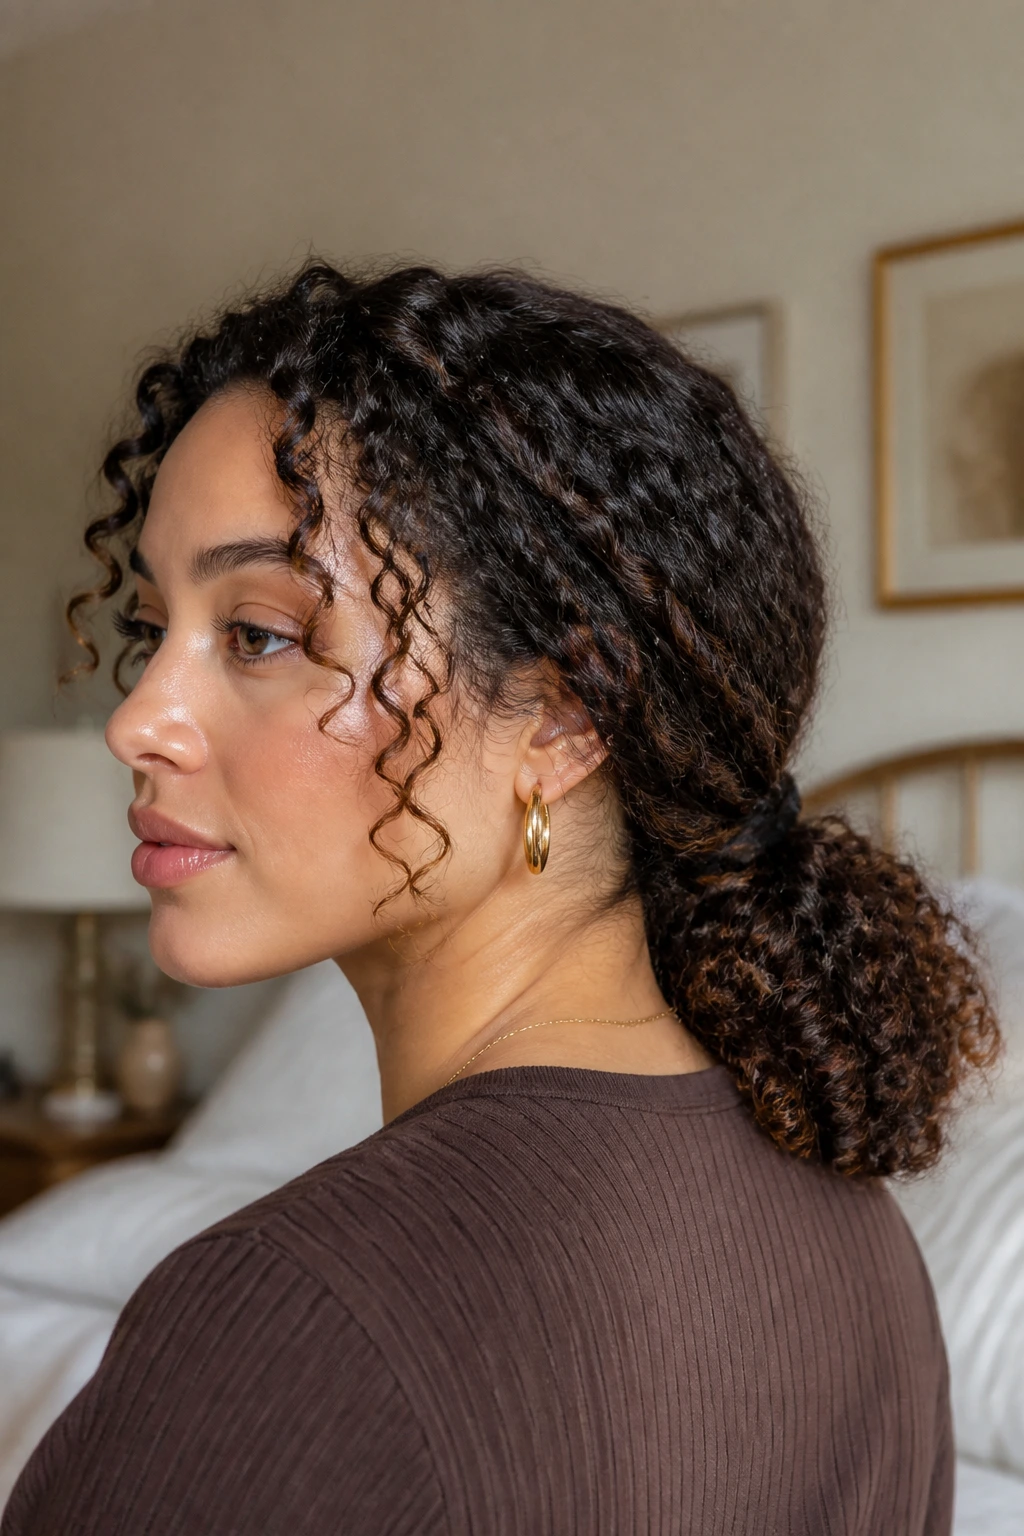
Picture a workday when your curls are on the edge of getting too big for the weather. A low curly ponytail comes in and solves the problem without flattening the hair into nothing. It sits at the nape, keeps the face open, and still leaves enough texture to look like you meant it.
The wrapped base is the part I care about most. Take a small curl from underneath the ponytail, wind it around the elastic, and pin it under the band with one bobby pin. That tiny move hides the hardware and makes the style look calmer. A side part helps here, especially if your curls tend to separate on one side anyway.
- Best with medium to long length
- Works well on day-two or day-three curls
- Add a light mist of water only if the top layer feels frizzy
- Leave one or two face-framing curls out if you want softness
There’s a reason this style survives so many rushed mornings. It is fast, tidy, and not fussy.
6. The Claw Clip Twist-Up
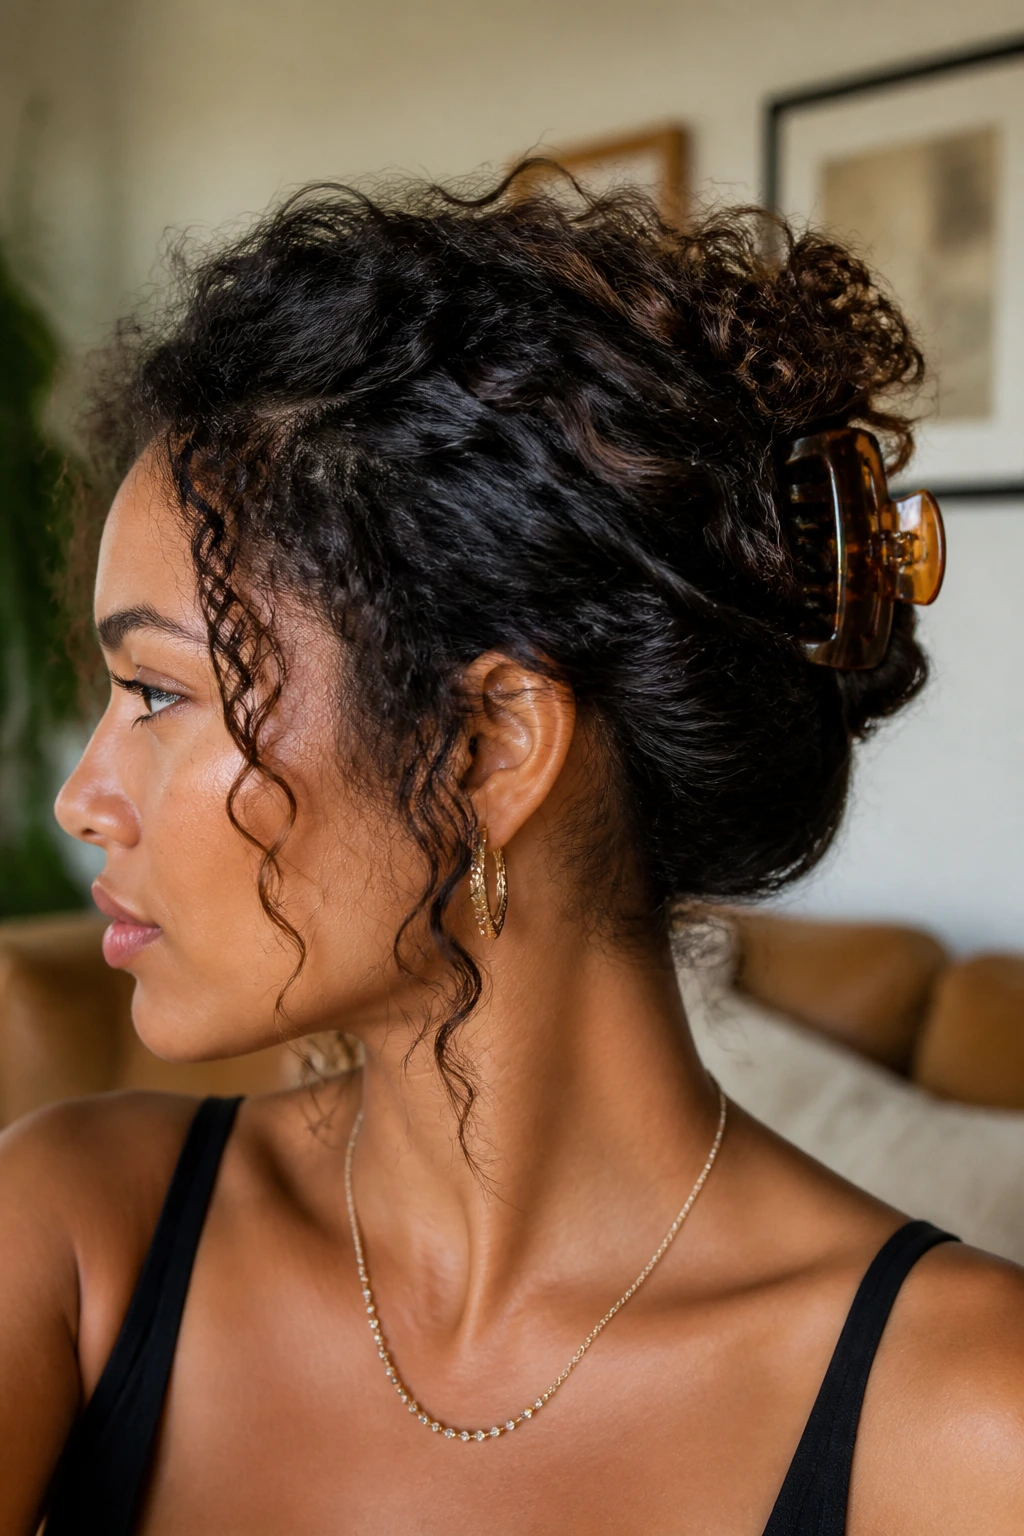
A claw clip twist-up is what happens when curly hair refuses to behave like straight hair, and honestly, that’s the charm. Unlike a tight bun, this style leaves some of the curl pattern intact, so the hair still has movement even after it’s pinned up.
Twist the hair upward once or twice, fold the length at the back of the head, and secure it with a clip big enough to hold the mass without digging into the scalp. Cheap clips snap here. The good ones have enough spring to catch the hair without crushing the roots. If a few curls fall out around the sides, leave them there. That is not a mistake.
What Makes It Different
- Fast enough for a 5-minute reset
- Better than a tight bun when you want less tension at the scalp
- Leaves curls looking soft instead of flattened
- Works with medium and long type 3 hair
This is the style I’d pick for running errands, sitting through a long dinner, or getting curls off the neck without losing all the shape.
7. The Deep Side Part and One-Side Tuck
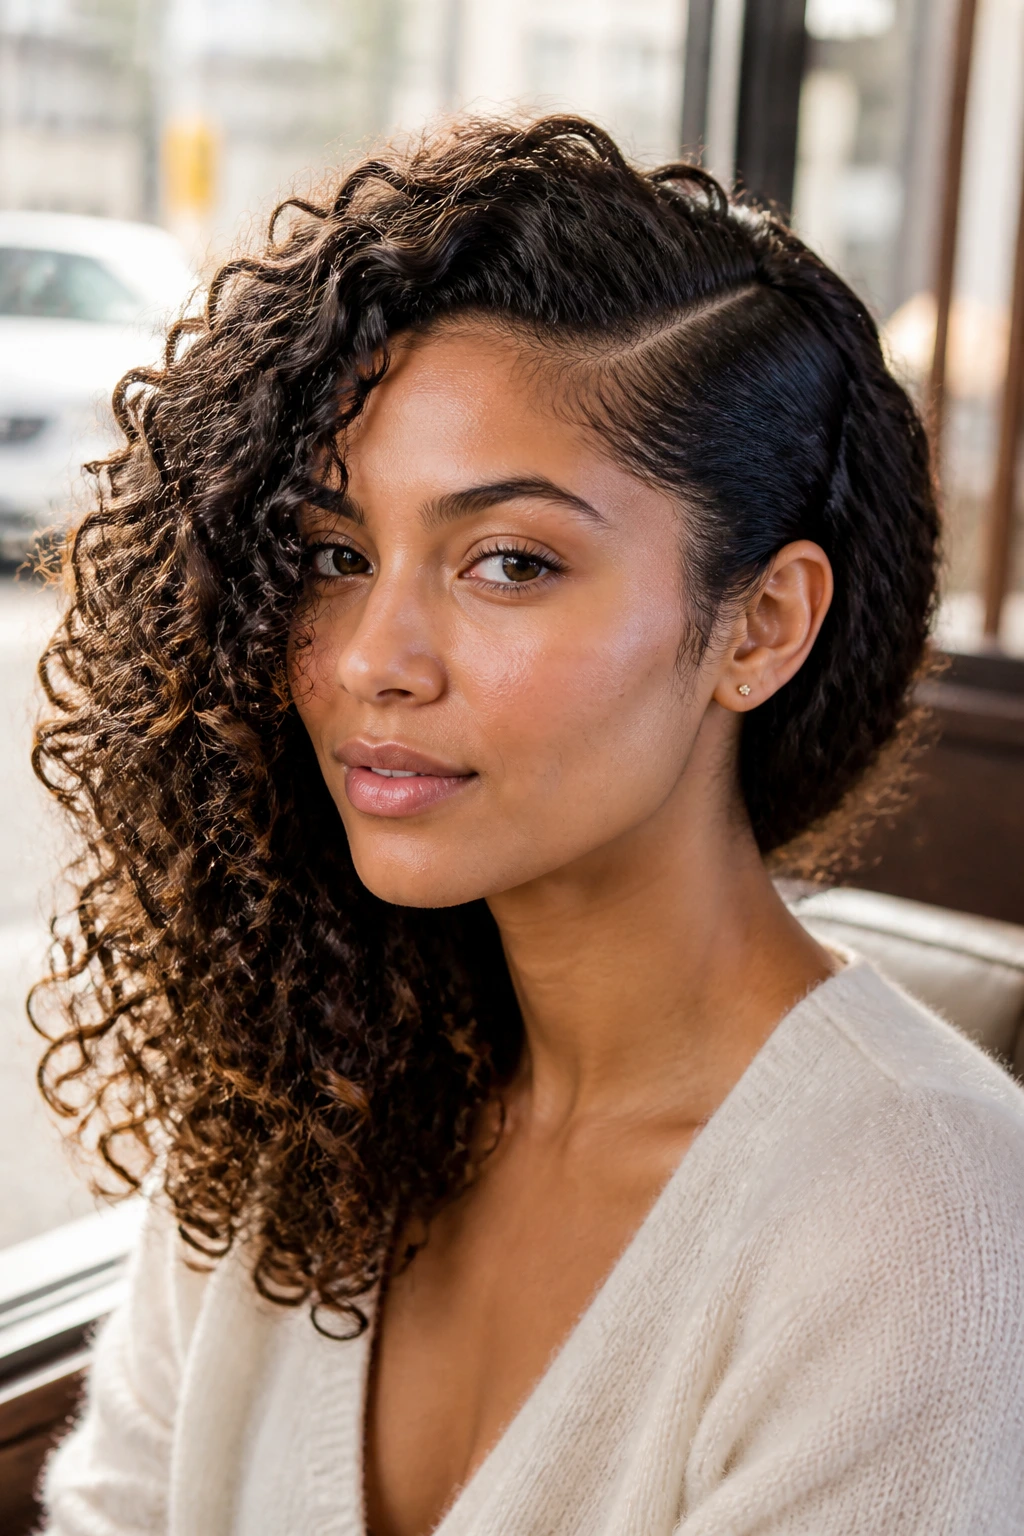
A deep side part can change type 3 curls without touching the length at all. That’s the whole trick. One side gets tucked behind the ear or pinned back, and suddenly the hair looks sharper, taller, and a little more dramatic.
Start with dry or slightly damp curls. Use the handle of a rattail comb or your fingers to carve the part far over from where it normally lives. Then tuck the heavier side behind the ear and pin it if it keeps slipping. The other side stays full, which gives the face an easy frame. Clean. Simple. Better than people expect.
The nice thing about this style is that it works whether the curls are loose spirals or tighter ringlets. If the part wants to close back up, mist the roots very lightly and press them in place with your palm for a few seconds. Not too much water. Just enough to tell the hair where to sit.
8. The Layered Curly Bob
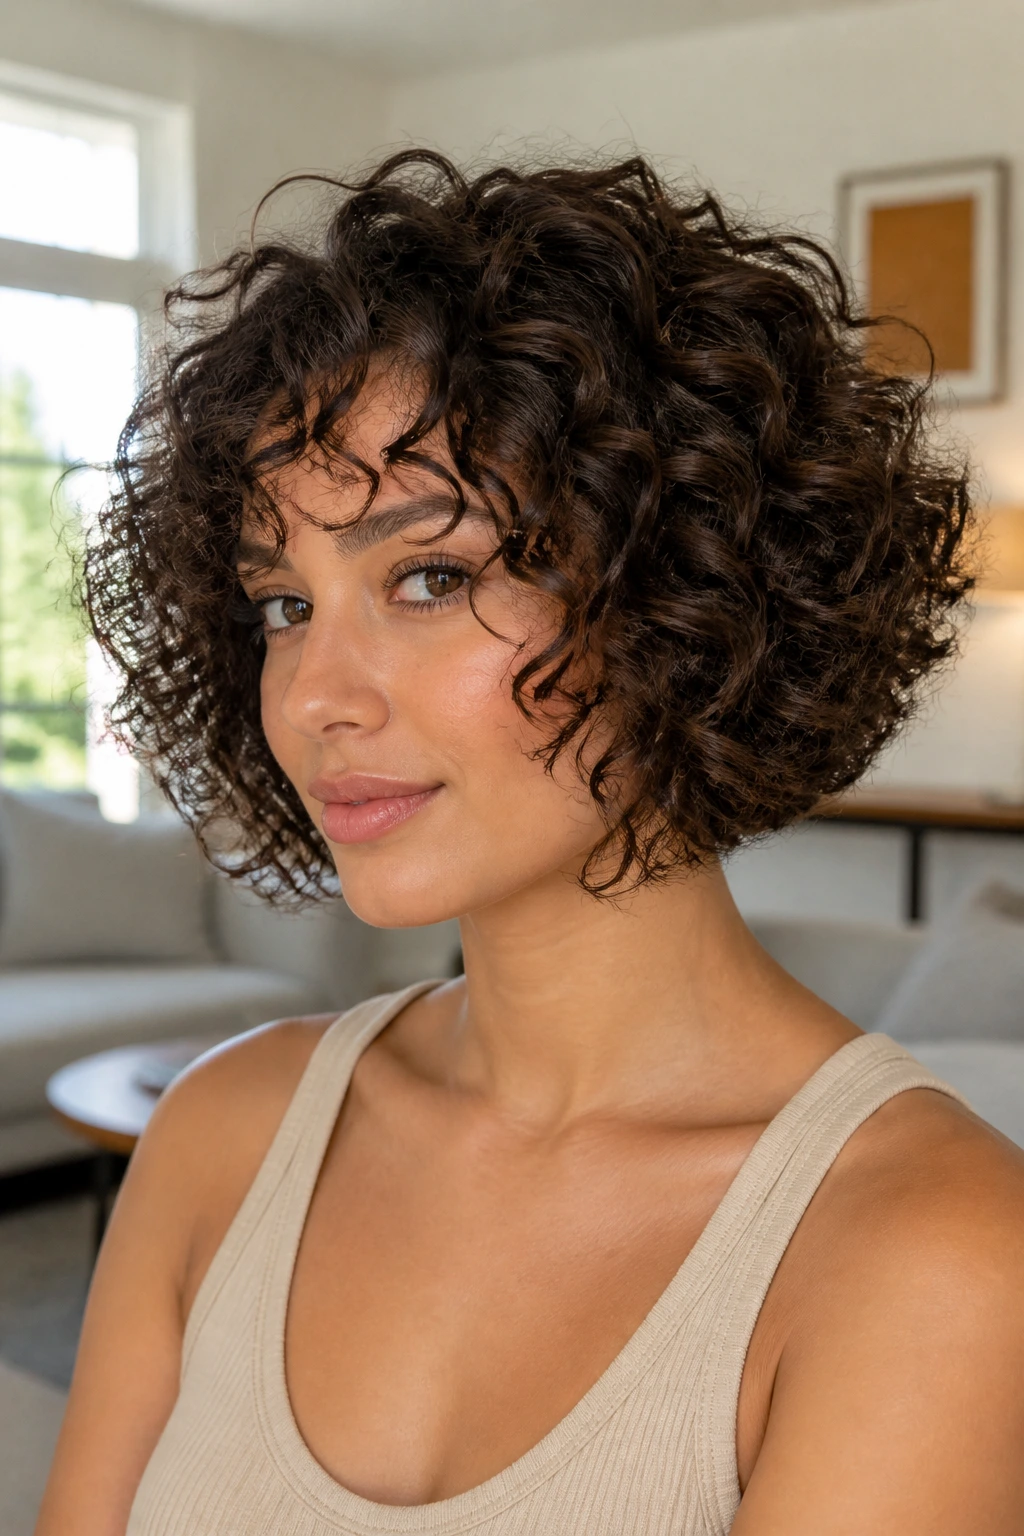
Can a bob work on naturally curly hair type 3? Absolutely — if the layers are doing their job. A blunt bob without shape can turn into a triangle. A bob with thoughtful layering gives the curls room to bounce outward and upward instead of ballooning at the sides.
What the Layers Do
Layers remove weight from the places that drag curls down. That matters more than length. Even a chin-length bob can look dense and shapeless if the bottom is too heavy, while a slightly shorter layered bob can look softer and fuller in motion. The cut should let the curls stack on top of one another instead of sitting in one flat block.
This style works especially well when the curls are defined but not stiff. A diffuser helps if you want the shape to sit higher at the crown. If the hair dries in a weird shelf around the jaw, the cut probably needs more movement around the cheeks and nape.
It’s a good choice for anyone who wants a lighter feel without giving up volume. The bob shows off curl pattern fast.
9. The Curly Shag With Curtain Bangs
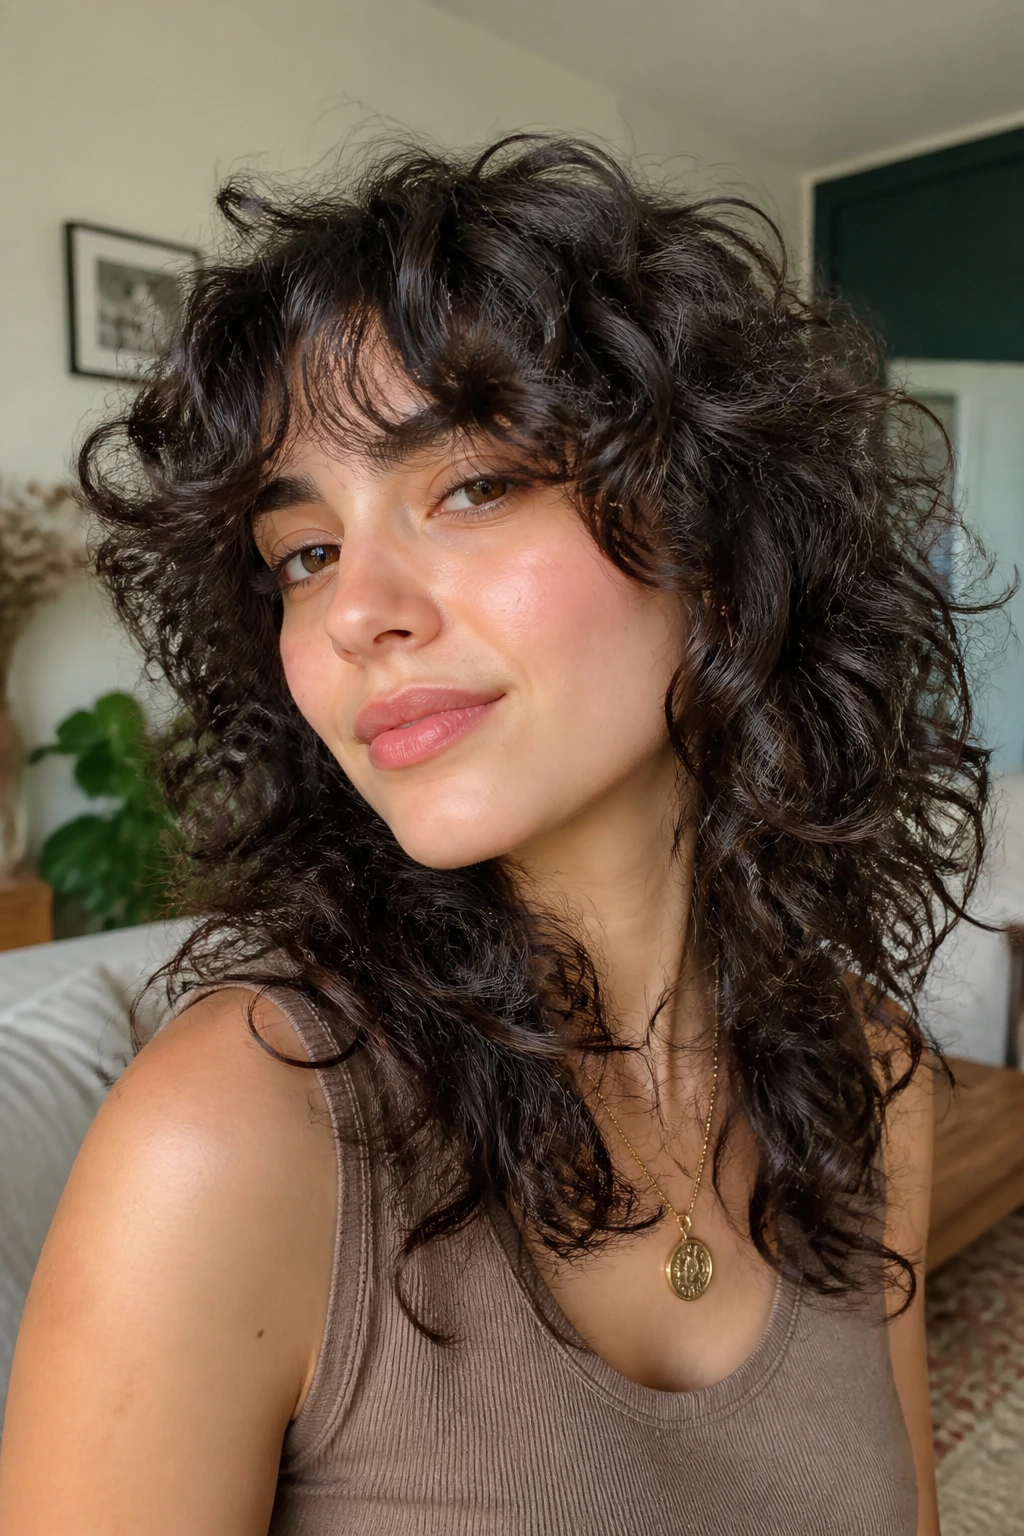
The shag is one of the few cuts that gets better when it looks a little undone. On type 3 curls, that’s a gift. The layers build movement, the curtain bangs soften the front, and the whole shape feels relaxed without looking sloppy.
What makes this style so useful is the way it handles density. Thick curls can start to feel heavy near the bottom, but a shag breaks that weight into pieces. The bangs draw attention upward, which helps the face look framed instead of buried. If the bang area is too short, though, the curls will spring up more than expected, so a little extra length at the front is usually wise.
You do need a stylist who understands curly shrinkage. A shag cut straight across in the wrong hands can land unevenly once it dries. That’s the catch. When it’s done well, though, it gives type 3 hair a lived-in shape that doesn’t need much more than leave-in and a quick scrunch.
10. Space Buns With Loose Ends

Space buns sound playful because they are. They also happen to be one of the easiest ways to make type 3 curls look on purpose when the lengths are not cooperating. Split the hair into two high sections, twist or loop each one into a bun, and let the ends poke out a little.
That last part matters. If you tuck everything in too neatly, the style loses its curl personality and starts looking stiff. A few loose ends keep it fun and keep the curls visible. Middle parts give the most even look, while a slight off-center split softens the whole thing.
- Good for concerts, weekends, and second-day curls
- Use two small elastics before the buns if the hair is slippery
- Secure with bobby pins crossed in an X if your curls are heavy
- Leave baby hairs or fringe out if you want a softer finish
Space buns are not subtle. That’s the point.
11. The Braided Crown With Curly Lengths Left Free

A braided crown gives the hairline a break while leaving the rest of the curls loose and visible. That balance is why it works so well on type 3 textures. You get control around the face, but you do not have to sacrifice the spiral pattern through the ends.
The braid itself can sit just along the front hairline, or it can wrap around the head like a soft halo. Either way, the sectioning needs to be neat enough to hold but not so tight that it pulls the curls thin. If the braid is too tight, the style looks severe. If it’s too loose, it slides around by lunch.
Where to Place It
Keep the braid close to the forehead if you want a romantic shape. Place it higher on the crown if you want more volume at the roots. Leave the back loose so the curls fall naturally. That part is what makes the style feel wearable instead of costume-like.
A little texture spray on the braid helps the pattern stay visible, but don’t drown it. You want grip, not crunch.
12. The French Braid Into Curly Ends

Unlike a full braid that tucks everything away, a French braid into curly ends keeps the curl pattern on display. That makes it a smart pick for type 3 hair, especially when you want some control at the top and freedom at the bottom.
Start the braid high enough that it holds the front sections in place. Braid only until you reach the nape or upper back, then secure it and let the rest fall loose. The contrast is the whole look: structured roots, springy ends. If the braid is too neat, it can feel rigid. If it’s too messy, it won’t hold the line.
This style is especially useful on hair that gets frizzy around the face but still has good shape through the length. You calm the top without flattening the ends. Not bad for a style that looks far more complicated than it is.
If your hair is fine, braid a slightly smaller section. If it’s thick, keep the braid wider so it doesn’t disappear into the curls.
13. The Faux Hawk Puff

The faux hawk puff is for days when you want the curls to look bold without actually cutting them short on the sides. Pin or smooth the side sections back, leave a strong ridge of volume down the center, and let the curls stack higher through the middle.
It sounds dramatic because it is. But the shape is easy to control. The center section should be the star, while the sides act like a frame. A little gel at the temples can help the sides stay in place without looking stiff. If you prefer a softer finish, use a few bobby pins and a light touch instead of a full slick-back.
- Great for events, nights out, and photos
- Works best when the curls have enough density to stand up
- Add height at the crown before securing the sides
- Leave the front slightly loose if you want it less sharp
The faux hawk is not shy. That’s why it looks so good on curl types that already have texture and lift.
14. The Low Bun With Face-Framing Tendrils
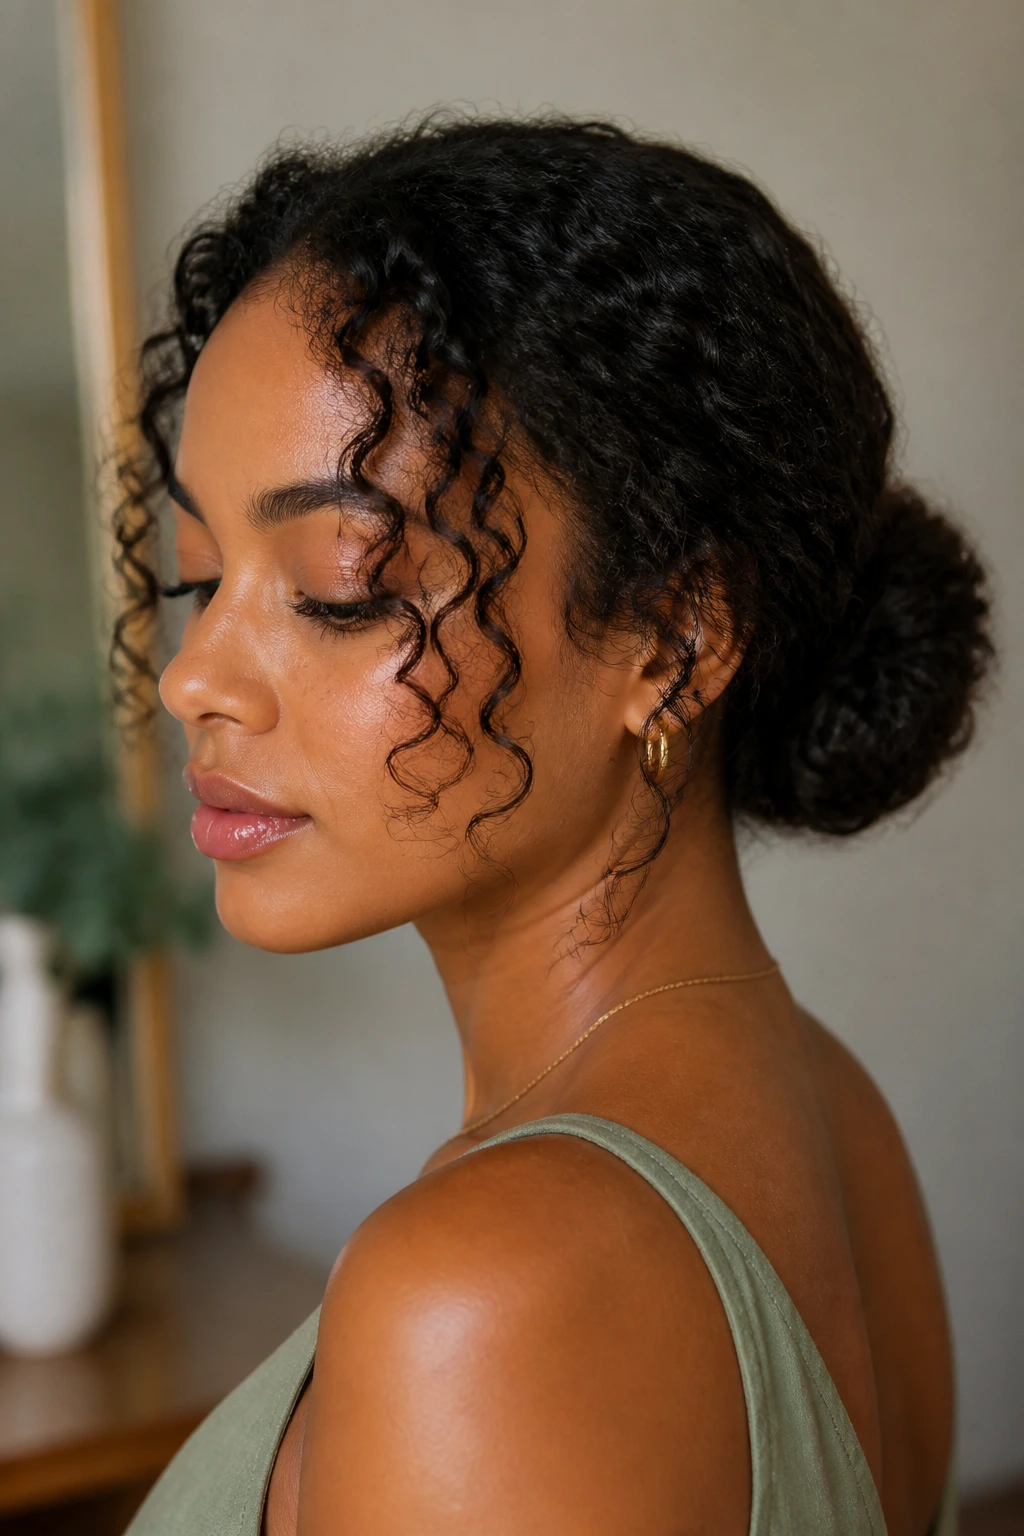
A low bun can look too neat on type 3 curls if you try to smooth every last strand. The better version leaves a little movement around the face. Two soft tendrils near the temples, a bun at the nape, and suddenly the style feels easier to wear.
The bun itself should sit low enough to feel relaxed, not tucked so tightly that the curls lose their bend. Twist the length into a coil, pin it with a few U-pins or bobby pins, and stop before it looks overworked. The goal is shape, not perfection. A few loose curls around the neck can help too, especially if the hair is dense.
This is one of those styles that works for weddings, interviews, or any event where you want your curls to look controlled but not erased. It is also kinder to the scalp than a high ponytail when you need to wear your hair up for hours.
15. The Mini Twist-Out Updo
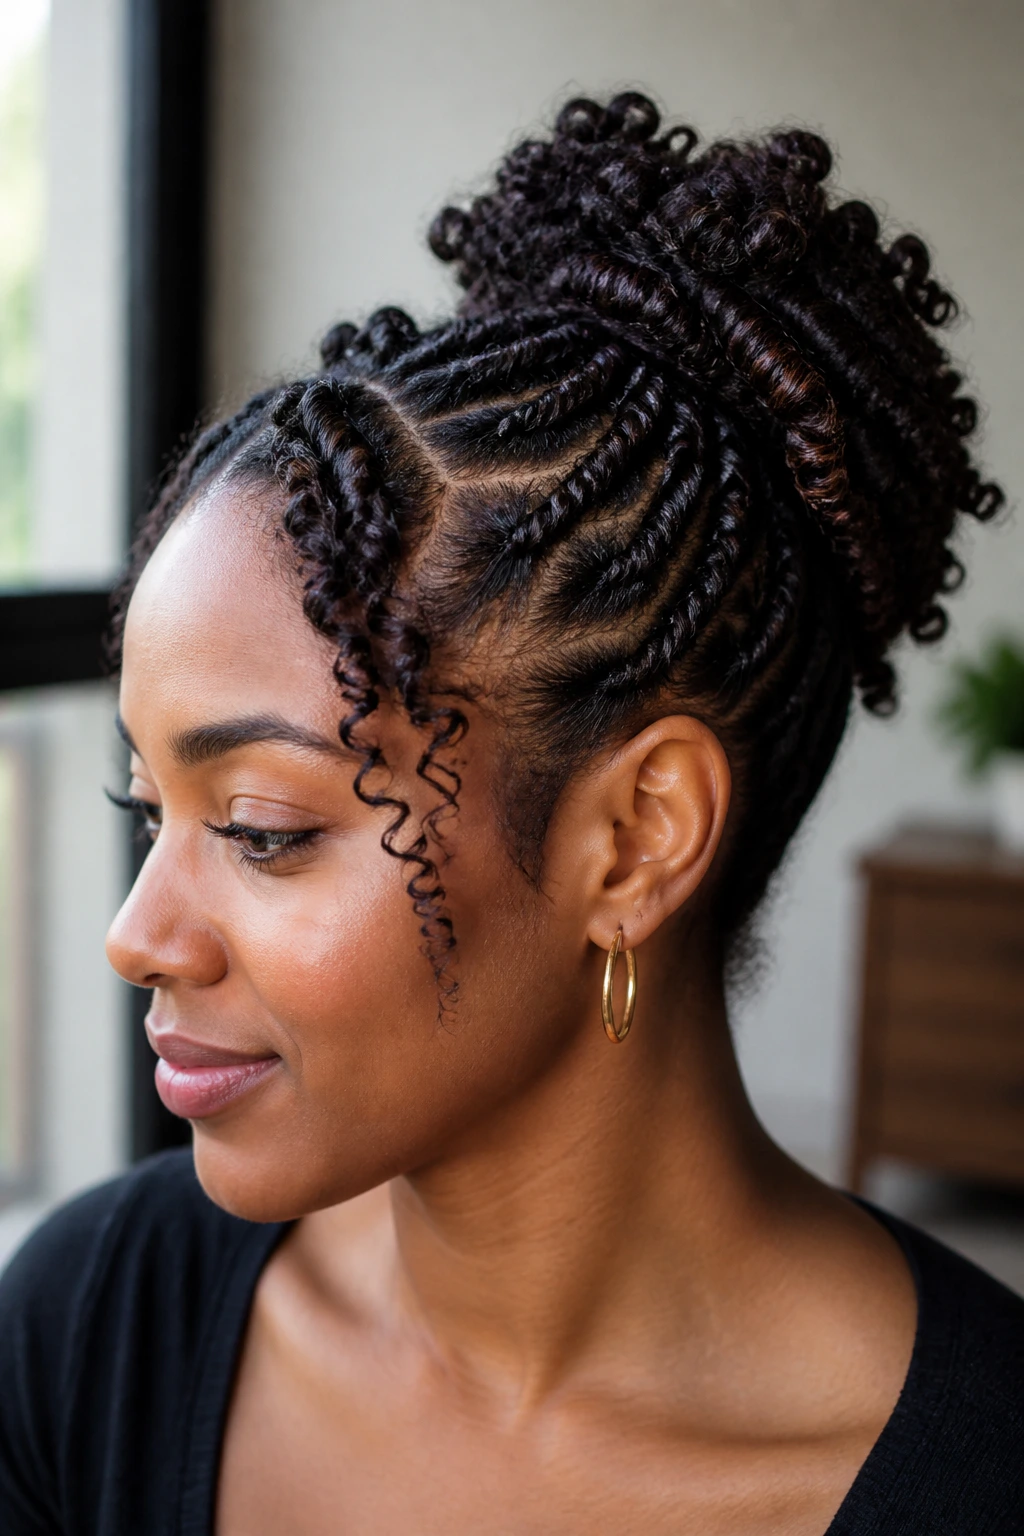
Can you get updo texture without heat? Yes, and the mini twist-out updo is a good place to start. Twist small sections of type 3 hair, let them set, then gather the twists into an updo that still shows the pattern. It looks polished, but the texture stays front and center.
How to Get the Most From It
The twists do not need to be tiny enough to take all afternoon. Around 12 to 18 sections is often enough for medium-length hair, fewer if your curls are dense. Let them dry fully before pinning them up. If they are even a little damp, the style loses shape fast and can feel fuzzy by evening.
You can pin the twists into a low bun, a rolled crown, or a tucked-up swirl at the back. The beauty here is texture on texture. The twists give the hair a controlled base, and the unraveling adds depth once the updo is set.
This is a smart pick when you want something more sculpted than a wash-and-go but less tight than a formal bun. It has structure without losing the curl pattern.
16. The Headband Tuck

The headband tuck is one of those styles that looks fancier than the effort required. A stretchy headband sits across the front, and the curls are tucked upward and inward around it until the hair forms a rolled shape. It’s simple, but it has a nice old-school feel.
Type 3 curls work well here because they already have enough bend to hold a tuck without endless pinning. Start with hair that has some grip — day-two curls are usually ideal. Slip the band on, tuck the ends section by section, and keep the roll loose enough so the hair does not puff oddly at the back.
A wider band tends to be easier than a thin one, especially if your curls are thick. Thin bands can pinch and split the shape. If the front starts to slip, one or two hidden bobby pins near the temples usually solve it.
This style is especially useful when you want the neck clear and the curls off your face without losing all sense of shape.
17. The Side-Swept Pin-Back Style

Sometimes the best hairstyle is the one that barely intervenes. Pin one side of the curls behind the ear, leave the rest free, and let the asymmetry do the work. It is a tiny change, but on type 3 hair it creates an instant shift in shape.
A cluster of two or three barrettes works better than one lonely pin. One pin can disappear into the curls. A small row of them looks deliberate and holds the side flatter. If you want a softer finish, tuck a single front curl behind the ear and keep the rest loose so the movement stays visible.
This is the style I’d pick when the curls are behaving well but one side is doing too much. You don’t need a full updo. You just need to control one corner of the head and let the rest breathe.
Pretty low effort. Very useful.
18. Curly Bangs and a Shoulder-Length Shape

Curly bangs are not a straight-hair transplant. They sit higher, move differently, and need enough length to spring instead of poofing out awkwardly. On type 3 curls, that softness at the front can be the whole style.
What to Ask For
Keep the bangs longer than you think you need. They will shrink. A stylist who cuts curly bangs dry can usually see where the curls live and avoid taking off too much. Ask for shape around the cheekbones and a little room at the temples so the front does not turn boxy.
The shoulder-length shape helps too. It gives the bangs a place to land and keeps the curls from building too much width around the jaw. This is a good cut if you want face-framing without hiding behind the hair. The bangs can be playful, a little moody, or soft enough for everyday wear.
It is not a low-maintenance choice, and I won’t pretend otherwise. But when the length and bang shape are right, it gives type 3 curls a very fresh silhouette.
19. The Flat-Twist Crown
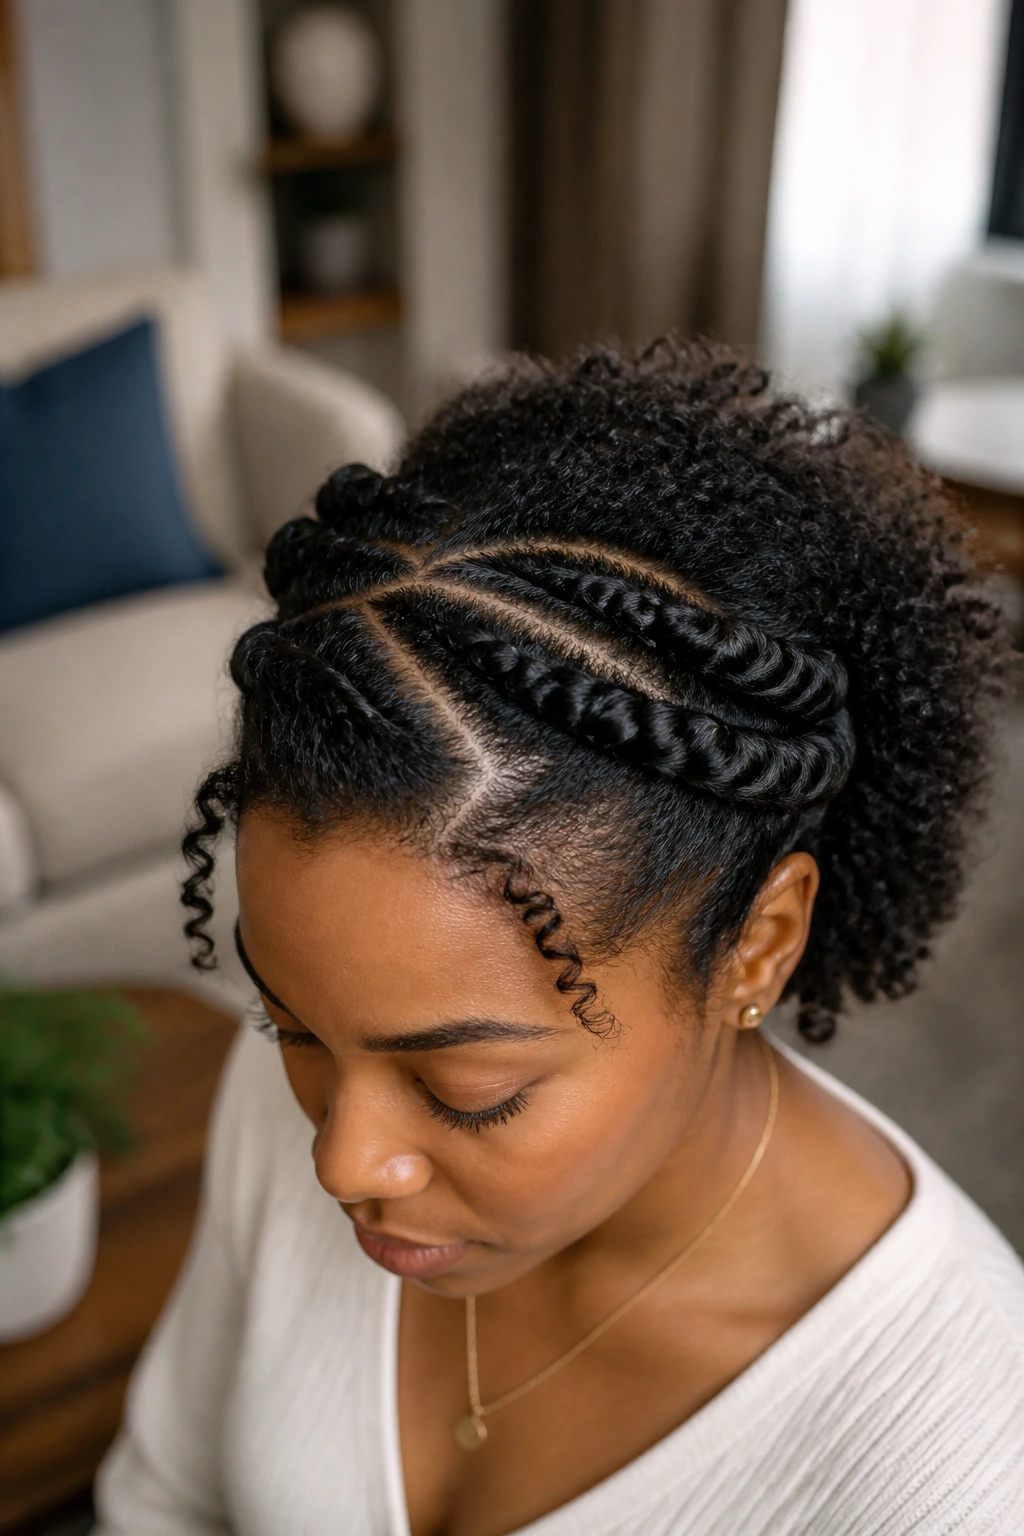
The flat-twist crown is a good answer when you want the hair protected, neat around the edges, and still interesting to look at. Two or more flat twists sweep along the scalp and wrap around the head like a crown, leaving the ends tucked or pinned.
It works well on type 3 hair because the texture gives the twist a bit of body. Straight hair can make this style look thin. Curly hair gives it shape. The hairline stays calm, which is helpful if you are trying to avoid daily manipulation, and the crown shape keeps the style from feeling too plain.
- Good for low-tension styling
- Helps keep the front and sides controlled
- Pairs well with a middle part or side part
- Can be worn for several days with light touch-ups
If the twists feel too tight, they are too tight. You want them anchored, not pulled. That distinction matters more than people admit.
20. The Curly French Twist
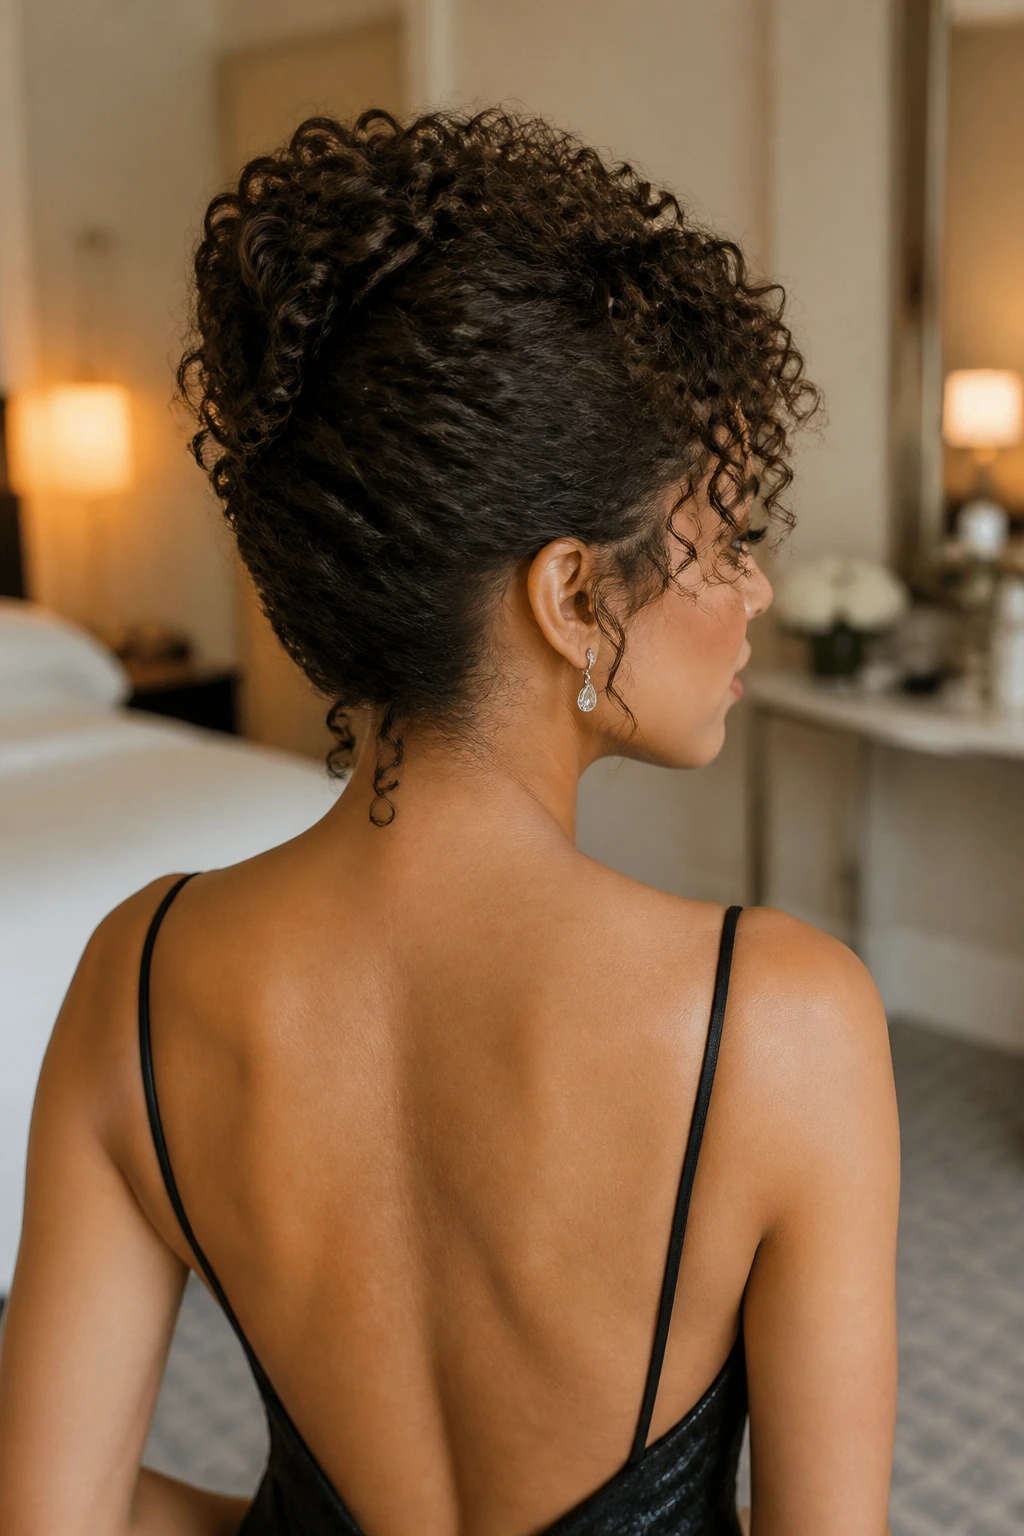
A curly French twist is the sort of style that looks more difficult than it is, which is half the reason it keeps showing up for formal events. Type 3 curls give it body, and that body keeps the twist from looking flat or too severe.
Gather the length upward, twist it vertically along the back of the head, and pin the shell of the style so the curls tuck in while a few ends stay visible. That loose finish is important. If every strand gets hidden, the style can look stiff. A little curl escaping at the top or near the nape gives it life.
This is the style I’d choose when I want the neck clear and the silhouette to feel clean, but I still want people to know the hair is curly. It’s a good reminder that type 3 hair does not need to be flattened to look polished. It just needs a shape that respects the bend.
And that’s the part people miss most often. The curl pattern is not a problem to solve. It’s the whole point.
