



Medium-length hair sits in a strange sweet spot. It is long enough to pin, twist, braid, and tuck, but short enough that a heavy bun can collapse if you load it with too much product. That is exactly why easy updos for medium length hair can be better than the fussy ones: you need shape, not sculpture.
The trick is working with the length you have instead of pretending you have waist-length hair. Shoulder-length and collarbone-length cuts usually hold best when the style has a clear anchor at the nape, a bit of grip at the roots, and a few pieces left out on purpose so the whole thing does not look strained. A couple of crossed bobby pins, a small elastic, and some texture at the crown often matter more than five extra minutes of twisting.
And, honestly, medium hair is often the most forgiving length for updos. You can make it neat, soft, messy, or sleek without needing extensions or a salon set of hands. No drama. Just good pins, a little structure, and styles that stop fighting your hair texture.
1. The Low Twist That Works on Medium Length Hair
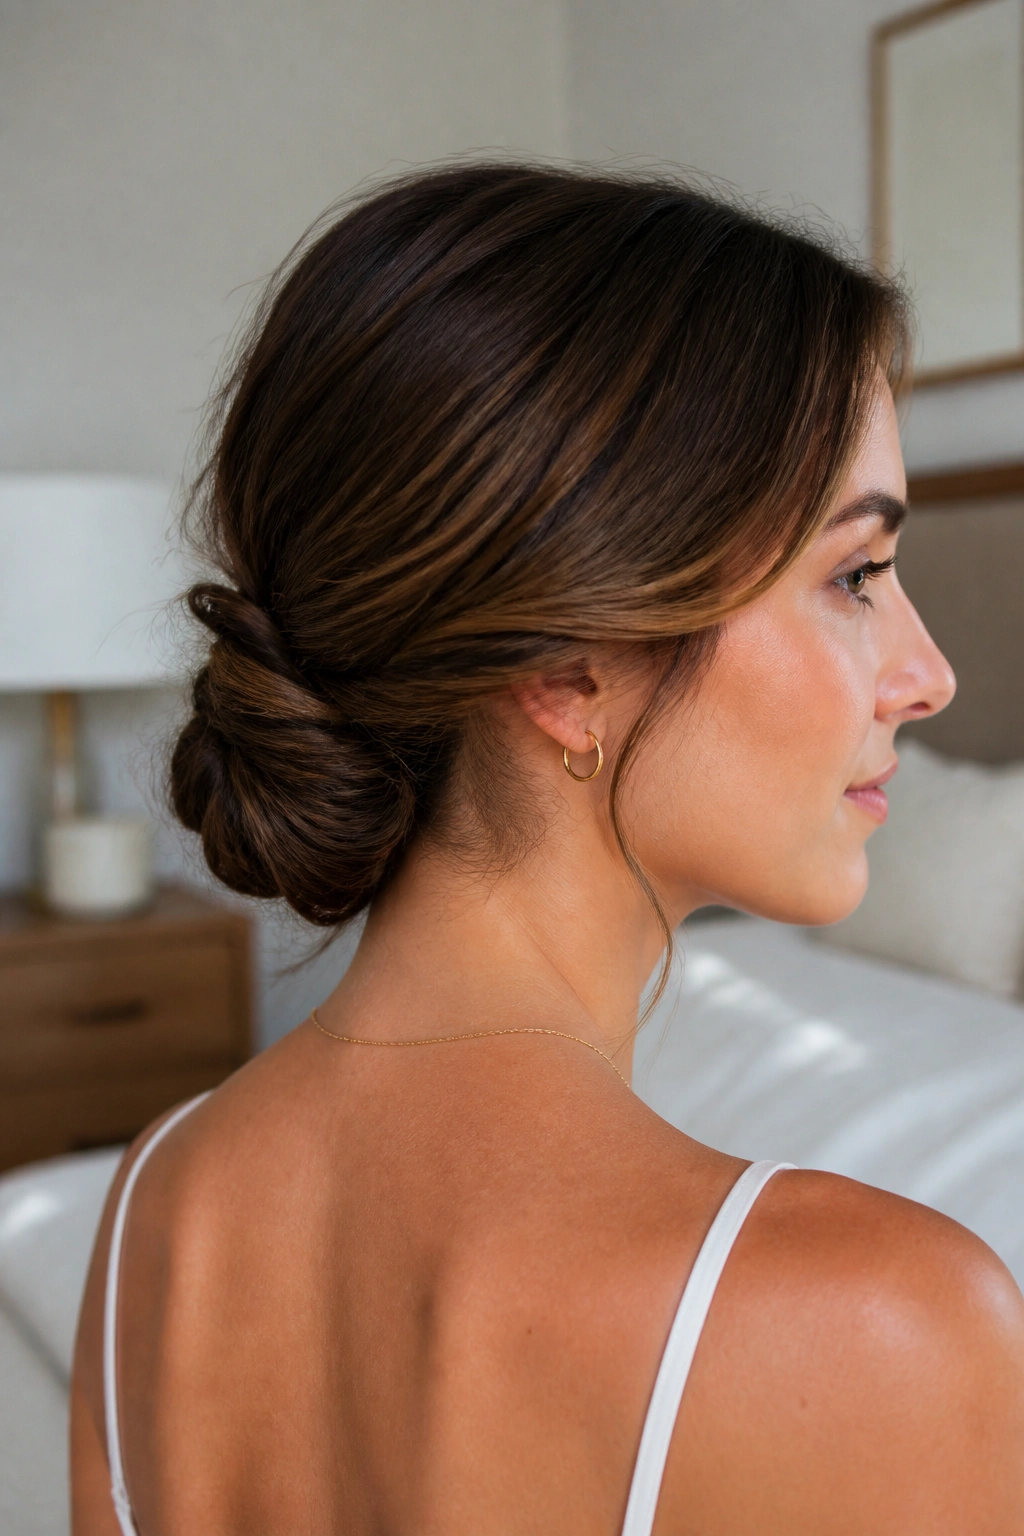
A low twist is the kind of style that looks calm even when the rest of your morning is not. Medium hair tends to settle into this shape beautifully because the ends are short enough to hide inside the twist instead of poking out like little escape artists.
Why It Works on Medium Length Hair
The whole style depends on keeping the weight low and close to the head. That means you do not need a giant donut bun or a dozen accessories. A small elastic, four to six bobby pins, and a light mist of texturizing spray are usually enough.
- Best on hair that is one day past washing
- Works with straight, wavy, or lightly curled hair
- Takes about 5 to 7 minutes
- Hides layers better than a plain bun
Pin from the inside out. That tiny detail matters more than people think. Slide the pin through the twist, then anchor it into the hair underneath so the style grips the scalp instead of floating on top.
2. The Claw-Clip French Twist
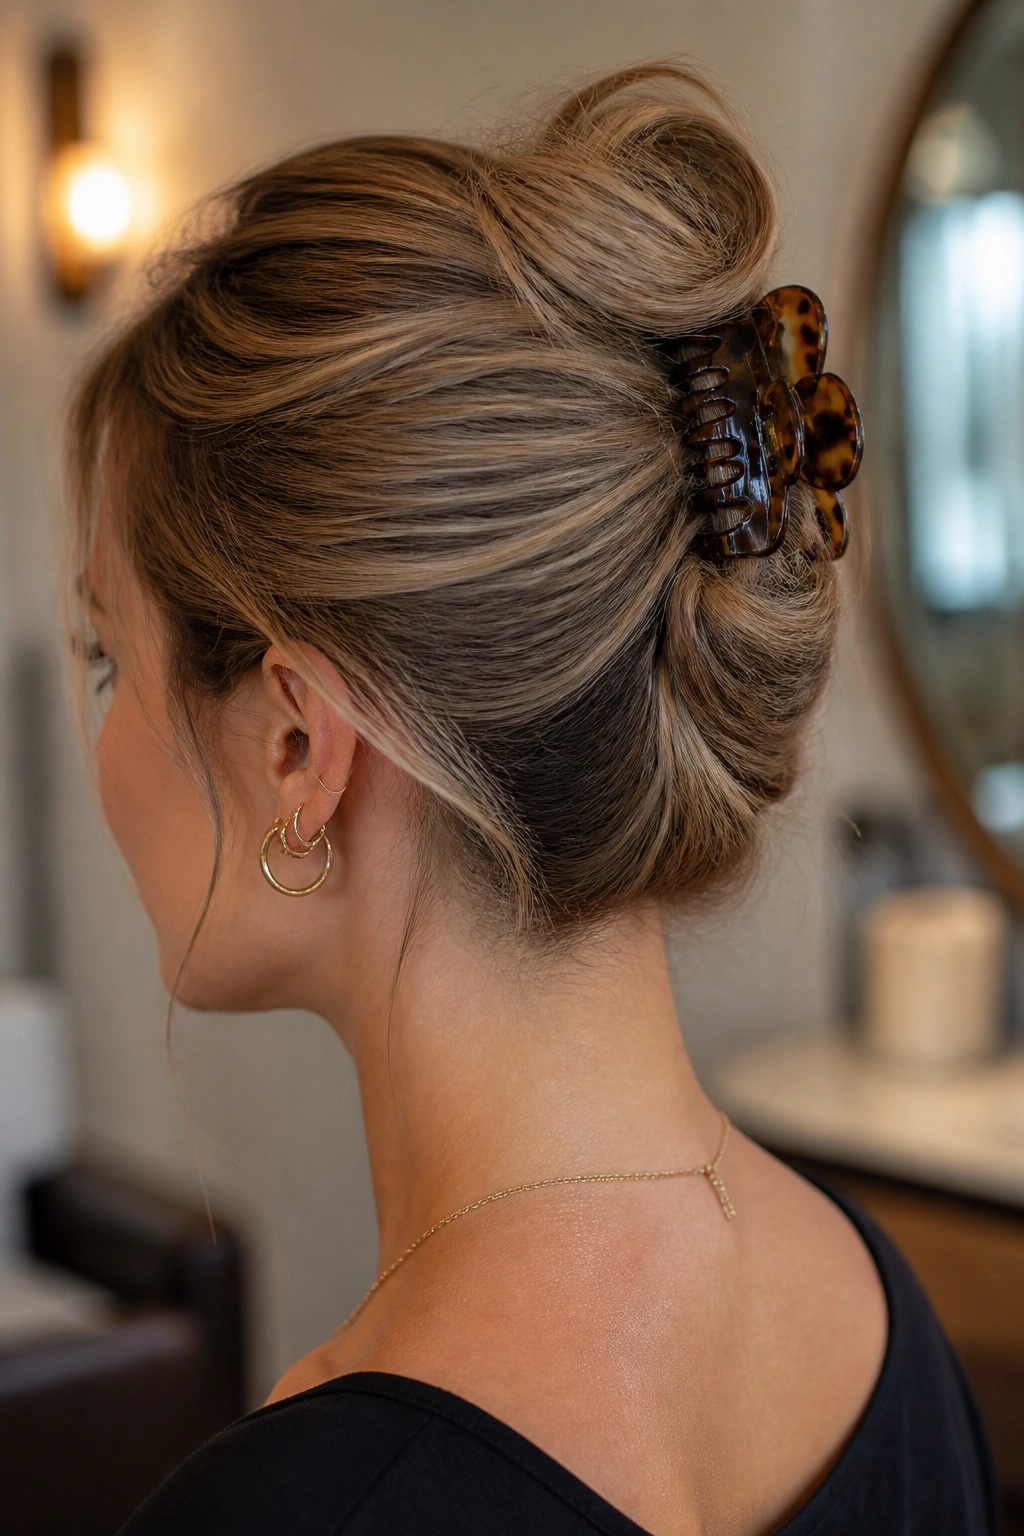
A claw-clip French twist looks polished fast, and that is the whole point. On medium length hair, it gives you the clean sweep of a formal updo without asking your hair to do something impossible.
Start by gathering the hair at the back as if you were making a low ponytail. Then twist upward, tuck the loose ends down, and open the clip over the middle of the roll. A medium-sized claw clip with teeth that actually grip works better than a slippery decorative one. Big, flat clips are easier to see; narrower ones usually hold tighter.
The best version of this style is not the one that looks rigid. It is the one that sits slightly loose at the crown and lets a few ends disappear into the twist. If your hair is fine, rough up the roots first with a little dry shampoo or powder. If your hair is thick, split the twist into two smaller sections before clipping. That keeps the shape from ballooning.
3. Braided Low Bun at the Nape
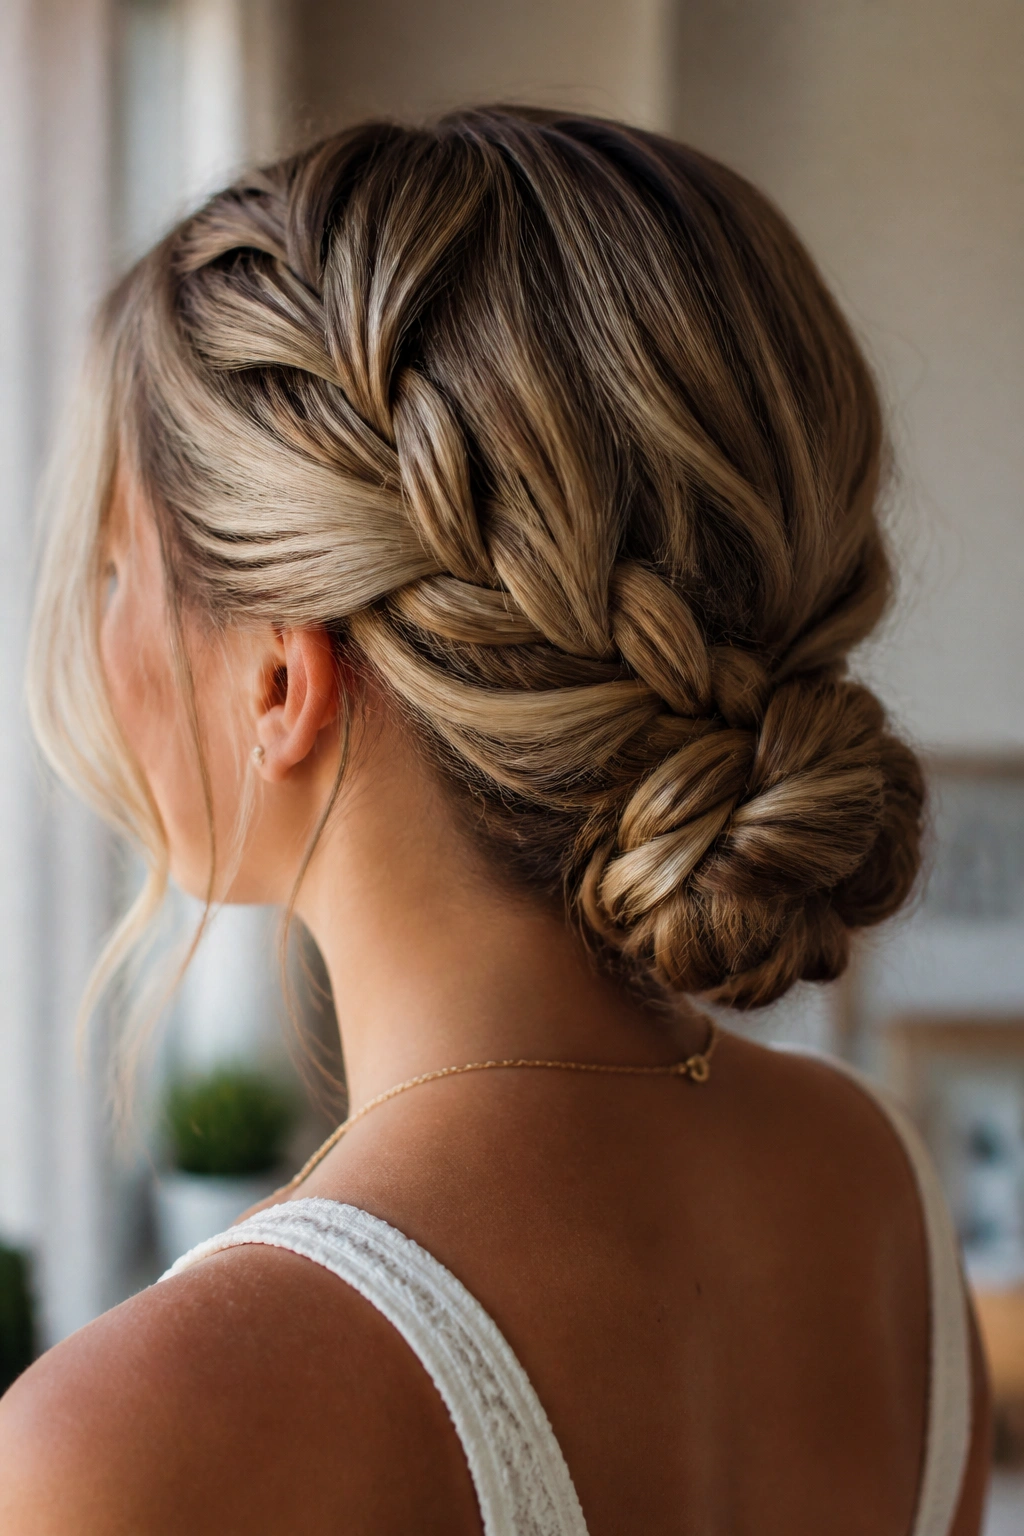
Why does a braid make a low bun behave? Because it gives the bun teeth. A plain coil can slip around on medium hair, but a braid has texture, and texture gives pins something to bite into.
How to Use It
Pull the hair into a low ponytail, braid it loosely, then wrap the braid into a flat bun at the nape. Secure the end with a small clear elastic first, then pin the coil in two or three spots. If layers keep sliding out, braid a little tighter near the crown and looser near the ends. That keeps the shape compact without looking stiff.
You can wear this one with a side part or a center part. Side parts soften the look; center parts make it feel cleaner. Either way, it works because the braid shortens the hair before you pin it, which is exactly what medium length hair often needs.
4. Half-Up Knot for Shoulder-Length Hair
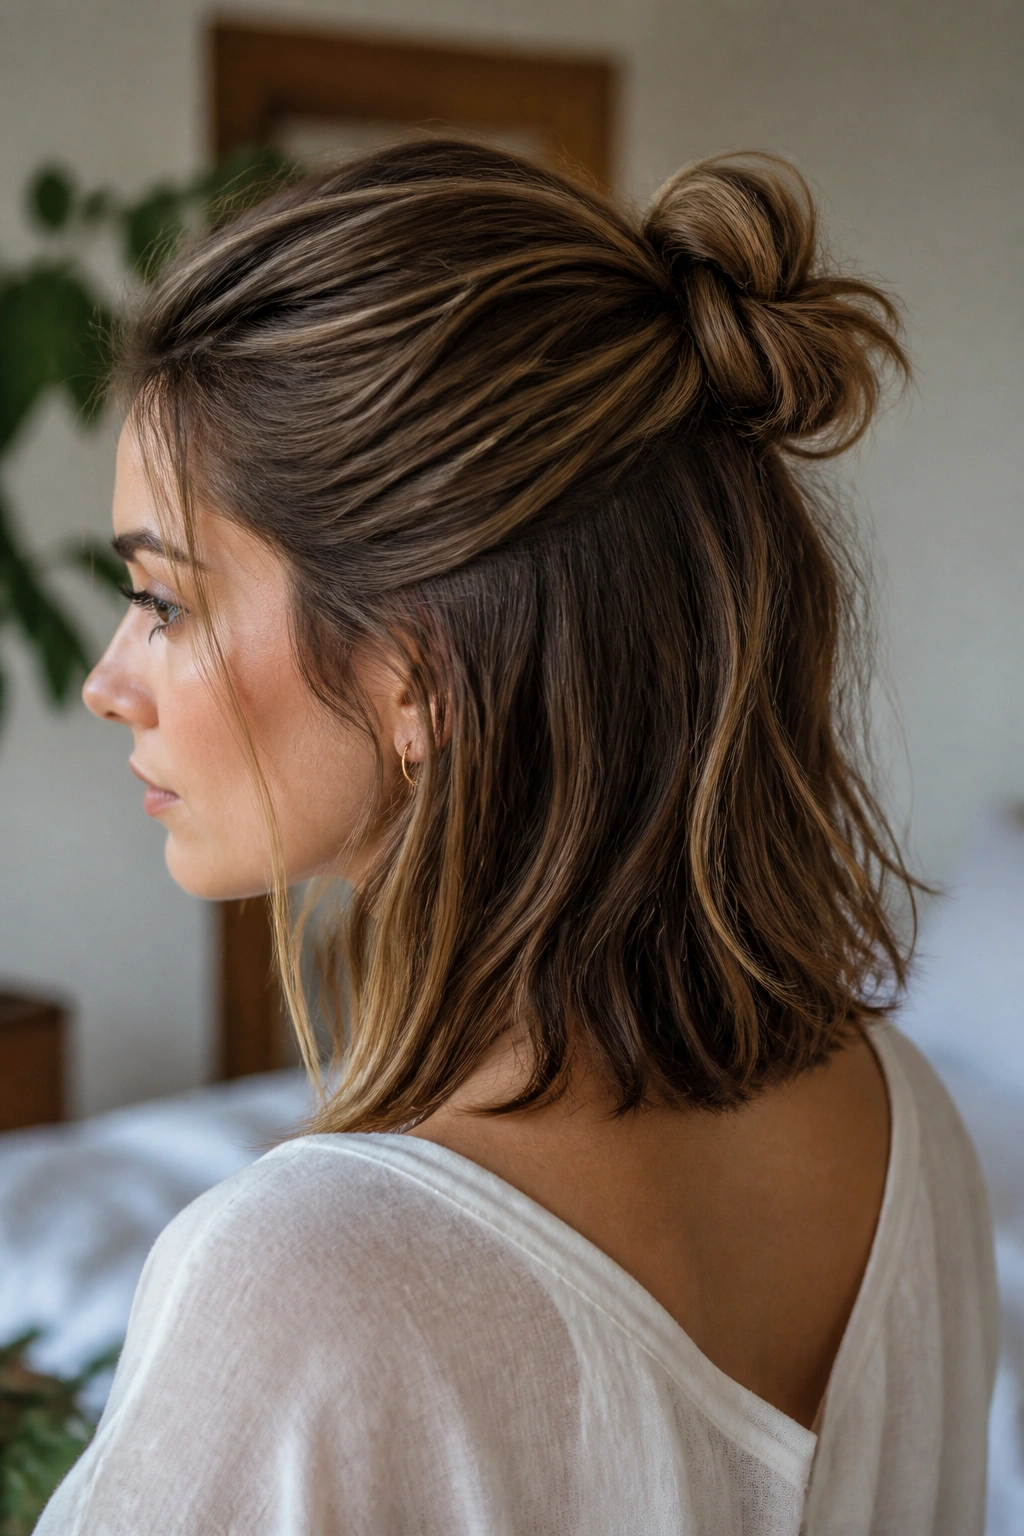
On rushed mornings, a half-up knot saves the day when the rest of the hair refuses to cooperate. You get hair off your face, some lift at the crown, and enough length left down below to make the whole thing feel intentional.
Pull back the top third of the hair, twist it once or twice, and knot it into a small bun at the back of the head. If the knot looks tiny, that is fine. Tiny is better than bulky here. A half-inch of teasing at the crown can keep the style from sinking flat by noon, and a little hairspray on the twisted section helps the knot stay tidy.
- Best for medium hair with soft layers
- Works well with curtain bangs or face-framing pieces
- Needs only 1 elastic and 2 to 4 pins
- Looks nicest when the knot sits centered, not too high
One small thing. Don’t pull the knot too tight. Leave a little softness around the hairline, and the whole style looks far more expensive than it is.
5. The Gibson Tuck
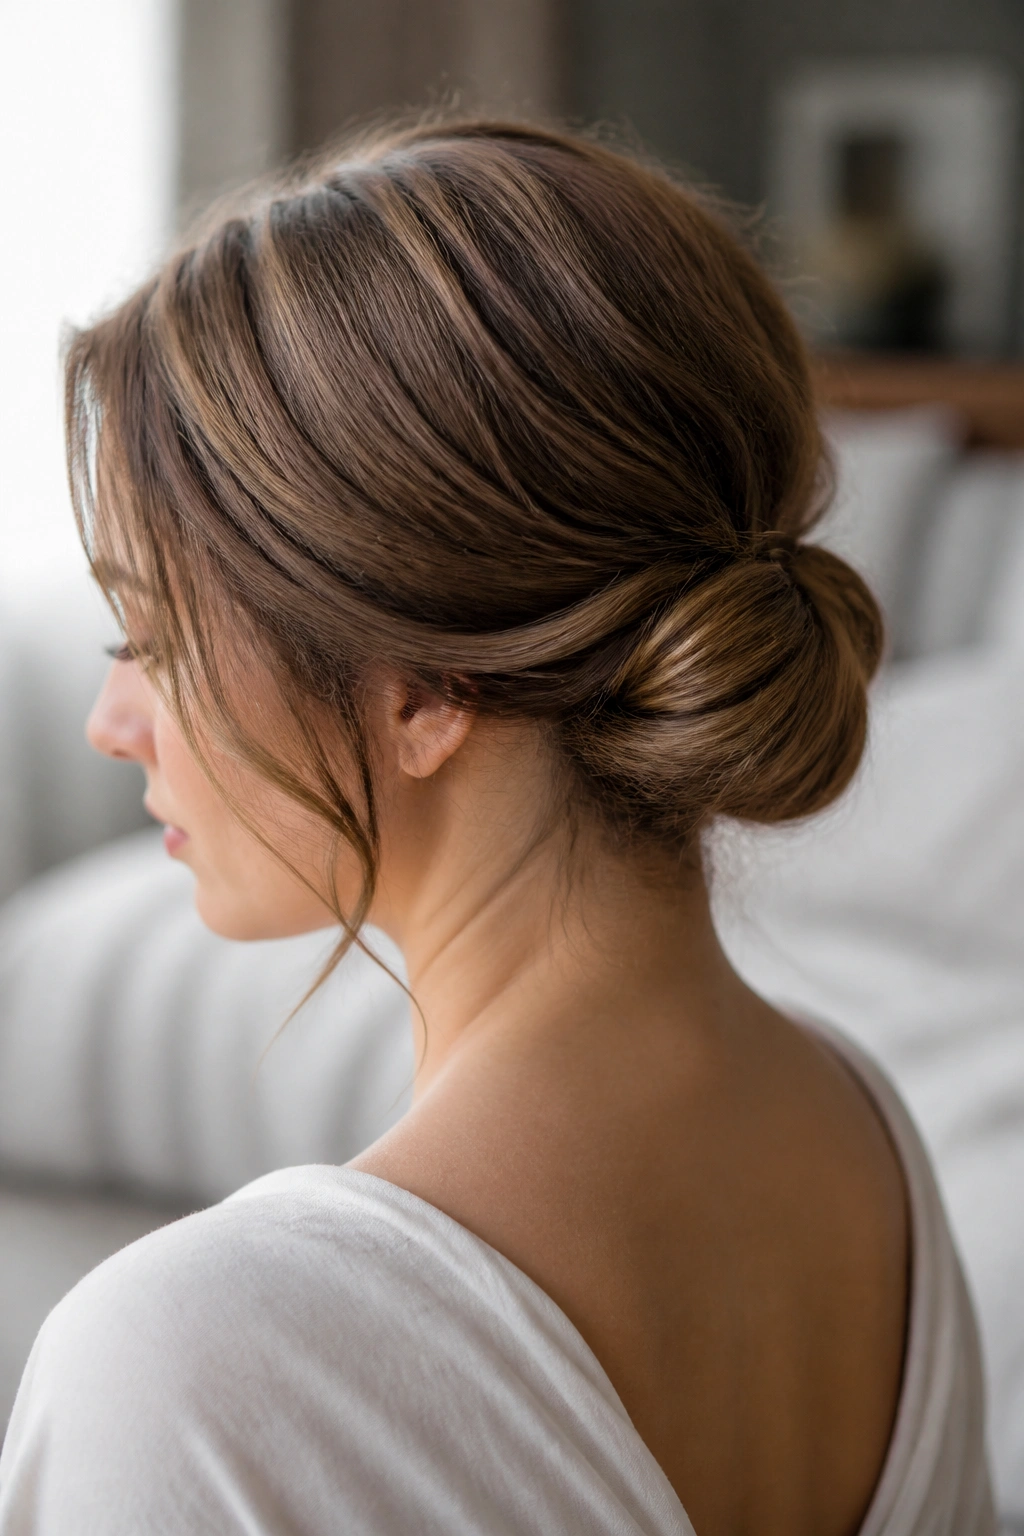
The Gibson tuck is one of those old-school styles that never really went away because it solves a real problem. Medium-length hair often has enough length to tuck, but not enough to form a big bun, and this style lives right in that gap.
You create a loose low roll, then tuck the ends up and into the roll until they disappear. A soft headband can help if the hair is slippery, though you can also do it with just pins. The key is not making the roll too perfect at first. Leave room for the ends to fold in, or the tuck becomes a fight.
It works especially well when the hair has a little bend from day-old waves or a quick curl at the ends. Straight, freshly washed hair can be too smooth. If that happens, rub a pea-sized amount of styling cream through the lower half of the hair before you start.
There is something nice about this one. It feels tidy without looking severe.
6. Crown Braid Into a Nape Tuck
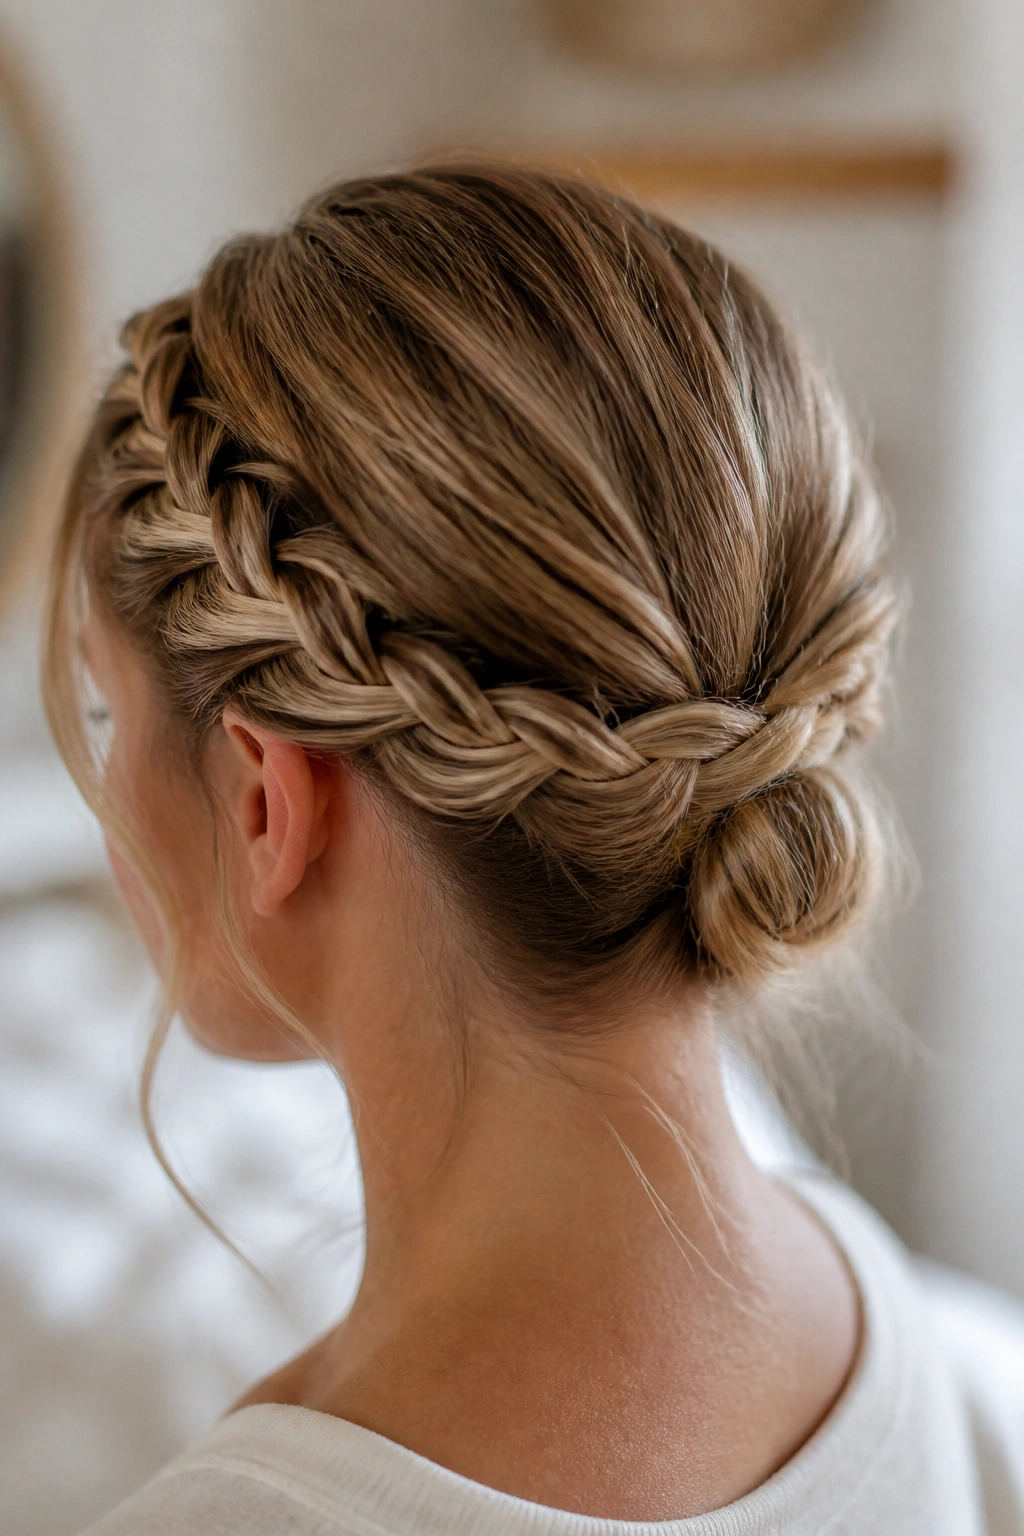
Unlike a full crown braid, this version does not ask you to braid around your entire head. Good. That makes it much easier for medium length hair, and much less likely to unravel halfway through the day.
Braid each side from the temples back, stop at the nape, and join the two braids into a tucked bun or small coil. The visual trick is that the braids create the illusion of more hair than you actually have. They also keep shorter layers from popping out at the sides, which is where medium hair usually starts misbehaving.
Best for
- Hair that hits the shoulders or collarbone
- Lightly layered cuts
- Second-day hair with a little grit
- Events where you want something soft but not too sweet
If you want this style to last longer, secure each braid with a tiny clear elastic before joining them. That extra step sounds boring. It is boring. It also keeps the whole style from loosening at the sides.
7. Space Buns for Medium Length Hair
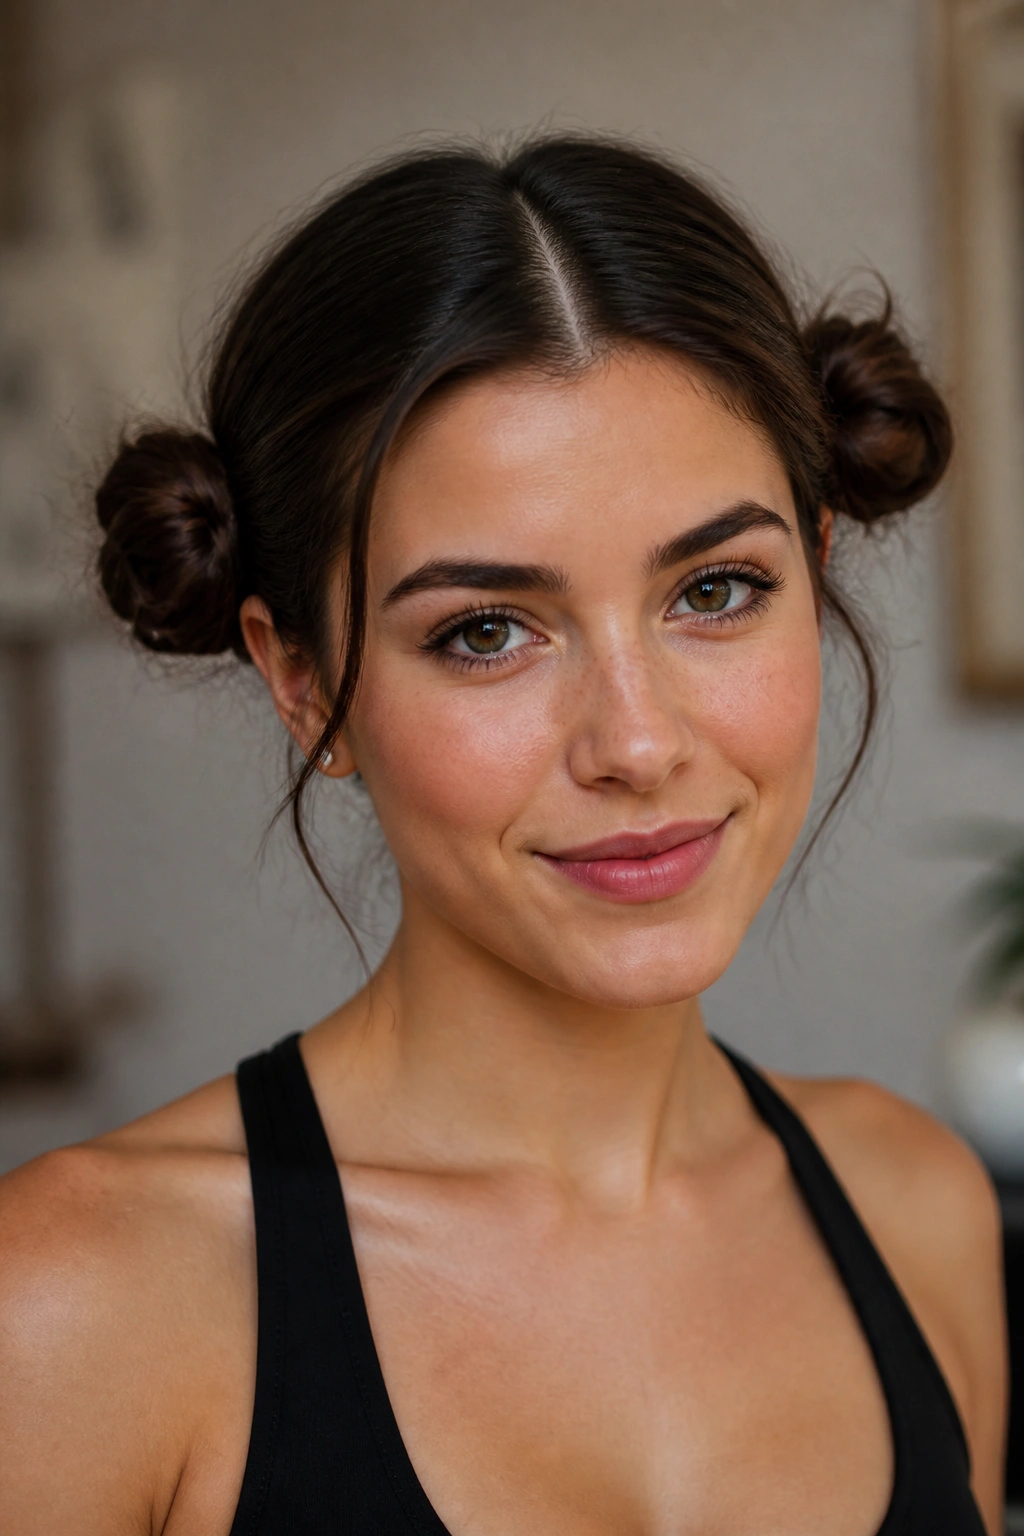
Space buns are not only for festivals and gym selfies. On medium length hair, they can look neat, playful, or even sleek if you keep the parts clean and the buns small enough to match the length.
What Makes Them Hold
The trick is to place them slightly lower than people expect, usually around ear level or just above. High buns can get too tiny and feel awkward. Lower buns give the hair enough length to wrap twice instead of once, which makes a big difference in how secure they feel.
- Part the hair straight down the middle
- Make two small pigtails first
- Twist each pigtail into a coil
- Pin the ends underneath with 2 pins per bun
A little texture spray at the roots helps the part stay sharp. If you want the style to look softer, pull a few thin pieces out near the temples. If you want it clean, brush everything smooth and keep the buns small and even.
8. The Rope-Braid Ponytail Wrap
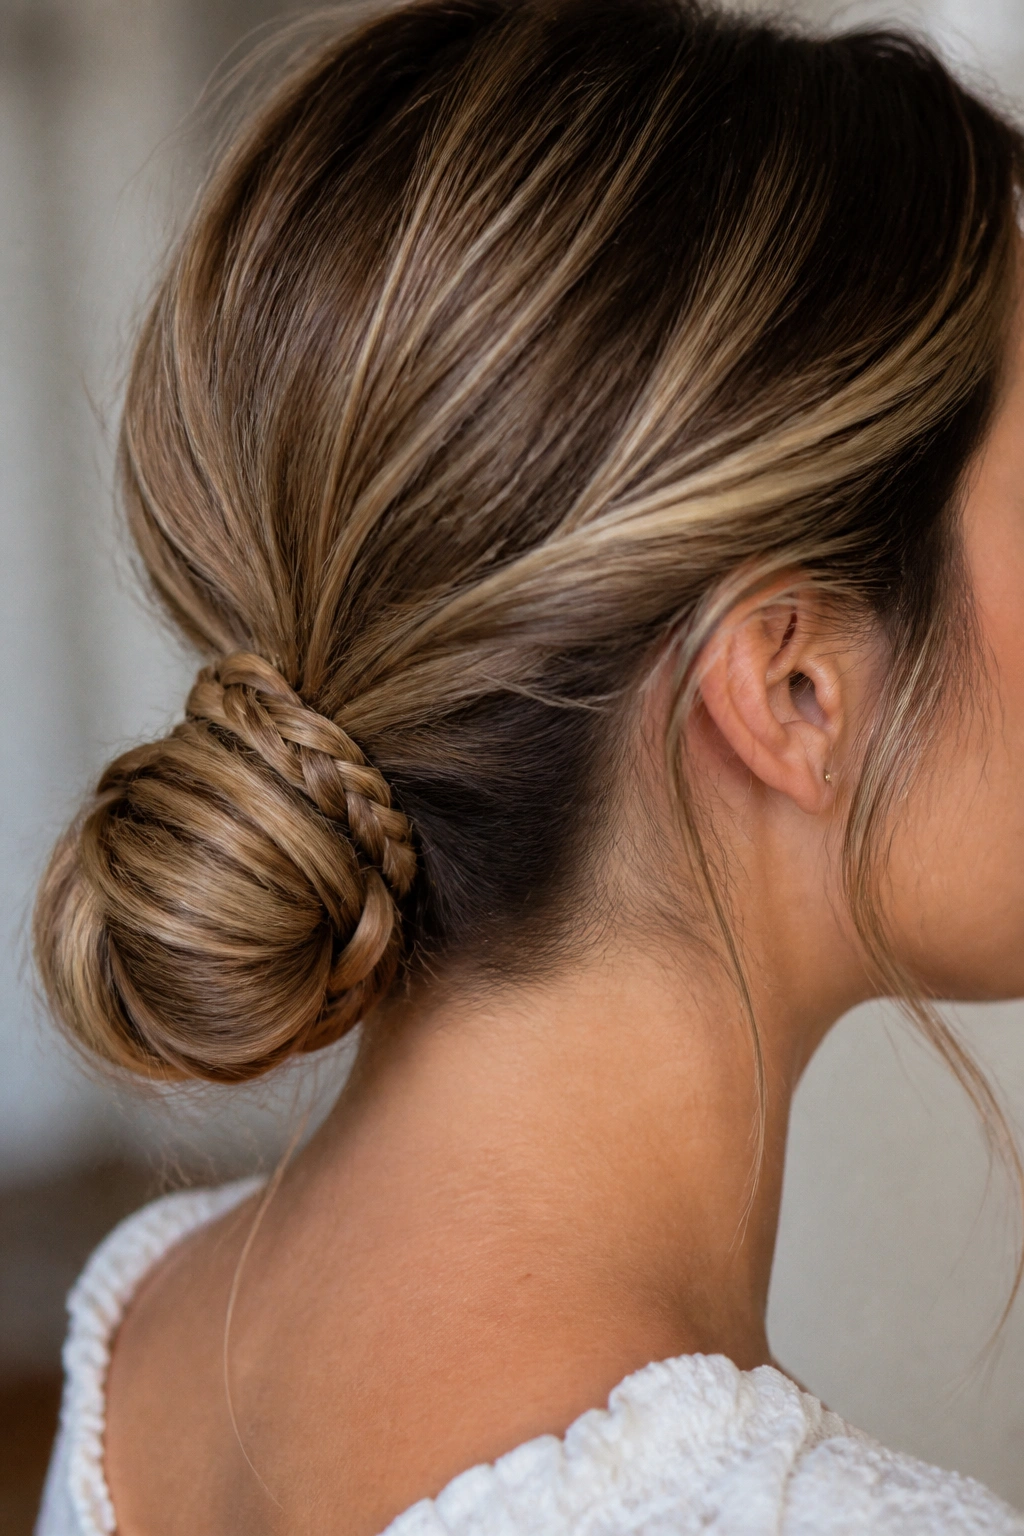
A rope braid looks fancier than it is. That is why it belongs on medium hair. You only need two sections, a bit of tension, and a small elastic at the end.
Gather the hair into a low or mid ponytail, split it into two equal pieces, twist each piece in the same direction, then wrap them around each other in the opposite direction. That counter-twist is what makes the rope braid hold together. Once it is secure, coil the ponytail into a bun or wrap it around the base and pin it down.
This style is especially useful if your hair is fine and slips out of regular braids. The rope braid adds structure without needing much length. It also looks cleaner than a messy bun when you need something a little more dressed up.
If the twist starts to open up while you work, hold each section firmly at the base. Sloppy tension is the main reason this style falls apart.
9. Side-Swept Chignon
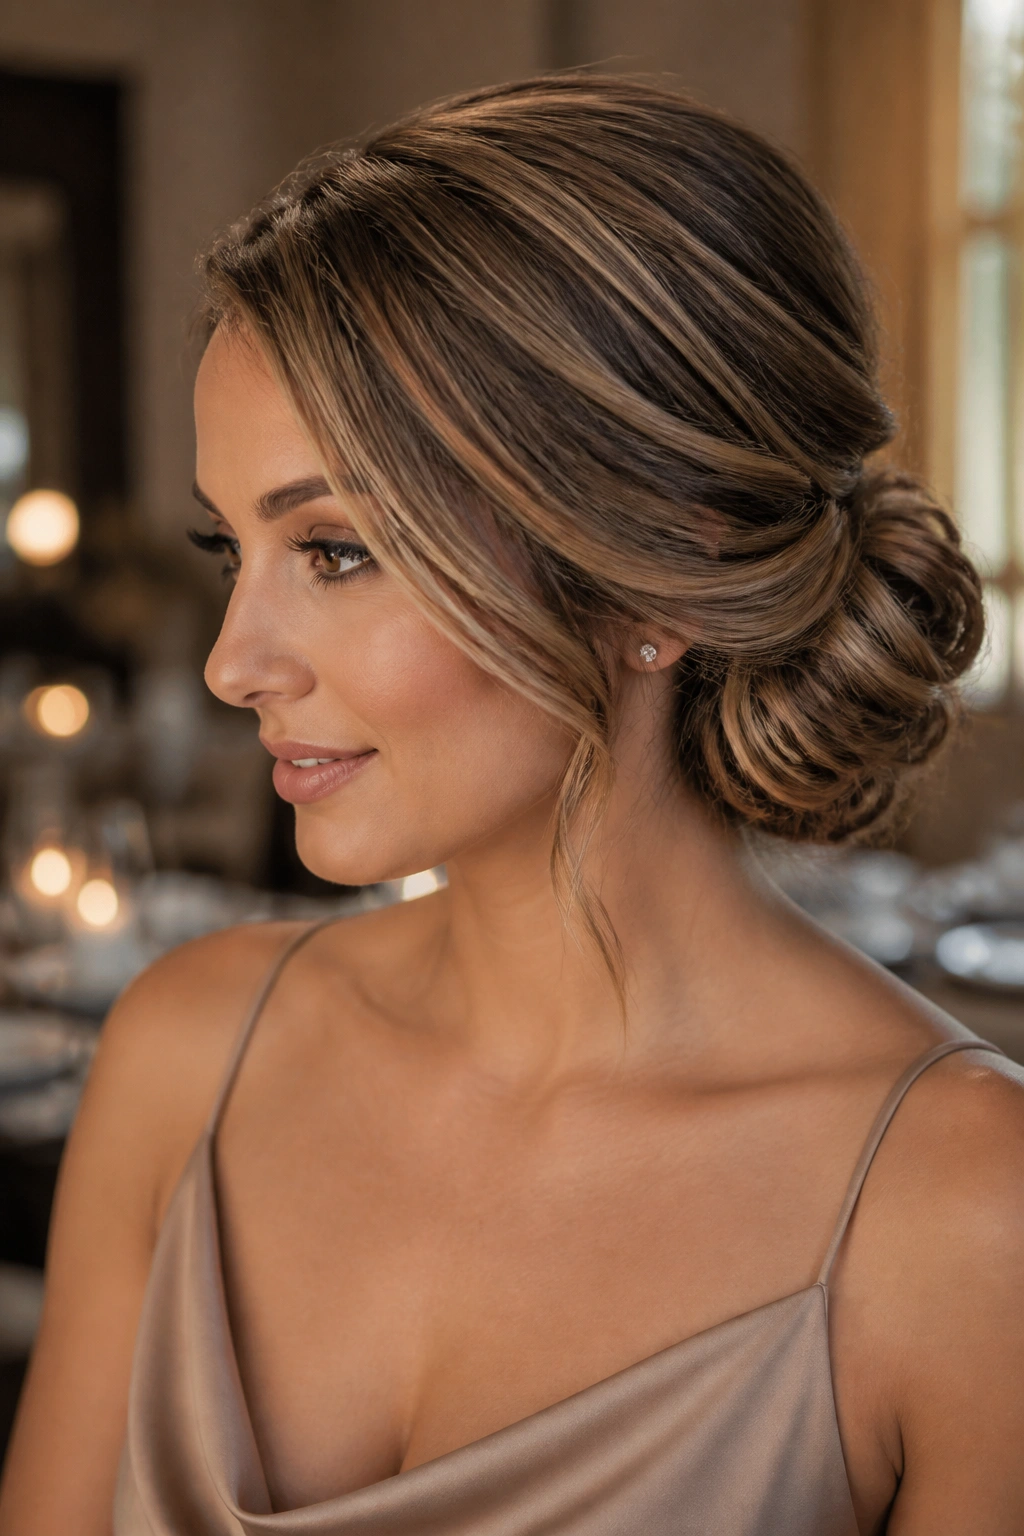
Why does a side-swept chignon flatter medium length hair so well? Because it uses asymmetry to hide the places where hair is shortest. The eye follows the sweep, not the ends, and that makes the style look fuller than it really is.
Brush the hair toward one side, gather it low near the ear, and twist it into a small chignon that sits just behind the jawline. You can leave the opposite side sleek, or tuck a few face-framing pieces behind the ear for softness. A chignon that sits too far back can look like an afterthought. Keep it off-center and it suddenly feels deliberate.
This is one of the better styles for dinners, weddings, or work events because it sits quietly and does not require constant fixing. Use two pins crossed in an X shape to anchor the coil, then one extra pin under the twist to keep it from slipping.
Small detail, big payoff.
10. Bubble Ponytail Into a Bun
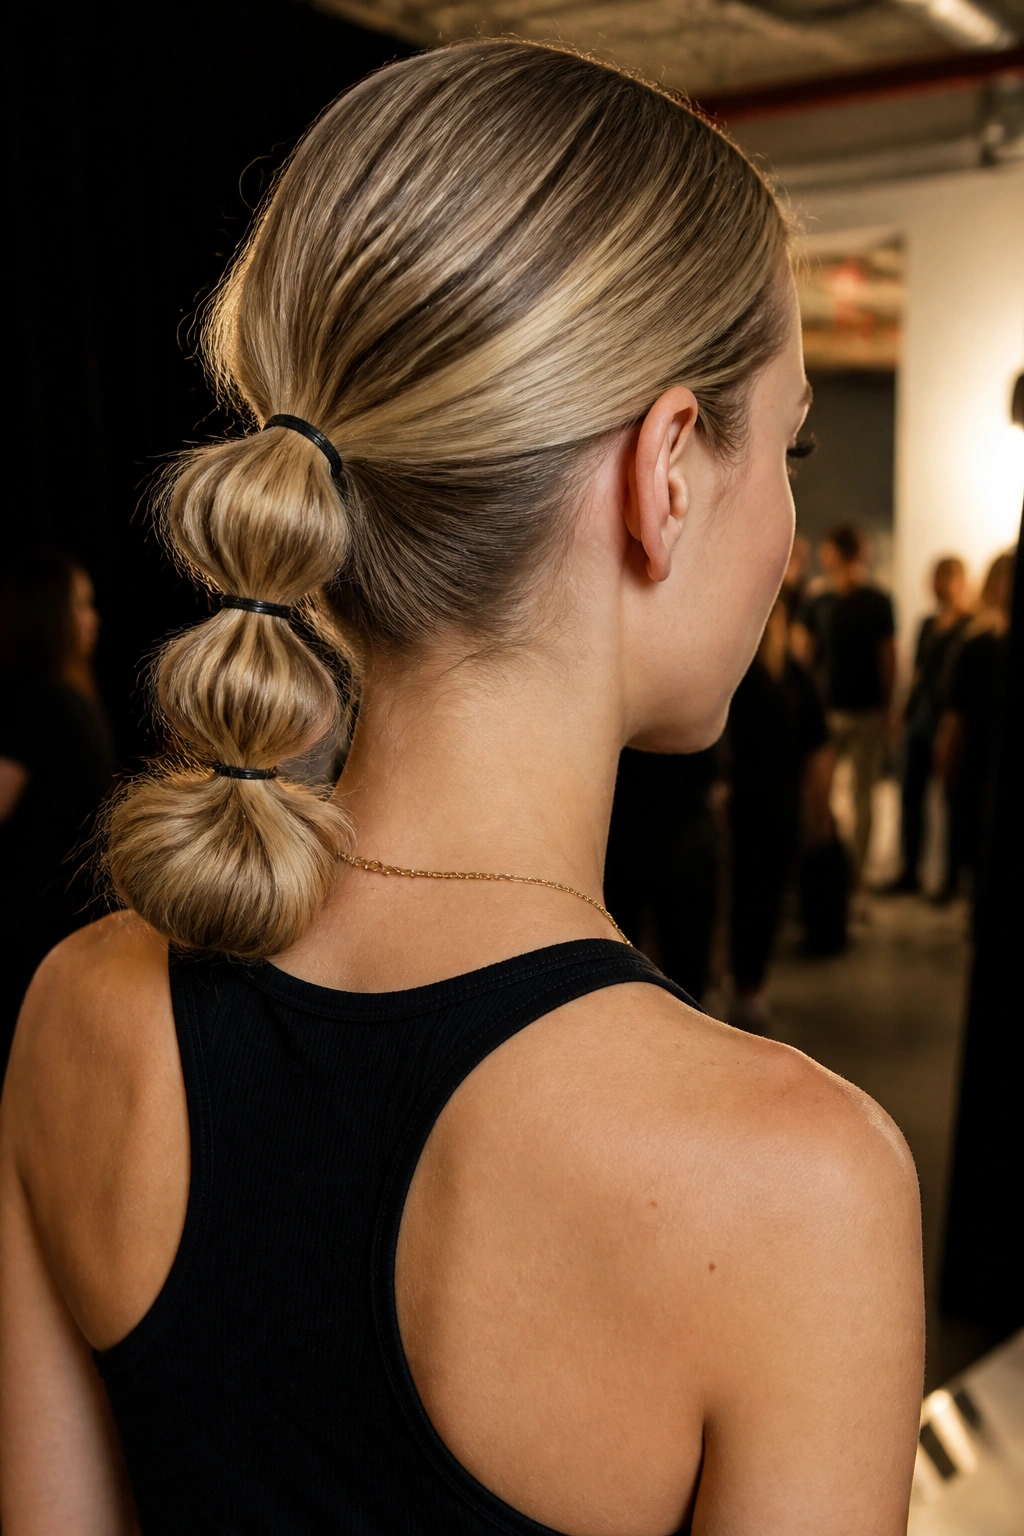
A bubble ponytail gives medium hair the extra structure it sometimes needs before it becomes a bun. That matters. Regular buns can sag when the length is borderline, but bubbles create sections that hold their shape.
Tie the hair into a low ponytail, then add small elastics every 2 to 3 inches down the length. Gently puff each section between the elastics so it looks rounded, not overstuffed. After that, wrap the whole ponytail around the base and pin it into a bun. The bubbles give the style body, and the bun gives it a finish that feels more grown-up.
- Works well on straight hair that needs grip
- Best with clear elastics or elastics matched to your hair color
- Takes around 8 minutes
- Looks fuller if the ends are lightly curled first
This one is a little playful, but not childish if you keep the bubbles even and the bun low.
11. Messy Pin-and-Tuck Updo
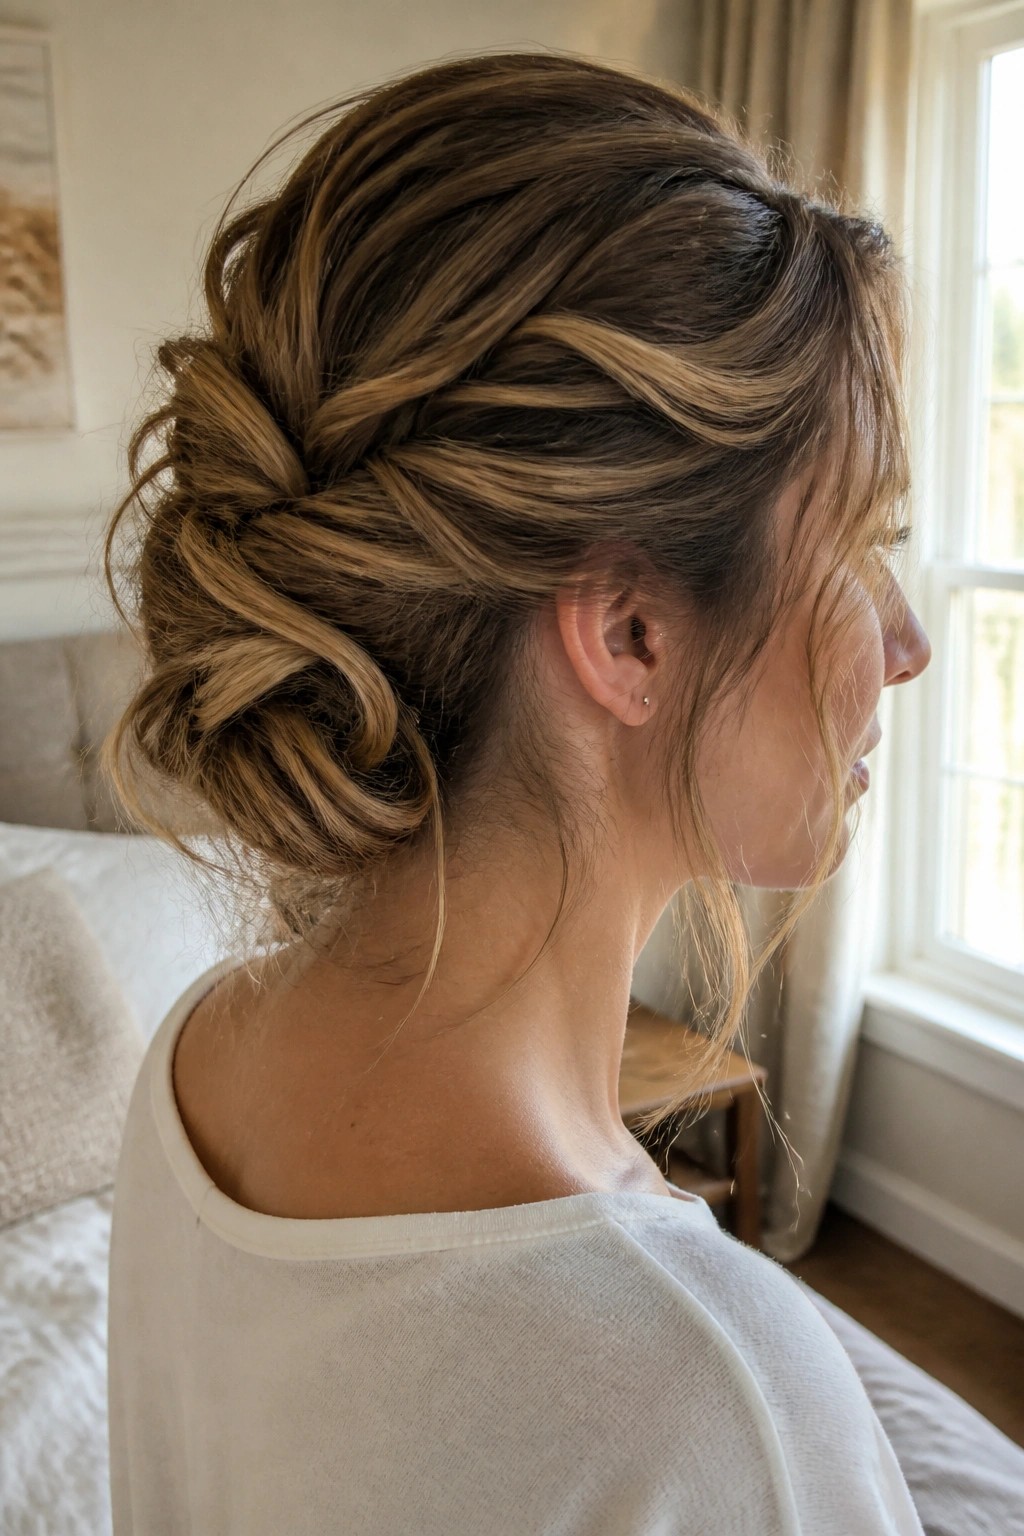
There are days when polished feels like too much effort, and honestly, that is when the messy pin-and-tuck updo earns its keep. Medium hair is perfect for it because the length is just long enough to tuck, but not so long that the style gets heavy.
Start by folding sections upward at the nape and pinning them where they want to live. Then take the remaining ends and tuck them under neighboring sections, not all in one place. The goal is a soft nest of hair, not a perfect knot. It should look a little undone, but not accidental. There is a difference.
Use more pins than you think at first, then remove the obvious ones once the shape holds. That sounds backwards, yet it works. Once the tuck is stable, the style usually needs fewer visible pins than you expected.
This is the kind of updo that looks better after a few minutes of settling. Leave it alone once it is in place.
12. Dutch Braid Bun
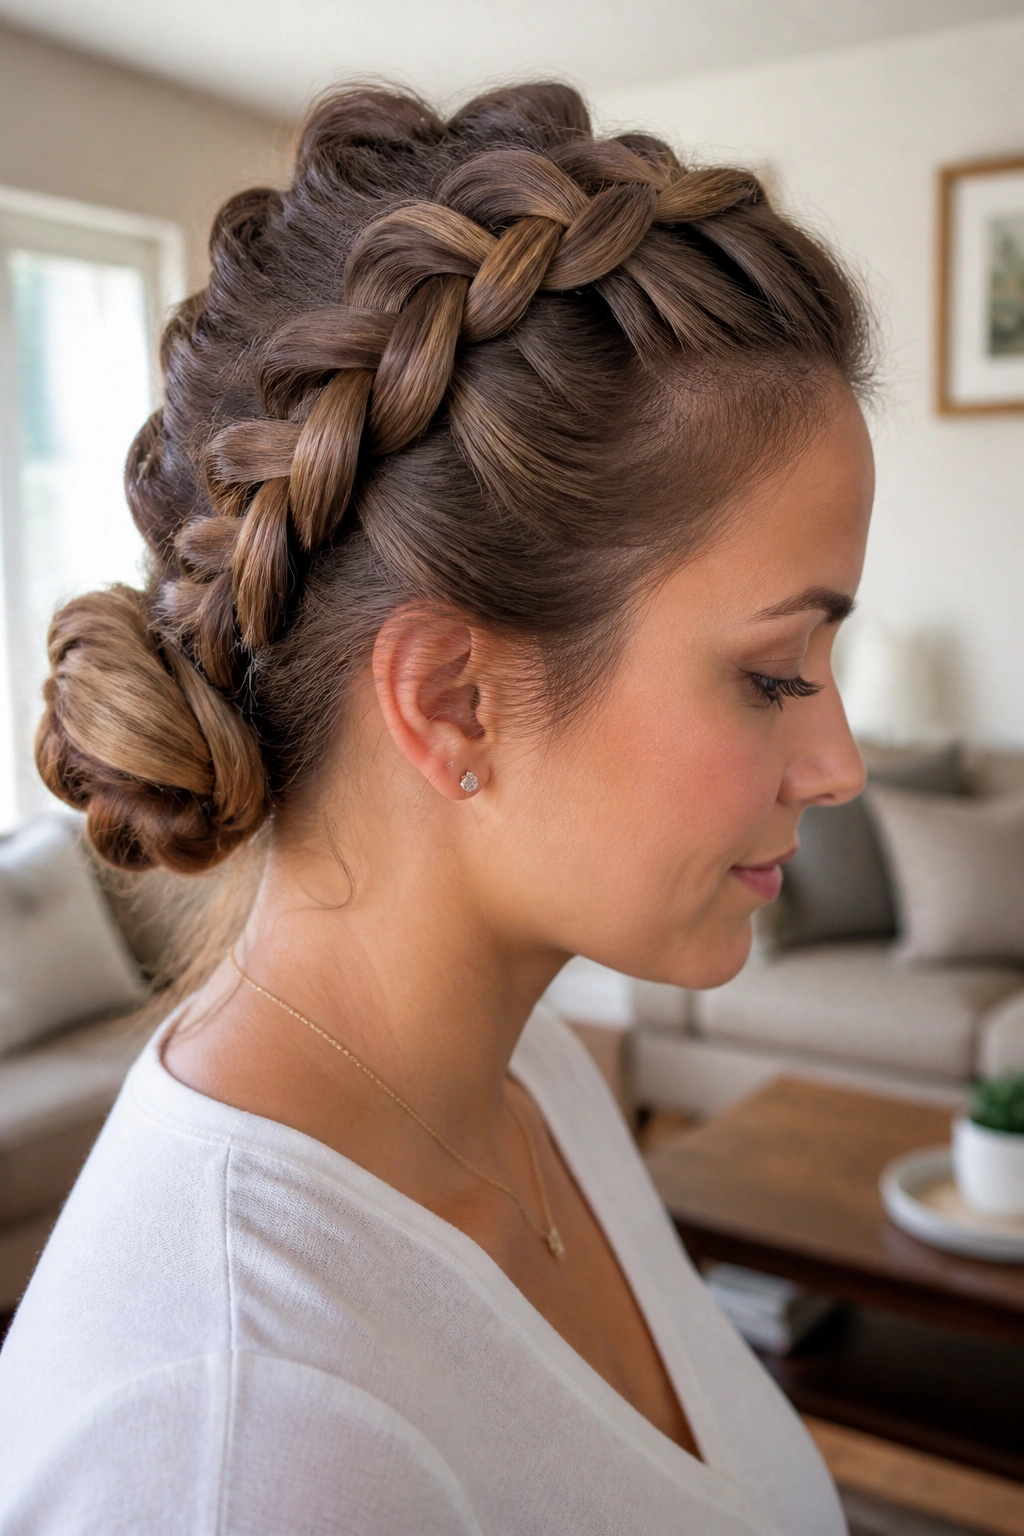
A Dutch braid bun gives medium-length hair a strong center line and a lot of grip. Unlike a standard braid that lies flat, the Dutch braid sits on top of the hair, which makes the whole bun easier to see and easier to secure.
Braid from the crown down to the nape, keeping the braid snug but not so tight that it tugs the scalp. Then coil the remaining length into a bun and pin it in place. If your hair is thick, stop the braid lower and let the bun do the last bit of work. If your hair is fine, braid a little tighter at the top so the braid does not puff apart.
This style is a smart choice for active days. It holds up better than a loose knot because the braid creates a built-in anchor, and the bun sits right on top of it. No fancy tricks.
Just good sectioning and enough pins to matter.
13. The Rolled Headband Updo
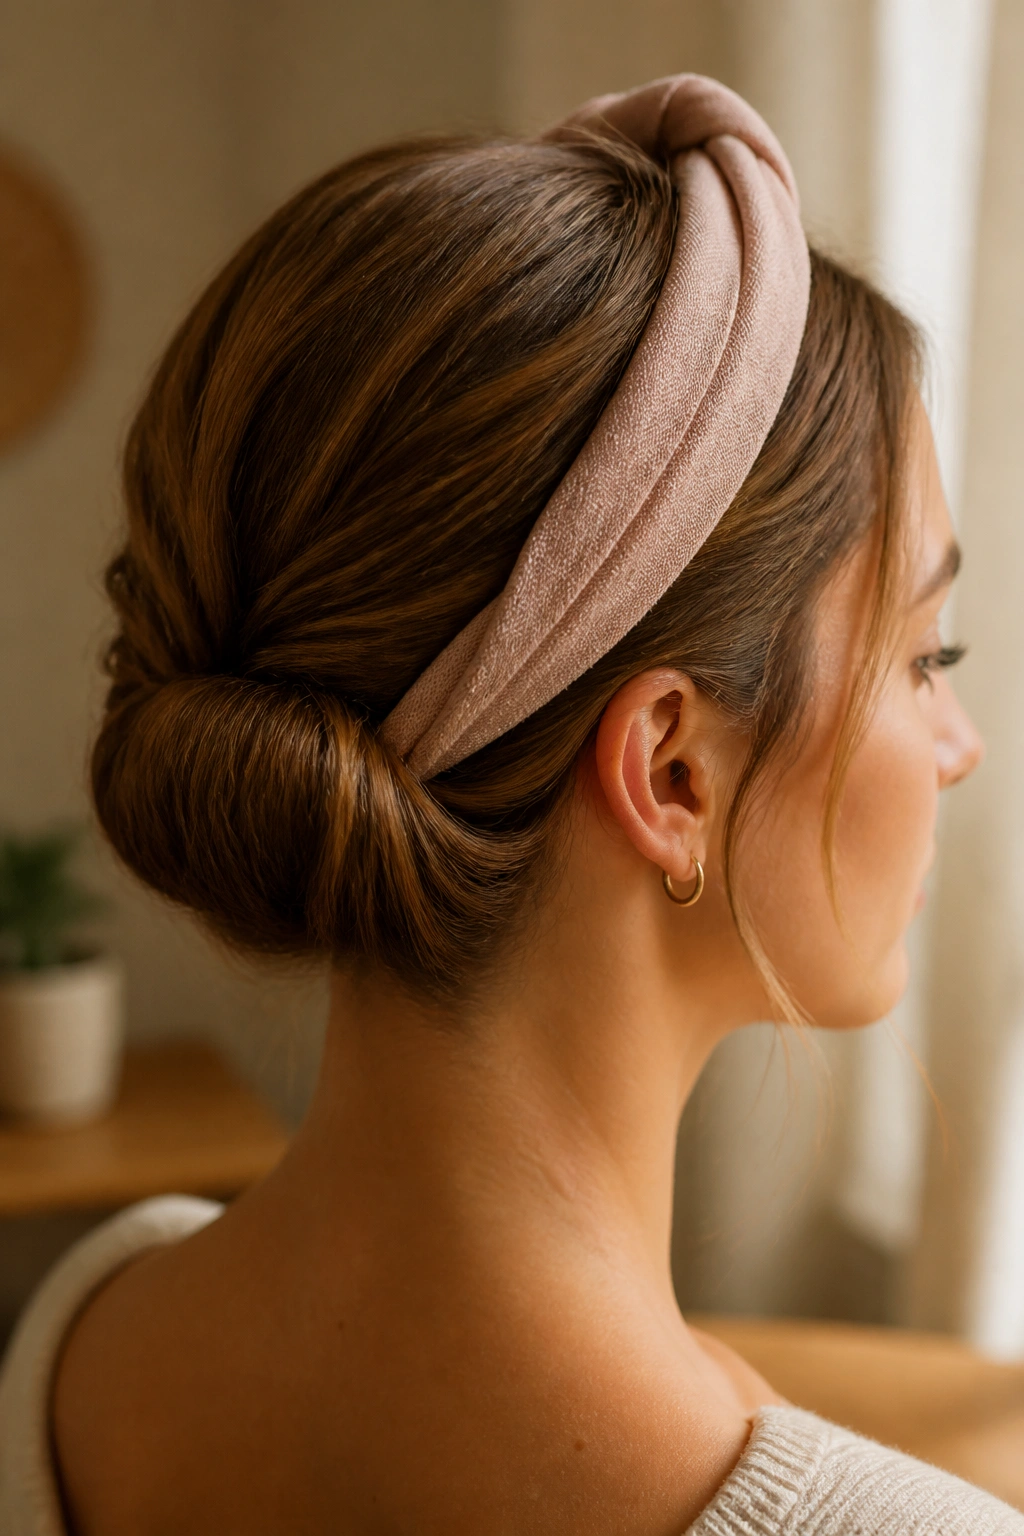
A soft headband can turn medium hair into a tidy rolled updo in a few minutes. The band gives the style shape, and the roll gives it enough height to look intentional rather than improvised.
What Makes It Stay
Place the headband over the hair, then tuck the ends of the hair upward and inward around the band until the roll runs along the back of the head. If the band is wide and slightly stretchy, it will hold much better than a slick plastic one. Fabric bands are easier on the scalp, too.
- Best for hair that is shoulder length or just below
- Works well with a bit of wave
- Needs 1 headband and 3 to 5 pins
- Easier to do on second-day hair
A few loose pieces around the ears can soften the look. If you want it more secure, pin the roll at each side before you tuck the center. That keeps the band from sliding up later, which is the usual problem with this style.
14. The Sleek Middle-Part Low Bun
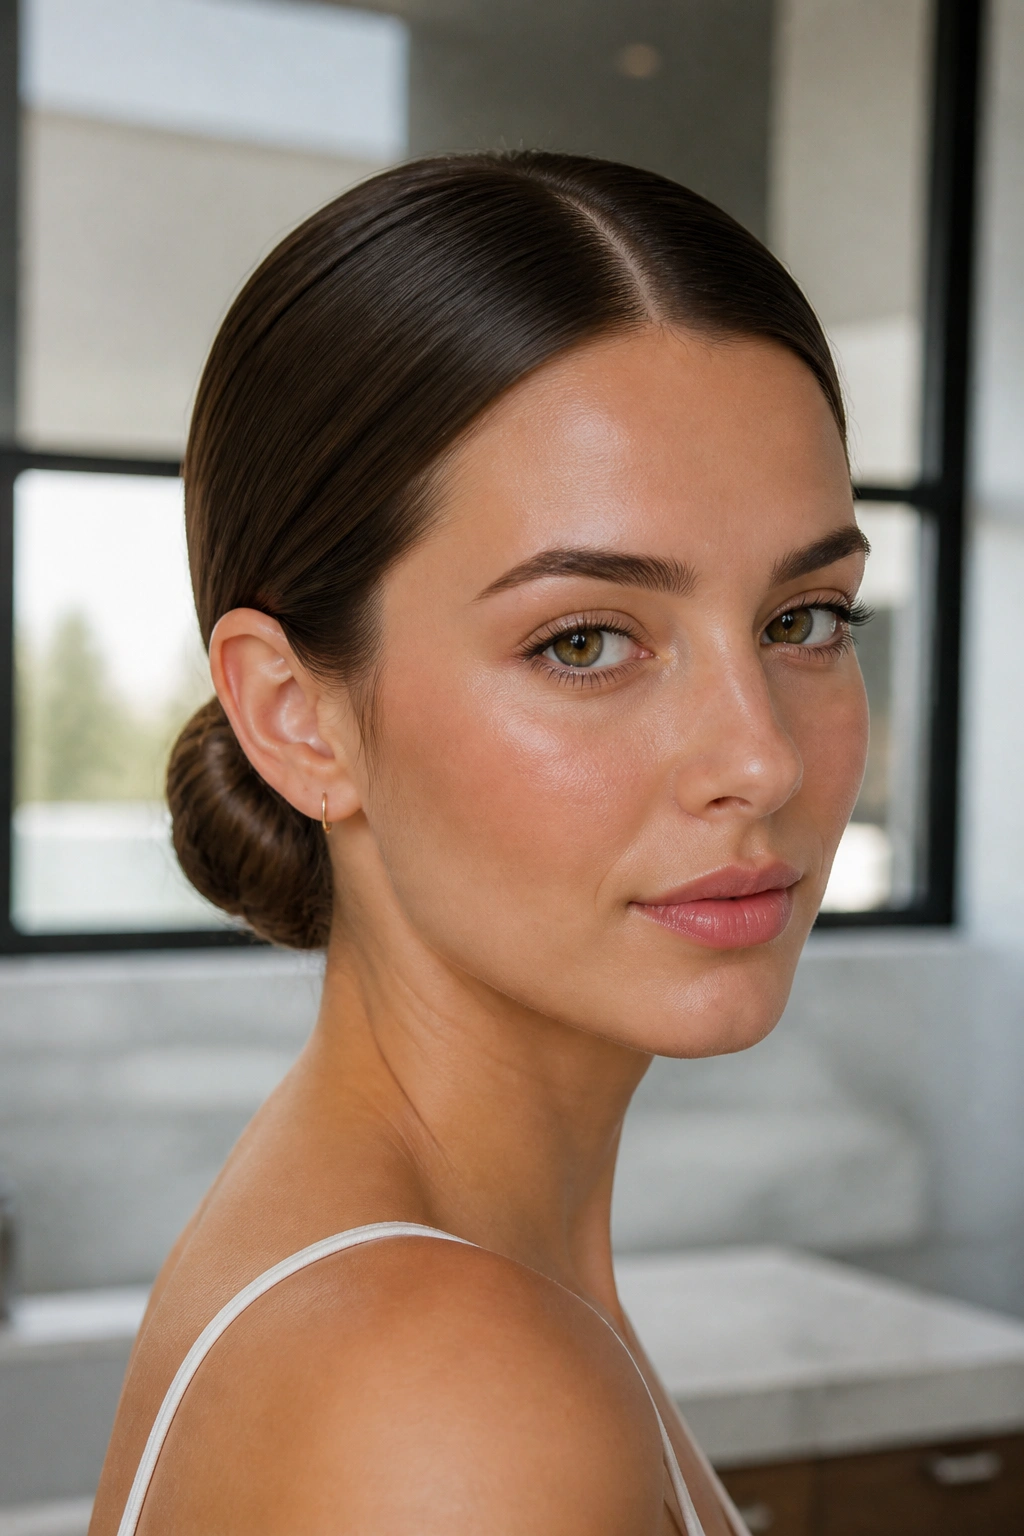
A sleek low bun looks simple because it is simple, but that does not mean it is boring. On medium length hair, the center part and low placement make the style feel crisp without needing much length.
Brush the hair flat, smooth a tiny amount of gel or pomade over the top layer only, and gather everything low at the nape. Then twist or coil the tail into a neat bun and secure it tightly. The key is restraint. Too much product on the ends makes the bun look greasy, and too much volume at the crown ruins the clean line.
This style works especially well when the hair has one or two shorter layers around the face. A center part lets those pieces frame the face instead of fighting the bun. If the part looks slightly uneven, fix it before you pull the hair back. Once the bun is in place, the part is much harder to correct.
A little shine is good here. Wet-looking is not.
15. Double Twist Ponytail Updo
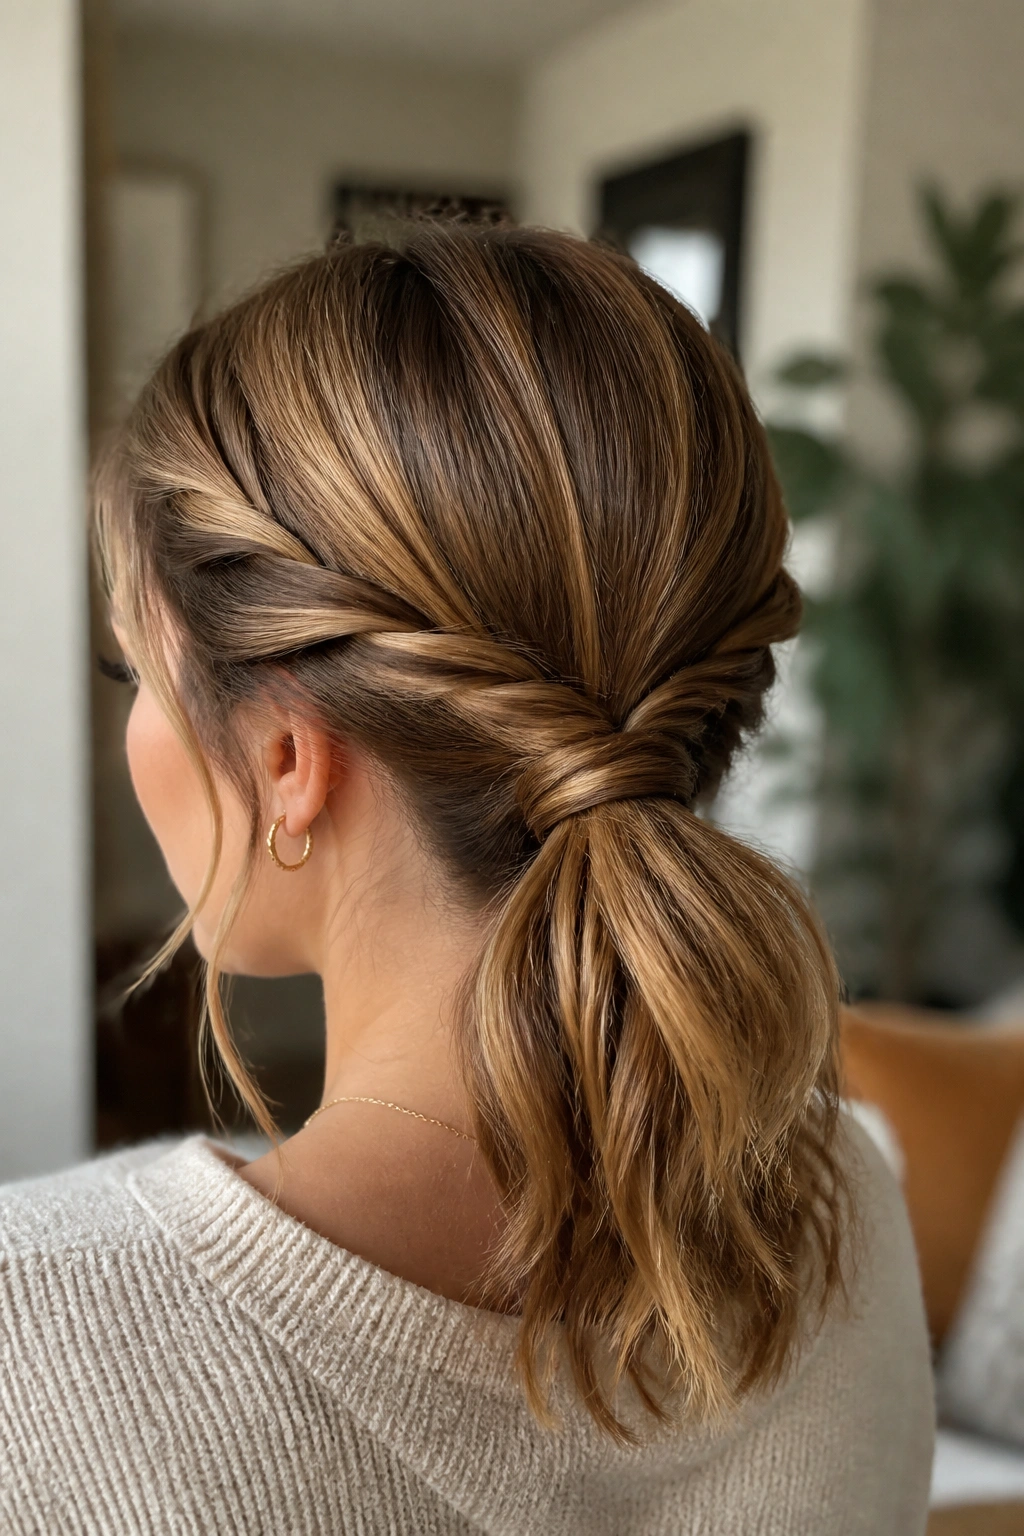
How do two twists beat one? They spread the bulk out, which matters a lot when medium hair is too short for a long wrap but too long to stay flat.
Split the hair into two back sections, twist each one toward the center, and join them into a low ponytail or small bun at the base. Then wrap the combined tail around itself if you want a fuller shape. This style works because the twists pull the hair inward from both sides, so the ends hide more easily.
How to Get the Most From It
Use a rat-tail comb to section the hair cleanly. The cleaner the parting, the neater the final shape. If your hair is layered, twist the sections a little tighter before joining them so the shorter pieces stay tucked.
This one is fast, and that matters. It is the kind of style you can do without staring into the mirror for ten minutes, which is more useful than people admit.
16. The Fishtail Wrap Bun
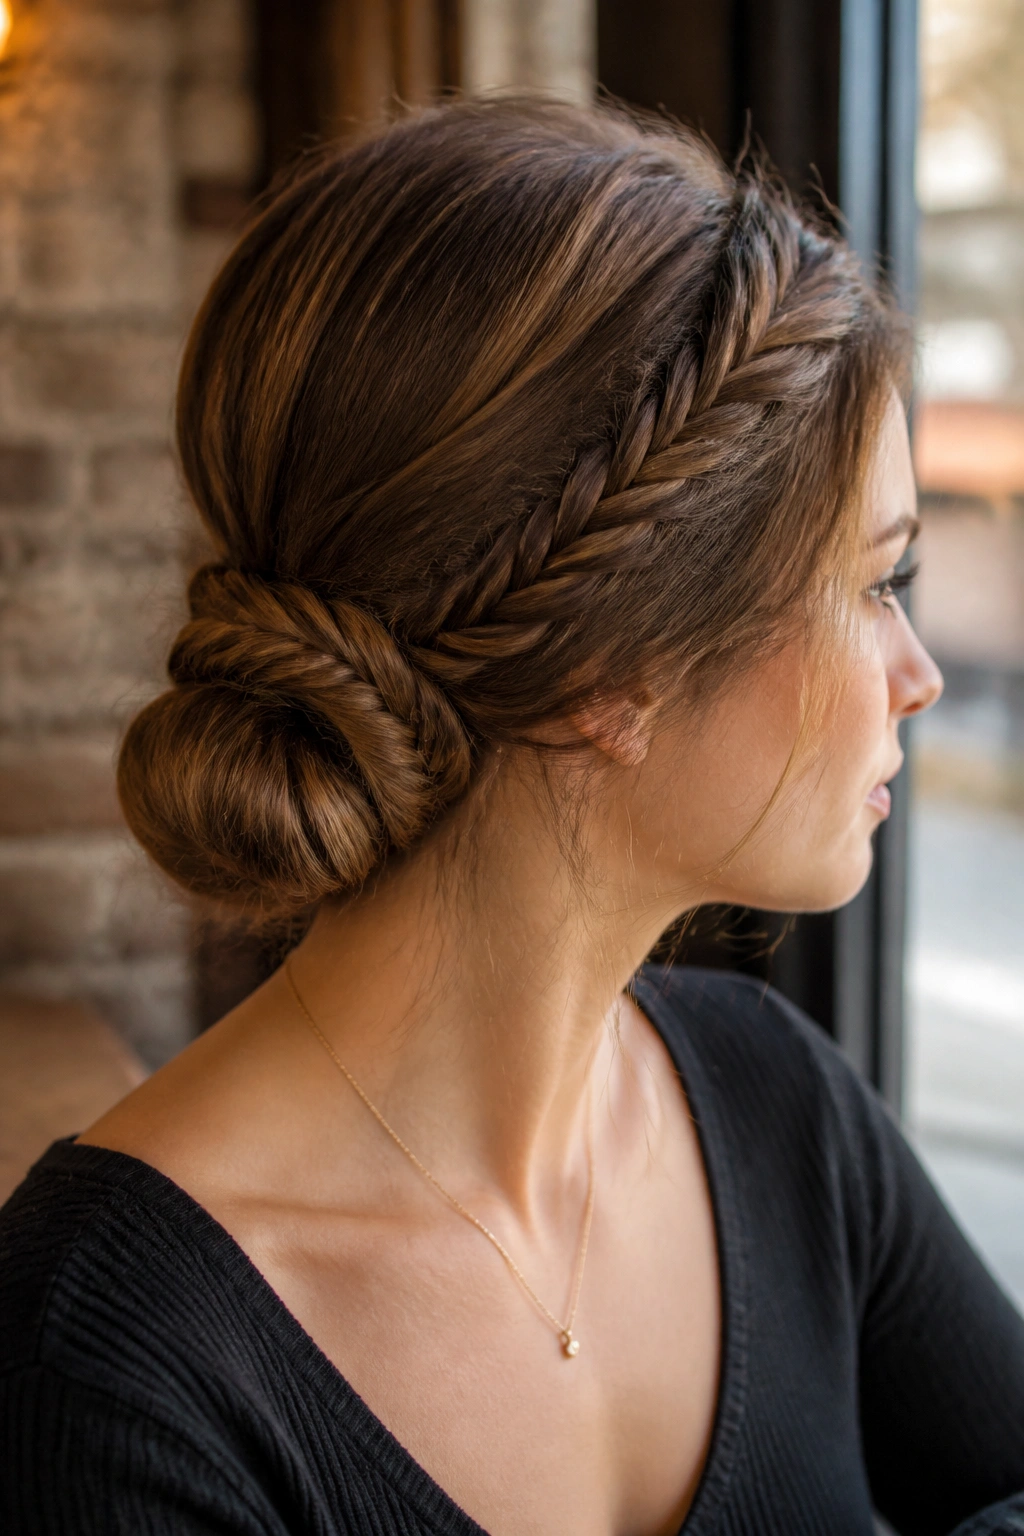
A fishtail braid gives a wrap bun a nicer edge than a plain braid does. It looks a touch more detailed, but the process is still manageable on medium length hair, especially if the braid only needs to go halfway before turning into a bun.
Start with a low ponytail, fishtail braid the tail, then wrap the braid around the base and pin it in place. Once the bun is secure, gently pull on the braid’s outer edges to widen it. That makes the bun look fuller without adding any extra hair. If your ends are short, tuck them under the bun before you start pinning. Short ends can stick out fast if you leave them for the end.
- Best for medium hair with some natural wave
- Needs 4 to 6 pins, depending on thickness
- Works nicely with a side part or center part
- Holds better if the ponytail base is slightly teased
A fishtail is not the fastest option on this list, but it does have a nicer finish than most simple wraps.
17. Mini Braided Crown Half-Up
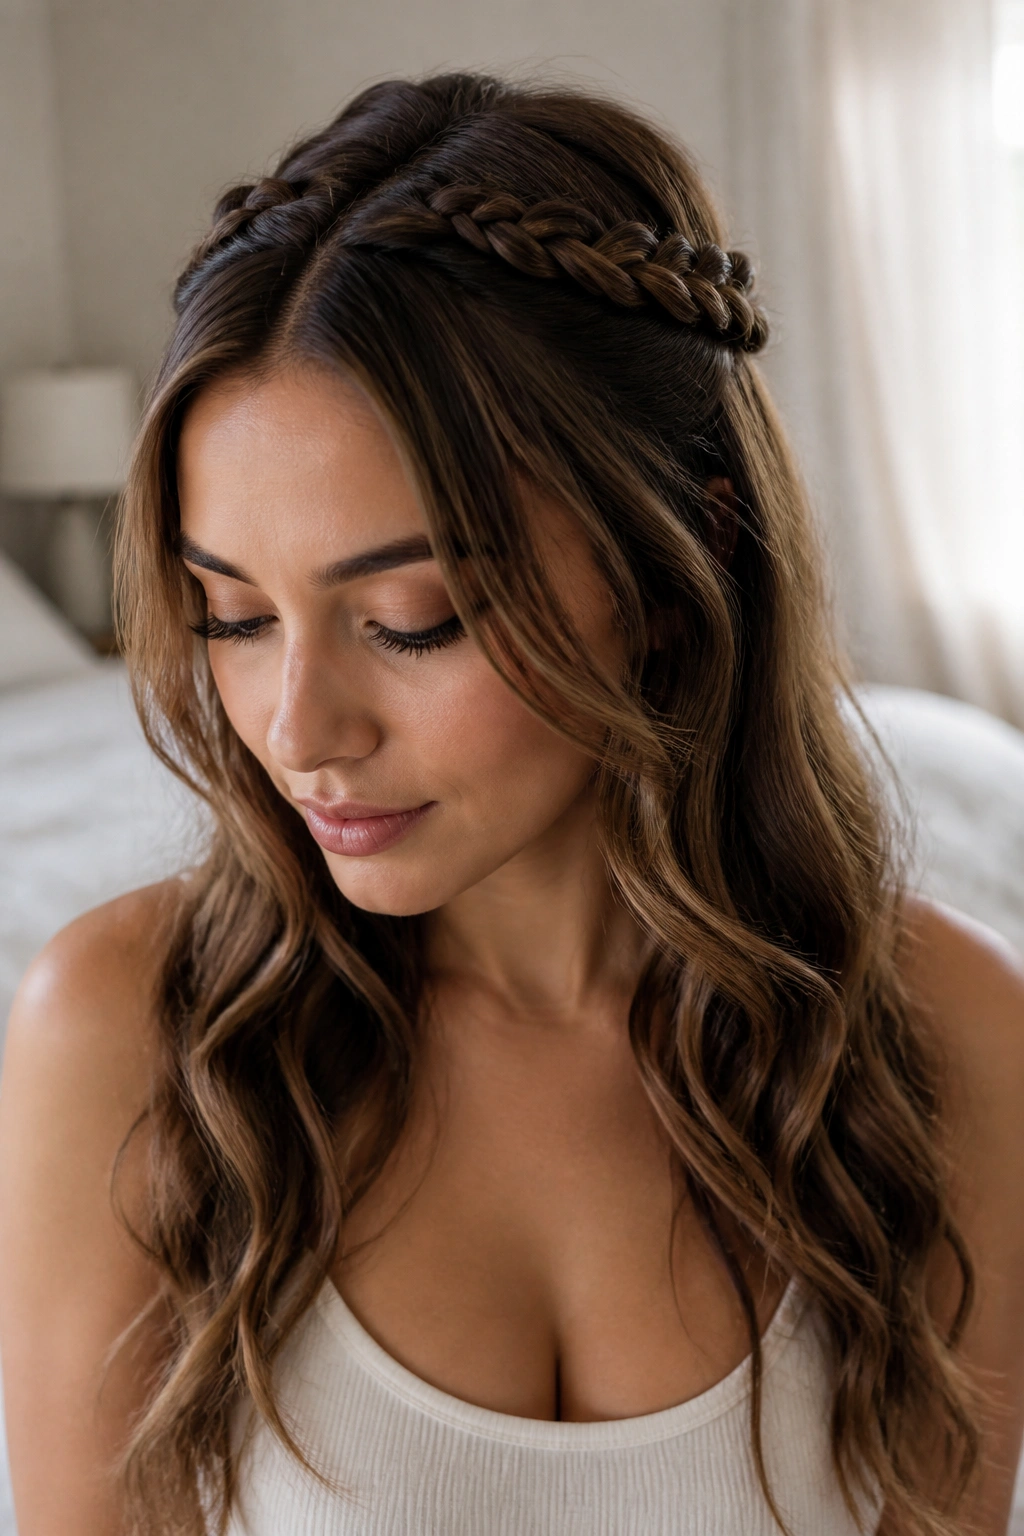
A mini braided crown is the middle ground between a full crown braid and a plain half-up style. That is why it works so well on medium hair. You get detail across the top without having to braid all the way around the head.
Take two small sections from each temple, braid them back toward the crown, and pin them together at the back. The rest of the hair can hang down in waves, straight lengths, or soft bends. The braids create a little frame around the face and hold the front layers out of your eyes, which is the practical part most people care about.
This style is one of the easiest ways to hide growing bangs or shorter face-framing layers. It also sits well under a hat or coat collar, which sounds unglamorous but matters if you wear your hair up because it keeps getting caught.
The whole look depends on keeping the braids slim. Thick braids can overpower medium length hair fast.
18. Low Knot With Face-Framing Pieces
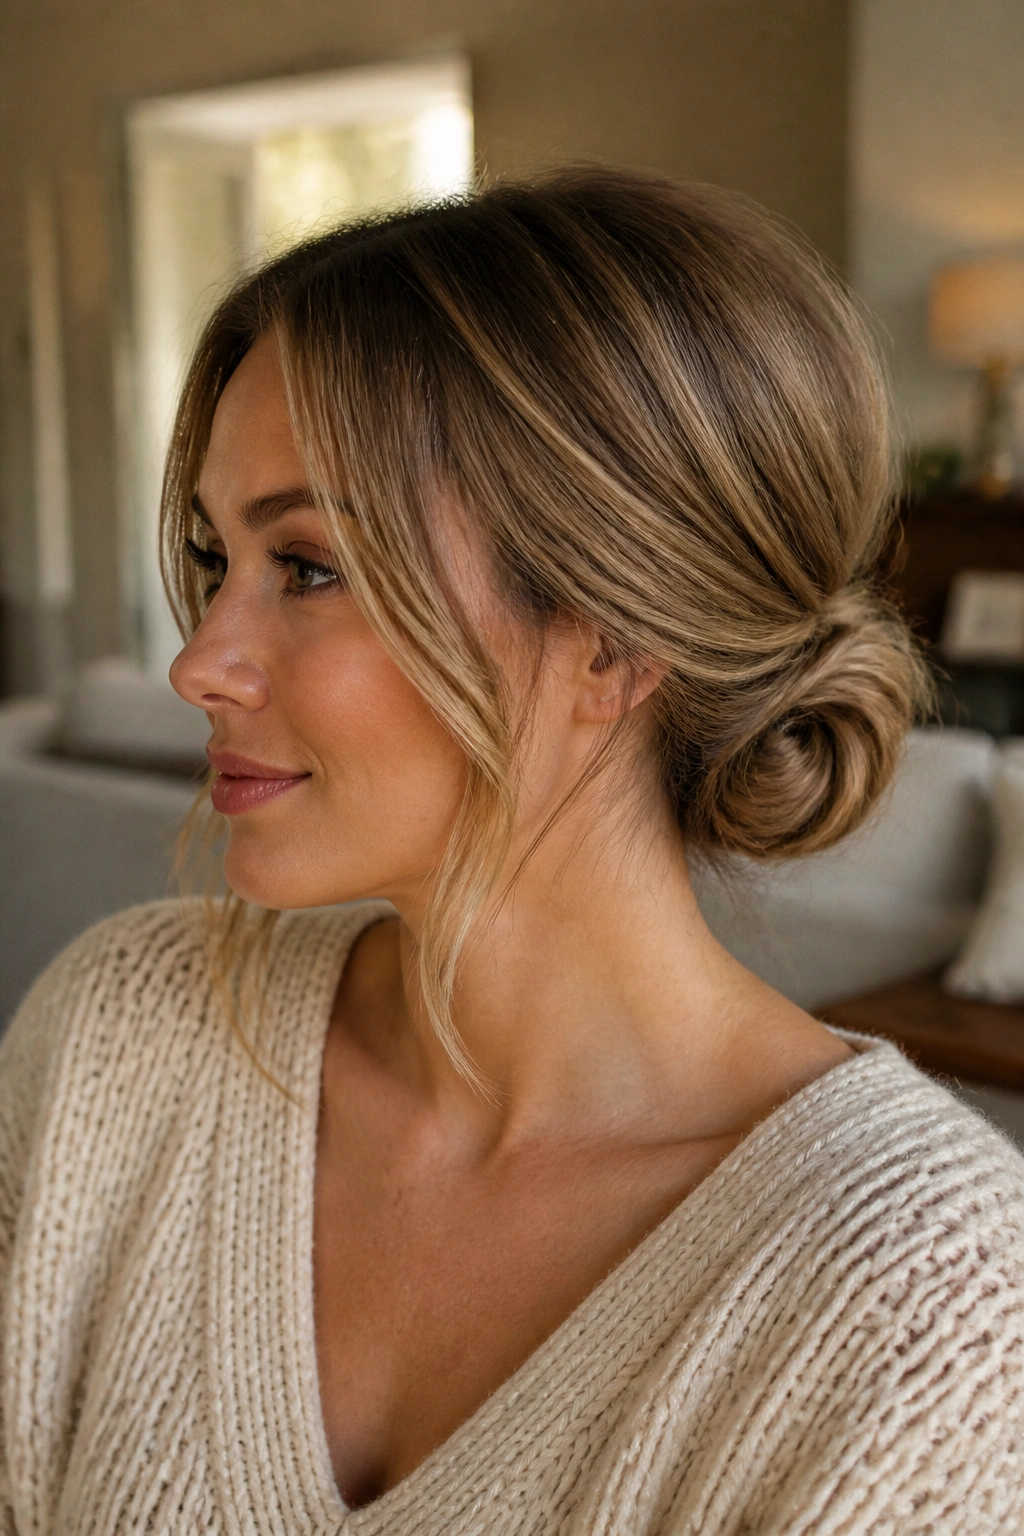
Unlike the polished low bun, this version is all about softness. It keeps the structure at the nape but leaves enough movement around the face that the whole style feels relaxed instead of strict.
Gather the hair into a low knot, but stop before every strand is smoothed away. Pull out a thin piece on each side of the face, then maybe a second smaller piece if your cut is layered. The knot itself can be flat or slightly twisted; both work. What matters is that the hairline stays soft and the bun does not sit too tight against the head.
This is a very good choice for medium hair because it hides the places where the hair runs out of length. Face-framing pieces also distract from pins, which means you can use a practical number of them without worrying too much about neatness.
Wear it with a sweater, a dress, or a button-down shirt. It adapts easily.
19. The Curly Pinned Updo
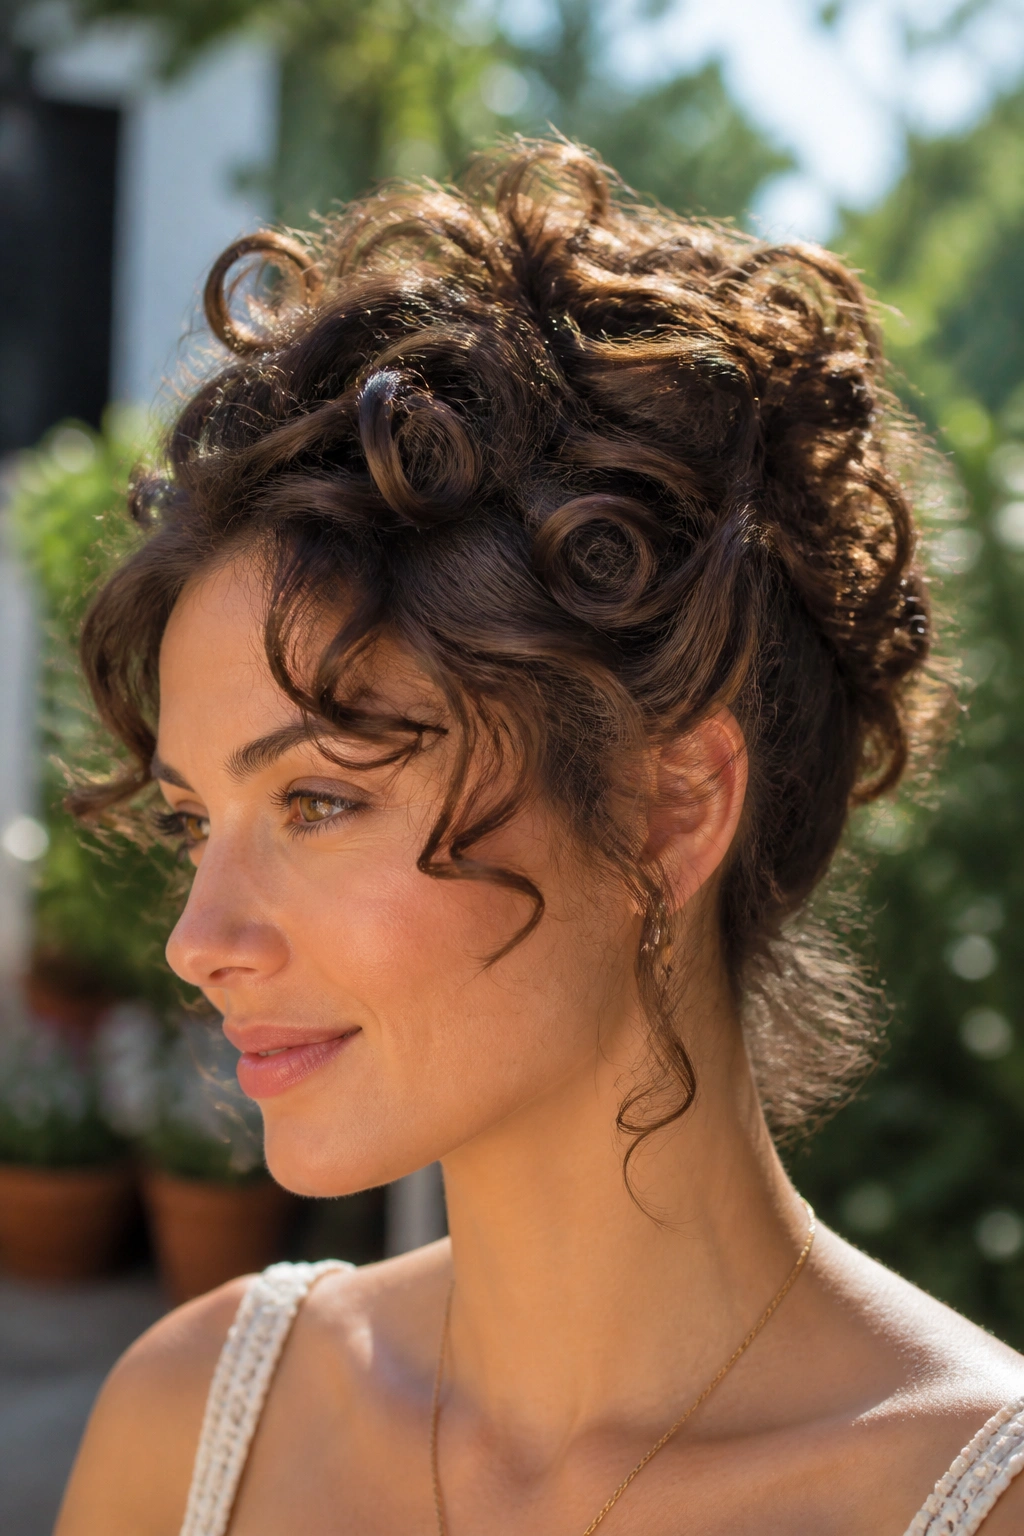
Curly medium-length hair has a head start on any updo because the texture gives the pins something to grab. The mistake is trying to brush that texture away. Don’t. You will only fight the shape and flatten the good parts.
Why It Works on Curly Hair
Work with the curls in sections, pinning them upward and inward at the nape while leaving some ringlets loose around the temples or crown. If the curls are dense, pin the lower half first, then tuck the upper half over it. That layering keeps the style from looking bulky in one spot.
- Best on defined curls or soft coils
- Needs 6 to 10 pins, sometimes more
- Holds better if the hair is dry and not freshly conditioned
- Looks nicer when a few curls are left out on purpose
Use your fingers, not a brush, to separate the curls before pinning. A brush can turn the style into a puff. Finger-shaping keeps the curl pattern visible and makes the final updo feel deliberate.
20. The Five-Pin Emergency Updo
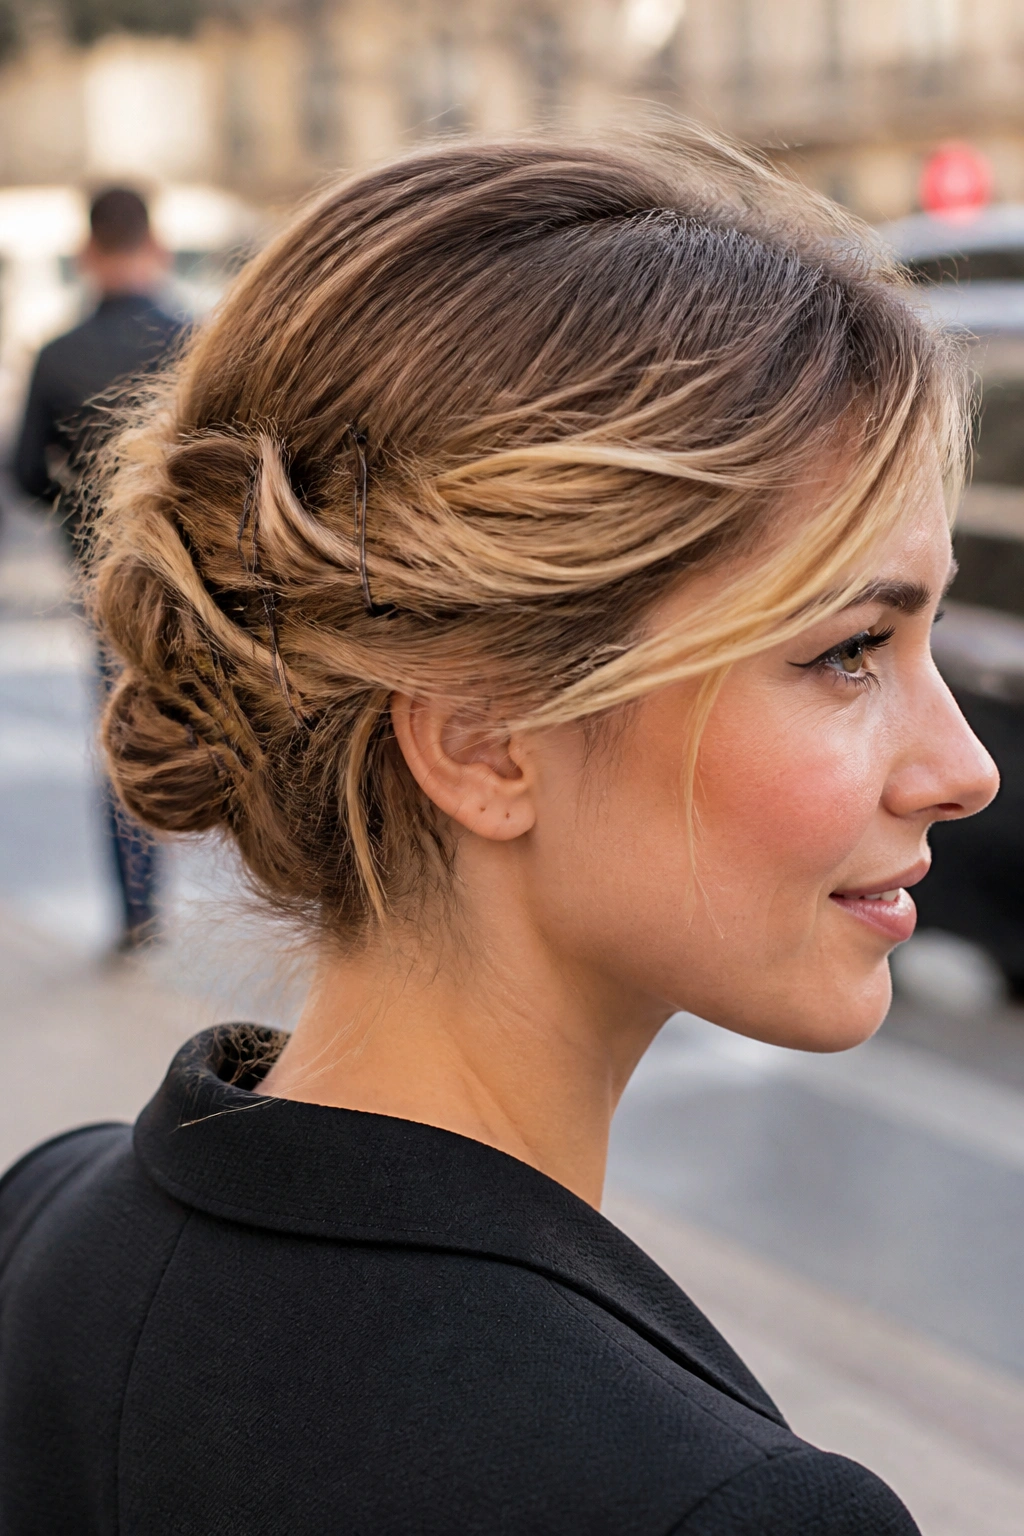
Some styles need a whole kit. This one does not. If you have medium length hair, five strong bobby pins can get you out the door with a style that looks more planned than it really was.
Gather the hair low, twist it once, fold the ends under, then pin the shape in five places: one at each side, one at the base, and two to lock the twist in the middle. That is usually enough if the hair has a little texture. Freshly washed hair may need a sixth pin, maybe seven if it is slippery. The point is not perfection. It is a clean silhouette that holds while you get on with your day.
This is the style to remember when your hair has already slipped out twice and you are done negotiating with it. A little grit at the roots, a few pins, and a compact twist can do more than a complicated updo that looks pretty for twelve minutes.
Clean lines are nice. So is a style that survives a commute, a windy sidewalk, and one more cup of coffee.
