



There is a specific kind of frustration that comes with standing in front of a bathroom mirror at 7:30 a.m., staring at hair that refuses to cooperate. You have a meeting in an hour, or perhaps a long day of lectures, and the last thing you have time for is a complex blowout or an intricate updo that requires twenty bobby pins and half a bottle of hairspray. This is exactly where the low ponytail shines. It is the reliable, understated workhorse of the hairstyling world.
We often overlook the low pony because it feels simple, maybe even a bit boring if you stick to the same elastic-and-go method every day. But with a few tweaks, a different part, or a subtle texture change, it becomes something far more intentional. It is clean, professional, and entirely functional for the grind of the daily routine. You do not need a salon appointment to look put-together. You just need to know how to manipulate your hair into something that feels deliberate rather than accidental.
Let’s look at how to elevate this staple style so that it works as hard as you do, whether you are heading into a boardroom or a classroom.
1. The Sleek Center-Parted Low Pony
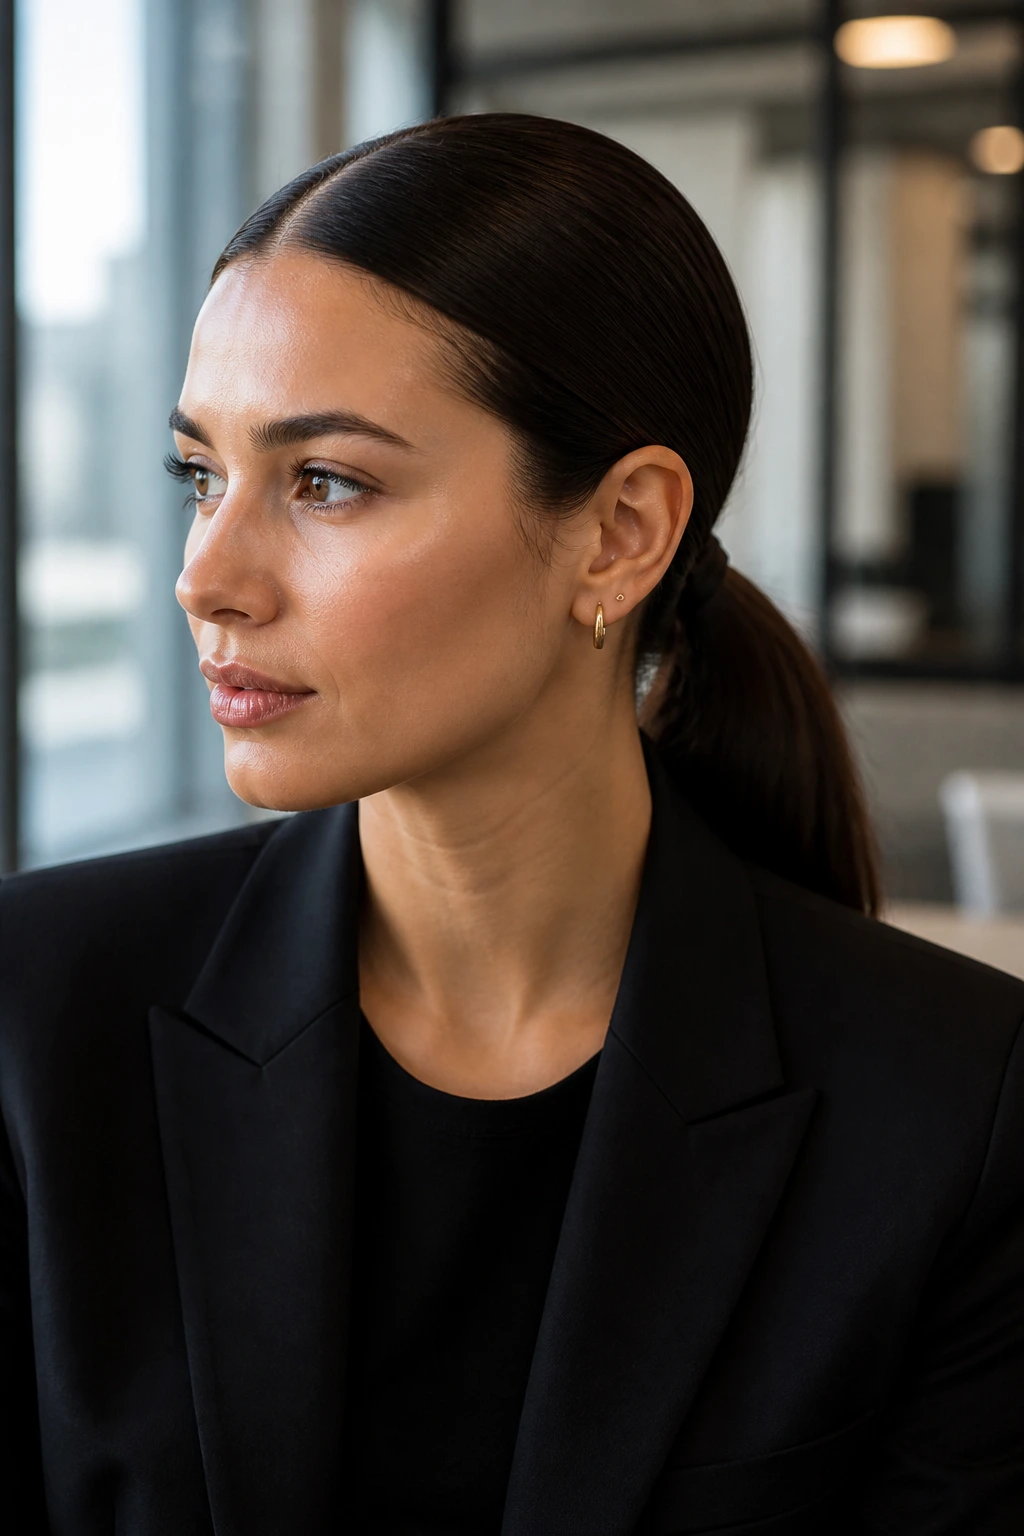
This style screams minimalism and sharp focus. By pulling your hair into a strict center part and gathering it low at the nape of the neck, you create a look that feels architectural and incredibly polished. It works best on hair that has been straightened or is naturally smooth, as any flyaways here will be quite noticeable.
Achieving the Look
Start by using a rattail comb to create a razor-sharp part from your forehead back to the crown. If you struggle with parts that want to wander, use a tiny amount of styling cream or a pomade on your fingertips to press the hair into place. Gather the hair low, secure it with a snag-free hair tie, and then take a small section of hair from the underside of the pony. Wrap that piece around the elastic to hide it, pinning the end securely with a bobby pin that matches your hair color.
Why This Style Works for Work
There is zero distraction with this hairstyle. It keeps your hair completely out of your eyes and face, allowing you to focus entirely on your work. It is the go-to choice for days when you need to convey authority and precision. A quick mist of flexible-hold hairspray is all you need to keep it looking perfect until the evening commute.
2. The Textured Messy Low Pony

If the sleek, parted look feels too severe, the textured messy pony is your best friend. This style is forgiving. It does not require perfect hair, and in fact, it often looks better on second-day hair that has a bit of grit to it. It says you are capable and approachable, without looking like you spent hours primping.
Adding Volume and Grip
The secret here is texture spray or dry shampoo. Spray it liberally through your roots and mid-lengths before you even think about grabbing an elastic. Use your fingers to rake your hair back rather than a brush; you want the natural bumps and valleys that your hands create. Gather the hair loosely at the nape, leaving a few tendrils around the ears to soften the perimeter.
A Note on Hardware
Avoid heavy, embellished hair ties for this style. You want something subtle that blends in. A clear plastic coil or a thin, fabric-covered elastic works well because the focus should be on the movement and volume of your hair, not the accessory holding it together. If your hair is very fine, tease the base of the ponytail slightly before securing it to create a bit of internal structure.
3. The Wrapped-Base Ponytail
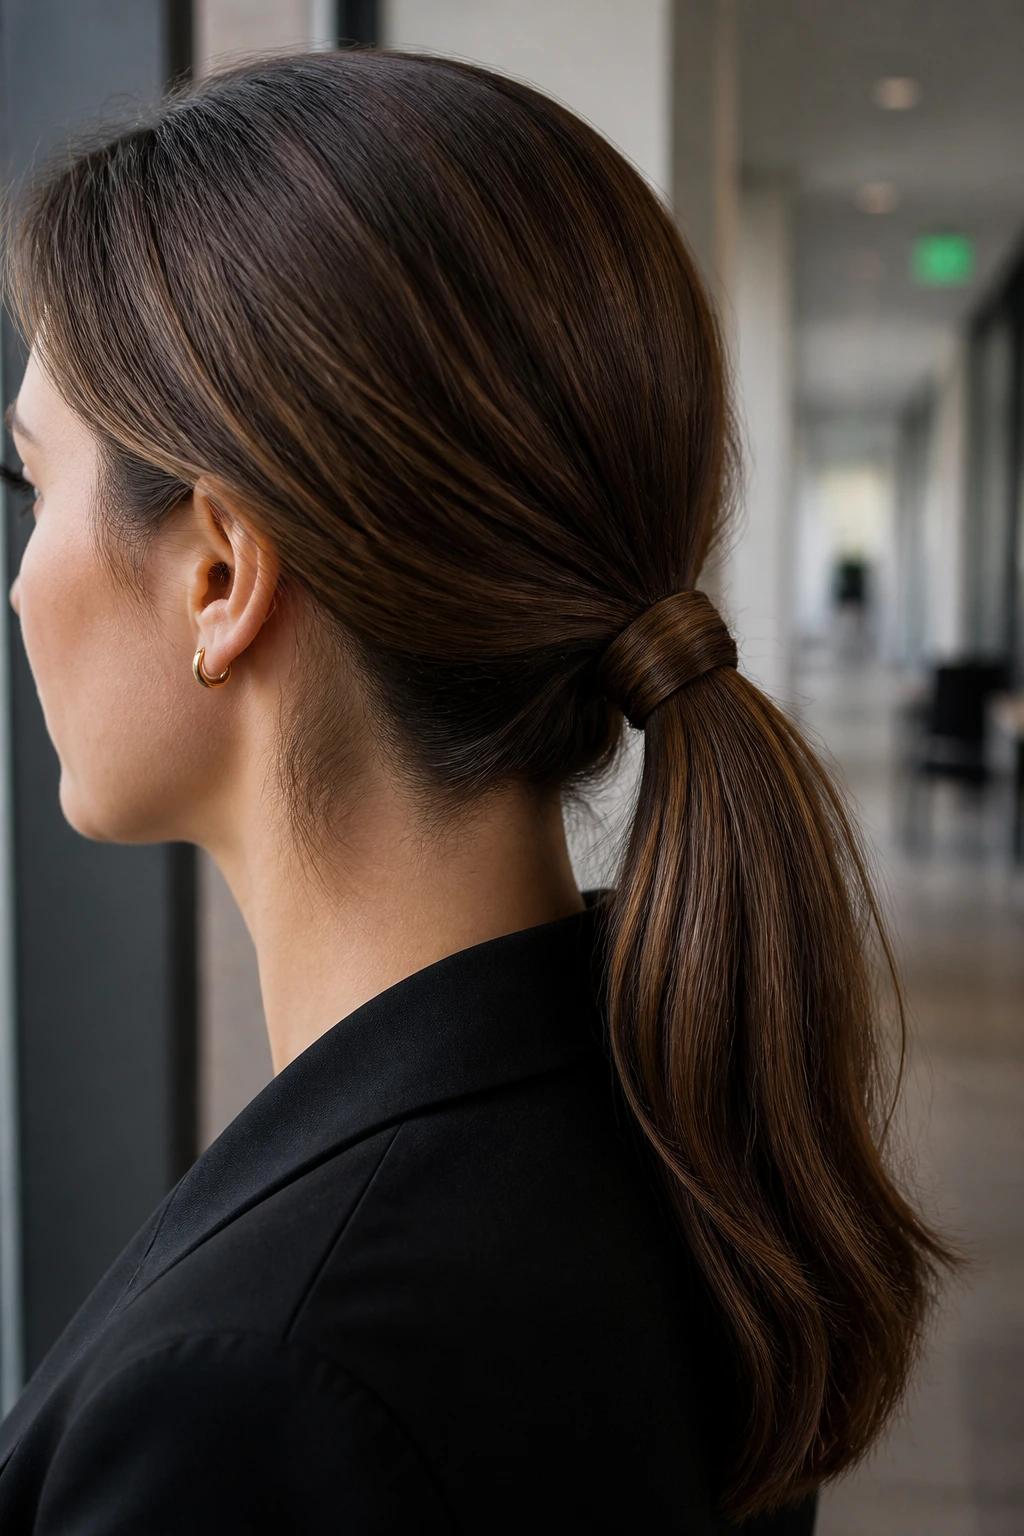
Sometimes, the difference between a “gym ponytail” and a “work ponytail” is just one small detail. Wrapping the base of your ponytail is that detail. It hides the utilitarian hair tie and makes the style look finished and intentional. It is a subtle technique that pays massive dividends in how professional you look.
The Wrapping Technique
After you secure your ponytail with a standard elastic, pull out a small strand of hair—about half an inch thick—from the underside of the pony. Wrap this strand tightly around the base, spiraling it until you reach the very end. Tuck the end of the strand into the elastic to secure it, or use a small, discreet bobby pin to anchor it underneath.
Why It Matters
This small, thirty-second step changes the silhouette of your style. It elevates the ponytail from a practical necessity to a styled look. You can do this with any ponytail, whether it is high or low, but it looks particularly sophisticated at the nape of the neck. It draws the eye to the smooth gathering of the hair, making the entire style feel like a deliberate choice rather than a rush job.
4. The Twisted Side Low Pony
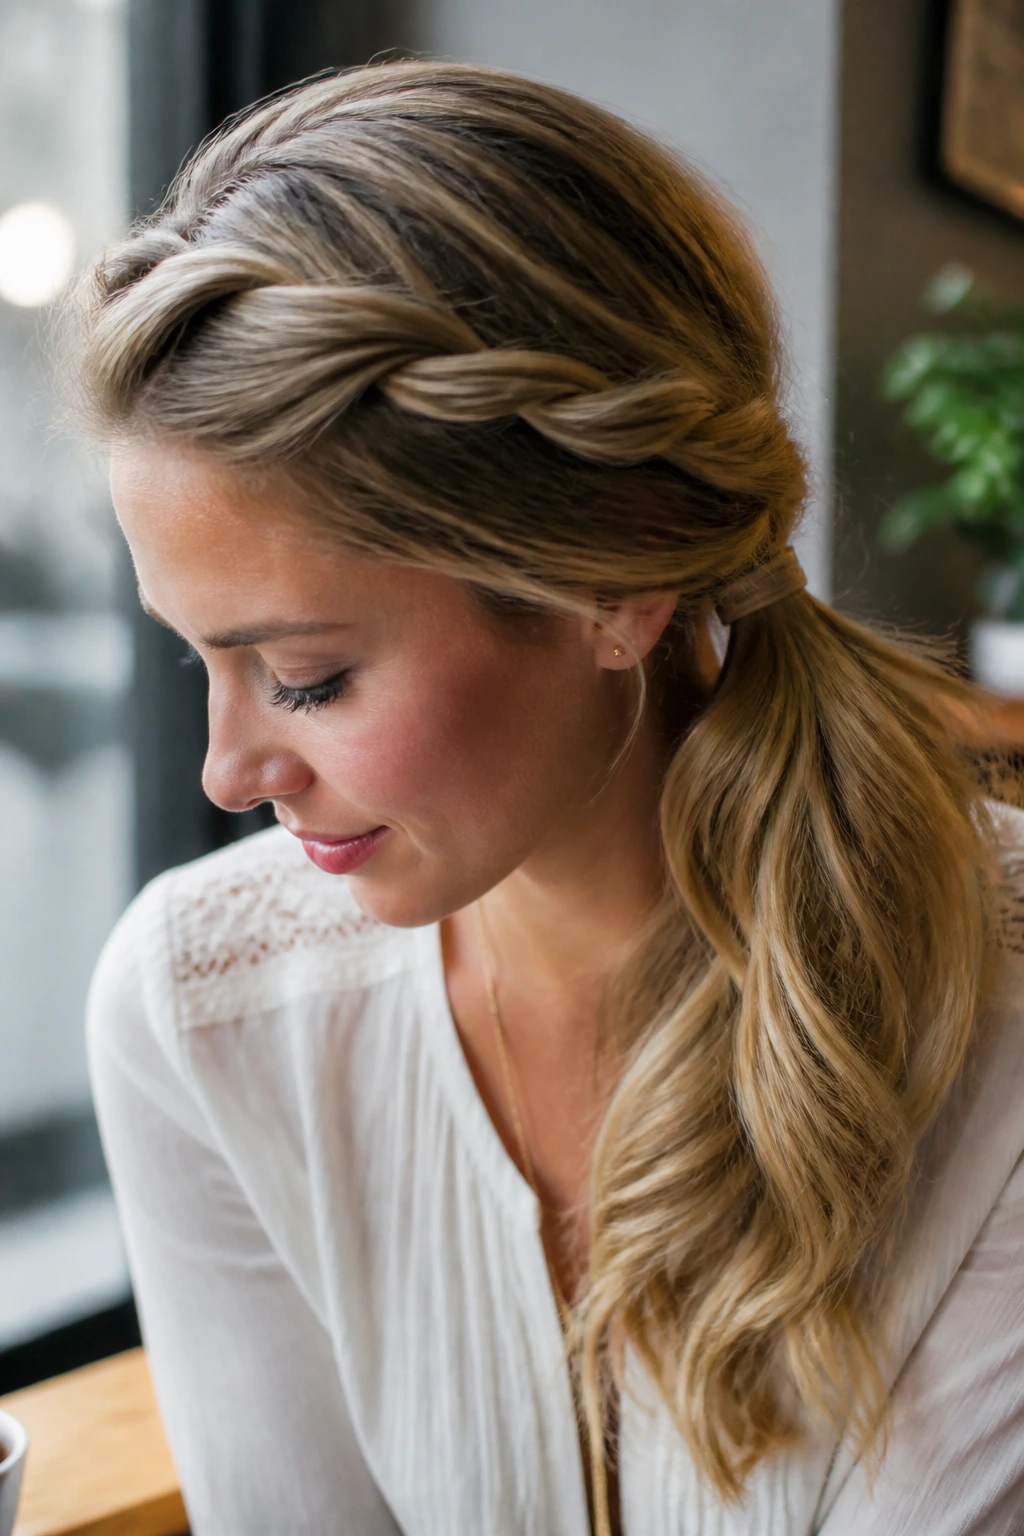
If you want something that feels a bit more feminine and soft, moving the ponytail to the side is a great way to change the geometry of your look. By adding a twist to the side, you introduce texture and interest that makes the style look much more complex than it actually is.
How to Execute the Twist
Part your hair to one side, then gather the hair towards the opposite side of your neck. Before securing the pony, take two small sections from the front—near your hairline—and twist them backward, incorporating them into the base as you gather the rest of the hair. This keeps the hair off your face while adding a touch of detailing that frames your features beautifully.
Best Hair Types for This Style
This style excels on wavy or curly hair. The twists blend seamlessly into the texture, and the side placement allows your natural pattern to cascade over one shoulder. If you have stick-straight hair, you might want to add a quick wave with a curling iron before you begin, or use a texturizing paste to give your hair enough grip so the twists do not unravel throughout the day.
5. The Braided-Detail Ponytail
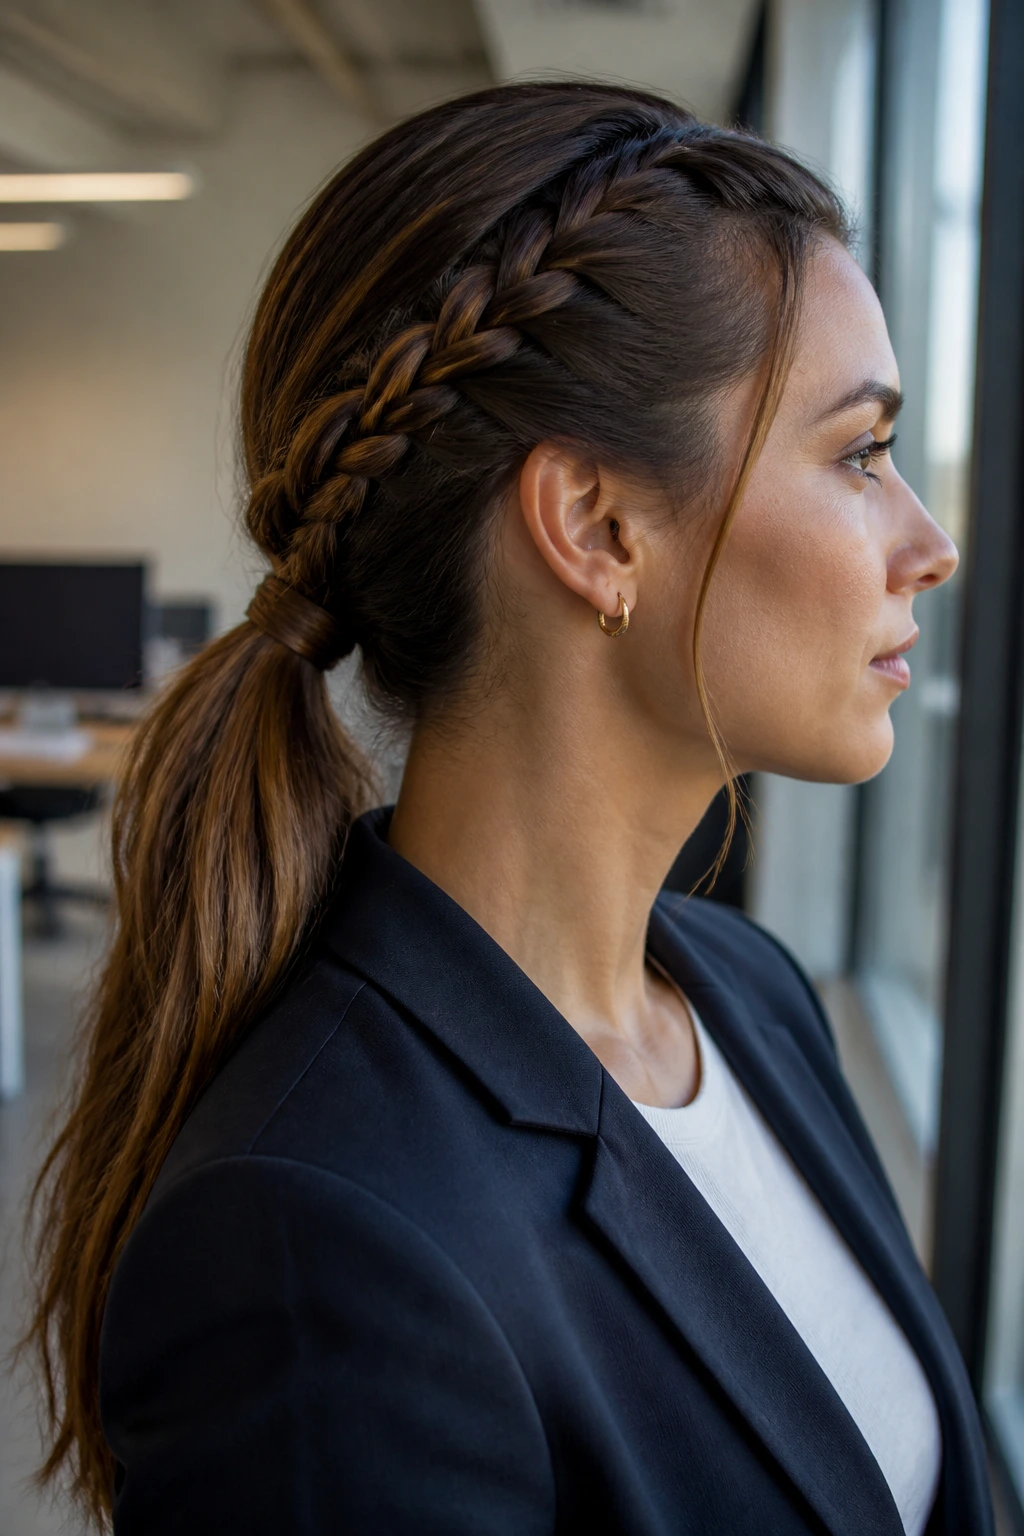
Braids are fantastic for keeping layers contained, especially for those of us who have bangs or shorter face-framing pieces that usually fall into our eyes. Integrating a braid into your low ponytail is a functional and aesthetic win. It keeps everything tight and orderly for long days at a desk.
Styles of Braids
- The Dutch Braid: This sits on top of the hair and creates a 3D effect that looks very modern.
- The French Braid: This is classic, sits flatter against the head, and offers a more subtle look.
- The Two-Strand Twist: If you are short on time, a simple twist is faster than a braid but offers the same benefit of containment.
The Assembly
Start the braid at your hairline and work it back toward the nape of your neck. Once you reach the desired spot, combine the braid with the rest of your hair and secure it all into a single low ponytail. If you have extra time, you can pull on the loops of the braid to “pancake” it, making the braid look thicker and fuller before tying everything together.
6. The Bubble Ponytail for Professional Settings
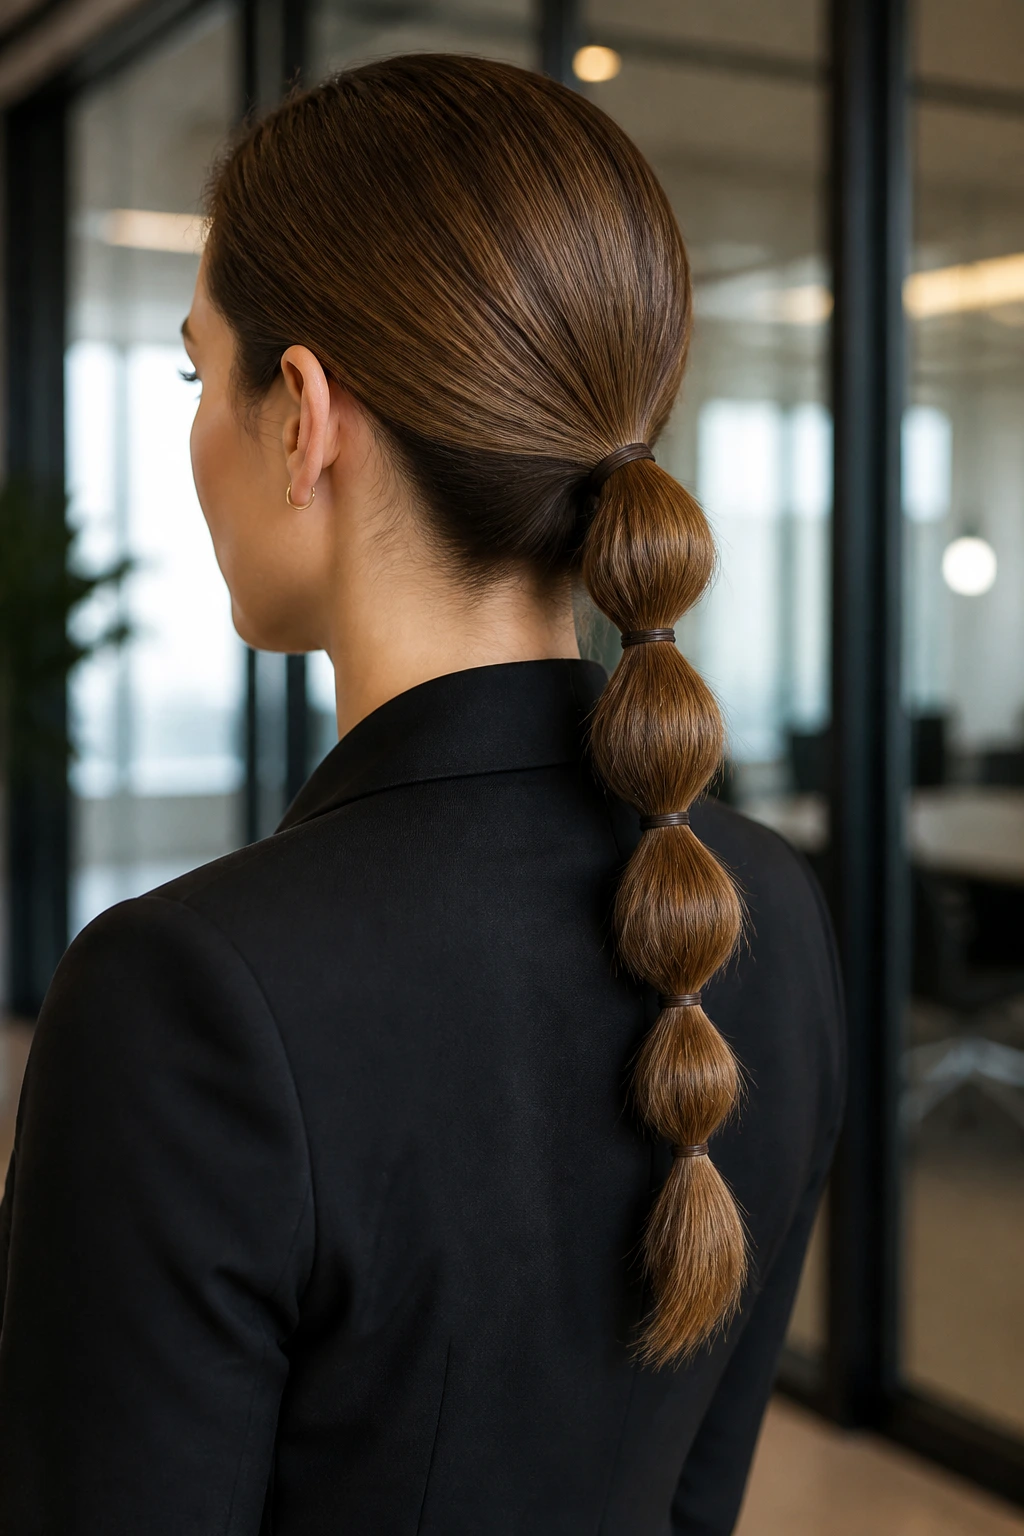
The bubble ponytail has gained a lot of traction recently, but it can look a bit youthful if not done correctly. For work, you want to keep the bubbles smaller, tighter, and more uniform. This style is excellent for hiding a lack of volume in the ponytail itself, as the sections create the illusion of thickness.
The Construction
Start with a standard low ponytail. Then, place additional small elastic bands every two or three inches down the length of the tail. Between each elastic, gently tug at the hair to puff it out into a “bubble.” The key to making this work-appropriate is to ensure the bubbles are consistent in size and to use clear, non-distracting elastics.
Managing the Bubbles
If your hair is very slippery, the bubbles might deflate throughout the day. You can prevent this by applying a light-hold hairspray or a dry texture spray to the length of the pony before you start adding the elastics. This gives the hair enough body to maintain that rounded shape rather than sagging or looking like a limp rope.
7. The Low Pony with a Silk Scarf
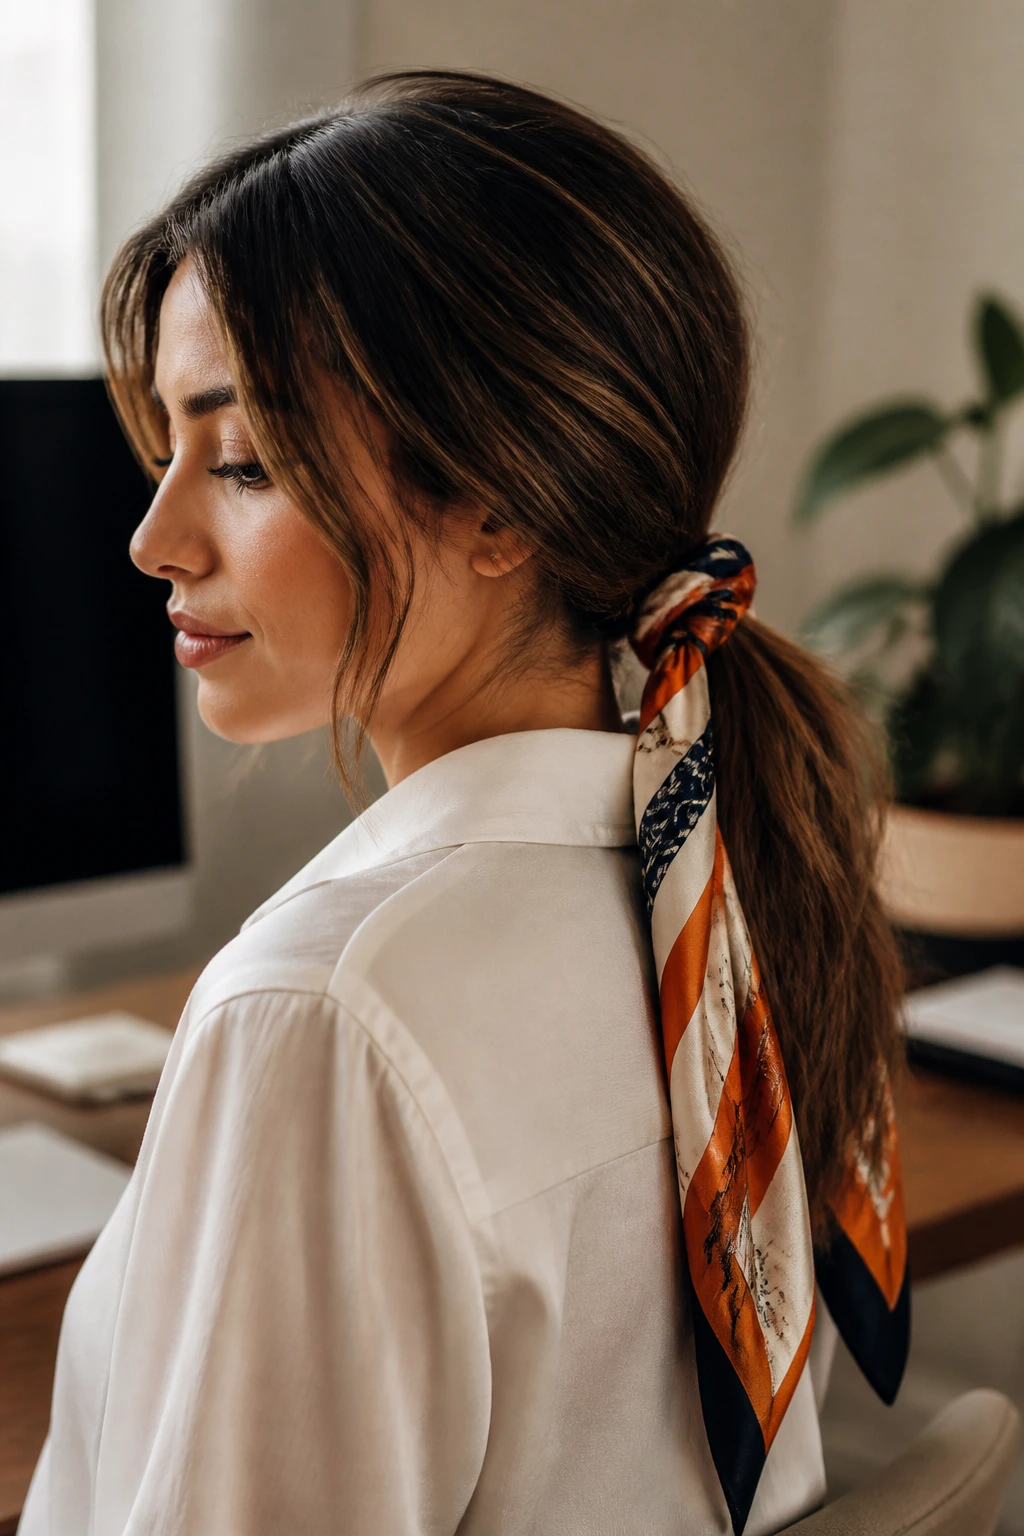
Accessories are the easiest way to make a hairstyle feel brand new. A silk scarf tied around a low ponytail instantly adds color, pattern, and a sense of refined style. It is a fantastic way to coordinate your hair with your outfit, and it takes almost zero effort to implement.
Tying the Scarf
Once your hair is secured in a low ponytail, take a long, thin silk scarf and wrap it around the elastic base. You can tie it in a simple knot, letting the ends hang long, or you can weave the ends of the scarf into the ponytail itself, braiding it in as you go. For a workday look, sticking to a knot that sits on top of the pony is usually the most manageable option.
Fabric Choice Matters
Silk is slippery, which can be both a pro and a con. It is gentle on your hair, meaning it will not cause breakage, but it can slide off if not tied securely. Look for scarves that are long enough to tie a double knot. If you find it slipping, pin the scarf to the hair tie using a bobby pin to anchor it in place before you tie your knot.
8. The Voluminous Teased Ponytail
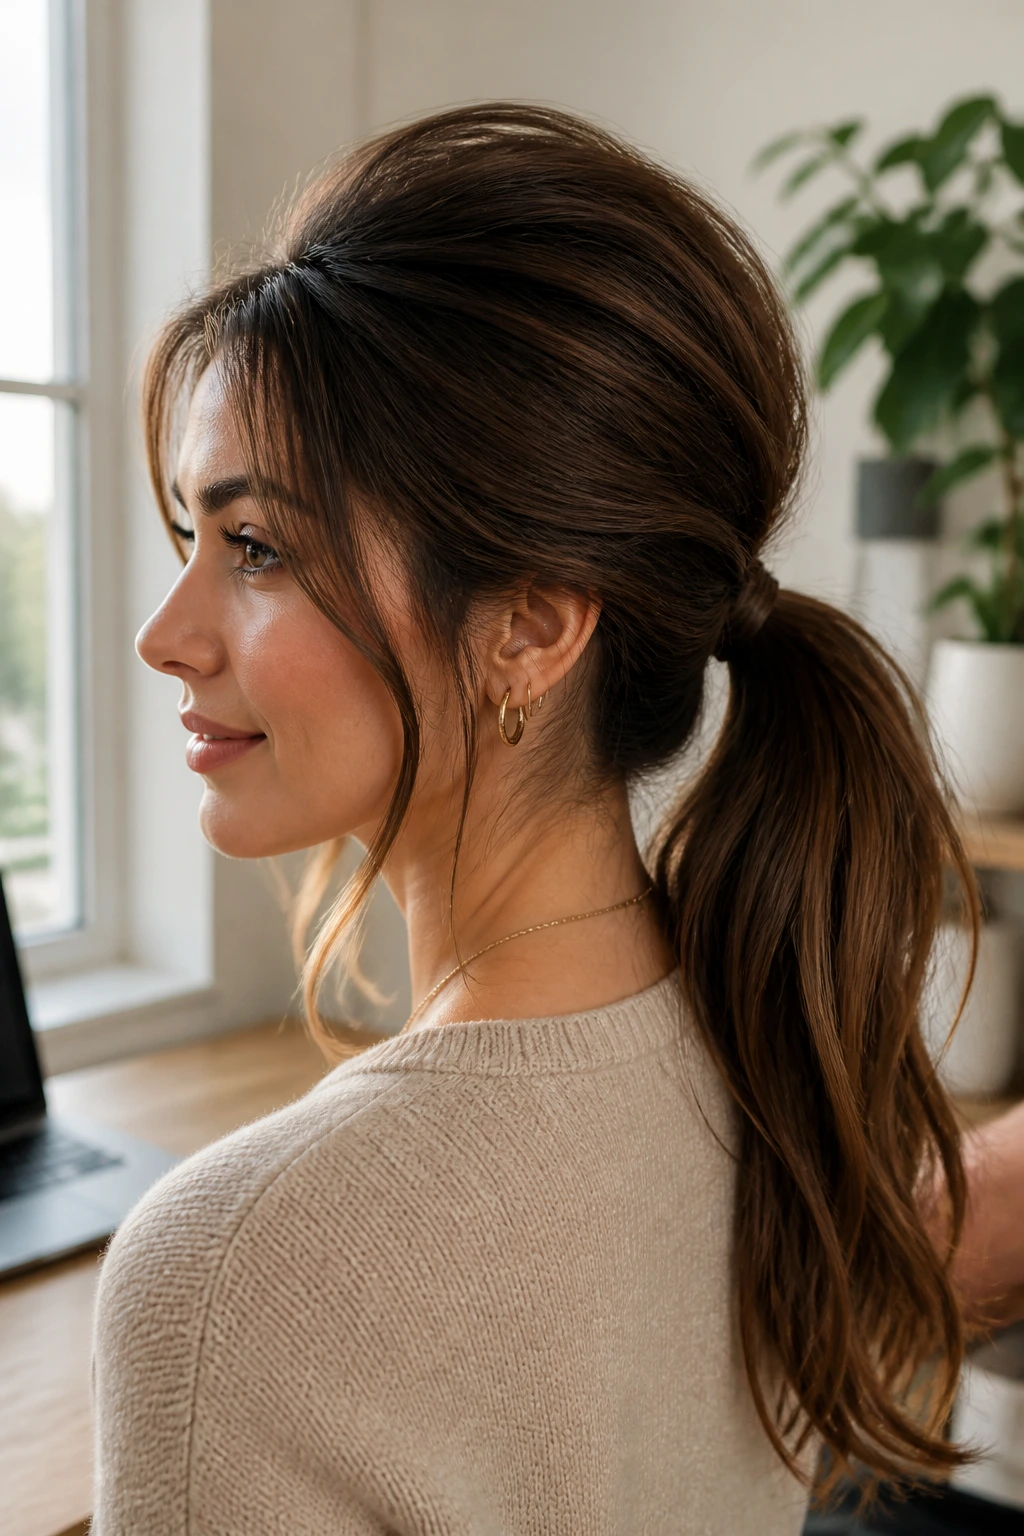
Sometimes, a flat ponytail just doesn’t feel right. If you have fine or thin hair, the low ponytail can look a bit sad if it lacks volume. The solution is to introduce some intentional teasing at the crown to lift the hair away from your scalp.
Teasing Technique
Lift a section of hair at the crown of your head. Using a fine-tooth comb, gently backcomb the hair at the roots—always push the comb down toward the scalp in short, controlled strokes. Never use a sawing motion, as that creates tangles that are a nightmare to remove. Once you have enough lift, smooth the top layer of hair over the teased section with a brush, then gather the hair into your low pony.
Maintaining the Bump
That bit of “bump” at the crown provides a nice balance to the low placement of the ponytail. It prevents your head from looking too small and adds a polished, salon-quality finish. Just be sure to set the teased section with a quick spray of light-hold hairspray before you finish the ponytail, otherwise, the volume will flatten out by lunch.
9. The Double-Knot Ponytail
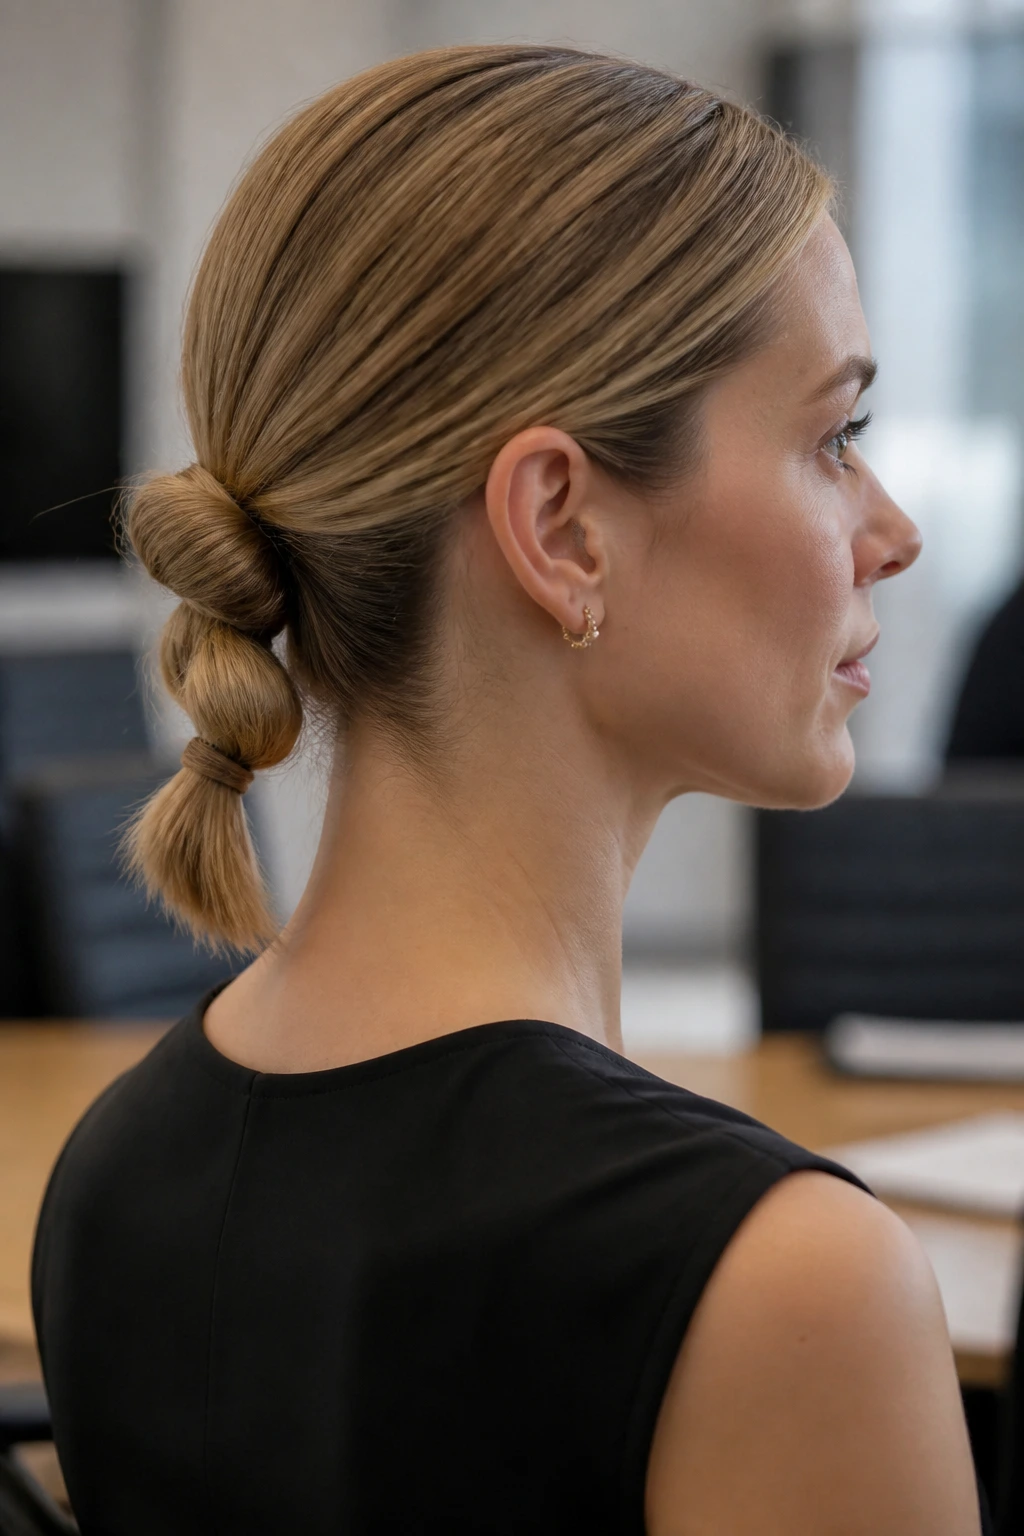
This is a structural style that looks much more complicated than it actually is. It creates a sleek, almost sculptural look that is perfect for a business-casual environment. It is essentially creating a knot out of your own hair, which keeps the ends contained and creates a unique shape.
How to Tie It
Divide your hair into two equal sections at the nape of your neck. Take the two sections and tie them together in a simple knot, just as you would with shoelaces. Tighten the knot until it sits snugly against your head. Take the remaining lengths of hair, tie them into a second knot directly below the first one, and secure the ends with a clear elastic tucked underneath the final knot.
Refining the Look
This style works best on medium-to-long hair that has some weight to it. If your hair is very layered, the ends might poke out and look messy. Use a small amount of smoothing serum or light pomade to tame those ends and tuck them into the structure of the knots. It creates a very clean, deliberate finish that looks high-end.
10. The Parted Low Pony with Face-Framing Tendrils
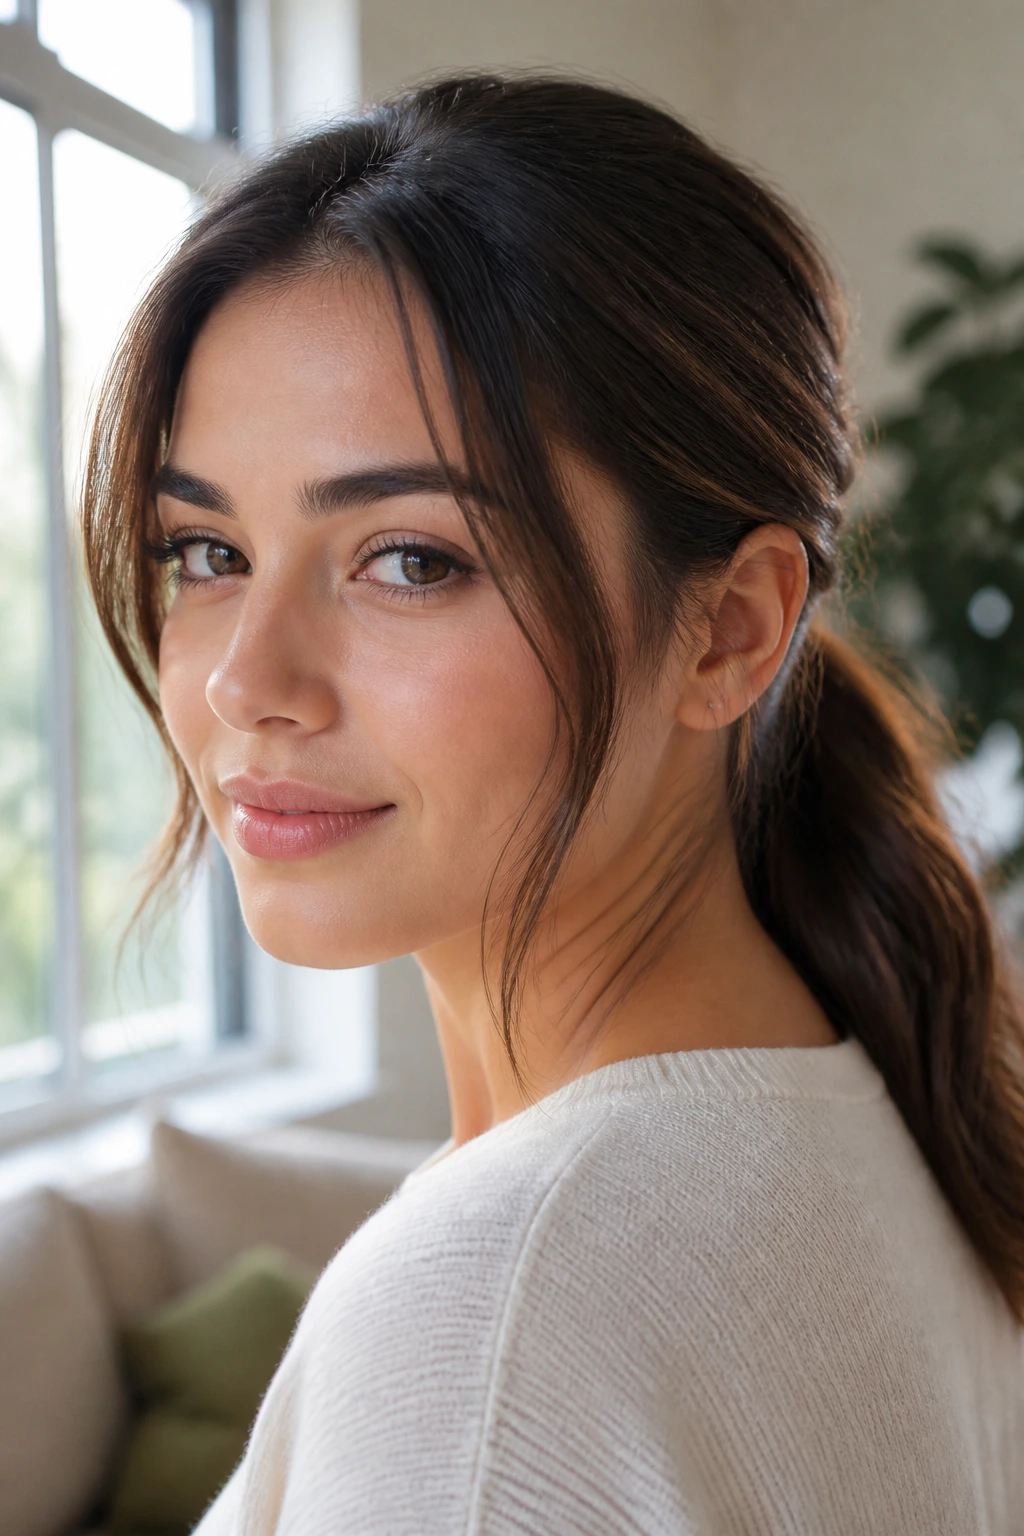
Softness is key when you want to look approachable. A center or side part, paired with face-framing tendrils, creates a look that is classic and incredibly flattering. This style works for almost every face shape because the tendrils help to break up the harshness of having all your hair pulled back.
Creating the Tendrils
Before you pull your hair back, section out a one-inch piece of hair on either side of your face. You can leave them straight, or for a more polished look, use a curling iron to put a soft, loose wave in them. The key is to keep them long enough to sit near your jawline. Too short, and they look like unintentional flyaways; too long, and they just blend into the rest of your hair.
The Right Amount of Tension
The main ponytail should be pulled back somewhat loosely. If you pull it too tight, you get that uncomfortable “face-lift” effect that causes tension headaches by the end of the day. You want the hair to be secure, but comfortable enough to wear for eight hours straight. A loose, relaxed pull allows for a softer silhouette that complements the delicate tendrils.
11. The Velvet Ribbon Ponytail
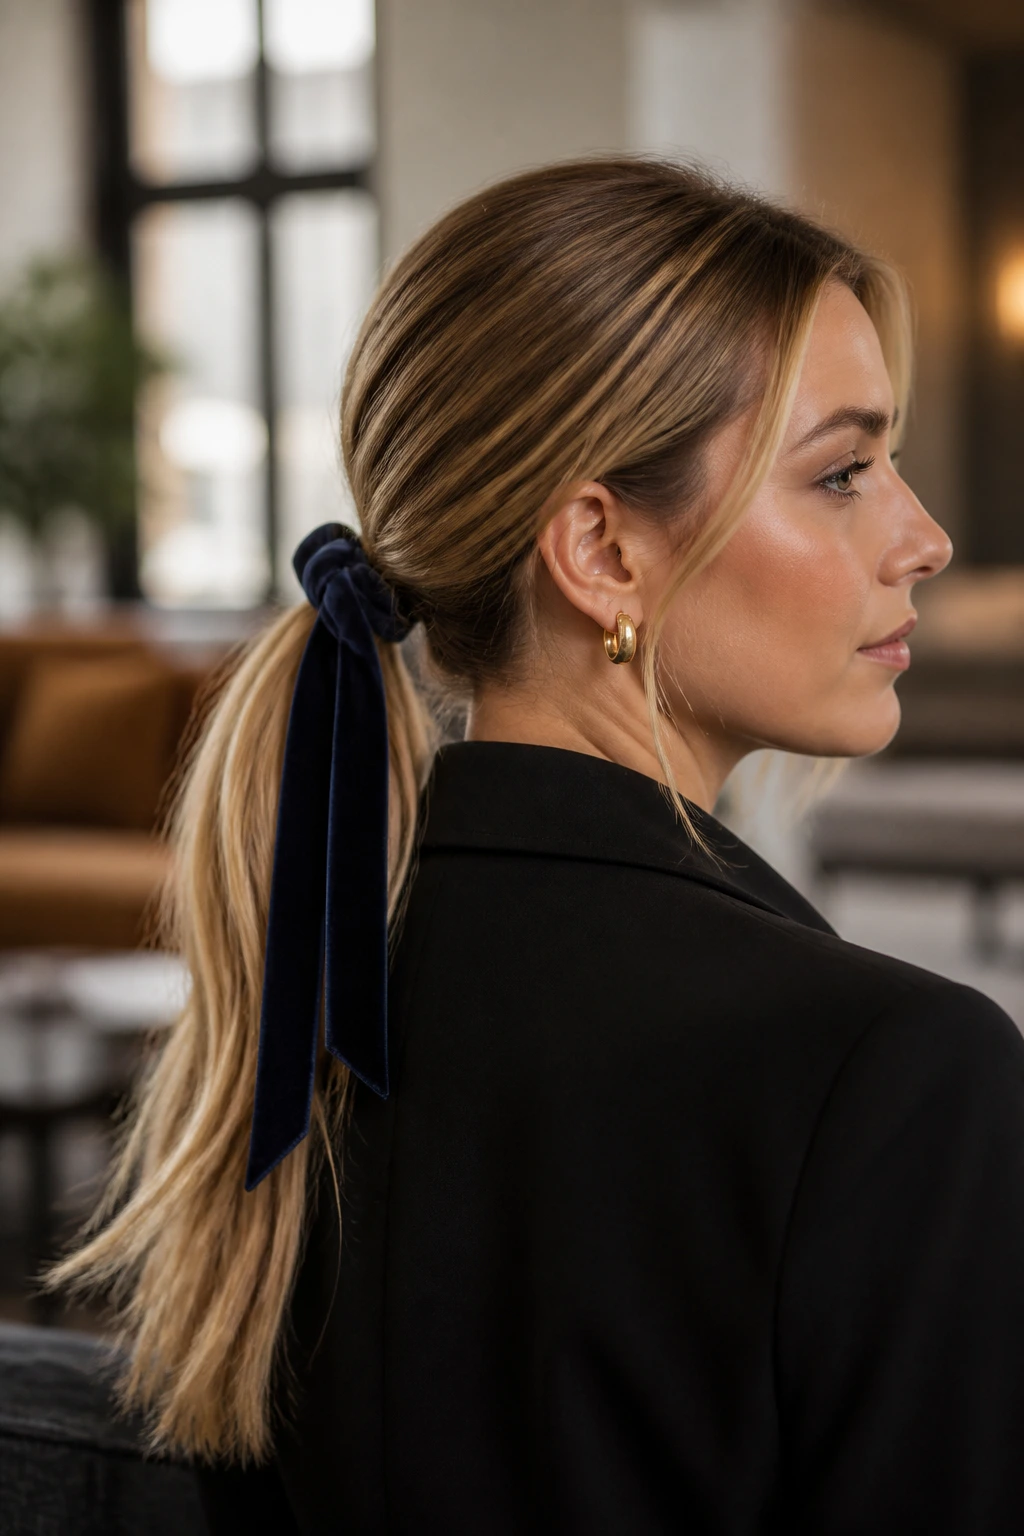
If you work in an office with a dress code, you might want accessories that are elegant rather than loud. A velvet ribbon is the epitome of understated elegance. It adds texture and a bit of luxury without being distracting, making it ideal for professional settings or academic presentations.
Why Velvet Works
Velvet catches the light in a way that feels rich and sophisticated. A black or navy velvet ribbon looks crisp against lighter hair and seamless against darker hair. It works well throughout the year, adding a touch of polish to any outfit. You can buy pre-made velvet-wrapped hair ties, or simply buy a spool of velvet ribbon and tie a bow over your existing hair tie.
The Bow vs. The Band
A bow can look a bit youthful, so if you are worried about that, tie the ribbon in a simple knot with short tails rather than a full, looping bow. This keeps the line clean and modern. The ribbon acts as a soft cover for the elastic, softening the transition from the scalp to the tail of the pony.
12. The Minimalist Low Pony
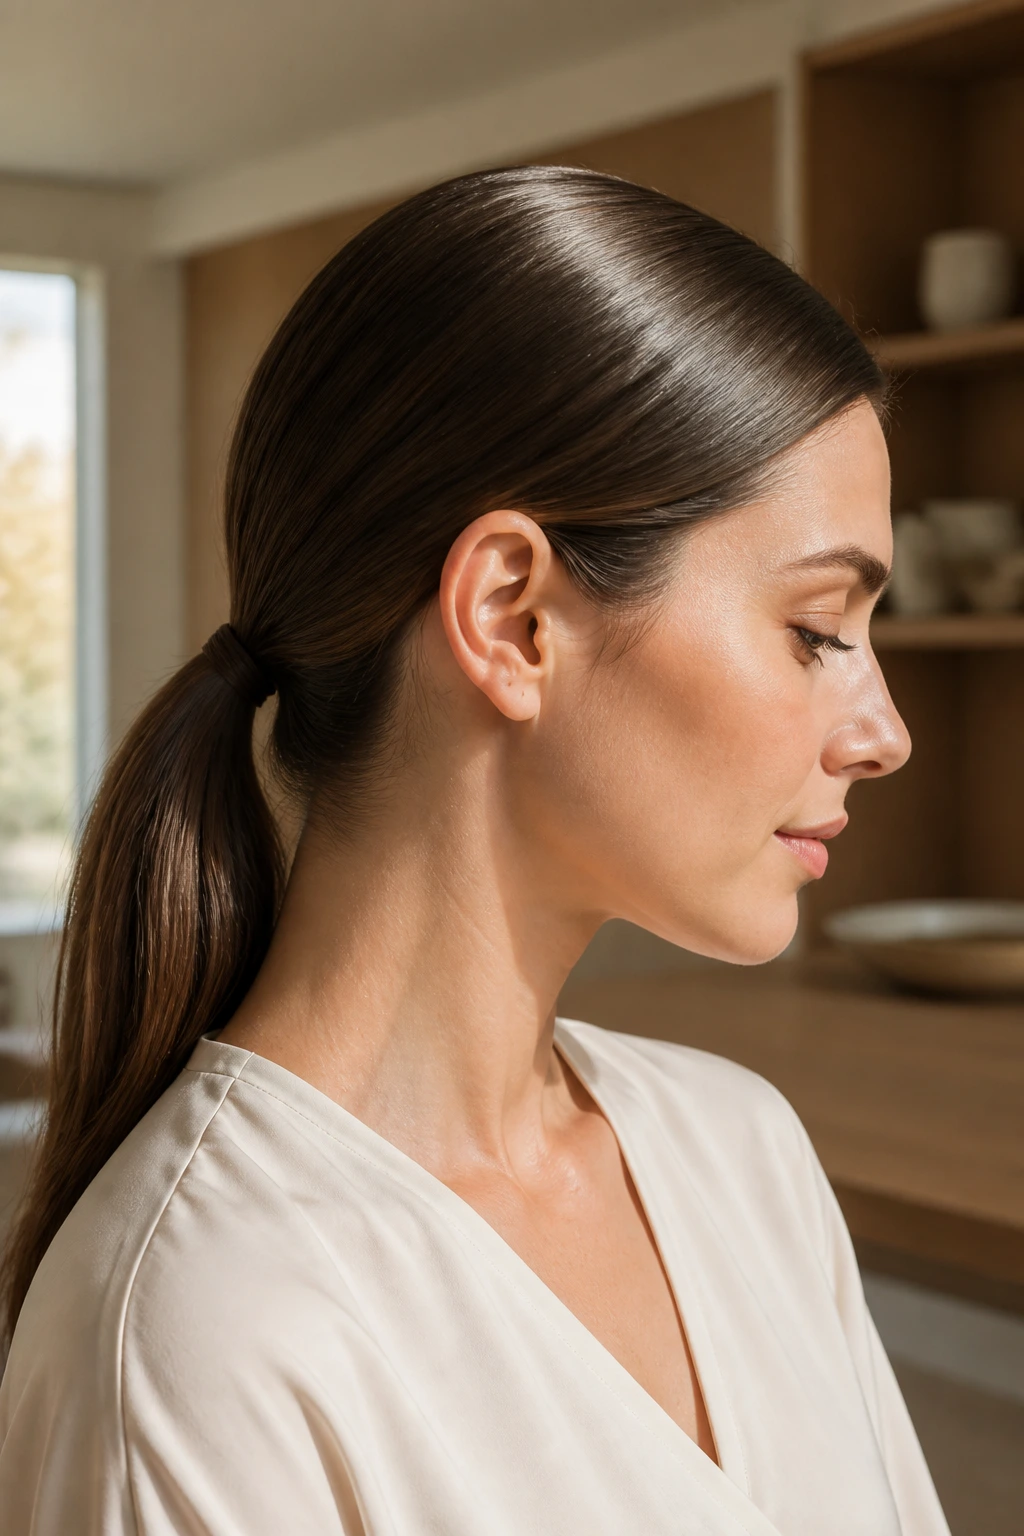
Sometimes, the best style is the one that says “I didn’t try too hard.” The minimalist low pony is all about healthy-looking hair. There are no braids, no twists, and no teasing. It is simply your hair, pulled back, with a focus on shine and smoothness.
The Focus on Hair Health
Because this style has nowhere to hide, you want your hair to look hydrated and healthy. A quick pass with a flat iron can help smooth down the cuticle, and a drop of hair oil applied to the mid-lengths and ends will give it a nice, healthy sheen. Use a high-quality, seamless hair tie that matches your hair color as closely as possible to keep the focus on the hair itself.
When to Choose This
This is your “I’m running five minutes late but still need to look sharp” style. It is the ultimate fail-safe. It works in the office, the classroom, or a coffee shop. It is clean, simple, and never goes out of style. If your hair feels particularly dry, a quick application of a leave-in conditioner before you pull it back will keep it looking sleek all day.
13. The Half-Twist Low Ponytail
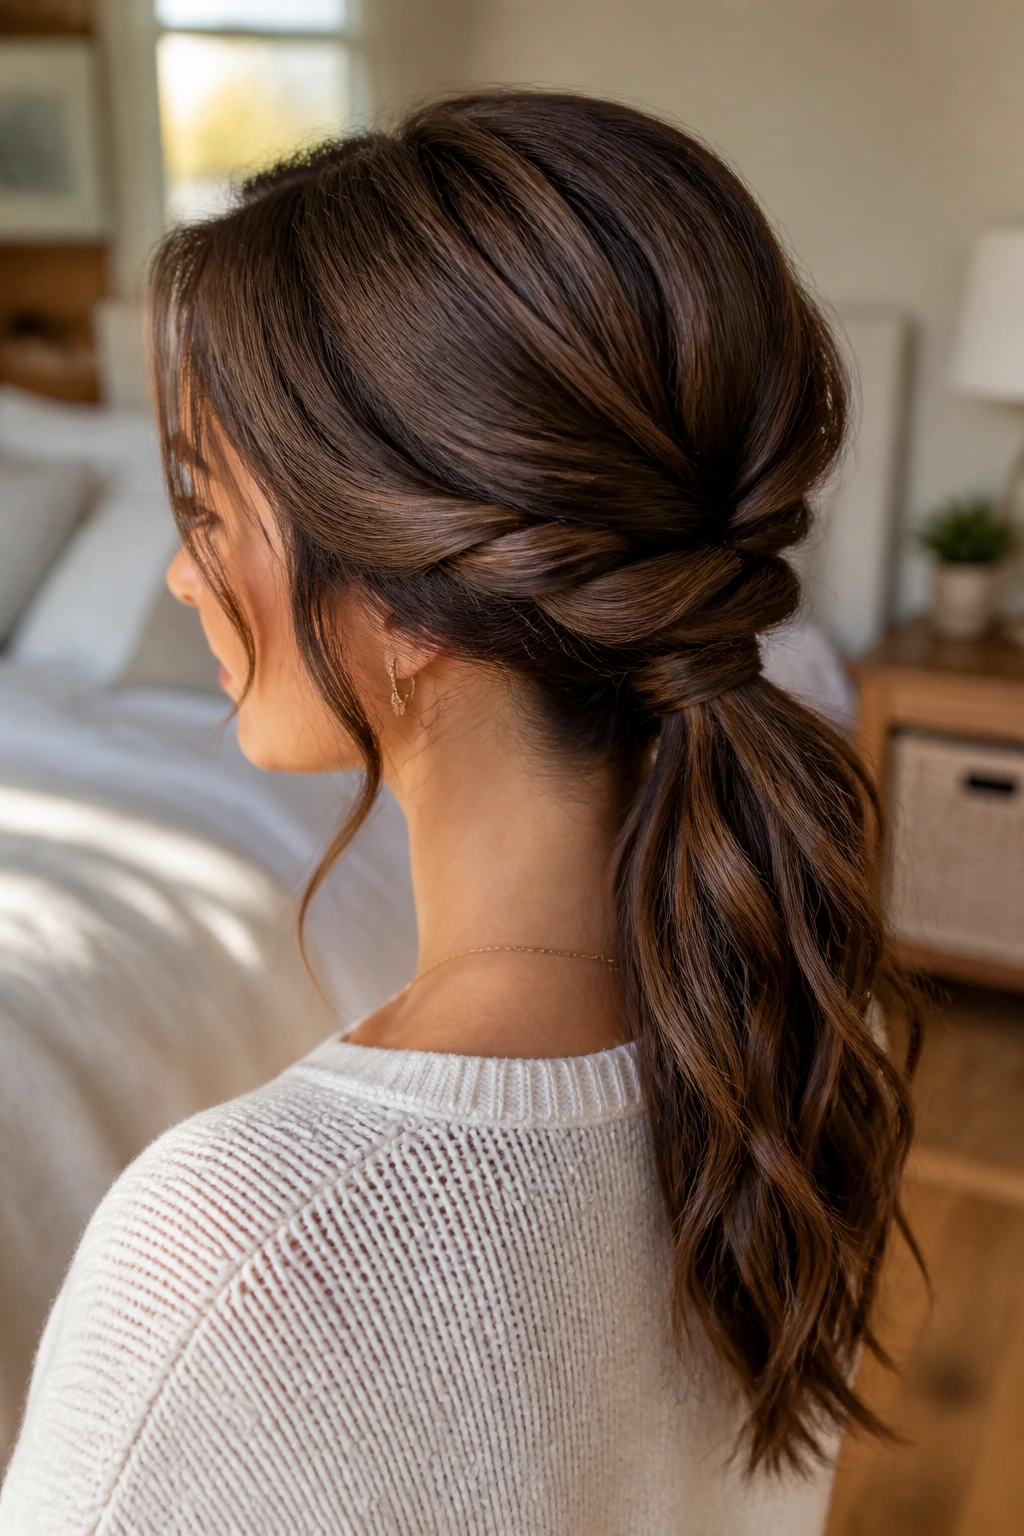
If you have a lot of hair, a full ponytail can sometimes feel too heavy or bulky. The half-twist is a great way to split the difference, creating a look that feels more styled and prevents the hair from just hanging like a curtain.
How to Build the Twist
Section the top half of your hair—from the temples up—and pull it back into a small, loose ponytail. Then, create a “topsy-tail” by looping that top ponytail through itself, pulling it down and through the space just above the elastic. Once that is done, gather that remaining hair with the rest of your hair at the nape and secure the entire thing in a low, combined ponytail.
The Benefit of the Twist
This creates a beautiful, rolled texture at the base of your ponytail that looks intentional and complicated. It adds volume to the crown without the need for teasing or hairspray. It is an excellent technique for medium-to-long hair and works particularly well if you have highlights or balayage, as the twist highlights the different tones in your hair.
14. The Low Pony with Jeweled Accessories
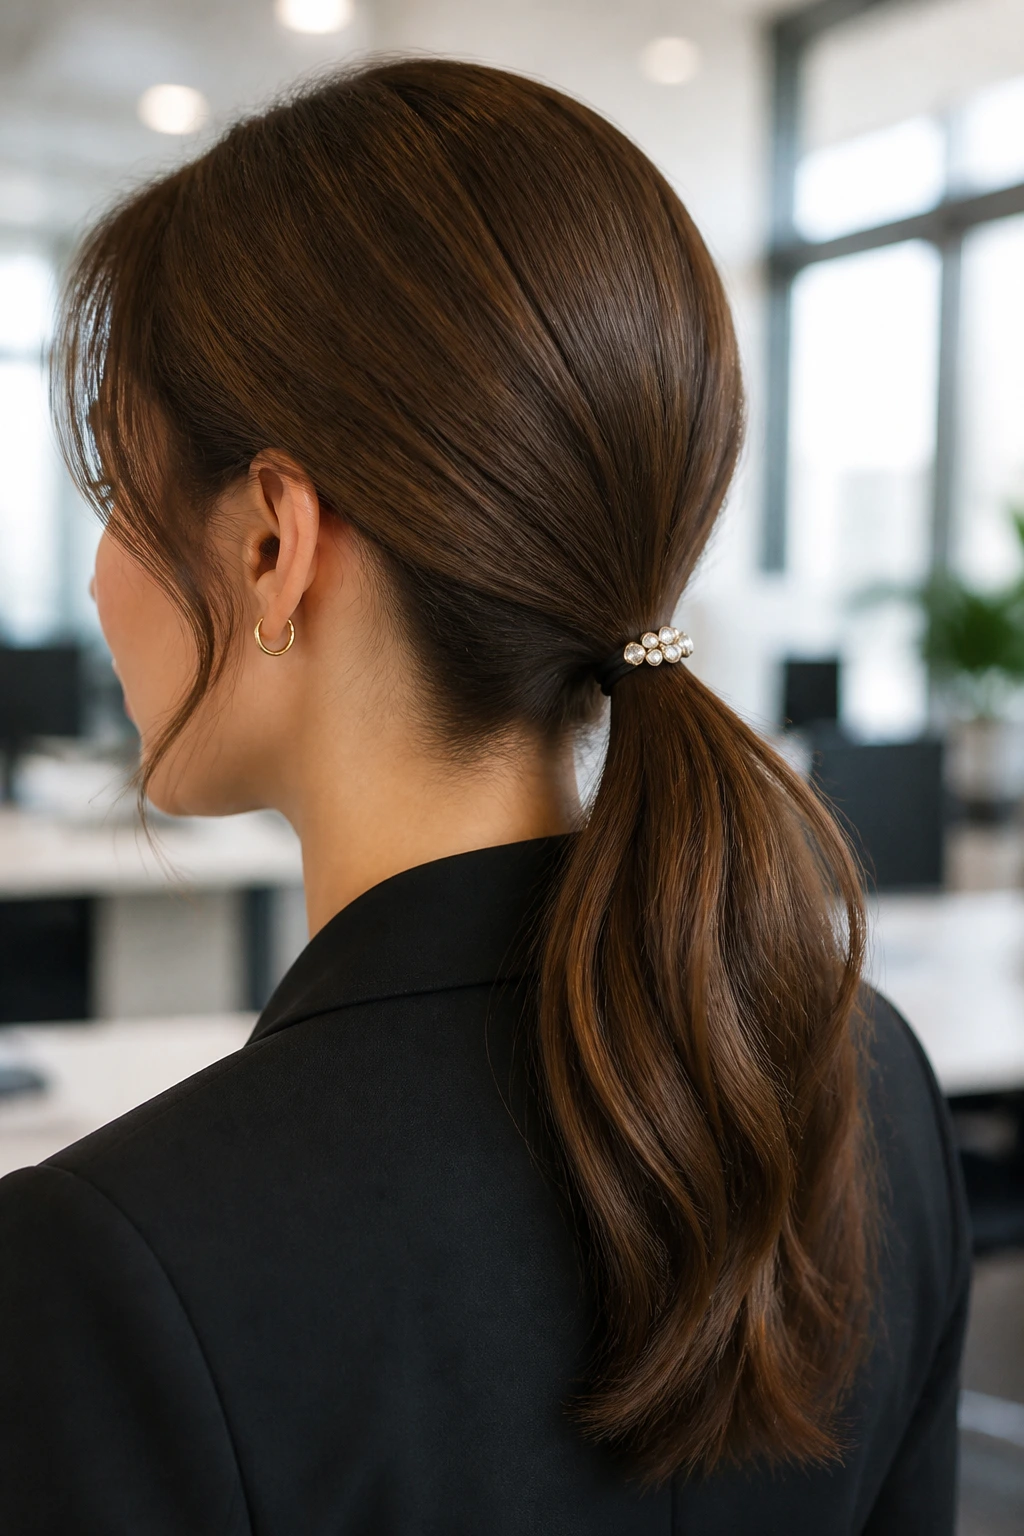
Who says office hair has to be boring? Adding a jeweled clip or a metallic barrette to your low ponytail is an easy way to inject some personality into your look. It takes a standard style and makes it feel like an intentional accessory choice.
Choosing the Right Clip
Avoid anything too oversized or flashy, which can look out of place in a professional setting. Look for delicate barrettes, clips with small pearls, or gold-toned geometric slides. You can place the clip directly over your hair tie to hide it, or slide it into the side of the ponytail for a little extra detail.
Keeping It Secure
Jeweled accessories can be heavy. If you have fine hair, they might slip or drag your ponytail down. The trick is to secure your hair with a strong elastic first, and then place the clip on top of the elastic. This gives the clip something sturdy to grip onto, preventing it from sliding down your hair as the day progresses.
15. The Flipped-Through Loop Ponytail
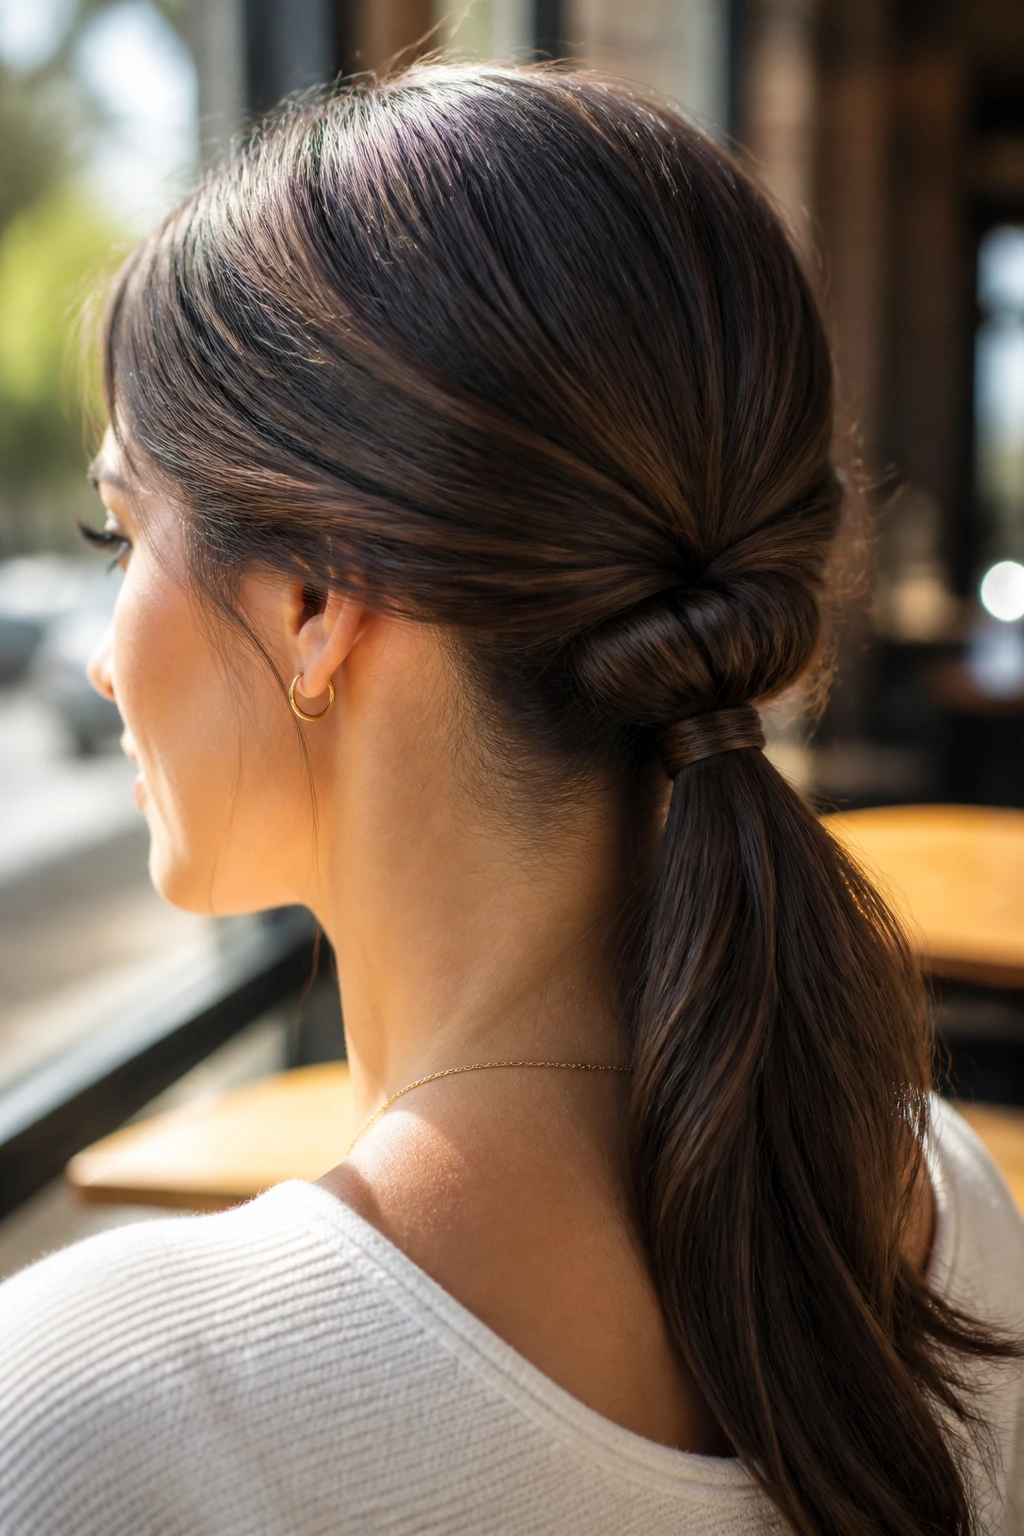
This is a classic technique that many of us learned years ago, but it remains one of the fastest ways to make a ponytail look “styled” rather than “just pulled back.” It creates a rounded, elegant shape at the nape of the neck that hides the messy start of a ponytail.
The Topsy-Tail Method
Gather your hair into a low ponytail and secure it with an elastic, but don’t pull it too tight. Use your fingers to create a hole in the hair directly above the elastic. Take the tail of the ponytail and flip it up, over, and through that hole. Pull the tail through to tighten the loop.
Why It Works for Busy Mornings
It takes less than ten seconds, but it changes the entire silhouette of the pony. It smooths out the area where the hair meets the neck, creating a clean, professional finish. It looks sophisticated, stays secure, and works well on almost any hair texture. It is a fantastic bridge between a casual ponytail and a more formal updo.
Final Thoughts
The low ponytail is rarely just a low ponytail. It is a canvas. It is a foundation that adapts to the mood, the requirement, or the available time of your morning. You do not need to master every single variation on this list—just having three or four go-to styles that you can execute in your sleep will change how you handle your morning routine.
Find the version that works for your specific hair texture and length. Maybe you love the structure of the center part, or perhaps you find comfort in the textured, messy look. Whatever you choose, remember that the smallest adjustments—a wrap, a twist, or a simple accessory—are what separate a rushed hairstyle from a styled one. Keep it simple, keep it reliable, and let your hair work for you.
