



Sleek bun styles for office days work because they solve a problem most people know too well: you want hair that looks finished at 8:30 a.m. and still behaves at 4:30 p.m. without needing a mirror every forty minutes. A good bun keeps your face clear, your neckline neat, and your outfit from fighting your hair for attention.
The best office bun is not stiff. That’s the mistake people make when they chase “polish” too hard. You want a smooth crown, a clean base, and enough structure that the style holds its shape when you bend over a desk, tuck hair behind an ear, or pull on a blazer.
Humidity is rude.
I always think the smartest workday buns are the ones that look deliberate, not overworked. A boar-bristle brush, a small amount of gel or styling cream, a fine-tooth comb, and enough pins to actually do their job can make a huge difference. Fine hair usually needs a little grip at the roots. Thicker hair usually needs more sectioning, more pinning, and less poking around once the shape is set.
Some mornings call for a low chignon. Others need a French twist, a clean top knot, or a bun that hides every stray end like it was never there. The point is not to build the same knot every day. It’s to have options that look sharp in a meeting and still feel like you.
1. Low Chignon at the Nape
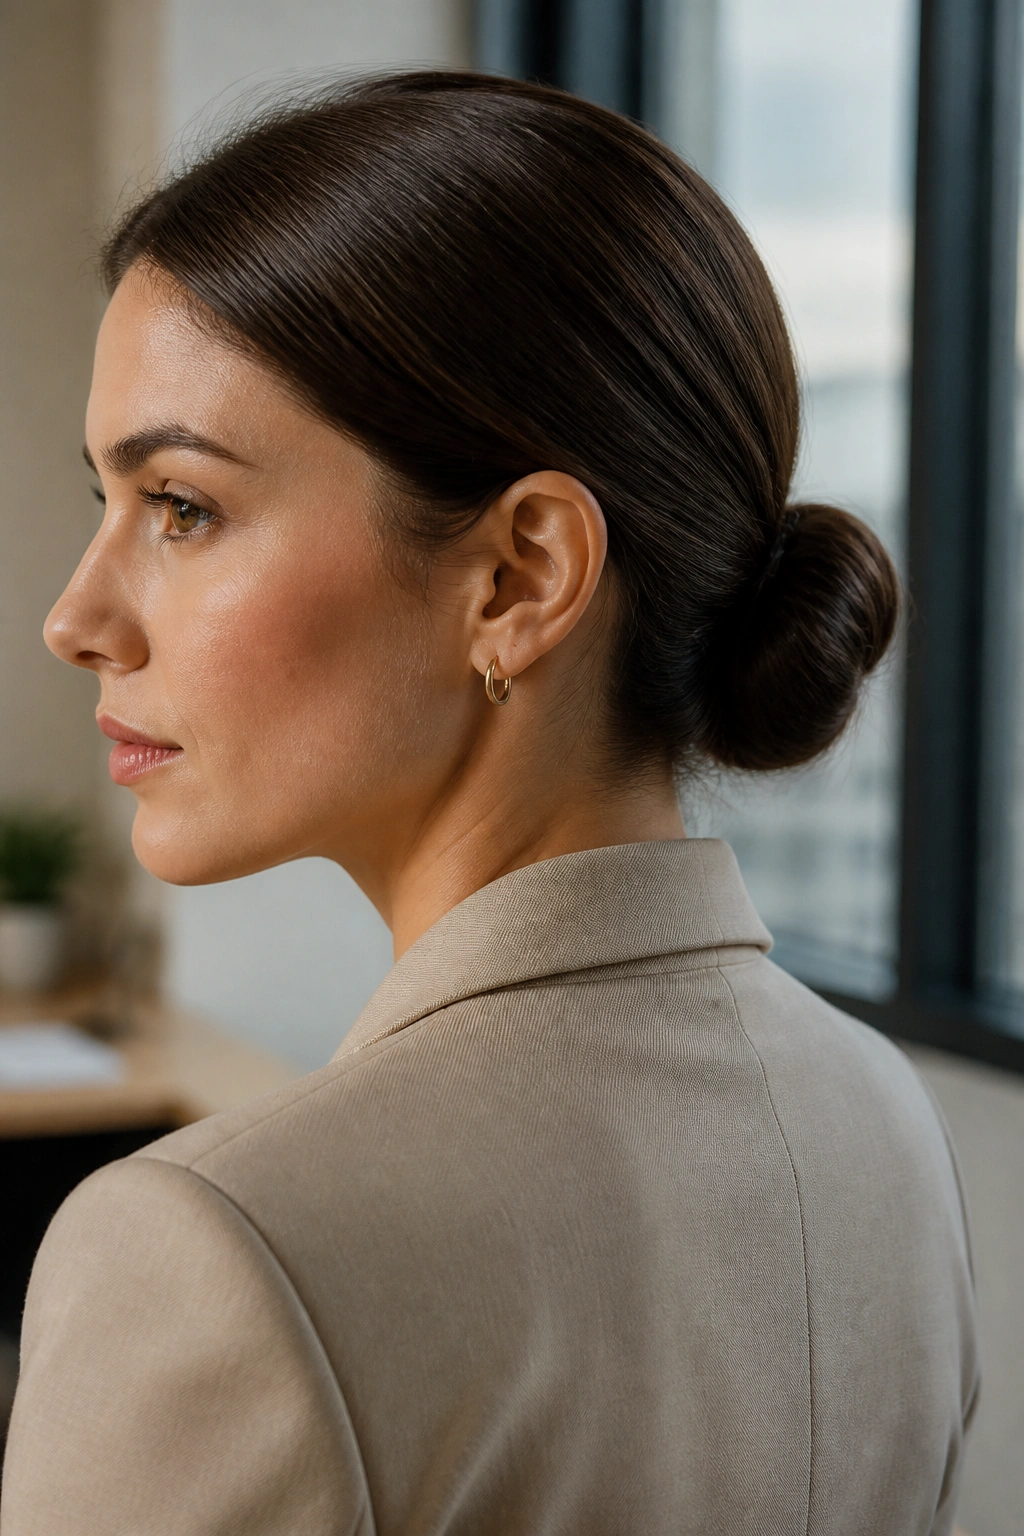
A low chignon is the workhorse of sleek bun styles for office days. It sits low, stays quiet, and never looks like it’s trying too hard. That’s exactly why it works so well under tailored jackets, high collars, and plain crewneck tops.
Why it works
The shape is small and controlled, which keeps the hair from puffing up around the crown. You brush everything down toward the nape, twist or coil the lengths into a compact knot, and pin the base so the style stays close to the head. The result is calm. No extra height. No fuss.
Best for: medium to long hair, especially if you want a low-profile look that won’t catch on scarf collars or headphone bands.
Use: a smoothing cream at the roots, then a light mist of hairspray after the bun is pinned.
Watch for: overloading the hair with product. Too much gel can make the top look wet instead of sleek.
Pro tip: Pin the bun first, then smooth the crown. If you chase flyaways before the shape is secure, you loosen the whole style.
2. Center-Part Bun
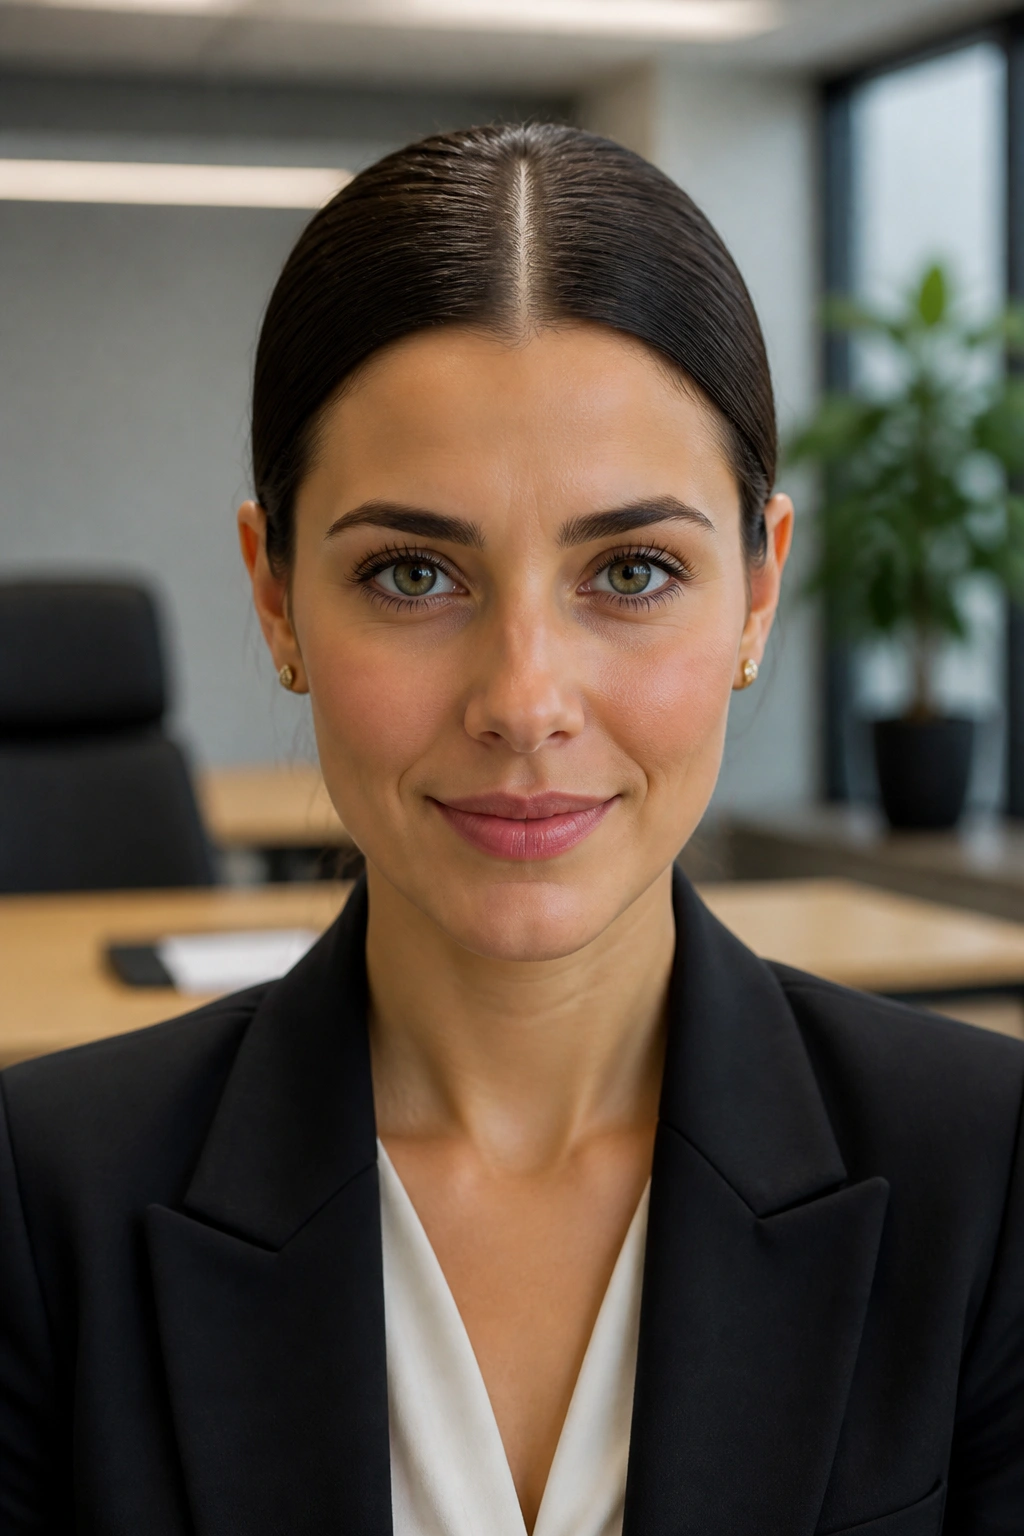
If you want the most businesslike version of a sleek bun, the center-part bun is hard to beat. It gives the face a clean frame and makes the whole style look intentional from the first glance. There’s no mystery here. It is crisp, balanced, and a little severe in the best way.
A sharp middle part changes the mood of the bun instantly. Even a plain low coil looks more polished when both sides of the head are smoothed evenly back from the part. I like this style when the outfit is simple and needs a bit of structure—think white shirt, dark blazer, no extra jewelry.
The important part is the part itself. Use the tail of a comb, not your fingers, and take the line all the way back to the crown so it stays straight. Then smooth each side flat before gathering the hair low and wrapping it into a neat bun. A crooked part ruins the effect faster than a loose pin ever will.
If your hair likes to split or fluff at the roots, a tiny bit of styling cream on the fingertips helps. Keep it light. You want sheen, not grease.
3. Deep Side-Part Bun
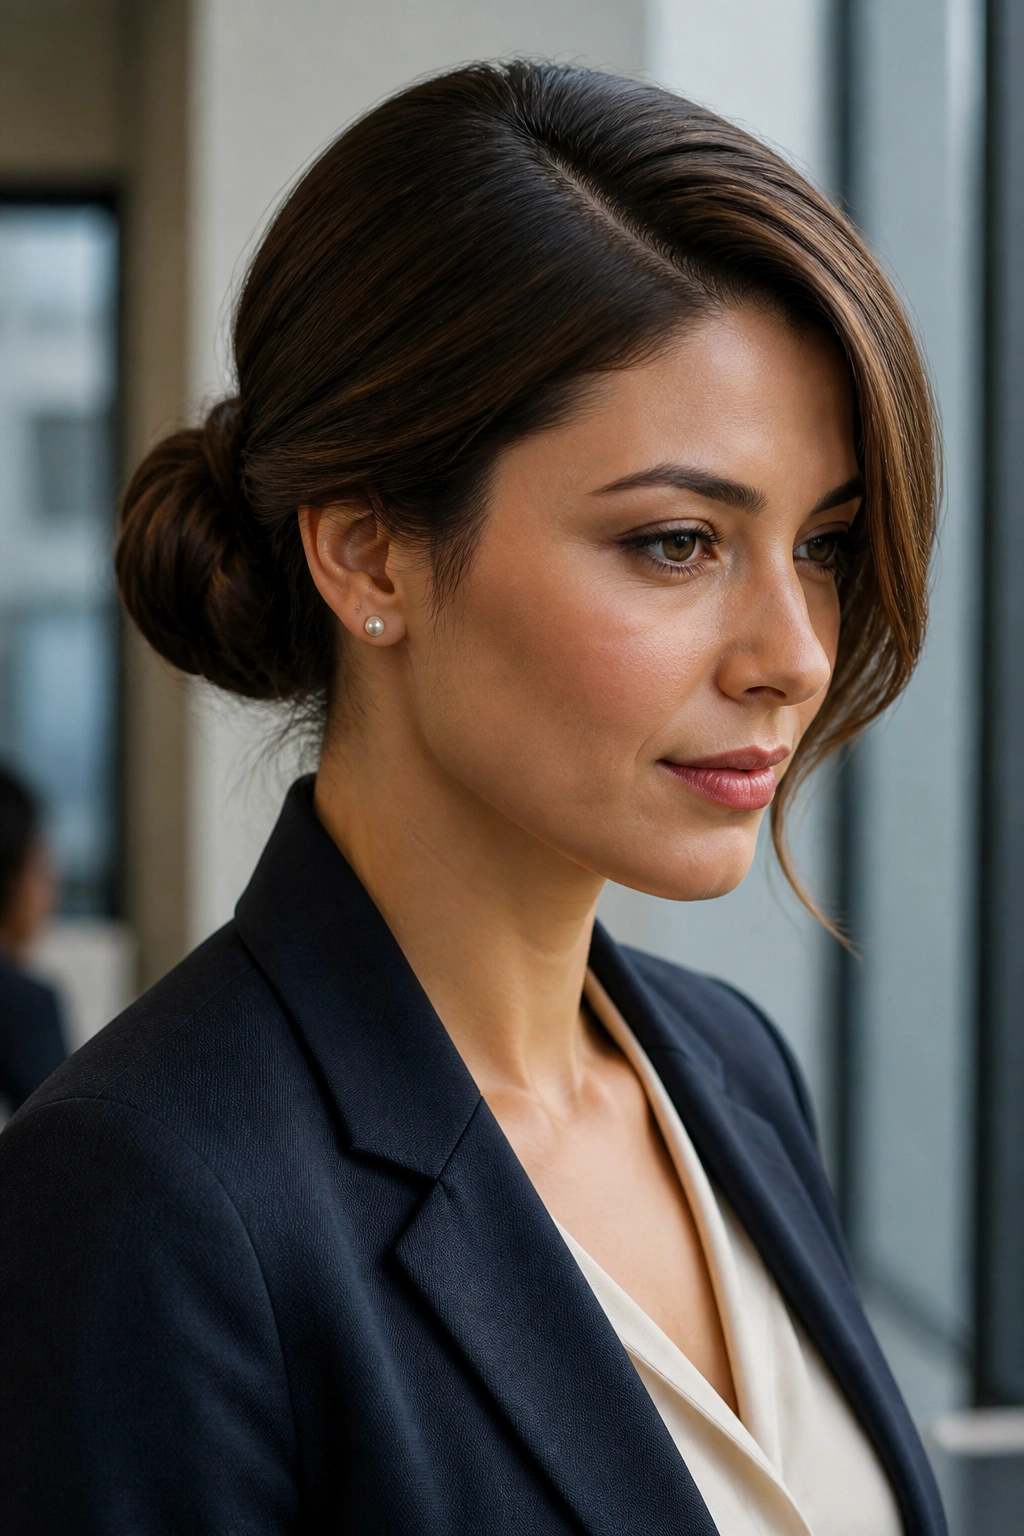
Why does a side part make a bun feel softer without losing polish? Because it shifts the shape just enough to avoid that too-symmetrical, slightly stern look some office buns can have. A deep side-part bun still reads neat, but it has a little more movement across the front.
The style is especially nice when you want to keep things professional without looking overly formal. One side is brushed sleek and flat, while the other gets a fuller sweep across the forehead before everything is gathered low. That small imbalance keeps the style from feeling rigid.
How to wear it at work
A deep side part works well with collars that already have strong lines—blazers, button-down shirts, and simple knit tops. It also helps if one side of your hair grows flatter than the other. Instead of fighting that natural bend, you build with it.
- Keep the part clean and deliberate.
- Smooth the heavier side first, then the lighter side.
- Place the bun just below the occipital bone for a tidy profile.
- Use one or two extra pins on the fuller side, since that side usually wants to lift.
It’s a small styling choice, but it changes the mood completely. Softer. Still sharp.
4. Rope-Twist Low Bun
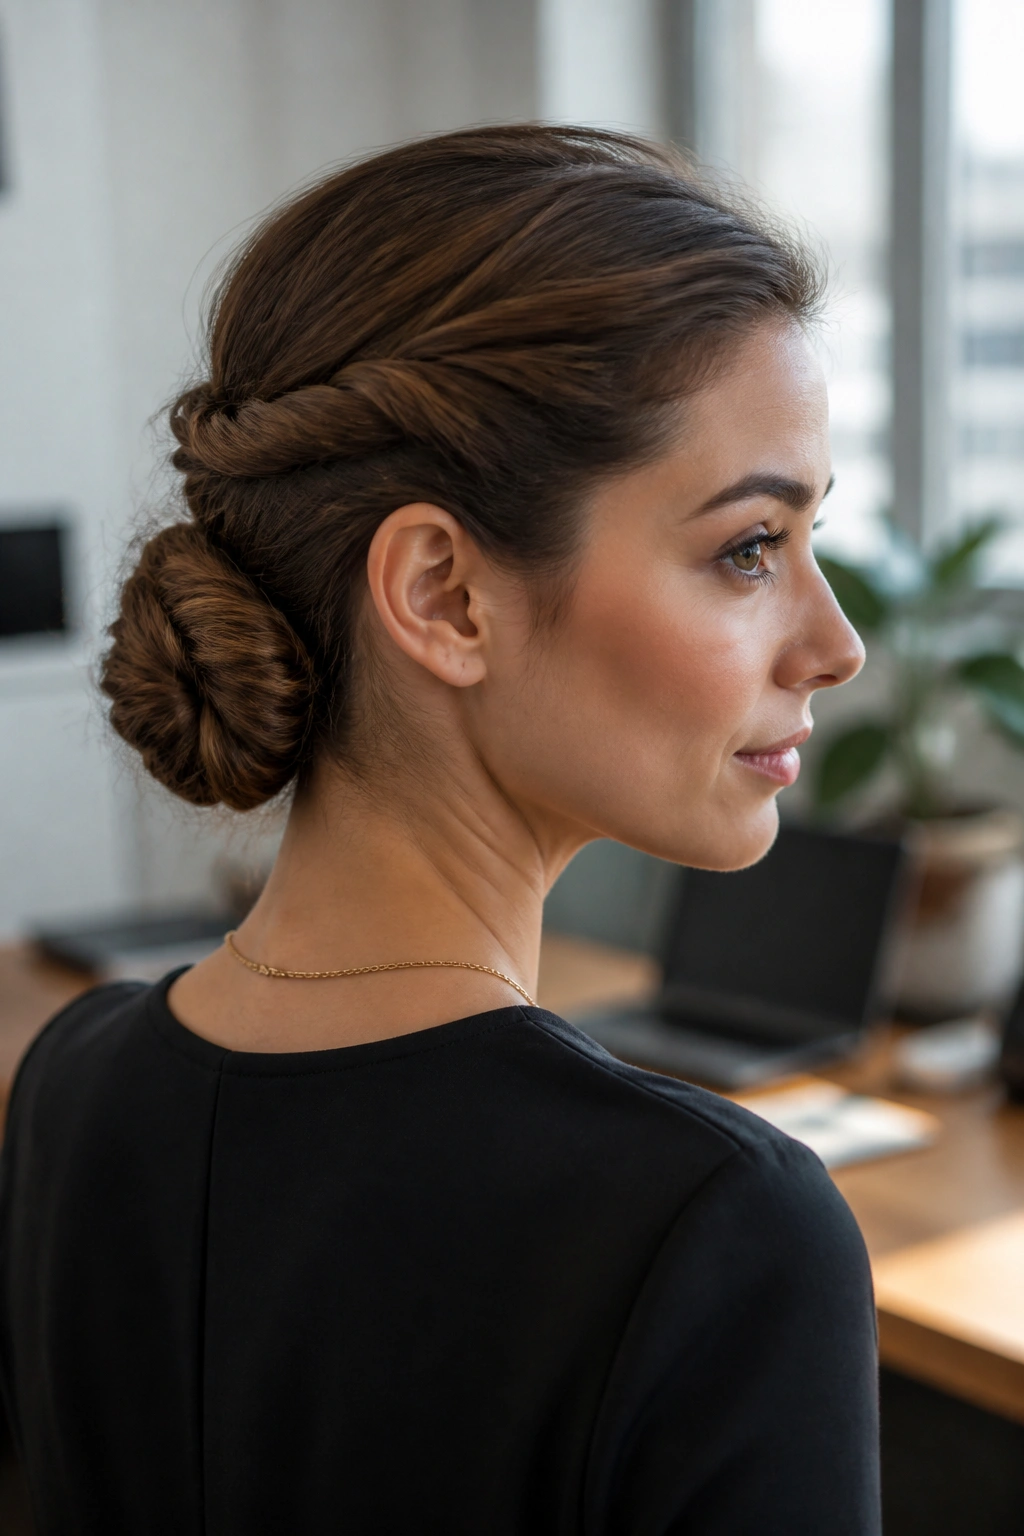
You know those mornings when you’ve got twelve minutes, one mirror, and a meeting that starts before your coffee cools? Rope-twist low bun. That’s the answer. It looks more constructed than a plain twist, but it’s still fast enough for a rushed weekday.
Start with a low ponytail and split it into two sections. Twist each section tightly in the same direction, then twist them around each other in the opposite direction so they form a rope. Wrap that rope into a bun at the nape and pin it in place. The texture reads clean, not messy, especially if the hair was brushed smooth first.
What to know
- Works best on medium to long hair with a little natural grip.
- Needs 3 to 5 bobby pins, depending on thickness.
- Looks best when the twist is firm from root to end.
- Holds especially well on second-day hair.
The rope texture also hides small imperfections better than a straight coil. If one section isn’t perfectly smooth, the twist disguises it. That is useful. Office hair should not require museum-level precision.
5. Braided Wrap Bun
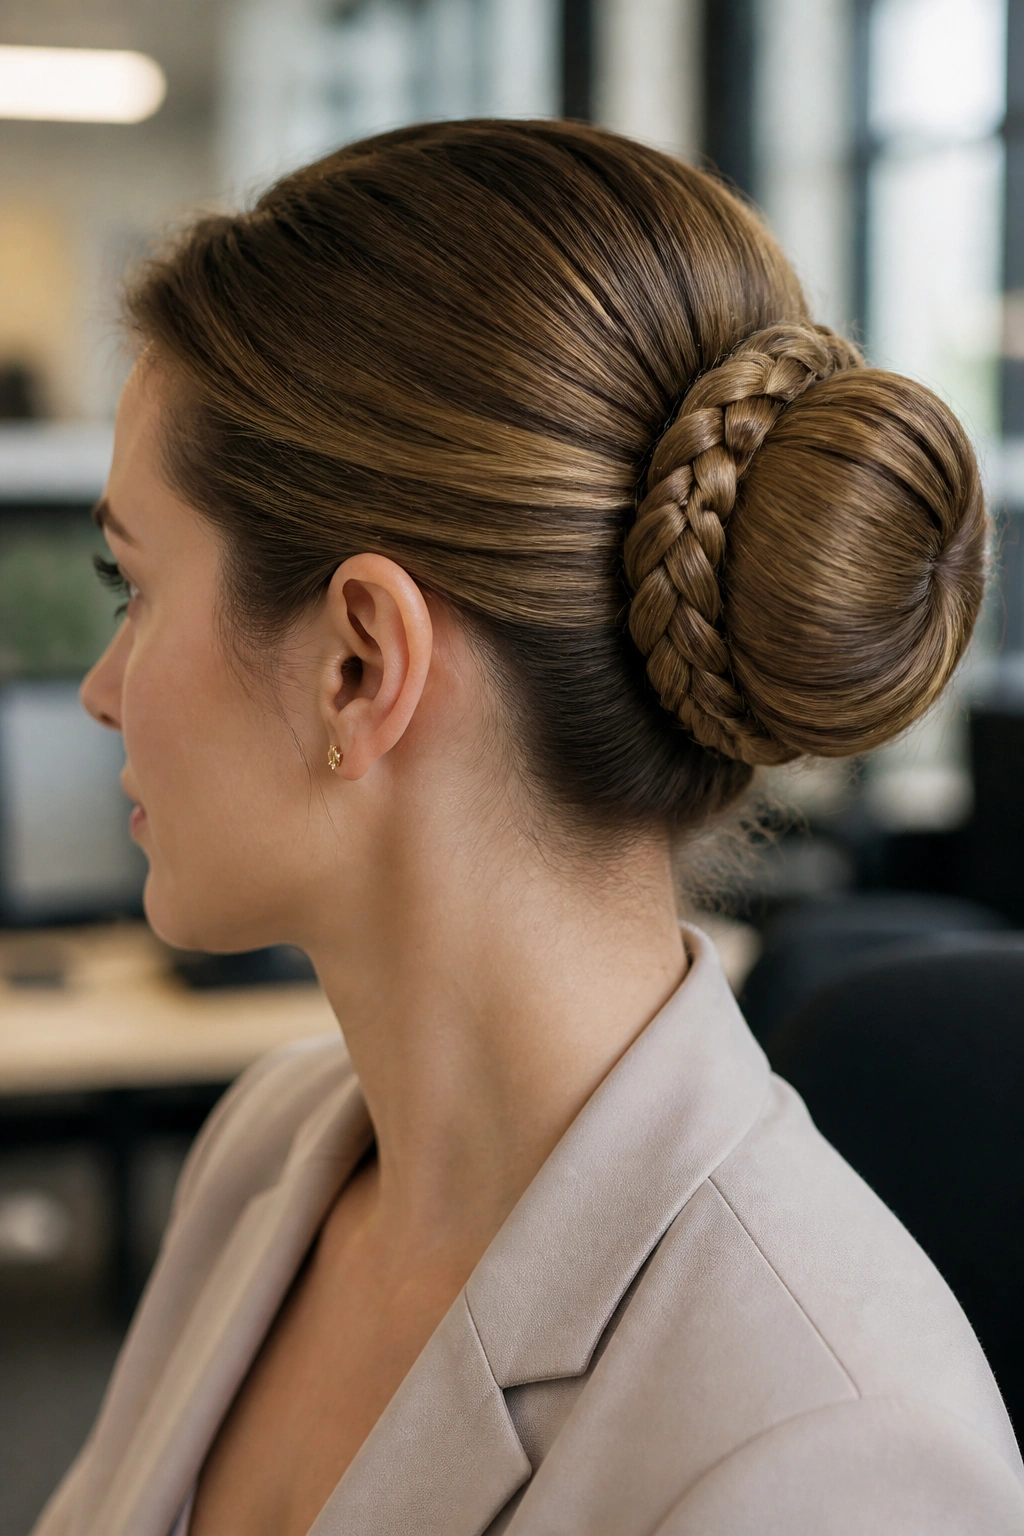
A braid around the base gives a sleek bun a bit more grip and a little more interest, which is useful when plain styles start feeling repetitive. The braid does the boring work for you. It anchors the bun, controls the ends, and makes the whole shape look more finished than a simple wrapped knot.
I like this version on long hair because the braid keeps layers from slipping out and turning the back of your head into a small battle. You can start with a low ponytail, braid the tail tightly, then wrap the braid around itself until it forms a compact circle. Pin every few inches as you go.
The finish should feel secure, not bulky. If the braid is too loose, the bun puffs out and loses that clean office look. If it is too tight, the shape can look hard. Somewhere in the middle is best—neat, but not stiff.
This is one of those styles that looks more complicated than it is. Once you’ve done it twice, it becomes routine. And routine is useful on a weekday.
6. French Twist Bun
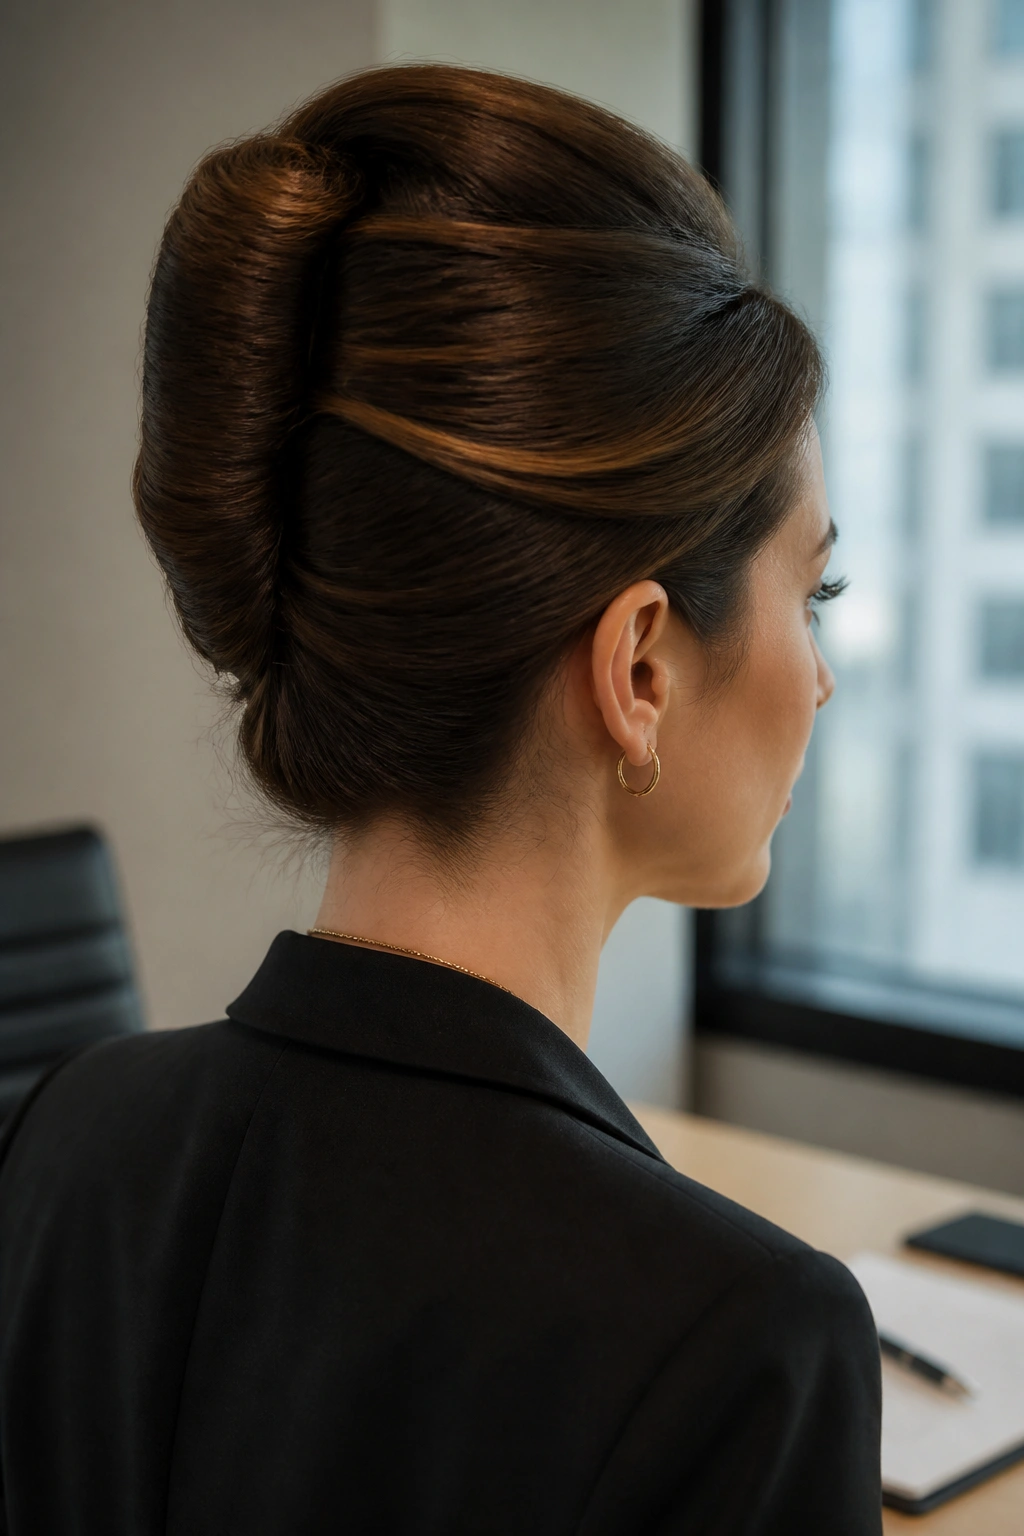
Unlike a low chignon, the French twist reads upright and crisp. It has a built-in sense of order, which is why it works so well for presentations, interviews, and days when you want your hair to feel a little more formal without turning it into a full event.
The shape is created by sweeping the hair back, rolling it upward, and tucking the ends into the twist so they disappear. The seam runs vertically, which gives the style that unmistakable polished line. It is classic for a reason. It makes a plain top look sharper and a structured top look even cleaner.
If your hair slips easily, prep the roots with a little dry shampoo or texturizing spray before you start. That tiny bit of grip keeps the roll from collapsing. Do not overload the hair with oil or creamy products here. A French twist needs hold, not slide.
Best part? It looks expensive without needing ornaments. A single plain pin is enough. Maybe two.
7. Sleek Top Knot
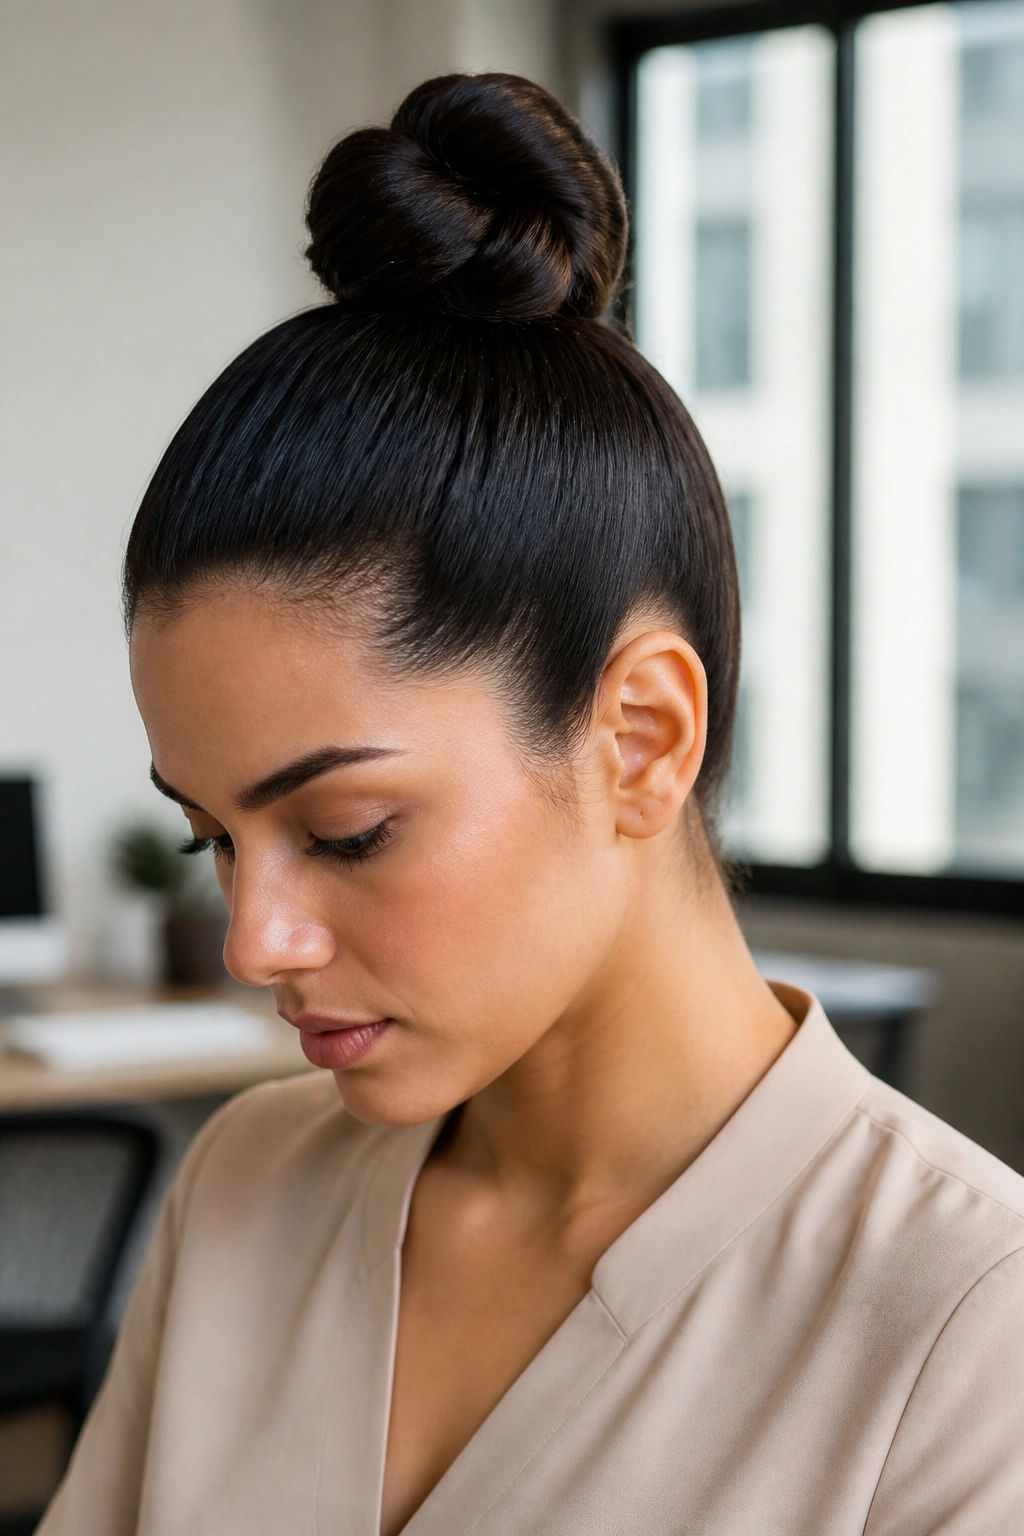
A top knot can look office-appropriate. It just needs restraint. Too high, too loose, too scrappy, and it starts looking like you gave up halfway through getting ready. Keep the shape compact, the sides flat, and the knot clean.
This version works when you want your neckline open and your face fully clear. It also helps if you wear glasses, because the bun sits out of the way and keeps the profile tidy. Gather the hair high, smooth the crown carefully, and twist the tail around the base until the knot sits snug and centered.
Why it stays polished
The difference between a sloppy top knot and a sleek one comes down to tension and placement. If the base wobbles, the whole thing looks casual. If the sides puff out, the style loses its sharp edge.
- Place the ponytail high, but not at the absolute top of the head.
- Brush the crown flat before you twist.
- Use a strong elastic first, then pins.
- Tuck the ends in tightly so they don’t fan out.
A top knot is not the most conservative style on this list, but it can still look smart. Especially with simple earrings and a clean shirt.
8. Wrapped Ponytail Bun
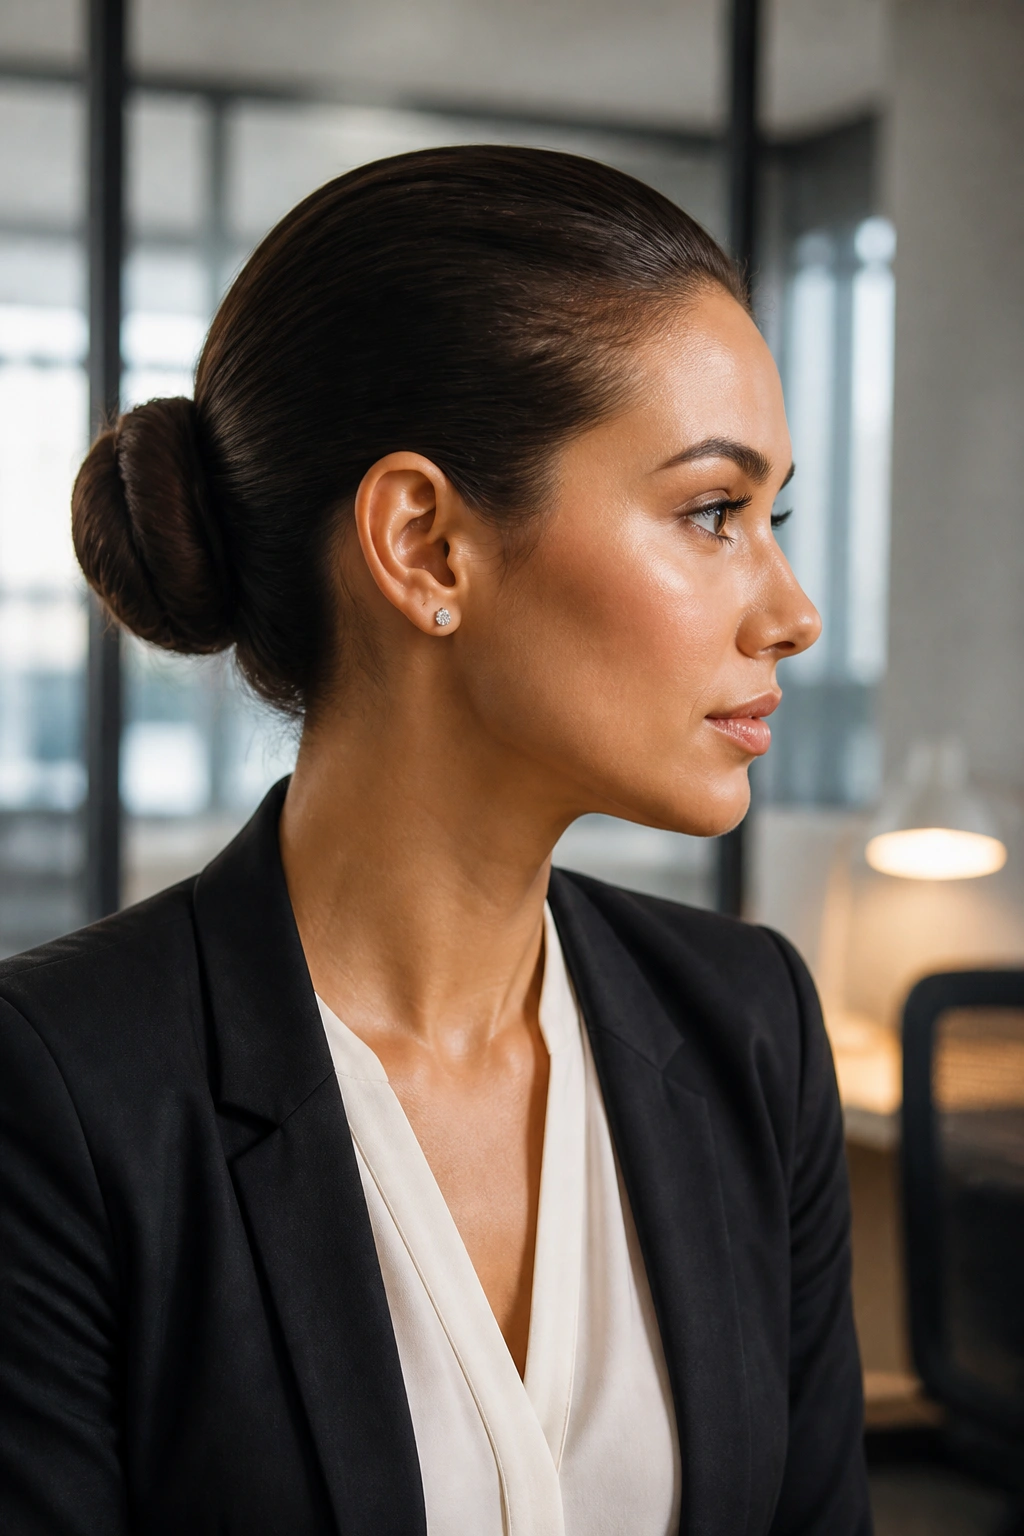
This is the fastest polished bun for hair that refuses to stay put. It starts like a regular ponytail, which makes it easy, then turns into a bun once the length is wrapped around the base. The trick is making the ponytail sleek before you turn it into a knot. Skip that part and the style looks half-finished.
Brush the hair back with a light hand, gather it at your preferred height, and secure it with a snag-free elastic. Then twist the tail tightly and wrap it around the base until all the length is hidden. Pin the end underneath, not on top. That keeps the bun neat from every angle.
The style is especially good on medium-length hair because the wrapped tail does not need to be enormous to create a full-looking bun. It also handles straight hair nicely, since the wrap creates enough shape on its own.
One small thing: a wrapped ponytail bun looks best when the bun base is compact. A loose base makes the whole thing sag by midafternoon. Tight base. Clean wrap. Better result.
9. Gibson Tuck Bun
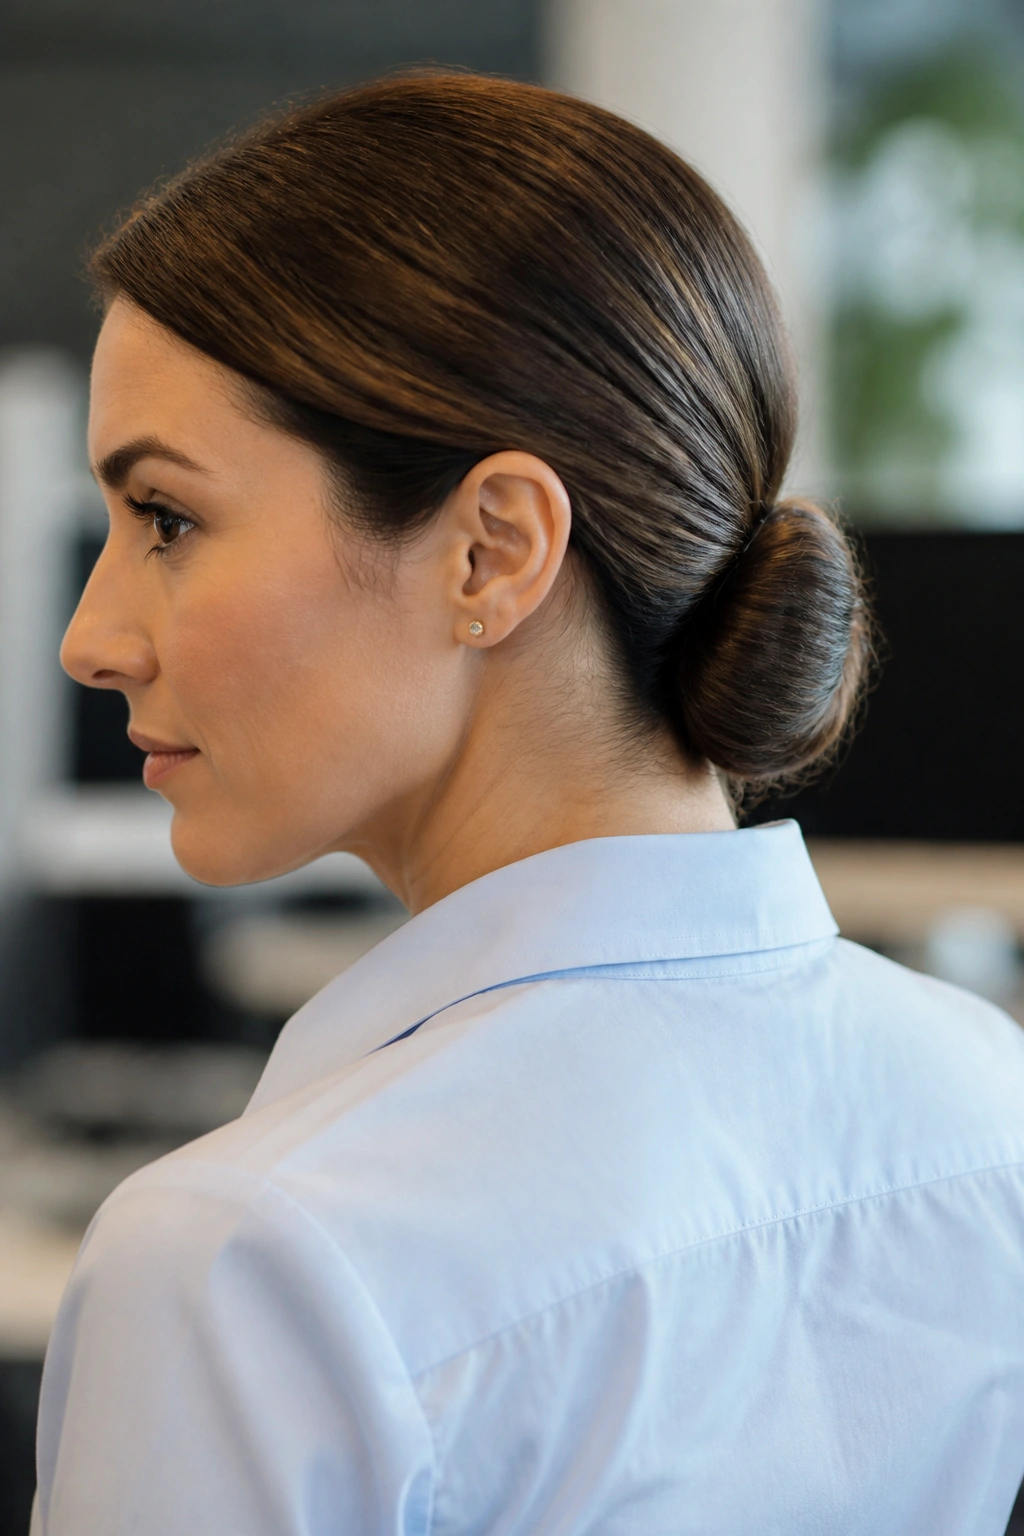
What makes the Gibson tuck so office-friendly? It sits low, looks finished, and does not need a lot of pin choreography. There’s a softness to it, but it still reads neat because the hair is tucked under itself in a controlled fold.
The style works best when the hair is brushed smooth and gathered into a low band or loose ponytail. Then you create a small gap above the elastic, flip the lengths up and through, and tuck the ends back into the roll. The shape settles into a neat curve that looks calm from the side and tidy from behind.
How to get the roll compact
- Keep the tuck close to the nape so the fold doesn’t balloon outward.
- Use 2 to 4 pins to lock the roll in place.
- Tuck ends inward, not straight down.
- Smooth the outer layer once the roll is secured.
The Gibson tuck has a quiet, old-school charm that works well with collars and simple makeup. It is not flashy. That’s the appeal. It looks like you knew exactly what you were doing.
10. Double-Knot Bun
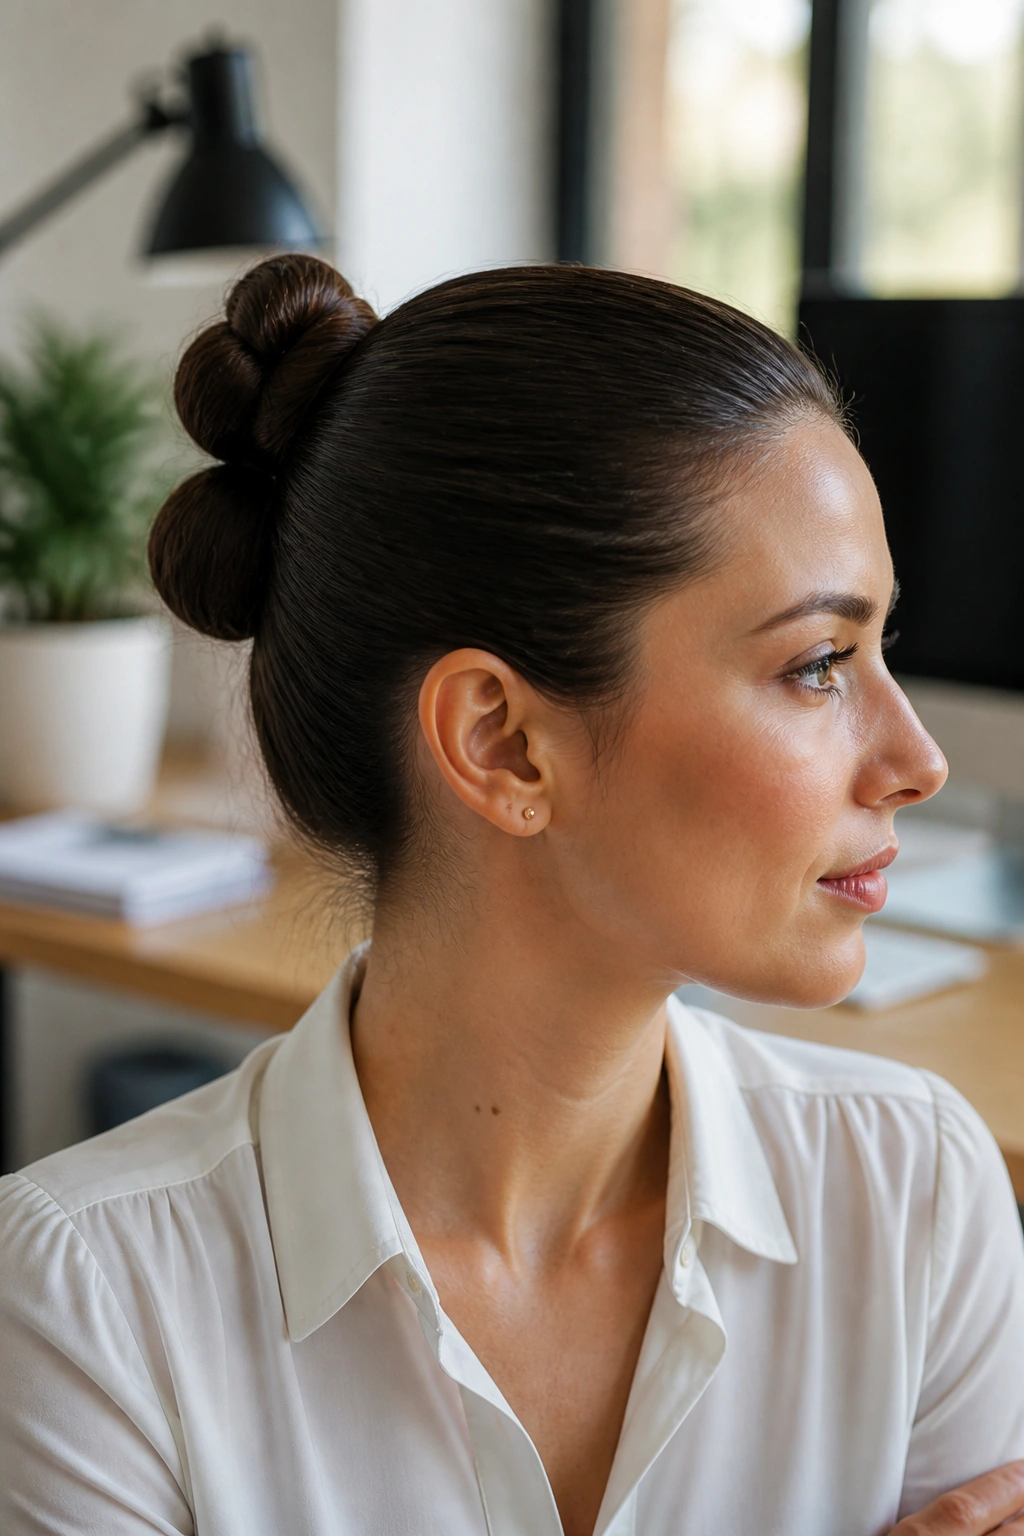
On thick hair, a single bun can feel like a small construction project. The double-knot bun handles that better. It spreads the weight across two loops, which makes the style feel secure without forcing every strand into one heavy coil.
Start by dividing the ponytail into two sections. Tie them into a loose knot, then knot them again or wrap the ends into a second secured shape, depending on your length. The goal is to build a compact knot that sits low and stays put. If your hair is very dense, this style can feel easier than trying to force one giant bun into shape.
Key details
- Best for thick, heavy, or layered hair.
- Needs strong pins, not the flimsy kind that bend on contact.
- Works better when the ponytail is anchored tightly first.
- Looks cleaner if the front is brushed flat before you start.
The appeal here is structure. The bun does not need much decoration because the knot itself is the design. It feels practical, and that is a compliment. Some mornings, practical is the smartest thing in the room.
11. Pretzel Bun
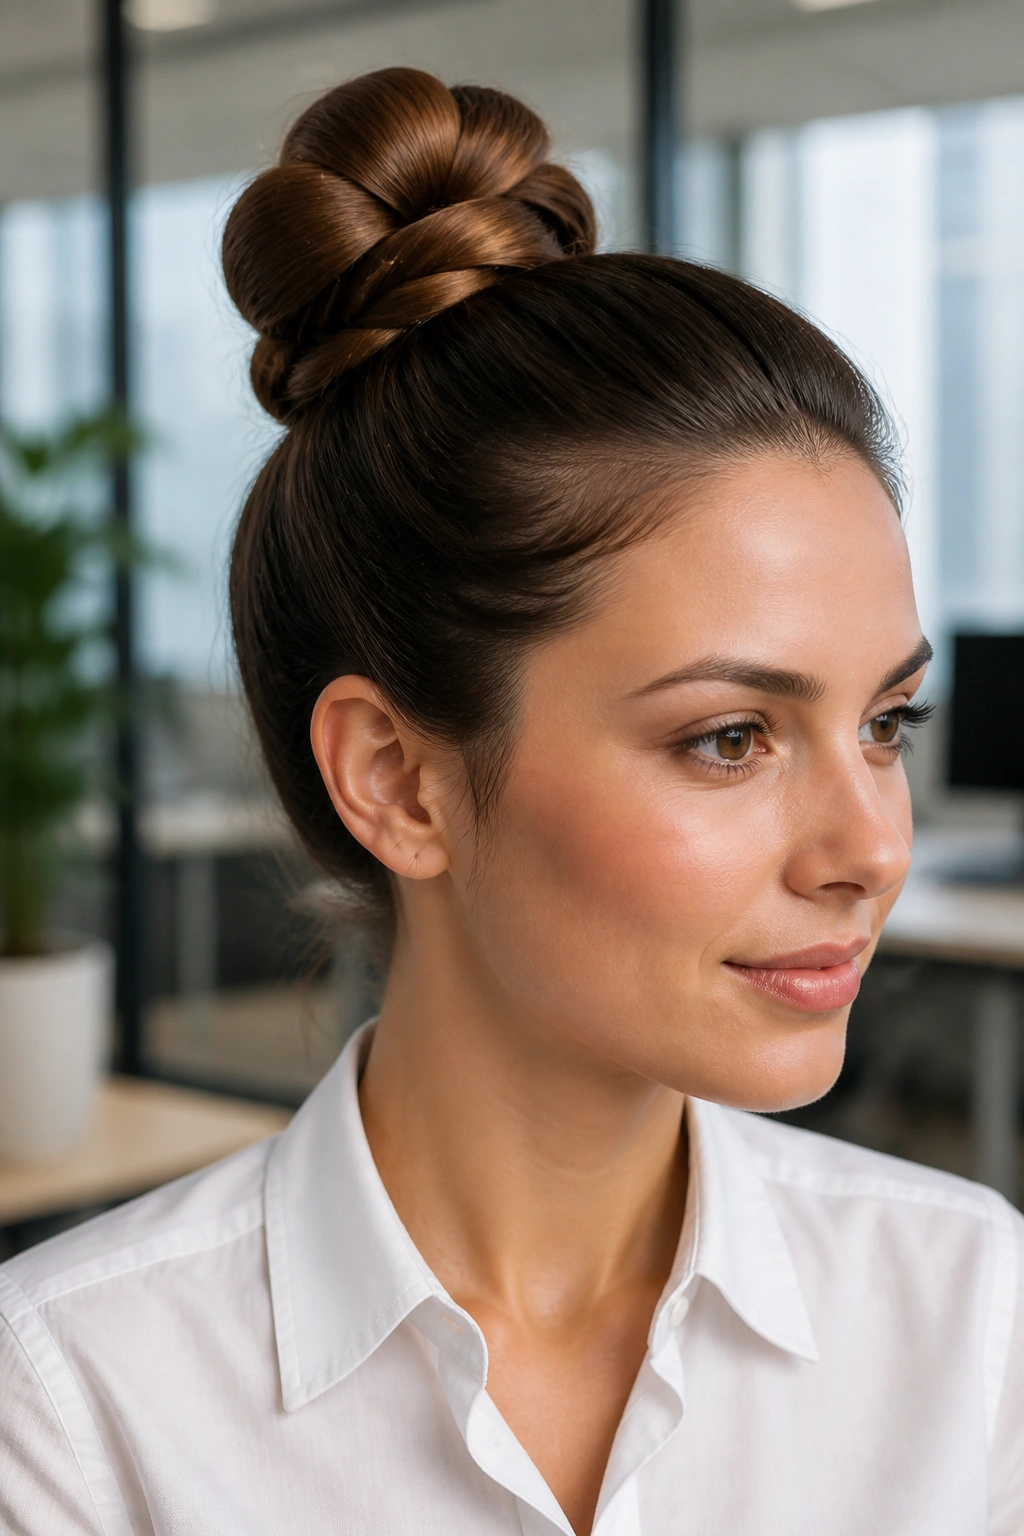
The pretzel bun sits somewhere between elegant and slightly clever. You cross two sections over each other, loop them around, and tuck the ends so the bun ends up with a woven shape instead of a plain round coil. That small difference gives the style more personality without making it loud.
I like this one when the outfit is plain and the hair needs a little shape to carry the look. A crisp shirt and a pretzel bun work well together because both have clean lines. The bun feels thoughtful, not fussy. And that balance is harder to get than it looks.
The key is tension. If the twists are loose, the bun starts to sag and lose its tidy shape. If they are too tight, the style can pull at the roots. Keep the sections smooth, cross them firmly, and pin under the folds where the pins disappear.
It is one of those styles that makes people assume you spent longer on your hair than you did. I never complain about that.
12. Donut Bun
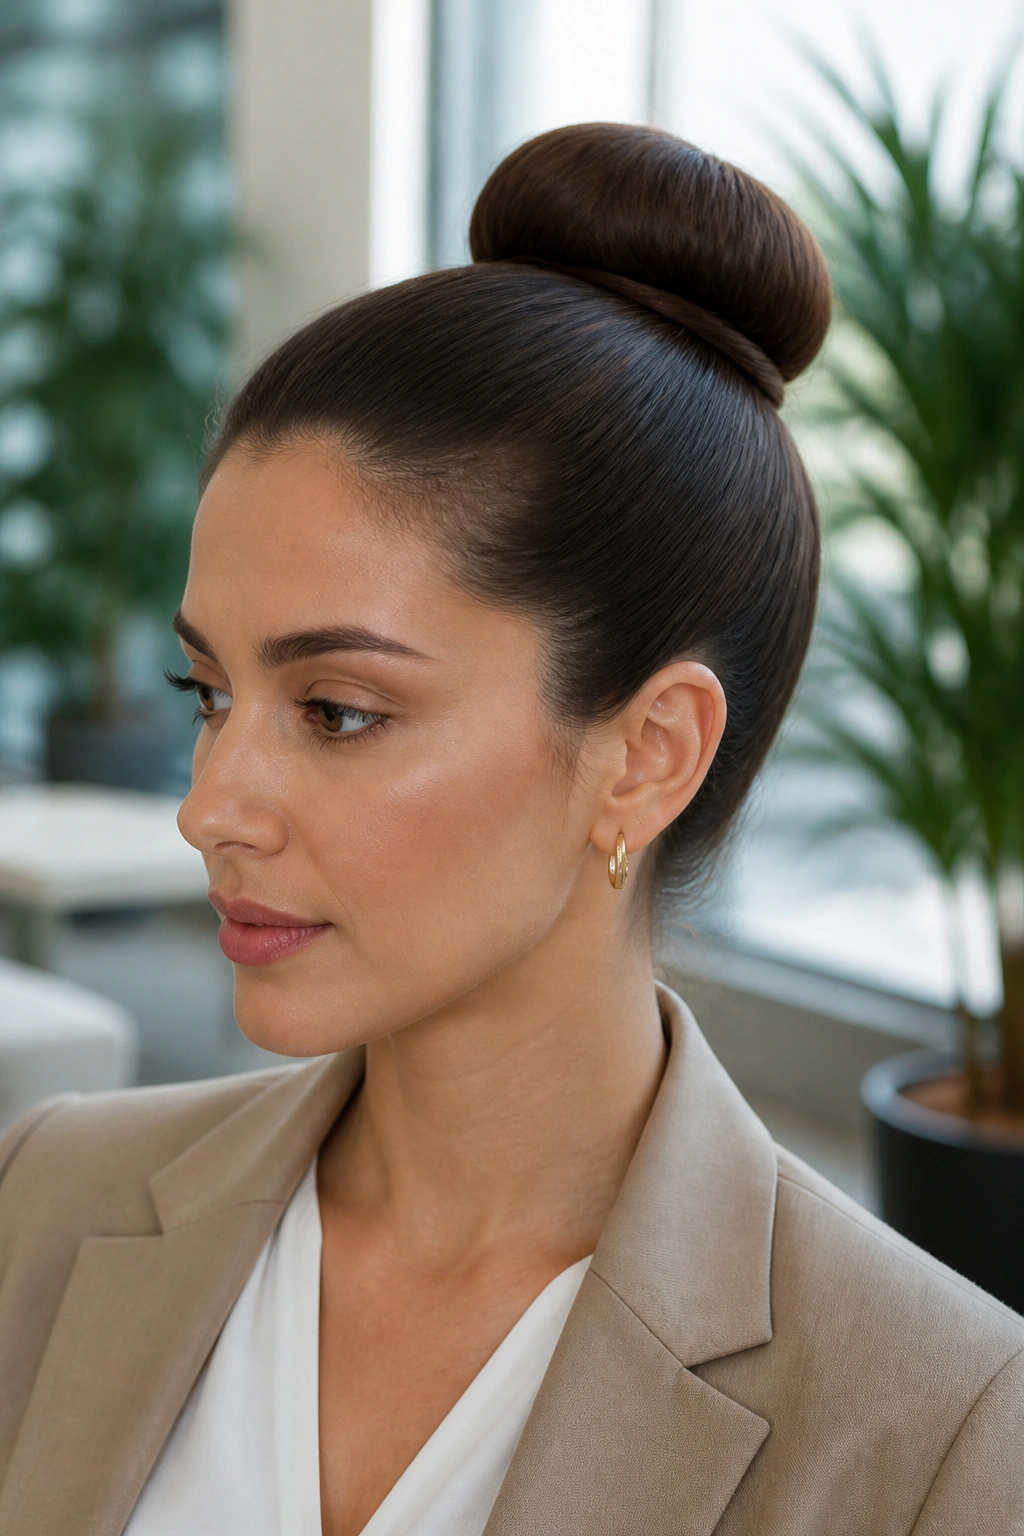
A donut bun is cleaner than people think. Done well, it looks polished and round, not like a recital hairstyle. The shape is smooth, balanced, and especially useful when you want the bun itself to look full even if your hair is on the finer side.
Use a hair donut or a rolled sock if that’s what you have. Pull the ponytail through the center, spread the hair evenly around the form, and wrap the ends underneath until the ring is hidden. The surface should look smooth before you pin anything. If you fix the outside after the bun is built, you usually end up disturbing the whole thing.
What makes it different
Unlike a loose bun, the donut version gives you a clear edge and a round silhouette. That makes it a strong choice for straight hair that tends to collapse into a flat knot.
It is also one of the easiest styles to keep symmetrical. If the ring looks even from the first minute, it usually stays that way. A few pins around the perimeter are enough. Not twenty. Just enough to stop it shifting when you move.
13. Twisted Halo Bun
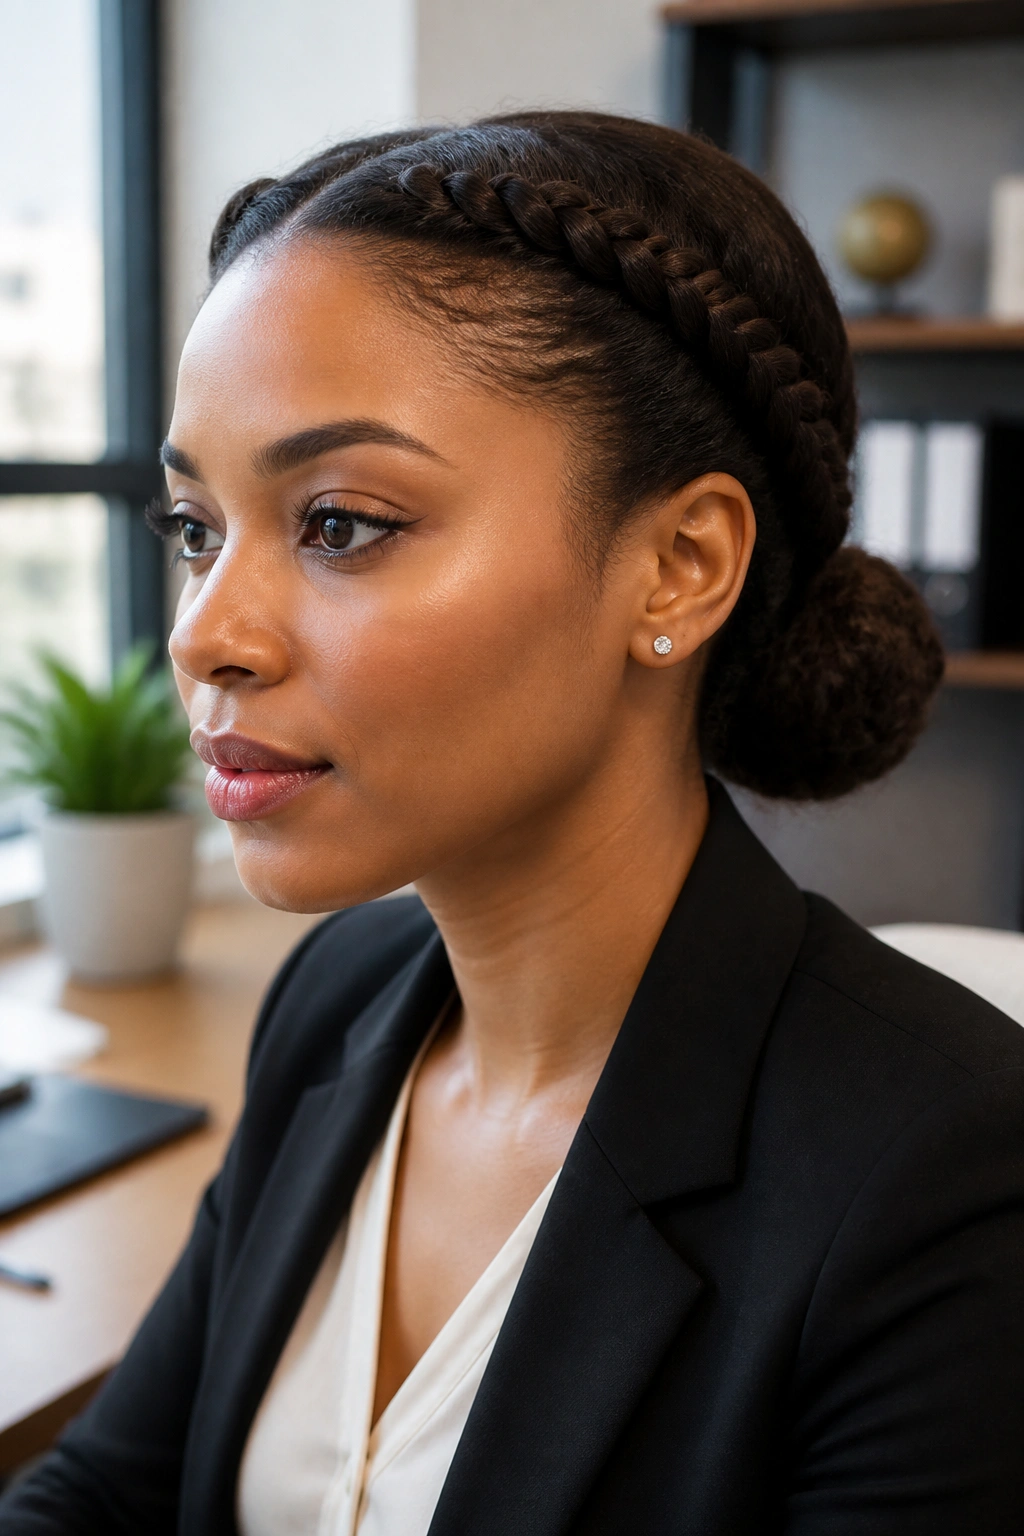
Two flat twists from the temples make the whole style feel controlled from the first inch. That is why the twisted halo bun works so well on office days when your hair around the face likes to escape and bother you by lunchtime.
Start by parting the front sections on each side and twisting them back along the hairline. Bring both twists to the nape, then gather the rest of the hair and shape it into a low bun or tucked knot. The front stays smooth, the sides stay clean, and the bun gets a built-in frame.
Why it stays polished
The twists hold the loose face-framing hairs in place, which makes this style a good choice for layered cuts. It also helps if you have a naturally uneven hairline or shorter front pieces that tend to fall forward.
- Keep the twists flat against the head.
- Use a little cream on the front sections only.
- Pin the twists under the bun, not beside it.
- Finish with a light mist of spray along the top.
This one has a little more shape than a plain low bun, and that is the point. It gives structure without feeling severe.
14. Stacked Low Bun
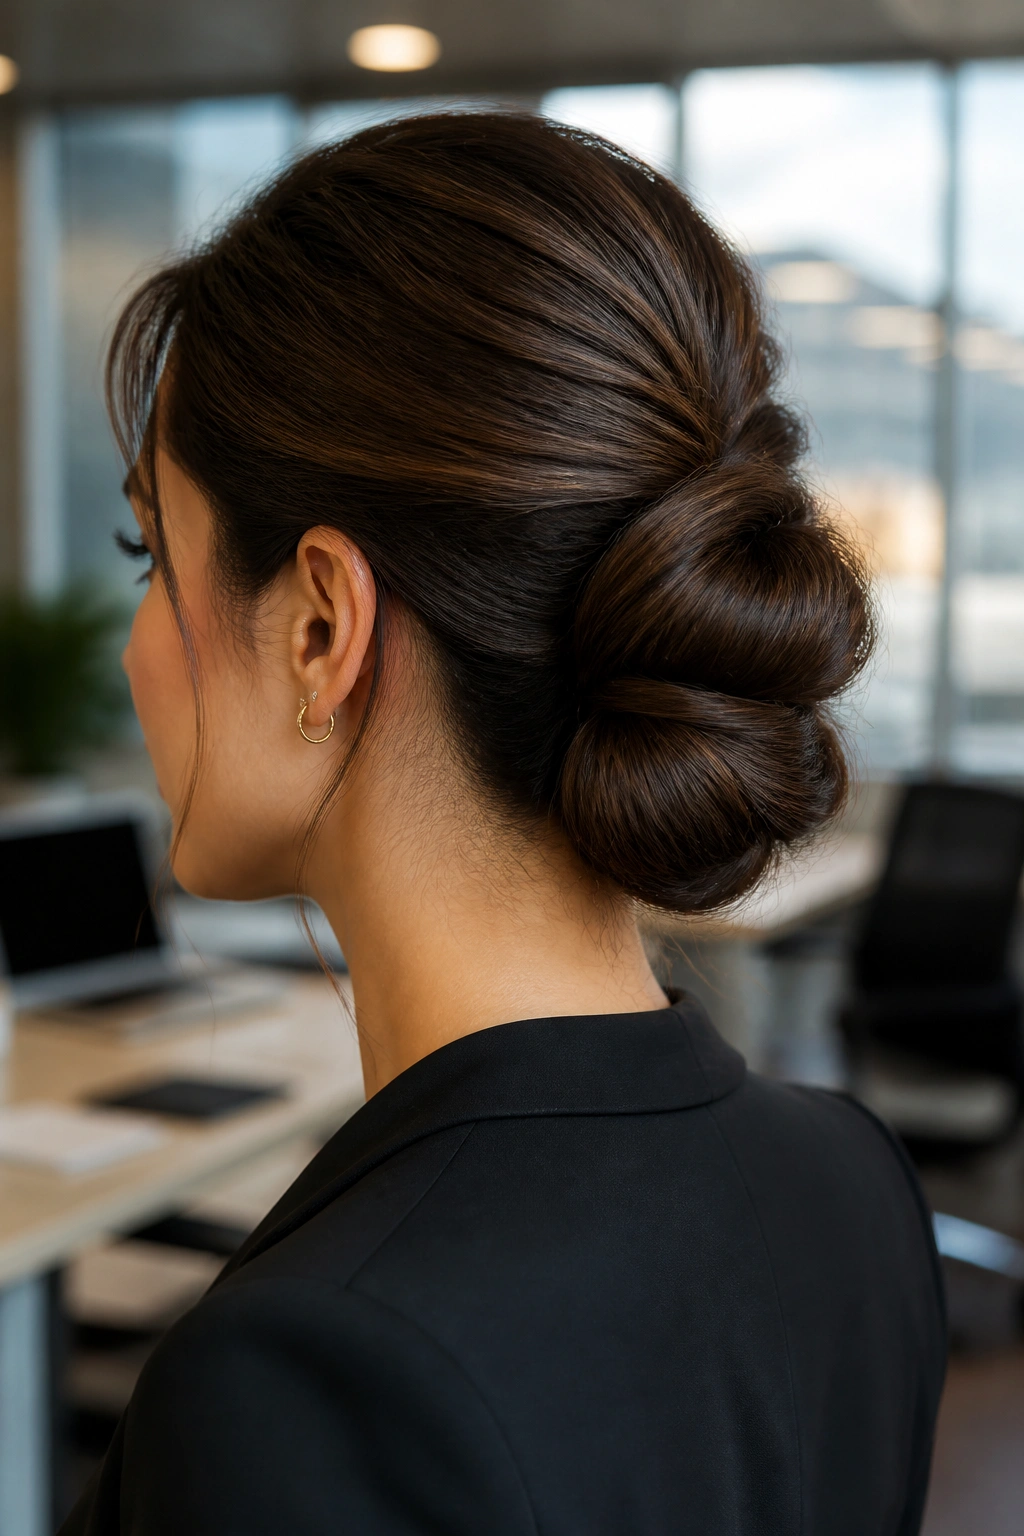
If you want a bun that looks a little more architectural, stacked loops do the job. The style builds height in layers rather than one round mass, which gives the back of the head a neat, structured look. It is a quiet way to make a bun feel more intentional.
The easiest way to create it is to split the ponytail into two sections and wrap them one over the other, stacking the loops so the bun has a visible top and bottom. Pin between the layers as you build. That keeps the structure from slipping into one flat lump.
A stacked bun is especially useful for shorter lengths that do not want to make a big full circle. It gives the illusion of more shape without needing extra hair. Nice trick. Useful one.
The finish should be crisp but not too polished to breathe. If every strand is lacquered into place, the style can look a bit stiff. Leave the top smooth, sure, but let the bun itself have a tiny bit of softness around the edges.
15. Sleek Ballet Bun
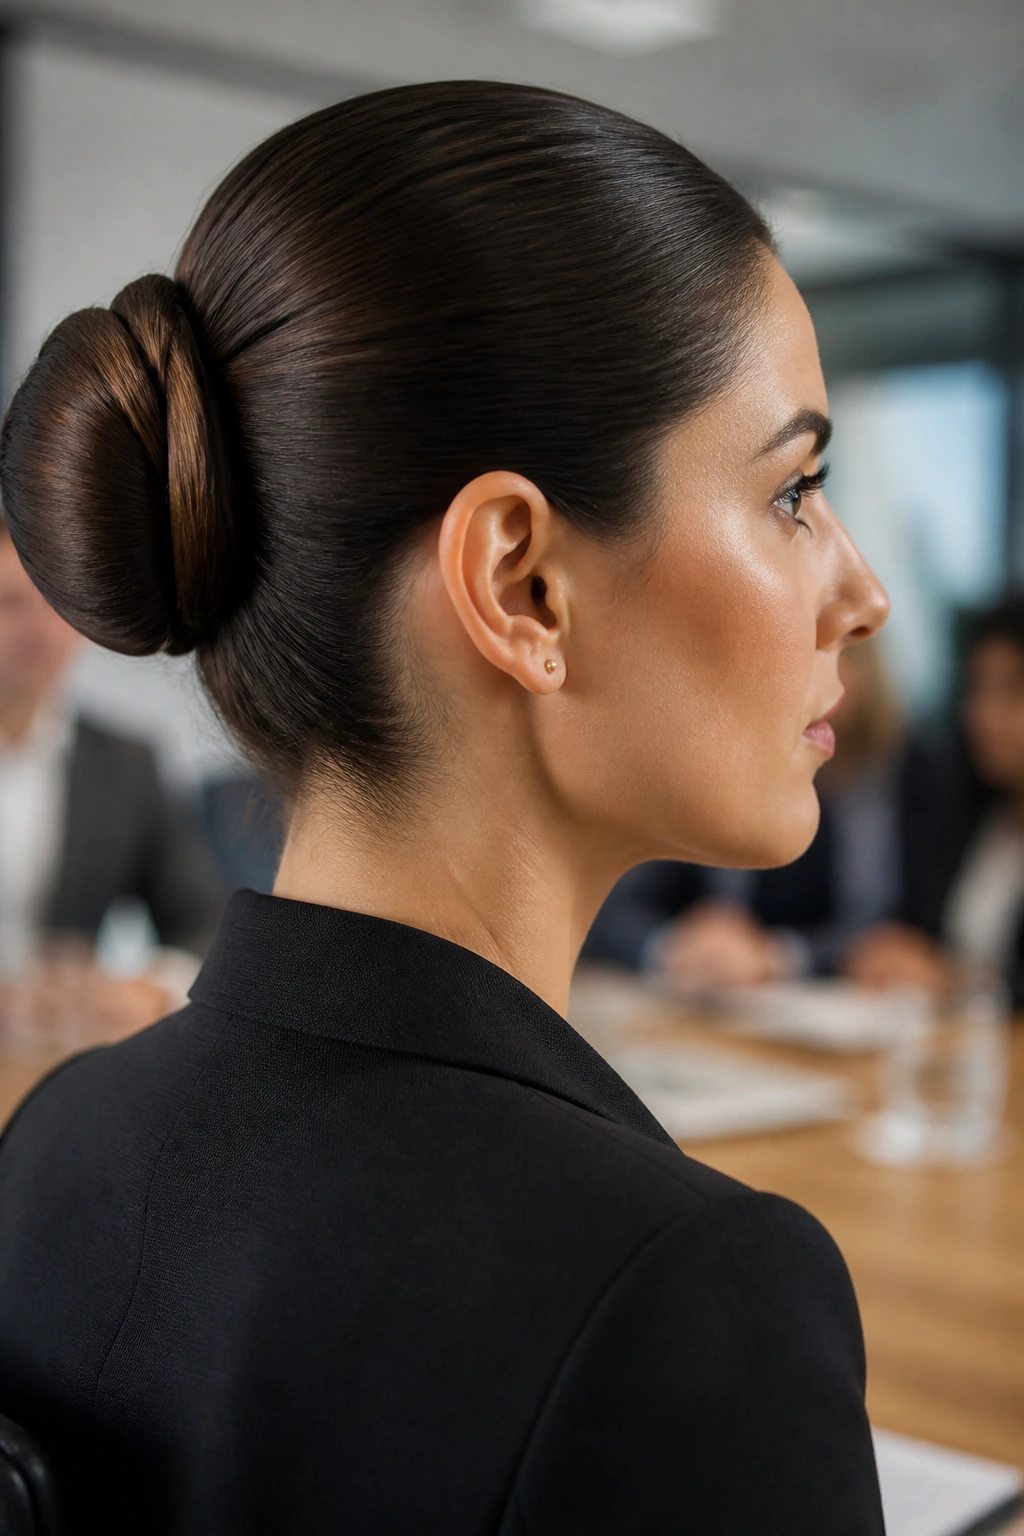
Why does a ballet bun still look right in a boardroom? Because it is simple, centered, and honest about what it is. There is nowhere for flyaways to hide, which means the style looks controlled fast.
This version sits tight against the head, usually at the middle of the back of the head or slightly higher, and it is wrapped into a smooth coil with very little bulk. The hair is brushed flat, secured firmly, and pinned with the kind of precision that keeps the bun from tilting when you move.
A ballet bun is one of the better choices if you need a style that stays clean under headphones, masks, or a high-neck blouse. It also works when you want your hair completely out of the way for a long desk day.
One thing I would not do is wear it at the same exact placement every single day. Move it a little. A few millimeters higher one day, a touch lower the next. That tiny shift helps avoid constant tension on the same spot. It matters more than people think.
16. Loop-Through Bun
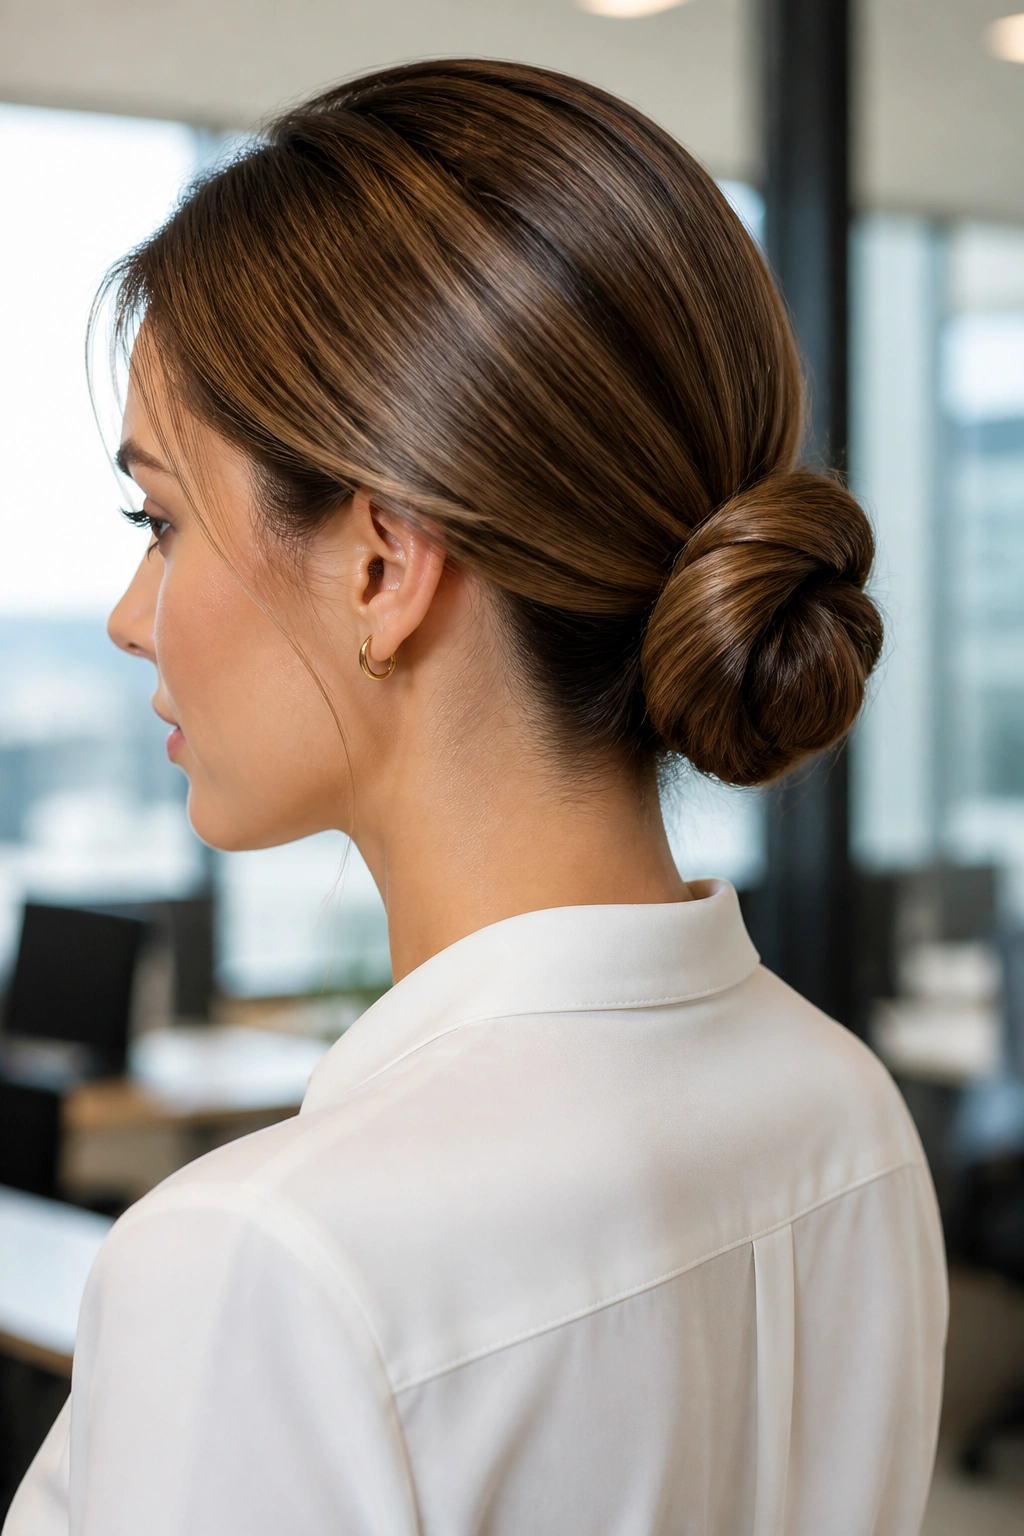
The loop-through bun is the style I reach for when my hair is clean but a little too soft to hold a sculpted twist. It has a tidy shape, but it is quicker than a French twist and less fussy than a braided bun.
Pull the hair into a low or mid ponytail, secure it, and on the last pass through the elastic, leave the length only halfway pulled through so it forms a loop. Then spread the loop neatly, tuck the ends around the base, and pin where needed. The result is compact and smooth with just enough structure to feel finished.
Quick reasons it earns its spot
- Good for medium-length hair that is hard to coil tightly.
- Needs fewer pins than a braided style.
- Holds up well when the hair has a little natural slip.
- Looks neat from the side, which matters more than people admit.
The best part is speed. Not rushed, just efficient. Some workday buns need a full mirror and a calm morning. This one does not.
17. Flat Twisted Bun
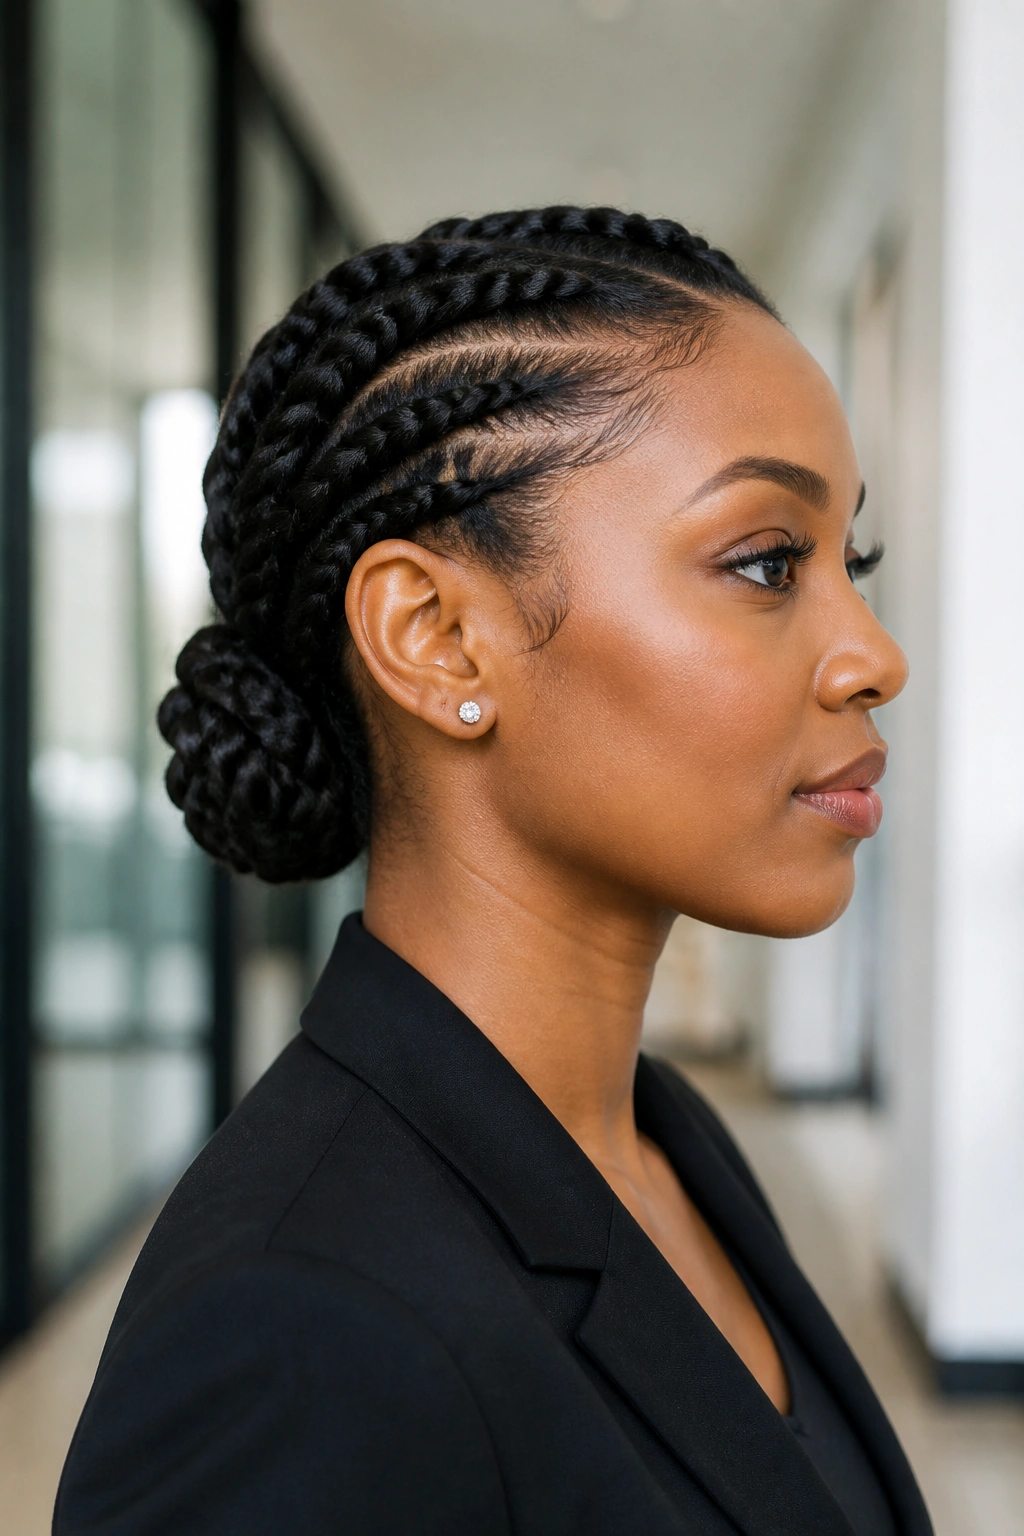
This one hugs the head. That’s the whole appeal. Instead of building height or volume, the flat twisted bun keeps the shape low and close, which makes it especially useful on days when you want a neat profile under coats, blazers, or scarves.
Section the hair into two or three flat twists from the sides toward the nape, then bring the lengths together and tuck them into a bun that sits snug against the head. The surface stays smooth, and the bun does not stick out much from the back. That makes it a quiet choice, but not a boring one.
It is also friendly to fine hair because it does not depend on fullness. In fact, a little less volume can make the shape look cleaner. If your ends are short or layered, tuck them tightly and pin under the folds so they disappear.
A touch of styling cream on the hands is enough. You do not need much more. The style should look controlled, not wet.
18. Polished Mid-Bun
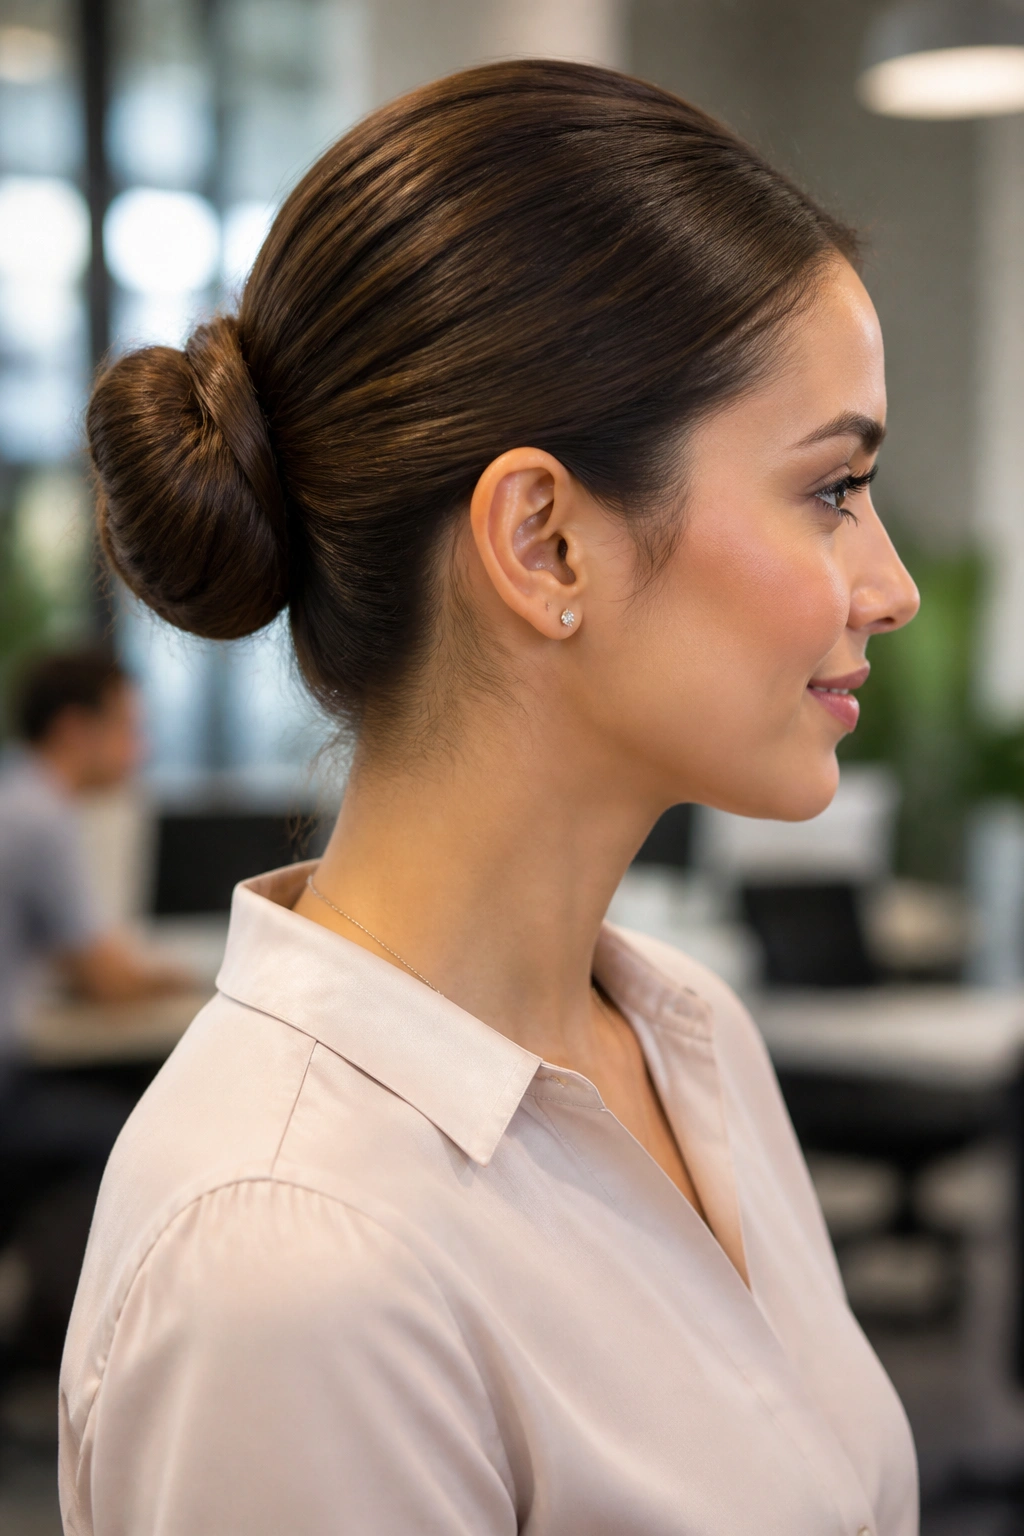
A mid-bun sits in the sweet spot between severe and casual. It gives you the polish of a sleek bun without pushing everything too low or too high, which is why it is one of the most useful styles for office days that run from early meetings to late emails.
The placement matters. A mid-bun should sit around the middle of the back of the head, where it feels balanced from the front and the side. Too high and it starts drifting into top-knot territory. Too low and it loses some of its lift. In the middle, it feels steady.
This is the one I reach for when I want the hairstyle to disappear into the outfit and still hold through a long afternoon. It works with straight hair, wavy hair, and even slightly stretched curls, as long as the surface is smoothed first. Hidden pins help here, because they keep the bun looking clean from every angle while keeping the structure tight.
If you only learn one style from this whole list, make it this one. It is plain in the best way. Reliable. Sharp. Easy to repeat when your week gets crowded.
