



Long hair can make a Dutch braid look gorgeous for about ten minutes, then the weight starts dragging the shape down if the braid was too loose at the crown. Dutch braid hairstyles for long hair solve that problem by building the braid on top first, where the eye can actually see it, then letting the length do the rest.
That’s why these styles have such range. A Dutch braid on long hair can feel clean and strict, soft and romantic, sporty, dramatic, or halfway between a braid and an updo. The same basic technique changes fast depending on where you start the braid, how tightly you feed in sections, and whether you leave the tail hanging, twist it up, or split it into something more playful.
Second-day hair usually behaves better than freshly washed hair. Freshly cleaned strands can slip like crazy, especially if your hair is fine or very silky, and a little dry shampoo or texturizing spray near the roots can save you from constant redoing. Not much. Just enough grip to keep the sections honest.
The cleanest place to start is the classic center braid.
1. Classic Center-Part Dutch Braid

The classic center-part Dutch braid is the style that makes long hair look orderly without flattening it into the scalp. Start with a straight center part, pick up three even sections at the crown, and braid under instead of over so the plait sits on top of the hair. That raised pattern is the whole point.
Long hair gives this version a nice payoff. You get a tidy braid at the top, then a long, rope-like tail that shows off thickness and length in a way a regular three-strand braid often can’t. Keep the first few passes firm so the braid holds its shape near the hairline, then loosen your hands a little once you pass the crown. That keeps the front clean and the lower half from looking too stiff.
A small amount of smoothing cream on the ends helps a lot here. If your ends fray or puff out, the braid can look unfinished even when the top is neat. I usually braid all the way down and secure with a thin elastic about 1 inch from the ends, then tug the outer edges very lightly if I want a wider shape.
A little tension matters here.
2. Twin Dutch Braids

Twin Dutch braids are the style I reach for when hair has to stay put. They sit neatly, they last through movement, and they make long hair feel controlled without pinning every strand into a bun. If you’ve got a busy day, a workout, or a trip where you do not want to think about your hair again, this is the one.
Why They Stay Put
Each braid anchors its own side of the head, which spreads the weight out instead of hanging all of it from one point. That means less slipping at the crown and fewer loose pieces near the nape. Long hair benefits from that balance because the length is divided instead of pulling against one single braid line.
- Part the hair straight down the middle before you start.
- Begin each braid just above the temple, not too far back.
- Keep the sections even so one braid does not look thinner than the other.
- Finish low or mid-back, depending on whether you want a sporty or softer look.
Best for: gym days, casual errands, travel days, and anyone who wants a braid style that stays neat for hours.
3. Dutch Braid Ponytail

Want the lift of a braid without losing the swing of a ponytail? A Dutch braid ponytail gives you both. The braid handles the top section, where you need control and polish, then the ponytail keeps the length visible and easy to move.
The trick is to braid from the front hairline or upper crown down to the point where you want the ponytail to sit, then gather everything together with a strong elastic. On long hair, that ponytail can look thick and dramatic instead of limp. Wrap a small strand around the elastic if you want the base to look cleaner, and pin the end underneath with a bobby pin.
How to Keep the Tail Full
If the tail looks flat, don’t blame the braid right away. The fix is usually in the prep. A little root lift at the crown, plus a gentle pull on the ponytail after securing it, gives the style body without making it messy.
This one works especially well when your hair is long enough to fall below the shoulder blades. The braid does the framing. The ponytail does the movement.
4. Half-Up Dutch Braid

Picture hair that keeps falling into your face while you want the rest of it down. That’s exactly where a half-up Dutch braid earns its keep. It gives you the structure of a braid across the top, but leaves enough length loose that the style still feels soft.
Start by taking a section from each temple and braid it back along the crown, stopping once you reach the back of the head. Secure it with a small elastic or a couple of pins, then let the rest of the hair hang loose. On long hair, that contrast matters. The top looks deliberate, and the lower length keeps the style from feeling too severe.
A little wave in the loose section makes this style better. Straight lengths can work too, but they tend to make the braid look more formal and a little sharper around the ends. If you want it softer, curl only the last third of the hair, not the whole head.
- Start the braid a finger’s width behind the hairline.
- Keep the braid close to the scalp for the first few passes.
- Leave the loose length brushed out or softly waved.
- Pin the braid ends under a top layer so the back looks clean.
That balance is the appeal. Clean on top. Easy everywhere else.
5. Dutch Braid Crown Around the Hairline
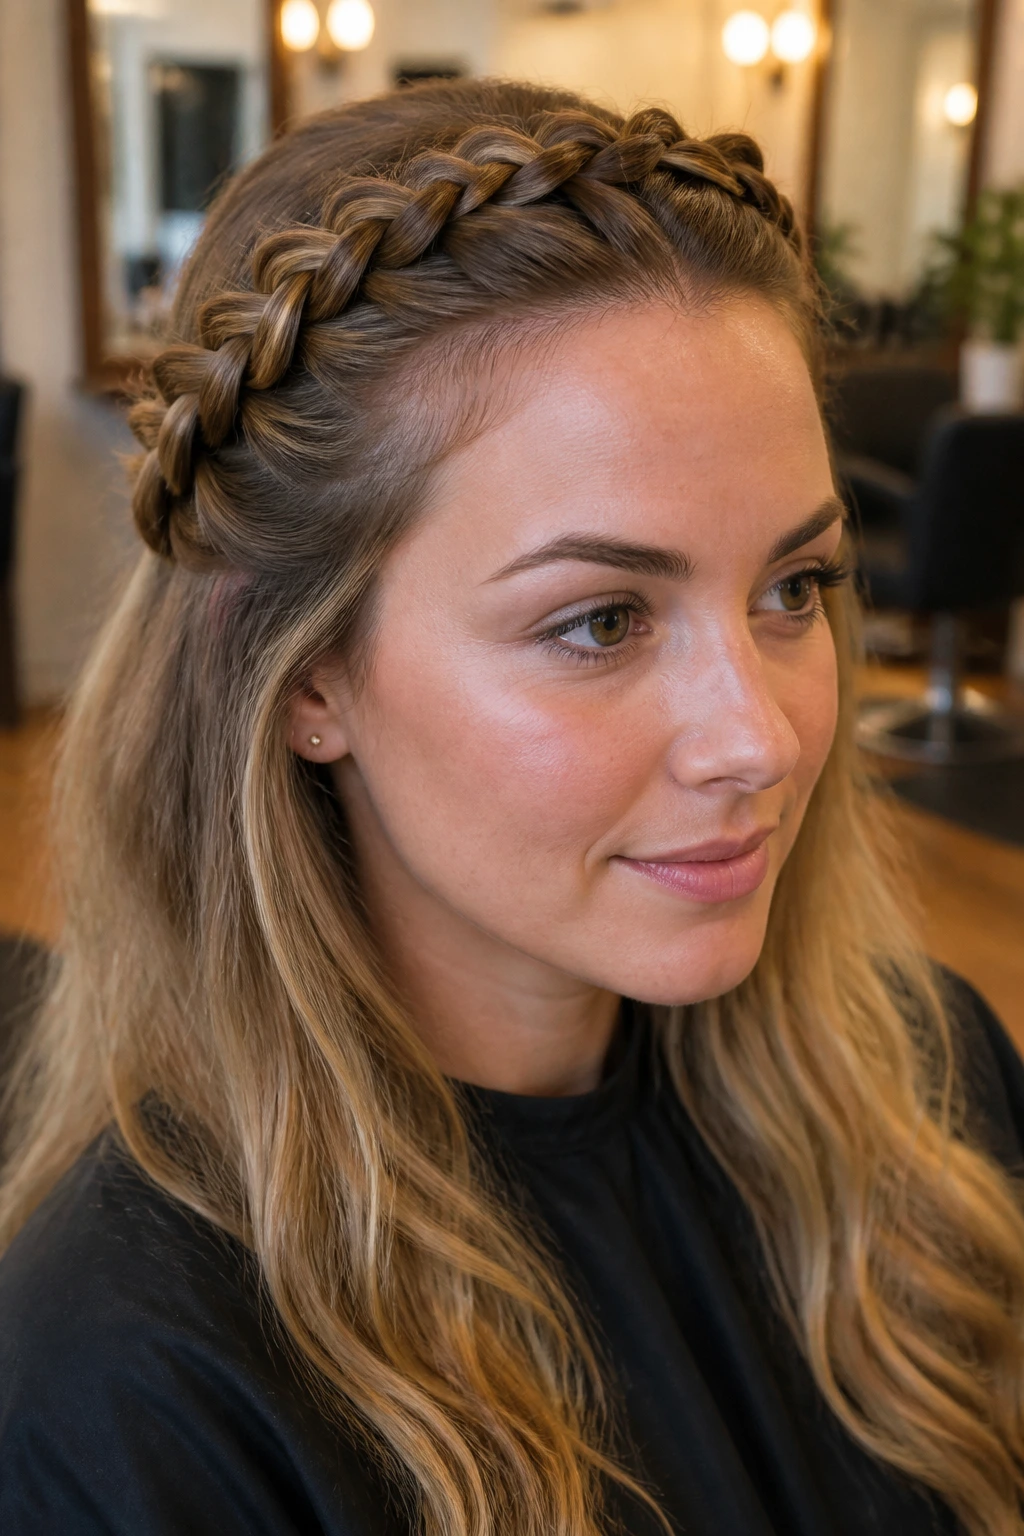
A crown braid looks fussy until you realize the long hair is doing half the work. When the braid runs around the hairline and across the back of the head like a band, it creates a frame that feels polished without needing much else.
This style works because the braid follows the perimeter instead of fighting the center. You braid from one side of the part, wrap around the head, and tuck the tail under the opposite side with hidden pins. Use bobby pins in the direction of the braid, not sideways, so they disappear better and grip the braid base instead of sliding out.
Long hair is useful here because you get enough length to finish the loop with some substance. Shorter lengths can struggle to make the wrap feel complete. With long hair, the braid can travel farther and still have enough tail to anchor under the other side.
It behaves like a built-in headband.
If you want it to feel less strict, loosen the braid a touch after pinning and pull a few tiny pieces around the temples. Just a few. Too much softening and the shape starts to vanish.
6. Side-Swept Dutch Braid

A center braid is neat; a side braid has more attitude. When you start a Dutch braid from a deep side part and carry it diagonally across the head, the whole style feels more relaxed and a little more directional.
This is one of the best Dutch braid hairstyles for long hair when your hair is thick, because the side placement helps distribute weight over one shoulder instead of straight down the middle of your back. It also works well with layered cuts. Shorter layers can blend into the braid more naturally when they’re not split symmetrically on both sides.
If you wear side parts often, this version will probably feel familiar fast. Start above the heavier side of the part, braid toward the opposite nape, then let the tail fall over one shoulder. A loose shoulder drape is the point here — if you cinch it too tightly at the end, you lose the easy shape.
I like this one with a high-neck top or a plain T-shirt. The braid gives the outfit structure without making you look overdressed.
7. Dutch Braid Into a Low Bun
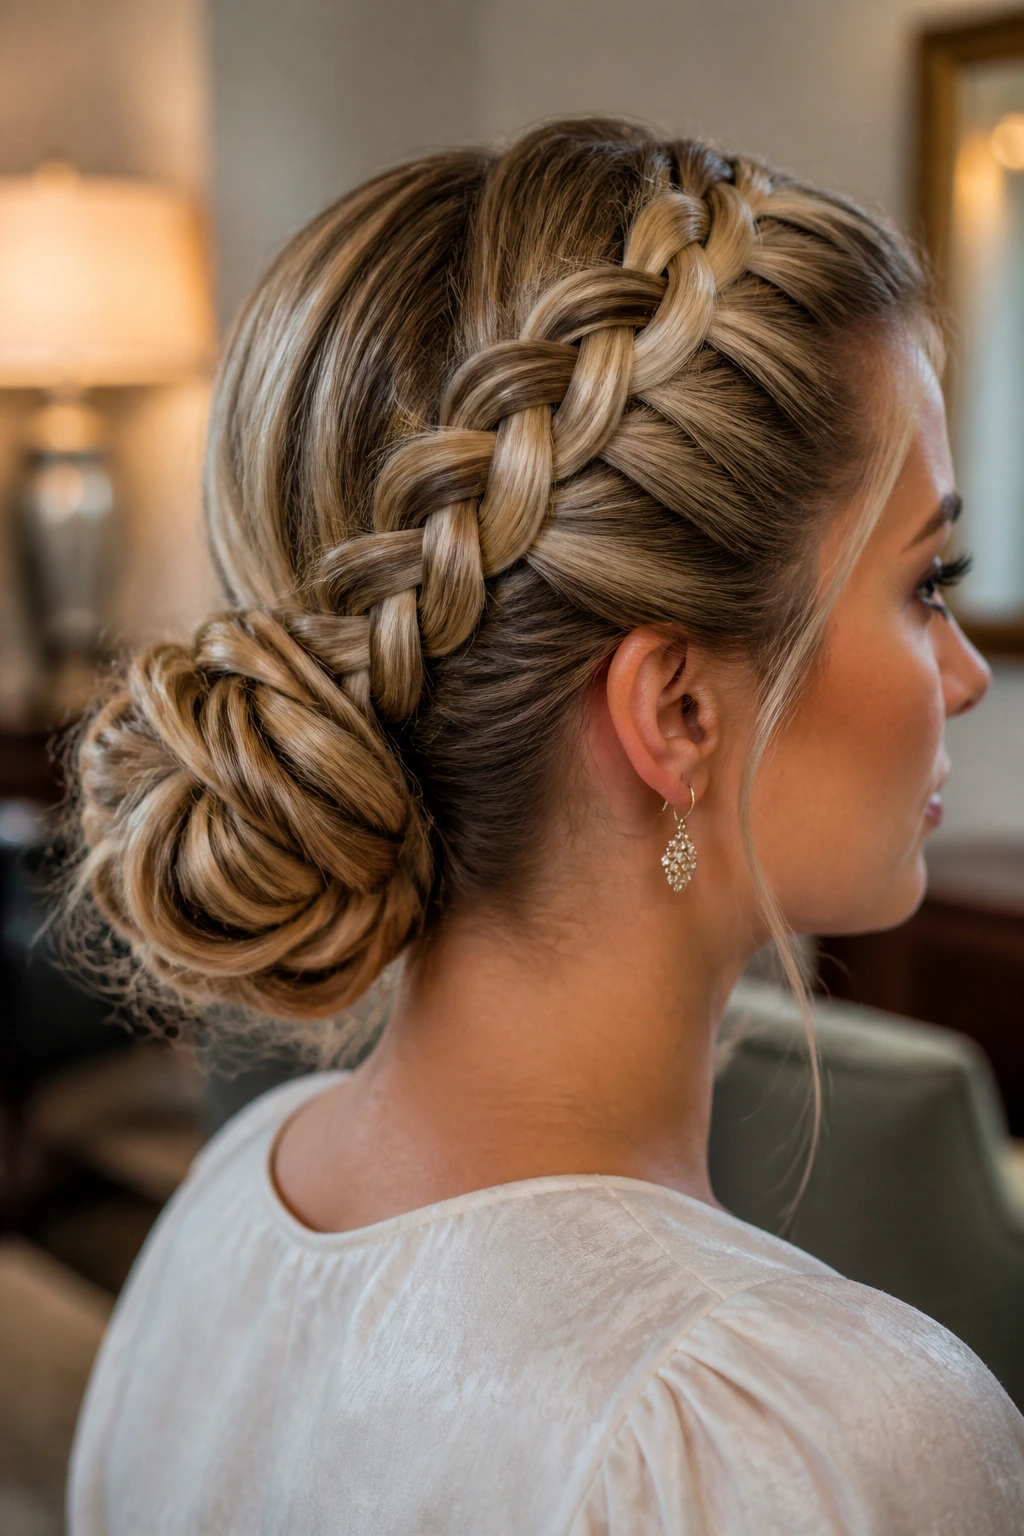
This is the braid I like when the outfit wants polish but not stiffness. A Dutch braid into a low bun starts with a clean braid at the crown or mid-head, then turns the tail into a bun at the nape. The result feels tidy, but not severe.
Long hair makes the bun better. There’s enough length to coil properly, so the bun looks full rather than pinched. Braid to the point where you want the bun to sit, secure the tail, twist it around its base, and pin it with U-pins or regular bobby pins. Do not overload the bun with pins all in one spot; spread them around the circle so the weight holds evenly.
Best Uses for This Shape
- Workdays when you need hair off your neck
- Formal events where a full updo would feel too stiff
- Cool weather, when collars and coats keep snagging loose hair
- Long hair that needs the ends tucked away
The braid gives the bun a little texture at the top, which is exactly what keeps it from looking flat. It’s a small detail, but it changes the whole read of the style.
8. Dutch Braided Pigtails
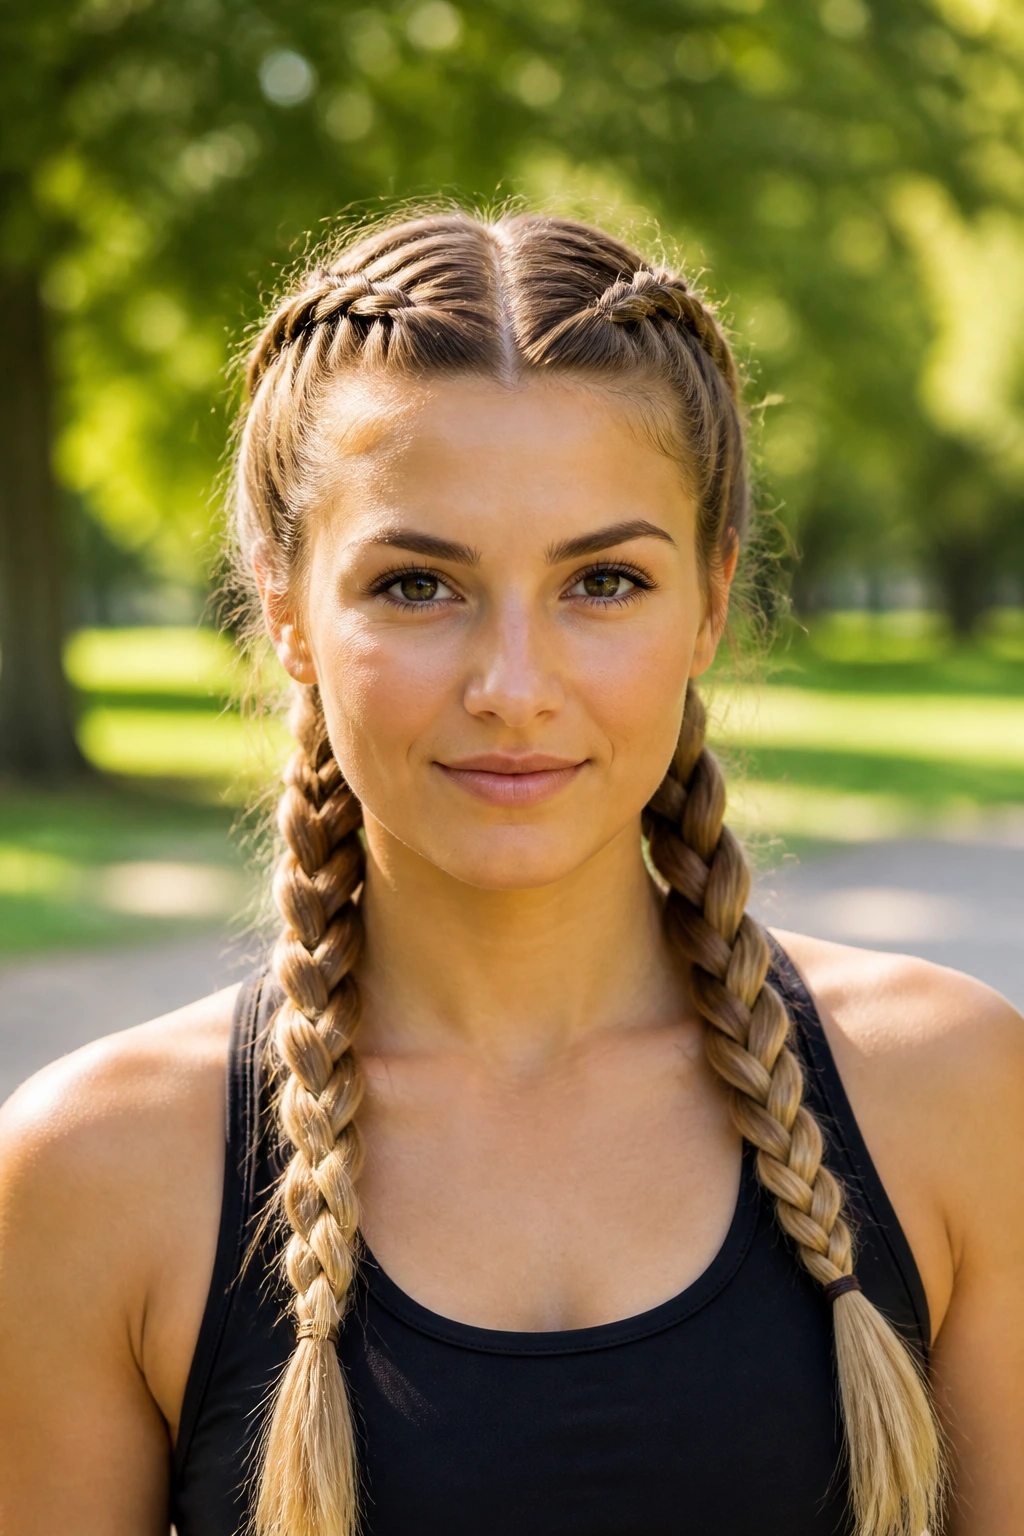
I keep coming back to pigtails when the goal is clean hair and zero fuss. Dutch braided pigtails split the weight evenly, keep the top neat, and give long lengths a playful shape that does not feel childish if you style them with a little care.
The structure is simple: part the hair down the center, create two Dutch braids, and either stop at the nape or continue all the way through the ends. The long hair helps the style look balanced because each side has enough length to hang with substance. Thin pigtails can look flimsy. Thick ones look intentional.
A softer version sits low and loose. A sharper version starts higher on the head and stays close to the scalp. Either way, the center part needs to be straight if you want the style to look clean. If the part wanders, the whole look gets crooked fast.
- Use a fine-tooth comb for the part.
- Keep both braid starts at the same height.
- Secure each end with the same size elastic.
- Pull a few outer loops wider if you want a fuller shape.
There’s something practical about this style that I always like. It works hard without trying to look complicated.
9. Dutch Braid Mohawk
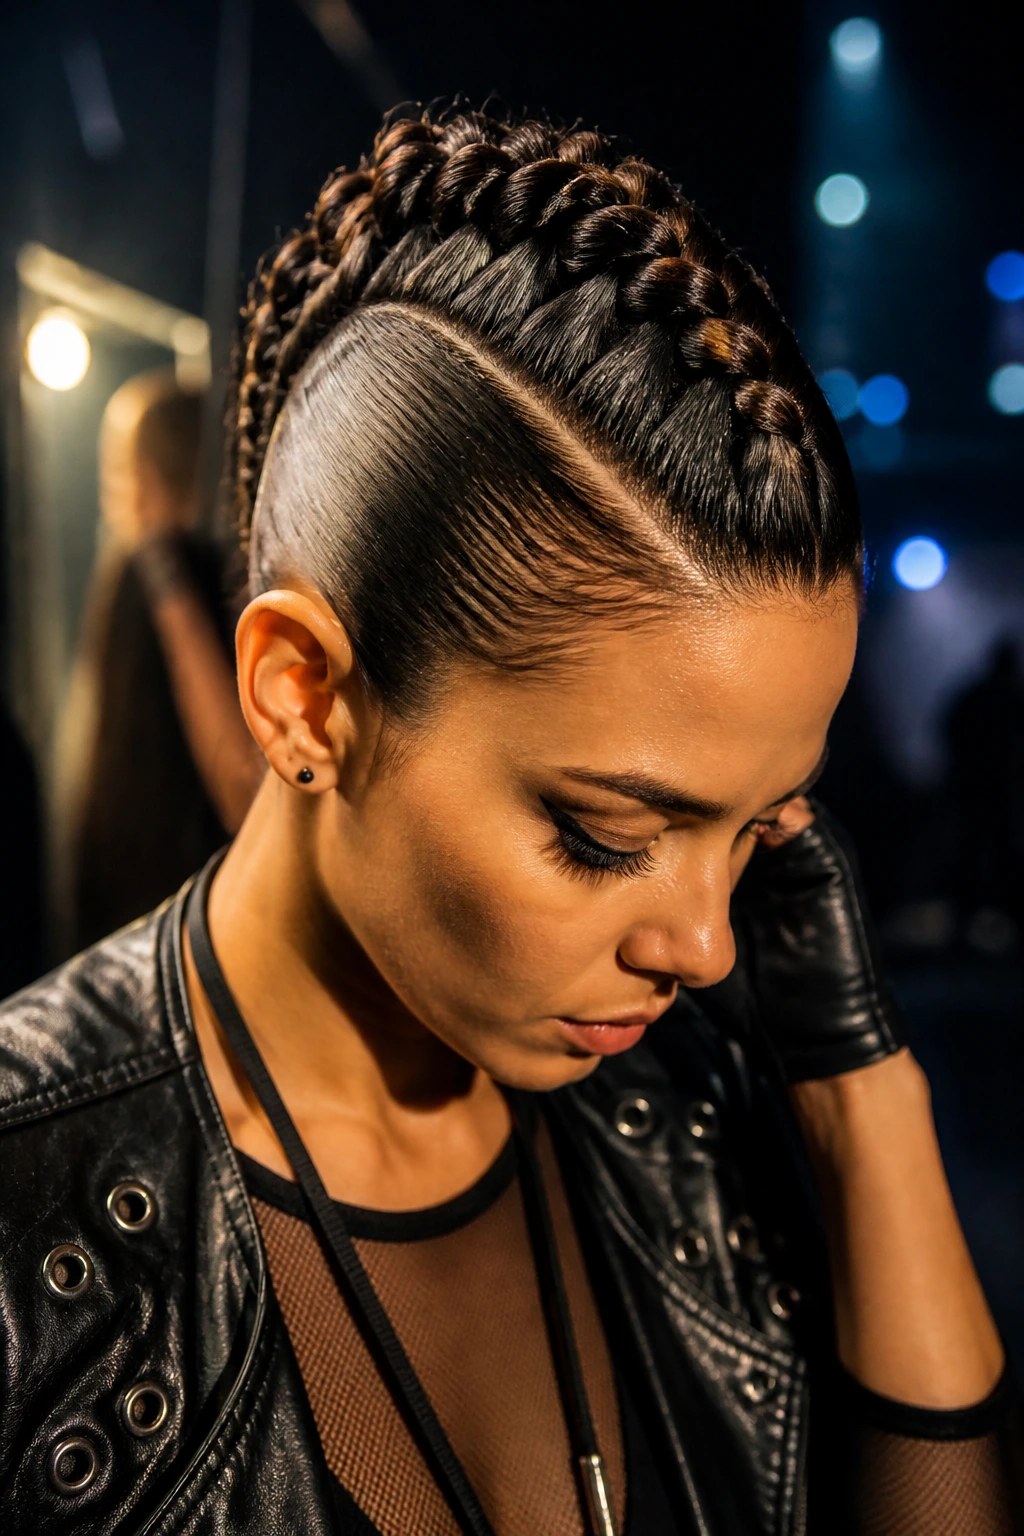
Need something with more edge than a normal braid? The Dutch braid mohawk gives you a ridge of braid right through the center, with the sides pulled tight, slicked back, or left loose for contrast. It has a bit of attitude built in.
How to Wear It Without Looking Overstyled
The key is proportion. The center braid should feel bold, but not so wide that it swallows the rest of the hair. Start at the front hairline, braid straight back along the middle, and keep the side sections controlled. You can use a light gel at the temples if you want the sides smooth, or leave them soft if you want more movement.
Long hair gives this style a dramatic tail at the back, which is half the fun. The braid line reads like a spine, then the rest of the length can hang down or be pinned up into a half-up finish. I prefer this style for concerts, nightlife, or any time you want the braid to be the main feature.
It’s not subtle. That’s the point.
If your hair is fine, tease the crown a little before you braid. If it’s thick, you can usually skip that and let the braid’s own texture do the work.
10. Dutch Braid Bubble Ponytail
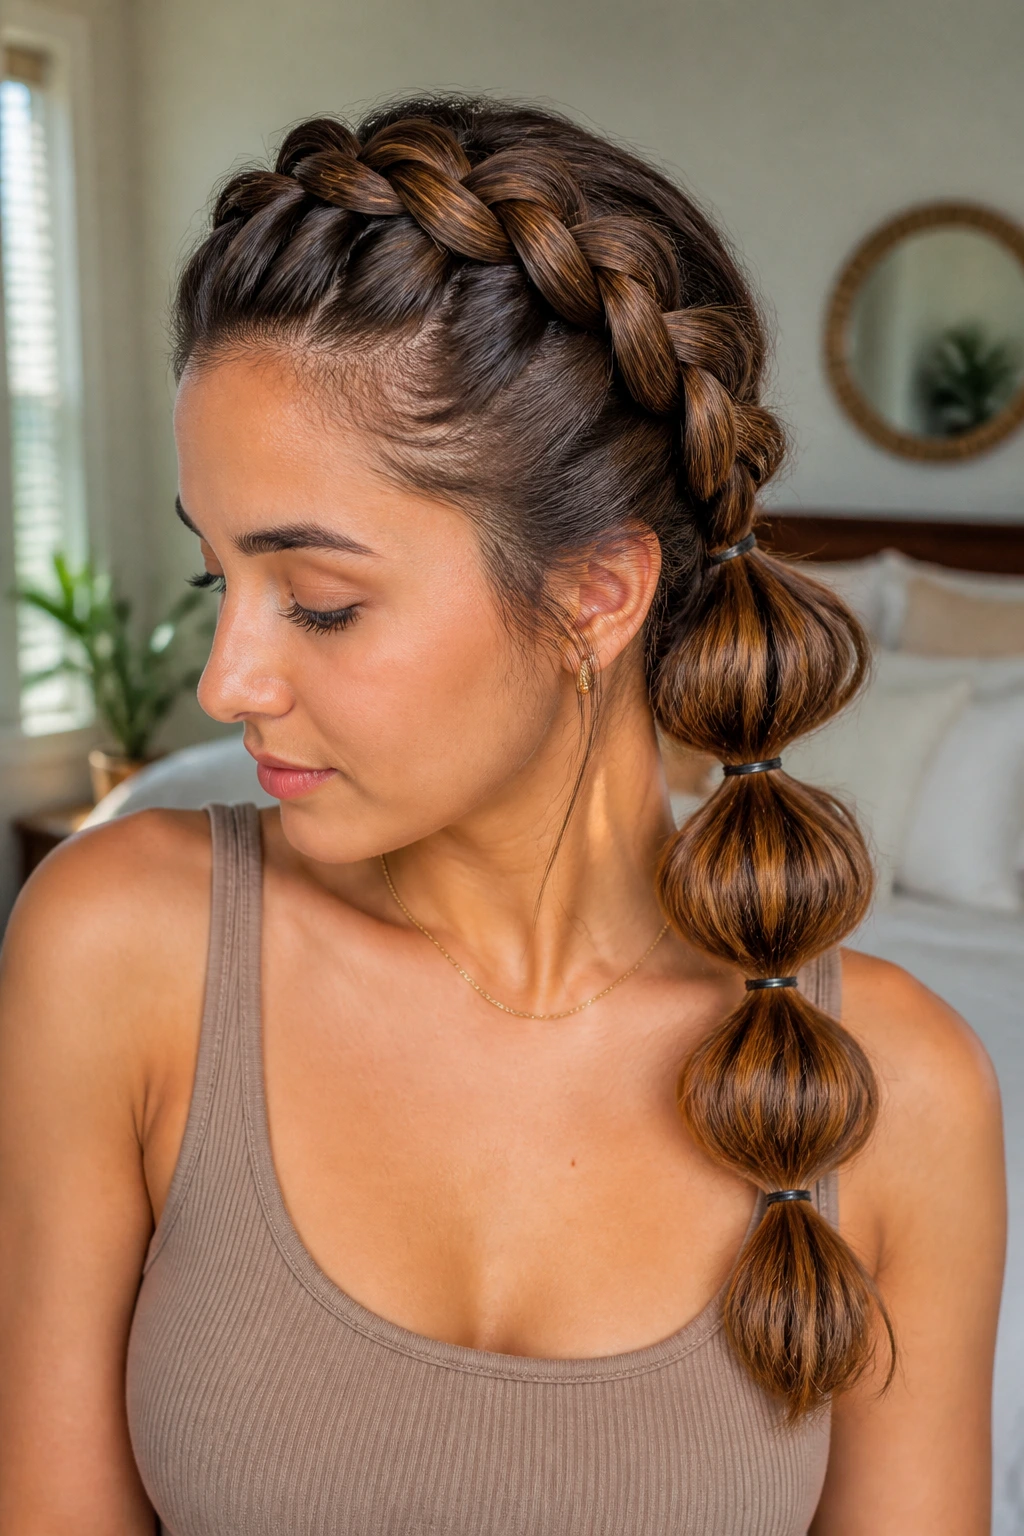
Elastic bands spaced down long hair create a rhythm that regular braids can’t fake. A Dutch braid bubble ponytail gives you that rhythmic look while keeping the top section controlled and smooth.
Start with a Dutch braid across the crown or along the center, then gather the rest into a ponytail. Place small elastics every 2 to 3 inches down the tail, then gently tug each section outward until it rounds into a bubble. Spacing matters — if the elastics are uneven, the bubbles start looking accidental instead of designed.
This style is especially good when the hair is very long because the bubbles need length to show. On shoulder-length hair, the effect can look cramped. On long hair, each section has room to puff out and sit separately. Use clear elastics if you want the bands to disappear, or matte ones if you want them to read as part of the style.
A little texturizing spray helps the bubbles hold their shape. Too much, though, and the hair gets crunchy. You want grip, not stiffness.
The result feels playful and structured at the same time, which is a rare combination.
11. Dutch Fishtail Hybrid
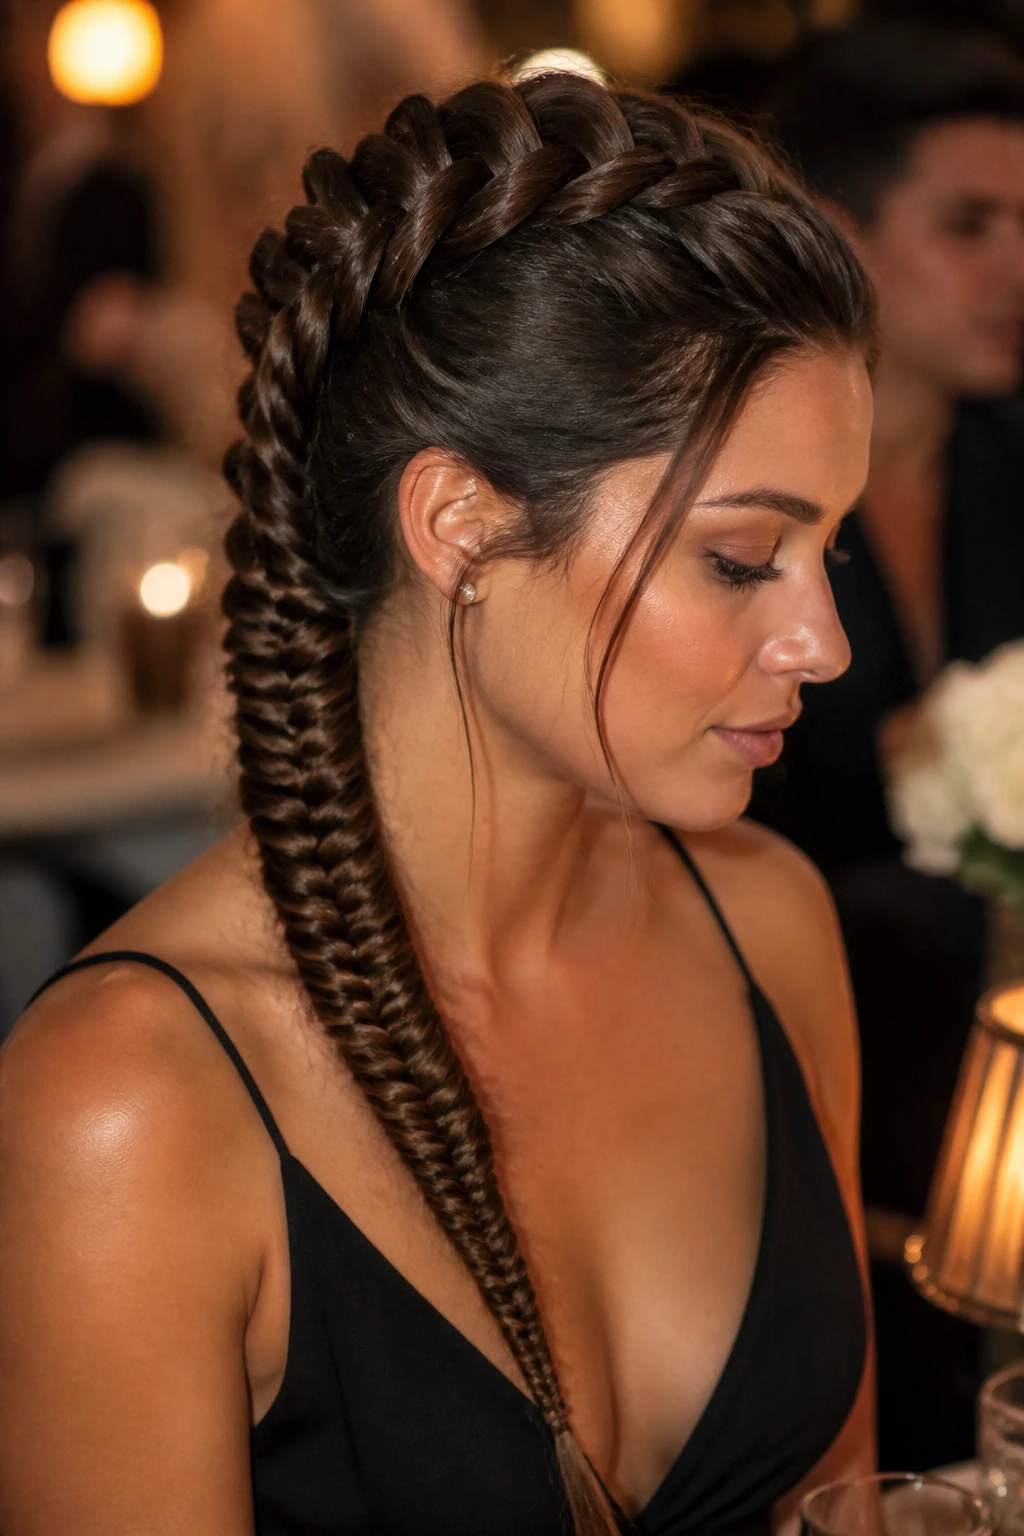
A full Dutch braid feels bold; a fishtail finish feels sharper and finer. Put the two together and you get a hybrid that has a heavier-looking crown with a more detailed tail. It’s a smart move on long hair because the length has enough room to show both textures.
Start with a standard Dutch braid at the top, then switch into a fishtail once you reach the lower half. That shift changes the visual weight. The top stays broad and raised, while the tail becomes tighter and more intricate. If your ends are blunt, smooth them with a little cream first so the fishtail finish doesn’t fray out.
This one looks especially good when the hair is all one shade or has subtle highlights. The braid pattern becomes easier to see. If the hair is heavily layered, the fishtail section can be a little tricky, but the payoff is still worth it.
I’d wear this one for dinners, evening events, or any setting where you want the braid to feel a little more detailed than the usual three-strand finish. It reads polished, but not stiff.
12. Pull-Through Dutch Braid
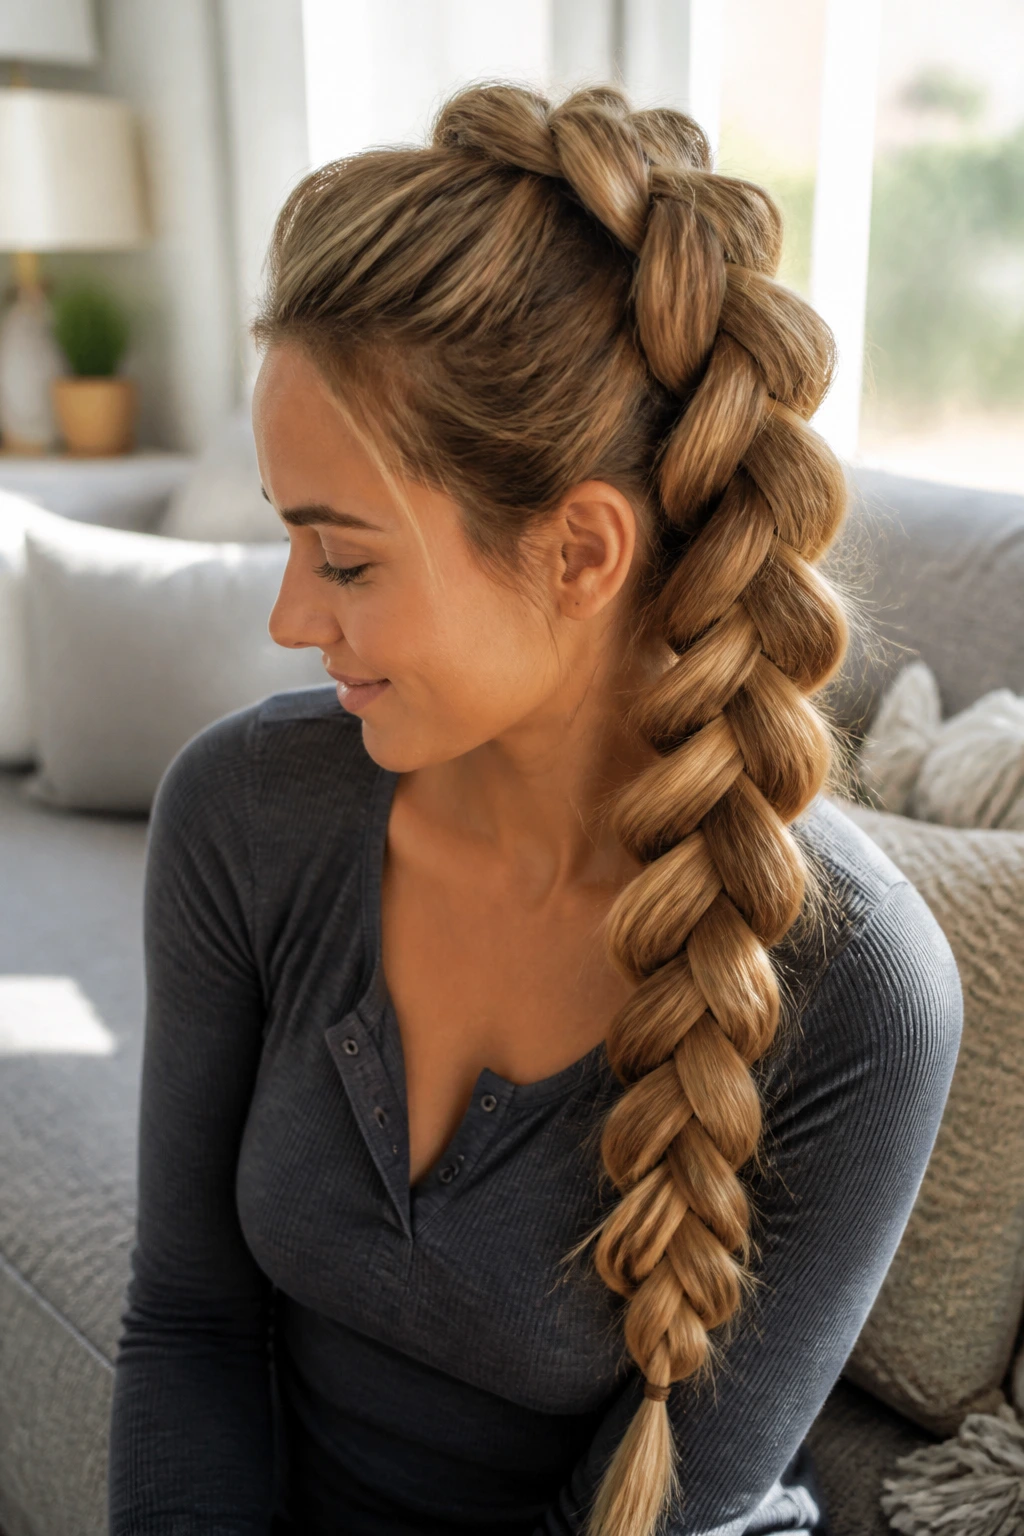
If your fingers get tired of weaving, the pull-through version is the easiest way to get a big braid look. It is not a true braid in the traditional sense, but the visual effect is close enough that most people will just call it a braid and move on.
The style uses stacked ponytails or small tied sections that are split and pulled through one another. Long hair is perfect for it because the volume builds fast and the finished braid looks full from top to bottom. You can make it high, low, side-swept, or centered. The mechanics stay the same.
This is a strong choice for thicker hair, layered hair, or anyone who wants a Dutch braid look without trying to manage three sections at once. Use several small elastics, keep the spacing even, and gently tug the sides of each section after securing it. The widening happens after the elastic, not before.
It’s also a good party style because it gives a lot of shape without requiring perfect hand coordination. A little imperfection actually helps here.
13. Ribbon-Woven Dutch Braid
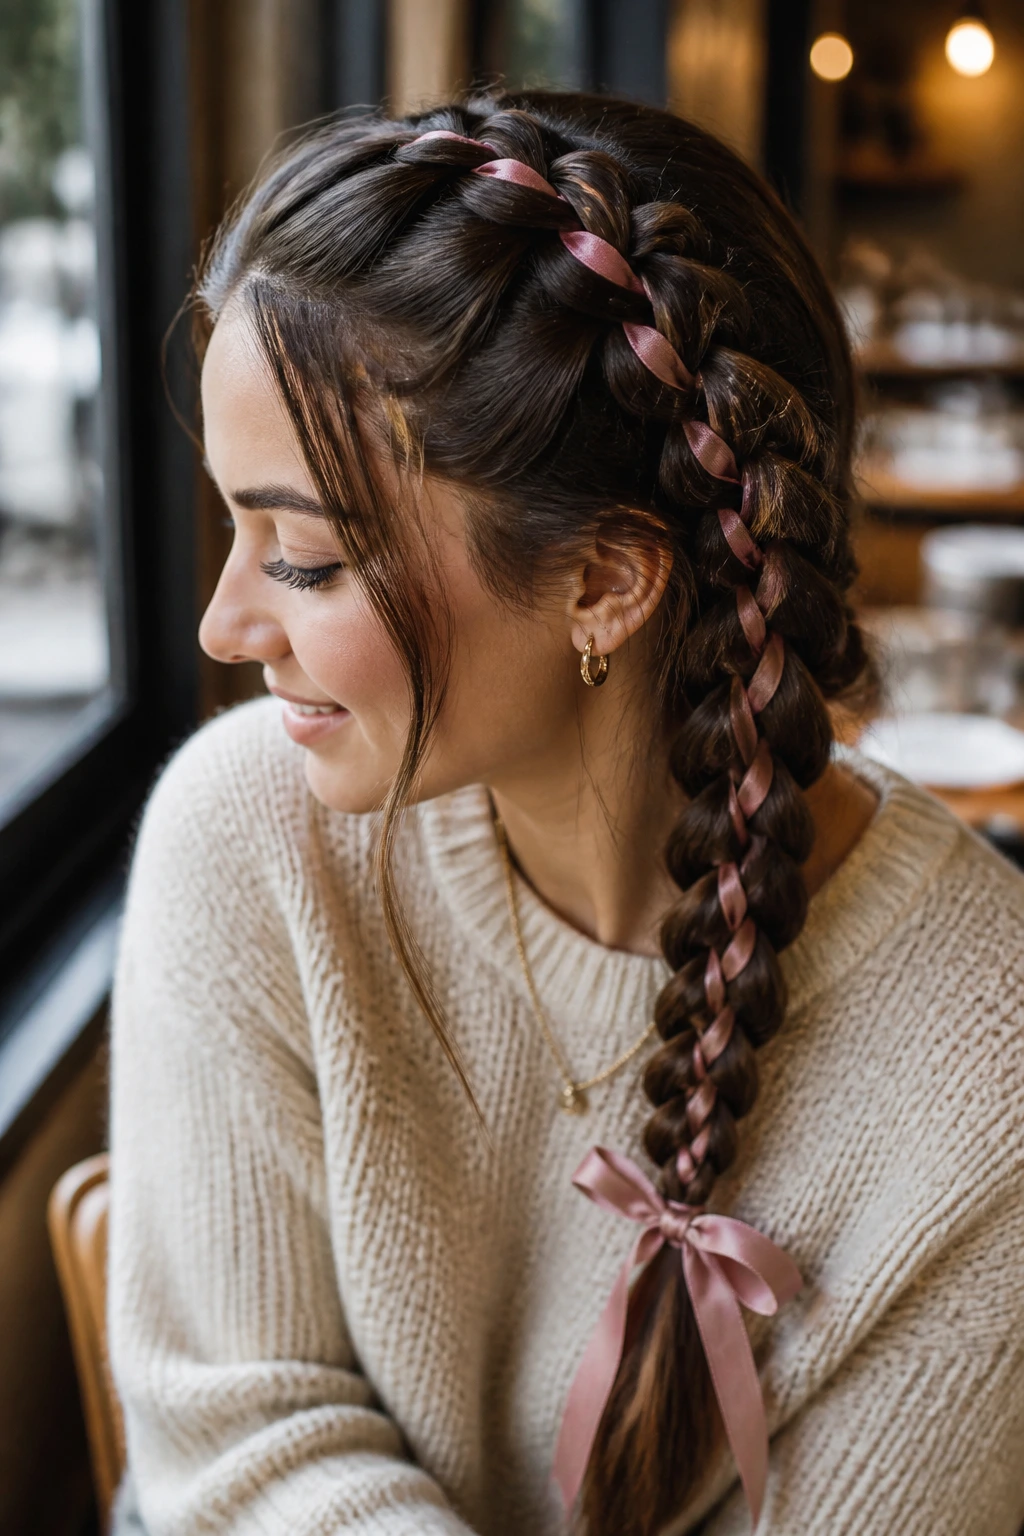
A ribbon changes the mood fast. Slip a satin ribbon into a Dutch braid and the whole style feels more finished, even if the braid itself is simple. Long hair gives the ribbon enough run to show off color and texture without swallowing it.
Start by tying the ribbon under the first section near the crown, then divide the hair into three braid sections with the ribbon mixed into one or two of them, depending on the look you want. Satin slides differently than hair does, so you need to keep your hands steady while you braid. A ribbon that’s about 1/4 to 1/2 inch wide is easier to manage than a wide one.
- Choose a matte or satin ribbon if you want a softer finish.
- Use a strong knot at the base so it doesn’t creep out.
- Keep the ribbon ends the same length before braiding.
- Match the ribbon to your clothes if you want the braid to feel intentional.
This style is especially nice for events, school spirit looks, or days when hair accessories are doing the heavy lifting. The braid itself stays familiar. The ribbon does the talking.
14. Messy Dutch Braid Bun
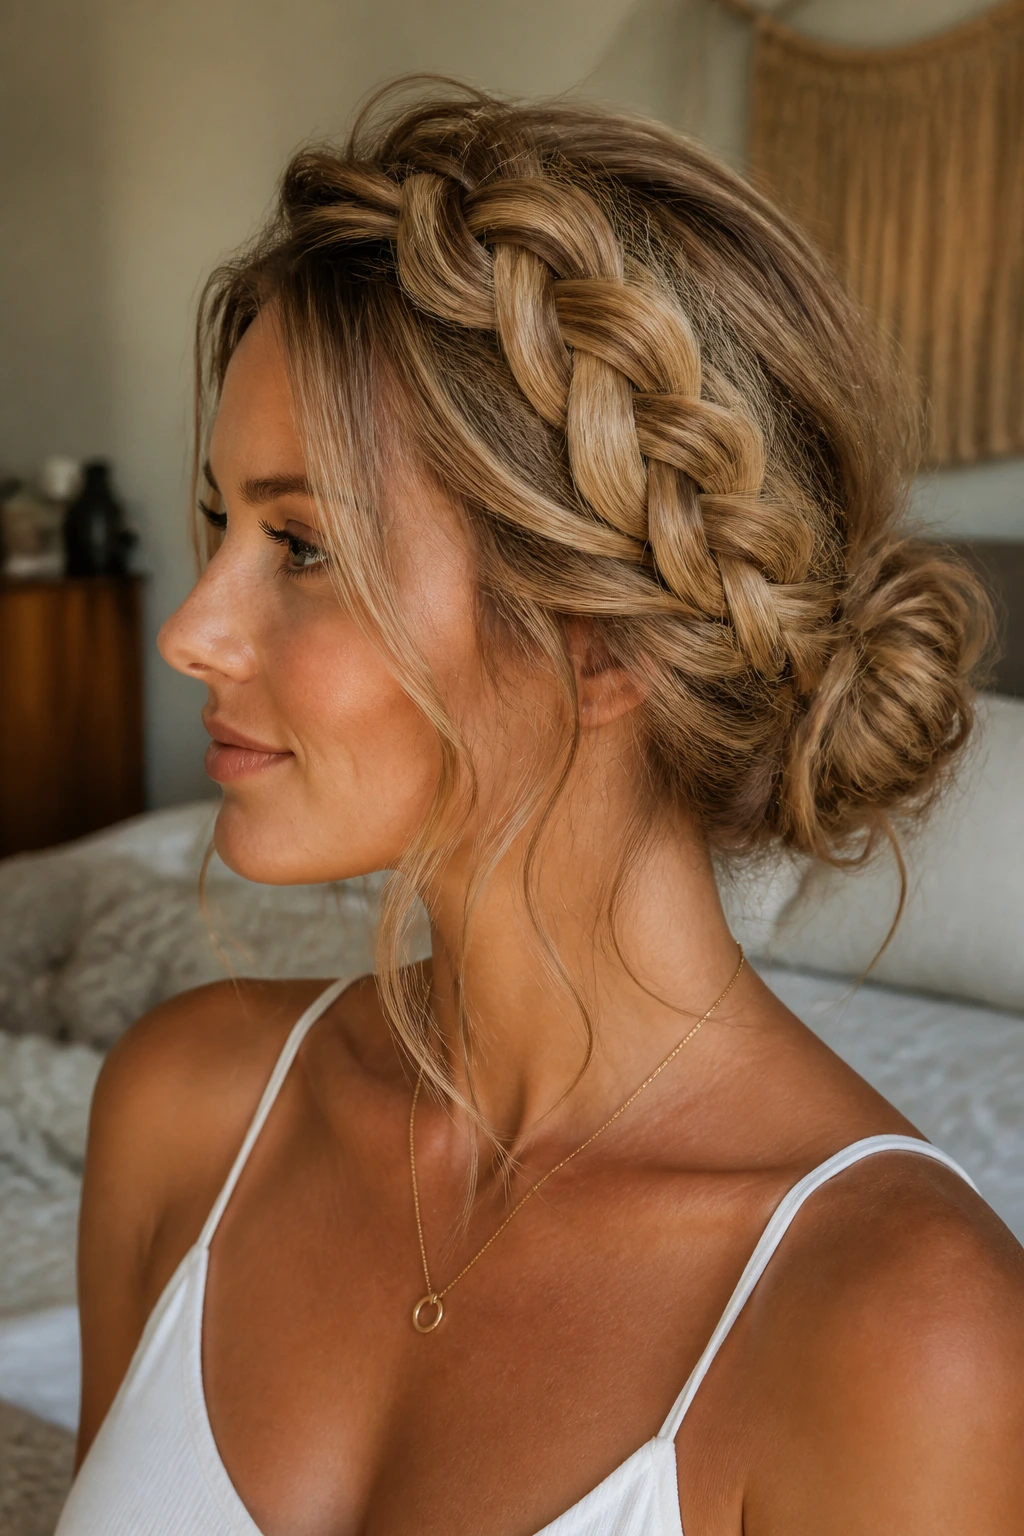
Want the braid to look soft rather than severe? A messy Dutch braid bun gives you that slightly undone finish without turning into a complete knot of frizz. It’s one of those styles that looks easiest when the hair has a little texture already.
How to Keep It Soft
Start the Dutch braid a touch looser than you would for a sleek style. Don’t pull the crown sections tight against the scalp. Stop at the nape, twist the tail into a bun, and leave a few smaller pieces around the face if you like that softer frame. Long hair gives the bun more surface area, so it can look relaxed instead of tiny and tight.
This works well on hair that was washed the day before. Freshly washed hair can be too slippery for the loosened braid to hold. If your roots are squeaky clean, add dry shampoo before you start and pin the bun with a few more pins than you think you’ll need. Loose does not mean unsupported.
A messy bun can tip into sloppy fast. The difference is usually in the base. If the braid line is even and the bun is pinned well, the style reads as soft on purpose.
15. Two Dutch Braids Fused Into One Braid
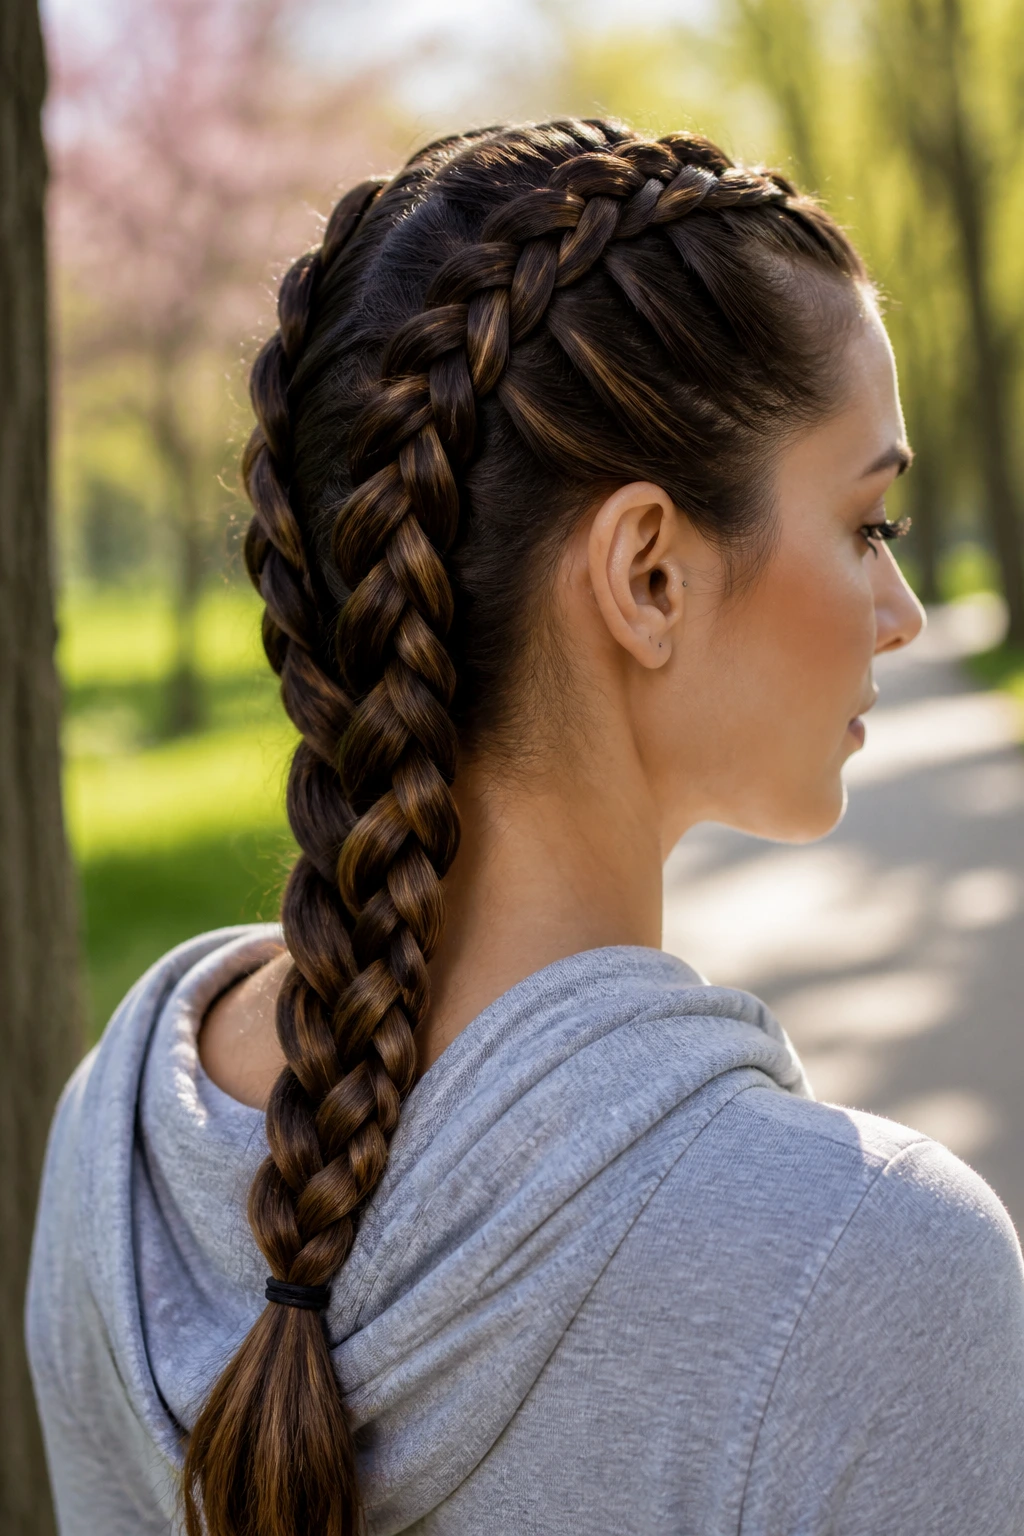
Two Dutch braids that join into one braid at the nape give you the control of a twin-braid style with the drama of a single thick tail. It is a smart choice for long hair because the fused braid feels substantial, not skinny.
Start with a middle part and braid each side in toward the back of the head. Once the braids reach the nape, combine the remaining hair into one three-strand braid or keep it as a larger Dutch braid if your hands are steady enough. That join creates a clean transition and makes the tail feel denser. The handoff should happen low and smooth; if the swap is messy, the style loses its shape.
This style also helps if your hair is very long and you do not want two heavy braids hanging separately. The joined version distributes the weight better. You get the neatness of two braids at the top and the simplicity of one braid at the bottom.
It’s a solid everyday style, but it can also look polished enough for a dressier outfit. Strange how much better it looks than it has any right to.
16. Halo Dutch Braid Updo
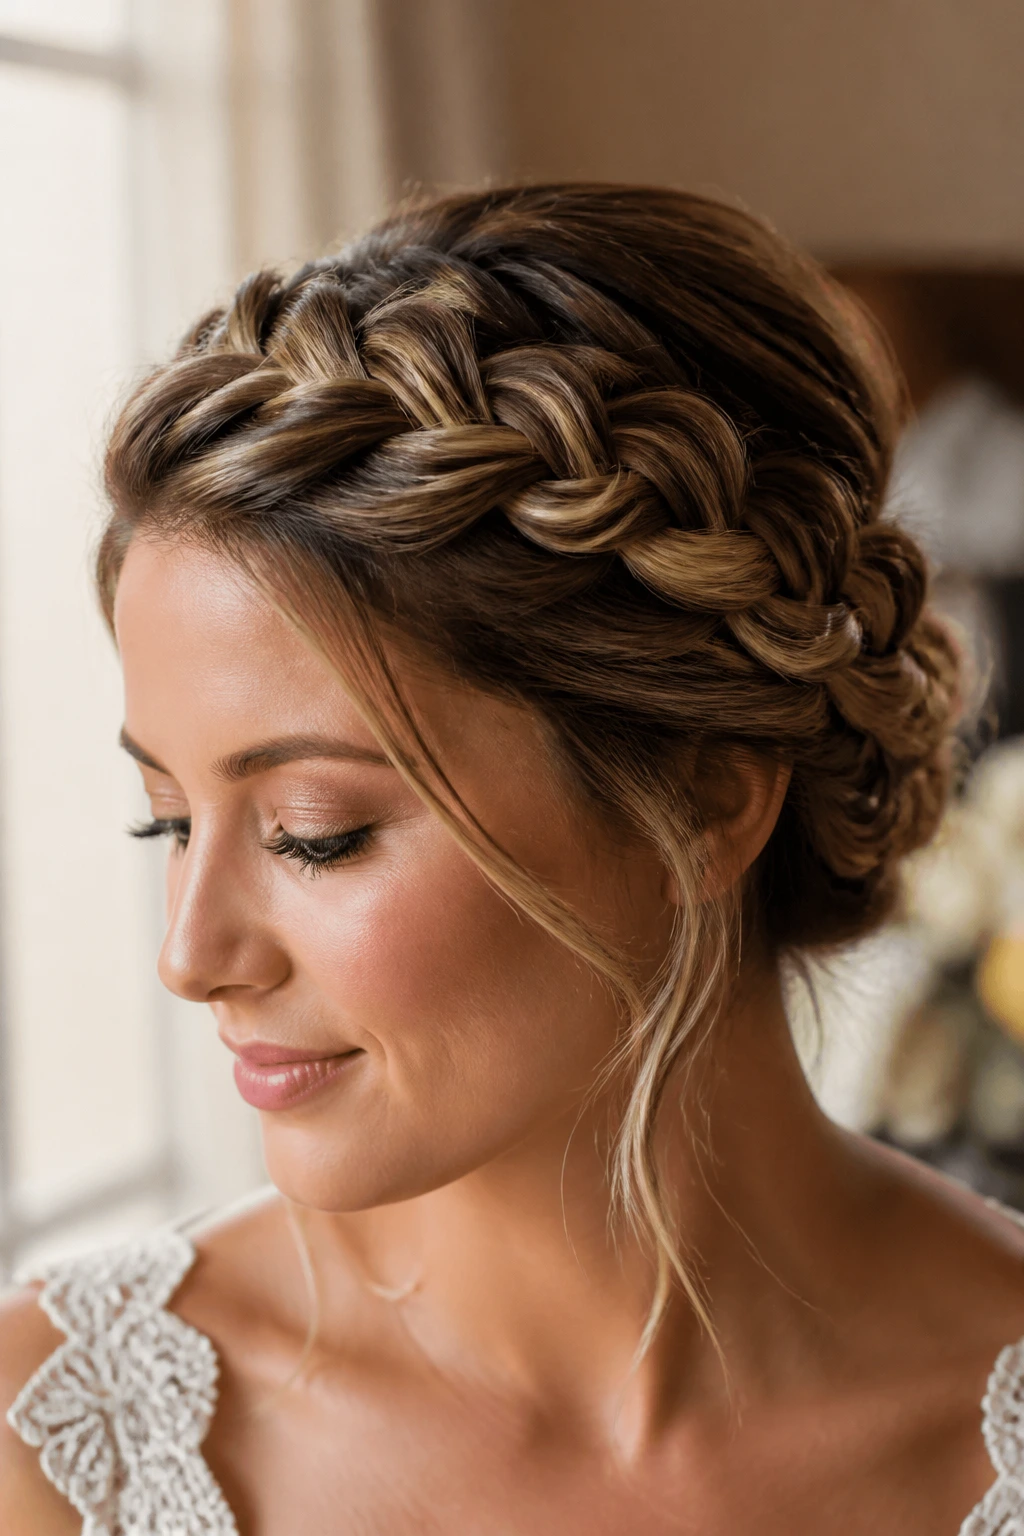
A crown braid hugs the hairline; a halo updo floats a little higher and looks lighter. That small difference changes the whole mood. The halo version sits above the ears and wraps around the head in a more lifted line, then gets pinned into a tucked shape instead of hanging as a loose loop.
Long hair makes this style easier to build because you have enough length to wrap and hide the ends inside the structure. A shorter braid can struggle to stay neat around the back. With long hair, you can take the braid farther around and pin the finish into the hidden center without the shape collapsing.
This is the one I’d pick for weddings, graduations, or any event where a regular braid feels too casual. It has the structure of a braid and the neatness of an updo, but it doesn’t sit as flat as a strict chignon. Hidden pins are your friend here — place them under the braid, not on top of it, so the finish stays clean.
It looks formal without acting precious. That’s a good thing.
17. Dutch Braid With Face-Framing Pieces
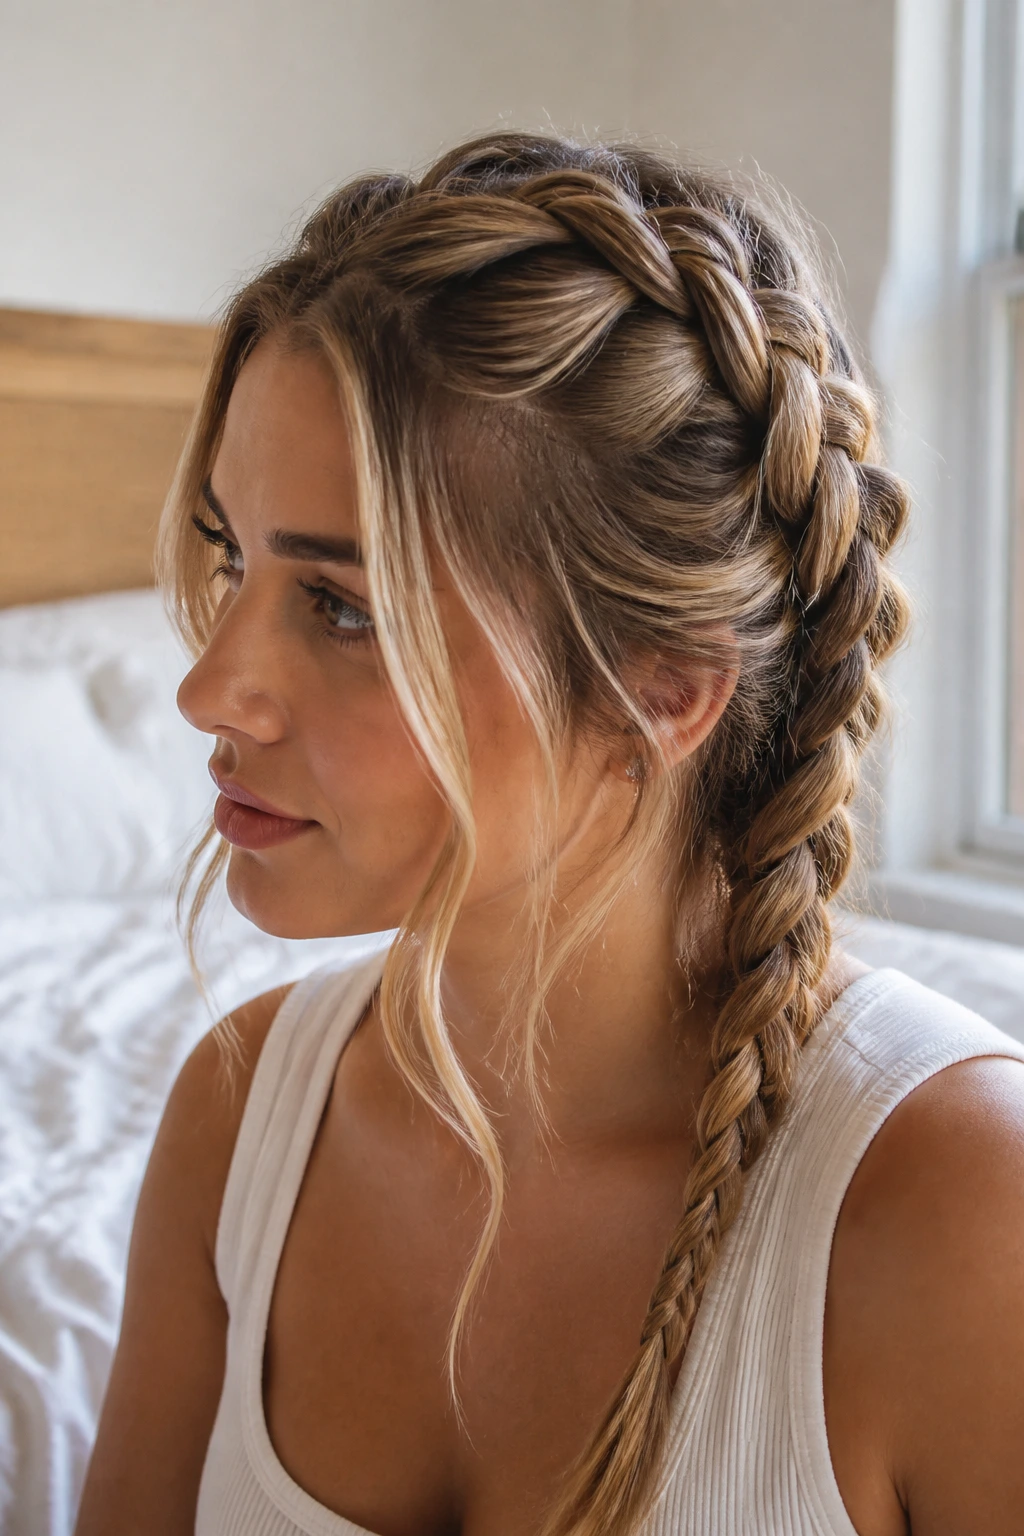
A few loose pieces can save a braid from looking too hard-edged. A Dutch braid with face-framing strands keeps the structure of the braid while softening the front just enough that the style feels easier to wear.
Leave small sections out near the temples and, if you want, just in front of the ears. Think 1/2 inch to 1 inch wide, not giant curtain pieces that swallow the braid. Those strands can stay straight, be bent with a curling iron, or be twisted loosely with your fingers after a little serum. Long hair helps because the loose front pieces can blend into the rest of the length instead of looking like accidental flyaways.
This style works especially well when you want the braid to feel romantic or casual rather than severe. It is also useful if your hairline is a little finer and you do not want everything pulled back tightly. The braid stays the main event, but the face pieces keep it from feeling harsh.
If the front pieces start to frizz, tuck a tiny bit of cream into your palms and smooth only the outer layer. Don’t drag the product into the braid itself.
18. Dutch Braid Rope Ponytail
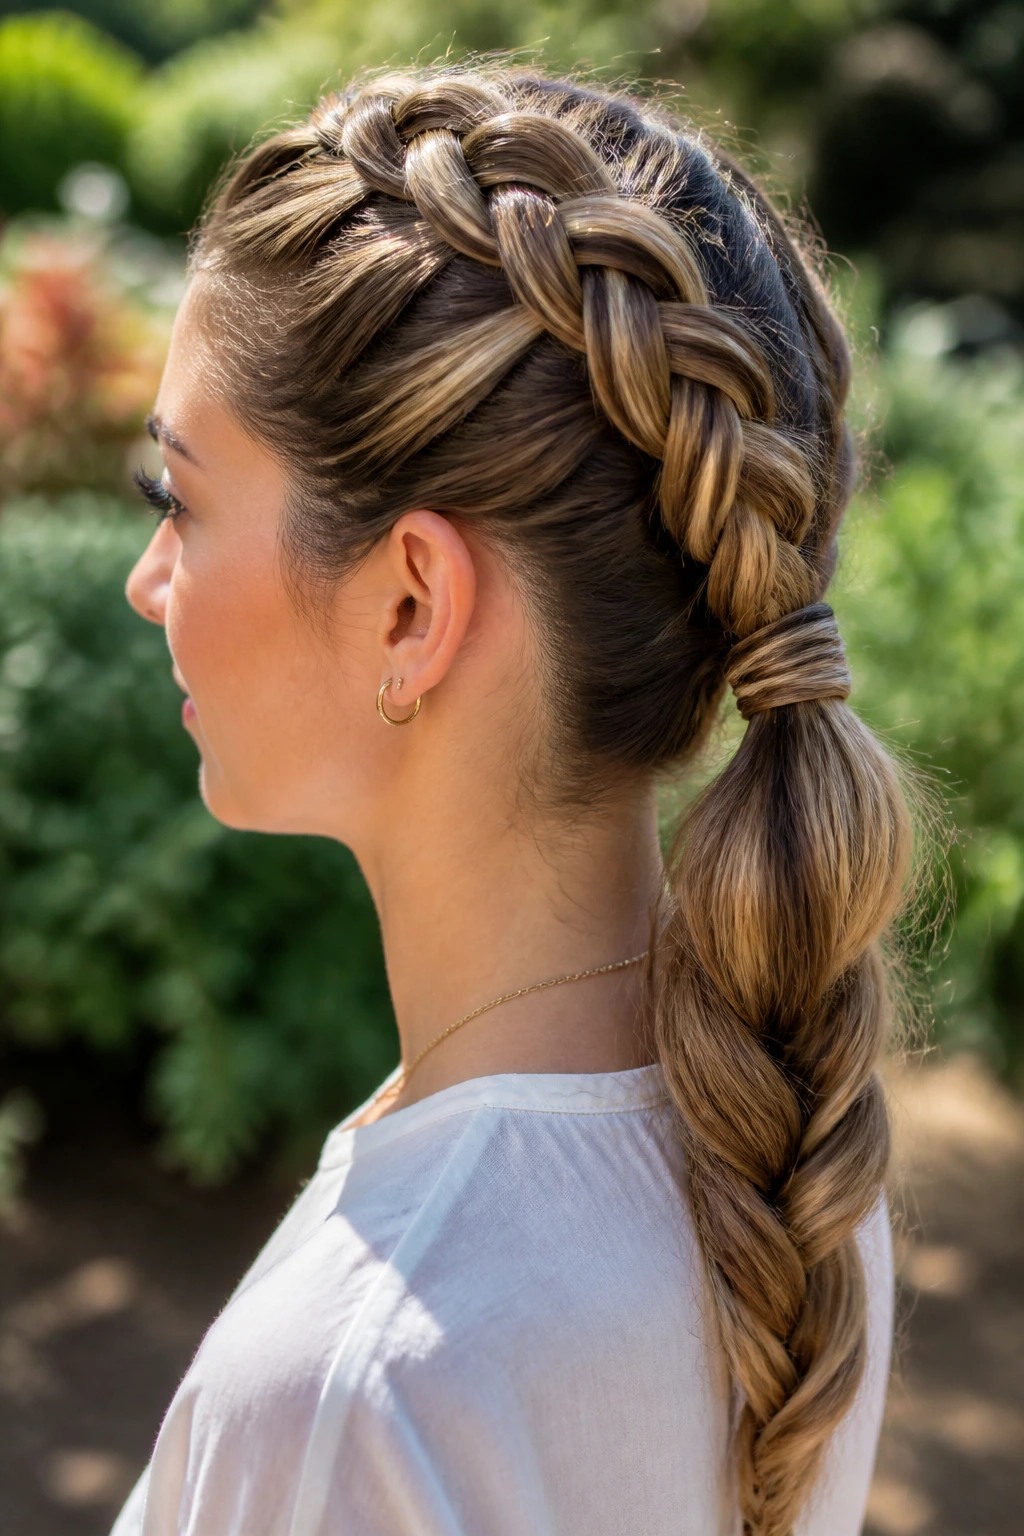
A Dutch braid rope ponytail gives you braid detail at the top and a twist finish at the bottom. It sounds complicated, but the structure is simple enough once you see it. Braid the top section in Dutch style, gather the rest into a ponytail, then split the tail into two sections and twist them around each other into a rope.
This is one of the better styles for thick, long hair because the rope twist controls the ends without flattening them. The tail still moves, but it feels more contained than a loose ponytail. Twist both sections in the same direction before wrapping them together in the opposite direction if you want the rope to hold. If the twist collapses, the problem is usually direction, not tension.
What Makes It Work
- A Dutch braid gives the crown lift.
- The rope tail reduces bulk at the ends.
- The style stays tidy without looking stiff.
- It holds well with one medium elastic and one small elastic.
I like this version when the hair is long enough to become heavy in a plain ponytail. The rope keeps it tidy and gives the whole style some shape.
19. Dutch Braid Ladder Accent
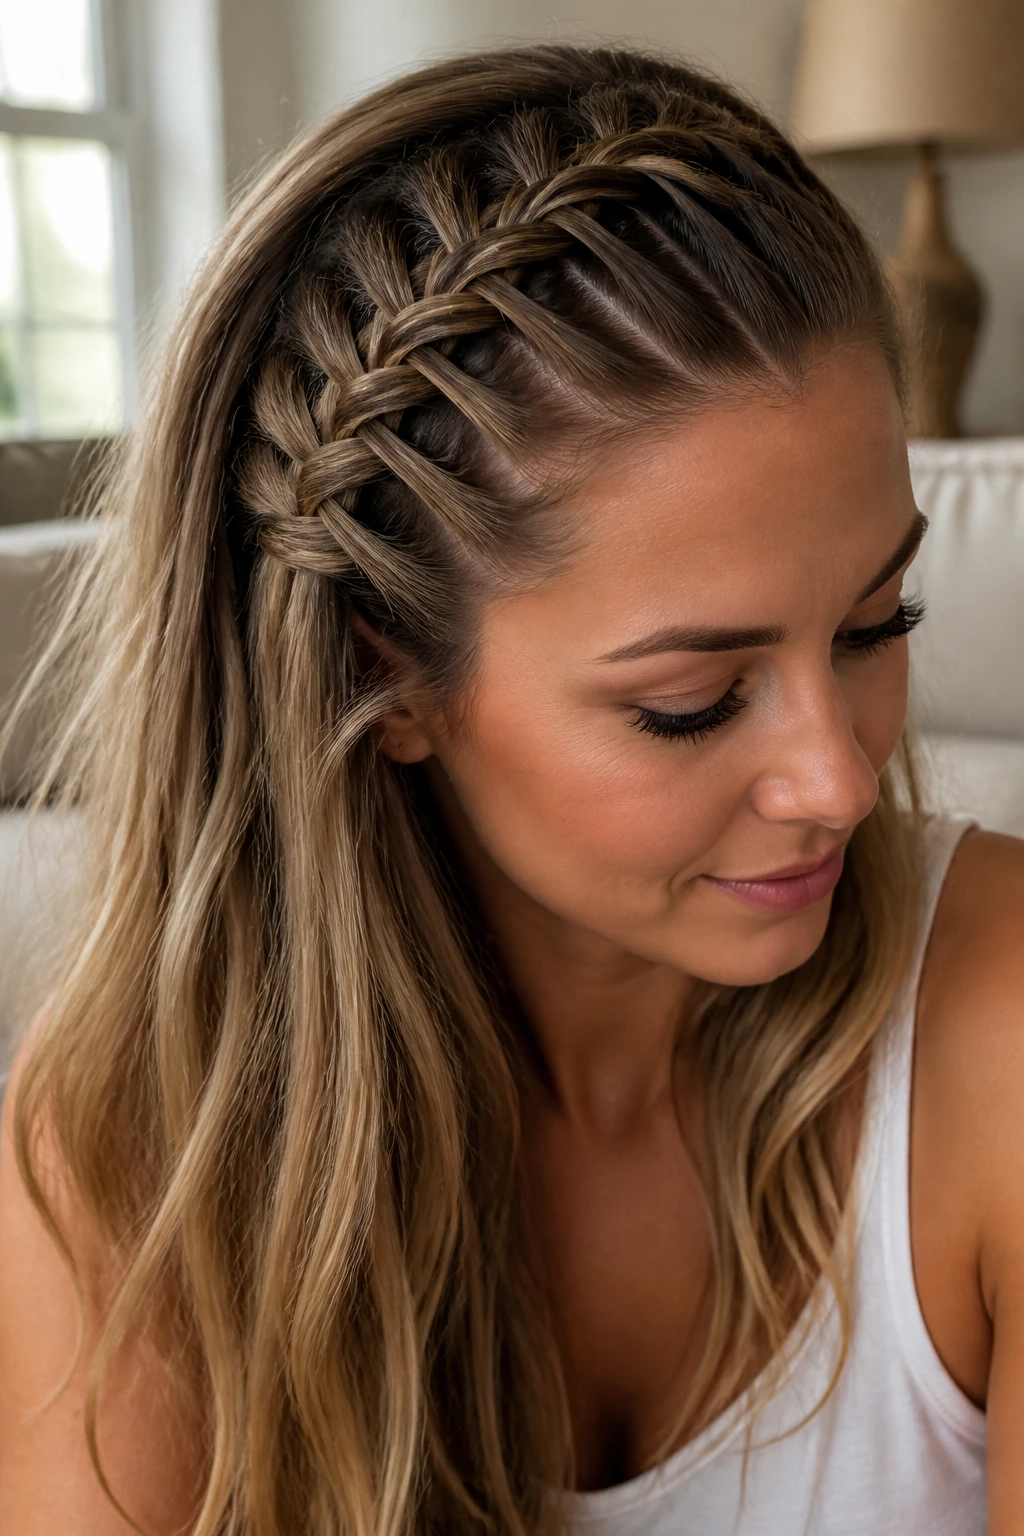
Ever wanted a braid that looks a little more detailed without turning into a full festival style? A Dutch braid ladder accent gives you that middle ground. It uses small sections that feed into the main braid at intervals, creating a layered look that reads almost like rungs running down the hair.
How to Use It
Start with a Dutch braid at the crown, then add tiny side pieces every couple of inches instead of only feeding in big sections. The braid gets a slightly segmented look, which is what gives the ladder effect. On long hair, those small additions are easy to see because the length has space to show each segment.
This style works best when the hair has some texture. Slick, ultra-smooth hair can make the ladder details disappear. A little dry shampoo or a light texturizing mist helps the sections hold their shape. Do not overstuff the braid; the ladder effect gets lost if every feed-in section is too large.
The result is detailed without being fussy. It’s the sort of braid you choose when you want people to notice there was some thought involved.
20. Oversized Pancaked Dutch Braid
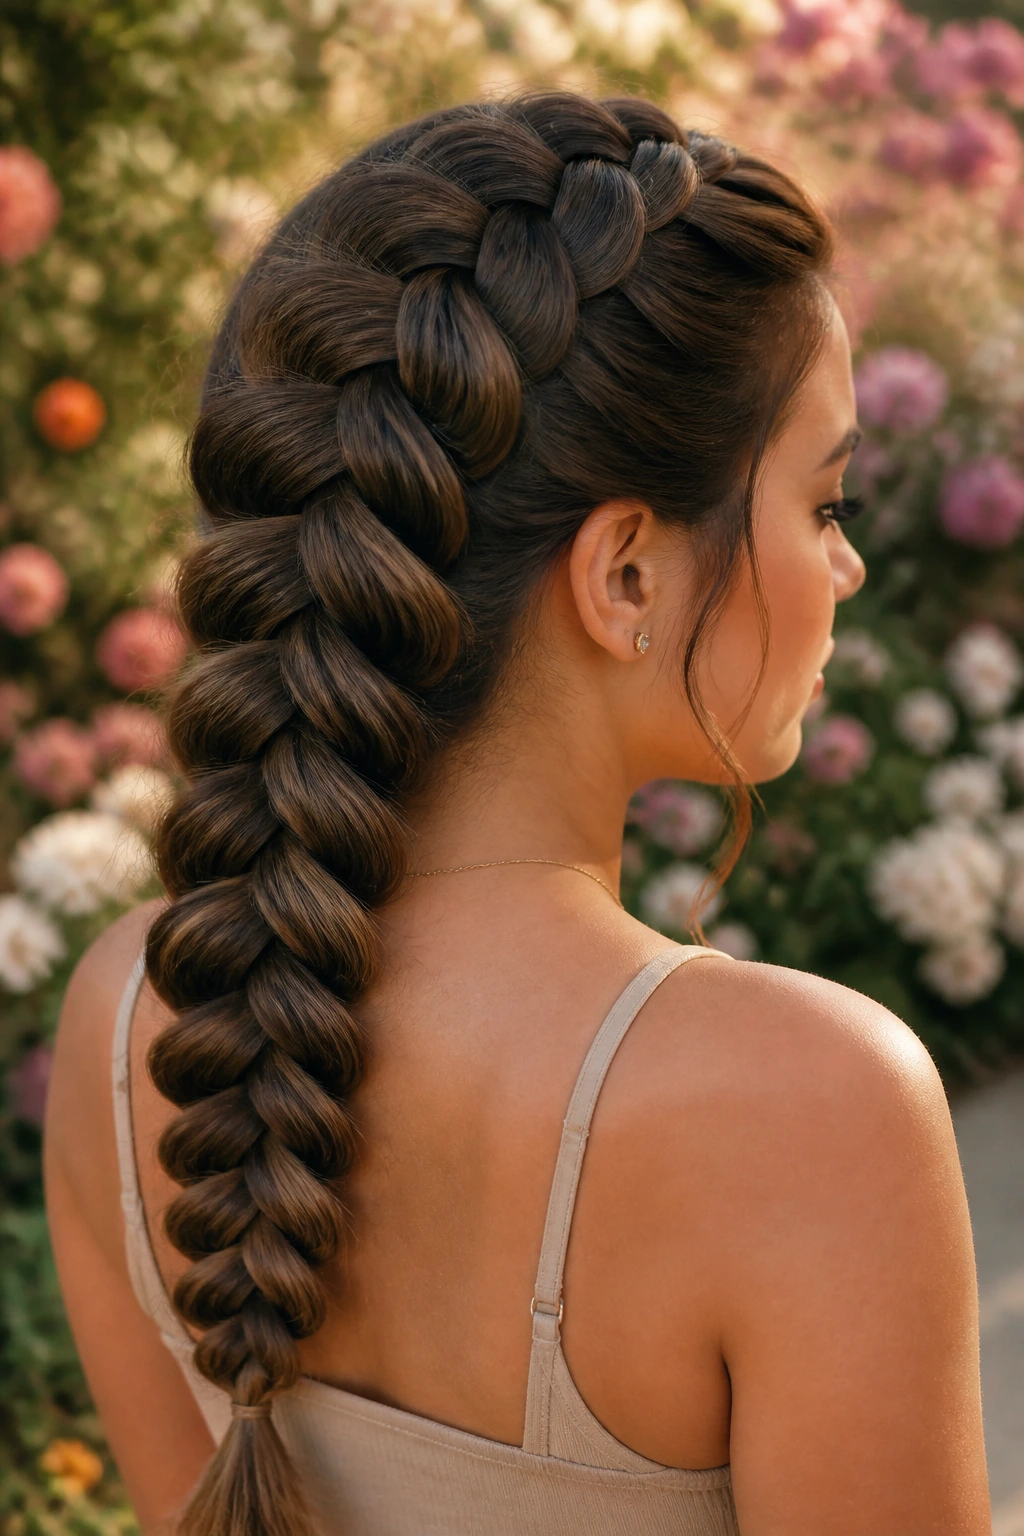
The oversized pancaked Dutch braid is the one that shows off long hair in the most obvious way. You braid it normally, secure it, then gently pull the outer edges of each loop so the braid widens and flattens into a fuller shape. That widening is what people usually mean by “pancaking,” and on long hair it works beautifully if you don’t rush it.
Start with a firm braid so the base stays intact, then work from the bottom upward and tug just the outer edges. Never yank the center line or the whole braid starts to loosen in the wrong places. If you want a wider braid, make the widening gradual. A little pull, then stop. A little more, then stop again. Long hair can take that expansion because there’s enough length to support the broader shape.
This style looks especially good on thick or wavy hair, but straight hair can hold it too if you add a bit of texture first. I like it when the braid needs to read from across a room. It has more presence than a tight braid, and that is the appeal.
Final Thoughts
Long hair gives Dutch braids a lot more room to act up, which is exactly why the best styles manage the weight instead of pretending it isn’t there. A braid that looks neat at the crown and thoughtful at the ends usually beats one that starts loose and falls apart by lunch.
The safest bets for everyday wear are the classic center braid, twin braids, and the braid-into-ponytail looks. If you want something dressier, the crown, halo, low bun, and ribbon versions carry more visual weight. Keep a couple of small elastics and two bobby pins nearby, because long hair has a habit of revealing the weak spot right when you are trying to leave the house.
